
Posted By: 5th January 2025
bridal makeup artist in haripal
Introduction Welcome to Ladyfair Bridal Services in Haripal, where every bride's dream look becomes a reality. From traditional Bengali bridal styles to contemporary elegance, we specialize in creating stunning looks that will make your wedding day unforgettable. Contact us at 7004721239 to book your appointment today. Why Choose Ladyfair Bridal Services in Haripal? 1. Experienced Artists Our professional makeup artists bring years of expertise and passion to create flawless bridal looks. 2. Premium Products We use top-notch makeup brands like MAC, HUDA Beauty, and Kryolan to ensure long-lasting perfection. 3. Customized Bridal Packages Choose from a range of services tailored to your needs—from engagement to reception. 4. Convenient Doorstep Services Relax and enjoy your makeover in the comfort of your home with our doorstep services. Our Services Traditional Bridal Makeup – Perfect for brides who want an authentic Bengali bridal look. Contemporary Bridal Makeup – Elegant and minimalist for modern brides. Pre-Wedding Glam Services – Includes makeup for mehndi, sangeet, and other pre-wedding events. Complete Bridal Styling – Comprehensive services including hairstyling, draping, and accessorizing. Signature Bridal Looks Traditional Bengali Bridal Look Bold eyes, a striking red bindi, and intricate gold jewelry create a timeless Bengali bridal style. Modern Minimalist Look Glowing skin, soft hues, and understated elegance for a chic, contemporary bride. Fusion Style A blend of traditional and modern makeup for a unique, standout look. What Haripal Brides Are Saying Ankita S., Haripal: "Ladyfair gave me my dream bridal look. I couldn’t have asked for a better experience!" Rupali D., Haripal: "My makeup stayed flawless all day, and the team was so professional and kind." Piyali M., Haripal: "Everything from the trial to the wedding day was perfect. Highly recommend Ladyfair!" Beauty Tips for Haripal Brides Hydrate: Keep your skin radiant by drinking plenty of water. Start Early: Begin a skincare routine months before your wedding for the best results. Trial Sessions: Opt for a makeup trial to finalize your look. Relax: Get enough rest to ensure you look fresh and vibrant on your big day. FAQs Q1: What makeup styles do you offer in Haripal? We provide traditional, modern, and fusion bridal makeup styles to match your preferences. Q2: Do you offer pre-wedding services? Yes, we cater to events like mehndi, sangeet, and more. Q3: Can I book a makeup trial? Of course! Trials are a great way to plan your perfect look. Q4: What brands do you use? We use premium products from MAC, HUDA Beauty, and Kryolan to ensure top-quality results. Q5: How do I book your services? Call us at 7004721239 to schedule your appointment.

Posted By: 5th January 2025
BEST BRIDAL MAKEUP ARTIST IN TUFANGANJ-I
Introduction At Ladyfair Bridal Services in Tufanganj-I, we specialize in crafting stunning bridal looks that make your big day even more memorable. Whether it’s a traditional Bengali wedding or a contemporary ceremony, our professional makeup artists ensure you look picture-perfect. To book your bridal makeover, call us at 7004721239 today. Why Ladyfair Bridal Services in Tufanganj-I? 1. Expert Makeup Artists Our skilled professionals have years of experience in creating flawless bridal makeup and hairstyles. 2. Premium Products We use world-class makeup brands such as MAC, HUDA Beauty, and Kryolan for a long-lasting and radiant finish. 3. Tailor-Made Bridal Packages From engagement to the reception, our packages are customized to your needs. 4. On-Demand Services We provide doorstep services for a stress-free and comfortable experience. Bridal Makeup Services Offered Traditional Bridal Makeup – Perfect for a regal Bengali bridal appearance. Contemporary Bridal Makeup – For brides who prefer a modern, minimalistic touch. Pre-Wedding Glam – Ideal for events like mehndi, sangeet, and cocktail parties. Complete Bridal Styling – Includes hairstyling, draping, and accessorizing for a complete look. Our Signature Looks Classic Bengali Bridal Look Defined eyes, bold red lips, and intricate red-and-gold accents for a timeless appearance. Elegant Contemporary Look Subtle, glowing makeup that enhances your natural beauty. Fusion Look A creative mix of traditional and modern elements for a unique style. Testimonials from Tufanganj-I Brides Nisha D., Tufanganj-I: "Ladyfair made my wedding day magical! Their team was professional and friendly." Ananya B., Tufanganj-I: "My bridal makeup was flawless and stayed perfect throughout the day. Highly recommended!" Pallavi S., Tufanganj-I: "Everything from the trial session to the final look was amazing. Loved the service!" Bridal Beauty Tips for Tufanganj-I Brides Stay Hydrated: Drink lots of water for naturally glowing skin. Start Skincare Early: Begin a skincare routine at least three months before your wedding. Book a Trial: Ensure your makeup style suits your preferences. Relax and Sleep: Get plenty of rest to avoid puffiness or dark circles. FAQs Q1: What bridal makeup services do you offer in Tufanganj-I? We provide traditional and modern bridal makeup, pre-wedding services, and complete styling. Q2: Can I customize my bridal package? Yes, we offer personalized packages tailored to your specific needs. Q3: Do you offer doorstep services? Absolutely! We make sure you can get ready in the comfort of your home. Q4: What brands do you use? We use premium brands such as MAC, HUDA Beauty, and Kryolan for exceptional results. Q5: How do I book your services? Call us at 7004721239 to schedule your appointment.

Posted By: 5th January 2025
BEST BRIDAL MAKEUP ARTIST IN MATHABHANGA-I
Introduction At Ladyfair Bridal Services in Mathabhanga I, we are committed to making every bride feel confident, radiant, and beautiful on her special day. Whether you dream of a traditional Bengali bridal look or prefer a modern, minimal style, our expert makeup artists deliver perfection. To book your bridal makeup session, call us today at 7004721239. Why Choose Ladyfair Bridal Services in Mathabhanga I? 1. Professional Makeup Artists Our experienced team specializes in bridal looks that complement your unique features and wedding attire. 2. High-Quality Products We use trusted brands like MAC, HUDA Beauty, and Kryolan for flawless, long-lasting makeup. 3. Tailored Bridal Packages From mehndi and engagement to the big day, we customize packages to suit your needs. 4. Convenient At-Home Services Enjoy our doorstep services for a stress-free bridal preparation experience. Our Bridal Makeup Services in Mathabhanga I Traditional Bridal Makeup – Highlighting rich Bengali heritage with bold and vibrant colors. Contemporary Bridal Makeup – Subtle yet striking looks for modern brides. Pre-Wedding Makeup – Perfect for sangeet, mehndi, or pre-wedding photoshoots. Complete Bridal Styling – Includes hairstyling, saree or lehenga draping, and accessorizing. Signature Bridal Looks Elegant Bengali Bridal Look Defined eyes, bold lips, and traditional red and gold accents create a timeless Bengali bridal style. Modern Glam Look Soft hues and light contouring ensure a natural and elegant bridal glow. Fusion Bridal Look A blend of traditional and contemporary elements for a unique appearance. What Brides in Mathabhanga I Say About Us Priya R., Mathabhanga I: "Ladyfair was amazing! My makeup was perfect, and the team was so professional." Snehal A., Mathabhanga I: "I loved how they customized my look to match my wedding theme. Highly recommend them!" Ankita T., Mathabhanga I: "They made me feel comfortable and confident. My makeup lasted all day without a smudge!" Bridal Beauty Tips for Mathabhanga I Brides Hydration is Key: Drink plenty of water to keep your skin glowing. Start Early: Follow a consistent skincare routine months before your wedding. Trial Runs: Opt for a trial session to finalize your makeup preferences. Relax and Rest: Get enough sleep to avoid dark circles and tired skin. FAQs Q1: Do you offer pre-wedding services in Mathabhanga I? Yes, we provide makeup and styling for all pre-wedding events, including engagement, sangeet, and mehndi. Q2: Can I get a customized bridal package? Absolutely! We tailor our packages to meet your specific needs. Q3: Do you provide doorstep services? Yes, our team ensures you get ready in the comfort of your home. Q4: What makeup brands do you use? We use premium brands like MAC, HUDA Beauty, and Kryolan. Q5: How do I book Ladyfair services? Call us at 7004721239 to reserve your appointment.

Posted By: 5th January 2025
best bridal makeup artist in mathabhanga-II
Introduction Your wedding day is a moment of joy, and at Ladyfair Bridal Services in Mathabhanga II, we strive to make it perfect. From traditional Bengali bridal artistry to contemporary styles, our experienced makeup professionals ensure you shine bright on your big day. Contact us today at 7004721239 to book your bridal session! Why Choose Ladyfair Bridal Services in Mathabhanga II? 1. Expert Makeup Artists Our team specializes in various bridal styles, from traditional to modern, to suit your preferences. 2. Top-Quality Products We use high-end brands like MAC, HUDA Beauty, and Kryolan for flawless and long-lasting results. 3. Custom Packages From engagement to reception, we offer tailored packages for every wedding event. 4. At-Home Service Enjoy our doorstep services, ensuring comfort and convenience on your special day. Our Bridal Makeup Services in Mathabhanga II Traditional Bridal Makeup – Perfect for Bengali weddings with rich reds and golds. Modern Bridal Makeup – A classy and elegant look for today’s bride. Pre-Wedding Makeup – Ideal for events like mehndi, sangeet, and engagement. Hairstyling & Draping – Complete your look with professional hairstyling and saree or lehenga draping. Popular Bridal Looks Classic Bengali Look Rich red and golden hues paired with dramatic eyeliner and traditional accessories like shankha-pola for an iconic appearance. Minimal Glam Look Soft makeup with light tones for a natural yet radiant bridal glow. Fusion Look A modern twist on traditional styles, blending bold and subtle elements for a unique look. What Brides in Mathabhanga II Are Saying Riya S., Mathabhanga II: "Ladyfair transformed me into the bride I always dreamed of. The makeup stayed perfect all day!" Ananya P., Mathabhanga II: "The team was professional and attentive. They customized my look perfectly." Sneha T., Mathabhanga II: "I loved their pre-wedding services. Their hairstyling and makeup were outstanding." Essential Bridal Beauty Tips Stay Hydrated: Drink plenty of water for glowing skin. Start Skincare Early: Follow a skincare routine months before your wedding. Trial Makeup: Book a trial session to finalize your look. Rest Well: Get enough sleep to look fresh and radiant. FAQs Q1: Do you provide makeup trials in Mathabhanga II? Yes, we offer trials to help you choose the perfect bridal look. Q2: Which brands do you use for makeup? We use premium brands like MAC, HUDA Beauty, and Kryolan. Q3: Can I customize my bridal package? Absolutely! We offer flexible packages tailored to your preferences. Q4: Do you include hairstyling in your services? Yes, hairstyling and saree/lehenga draping are part of our bridal packages. Q5: How can I book your services? Call us at 7004721239 to secure your appointment with Ladyfair Bridal Services.

Posted By: 5th January 2025
best bridal makeup artist dinhata-II
Introduction Your wedding day deserves the best, and at Ladyfair Bridal Services in Dinhata-II, we bring out your inner beauty to make your special day unforgettable. From traditional Bengali bridal makeup to modern and elegant styles, our expert team ensures perfection. Contact us at 7004721239 to book your appointment today! Why Choose Ladyfair Bridal Services in Dinhata-II? 1. Skilled Bridal Artists Our team comprises experienced makeup artists specializing in diverse bridal looks. 2. Premium Products We use renowned brands like MAC, HUDA Beauty, and Kryolan for a flawless, long-lasting finish. 3. Tailored Packages Our customizable packages cater to all wedding events, from engagement to reception. 4. On-Site Services Enjoy the convenience of our doorstep services to make your big day stress-free. Our Services for Brides in Dinhata-II Traditional Bridal Makeup – Highlighting classic Bengali beauty with bold and vibrant tones. Contemporary Bridal Makeup – A blend of subtlety and elegance for a timeless look. Pre-Wedding Makeup – Perfect for events like engagement, mehndi, and sangeet. Hairstyling & Draping – Professional styling and saree/lehenga draping for a complete look. Signature Bridal Looks Bengali Heritage Look Embrace the cultural richness of Dinhata-II with bold red and gold tones, intricate eye makeup, and traditional accessories like shankha-pola. Soft Glam Bridal Look Minimal yet captivating, this style emphasizes natural beauty with subtle shades and soft contours. Fusion Bridal Look For brides seeking a mix of tradition and modernity, this look combines the best of both worlds. Client Testimonials Ankita D., Dinhata-II: "Ladyfair made me feel like royalty on my wedding day. The makeup was flawless and lasted all day." Priya R., Dinhata-II: "Amazing service! The team is so professional and friendly. They created exactly the look I wanted." Simran K., Dinhata-II: "Highly recommend Ladyfair for bridal makeup. Their expertise and attention to detail are unmatched!" Bridal Beauty Tips for Dinhata-II Brides Plan Ahead: Book your makeup artist in advance to avoid last-minute stress. Hydrate: Drink plenty of water for glowing skin. Skincare Routine: Maintain a consistent skincare regimen leading up to the big day. Trial Sessions: Opt for a trial to finalize your desired look. FAQs Q1: Do you offer makeup trials in Dinhata-II? Yes, we provide trials to help brides choose their perfect look. Q2: Which makeup brands do you use? We use high-quality brands like MAC, HUDA Beauty, and Kryolan. Q3: Can I customize my bridal package? Absolutely! We offer flexible packages tailored to your needs. Q4: Do you provide hairstyling services? Yes, we include hairstyling and saree/lehenga draping in our services. Q5: How do I book an appointment? Call 7004721239 to book your session with Ladyfair Bridal Services in Dinhata-II.

Posted By: 5th January 2025
best bridal makeup artist in dinhata-I
Introduction Your wedding day is a once-in-a-lifetime event, and at Ladyfair Bridal Services in Dinhata-I, we ensure you look your absolute best. With our expert makeup artists, premium-quality products, and personalized attention, we create stunning bridal looks tailored just for you. Book your appointment today by calling 7004721239 and let us make your wedding day truly magical! Why Choose Ladyfair Bridal Services in Dinhata-I? 1. Expert Bridal Artists Our team of professionals specializes in traditional and contemporary bridal looks, ensuring perfection for every bride. 2. Premium Products We use only the finest makeup brands like MAC, HUDA Beauty, and Kryolan for long-lasting and flawless results. 3. Customized Packages From engagement to reception, our flexible packages cover all your makeup needs at competitive prices. 4. Doorstep Service Enjoy the convenience of our doorstep bridal services, making your wedding day stress-free and special. Our Services for Brides in Dinhata-I Traditional Bridal Makeup – Perfect for Bengali brides, highlighting bold eyes, red lips, and cultural elements. Modern Bridal Makeup – Subtle and elegant styles with a radiant finish for contemporary brides. Pre-Wedding Makeup – Engagement, sangeet, and mehndi makeup for a picture-perfect look at every event. Hairstyling & Draping – Stunning hairstyles and professional saree or lehenga draping to complete your look. Signature Bridal Styles Bengali Bridal Look Featuring a bold red and gold palette, shankha-pola bangles, and intricate designs, this style embraces cultural heritage. Minimal Glam Look Ideal for brides who prefer subtle elegance, with soft tones and natural highlights. Fusion Bridal Look Combines traditional and modern makeup styles for a unique and captivating appearance. Happy Brides in Dinhata-I Riya C., Dinhata-I: "My wedding makeup was everything I dreamed of! Ladyfair did an amazing job, and I felt like a princess." Nisha P., Dinhata-I: "Thank you, Ladyfair, for making my big day special. The team was professional, and the makeup lasted all day." Priyanka M., Dinhata-I: "Highly recommend Ladyfair! They understood exactly what I wanted and made me look stunning on my wedding day." Bridal Tips for Dinhata-I Brides Hydration: Keep your skin glowing by drinking plenty of water. Skincare Routine: Start a consistent skincare routine months before the wedding. Makeup Trial: Book a trial session to finalize your look. Beauty Rest: Ensure a good night’s sleep for a fresh and radiant appearance. FAQs Q1: Can I book a makeup trial in Dinhata-I? Yes, we offer makeup trials to help you select your perfect bridal look. Q2: What types of makeup do you provide? We specialize in traditional, contemporary, and fusion bridal makeup. Q3: Do you offer hairstyling services? Absolutely! We provide hairstyling and draping services to complete your bridal look. Q4: What brands do you use? We use high-quality brands like MAC, HUDA Beauty, and Kryolan for flawless results. Q5: How can I book a session? Call 7004721239 to book your appointment with Ladyfair Bridal Services in Dinhata-I.

Posted By: 5th January 2025
BEST BRIDAL MAKEUP ARTIST IN COOCH BEHAR I
Introduction Transform your wedding day into a fairytale with Ladyfair Bridal Services in Cooch Behar I. Our experienced makeup artists specialize in creating flawless bridal looks that suit your personality and preferences. Whether it’s a traditional ceremony or a modern affair, we ensure that you are the star of your big day. For bookings and inquiries, call us at 7004721239 today! Why Choose Ladyfair Bridal Services in Cooch Behar I? 1. Professional Expertise Our highly trained makeup artists excel in bridal makeup, offering a wide range of styles to match your vision. 2. High-Quality Products We only use top-tier brands like MAC, HUDA Beauty, and Kryolan, ensuring long-lasting, smudge-proof results. 3. Customizable Packages Choose from a variety of packages tailored to cover all your bridal makeup needs, including pre-wedding and reception looks. 4. Home Service Convenience Enjoy a stress-free experience with our doorstep bridal makeup and hairstyling services in Cooch Behar I. Our Bridal Makeup Services Traditional Bridal Makeup – Embrace cultural elegance with bold colors, intricate details, and classic styles. Contemporary Bridal Makeup – Achieve a modern and sophisticated look with soft, radiant tones and minimalistic charm. Pre-Wedding Makeup – Glamorous looks for engagement, mehndi, or sangeet to keep you picture-perfect at every event. Hairstyling & Draping – Complete your bridal look with beautifully styled hair and expertly draped sarees or lehengas. Specialized Bridal Looks in Cooch Behar I Bengali Bridal Makeup Highlight your heritage with a bold red bindi, dramatic winged eyeliner, and traditional shankha-pola adornments. Minimalistic Bridal Style For brides who love simplicity, this look focuses on natural makeup tones, light contouring, and a luminous glow. Fusion Bridal Style A perfect blend of traditional and modern elements for a truly unique bridal look. Customer Testimonials Ananya G., Cooch Behar I: "Ladyfair made my wedding day unforgettable! The makeup was flawless, and the team made me feel so comfortable. Highly recommend!" Sneha R., Cooch Behar I: "I loved my bridal look! The team did an amazing job with both makeup and hairstyling. Thank you, Ladyfair!" Madhavi P., Cooch Behar I: "Excellent service! Ladyfair gave me the perfect look for my big day. The makeup stayed flawless throughout!" Tips for Cooch Behar I Brides Hydrate Well: Drink plenty of water to keep your skin glowing and hydrated. Start Early: Follow a skincare routine months before your wedding to enhance your natural beauty. Rest Well: Ensure a good night's sleep before your big day to look refreshed and radiant. Trial Sessions: Book a makeup trial to finalize your dream bridal look. FAQs Q1: Can I book a makeup trial in Cooch Behar I? Yes, we offer makeup trials to ensure you’re happy with your bridal look. Q2: What makeup brands do you use? We use high-quality brands like MAC, HUDA Beauty, and Kryolan. Q3: Do you provide pre-wedding event services? Yes, we offer makeup and hairstyling for engagement, mehndi, sangeet, and other pre-wedding events. Q4: How can I book my bridal makeup? Call 7004721239 to book your bridal makeup session with Ladyfair. Q5: Do you offer customized packages? Absolutely! We tailor packages based on your specific needs and preferences.

Posted By: 5th January 2025
BEST BRIDAL MAKEUP ARTIST IN COOCH BEHAR II
Introduction Make your special day truly magical with Ladyfair Bridal Services in Cooch Behar II. Our team of expert makeup artists is dedicated to creating stunning bridal looks tailored to your personality and preferences. Whether you're planning a traditional wedding or a modern celebration, our personalized services ensure you shine like a star on your big day. For inquiries or bookings, call us today at 7004721239! Why Choose Ladyfair Bridal Services in Cooch Behar II? 1. Experienced Makeup Artists Our skilled makeup artists specialize in bridal makeup, ensuring you look flawless and radiant on your wedding day. From traditional styles to contemporary trends, we create looks that match your vision. 2. Premium Quality Products We use high-end makeup brands like MAC, HUDA Beauty, and Kryolan to ensure long-lasting, smudge-free, and photogenic results. 3. Custom Bridal Packages We offer a variety of bridal makeup packages tailored to meet your needs, whether it's for the wedding ceremony, reception, or pre-wedding events. 4. Convenient Home Services We provide the convenience of home service in Cooch Behar II, bringing professional makeup and hairstyling to your doorstep. Our Bridal Makeup Services Traditional Bridal Makeup – Perfect for those who want to embrace cultural elegance with vibrant colors, bold eyes, and intricate details. Modern Bridal Makeup – A sophisticated look featuring soft tones, glowing skin, and minimalistic charm for contemporary brides. Pre-Wedding Makeup – Glamorous makeup for your mehndi, sangeet, or engagement ceremony, ensuring you look picture-perfect for every occasion. Hairstyling and Draping – From elaborate bridal updos to perfectly draped sarees or lehengas, we complete your bridal look with finesse. Signature Bridal Looks in Cooch Behar II Traditional Bengali Bridal Look Highlight your cultural roots with this classic style, featuring bold red tones, dramatic eyeliner, and the iconic shankha-pola adornments. Minimalist Bridal Look Opt for understated elegance with a focus on natural tones, light contouring, and a radiant glow. Perfect for intimate or modern ceremonies. Fusion Bridal Look Blend traditional and modern elements for a unique and personalized bridal style, perfect for multi-cultural celebrations. What Brides in Cooch Behar II Say About Ladyfair Riya S., Cooch Behar II: "Ladyfair made my wedding day unforgettable! The makeup was flawless, and the team was professional and friendly. Highly recommend them for bridal services." Ankita D., Cooch Behar II: "I loved my bridal look! The makeup lasted all day, and I received so many compliments. The hairstyling was beautiful too. Thank you, Ladyfair!" Maya P., Cooch Behar II: "The Ladyfair team was amazing! They listened to what I wanted and created a look that was better than I imagined. I felt like royalty!" Bridal Beauty Tips for Cooch Behar II Brides Start Early: Begin a skincare routine months before your wedding for glowing skin. Stay Hydrated: Drink plenty of water to keep your skin healthy and hydrated. Rest Well: A good night's sleep before your wedding ensures you wake up looking fresh and radiant. Consult Early: Schedule your makeup trial early to plan your perfect bridal look. FAQs Q1: Do you offer makeup trials in Cooch Behar II? Yes, we provide makeup trials to ensure you're happy with your bridal look. Q2: Can I customize my bridal package? Absolutely! We tailor our packages to meet your specific preferences and needs. Q3: What brands do you use for bridal makeup? We use premium brands such as MAC, HUDA Beauty, and Kryolan for all our services. Q4: Do you offer services for pre-wedding events? Yes, we provide makeup and hairstyling for engagement, mehndi, sangeet, and other pre-wedding functions. Q5: How can I book my bridal makeup session? Call 7004721239 to schedule your bridal makeup session with us.

Posted By: 5th January 2025
best bridal makeup artist in melkiganj
Introduction Make your wedding day unforgettable with flawless bridal makeup by Ladyfair Bridal Services in Mekliganj. Our expert makeup artists are committed to creating a personalized, stunning look that matches your wedding vision. Whether you want a traditional bridal style or a more contemporary look, we ensure you shine on your special day. For more information or to book a consultation, call 7004721239 today! Why Choose Ladyfair Bridal Services in Mekliganj? 1. Experienced and Skilled Makeup Artists Our team of professional makeup artists specializes in bridal makeup and hair styling, ensuring that your makeup is perfect for your wedding day. We take into account your skin tone, style preferences, and the overall theme of your wedding to create a custom look just for you. 2. Premium Makeup Products We use only high-quality makeup brands like MAC, HUDA Beauty, and Kryolan to ensure your makeup looks flawless and lasts all day. From foundation to lipstick, we choose products that are best suited for your skin type and will ensure long-lasting results. 3. Customized Bridal Packages At Ladyfair, we understand that every bride is different, and we offer customized bridal makeup packages. Whether you need makeup for your wedding day, pre-wedding ceremonies, or both, we have packages to meet your needs. 4. Home Service for Bridal Makeup For your convenience, we provide doorstep bridal makeup services in Mekliganj. Relax and enjoy your special day in the comfort of your home while we take care of your beauty needs. Our Bridal Makeup Services Traditional Bridal Makeup – Bold and vibrant with rich colors and a timeless look, ideal for a traditional ceremony. Modern Bridal Makeup – Soft and subtle makeup that enhances your natural beauty, perfect for a contemporary wedding. Hairstyling – Elegant updos, soft curls, or any hairstyle of your choice to complement your bridal look. Pre-Wedding Makeup – Stunning makeup for engagement, mehndi, sangeet, and other pre-wedding functions. Saree Draping – Perfectly draped sarees that elevate your bridal look and add to your charm. Signature Bridal Looks in Mekliganj Classic Bengali Bridal Look A traditional and striking bridal look featuring bold eye makeup, red lips, and intricate alta designs, creating a timeless beauty perfect for Bengali weddings. Modern Bridal Look For brides who want to keep it chic and elegant, we offer a natural yet stunning makeup look with soft makeup and effortless waves or curls for a fresh, modern appeal. Fusion Bridal Look The fusion of traditional and contemporary styles, perfect for those who want to combine the best of both worlds for a unique and extraordinary bridal look. What Our Brides Say About Us Sangita D., Mekliganj: "My bridal makeup was absolutely perfect! The Ladyfair team understood exactly what I wanted, and I felt like a princess on my wedding day. Highly recommend their services!" Nisha P., Mekliganj: "Thank you to Ladyfair for making my big day so memorable. The makeup was flawless, and I received so many compliments. I couldn’t have asked for better!" Anjali K., Mekliganj: "The makeup was exactly what I envisioned. The team was professional, and the entire process was stress-free. I felt beautiful and confident on my wedding day." Bridal Beauty Tips for Mekliganj Brides Hydrate and Moisturize: Healthy skin starts with hydration, so drink plenty of water and use a good moisturizer daily. Pre-Wedding Skincare Routine: Start a skincare regimen a few months before the wedding to get your skin glowing. Healthy Diet: Include fruits and vegetables in your diet to improve skin texture and health. Get Enough Sleep: Rest well to look refreshed and radiant on your wedding day. FAQs Q1: Do you offer bridal makeup trials in Mekliganj? Yes, we offer makeup trials so that you can choose the perfect look for your wedding day. Q2: Can I have a customized bridal package? Absolutely! We provide customized packages tailored to your specific needs for your wedding day and pre-wedding functions. Q3: Do you offer bridal makeup services at home in Mekliganj? Yes, we offer home service options for bridal makeup, ensuring you feel relaxed and pampered in the comfort of your own home. Q4: What makeup brands do you use? We use premium brands like MAC, HUDA Beauty, and Kryolan for all our bridal makeup services. Q5: How do I book a bridal makeup session? You can book your bridal makeup consultation by calling 7004721239.

Posted By: 5th January 2025
best bridal makeup artist in tufanganj-II
Introduction Transform your wedding day into a dream with Ladyfair Bridal Services in Tufanganj-II. Our expert makeup artists specialize in crafting personalized bridal looks that capture your unique style and enhance your natural beauty. From traditional to modern bridal makeup, we offer a range of services to ensure you feel flawless on your special day. For more information or to book a consultation, contact 7004721239 today! Why Choose Ladyfair Bridal Services in Tufanganj-II? 1. Experienced Makeup Artists Our team of professional makeup artists specializes in bridal makeup and hairstyling, offering a bespoke approach for every bride. We focus on creating a look that is uniquely yours, ensuring you feel confident and radiant. 2. Premium Makeup Products We use high-quality, long-lasting makeup products from brands like MAC, HUDA Beauty, and Kryolan, ensuring your bridal makeup stays perfect throughout the day. 3. Customized Bridal Packages We offer tailor-made bridal packages to suit your preferences and requirements. Whether it’s for your wedding day, pre-wedding functions, or a special event, our packages are designed for your convenience. 4. Home Service Option Enjoy the luxury of bridal makeup in the comfort of your home. We provide home service for bridal makeup in Tufanganj-II, allowing you to relax while we work our magic on your wedding look. Our Bridal Makeup Services Traditional Bridal Makeup – For brides who love bold, vibrant makeup with striking eyes, red lips, and intricate details. Modern Bridal Makeup – A soft and elegant makeup style that enhances your natural beauty and suits contemporary weddings. Pre-Wedding Makeup – Beautiful makeup for functions like engagement, mehndi, sangeet, and other pre-wedding ceremonies. Hairstyling – Expert hairstyling for your wedding day, from classic updos to loose curls, to match your bridal look. Saree Draping – Elegant and perfect saree draping to complete your bridal attire and make you feel confident and graceful. Signature Bridal Looks in Tufanganj-II Classic Bengali Bridal Look For brides who love traditional aesthetics, this look includes rich red tones, bold eye makeup, and the famous alta design to celebrate Bengali culture. It’s a timeless and captivating choice for your wedding day. Natural Bridal Makeup A softer approach with a natural look, soft tones, and understated elegance, perfect for modern brides who want to embrace their natural beauty. Fusion Bridal Look The perfect mix of traditional and modern styles for a unique bridal look that makes you stand out on your wedding day. What Our Brides Say About Us Tania D., Tufanganj-II: "The makeup was absolutely stunning, and the team was professional and friendly. I felt like a princess on my wedding day. Thank you, Ladyfair!" Rita P., Tufanganj-II: "Ladyfair made my bridal experience amazing! The makeup was flawless, and I felt beautiful throughout the day. Highly recommend!" Maya G., Tufanganj-II: "From the consultation to the final look, everything was perfect. Ladyfair Bridal Services made my wedding day even more special. Thank you!" Bridal Beauty Tips for Tufanganj-II Brides Pre-Wedding Skincare: Start preparing your skin months before the wedding with a proper skincare routine for glowing skin. Hydrate: Drink plenty of water to keep your skin fresh and hydrated, giving you a natural glow. Sleep Well: Ensure you get enough rest to look fresh and rejuvenated on your wedding day. Healthy Diet: Incorporate a lot of fruits and vegetables into your diet for better skin and overall wellness. FAQs Q1: Do you offer bridal makeup trials in Tufanganj-II? Yes, we offer bridal makeup trials to ensure you’re happy with your look before the big day. Q2: Can I customize my bridal package? Absolutely! We offer personalized bridal packages based on your preferences and wedding requirements. Q3: Do you provide bridal makeup services at home in Tufanganj-II? Yes, we offer home service for bridal makeup, ensuring a stress-free experience for you. Q4: What makeup products do you use? We use premium makeup brands like MAC, HUDA Beauty, and Kryolan to create your perfect bridal look. Q5: How do I book a bridal makeup session? Simply call 7004721239 to book your consultation and bridal makeup session.

Posted By: 5th January 2025
best bridal makeup artist in haldibari
Introduction Looking for a flawless bridal makeup look in Haldibari? Ladyfair Bridal Services offers premium bridal makeup and hairstyling to make your special day even more beautiful. Our expert team of makeup artists works closely with you to create the perfect look, tailored to your wedding theme and personal style. Call 7004721239 to book your bridal makeup consultation today! Why Choose Ladyfair Bridal Services in Haldibari? 1. Expert Bridal Makeup Artists At Ladyfair, we take pride in offering the best bridal makeup artistry. Our team of professionals understands every bride's vision and ensures that your makeup is nothing short of perfection, whether you want a traditional or modern bridal look. 2. Long-Lasting, Premium Products We only use top-notch makeup products from brands like MAC, HUDA Beauty, and Kryolan, ensuring your makeup lasts throughout the day, from your wedding ceremony to your reception. 3. Personalized Bridal Packages We offer customized bridal makeup packages to meet your specific needs. Whether you need makeup for pre-wedding events or a complete makeover on the wedding day, we have you covered. 4. Home Service Option For your convenience, we offer doorstep bridal makeup services in Haldibari, ensuring you have a stress-free and comfortable experience on your big day. Our Bridal Makeup Services Traditional Bridal Makeup – Bold, rich colors and classic styles for a timeless look. Contemporary Bridal Makeup – Soft, elegant makeup for a modern yet graceful appearance. Hairstyling – From elegant updos to romantic curls, we ensure your hairstyle complements your bridal look. Saree Draping – Perfect draping techniques to enhance the beauty of your saree and make you feel flawless. Pre-Wedding Makeup – Glamorous and stylish makeup for engagement, mehndi, sangeet, and other pre-wedding functions. Signature Bridal Looks in Haldibari Classic Bengali Bridal Look For a traditional Bengali wedding, we offer a rich red bridal look with bold eye makeup, statement lips, and the famous alta design, giving you a beautiful and timeless appearance. Modern Chic Bridal Look For the bride who wants a subtle, modern approach, we create soft, natural makeup with glowing skin, soft curls, and fresh floral details. Fusion Bridal Look A combination of contemporary and traditional styles, perfect for those who want a unique and striking look that blends both worlds. What Our Brides Say About Us Madhuri S., Haldibari: "I absolutely loved my bridal makeup by Ladyfair! The makeup stayed fresh all day, and I got so many compliments. The team is amazing!" Rina P., Haldibari: "The makeup was flawless, and the team really listened to my ideas. They made me feel like a queen on my wedding day." Sita R., Haldibari: "Thank you, Ladyfair! The makeup was so beautiful, and it lasted all day. I couldn’t be happier with the results." Bridal Beauty Tips for Haldibari Brides Start Skincare Early: Get your skin glowing by following a skincare routine months before the wedding. Hydrate for Healthy Skin: Drink plenty of water to keep your skin fresh and radiant. Eat Healthy: A balanced diet with plenty of fruits and vegetables will help keep your skin clear and glowing. Sleep Well: Make sure to get enough rest so that you feel refreshed and look radiant on your big day. FAQs Q1: Do you offer bridal makeup trials in Haldibari? Yes, we offer makeup trials so that you can finalize your look well before your wedding day. Q2: Can I choose a different makeup style for pre-wedding functions? Absolutely! We customize your makeup for every function, including engagement, mehndi, sangeet, etc. Q3: Do you provide home service for bridal makeup in Haldibari? Yes, we offer doorstep bridal makeup services for your convenience. Q4: Which makeup brands do you use? We use only premium brands like MAC, HUDA Beauty, and Kryolan for flawless, long-lasting results. Q5: How can I book my bridal makeup session? You can contact us at 7004721239 to schedule your bridal makeup consultation.

Posted By: 5th January 2025
best bridal makeup artist in sitai
Introduction Looking for flawless bridal makeup in Sitai? Ladyfair Bridal Services is your perfect choice for stunning, personalized bridal looks. Our team of makeup experts specializes in creating beautiful bridal makeup styles for every bride, ensuring you look your absolute best on your big day. From bridal makeup to pre-wedding ceremonies, we’ve got you covered. Call 7004721239 to book your bridal makeover today! Why Choose Ladyfair Bridal Services in Sitai? 1. Professional Bridal Makeup Artists Our skilled makeup artists are experts in delivering high-quality bridal looks, whether you desire a traditional, contemporary, or fusion style. We understand that every bride has her own unique vision, and we work closely with you to bring that vision to life. 2. Premium Products for Long-Lasting Results We use only the best products from renowned brands like MAC, HUDA Beauty, and Kryolan to ensure your makeup stays perfect throughout the wedding day. 3. Customized Bridal Packages Our bridal makeup packages are designed to meet your unique needs. From the pre-wedding function to your wedding day, we provide personalized services that ensure you look stunning at every event. 4. Convenient Home Services We bring our expert bridal makeup services right to your doorstep in Sitai, providing you with comfort and convenience. Our Bridal Makeup Services Traditional Bridal Makeup – Classic looks that enhance your beauty with bold, rich tones. Modern Bridal Makeup – Contemporary styles with subtle elegance for the modern bride. Hairstyling – From intricate updos to soft curls, we ensure your hairstyle complements your look. Saree Draping – Perfectly draped sarees to match your bridal style and ensure a graceful appearance. Pre-Wedding Makeup – Beautiful looks for engagement, mehndi, or sangeet functions, tailored to your style. Signature Bridal Looks in Sitai Bengali Bridal Look A vibrant, traditional bridal look featuring bold eyes, red lips, and the iconic alta design, perfect for a Bengali wedding.4 Elegant Modern Bride For the bride who wants to keep it simple yet chic, a soft, glowing makeup style that brings out natural beauty. Fusion Bridal Look A combination of both modern and traditional styles, giving you a unique and eye-catching appearance that is unforgettable. What Our Brides Say About Us Sonia P., Sitai: "I couldn’t be happier with the bridal makeup by Ladyfair! The makeup was flawless and lasted all day. Highly recommend them!" Madhavi G., Sitai: "The makeup artists at Ladyfair are incredibly talented. They made me feel like a queen on my wedding day." Tina R., Sitai: "Ladyfair Bridal Services is amazing! They listened to my preferences and gave me the exact bridal look I wanted." Bridal Beauty Tips for Sitai Brides Start Skincare Early: Begin a skincare routine a few months before your wedding to achieve clear, glowing skin. Stay Hydrated: Drink plenty of water to maintain healthy skin. Healthy Diet: Eating a balanced diet with fruits and vegetables helps keep your skin fresh and clear. Get Enough Sleep: Ensure you rest well in the days leading up to your wedding for a refreshed, radiant look. FAQs Q1: Do you provide bridal makeup trials in Sitai? Yes, we offer makeup trials so you can finalize your bridal look well before your wedding day. Q2: Can I choose different makeup looks for my pre-wedding functions? Yes, we customize the makeup for each function, including engagement, mehndi, and sangeet. Q3: Do you offer home service for bridal makeup in Sitai? Yes, we offer home service for your convenience. Q4: What makeup brands do you use? We use high-quality products from trusted brands such as MAC, HUDA Beauty, and Kryolan. Q5: How can I book an appointment with you? You can call us at 7004721239 to book your bridal consultation or makeover.

Posted By: 5th January 2025
best bridal makeup artist in sitalkuchi
Introduction Make your wedding day unforgettable with professional bridal makeup by Ladyfair Bridal Services in Sitalkuchi. From traditional to modern bridal looks, our team of experts is dedicated to making you look flawless. Whether it's for the wedding, engagement, or other pre-wedding functions, our services are designed to match your style. Call 7004721239 today and book your bridal makeover! Why Choose Ladyfair Bridal Services in Sitalkuchi? 1. Expert Bridal Makeup Artists Our experienced team of makeup artists specializes in creating the perfect bridal look tailored to your preferences and skin tone. 2. High-Quality Beauty Products We use only premium products from brands like MAC, HUDA Beauty, and Kryolan to ensure long-lasting, radiant makeup. 3. Custom Bridal Packages We understand that every bride is unique. Our packages are designed to suit your needs, ensuring you feel your best on your big day. 4. Home Service in Sitalkuchi Enjoy our bridal services at the comfort of your home or venue, eliminating the need to travel. Our Bridal Makeup Services Traditional Bridal Makeup – Enhance your natural beauty with a classic, timeless look. Modern Bridal Makeup – Create a contemporary, fresh style that reflects your personality. Hairstyling – From elegant buns to chic curls, we perfect your bridal hairstyle. Saree Draping – Let our experts drape your saree perfectly, enhancing your bridal ensemble. Pre-Wedding Makeup – Stunning makeup for pre-wedding functions like engagement, mehndi, and more. Signature Bridal Looks in Sitalkuchi Classic Bengali Bridal Look A vibrant and traditional look with bold eyes, red lips, and intricate alta designs. Contemporary Elegant Look A minimalist approach with soft tones and natural radiance for a more modern touch. Fusion Bridal Look A combination of traditional and modern styles for brides who want a unique and eye-catching appearance. Testimonials from Brides in Sitalkuchi Priya G., Sitalkuchi: "Ladyfair made me look like a princess on my wedding day. The makeup was flawless, and I felt so special." Anjali K., Sitalkuchi: "I loved the professional approach and attention to detail. My bridal look was exactly what I imagined!" Rina B., Sitalkuchi: "Highly recommend Ladyfair! They made me look perfect for all my wedding events." Pre-Bridal Care Tips Hydrate: Drink plenty of water to keep your skin glowing and hydrated. Follow a Skincare Routine: Start early with regular skincare treatments for a radiant complexion. Eat Right: Include healthy, fresh foods in your diet for clear, glowing skin. Sleep Well: Ensure you get enough rest in the days leading up to your wedding to look fresh. FAQs Q1: Do you offer bridal makeup trials in Sitalkuchi? Yes, we provide makeup trials to ensure you’re happy with your look before the big day. Q2: Can I request different makeup styles for each wedding function? Absolutely! We customize the look based on each event, whether it's the wedding, reception, or pre-wedding ceremonies. Q3: Do you provide home service in Sitalkuchi? Yes, we offer at-home bridal services to make your experience more convenient. Q4: What makeup products do you use? We use top-quality products from trusted brands like MAC, HUDA Beauty, and Kryolan. Q5: How do I book your services? Call us at 7004721239 to book your bridal consultation.

Posted By: 5th January 2025
best bridal makeup artist on goghat-II
Introduction Every bride deserves to look stunning on her special day. At Ladyfair Bridal Services, we bring our expertise to Goghat-II, offering exceptional bridal makeup, hairstyling, and saree draping services. With a focus on perfection, we make your wedding dreams come true. Call 7004721239 today to book your appointment! Why Choose Ladyfair Bridal Services in Goghat-II? 1. Professional Makeup Artists Our skilled artists specialize in bridal looks, ensuring a flawless appearance for your big day. 2. Premium Beauty Products We use trusted brands like MAC, HUDA Beauty, and Kryolan to create radiant, long-lasting looks. 3. Customized Bridal Packages Whether it’s your wedding, engagement, or reception, we offer tailored packages for every event. 4. At-Home Service in Goghat-II Relax and enjoy our premium services at your doorstep. Our Bridal Makeup Services Traditional Bridal Makeup – Celebrate cultural beauty with a timeless look. Contemporary Bridal Makeup – Modern and elegant styles for today’s bride. Exclusive Hairstyling – From classic buns to trendy curls, we style your hair to perfection. Saree Draping Services – Perfectly draped sarees to complement your bridal ensemble. Pre-Wedding Event Makeup – Stunning looks for engagement, mehndi, and other ceremonies. Signature Bridal Styles in Goghat-II Traditional Bengali Bridal Look Vibrant lips, bold eyes, and traditional alta for a timeless bridal charm. Modern Minimalist Look A subtle and radiant style for the bride who loves simplicity. Fusion Look A unique blend of traditional and contemporary makeup for a standout appearance. Testimonials from Goghat-II Brides Ananya M., Goghat-II: "Ladyfair made my wedding day unforgettable! The makeup was flawless." Ritika S., Goghat-II: "The team was professional and attentive. I looked stunning throughout the day!" Sneha D., Goghat-II: "Thank you, Ladyfair, for the perfect bridal look. Highly recommended!" Pre-Bridal Care Tips Hydrate Your Skin: Drink plenty of water for a natural glow. Start Early: Begin your skincare routine months before the wedding. Balanced Diet: Include fruits and greens in your meals for radiant skin. Get Enough Rest: A good night’s sleep keeps your skin fresh and bright. FAQs Q1: Do you offer bridal makeup trials in Goghat-II? Yes, we provide makeup trials to help you finalize your perfect look. Q2: Can you create different looks for multiple wedding events? Absolutely! We customize makeup for every occasion, from engagement to reception. Q3: Are doorstep services available? Yes, our team will come to your home or wedding venue in Goghat-II. Q4: What products do you use? We use premium brands like MAC, HUDA Beauty, and Kryolan. Q5: How can I book your services? Call us at 7004721239 to schedule your bridal consultation.

Posted By: 5th January 2025
best bridal makeup artist in goghat-I
Introduction Every bride dreams of looking her best on her special day. Ladyfair Bridal Services brings top-notch bridal makeup and hairstyling services to Goghat-I to make your wedding day truly magical. With experienced artists and premium products, we ensure a flawless and stunning look that matches your vision. Call us today at 7004721239 to book your appointment. Why Choose Ladyfair Bridal Services in Goghat-I? 1. Expert Makeup Artists Our highly skilled makeup professionals have years of experience in creating exquisite bridal looks. 2. High-Quality Products We use trusted brands like MAC, HUDA Beauty, and Kryolan to ensure a long-lasting and radiant finish. 3. Tailored Packages Choose from our customized bridal packages that cover makeup, hairstyling, and saree draping for all your wedding events. 4. Convenient Doorstep Service Enjoy premium beauty services at your home or wedding venue in Goghat-I. Our Bridal Makeup Services Traditional Bridal Makeup – Embrace cultural richness with a classic bridal look. Modern Bridal Makeup – Subtle, elegant, and perfect for the contemporary bride. Hairstyling Services – From traditional buns to modern curls, we style it all. Saree Draping Expertise – Perfectly draped sarees to enhance your bridal attire. Pre-Wedding Event Makeup – Gorgeous looks for engagement, mehndi, and reception. Signature Bridal Looks in Goghat-I Classic Bengali Bridal Look Bold eyes, vibrant lips, and traditional alta enhance your timeless beauty. Minimalist Bridal Style A radiant, natural finish for the modern bride who loves simplicity. Fusion Bridal Look Blending traditional and modern elements for a unique and captivating appearance. Testimonials from Brides in Goghat-I Riya G., Goghat-I: "I felt like a princess on my wedding day, all thanks to Ladyfair's amazing team!" Sonal P., Goghat-I: "The makeup was flawless and lasted all day. Highly recommend Ladyfair!" Priya D., Goghat-I: "Ladyfair’s services are incredible! Their attention to detail is unmatched." Pre-Bridal Beauty Tips Stay Hydrated: Drink plenty of water for glowing skin. Start Skincare Early: Follow a consistent skincare routine 3-4 months before your wedding. Healthy Diet: Add fruits and vegetables to your meals for natural radiance. Sleep Well: Get enough rest to avoid puffiness or dullness. FAQs Q1: Do you offer bridal makeup trials in Goghat-I? Yes, we provide trial sessions to finalize your bridal look. Q2: What makeup brands do you use? We use premium brands like MAC, HUDA Beauty, and Kryolan for the best results. Q3: Can you do makeup for pre-wedding events? Absolutely! We provide makeup services for engagement, mehndi, and other events. Q4: Are your services available at home? Yes, we offer doorstep services for your convenience. Q5: How do I book your services? Call us at 7004721239 to book an appointment.

Posted By: 5th January 2025
best bridal makeup artist in arambagh
Introduction Your wedding day is a celebration of love and joy, and Ladyfair Bridal Services is here to make it unforgettable. With our expert bridal makeup services now available in Arambagh, we specialize in creating stunning bridal looks tailored to your style and preferences. Contact us today at 7004721239 to book your personalized bridal sessio Why Choose Ladyfair Bridal Services in Arambagh? 1. Expert Makeup Artists Our team of skilled professionals is trained to deliver flawless and elegant bridal looks for your big day. 2. Premium Products We use top-tier products from renowned brands like MAC, HUDA Beauty, and Kryolan to ensure a long-lasting and impeccable finish. 3. Custom Bridal Packages From your engagement to your wedding day, our customized packages cater to all your beauty needs. 4. Doorstep Services Enjoy the comfort of professional makeup services at your home or wedding venue in Arambagh. Our Bridal Makeup Services Traditional Bridal Makeup – Perfectly crafted for a timeless and cultural bridal look. Contemporary Makeup Styles – Elegant and minimal makeup for the modern bride. Hairstyling – Stunning styles, from classic buns to intricate braids. Saree Draping – Expert draping techniques to complement your bridal attire. Pre-Wedding Event Makeup – Makeup for engagement, mehndi, and sangeet ceremonies. Signature Bridal Looks in Arambagh Traditional Bengali Bride Celebrate your heritage with dramatic eyes, bold lips, and traditional alta for an authentic Bengali bridal look. Minimalistic Modern Bride Opt for a natural, glowing makeup style that exudes elegance and simplicity. Fusion Bride Combine traditional and modern elements to create a unique and captivating bridal style. Testimonials from Brides in Arambagh Shreya M., Arambagh: "Ladyfair's team made my wedding day extra special. My makeup was flawless and lasted all day long!" Ritika D., Arambagh: "Their services are exceptional. They gave me the exact look I wanted for my reception!" Ananya P., Arambagh: "From makeup to hairstyling, everything was perfect. Highly recommend Ladyfair for all brides-to-be!" Pre-Bridal Beauty Tips Start Early: Follow a consistent skincare routine at least three months before your wedding. Stay Hydrated: Drink plenty of water to keep your skin glowing. Healthy Diet: Focus on fruits and vegetables for radiant skin. Beauty Sleep: Ensure 7-8 hours of sleep daily to avoid stress and dullness. FAQs Q1: Can I book a makeup trial in Arambagh? Yes, trial sessions are available to help you finalize your bridal look. Q2: Do you offer services for pre-wedding events? Absolutely! We provide makeup services for engagement, mehndi, sangeet, and more. Q3: Which brands do you use for makeup? We use premium brands like MAC, HUDA Beauty, and Kryolan for flawless results. Q4: Are doorstep services available in Arambagh? Yes, we provide on-site services for your convenience. Q5: How can I book Ladyfair Bridal Services? You can contact us at 7004721239 to book your appointment.

Posted By: 5th January 2025
best bridal makeup artist in Sreerampur-Uttarpara
Introduction Step into your wedding day with confidence and elegance, as Ladyfair Bridal Services brings its premium offerings to Sreerampur-Uttarpara. From traditional bridal looks to contemporary styles, our team of expert makeup artists will ensure you radiate beauty and grace. Book your appointment today at 7004721239 and let us make your special day unforgettable. Why Choose Ladyfair Bridal Services in Sreerampur-Uttarpara? 1. Professional Expertise Our highly skilled makeup artists specialize in a wide range of bridal styles, tailored to meet your unique preferences. 2. High-Quality Products We use only premium brands like MAC, HUDA Beauty, and Kryolan to achieve a flawless and long-lasting finish. 3. Customized Packages Whether it’s your wedding day or pre-wedding events, we have packages designed for every need. 4. Doorstep Services Our team offers on-site bridal makeup services in Sreerampur-Uttarpara, providing you with convenience and comfort. Signature Bridal Styles Traditional Bengali Bride Perfectly crafted red and gold makeup with dramatic eyes and traditional alta designs for a classic Bengali bridal appearance. Minimalist Modern Bride Achieve a chic, understated look with subtle makeup, dewy skin, and natural tones that exude elegance. Fusion Bridal Look Blend tradition with modern elements to create a unique bridal style that’s as special as your wedding day. Our Services Bridal Makeup – Tailored to make you the star of your special day. Hairstyling – From intricate buns to flowing waves, we offer diverse options. Saree Draping – Professional draping styles to complement your bridal look. Pre-Wedding Makeup – Engagement, mehndi, sangeet, and reception makeup for all your events. What Brides in Sreerampur-Uttarpara Say Priya R., Sreerampur-Uttarpara: "Ladyfair made me feel like a queen on my wedding day! The makeup was flawless and lasted all day." Ananya G., Sreerampur-Uttarpara: "The team was professional, friendly, and incredibly talented. Highly recommended!" Ritika D., Sreerampur-Uttarpara: "Everything was perfect—from the makeup to the hairstyling. Thank you, Ladyfair!" Pre-Bridal Tips for Brides in Sreerampur-Uttarpara Skin Prep: Start a good skincare routine at least 3 months in advance. Hydration: Drink plenty of water for naturally glowing skin. Balanced Diet: Eat healthy meals rich in fruits and vegetables for a radiant look. Adequate Sleep: Ensure 7-8 hours of sleep every night to avoid stress and fatigue. FAQs Q1: Do you provide makeup trials in Sreerampur-Uttarpara? Yes, trial sessions are available to finalize your bridal look. Q2: Which brands do you use for makeup? We use top-quality brands such as MAC, HUDA Beauty, and Kryolan. Q3: Are home services available in Sreerampur-Uttarpara? Absolutely! We offer doorstep bridal services for your convenience. Q4: Can I book makeup for pre-wedding events? Yes, we provide makeup services for engagement, mehndi, sangeet, and other pre-wedding events. Q5: How do I book Ladyfair Bridal Services? You can book your appointment by calling us at 7004721239.

Posted By: 5th January 2025
best bridal makeup artist in jangipura
Introduction Celebrate your special day with Ladyfair Bridal Services, now available in Jangipara! From timeless traditional looks to modern bridal styles, our professional makeup artists will ensure you shine bright on your wedding day. To book your appointment, call 7004721239 today! Why Choose Ladyfair Bridal Services in Jangipara? 1. Expert Makeup Artists Our skilled professionals specialize in a variety of bridal styles, tailored to your preferences. 2. Premium Products We use trusted brands like MAC, HUDA Beauty, and Kryolan to create a flawless look. 3. Personalized Packages Whether you need makeup for the wedding day or pre-wedding events, our packages are designed to suit every bride. 4. On-Site Services Enjoy the convenience of doorstep services right in Jangipara, making your preparation stress-free. Our Signature Bridal Looks Traditional Bengali Bride A stunning look featuring vibrant red lips, intricate eye makeup, and traditional alta designs for a classic Bengali bridal appearance. Modern Minimalist Bride A chic and elegant style with glowing skin, nude tones, and a radiant finish for contemporary brides. Fusion Bridal Look A beautiful blend of tradition and modernity, customized for brides who want something unique. Our Services Bridal Makeup: Perfectly designed for your wedding day. Hairstyling: From traditional buns to trendy curls, we’ve got you covered. Saree Draping: Expertly styled to enhance your bridal outfit. Pre-Wedding Makeup: Engagement, mehndi, sangeet, or reception—our services cater to all. What Brides in Jangipara Say Ankita G., Jangipara: "Ladyfair turned my dream bridal look into reality. The team was professional and talented!" Madhuri S., Jangipara: "The makeup was flawless, and the hairstyling was on point. Thank you, Ladyfair!" Ritika P., Jangipara: "Highly recommend their services. The team ensured I looked perfect on my big day!" Pre-Bridal Tips for Brides in Jangipara Skincare Routine: Start a proper skincare regime months before the wedding. Stay Hydrated: Drink plenty of water for glowing skin. Healthy Diet: Include fresh fruits and vegetables in your meals for a natural glow. Rest Well: Sleep adequately to avoid stress and dark circles. FAQs Q1: Do you offer trial sessions in Jangipara? Yes, we provide trial makeup sessions to finalize your bridal look. Q2: Which makeup brands do you use? We use top-quality brands like MAC, HUDA Beauty, and Kryolan. Q3: Are doorstep services available in Jangipara? Yes, our team offers on-site services for your convenience. Q4: Do you provide makeup for pre-wedding events? Absolutely! We have packages for engagement, mehndi, sangeet, and more. Q5: How can I book Ladyfair Bridal Services? Call us at 7004721239 to book your appointment and discuss your needs.

Posted By: 5th January 2025
best bridal makeup artist in chanditala-II
Introduction Ladyfair Bridal Services now offers exclusive and luxurious bridal makeup solutions in Chanditala-II. Be it a traditional Bengali wedding or a contemporary celebration, our expert makeup artists ensure that you look perfect for your special day. For bookings, call 7004721239 and let us make your dream look a reality. Why Choose Ladyfair Bridal Services in Chanditala-II? 1. Skilled Professionals Our team of certified artists specializes in a wide variety of bridal styles, ensuring your unique preferences are met. 2. Top-Notch Products We use only high-quality makeup products from brands like MAC, HUDA Beauty, and Kryolan, ensuring a flawless finish. 3. Customized Packages From bridal makeup to pre-wedding events, our packages are tailored to meet all your needs. 4. Doorstep Services We bring our premium services right to your doorstep, making your day hassle-free. Signature Bridal Looks in Chanditala-II Traditional Bengali Bridal Look With bold red lips, stunning eye makeup, and intricate alta designs, this look captures the essence of Bengali culture. Modern Elegance For brides who prefer a chic and minimalist aesthetic with glowing skin and subtle tones. Fusion Bridal Style Blend modern trends with cultural touches for a unique and breathtaking appearance. Our Services Bridal Makeup: Perfectly crafted for your big day. Hairstyling: Customized styles ranging from traditional buns to elegant curls. Saree Draping: Expertly draped sarees that enhance your bridal ensemble. Occasion Makeup: Engagement, mehndi, sangeet, or reception—we cater to all your pre-wedding events. Testimonials from Chanditala-II Brides Soma M., Chanditala-II: "The team at Ladyfair made my wedding day unforgettable. They gave me the perfect traditional look!" Nandini K., Chanditala-II: "Ladyfair is the best in the business! The makeup was flawless and stayed intact throughout the day." Riya P., Chanditala-II: "The service was professional, and they made me feel so comfortable. Highly recommend Ladyfair!" Pre-Bridal Tips for Brides in Chanditala-II Start Early: Begin a skincare routine months before the wedding for glowing skin. Hydrate: Drink plenty of water and eat fresh fruits and vegetables for a radiant complexion. Hair Care: Nourish your hair with regular treatments for a healthy, shiny look. Sleep Well: Get enough rest to reduce stress and under-eye circles. FAQ Q1: Do you offer trial makeup sessions in Chanditala-II? Yes, we provide trial sessions to help you choose your desired bridal look. Q2: What brands do you use for makeup? We use premium brands like MAC, HUDA Beauty, and Kryolan for all our services. Q3: Can you come to my home for the services? Yes, we provide doorstep services in Chanditala-II for your convenience. Q4: Do you offer makeup for pre-wedding events like engagements or sangeet? Yes, we have customized packages for all pre-wedding and wedding ceremonies. Q5: How can I book Ladyfair Bridal Services? Simply call us at 7004721239 to book your appointment and discuss your requirements.

Posted By: 5th January 2025
best bridal makeup artist in chanditala-I
Introduction Ladyfair Bridal Services brings professional and luxurious bridal makeup solutions to Chanditala-I. Whether you’re planning a traditional Bengali wedding or a modern ceremony, our skilled team ensures you look stunning on your special day. Book your dream bridal makeover now by calling 7004721239. Why Choose Ladyfair Bridal Services in Chanditala-I? 1. Experienced Artists Our team comprises certified professionals who excel in creating both traditional and modern bridal looks. 2. Premium Products We use only trusted, high-quality brands such as MAC, HUDA Beauty, and Kryolan, ensuring a long-lasting, flawless finish. 3. Customizable Packages From engagement to reception, we offer tailored bridal packages to meet all your needs. 4. At-Home Services Enjoy a stress-free experience as we provide doorstep services across Chanditala-I. Signature Bridal Looks in Chanditala-I Bengali Traditional Bridal Look This iconic look features bold red lips, dramatic eyes, and artistic alta designs to complement the bride’s attire. Minimalist Elegance Ideal for brides who prefer a subtle yet radiant appearance with soft tones and a natural glow. Fusion Bridal Style A perfect mix of modern aesthetics and cultural heritage for a unique look. Our Comprehensive Services Bridal Makeup: Flawlessly crafted looks for the big day. Hairstyling: From intricate buns to flowing curls, we create styles that match your personality. Saree Draping: Expertly styled drapes that enhance your bridal attire. Occasion Makeup: Engagement, reception, or pre-wedding ceremonies—we have you covered. What Chanditala-I Brides Say Mitali R., Chanditala-I: "Ladyfair transformed me into a princess on my wedding day. Their attention to detail is incredible!" Priyanka D., Chanditala-I: "Highly recommend Ladyfair! They understood my preferences and gave me the perfect look." Ananya S., Chanditala-I: "From trial sessions to the wedding day, the experience was seamless. Thank you, Ladyfair!" Pre-Bridal Tips for Chanditala-I Brides Skincare Routine: Regular cleansing and moisturizing are key to glowing skin. Healthy Diet: Include fruits, vegetables, and plenty of water in your diet. Adequate Rest: Ensure you get 7-8 hours of sleep daily for refreshed skin. Hair Care: Use nourishing treatments to ensure smooth and healthy hair. FAQ Q1: Can I book a trial makeup session in Chanditala-I? Yes, we offer trial sessions to help you decide on your preferred bridal look. Q2: What kind of makeup products do you use? We use premium brands like MAC, HUDA Beauty, and Kryolan to ensure the best results. Q3: Do you provide home services in Chanditala-I? Absolutely! We bring our professional services to your doorstep for convenience. Q4: Can I book makeup for other events like engagement or reception? Yes, we offer packages for engagement, reception, and other wedding events. Q5: How can I schedule a booking with Ladyfair Bridal Services? Call us at 7004721239 to discuss your requirements and confirm your booking.

Posted By: 5th January 2025
best bridal makeup artist in khanakul-I
Introduction Ladyfair Bridal Services in Khanakul-I is your one-stop solution for achieving the perfect bridal look. Our expert team specializes in flawless makeup, hairstyling, and saree draping, ensuring you feel confident and radiant on your wedding day. Call us at 7004721239 to book your premium bridal services today! Why Choose Ladyfair Bridal Services in Khanakul-I? 1. Professional Expertise Our experienced artists understand the cultural and personal preferences of Khanakul-I brides, creating looks that resonate with tradition and modernity. 2. High-Quality Products We use internationally renowned brands like MAC, HUDA Beauty, and Bobbi Brown for a luxurious and skin-safe makeover. 3. Personalized Packages Whether it’s a traditional Bengali bridal look or a contemporary style, we have tailored packages for every bride. 4. Home Services Enjoy the luxury of getting ready at home with our professional team serving all areas in Khanakul-I. Popular Bridal Looks in Khanakul-I Classic Bengali Bridal Look Featuring bold eyes, red lips, and intricate alta designs, this look captures the essence of Bengali tradition. Modern Chic Perfect for brides looking for a contemporary and elegant vibe with soft tones and a natural glow. Fusion Glam Combining the best of traditional and modern styles for a unique bridal appearance. Our Bridal Services Include: Bridal Makeup: Enhancing your natural beauty with precision and artistry. Hairstyling: From elegant buns to trendy curls, we cater to every style. Saree Draping: Expert draping techniques for a flawless traditional look. Engagement & Reception Makeup: Additional packages for all your pre- and post-wedding events. What Our Brides Say Ananya D., Khanakul-I: "Ladyfair gave me my dream bridal look! The makeup stayed perfect all day." Sreeja R., Khanakul-I: "I was amazed by the professionalism and creativity of the team. Highly recommend them!" Purnima S., Khanakul-I: "From the trial to the wedding day, every detail was handled perfectly. Thank you, Ladyfair!" Pre-Bridal Tips for Khanakul-I Brides Stay Hydrated: Drink ample water for glowing skin. Follow a Skincare Routine: Cleanse and moisturize daily for smooth skin. Eat Nutritiously: Focus on a balanced diet rich in fruits and vegetables. Get Plenty of Sleep: Aim for 7-8 hours of restful sleep each night. FAQ Q1: Can I book a bridal trial in Khanakul-I? Yes, we offer trial sessions to help you choose the best look for your big day. Q2: What products do you use for makeup? We use premium brands like MAC, HUDA Beauty, and Kryolan for a flawless finish. Q3: Are your services available at home? Yes, we provide at-home bridal services in Khanakul-I. Q4: Do you offer services for other wedding events? Absolutely! We offer makeup and hairstyling for engagements, receptions, and other events. Q5: How can I book Ladyfair Bridal Services? Contact us at 7004721239 to schedule your bridal consultation and booking.

Posted By: 5th January 2025
best bridal makeup artist in Khanakul-II
Introduction Every bride deserves to look stunning on her special day, and Ladyfair Bridal Services in Khanakul-II is here to make that happen. With professional expertise in makeup, hairstyling, and saree draping, we ensure you shine like a star on your wedding day. Call us at 7004721239 to book our premium bridal services and enjoy a hassle-free makeover experience. Why Choose Ladyfair Bridal Services in Khanakul-II? 1. Expert Makeup Professionals Our skilled artists understand the nuances of bridal makeup and customize looks to suit your style. 2. Premium Makeup Products We use top-tier brands like MAC, HUDA Beauty, and Kryolan for a flawless and long-lasting look. 3. Tailored Bridal Packages Whether you prefer a traditional or modern bridal look, our packages are designed to cater to your unique preferences. 4. At-Home Services We bring the salon to your doorstep, offering convenience and comfort in Khanakul-II. Signature Bridal Looks for Khanakul-II Brides Traditional Bengali Bridal Look A stunning look featuring bold red lips, kohl-rimmed eyes, and intricate alta designs. Modern Elegance A sophisticated blend of smokey eyes, nude lips, and soft contours for a contemporary bridal vibe. Minimalist Glow Emphasizing natural beauty with soft tones and a radiant finish. Our Bridal Makeover Process Consultation: Understanding your wedding theme and personal style. Trial Makeup: Testing and finalizing the perfect look. Big Day Makeover: Seamless execution of makeup, hairstyling, and saree draping. Final Touch: Ensuring every detail is flawless for your special moment. Happy Brides from Khanakul-II Ritika S., Khanakul-II: "Ladyfair gave me the perfect traditional Bengali bridal look. I couldn’t have asked for more!" Megha K., Khanakul-II: "My bridal makeup was flawless and stayed fresh throughout the day. Highly recommend!" Pooja R., Khanakul-II: "The team was so professional and made me feel at ease. My look was exactly as I imagined." Pre-Wedding Beauty Tips for Khanakul-II Brides Hydrate: Drink plenty of water for glowing skin. Follow a Skincare Routine: Cleanse, tone, and moisturize daily. Healthy Eating: Focus on fruits, vegetables, and protein. Sleep Well: Ensure 7-8 hours of quality sleep every night. Additional Services Available in Khanakul-II Engagement Makeup Reception Makeup Bridesmaid Makeover Party Makeup Saree Draping and Hairstyling Frequently Asked Questions (FAQs) Q1: Do you offer bridal trials in Khanakul-II? Yes, we provide trial sessions to help you choose the perfect look. Q2: Which makeup brands do you use? We use high-end brands such as MAC, Bobbi Brown, and HUDA Beauty. Q3: Are at-home services available in Khanakul-II? Yes, we provide professional bridal services at your home. Q4: What does the bridal package include? Our packages include makeup, hairstyling, and saree draping services. Q5: How can I book Ladyfair Bridal Services? Simply call us at 7004721239 to schedule your appointment.

Posted By: 5th January 2025
BEST BRIDAL MAKEUP ARTIST IN PURSURAH
Introduction Your dream wedding look begins with Ladyfair Bridal Services in Pursurah. Let us create a flawless bridal look that reflects your personality and enhances your natural beauty. Call us at 7004721239 to book professional bridal makeup, hairstyling, and saree draping services for your special day. Why Choose Ladyfair Bridal Services in Pursurah? 1. Expert Makeup Artists Our experienced artists specialize in creating customized bridal looks to suit your style and preferences. 2. Premium Products We only use high-quality products from brands like MAC, HUDA Beauty, and Kryolan for a radiant and long-lasting finish. 3. Personalized Bridal Packages From traditional Bengali bridal makeup to contemporary styles, we offer packages tailored to your needs. 4. On-Site Services Enjoy the convenience of professional makeup and hairstyling in the comfort of your home in Pursurah. Popular Bridal Makeup Styles in Pursurah Classic Bengali Bridal Look This timeless style includes bold red lips, intricate eye makeup, and alta-adorned hands. Modern Bridal Glam A chic look with smokey eyes, nude lips, and perfectly contoured features. Natural Elegance Soft, glowing makeup for a subtle yet stunning look. Our Bridal Makeup Process Initial Consultation: Understand your vision and preferences. Trial Session: Experiment with looks to finalize the perfect style. Wedding Day: Seamless application of makeup, hairstyling, and saree draping. Finishing Touches: Ensuring you’re picture-perfect for your big day. Testimonials from Pursurah Brides Sanjana D., Pursurah: "Ladyfair made my wedding day so special. I felt confident and beautiful!" Priya K., Pursurah: "The makeup was flawless and lasted throughout the day. Thank you, Ladyfair!" Anjali R., Pursurah: "I received so many compliments on my bridal look. The team was amazing!" Pre-Wedding Beauty Tips for Pursurah Brides Stay Hydrated: Drink enough water for glowing skin. Follow a Routine: Cleanse and moisturize regularly. Healthy Diet: Include fruits and green veggies in your meals. Good Sleep: Ensure 7-8 hours of rest daily. Additional Services in Pursurah Engagement Makeup Reception Makeup Bridesmaid Makeup Party Makeup Hairstyling and Saree Draping Frequently Asked Questions (FAQs) Q1: Do you offer makeup trials in Pursurah? Yes, we provide trials to help you finalize your desired look. Q2: What makeup products do you use? We use trusted brands like MAC, Bobbi Brown, and HUDA Beauty. Q3: Can you provide home services in Pursurah? Yes, we offer on-site bridal services for your convenience. Q4: Is hairstyling part of the bridal package? Yes, our bridal packages include hairstyling and saree draping. Q5: How can I book Ladyfair Bridal Services? Call us at 7004721239 to schedule your appointment today.

Posted By: 4th January 2025
best bridal makeup artist in Polba-Dadpur
Introduction Your wedding day deserves the perfect touch of elegance and beauty. At Ladyfair Bridal Services in Polba-Dadpur, we specialize in creating timeless looks that make every bride shine. Book now at 7004721239 for flawless bridal makeup, hairstyling, and saree draping services. Why Choose Ladyfair Bridal Services in Polba-Dadpur? 1. Expert Bridal Makeup Artists Our team of professionals has extensive experience in crafting customized bridal looks. 2. High-Quality Products We use trusted brands like MAC, HUDA Beauty, and Kryolan to ensure long-lasting and skin-safe makeup. 3. Tailored Bridal Packages Choose from traditional, modern, or natural bridal makeup styles to suit your preferences. 4. Convenient On-Site Services We bring our expertise to your location in Polba-Dadpur, ensuring a stress-free experience. Popular Bridal Makeup Styles in Polba-Dadpur Traditional Bridal Look Bold and elegant, featuring dramatic eyes, red lips, and intricate alta designs. Contemporary Bridal Glam Shimmery eyeshadow, sculpted features, and soft tones for a modern bridal aesthetic. Minimalist Bride A natural, radiant look perfect for daytime or outdoor ceremonies. Our Bridal Makeup Process Consultation: Discuss your vision, themes, and preferences. Trial Session: Finalize your look with a makeup trial. Wedding Day: Flawless makeup application, hairstyling, and saree draping. Finishing Touches: Ensuring perfection for your big day. Testimonials from Polba-Dadpur Brides Arpita G., Polba-Dadpur: "I couldn't have asked for better service. Ladyfair made my wedding day unforgettable!" Smriti C., Polba-Dadpur: "The makeup was stunning and stayed perfect all day. Highly recommend Ladyfair!" Nisha B., Polba-Dadpur: "The team was professional and attentive, making me feel like a queen. Thank you!" Pre-Wedding Beauty Tips for Polba-Dadpur Brides Hydrate Well: Drink plenty of water for glowing skin. Follow a Routine: Cleanse, exfoliate, and moisturize daily. Eat Right: Incorporate fruits, nuts, and green veggies for healthy skin. Adequate Rest: Get at least 7-8 hours of sleep every night. Additional Services in Polba-Dadpur Reception Makeup Engagement Makeup Party Makeup Bridesmaid Makeup Hairstyling and Saree Draping Frequently Asked Questions (FAQs) Q1: Do you provide makeup trials in Polba-Dadpur? Yes, we offer trials to ensure your satisfaction with the final look. Q2: What makeup brands do you use? We use premium brands like MAC, HUDA Beauty, and Bobbi Brown. Q3: Are home services available in Polba-Dadpur? Yes, we provide convenient on-site services. Q4: Is hairstyling included in the bridal package? Absolutely! Our bridal packages include hairstyling and saree draping. Q5: How do I book Ladyfair Bridal Services? Call us at 7004721239 to book your appointment today.

Posted By: 4th January 2025
best bridal makeup artist in pandua
Introduction Turn your wedding day into a magical event with Ladyfair Bridal Services in Pandua. Our expert team ensures you look stunning with personalized makeup, hairstyling, and saree draping services. Book your appointment today at 7004721239 to shine on your special day. Why Choose Ladyfair Bridal Services in Pandua? 1. Experienced Makeup Artists Our skilled professionals craft unique looks to complement your wedding theme and personal style. 2. High-Quality Products We use trusted brands like MAC, HUDA Beauty, and Kryolan for a flawless and long-lasting finish. 3. Custom Bridal Packages From bold traditional looks to soft natural styles, we have something for every bride. 4. Convenience at Your Doorstep We offer on-site services, bringing expert care to your home or wedding venue in Pandua. Popular Bridal Makeup Styles in Pandua Traditional Bridal Look A classic Bengali bridal style featuring bold red lips, dramatic eyes, and intricate alta designs. Modern Glam Bride Shimmering eyeshadow, soft blush, and contoured features for a glamorous look. Natural Radiance Bride Minimal makeup with glowing skin, perfect for outdoor or day weddings. Our Bridal Makeup Process Consultation: Discuss your vision and wedding theme. Makeup Trial: Test and finalize your look. Wedding Day Prep: Flawless makeup application and hairstyling. Final Touches: Ensuring perfection before your grand entrance. Testimonials from Brides in Pandua Sanchita R., Pandua: "Ladyfair made me feel confident and beautiful on my big day. Their service is unmatched!" Ritu M., Pandua: "From makeup to saree draping, everything was on point. Highly recommend their services!" Piyali B., Pandua: "The team listened to all my preferences and gave me the look I dreamed of. Thank you, Ladyfair!" Pre-Wedding Beauty Tips for Pandua Brides Hydrate: Drink plenty of water for glowing skin. Follow a Routine: Cleanse and moisturize daily. Eat Healthy: Incorporate fruits and nuts into your diet. Sleep Well: Get adequate rest for fresh-looking skin. Additional Services in Pandua Reception Makeup Engagement Makeup Bridesmaid Makeup Party Makeup Saree Draping and Hairstyling Frequently Asked Questions (FAQs) Q1: Do you offer bridal makeup trials in Pandua? Yes, we provide trials to ensure your satisfaction with the final look. Q2: What brands do you use for makeup? We use top-quality brands like MAC, HUDA Beauty, and Bobbi Brown. Q3: Can I book home services for my wedding day? Absolutely, we provide on-site services for your convenience. Q4: Are hairstyling and saree draping included in the bridal package? Yes, our packages include complete hairstyling and saree draping services. Q5: How can I book Ladyfair Bridal Services in Pandua? Call us at 7004721239 to secure your appointment.
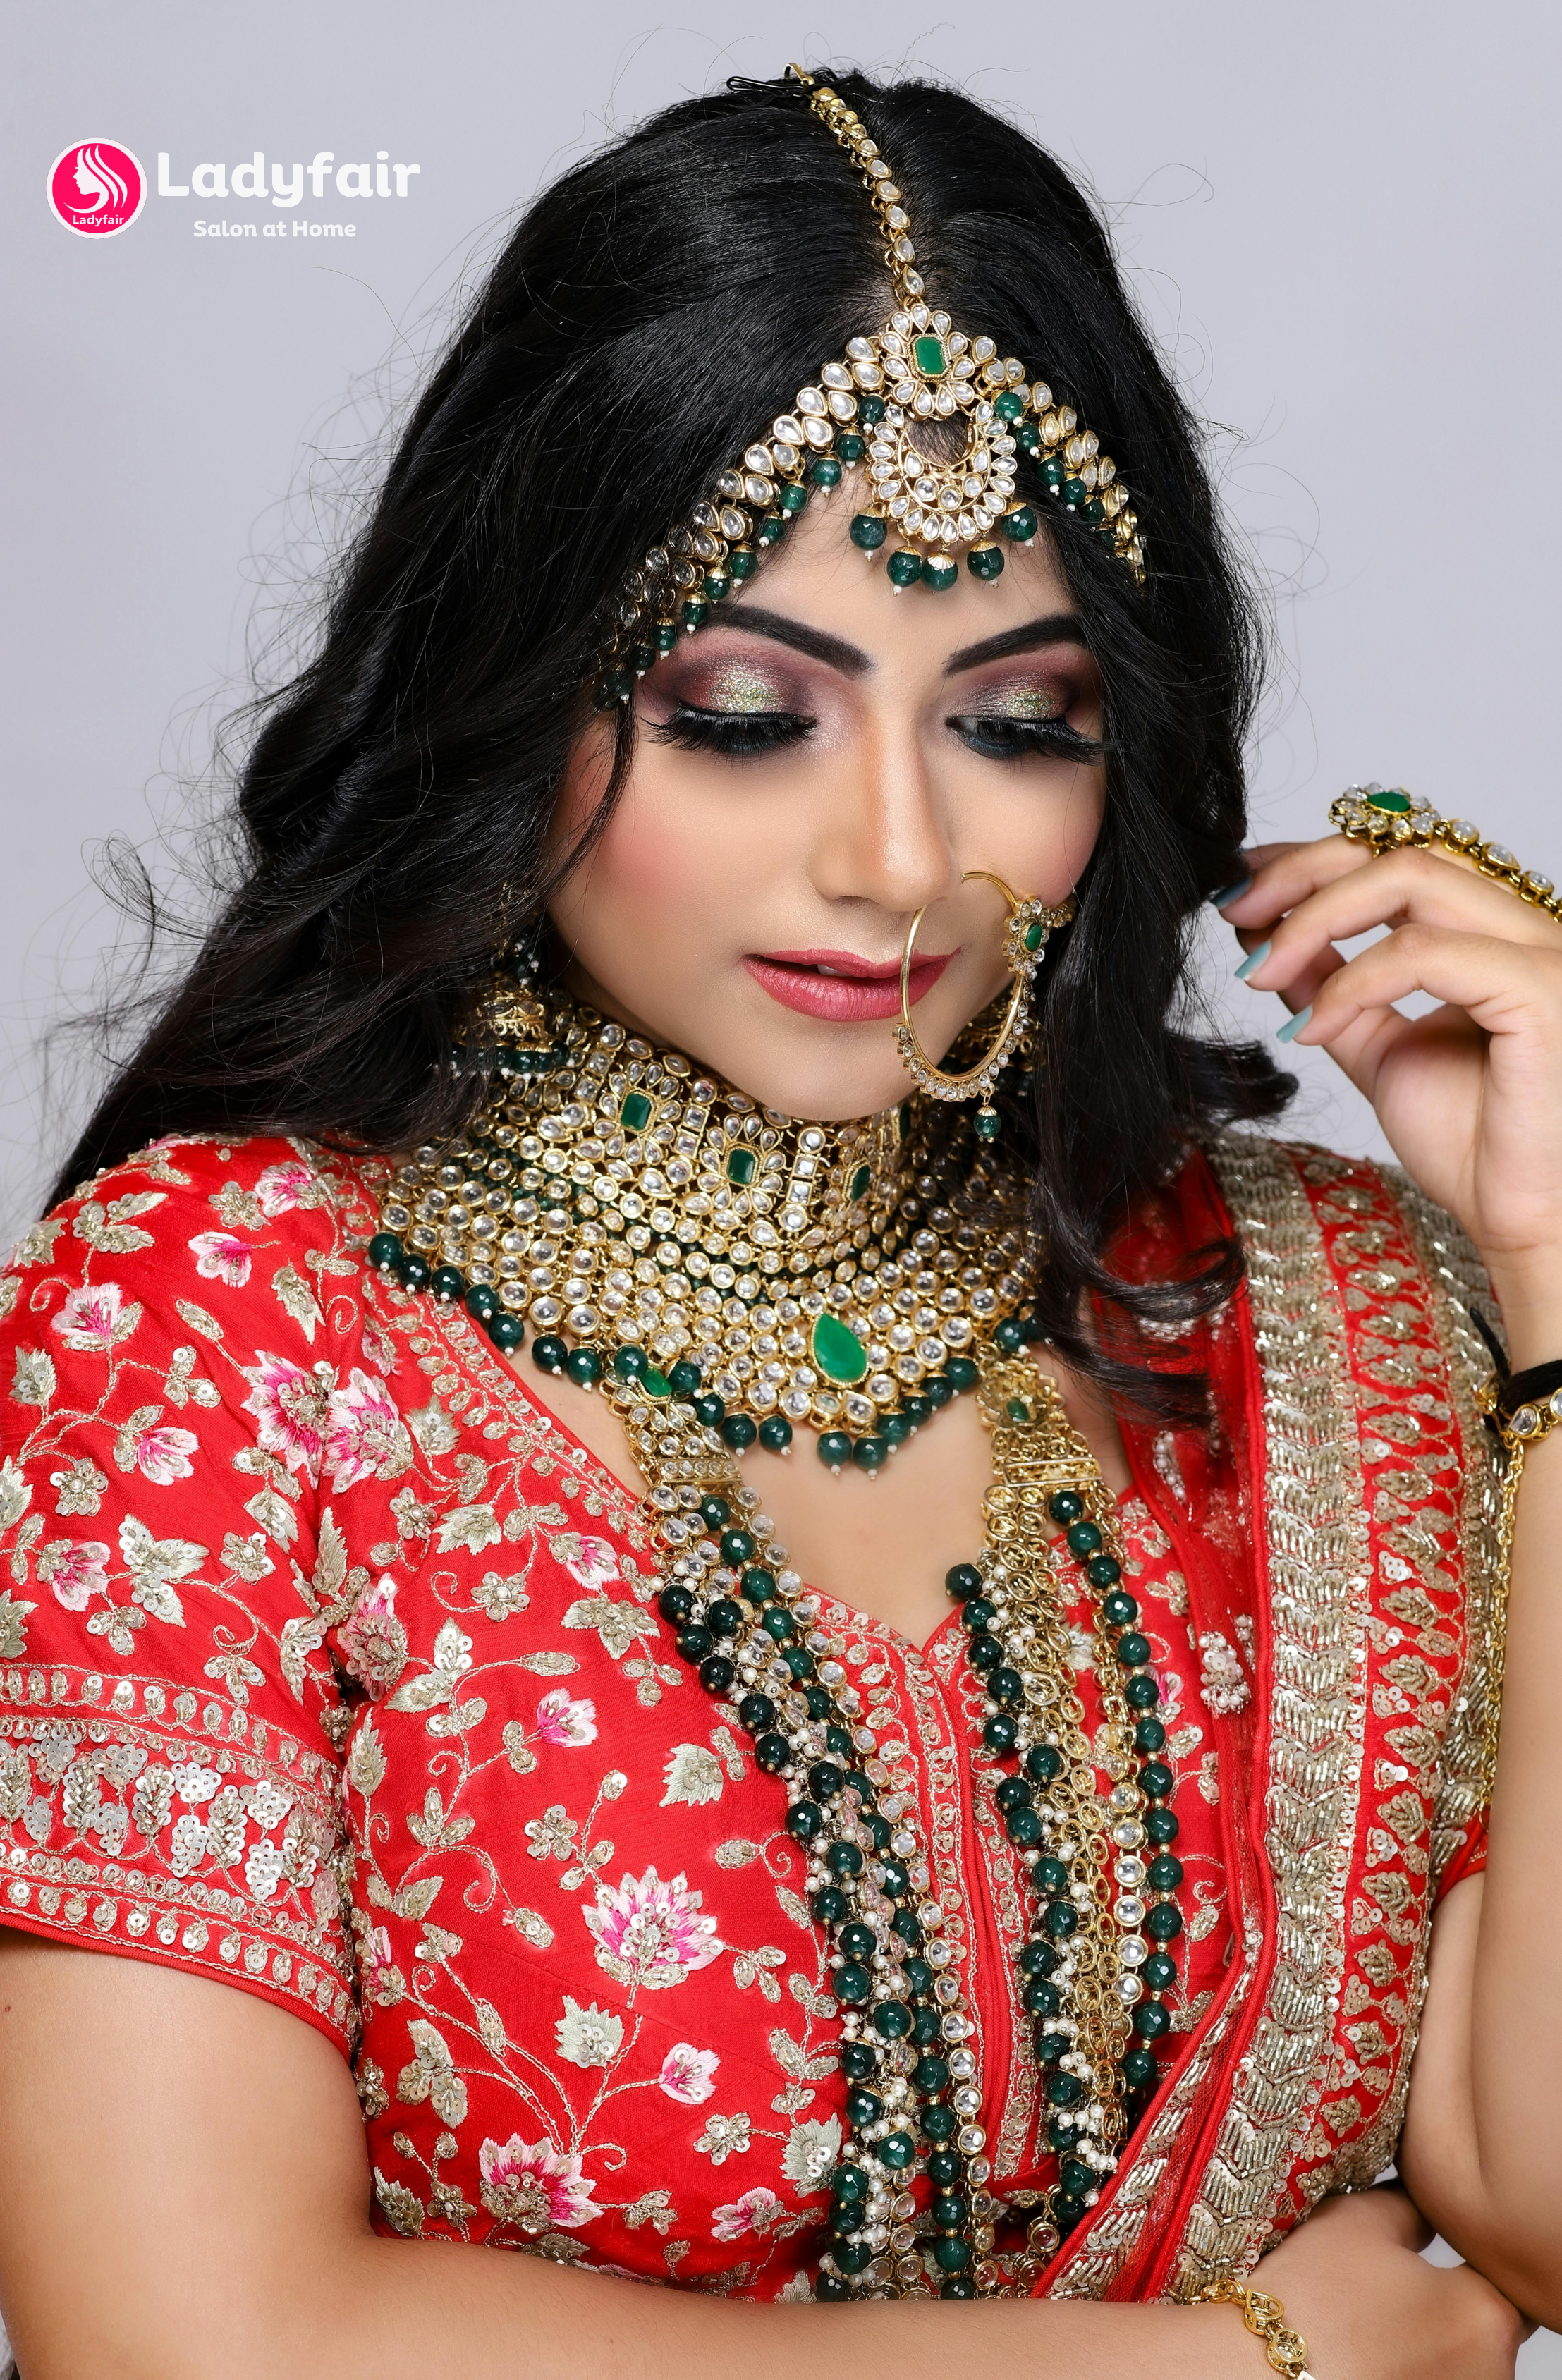
Posted By: 4th January 2025
best bridal makeup artist in Chinsurah-Mogra
Introduction Looking to make your wedding day special in Chinsurah-Mogra? Ladyfair Bridal Services brings the best in bridal makeup and styling, ensuring you radiate beauty and confidence. Book now at 7004721239 for a flawless bridal experience. Why Choose Ladyfair Bridal Services in Chinsurah-Mogra? 1. Expert Makeup Artists Our team specializes in creating personalized looks that enhance your natural beauty. 2. Premium Products We use top-tier brands like MAC, HUDA Beauty, and Bobbi Brown for a stunning finish. 3. Versatile Styles From traditional Bengali bridal looks to contemporary styles, we cater to every bride's vision. 4. Convenience Guaranteed Enjoy our services at your home or wedding venue in Chinsurah-Mogra. Top Bridal Makeup Styles in Chinsurah-Mogra Classic Bengali Bridal Look Bold red lips, winged eyeliner, and intricate alta designs reflect the elegance of Bengali traditions. Modern Glam Bride Nude tones, glittery eyeshadow, and soft curls for a chic, glamorous appearance. Natural Glow Bride Minimal makeup focusing on glowing skin, soft pink lips, and a light blush. Our Bridal Makeup Process Consultation: Discuss your wedding theme and preferences. Pre-Wedding Trial: Test and finalize your bridal look. Flawless Application: Ensure your makeup lasts through the celebrations. Final Touch-Up: Perfect every detail before you walk down the aisle. Testimonials from Brides in Chinsurah-Mogra Priya S., Chinsurah: "The Ladyfair team made my big day unforgettable. The makeup was stunning, and it lasted all day!" Ankita G., Mogra: "The artists were professional and attentive. I looked exactly as I dreamed on my wedding day." Suman B., Chinsurah: "I highly recommend Ladyfair Bridal Services for their excellent work and punctuality." Pre-Wedding Beauty Tips for Chinsurah-Mogra Brides Hydration is Key: Drink plenty of water for glowing skin. Skincare Routine: Exfoliate, cleanse, and moisturize regularly. Beauty Sleep: Get at least 7-8 hours of rest every night. Healthy Diet: Eat a balanced diet to nourish your skin from within. Additional Services in Chinsurah-Mogra Reception Makeup Engagement Makeup Bridesmaid Makeup Party Makeup Saree Draping and Hairstyling Frequently Asked Questions (FAQs) Q1: Do you provide at-home bridal makeup services in Chinsurah-Mogra? Yes, we offer on-site makeup services for your convenience. Q2: Can I book a makeup trial before the wedding? Absolutely! Trials are available to ensure you’re satisfied with the look. Q3: What makeup products do you use? We use premium brands like MAC, HUDA Beauty, and Bobbi Brown. Q4: Are hairstyling and saree draping included in the packages? Yes, we offer complete bridal packages, including hairstyling and saree draping. Q5: How do I book Ladyfair Bridal Services in Chinsurah-Mogra? Call us at 7004721239 to schedule your appointment today.

Posted By: 4th January 2025
bridal makeup artist in balagarh
Introduction Make your wedding day unforgettable with Ladyfair Bridal Services in Balagarh. Known for our expertise in bridal makeup, we ensure you step into your new chapter with grace and elegance. Call 7004721239 now to book your bridal makeover. Why Ladyfair Bridal Services is the Best Choice in Balagarh 1. Professional Expertise Our team of makeup artists excels in creating personalized bridal looks, ensuring every bride feels special. 2. Premium Products We use world-class brands like MAC, HUDA Beauty, and Kryolan to ensure a flawless and radiant finish. 3. Tailored Packages From minimalist looks to traditional styles, we offer bridal packages to suit every need and budget. 4. On-Site Services Our team comes to your home or wedding venue in Balagarh for your convenience. Popular Bridal Makeup Styles in Balagarh Traditional Bride This look combines bold red lips, kohl-lined eyes, and intricately designed alta to represent Bengali culture. Contemporary Bride A chic look featuring subtle highlights, nude lips, and perfectly contoured cheeks for a modern touch. Minimalistic Bride Perfect for small ceremonies, this style emphasizes natural beauty with soft and neutral tones. Our Bridal Makeup Process in Balagarh Consultation: Understand your preferences and wedding theme. Pre-Wedding Trial: Test and finalize the perfect look for your big day. Makeup Application: Achieve a flawless and long-lasting finish. Final Touch-Up: Make last-minute adjustments for perfection. Testimonials from Balagarh Brides Ananya S., Balagarh: "Ladyfair Bridal Services made me look like a queen on my special day. I highly recommend their services!" Puja R., Balagarh: "The team was punctual and professional. My makeup lasted all day, and I felt amazing." Soma D., Balagarh: "Thank you, Ladyfair, for making me look so beautiful. The attention to detail was incredible!" Pre-Wedding Skincare Tips for Balagarh Brides Stay Hydrated: Drink plenty of water to keep your skin glowing. Follow a Skincare Routine: Cleanse, moisturize, and exfoliate regularly. Avoid Stress: Practice relaxation techniques for a fresh look. Sleep Well: Ensure 7-8 hours of sleep every night. Additional Services in Balagarh Party Makeup Engagement Makeup Reception Makeup Bridesmaid Makeup Saree Draping and Hairstyling Frequently Asked Questions (FAQs) Q1: Do you provide at-home bridal makeup services in Balagarh? Yes, we offer on-site services at your home or wedding venue. Q2: Can I book a makeup trial before my wedding? Absolutely! We offer trial sessions to finalize your look. Q3: What makeup brands do you use? We use premium brands like MAC, HUDA Beauty, and Kryolan. Q4: Are saree draping and hairstyling included in the packages? Yes, these are part of our comprehensive bridal packages. Q5: How do I book Ladyfair Bridal Services in Balagarh? You can call us at 7004721239 to schedule your appointment.

Posted By: 4th January 2025
best bridal makeup artist in balagarh
Introduction Make your wedding day unforgettable with Ladyfair Bridal Services in Balagarh. Known for our expertise in bridal makeup, we ensure you step into your new chapter with grace and elegance. Call 7004721239 now to book your bridal makeover. Why Ladyfair Bridal Services is the Best Choice in Balagarh 1. Professional Expertise Our team of makeup artists excels in creating personalized bridal looks, ensuring every bride feels special. 2. Premium Products We use world-class brands like MAC, HUDA Beauty, and Kryolan to ensure a flawless and radiant finish. 3. Tailored Packages From minimalist looks to traditional styles, we offer bridal packages to suit every need and budget. 4. On-Site Services Our team comes to your home or wedding venue in Balagarh for your convenience. Popular Bridal Makeup Styles in Balagarh Traditional Bride This look combines bold red lips, kohl-lined eyes, and intricately designed alta to represent Bengali culture. Contemporary Bride A chic look featuring subtle highlights, nude lips, and perfectly contoured cheeks for a modern touch. Minimalistic Bride Perfect for small ceremonies, this style emphasizes natural beauty with soft and neutral tones. Our Bridal Makeup Process in Balagarh Consultation: Understand your preferences and wedding theme. Pre-Wedding Trial: Test and finalize the perfect look for your big day. Makeup Application: Achieve a flawless and long-lasting finish. Final Touch-Up: Make last-minute adjustments for perfection. Testimonials from Balagarh Brides Ananya S., Balagarh: "Ladyfair Bridal Services made me look like a queen on my special day. I highly recommend their services!" Puja R., Balagarh: "The team was punctual and professional. My makeup lasted all day, and I felt amazing." Soma D., Balagarh: "Thank you, Ladyfair, for making me look so beautiful. The attention to detail was incredible!" Pre-Wedding Skincare Tips for Balagarh Brides Stay Hydrated: Drink plenty of water to keep your skin glowing. Follow a Skincare Routine: Cleanse, moisturize, and exfoliate regularly. Avoid Stress: Practice relaxation techniques for a fresh look. Sleep Well: Ensure 7-8 hours of sleep every night. Additional Services in Balagarh Party Makeup Engagement Makeup Reception Makeup Bridesmaid Makeup Saree Draping and Hairstyling Frequently Asked Questions (FAQs) Q1: Do you provide at-home bridal makeup services in Balagarh? Yes, we offer on-site services at your home or wedding venue. Q2: Can I book a makeup trial before my wedding? Absolutely! We offer trial sessions to finalize your look. Q3: What makeup brands do you use? We use premium brands like MAC, HUDA Beauty, and Kryolan. Q4: Are saree draping and hairstyling included in the packages? Yes, these are part of our comprehensive bridal packages. Q5: How do I book Ladyfair Bridal Services in Balagarh? You can call us at 7004721239 to schedule your appointment.

Posted By: 4th January 2025
best bridal makeup artist in tarakeswar
Introduction Ladyfair Bridal Services in Tarakeswar is your one-stop destination for premium bridal makeup. Whether you're planning a traditional Bengali wedding or a contemporary ceremony, our expert makeup artists will ensure you shine on your special day. Call 7004721239 now to book your bridal makeover. Why Choose Ladyfair Bridal Services in Tarakeswar? 1. Expertise in Bridal Makeup Our professional artists specialize in creating stunning bridal looks tailored to your style. 2. High-Quality Products We use top-notch makeup brands like MAC, HUDA Beauty, and Kryolan for a flawless and long-lasting finish. 3. Customized Bridal Packages Choose from a range of bridal packages tailored to your preferences and budget. 4. On-Site Makeup Services Enjoy hassle-free services at your home or wedding venue in Tarakeswar. Popular Bridal Looks for Tarakeswar Brides Traditional Bengali Bride With bold eyes, red lips, and intricate alta designs, this timeless look captures Bengali traditions perfectly. Minimalist Bride Perfect for intimate ceremonies, this look features soft tones and a natural glow. Modern Glamour Bride For a bold and chic bride, this style includes shimmery eyes, flawless contouring, and nude lips. Our Bridal Makeup Process in Tarakeswar Consultation: Discuss your desired look and preferences. Pre-Wedding Trial: Test and refine your bridal makeup style. Makeup Application: Ensure a picture-perfect and durable finish. Final Touch-Up: Perfect the details for your big day. Testimonials from Tarakeswar Brides Poulomi C., Tarakeswar: "Ladyfair made my wedding day even more special. The makeup was stunning, and the team was so supportive!" Sushmita M., Tarakeswar: "I loved the attention to detail. My makeup stayed flawless throughout the ceremony." Rima D., Tarakeswar: "Highly recommend Ladyfair! They gave me the perfect bridal look I always dreamed of." Pre-Wedding Beauty Tips for Tarakeswar Brides Stay Hydrated: Drinking plenty of water keeps your skin glowing. Exfoliate Regularly: Remove dead skin cells for smoother skin. Sleep Well: Ensure 7-8 hours of sleep for a fresh and radiant look. Avoid New Skincare Products: Stick to your tried-and-tested products. Additional Services in Tarakeswar Party Makeup Engagement Makeup Reception Makeup Bridesmaid Makeup Saree Draping and Hairstyling Frequently Asked Questions (FAQs) Q1: Do you provide at-home bridal makeup services in Tarakeswar? Yes, we offer on-site services at your home or wedding venue. Q2: Can I book a trial session? Yes, we provide pre-wedding makeup trials to perfect your look. Q3: What makeup brands do you use? We use premium brands like MAC, HUDA Beauty, Bobbi Brown, and more. Q4: Are saree draping and hairstyling included? Yes, both are part of our comprehensive bridal packages. Q5: How do I book Ladyfair Bridal Services in Tarakeswar? Simply call us at 7004721239 to schedule your appointment.
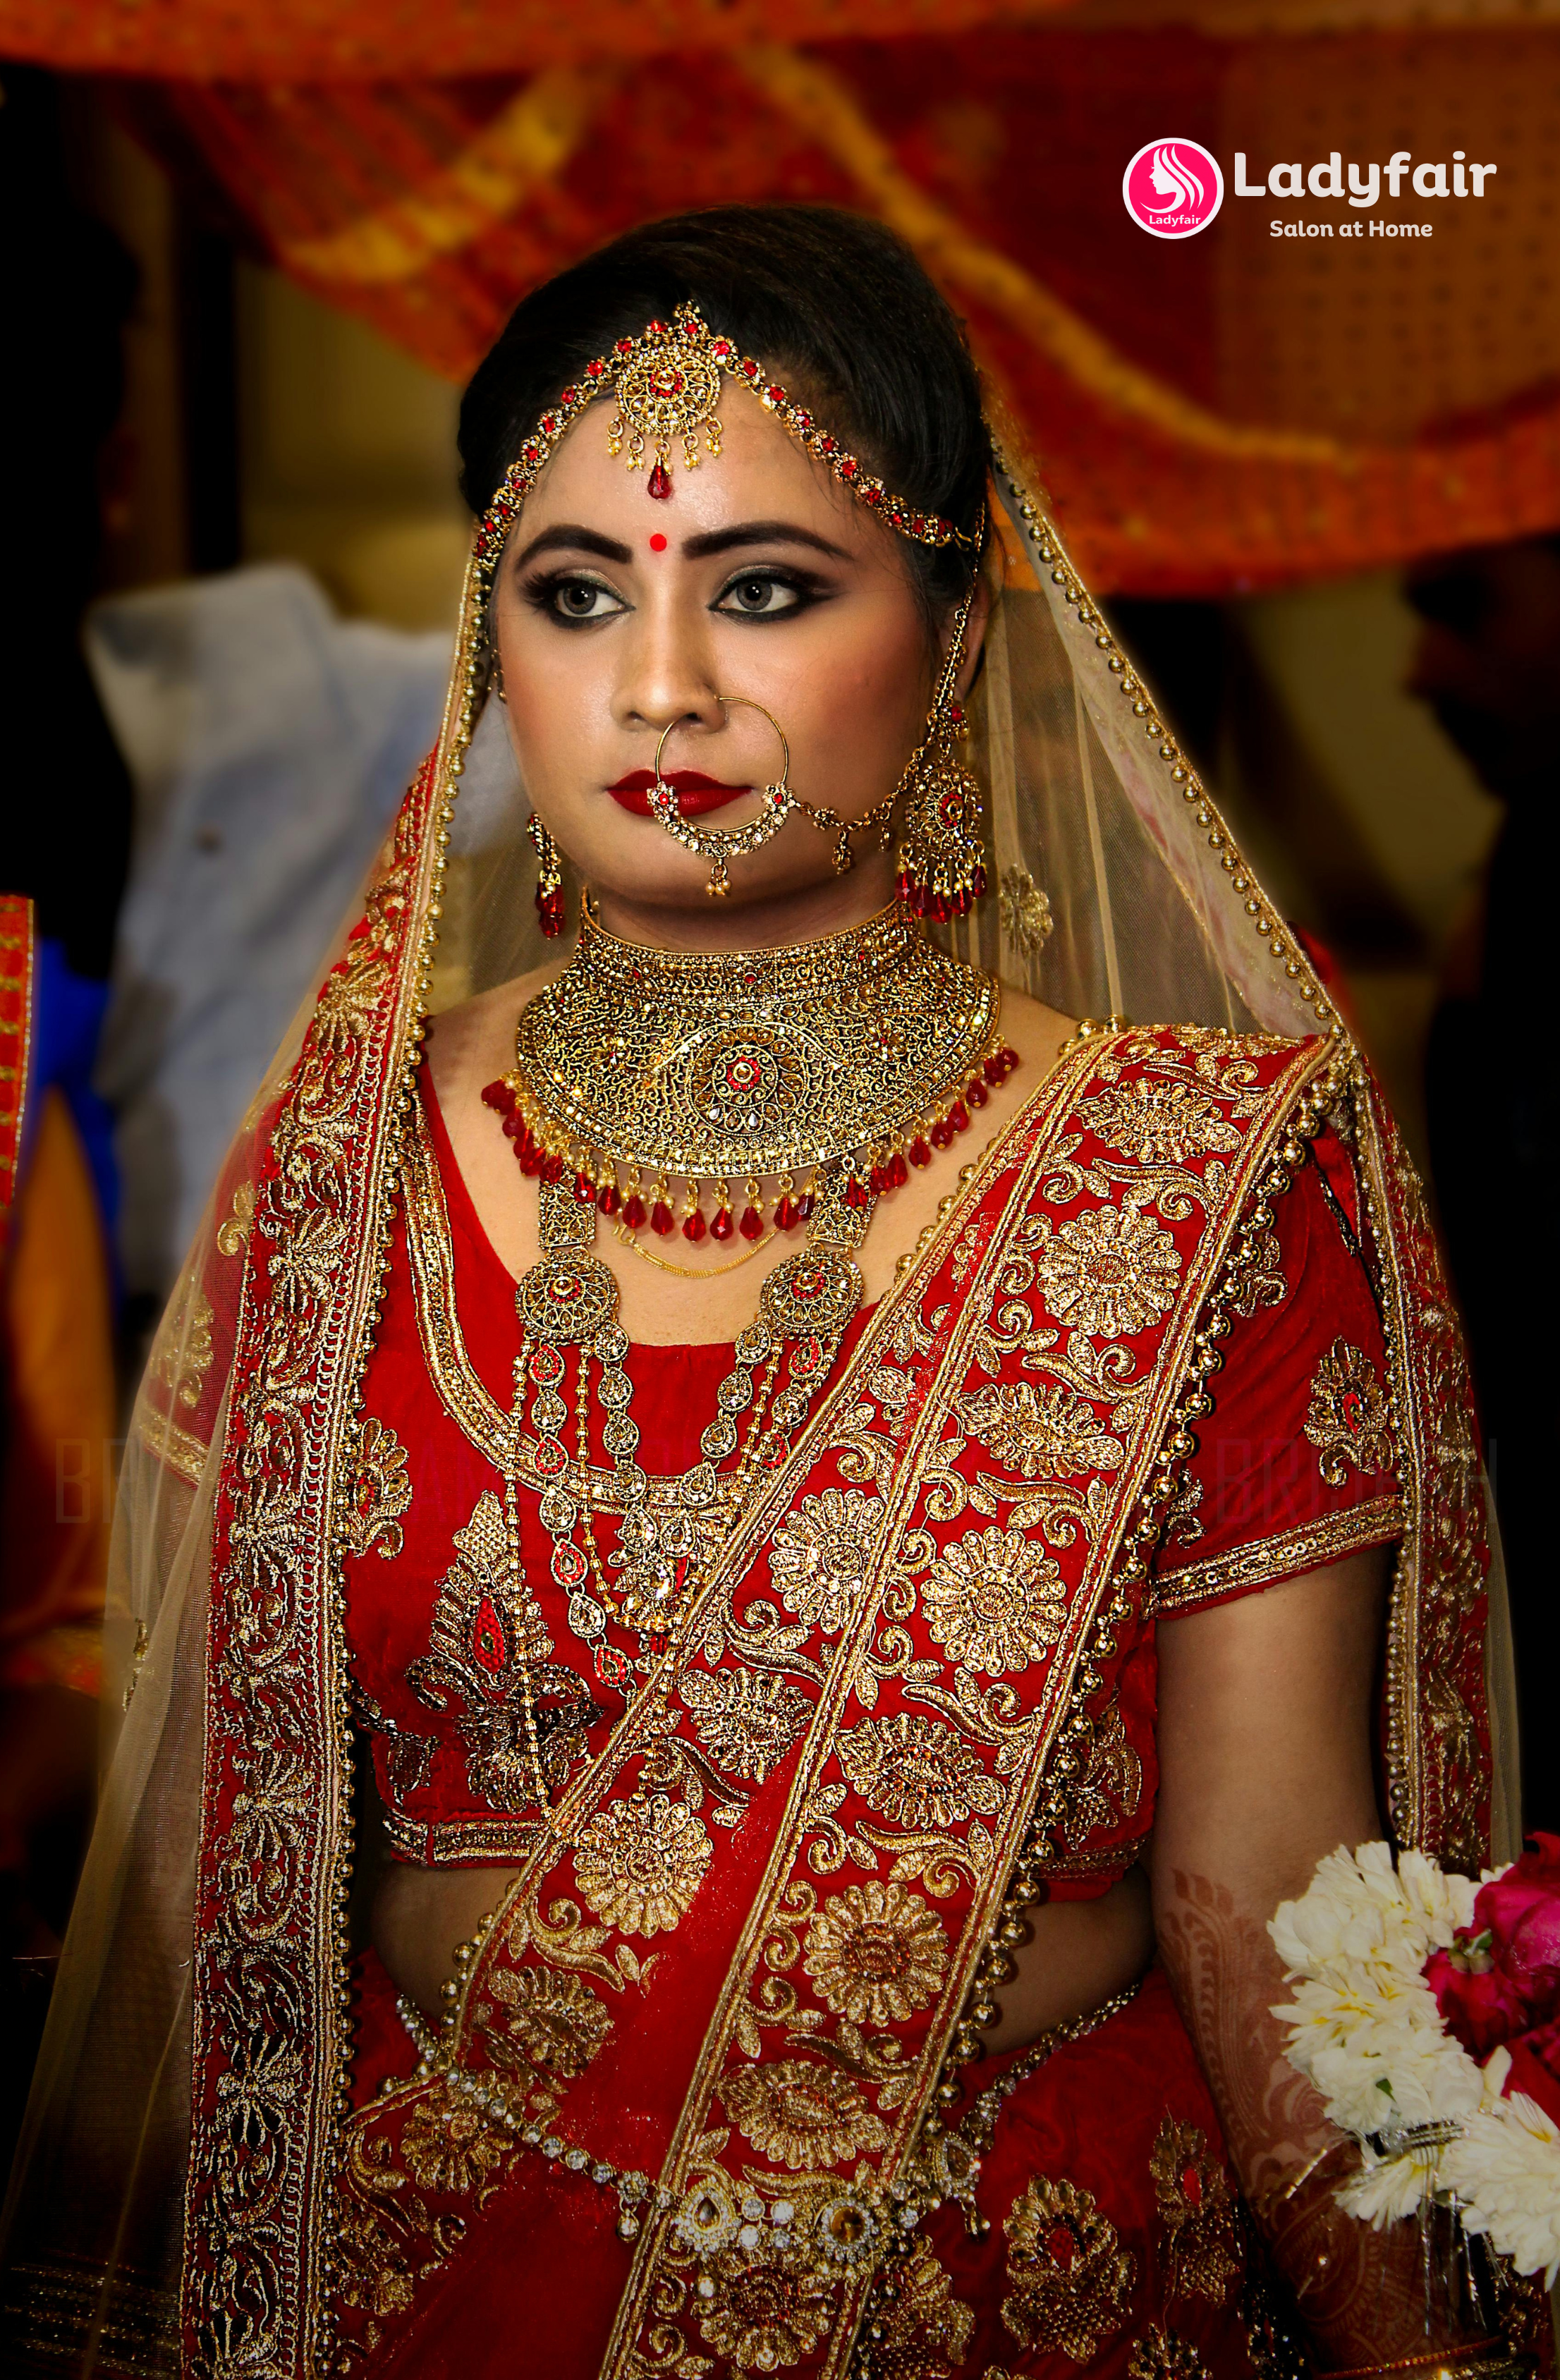
Posted By: 4th January 2025
best bridal makeup artist in singur
Introduction For brides in Singur, Ladyfair Bridal Services offers premium, professional bridal makeup to make your wedding day unforgettable. Whether you desire a traditional Bengali look or a modern bridal makeover, our experts will ensure you look flawless. Call 7004721239 to book your personalized bridal package today. Why Choose Ladyfair Bridal Services in Singur? 1. Experienced Makeup Artists Our skilled professionals specialize in creating breathtaking bridal looks. 2. Top-Quality Products We use trusted, skin-safe brands such as MAC, HUDA Beauty, and Kryolan to ensure a lasting and radiant finish. 3. Customized Packages We cater to your specific preferences, offering tailored bridal packages for every bride. 4. On-Location Service Enjoy the convenience of professional makeup services at your home or wedding venue. Popular Bridal Looks for Singur Brides Traditional Bengali Bridal Makeup With bold red lips, dramatic winged eyes, and intricate alta designs, this style embodies cultural elegance. Natural Glow Makeup Ideal for daytime weddings, this look focuses on subtle enhancements and a radiant complexion. Contemporary Glam Bride For a chic and modern bride, this style features soft contours, nude lips, and shimmer accents. Our Bridal Makeup Process in Singur Consultation: Understanding your vision and desired look. Pre-Wedding Trial: Testing makeup styles to perfect the final look. Flawless Application: Ensuring long-lasting, picture-perfect makeup. Final Touch-Up: Adding finishing details for a flawless appearance. Testimonials from Singur Brides Ananya D., Singur: "Ladyfair made me feel like a princess on my wedding day. The team was professional and kind, and the results were amazing." Riya S., Singur: "The bridal package was perfect! My makeup stayed fresh all day and looked stunning in photos." Sweta P., Singur: "Highly recommend Ladyfair! The team understood exactly what I wanted and delivered beautifully." Pre-Wedding Beauty Tips for Brides in Singur Stay Hydrated: Drink plenty of water to keep your skin glowing. Follow a Skincare Routine: Cleanse, tone, and moisturize daily. Eat Healthy: Include fresh fruits and vegetables in your diet. Avoid Last-Minute Treatments: Schedule facials and other treatments well in advance. Additional Services in Singur Party Makeup Engagement Makeup Reception Makeup Bridesmaid Makeup Saree Draping and Hairstyling Frequently Asked Questions (FAQs) Q1: Do you offer at-home bridal makeup services in Singur? Yes, our team provides on-location services for your convenience. Q2: Can I book a pre-wedding makeup trial? Absolutely! We offer trials to help you finalize your bridal look. Q3: What brands do you use for makeup? We use premium brands like MAC, HUDA Beauty, Bobbi Brown, and more. Q4: Is hairstyling included in the bridal package? Yes, hairstyling and saree draping are part of our comprehensive bridal services. Q5: How can I book your services? Call us at 7004721239 to schedule your appointment.
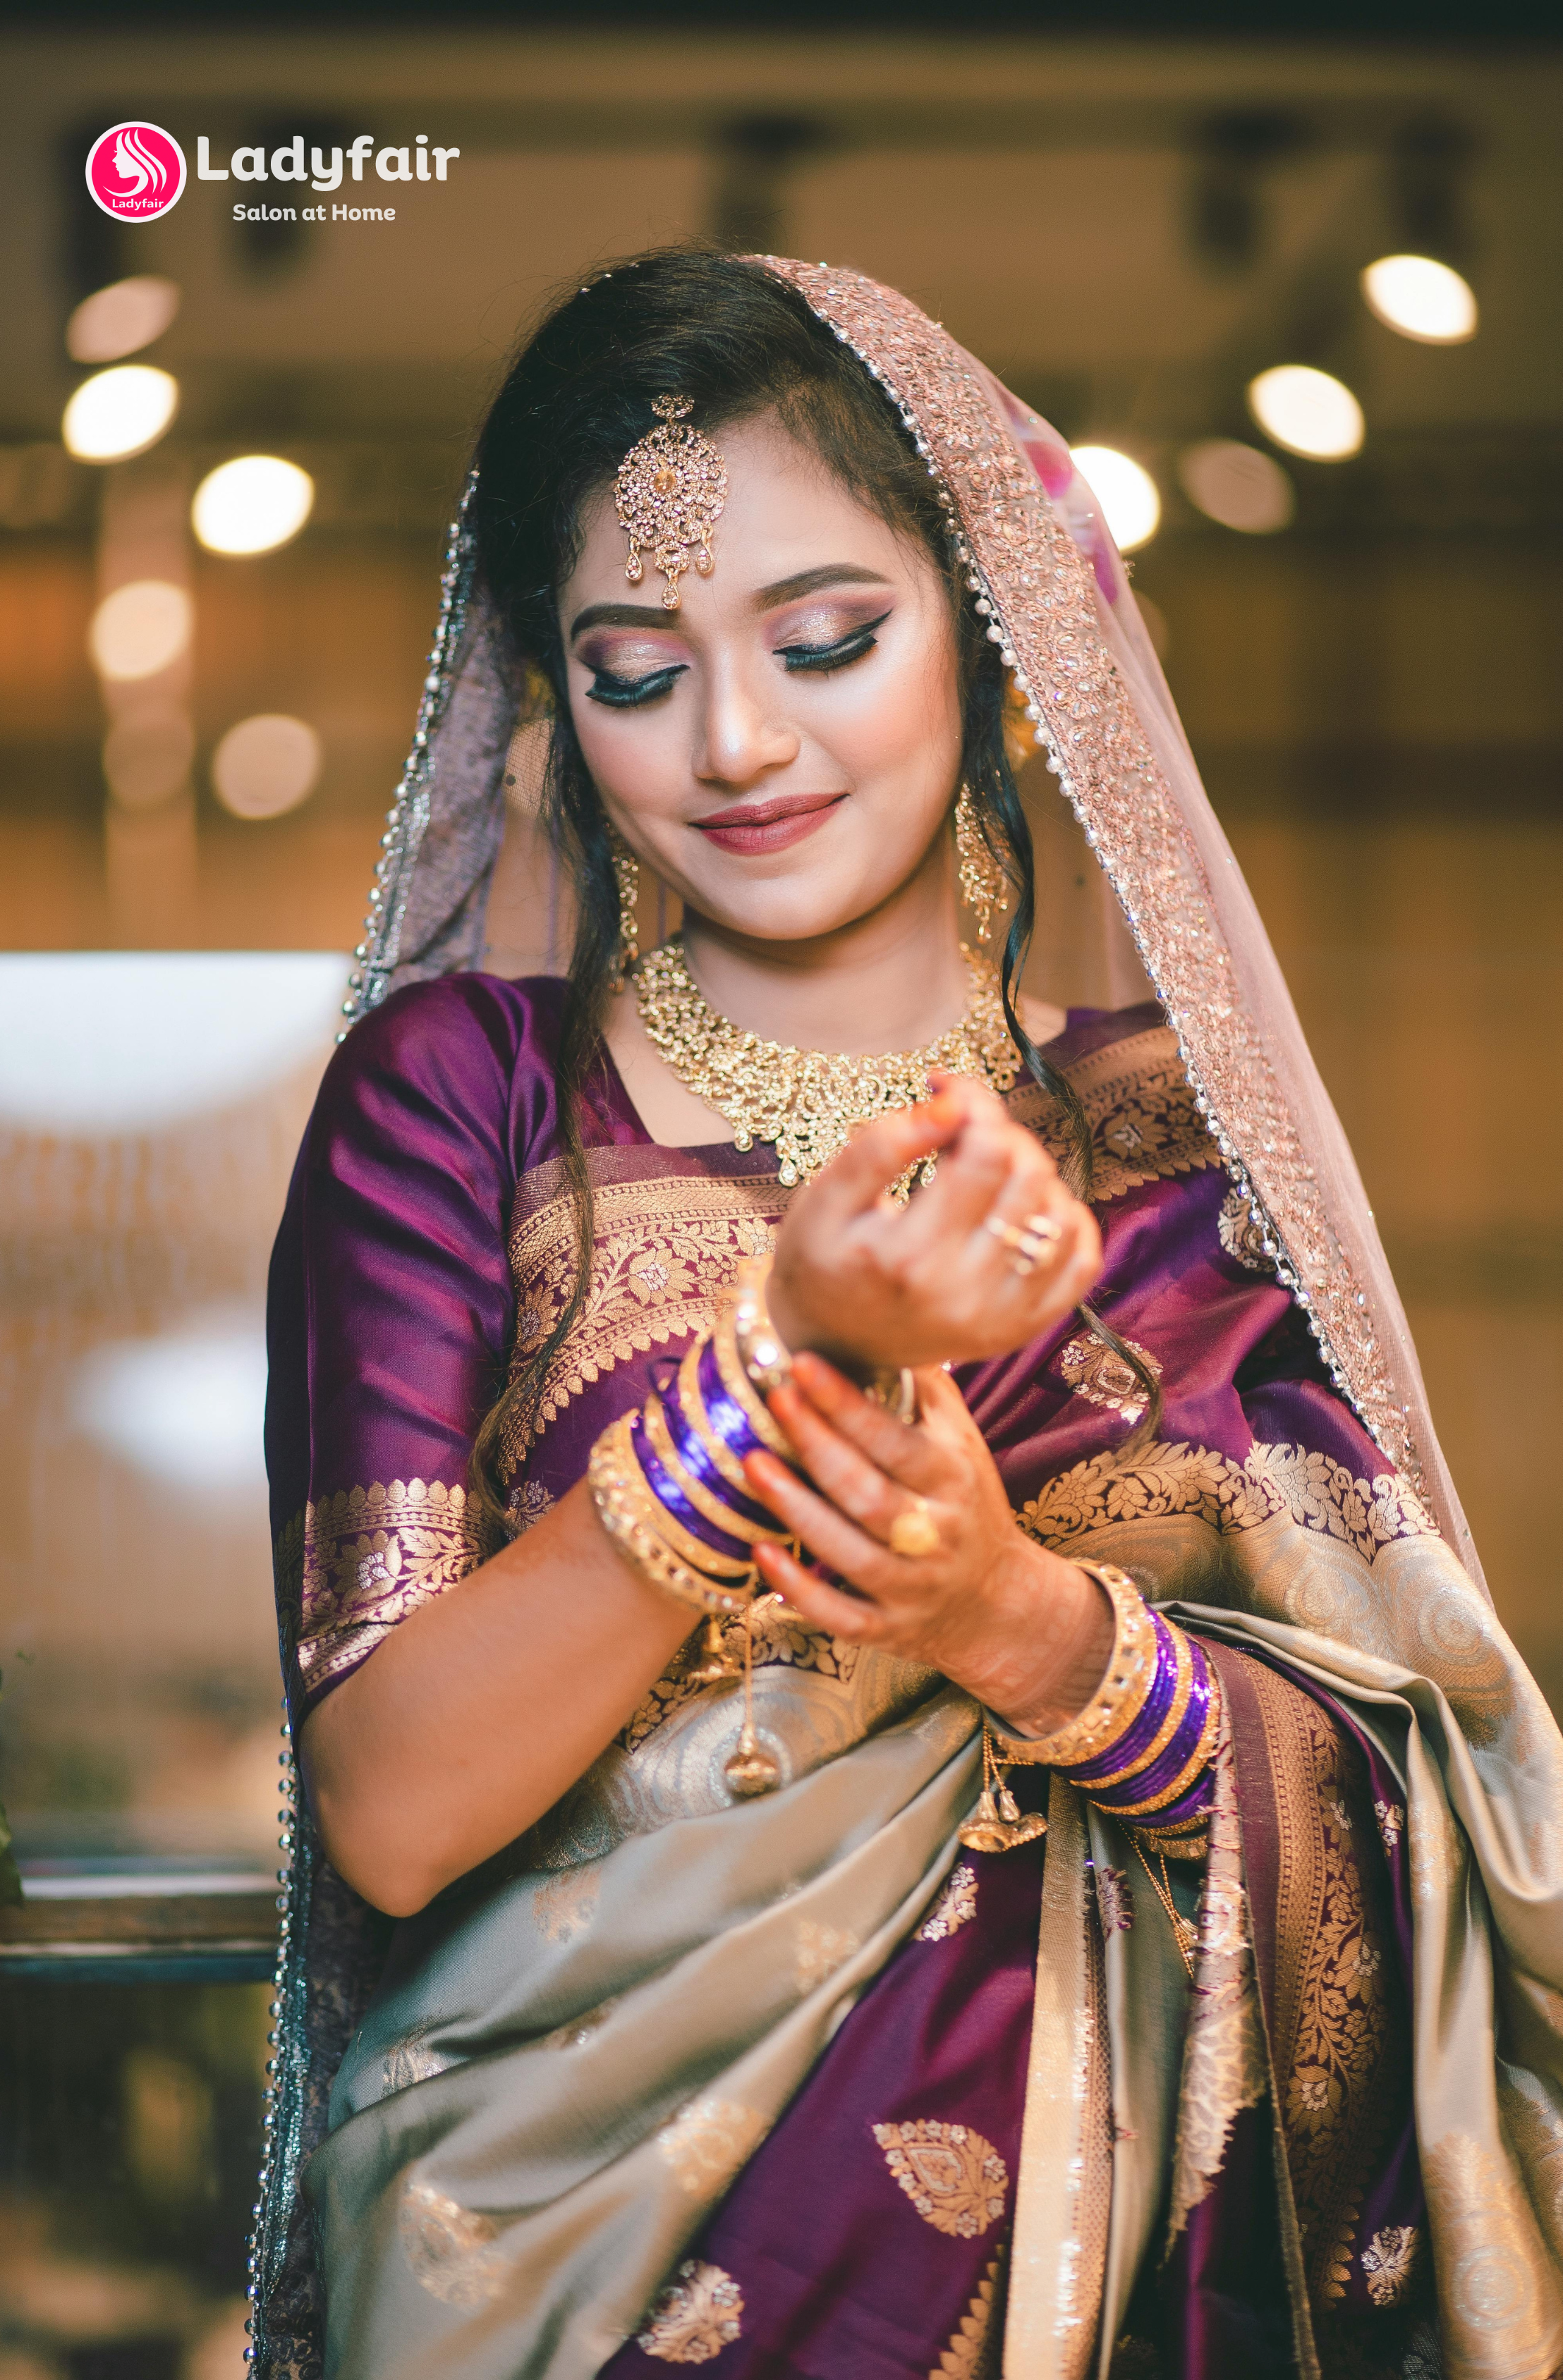
Posted By: 30th December 2024
best bridal makeup artist in haripal
Introduction Transform your wedding day into a magical affair with Ladyfair Bridal Services in Haripal. Our team of skilled makeup artists specializes in creating breathtaking bridal looks tailored to your preferences. Call us today at 7004721239 to book your appointment and make your special day unforgettable. Why Choose Ladyfair Bridal Services in Haripal? 1. Experienced Professionals Our makeup artists are well-trained and experienced in crafting flawless looks for weddings. 2. Premium Products We use high-quality, skin-friendly products from renowned brands like MAC, HUDA Beauty, and Bobbi Brown. 3. Customizable Packages Choose from a variety of bridal makeup styles to match your personality and wedding theme. 4. On-Site Services Enjoy stress-free services at your preferred location in Haripal. Bridal Makeup Styles for Haripal Weddings Graceful Traditional Bride Inspired by classic wedding traditions, this look emphasizes bold eyes and vibrant lip colors. Ethereal Glow A soft, radiant look perfect for day weddings and outdoor ceremonies. Modern Chic Bride This contemporary style focuses on subtle tones and elegant makeup for a sophisticated appearance. Our Bridal Makeup Process in Haripal Consultation: Discussing your vision and preferences. Pre-Wedding Trial: Ensuring your makeup is perfect for the big day. Wedding Day Glam: Expert application to keep you glowing all day. Final Touches: Quick fixes to ensure perfection throughout the event. Testimonials from Haripal Brides Sonal M., Haripal: "Ladyfair Bridal Services made me look stunning on my wedding day. Highly recommended!" Ritika D., Haripal: "I was impressed by their professionalism and attention to detail. My makeup was flawless!" Neha K., Haripal: "Their team made me feel so comfortable, and the results were amazing. Thank you!" Pre-Wedding Beauty Tips for Brides in Haripal Moisturize Daily: Keep your skin hydrated for a smooth makeup application. Avoid Stress: Stay relaxed and well-rested before your big day. Schedule Facials: Start treatments at least a month in advance for glowing skin. Eat Healthy: Include fresh fruits and vegetables in your diet. Additional Services in Haripal Engagement Makeup Reception Makeup Party Makeup Bridesmaid and Family Makeup Hairstyling and Saree Draping Frequently Asked Questions (FAQs) Q1: Do you offer home services in Haripal? Yes, we provide on-site bridal makeup services for your convenience. Q2: Which brands do you use for makeup? We use top-quality brands like MAC, HUDA Beauty, Bobbi Brown, and others. Q3: How can I book your services? Call us at 7004721239 to check availability and reserve your slot. Q4: Can I get a pre-wedding trial? Yes, we offer pre-wedding trials to ensure your satisfaction. Q5: Do you include hairstyling in bridal packages? Yes, hairstyling and saree draping are included in our bridal packages.

Posted By: 30th December 2024
best bridal makeup artist in Jore Bunglow-Sukiapokhri
Introduction Make your wedding day unforgettable in the serene hills of Jore Bunglow-Sukiapokhri with Ladyfair Bridal Services. Our expert makeup artists craft stunning bridal looks tailored to your style and preferences. Call us today at 7004721239 to book your session. Why Choose Ladyfair Bridal Services in Jore Bunglow-Sukiapokhri? 1. Expert Makeup Artists Our team has extensive experience in creating flawless bridal looks for all types of ceremonies. 2. High-Quality Products We use premium brands like MAC, HUDA Beauty, and Bobbi Brown to ensure long-lasting results. 3. Custom Bridal Packages Whether you desire a traditional or contemporary style, our services are personalized to suit your vision. 4. Convenient On-Site Services We bring our services to your location, ensuring a stress-free experience. Bridal Makeup Styles for Jore Bunglow-Sukiapokhri Weddings Mountain Bliss Bride Inspired by the pristine beauty of the hills, this look combines soft, natural tones with glowing highlights. Traditional Charm Perfect for traditional ceremonies, this style features bold eyes, intricate designs, and rich lip colors. Modern Elegance A sleek and sophisticated look with subtle makeup, perfect for contemporary brides. Our Bridal Makeup Process in Jore Bunglow-Sukiapokhri Consultation: Understanding your style, preferences, and wedding theme. Trial Session: Pre-wedding trials to finalize the perfect look. Wedding Day Service: Flawless execution to ensure you shine on your big day. Final Touch-Ups: Quick fixes to keep your makeup impeccable throughout the event. Testimonials from Jore Bunglow-Sukiapokhri Brides Priya S., Jore Bunglow: "I loved the personalized service from Ladyfair. My makeup was perfect for my outdoor wedding." Anjali D., Sukiapokhri: "Their team was professional and friendly. They made me feel like a princess on my wedding day." Sneha T., Jore Bunglow: "Ladyfair exceeded my expectations with their attention to detail and flawless execution." Pre-Wedding Beauty Tips for Brides in Jore Bunglow-Sukiapokhri Hydrate Your Skin: The cool climate can dry your skin, so moisturize regularly. Stay Rested: Get plenty of sleep to look fresh and radiant. Plan Treatments Early: Schedule facials and treatments a few weeks before your wedding. Stay Hydrated: Drink plenty of water for a glowing complexion. Additional Services in Jore Bunglow-Sukiapokhri Engagement Makeup Reception Makeup Bridesmaid and Family Makeup Hairstyling and Saree Draping Event and Party Makeup Frequently Asked Questions (FAQs) Q1: Do you provide services at home in Jore Bunglow-Sukiapokhri? Yes, we offer on-site services for your convenience. Q2: What brands do you use for makeup? We use trusted brands like MAC, HUDA Beauty, Bobbi Brown, and others for high-quality results. Q3: How far in advance should I book? We recommend booking at least 2-3 months in advance to secure your slot. Q4: Do you offer pre-wedding grooming packages? Yes, we have packages for pre-wedding events like engagements and sangeet. Q5: Is hairstyling included in the bridal package? Yes, our bridal packages include hairstyling and saree draping.

Posted By: 30th December 2024
best bridal makeup artist in Darjeeling-Pulbazar
Introduction Celebrate your dream wedding in the breathtaking beauty of Darjeeling-Pulbazar with the perfect bridal makeover. Ladyfair Bridal Services specializes in creating exquisite bridal looks that enhance your natural elegance. Contact us today at 7004721239 to book your personalized bridal makeup session. Why Choose Ladyfair Bridal Services in Darjeeling-Pulbazar? 1. Experienced Makeup Artists Our expert team crafts stunning bridal transformations that align with your unique style and vision. 2. Premium Quality Products We only use trusted makeup brands like MAC, HUDA Beauty, and Bobbi Brown for flawless, long-lasting results. 3. Tailored Bridal Packages Whether you desire a traditional look or a modern touch, our packages are customized to meet your preferences. 4. On-Site Services Our team travels to your location, ensuring convenience and perfection on your special day. Popular Bridal Looks in Darjeeling-Pulbazar Tea Garden Glow Inspired by the serene charm of Darjeeling’s tea gardens, this look emphasizes a radiant, fresh complexion with soft, natural hues. Heritage Bride Celebrate tradition with bold eyes, intricate designs, and richly hued lips that complement cultural attire. Elegant Minimalism Perfect for modern brides, this style features subtle tones, soft highlights, and an effortless finish. Our Process for Bridal Makeup in Darjeeling-Pulbazar Initial Consultation: We understand your vision and preferences. Trial Session: A pre-wedding trial ensures complete satisfaction. Flawless Execution: On your big day, we create a stunning look that lasts all day. Final Touch-Ups: We provide last-minute adjustments to keep your look impeccable. Client Testimonials from Darjeeling-Pulbazar Anita M., Darjeeling: "I couldn’t have asked for better service. Ladyfair made my wedding day truly magical with their makeup artistry." Ritika K., Pulbazar: "Their team was highly professional and friendly. They brought out my best features beautifully." Sonal T., Darjeeling: "I loved how my makeup stayed flawless throughout the day. Ladyfair truly exceeded my expectations!" Pre-Wedding Beauty Tips for Brides in Darjeeling-Pulbazar Moisturize Well: The cool weather can dry out your skin; keep it hydrated. Plan Ahead: Schedule facials and treatments early to ensure glowing skin. Stay Hydrated: Drink plenty of water for a radiant, healthy complexion. Get Adequate Sleep: Rest well to look fresh and energized. Additional Services in Darjeeling-Pulbazar Engagement Makeup Reception Makeup Bridesmaid and Family Makeup Hairstyling and Saree Draping Event and Party Makeup Frequently Asked Questions (FAQs) Q1: Can you travel to remote locations in Darjeeling-Pulbazar? Yes, our team is equipped to provide services at any location. Q2: Do you offer packages for pre-wedding events? Absolutely! We have tailored packages for all wedding-related events. Q3: Are your products suitable for sensitive skin? Yes, we use high-quality, dermatologist-tested products for all skin types. Q4: Do you offer hairstyling along with makeup? Yes, our packages include hairstyling and saree draping. Q5: When should I book my bridal makeup? We recommend booking at least 2-3 months in advance to secure your slot.

Posted By: 30th December 2024
best bridal makeup artist in mirik
Introduction Nestled amidst the scenic beauty of Mirik, your wedding deserves the finest touch of elegance. Ladyfair Bridal Services brings you bespoke makeup artistry to enhance your natural charm. Call us today at 7004721239 to book the perfect bridal makeover for your special day. Why Choose Ladyfair Bridal Services in Mirik? 1. Skilled Makeup Professionals Our experienced artists specialize in bridal makeup, creating looks that complement your personality and the serene beauty of Mirik. 2. High-Quality Products We use premium brands like MAC, HUDA Beauty, and Bobbi Brown to ensure your makeup is long-lasting and camera-ready. 3. Customized Bridal Packages We tailor our services to suit your specific needs, offering everything from traditional to contemporary bridal styles. 4. On-Site Convenience Enjoy stress-free beauty services at your preferred location in Mirik with our fully equipped team. Popular Bridal Looks in Mirik Ethereal Glow Perfect for outdoor weddings in Mirik’s natural settings, this look emphasizes dewy skin, subtle eyes, and soft lips. Traditional Grace Highlight your cultural roots with bold eyeliner, a flawless complexion, and rich lip colors. Modern Elegance A fusion of chic and classic styles, ideal for contemporary brides who want to make a statement. The Ladyfair Bridal Makeup Process in Mirik Consultation: We begin with understanding your vision and style preferences. Trial Makeup: A pre-wedding session ensures you are confident in your bridal look. Wedding Day Execution: Our experts arrive on time to create a flawless look for your big day. Final Touch-Ups: We ensure your makeup stays impeccable throughout the ceremony. Client Testimonials from Mirik Ananya T., Mirik: "I couldn’t have asked for a better experience. The makeup was stunning and perfectly suited the serene backdrop of Mirik." Radhika P., Mirik: "Ladyfair made my wedding day unforgettable with their expert services. Highly recommended!" Sonal M., Mirik: "They created the perfect traditional look for me. The team was professional and friendly, making the experience delightful." Pre-Wedding Beauty Tips for Brides in Mirik Moisturize Regularly: Keep your skin hydrated to combat the mountain air's dryness. Schedule Facials: Pamper your skin with regular facials to ensure a radiant glow. Rest and Relax: A good night’s sleep is essential for looking your best. Stay Hydrated: Drink plenty of water to maintain a fresh and dewy complexion. Additional Services in Mirik Engagement Makeup Reception Makeup Bridesmaid and Family Makeup Hairstyling and Draping Event and Party Makeup Frequently Asked Questions (FAQs) Q1: Do you offer trial sessions in Mirik? Yes, we provide trial makeup sessions to finalize your look. Q2: Can you accommodate outdoor wedding locations in Mirik? Absolutely! Our team is equipped to deliver services at outdoor venues. Q3: Are your products suitable for sensitive skin? Yes, we use high-quality, dermatologist-approved products. Q4: How far in advance should I book? We recommend booking 2-3 months ahead to ensure availability. Q5: Do you provide hairstyling and saree draping? Yes, all our bridal packages include hairstyling and attire draping.

Posted By: 30th December 2024
best bridal makeup artist in kurseong
Introduction Your wedding day in the picturesque hills of Kurseong deserves nothing less than perfection. Ladyfair Bridal Services offers the ultimate bridal makeover experience to make you look radiant on your big day. Call us today at 7004721239 to book your dream bridal makeup session. Why Choose Ladyfair Bridal Services in Kurseong? 1. Expert Makeup Artists Our professionals specialize in creating stunning bridal looks tailored to enhance your natural beauty. 2. Premium Products We use trusted brands like MAC, HUDA Beauty, and Bobbi Brown to ensure long-lasting, flawless results. 3. Customized Packages From traditional to contemporary bridal styles, we offer packages designed to suit your preferences. 4. On-Location Services Our team is equipped to bring salon-quality services to your chosen venue in Kurseong. Popular Bridal Looks in Kurseong Hilltop Glow A dewy, radiant look inspired by Kurseong’s natural beauty, perfect for outdoor ceremonies. Traditional Bridal Beauty Enhance your cultural elegance with bold eyes, a smooth base, and richly pigmented lips. Modern Minimalist For brides who prefer a sophisticated, understated look with soft hues and elegant details. Ladyfair Bridal Makeup Process in Kurseong Consultation: We discuss your style and preferences to create a personalized look. Trial Makeup: A pre-wedding trial ensures you’re happy with the final result. Wedding Day Glam: Our team ensures a flawless finish for your special day. Touch-Ups: Final adjustments to maintain perfection throughout the event. Client Testimonials from Kurseong Priya S., Kurseong: "Ladyfair Bridal Services exceeded my expectations. They made me feel beautiful and confident on my wedding day." Maya R., Kurseong: "Their team was professional, friendly, and delivered exactly what I wanted. Highly recommended!" Anjali D., Kurseong: "Ladyfair’s expertise turned my vision into reality. The makeup stayed flawless all day, even in the cool hill climate." Pre-Wedding Beauty Tips for Brides in Kurseong Hydrate Your Skin: The cool weather can dry out your skin; moisturizing is key. Pamper Yourself: Schedule facials and treatments to achieve a natural glow. Eat Healthy: A balanced diet enhances your skin’s radiance. Sleep Well: Adequate rest is essential for a fresh and glowing appearance. Additional Services in Kurseong Engagement Makeup Reception Makeup Bridesmaid and Family Makeup Hairstyling and Saree Draping Event and Party Makeup Frequently Asked Questions (FAQs) Q1: Do you provide services at outdoor venues in Kurseong? Yes, our team is fully equipped for outdoor weddings. Q2: Are the products safe for sensitive skin? Absolutely! We use high-quality, dermatologist-tested products suitable for all skin types. Q3: Can I book a trial session? Yes, trial sessions are available to ensure your satisfaction. Q4: How far in advance should I book? We recommend booking at least 2-3 months before your wedding. Q5: Do you include hairstyling in the packages? Yes, all bridal packages include hairstyling and saree draping.

Posted By: 30th December 2024
best bridal makeup artist in matigara
Introduction Step into your dream wedding in Matigara with a flawless bridal look crafted by Ladyfair Bridal Services. Our team of professional makeup artists is dedicated to making your big day even more special. Call 7004721239 today to book our expert bridal makeup services and shine like a star on your special day! Why Choose Ladyfair Bridal Services in Matigara? 1. Professional Makeup Artists Our skilled artists specialize in creating breathtaking bridal looks tailored to your personality and style. 2. High-Quality Products We use premium products from brands like MAC, HUDA Beauty, and Estee Lauder, ensuring a stunning, long-lasting finish. 3. Flexible Bridal Packages We offer customizable packages to suit all budgets and wedding themes, from traditional to modern styles. 4. On-Location Service Our team comes to your location in Matigara, saving you time and ensuring comfort on your big day. Bridal Makeup Styles Popular in Matigara Classic Bridal Look Timeless elegance featuring bold eyes, radiant skin, and vibrant lips to complement traditional bridal attire. Natural Glow Soft, dewy tones perfect for outdoor weddings, highlighting your natural beauty. Fusion Style A blend of traditional and modern elements, ideal for contemporary brides looking for a unique touch. Our Bridal Makeup Process in Matigara Consultation: Understanding your preferences and wedding theme for a perfect look. Trial Session: A pre-wedding trial ensures your complete satisfaction. Wedding Day: Our artists arrive fully equipped to deliver a flawless makeup application. Final Enhancements: Attention to detail for a look that lasts throughout the celebrations. What Brides Say About Ladyfair in Matigara Sneha R., Matigara: "Ladyfair gave me the perfect bridal look! The team was professional and made me feel so comfortable. Highly recommended!" Ritika S., Matigara: "From the trial to the wedding day, everything was seamless. My makeup was stunning and lasted all day. Thank you, Ladyfair!" Ananya P., Matigara: "The team was punctual, professional, and incredibly talented. My bridal makeup was exactly what I wanted—natural yet glamorous!" Pre-Wedding Beauty Tips for Brides in Matigara Hydrate: Drink plenty of water to maintain glowing skin. Follow a Skincare Routine: Start early to prepare your skin for the big day. Get Enough Rest: Sleep well to avoid puffiness and fatigue. Trust the Experts: Let us handle your bridal makeup so you can enjoy every moment. Additional Services in Matigara Engagement Makeup Reception Makeup Bridesmaid Makeup Hairstyling and Draping Party and Event Makeup Frequently Asked Questions (FAQs) Q1: Do you offer makeup trials in Matigara? Yes, we provide pre-wedding makeup trials to ensure your look is perfect. Q2: Can you handle bridal parties? Yes, our team can cater to bridesmaids, family members, and other guests. Q3: What brands do you use for makeup? We use trusted, high-quality brands like MAC, Estee Lauder, and HUDA Beauty. Q4: How early should I book your services? We recommend booking 2-3 months in advance to secure your date. Q5: Do your packages include hairstyling? Yes, hairstyling and draping are included in our bridal packages.

Posted By: 30th December 2024
best bridal makeup artist in naxal bari
Introduction Transform your wedding day into a picture-perfect celebration with Ladyfair Bridal Services in Naxalbari. Our expert makeup artists create stunning looks tailored to your style, ensuring you shine as a radiant bride. Book your appointment today at 7004721239 for a memorable bridal experience. Why Choose Ladyfair Bridal Services in Naxalbari? 1. Expert Makeup Artists Our team specializes in delivering flawless bridal looks, combining artistry and precision to highlight your natural beauty. 2. Premium-Quality Products We use only top-tier makeup products from brands like MAC, HUDA Beauty, and Kryolan to ensure long-lasting results. 3. Personalized Bridal Packages From traditional bridal looks to modern styles, our packages are customized to match your preferences and wedding theme. 4. Convenient On-Site Services Enjoy stress-free beauty services as our professionals bring everything to your doorstep in Naxalbari. Popular Bridal Makeup Styles in Naxalbari Traditional Elegance A classic bridal look with bold eyes, flawless base makeup, and statement lips that beautifully complement traditional Indian attire. Natural Glow Soft, radiant, and minimalistic makeup perfect for brides who prefer an understated, natural look. Fusion Glam A blend of traditional and modern trends that create a distinctive, chic bridal appearance. Our Bridal Makeup Process in Naxalbari Consultation: We discuss your vision and preferences for your bridal look. Trial Makeup: A pre-wedding trial ensures you're completely satisfied with your makeup style. Wedding Day Services: Our team arrives punctually and prepares you for your big day with flawless execution. Final Enhancements: We make sure your makeup stays impeccable throughout the event with finishing touches. Client Testimonials from Naxalbari Priya S., Naxalbari: "I was thrilled with my bridal look. Ladyfair made my wedding day even more special with their exceptional service!" Ritika M., Naxalbari: "Highly professional team! The makeup stayed perfect for hours, and I felt like a queen." Anjali K., Naxalbari: "Ladyfair exceeded my expectations. I loved the modern bridal look they created for me." Pre-Wedding Beauty Tips for Brides in Naxalbari Hydrate Well: Drinking enough water keeps your skin fresh and glowing. Follow a Skincare Regimen: Start early to address any skin concerns before your wedding day. Get Ample Rest: Sleep well to avoid puffiness and dull skin. Stay Relaxed: Let our professionals handle the details so you can focus on enjoying your big day. Additional Services in Naxalbari Engagement Makeup Reception Makeup Bridesmaid Makeup Hairstyling and Draping Party and Event Makeup Frequently Asked Questions (FAQs) Q1: Do you offer makeup trials in Naxalbari? Yes, we provide trial sessions to help you finalize your desired bridal look. Q2: Are your products safe for sensitive skin? Absolutely! We use premium products that are dermatologically tested and suitable for all skin types. Q3: Can you accommodate large bridal parties? Yes, we offer services for bridesmaids, family members, and other guests. Q4: What is the ideal time to book your bridal services? We recommend booking at least 2-3 months in advance to secure your wedding date. Q5: Do your packages include hairstyling and draping? Yes, our bridal packages include hairstyling and saree or lehenga draping.

Posted By: 29th December 2024
best bridal makeup artist in phansidewa
Introduction Celebrate your wedding day in the serene beauty of Phansidewa with a flawless bridal look crafted by Ladyfair Bridal Services. Our expert team brings professional makeup artistry to your doorstep, ensuring you feel confident and radiant. Call 7004721239 today to book our exceptional bridal makeup services. Why Choose Ladyfair Bridal Services in Phansidewa? 1. Skilled Bridal Makeup Experts Our talented artists are experienced in creating bespoke looks that enhance your natural beauty and suit your wedding attire. 2. Premium Makeup Products We use high-quality, skin-friendly products from trusted brands like MAC, HUDA Beauty, and Estee Lauder to ensure a long-lasting finish. 3. Customized Packages Choose from a variety of bridal packages tailored to your preferences and budget, whether you want a traditional or modern style. 4. On-Site Services We bring our services to your home or wedding venue, making your special day hassle-free and comfortable. Popular Bridal Makeup Styles in Phansidewa Traditional Bridal Look A timeless style featuring bold eyes, a flawless complexion, and vibrant lips that pair beautifully with traditional Indian bridal attire. Minimalist Glam Soft tones and a dewy finish for brides who prefer a subtle yet elegant appearance, ideal for outdoor weddings. Contemporary Chic A fusion of classic and modern elements, offering a unique and sophisticated bridal look. Our Bridal Makeup Process in Phansidewa Consultation: We start with a detailed discussion to understand your preferences and wedding theme. Trial Makeup: A pre-wedding trial ensures you are delighted with your final look. Wedding Day Makeup: Our professionals arrive on time, equipped to deliver impeccable bridal makeup. Final Touches: We perfect your look with details that ensure your makeup stays flawless throughout your big day. Client Testimonials from Phansidewa Ritika M., Phansidewa: "Ladyfair made me look and feel amazing on my wedding day! The makeup was exactly how I wanted it—natural yet elegant. Highly recommend them!" Anjali D., Phansidewa: "Thank you for the beautiful bridal makeup. The team was professional, punctual, and made my day so special!" Pooja S., Phansidewa: "I was nervous about my bridal look, but Ladyfair did an incredible job. My makeup stayed perfect even after hours of celebrations!" Pre-Wedding Beauty Tips for Brides in Phansidewa Stay Hydrated: Drinking plenty of water keeps your skin glowing and healthy. Follow a Skincare Routine: Start a skincare regimen months before your wedding for optimal results. Get Rest: A good night’s sleep ensures you look fresh and radiant. Relax: Let us take care of your bridal makeup so you can focus on enjoying your special day. Additional Services in Phansidewa Engagement Makeup Reception Makeup Bridesmaid Makeup Hairstyling and Draping Party and Event Makeup Frequently Asked Questions (FAQs) Q1: Do you offer a trial makeup session in Phansidewa? Yes, we provide pre-wedding trials to ensure your satisfaction with your bridal look. Q2: Can you handle large bridal parties? Absolutely! We can accommodate bridal parties, including bridesmaids and family members. Q3: Are your products skin-friendly? Yes, we use premium, dermatologically-tested products suitable for all skin types. Q4: What is the best time to book bridal makeup services? We recommend booking at least 2-3 months before your wedding to secure your date. Q5: Do you offer hairstyling with makeup? Yes, hairstyling and saree or lehenga draping are included in our packages.

Posted By: 29th December 2024
best bridal makeup artist in rangli rangliot
Introduction In the picturesque town of Rangli Rangliot, let your bridal beauty shine as brightly as the surrounding hills. Ladyfair Bridal Services is here to enhance your natural charm with professional bridal makeup tailored to your wedding style. Trust our expert team to deliver flawless, long-lasting makeup on your big day. Call 7004721239 to book your bridal session now. Why Choose Ladyfair Bridal Services in Rangli Rangliot? 1. Expert Bridal Makeup Artists Our team consists of experienced professionals who specialize in creating customized looks that highlight your unique features and preferences. 2. High-Quality Makeup Products We use premium products from trusted brands like MAC, Estee Lauder, and HUDA Beauty to ensure your makeup is safe, long-lasting, and camera-ready. 3. Personalized Makeup Packages We offer a variety of packages tailored to your needs, from traditional bridal looks to modern, minimalist styles. 4. On-Site Makeup Services Enjoy the convenience of our on-location services, whether at your home or wedding venue, ensuring a stress-free experience. Popular Bridal Makeup Styles in Rangli Rangliot Traditional Elegance A radiant look featuring bold eyes, glowing skin, and vibrant lips that pairs beautifully with traditional wedding attire. Natural Glow Minimal makeup emphasizing natural beauty with soft tones and a dewy finish, ideal for outdoor ceremonies. Fusion Glam A perfect blend of modern trends and traditional elements to create a distinctive, elegant bridal appearance. Our Bridal Makeup Process in Rangli Rangliot Consultation: We start by understanding your vision, wedding theme, and personal preferences. Trial Session: A pre-wedding trial helps finalize your bridal look and ensures you’re fully satisfied. Wedding Day Makeup: Our team arrives prepared and on time to provide flawless, professional makeup on your special day. Finishing Touches: We complete your look with finishing details that make your makeup stay perfect throughout the celebrations. Client Testimonials from Rangli Rangliot Anita R., Rangli Rangliot: "I was thrilled with my bridal makeup! The Ladyfair team gave me a glowing look that matched my wedding theme perfectly. Highly recommend them!" Sushmita T., Rangli Rangliot: "Ladyfair Bridal Services made me feel so special on my big day. Their attention to detail is amazing, and my makeup stayed flawless all day!" Mitali B., Rangli Rangliot: "From the trial session to the final look, everything was perfect. Thank you, Ladyfair, for making me feel beautiful on my wedding day!" Pre-Wedding Beauty Tips for Brides in Rangli Rangliot Stay Hydrated: Drink plenty of water to keep your skin hydrated and glowing. Follow a Skincare Routine: Start a skincare routine months before your wedding for a radiant complexion. Get Enough Sleep: Beauty sleep is essential for a fresh and rested look. Avoid Stress: Stay relaxed and trust us to handle your makeup needs! Additional Bridal Services in Rangli Rangliot Engagement Makeup Reception Makeup Bridesmaid Makeup Hairstyling and Saree Draping Party and Event Makeup Frequently Asked Questions (FAQs) Q1: Do you offer bridal makeup trials in Rangli Rangliot? Yes, we provide a trial session to help you finalize your desired bridal look. Q2: Can I book makeup for other wedding events like the reception? Yes, we offer makeup services for all wedding-related events, including the reception and engagement. Q3: Are hairstyling and draping included in the package? Yes, our packages include hairstyling and saree or lehenga draping. Q4: When should I book my bridal makeup service? We recommend booking at least 2-3 months before your wedding to secure your date. Q5: Do you use waterproof makeup products? Yes, we use high-quality, waterproof products to ensure your makeup lasts throughout the day.

Posted By: 28th December 2024
best bridal makeup artist in kharibari
Introduction Looking for bridal makeup services in Kharibari? Ladyfair Bridal Services offers exceptional bridal makeup that enhances your natural beauty and makes you look stunning on your big day. Our experienced makeup artists specialize in creating customized bridal looks, ensuring that you feel confident and beautiful. Call us at 7004721239 to book your bridal makeup session today! Why Choose Ladyfair Bridal Services in Kharibari? 1. Experienced and Professional Makeup Artists Our team consists of highly skilled and experienced makeup artists who specialize in bridal makeup, ensuring flawless results that last throughout the wedding. 2. Customized Bridal Makeup Packages We understand that every bride is unique, which is why we offer personalized bridal makeup packages that cater to your specific preferences and style. 3. Premium Makeup Products Ladyfair uses only high-quality makeup products from renowned brands such as MAC, Estee Lauder, and HUDA Beauty to achieve a flawless, long-lasting look. 4. On-Location Makeup Services Our on-location bridal makeup service allows you to get ready in the comfort of your home or venue, making the experience more relaxed and convenient for you. Popular Bridal Makeup Looks in Kharibari Traditional Bridal Look A timeless bridal look featuring bold eyes, red lips, and flawless skin, perfectly complementing a traditional wedding ensemble. Contemporary Bridal Look A modern bridal look that emphasizes natural beauty with subtle makeup, glowing skin, and a soft, fresh appearance. Fusion Bridal Makeup A fusion of modern and traditional elements that creates a unique and elegant look, blending both styles for a memorable bridal appearance. Our Bridal Makeup Process in Kharibari Consultation: We begin with a detailed consultation to understand your wedding theme, preferences, and desired makeup style. Trial Session: We provide a trial makeup session to perfect your look and ensure you’re happy with the final result. Wedding Day Service: On your wedding day, we arrive on time and provide professional makeup services that make you feel like the most beautiful version of yourself. Final Touches: We give you the final touches to ensure your makeup stays flawless throughout the celebrations. Client Testimonials from Kharibari Priya D., Kharibari: "Ladyfair made my wedding day even more special! Their team gave me a perfect bridal look, and I felt absolutely stunning. Highly recommend!" Neha S., Kharibari: "I loved how the team understood my vision and created a beautiful, natural bridal look. The makeup stayed fresh all day long!" Rina M., Kharibari: "Thank you, Ladyfair, for the amazing service. My bridal makeup was flawless, and I received so many compliments from my guests!" Pre-Wedding Beauty Tips for Brides in Kharibari Hydration is Key: Drink plenty of water in the months leading up to your wedding for hydrated, glowing skin. Start Skincare Early: A good skincare routine a few months before your wedding will help you achieve flawless skin. Sleep Well: Ensure you get enough rest to wake up fresh on your big day. Avoid Stress: Keep calm and enjoy the wedding preparations—we’ve got your makeup covered! Additional Bridal Services Offered in Kharibari Engagement Makeup Reception Makeup Bridesmaid Makeup Hairstyling & Saree Draping Bridal Party Makeup Frequently Asked Questions (FAQs) Q1: Do you offer bridal makeup at home in Kharibari? Yes, we offer on-location bridal makeup services at your home or wedding venue for your convenience. Q2: Can I have a makeup trial before my wedding day? Yes, we offer a trial session to help you finalize your bridal look and ensure it matches your expectations. Q3: What brands of makeup do you use? We use premium makeup products from trusted brands like MAC, Estee Lauder, and HUDA Beauty to ensure a flawless finish. Q4: When should I book my bridal makeup appointment? It’s best to book your bridal makeup at least 2-3 months in advance to secure your date. Q5: Is hairstyling included in the bridal package? Yes, hairstyling is included in all of our bridal makeup packages.

Posted By: 28th December 2024
best bridal makeup artist in banshihari
Introduction Ladyfair Bridal Services brings the best bridal makeup experience to Banshihari. Elevate your wedding look with our professional makeup artists who blend expertise and premium products to create your dream bridal appearance. Contact us at 7004721239 to book your appointment. Why Choose Ladyfair in Banshihari? 1. Skilled Makeup Artists Our team specializes in bridal and wedding makeup, ensuring you shine on your big day. 2. Personalized Packages We tailor our services to meet your unique needs and wedding theme. 3. High-Quality Products We use trusted brands like MAC, Estee Lauder, and HUDA Beauty for a flawless finish. 4. Convenience Get ready stress-free with our on-location makeup services. Popular Bridal Looks in Banshihari Classic Traditional Bridal Look Perfect for traditional weddings, featuring bold eyes, glowing skin, and vibrant hues. Elegant Contemporary Look Modern and minimalist, enhancing your natural beauty with subtle charm. Fusion Wedding Look A unique blend of traditional and modern makeup styles. Ladyfair Bridal Makeup Process Initial Consultation: Understand your style, preferences, and wedding plans. Trial Makeup Session: Test different looks to select the ideal one. Wedding Day Service: Flawless and timely makeup for your special day. Final Finishing Touches: Ensure a long-lasting, camera-ready look. Client Testimonials in Banshihari Priyanka S., Banshihari: "Ladyfair made my wedding day even more special with their amazing makeup service!" Mona D., Banshihari: "Professional team and high-quality products—highly satisfied with my bridal look!" Neha G., Banshihari: "They created the exact look I had in mind. I couldn’t have asked for better!" Pre-Wedding Beauty Tips for Banshihari Brides Hydrate Regularly: Keeps your skin fresh and glowing. Follow a Skincare Routine: Start a skincare regime months before your wedding. Sleep Well: Adequate rest ensures bright and beautiful skin. Trust the Experts: Rely on us for your perfect bridal makeup. Additional Services in Banshihari Engagement Makeup Reception Makeup Bridesmaid Makeup Saree Draping and Hairstyling FAQs Q1: Do you offer home services in Banshihari? Yes, we provide on-location bridal makeup services. Q2: Can I book a trial session? Of course! Trial sessions help you finalize your perfect look. Q3: Which products do you use? We use high-quality brands like MAC, Estee Lauder, and HUDA Beauty. Q4: How soon should I book? We recommend booking 2-3 months in advance for assured availability. Q5: Is hairstyling included in the package? Yes, our bridal packages include saree draping and hairstyling.

Posted By: 28th December 2024
best bridal makeup artist in Hili
Introduction Celebrate your special day with Ladyfair, the leading bridal makeup service in Hili. From flawless traditional looks to modern bridal styles, our expert team ensures you look breathtaking on your wedding day. Book your appointment now at 7004721239. Why Choose Ladyfair for Bridal Makeup in Hili? 1. Professional Expertise Our seasoned makeup artists specialize in creating stunning bridal looks tailored to your preferences. 2. Customized Packages We offer personalized makeup packages to fit your style, budget, and wedding theme. 3. Premium Products We use only top-tier brands like MAC, HUDA Beauty, and Estee Lauder to ensure high-quality results. 4. On-Location Service Enjoy the convenience of our makeup artists coming to your home or venue. Bridal Makeup Styles in Hili Traditional Look Featuring bold eyes, radiant skin, and classic colors, this style is perfect for traditional ceremonies. Modern Minimalist Look A chic and understated look that enhances your natural beauty. Fusion Look Blend of traditional and contemporary styles for a unique and captivating bridal appearance. Our Bridal Makeup Process Consultation: Understand your vision and plan your dream look. Trial Session: Test different styles to finalize your perfect bridal look. Wedding Day Makeup: Punctual and meticulous service to get you wedding-ready. Final Touch: Ensure perfection with long-lasting, flawless makeup. What Brides in Hili Say Ritika M., Hili: "I felt like a princess on my wedding day thanks to Ladyfair. Highly recommended!" Swati S., Hili: "The makeup lasted throughout the day, and everyone loved my look!" Madhuri T., Hili: "The team was professional and friendly. They truly made my day special!" Tips for Brides in Hili Stay Hydrated: Proper hydration helps achieve radiant skin. Schedule a Trial: Confirm your preferred look before the wedding day. Start Early: Begin a skincare routine a few weeks before the wedding. Relax and Enjoy: Trust our team to handle all your makeup needs. Additional Services Offered in Hili Pre-Wedding Shoot Makeup Reception Makeup Bridesmaid Makeup Saree Draping and Hairstyling FAQs Q1: Do you provide bridal makeup services at home in Hili? Yes, our team offers doorstep services for a stress-free experience. Q2: Can I book a trial session? Absolutely! Trial sessions are available to finalize your look. Q3: Which brands do you use? We use premium brands like MAC, HUDA Beauty, and Estee Lauder. Q4: How far in advance should I book? It’s ideal to book at least 2-3 months in advance. Q5: Are saree draping and hairstyling included? Yes, our bridal packages include saree draping and hairstyling.

Posted By: 28th December 2024
best bridal makeup artist in kushmandi
Introduction Step into your dream wedding look with Ladyfair, the premier bridal makeup service in Kushmandi. With a team of expert artists and tailored packages, we ensure you shine bright on your big day. Call 7004721239 now to book an appointment. Why Choose Ladyfair for Bridal Makeup in Kushmandi? 1. Experienced Artists Our skilled professionals are experts in creating flawless bridal looks. 2. Personalized Services Every bride is unique, and so is our approach. We design your look to complement your style and personality. 3. High-Quality Products We only use trusted brands like MAC, HUDA Beauty, and Estee Lauder to ensure a radiant and lasting finish. 4. On-Location Convenience Get ready at your home or wedding venue with our reliable doorstep services. Bridal Makeup Styles in Kushmandi Traditional Look A timeless style featuring bold eyes, vibrant lips, and intricate detailing. Minimalist Look Simple yet elegant makeup that enhances your natural beauty. Contemporary Look Trendy and chic makeup for the modern bride who loves experimenting with unique styles. Our Bridal Makeup Process Initial Consultation: Discuss your vision, outfit, and wedding theme with our experts. Trial Session: Test different looks to pick the one that matches your preferences. Wedding Day Prep: Arrive at your venue prepared for seamless and on-time service. Final Touches: Ensure perfection for a stress-free and stunning experience. What Clients in Kushmandi Say Pooja D., Kushmandi: "Ladyfair made my wedding day extra special! I felt like a queen." Ankita R., Kushmandi: "The makeup lasted all day, and I received so many compliments. Highly recommend Ladyfair!" Nikita S., Kushmandi: "The team was punctual, professional, and made me feel confident. Thank you, Ladyfair!" Bridal Preparation Tips for Kushmandi Brides Start Early: Begin your skincare routine weeks before the wedding. Stay Hydrated: Drinking plenty of water helps achieve glowing skin. Trust the Experts: Share your ideas and let our team craft the perfect look. Schedule a Trial: Ensure you love your bridal look before the big day. Additional Services in Kushmandi Pre-Wedding Shoot Makeup Engagement Makeup Reception Makeup Bridesmaid Makeup Saree Draping and Hairstyling FAQs Q1: Do you provide at-home services in Kushmandi? Yes, we offer doorstep bridal makeup services for your convenience. Q2: Can I book a trial session? Certainly! Trial sessions are available to finalize your preferred look. Q3: What brands do you use for makeup? We use premium brands like MAC, HUDA Beauty, and Estee Lauder. Q4: How far in advance should I book? It’s best to book 2-3 months ahead to secure your slot. Q5: Are saree draping and hairstyling included? Yes, our bridal packages include hairstyling and draping services.

Posted By: 28th December 2024
best bridal makeup artist in harirampur
Introduction Welcome to Ladyfair, your one-stop destination for professional bridal makeup services in Harirampur. Transform your wedding day into a memorable occasion with our expert makeup artists. Call 7004721239 to book your appointment and experience personalized bridal styling. Why Choose Ladyfair for Bridal Makeup in Harirampur? 1. Expert Makeup Artists Our highly trained professionals specialize in creating breathtaking bridal looks. 2. Customized Makeup Packages We tailor every aspect of your bridal makeup to suit your preferences and wedding theme. 3. Premium Quality Products We use top-tier brands like MAC, HUDA Beauty, and Bobbi Brown for a flawless, long-lasting finish. 4. At-Home Services Get ready in the comfort of your home with our convenient doorstep bridal makeup services. Bridal Makeup Styles in Harirampur Traditional Bridal Look Perfect for cultural weddings, featuring bold eyes, vibrant colors, and intricate detailing. Contemporary Bridal Look A minimalistic and elegant style with soft tones and subtle highlights. Fusion Bridal Look A mix of tradition and modernity, designed for brides seeking something unique and extraordinary. Our Bridal Makeup Process Initial Consultation: Understand your style, preferences, and wedding attire. Trial Session: Explore different looks to find the one that suits you best. Wedding Day Prep: On-time delivery of makeup and hairstyling at your location. Final Touches: Ensure your makeup stays flawless throughout the celebrations. Client Testimonials Neha R., Harirampur: "Ladyfair did an incredible job! I received endless compliments on my bridal look." Anjali K., Harirampur: "They made me feel confident and beautiful. The team was so professional and friendly!" Riya S., Harirampur: "From the trial session to the final touch-ups, everything was perfect. Highly recommend Ladyfair." Tips for Brides in Harirampur Hydrate and Moisturize: Start your skincare routine early to achieve glowing skin. Share Your Vision: Communicate your ideas with our makeup artists for the best results. Plan Ahead: Book your trial and wedding day appointments in advance to avoid last-minute stress. Relax and Enjoy: Trust our team to handle every detail of your bridal beauty needs. Additional Services in Harirampur Engagement Makeup Reception Makeup Bridesmaid Makeup Pre-Wedding Shoot Makeup Draping and Hairstyling FAQs Q1: Do you provide doorstep services in Harirampur? Yes, we offer convenient at-home bridal makeup services. Q2: Can I book a trial session? Absolutely! We provide trial sessions to finalize your preferred look. Q3: What brands do you use for makeup? We use premium brands like MAC, Bobbi Brown, and HUDA Beauty for a flawless finish. Q4: How early should I book my bridal makeup? We recommend booking at least 2-3 months in advance for availability. Q5: Are hairstyling and draping included in the packages? Yes, our bridal packages include hairstyling and saree draping.

Posted By: 28th December 2024
best bridal makeup artist in kumarganj
Introduction Looking for expert bridal makeup services in Kumarganj? Ladyfair is here to make your wedding day special with a flawless and stunning bridal look. Call us at 7004721239 to book your appointment and experience professional artistry that complements your style. Why Choose Ladyfair for Bridal Makeup in Kumarganj? 1. Skilled Makeup Artists Our experienced professionals craft the perfect bridal look tailored to your needs. 2. Customized Bridal Styling Whether traditional or modern, we create styles that reflect your personality and preferences. 3. Premium Quality Products We use trusted brands like MAC, HUDA Beauty, and Bobbi Brown for a radiant and lasting finish. 4. On-Site Services Enjoy the convenience of bridal makeup and hairstyling at your home in Kumarganj. Bridal Makeup Styles in Kumarganj Traditional Look A classic bridal style with bold eyes, a radiant base, and a vibrant lip color to honor cultural traditions. Modern Look Subtle yet chic, this style focuses on natural tones and elegant detailing. Fusion Look A mix of traditional charm and modern aesthetics for brides who want a unique appearance. Our Bridal Makeup Process Consultation: Discuss your preferences, wedding theme, and outfit details. Trial Session: Experiment with styles to finalize your ideal bridal look. Wedding Day: We deliver flawless makeup and hairstyling at your location. Touch-Ups: We ensure your look stays perfect throughout the day. Client Testimonials Priya D., Kumarganj: "Ladyfair’s team is amazing! They gave me the bridal look I always dreamed of." Anjali S., Kumarganj: "Highly professional and talented artists. My makeup was flawless and lasted all day!" Megha T., Kumarganj: "Ladyfair brought my vision to life. I felt so confident and beautiful on my wedding day!" Tips for Brides in Kumarganj Prepare Your Skin: Start a skincare routine months before your wedding for glowing skin. Communicate Your Preferences: Share your ideas and inspirations with our team for a personalized touch. Schedule a Trial: A trial session ensures you’re happy with the final look. Relax and Enjoy: Trust our experts to take care of your makeup and hairstyling needs. Additional Services in Kumarganj Engagement Makeup Reception Makeup Pre-Wedding Photoshoot Makeup Bridesmaid Makeup Draping and Hairstyling FAQs Q1: Do you provide trial makeup sessions in Kumarganj? Yes, we offer trial sessions to help finalize your bridal look. Q2: What brands do you use? We use premium brands like MAC, Bobbi Brown, and HUDA Beauty. Q3: Are hairstyling and draping included? Yes, our bridal packages include hairstyling and saree draping. Q4: How far in advance should I book? We recommend booking at least 2-3 months before your wedding date. Q5: Can you travel to my location in Kumarganj? Yes, we provide doorstep bridal makeup services for your convenience.

Posted By: 28th December 2024
best bridal makeup artist in tapan
Introduction Ladyfair is proud to offer expert bridal makeup services in Tapan. Your wedding day deserves the perfect look, and our professional team ensures you achieve a stunning bridal appearance. Call us at 7004721239 to book your personalized bridal makeup and hairstyling services today. Why Choose Ladyfair for Bridal Makeup in Tapan? 1. Expert Professionals Our makeup artists bring years of experience to create your flawless bridal look. 2. Customized Looks From traditional to modern styles, we design a look that complements your personality, outfit, and theme. 3. Premium Products We use trusted brands like MAC, Bobbi Brown, and HUDA Beauty to ensure a long-lasting, radiant finish. 4. Doorstep Convenience Enjoy our services from the comfort of your home in Tapan. Bridal Makeup Styles in Tapan Traditional Bengali Bridal Look Perfect for brides who embrace culture, featuring bold red lips, kohl-rimmed eyes, and intricate designs. Minimalist Modern Look Soft, natural tones for a subtle yet elegant appearance. Fusion Bridal Look A unique blend of traditional and contemporary elements for a standout style. Our Process Initial Consultation: Discuss your vision and style preferences. Trial Makeup Session: Test various styles to finalize your desired look. Wedding Day Service: Flawless makeup and hairstyling done at your preferred location. Touch-Up Assistance: Ensure your look remains perfect throughout the event. Client Reviews Riya S., Tapan: "Ladyfair made my wedding so special with their stunning makeup services." Swati K., Tapan: "Exceptional service and attention to detail. My bridal look was perfect!" Ananya B., Tapan: "The team at Ladyfair exceeded my expectations. Highly recommended for brides in Tapan." Tips for Brides in Tapan Hydrate and Nourish: Healthy skin is the foundation of flawless makeup. Start Early: Begin a skincare routine months before your wedding day. Communicate Your Style: Let our artists know your preferences for a personalized touch. Be Open to Suggestions: Our experts are here to guide you for the best results. Additional Services in Tapan Engagement Makeup Reception Makeup Pre-Wedding Shoots Bridesmaid Makeup Hairstyling and Draping FAQs Q1: Do you offer trial sessions in Tapan? Yes, we provide trial sessions to help you finalize your bridal look. Q2: What brands do you use for bridal makeup? We use premium brands like MAC, HUDA Beauty, and Bobbi Brown. Q3: Can I customize my makeup style? Absolutely! We tailor every look to your preferences and outfit. Q4: Is hairstyling included in your packages? Yes, hairstyling and draping are part of our bridal packages. Q5: How can I book Ladyfair's services? Simply call us at 7004721239 to schedule your appointment.

Posted By: 28th December 2024
Bridal Makeup in Gangarampur | Ladyfair Professional Services
Introduction Elevate your bridal look with Ladyfair’s professional bridal makeup services in Gangarampur. Your wedding day is one of the most memorable occasions of your life, and our expert makeup artists are here to make you shine. Call us at 7004721239 to book flawless and personalized bridal makeup services for your big day. Why Choose Ladyfair for Bridal Makeup in Gangarampur? 1. Experienced Artists Our team of professional makeup artists is skilled in creating stunning bridal transformations. 2. Custom Bridal Looks We craft a bridal look that suits your preferences, outfit, and wedding theme for a picture-perfect appearance. 3. Top-Quality Products We use premium products like MAC, HUDA Beauty, and Bobbi Brown, ensuring a flawless and long-lasting finish. 4. On-Location Service Enjoy the convenience of our doorstep service in Gangarampur, letting you relax and focus on your special day. Popular Bridal Makeup Styles in Gangarampur Traditional Bengali Bridal Look Featuring vibrant red lips, defined eyes, and intricate designs, this style embraces cultural heritage beautifully. Subtle Elegant Look Soft tones, radiant skin, and minimalistic makeup for brides who prefer understated elegance. Modern Fusion Look A blend of traditional and modern elements, creating a unique and contemporary bridal appearance. Our Bridal Makeup Process Consultation: Understand your vision and preferences for a perfect bridal look. Trial Session: Test and finalize your makeup style with a trial session. Wedding Day Service: Our team arrives at your location to provide top-notch makeup and hairstyling. Touch-Up Assistance: Ensure your makeup stays impeccable throughout the event with touch-up support. Client Testimonials Priya C., Gangarampur: "Ladyfair transformed me into a beautiful bride. Their attention to detail was amazing." Soma D., Gangarampur: "I loved my bridal look! The team was professional and ensured everything was perfect." Arpita B., Gangarampur: "Ladyfair made my wedding stress-free with their top-notch service. Highly recommended!" Tips for Brides in Gangarampur Start a Skincare Routine: Prep your skin at least three months before the wedding for a natural glow. Hydrate Well: Keep your skin hydrated for a fresh and radiant look. Communicate Clearly: Share your preferences with the makeup artist to achieve your dream bridal look. Trust the Experts: Rely on Ladyfair’s professionals for makeup and styling advice. Additional Services in Gangarampur Pre-Wedding Makeup Engagement Makeup Reception Makeup Bridesmaid Makeup Hairstyling Services FAQs Q1: Do you offer makeup trials in Gangarampur? Yes, we provide trial sessions to finalize your bridal look. Q2: What makeup brands do you use? We use top-tier brands like MAC, HUDA Beauty, Bobbi Brown, and more. Q3: Can I customize my bridal look? Absolutely! We create looks tailored to your preferences and style. Q4: Is hairstyling included in your bridal packages? Yes, hairstyling is a part of our comprehensive bridal packages. Q5: How can I book your services? You can call us at 7004721239 to book our services.

Posted By: 28th December 2024
best bridal makeup artist for balurghat
Introduction Transform your wedding day into a magical experience with Ladyfair’s expert bridal makeup services in Balurghat. We understand that every bride dreams of looking perfect on her special day, and our professional team ensures that dream becomes a reality. Contact us at 7004721239 to book your appointment for flawless bridal makeup tailored to your style. Why Choose Ladyfair for Bridal Makeup in Balurghat? 1. Professional Makeup Artists Our team comprises skilled and experienced artists who specialize in creating stunning bridal looks. 2. Personalized Service We work closely with you to customize your bridal look, keeping your preferences and wedding theme in mind. 3. High-Quality Products We use premium makeup brands like MAC, HUDA Beauty, and Bobbi Brown to ensure your makeup lasts all day without compromising your skin. 4. At-Home Convenience Enjoy hassle-free service as we bring everything to your doorstep in Balurghat, saving you time and stress on your big day. Popular Bridal Makeup Styles in Balurghat Traditional Bridal Look Highlighting cultural beauty with vibrant colors, bold eyes, and exquisite detailing to create a regal look. Contemporary Minimalist Look Soft, natural tones for a radiant yet understated elegance that’s perfect for modern brides. Fusion Look A mix of traditional and modern styles to bring out the best of both worlds, creating a unique bridal statement. Our Bridal Makeup Process Consultation Understand your style, preferences, and wedding theme to design the perfect look for your big day. Trial Makeup Session Experience a trial run to finalize the details and ensure you’re completely satisfied with your bridal look. Wedding Day Makeup Our team will arrive at your location in Balurghat to deliver impeccable makeup and hairstyling services. Post-Makeup Support We provide touch-up assistance during the ceremony to ensure your makeup remains flawless throughout the event. Client Testimonials Riya S., Balurghat: "I felt like a princess on my wedding day. Ladyfair’s makeup artists are incredibly talented and professional." Ankita D., Balurghat: "Ladyfair made my special day even more memorable with their flawless makeup and hairstyling." Madhura G., Balurghat: "The team is so friendly and skilled. My makeup was just perfect, exactly how I imagined it!" Tips for Brides in Balurghat Stay Hydrated: Drink plenty of water for naturally glowing skin. Follow a Skincare Routine: Start prepping your skin months before the wedding for the best results. Be Open to Suggestions: Trust the professionals for advice on what suits you best. Relax: Enjoy every moment of your big day without stressing about your look—Ladyfair has you covered! Additional Services in Balurghat Engagement Makeup Reception Makeup Bridesmaid Makeup Pre-Wedding Shoot Makeup Bridal Hairstyling FAQs Q1: Do you provide makeup trials in Balurghat? Yes, we offer trial sessions to help you decide on your bridal look. Q2: Which makeup brands do you use? We use top-tier brands like MAC, HUDA Beauty, Bobbi Brown, and others. Q3: Do you offer hairstyling services? Yes, our bridal packages include hairstyling to complement your makeup. Q4: Can I customize my bridal look? Absolutely! Our team works with you to create a look tailored to your style and preferences. Q5: How do I book your services? You can book our services by calling 7004721239.

Posted By: 28th December 2024
best bridal makeup artist in turkaulia
Introduction Every bride deserves to look and feel her best on her wedding day, and Ladyfair is here to make that happen. Our professional bridal makeup services in Turkaulia combine elegance, expertise, and premium products to create the perfect bridal look for your special day. Contact us at 7004721239 to book your appointment and enjoy a stress-free makeup experience right at your doorstep. Why Choose Ladyfair for Bridal Makeup in Turkaulia? 1. Expert Makeup Artists Our team consists of experienced professionals who understand the nuances of bridal makeup, ensuring you look stunning and feel confident. 2. Convenient At-Home Services We bring our makeup services to your home in Turkaulia, saving you time and effort on your big day. 3. Premium Products We use only the best brands like MAC, HUDA Beauty, and Bobbi Brown to ensure a flawless and long-lasting finish. 4. Personalized Looks Whether you want a traditional bridal look or a contemporary style, we customize our services to match your preferences. Popular Bridal Makeup Styles in Turkaulia Traditional Bridal Makeup Reflecting the cultural essence of Indian weddings, this look features bold, vibrant colors and intricate detailing to highlight your beauty. Modern Minimalist Makeup For brides who prefer a subtle, natural glow, this style uses soft tones and light makeup for an elegant and understated look. Fusion Bridal Makeup Combining traditional and modern elements, this style includes a balance of bold and soft tones for a unique bridal appearance. Our Bridal Makeup Process Consultation We discuss your wedding theme, outfit, and desired look during an initial consultation to ensure your makeup aligns perfectly. Trial Session A trial makeup session helps you finalize your look and gives you confidence before the wedding day. Wedding Day Makeup On your special day, our team arrives at your location in Turkaulia fully equipped to deliver a flawless makeup experience. Touch-Up Assistance We ensure your makeup stays perfect throughout your ceremony with on-the-spot touch-ups as needed. Client Testimonials Pooja R., Turkaulia: "I loved my bridal look! Ladyfair's team is incredibly talented and professional. Highly recommended!" Nikita S., Turkaulia: "Ladyfair transformed me on my wedding day. The makeup lasted all day and looked amazing in photos!" Shreya T., Turkaulia: "My makeup was exactly how I envisioned it—subtle yet beautiful. Thank you, Ladyfair!" Tips for Brides in Turkaulia Skincare Routine: Start preparing your skin months before the wedding with a proper skincare routine. Hydrate Well: Drink plenty of water for glowing, hydrated skin. Trial Makeup: Always schedule a trial session to finalize your bridal look. Relax and Enjoy: Trust the professionals to do their magic and enjoy every moment of your big day. Other Services Offered in Turkaulia Engagement Makeup Reception Makeup Bridesmaid Makeup Pre-Wedding Shoot Makeup Bridal Hairstyling FAQs Q1: Do you provide makeup trials? Yes, we offer trial sessions to ensure you’re satisfied with your bridal look before the wedding. Q2: What makeup brands do you use? We use top-tier brands like MAC, HUDA Beauty, Bobbi Brown, and more. Q3: Can I customize my bridal makeup? Of course! Our team works with you to create a look that matches your preferences and wedding theme. Q4: Do you offer hairstyling services? Yes, we provide professional bridal hairstyling to complement your makeup. Q5: How can I book your services? Call us at 7004721239 to schedule your bridal makeup session in Turkaulia.

Posted By: 28th December 2024
best bridal makeup artist in sugauli
Introduction Every bride dreams of looking perfect on her wedding day, and Ladyfair is here to make that dream a reality. Our bridal makeup services in Sugauli are designed to give you a radiant and flawless look that complements your personality and wedding theme. With our experienced makeup artists and high-quality products, you’ll walk down the aisle with confidence and grace. Call us at 7004721239 to book your session today. Why Choose Ladyfair for Bridal Makeup in Sugauli? 1. Professional Makeup Artists Our skilled makeup artists specialize in various bridal looks, from traditional to modern, ensuring you achieve the exact style you desire. 2. Convenient At-Home Services No need to step out on your wedding day. We bring our professional bridal makeup services to your doorstep in Sugauli. 3. Premium Quality Products We use only top-tier makeup brands to ensure long-lasting results that are safe for all skin types. 4. Personalized Bridal Looks Our team collaborates with you to create a customized makeup look that suits your preferences and enhances your natural beauty. Popular Bridal Makeup Styles in Sugauli Traditional Bridal Makeup Highlighting the essence of Indian weddings, this look features bold eyes, rich lip colors, and intricate details that reflect cultural beauty. Minimalist Bridal Makeup Perfect for brides who love simplicity, this look emphasizes soft tones and a natural glow, letting your inner beauty shine through. Contemporary Bridal Makeup A fusion of elegance and modern trends, this style incorporates subtle contouring, shimmery eyes, and muted lip shades. Our Bridal Makeup Process Initial Consultation We start with a detailed discussion about your desired look, outfit, and wedding theme. Trial Makeup Session A trial session helps you finalize your bridal look and ensures satisfaction before the big day. On-The-Day Makeup Our team arrives at your location in Sugauli with all the essentials to deliver a flawless makeup experience. Touch-Up Services We ensure your makeup remains perfect throughout the event with touch-up assistance as needed. Client Testimonials Rashmi K., Sugauli: "I couldn't have asked for a better experience. Ladyfair made me look stunning on my wedding day!" Anjali S., Sugauli: "The makeup team was professional, punctual, and truly talented. Highly recommended for bridal makeup." Sneha P., Sugauli: "Ladyfair exceeded my expectations. My makeup was flawless and lasted the entire day without any smudges." Tips for Brides in Sugauli Hydrate Your Skin: Start drinking plenty of water and follow a skincare routine months before your wedding for a natural glow. Choose the Right Look: Discuss your preferences with your makeup artist during the consultation. Stay Relaxed: Trust the professionals and enjoy every moment of your big day. Don’t Forget a Trial: A makeup trial can help you visualize your final look and make necessary adjustments. Other Services by Ladyfair in Sugauli Bridal Hairstyling Engagement Makeup Bridesmaid Makeup Reception Makeup Pre-Wedding Photoshoot Makeup FAQs Q1: Do you offer makeup trials? Yes, we provide trial sessions to ensure you’re happy with your bridal look before the wedding. Q2: What makeup brands do you use? We use premium brands like MAC, HUDA Beauty, and Estee Lauder for long-lasting and high-quality results. Q3: Can I customize my bridal look? Absolutely! We tailor your makeup based on your preferences, skin type, and wedding theme. Q4: How can I book my bridal makeup? You can call us at 7004721239 to schedule your bridal makeup session. Q5: Do you offer hairstyling services? Yes, we provide professional bridal hairstyling services to complement your makeup look.

Posted By: 26th December 2024
best bridal makeup artist in kotwa
Introduction Your wedding day is one of the most special occasions in your life, and Ladyfair is here to help you look flawless and feel confident on your big day. Offering professional bridal makeup services in Kotwa, our expert artists specialize in creating stunning bridal looks that will make you feel like a queen. Call us at 7004721239 to book your bridal makeup session and let us transform you into the perfect bride. Why Choose Ladyfair for Bridal Makeup in Kotwa? 1. Expert Makeup Artists Our team of highly skilled makeup artists brings years of experience to the table. Whether you want a traditional bridal look or a more contemporary style, we can deliver exactly what you envision. 2. At-Home Bridal Makeup Services For the convenience of our brides in Kotwa, we offer at-home bridal makeup services. Our professionals come to your location with all the necessary tools and products to create the perfect bridal look. 3. High-Quality Makeup Products We use only the best makeup products that are long-lasting, skin-friendly, and suitable for all skin types. Your makeup will stay intact through the entire wedding day, from the ceremony to the reception. 4. Customized Bridal Makeup We understand that every bride is unique, and we take the time to tailor your makeup according to your style, personality, and wedding theme. Popular Bridal Makeup Styles in Kotwa Traditional Bridal Makeup This timeless look features bold eyes, red lips, and a radiant complexion. It’s perfect for brides who want to honor tradition while looking stunning. Natural Bridal Makeup For brides who prefer a subtle and elegant look, natural bridal makeup focuses on enhancing your features with soft tones and light coverage. Glamorous Bridal Makeup If you're aiming to steal the spotlight, glamorous bridal makeup is your perfect choice. With dramatic eyes, contouring, and a flawless finish, you'll be sure to make a statement. Bridal Makeup Process at Ladyfair Consultation: We begin with a detailed consultation to understand your preferences and wedding theme. Trial Makeup: A trial session allows you to see how your bridal makeup will look on the big day. Wedding Day Makeup: On the day of your wedding, we arrive at your location in Kotwa with all the tools to ensure a flawless makeup application. Touch-Up Services: We also provide touch-up services throughout the day to ensure your makeup remains perfect during all the celebrations. What Brides in Kotwa Are Saying About Ladyfair Priya T., Kotwa: "Ladyfair made me feel like the most beautiful bride! My makeup was flawless, and I received so many compliments." Nina P., Kotwa: "I loved my bridal makeup by Ladyfair. The team was so professional, and my makeup lasted all day without any touch-ups!" Rina D., Kotwa: "Thank you, Ladyfair, for the amazing makeup and hairstyling. You made me feel so special on my wedding day!" Bridal Makeup Tips for Brides in Kotwa Start Skincare Early: Begin a skincare regimen well in advance of your wedding to ensure glowing skin on the big day. Know What You Want: Come to your consultation with ideas and inspiration to help the makeup artist understand your desired look. Book a Trial: Schedule a trial makeup session to make sure the makeup complements your personality and style. Don’t Stress: Relax and let the professionals handle the makeup while you enjoy every moment of your wedding day. Other Services Offered by Ladyfair in Kotwa Bridal Hairstyling Engagement Makeup Bridesmaid Makeup Photoshoot Makeup Pre-Wedding Makeup FAQs How far in advance should I book my bridal makeup? It’s recommended to book at least 2-3 months ahead to secure your wedding day. Do you offer makeup trials? Yes, we offer a trial session to ensure you are completely happy with your bridal look. What makeup brands do you use? We use only premium, long-lasting makeup brands suitable for various skin types. Can I customize my bridal makeup look? Yes! We work with you to create a personalized bridal makeup look that suits your style and wedding theme. How can I book my bridal makeup appointment? Simply call 7004721239 to schedule your bridal makeup with Ladyfair.

Posted By: 26th December 2024
best bridal makeup artist in piprakothi
Introduction Your wedding day is one of the most important days of your life, and Ladyfair is here to ensure that you look your absolute best. Offering expert bridal makeup services in Piprakothi, we help brides look radiant, flawless, and ready for their big day. Book your appointment with our professional makeup artists by calling 7004721239 and enjoy a seamless, stunning bridal look! Why Choose Ladyfair for Bridal Makeup in Piprakothi? 1. Skilled and Experienced Makeup Artists Our team of expert makeup artists has years of experience in the bridal industry. They understand the latest trends and techniques, and will help you achieve the perfect look for your wedding. 2. At-Home Bridal Makeup Services We offer convenience by providing at-home bridal makeup services in Piprakothi. Our artists arrive at your location fully prepared to make sure you're ready for your wedding without the stress of traveling. 3. Premium Makeup Products We only use top-of-the-line makeup products that are gentle on the skin and long-lasting. You can count on us to keep your makeup flawless throughout the ceremony, reception, and beyond. 4. Personalized Bridal Makeup We understand that every bride has her unique vision. Our team works with you to design a custom bridal look that highlights your natural beauty and complements your wedding theme. Popular Bridal Makeup Styles in Piprakothi Traditional Bridal Makeup Traditional bridal makeup focuses on enhancing the natural features of the bride while adhering to cultural aesthetics. With vibrant eye makeup, bold lips, and a flawless complexion, this style brings out the best in every bride. Natural Bridal Makeup For those who want to feel like themselves on their special day, natural bridal makeup is perfect. Light coverage and a fresh, dewy look will make you feel glowing and radiant without feeling overly done-up. Glamorous Bridal Makeup If you want to turn heads on your wedding day, glamorous bridal makeup is the way to go. Dramatic eyes, contoured cheeks, and bold lips will ensure you look stunning and confident. Bridal Makeup Process at Ladyfair Consultation: We begin with a consultation to understand your vision, preferences, and wedding theme. Trial Makeup: You’ll experience a trial session where we create a bridal look tailored to your features and style. Wedding Day Makeup: On your wedding day, our makeup artists arrive at your location in Piprakothi with all the necessary tools and products for a flawless application. Touch-Up Services: Throughout your big day, we offer touch-up services to ensure your makeup stays picture-perfect from start to finish. What Brides in Piprakothi Are Saying About Ladyfair Meera R., Piprakothi: "Ladyfair made me feel like a princess on my wedding day. My makeup was flawless, and I got so many compliments!" Sonali S., Piprakothi: "I couldn’t have asked for a better bridal makeup experience. The Ladyfair team was professional, and my makeup looked amazing throughout the entire wedding." Neha D., Piprakothi: "I highly recommend Ladyfair to all brides. The makeup was perfect, and the artists were so calm and helpful on my big day!" Bridal Makeup Tips for Brides in Piprakothi Skincare is Key: Start your skincare routine months before your wedding to ensure your skin is smooth and glowing. Have a Clear Vision: Bring reference photos to your consultation to help the makeup artist understand the look you want. Book a Trial: A trial run of your bridal makeup is essential to ensure that you're happy with the style before your big day. Relax and Enjoy: Let the professionals handle your makeup while you enjoy the excitement of your wedding day. Other Services Offered by Ladyfair in Piprakothi Bridal Hairstyling Bridesmaid Makeup Engagement Makeup Pre-Wedding Makeup Photoshoot Makeup FAQs When should I book my bridal makeup session? It’s advisable to book at least 2-3 months in advance to secure your wedding date. Do you provide makeup trials? Yes, we offer makeup trials to help you finalize your bridal look. What makeup brands do you use? We use premium, long-lasting makeup brands suitable for all skin types. Can I personalize my bridal makeup look? Absolutely! We tailor your makeup to suit your preferences and wedding theme. How can I book my bridal makeup appointment? You can call 7004721239 to schedule your bridal makeup session with Ladyfair.

Posted By: 26th December 2024
best bridal makeup artist in motihari
Introduction Make your wedding day unforgettable with the perfect bridal makeup in Motihari! Ladyfair offers expert bridal makeup services to help you look radiant and flawless on your special day. Our team of professional makeup artists ensures that you get the bridal look you’ve always dreamed of. Book your appointment today by calling 7004721239! Why Choose Ladyfair for Bridal Makeup in Motihari? 1. Experienced and Professional Makeup Artists Our makeup artists have extensive experience in creating beautiful bridal looks. From traditional to modern styles, we work with you to ensure that your makeup complements your wedding attire and enhances your natural beauty. 2. Convenient At-Home Bridal Makeup Services Ladyfair offers at-home bridal makeup services in Motihari, ensuring a hassle-free experience. We come to your location with professional makeup tools and products, saving you the trouble of traveling on your big day. 3. High-Quality Makeup Products We use only the best makeup products that are long-lasting and suitable for all skin types. Your makeup will stay flawless throughout the ceremony, photoshoots, and celebrations. 4. Customized Bridal Makeup Looks We understand that every bride is unique. Our makeup artists work closely with you to create a customized look that suits your personality and wedding theme. Popular Bridal Makeup Styles in Motihari Traditional Bridal Makeup Traditional bridal makeup is timeless and perfect for a classic wedding. It emphasizes elegant features, with a focus on eyes and lips. This style is ideal for brides who want to embrace cultural traditions while looking stunning. Natural Bridal Makeup For brides who want a soft and subtle look, natural bridal makeup enhances your natural features with light coverage and a fresh, glowing finish. It’s a perfect choice for outdoor weddings or daytime events. Glamorous Bridal Makeup Glamorous bridal makeup is perfect for brides who want to make a bold statement. With dramatic eyes, bold lips, and flawless contouring, this look ensures you stand out and make an impact on your wedding day. Bridal Makeup Process at Ladyfair Consultation: Your bridal makeup journey begins with a consultation where we discuss your preferences, wedding theme, and desired look. Trial Session: A trial makeup session is provided to try different looks and finalize your bridal style. Wedding Day Makeup: On your wedding day, our professional artists arrive at your location in Motihari with all the necessary tools to provide a flawless bridal look. Touch-Up Services: Throughout the wedding day, we offer touch-up services to ensure your makeup remains perfect from start to finish. What Brides in Motihari Are Saying About Ladyfair Sita P., Motihari: "Ladyfair’s makeup team made me feel like a queen on my wedding day! I was so happy with the results and the makeup stayed perfect throughout the day." Priya T., Motihari: "I couldn't have asked for a better bridal makeup experience! The team at Ladyfair understood my vision and gave me exactly what I wanted." Nisha K., Motihari: "Thank you, Ladyfair, for the amazing bridal makeup! My makeup was flawless, and I received so many compliments from my guests!" Bridal Makeup Tips for Brides in Motihari Start Skincare Early: Begin your skincare routine well before your wedding day to achieve smooth, radiant skin. Be Clear About Your Desired Look: Bring reference photos or inspiration to your consultation to help the artist understand your preferred style. Get a Trial: A trial run of your bridal makeup is essential to ensure you love the look before your big day. Keep Calm and Relax: On your wedding day, trust the professionals to handle your makeup while you enjoy the celebration. Other Services Offered by Ladyfair in Motihari Bridal Hairstyling Bridesmaid Makeup Engagement Makeup Pre-Wedding Makeup Photoshoot Makeup FAQs How far in advance should I book my bridal makeup appointment? It’s best to book your bridal makeup at least 2-3 months before your wedding to secure your date. Do you offer makeup trials? Yes, we offer trial sessions so you can finalize the bridal look before the big day. Which makeup brands do you use? We use premium quality makeup brands known for their long-lasting and flawless finish. Can I customize my bridal makeup look? Yes, we will customize your makeup based on your preferences and wedding style. How do I book my bridal makeup session? Call 7004721239 to schedule your appointment with Ladyfair.

Posted By: 26th December 2024
best bridal makeup artist in banjaria
Introduction Make your wedding day extraordinary with perfect bridal makeup in Banjaria! Ladyfair offers expert bridal makeup services that are designed to enhance your natural beauty and create the ideal bridal look. Our team of skilled makeup artists will work with you to achieve the flawless bridal style you’ve always dreamed of. Book your appointment now by calling 7004721239! Why Choose Ladyfair for Bridal Makeup in Banjaria? 1. Skilled and Experienced Makeup Artists Our makeup artists have extensive experience in creating stunning bridal looks. Whether you’re looking for a traditional, contemporary, or glamorous style, we will work with you to bring your vision to life. 2. Convenient At-Home Makeup Services in Banjaria Ladyfair provides at-home bridal makeup services in Banjaria for a comfortable, stress-free experience. We bring professional makeup products and tools to your location, ensuring you look flawless without the hassle. 3. Premium Quality Makeup Products We only use top-notch makeup products to create a flawless look that lasts all day. The makeup is designed to stay in place, so you can enjoy your wedding without worrying about touch-ups. 4. Customized Bridal Looks Every bride is unique, and we take the time to understand your personal preferences. Our makeup artists will tailor a look that complements your features and matches your wedding theme. Popular Bridal Makeup Styles in Banjaria Traditional Bridal Makeup Traditional bridal makeup focuses on elegance and timeless beauty. It’s a perfect choice for those who want a classic bridal look with a touch of refinement. It works wonderfully with traditional wedding attire and jewelry. Natural Bridal Makeup Natural bridal makeup enhances your features without being overpowering. This look focuses on a dewy, fresh-faced appearance and is ideal for brides who prefer a soft, understated makeup style. Glamorous Bridal Makeup For a more dramatic and bold bridal look, glamorous makeup is the way to go. This style includes defined eye makeup, bold lips, and expertly contoured features, ensuring you stand out and shine on your special day. The Bridal Makeup Process at Ladyfair Initial Consultation: The process begins with a consultation where we discuss your desired look, preferences, and wedding details. Trial Session: A trial session is included to help you explore different makeup looks and decide which one suits you best. Wedding Day Makeup: On your wedding day, we arrive at your location in Banjaria, equipped with professional makeup tools and products to give you the perfect bridal look. Touch-Up Services: Throughout the day, we offer touch-up services to make sure your makeup stays flawless during your celebrations. What Brides in Banjaria Are Saying About Ladyfair Anjali T., Banjaria: "I had the most amazing bridal makeup experience with Ladyfair! The team understood exactly what I wanted and made me feel like a princess on my wedding day." Rina D., Banjaria: "Ladyfair’s makeup artists are true professionals! My bridal look was perfect, and I received so many compliments. I highly recommend their services!" Kiran R., Banjaria: "The makeup was flawless, and it lasted all day! I’m so happy with my wedding makeup. Ladyfair made my day even more special!" Bridal Makeup Tips for Brides in Banjaria Prepare Your Skin Early: Start your skincare routine a few months before your wedding to achieve radiant skin. Bring Inspiration: Bring photos or mood boards that capture your desired look, helping us understand your vision. Book a Trial Session: A trial allows you to try different looks and finalize the best one for your big day. Relax and Enjoy: On your wedding day, let the experts handle your makeup while you enjoy the celebration. Other Services Offered by Ladyfair in Banjaria Bridal Hairstyling Bridesmaid Makeup Engagement Makeup Pre-Wedding Makeup Photoshoot Makeup FAQs How far in advance should I book my bridal makeup? It’s best to book your bridal makeup appointment at least 2-3 months before your wedding date. Do you provide a makeup trial? Yes, we offer trial sessions to help you finalize your bridal makeup look before the big day. What brands do you use for bridal makeup? We use high-quality makeup products from trusted brands to ensure that your bridal look stays perfect all day. Can I personalize my bridal makeup look? Absolutely! Our makeup artists will work closely with you to create a customized bridal look that fits your personal style. How do I book my bridal makeup appointment? Call 7004721239 to schedule your bridal makeup consultation.

Posted By: 26th December 2024
best bridal makeup artist in kesaria
Introduction Looking for exquisite bridal makeup in Kesaria? Ladyfair offers professional bridal makeup services to help you look flawless on your big day. Our expert makeup artists are dedicated to enhancing your natural beauty and creating a personalized bridal look just for you. Contact 7004721239 today to schedule your consultation! Why Choose Ladyfair for Bridal Makeup in Kesaria? 1. Skilled and Experienced Makeup Artists Our team of professional makeup artists has years of experience in creating beautiful bridal looks. Whether you want a traditional, modern, or glamorous style, we ensure you look stunning on your wedding day. 2. Convenient At-Home Makeup Services Ladyfair offers convenient at-home bridal makeup services in Kesaria. Our makeup artists bring high-quality products and tools directly to your doorstep, ensuring you have a comfortable and stress-free makeup session. 3. Premium Makeup Products We use only the best makeup products that provide long-lasting, flawless coverage. Our makeup ensures that you look radiant and picture-perfect throughout your wedding day. 4. Custom Bridal Looks Every bride is unique, and we take the time to understand your preferences and style. Our team works with you to create a customized bridal look that suits your personality and wedding theme. Popular Bridal Makeup Styles in Kesaria Traditional Bridal Makeup Traditional bridal makeup is timeless and emphasizes your natural beauty. Perfect for religious or cultural weddings, this style pairs beautifully with traditional attire and a classic bridal look. Natural Bridal Makeup For brides who prefer a soft, elegant look, natural bridal makeup enhances your features without overpowering them. This look gives you a fresh, dewy appearance, perfect for outdoor or daytime weddings. Glamorous Bridal Makeup For a more bold and sophisticated look, glamorous bridal makeup is the way to go. With dramatic eye makeup, contoured cheekbones, and perfect skin, this look will make you feel like a star on your big day. The Bridal Makeup Process at Ladyfair Consultation: We start with a personalized consultation to discuss your vision, makeup preferences, skin type, and wedding theme. Trial Session: A trial makeup session is available to help you test out different looks before your wedding day. Wedding Day Makeup: On your special day, our team arrives in Kesaria to create a flawless bridal look that enhances your natural beauty. Touch-Up Services: We provide touch-up services throughout the day to ensure your makeup stays fresh and flawless for every moment. What Brides in Kesaria Are Saying About Ladyfair Suman R., Kesaria: "Ladyfair did an incredible job on my bridal makeup! The team was professional and made me feel so special on my wedding day. I couldn’t have been happier with the results." Neha K., Kesaria: "My bridal makeup was absolutely flawless, thanks to Ladyfair. They understood exactly what I wanted and made me look stunning. Highly recommend their services!" Rakhi S., Kesaria: "I was so pleased with my wedding makeup from Ladyfair. They made sure everything was perfect, from the makeup to the hairstyle. I felt like a princess on my wedding day!" Bridal Makeup Tips for Brides in Kesaria Start Skincare Early: Begin your skincare routine at least 1-2 months before your wedding to ensure your skin is glowing and healthy. Bring Inspiration: If you have a specific look in mind, bring photos to your consultation to help us understand your vision. Schedule a Trial Session: A trial session will give you the chance to experiment with different looks and finalize your bridal makeup style. Relax and Enjoy: Let the makeup artists handle everything while you relax and enjoy the most special day of your life. Other Services Offered by Ladyfair in Kesaria Bridal Hairstyling Pre-Wedding Makeup Engagement Makeup Bridesmaid Makeup Bridal Photoshoot Makeup FAQs How soon should I book my bridal makeup appointment? It’s best to book at least 2-3 months in advance to ensure availability for your wedding date. Do you provide a trial makeup session? Yes, we offer a trial session to help you finalize your look and ensure you're completely satisfied with the makeup. What makeup brands do you use? We use premium, high-quality makeup products from leading brands that guarantee a flawless finish. Can I customize my bridal makeup? Yes, we work with you to create a customized bridal look that complements your features, dress, and wedding theme. How can I book my bridal makeup session? To book your bridal makeup session, simply call 7004721239.
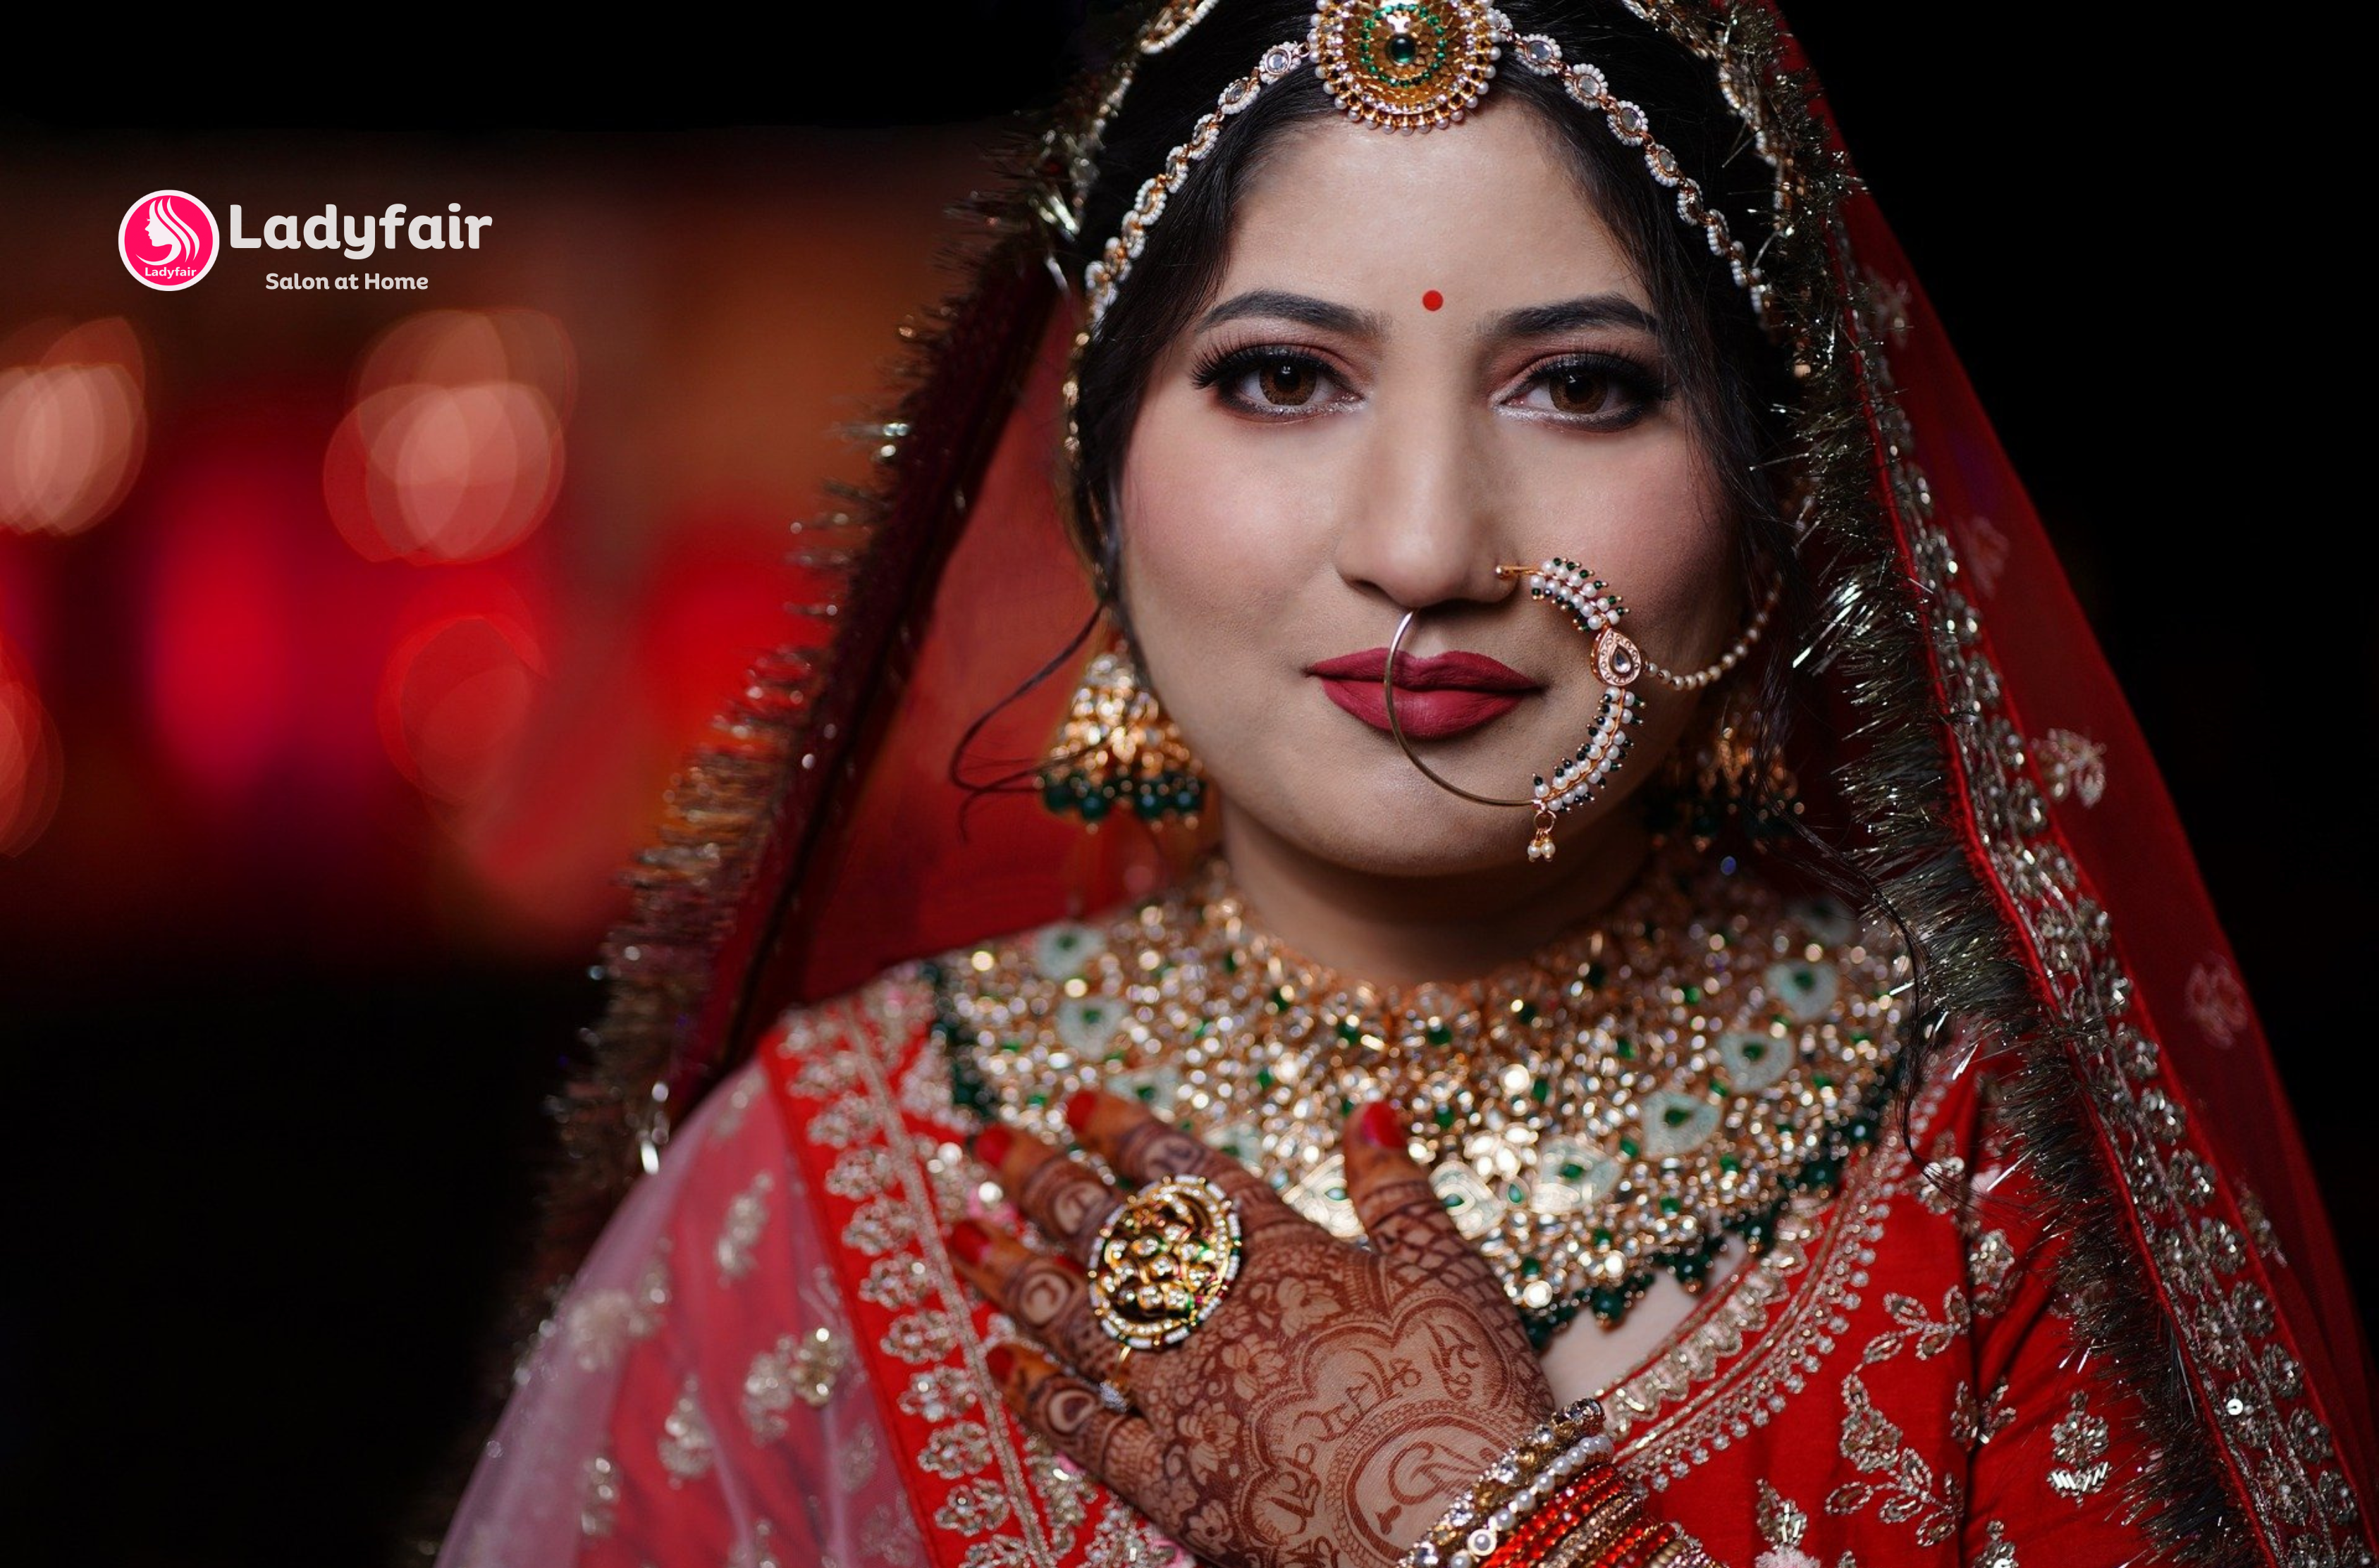
Posted By: 26th December 2024
best bridal makeup artist in chakia
Introduction If you're a bride in Chakia looking for the perfect bridal makeup, look no further than Ladyfair. We offer professional bridal makeup services to ensure you look stunning on your wedding day. Our expert makeup artists will customize your look to suit your style and preferences. Call 7004721239 now to book your appointment! Why Choose Ladyfair for Bridal Makeup in Chakia? 1. Professional and Experienced Makeup Artists Our team of skilled makeup artists has years of experience in creating flawless bridal looks. Whether you're aiming for a traditional, contemporary, or glamorous style, we ensure that you shine on your wedding day. 2. Convenient At-Home Bridal Makeup Services Ladyfair brings bridal makeup to your doorstep in Chakia. Our team arrives with all the necessary tools and high-quality products, allowing you to enjoy a stress-free makeup experience in the comfort of your home. 3. High-Quality Makeup Products We use only the best makeup products that guarantee a long-lasting and flawless finish. Our makeup ensures you look picture-perfect throughout the day. 4. Customized Bridal Looks Every bride is unique, and we understand that. Our team offers personalized consultations to understand your preferences and create a bridal look that aligns with your vision. Popular Bridal Makeup Styles in Chakia Traditional Bridal Makeup This timeless bridal look emphasizes your natural beauty and complements traditional wedding attire, making it perfect for religious or cultural ceremonies. Natural Bridal Makeup For brides who prefer a softer and more subtle appearance, natural bridal makeup enhances your features without being overpowering, giving you a fresh and radiant look. Glamorous Bridal Makeup If you're looking for a bold and dramatic statement, glamorous bridal makeup with defined eyes, contoured cheeks, and flawless skin is the way to go. Perfect for evening or destination weddings. The Bridal Makeup Process at Ladyfair Consultation: We start with a one-on-one consultation to discuss your makeup preferences, skin type, and wedding theme to create a customized look. Trial Session: A trial session is available to help you test out your bridal look before the big day, ensuring that you are 100% happy with your choice. Wedding Day Makeup: On your wedding day, our team arrives in Chakia to create a stunning bridal look, ensuring that everything is perfect for your photos and ceremonies. Touch-Up Services: We offer touch-up services during your wedding day to ensure your makeup stays fresh and flawless throughout the event. What Brides in Chakia Are Saying About Ladyfair Shweta M., Chakia: "I couldn't have asked for a better bridal makeup experience. The team at Ladyfair made me feel so special and my makeup was perfect! Highly recommended!" Rani P., Chakia: "Ladyfair did an amazing job with my wedding makeup. The team understood exactly what I wanted and delivered a flawless look that lasted all day. Thank you for making me feel beautiful!" Priya S., Chakia: "My wedding day makeup was perfect thanks to Ladyfair. The makeup artists were so professional and accommodating. I felt like a princess on my special day." Bridal Makeup Tips for Brides in Chakia Start Early with Skincare: Begin a skincare routine at least a month before your wedding to keep your skin glowing and healthy. Bring Inspiration: If you have a specific look in mind, bring pictures to your consultation to help us understand your vision. Book a Trial Session: A trial session will give you the opportunity to experiment with different looks and ensure your makeup is exactly what you want. Relax and Enjoy: Leave the makeup to us so you can focus on enjoying every moment of your wedding day. Other Services Offered by Ladyfair in Chakia Bridal Hairstyling Bridesmaid Makeup Pre-Wedding Makeup Engagement Makeup Bridal Photoshoot Makeup FAQs How far in advance should I book my bridal makeup? We recommend booking your bridal makeup at least 2-3 months before your wedding to ensure you get your preferred date. Do you provide trial makeup sessions? Yes, we offer trial sessions to ensure your bridal makeup is exactly as you envision it before the big day. What makeup products do you use? We use only premium, high-quality makeup products from renowned brands to ensure a flawless and long-lasting finish. Can I customize my bridal makeup look? Yes, we offer personalized bridal makeup that is tailored to your style and preferences. We'll work with you to create your dream bridal look. How can I book my bridal makeup session? To book your bridal makeup session with Ladyfair, simply call 7004721239.

Posted By: 26th December 2024
best bridal makeup artist in mehsi
Introduction For brides in Mehsi who desire a perfect wedding day look, Ladyfair offers expert bridal makeup services that ensure you look your best on your special day. Our professional makeup artists specialize in creating customized bridal looks to suit your style and personality. Call 7004721239 today to book your appointment! Why Choose Ladyfair for Bridal Makeup in Mehsi? 1. Expert Makeup Artists Our makeup artists are highly skilled and experienced in enhancing your natural beauty. Whether you're aiming for a traditional or contemporary look, we guarantee a flawless finish that makes you shine on your wedding day. 2. At-Home Bridal Makeup Services We bring our bridal makeup services to your doorstep in Mehsi. Our team arrives with all the necessary tools and premium products to create the perfect bridal look right in the comfort of your home. 3. Premium Quality Products At Ladyfair, we use only high-quality makeup products to ensure your makeup stays fresh and flawless throughout your wedding day, giving you a long-lasting and beautiful look. 4. Personalized Bridal Looks Every bride has her unique style, and we understand that. Our team offers personalized consultations to understand your preferences and design a bridal look that aligns with your vision. Popular Bridal Makeup Styles in Mehsi Traditional Bridal Makeup A classic choice for brides who wish to maintain timeless elegance. This style emphasizes the bride’s natural beauty while complementing her traditional attire, making it perfect for religious ceremonies. Natural Bridal Makeup For brides looking for a soft and fresh appearance, natural bridal makeup is the ideal option. It enhances your features subtly while keeping the overall look light and radiant. Glamorous Bridal Makeup If you prefer a dramatic look, our glamorous bridal makeup includes bold eyes, a defined contour, and flawless skin, creating a statement look perfect for evening weddings. The Bridal Makeup Process at Ladyfair Consultation: We start by understanding your makeup preferences, skin type, and wedding style to create a customized look. Trial Makeup: A trial session is available to perfect your bridal look before the wedding day, ensuring you are 100% satisfied with your choice. Wedding Day Makeup: On your wedding day, we arrive at your location in Mehsi to create a stunning bridal look, making sure everything is picture-perfect. Touch-Up Services: We offer touch-up services during the wedding day to keep your makeup fresh and flawless. What Brides in Mehsi Are Saying About Ladyfair Nisha R., Mehsi: "My bridal makeup was flawless thanks to Ladyfair! The team listened to my preferences and created a stunning look that lasted the entire day. I couldn’t have asked for better service!" Anjali S., Mehsi: "Ladyfair made me feel like a queen on my wedding day. The makeup was perfect, and it stayed fresh from start to finish. I highly recommend their services!" Rita K., Mehsi: "Thanks to Ladyfair, my wedding makeup was exactly how I envisioned it. The makeup was applied so beautifully, and I received so many compliments throughout the day." Bridal Makeup Tips for Brides in Mehsi Prepare Your Skin Early: Start a skincare routine at least a month before the wedding to ensure your skin is glowing and healthy. Bring Inspiration: If you have a particular bridal look in mind, bring pictures to help our makeup artists understand your preferences. Book a Makeup Trial: Schedule a trial session to ensure your makeup style is exactly how you want it on your wedding day. Relax and Enjoy: Let the professionals handle your beauty needs so you can enjoy your special day stress-free. Other Services Offered by Ladyfair in Mehsi Bridal Hairstyling Bridesmaid Makeup Pre-Wedding Makeup Engagement Makeup Bridal Photoshoot Makeup FAQs How far in advance should I book my bridal makeup session? It’s recommended to book at least 2-3 months before your wedding to secure your preferred date. Do you offer trial makeup sessions? Yes, we provide trial sessions to ensure that your bridal look is exactly what you want before your big day. What makeup products do you use? We use only high-quality makeup products from top brands, ensuring a long-lasting and flawless finish. Can I customize my bridal makeup look? Absolutely! We work with you to create a personalized bridal look that suits your style, preferences, and wedding theme. How do I book my bridal makeup session? Call 7004721239 today to book your bridal makeup session with Ladyfair in Mehsi.

Posted By: 26th December 2024
best bridal makeup artist in paharpur
Introduction For brides in Paharpur seeking a flawless bridal look, trust Ladyfair's expert makeup artists to make your wedding day truly unforgettable. Our professional bridal makeup services are designed to enhance your beauty and ensure you look stunning from the moment you walk down the aisle. To book your session, call 7004721239 now. Why Choose Ladyfair for Bridal Makeup in Paharpur? 1. Experienced and Skilled Makeup Artists Ladyfair's makeup artists are experts in creating stunning bridal looks. Whether you prefer a traditional, natural, or glamorous look, our team will ensure that your makeup enhances your natural beauty and matches your wedding theme. 2. At-Home Bridal Makeup Services We bring our expert bridal makeup services to your doorstep in Paharpur. Our team arrives fully prepared with the best makeup products and tools, ready to create your perfect bridal look in the comfort of your home. 3. High-Quality Makeup Products We use only premium products from top beauty brands to ensure that your makeup lasts all day without compromising on quality. Our makeup is designed to look fresh and flawless throughout your wedding events. 4. Custom Bridal Makeup Every bride is unique, and so is every bridal look. Our team offers personalized consultations to create a look that matches your preferences, wedding theme, and personality. Whether you want something bold or subtle, we have the perfect style for you. Popular Bridal Makeup Styles in Paharpur Traditional Bridal Makeup This timeless style is perfect for brides who want to enhance their features with an elegant and graceful touch. It complements traditional bridal attire and ensures you look every bit the queen on your special day. Natural Bridal Makeup If you're looking for a soft, fresh look, natural bridal makeup is the way to go. It focuses on highlighting your features in a subtle way, leaving you with a glowing and radiant appearance that is perfect for daytime or outdoor weddings. Glamorous Bridal Makeup For brides who love a bit of drama and glam, this makeup style includes bold eye makeup, dramatic contouring, and a flawless finish. It’s ideal for evening weddings and those who want to make a statement on their big day. Our Bridal Makeup Process at Ladyfair Consultation: We begin by understanding your style and preferences to create a customized bridal look. Trial Makeup: A trial session is available to perfect your bridal look before the big day, ensuring you are happy with the style and feel. Wedding Day Makeup: On your wedding day, we arrive at your location in Paharpur and create the perfect bridal look, making sure everything is flawless and ready in time for your ceremony. Touch-Up Services: We offer touch-up services throughout the day to ensure your makeup stays fresh and radiant for every moment of your wedding. What Brides in Paharpur Are Saying About Ladyfair Rita M., Paharpur: "Ladyfair made my wedding day truly magical! The makeup was exactly what I wanted, and it stayed perfect throughout the entire day. I highly recommend their services!" Anjali T., Paharpur: "Thank you, Ladyfair, for the beautiful makeup on my wedding day! The team was so professional and made me feel like a queen. The makeup was flawless, and I got so many compliments!" Nisha S., Paharpur: "I couldn’t be happier with my bridal makeup from Ladyfair! They took the time to understand what I wanted, and the result was stunning. My makeup was on point, and it lasted all day!" Bridal Makeup Tips for Brides in Paharpur Start Skincare Early: Begin a skincare routine well before the wedding to ensure a healthy, glowing complexion. Bring Inspiration: Don’t hesitate to bring pictures of makeup looks you love to your consultation. Plan a Makeup Trial: Ensure that your bridal look is perfect by scheduling a trial makeup session before the wedding. Relax and Enjoy: Let our team handle all your beauty needs so you can focus on enjoying your big day. Other Services Offered by Ladyfair in Paharpur Bridal Hairstyling Bridesmaid Makeup Pre-Wedding Makeup Engagement Makeup Bridal Photoshoot Makeup FAQs When should I book my bridal makeup session? It’s best to book your session at least 2-3 months in advance to ensure availability for your wedding day. Do you offer trial makeup sessions? Yes, we offer a trial session to perfect your bridal look before the big day. What makeup products do you use? We use only high-quality makeup products from top brands to ensure a flawless look that lasts all day. Can I customize my bridal makeup look? Yes, we offer personalized consultations to design a bridal look that reflects your preferences and wedding style. How can I book my bridal makeup session? Call 7004721239 today to schedule your bridal makeup session with Ladyfair in Paharpur.

Posted By: 26th December 2024
best bridal makeup artist in areraj
Introduction For a flawless bridal look in Areraj, trust Ladyfair's expert makeup artists to make your wedding day truly unforgettable. Our professional bridal makeup services are designed to enhance your beauty and ensure you look stunning from the moment you walk down the aisle. To book your session, call 7004721239 now. Why Choose Ladyfair for Bridal Makeup in Areraj? 1. Experienced and Skilled Makeup Artists Ladyfair's makeup artists are experts in creating stunning bridal looks. Whether you prefer a traditional, natural, or glamorous look, our team will ensure that your makeup enhances your natural beauty and matches your wedding theme. 2. At-Home Bridal Makeup Services We bring our expert bridal makeup services to your doorstep in Areraj. Our team arrives fully prepared with the best makeup products and tools, ready to create your perfect bridal look in the comfort of your home. 3. High-Quality Makeup Products We use only premium products from top beauty brands to ensure that your makeup lasts all day without compromising on quality. Our makeup is designed to look fresh and flawless throughout your wedding events. 4. Custom Bridal Makeup Every bride is unique, and so is every bridal look. Our team offers personalized consultations to create a look that matches your preferences, wedding theme, and personality. Whether you want something bold or subtle, we have the perfect style for you. Popular Bridal Makeup Styles in Areraj Traditional Bridal Makeup This timeless style is perfect for brides who want to enhance their features with an elegant and graceful touch. It complements traditional bridal attire and ensures you look every bit the queen on your special day. Natural Bridal Makeup If you're looking for a soft, fresh look, natural bridal makeup is the way to go. It focuses on highlighting your features in a subtle way, leaving you with a glowing and radiant appearance that is perfect for daytime or outdoor weddings. Glamorous Bridal Makeup For brides who love a bit of drama and glam, this makeup style includes bold eye makeup, dramatic contouring, and a flawless finish. It’s ideal for evening weddings and those who want to make a statement on their big day. Our Bridal Makeup Process at Ladyfair Consultation: We begin by understanding your style and preferences to create a customized bridal look. Trial Makeup: A trial session is available to perfect your bridal look before the big day, ensuring you are happy with the style and feel. Wedding Day Makeup: On your wedding day, we arrive at your location in Areraj and create the perfect bridal look, making sure everything is flawless and ready in time for your ceremony. Touch-Up Services: We offer touch-up services throughout the day to ensure your makeup stays fresh and radiant for every moment of your wedding. What Brides in Areraj Are Saying About Ladyfair Suman K., Areraj: "Ladyfair made me feel like a princess on my wedding day. The makeup was perfect, and the team was so professional. I couldn’t have asked for a better experience!" Pooja S., Areraj: "I’m so glad I chose Ladyfair for my bridal makeup. They understood exactly what I wanted and delivered a stunning look. My makeup stayed flawless all day!" Nidhi D., Areraj: "Thank you, Ladyfair, for making me feel beautiful on my wedding day. The makeup was flawless, and I received so many compliments!" Bridal Makeup Tips for Brides in Areraj Start Skincare Early: Begin a skincare routine well before the wedding to ensure a healthy, glowing complexion. Bring Inspiration: Don’t hesitate to bring pictures of makeup looks you love to your consultation. Plan a Makeup Trial: Ensure that your bridal look is perfect by scheduling a trial makeup session before the wedding. Relax and Enjoy: Let our team handle all your beauty needs so you can focus on enjoying your big day. Other Services Offered by Ladyfair in Areraj Bridal Hairstyling Bridesmaid Makeup Pre-Wedding Makeup Engagement Makeup Bridal Photoshoot Makeup FAQs When should I book my bridal makeup session? It’s best to book your session at least 2-3 months in advance to ensure availability for your wedding day. Do you offer trial makeup sessions? Yes, we offer a trial session to perfect your bridal look before the big day. What makeup products do you use? We use only high-quality makeup products from top brands to ensure a flawless look that lasts all day. Can I customize my bridal makeup look? Yes, we offer personalized consultations to design a bridal look that reflects your preferences and wedding style. How can I book my bridal makeup session? Call 7004721239 today to schedule your bridal makeup session with Ladyfair in Areraj.

Posted By: 26th December 2024
best bridal makeup artist in harsidhi
Introduction Make your special day unforgettable with exquisite bridal makeup services from Ladyfair in Harsidhi. Our team of expert makeup artists ensures that every bride looks stunning and feels confident, with a personalized look that complements their beauty and wedding theme. For bookings and inquiries, call 7004721239 to book your bridal makeup session today. Why Ladyfair is the Best Choice for Bridal Makeup in Harsidhi 1. Expert Makeup Artists Ladyfair’s team comprises experienced and highly skilled makeup artists who specialize in bridal makeup. Our professionals are trained to create flawless looks that suit your style, ensuring you look radiant on your big day. 2. Convenient At-Home Service Our bridal makeup services are available at your doorstep in Harsidhi. We come fully equipped with all the necessary tools and high-quality products to create a beautiful bridal look in the comfort of your home. 3. Premium Products for Flawless Beauty We use top-tier makeup products from trusted brands to ensure your bridal look is long-lasting and flawless. Our products are designed to give you a glowing and radiant finish that holds up through the wedding day’s events. 4. Personalized Bridal Looks We understand that every bride is unique, which is why we offer a customized makeup experience. Whether you want a traditional look or a glamorous, modern style, our makeup artists will work with you to bring your vision to life. Popular Bridal Makeup Styles in Harsidhi Traditional Bridal Makeup This classic makeup style is perfect for brides who want to enhance their natural features with elegance. It pairs beautifully with traditional bridal attire, giving you a regal look with soft yet impactful makeup. Natural Bridal Makeup Ideal for brides who prefer a soft and subtle look, natural bridal makeup enhances your features with a fresh and glowing finish. This style is perfect for daytime weddings or brides who want a more understated yet radiant appearance. Glamorous Bridal Makeup If you’re looking to make a bold statement, glamorous bridal makeup is the way to go. It includes bold eye makeup, dramatic contouring, and a stunning finish that lasts throughout your special day. Our Bridal Makeup Process at Ladyfair Consultation: We begin with a consultation to understand your style, wedding theme, and makeup preferences. This allows us to design a look that’s perfect for you. Trial Session: We offer a trial session to ensure you’re happy with your bridal look before the big day. During this session, we try out different styles and make adjustments as needed. Wedding Day Makeup: On your wedding day, we arrive at your home in Harsidhi to create the perfect bridal look. Our makeup artists work efficiently to ensure that you are ready on time and looking flawless. Touch-Up Services: We offer touch-up services throughout the day to ensure that your makeup stays fresh and beautiful, no matter what the day brings. What Brides in Harsidhi Are Saying About Ladyfair Meera K., Harsidhi: "Ladyfair made my wedding day even more special. The makeup was flawless, and the team was so professional and accommodating. I felt absolutely beautiful!" Rina S., Harsidhi: "Thank you, Ladyfair, for making me feel like a princess on my big day! The makeup was exactly what I wanted, and it stayed perfect throughout the day." Neha D., Harsidhi: "I’m so glad I chose Ladyfair for my bridal makeup. The team took the time to understand my style and gave me the most amazing look. I couldn’t have asked for more!" Bridal Makeup Tips for Brides in Harsidhi Hydrate Your Skin: Keep your skin hydrated in the weeks leading up to the wedding to ensure a smooth and radiant complexion. Bring Inspiration: Bring photos or ideas of bridal makeup looks you love to your consultation so we can create something just right for you. Plan a Trial: A trial session will help ensure that we achieve your dream look, so take time to schedule it before your wedding day. Relax: Let our professionals handle everything, so you can enjoy your wedding day with confidence and ease. Other Services Offered by Ladyfair in Harsidhi Bridal Hairstyling Bridesmaid Makeup Engagement Makeup Pre-Wedding Makeup Bridal Photoshoot Makeup FAQs How early should I book my bridal makeup session? We recommend booking your bridal makeup session 2-3 months in advance to ensure availability on your wedding day. Do you offer a trial makeup session? Yes, we provide a trial session where we work together to perfect your bridal look before the wedding day. What products do you use for bridal makeup? We use high-quality products from well-known and trusted brands to ensure that your makeup lasts all day and looks flawless. Can I customize my bridal makeup look? Absolutely! We offer personalized consultations to help you design a look that matches your vision and wedding style. How can I book my bridal makeup session? Call 7004721239 to schedule your bridal makeup session with Ladyfair in Harsidhi.

Posted By: 26th December 2024
best bridal makeup artist in sangrampur
Introduction Make your wedding day even more special with expert bridal makeup from Ladyfair in Sangrampur. Our talented team of makeup artists specializes in creating flawless bridal looks that highlight your natural beauty and make you feel like a queen. Call 7004721239 to schedule a consultation and experience the best bridal makeup service in Sangrampur. Why Choose Ladyfair for Bridal Makeup in Sangrampur? 1. Skilled and Experienced Makeup Artists Ladyfair’s team of professional makeup artists brings years of experience in bridal makeup. They are trained to create stunning bridal looks, ensuring you look picture-perfect on your big day. 2. At-Home Service for Your Convenience Our bridal makeup services are available at your doorstep in Sangrampur. We bring all the tools and products needed to create the perfect look, allowing you to relax and get ready in the comfort of your home. 3. High-Quality Products We use only top-rated makeup products from renowned brands that guarantee a flawless finish and long-lasting wear. Our products are carefully selected to give you a radiant and flawless bridal look. 4. Customized Bridal Look At Ladyfair, we understand that every bride is unique. We work closely with you to create a personalized makeup look that reflects your style, wedding theme, and personality. Popular Bridal Makeup Styles in Sangrampur Traditional Bridal Makeup If you're going for a classic, timeless look, traditional bridal makeup is the perfect choice. This style accentuates your natural features and pairs beautifully with traditional bridal attire, giving you a regal and elegant appearance. Natural Bridal Makeup For a more understated and soft look, natural bridal makeup enhances your beauty with a fresh and glowing finish. It’s perfect for brides who want a subtle yet stunning appearance on their special day. Glamorous Bridal Makeup For brides who want to make a bold and glamorous statement, this style involves dramatic eye makeup, contouring, and bold lips, ensuring you look unforgettable. It’s ideal for destination weddings, evening ceremonies, or lavish celebrations. Our Bridal Makeup Process at Ladyfair Consultation: We begin with an in-depth consultation to understand your bridal vision, preferences, and the makeup style you desire for your wedding. Trial Session: We offer a trial makeup session to experiment with different looks, ensuring you’re happy with the final choice before the big day. Wedding Day Makeup: On your wedding day, our makeup artists arrive at your home in Sangrampur to create a flawless look that enhances your natural beauty and lasts all day. Touch-Up Services: We provide touch-up services throughout the day to ensure that your makeup stays fresh and perfect, no matter the weather or time. What Brides in Sangrampur Are Saying About Ladyfair Aarti K., Sangrampur: "I couldn’t have asked for a better bridal makeup experience. The Ladyfair team made me feel so beautiful and confident on my wedding day. The makeup was flawless, and it lasted all day!" Suman R., Sangrampur: "The makeup was perfect and exactly what I wanted. The Ladyfair team understood my style and executed it beautifully. I felt like a queen on my wedding day!" Priyanka D., Sangrampur: "Ladyfair’s bridal makeup services are exceptional. I loved my look, and I received so many compliments. Thank you for making my special day even more memorable!" Tips for Brides in Sangrampur to Prepare for Their Makeup Appointment Drink Plenty of Water: Hydrated skin looks fresh and radiant. Make sure to drink plenty of water leading up to your wedding day. Share Your Vision: Bring inspiration photos or ideas to your consultation so we can create a look that suits your personality and wedding style. Skin Care: Follow a skincare routine to keep your skin healthy and glowing for the best makeup application. Relax: Trust the professionals at Ladyfair to make you look and feel your best. Take deep breaths and enjoy the process! Other Services Offered by Ladyfair in Sangrampur Bridal Hairstyling Bridesmaid Makeup Engagement Makeup Pre-Wedding Makeup Bridal Photoshoot Makeup FAQs When should I book my bridal makeup appointment? It’s recommended to book your bridal makeup at least 2-3 months in advance to secure your preferred date. Do you offer a trial session for bridal makeup? Yes, we offer a trial session to ensure that your bridal look is exactly how you envision it before the wedding day. What products do you use for bridal makeup? We use premium makeup products from well-known, trusted brands to guarantee that your makeup looks beautiful and lasts throughout the day. Can I customize my bridal makeup? Yes, we tailor your makeup to your preferences, ensuring it reflects your unique style and wedding theme. How can I book my bridal makeup appointment? Call 7004721239 or visit our website to book your bridal makeup appointment in Sangrampur.

Posted By: 26th December 2024
best bridal makeup artist in madhuban
Introduction Make your wedding day unforgettable with stunning bridal makeup from Ladyfair in Madhuban. Our expert team of makeup artists will help you achieve the perfect bridal look that complements your beauty and the theme of your wedding. Call 7004721239 today to book your consultation and experience the elegance of Ladyfair's bridal makeup services. Why Choose Ladyfair for Bridal Makeup in Madhuban? 1. Expert Makeup Artists At Ladyfair, our skilled makeup artists specialize in bridal makeup and have years of experience in creating flawless looks. They work with you to understand your style and preferences, ensuring you feel confident and beautiful on your special day. 2. Convenient At-Home Service We bring the salon to your doorstep with our at-home bridal makeup services in Madhuban. Relax in the comfort of your home while we make sure you look stunning for your big day. 3. Premium Makeup Products We use high-quality makeup products from trusted brands to ensure that your bridal look lasts throughout the day. Our carefully selected products are designed to enhance your features and give you a radiant, flawless finish. 4. Customized Bridal Look Every bride is unique, and we believe your makeup should reflect that. Our team takes the time to understand your needs and preferences, creating a personalized look that matches your wedding vision. Popular Bridal Makeup Styles in Madhuban Traditional Bridal Makeup Traditional bridal makeup is a classic and timeless choice for brides who want to enhance their natural beauty. This style is perfect for complementing a traditional wedding attire and ensuring that you look elegant on your special day. Natural Bridal Makeup For a more subtle and understated look, natural bridal makeup enhances your beauty without being overly dramatic. It’s ideal for brides who want a fresh and radiant appearance for their wedding. Glamorous Bridal Makeup If you want to make a bold statement, glamorous bridal makeup is the way to go. This look features dramatic eye makeup, bold lips, and contouring, ensuring you stand out and look fabulous. Our Bridal Makeup Process at Ladyfair Consultation: We begin with an initial consultation to understand your bridal look preferences, wedding theme, and the style of makeup you envision. Trial Session: Before your wedding day, we offer a trial session to perfect your look and ensure you're happy with your chosen style. Wedding Day Makeup: On your wedding day, our expert makeup artists arrive at your location in Madhuban to create a flawless look that lasts throughout the ceremony and reception. Touch-Up Services: We offer touch-up services to ensure that your makeup stays fresh and perfect throughout the entire wedding day. What Brides in Madhuban Are Saying About Ladyfair Anjali R., Madhuban: "Ladyfair did an amazing job with my bridal makeup. I felt like a queen on my wedding day! The makeup was flawless and lasted all day long. Highly recommend!" Priya S., Madhuban: "The team at Ladyfair made me feel so special. They listened to my preferences and created a look that was perfect for my wedding day. I'm so happy with how everything turned out!" Neha D., Madhuban: "I had such a wonderful experience with Ladyfair. The makeup was natural yet stunning, and I got so many compliments from my guests. Thank you for making me feel beautiful!" Tips for Brides in Madhuban to Prepare for Their Makeup Appointment Stay Hydrated: Drink plenty of water leading up to your wedding to ensure your skin stays hydrated and glowy. Share Your Vision: Bring pictures or ideas of makeup styles you like to your consultation so we can create a look that fits your personality and wedding theme. Follow a Skincare Routine: A good skincare routine before your wedding will ensure your skin is smooth and ready for makeup. Relax: Trust the professionals at Ladyfair to make you look stunning. Relax and enjoy the experience! Other Services Offered by Ladyfair in Madhuban Bridal Hairstyling Bridesmaid Makeup Engagement Makeup Pre-Wedding Makeup Bridal Photoshoot Makeup FAQs When should I book my bridal makeup appointment? It’s best to book your bridal makeup at least 2-3 months before your wedding day to ensure availability. Do you offer a trial session for bridal makeup? Yes, we offer a trial session where you can try different looks to find the one that suits you best. What makeup products do you use? We use premium makeup products from trusted brands to ensure your bridal makeup is long-lasting and flawless. Can I customize my bridal makeup? Absolutely! We work with you to create a personalized look that aligns with your vision for your wedding. How can I book my bridal makeup appointment? You can call 7004721239 or visit our website to schedule your bridal makeup appointment in Madhuban.

Posted By: 26th December 2024
best bridal makeup artist in tetaria
Introduction Make your wedding day truly special with stunning bridal makeup from Ladyfair in Tetaria. Our expert team of makeup artists is dedicated to creating the perfect bridal look, making you feel like a queen on your big day. Call 7004721239 to book your consultation and experience the magic of Ladyfair's bridal makeup services. Why Choose Ladyfair for Bridal Makeup in Tetaria? 1. Skilled Makeup Artists At Ladyfair, we have a team of skilled makeup artists who specialize in bridal makeup. With years of experience, they work with you to create a look that enhances your natural beauty and fits your wedding theme perfectly. 2. Convenience of Home-Service We offer at-home bridal makeup services in Tetaria, allowing you to relax and enjoy the comfort of your own space while we work our magic to make you look flawless for your big day. 3. Premium Makeup Products We use only the best makeup products from trusted brands to ensure that your makeup is long-lasting and looks stunning throughout the day. Our high-quality products are chosen for their ability to provide a flawless finish. 4. Customized Bridal Look Every bride is unique, and your makeup should reflect that. At Ladyfair, we take the time to understand your preferences and create a personalized look that aligns with your vision for your wedding day. Popular Bridal Makeup Styles in Tetaria Traditional Bridal Makeup For brides who love a classic look, traditional bridal makeup is the ideal choice. This style enhances your natural features and complements traditional wedding attire, ensuring you look stunning and elegant. Natural Bridal Makeup If you prefer a more subtle look, natural bridal makeup is perfect for you. This style enhances your beauty without being too heavy, giving you a radiant and fresh appearance on your wedding day. Glamorous Bridal Makeup For brides who want to make a bold statement, glamorous bridal makeup is the way to go. With bold eye makeup, sculpted cheeks, and a striking lip color, this style is perfect for a modern, fashion-forward bride. Our Bridal Makeup Process at Ladyfair Initial Consultation: We begin with a consultation to understand your wedding theme, personal preferences, and makeup style. We take the time to listen to your vision. Trial Session: Before your big day, we offer a trial session to perfect your look and ensure you’re happy with the style we’ve created. Wedding Day Makeup: On your wedding day, our expert makeup artists will come to your location in Tetaria and create a flawless look that lasts throughout your ceremony and reception. Touch-Up Services: We offer touch-up services to ensure your makeup stays fresh and perfect for all the festivities. What Brides in Tetaria Are Saying About Ladyfair Rashmi K., Tetaria: "Ladyfair's bridal makeup services were amazing! The team was so professional and the makeup stayed perfect all day. I received so many compliments!" Nidhi R., Tetaria: "My bridal makeup was flawless thanks to Ladyfair. They made me look like a princess on my special day. I highly recommend their services!" Pooja S., Tetaria: "I had a wonderful experience with Ladyfair. They listened to all my needs and created a look that was exactly what I wanted. I felt beautiful and confident!" Tips for Brides in Tetaria to Prepare for Their Makeup Appointment Stay Hydrated: Drink plenty of water before your wedding to keep your skin hydrated and glowing. Provide Inspiration: Share your preferred makeup styles with us ahead of time so we can create the perfect look for you. Maintain a Skincare Routine: Consistent skincare helps prepare your skin for makeup and ensures a smooth finish on your big day. Relax: Trust the professionals at Ladyfair to make you feel beautiful and confident on your wedding day. Other Services Offered by Ladyfair in Tetaria Bridal Hairstyling Bridesmaid Makeup Engagement Makeup Pre-Wedding Makeup Bridal Photoshoot Makeup FAQs When should I book my bridal makeup appointment? We recommend booking your bridal makeup at least 2-3 months before your wedding to secure your preferred date. Do you offer a trial session for bridal makeup? Yes, we offer a trial session so you can finalize your look before your wedding day. What makeup products do you use? We use only premium, long-lasting makeup products from top brands to ensure a flawless finish. Can I customize my bridal makeup? Absolutely! We work with you to create a personalized bridal look that suits your preferences. How can I book my bridal makeup appointment? You can call 7004721239 or visit our website to book your appointment for bridal makeup in Tetaria.

Posted By: 26th December 2024
best bridal makeup artist in patahi
Introduction Make your wedding day unforgettable with exceptional bridal makeup by Ladyfair in Patahi. Our team of professional makeup artists is dedicated to creating a flawless look that will make you feel confident and beautiful. Call 7004721239 to book your consultation today! Why Choose Ladyfair for Bridal Makeup in Patahi? 1. Expert Makeup Artists At Ladyfair, we take pride in our highly skilled makeup artists who specialize in bridal makeup. With years of experience, we work closely with each bride to create a look that enhances their natural beauty and fits their wedding style. 2. Home-Service for Convenience Our bridal makeup services are available at the comfort of your home in Patahi. Enjoy a stress-free experience and let us transform you for your big day in a familiar and comfortable environment. 3. Premium Makeup Products We use only top-quality makeup products to ensure a long-lasting, flawless look that will stay perfect throughout the wedding day. Our products are chosen for their durability and ability to make you glow. 4. Customized Bridal Look Every bride is unique, and we believe that your makeup should reflect your individuality. We work with you to create a personalized look that aligns with your wedding theme and personal preferences. Popular Bridal Makeup Styles in Patahi Traditional Bridal Makeup For brides who prefer a classic and timeless look, traditional bridal makeup is the perfect choice. We create a bold, elegant style that complements traditional bridal attire and enhances your natural features. Natural Bridal Makeup Natural bridal makeup is ideal for brides who want to look radiant and fresh without heavy makeup. This style highlights your natural beauty with subtle touches, ensuring you look like the best version of yourself. Glamorous Bridal Makeup If you're looking to stand out on your wedding day, glamorous bridal makeup is for you. This style features bold eye makeup, flawless skin, and a striking lip color for a dramatic, attention-grabbing look. Our Bridal Makeup Process at Ladyfair Initial Consultation: We start with a consultation to discuss your vision for your bridal look. We listen to your preferences, wedding theme, and style to create the perfect plan for your makeup. Trial Session: Before the big day, we schedule a trial session to fine-tune your makeup look and make sure you're fully satisfied with the results. Wedding Day Makeup: On your wedding day, our team will arrive at your location in Patahi to perform your makeup, ensuring you look stunning for the ceremony and celebrations. Touch-Up Services: We offer touch-up services throughout the day to keep your makeup looking fresh and perfect as you celebrate with your loved ones. What Brides in Patahi Are Saying About Ladyfair Neelam S., Patahi: "I am so glad I chose Ladyfair for my bridal makeup! The team made me feel so beautiful, and my makeup was perfect all day long. I got so many compliments!" Rita D., Patahi: "Ladyfair did a fantastic job with my bridal makeup. They listened to all my preferences and delivered a stunning look that I absolutely loved." Komal P., Patahi: "The makeup was flawless and stayed intact throughout the day. The artist was so professional, and I felt like a queen on my special day. Highly recommend Ladyfair!" Tips for Brides in Patahi to Prepare for Their Makeup Appointment Hydrate Your Skin: Drink plenty of water in the weeks leading up to your wedding to keep your skin hydrated and glowing. Bring Inspiration: Share photos of makeup styles you like to give us an idea of your vision for your bridal look. Follow a Skincare Routine: Stick to a skincare routine to ensure your skin is smooth and ready for makeup on your wedding day. Relax and Enjoy: Trust the experts at Ladyfair to create the perfect bridal look while you relax and enjoy your special day. Other Services Offered by Ladyfair in Patahi Bridal Hairstyling Bridesmaid Makeup Engagement Makeup Pre-Wedding Makeup Bridal Photoshoot Makeup FAQs When should I book my bridal makeup appointment? We recommend booking your bridal makeup at least 2-3 months in advance to ensure availability on your wedding day. Can I do a trial session before my wedding? Yes, we offer trial sessions to help you finalize the bridal look you're envisioning. What makeup brands do you use? We use only high-quality makeup products from trusted brands to ensure a flawless finish. Can I customize my bridal makeup? Absolutely! Your bridal makeup will be customized according to your style, preferences, and wedding theme. How can I book my bridal makeup appointment? You can call 7004721239 or visit our website to schedule your bridal makeup session with Ladyfair.

Posted By: 26th December 2024
best bridal makeup artist in phenhara
Introduction Transform your wedding day into a fairytale with expert bridal makeup by Ladyfair in Phenhara. Our professional makeup artists are here to ensure you look stunning and radiant on your special day. Call 7004721239 to book your consultation now! Why Choose Ladyfair for Bridal Makeup in Phenhara? 1. Experienced and Skilled Makeup Artists At Ladyfair, our team of makeup artists brings years of experience in perfecting bridal makeup looks. We ensure every bride gets a personalized look that enhances her features and complements her wedding style. 2. At-Home Makeup Services We offer the convenience of bringing our professional makeup services directly to your home in Phenhara. Enjoy a hassle-free experience and let our makeup artists work their magic in the comfort of your own space. 3. High-Quality Makeup Products We only use premium, long-lasting makeup products that will keep you looking flawless throughout your wedding day. Our makeup is designed to withstand the long hours of your celebration while keeping you comfortable and beautiful. 4. Personalized Bridal Look Every bride is unique, and so is her bridal makeup. We work closely with you to create a customized makeup look that aligns with your personal style, ensuring that you feel beautiful, confident, and ready to shine. Popular Bridal Makeup Styles in Phenhara Traditional Bridal Makeup For a timeless, classic look, traditional bridal makeup is a perfect choice. Bold eyes, vibrant lips, and intricate details will give you a sophisticated and elegant appearance. Natural Bridal Makeup Natural bridal makeup is perfect for brides who want a fresh, glowing look. It enhances your features subtly and leaves you looking radiant without a heavy makeup application. Glamorous Bridal Makeup If you're aiming for a more striking, bold look, glamorous bridal makeup will make you stand out. From dramatic eye makeup to sculpted cheekbones, this style is perfect for brides who want to make a statement. Our Bridal Makeup Process at Ladyfair Consultation: Our process begins with a consultation where we discuss your wedding theme, makeup preferences, and vision for the look. Trial Session: A trial session before your wedding day helps us perfect the bridal look and ensure you're completely satisfied. On Wedding Day: On your wedding day, our team will arrive at your location in Phenhara, ready to create the perfect bridal makeup that lasts throughout the ceremony and celebration. Touch-Ups: We offer touch-up services to ensure your makeup stays fresh and flawless during your wedding day activities. What Brides in Phenhara Are Saying About Ladyfair Nisha D., Phenhara: "I couldn't have asked for a better bridal makeup experience. The team at Ladyfair made me feel like a queen, and my makeup was flawless all day!" Kajal R., Phenhara: "Ladyfair did an amazing job on my bridal makeup. They really took the time to understand my style and created the perfect look for my wedding. I received so many compliments!" Suman P., Phenhara: "The makeup was stunning and lasted all day. The artist was so professional and attentive to every detail. I felt beautiful and confident on my special day!" Tips for Brides in Phenhara to Prepare for Their Makeup Appointment Stay Hydrated: Drink plenty of water in the days leading up to your wedding to keep your skin hydrated and glowing. Share Your Vision: Bring pictures of makeup styles you like so we can create a personalized look that fits your style. Skincare Routine: Follow a skincare routine before your wedding to ensure smooth, glowing skin for makeup application. Relax and Enjoy: Trust in our professionals to bring your bridal vision to life and enjoy the experience of getting ready for your big day. Other Services Offered by Ladyfair in Phenhara Bridal Hairstyling Bridesmaid Makeup Engagement Makeup Pre-Wedding Makeup Bridal Photoshoot Makeup FAQs When should I book my bridal makeup? We recommend booking your bridal makeup at least 2-3 months in advance to ensure availability on your wedding day. Can I try my bridal makeup before the wedding? Yes, we offer trial sessions to help you finalize your bridal look ahead of your wedding day. What makeup brands do you use? We use premium, long-lasting makeup products from trusted brands to ensure you look perfect all day. Can I customize my bridal look? Absolutely! We tailor each bridal makeup look to match your personal preferences and wedding theme. How do I book my bridal makeup appointment? You can call 7004721239 or visit our website to book your bridal makeup session with Ladyfair.

Posted By: 26th December 2024
best bridal makeup artist in pakridayal
Introduction Make your wedding day unforgettable with stunning bridal makeup from Ladyfair in Pakridayal. Our expert makeup artists specialize in creating custom bridal looks that will make you feel radiant and confident throughout your big day. Call 7004721239 today to book your consultation! Why Ladyfair is the Best Choice for Bridal Makeup in Pakridayal? 1. Skilled and Experienced Makeup Artists Our team at Ladyfair includes highly skilled makeup artists with years of experience in bridal makeup. We tailor each look to match your personal style and the theme of your wedding, ensuring you feel your most beautiful on your special day. 2. Convenient At-Home Services We understand how busy wedding days can be. To make things easier for you, we offer professional bridal makeup services right at your doorstep in Pakridayal. No need to travel—our makeup artists will come to you, ready to create the perfect bridal look. 3. Use of Premium Quality Products Only the best makeup products are used to ensure your bridal makeup lasts throughout the day, from the ceremony to the reception. We use high-quality, long-lasting formulas that are gentle on the skin and provide a flawless finish. 4. Customized Bridal Look We believe every bride is unique, and so is every bridal makeup look. We take the time to understand your preferences and design a personalized look that enhances your natural beauty, whether you're looking for something traditional, natural, or glamorous. Popular Bridal Makeup Styles in Pakridayal Traditional Bridal Makeup If you want a timeless, elegant look, traditional bridal makeup is a perfect choice. With rich, bold colors and intricate details, this style exudes sophistication and highlights your natural features. Natural Bridal Makeup For brides who prefer a fresh and glowing appearance, natural bridal makeup focuses on a soft, radiant look. It’s perfect for enhancing your features with minimal effort, allowing your natural beauty to shine through. Glamorous Bridal Makeup Want to make a statement on your wedding day? Glamorous bridal makeup is designed to give you a bold, striking look with dramatic eyes, sculpted cheekbones, and a flawless finish that will make you feel like a star. Our Bridal Makeup Process at Ladyfair Consultation: We begin with a consultation where we discuss your preferences and vision for your bridal look. Trial Session: Before the wedding, we offer a trial session to finalize your look and ensure you’re completely satisfied with the makeup style. On Wedding Day: On your big day, we arrive at your location in Pakridayal, ready to apply your bridal makeup and ensure you look stunning. Touch-Ups: We also offer touch-up services during the wedding day to keep your makeup fresh and flawless as the celebrations continue. What Brides in Pakridayal Are Saying About Ladyfair Sita R., Pakridayal: "The bridal makeup I had from Ladyfair was perfect! It was everything I imagined and more. I felt so confident and beautiful on my wedding day!" Rekha S., Pakridayal: "Ladyfair’s makeup artist was amazing! They listened to what I wanted and created a look that was absolutely stunning. My makeup lasted all day, and I got so many compliments!" Poonam T., Pakridayal: "I was thrilled with the bridal makeup from Ladyfair. The artist did an amazing job of matching my makeup to my dress and theme. I felt like a princess!" Tips for Brides in Pakridayal to Prepare for Their Makeup Appointment Hydrate Your Skin: Keep your skin hydrated by drinking plenty of water before your wedding day for a glowing complexion. Bring Inspiration: If you have a specific makeup look in mind, bring pictures or examples to help the artist create your ideal bridal look. Pre-Wedding Skincare: A gentle skincare routine before your wedding will help your makeup apply smoothly and stay fresh all day. Relax and Enjoy: Enjoy the experience and let our experts take care of your bridal beauty while you focus on your special day. Other Services Offered by Ladyfair in Pakridayal Engagement Makeup Bridesmaid Makeup Pre-Wedding Makeup Bridal Hairstyling Bridal Photoshoot Makeup FAQs How early should I book my bridal makeup? It’s recommended to book your bridal makeup at least 2-3 months in advance to ensure availability. Can I try my bridal makeup before the wedding day? Yes, we offer trial sessions so you can finalize your look ahead of time. What makeup products do you use? We use high-quality, long-lasting makeup products that are gentle on the skin and ensure a flawless finish. Can I request a customized bridal look? Absolutely! We offer personalized bridal makeup services based on your preferences and style. How do I book my bridal makeup appointment? To book your bridal makeup, simply call 7004721239 or visit our website to schedule an appointment.

Posted By: 26th December 2024
best bridal makeup artist in raxaul
Introduction Transform your wedding day into a beautiful celebration with Ladyfair’s bridal makeup services in Raxaul. Our skilled makeup artists specialize in creating a stunning, personalized bridal look that ensures you feel confident, radiant, and picture-perfect on your big day. Call 7004721239 to schedule your consultation with us! Why Choose Ladyfair for Bridal Makeup in Raxaul? 1. Experienced Makeup Artists Our team of professional makeup artists in Raxaul is highly experienced in bridal makeup, delivering flawless results tailored to each bride’s unique style. Whether you prefer a classic, natural, or glamorous look, we bring out your natural beauty to make your day extra special. 2. At-Home Makeup Services To make your day stress-free, we offer at-home bridal makeup services across Raxaul. No need to travel—we bring everything you need for a flawless bridal look directly to your doorstep. 3. Premium Makeup Products We use only the best makeup products, ensuring that your bridal makeup lasts throughout the ceremony and celebrations. From long-lasting foundations to waterproof mascara, our products provide a flawless finish that will stay fresh all day. 4. Customized Bridal Looks At Ladyfair, we believe every bride is unique. We take the time to understand your preferences and create a customized makeup look that complements your dress, theme, and personality. Popular Bridal Makeup Styles in Raxaul Traditional Bridal Makeup Celebrate your cultural heritage with a traditional bridal makeup look. Featuring bold, rich colors and intricate details, this look will give you a timeless, elegant appearance on your wedding day. Natural Bridal Makeup For brides who want a fresh, glowing appearance, natural bridal makeup enhances your features while maintaining a soft and dewy finish. This look is all about highlighting your natural beauty and ensuring you feel radiant without heavy makeup. Glamorous Bridal Makeup If you're looking to make a statement, glamorous bridal makeup is the perfect choice. With bold eyeshadows, dramatic eyeliner, and a flawless complexion, this look gives you a glamorous, red-carpet-worthy appearance. Our Bridal Makeup Process at Ladyfair Initial Consultation: We begin with a consultation to understand your preferences and discuss the makeup style that suits you best. Trial Session: We offer a trial session before the wedding to finalize your look, ensuring you feel confident and happy with your choices. On the Wedding Day: On your wedding day, our team arrives at your chosen location to provide professional bridal makeup, ensuring you look stunning and feel amazing. Touch-Up Services: Throughout the day, we also offer touch-up services to keep your makeup looking fresh for photos, vows, and the reception. What Brides in Raxaul Are Saying About Ladyfair Aarti R., Raxaul: "I had the best bridal makeup experience with Ladyfair. The makeup was flawless and lasted all day. I couldn’t have asked for a better artist for my wedding day!" Pooja D., Raxaul: "Thank you, Ladyfair, for making my wedding day so special. The artist listened to all my preferences and created the perfect look that made me feel so confident!" Suman T., Raxaul: "Ladyfair’s makeup artist did an incredible job on my bridal makeup. I was so happy with the results, and I got so many compliments. Highly recommend them for any bride in Raxaul!" Tips for Brides in Raxaul to Prepare for Their Makeup Appointment Keep Skin Hydrated: Drinking plenty of water before your wedding will help keep your skin hydrated and glowing. Share Your Vision: Bring pictures or describe the makeup style you want, so the artist can create the perfect look for you. Prep Your Skin: A gentle facial or skincare routine a few days before the wedding will help your makeup apply smoothly. Enjoy the Experience: Relax and let Ladyfair’s expert team take care of your bridal beauty so you can focus on enjoying your special day. Other Services Offered by Ladyfair in Raxaul Engagement Makeup Bridesmaid Makeup Pre-Wedding Makeup Bridal Hairstyling Bridal Photoshoot Makeup FAQs How far in advance should I book my bridal makeup? To ensure availability, it’s best to book your bridal makeup at least 2-3 months in advance. Do you offer trial sessions? Yes, we provide trial sessions to finalize your bridal look before the big day. What makeup products do you use? We use high-quality, long-lasting makeup products that are gentle on the skin and suitable for all skin types. Can I customize my bridal makeup look? Absolutely! We offer personalized bridal makeup services to ensure your look is exactly what you envision. How do I book my bridal makeup? Booking is easy—simply call 7004721239 or visit our website to schedule your appointment.

Posted By: 26th December 2024
best bridal makeup artist in ramgarhwa
Introduction Make your wedding day extraordinary with Ladyfair's expert bridal makeup services in Ramgarhwa. Our professional makeup artists specialize in creating flawless bridal looks that highlight your natural beauty. Whether you're going for a traditional, natural, or glamorous style, we ensure you feel confident and beautiful on your special day. Call 7004721239 to book your appointment today! Why Choose Ladyfair for Bridal Makeup in Ramgarhwa? 1. Experienced Makeup Artists Ladyfair's team of skilled makeup artists specializes in bridal makeup, ensuring that each bride receives a personalized, flawless look. We understand the importance of your big day and work to bring your vision to life. 2. Convenient At-Home Makeup Service We offer the convenience of at-home bridal makeup services in Ramgarhwa. No need to worry about travel or salon appointments—we bring everything you need right to your doorstep for a stress-free experience. 3. Premium Products for a Long-Lasting Look We use only top-quality makeup products to ensure your bridal look lasts throughout the ceremony and reception. From long-wear foundations to waterproof eye makeup, your makeup will stay fresh and flawless. 4. Tailored Bridal Makeup At Ladyfair, we understand that every bride is unique. Our artists work with you to create a customized bridal makeup look that suits your personality, dress, and wedding theme. Popular Bridal Makeup Styles in Ramgarhwa Traditional Bridal Makeup For brides who want to celebrate their cultural heritage, traditional bridal makeup is the perfect choice. With bold colors, intricate details, and vibrant styles, this look captures the essence of a classic bridal look. Natural Bridal Makeup Our natural bridal makeup focuses on enhancing your natural beauty with soft tones and a fresh, glowing finish. This style gives you a radiant, dewy look while maintaining a subtle and elegant appearance. Glamorous Bridal Makeup For brides who want to make a statement, our glamorous bridal makeup adds drama and allure. From bold eyeshadow to flawless skin, this look will have you feeling like a superstar on your wedding day. Our Bridal Makeup Process at Ladyfair Consultation: We begin with a consultation to understand your bridal makeup preferences and the look you want to achieve. Trial Session: We offer a trial session to finalize the makeup look, ensuring you are happy with your choices before the big day. Wedding Day Makeup: On your wedding day, we come to your location and provide expert bridal makeup services, ensuring you look flawless and feel confident. Touch-Up Services: We also provide touch-up services throughout the day to keep your makeup looking fresh for photos, ceremonies, and celebrations. What Brides in Ramgarhwa Are Saying About Ladyfair Anjali P., Ramgarhwa: "I couldn’t be happier with my bridal makeup from Ladyfair. The artist listened to my ideas and created a beautiful, personalized look that made me feel amazing on my wedding day." Radhika S., Ramgarhwa: "Thank you, Ladyfair, for making my wedding day so special. The makeup was flawless, and I felt so confident all day. I would highly recommend them to any bride in Ramgarhwa!" Priya K., Ramgarhwa: "The makeup artist from Ladyfair was professional and made me look absolutely stunning. I was so happy with the results—exactly what I had envisioned!" Tips for Brides in Ramgarhwa to Prepare for Their Makeup Appointment Hydrate Your Skin: Make sure to drink plenty of water in the days leading up to your wedding to keep your skin hydrated and radiant. Share Inspiration: Bring inspiration photos or describe your desired look to help the makeup artist understand your vision. Skin Prep: Consider a gentle facial or skincare treatment before your wedding to ensure a smooth, healthy complexion. Relax: Enjoy the process—let us take care of your makeup while you relax and get ready for your special day. Other Services Offered by Ladyfair in Ramgarhwa Pre-Wedding Makeup Bridesmaid Makeup Engagement Makeup Bridal Hairstyling Bridal Photoshoot Makeup FAQs How far in advance should I book my bridal makeup? It's best to book your bridal makeup at least 2-3 months in advance to ensure we can accommodate your wedding date. Do you offer trial sessions? Yes, we offer trial sessions to help you find the perfect bridal look before your wedding day. What makeup products do you use? We use high-quality, long-lasting makeup products that are suitable for all skin types and will ensure your makeup stays flawless throughout the day. Can I customize my bridal makeup look? Absolutely! We work closely with you to create a personalized bridal look that matches your vision and style. How do I book my bridal makeup? To book your bridal makeup service, simply call 7004721239 or visit our website to schedule your appointment.

Posted By: 26th December 2024
best bridal makeup artist in adapur
Introduction Looking for top-notch bridal makeup in Adapur? Ladyfair brings expert bridal makeup services right to your doorstep. Whether you’re aiming for a classic look or a modern style, our experienced makeup artists will ensure you look your absolute best on your wedding day. Book your appointment today by calling 7004721239 and let us create a magical bridal look for you. Why Choose Ladyfair for Bridal Makeup in Adapur? 1. Expert Makeup Artists Our team of skilled makeup artists specializes in bridal makeup, ensuring that each bride receives a flawless look tailored to her preferences. From soft and natural to bold and glamorous, we’ll help you achieve the perfect bridal style. 2. At-Home Makeup Services Ladyfair offers the convenience of at-home bridal makeup services in Adapur, allowing you to get ready in the comfort of your own home. Our artists come fully equipped with professional tools and makeup products to deliver a stunning bridal look without the hassle of salon visits. 3. Premium Quality Products We use only premium, long-lasting makeup products that are perfect for your wedding day. From long-wearing foundations to waterproof eye makeup, we ensure that your bridal look stays intact throughout the day and night. 4. Personalized Bridal Makeup Every bride is unique, and so is every bridal makeup look. We take the time to understand your vision and preferences, creating a customized bridal look that complements your personality, wedding theme, and dress style. Popular Bridal Makeup Styles in Adapur Traditional Bridal Makeup Embrace a rich, cultural bridal look with our traditional bridal makeup services. From vibrant eye makeup to bold lips, this style is perfect for brides who want to honor their heritage while looking glamorous. Natural Bridal Makeup For a subtle, fresh, and glowing look, choose our natural bridal makeup. This style enhances your natural features with light makeup that provides a radiant, dewy finish, making you look effortlessly beautiful. Glamorous Bridal Makeup If you're looking for a dramatic and eye-catching look, our glamorous bridal makeup is the perfect choice. Bold eyes, flawless skin, and defined features create a stunning effect that will turn heads on your big day. Our Bridal Makeup Process at Ladyfair Consultation: We begin with a consultation to understand your bridal makeup preferences, wedding theme, and any special requests you may have. Trial Session: We offer a trial session to help you try out different looks and finalize your bridal makeup style before the big day. Wedding Day Makeup: On your wedding day, we provide professional makeup services at your location. Our artists ensure that your makeup is perfect, so you can focus on enjoying the day. Touch-Up Services: We offer touch-up services to keep your makeup looking fresh and flawless throughout the ceremony and reception. What Brides in Adapur Are Saying About Ladyfair Rina K., Adapur: "Ladyfair did an amazing job on my bridal makeup! They listened to my ideas and created a look that perfectly matched my wedding dress. I felt like a queen on my special day. Highly recommended!" Aarti S., Adapur: "I am so glad I chose Ladyfair for my bridal makeup. The makeup artist was professional, and my makeup stayed intact all day long. I couldn't have asked for a better bridal look!" Neha T., Adapur: "Ladyfair made my wedding day even more special with their flawless bridal makeup. The look was exactly what I wanted and lasted through all the wedding festivities. Thank you so much!" Tips for Brides in Adapur to Prepare for Their Makeup Appointment Hydrate Your Skin: Drink plenty of water and follow a skincare routine leading up to your wedding to ensure your skin is smooth and glowing. Bring Inspiration: Share any inspiration photos or ideas with your makeup artist to help guide them in creating your desired look. Take Care of Your Skin: Consider a facial or gentle skincare treatments before your wedding to give your skin a healthy glow. Relax and Enjoy: Let us take care of your bridal makeup while you focus on enjoying your wedding day! Other Services Offered by Ladyfair in Adapur Pre-Wedding Makeup Bridesmaid Makeup Engagement Makeup Bridal Hairstyling Bridal Photoshoot Makeup FAQs How far in advance should I book my bridal makeup? We recommend booking your bridal makeup appointment at least 2-3 months in advance to ensure availability and secure your date. Do you offer trial sessions? Yes, we provide trial sessions where you can experiment with different looks and choose the one that’s perfect for you. What makeup products do you use? We use high-quality, long-lasting makeup products that are suitable for all skin types, ensuring your bridal look stays flawless all day. Can I customize my bridal look? Yes, we work closely with you to create a customized look that aligns with your vision, personality, and wedding theme. How do I book my bridal makeup appointment? To book your bridal makeup, call 7004721239 or visit our website to schedule your appointment.

Posted By: 26th December 2024
best bridal makeup artist in chauradano
Introduction Searching for exceptional bridal makeup in Chauradano? Look no further! Ladyfair provides professional, at-home bridal makeup services, ensuring you look your absolute best on your wedding day. Our experienced makeup artists are here to offer personalized bridal looks that will enhance your natural beauty. Call 7004721239 to book your appointment and let us make your wedding day truly unforgettable. Why Choose Ladyfair for Bridal Makeup in Chauradano? 1. Skilled Makeup Artists Our talented makeup artists specialize in bridal makeup and are experienced in creating the perfect look for every bride. Whether you prefer a traditional, natural, or contemporary style, we’ll help bring your vision to life. 2. At-Home Makeup Services Ladyfair offers convenient at-home bridal makeup services so that you can enjoy getting ready in the comfort of your own space. Relax and unwind while our professional artists work their magic, ensuring a stress-free start to your wedding day. 3. High-Quality Makeup Products We use only the best quality makeup products to ensure a flawless finish that lasts throughout the day. From long-lasting foundation to waterproof eyeliner, we guarantee a radiant and smudge-free bridal look. 4. Customized Bridal Look Every bride is unique, and so is every bridal look. We collaborate with you to design a personalized makeup style that matches your personality, wedding theme, and dress, ensuring you feel confident and beautiful on your special day. Popular Bridal Makeup Styles in Chauradano Traditional Bridal Makeup If you're looking for a timeless and bold bridal look, our traditional bridal makeup is perfect for you. It combines rich colors, detailed eye makeup, and a flawless base to highlight your features while celebrating your heritage. Natural Bridal Makeup For brides who prefer a softer, more understated appearance, our natural bridal makeup enhances your features with a glowing and fresh look, giving you a radiant yet simple bridal style. Glamorous Bridal Makeup Make a statement on your big day with our glamorous bridal makeup. Bold eyes, defined cheekbones, and flawless skin combine to create a striking look that will leave everyone in awe. Our Bridal Makeup Process at Ladyfair Consultation: We start with a discussion about your wedding details, your preferences, and the look you desire. This helps us create a customized bridal look tailored just for you. Trial Session: We offer a trial makeup session, allowing you to test different styles and make sure we achieve the perfect look before your wedding day. Wedding Day Makeup: On your wedding day, we provide professional, flawless bridal makeup at your location. Our artists ensure that your makeup is perfect from start to finish. Touch-Up Services: We also offer touch-up services to keep your makeup looking fresh throughout the day and night. What Brides in Chauradano Are Saying About Ladyfair Seema R., Chauradano: "My bridal makeup experience with Ladyfair was amazing! The makeup artist understood exactly what I wanted and executed it perfectly. I felt beautiful and confident on my wedding day. Highly recommended!" Pooja K., Chauradano: "I was so happy with my bridal makeup from Ladyfair. The team listened to my preferences and created a personalized look that matched my dress and theme. It was flawless all day long!" Neelam S., Chauradano: "Ladyfair made my wedding day even more special with their incredible bridal makeup services. I loved the natural yet elegant look they gave me. Thank you for making my day perfect!" Tips for Brides in Chauradano to Prepare for Their Makeup Appointment Hydrate Your Skin: Begin a skincare routine leading up to your wedding day to achieve smooth, glowing skin. Bring Inspiration: If you have a specific look in mind, bring photos or ideas to your consultation to help guide the makeup artist. Relax and Enjoy: Let the professionals handle your makeup while you enjoy the special moments leading up to your wedding ceremony. Other Services Offered by Ladyfair in Chauradano Pre-Wedding Makeup Bridesmaid Makeup Engagement Makeup Bridal Hairstyling Bridal Photoshoot Makeup FAQs How far in advance should I book my bridal makeup? We recommend booking your bridal makeup appointment at least 2-3 months in advance to secure your date and ensure availability. Do you provide a trial session? Yes, we offer trial sessions to ensure we get the perfect look before your wedding day. What makeup brands do you use? We use high-quality, long-lasting makeup products suitable for all skin types to ensure your bridal look stays flawless. Can I customize my bridal look? Yes, we work closely with you to design a look that aligns with your vision and wedding theme. How do I book my bridal makeup appointment? You can book your bridal makeup appointment by calling 7004721239 or visiting our website.

Posted By: 26th December 2024
best bridal makeup artist in bankatwa
Introduction Looking for stunning bridal makeup in Bankatwa? Ladyfair offers professional, at-home bridal makeup services that will make your special day unforgettable. Our skilled makeup artists are committed to giving you a personalized and flawless bridal look. Call 7004721239 to book your appointment and ensure you look radiant on your wedding day! Why Choose Ladyfair for Bridal Makeup in Bankatwa? 1. Experienced Makeup Artists At Ladyfair, we have a team of talented and professional makeup artists who specialize in bridal makeup. Whether you're aiming for a classic, natural, or glamorous look, we’ll help create the perfect bridal style for you. 2. At-Home Makeup Services We understand that comfort is key on your wedding day. Our at-home bridal makeup services allow you to get ready in the comfort of your own home, so you can enjoy every moment of your big day without any hassle. 3. Premium Quality Products Only the best makeup products are used in our services, ensuring long-lasting and flawless results. We select products that suit all skin types and provide a radiant look that lasts through the ceremony and celebrations. 4. Customized Bridal Look Every bride has her unique vision for her wedding day look. We collaborate with you to design a personalized makeup style that complements your dress, wedding theme, and personality, ensuring that you feel confident and beautiful. Popular Bridal Makeup Styles in Bankatwa Traditional Bridal Makeup Our traditional bridal makeup is perfect for brides who want to embrace the rich and bold look. With focus on intricate detailing and timeless beauty, it’s ideal for brides who want to embody the essence of wedding tradition. Natural Bridal Makeup For those who prefer a softer, more understated style, our natural bridal makeup enhances your features with a fresh, glowing look, offering a more relaxed but equally beautiful bridal appearance. Glamorous Bridal Makeup For a stunning, high-impact bridal look, we offer glamorous makeup services that include bold eyes, defined lips, and flawless skin. Perfect for brides who want to stand out and make a statement on their big day. Our Bridal Makeup Process at Ladyfair Initial Consultation: We begin by discussing your preferences and wedding details to understand your vision and design your ideal bridal look. Trial Session: A trial session allows you to try different makeup styles and ensure your desired look is achieved before the big day. Wedding Day Makeup: On your wedding day, we arrive at your location to provide professional, flawless bridal makeup. Touch-Up Services: We offer touch-up services throughout the day to keep your makeup looking fresh and perfect. What Brides in Bankatwa Are Saying About Ladyfair Poonam K., Bankatwa: "My bridal makeup experience with Ladyfair was incredible! The team worked with me to create the perfect look, and I felt absolutely beautiful on my wedding day. Thank you for making it so special!" Shilpi S., Bankatwa: "The makeup artists at Ladyfair are truly amazing. They listened to my preferences and executed my bridal look perfectly. I highly recommend them for anyone looking for top-notch makeup services!" Neha R., Bankatwa: "Ladyfair’s bridal makeup services exceeded my expectations! They were professional, timely, and the makeup was flawless. I couldn’t have asked for a better team to help me get ready for my wedding day." Tips for Brides in Bankatwa to Prepare for Their Makeup Appointment Hydrate and Care for Your Skin: Start hydrating your skin and follow a skincare routine leading up to your wedding day for the best results. Bring Inspiration: If you have a specific bridal look in mind, bring pictures to your consultation to help your makeup artist understand your preferences. Relax and Enjoy: Let go of any pre-wedding stress and enjoy the experience of getting ready with your bridal makeup. Other Services Offered by Ladyfair in Bankatwa Pre-Wedding Makeup Bridesmaid Makeup Engagement Makeup Bridal Hairstyling Bridal Photoshoot Makeup FAQs How far in advance should I book my bridal makeup? It's recommended to book your bridal makeup appointment at least 2-3 months ahead of your wedding date to secure your spot. Do you offer a trial makeup session? Yes, we offer a trial makeup session to ensure we get your bridal look just right. What makeup products do you use? We use premium, high-quality makeup products that are perfect for long-lasting, flawless results. Can I customize my bridal look? Absolutely! We work closely with you to create a personalized bridal look that fits your vision and wedding theme. How can I book my bridal makeup appointment? You can book your bridal makeup appointment by calling 7004721239 or visiting our website.

Posted By: 26th December 2024
best bridal makeup artist in chiraiya
Introduction Looking for flawless bridal makeup in Chiraiya? Ladyfair offers professional at-home bridal makeup services to make your special day even more memorable. Our expert makeup artists are dedicated to giving you a personalized and perfect bridal look. Call 7004721239 now to book your appointment and ensure you look stunning on your wedding day! Why Choose Ladyfair for Bridal Makeup in Chiraiya? 1. Expert Makeup Artists At Ladyfair, we have a team of experienced and professional makeup artists who specialize in bridal makeup. Whether you’re looking for a traditional, natural, or glamorous look, our artists are skilled in creating the perfect style for every bride. 2. At-Home Makeup Services We understand that comfort is important on your wedding day. Our at-home bridal makeup services allow you to get ready in the comfort of your own space, so you can enjoy every moment before the ceremony without the hassle of traveling. 3. Premium Makeup Products We use only the best makeup products, ensuring a flawless, long-lasting look that will stay perfect from the ceremony to the reception. Our products are selected with care to suit all skin types and ensure that you look beautiful all day long. 4. Customized Bridal Makeup Every bride is unique, and so is her bridal look. Our makeup artists will work with you to design a personalized look that complements your dress, theme, and personality, ensuring you feel confident and beautiful on your big day. Popular Bridal Makeup Styles in Chiraiya Traditional Bridal Makeup Our traditional bridal makeup focuses on creating a rich, bold look that brings out your features. Perfect for brides who want to embrace the timeless beauty of classic bridal styles. Natural Bridal Makeup If you prefer a softer, more understated look, our natural bridal makeup enhances your features with a fresh, radiant glow, perfect for brides who want to look effortlessly beautiful. Glamorous Bridal Makeup For a glamorous and high-impact bridal look, we focus on bold eyes, defined lips, and flawless skin. Ideal for brides who want to make a statement and shine on their wedding day. Our Bridal Makeup Process at Ladyfair Initial Consultation: We begin by discussing your preferences, wedding theme, and desired look. This helps us understand your vision and plan your perfect bridal style. Trial Session: To ensure your satisfaction, we offer a trial session where we test out different makeup styles so you can choose the perfect look. Wedding Day Makeup: On your wedding day, our team will arrive at your location to provide a professional, flawless bridal makeup experience. Touch-Up Services: We also offer touch-up services throughout your wedding day to ensure your makeup remains fresh and beautiful during every moment of the celebration. What Brides in Chiraiya Are Saying About Ladyfair Anjali M., Chiraiya: "My bridal makeup experience with Ladyfair was exceptional! The team made me feel relaxed and beautiful, and I was thrilled with the final look. Thank you, Ladyfair!" Rina S., Chiraiya: "Ladyfair's makeup artists are amazing! They listened to my preferences and created a gorgeous bridal look. I felt like a princess on my wedding day!" Priya R., Chiraiya: "The bridal makeup was flawless and lasted all day. I couldn’t have asked for a better team to help me get ready for my wedding day. Highly recommend Ladyfair!" Tips for Brides in Chiraiya to Prepare for Their Makeup Appointment Hydrate and Care for Your Skin: Drink plenty of water and follow a skincare routine to get your skin glowing for your wedding day. Bring Inspiration: Share makeup looks that inspire you with your artist, so they can create something that matches your vision. Relax and Enjoy: Your wedding day is all about celebrating, so let go of stress and enjoy the process of getting ready with your bridal makeup. Other Services Offered by Ladyfair in Chiraiya Pre-Wedding Makeup Bridesmaid Makeup Engagement Makeup Bridal Hairstyling Bridal Photoshoot Makeup FAQs How far in advance should I book my bridal makeup? We recommend booking your bridal makeup appointment at least 2-3 months ahead of your wedding date to secure your spot. Do you offer a trial makeup session? Yes, we offer trial makeup sessions to ensure that we get your bridal look just right. What kind of makeup products do you use? We use premium, high-quality makeup products from trusted brands, ensuring a beautiful and long-lasting finish. Can I customize my bridal look? Absolutely! We’ll work with you to create a personalized bridal look that complements your style and wedding theme. How can I book my bridal makeup appointment? You can easily book your bridal makeup appointment by calling 7004721239 or through our website.

Posted By: 26th December 2024
best bridal makeup artist in ghorasahan
Introduction Looking for professional bridal makeup services in Ghorasahan? Ladyfair offers top-tier, at-home bridal makeup services designed to give you the perfect look on your special day. Our experienced makeup artists will ensure you look flawless and radiant. Call 7004721239 today to book your appointment and make your bridal experience unforgettable! Why Choose Ladyfair for Bridal Makeup in Ghorasahan? 1. Skilled and Experienced Artists Our team at Ladyfair consists of highly skilled makeup artists with years of experience in creating stunning bridal looks. From traditional to contemporary, we can create the perfect style for you. 2. At-Home Bridal Makeup Services We know your wedding day is all about comfort and convenience. That’s why we offer at-home bridal makeup services, so you can relax in your own space while we work our magic to make you look beautiful. 3. Premium Quality Makeup Products At Ladyfair, we use only the best, skin-friendly makeup products to ensure a flawless, long-lasting finish. You can trust that your makeup will look amazing from the first moment to the last. 4. Custom Bridal Looks Every bride deserves a makeup look that reflects her personality and style. Our artists will work with you to create a customized look that perfectly complements your dress and wedding theme. Popular Bridal Makeup Styles in Ghorasahan Traditional Bridal Makeup For brides who love vibrant, bold looks, our traditional bridal makeup is designed to highlight your features with rich colors, intricate detailing, and dramatic eyes, making you look regal on your wedding day. Natural Bridal Makeup If you prefer a more subtle look, our natural bridal makeup focuses on enhancing your features with soft, glowing skin and a fresh, light appearance. Glamorous Bridal Makeup For a show-stopping bridal look, choose our glamorous bridal makeup. Bold eyes, defined lips, and a radiant complexion ensure that you’ll shine brightly on your special day. Our Bridal Makeup Process at Ladyfair Initial Consultation: We begin by discussing your makeup preferences, wedding theme, and desired look. This helps us plan the best bridal style for you. Trial Session: To ensure you're happy with the look, we offer a trial session where we test out different styles and techniques. Wedding Day Makeup: On your wedding day, our team will arrive at your location to give you a flawless, picture-perfect look. Touch-Up Services: We also offer touch-up services to ensure your makeup stays fresh and beautiful throughout your wedding day. What Brides in Ghorasahan Are Saying About Ladyfair Neha P., Ghorasahan: "I couldn’t have asked for a better bridal makeup experience! Ladyfair’s team was professional and created the perfect look for me. I felt like a queen on my wedding day!" Aarti K., Ghorasahan: "Thank you, Ladyfair, for making me look gorgeous on my wedding day. The makeup was flawless and stayed in place all day, even through the celebrations." Suman S., Ghorasahan: "I absolutely loved my bridal makeup. Ladyfair understood exactly what I wanted and made me feel amazing. Highly recommend!" Tips for Brides in Ghorasahan to Prepare for Their Makeup Appointment Hydrate: Drink plenty of water and follow a skincare routine to ensure your skin is clear and glowing. Communicate Your Style: Share photos of makeup looks you love with your makeup artist to help them understand your vision. Relax and Enjoy the Process: Enjoy your bridal makeup experience! It’s all about feeling beautiful and confident on your special day. Other Services Offered by Ladyfair in Ghorasahan Pre-Wedding Makeup Bridesmaid Makeup Engagement Makeup Bridal Hairstyling Bridal Photoshoot Makeup FAQs How early should I book my bridal makeup? We recommend booking your bridal makeup at least 2-3 months in advance to ensure your desired date is available. Is a trial session necessary? While a trial is not mandatory, we highly recommend it so we can perfect your bridal look before the big day. What makeup products do you use? We only use high-quality, long-lasting makeup products that are suitable for all skin types. Can I customize my bridal look? Yes! We’ll work with you to create a personalized bridal look that matches your style and wedding theme. How can I book my bridal makeup appointment? You can easily book your appointment by calling 7004721239 or through our website.

Posted By: 26th December 2024
best bridal makeup artist in dhaka
Introduction Looking for professional bridal makeup services in Dhaka? Ladyfair offers premium, at-home bridal makeup services tailored to make you look your absolute best on your wedding day. Our team of experienced makeup artists ensures a flawless and stunning look for brides. Call 7004721239 today to book your appointment and enjoy an unforgettable bridal makeup experience! Why Choose Ladyfair for Bridal Makeup in Dhaka? 1. Experienced and Skilled Artists At Ladyfair, we have a team of expert bridal makeup artists who specialize in creating beautiful, customized looks. Our artists are trained to enhance your natural features and bring out the best version of yourself. 2. At-Home Bridal Makeup We understand that your wedding day is special, and that’s why we offer convenient at-home bridal makeup services. Our team will come to you, saving you time and effort while ensuring you look amazing for your big day. 3. High-Quality Makeup Products We use only the best makeup products, ensuring that your makeup looks flawless and lasts all day. Our makeup products are skin-friendly and perfect for all skin types, offering a beautiful, radiant finish. 4. Tailored Bridal Looks Every bride is unique, and so should be their makeup look. We customize each bridal makeup style based on your preferences, wedding theme, and personality. Whether you want a traditional, natural, or glamorous look, we can create the perfect style for you! Popular Bridal Makeup Styles in Dhaka Traditional Bridal Makeup For brides who prefer a bold, vibrant look, traditional bridal makeup is the perfect choice. With rich colors, intricate detailing, and dramatic eye makeup, this style is designed to complement traditional wedding attire. Natural Bridal Makeup If you prefer a soft, natural look, our natural bridal makeup will enhance your features while maintaining a light and fresh appearance. It’s perfect for brides who want to look effortlessly beautiful. Glamorous Bridal Makeup For a show-stopping look, choose glamorous bridal makeup. This style incorporates bold eye makeup, radiant skin, and striking lips, designed to make you shine on your special day. Our Bridal Makeup Process at Ladyfair Initial Consultation: We begin by discussing your bridal makeup preferences, skin type, and desired look to create a personalized plan. Trial Session: We offer a trial makeup session to help you decide on the perfect look and make any necessary adjustments before the big day. Wedding Day Makeup: On your wedding day, our team will come to your location and provide expert makeup services to ensure you look flawless. Touch-Up Service: Our team will also provide touch-up services to ensure your makeup stays fresh and perfect throughout the wedding festivities. What Brides in Dhaka Are Saying About Ladyfair Fatima S., Dhaka: "Ladyfair’s bridal makeup team made me feel so beautiful on my wedding day. I loved how they customized my look to match my personality, and the makeup lasted all day!" Sharon M., Dhaka: "The team at Ladyfair is amazing! I was so impressed with the quality of makeup and the professional service they provided. My bridal look was exactly what I wanted!" Ayesha R., Dhaka: "Thank you to the Ladyfair team for making me feel like a queen on my wedding day. The makeup was flawless, and I received so many compliments!" Tips for Brides in Dhaka to Prepare for Their Makeup Appointment Prepare Your Skin: Drink plenty of water and follow a skincare routine leading up to your wedding day for a smooth, clear complexion. Share Your Preferences: Bring photos of makeup looks you like to your consultation to help your makeup artist understand your desired style. Relax and Enjoy: Take a deep breath and enjoy the process. Your wedding day is all about celebrating love, and our makeup team will make sure you feel gorgeous and relaxed. Other Services Offered by Ladyfair in Dhaka Pre-Wedding Makeup Bridesmaid Makeup Engagement Makeup Bridal Hairstyling Bridal Photoshoot Makeup FAQs How far in advance should I book my bridal makeup? It’s best to book your bridal makeup at least 2-3 months before your wedding to secure your desired date. Is a trial session required? A trial session is not mandatory, but it’s highly recommended to ensure the makeup artist can create the look you want for your wedding day. What products do you use for bridal makeup? We use high-quality, long-lasting makeup products that are gentle on the skin and suitable for all skin types. Can I customize my bridal makeup look? Yes, we customize the bridal makeup based on your preferences, wedding theme, and style. How do I book my bridal makeup appointment? You can book your bridal makeup appointment by calling 7004721239 or contacting us through our website.

Posted By: 26th December 2024
best bridal makeup artist in baikunthpur
Introduction Searching for expert bridal makeup services in Baikunthpur? Ladyfair is here to make your wedding day extra special with top-quality bridal makeup at your doorstep. Our talented team of makeup artists is dedicated to ensuring you look absolutely stunning on your big day. Call 7004721239 today to book your bridal makeup and experience the best in the industry! Why Choose Ladyfair for Bridal Makeup in Baikunthpur? 1. Expert Bridal Makeup Artists At Ladyfair, we have a team of professional makeup artists with years of experience in bridal makeup. They are skilled at enhancing your natural beauty and making you feel confident and gorgeous. 2. At-Home Bridal Makeup Service We bring our services to you! Enjoy the convenience of at-home bridal makeup, so you can get ready for your wedding day in the comfort of your own home. Our team will come to your location, ensuring a hassle-free experience. 3. Premium Quality Makeup Products Only the best for your special day! We use high-quality, skin-friendly makeup products that are long-lasting and suitable for all skin types. You can trust us to create a flawless, radiant look that lasts throughout the celebration. 4. Customized Bridal Look Every bride is unique, and we tailor the makeup look to suit your individual style, personality, and wedding theme. Whether you want a bold, dramatic look or a natural, elegant appearance, we've got you covered! Popular Bridal Makeup Styles in Baikunthpur Traditional Bridal Makeup Perfect for brides who want a classic and vibrant look. Traditional bridal makeup features bold eye makeup, rich colors, and intricate detailing to complement your wedding attire. Natural Bridal Makeup For those who prefer a soft and fresh look, natural bridal makeup enhances your beauty without looking overdone. It’s perfect for brides who want to keep it light yet stunning. Glamorous Bridal Makeup If you want to shine like a star on your wedding day, go for glamorous bridal makeup. With dramatic eye makeup, bold lips, and glowing skin, this style is perfect for brides who want a show-stopping look. Our Bridal Makeup Process at Ladyfair Initial Consultation: We begin with a consultation to understand your preferences, skin type, and the look you desire for your wedding day. Trial Session: We offer a trial session to try out different looks and help you choose the perfect makeup style. Wedding Day Makeup: On your wedding day, we come to your home and provide the bridal makeup services, ensuring you look beautiful and feel relaxed. Touch-Up Service: We offer touch-ups to make sure your makeup stays flawless throughout the ceremony and reception. What Brides in Baikunthpur Are Saying About Ladyfair Shalini R., Baikunthpur: "I couldn’t have asked for a better bridal makeup experience! The team at Ladyfair was so professional, and I loved my bridal look. It was exactly what I envisioned." Pooja K., Baikunthpur: "Ladyfair made me feel like a queen on my wedding day! The makeup was flawless, and it lasted the entire day. I’m so happy with their service and highly recommend them." Neha T., Baikunthpur: "I’m so glad I chose Ladyfair for my wedding makeup. They made me feel confident and beautiful, and my makeup was perfect from start to finish. Thank you, Ladyfair team!" Tips for Brides in Baikunthpur to Prepare for Their Makeup Appointment Hydrate Your Skin: Drink plenty of water in the weeks leading up to your wedding to ensure your skin is well-hydrated and ready for makeup. Skin Care Routine: Start a skincare routine before the big day to ensure clear, smooth skin. Discuss Your Style: Be clear about the makeup style you want during your consultation. Bring pictures or ideas to help the makeup artist understand your vision. Enjoy the Process: Your wedding day is one of the most special days of your life. Relax and trust the professionals to help you look your best! Other Services Offered by Ladyfair in Baikunthpur Pre-Wedding Makeup Bridesmaid Makeup Engagement Makeup Bridal Hairstyling Bridal Photoshoot Makeup FAQs How early should I book my bridal makeup? We recommend booking your bridal makeup at least 2-3 months before the wedding, especially during peak wedding seasons. Do I need a trial session for bridal makeup? A trial session is optional but recommended, as it gives you a chance to experiment with different looks and ensure you are completely satisfied. What makeup products do you use? We use only premium, long-lasting makeup products that are safe for all skin types. Can I customize my bridal makeup look? Yes, we work with you to create a personalized bridal look that complements your style, personality, and wedding theme. How do I book my bridal makeup appointment? To book your bridal makeup with Ladyfair, simply call 7004721239 or contact us through our website.

Posted By: 26th December 2024
best bridal makeup artist in barauli
Introduction Are you looking for the best bridal makeup in Barauli? Ladyfair offers top-tier bridal makeup services at home, ensuring that you look flawless and feel confident on your special day. Our team of experienced makeup artists will craft a personalized look that enhances your beauty. Call 7004721239 to book your bridal makeup and make your wedding day unforgettable! Why Choose Ladyfair for Bridal Makeup in Barauli? 1. Experienced Makeup Artists Our team of professional makeup artists specializes in bridal makeup, ensuring that your look is not only beautiful but also long-lasting. We take the time to understand your preferences and provide a customized bridal makeup experience. 2. At-Home Bridal Makeup Service Ladyfair provides the convenience of at-home bridal makeup, making it easier for you to prepare for your wedding day without leaving the comfort of your home. Our experts will come to you, saving you time and effort. 3. Premium Makeup Products We use only the finest makeup products that are both high-quality and gentle on your skin. Our products are designed to withstand long hours, ensuring that you look stunning from start to finish. 4. Tailored Bridal Makeup Look At Ladyfair, we believe every bride is unique. Our makeup artists work closely with you to create a bridal look that complements your personality, style, and wedding theme. Popular Bridal Makeup Styles in Barauli Traditional Bridal Makeup Traditional bridal makeup is perfect for brides who want a bold and vibrant look. It includes rich colors and intricate detailing, highlighting your best features and matching traditional wedding attire. Natural Bridal Makeup If you prefer a soft and elegant look, natural bridal makeup is ideal. It enhances your features subtly, creating a radiant and fresh look for your big day. Glamorous Bridal Makeup For brides who want to stand out, glamorous bridal makeup is the way to go. With dramatic eyes and bold lips, this style creates a stunning and high-fashion look. The Ladyfair Bridal Makeup Process Consultation: We start with a one-on-one consultation to discuss your makeup preferences, wedding style, and the look you envision for your special day. Trial Session: A trial session is offered to help you decide on your perfect bridal look before the wedding day. Wedding Day Makeup: On your wedding day, we’ll bring the bridal makeup experience to you, providing a flawless and radiant look that stays beautiful throughout the ceremony. Touch-Up Service: We also offer touch-up services to ensure your makeup stays fresh and flawless throughout the day. Testimonials from Brides in Barauli Rita K., Barauli: "Ladyfair's bridal makeup was amazing! The makeup artists were professional and made me feel so beautiful on my wedding day. I loved the personalized approach and the flawless finish." Neha P., Barauli: "I couldn't have asked for a better bridal makeup experience! The Ladyfair team was amazing, and they made sure I looked stunning on my big day. Thank you so much!" Suman L., Barauli: "I highly recommend Ladyfair for bridal makeup! The team is very professional, and the makeup was just perfect. I felt like a queen on my wedding day." Tips for Brides in Barauli to Prepare for Their Makeup Appointment Hydrate Your Skin: Drinking plenty of water and moisturizing your skin before the wedding will ensure a smooth and glowing base for your makeup. Stick to a Skincare Routine: Begin a skincare routine a few months before your wedding to achieve clear, healthy skin. Discuss Your Preferences: Make sure to discuss your bridal makeup preferences and expectations with your makeup artist to ensure a look that suits you. Relax and Enjoy the Moment: Trust the professionals at Ladyfair to bring your bridal vision to life. Enjoy your makeup session and your special day! Other Services Offered by Ladyfair in Barauli Pre-Wedding Makeup Bridesmaid Makeup Engagement Makeup Bridal Hairstyling Bridal Photoshoot Makeup FAQs How early should I book my bridal makeup appointment? We recommend booking at least 2-3 months before your wedding, especially during peak wedding seasons. Do I need to schedule a trial session? Yes, we highly recommend a trial session to ensure your bridal look is exactly how you want it. What makeup products do you use? We use only premium, long-lasting products that suit all skin types and ensure a flawless look throughout the day. Can I customize my bridal makeup? Yes, our makeup artists work with you to create a personalized bridal look that suits your style and wedding theme. How do I book my bridal makeup appointment? Call 7004721239 or contact us through our website to schedule your appointment and discuss your needs.

Posted By: 26th December 2024
best bridal makeup artist in gopalganj
Introduction Looking for the best bridal makeup in Gopalganj? Ladyfair offers expert bridal makeup services at home, ensuring you look stunning on your wedding day. Our experienced makeup artists specialize in creating personalized bridal looks that enhance your natural beauty. Book your bridal makeup session today by calling 7004721239 and make your special day even more memorable! Why Choose Ladyfair for Bridal Makeup in Gopalganj? 1. Professional Makeup Artists Our team consists of experienced makeup artists who specialize in bridal makeup. They ensure that every bride looks her best with a flawless and beautiful look tailored to her preferences. 2. At-Home Makeup Service We understand how stressful wedding planning can be, which is why Ladyfair offers at-home bridal makeup services. Our makeup artists come to your location, saving you time and effort so you can enjoy your big day without worries. 3. Premium Makeup Products We use only the highest quality makeup products, ensuring that your bridal look lasts all day without compromising your skin’s health. From foundation to lip color, our products are carefully selected for durability and comfort. 4. Personalized Bridal Look At Ladyfair, we believe that every bride is unique. Our makeup artists customize your bridal look according to your face shape, dress style, and personal preferences, whether you prefer a traditional, modern, or minimalistic approach. Popular Bridal Makeup Styles in Gopalganj Traditional Bridal Makeup Traditional bridal makeup in Gopalganj is all about bold colors and intricate detailing. It’s perfect for brides who want to go for a rich and cultural look, complete with bold eyes and vibrant lips. Natural Bridal Makeup If you’re looking for a soft and elegant look, natural bridal makeup is for you. It enhances your features subtly, using neutral tones that create a timeless, radiant glow. Glamorous Bridal Makeup Glamorous bridal makeup is perfect for brides who want to stand out with dramatic eyes, bold lips, and a flawless finish. This style is ideal for high-fashion weddings or modern themes. The Ladyfair Bridal Makeup Process Consultation: We start with a consultation to discuss your wedding theme, makeup preferences, and desired style. Our artists will help you choose the best look for your big day. Trial Session: We offer a trial session where we create a test look, ensuring that you’re happy with the makeup before the wedding. Wedding Day Makeup: On your wedding day, our artists will come to your location, providing you with a stunning bridal look that lasts through the ceremony and celebrations. Touch-Up Service: We offer touch-ups during the day to ensure your makeup remains flawless throughout the wedding event. Testimonials from Brides in Gopalganj Priya M., Gopalganj: "Ladyfair made me feel like a queen on my wedding day! The bridal makeup was absolutely perfect and stayed flawless all day long. Highly recommend their services!" Rina K., Gopalganj: "Thank you to the Ladyfair team for their amazing bridal makeup! They understood exactly what I wanted, and I felt so beautiful on my special day." Suman R., Gopalganj: "I am so happy with the bridal makeup I received from Ladyfair! They were professional, and my makeup was perfect for my wedding. Thank you for making me feel amazing!" Tips for Brides in Gopalganj to Prepare for Their Makeup Appointment Hydrate Your Skin: Keep your skin hydrated before the wedding day to ensure your makeup applies smoothly and lasts longer. Stick to a Skincare Routine: Starting a skincare routine a few months before your wedding can help achieve glowing, healthy skin for makeup. Discuss Your Preferences: Be sure to communicate your makeup preferences and desired look to our artists to ensure your bridal makeup is exactly what you want. Relax and Enjoy the Process: Trust our makeup artists to make you look flawless, and enjoy the process of getting ready for your wedding day. Other Services Offered by Ladyfair in Gopalganj Pre-Wedding Makeup Bridesmaid Makeup Engagement Makeup Bridal Hairstyling Bridal Photoshoot Makeup FAQs How early should I book my bridal makeup appointment? We recommend booking at least 2-3 months before your wedding day, especially during peak wedding seasons. Is a trial session required? Yes, a trial session is highly recommended to ensure that you are satisfied with the makeup before the wedding day. What makeup products do you use? We use high-quality, long-lasting makeup products suitable for different skin types, ensuring that your look stays intact throughout your wedding. Can I customize my bridal look? Absolutely! We offer personalized bridal makeup styles, so you can choose the look that best suits your personality and wedding theme. How do I book my bridal makeup appointment? Call 7004721239 or get in touch with us through our website to book your bridal makeup appointment and discuss your needs.

Posted By: 26th December 2024
best bridal makeup artist in kuchaikote
Introduction Searching for the best bridal makeup in Kuchaikote? Ladyfair offers expert bridal makeup services at home, ensuring you look breathtaking on your special day. Our skilled makeup artists specialize in crafting personalized bridal looks that accentuate your natural beauty. Book your bridal makeup appointment today by calling 7004721239 and let us make your wedding day unforgettable! Why Choose Ladyfair for Bridal Makeup in Kuchaikote? 1. Experienced Makeup Artists Our team consists of professional makeup artists who specialize in bridal makeup. They use their experience to create a perfect look that aligns with your vision and wedding theme. 2. Convenient At-Home Makeup Service We understand that wedding preparations can be overwhelming, so Ladyfair provides a hassle-free at-home bridal makeup service. Sit back, relax, and let our experts handle the makeup while you enjoy your big day. 3. High-Quality Makeup Products We only use premium, long-lasting makeup products to ensure you look flawless throughout the wedding day. From foundation to lipstick, all products are carefully chosen for their skin-friendly qualities. 4. Customized Bridal Makeup Every bride is unique, and we tailor the makeup to your individual preferences, whether you desire a traditional, modern, or minimalistic bridal look. Popular Bridal Makeup Styles in Kuchaikote Traditional Bridal Makeup Traditional bridal makeup is rich in vibrant colors, intricate detailing, and bold looks. This style is perfect for brides who want to embrace classic bridal beauty with cultural elements. Natural Bridal Makeup Natural bridal makeup focuses on a soft and glowing look, using neutral tones to enhance your features without overwhelming them. It's perfect for brides who prefer a more understated, timeless appearance. Glamorous Bridal Makeup For brides who want to make a bold statement, glamorous bridal makeup highlights dramatic eyes, bold lips, and a flawless finish. It’s ideal for couples planning a grand, high-fashion wedding. The Ladyfair Bridal Makeup Process Initial Consultation: We discuss your preferences, wedding theme, and the makeup style you'd like. Our artists provide recommendations and help you choose the right look. Trial Makeup Session: We schedule a trial session to test the makeup and fine-tune your look, ensuring everything is perfect for your wedding day. Wedding Day Makeup: On the big day, our artists come to your location and provide your bridal makeup, ensuring you look beautiful for the entire event. Touch-Up Service: We also offer touch-up services throughout the day to keep you looking fresh and flawless during your wedding celebrations. Testimonials from Brides in Kuchaikote Anjali R., Kuchaikote: "Thank you, Ladyfair, for the wonderful bridal makeup! It was exactly what I wanted, and I felt amazing on my wedding day. The team was so professional and friendly!" Priya S., Kuchaikote: "I couldn't have asked for a better makeup experience. Ladyfair made me feel like a princess, and my bridal makeup was flawless all day long!" Kavita K., Kuchaikote: "I loved my bridal makeup by Ladyfair! They gave me the perfect look for my traditional wedding, and I received so many compliments. Highly recommend their services!" Tips for Brides in Kuchaikote to Prepare for Their Makeup Appointment Hydrate Early: Drink plenty of water leading up to your wedding day to keep your skin hydrated and glowing. Follow a Skincare Routine: Start a skincare regimen a few months before the wedding to ensure your skin is in the best condition for makeup. Share Your Vision: Communicate your makeup preferences clearly so our artists can create a look you’ll love. Relax and Enjoy: Trust our professionals to do their magic, and focus on enjoying the process of getting ready for your big day! Other Services Offered by Ladyfair in Kuchaikote Pre-Wedding Makeup Bridesmaid Makeup Engagement Makeup Bridal Hairstyling Bridal Photoshoot Makeup FAQs How soon should I book my bridal makeup appointment? It’s recommended to book your bridal makeup at least 2-3 months in advance to secure your date, especially during peak wedding seasons. Is a trial makeup session necessary? Yes, a trial session helps us finalize your bridal look and ensures you are comfortable with the makeup before the wedding day. What products do you use for bridal makeup? We use top-quality makeup brands that are long-lasting and suitable for all skin types. Our products ensure you look beautiful all day. Can I choose my own bridal makeup style? Yes! You can choose the makeup style that matches your personality, whether it’s traditional, natural, or glamorous. Our artists will work with you to create the perfect look. How do I book my bridal makeup session? Call 7004721239 or contact us to book your appointment and discuss your bridal makeup requirements.

Posted By: 26th December 2024
best bridal makeup artist in manjha
Introduction Looking for the best bridal makeup in Manjha? Ladyfair offers expert at-home bridal makeup services to ensure you look stunning on your big day. Our professional makeup artists are skilled in creating customized bridal looks that highlight your natural beauty. For flawless bridal makeup, call 7004721239 and book your session with us today! Why Choose Ladyfair for Bridal Makeup in Manjha? 1. Skilled Makeup Artists Our team consists of talented and experienced makeup artists who specialize in bridal makeup. They work with you to design the perfect look, keeping your preferences and features in mind. 2. At-Home Makeup Service Ladyfair brings the bridal makeup experience to the comfort of your home. Enjoy a stress-free service as we take care of all your makeup needs on your special day. 3. Premium Products We use only high-quality, skin-friendly makeup products that ensure long-lasting wear. From foundation to eyeliner, our products keep your makeup fresh throughout your wedding celebrations. 4. Tailored Bridal Makeup Whether you're going for a traditional, modern, or natural look, Ladyfair tailors your makeup to your personal style, ensuring you feel and look your best. Popular Bridal Makeup Styles in Manjha Traditional Bridal Makeup Traditional bridal makeup focuses on rich colors and intricate detailing. Ideal for brides who want to embrace a classic and cultural look on their wedding day. Natural Bridal Makeup Natural bridal makeup is perfect for brides who want to enhance their features with subtle tones and a glowing, fresh finish. This style creates a soft, elegant look for a beautiful and timeless appearance. Glamorous Bridal Makeup For a bold and striking appearance, glamorous bridal makeup emphasizes dramatic eyes, bold lips, and a flawless base, ensuring you stand out in all your wedding photos. The Ladyfair Bridal Makeup Process Initial Consultation: We begin with a consultation to understand your wedding theme, preferences, and desired makeup style. Our artists will provide expert advice to ensure the perfect bridal look. Trial Makeup Session: A trial session is scheduled before your wedding day, where we finalize your makeup look to ensure you are completely satisfied. On the Wedding Day: Our team arrives at your location and provides the complete bridal makeup service, ensuring you look picture-perfect for your big day. Touch-Up Service: We also offer touch-up services throughout the day, so your makeup stays fresh and beautiful for the entire celebration. Testimonials from Brides in Manjha Meera R., Manjha: "Ladyfair did an amazing job on my bridal makeup! I loved how they listened to my preferences and created a look that was perfect for me. I felt beautiful all day long!" Rani K., Manjha: "I was so pleased with the bridal makeup done by Ladyfair. The makeup was flawless, and the team was so professional. They made me feel like a queen!" Pooja S., Manjha: "Thank you, Ladyfair, for making my wedding day even more special. The makeup was amazing, and I received so many compliments from my family and friends!" Tips for Brides in Manjha to Prepare for Their Makeup Appointment Stay Hydrated: Keep your skin hydrated by drinking plenty of water in the days leading up to your wedding. Start Skincare Early: Start using a skincare routine months before your wedding to ensure clear, glowing skin. Communicate Your Vision: Make sure to communicate your makeup preferences and the style you envision for your bridal look during the consultation. Enjoy the Moment: Relax and let our professional makeup artists take care of everything. Focus on enjoying your special day! Other Services Offered by Ladyfair in Manjha Engagement Makeup Pre-Wedding Makeup Bridal Photoshoot Makeup Bridesmaid Makeup Bridal Hairstyling FAQs How soon should I book my bridal makeup appointment? We recommend booking at least 2-3 months in advance, especially during peak wedding season, to ensure your preferred date is available. Do I need a trial makeup session? Yes, we suggest having a trial session to test the makeup look before the big day, so you are confident with your bridal makeup. What products do you use for bridal makeup? We use premium-quality makeup products that are long-lasting and suitable for all skin types to ensure your makeup looks flawless throughout your wedding day. Can I choose the bridal makeup style I want? Absolutely! Whether you prefer a traditional, modern, or natural look, we customize the makeup based on your preferences. How do I book my bridal makeup session? Call 7004721239 or reach out to us to schedule your bridal makeup appointment.

Posted By: 26th December 2024
best bridal makeup artist in thawe
Introduction Looking for the best bridal makeup in Thawe? Ladyfair offers top-notch at-home bridal makeup services to ensure you look stunning on your big day. Our experienced makeup artists will create the perfect bridal look that complements your style and personality. For flawless bridal makeup, contact us at 7004721239 and book your session today! Why Choose Ladyfair for Bridal Makeup in Thawe? 1. Expert Makeup Artists Our talented team of makeup artists specializes in creating personalized bridal looks. We take into account your features, preferences, and wedding theme to ensure you look picture-perfect. 2. At-Home Service We provide convenient at-home bridal makeup services in Thawe, allowing you to relax in the comfort of your own space while we work our magic. 3. High-Quality Products Ladyfair uses only premium, skin-friendly makeup products that ensure your bridal look lasts all day long, from the ceremony to the reception. 4. Customized Bridal Look Whether you prefer a traditional or modern bridal style, we tailor the makeup to suit your vision, ensuring you feel confident and beautiful on your wedding day. Popular Bridal Makeup Styles in Thawe Traditional Bridal Makeup Traditional bridal makeup highlights rich colors, intricate details, and classic styles. Ideal for brides who want to embrace cultural beauty and elegance on their wedding day. Natural Bridal Makeup If you desire a subtle, glowing look, natural bridal makeup is perfect for you. It enhances your natural features with soft tones and a fresh, dewy finish. Glamorous Bridal Makeup For a bold and dramatic bridal look, glamorous makeup focuses on striking eye makeup, bold lips, and a flawless base, ensuring you stand out on your special day. The Ladyfair Bridal Makeup Process Consultation: We begin with a consultation to understand your preferences, wedding theme, and desired look. Based on this, we provide professional advice to ensure you get the perfect makeup. Trial Session: Before your big day, we schedule a trial session to finalize your bridal look and ensure everything is just right. Wedding Day Service: On your wedding day, our artists arrive at your venue and take care of all your makeup needs, so you can focus on enjoying your day. Touch-Up Services: We also offer touch-up services throughout the day to keep your makeup looking fresh for pictures and celebrations. Testimonials from Brides in Thawe Suman K., Thawe: "I’m so happy I chose Ladyfair for my wedding makeup. The makeup was flawless, and I felt so beautiful throughout the day. The artists were so friendly and professional!" Rekha M., Thawe: "The bridal makeup done by Ladyfair was everything I wanted and more. The team listened to my preferences and delivered a look that was perfect for me. I felt so confident!" Priya S., Thawe: "Thank you, Ladyfair, for making me feel like a queen on my wedding day. The makeup was impeccable, and I received so many compliments from my guests!" Tips for Brides in Thawe to Prepare for Their Makeup Appointment Hydrate Your Skin: Drink plenty of water in the days leading up to your wedding to keep your skin healthy and glowing. Follow a Skincare Routine: Start a skincare routine well in advance to ensure smooth, clear skin for your makeup. Discuss Your Vision: Share your preferences with our team during the consultation to ensure we create the look you desire. Relax and Enjoy: Trust our professionals to take care of your makeup, allowing you to enjoy the day without worry. Other Services Offered by Ladyfair in Thawe Engagement Makeup Pre-Wedding Makeup Bridal Photoshoot Makeup Bridesmaid Makeup Bridal Hairstyling FAQs When should I book my bridal makeup appointment? We recommend booking as soon as possible, especially during wedding season, to secure your desired date. Can I get a trial session before my wedding? Yes! We offer trial sessions to help you finalize your bridal makeup look and ensure it’s exactly what you want. Can I choose my own bridal makeup style? Definitely! We work with you to design a makeup look that fits your vision, whether it’s traditional, natural, or glamorous. What makeup products do you use? We use only high-quality, long-lasting makeup products that are safe for all skin types. How do I book my bridal makeup session? Simply call 7004721239 or reach out to us for more details about booking your bridal makeup appointment.

Posted By: 26th December 2024
best bridal makeup artist in sidhwaliya
Introduction Looking for the best bridal makeup in Sidhwaliya? Ladyfair brings professional at-home bridal makeup services to help you achieve a flawless look on your wedding day. Our expert makeup artists specialize in creating personalized, stunning bridal looks that suit your unique style. With Ladyfair, you’re guaranteed to look your best on the most important day of your life. Contact us at 7004721239 to book your bridal makeup session today! ] Why Choose Ladyfair for Bridal Makeup in Sidhwaliya? 1. Professional Makeup Artists Our team of skilled and experienced makeup artists understands the significance of your wedding day and works diligently to create a makeup look that complements your features and personality. 2. Convenient At-Home Service We offer at-home bridal makeup services in Sidhwaliya, ensuring that you can enjoy your pre-wedding preparations in the comfort of your own space, without any stress or travel worries. 3. High-Quality Makeup Products We use only top-notch, long-lasting makeup products that are safe for your skin and guarantee a picture-perfect look that stays fresh all day long. 4. Customized Bridal Look Whether you desire a traditional, modern, or glamorous bridal look, we customize the makeup based on your preferences, theme, and style, ensuring that you feel beautiful and confident. Popular Bridal Makeup Styles in Sidhwaliya Traditional Bridal Makeup Perfect for brides who want a classic, elegant look with rich colors and intricate details, traditional bridal makeup celebrates cultural beauty and heritage. Natural Bridal Makeup For brides who prefer a more subtle and radiant look, natural bridal makeup enhances your natural beauty with soft tones, a dewy finish, and a glowing complexion. Glamorous Bridal Makeup If you're looking to make a bold statement, glamorous bridal makeup focuses on enhancing your features with bold colors, dramatic eye makeup, and a flawless finish for an unforgettable look. The Ladyfair Bridal Makeup Process Consultation: We start with a consultation to discuss your preferences, wedding theme, and desired look. Our team will offer professional suggestions based on your ideas. Trial Session: Before your wedding, we arrange a trial session to perfect your look, ensuring that you're happy with the style and makeup. Wedding Day Service: On your wedding day, we arrive at your chosen location and take care of your makeup, making sure you're ready for your big day. Touch-Up Services: Throughout the ceremony and reception, we offer touch-up services to keep your makeup looking flawless and fresh for photos and celebrations. Testimonials from Brides in Sidhwaliya Kavita S., Sidhwaliya: "I’m so happy I chose Ladyfair for my wedding day makeup. The makeup was stunning, and the artists were friendly and professional. I felt like a princess!" Priya D., Sidhwaliya: "The makeup was beyond my expectations! The team at Ladyfair listened to my vision and created the perfect bridal look. Thank you so much for making me feel beautiful!" Anjali K., Sidhwaliya: "I can't thank Ladyfair enough for their amazing service. The makeup was flawless, and I received so many compliments. I felt gorgeous all day!" Tips for Brides in Sidhwaliya to Prepare for Their Makeup Appointment Start Skincare Early: Begin a skincare regimen well in advance to ensure your skin is glowing and healthy on your big day. Hydrate: Drink plenty of water in the weeks leading up to your wedding to keep your skin fresh and radiant. Share Your Vision: Let us know your preferences and makeup style ahead of time, so we can create the perfect look for you. Relax and Enjoy: Trust our professionals to take care of all your makeup needs, allowing you to enjoy your day without any stress. Other Services Offered by Ladyfair in Sidhwaliya Engagement Makeup Pre-Wedding Makeup Bridal Photoshoot Makeup Bridesmaid Makeup Bridal Hairstyling FAQs How far in advance should I book my bridal makeup appointment? We recommend booking as early as possible to secure your preferred date, especially during wedding season. Can I have a makeup trial before the wedding? Yes! We offer a trial session to help you decide on your desired look for your big day. Can I choose my bridal makeup look? Absolutely! We work with you to design a personalized makeup look that fits your style and wedding theme. What products do you use for bridal makeup? We use premium, long-lasting makeup products suitable for all skin types, ensuring a flawless and comfortable application. How can I book my bridal makeup session? You can book your session by calling 7004721239 or by reaching out to us for more details.

Posted By: 26th December 2024
best bridal makeup artist in bhorey
Introduction Looking for the best bridal makeup in Bhorey? Ladyfair offers exceptional at-home bridal makeup services to ensure you look your best on your wedding day. Our expert makeup artists specialize in creating stunning looks that enhance your natural beauty, from traditional to contemporary styles. With Ladyfair, you’re guaranteed a flawless and unforgettable bridal look. Book your session today by calling 7004721239! Why Choose Ladyfair for Bridal Makeup in Bhorey? 1. Skilled and Experienced Makeup Artists Our team of professional makeup artists brings years of experience to create the perfect bridal look, paying attention to every detail to make sure you look stunning. 2. Convenient At-Home Makeup Service Our bridal makeup services are available at your doorstep, ensuring you have a relaxed, comfortable, and hassle-free experience on your special day. 3. High-Quality Makeup Products We only use premium makeup products that are safe, long-lasting, and perfect for all skin types, giving you a flawless look that lasts all day. 4. Customized Bridal Look Whether you want a bold, glamorous look or a subtle, natural appearance, we create a personalized bridal makeup look based on your preferences and wedding theme. Popular Bridal Makeup Styles in Bhorey Classic Bridal Makeup Traditional bridal makeup is perfect for brides who want a timeless and elegant look. This style includes rich, bold colors and intricate designs that bring out the bride's cultural heritage. Natural Bridal Makeup For brides who prefer a subtle, radiant look, natural bridal makeup focuses on enhancing the bride’s natural features with soft tones and a glowing finish. Glamorous Bridal Makeup For brides who want to make a bold statement, glamorous bridal makeup adds drama with bold colors, striking features, and a flawless finish, making you stand out on your big day. The Ladyfair Bridal Makeup Process Consultation: We begin by understanding your vision for your bridal look and preferences, offering professional advice on the best style for you. Trial Session: A makeup trial is arranged to help you finalize the look before the big day. Wedding Day Service: On your wedding day, our artists arrive at your location and ensure you look beautiful and radiant as you prepare for your ceremony. Touch-Up Services: Throughout the day, we provide touch-ups to keep your makeup looking flawless for photos and celebrations. Testimonials from Brides in Bhorey Meera K., Bhorey: "I was so happy with the bridal makeup from Ladyfair! My makeup was stunning, and the team was so friendly and professional. I felt beautiful all day!" Suman D., Bhorey: "The bridal makeup artists at Ladyfair listened to all my preferences and gave me the perfect look. I received so many compliments, and it lasted all day!" Neha T., Bhorey: "Ladyfair made my wedding day special with their amazing makeup services. The team was on time and so skilled. I felt like a queen!" Tips for Brides in Bhorey to Prepare for Their Makeup Appointment Start Skincare Early: To achieve a radiant glow, begin a skincare routine several weeks before the wedding. Stay Hydrated: Drinking plenty of water helps maintain healthy and glowing skin for makeup. Share Your Style Preferences: During your consultation, let us know if you prefer a specific style or look for your wedding day. Relax and Enjoy: Trust our experts to take care of your makeup needs, leaving you stress-free and confident on your big day. Other Services Offered by Ladyfair in Bhorey Engagement Makeup Pre-Wedding Makeup Bridal Photoshoot Makeup Bridesmaid Makeup Bridal Hairstyling FAQs How early should I book my bridal makeup session? We recommend booking as soon as possible, as we get busy closer to wedding season. However, last-minute bookings may also be available. Do you offer makeup trials? Yes, we offer a trial session to make sure we capture the look you want for your wedding day. Can I choose my own bridal makeup look? Absolutely! We work with you to create the perfect bridal look based on your preferences. What makeup products do you use? We use high-quality, long-lasting makeup that’s suitable for all skin types, ensuring your makeup stays flawless. How can I book my bridal makeup session? Call us at 7004721239 to book your bridal makeup session or to inquire further about our services.

Posted By: 26th December 2024
best bridal makeup artist in hathua
Introduction Searching for the perfect bridal makeup in Hathua? Look no further than Ladyfair! Our expert makeup artists specialize in creating stunning looks tailored to your personal style, ensuring that you look radiant on your big day. Whether you prefer a classic or modern look, our at-home bridal makeup service will make you feel beautiful and confident. Book your appointment today by calling 7004721239! Why Choose Ladyfair for Bridal Makeup in Hathua? 1. Professional Makeup Artists Our team of skilled makeup artists brings years of experience to create the perfect bridal look for you, focusing on enhancing your natural beauty. 2. At-Home Makeup Service Experience the convenience of our at-home bridal makeup service. We’ll come to your location and provide a flawless, stress-free experience on your special day. 3. Premium Makeup Products We use only top-quality makeup products that are long-lasting and safe for all skin types, ensuring a perfect look throughout your wedding. 4. Personalized Bridal Look From bold, glamorous styles to soft, natural finishes, we customize each bridal look to fit your preferences and wedding theme. Popular Bridal Makeup Styles in Hathua Traditional Bridal Makeup Traditional bridal makeup creates a regal and timeless look, featuring rich colors and intricate detailing. Ideal for brides seeking a classic and cultural aesthetic. Natural Bridal Makeup For a more subtle and glowing look, natural bridal makeup enhances your features with neutral tones, giving you a fresh and radiant appearance. Glamorous Bridal Makeup If you prefer a dramatic and bold look, glamorous bridal makeup emphasizes your features with bold colors and striking techniques, ensuring you stand out on your big day. The Ladyfair Bridal Makeup Process Initial Consultation: We start by discussing your vision for your bridal look and any preferences you have. Trial Makeup Session: We offer a trial session so you can test different styles and choose the one that suits you best. Wedding Day Service: On your wedding day, our makeup artists arrive at your location, ensuring you look flawless as you prepare for the ceremony. Touch-Up Services: We provide touch-up services throughout the day to keep your makeup looking perfect. What Brides in Hathua Are Saying Suman R., Hathua: "Ladyfair made me feel like a queen on my wedding day. My makeup was exactly how I wanted it, and I received so many compliments!" Rina S., Hathua: "I was nervous about how my makeup would turn out, but the team at Ladyfair exceeded all my expectations. My makeup was stunning and lasted all day!" Neha P., Hathua: "The bridal makeup team at Ladyfair was so professional and friendly. They listened to all my requests and made me feel at ease. Highly recommended!" Tips for Brides in Hathua to Prepare for Their Makeup Appointment Pre-Wedding Skincare: Start a skincare regimen well before the wedding to ensure your skin is glowing and ready for makeup. Hydrate: Drinking water in the days leading up to your wedding helps maintain your skin’s freshness and prevents dryness. Share Your Vision: During the consultation, be sure to share your desired look, whether it’s bold, natural, or traditional. Relax and Enjoy: Let our team take care of the details – we’re here to make you look and feel your best! Other Services Offered by Ladyfair in Hathua Pre-Wedding Makeup Engagement Makeup Photoshoot Makeup Bridal Hairstyling for Brides and Bridesmaids FAQs When should I book my bridal makeup session? We recommend booking as early as possible, but last-minute bookings may be available depending on our schedule. Do you offer makeup trials? Yes, we offer a trial session to help you decide on the perfect look for your wedding day. Can I choose my own bridal makeup style? Of course! We work with you to create a customized bridal look based on your preferences and wedding theme. What makeup brands do you use? We use high-quality, long-lasting makeup products that are safe for all skin types, ensuring flawless results. How do I book my bridal makeup session? Call us at 7004721239 to book your bridal makeup or to inquire about our services.

Posted By: 26th December 2024
best bridal makeup artist in kateya
Introduction For flawless bridal makeup in Kateya, look no further than Ladyfair. Our expert makeup artists specialize in creating stunning looks that enhance your natural beauty. Whether you're preparing for a traditional ceremony or a modern wedding, our at-home makeup service ensures you feel beautiful and confident on your special day. Book your appointment today by calling 7004721239! Why Choose Ladyfair for Bridal Makeup in Kateya? 1. Professional Makeup Artists Our skilled makeup artists use their expertise to craft the perfect bridal look tailored to your preferences and the wedding theme. 2. Convenient At-Home Service Forget the hassle of salon visits! Our team will arrive at your location, providing you with a comfortable and stress-free experience on your wedding day. 3. Top-Quality Makeup Products We use only the best makeup products that are long-lasting and gentle on your skin. You’ll look radiant all day long. 4. Customized Bridal Looks Whether you want a bold, glamorous style or a soft, natural appearance, we ensure that your bridal makeup is exactly what you envision. Popular Bridal Makeup Styles in Kateya Traditional Bridal Makeup With deep colors and intricate details, traditional bridal makeup gives you a classic and regal appearance, perfect for cultural weddings. Natural Bridal Makeup For brides who prefer a more understated look, natural bridal makeup enhances your features with subtle tones, ensuring a glowing finish. Glamorous Bridal Makeup If you want to stand out on your wedding day, glamorous bridal makeup offers bold colors and dramatic techniques to create a show-stopping look. The Ladyfair Bridal Makeup Process Consultation: We begin with a discussion about your makeup preferences and vision for your wedding day. Trial Session: We offer a trial session to help you choose your perfect look before the big day. Wedding Day Service: Our artists arrive at your location on the wedding day and provide a flawless bridal makeup experience. Touch-Ups: Throughout the day, we ensure that your makeup stays perfect, offering touch-ups as needed. What Brides in Kateya Are Saying Priya R., Kateya: "The makeup Ladyfair did for me was absolutely stunning. I felt like a princess on my wedding day, and I received so many compliments!" Kavita S., Kateya: "Ladyfair’s team made my wedding makeup experience so enjoyable. They were professional, and my makeup lasted all day, even through the photoshoot!" Neha P., Kateya: "I was nervous about how my makeup would turn out, but Ladyfair exceeded my expectations. I looked and felt amazing!" Tips for Brides in Kateya to Prepare for Their Makeup Appointment Start Skincare Early: Healthy skin makes for flawless makeup. Begin a skincare routine well in advance of your wedding day. Stay Hydrated: Drink plenty of water in the days leading up to your wedding to keep your skin looking fresh and vibrant. Communicate Your Preferences: Make sure to discuss your style and any specific requests with your makeup artist during the consultation. Trust the Experts: Relax and enjoy the process – our team is here to make you feel and look your best. Other Services Offered by Ladyfair in Kateya Pre-Wedding Makeup Engagement Makeup Photoshoot Makeup Bridal Hairstyling for Brides and Bridesmaids FAQs How far in advance should I book my bridal makeup session? It’s always best to book as soon as possible, but we do accept last-minute bookings depending on availability. Do you offer trial makeup sessions? Yes, we offer a trial session to ensure your bridal look is exactly how you envision it. Can I choose my bridal makeup style? Absolutely! Our makeup artists will work with you to create a look that matches your style, preferences, and wedding theme. What makeup products do you use? We use high-quality, long-lasting makeup products that are safe for all skin types, ensuring a flawless look on your wedding day. How can I book my bridal makeup session? Call us at 7004721239 to book your bridal makeup or to ask for more information.

Posted By: 26th December 2024
best bridal makeup artist in panchdewari
Introduction On your wedding day, trust Ladyfair for stunning bridal makeup services in Panchdewari. With our at-home makeup service, we bring professional beauty treatments to your doorstep, ensuring you look radiant and confident on your special day. Call us at 7004721239 to book your bridal makeup appointment today! Why Choose Ladyfair for Bridal Makeup in Panchdewari? 1. Expert Makeup Artists Our talented team of professional makeup artists will work with you to create the perfect bridal look, highlighting your beauty and making you feel fabulous. 2. Convenient At-Home Service Enjoy the luxury of getting your makeup done at home. No need to worry about salon visits; we bring everything you need to you. 3. High-Quality Makeup Products We use only premium-quality, long-lasting makeup products that are gentle on your skin, ensuring a flawless finish that stays throughout the day. 4. Personalized Bridal Looks Whether you're envisioning a timeless traditional look or a chic modern style, we will tailor the makeup to suit your personal taste and wedding theme. Popular Bridal Makeup Styles in Panchdewari Traditional Bridal Makeup This timeless look uses rich, bold colors and intricate detailing to give you a royal appearance, perfect for traditional weddings. Natural Bridal Makeup For a soft and glowing look, natural makeup focuses on enhancing your features without heavy coverage, ideal for brides who prefer a subtle look. Glamorous Bridal Makeup Go all out with a glamorous bridal look that includes dramatic eyes, contouring, and a flawless complexion, ideal for brides who love to stand out. The Ladyfair Bridal Makeup Process Consultation: Start with a consultation where we discuss your preferences and ideas for your bridal makeup. Trial Session: Enjoy a trial session to try out your bridal look before the big day. Wedding Day Service: Our artists will arrive at your location on your wedding day and create a flawless makeup look. Touch-ups and After-Service: We provide touch-ups throughout your wedding day to ensure your makeup stays perfect from start to finish. What Brides in Panchdewari Are Saying Rita K., Panchdewari: "The team at Ladyfair was fantastic! My bridal makeup was stunning, and I received so many compliments on my wedding day." Shalini S., Panchdewari: "I couldn't have asked for a better bridal makeup experience. Ladyfair's professionalism and attention to detail were unmatched!" Neelam P., Panchdewari: "I was worried about how my makeup would turn out, but Ladyfair exceeded my expectations. I felt like a queen on my wedding day!" Preparation Tips for Brides in Panchdewari Start Skincare Early: Consistent skincare leading up to your wedding day ensures a glowing, healthy complexion. Eat Well and Stay Hydrated: A nutritious diet and hydration help achieve glowing skin, keeping you looking fresh. Consult Early: Discuss your bridal makeup ideas with your artist well in advance to ensure your vision is captured perfectly. Relax and Trust the Process: Enjoy your bridal experience and let the professionals handle the rest! Additional Services Offered by Ladyfair in Panchdewari Pre-Wedding Makeup Engagement Makeup Photoshoot Makeup Hairstyling for Brides and Bridesmaids FAQs How far in advance should I book my bridal makeup session? It’s best to book as early as possible, but we do accept last-minute bookings based on availability. Do you provide trial sessions for bridal makeup? Yes, we offer a trial session to help you decide on the perfect look for your wedding day. Can I customize my bridal makeup look? Absolutely! We offer personalized makeup services to match your desired style and wedding theme. What makeup products do you use? We use premium, long-lasting products that are safe for all skin types, ensuring your makeup looks flawless for hours. How do I book my bridal makeup session? Simply call us at 7004721239 to reserve your appointment or get more details.

Posted By: 26th December 2024
best bridal makeup artist in phulwariya
Introduction Make your wedding day unforgettable with stunning bridal makeup services in Phulwariya. Ladyfair specializes in offering expert at-home makeup services, ensuring that you look radiant, confident, and ready for your big day. Reach out to us at 7004721239 to book your bridal makeup appointment today. Why Choose Ladyfair for Bridal Makeup in Phulwariya? 1. Skilled Makeup Artists Our team of expert makeup artists is dedicated to creating the perfect bridal look that complements your style and enhances your natural beauty. 2. Convenient At-Home Service Forget the stress of salon appointments. We bring professional makeup services to the comfort of your home. 3. High-Quality Makeup Products We use only the best makeup products that are safe for all skin types and will last throughout your wedding day. 4. Customized Bridal Looks Whether you desire a classic traditional style or a modern, glamorous look, we tailor our services to match your wedding theme and personal preferences. Popular Bridal Makeup Styles in Phulwariya Traditional Bridal Makeup This timeless look features rich colors, bold eye makeup, and intricate detailing to give you a royal and regal appearance. Natural Bridal Makeup Perfect for brides who want a more subtle, fresh, and glowing look, emphasizing natural beauty while enhancing your features. Contemporary Bridal Makeup A blend of modern techniques with a traditional twist, ideal for brides looking for something unique and chic. The Ladyfair Bridal Makeup Process Consultation: Discuss your desired look and preferences during a personal consultation. Trial Session: Experience your bridal makeup look beforehand with a trial session. Wedding Day Service: Relax and enjoy the final touch-ups and makeup artistry on your wedding day. After-Service Assistance: We ensure your makeup remains flawless throughout the ceremony and reception. What Brides in Phulwariya are Saying Suman D., Phulwariya: "Ladyfair's at-home makeup service was a game changer! My makeup looked amazing, and I felt so comfortable in my own space." Naina P., Phulwariya: "I loved how the makeup artist listened to my ideas and brought them to life. The entire experience was wonderful!" Anita G., Phulwariya: "From consultation to wedding day, Ladyfair made everything so smooth. My bridal look was just what I envisioned!" Preparation Tips for Brides in Phulwariya Start Skincare Early: Good skincare is key to glowing skin on your wedding day. Eat Healthy and Hydrate: Staying hydrated and eating healthy will give your skin a natural glow. Choose Your Style Early: Discuss your preferred bridal makeup style with the artist in advance. Trust the Process: Relax and enjoy the makeup journey—we’ve got you covered! Additional Services Offered by Ladyfair in Phulwariya Engagement Makeup Pre-Wedding Photoshoot Makeup Party Makeup Hairstyling for Brides and Bridesmaids FAQs How early should I book my bridal makeup appointment? It’s ideal to book early, but we do accept last-minute bookings depending on availability. Do you offer trial sessions? Yes, we offer trial sessions so you can see how your bridal makeup will look on the big day. Can you customize my bridal makeup look? Absolutely! We offer personalized makeup looks based on your style, wedding theme, and preferences. What makeup products do you use? We use premium, skin-friendly products that provide long-lasting and flawless coverage. How do I schedule my bridal makeup session? You can book your session by calling us at 7004721239.

Posted By: 26th December 2024
best bridal makeup artist in uchkagaon
Introduction Every bride deserves to look stunning on her special day. In Uchkagaon, Ladyfair brings the ultimate convenience and expertise in bridal makeup right to your doorstep. With our professional at-home makeup services, you can focus on enjoying your day while we ensure you look radiant. Call us at 7004721239 to book your bridal makeup appointment today. Why Choose Ladyfair for Bridal Makeup in Uchkagaon? 1. Expert Makeup Artist Our experienced artist specializes in creating flawless bridal looks that reflect your personality and match your wedding theme. 2. Convenient At-Home Service Skip the salon visits and enjoy a luxurious makeup session in the comfort of your home. 3. Premium Products Ladyfair uses top-quality, long-lasting, and skin-friendly makeup products to ensure your look stays fresh all day. 4. Tailored Bridal Styles From traditional elegance to modern chic, we customize every detail of your bridal makeup to suit your preferences. Popular Bridal Makeup Styles in Uchkagaon Traditional Bridal Makeup Perfect for brides seeking a regal look with bold colors, intricate details, and classic charm. Contemporary Minimalist Look A subtle, fresh-faced approach that emphasizes natural beauty and elegance. Fusion Makeup A mix of traditional and modern styles, offering a unique and personalized bridal look. The Ladyfair Bridal Makeup Process Consultation: Share your vision and preferences during a one-on-one consultation with our makeup artist. Trial Session: Experience a trial makeup session to finalize your look before the big day. Wedding Day Glam: Enjoy a flawless and stress-free makeup session on your wedding day. Touch-Up Assistance: Ensure your makeup remains picture-perfect throughout the event. What Our Brides Say Ritika P., Uchkagaon: "I loved the convenience of having my makeup done at home. The results were beyond my expectations!" Sunita K., Uchkagaon: "Ladyfair made me feel so confident and beautiful on my big day. Highly recommend their service!" Neha J., Uchkagaon: "The trial session was amazing, and the final look was exactly what I dreamed of. Thank you, Ladyfair!" Preparation Tips for Brides in Uchkagaon Start Skincare Early: Follow a consistent skincare routine to keep your skin glowing. Stay Hydrated: Drink plenty of water in the weeks leading up to your wedding. Plan Ahead: Discuss your preferences with the makeup artist during the consultation. Relax and Enjoy: Trust Ladyfair to handle your bridal beauty needs. Additional Services by Ladyfair in Uchkagaon Engagement Makeup Party Makeup Pre-Wedding Events Makeup Hairstyling Services FAQs How far in advance should I book my bridal makeup? It’s best to book as early as possible, but we also accommodate last-minute requests when possible. Do you offer trial sessions? Yes, we provide trial sessions to help you finalize your bridal look. What types of makeup styles do you offer? We specialize in traditional, modern, and fusion bridal makeup styles. What products do you use? We use high-quality, skin-safe products to ensure a flawless and lasting finish. How do I schedule an appointment? Simply call us at 7004721239 to book your session.

Posted By: 26th December 2024
best bridal makeup artist in vijayipur
Introduction Your wedding day is one of the most significant moments of your life, and every bride deserves to look her absolute best. In Vijayipur, Ladyfair provides exceptional at-home bridal makeup services, ensuring you look stunning without the hassle of visiting a salon. Contact us today at 7004721239 to schedule your personalized bridal makeup session. Why Choose Professional Bridal Makeup? Bridal makeup is an art that combines expertise, precision, and creativity to enhance a bride’s natural beauty. A professional makeup artist ensures your makeup complements your outfit, jewelry, and wedding theme while lasting throughout the event. Ladyfair specializes in creating bespoke bridal looks tailored to your preferences, making every bride in Vijayipur feel confident and radiant. Why Ladyfair is the Best Choice in Vijayipur At-Home Convenience Skip the salon stress. Ladyfair’s expert makeup artist will come to your home, providing a comfortable and relaxing experience. Experienced Makeup Artist Our professional artist is skilled in various bridal styles, from traditional grandeur to contemporary elegance. Premium Products Ladyfair uses only high-quality, long-lasting, and skin-safe products to ensure your look stays flawless throughout your big day. Personalized Consultation We provide pre-wedding consultations to understand your preferences and create your dream bridal look. Trending Bridal Makeup Styles in Vijayipur Traditional Bridal Makeup Embrace the vibrant colors and intricate designs of traditional Indian bridal makeup for a timeless look. Modern Minimalist Makeup Go for a subtle, natural look that highlights your features with a soft and glowing finish. Classic Fusion Makeup Blend traditional and modern elements to create a unique bridal look tailored to your personality. Steps to Your Perfect Bridal Look with Ladyfair Initial Consultation: Discuss your vision, preferences, and wedding theme with our expert makeup artist. Trial Session: Experience a trial makeup session to finalize your bridal look. Flawless Application: Enjoy a seamless makeup application on your wedding day. Post-Makeup Touch-Ups: Keep your makeup fresh throughout the celebration. Client Testimonials Priya M., Vijayipur: "Ladyfair’s service was excellent! The makeup artist came to my home, and the results were beyond my expectations. Highly recommended!" Anjali R., Vijayipur: "The at-home convenience and trial session made all the difference. I felt confident and looked amazing on my special day!" Neetu S., Vijayipur: "Ladyfair provided the perfect blend of traditional and modern makeup. I was thrilled with the results!" Preparation Tips for Brides in Vijayipur Hydration is Key: Drink plenty of water to keep your skin glowing. Follow a Skincare Routine: Cleanse, tone, and moisturize regularly. Communicate Your Preferences: Clearly share your ideas with the makeup artist. Avoid New Products: Stick to familiar products to prevent skin irritations. Additional Services by Ladyfair in Vijayipur Engagement Makeup Party Makeup Everyday Makeup for Special Events Hairstyling Services FAQs What makes Ladyfair unique in Vijayipur? Ladyfair provides premium at-home bridal makeup services, ensuring every bride feels relaxed and confident. What bridal styles do you offer? We specialize in traditional, modern minimalist, and fusion bridal makeup styles. How far in advance should I book? We recommend booking as early as possible, but we also accommodate last-minute requests when feasible. What products do you use? We use only high-quality, skin-friendly products for all makeup applications. Is a trial session included? Yes, we offer trial sessions to help finalize your desired bridal look. How do I book your services? Contact us at 7004721239 to schedule your appointment.

Posted By: 26th December 2024
best bridal makeup artist in kako
Introduction A wedding is an unforgettable moment in a bride's life, and looking beautiful on this special day is a priority. In Kako, Ladyfair brings premium at-home bridal makeup services to make every bride's dream look a reality. Skip the hassle of traveling and enjoy the convenience of personalized beauty services at your doorstep. Contact us at 7004721239 to book your bridal makeup session today. Why Choose Professional Bridal Makeup? Bridal makeup is not just about applying cosmetics—it's about creating a look that enhances your natural beauty while complementing your wedding outfit and theme. Professional makeup ensures you look radiant throughout the day and picture-perfect in your wedding photographs. Ladyfair specializes in crafting unique bridal looks tailored to individual preferences, ensuring every bride in Kako feels confident and beautiful. Why Ladyfair is the Top Choice in Kako Convenient At-Home Services Our expert makeup artist comes to your home, offering a stress-free and relaxing makeup experience without the need to visit a salon. Skilled Makeup Artist Ladyfair’s professional artist has extensive experience in creating stunning bridal looks, from traditional elegance to modern sophistication. Use of Premium Products We use high-quality, skin-friendly, and long-lasting makeup products to ensure a flawless look that lasts throughout your wedding day. Customized Consultation Ladyfair offers pre-wedding consultations and trial sessions to understand your preferences and perfect your bridal look. Trending Bridal Makeup Styles in Kako Traditional Bridal Makeup This style is ideal for brides who want a bold and vibrant look that pairs perfectly with traditional wedding attire. Minimalist Bridal Makeup A soft, glowing look with subtle highlights and natural tones for brides who prefer understated elegance. Fusion Bridal Makeup A unique blend of traditional and modern styles that highlights the best of both worlds. Steps to Your Dream Bridal Look with Ladyfair Consultation: Discuss your preferences and wedding theme with our makeup artist. Trial Session: Try out your bridal look in advance to ensure satisfaction. Final Makeup: Enjoy a flawless and radiant transformation on your wedding day. Post-Makeup Touch-Ups: Keep your look fresh throughout your celebrations. Client Testimonials Neha S., Kako: "Ladyfair made my wedding day so special. The at-home service was so convenient, and the makeup artist exceeded my expectations!" Pooja T., Kako: "I loved the trial session. It gave me confidence that my bridal look would be perfect. The team is very professional!" Anjali K., Kako: "The makeup artist listened to all my requirements and created a beautiful fusion look. I was so happy with the results!" Preparation Tips for Your Bridal Makeup Hydrate Your Skin: Drink plenty of water to maintain a natural glow. Follow a Skincare Routine: Regular cleansing, toning, and moisturizing are key to a healthy complexion. Communicate Clearly: Share your vision with the makeup artist during your consultation. Avoid New Products: Stick to familiar products to avoid skin reactions. Additional Services by Ladyfair in Kako Engagement Makeup Party Makeup Special Occasion Makeup Everyday Makeup for Photoshoots FAQs What makes Ladyfair unique in Kako? We provide premium at-home bridal makeup services tailored to your preferences. What makeup styles do you offer? We specialize in traditional, minimalist, and fusion bridal looks. Can you accommodate last-minute bookings? We recommend booking in advance, but we do our best to accommodate last-minute requests. What products do you use? We use top-quality, skin-friendly, and long-lasting products for all makeup sessions. Do you provide touch-up services? Yes, we offer touch-ups to ensure your makeup stays fresh all day. How do I book Ladyfair’s services? Call us at 7004721239 to schedule your bridal makeup appointment.

Posted By: 26th December 2024
best bridal makeup artist in modanganj
Introduction Your wedding day is one of the most cherished moments of your life, and every bride desires to look radiant and confident. In Modanganj, Ladyfair brings you exceptional at-home bridal makeup services, ensuring you look flawless and stress-free on your special day. With our personalized approach, we make your bridal transformation convenient and memorable. Call us now at 7004721239 to book your appointment. In this blog, we’ll explore the importance of professional bridal makeup, what makes Ladyfair the best choice in Modanganj, and how our services can elevate your wedding day look. The Importance of Bridal Makeup Bridal makeup is more than applying cosmetics—it's an art that enhances your natural beauty while complementing your wedding attire. Professional makeup ensures you look stunning in person and in your wedding photographs. At Ladyfair, we specialize in creating unique bridal looks that blend traditional elegance with modern sophistication. Why Ladyfair Stands Out in Modanganj At-Home Services for Convenience With Ladyfair, you don’t need to step out of your home. Our skilled makeup artist comes to your location, offering a relaxing and customized bridal makeup experience. Expert Makeup Artist Our experienced artist ensures your bridal look aligns with your preferences, wedding theme, and attire. Whether it’s a bold traditional look or a soft, minimalist style, Ladyfair delivers excellence. Premium Products We use high-quality, skin-safe, and long-lasting products to ensure your makeup stays flawless throughout the day. Pre-Wedding Consultations Understanding your vision is essential to us. Ladyfair provides pre-wedding consultations to finalize your makeup style and perform trial sessions for a perfect result. Bridal Makeup Trends in Modanganj Traditional Bridal Makeup This classic style features bold eye makeup, vibrant lips, and detailed contouring, perfectly complementing traditional wedding attire. Modern Bridal Makeup Soft tones, subtle highlights, and a glowing complexion characterize modern bridal makeup, offering a minimalist yet stunning look. Fusion Bridal Makeup Ladyfair excels at blending traditional and modern styles, creating fusion looks tailored to your preferences and cultural background. The Ladyfair Experience Initial Contact: Call us at 7004721239 to discuss your requirements. Pre-Wedding Consultation: Share your vision and preferences with our expert makeup artist. Trial Session: Experience a trial look to ensure satisfaction. Final Makeup Session: Enjoy a flawless bridal transformation on your wedding day. Post-Wedding Touch-Ups: If needed, we provide touch-ups to keep your makeup fresh. Client Testimonials Sanya R., Modanganj: "Ladyfair made my wedding day stress-free with their at-home service. My makeup was stunning and exactly what I envisioned!" Priya T., Modanganj: "The trial session gave me so much confidence. The makeup artist was professional, and the products were amazing. Highly recommended!" Ankita P., Modanganj: "Ladyfair created the perfect fusion look for me. My makeup lasted all day, and I felt absolutely beautiful." Preparing for Your Bridal Makeup Session Stay Hydrated: Drink plenty of water to keep your skin healthy. Follow a Skincare Routine: Cleanse, tone, and moisturize daily for a glowing complexion. Avoid New Products: Stick to familiar skincare products to prevent any adverse reactions. Communicate Your Vision: Share your preferences during the consultation. Beyond Bridal Makeup: Ladyfair’s Additional Services Party Makeup: Perfect for wedding guests. Everyday Makeup: Subtle looks for casual outings. Special Occasion Makeup: Ideal for engagements, anniversaries, and more. Looking Ahead: Ladyfair’s Vision for Modanganj Ladyfair aims to revolutionize bridal makeup services in Modanganj by offering premium quality, convenience, and unmatched customer satisfaction. FAQs What makes Ladyfair unique in Modanganj? Our at-home bridal makeup services provide convenience and a personalized experience for every bride. What styles does Ladyfair specialize in? We specialize in traditional, modern, and fusion bridal makeup tailored to your preferences. How does the at-home service work? Our makeup artist visits your location, providing consultation, trial sessions, and final makeup services. What products do you use? We use high-quality, skin-friendly, and long-lasting makeup products. How can a bride prepare for her session? Stay hydrated, follow a consistent skincare routine, and share your vision during the consultation. Can you accommodate cultural preferences? Yes, we specialize in incorporating cultural and traditional elements into your bridal makeup. How do I book Ladyfair’s services? Call us at 7004721239 to discuss your bridal makeup needs and schedule an appointment.

Posted By: 26th December 2024
best bridal makeup artist in ratni faridpur
Introduction Every bride dreams of looking stunning and radiant on her wedding day. In Ratni Faridpur, Ladyfair Bridal Makeup Services brings your vision to life with flawless, professional, and personalized makeup. Our at-home service ensures a stress-free experience so you can focus on cherishing your special day. To book your appointment, call us at 7004721239. In this blog, we’ll discuss why professional bridal makeup is crucial, what makes Ladyfair the top choice in Ratni Faridpur, and the range of services we offer to brides. Why Professional Bridal Makeup Matters Bridal makeup is an art that enhances your natural beauty while perfectly complementing your attire, jewelry, and personality. With Ladyfair, you’ll shine both in person and in photographs. Our experienced makeup artist ensures: Long-lasting, flawless makeup. A look tailored to your unique style. Confidence on one of the most important days of your life. Why Choose Ladyfair in Ratni Faridpur? 1. At-Home Service No need to step out! Our makeup artist comes to your home, offering a convenient and personalized experience. 2. Expert Techniques From traditional looks to modern styles, Ladyfair creates stunning bridal transformations that cater to all preferences. 3. Premium Products We use high-quality, skin-friendly products to ensure safety and long-lasting perfection. 4. Pre-Wedding Consultations Every bride is unique, and we take the time to plan your look, try out styles, and make sure your makeup complements your attire and vision. Bridal Makeup Styles Offered in Ratni Faridpur 1. Traditional Bridal Makeup Bold eyeliner, rich lip colors, and intricate contouring to enhance your cultural attire. 2. Modern Bridal Makeup A minimalist, radiant look with subtle highlights and soft tones. 3. Fusion Bridal Makeup Combining the best of traditional and modern techniques for a unique style. The Ladyfair Experience: Step by Step Step 1: Call 7004721239 to book your appointment. Step 2: Pre-wedding consultation to finalize your look. Step 3: Makeup trial to ensure satisfaction. Step 4: Bridal makeup session at your location. Step 5: Optional touch-ups during your wedding day. Client Testimonials Priti S., Ratni Faridpur: "Ladyfair made my wedding day stress-free with their at-home service. My makeup looked stunning, and I felt so confident!" Neha R., Ratni Faridpur: "The trial session helped me feel completely ready for my wedding day. The artist was skilled and professional." Asha K., Ratni Faridpur: "I wanted a mix of tradition and modernity, and Ladyfair nailed it. My makeup lasted all day!" Preparation Tips for Your Bridal Makeup Session Stay hydrated for glowing skin. Follow a consistent skincare routine. Avoid trying new products to prevent reactions. Communicate your preferences during the consultation. Additional Services by Ladyfair Party Makeup for wedding guests. Engagement and Pre-Wedding Makeup for special occasions. Everyday Makeup for casual outings. FAQs Q: How do I book a session? Call us at 7004721239 to schedule your bridal makeup appointment. Q: Do you offer trial sessions? Yes, we provide trial sessions to perfect your final look. Q: Can I book makeup for family members? Yes, we offer services for bridesmaids and family members. Q: What products do you use? We use high-quality, long-lasting products suitable for all skin types.

Posted By: 26th December 2024
best bridal makeup artist in hulasganj
Introduction Your wedding day is one of the most cherished moments of your life, and at Ladyfair, we ensure you look absolutely stunning. As the leading bridal makeup service provider in Hulasganj, we bring you the convenience of at-home bridal makeup services. With our expert team, premium products, and personalized approach, we make your special day unforgettable. Call us at 7004721239 to book your bridal makeup session today. In this blog, discover how Ladyfair transforms brides in Hulasganj into their most radiant selves and why we are trusted by countless happy customers. Why Bridal Makeup Matters Bridal makeup is more than just applying products—it’s about creating a timeless look that enhances your natural beauty while reflecting your personality. At Ladyfair, we craft looks that are picture-perfect and long-lasting, ensuring you feel confident and radiant throughout your wedding day. Why Choose Ladyfair for Bridal Makeup in Hulasganj? At-Home Services Enjoy the convenience of professional bridal makeup in the comfort of your home. No salon visits, no hassle—just expert service brought to your doorstep. Experienced Makeup Artists Our team of skilled makeup artists specializes in creating bridal looks that range from traditional to modern, tailored to your preferences and style. Premium Quality Products We use high-quality, long-lasting, and skin-friendly products to ensure a flawless finish that stays fresh all day. Customized Looks Every bride is unique, and so is her style. We create a bridal look that complements your wedding attire, jewelry, and overall theme. Our Bridal Makeup Styles Traditional Bridal Makeup Perfect for brides who want to embrace their cultural roots with bold colors, intricate details, and a timeless look. Modern Bridal Makeup For brides seeking a subtle and elegant appearance, modern makeup focuses on enhancing your natural features with soft tones. Fusion Bridal Makeup A blend of traditional and contemporary styles, ideal for brides looking for a unique and personalized look. How Ladyfair Ensures a Flawless Bridal Look Consultation Schedule a consultation by calling 7004721239, where we discuss your preferences, wedding theme, and desired look. Trial Session Try out your bridal look before the big day to ensure it’s exactly how you envision. Wedding Day Makeup On your special day, we arrive at your location and provide professional services that leave you glowing and stress-free. Touch-Up Services For brides wanting to maintain their look throughout the day, we offer on-site touch-up services. Testimonials from Hulasganj Brides Shalini T., Hulasganj "Ladyfair made my wedding day so special. Their at-home service was convenient, and my makeup was perfect!" Ritika S., Hulasganj "The team was professional and patient. My makeup was flawless and lasted the entire day. Highly recommended!" Anjali P., Hulasganj "I loved the trial session—it gave me confidence that I would look amazing on my wedding day. The final look was beyond my expectations!" Pre-Bridal Makeup Tips Hydrate: Drink plenty of water to keep your skin radiant. Skincare: Stick to your regular skincare routine to avoid any surprises. Avoid New Products: Prevent allergic reactions by avoiding new skincare products close to the wedding. Communicate Your Style: Share your vision with our artists for the best results. Other Services Offered by Ladyfair Engagement Makeup Party Makeup Pre-Wedding Shoot Makeup Everyday Makeup for Special Occasions Book Your Bridal Makeup Today Ladyfair is proud to be the go-to bridal makeup service provider in Hulasganj. With our professional team, personalized services, and high-quality products, we ensure you look and feel your best on your wedding day. Call us now at 7004721239 to schedule your consultation and book your session. FAQ - Bridal Makeup Services in Hulasganj Q1. How do I book a bridal makeup appointment with Ladyfair in Hulasganj? To book an appointment, simply call us at 7004721239. Our team will assist you in scheduling a consultation and your bridal makeup session. Q2. Do you offer trial makeup sessions? Yes, we offer trial sessions so you can finalize your look before the big day. This ensures you are completely satisfied with your bridal makeup. Q3. What type of products do you use for bridal makeup? We use high-quality, long-lasting, and skin-friendly products from trusted brands to ensure a flawless and safe makeup application. Q4. Can I customize my bridal makeup look? Absolutely! Our makeup artists work closely with you to create a look that complements your wedding attire, jewelry, and personal style. Q5. Do you provide services for destination weddings or outstation bookings? Yes, we cater to destination weddings and outstation bookings. Please contact us at 7004721239 to discuss your requirements and arrangements. Q6. How early should I book my bridal makeup session? It’s best to book your bridal makeup session at least 1–2 months in advance to ensure availability and allow time for trial sessions. Q7. Do you offer packages for pre-wedding and engagement makeup? Yes, we have customized packages that include pre-wedding, engagement, and bridal makeup services. Let us know your needs, and we’ll tailor a package for you. Q8. Can I also book makeup for family members and bridesmaids? Yes, we provide makeup services for family members, bridesmaids, and the bridal party. Contact us for group bookings. Q9. Do you provide touch-up services throughout the wedding day? Yes, we offer on-site touch-up services to ensure your makeup stays flawless throughout the day. Q10. What safety precautions do you take during the makeup session? We follow strict hygiene protocols, including sanitizing all tools and using disposable applicators where necessary, to ensure your safety and comfort.

Posted By: 26th December 2024
best bridal makeup artist in makhdumpur
Introduction Your wedding day is one of the most significant moments of your life, and every bride deserves to look and feel extraordinary. At Ladyfair, we provide the best bridal makeup services in Makhdumpur, ensuring you look flawless from the moment you walk down the aisle to the last dance at your reception. We offer convenient at-home bridal makeup services, allowing you to enjoy the comfort of your home while our experts enhance your beauty. Call us now at 7004721239 to book your bridal makeup session. In this blog, we’ll dive into why professional bridal makeup is essential and why Ladyfair’s services in Makhdumpur are the perfect choice for brides-to-be. Why Bridal Makeup is Essential for Your Wedding Day Bridal makeup goes beyond just cosmetics; it’s about helping you shine with confidence and elegance. A professional makeup artist understands how to accentuate your natural features while creating a look that lasts throughout the event. At Ladyfair, we specialize in delivering flawless bridal makeup, tailored to your style and personality, so you can enjoy your special day without any worry about your look. Why Choose Ladyfair in Makhdumpur? At-Home Bridal Makeup Services We bring the salon experience directly to your home in Makhdumpur, saving you time and ensuring a stress-free bridal preparation. Our skilled makeup artists come to you, ensuring comfort and convenience. Experienced Makeup Artists Our team of professional makeup artists is experienced in creating a variety of bridal looks. From traditional to modern, we have the skills to bring your vision to life and enhance your beauty on your special day. Premium Quality Makeup Products We use only high-quality makeup products that are long-lasting and suitable for all skin types. Our products are carefully selected to give you a radiant, flawless finish that stays fresh throughout the event. Personalized Bridal Makeup At Ladyfair, we understand that every bride is unique. That’s why we provide personalized bridal makeup services, customizing your look to match your preferences, wedding theme, and personality. Popular Bridal Makeup Styles in Makhdumpur Traditional Bridal Makeup For brides who want to honor tradition, we offer vibrant and bold makeup looks that highlight classic bridal elements. Rich colors, defined eyes, and statement lips will make you the center of attention on your wedding day. Modern Bridal Makeup If you prefer a more contemporary, subtle look, our modern bridal makeup focuses on enhancing your natural beauty with softer tones and a fresh, radiant finish. This style is perfect for brides who want to look elegant yet understated. Fusion Bridal Makeup For those who want a blend of traditional and modern styles, our fusion bridal makeup combines the best of both worlds. We tailor this look to your wedding theme and personal style, creating a unique and stunning bridal appearance. The Ladyfair Bridal Makeup Process Consultation: Begin by reaching out to us at 7004721239 to book your bridal consultation. We’ll discuss your wedding theme, preferred makeup style, and any specific requests you have for your look. Trial Session: Before the wedding, we offer a trial session to perfect your look. This allows us to adjust the makeup according to your preferences, ensuring you are completely happy with the final result. Wedding Day Makeup: On your wedding day, we arrive at your location and work our magic, creating the bridal look of your dreams. We use high-quality products to ensure long-lasting results. Touch-Up Services: If required, we offer touch-up services during the event to keep your makeup fresh and flawless. Client Testimonials for Ladyfair’s Bridal Makeup in Makhdumpur Shalini P., Makhdumpur "Ladyfair’s bridal makeup service was amazing! I felt so beautiful and confident on my wedding day. The makeup lasted all day and night without needing any touch-ups." Rekha T., Makhdumpur "I was so pleased with my bridal makeup! The team at Ladyfair listened to my preferences and created the perfect look for my wedding. It was flawless!" Asha S., Makhdumpur "From the consultation to the wedding day, Ladyfair was professional and attentive. They made sure I felt comfortable, and the makeup was stunning. I couldn't have asked for more!" How to Prepare for Your Bridal Makeup Session To get the best results from your bridal makeup, here are some helpful tips: Stay Hydrated: Keep your skin glowing by drinking plenty of water in the days leading up to your wedding. Follow Your Skincare Routine: Maintain your regular skincare routine to ensure your skin is in its best condition. Avoid New Products: Stick to familiar skincare products to avoid any allergic reactions before your wedding day. Communicate Your Preferences: Share your vision for your bridal makeup so we can create a look that matches your style and personality. Other Services Offered by Ladyfair Party Makeup: Perfect for engagements, receptions, and other special events where you want to look your best. Everyday Makeup: For casual outings or work events, we offer natural, everyday makeup that enhances your features. Special Occasion Makeup: Whether it's a birthday or an anniversary, we ensure you look gorgeous for any celebration. Book Your Bridal Makeup with Ladyfair Today! Ladyfair is committed to providing exceptional bridal makeup services in Makhdumpur. Our team of professional artists, high-quality makeup products, and personalized service will ensure that you feel beautiful and confident on your wedding day. FAQs Why should I choose Ladyfair for my bridal makeup in Makhdumpur? Ladyfair offers personalized, professional at-home bridal makeup services, ensuring you look flawless on your wedding day. What types of bridal makeup styles do you offer? We provide traditional, modern, and fusion bridal makeup styles, all tailored to suit your preferences and wedding theme. How does the at-home bridal makeup service work? Our makeup artists will come to your location, bringing the salon experience to your home for a comfortable and convenient bridal prep. What makeup products do you use? We use premium, long-lasting makeup products that are safe for all skin types. How can I prepare for my bridal makeup session? Stay hydrated, maintain your skincare routine, and discuss your preferences with your makeup artist during the consultation. Can you accommodate cultural wedding makeup preferences? Yes! We create bridal looks that reflect your cultural traditions and personal style. How do I book my bridal makeup session? Call us at 7004721239 to schedule your consultation and book your bridal makeup service.

Posted By: 26th December 2024
best bridal makeup artist in ghosi
Introduction Every bride dreams of looking stunning on her wedding day, and at Ladyfair, we turn that dream into reality. Offering the finest bridal makeup services in Ghosi, we specialize in enhancing your natural beauty and creating a look that perfectly complements your style. Our at-home bridal makeup services ensure you can relax and enjoy your big day while we take care of making you look flawless. Call us now at 7004721239 to book your session. In this blog, we’ll explore the significance of bridal makeup and why Ladyfair is the top choice for brides in Ghosi. The Importance of Bridal Makeup for Your Wedding Day Your wedding day is one of the most memorable occasions in your life, and professional bridal makeup ensures you look and feel your best. It’s not just about makeup; it’s about creating a radiant, picture-perfect look that lasts throughout the day. Ladyfair’s team of expert makeup artists ensures your makeup is tailored to your unique features and preferences, giving you the confidence to shine on your special day. Why Choose Ladyfair in Ghosi? At-Home Bridal Makeup Services We bring the convenience of professional makeup services right to your doorstep. No need to travel or worry about salon visits—we come to you! Experienced Makeup Artists Our skilled team is experienced in creating various bridal looks, from traditional to contemporary, ensuring you get the perfect style for your big day. High-Quality Makeup Products We use premium products that are long-lasting and skin-friendly, giving you a flawless finish that stays fresh all day. Customized Bridal Looks Every bride is unique, and so is her style. We tailor your makeup to match your preferences, wedding theme, and personality. Bridal Makeup Styles We Offer in Ghosi Traditional Bridal Makeup Perfect for brides who want a classic look with bold colors and intricate detailing. This style highlights traditional bridal beauty while making you the star of the day. Modern Bridal Makeup For brides who prefer a subtle, elegant look, modern bridal makeup focuses on enhancing your natural features with soft tones and a radiant finish. Fusion Bridal Makeup Can’t decide between traditional and modern? Fusion bridal makeup blends the best of both worlds to create a unique and stunning look. How Ladyfair Ensures Your Bridal Makeup is Flawless Consultation Call us at 7004721239 to schedule a consultation where we discuss your preferences, wedding theme, and makeup style. Trial Session Our trial sessions allow you to see and refine your bridal look before the big day, ensuring it’s exactly what you envision. Wedding Day Makeup On your special day, our team arrives at your location to deliver professional makeup services, leaving you stress-free and glowing. Touch-Up Services For brides who want to maintain their look throughout the day, we offer touch-up services to keep you flawless. Testimonials from Ghosi Brides Ankita R., Ghosi "Ladyfair’s at-home bridal makeup was the best decision I made for my wedding. The team was professional, and my makeup was flawless!" Priya J., Ghosi "The trial session was amazing, and the final look was even better. Ladyfair truly knows how to make a bride feel special." Nidhi S., Ghosi "I loved how personalized the service was. They listened to my preferences and created a look that was perfect for me." Tips for Preparing for Your Bridal Makeup Session Hydrate Well: Drink plenty of water to keep your skin glowing. Stick to Your Skincare Routine: Consistency is key for radiant skin. Avoid New Products: To prevent allergic reactions, stick to familiar skincare products. Communicate Clearly: Share your makeup preferences and inspirations during the consultation. Other Makeup Services by Ladyfair Engagement Makeup: Look stunning for your pre-wedding events. Party Makeup: For any occasion where you want to shine. Everyday Makeup: Perfect for casual outings or work events. Book Your Bridal Makeup in Ghosi Today! Ladyfair offers the best bridal makeup services in Ghosi, ensuring you look radiant on your wedding day. With personalized consultations, expert artists, and premium products, we make sure your bridal makeup is everything you’ve ever dreamed of. FAQs Why choose Ladyfair for bridal makeup in Ghosi? We offer professional, at-home services, ensuring a stress-free and convenient bridal prep. What bridal styles do you specialize in? We create traditional, modern, and fusion bridal looks tailored to your preferences. What products do you use? We use high-quality, long-lasting makeup products suitable for all skin types. Can I book a trial session? Yes! Our trial sessions ensure you’re completely satisfied with your bridal look. How do I book Ladyfair’s services? Call us at 7004721239 to schedule your consultation and book your bridal makeup session.

Posted By: 25th December 2024
best bridal makeup artist in jehanabad
Introduction Your wedding day deserves nothing less than perfection, and your bridal look is a crucial part of making that day unforgettable. At Ladyfair, we provide the best bridal makeup services in Jehanabad, ensuring you feel stunning and confident throughout your special day. With our professional at-home bridal makeup services, we bring the beauty salon experience directly to your doorstep, so you can enjoy every moment of your wedding without stress. To book your bridal makeup session, call us at 7004721239. In this blog, we’ll explore why professional bridal makeup is essential and what makes Ladyfair’s services in Jehanabad the perfect choice for brides. Why Bridal Makeup is Crucial for Your Wedding Day Bridal makeup isn't just about applying cosmetics—it's about making you feel beautiful, confident, and ready to shine on your wedding day. Professional makeup artists understand the nuances of enhancing your natural beauty, ensuring that your makeup lasts throughout the day, from the ceremony to the reception. At Ladyfair, we specialize in creating flawless bridal looks that suit your style, personality, and wedding theme. Why Choose Ladyfair in Jehanabad? At-Home Bridal Makeup Services Ladyfair offers convenient at-home bridal makeup services in Jehanabad. Our expert makeup artists come to your home, saving you time and stress on your big day. Experienced and Skilled Makeup Artists Our team of makeup artists has extensive experience in the bridal industry, ensuring your makeup is done to perfection. Whether you prefer a traditional, modern, or fusion bridal look, we can create a style that complements your wedding and personality. High-Quality Makeup Products We use only premium makeup products to ensure that your bridal makeup is not only beautiful but also long-lasting. Our products are safe for all skin types and will help you look radiant throughout the day. Personalized Bridal Makeup We take the time to understand your vision for your bridal makeup and customize the look to suit your preferences. From your skin tone to your wedding theme, we ensure that every detail is taken into account. Popular Bridal Makeup Styles in Jehanabad Traditional Bridal Makeup This classic style focuses on bold and vibrant makeup, perfect for traditional wedding ceremonies. We use rich colors and dramatic eye makeup to create a stunning look that reflects your heritage. Modern Bridal Makeup For brides who prefer a more contemporary look, we offer modern bridal makeup. Soft, natural tones, glowing skin, and delicate features come together for a fresh and radiant appearance. Fusion Bridal Makeup If you're looking for a blend of traditional and modern styles, our fusion bridal makeup is perfect for you. We combine timeless elegance with modern trends to create a unique look for your wedding day. The Ladyfair Bridal Makeup Process Consultation: Reach out to us at 7004721239 to schedule your bridal makeup consultation. We'll discuss your wedding theme, style preferences, and any specific requests you have for your look. Trial Session: Before your wedding day, we offer a trial session to ensure your makeup is just right. This allows us to make adjustments and ensure that you’re happy with the final look. Wedding Day Makeup: On your wedding day, our makeup artist will arrive at your home and create the bridal look you’ve dreamed of. We use high-quality products to ensure your makeup lasts throughout the event. Touch-Up Services: If needed, we offer touch-up services during the day to keep your makeup looking flawless, so you can enjoy your wedding without worrying about your appearance. What Clients Say About Ladyfair's Bridal Makeup in Jehanabad Rina D., Jehanabad "Ladyfair’s bridal makeup service made me feel like a queen on my wedding day. The makeup artist was skilled, and my makeup stayed perfect all day long. I received so many compliments!" Pooja R., Jehanabad "I couldn’t have asked for a better bridal makeup experience. Ladyfair truly listens to what the bride wants and delivers! My makeup was beautiful and exactly what I envisioned." Aditi K., Jehanabad "The entire team at Ladyfair is professional and attentive. They made sure I was comfortable, and the makeup was flawless. I felt confident and stunning throughout my wedding." How to Prepare for Your Bridal Makeup Appointment To get the best results from your bridal makeup session, follow these tips: Stay Hydrated: Drink plenty of water in the days leading up to your wedding for glowing skin. Follow Your Skincare Routine: Maintain your usual skincare routine to prevent any skin issues before your wedding. Avoid New Products: Stick to familiar skincare and makeup products to avoid irritation or allergic reactions. Communicate Your Vision: Share your vision for your bridal look with the makeup artist so that we can create a look that suits your preferences and style. Other Services Offered by Ladyfair Party Makeup: Perfect for engagements, receptions, or any event where you want to look your best. Everyday Makeup: Get a fresh and natural look for casual days or work events. Special Occasion Makeup: Whether it’s a birthday, anniversary, or family gathering, Ladyfair is here to make you look stunning. Ready to Look Your Best in Jehanabad? Ladyfair is dedicated to providing exceptional bridal makeup services in Jehanabad. We bring expertise, personalized service, and high-quality products to ensure you feel beautiful and confident on your wedding day. FAQs Why should I choose Ladyfair for my bridal makeup in Jehanabad? We offer personalized, at-home bridal makeup services with experienced artists, using high-quality products to ensure you look flawless on your wedding day. What makeup styles does Ladyfair offer? We offer traditional, modern, and fusion bridal makeup, with a personalized consultation to create the perfect look for your wedding. How does the at-home bridal makeup service work? Our makeup artists will come to your location on your wedding day, providing a comfortable and stress-free experience. What products do you use for bridal makeup? We use high-quality, long-lasting makeup products that are safe for all skin types. How do I prepare for my bridal makeup session? Stay hydrated, follow your skincare routine, and discuss your preferred makeup style during your consultation. Can you cater to specific cultural wedding makeup needs? Yes! We create bridal looks that reflect your cultural traditions and personal preferences. How can I book Ladyfair’s bridal makeup services? Call us at 7004721239 to schedule your bridal makeup consultation or get more information about our services.

Posted By: 25th December 2024
best bridal makeup artist in chautham
Introduction Your wedding day is one of the most important moments of your life, and looking your best is essential. At Ladyfair, we offer exceptional bridal makeup services in Chautham, ensuring that every bride feels beautiful, confident, and radiant. With our professional at-home bridal makeup service, we bring the salon experience to your doorstep, so you can focus on enjoying every moment of your special day. Contact us today at 7004721239 to book your appointment. In this blog, we’ll discuss why professional bridal makeup is so important and how Ladyfair's services in Chautham stand out from the rest. Why Bridal Makeup is Essential Bridal makeup is not just about applying cosmetics—it's about enhancing your natural beauty and making you feel flawless on your wedding day. Professional makeup artists know the right techniques to accentuate your features and ensure your makeup lasts through the entire celebration. At Ladyfair, we specialize in creating timeless and beautiful bridal looks that will keep you glowing all day long. Why Ladyfair Stands Out in Chautham At-Home Bridal Makeup Ladyfair offers the convenience of at-home bridal makeup services in Chautham, bringing a luxurious experience to your home. Our makeup artists will arrive at your location, so you don’t have to worry about traveling on your big day. Skilled and Experienced Artists Our professional makeup artists have years of experience in the bridal industry. Whether you're looking for a classic, modern, or fusion look, we can tailor your makeup to suit your style, personality, and wedding theme. High-Quality Makeup Products We use only premium makeup products that are safe for your skin and provide long-lasting results. Our makeup stays fresh all day, ensuring you look beautiful in every photo and feel confident throughout your wedding. Personalized Bridal Looks At Ladyfair, we understand that every bride is unique. During your consultation, we’ll discuss your vision and create a custom bridal makeup look that suits your preferences and enhances your natural beauty. Popular Bridal Makeup Styles in Chautham Traditional Bridal Makeup This look focuses on bold, vibrant colors and dramatic features, perfect for traditional weddings. We enhance your eyes with kohl, add rich colors to your lips, and create a striking bridal look. Modern Bridal Makeup A modern bridal makeup look is all about natural beauty with glowing skin and soft eyes. We use light tones to create a fresh and contemporary look while maintaining elegance and sophistication. Fusion Bridal Makeup A fusion bridal look blends the best of both traditional and modern makeup styles. It's perfect for brides who want to combine classic elements with a trendy touch for a unique look. The Ladyfair Experience: From Consultation to Wedding Day Initial Contact: Call us at 7004721239 to book your bridal makeup appointment and discuss your preferences. Consultation: We'll meet with you to understand your makeup style, wedding theme, and any specific requirements you have. Makeup Trial: Before your wedding day, we offer a trial session to ensure your look is exactly how you want it. Wedding Day Makeup: Our makeup artist will arrive at your location on your wedding day and apply your custom bridal makeup. Post-Wedding Touch-Ups: If necessary, we provide touch-up services throughout the celebration to ensure your makeup stays flawless. Client Testimonials Sanya D., Chautham "I was so impressed with Ladyfair’s bridal makeup service! The artist was professional, and my makeup looked stunning. It lasted all day, and I received so many compliments." Madhavi S., Chautham "Ladyfair made me feel like a princess on my wedding day. The makeup was perfect, and the artist really listened to what I wanted. Highly recommend!" Shalini P., Chautham "I couldn’t have asked for a better bridal makeup experience. Ladyfair truly knows how to make brides feel special. My makeup was flawless, and I felt beautiful throughout the day." How to Prepare for Your Bridal Makeup Session To ensure the best results for your bridal makeup, keep the following tips in mind: Stay Hydrated: Drink plenty of water leading up to your wedding to keep your skin glowing. Stick to Your Skincare Routine: Consistent skincare can help prevent any breakouts or irritation. Avoid New Products: Don’t try new skincare or makeup products just before your wedding to avoid skin reactions. Share Your Vision: During the consultation, let us know your preferences for your bridal makeup look to ensure it matches your style. Additional Services at Ladyfair Party Makeup: Perfect for engagements, parties, and other events. Everyday Makeup: For a natural and easygoing look. Special Occasion Makeup: Ideal for anniversaries, birthdays, or other significant moments. Looking Forward to Bridal Makeup in Chautham Ladyfair is committed to providing high-quality bridal makeup services in Chautham. We continue to perfect our craft and offer exceptional services that ensure every bride feels confident and beautiful on their wedding day. FAQs What makes Ladyfair different from other bridal makeup artists in Chautham? Ladyfair offers the convenience of at-home bridal makeup services, bringing the salon experience to your doorstep. Our skilled artists ensure a personalized look that complements your style and wedding theme. What makeup styles does Ladyfair specialize in? We specialize in traditional, modern, and fusion bridal makeup, offering a variety of looks to match your vision. How does the at-home bridal makeup service work? Our artists come to your location, making it easier for you to relax and enjoy the bridal experience without the hassle of travel. What makeup products do you use? We use high-quality, long-lasting makeup products that ensure you look beautiful throughout your wedding day. How should I prepare for my bridal makeup session? Stay hydrated, follow your skincare routine, and discuss your preferences during the consultation to ensure your look is exactly what you want. Does Ladyfair cater to specific cultural bridal looks? Yes! We customize our makeup services to reflect your cultural traditions and specific preferences. What do clients say about Ladyfair’s bridal makeup services? Clients rave about our attention to detail, professionalism, and ability to create flawless bridal looks that make them feel beautiful on their wedding day. How can I book Ladyfair’s services? Call us at 7004721239 to book your bridal makeup consultation or learn more about our services.

Posted By: 25th December 2024
best bridal makeup artist in beldaur
Introduction Every bride deserves to feel radiant on her wedding day, and at Ladyfair, we ensure you look and feel your best with our expert bridal makeup services in Beldaur. We specialize in providing personalized, at-home bridal makeup services that highlight your natural beauty and create a flawless, lasting look for your special day. Whether you’re aiming for a classic or contemporary bridal look, Ladyfair is the go-to choice for brides in Beldaur. To book your appointment, contact us at 7004721239. In this blog, we’ll explore why professional bridal makeup is essential and what makes Ladyfair’s services in Beldaur stand out. Why Bridal Makeup is Essential Bridal makeup is about more than just looking good; it’s about feeling confident and radiant on one of the most important days of your life. Professional makeup artists know how to enhance your features and ensure that your makeup lasts throughout the day and night. With our expert team at Ladyfair, you can be sure that your bridal look will stay flawless, whether you're celebrating indoors or outdoors, day or night. Why Ladyfair Stands Out in Beldaur At-Home Bridal Makeup Ladyfair brings the beauty salon experience right to your home. Our expert makeup artists travel to your location, saving you time and stress, so you can focus on enjoying your wedding day. Experienced Makeup Artist Our bridal makeup artist is highly skilled in creating a variety of looks, from traditional to modern, ensuring that your makeup enhances your natural beauty and complements your wedding theme. Use of Premium Products We use only high-quality, long-lasting makeup products that are safe for your skin and deliver stunning results. Our makeup stays fresh throughout the day, even during emotional moments, ensuring you look flawless in all photos. Customized Bridal Looks At Ladyfair, we take the time to understand your vision and offer a personalized consultation to ensure your makeup aligns with your style and preferences. We work with you to create a look that’s both beautiful and unique. Popular Bridal Makeup Styles in Beldaur Traditional Bridal Makeup Bold and beautiful, traditional bridal makeup enhances your features with vibrant tones and dramatic eye makeup, creating a stunning and timeless look. Modern Bridal Makeup For brides who prefer a more natural look, modern bridal makeup focuses on glowing skin, soft eyes, and subtle highlights, offering a fresh, contemporary style. Fusion Bridal Makeup Fusion bridal makeup blends traditional elements with modern techniques, resulting in a look that’s both classic and on-trend, ideal for brides who want a bit of both worlds. The Ladyfair Experience: From Consultation to Wedding Day Initial Contact: Call us at 7004721239 to discuss your bridal makeup needs and book an appointment. Consultation: We begin with a consultation where we discuss your vision, the wedding theme, and your preferences. Makeup Trial: You’ll experience a trial run of your bridal makeup to ensure everything is perfect for your big day. Wedding Day Makeup: On your wedding day, we arrive at your home to apply your custom bridal look, ensuring you feel flawless. Post-Wedding Touch-Ups: If needed, we provide touch-up services throughout your celebration. Client Testimonials Suman J., Beldaur "I’m so happy I chose Ladyfair for my bridal makeup. The artist was professional, and the makeup was exactly what I envisioned. I received so many compliments!" Pooja M., Beldaur "Ladyfair’s team made me feel like a queen on my wedding day. The makeup was natural and stunning. I felt beautiful, and it lasted all day." Rekha T., Beldaur "From the consultation to the wedding day, everything was perfect. Ladyfair listened to my vision and made me look exactly how I imagined. Highly recommend!" How to Prepare for Your Bridal Makeup Session For the best results, keep these tips in mind: Hydrate: Drink plenty of water leading up to your wedding for healthy, glowing skin. Skincare Routine: Stick to your regular skincare regimen to avoid any irritation or breakouts. Avoid New Products: Avoid trying new skincare products close to your wedding date. Share Your Vision: During the consultation, discuss your preferences, makeup style, and any concerns to ensure your look is exactly what you want. Additional Services at Ladyfair Party Makeup: Perfect for weddings, parties, and other special events. Everyday Makeup: For a natural, everyday look. Special Occasion Makeup: Ideal for engagements, anniversaries, or any celebratory occasion. Looking Forward to the Future of Bridal Makeup in Beldaur Ladyfair is dedicated to continuously enhancing the bridal makeup experience in Beldaur, offering personalized services and expert techniques to help brides feel beautiful and confident on their big day. FAQs What makes Ladyfair unique in Beldaur? Ladyfair offers at-home bridal makeup services, ensuring that you have a personalized and convenient experience on your wedding day. What makeup styles does Ladyfair specialize in? We specialize in traditional, modern, and fusion bridal makeup styles, customized to suit your preferences and wedding theme. How does the at-home makeup service work? Our artist travels to your location to apply your bridal makeup, making the process stress-free and convenient. What makeup products do you use? We use premium makeup products that are skin-friendly and long-lasting. How should I prepare for my bridal makeup session? Stay hydrated, follow your skincare routine, and share your makeup preferences during the consultation. Can Ladyfair handle cultural makeup requirements? Absolutely! We tailor our makeup styles to reflect your cultural traditions and preferences. What do clients say about Ladyfair’s services? Clients praise our professionalism, personalized service, and flawless results, making them feel confident and beautiful on their wedding day. How can I book Ladyfair’s services? Call us at 7004721239 to discuss your bridal makeup needs and schedule a consultation.

Posted By: 25th December 2024
best bridal makeup artist in mansi
Introduction Your wedding day is one of the most important and unforgettable moments in your life, and every bride deserves to look her best. In Mansi, Ladyfair ensures you radiate beauty and elegance on your special day. Offering personalized, at-home bridal makeup services, we bring the salon experience right to your doorstep. Our professional makeup artist will ensure that you look flawless and feel confident as you step into your new life. To book your appointment, call us at 7004721239. In this blog, we will explore why professional bridal makeup is essential, what makes Ladyfair stand out in Mansi, and why we are the preferred choice for brides in the region. The Importance of Bridal Makeup Bridal makeup is more than just applying cosmetics—it's about enhancing your natural beauty, reflecting your style, and complementing your wedding attire. Professional makeup ensures you look gorgeous in person and on camera, boosting your confidence throughout the day. At Ladyfair, we use a blend of traditional and modern techniques to create a bridal look that is unique and tailored to your preferences. Whether you are aiming for a bold traditional look or a soft, modern aesthetic, Ladyfair has you covered. Why Ladyfair Stands Out in Mansi Convenience of At-Home Services Say goodbye to salon visits! Ladyfair offers professional bridal makeup services in the comfort of your home. No more travel or time constraints—our skilled artist comes to you, providing a personalized and stress-free experience. Expertise in Bridal Makeup With years of experience, Ladyfair’s makeup artist is proficient in all styles, from traditional bold makeup to contemporary minimalist looks. We ensure your makeup matches your wedding theme and attire seamlessly. High-Quality Products We use premium, skin-safe products that are long-lasting, ensuring you stay looking beautiful all day. Our makeup is carefully selected to suit all skin types, so you can rest assured that it will look flawless during your wedding day celebrations. Personalized Pre-Wedding Consultations Every bride is unique, and we believe your bridal makeup should reflect that. We offer consultations where we discuss your vision, try out different looks, and ensure your makeup is exactly how you imagined it. Bridal Makeup Trends in Mansi Traditional Bridal Makeup Timeless and elegant, traditional bridal makeup features bold eye makeup, vibrant lips, and intricate contouring to complement cultural wedding attire. Modern Bridal Makeup Emphasizing a natural look with soft tones, glowing skin, and subtle highlights, modern bridal makeup enhances your natural features, creating a fresh and dewy look. Fusion Bridal Makeup The perfect combination of tradition and modernity, fusion bridal makeup merges both styles, resulting in a harmonious, stunning appearance that suits contemporary brides with traditional roots. The Ladyfair Experience: From Consultation to Final Look Initial Contact: Call us at 7004721239 to discuss your makeup requirements and book your appointment. Pre-Wedding Consultation: Meet our artist, share your vision, review your attire, and finalize the look you want for your big day. Makeup Trial: Experience a trial run to preview your bridal look and make adjustments as needed. Final Makeup Session: On your wedding day, our artist will come to your home and create the perfect bridal makeup for you. Post-Wedding Touch-Ups: We also offer touch-up services to keep your makeup fresh throughout your celebrations. Client Testimonials Priya K., Mansi "Ladyfair made my wedding day so much easier! The artist was professional, and the makeup was exactly what I wanted. I felt stunning throughout the day!" Neha S., Mansi "The makeup trial gave me so much confidence in my look. The artist listened to all my preferences and made sure everything was perfect for my wedding." Rani T., Mansi "My bridal look was exactly how I envisioned it—flawless, long-lasting, and beautiful. I couldn’t have asked for a better experience with Ladyfair!" Preparing for Your Bridal Makeup Session To get the best results, here are a few tips: Stay Hydrated: Drink plenty of water in the days leading up to your wedding for radiant skin. Follow a Skincare Routine: Cleanse, tone, and moisturize daily to ensure smooth and glowing skin. Avoid New Products: Stick to your regular skincare products to avoid any unexpected reactions. Communicate Your Vision: Share your preferences and any concerns during the consultation to make sure your look is just right. Beyond Bridal Makeup: Ladyfair’s Additional Services Party Makeup: Ideal for weddings, events, or any special occasion. Everyday Makeup: Subtle makeup for daily wear. Special Occasion Makeup: Perfect for engagements, anniversaries, and more. Looking Ahead: The Future of Bridal Makeup in Mansi Ladyfair is committed to revolutionizing bridal makeup services in Mansi. With innovative techniques, high-quality products, and a customer-centric approach, we aim to make every bride’s special day unforgettable. FAQs What makes Ladyfair unique in Mansi? Ladyfair offers professional at-home bridal makeup services, providing a personalized and stress-free experience for brides. What makeup styles does Ladyfair specialize in? We specialize in traditional, modern, and fusion bridal makeup styles, custom-tailored to each bride’s preferences. How does the at-home service work? Our artist comes to your location, providing a consultation, trial session, and final bridal makeup application on your wedding day. What products do you use? We use high-quality, long-lasting makeup products suitable for all skin types. How can a bride prepare for her session? Stay hydrated, follow a skincare routine, and communicate your vision clearly during the consultation. Can Ladyfair accommodate cultural makeup requirements? Absolutely! We incorporate cultural elements into your bridal makeup to celebrate your heritage. What do clients say about Ladyfair? Clients love our convenience, quality, and professionalism. Many praise how confident and beautiful they felt on their wedding day. How do I book Ladyfair’s services? Call us at 7004721239 to discuss your bridal makeup needs and schedule an appointment.

Posted By: 25th December 2024
BEST BRIDAL MAKEUP ARTIST IN ALAULI
Introduction Your wedding day is one of the most cherished moments of your life, and every bride dreams of radiating elegance and grace. In Alauli, Khagaria District, Ladyfair is here to make that dream come true. With our exclusive at-home bridal makeup services, we ensure a stress-free, tailored experience in the comfort of your home. Book your appointment today by calling 7004721239. In this blog, we’ll explore the significance of professional bridal makeup, why Ladyfair is the trusted choice in Alauli, and how we cater to brides in the Khagaria District. The Importance of Bridal Makeup Bridal makeup is more than just applying products; it’s an art that enhances your natural beauty while complementing your wedding attire. Professional makeup not only ensures you look flawless in person but also shines through in photographs, leaving a lasting impression on your special day. At Ladyfair, we specialize in creating bridal looks that reflect your unique style, combining traditional techniques with modern trends. Why Ladyfair Stands Out in Alauli Convenience of At-Home Services No need to travel long distances to salons. Ladyfair brings professional bridal makeup services right to your doorstep in Alauli, offering a relaxing and personalized experience. Expert Makeup Artist Our makeup artist has extensive experience in bridal makeup, catering to both traditional and contemporary styles. Whether you desire a bold, vibrant look or a subtle, natural glow, we deliver perfection. Premium Products Ladyfair uses high-quality, long-lasting, and skin-safe products to ensure your makeup remains flawless throughout your big day. Tailored Consultations We believe every bride is unique. That’s why we offer pre-wedding consultations to discuss your preferences, try different styles, and finalize a look that aligns with your vision. Bridal Makeup Trends in Alauli Traditional Bridal Makeup Bold eyeliner, vibrant lip colors, and intricate contouring that beautifully complement cultural wedding attire. Modern Bridal Makeup A minimalist approach featuring soft tones, radiant highlights, and a natural glow. Fusion Bridal Makeup A blend of traditional and modern styles for brides seeking a unique and balanced look. The Ladyfair Experience: Step-by-Step Initial Contact: Call us at 7004721239 to discuss your requirements and book an appointment. Pre-Wedding Consultation: Share your ideas, review your wedding attire, and finalize your desired style. Makeup Trial: Preview your bridal look to ensure everything is perfect for your big day. Final Session: On your wedding day, our artist will provide the full bridal makeup service at your location. Post-Wedding Touch-Ups: Keep your makeup fresh with optional touch-up services. Client Testimonials Priya S., Alauli: "Ladyfair’s service was exceptional. The artist listened to my preferences and created a flawless look that made me feel beautiful and confident." Ritika M., Alauli: "The at-home service was such a relief! The makeup stayed perfect all day, and the products felt great on my skin." Anjali K., Alauli: "I opted for a fusion look, and it turned out stunning. The trial session gave me peace of mind, and the final result exceeded my expectations." Preparing for Your Bridal Makeup Session Hydrate: Drink plenty of water for healthy, glowing skin. Skincare Routine: Follow a consistent routine of cleansing, toning, and moisturizing. Avoid New Products: Stick to familiar skincare products to prevent any reactions. Communicate: Share your preferences during consultations for a personalized experience. Beyond Bridal Makeup: Additional Services Ladyfair also offers: Party Makeup: Perfect for wedding guests and other special occasions. Everyday Makeup: Subtle looks for casual outings. Special Occasion Makeup: For engagements, anniversaries, and more. Looking Ahead: Bridal Makeup in Alauli At Ladyfair, we are committed to providing innovative, high-quality, and convenient bridal makeup services. Our mission is to make every bride’s special day unforgettable. FAQs 1. What makes Ladyfair unique in Alauli? We provide professional at-home bridal makeup services tailored to each bride’s preferences. 2. Can you accommodate cultural bridal styles? Yes, we specialize in traditional, modern, and fusion styles to honor cultural preferences. 3. What products do you use? We use premium, long-lasting, and skin-friendly makeup products. 4. How do I book an appointment? Call us at 7004721239 to discuss your needs and schedule a session.

Posted By: 25th December 2024
best bridal makeup artist in gogri
Introduction Planning your dream wedding in Gogri? Let Ladyfair’s at-home bridal makeup services make your big day even more special. With a team of skilled makeup artists, we ensure a flawless bridal look tailored to your style. Book your session now by calling 7004721239 and enjoy the luxury of professional makeup in the comfort of your home. Why Bridal Makeup is Important Your wedding day is one of the most memorable moments of your life, and your bridal look is a crucial part of it. A professional makeup artist enhances your natural beauty, complements your attire, and ensures you look radiant in every photograph. Why Choose Ladyfair in Gogri At-Home Service No need to worry about traveling to a salon on your special day—we come to you. Expert Artists Our team specializes in creating unique bridal looks that suit your style and preferences. Premium Products We use high-quality, skin-friendly products that ensure long-lasting perfection throughout your celebrations. Personalized Touch Whether it’s a traditional bridal look or a modern aesthetic, we customize every detail for you. Our Bridal Makeup Packages Traditional Bridal Look Classic and timeless, celebrating the beauty of your heritage. Modern Bridal Look Minimalistic, radiant, and chic to match contemporary styles. Fusion Bridal Look A mix of traditional and modern elements for a unique appearance. How It Works Consultation: Share your vision with our expert artists. Trial Session: Fine-tune your look before the big day. Wedding Day Prep: Relax while we create your dream bridal look. Optional Touch-Ups: Keep your makeup flawless throughout the day. Testimonials from Gogri Brides Riya P., Gogri: "Ladyfair’s service was exceptional! My bridal look was exactly what I wanted, and the at-home service was so convenient." Megha S., Gogri: "I loved how they customized my bridal makeup. The quality and professionalism were top-notch." Anjali R., Gogri: "Their team ensured I looked my best on my wedding day. I highly recommend Ladyfair for every bride in Gogri." Additional Services We Offer Engagement Makeup Reception Makeup Party Makeup for Special Occasions Bridal Beauty Tips Stay Hydrated: Keep your skin glowing and healthy. Follow a Skincare Routine: Start weeks in advance for smooth, radiant skin. Communicate Clearly: Discuss your preferences and vision with the artist. Relax and Trust: Let our experts handle your bridal look stress-free. Why Ladyfair is the Best Choice for Brides in Gogri Ladyfair offers unmatched convenience, professional expertise, and premium products, ensuring you look stunning on your wedding day without any hassle. FAQs 1. How do I book Ladyfair’s bridal makeup services in Gogri? Call us at 7004721239 to book your session today. 2. Can I get a trial session? Yes, trial sessions are available to perfect your bridal look in advance. 3. What products do you use? We use only high-quality, skin-friendly products to ensure the best results. 4. Is your service at-home? Yes, we provide our bridal makeup services at your home for maximum convenience. 5. Can I customize my bridal look? Of course! We work closely with you to create a look that matches your style.

Posted By: 25th December 2024
best bridal makeup artist in parbatta
Introduction Get the perfect bridal look in Parbatta with Ladyfair’s at-home bridal makeup services. We ensure you shine on your wedding day with customized makeup artistry brought straight to your doorstep. Skip the hassle of traveling to salons and let us pamper you in the comfort of your home. Call us at 7004721239 to book now! Why Bridal Makeup Matters Your wedding day is a celebration of love, and your bridal look is at the center of it all. Professional makeup enhances your natural beauty, harmonizes with your outfit, and ensures you look radiant and confident in every photograph. Why Choose Ladyfair for Bridal Makeup in Parbatta At-Home Convenience No more stressful commutes. We bring our premium bridal makeup services directly to your location. Skilled Makeup Artists Our experienced team creates stunning and personalized bridal looks that reflect your personality. Premium Products for Lasting Perfection We use only the best quality, skin-friendly products to ensure your makeup stays flawless all day. Customized Services Whether you desire a traditional, contemporary, or fusion bridal look, we tailor every detail to match your preferences. Bridal Makeup Packages Traditional Bridal Makeup Celebrate your culture with elegant, bold looks steeped in tradition. Modern Bridal Makeup Achieve a chic and glowing aesthetic for a timeless appearance. Fusion Bridal Makeup Blend traditional and modern styles for a unique, eye-catching bridal look. How Ladyfair Works Consultation: Discuss your preferences and ideas with our expert team. Trial Session: Test and refine your bridal look before the wedding day. Wedding Day Glam: Relax as we create your dream look with precision. Optional Touch-Ups: Stay flawless throughout the celebrations. Testimonials from Parbatta Brides Priya S., Parbatta: "Ladyfair made my wedding day stress-free! The makeup was perfect, and the artists were incredibly professional." Ritika J., Parbatta: "The convenience of at-home service was a lifesaver. My bridal look was exactly how I imagined it, if not better!" Ankita M., Parbatta: "I recommend Ladyfair to every bride in Parbatta. Their attention to detail and quality products are unmatched." Other Services by Ladyfair Engagement Makeup Reception Makeup Special Occasion Party Makeup Bridal Beauty Tips Hydrate Regularly: Keep your skin fresh and glowing. Follow a Skincare Routine: Prep your skin weeks in advance for the best results. Communicate Clearly: Share your vision with the makeup artist. Trust the Experts: Relax and let our professionals create your perfect look. Why Ladyfair is the Best Choice in Parbatta Ladyfair combines expert artistry, premium products, and the convenience of at-home service to ensure you look stunning and stress-free on your wedding day. FAQs 1. How do I book Ladyfair’s bridal makeup services in Parbatta? Call us at 7004721239 to schedule your appointment. 2. Can I have a trial session? Yes, we provide trial sessions to perfect your bridal look in advance. 3. Do you use high-quality products? Absolutely! We use premium, skin-friendly products to ensure the best results. 4. Is your service at-home? Yes, our bridal makeup services are offered at-home for your convenience. 5. Can I personalize my bridal look? Yes, we work closely with you to create a unique look that reflects your style.

Posted By: 25th December 2024
best bridal-makeup artist in khagaria
Introduction Looking for the perfect bridal look in Khagaria? Ladyfair’s at-home bridal makeup services ensure you glow on your special day with stunning makeup tailored just for you. Skip the salon chaos and enjoy professional artistry at your doorstep. Call us at 7004721239 to book your appointment today! Why Bridal Makeup Is Crucial Your wedding day is the most photographed event of your life. Professional bridal makeup enhances your natural beauty, complements your outfit, and ensures a flawless, camera-ready look throughout the day. Why Ladyfair is Khagaria's Trusted Bridal Makeup Service Convenience at Your Doorstep We bring top-notch bridal makeup services directly to you, saving time and effort. Experienced Makeup Professionals Our team specializes in creating stunning, personalized bridal looks to match your style. Premium Products for Radiance We use only high-quality, skin-friendly makeup products for long-lasting results. Tailored to Your Vision Whether you prefer a traditional, modern, or fusion bridal look, we create a style that reflects your personality. Bridal Makeup Packages Traditional Bridal Makeup Embrace your culture with bold and timeless looks that exude elegance. Modern Bridal Makeup Opt for a chic, minimalistic, and glowing bridal aesthetic. Fusion Bridal Makeup Combine traditional charm with contemporary trends for a one-of-a-kind appearance. How Ladyfair Works Consultation: Discuss your dream bridal look with our experts. Trial Session: Preview and refine your makeup style before the big day. Wedding Day Glam: Enjoy stress-free, flawless makeup application. Optional Touch-Ups: Stay picture-perfect throughout the celebrations. Testimonials from Happy Brides in Khagaria Richa D., Khagaria: "Ladyfair's service was amazing! My makeup was stunning, and the convenience of at-home service made my day so much easier." Sneha P., Khagaria: "The artists were professional and skilled. They knew exactly how to make me look beautiful and confident on my wedding day." Nisha K., Khagaria: "I loved the trial session! It helped me finalize the perfect bridal look, and the result was fabulous." Other Services by Ladyfair Engagement Makeup Reception Makeup Party Makeup for Special Events Bridal Beauty Tips Hydrate Well: Drink plenty of water for glowing skin. Start Skincare Early: Follow a routine to prepare your skin weeks in advance. Be Clear About Preferences: Share your ideas and concerns with your makeup artist. Relax and Trust: Let the professionals work their magic. Why Ladyfair Stands Out in Khagaria Ladyfair is the ultimate choice for bridal makeup in Khagaria. Our expert artists, premium products, and hassle-free at-home service ensure you feel confident and beautiful on your special day. FAQs 1. How do I book Ladyfair’s bridal makeup services in Khagaria? Call us at 7004721239 to schedule your appointment. 2. Do you offer trial sessions? Yes, trial sessions are available to finalize your perfect bridal look. 3. What products do you use? We use only high-quality, long-lasting, and skin-friendly products. 4. Are your services at-home? Yes, we provide at-home bridal makeup services for your convenience. 5. Can I customize my bridal look? Of course! Our team works with you to create a style that reflects your personality.

Posted By: 25th December 2024
best bridal makeup artist in gaura bauram
Introduction Make your wedding day unforgettable with Ladyfair’s at-home bridal makeup services in Gaura Bauram. Our experienced makeup artists ensure you look radiant and picture-perfect for your big day, right from the comfort of your home. Call us at 7004721239 to book your session and let your bridal beauty shine! Why Bridal Makeup Matters Bridal makeup enhances your natural features, complements your wedding attire, and ensures you look flawless in every photograph. It’s not just about makeup; it’s about creating a lasting impression on your special day. Why Choose Ladyfair in Gaura Bauram? Convenient At-Home Service Skip the salon rush. We bring our professional services directly to your doorstep. Experienced Artists Our team specializes in crafting customized bridal looks tailored to your preferences. Premium Products We use high-quality, skin-friendly products for a flawless and long-lasting finish. Personalized Touch From traditional to modern styles, we create a look that perfectly suits your personality. Our Bridal Makeup Packages Traditional Bridal Makeup Celebrate your heritage with vibrant, bold, and intricate bridal looks. Modern Bridal Makeup Achieve an elegant and minimalistic style with a radiant glow. Fusion Bridal Makeup Blend tradition and contemporary trends for a unique bridal aesthetic. The Ladyfair Process Initial Consultation: Discuss your vision, outfit, and preferences with our experts. Trial Makeup: Preview your bridal look and make adjustments if needed. Wedding Day Makeup: Enjoy stress-free professional application. Optional Touch-Ups: Maintain your flawless look throughout the celebrations. Testimonials from Gaura Bauram Brides Priya K., Gaura Bauram: "Ladyfair made my wedding day so special. My makeup was perfect, and the artist understood exactly what I wanted." Neha S., Gaura Bauram: "The convenience of at-home services was a blessing. I looked amazing, and the entire process was seamless." Ritu T., Gaura Bauram: "Highly recommend Ladyfair! The trial session ensured there were no surprises, and my bridal look was stunning." Additional Services We Provide Engagement Makeup Reception Makeup Party Makeup for Special Occasions Bridal Beauty Tips Stay Hydrated: Healthy skin leads to better makeup application. Start Skincare Early: Follow a skincare routine weeks before the wedding. Share Your Preferences: Communicate clearly with your makeup artist. Relax and Enjoy: Trust our experts to make you look your best. Why Ladyfair Stands Out in Gaura Bauram Ladyfair is the go-to choice for bridal makeup in Gaura Bauram. With professional artistry, premium products, and unmatched convenience, we ensure every bride feels beautiful and confident. FAQs 1. How do I book Ladyfair’s bridal makeup services in Gaura Bauram? Call us at 7004721239 to schedule your appointment. 2. Is a trial session included? Yes, we offer trial sessions to finalize your desired look. 3. What products do you use? We use only high-quality, long-lasting, and skin-friendly products. 4. Do you offer at-home services? Yes, our artists provide makeup services at your location. 5. Can I customize my bridal makeup? Absolutely! We design your look to match your style and preferences.

Posted By: 25th December 2024
best bridal makeup artist in kiratpur
Introduction Your wedding day deserves nothing less than perfection, and Ladyfair’s at-home bridal makeup services in Kiratpur are here to make it happen. Whether you envision a traditional bridal look or a modern glam style, our expert makeup artists bring your dream to life in the comfort of your home. Call us now at 7004721239 to schedule your session and shine like the bride you’ve always dreamed of being! Why Bridal Makeup is Important Bridal makeup ensures you look flawless on one of the most important days of your life. It highlights your natural beauty, complements your attire, and creates a stunning impression both in person and in photos. Why Choose Ladyfair for Bridal Makeup in Kiratpur? Professional at Your Doorstep Say goodbye to travel stress—our makeup artists provide premium services at your home. Skilled Experts Our professionals specialize in creating unique, customized bridal looks for every bride. High-Quality Products We use only top-tier, skin-friendly products for a radiant and long-lasting finish. Personalized Service From traditional to contemporary, our artists design makeup to suit your style and preferences. Our Bridal Makeup Options Traditional Bridal Makeup Embrace cultural beauty with bold, intricate details and vibrant shades. Modern Bridal Makeup Opt for a minimalistic and elegant look with a soft, dewy finish. Fusion Bridal Makeup Blend the best of tradition and modernity for a unique bridal appearance. The Ladyfair Process Consultation: Discuss your preferences and wedding theme with our experts. Trial Session: Preview and finalize your bridal look. Wedding Day Glam: Experience professional, stress-free makeup application. Optional Touch-Ups: Keep your look flawless throughout your celebrations. What Brides Say About Ladyfair in Kiratpur Ankita R., Kiratpur: "Ladyfair gave me a stunning bridal look that was exactly what I envisioned. The convenience of at-home service was a lifesaver!" Sneha P., Kiratpur: "My makeup was absolutely flawless. The artist was professional and made sure everything matched my outfit and jewelry." Pooja M., Kiratpur: "The trial session really helped me feel confident about my wedding day look. Highly recommend Ladyfair for brides!" Additional Services We Offer Engagement Makeup Reception Makeup Party Makeup for Events Bridal Beauty Tips Hydrate and Sleep Well: Healthy skin is the base for perfect makeup. Start Skincare Early: Prepare weeks ahead of your wedding day. Communicate Clearly: Share your ideas and preferences with your artist. Relax: Trust our experts to handle everything on your big day. Why Ladyfair is the Top Choice in Kiratpur With professional expertise, premium products, and personalized attention, Ladyfair ensures every bride feels confident and radiant on their big day. FAQs 1. How do I book Ladyfair’s bridal makeup services in Kiratpur? Call us at 7004721239 to book your appointment. 2. Do you offer a trial session? Yes, trial sessions are available to help you finalize your look. 3. What products do you use? We use high-quality, long-lasting, and skin-safe makeup products. 4. Do you provide at-home services? Yes, our makeup artists come to your home for your convenience. 5. Can I customize my bridal look? Absolutely! We work with you to create a look that suits your style and preferences.

Posted By: 25th December 2024
best bridal makeup artist in kusheshwar asthan east
Introduction Make your special day unforgettable with Ladyfair’s at-home bridal makeup services in Kusheshwar Asthan East. Our expert makeup artists ensure that you walk down the aisle looking flawless and radiant. From traditional to contemporary looks, we cater to every bride’s unique style. Call us now at 7004721239 to book your appointment and bring your bridal vision to life! Why Bridal Makeup is Important Bridal makeup enhances your natural beauty and harmonizes with your attire, making you picture-perfect for your big day. It’s not just makeup—it’s a touch of artistry that creates lasting impressions in person and in photos. Why Choose Ladyfair for Bridal Makeup in Kusheshwar Asthan East? Convenient Home Service Skip the hassle of travel. Our makeup artists bring professional bridal services to your home. Experienced Makeup Professionals Our team specializes in crafting customized bridal looks that reflect your personality and wedding theme. Premium Products We use high-quality, skin-safe products to ensure a flawless and long-lasting finish. Tailored to You Whether you prefer a traditional, modern, or fusion look, we design makeup that suits your style and preferences. Our Bridal Makeup Options Traditional Bridal Makeup Celebrate your heritage with bold eyes, vibrant lips, and intricate detailing. Modern Bridal Makeup Soft, dewy, and elegant—perfect for brides who love simplicity and sophistication. Fusion Bridal Makeup Combine tradition with modern trends for a unique and versatile bridal look. The Ladyfair Process Consultation: Discuss your vision and style preferences. Trial Makeup: Experience your wedding day look in advance. Wedding Day Glam: Enjoy stress-free professional service on your big day. Optional Touch-Ups: Keep your makeup flawless throughout the celebrations. What Brides Say About Ladyfair in Kusheshwar Asthan East Rashmi T., Kusheshwar Asthan East: "Ladyfair gave me the most stunning bridal look. The convenience of at-home service made my wedding preparations so much easier!" Priya G., Kusheshwar Asthan East: "My makeup was perfect, and I felt so confident. The artist was professional and listened to all my preferences." Nidhi S., Kusheshwar Asthan East: "The trial session helped finalize my look. On the big day, everything was just as I imagined. Highly recommend Ladyfair!" Additional Services We Offer Engagement Makeup Reception Makeup Event and Party Makeup Bridal Beauty Tips Hydrate and Sleep Well: For naturally glowing skin. Start Early with Skincare: Prepare your skin weeks ahead of the big day. Share Your Preferences: Communicate openly with your makeup artist. Stay Relaxed: Trust the process and enjoy the transformation. Why Ladyfair is the Top Choice in Kusheshwar Asthan East Ladyfair’s unmatched combination of professional expertise, premium products, and personalized attention ensures every bride shines on her big day. FAQs 1. How do I book a Ladyfair bridal makeup session in Kusheshwar Asthan East? Call us at 7004721239 to schedule your appointment. 2. Is a trial session available? Yes, we offer trial sessions to help you finalize your look. 3. What makeup products do you use? We use only high-quality, skin-friendly, and long-lasting products. 4. Can you come to my home? Yes, our professional makeup artists provide at-home services for your convenience. 5. Do you offer customization? Absolutely! We tailor every bridal look to match your preferences.
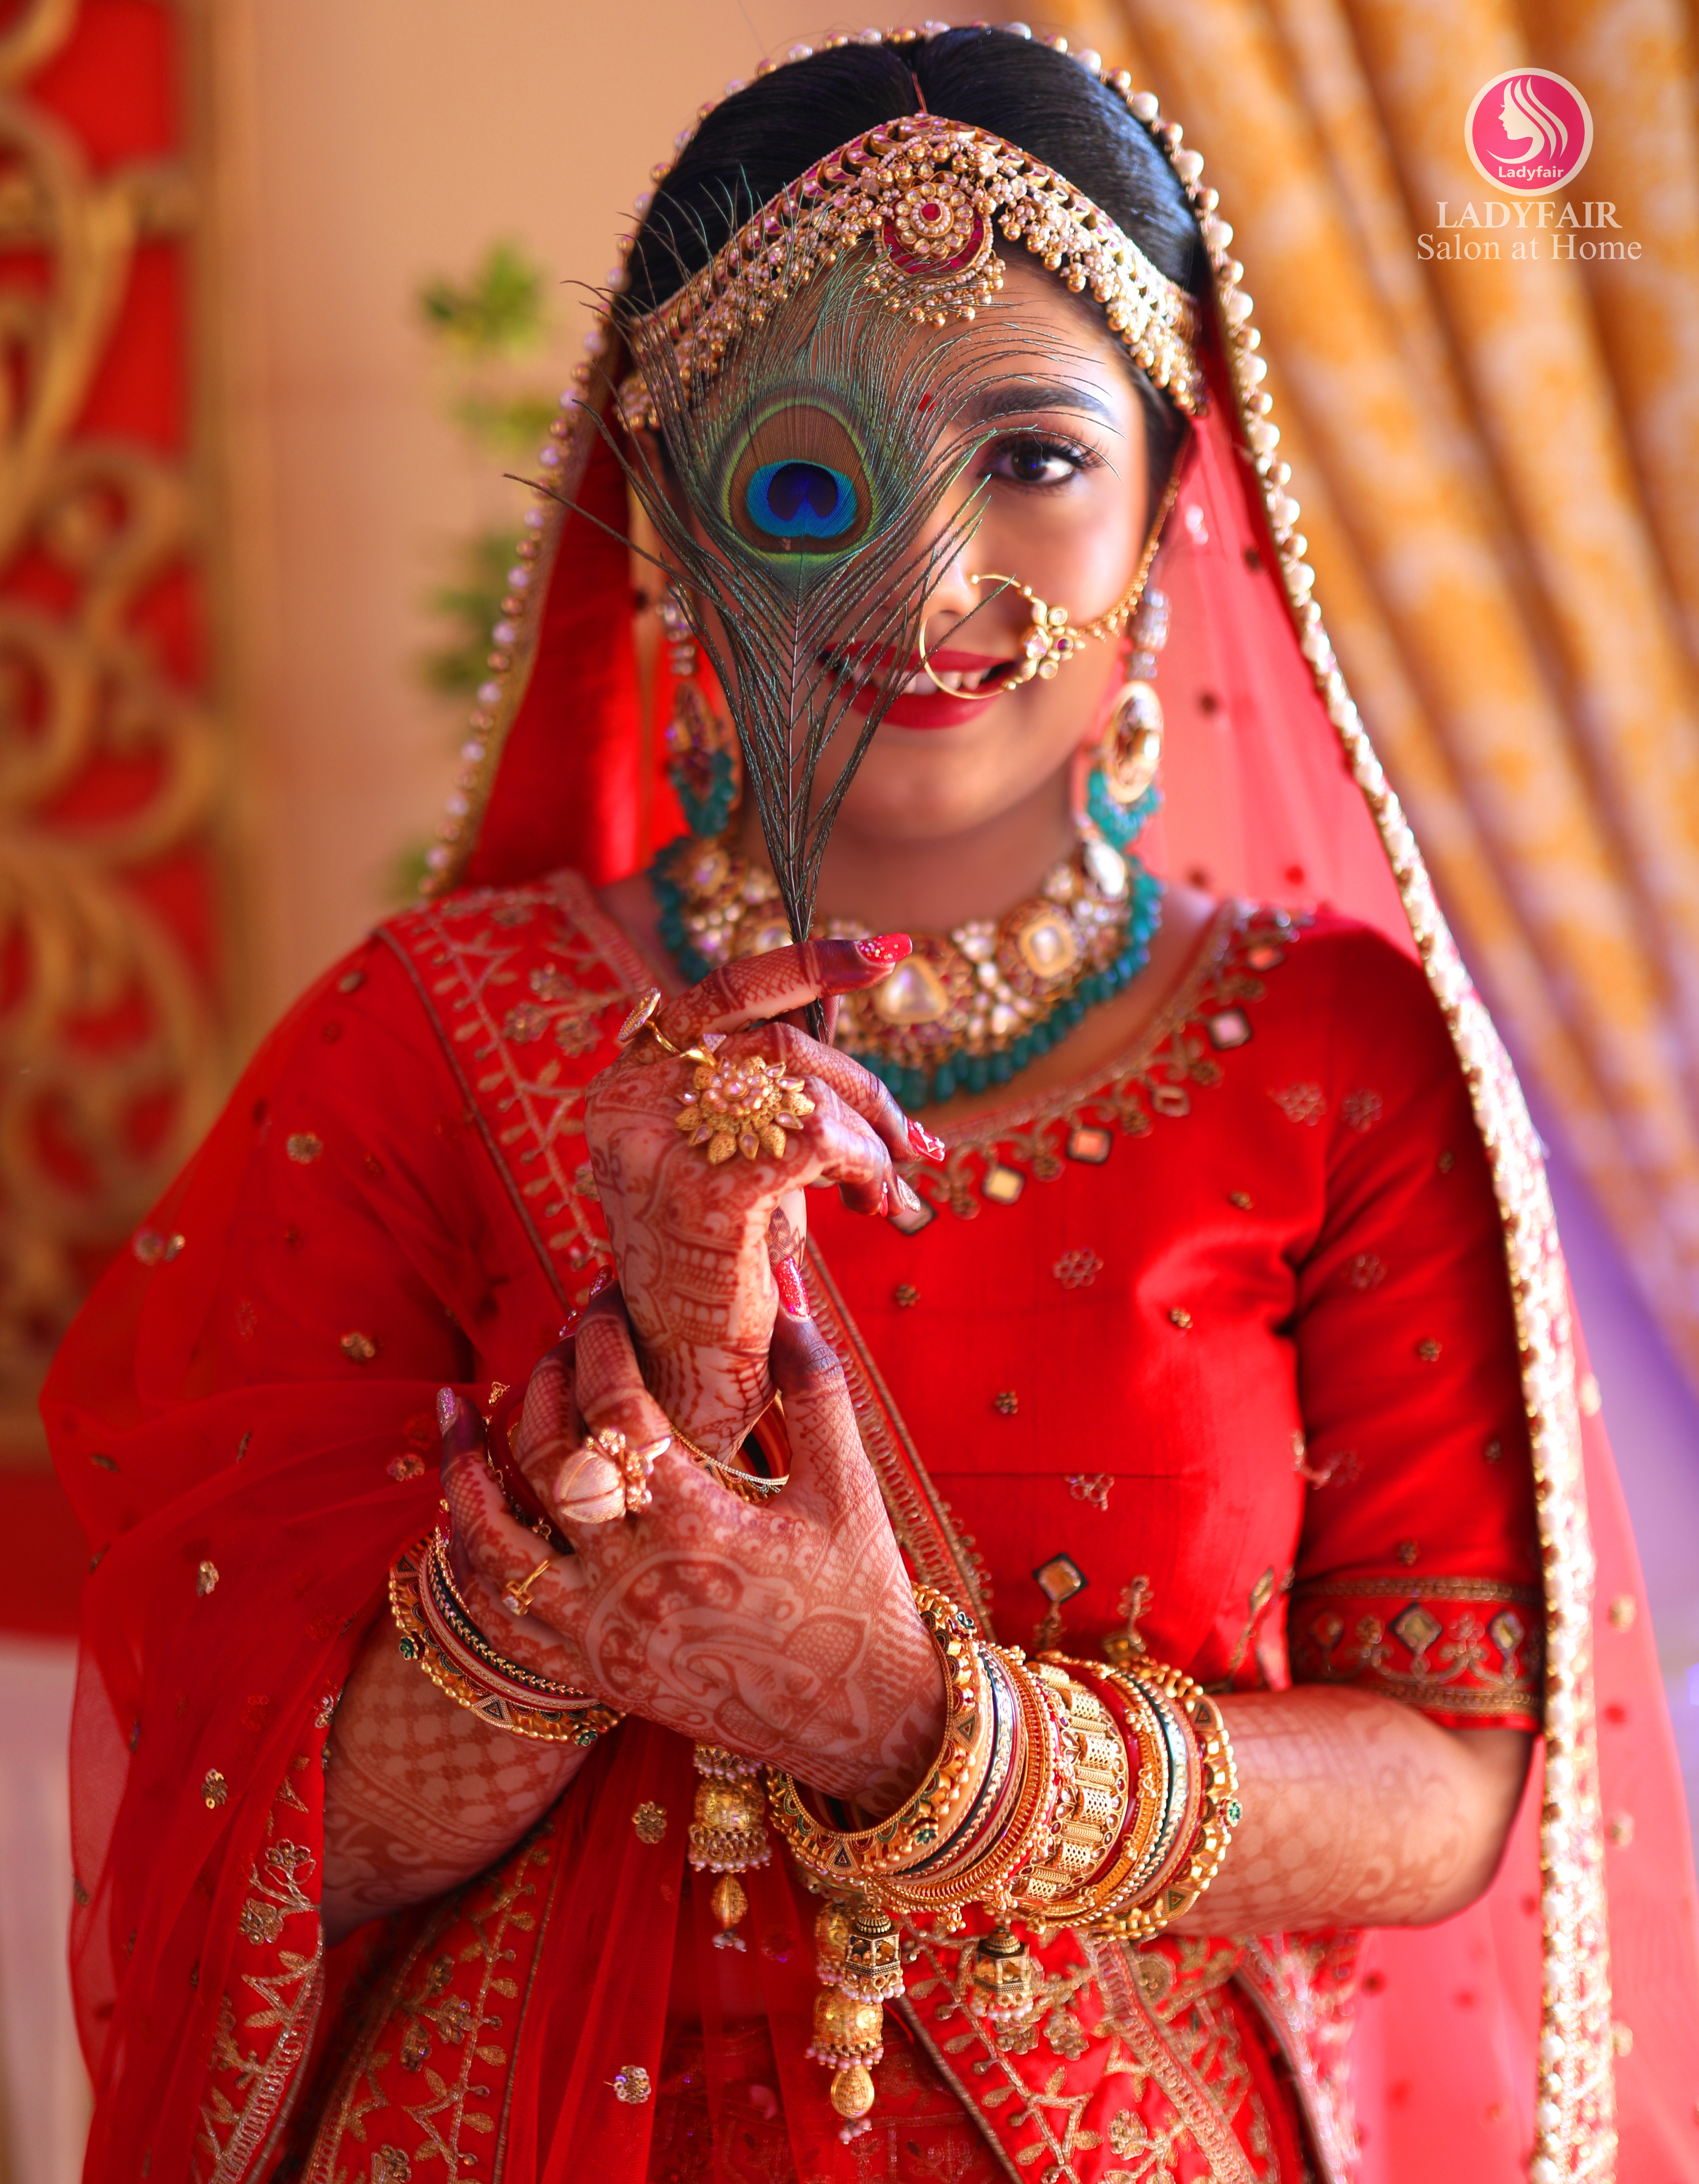
Posted By: 25th December 2024
brest bridal makeup artist in kusheshwar asthan
Introduction Your wedding day deserves nothing less than perfection, and Ladyfair is here to deliver just that with our at-home bridal makeup services in Kusheshwar Asthan. Our team of professional makeup artists creates stunning bridal looks tailored to your preferences, ensuring you radiate confidence and beauty. To book your personalized bridal makeover, call us at 7004721239 today! Why Bridal Makeup is Essential Bridal makeup goes beyond enhancing your natural beauty; it complements your wedding attire and captures timeless memories in photos and videos. With the right expertise and premium products, Ladyfair ensures every bride shines brightly on her special day. Why Choose Ladyfair for Bridal Makeup in Kusheshwar Asthan? Convenient At-Home Service Skip the salon visit—our artists come to your doorstep, bringing the full bridal experience to your comfort zone. Expert Artists Our team specializes in bridal makeup, with years of experience in creating looks that match every bride’s unique personality and wedding theme. Quality You Can Trust We use premium, skin-friendly products that offer long-lasting results and a flawless finish. Tailored to Your Preferences From bold traditional looks to soft, minimalistic styles, our makeup artists work closely with you to craft a look you’ll love. Bridal Makeup Styles We Offer Traditional Bridal Makeup Featuring bold eyes, vibrant lips, and intricate detailing, this style celebrates cultural heritage with elegance. Contemporary Bridal Makeup A modern take with soft tones, dewy skin, and understated charm, perfect for today’s brides. Fusion Bridal Makeup Blending the best of both traditional and modern styles, this look is unique and versatile. The Ladyfair Bridal Makeup Process Initial Consultation: Discuss your style preferences and wedding theme with our experts. Trial Makeup Session: Experiment with different looks to find your perfect match. Wedding Day Makeup: Relax as we create a flawless look that lasts all day. Touch-Up Services: Keep your glow intact with optional touch-up packages. What Brides in Kusheshwar Asthan Say About Ladyfair Pooja S., Kusheshwar Asthan: "Ladyfair gave me the perfect bridal look I always dreamed of. The at-home service made everything stress-free and convenient!" Anjali R., Kusheshwar Asthan: "The makeup artist understood exactly what I wanted. The results were stunning, and I received endless compliments on my big day." Sneha K., Kusheshwar Asthan: "From the trial session to the final look, everything was seamless. Thank you, Ladyfair, for making my wedding day special!" Tips for a Radiant Bridal Look Start a Skincare Routine Early: Glowing skin begins with consistent care. Stay Hydrated: Drinking water improves your skin’s natural radiance. Communicate with Your Makeup Artist: Share your style preferences for a customized look. Stay Calm: Trust the process and enjoy your transformation. Other Services by Ladyfair Engagement Makeup Reception Makeup Party and Event Makeup Why Ladyfair Stands Out in Kusheshwar Asthan Ladyfair combines expertise, premium products, and personalized service to make every bride feel extraordinary. Whether it’s a traditional or contemporary look, we guarantee a seamless and stress-free experience. FAQs 1. How do I book Ladyfair bridal makeup in Kusheshwar Asthan? Call us at 7004721239 to schedule your appointment. 2. Can I get a trial session? Yes, we provide trial sessions to finalize your bridal look. 3. What products do you use? We use premium, long-lasting products to ensure a flawless finish. 4. Do you offer at-home services? Yes, our bridal makeup services are delivered to your doorstep. 5. Can you accommodate special requests? Absolutely! We tailor our services to meet your unique needs.

Posted By: 25th December 2024
best-bridal-makeup-artist-in-ghanshyampur
Introduction Every bride dreams of looking breathtaking on her wedding day, and Ladyfair makes that dream a reality. Offering at-home bridal makeup services in Ghanshyampur, we bring beauty and convenience together for an unforgettable experience. Our expert makeup artists specialize in creating flawless bridal looks that enhance your natural beauty and match your wedding theme. To book your bridal makeover, call us at 7004721239 today! Why Bridal Makeup Matters Your wedding day is one of the most important milestones of your life. A professionally done bridal makeup ensures that you look stunning in person and in photographs, making your memories timeless. With the right products, techniques, and styling, your natural beauty shines through, giving you the confidence to enjoy every moment. Why Choose Ladyfair for Bridal Makeup in Ghanshyampur? Convenient At-Home Service Ladyfair brings the salon experience to your doorstep. Our at-home bridal makeup service in Ghanshyampur allows you to relax and prepare for your big day without leaving your comfort zone. Experienced Bridal Makeup Artists Our highly skilled makeup artists have extensive experience in bridal beauty. They work with you to create a personalized look that complements your dress, jewelry, and overall style. Premium Products for a Flawless Look We use only top-quality, long-lasting makeup products to ensure your look stays perfect from the ceremony to the final celebration. Customized Bridal Makeup Trials Worried about your bridal look? We offer trial sessions where you can experiment with different styles and finalize the one that feels just right for you. Bridal Makeup Styles in Ghanshyampur Classic Bridal Makeup A timeless choice that emphasizes bold eyes, flawless skin, and a touch of glamour. Perfect for brides who love traditional elegance. Minimalistic Bridal Makeup This style focuses on natural beauty, with subtle highlights and soft tones for a modern yet graceful appearance. Fusion Bridal Makeup A combination of traditional and contemporary elements, offering a unique and versatile bridal look that blends the best of both worlds. The Ladyfair Bridal Makeup Process Booking Your Appointment: Call 7004721239 to secure your date. Consultation: Share your preferences and wedding theme with our artists to plan your perfect look. Trial Session: Try out different makeup styles before the big day to find what works best for you. Wedding Day Service: Our artists arrive at your location, fully equipped to give you a stunning bridal look. Touch-Up Options: Keep your look fresh throughout the day with our optional touch-up service. Client Testimonials from Ghanshyampur Priya M., Ghanshyampur: "Ladyfair made me feel like a princess on my wedding day! The at-home service was so convenient, and the makeup was flawless. Highly recommend!" Kajal T., Ghanshyampur: "The team was professional, friendly, and incredibly talented. They gave me the perfect bridal look, and I received so many compliments!" Sneha R., Ghanshyampur: "I was nervous about my bridal makeup, but Ladyfair exceeded my expectations. Thank you for making my day so special!" Tips for the Perfect Bridal Look Start Early with Skincare: A good skincare routine can enhance your makeup finish. Stay Hydrated: Drink plenty of water for naturally glowing skin. Communicate Your Preferences: Share any specific makeup ideas or concerns during the consultation. Relax and Enjoy the Process: Trust your artist to bring out your best look. Other Services by Ladyfair Engagement Makeup Party Makeup Special Occasion Makeup Why Ladyfair Stands Out in Ghanshyampur Ladyfair is your trusted partner for professional bridal makeup. With experienced artists, premium products, and a commitment to personalized service, we ensure every bride looks and feels her best. FAQs 1. How do I book Ladyfair bridal makeup services in Ghanshyampur? Call us at 7004721239 to schedule your appointment. 2. Can I get a trial session? Yes, we offer trial sessions to finalize your bridal look. 3. What styles do you offer? We provide traditional, modern, and fusion bridal makeup styles to suit your preferences. 4. Do you use high-quality products? Absolutely! We use premium makeup products to ensure a flawless and lasting look. 5. Is the service available at home? Yes, we offer at-home bridal makeup services for your convenience.

Posted By: 25th December 2024
best bridal makeup artist in biraul
Introduction Your wedding day is a momentous occasion, and every bride deserves to look and feel her best. At Ladyfair, we offer at-home bridal makeup services in Biraul, providing you with a personalized and comfortable experience right at your doorstep. Our talented makeup artists specialize in creating flawless bridal looks that will make you feel radiant and confident on your big day. Call us at 7004721239 to book your bridal makeup session and let us help you look stunning! Why Bridal Makeup is Essential Bridal makeup plays a crucial role in highlighting your natural beauty and ensuring that you feel confident on your wedding day. With the right makeup, you can enhance your features and look perfect for the camera, from your first look to your final exit. Why Choose Ladyfair for Bridal Makeup in Biraul? Convenience of At-Home Bridal Makeup We understand that your wedding day is full of excitement and busy moments. That's why Ladyfair offers at-home bridal makeup services in Biraul, allowing you to relax in the comfort of your own home while we work our magic. Enjoy a stress-free experience as our expert artists transform you into the bride of your dreams. Expert Bridal Makeup Artists Our team consists of highly skilled and experienced makeup artists who specialize in bridal makeup. We listen to your preferences and ensure that your makeup complements your wedding theme, your dress, and your personal style. Whether you want a classic look, a modern glam style, or something entirely unique, we’ve got you covered. Premium Makeup Products for a Long-Lasting Look At Ladyfair, we use only high-quality makeup products that are designed to last all day, from your ceremony to your reception. Our products are selected to create a flawless finish and provide you with a natural, glowing look that will make you shine on your big day. Personalized Bridal Makeup Trial We offer personalized consultations and trial sessions to ensure you're satisfied with your bridal look. During the trial, you can experiment with different makeup styles and find the one that works best for you. We’ll make adjustments based on your feedback to ensure you're comfortable and confident on your wedding day. Bridal Makeup Styles in Biraul Traditional Bridal Makeup For brides who want to embrace a timeless look, traditional bridal makeup is a perfect choice. This style focuses on bold eyes, vibrant lips, and radiant skin, creating a dramatic yet elegant appearance that’s perfect for the wedding day. Modern Bridal Makeup Modern bridal makeup is all about a fresh, natural look. This style focuses on glowing skin, soft eyes, and understated lips. Ideal for brides who prefer a contemporary, minimalistic style while still looking stunning. Fusion Bridal Makeup Fusion bridal makeup combines the best of both traditional and modern styles. This hybrid look incorporates bold elements with a more natural finish, offering brides the flexibility to express their unique personalities while still staying true to cultural traditions. The Ladyfair Bridal Makeup Experience in Biraul Book Your Appointment: Call 7004721239 to schedule your bridal makeup appointment. Consultation: Discuss your preferences, wedding theme, and makeup ideas with our expert makeup artists. Trial Session: Experience your bridal look during the trial session, where we’ll adjust the makeup according to your preferences. Wedding Day Makeup: On your wedding day, our artists will arrive at your home and create the perfect bridal look tailored just for you. Touch-Up Services: We also provide touch-up services to keep you looking flawless throughout your special day. Client Testimonials from Biraul Anjali K., Biraul: "Thank you, Ladyfair, for making me feel like a queen on my wedding day! The makeup was perfect, and it lasted all day without any touch-ups. I loved the at-home service—it was so convenient!" Sita P., Biraul: "Ladyfair did an amazing job with my bridal makeup! The makeup artist was professional, and she created a look that was exactly what I envisioned. I highly recommend their services to all brides in Biraul!" Madhavi R., Biraul: "Absolutely loved my bridal makeup! The team at Ladyfair was so professional and made me feel special. The makeup was flawless, and I received so many compliments." Tips for Your Bridal Makeup Session Hydrate Your Skin: Drink plenty of water in the weeks leading up to your wedding for glowing, healthy skin. Stick to Your Skincare Routine: Use the skincare products that work best for your skin to avoid any irritation or reactions. Bring Your Inspiration: Share any makeup ideas or pictures you love during your consultation so that your artist can create your dream look. Don’t Rush the Process: Bridal makeup takes time, so make sure to relax and enjoy the experience. Other Services Offered by Ladyfair In addition to bridal makeup, we offer the following services: Party Makeup: Perfect for receptions, engagement parties, and other events. Engagement Makeup: Get a gorgeous look for your engagement ceremony with Ladyfair's expert artists. Special Occasion Makeup: Ideal for birthdays, anniversaries, and other important celebrations. Why Ladyfair is the Best Choice for Bridal Makeup in Biraul Ladyfair is committed to providing high-quality bridal makeup services that make you look and feel your best. With our skilled artists, premium products, and personalized services, we ensure a flawless bridal look that complements your unique style and personality. FAQs 1. How do I book my bridal makeup appointment? Call 7004721239 to book your appointment for bridal makeup services. 2. Do you offer trial sessions? Yes, we offer trial sessions where you can experiment with different looks before your wedding. 3. What bridal makeup styles do you offer? We offer traditional, modern, and fusion bridal makeup styles to suit your personal preferences. 4. What products do you use for bridal makeup? We use premium, long-lasting makeup products to ensure a flawless look on your wedding day. 5. Can you tailor my bridal makeup to my wedding theme? Yes, we will work with you to create a bridal makeup look that perfectly complements your wedding theme.

Posted By: 25th December 2024
best bridal makeup artist in alinagar
Introduction Your wedding day is one of the most important days of your life, and looking your best is essential. At Ladyfair, we specialize in providing at-home bridal makeup services in Alinagar, ensuring that you have a hassle-free experience in the comfort of your home. Our team of expert makeup artists will work with you to create a personalized, flawless bridal look. Book your bridal makeup session today by calling 7004721239, and let us help you look radiant on your big day! The Importance of Bridal Makeup Bridal makeup is more than just about looking beautiful—it's about feeling confident and special on your wedding day. The right makeup can highlight your natural features, ensuring that you look perfect in every photograph and feel your best as you walk down the aisle. Why Choose Ladyfair for Bridal Makeup in Alinagar? Convenience of At-Home Bridal Makeup We bring the beauty salon to you! Ladyfair offers convenient at-home bridal makeup services in Alinagar. You can relax in the comfort of your home while our talented makeup artists create the perfect look for your wedding day. Expert Makeup Artists Our team consists of skilled and experienced makeup artists who specialize in bridal makeup. Whether you prefer a traditional look, a modern glam style, or something unique, we will customize your makeup to suit your taste and wedding theme. Top-Quality Products for a Flawless Look We only use premium, long-lasting makeup products that will ensure your bridal look lasts all day and night. Our products are carefully chosen to enhance your features and give you a natural, radiant glow. Personalized Consultation and Trial To ensure that you feel confident and comfortable with your look, we offer a trial session before the big day. During the trial, you can discuss your preferences, try out different looks, and make sure you're satisfied with your bridal makeup. Bridal Makeup Styles in Alinagar Traditional Bridal Makeup Traditional bridal makeup is all about bold eyes, rich colors, and radiant skin. This style is perfect for brides who want a classic, timeless bridal look that is both elegant and striking. Modern Bridal Makeup For brides who prefer a more contemporary look, modern bridal makeup focuses on a glowing complexion, subtle eye makeup, and a natural, fresh finish. This style is ideal for brides who want to feel beautiful without going overboard. Fusion Bridal Makeup Fusion bridal makeup combines traditional elements with modern trends. It’s a perfect choice for brides who want a blend of boldness and elegance, combining the best of both worlds for a unique look. The Ladyfair Bridal Makeup Experience in Alinagar Book Your Appointment: Call 7004721239 to book your bridal makeup appointment. Consultation: Discuss your makeup preferences, wedding theme, and ideas with our expert makeup artists. Trial Session: Try out different makeup looks during your trial session to ensure you are 100% happy with your choice. Wedding Day Makeup: On your wedding day, our makeup artists will come to your home and create the perfect bridal look. Touch-Up Services: We also offer touch-up services throughout the day to keep you looking flawless. Client Testimonials from Alinagar Priya S., Alinagar: "Ladyfair exceeded my expectations! The makeup was flawless, and the best part was that I didn't have to leave my home. The makeup artist was friendly and professional, and I felt beautiful all day long!" Rina M., Alinagar: "I couldn't have asked for a better bridal makeup experience. The team at Ladyfair listened to all my requests and made me feel so special. My makeup was perfect, and it lasted through the entire wedding." Kavita R., Alinagar: "Thank you, Ladyfair, for making me feel like a princess on my wedding day! The makeup was exactly what I wanted—classic and beautiful. I highly recommend their services!" Tips for Your Bridal Makeup Session Stay Hydrated: Drink plenty of water in the days leading up to your wedding for glowing, healthy skin. Use Your Regular Skincare Products: Stick to the skincare routine that you know works for you to avoid any surprises. Be Open About Your Preferences: Share your makeup inspirations and ideas during the consultation to ensure your look matches your vision. Don’t Rush the Process: Bridal makeup requires time and attention to detail. Enjoy the process and relax as your makeup artist creates the perfect look. Other Services Offered by Ladyfair In addition to bridal makeup, Ladyfair also provides makeup services for other occasions such as: Party Makeup: Perfect for receptions, engagements, and other celebrations. Engagement Makeup: Get the perfect look for your engagement ceremony with Ladyfair's expert services. Special Occasion Makeup: Ideal for birthdays, anniversaries, and other important events. Why Choose Ladyfair for Bridal Makeup in Alinagar? At Ladyfair, we are committed to offering you the best bridal makeup experience. Our talented team, high-quality products, and personalized service will ensure that you look stunning and feel amazing on your wedding day. FAQs 1. How do I book an appointment for bridal makeup? Call 7004721239 to schedule your bridal makeup appointment. 2. Do you offer trial sessions? Yes, we provide trial sessions before the wedding to help you finalize your bridal makeup look. 3. What styles of bridal makeup do you offer? We offer traditional, modern, and fusion bridal makeup styles, based on your preferences. 4. What makeup products do you use? We use only premium, long-lasting makeup products to ensure a flawless finish. 5. Can you customize my bridal makeup based on my wedding theme? Absolutely! We work with you to create a look that complements your wedding theme and style.

Posted By: 25th December 2024
best bridal makeup artist in benipur
Introduction Your wedding day is the most magical day of your life, and every bride deserves to look and feel her best. At Ladyfair, we offer at-home bridal makeup services in Benipur, ensuring that you can relax in the comfort of your own home while our expert makeup artists transform you into the bride of your dreams. With our personalized approach, we promise to make you look radiant, glamorous, and confident. Call 7004721239 today to schedule your bridal makeup session with Ladyfair! The Importance of Bridal Makeup Bridal makeup is about enhancing your natural beauty, making you feel confident, and ensuring you look stunning in every picture. The right makeup can elevate your look, making you feel special and comfortable, and ensuring you’re ready for every moment of your wedding day. Why Choose Ladyfair for Bridal Makeup in Benipur? Convenience of At-Home Bridal Makeup Ladyfair brings the salon experience right to your doorstep in Benipur. No need to worry about traffic or time constraints—our professional makeup artists will come to you, creating the perfect bridal look in the comfort of your home. Experienced and Professional Makeup Artists Our team of makeup artists is highly skilled and experienced in creating bridal looks that suit every bride’s personality and style. Whether you’re looking for a bold, dramatic appearance or a soft, natural glow, we will create a look that enhances your features and makes you feel beautiful. High-Quality, Long-Lasting Products We only use premium, high-quality makeup products to ensure that your look lasts all day and night. Our products are chosen with care, ensuring a flawless finish that will hold up through tears, smiles, and dancing. Personalized Consultation and Trial Session To make sure your makeup is perfect, we offer a pre-wedding consultation and trial session. This gives you the opportunity to discuss your preferences and make adjustments so you feel confident about your look on your big day. Bridal Makeup Styles in Benipur Traditional Bridal Makeup Traditional bridal makeup includes bold eyes, rich lipstick, and a radiant complexion. This style is ideal for brides who want to make a grand statement on their special day. Modern Bridal Makeup For brides who prefer a softer, more understated look, modern bridal makeup focuses on glowing skin, subtle eye makeup, and a fresh, youthful appearance. Fusion Bridal Makeup Fusion bridal makeup blends traditional elements with modern trends, offering a unique look that balances boldness with elegance. It’s perfect for brides who want to honor their cultural roots while staying trendy. The Ladyfair Bridal Makeup Experience in Benipur Book Your Appointment: Call 7004721239 to schedule your bridal makeup appointment. Consultation: Discuss your makeup preferences, wedding theme, and vision with our expert makeup artists. Trial Session: We provide a trial session to help you choose your perfect bridal look. Wedding Day Makeup: Our artist will arrive at your home on your wedding day to create your flawless bridal look. Touch-Up Services: We offer touch-up services throughout the day to ensure you stay picture-perfect. Client Testimonials from Benipur Sanya K., Benipur: "Ladyfair made me feel like the most beautiful bride! The makeup was flawless, and it lasted all day. The convenience of having it done at home was a huge plus. I highly recommend them!" Priya T., Benipur: "The makeup artist was so talented! She listened to all my preferences and made me feel at ease. I loved my bridal look, and it stayed perfect throughout the ceremony." Neha P., Benipur: "Ladyfair made my wedding day even more special. The makeup was exactly what I wanted—elegant, glowing, and timeless. Thank you for making me feel beautiful on my big day!" Tips for Your Bridal Makeup Session Prep Your Skin: Hydrate your skin in the days leading up to your wedding for a healthy, glowing complexion. Stick to What Works: Use the skincare products you know and love to avoid irritation or breakouts. Communicate Your Vision: Bring pictures of the makeup looks you love and have an open discussion with your artist. Avoid Last-Minute Changes: Finalize your look in the trial session so you don’t feel rushed on the big day. Other Services Offered by Ladyfair In addition to bridal makeup, Ladyfair also provides makeup services for other occasions such as: Party Makeup: Perfect for wedding receptions, engagements, and other celebrations. Engagement Makeup: Look your best on your engagement day with our professional makeup services. Special Occasion Makeup: Ideal for birthdays, anniversaries, and other milestone events. Why Choose Ladyfair for Bridal Makeup in Benipur? Ladyfair is committed to offering the best bridal makeup experience in Benipur. Our skilled makeup artists and personalized service ensure that you’ll feel stunning and confident on your special day. Whether you want a classic bridal look or something more contemporary, we will tailor our services to meet your unique preferences. FAQs 1. How do I book an appointment for bridal makeup? Simply call 7004721239 to book your bridal makeup appointment. 2. Do you offer trial sessions before the wedding day? Yes, we offer trial sessions to help you finalize your bridal makeup look. 3. What makeup styles do you offer? We offer traditional, modern, and fusion bridal makeup styles, depending on your preference. 4. What products do you use for bridal makeup? We use only premium, high-quality makeup products to ensure a flawless, long-lasting look. 5. Can you customize my bridal makeup based on my wedding theme? Yes, we work closely with you to create a makeup look that complements your wedding theme and personal style.

Posted By: 25th December 2024
best bridal makeup artist in hanuman nagar
Introduction Your wedding day is one of the most memorable moments of your life, and every bride deserves to feel extraordinary on her special day. At Ladyfair, we provide at-home bridal makeup services in Hanuman Nagar, ensuring you look stunning without the hassle of traveling to a salon. Our professional makeup artists create personalized looks that enhance your natural beauty while reflecting your unique wedding style. Call 7004721239 to schedule your bridal makeup appointment and get ready to shine on your wedding day! The Significance of Bridal Makeup Bridal makeup is not just about looking beautiful but also about feeling confident and comfortable as you walk down the aisle. Whether you prefer a bold, glamorous look or a more natural, elegant style, the right makeup can transform your appearance, making you feel like the most beautiful version of yourself. Why Choose Ladyfair for Bridal Makeup in Hanuman Nagar? Convenience of At-Home Bridal Makeup With Ladyfair, there’s no need to leave your home on your big day. Our at-home bridal makeup service brings the salon experience to you, allowing you to relax in your own space while our expert makeup artists create your desired look. Skilled and Experienced Makeup Artists Our team of professional makeup artists has years of experience in bridal makeup and understands how to create looks that suit every bride’s unique features. From traditional to contemporary, our makeup artists will craft a flawless look that reflects your style. Premium Products for a Long-Lasting Finish At Ladyfair, we use only top-quality, long-lasting makeup products that are gentle on your skin and ensure your look stays perfect throughout the ceremony and reception. Our products are carefully selected to provide a flawless, radiant finish. Personalized Consultation and Trial Session We offer personalized consultations before the big day to discuss your wedding theme and makeup preferences. Our team also provides trial sessions, allowing you to test different looks and ensure you’re completely happy with the final style. Bridal Makeup Styles in Hanuman Nagar Traditional Bridal Makeup Traditional bridal makeup focuses on bold eye makeup, rich lipstick colors, and intricate detailing. This look is ideal for brides who want a royal, timeless appearance that will leave a lasting impression. Modern Bridal Makeup For brides who prefer a more understated yet elegant look, modern bridal makeup emphasizes soft tones, glowing skin, and subtle eye makeup. This style creates a fresh and youthful appearance while still looking sophisticated. Fusion Bridal Makeup A fusion bridal look combines elements of traditional and modern styles, creating a balanced, versatile appearance. This style works well for brides who want to honor their cultural heritage while incorporating contemporary trends. The Ladyfair Bridal Makeup Experience in Hanuman Nagar Book Your Appointment: Call 7004721239 to schedule your bridal makeup appointment. Consultation: Meet with our artist to discuss your preferences, wedding theme, and desired makeup style. Trial Session: We offer a trial session to finalize your look and make any necessary adjustments before your wedding. Wedding Day Makeup: On the big day, our artist will arrive at your home to create a flawless bridal look. Touch-Up Services: We offer touch-up services throughout the day to ensure your makeup stays perfect. Client Testimonials from Hanuman Nagar Sonia M., Hanuman Nagar: "I couldn’t be happier with the makeup by Ladyfair! The makeup was flawless and lasted all day. The convenience of having the makeup done at home was a huge relief. Thank you for making me feel like a queen on my wedding day!" Kajal P., Hanuman Nagar: "The makeup artist was so professional and listened to all my preferences. The makeup was perfect, and I felt so confident. Ladyfair made my wedding day even more special!" Priya S., Hanuman Nagar: "I loved my bridal makeup! Ladyfair's artist created a gorgeous look that matched my personality and wedding theme. I felt like the best version of myself, and my makeup stayed fresh all day!" Tips for Your Bridal Makeup Session Hydrate Your Skin: Begin hydrating your skin a few days before the wedding to ensure a glowing complexion. Follow Your Skincare Routine: Clean, moisturized skin provides the best foundation for makeup. Communicate Your Preferences: Bring along photos of your desired look and discuss it with your makeup artist. Avoid New Skincare Products: Stick to products you’ve used before to avoid any skin irritation on your big day. Other Services Offered by Ladyfair Besides bridal makeup, Ladyfair provides makeup services for other occasions, including: Party Makeup: Perfect for weddings, engagements, and other celebrations. Engagement Makeup: Get the perfect look for your engagement ceremony. Special Occasion Makeup: Ideal for birthdays, anniversaries, or any other special events. Why Choose Ladyfair for Bridal Makeup in Hanuman Nagar? Ladyfair is dedicated to providing the best bridal makeup experience in Hanuman Nagar. Our professional makeup artists will ensure you look flawless on your wedding day, with a personalized approach that guarantees your makeup perfectly complements your unique style. FAQs 1. How can I book a bridal makeup appointment with Ladyfair? Call 7004721239 to schedule your bridal makeup session. 2. Do you provide trial sessions for bridal makeup? Yes, we offer trial sessions to finalize your desired bridal look before the big day. 3. What bridal makeup styles do you offer? We offer traditional, modern, and fusion bridal makeup styles to suit your preferences. 4. What products do you use for bridal makeup? We use premium, long-lasting makeup products that are gentle on the skin and designed to keep you looking perfect throughout your wedding day. 5. Can you create a personalized makeup look based on my wedding theme? Yes, we can customize your makeup look based on your wedding theme, cultural preferences, and personal style.

Posted By: 25th December 2024
bridal makeup artist in hayaghat
Introduction Your wedding day is one of the most significant moments of your life, and looking your absolute best is essential. At Ladyfair, we specialize in offering at-home bridal makeup services in Hayaghat, ensuring you enjoy a stress-free, flawless bridal look from the comfort of your home. Our expert makeup artists work with you to create a personalized look that suits your style, wedding theme, and personality. Call 7004721239 to book your bridal makeup service and ensure you're ready to shine on your special day! The Importance of Bridal Makeup Bridal makeup plays a crucial role in enhancing your natural beauty and boosting your confidence. A well-done bridal makeup ensures you look radiant, feel comfortable, and leave a lasting impression. Whether you prefer a bold, traditional look or something subtle and modern, Ladyfair's makeup artists will create the perfect style to match your vision for your wedding day. Why Ladyfair is the Best Bridal Makeup Artist in Hayaghat Convenience of At-Home Makeup Services No need to worry about traveling to a salon on your big day. With our at-home bridal makeup services, you can relax in the comfort of your home while our professional artists work their magic. Enjoy your special day without the hassle of traffic or salon appointments. Experienced and Skilled Makeup Artists Ladyfair's team consists of highly skilled makeup artists with years of experience in bridal makeup. They are trained to create various bridal styles, from traditional to modern, and will tailor your makeup to highlight your best features. Use of High-Quality Products We believe in using only the best products that are long-lasting, skin-friendly, and create a flawless finish. From foundation to lipstick, our makeup products are designed to keep you looking beautiful throughout your wedding ceremony and reception. Customized Bridal Consultation Before the wedding day, we offer a consultation to discuss your preferences, wedding theme, and any specific looks you desire. Our team will work with you to understand your vision, and we also offer a trial session to finalize your look before the big day. Bridal Makeup Styles in Hayaghat Traditional Bridal Makeup Traditional bridal makeup focuses on bold colors, dramatic eye makeup, and rich lip tones. This look is perfect for brides who want a timeless, elegant appearance and a glamorous, regal feel. Modern Bridal Makeup For a fresh and youthful look, modern bridal makeup is all about enhancing natural beauty with soft tones and glowing skin. This style is ideal for brides who prefer a lighter, more natural appearance. Fusion Bridal Makeup A fusion of both traditional and modern styles, fusion bridal makeup offers a perfect balance of boldness and elegance. This look is perfect for brides who want the best of both worlds, combining classic elements with contemporary touches. The Ladyfair Bridal Makeup Experience in Hayaghat Book Your Appointment: Call 7004721239 to schedule your bridal makeup appointment. Pre-Wedding Consultation: Meet with our makeup artist to discuss your desired bridal look and wedding theme. Trial Session: We offer a trial session to ensure the makeup style is exactly what you want for your wedding day. Bridal Makeup on Your Wedding Day: Our makeup artist will arrive at your home on the big day to create a flawless bridal look. Touch-Up Services: We offer touch-up services throughout the day to ensure your makeup remains perfect. Client Testimonials from Hayaghat Pooja S., Hayaghat: "I was amazed by the makeup! Ladyfair made me look so beautiful on my wedding day. The makeup was perfect, and I loved the convenience of having the artist come to my home." Rita T., Hayaghat: "Thank you, Ladyfair, for making my wedding day so special. The makeup was stunning, and the artist was incredibly professional. I felt so comfortable and confident all day." Neha R., Hayaghat: "Ladyfair’s bridal makeup services were beyond my expectations. The makeup was long-lasting, and I felt like a princess. The team took great care of every detail!" Tips for Your Bridal Makeup Session Hydrate: Start hydrating your skin a few days before the wedding to maintain a glowing complexion. Follow Your Skincare Routine: Clean and moisturized skin will provide the best canvas for makeup. Be Clear About Your Preferences: Bring along photos of looks you like, and make sure to communicate your desired style with the artist. Avoid New Products: Stick to products you've used before to prevent any skin irritation on your wedding day. Other Services Offered by Ladyfair In addition to bridal makeup, Ladyfair provides services for other occasions: Party Makeup: Perfect for special events or guest makeup. Engagement Makeup: Ensure you look flawless during your engagement celebrations. Special Occasion Makeup: Ideal for birthdays, anniversaries, or any special event. Why Choose Ladyfair for Bridal Makeup in Hayaghat? Ladyfair offers a seamless and convenient bridal makeup experience in Hayaghat. With expert artists, personalized service, and top-quality products, we ensure you look your best on your wedding day. Our at-home service eliminates the stress of salon visits, allowing you to enjoy a relaxed and beautiful wedding day. FAQs 1. How can I book Ladyfair’s bridal makeup services? Call 7004721239 to book your bridal makeup appointment. 2. Do you offer trial sessions for bridal makeup? Yes, we offer trial sessions to help you finalize your bridal look before the wedding day. 3. What makeup styles do you offer? We offer traditional, modern, and fusion bridal makeup styles to suit your personal preferences. 4. What products do you use for bridal makeup? We use premium, skin-friendly makeup products designed to last throughout the day. 5. Can you create a makeup look based on my cultural preferences? Yes, we can create a makeup style that reflects your cultural traditions and wedding theme.

Posted By: 25th December 2024
best bridal makeup artist in hayaghat
Introduction Your wedding day is one of the most significant moments of your life, and looking your absolute best is essential. At Ladyfair, we specialize in offering at-home bridal makeup services in Hayaghat, ensuring you enjoy a stress-free, flawless bridal look from the comfort of your home. Our expert makeup artists work with you to create a personalized look that suits your style, wedding theme, and personality. Call 7004721239 to book your bridal makeup service and ensure you're ready to shine on your special day! The Importance of Bridal Makeup Bridal makeup plays a crucial role in enhancing your natural beauty and boosting your confidence. A well-done bridal makeup ensures you look radiant, feel comfortable, and leave a lasting impression. Whether you prefer a bold, traditional look or something subtle and modern, Ladyfair's makeup artists will create the perfect style to match your vision for your wedding day. Why Ladyfair is the Best Bridal Makeup Artist in Hayaghat Convenience of At-Home Makeup Services No need to worry about traveling to a salon on your big day. With our at-home bridal makeup services, you can relax in the comfort of your home while our professional artists work their magic. Enjoy your special day without the hassle of traffic or salon appointments. Experienced and Skilled Makeup Artists Ladyfair's team consists of highly skilled makeup artists with years of experience in bridal makeup. They are trained to create various bridal styles, from traditional to modern, and will tailor your makeup to highlight your best features. Use of High-Quality Products We believe in using only the best products that are long-lasting, skin-friendly, and create a flawless finish. From foundation to lipstick, our makeup products are designed to keep you looking beautiful throughout your wedding ceremony and reception. Customized Bridal Consultation Before the wedding day, we offer a consultation to discuss your preferences, wedding theme, and any specific looks you desire. Our team will work with you to understand your vision, and we also offer a trial session to finalize your look before the big day. Bridal Makeup Styles in Hayaghat Traditional Bridal Makeup Traditional bridal makeup focuses on bold colors, dramatic eye makeup, and rich lip tones. This look is perfect for brides who want a timeless, elegant appearance and a glamorous, regal feel. Modern Bridal Makeup For a fresh and youthful look, modern bridal makeup is all about enhancing natural beauty with soft tones and glowing skin. This style is ideal for brides who prefer a lighter, more natural appearance. Fusion Bridal Makeup A fusion of both traditional and modern styles, fusion bridal makeup offers a perfect balance of boldness and elegance. This look is perfect for brides who want the best of both worlds, combining classic elements with contemporary touches. The Ladyfair Bridal Makeup Experience in Hayaghat Book Your Appointment: Call 7004721239 to schedule your bridal makeup appointment. Pre-Wedding Consultation: Meet with our makeup artist to discuss your desired bridal look and wedding theme. Trial Session: We offer a trial session to ensure the makeup style is exactly what you want for your wedding day. Bridal Makeup on Your Wedding Day: Our makeup artist will arrive at your home on the big day to create a flawless bridal look. Touch-Up Services: We offer touch-up services throughout the day to ensure your makeup remains perfect. Client Testimonials from Hayaghat Pooja S., Hayaghat: "I was amazed by the makeup! Ladyfair made me look so beautiful on my wedding day. The makeup was perfect, and I loved the convenience of having the artist come to my home." Rita T., Hayaghat: "Thank you, Ladyfair, for making my wedding day so special. The makeup was stunning, and the artist was incredibly professional. I felt so comfortable and confident all day." Neha R., Hayaghat: "Ladyfair’s bridal makeup services were beyond my expectations. The makeup was long-lasting, and I felt like a princess. The team took great care of every detail!" Tips for Your Bridal Makeup Session Hydrate: Start hydrating your skin a few days before the wedding to maintain a glowing complexion. Follow Your Skincare Routine: Clean and moisturized skin will provide the best canvas for makeup. Be Clear About Your Preferences: Bring along photos of looks you like, and make sure to communicate your desired style with the artist. Avoid New Products: Stick to products you've used before to prevent any skin irritation on your wedding day. Other Services Offered by Ladyfair In addition to bridal makeup, Ladyfair provides services for other occasions: Party Makeup: Perfect for special events or guest makeup. Engagement Makeup: Ensure you look flawless during your engagement celebrations. Special Occasion Makeup: Ideal for birthdays, anniversaries, or any special event. Why Choose Ladyfair for Bridal Makeup in Hayaghat? Ladyfair offers a seamless and convenient bridal makeup experience in Hayaghat. With expert artists, personalized service, and top-quality products, we ensure you look your best on your wedding day. Our at-home service eliminates the stress of salon visits, allowing you to enjoy a relaxed and beautiful wedding day. FAQs 1. How can I book Ladyfair’s bridal makeup services? Call 7004721239 to book your bridal makeup appointment. 2. Do you offer trial sessions for bridal makeup? Yes, we offer trial sessions to help you finalize your bridal look before the wedding day. 3. What makeup styles do you offer? We offer traditional, modern, and fusion bridal makeup styles to suit your personal preferences. 4. What products do you use for bridal makeup? We use premium, skin-friendly makeup products designed to last throughout the day. 5. Can you create a makeup look based on my cultural preferences? Yes, we can create a makeup style that reflects your cultural traditions and wedding theme.

Posted By: 25th December 2024
best bridal makeup artist in baheri
Introduction Your wedding day is one of the most important days of your life, and looking your best is a top priority. At Ladyfair, we specialize in offering at-home bridal makeup services that ensure you look flawless while enjoying the comfort of your own home in Baheri. Our expert makeup artists will create a personalized bridal look that aligns with your style, making you feel confident and beautiful on your special day. Call 7004721239 to book your bridal makeup service and enjoy a stress-free wedding day! The Importance of Bridal Makeup Bridal makeup is essential not just for looking gorgeous, but also for feeling confident as you celebrate the most memorable day of your life. Whether you prefer a classic, traditional look or a modern, subtle style, the right makeup can enhance your natural beauty and leave you glowing all day long. Ladyfair's experienced team uses high-quality products and techniques to create a stunning bridal look, ensuring you look picture-perfect throughout your ceremony and reception. Why Ladyfair is the Best Bridal Makeup Artist in Baheri Convenience of At-Home Services No need to travel to a salon on your big day! Our bridal makeup service is delivered right to your doorstep, so you can stay relaxed and pampered while we work on your look. Enjoy the convenience of having a professional artist at your home without the added stress of travel. Skilled and Experienced Makeup Artists At Ladyfair, we pride ourselves on our team of highly skilled professionals who specialize in bridal makeup. With years of experience, our artists know how to create the perfect look that complements your wedding attire and your personality. Top-Quality Products We use only premium makeup products that are gentle on your skin and designed to last throughout the day. Whether it's foundation, eyeshadow, or lip color, you can trust that Ladyfair's makeup products will keep you looking beautiful for hours. Personalized Bridal Consultation To make sure we create your dream bridal look, we offer pre-wedding consultations where we discuss your preferences and wedding details. We’ll listen to your ideas, suggest looks based on your wedding theme, and customize a style that suits your personality. A trial session is also available to finalize the look before the big day. Bridal Makeup Styles in Baheri Traditional Bridal Makeup Traditional bridal makeup is bold, vibrant, and regal. It often includes dramatic eyes, rich lip colors, and glowing skin. This look is perfect for brides who want a timeless, classic appearance. Modern Bridal Makeup For those who prefer a lighter, more natural style, modern bridal makeup focuses on enhancing natural features with soft, elegant tones. A glowing complexion and delicate eye makeup ensure a fresh and contemporary look. Fusion Bridal Makeup Fusion makeup combines the best of both traditional and modern styles. This option is ideal for brides who want a balance of boldness and subtlety, offering elegance with a contemporary touch. The Ladyfair Bridal Makeup Experience in Baheri Book Your Appointment: Call 7004721239 to schedule your bridal makeup appointment. Pre-Wedding Consultation: Meet with our makeup artist to discuss your preferences, attire, and desired style. Trial Session: Our team offers a trial session to ensure your bridal makeup is perfect before the wedding day. Bridal Makeup on Your Wedding Day: Our makeup artist will arrive at your home to create your flawless bridal look. Touch-Up Services: We offer touch-ups throughout the day to ensure your makeup stays perfect for every moment. Client Testimonials from Baheri Rita K., Baheri: "Ladyfair’s bridal makeup service was exceptional. I felt like a princess on my wedding day! The makeup was flawless, and I loved that the artist came to my home. Highly recommended!" Suman P., Baheri: "I couldn't have asked for a better makeup artist for my wedding. The team at Ladyfair listened to my vision and made it come to life. My makeup was natural and beautiful. Thank you for making me feel so special!" Nisha S., Baheri: "Thank you Ladyfair for making my wedding day perfect! The makeup was long-lasting, and I received so many compliments. The artist was so friendly and professional." Tips for Your Bridal Makeup Session Hydrate: Drink plenty of water in the days leading up to your wedding to keep your skin looking radiant. Follow Your Skincare Routine: Clean, hydrated skin provides the best base for makeup. Be Clear About Your Vision: Make sure to communicate your desired look and share inspiration with your makeup artist. Stick to Your Routine: Avoid using new products or skincare routines before your wedding to prevent skin irritation. Other Services Offered by Ladyfair In addition to bridal makeup, Ladyfair provides makeup for various events: Party Makeup: Perfect for guests or any special occasion. Engagement Makeup: Enhance your engagement day with flawless makeup. Special Occasion Makeup: Ideal for birthdays, anniversaries, or any milestone event. Why Choose Ladyfair for Bridal Makeup in Baheri? Ladyfair’s at-home bridal makeup service is designed to give you a convenient, stress-free experience. With a focus on personalized service, high-quality products, and skilled artistry, we ensure that you look your best on your wedding day. FAQs 1. How can I book Ladyfair’s bridal makeup services? Simply call 7004721239 to book your bridal makeup appointment. 2. Do you offer trial sessions for bridal makeup? Yes, we offer trial sessions so you can feel confident about your bridal look before the wedding day. 3. What makeup styles do you offer? We offer traditional, modern, and fusion bridal makeup styles. 4. What products do you use for bridal makeup? We use premium-quality products to ensure a long-lasting and flawless look. 5. Can you cater to cultural preferences in makeup? Yes, we can create makeup looks that reflect cultural traditions and wedding themes.

Posted By: 25th December 2024
best bridal makeup artist in tardih
Introduction Your wedding day is a celebration of love, and it's important to feel radiant and confident. At Ladyfair, we specialize in at-home bridal makeup services that bring the salon experience right to your doorstep in Tardih. Our professional makeup artists will ensure you look absolutely stunning as you step into your new chapter. Forget the stress of salon visits, and enjoy a customized bridal makeup experience in the comfort of your own home. Call 7004721239 today to book your bridal makeup session! The Importance of Bridal Makeup Bridal makeup is all about accentuating your natural beauty while ensuring that you look flawless in photos and throughout your wedding day. It is a blend of artistry and precision, designed to make you feel beautiful, confident, and unforgettable. At Ladyfair, we understand the significance of your big day and provide tailored makeup services that align with your unique style, wedding theme, and personality. Whether you prefer a traditional, bold look or a modern, minimalist style, our artists have the expertise to deliver the perfect bridal look. Why Ladyfair is the Best Bridal Makeup Artist in Tardih Convenience of At-Home Services No need to worry about traveling to a salon on your wedding day! Ladyfair’s bridal makeup service comes to you. Our experienced makeup artists will arrive at your home, ensuring you stay relaxed and comfortable while we work our magic. Experienced and Skilled Makeup Artists Our team consists of highly trained and experienced professionals who specialize in bridal makeup. From bold and dramatic to soft and natural, we can create any look you desire. We listen to your vision and work closely with you to bring it to life. High-Quality Makeup Products We use only premium-quality makeup products that are gentle on the skin and long-lasting. These products will keep you looking flawless throughout your ceremony and celebrations. Personalized Bridal Consultation We offer pre-wedding consultations to ensure your bridal look matches your expectations. During this session, we discuss your preferences, wedding attire, and overall vision. A trial session is also available to help finalize the look before your big day. Bridal Makeup Styles in Tardih Traditional Bridal Makeup For brides who love bold, vibrant colors and a dramatic look, traditional bridal makeup is the perfect choice. With rich eyeshadow, a striking lip color, and radiant skin, you’ll look stunning in your wedding attire. Modern Bridal Makeup If you prefer a more subtle, contemporary style, modern bridal makeup focuses on glowing skin, natural tones, and soft eye makeup. This style enhances your natural beauty while maintaining a fresh, elegant appearance. Fusion Bridal Makeup A fusion style combines elements of both traditional and modern makeup to create a balanced, sophisticated look. Perfect for brides who want the best of both worlds, fusion makeup combines glamour with elegance. The Ladyfair Bridal Makeup Experience in Tardih Book Your Appointment: Reach out to 7004721239 to schedule your bridal makeup appointment. Pre-Wedding Consultation: Meet our makeup artist to discuss your preferences, wedding details, and style. Trial Session: We offer a trial session to make sure your bridal look is perfect. Bridal Makeup on Wedding Day: Our makeup artist will arrive at your home on the big day and create a flawless look. Touch-Up Services: We also offer touch-up services throughout your wedding day, ensuring you stay beautiful all day long. Client Testimonials from Tardih Aarti K., Tardih: "Ladyfair made me feel like a queen on my wedding day! The makeup was flawless, and the best part was that I didn't have to leave home. Highly recommend their services to any bride in Tardih!" Shalini P., Tardih: "My bridal makeup was exactly what I wanted—elegant and modern. The artist was professional and made sure I was happy with the look. Thank you for making my day even more special!" Preeti S., Tardih: "I had such a wonderful experience with Ladyfair. The trial session helped me choose the perfect style, and on my wedding day, I was blown away by how beautiful the makeup turned out. Thank you for your excellent service!" Tips for Your Bridal Makeup Session Hydrate: Drink plenty of water leading up to your wedding to keep your skin looking fresh and hydrated. Follow a Skincare Routine: A clean, moisturized face provides the best base for makeup. Discuss Your Vision: Be sure to share your preferences and inspirations with the makeup artist during the consultation. Don’t Try New Products: Stick to your regular skincare routine to avoid skin irritation or reactions. Additional Services Offered by Ladyfair In addition to bridal makeup, we also offer makeup for other occasions: Party Makeup: Perfect for wedding guests or any special event. Engagement Makeup: Make your engagement day even more special with professional makeup. Special Occasion Makeup: Ideal for birthdays, anniversaries, and other milestone events. Why Choose Ladyfair for Bridal Makeup in Tardih? Ladyfair is known for providing excellent bridal makeup services in Tardih, focusing on high-quality products, professional artistry, and a personalized experience. Whether you're looking for a traditional or modern look, our expert makeup artists will ensure you look and feel your best on your wedding day. FAQs 1. How do I book Ladyfair’s bridal makeup services? Simply call 7004721239 to book your bridal makeup appointment. 2. Do you offer trial sessions for bridal makeup? Yes, we offer trial sessions so you can be confident in your bridal look before the wedding day. 3. What makeup styles do you specialize in? We specialize in traditional, modern, and fusion bridal makeup. 4. What makeup products do you use? We use only premium, long-lasting products that are safe for all skin types. 5. Can you accommodate cultural makeup preferences? Yes, we can incorporate traditional and cultural elements into your bridal makeup to align with your wedding theme.

Posted By: 25th December 2024
best bridal makeup artist in manigacchi
Introduction Your wedding day is one of the most memorable moments of your life, and every bride deserves to look radiant and flawless. In Manigachhi, Ladyfair ensures that you step into your new chapter with confidence and beauty. Our professional at-home bridal makeup services bring convenience, comfort, and expert artistry right to your doorstep. Say goodbye to salon visits and enjoy a relaxing, personalized bridal experience at home. Call 7004721239 today to book your appointment and secure your perfect bridal look! The Importance of Bridal Makeup Bridal makeup is more than just cosmetics; it’s an art form that enhances your natural beauty and ensures you look stunning on your special day. Professional bridal makeup not only highlights your best features but also creates a flawless look that will last throughout the ceremony and celebrations. At Ladyfair, we focus on understanding your vision and bringing it to life through a combination of traditional and modern makeup techniques. We aim to make you feel beautiful, confident, and unforgettable. Why Ladyfair Stands Out in Manigachhi Convenience of At-Home Services Ladyfair brings the salon experience to your doorstep. You don’t have to worry about traffic or spending hours at a salon. Our skilled makeup artist arrives at your location and provides a stress-free, personalized bridal makeup session that ensures you look and feel your best. Expert Makeup Artists Our team of professional makeup artists is highly experienced in creating diverse bridal looks. Whether you’re looking for bold, traditional makeup or a more subtle, contemporary style, we tailor our services to match your personality, outfit, and wedding theme. Top-Quality Makeup Products At Ladyfair, we use only the best makeup products that are long-lasting, gentle on the skin, and suitable for all skin types. Our products are designed to keep you looking flawless from morning until night. Personalized Bridal Consultation Every bride has her unique preferences, and we offer pre-wedding consultations to understand your vision for the big day. During the consultation, we’ll discuss your attire, wedding theme, and preferred makeup style to ensure that everything aligns perfectly. We also offer trial sessions to preview your bridal look and make any necessary adjustments. Bridal Makeup Styles in Manigachhi Traditional Bridal Makeup For brides who prefer bold, classic styles, traditional bridal makeup involves rich colors, dramatic eyes, and striking lip shades that complement cultural wedding attire. This style is perfect for brides who want a timeless, elegant look. Modern Bridal Makeup Modern bridal makeup focuses on soft, natural tones, glowing skin, and minimalism. This style highlights the bride's features subtly, creating a fresh and radiant look that feels light yet glamorous. Fusion Bridal Makeup Fusion bridal makeup combines traditional elements with modern techniques, offering a balanced look that blends boldness with elegance. If you’re unsure whether to go for a classic or contemporary style, fusion makeup offers the best of both worlds. The Ladyfair Bridal Makeup Experience in Manigachhi Book Your Appointment: Call 7004721239 to schedule your bridal makeup service. Pre-Wedding Consultation: Meet our makeup artist to discuss your style, wedding details, and preferences. Trial Session: Get a preview of your bridal look, ensuring everything is perfect before the big day. Bridal Makeup on Wedding Day: On your wedding day, we’ll provide the full bridal makeup service at your home. Touch-Up Services: If needed, we offer touch-up services throughout the day to keep your look flawless. Client Testimonials from Manigachhi Sonali P., Manigachhi: "I am so grateful to Ladyfair for making my wedding day stress-free and beautiful. The makeup artist created a stunning look that lasted all day. Highly recommend their at-home service!" Priya D., Manigachhi: "The trial session gave me the confidence I needed for my big day. The makeup artist was incredibly professional, and the final look was exactly what I wanted!" Neha S., Manigachhi: "Ladyfair did an amazing job with my bridal makeup. I was looking for a blend of traditional and modern, and they nailed it! I felt absolutely gorgeous on my wedding day." Tips for Preparing for Your Bridal Makeup Session Stay Hydrated: Drink plenty of water in the days leading up to your wedding to ensure your skin stays glowing and healthy. Follow a Skincare Routine: Cleanse, tone, and moisturize your skin regularly to create a smooth base for makeup. Stick to Familiar Products: Avoid introducing new skincare products to your routine before your wedding to prevent any skin issues. Share Your Vision: Be sure to communicate your ideas and preferences during your consultation to ensure your bridal makeup aligns with your expectations. Additional Services from Ladyfair In addition to bridal makeup, we also offer makeup services for other occasions: Party Makeup: Perfect for wedding guests or any special events. Engagement Makeup: Celebrate your engagement with a stunning look that complements your style. Special Occasion Makeup: Ideal for birthdays, anniversaries, and other milestones where you want to look your best. Why Choose Ladyfair in Manigachhi? Ladyfair is known for providing exceptional bridal makeup services in Manigachhi. We prioritize customer satisfaction, using premium products and offering personalized consultations to ensure that every bride looks and feels her best. Whether you want a bold traditional look or a soft, contemporary style, we have the expertise to make your bridal makeup dreams come true. FAQs 1. How do I book Ladyfair’s bridal makeup services? Simply call 7004721239 to schedule your appointment and discuss your needs with our team. 2. Do you offer trial sessions for bridal makeup? Yes, we offer trial sessions so you can finalize your look before your wedding day. 3. What makeup styles do you specialize in? We specialize in traditional, modern, and fusion bridal makeup to cater to every bride’s preferences. 4. What makeup products do you use? We use high-quality, long-lasting products that are safe for all skin types. 5. Can you accommodate cultural makeup preferences? Absolutely! We can incorporate cultural and traditional elements into your bridal look to honor your heritage.

Posted By: 25th December 2024
best bridal makeup artist in jale
Introduction Your wedding day is one of the most cherished moments of your life, and looking your best is essential to feeling your most confident. In Jale, Ladyfair provides professional at-home bridal makeup services, ensuring you look radiant and flawless throughout your special day. Forget about salon visits and let our expert makeup artist come to you, offering personalized service that matches your style and wedding theme. Call 7004721239 to book your appointment today! The Importance of Bridal Makeup Bridal makeup is about more than just applying makeup—it’s an art that enhances your natural beauty, ensuring you look stunning in person and in photographs. With professional bridal makeup, you’ll enjoy a polished look that stays fresh all day and into the night. Here’s why professional bridal makeup is crucial: Long-Lasting Results: Your makeup stays perfect through every event, from the ceremony to the reception. Flawless Appearance: A skilled makeup artist can ensure your skin looks smooth and your features are enhanced, creating a timeless bridal look. Personalized Styles: Whether you desire bold traditional makeup or a more subtle modern look, professional artists can tailor the makeup to suit your preferences. At Ladyfair, we blend modern and traditional techniques to create a look that makes you feel beautiful and confident. Why Ladyfair is the Best Choice for Bridal Makeup in Jale Convenience of At-Home Services Ladyfair brings the beauty studio to your doorstep. Our at-home bridal makeup service means you don’t need to worry about traveling to a salon or sitting in traffic on your big day. Let us make the process relaxing and enjoyable right at your home. Expert Bridal Makeup Artists Our makeup artists are skilled in various bridal makeup styles, from traditional, bold looks to modern, minimalist beauty. We understand the significance of your special day and work closely with you to ensure that your bridal makeup aligns perfectly with your vision. High-Quality Makeup Products We only use top-quality makeup products that are suitable for all skin types, long-lasting, and designed to withstand the entire wedding day. Our premium products ensure you look flawless in every shot and under any lighting. Personalized Consultation and Trial Every bride is unique, and Ladyfair takes pride in providing personalized service. We offer pre-wedding consultations to understand your preferences, ensuring your final makeup look matches your wedding theme, outfit, and vision. Plus, our trial sessions allow you to experiment and finalize your desired look. Popular Bridal Makeup Styles in Jale Traditional Bridal Makeup Traditional bridal makeup includes bold eyeliner, vibrant lipstick, and dramatic contouring. This style enhances the bride’s features, making it ideal for cultural weddings and elaborate outfits. Modern Bridal Makeup Modern bridal makeup focuses on soft tones, dewy skin, and minimalism. It’s a more natural look, perfect for brides who want a radiant, glowing appearance without heavy makeup. Fusion Bridal Makeup For those who want to combine tradition with a contemporary edge, fusion bridal makeup brings together bold traditional elements and soft, modern touches to create a balanced, versatile look. The Ladyfair Bridal Makeup Experience in Jale Book Your Appointment: Call 7004721239 to book your bridal makeup service. Pre-Wedding Consultation: Meet with our makeup artist to discuss your bridal vision, wedding theme, and preferred style. Trial Session: Try out the makeup look before the big day to make sure it’s exactly what you want. Bridal Makeup on Wedding Day: On your special day, we’ll come to your home and create the bridal look of your dreams. Post-Wedding Touch-Ups: We also offer touch-up services, ensuring you stay fresh and flawless throughout your wedding day. Client Testimonials from Jale Neha K., Jale: "Ladyfair’s at-home service was a lifesaver on my wedding day. The makeup was stunning, and I felt beautiful the whole day!" Rina M., Jale: "The makeup artist was so professional and understood exactly what I wanted. The trial helped me make confident choices, and my makeup was perfect!" Poonam S., Jale: "I wanted a traditional look with a modern twist, and Ladyfair delivered beyond my expectations. I felt like a queen on my wedding day!" Bridal Beauty Tips for the Perfect Look Hydrate: Drinking plenty of water leading up to your wedding day keeps your skin glowing and healthy. Skincare Routine: Regular cleansing, toning, and moisturizing help you achieve a smooth canvas for makeup. Avoid New Skincare Products: Stick to your usual skincare products to prevent any potential irritation or breakouts. Share Your Vision: Discuss your style preferences and any concerns with your makeup artist to ensure a flawless final result. Additional Services from Ladyfair in Jale In addition to bridal makeup, we offer other beauty services for different occasions: Party Makeup: Perfect for guests or bridesmaids. Engagement Makeup: Elegant makeup for your engagement ceremony. Special Occasion Makeup: Ideal for birthdays, anniversaries, or any celebration where you want to look your best. Why Ladyfair is Trusted in Jale Ladyfair has built a reputation for offering professional, personalized bridal makeup services in Jale. Our commitment to quality products, expert artists, and outstanding customer service makes us the top choice for brides looking to look and feel their best on their wedding day. FAQs 1. How can I book Ladyfair’s services? Call 7004721239 to schedule an appointment for bridal makeup. 2. Do you offer trial sessions? Yes, we offer trial sessions so that you can see the look before your wedding day. 3. What makeup styles do you specialize in? We specialize in traditional, modern, and fusion bridal makeup to match any bride’s style. 4. What products do you use? We use premium, skin-friendly, and long-lasting makeup products. 5. Can you accommodate cultural makeup preferences? Absolutely! We can tailor the makeup to reflect your cultural and traditional needs.

Posted By: 25th December 2024
best bridal makeup artist in Singhwara
Introduction Your wedding day deserves to be as memorable as the love story it celebrates, and at Ladyfair, we ensure you look radiant as you step into this new chapter of your life. Offering professional at-home bridal makeup services in Singhwara, we bring the beauty studio to your doorstep, ensuring a stress-free, personalized experience. Let us help you achieve a flawless bridal look that complements your style and makes you feel confident on your special day. Book your appointment now by calling 7004721239. The Importance of Bridal Makeup Bridal makeup is more than just applying cosmetics—it’s about enhancing your natural beauty and making sure you look stunning, both in person and in photos. Professional makeup ensures long-lasting results, a flawless finish, and a look that’s customized to your style and wedding theme. Why opt for professional bridal makeup? Confidence Boost: A professional touch will give you the confidence to shine. Long-Lasting Look: Makeup that stays perfect from the ceremony to the after-party. Personalized Style: Your makeup will be tailored to your personality, wedding theme, and attire. At Ladyfair, we use both modern and traditional techniques to create a look that’s uniquely yours. Why Ladyfair is the Top Choice for Bridal Makeup in Singhwara Convenience of At-Home Services Ladyfair offers the luxury of bridal makeup at your doorstep. No need to travel to a salon—our expert makeup artist will come to your location, providing a relaxing and personalized experience. Expert Makeup Artists Our team has extensive experience in creating stunning bridal looks. Whether you desire a traditional bold look or a modern minimalist style, we ensure your makeup complements your attire and enhances your features. High-Quality Makeup Products We use only top-tier, skin-friendly makeup products that provide flawless, long-lasting results. Our products are suitable for all skin types, ensuring you look your best all day. Personalized Consultations Ladyfair understands that every bride is unique. We offer pre-wedding consultations to plan your bridal look and make sure it aligns with your vision, ensuring you feel beautiful and confident. Bridal Makeup Styles Offered in Singhwara Traditional Bridal Makeup For brides who prefer classic beauty, traditional makeup is bold and beautiful, with rich eye makeup, vibrant lips, and intricate contouring. Modern Bridal Makeup Modern bridal makeup focuses on subtlety, with soft tones and a fresh, radiant look that enhances your natural beauty. Fusion Bridal Makeup A perfect blend of tradition and modernity, fusion makeup combines the best of both worlds, allowing you to look timeless yet trendy. The Ladyfair Bridal Makeup Experience Contact Us: Call 7004721239 to discuss your bridal makeup needs and schedule your appointment. Consultation: Share your wedding vision, style, and preferences with our makeup artist to plan your look. Trial Session: Experience a trial session to see how the makeup complements your attire and make any adjustments as needed. Wedding Day Makeup: On your big day, our expert artist will apply your bridal makeup at your location, ensuring a flawless look for the ceremony. Touch-Ups: If needed, we provide post-wedding touch-up services to keep your makeup fresh throughout the celebrations. Client Testimonials from Singhwara Anita R., Singhwara: "Ladyfair’s at-home service made my wedding day hassle-free. The makeup was stunning, and I felt confident all day long!" Simran P., Singhwara: "The trial session helped me finalize my look, and the final makeup was even more beautiful than I imagined. Highly recommend Ladyfair!" Nisha S., Singhwara: "I wanted a natural look for my wedding, and Ladyfair nailed it perfectly! The makeup was light yet flawless. Thank you, Ladyfair!" Bridal Beauty Preparation Tips Stay Hydrated: Drinking water ensures your skin stays hydrated and glowing for your makeup. Follow a Skincare Routine: Consistent cleansing and moisturizing will make your skin radiant and smooth. Avoid New Skincare Products: Stick to products your skin is familiar with to avoid irritation before the big day. Share Your Vision: Communicate your preferred style and concerns with your makeup artist during the consultation to ensure your desired look. Additional Services from Ladyfair in Singhwara In addition to bridal makeup, Ladyfair also offers: Engagement Makeup: Elegant makeup for your engagement day. Party Makeup: Stunning makeup for weddings, parties, and other celebrations. Everyday Makeup: Subtle makeup for casual outings or everyday wear. Why Ladyfair is Trusted in Singhwara Ladyfair has become the top choice for brides in Singhwara, offering premium makeup services with a personal touch. Our commitment to excellence, high-quality products, and expert artists have made us the trusted name for bridal makeup in the area. FAQs 1. How can I book Ladyfair’s services? Call 7004721239 to discuss your bridal makeup needs and schedule your appointment. 2. Does Ladyfair provide trial sessions? Yes, we offer trial sessions so you can finalize your bridal look with confidence. 3. What makeup styles do you offer? We offer traditional, modern, and fusion bridal makeup styles to match every bride’s preferences. 4. What products do you use for bridal makeup? We use high-quality, safe, and long-lasting products that are suitable for all skin types. 5. Can you accommodate cultural makeup preferences? Absolutely! We customize makeup to reflect your cultural and traditional preferences.

Posted By: 25th December 2024
best bridal makeup artist in keoti
Introduction Your wedding day is one of the most important milestones in your life, and Ladyfair is here to ensure you look absolutely stunning on this special occasion. Offering professional at-home bridal makeup services in Keoti, we provide a personalized experience that is both convenient and luxurious. Let us help you achieve a flawless bridal look with our expert makeup services. Book your appointment now by calling 7004721239 and step into your wedding day radiantly. The Importance of Bridal Makeup Bridal makeup is not just about applying cosmetics—it’s an art that enhances your natural beauty while reflecting your style. A professional makeup artist ensures that you look picture-perfect in person and on camera, boosting your confidence throughout the day. Here’s why professional bridal makeup is essential: Long-Lasting Results: Professional makeup stays in place all day and night, no matter the weather or activities. Flawless Finish: A makeup artist uses techniques that ensure your makeup is applied perfectly, ensuring a smooth and radiant finish. Tailored Look: Whether you want a bold or soft look, professional makeup is customized to your style, wedding theme, and attire. Why Ladyfair is the Top Choice for Bridal Makeup in Keoti Convenient At-Home Services Ladyfair offers the convenience of bridal makeup in the comfort of your home. No need to travel to a salon—we bring the makeup studio to you, ensuring a stress-free experience. Expert Makeup Artists Our professional makeup artists are skilled at creating diverse bridal looks. Whether it’s a traditional or modern style, we have the expertise to bring your vision to life. High-Quality Makeup Products We use only the best, skin-friendly products to ensure your makeup lasts for hours and looks flawless all day. Personalized Consultations Ladyfair takes the time to understand your preferences and offers personalized consultations to design the perfect bridal look for you. Bridal Makeup Styles Offered in Keoti Traditional Bridal Makeup This style highlights bold eye makeup, vivid lips, and a classic look that complements traditional bridal attire. Modern Bridal Makeup A contemporary, natural style with soft tones, creating a radiant and dewy look for the modern bride. Fusion Bridal Makeup For those who want the best of both worlds, fusion makeup combines traditional and modern elements for a personalized look. The Ladyfair Bridal Makeup Process Contact Us: Call 7004721239 to discuss your makeup needs and schedule an appointment. Consultation: Share your vision and details of your wedding with our artist to finalize your bridal look. Trial Makeup Session: Experience a trial to see your makeup style and make adjustments as needed. Wedding Day Makeup: On your special day, we arrive at your location to provide a flawless bridal makeup application. Touch-Ups: If needed, we offer post-wedding touch-ups to keep your makeup fresh throughout the celebrations. Client Testimonials from Keoti Rekha S., Keoti: "Ladyfair’s makeup was everything I dreamed of! The at-home service made my day even more special, and I felt so beautiful!" Maya P., Keoti: "The makeup artist was so talented and understood exactly what I wanted. My makeup was flawless, and it lasted all day." Neha T., Keoti: "Thank you, Ladyfair, for making my wedding day perfect! The trial session helped me feel confident in my look, and the final result was amazing." Bridal Beauty Preparation Tips Hydrate: Drink plenty of water leading up to your wedding day to keep your skin glowing. Follow a Skincare Routine: Cleanse, moisturize, and protect your skin regularly to ensure a smooth complexion. Avoid Skin Irritants: Stick to familiar skincare products to prevent any skin reactions or irritation. Consult Your Artist: Be sure to discuss your preferences and concerns with your makeup artist during the consultation. Additional Services from Ladyfair in Keoti Aside from bridal makeup, Ladyfair also offers: Engagement Makeup: Elegant looks for your engagement day. Party Makeup: Stunning makeup for weddings, anniversaries, and other celebrations. Everyday Makeup: Simple, beautiful makeup for any occasion. Why Ladyfair is Trusted in Keoti Ladyfair has gained a strong reputation in Keoti for delivering high-quality, personalized bridal makeup services. Brides trust us to make them look their best on their big day with our expertise, professionalism, and dedication to client satisfaction. FAQs 1. How do I book an appointment with Ladyfair? Call 7004721239 to discuss your bridal makeup needs and schedule your appointment. 2. Does Ladyfair provide trial sessions? Yes, we offer trial sessions so you can preview and finalize your bridal makeup. 3. What makeup styles do you offer? We offer traditional, modern, and fusion bridal makeup styles, personalized to suit each bride. 4. What products do you use for bridal makeup? We use premium, safe, and long-lasting makeup products suitable for all skin types. 5. Can you accommodate cultural makeup preferences? Absolutely! We can incorporate cultural and traditional elements into your bridal look.

Posted By: 25th December 2024
best bridal makeup artist in bahadurpur
Introduction Every bride dreams of looking stunning on her wedding day, and Ladyfair is here to make that dream a reality. Offering professional at-home bridal makeup services in Bahadurpur, we ensure that your beauty shines through on your special day. From traditional elegance to contemporary charm, we specialize in creating customized looks for every bride. Book your session now by calling 7004721239 and let us bring out the best in you. Why Professional Bridal Makeup is Important Your wedding is one of the most photographed days of your life, and professional bridal makeup ensures you look flawless from morning to night. Here’s why expert makeup services are essential: Photo-Ready Finish: Perfectly applied makeup enhances your natural beauty for photographs and videos. Customized for Your Style: Your look is tailored to suit your outfit, venue, and preferences. Stress-Free Preparation: With a professional artist, you can relax and enjoy your wedding day. With Ladyfair, you’re guaranteed a seamless and memorable experience. Why Choose Ladyfair in Bahadurpur? Convenient At-Home Services Enjoy professional makeup in the comfort of your home, saving time and effort on your wedding day. Experienced Makeup Artist Our skilled artist brings years of expertise in crafting stunning bridal looks that meet your expectations. Premium Products We use top-quality, skin-friendly makeup products that ensure a long-lasting and flawless finish. Personalized Bridal Styles Whether you prefer traditional charm or a modern touch, we create looks that reflect your unique personality. Bridal Makeup Styles Offered in Bahadurpur Traditional Bridal Makeup Featuring bold eyes, striking lips, and a radiant complexion, this style is perfect for brides in classic attire. Modern Bridal Makeup Focusing on soft tones and a natural finish, this look highlights your inner glow with elegance. Fusion Bridal Makeup Blending traditional and contemporary elements, fusion makeup is ideal for creating a distinctive bridal look. How Ladyfair Works Book Your Appointment: Call 7004721239 to schedule your session. Discuss Your Vision: Share your preferences and wedding details with our artist. Trial Makeup Session: Experience a trial look to finalize your style. Wedding Day Service: Sit back and let us create your flawless bridal look. Optional Touch-Ups: Keep your makeup perfect throughout the event with additional touch-up services. Client Testimonials from Bahadurpur Pooja S., Bahadurpur: "Ladyfair made my wedding day magical! The makeup was perfect, and the at-home service was so convenient." Anjali R., Bahadurpur: "I loved how they customized my look based on my outfit and jewelry. Highly recommend Ladyfair!" Nidhi T., Bahadurpur: "The artist was professional and understood exactly what I wanted. My bridal makeup was stunning!" Pre-Wedding Beauty Tips Hydrate Regularly: Drink plenty of water to keep your skin fresh and glowing. Follow a Skincare Routine: Cleanse, exfoliate, and moisturize daily for a smooth complexion. Avoid New Products: Stick to familiar skincare products to prevent allergic reactions. Plan Early: Book your makeup service well in advance to secure your preferred date. Additional Ladyfair Services in Bahadurpur In addition to bridal makeup, Ladyfair offers: Engagement Makeup: Stunning looks for pre-wedding celebrations. Party Makeup: Elegant styles for wedding guests and festive occasions. Casual Makeup: Simple yet chic everyday makeup looks. Why Ladyfair is the Top Choice in Bahadurpur Ladyfair has earned the trust of brides across Bahadurpur for its dedication to quality, professionalism, and personalized service. FAQs 1. How do I book Ladyfair’s services? Simply call 7004721239 to schedule your appointment. 2. Can I request a trial makeup session? Yes, we offer trial sessions to help you finalize your bridal look. 3. Are the products safe for sensitive skin? Absolutely. We use premium, skin-safe products that suit all skin types. 4. Can you create a look based on my preferences? Yes, our artist tailors your makeup to match your style and wedding theme. 5. Do you offer makeup services for other occasions? Yes, we provide makeup services for engagements, parties, and more.

Posted By: 25th December 2024
best bridal makeup artist in darbhanga sadar
Introduction Your wedding day is a once-in-a-lifetime event, and every bride deserves to look her absolute best. At Ladyfair, we bring professional at-home bridal makeup services to Darbhanga Sadar, ensuring a stress-free and customized experience. From traditional to modern styles, we craft looks that capture your beauty and elegance. Call 7004721239 today to book your session and step into your new chapter with confidence. Why Professional Bridal Makeup is Essential Bridal makeup is more than just cosmetics; it’s an art that enhances your natural beauty and ensures you shine both in person and in photographs. Here’s why professional makeup matters: Long-Lasting Results: High-quality products and expert techniques ensure your makeup stays flawless all day. Customized Looks: Your makeup is tailored to complement your attire, theme, and personal style. Stress-Free Experience: With an expert at your service, you can relax and enjoy your big day. At Ladyfair, we specialize in creating timeless looks that make every bride feel confident and radiant. Why Choose Ladyfair in Darbhanga Sadar? Convenience of At-Home Services Forget the hassle of traveling to a salon. Ladyfair offers professional bridal makeup in the comfort of your home, making your preparations stress-free. Experienced Makeup Artist Our skilled artist has extensive experience in crafting stunning bridal looks, ensuring every detail is perfect. Premium Products We use high-quality, skin-safe products that provide a flawless and long-lasting finish suitable for all skin types. Tailored Bridal Looks Whether you prefer a traditional, modern, or fusion style, we create a look that reflects your personality and preferences. Popular Bridal Makeup Styles in Darbhanga Sadar Traditional Bridal Makeup This classic style features bold eyes, vibrant lips, and a radiant glow to match traditional wedding attire. Modern Bridal Makeup For brides who prefer a minimalist look, this style focuses on natural tones, subtle highlights, and a soft, dewy finish. Fusion Bridal Makeup A blend of traditional and modern elements, fusion bridal makeup combines the best of both worlds for a unique and personalized look. How Ladyfair Works Book Your Appointment: Call 7004721239 to schedule your bridal makeup session. Consultation: Discuss your preferences, outfit, and vision with our artist. Makeup Trial: Experience a trial session to finalize your look. Wedding Day Service: Relax while our artist creates your perfect bridal look. Touch-Up Services: Keep your makeup fresh with optional touch-ups throughout the event. Client Testimonials from Darbhanga Sadar Neha J., Darbhanga Sadar: "Ladyfair made my wedding day so special. The makeup was flawless, and I felt like a queen!" Riya P., Darbhanga Sadar: "The at-home service was a game-changer. I loved my bridal look, and the artist was so professional." Ankita T., Darbhanga Sadar: "I wanted a modern look with a traditional touch, and Ladyfair delivered perfectly. Highly recommend!" Pre-Wedding Preparation Tips Stay Hydrated: Drink plenty of water to keep your skin radiant. Follow a Skincare Routine: Cleanse, tone, and moisturize daily for smooth skin. Avoid New Products: Stick to familiar skincare products to prevent reactions. Communicate Clearly: Share your ideas and preferences with the makeup artist. Additional Ladyfair Services In addition to bridal makeup, Ladyfair offers: Engagement Makeup: Perfect for pre-wedding ceremonies. Party Makeup: For wedding guests and festive occasions. Casual Makeup: Subtle, everyday looks. Why Ladyfair is Trusted in Darbhanga Sadar Ladyfair has earned a reputation for its professional and personalized services, making us the go-to choice for brides in Darbhanga Sadar. FAQs 1. How do I book Ladyfair’s services? Call 7004721239 to schedule your appointment. 2. Can I request a trial session? Yes, we offer makeup trials to ensure your look is perfect. 3. Are the products safe for sensitive skin? Absolutely. We use premium, skin-safe products suitable for all skin types. 4. Can you create a specific bridal look I have in mind? Yes, we customize your makeup to align with your preferences and wedding theme. 5. Do you offer makeup services for other occasions? Yes, we provide makeup for engagements, parties, and other events.

Posted By: 25th December 2024
best bridal makeup artist in simri
Introduction Your wedding day is one of the most special moments of your life, and at Ladyfair, we are dedicated to ensuring you look absolutely stunning. Our at-home bridal makeup services in Simri provide you with a seamless and personalized experience. From traditional elegance to modern charm, we craft looks that reflect your unique style. Call 7004721239 to book your session today! Why Choose Professional Bridal Makeup? Your wedding day memories will be captured forever in photos and videos. A professional makeup artist ensures: Flawless and radiant makeup that lasts throughout the day. A look tailored to your bridal attire and wedding theme. Stress-free preparation, allowing you to focus on your big day. Ladyfair brings years of experience and skill to ensure you shine on your special day. What Makes Ladyfair the Best in Simri? Convenient At-Home Services No more running to salons! Our makeup artist comes to your home, providing you with a relaxed and stress-free experience. Experienced Makeup Artist Our expert artist has mastered the art of creating breathtaking bridal looks, ensuring every detail is perfect. Premium Products We use high-quality, skin-safe makeup products to ensure a flawless and long-lasting finish. Customized Bridal Looks Whether you envision a bold, traditional look or a soft, modern aesthetic, we design a style that’s uniquely yours. Popular Bridal Makeup Styles in Simri Traditional Bridal Makeup Rich, bold colors paired with dramatic eyes and a glowing complexion to complement cultural attire. Modern Bridal Makeup Natural tones, subtle highlights, and a dewy finish for a chic and sophisticated look. Fusion Bridal Makeup A mix of classic and contemporary elements tailored to your preferences. How Ladyfair Works Book Your Appointment: Call 7004721239 to reserve your bridal makeup session. Consultation: Discuss your preferences, wedding theme, and outfit details with our artist. Makeup Trial: Try out your look ahead of time to ensure perfection. Wedding Day Service: Relax as we create a flawless bridal look. Touch-Up Options: Keep your makeup fresh and flawless throughout the event. Client Testimonials in Simri Pooja R., Simri: "Ladyfair made my wedding day stress-free and magical. The makeup was perfect, and I received so many compliments!" Radhika S., Simri: "My bridal look was exactly how I imagined. Ladyfair’s service is professional and exceptional." Ankita T., Simri: "The convenience of at-home service combined with such expertise is unbeatable. Highly recommended!" Pre-Wedding Preparation Tips Hydrate Well: Keep your skin glowing by drinking plenty of water. Stick to Your Routine: Avoid introducing new skincare products to prevent reactions. Communicate Clearly: Share your ideas and preferences with the makeup artist. Rest Up: Get a good night’s sleep before your wedding day for refreshed skin. Additional Ladyfair Services Beyond bridal makeup, we also provide: Engagement Makeup: Perfect for pre-wedding celebrations. Party Makeup: Glamorous looks for special occasions. Casual Makeup: For a polished, everyday appearance. Why Brides in Simri Trust Ladyfair Ladyfair has established itself as a trusted name for bridal makeup services in Simri, known for its professionalism, attention to detail, and commitment to making every bride feel special. FAQs 1. How do I book Ladyfair services in Simri? Simply call 7004721239 to schedule your appointment. 2. Can I request a trial makeup session? Yes, we offer trials to ensure your look matches your expectations. 3. Are the products used safe for sensitive skin? Absolutely. We use premium, skin-friendly products suitable for all skin types. 4. Can you accommodate last-minute bookings? We recommend booking in advance, but we’ll do our best to accommodate urgent requests. 5. Do you offer makeup for other events? Yes, we provide makeup services for engagements, parties, and other special occasions.

Posted By: 25th December 2024
best bridal makeup artist in chougain
Introduction A bride’s wedding day is one of the most cherished moments of her life. At Ladyfair, we specialize in making brides feel beautiful and confident with our at-home bridal makeup services in Chougain. Whether you dream of a traditional, modern, or fusion bridal look, our expert makeup artist is here to bring your vision to life. Call 7004721239 to book your session today! Why Choose Professional Bridal Makeup? Your wedding photos and videos are forever, so your makeup needs to be flawless and timeless. Professional bridal makeup ensures: A polished and radiant appearance. Makeup that complements your attire and wedding theme. Long-lasting results, perfect for every moment of your big day. Ladyfair promises an unmatched bridal makeup experience tailored to your preferences. What Sets Ladyfair Apart in Chougain? Convenient At-Home Services No need to stress over salon visits. Our makeup artist will come to your doorstep, ensuring a comfortable and hassle-free experience. Highly Skilled Makeup Artist Our artist is experienced in crafting stunning bridal looks, combining expertise with the latest trends. Premium Quality Products We use top-notch, skin-friendly products to ensure a flawless finish without compromising your skin's health. Customized Bridal Looks From bold and traditional to soft and modern, Ladyfair offers personalized styles to make every bride feel unique. Popular Bridal Makeup Styles in Chougain Traditional Bridal Makeup Rich, bold colors paired with dramatic eyes and a timeless glow. Contemporary Bridal Makeup Natural tones with a dewy finish for an understated yet elegant look. Fusion Bridal Makeup A creative blend of classic and modern elements tailored to your preferences. How It Works with Ladyfair Appointment Booking: Call 7004721239 to secure your slot. Detailed Consultation: Discuss your wedding theme, outfit, and preferences with our expert. Makeup Trial: Try out your chosen look in advance for complete confidence. Wedding Day Glam: Relax while we transform you into the bride of your dreams. Optional Touch-Up Services: Ensure your makeup stays picture-perfect all day long. Testimonials from Brides in Chougain Ritu S., Chougain: "Ladyfair’s at-home service was such a relief! My bridal makeup was flawless, and the artist was incredibly professional." Nisha P., Chougain: "The makeup artist understood exactly what I wanted. I couldn’t have asked for a better bridal look!" Ankita K., Chougain: "I felt like a princess on my wedding day! Ladyfair’s service is top-notch and stress-free." Preparation Tips for Your Bridal Makeup Session Hydrate Well: Drink plenty of water to keep your skin naturally glowing. Stick to Your Routine: Maintain your regular skincare routine to avoid any reactions. Avoid New Products: Do not experiment with new skincare or makeup products right before your wedding. Communicate Clearly: Share your preferences and concerns openly with the makeup artist. Additional Services by Ladyfair In addition to bridal makeup, we also offer: Engagement Makeup: Perfect for pre-wedding events. Party Makeup: Glam looks for celebrations. Daily Makeup: For a polished everyday appearance. Why Ladyfair is the Preferred Choice for Brides in Chougain Ladyfair has earned the trust of brides in Chougain for its professional service, attention to detail, and personalized approach. Our goal is to make your special day as beautiful as you envision. FAQs 1. How do I book Ladyfair services in Chougain? Call 7004721239 to discuss your requirements and secure your appointment. 2. Can I request a makeup trial? Yes, we offer trials to help you finalize your bridal look. 3. Are the makeup products safe for sensitive skin? Absolutely. We use high-quality, skin-friendly products that are safe for all skin types. 4. Can you accommodate last-minute bookings? We recommend booking in advance, but we’ll try to accommodate urgent requests based on availability. 5. What other events do you cater to? We provide makeup services for engagements, parties, and various special occasions.

Posted By: 25th December 2024
best bridal makeup artist in chakki
Introduction Every bride deserves to look stunning on her wedding day, and Ladyfair is here to make that happen effortlessly. Offering professional at-home bridal makeup services in Chakki, we ensure you shine with confidence and elegance. Let us bring the salon to your doorstep, delivering exceptional bridal makeup services customized to your unique style. Call 7004721239 to book your appointment today! Why Professional Bridal Makeup is Essential Your wedding day is one of the most memorable events of your life, with countless eyes on you and cameras capturing every moment. Professional bridal makeup ensures you look and feel your best, with makeup that: Highlights your natural beauty. Complements your attire and wedding theme. Stays flawless throughout the day. At Ladyfair, we specialize in creating breathtaking bridal looks that leave every bride feeling radiant and confident. Why Choose Ladyfair in Chakki? Convenient At-Home Service Forget the stress of traveling to a salon. Our makeup artist comes to your home, ensuring a relaxing and personalized experience. Experienced Makeup Artist Our professional makeup artist has extensive experience in bridal makeup, offering stunning looks tailored to each bride's vision. High-Quality Products We use premium, skin-friendly makeup products that guarantee a long-lasting and flawless finish. Custom Bridal Looks Ladyfair understands that every bride is unique. We offer personalized makeup styles to match your personality, outfit, and wedding theme. Popular Bridal Makeup Styles in Chakki Traditional Bridal Makeup Celebrate your heritage with bold eyes, vibrant lips, and a regal finish. Modern Bridal Makeup Opt for a subtle, elegant glow with natural tones and soft highlights. Fusion Bridal Makeup Combine traditional charm with contemporary trends for a unique bridal look. How Ladyfair Works Book Your Appointment: Call 7004721239 to reserve your date. Consultation: Discuss your preferences and wedding details with our expert. Makeup Trial: Preview your bridal look and make adjustments as needed. Wedding Day Glam: Relax while we bring your dream look to life in the comfort of your home. Optional Touch-Ups: Keep your makeup fresh and perfect throughout the day. Testimonials from Brides in Chakki Suman T., Chakki: "Ladyfair exceeded my expectations! My bridal makeup was flawless, and I felt so confident on my special day." Anjali B., Chakki: "The convenience of at-home service was a game-changer. The makeup artist was professional and talented. Highly recommended!" Priya N., Chakki: "I loved my bridal look! The makeup stayed perfect all day, and the products were amazing. Thank you, Ladyfair!" Preparation Tips for Your Bridal Makeup Session Hydrate Your Skin: Drink plenty of water to keep your skin glowing. Stick to Your Routine: Follow your regular skincare routine in the weeks leading up to the wedding. Avoid New Products: Prevent allergic reactions by not trying new skincare or makeup products before your wedding. Communicate Clearly: Share your ideas, preferences, and concerns with the makeup artist. Other Services by Ladyfair Apart from bridal makeup, we also offer: Engagement Makeup: Perfect looks for pre-wedding events. Party Makeup: Glamorous looks for special occasions. Everyday Makeup: Simplified beauty for daily wear. Why Ladyfair is the First Choice for Brides in Chakki Ladyfair is trusted by brides across Chakki for its professionalism, quality, and attention to detail. We go above and beyond to ensure your wedding day is as special as you’ve always imagined. FAQs 1. How can I book Ladyfair services in Chakki? Simply call 7004721239 to schedule your session and discuss your requirements. 2. Do you offer makeup trials? Yes, we provide makeup trial sessions to help finalize your bridal look. 3. Are your products safe for sensitive skin? Yes, we use high-quality, skin-friendly products suitable for all skin types. 4. Can you handle last-minute bookings? While we recommend booking in advance, we try our best to accommodate last-minute requests based on availability. 5. What other events do you cater to? In addition to bridal makeup, we offer makeup services for engagements, parties, and other special occasions.

Posted By: 25th December 2024
best bridal makeup artist in kesath
Introduction Every bride dreams of looking her absolute best on her wedding day, and Ladyfair is here to make that dream a reality. With our at-home bridal makeup services in Kesath, we ensure a stress-free, luxurious experience tailored to your style. Let us take the hassle out of your special day by bringing professional bridal makeup to your doorstep. Book your appointment today at 7004721239! In this blog, discover why Ladyfair is the top choice for bridal makeup in Kesath and the surrounding areas. Why Professional Bridal Makeup is a Must Your wedding day is one of the most photographed moments of your life, and professional bridal makeup ensures you shine both in person and on camera. Here’s why it matters: Enhances your natural beauty. Matches your attire and wedding theme. Stays flawless throughout the day. At Ladyfair, we specialize in crafting looks that make every bride feel confident, radiant, and ready for her big day. Why Choose Ladyfair in Kesath? Convenience at Your Doorstep With Ladyfair, there’s no need to travel to a salon. Our expert makeup artist comes to you, ensuring a comfortable and personalized experience. Experienced and Skilled Artist Our professional makeup artist has years of experience in bridal makeup, delivering stunning looks that align with your vision and preferences. Premium Products We use high-quality, skin-safe makeup products that provide long-lasting results, keeping you picture-perfect all day. Tailored Bridal Looks Ladyfair believes every bride is unique. That’s why we offer customized makeup styles to suit your personality, outfit, and wedding theme. Popular Bridal Makeup Styles in Kesath Traditional Bridal Makeup Bold eyes, intricate contours, and vibrant lips for a timeless, regal look. Modern Bridal Makeup Natural tones, soft highlights, and a glowing finish for a chic, contemporary style. Fusion Bridal Makeup A mix of traditional and modern aesthetics to create a unique, personalized look. How Ladyfair Works Book Your Appointment: Call 7004721239 to schedule a session. Consultation: Discuss your vision, preferences, and wedding details with our artist. Makeup Trial: Experience a preview of your bridal look and fine-tune the details. Wedding Day Makeup: Relax as we create your perfect bridal look in the comfort of your home. Optional Touch-Ups: Keep your makeup fresh and flawless throughout the celebration. Testimonials from Brides in Kesath Poonam R., Kesath: "Ladyfair made my wedding day so special. The makeup was flawless, and the convenience of at-home service was a lifesaver!" Nisha K., Kesath: "The makeup artist was professional and attentive. She created a look that was exactly what I wanted. Highly recommend Ladyfair!" Jyoti S., Kesath: "My bridal look was perfect, thanks to Ladyfair! The products were amazing, and my makeup stayed on all day." Tips to Prepare for Your Bridal Makeup Session Stay Hydrated: Drink plenty of water to keep your skin radiant. Follow a Skincare Routine: Cleanse, tone, and moisturize daily for smooth, glowing skin. Avoid Experimenting: Stick to familiar products to prevent skin reactions. Communicate Clearly: Share your preferences and concerns during the consultation. Additional Services by Ladyfair In addition to bridal makeup, Ladyfair also offers: Engagement Makeup: Pre-wedding event makeup. Party Makeup: Perfect for guests and special occasions. Everyday Makeup: For casual and routine looks. Why Brides in Kesath Choose Ladyfair Ladyfair is committed to making every bride’s day unforgettable with professional service, exceptional quality, and unmatched convenience. FAQs 1. How do I book Ladyfair’s services in Kesath? Call 7004721239 to book your session and discuss your requirements. 2. Do you provide trial sessions? Yes, we offer trial sessions to finalize your bridal look. 3. What makeup styles do you specialize in? We specialize in traditional, modern, and fusion bridal makeup. 4. Are your products skin-friendly? Yes, we use premium, skin-safe, and long-lasting makeup products. 5. Do you offer other makeup services? Yes, we provide makeup for engagements, parties, and daily wear.

Posted By: 25th December 2024
best bridal makeup artist in brahampur
Introduction Your wedding day is the most cherished event of your life, and looking flawless is every bride’s dream. With Ladyfair, the leading bridal makeup service in Nawanagar, your dream bridal look becomes a reality. Experience professional, at-home makeup services tailored to your needs. Call us today at 7004721239 to book your session! In this blog, we’ll explore why Ladyfair is the top choice for brides in Nawanagar and how our expert makeup services can make your special day even more memorable. The Importance of Bridal Makeup Bridal makeup is not just about cosmetics; it’s about highlighting your natural beauty and ensuring your look lasts throughout the celebrations. Here’s why professional bridal makeup is essential: Enhances your features for stunning photographs and videos. Creates a polished, long-lasting look for the entire day. Boosts your confidence as you walk down the aisle. At Ladyfair, we specialize in crafting unique, timeless looks that match every bride's vision. Why Ladyfair is the Best in Nawanagar Convenient At-Home Services Forget the hassle of visiting a salon on your big day. Ladyfair brings the salon experience to your home, ensuring you feel relaxed and pampered. Skilled Makeup Artists Our expert makeup artist has years of experience in creating breathtaking bridal looks. Whether you want a traditional appearance or something more contemporary, we deliver it with perfection. Premium Products We use only high-quality, skin-friendly products to ensure a flawless finish and long-lasting results. Personalized Consultations We understand that every bride is unique. That’s why we provide personalized consultations to design a look that complements your outfit, jewelry, and personal style. Popular Bridal Makeup Styles in Nawanagar Traditional Grace Classic bridal looks with bold eyes, defined contours, and vibrant lips to match traditional bridal wear. Modern Minimalism For brides who prefer a natural and understated look, this style focuses on soft tones and a radiant glow. Fusion Flair A blend of traditional and contemporary elements, perfect for a one-of-a-kind appearance. Our Bridal Makeup Process Booking: Call 7004721239 to secure your bridal makeup session. Consultation: Share your ideas and preferences during a personalized session. Trial Makeup: Preview your look and finalize any adjustments. Wedding Day: Relax as we create your dream bridal look at your location. Optional Touch-Ups: Ensure your makeup stays fresh throughout the celebrations. Testimonials from Nawanagar Brides Pooja R., Nawanagar: "Ladyfair made my wedding day magical! The makeup was flawless, and the at-home service was so convenient." Ritika K., Nawanagar: "I loved the personalized consultation. They understood exactly what I wanted and delivered the perfect bridal look." Neha S., Nawanagar: "Highly recommend Ladyfair! My makeup was elegant and stayed perfect the whole day. Thank you!" Preparation Tips for Your Bridal Makeup Session Hydrate Your Skin: Drink water regularly to keep your skin healthy. Follow a Skincare Routine: Cleanse, exfoliate, and moisturize to prepare your skin. Stick to Trusted Products: Avoid experimenting with new products before your big day. Discuss Your Vision: Be open about your preferences during the consultation. Additional Makeup Services by Ladyfair In addition to bridal makeup, we offer: Engagement Makeup: Stunning looks for pre-wedding ceremonies. Party Makeup: Perfect for wedding guests and other occasions. Everyday Makeup: Simple and polished makeup for casual events. Why Brides in Nawanagar Trust Ladyfair At Ladyfair, we prioritize your happiness and satisfaction. Our expert team ensures you look and feel your best on your wedding day with a seamless, stress-free experience. FAQs 1. How do I book Ladyfair’s bridal makeup services in Nawanagar? Call 7004721239 to book your appointment and discuss your needs. 2. Do you provide trial sessions? Yes, we offer trial sessions to help you finalize your bridal look. 3. What makeup styles do you offer? We specialize in traditional, minimalist, and fusion bridal makeup styles. 4. What kind of products do you use? We use premium, skin-friendly products that ensure a flawless and long-lasting finish. 5. Can you provide other makeup services? Yes, we also offer engagement, party, and everyday makeup services. Blog Tags: bridal makeup in Nawanagar, at-home bridal makeup Nawanagar, professional makeup artist Nawanagar, traditional bridal makeup Nawanagar, fusion bridal makeup Meta Keywords: bridal makeup Nawanagar, Ladyfair makeup services, at-home bridal makeup Nawanagar, traditional bridal look, modern bridal makeup Nawanagar Meta Description: Experience the best bridal makeup services in Nawanagar with Ladyfair. Call now at 7004721239 for flawless, professional, at-home makeup! Meta Title: Best Bridal Makeup in Nawanagar | Ladyfair 4o You said: write for brahampur ChatGPT said: ChatGPT Best Bridal Makeup in Brahampur Published on: 18th December 2024 by Digital Team Introduction Your wedding day deserves nothing but the best, and your bridal makeup is no exception. With Ladyfair, the leading bridal makeup service in Brahampur, you can step into your special day looking radiant and flawless. Offering at-home services tailored to your needs, Ladyfair ensures a stress-free and luxurious experience. Call us today at 7004721239 to book your session! In this blog, discover why brides in Brahampur trust Ladyfair for their perfect wedding look. Why Professional Bridal Makeup Matters Bridal makeup is about more than just looking good; it’s about feeling confident, beautiful, and ready for the most memorable day of your life. Here’s why professional makeup is essential: Creates a camera-ready look for photographs and videos. Enhances your features with precision and artistry. Provides long-lasting wear throughout the day. At Ladyfair, we specialize in crafting customized looks that reflect your personality and style. Why Choose Ladyfair in Brahampur? Convenient At-Home Services Say goodbye to the hassle of traveling to a salon. Our expert makeup artist comes to your home, ensuring you’re comfortable and relaxed. Experienced Makeup Artist Our skilled professional has extensive experience in creating timeless bridal looks, whether you prefer a traditional style or a modern twist. Top-Quality Products We use only premium, skin-friendly products that guarantee a flawless finish and are gentle on your skin. Customized Bridal Looks Every bride is unique, and so is her vision. We work closely with you to create a look that complements your outfit, jewelry, and overall theme. Bridal Makeup Styles Popular in Brahampur Traditional Elegance Bold eyes, defined contours, and vibrant lips for a classic bridal look. Contemporary Chic Minimalist makeup that focuses on enhancing natural beauty with a modern flair. Fusion Style A perfect blend of traditional and contemporary elements for a unique appearance. How Ladyfair Works Book Your Appointment: Call 7004721239 to schedule your session. Consultation: Discuss your preferences and finalize your bridal look. Trial Makeup: Get a preview of your look and suggest adjustments if needed. Wedding Day Glam: Relax as we create your perfect bridal look at your location. Touch-Ups: Optional touch-up services to keep your makeup fresh throughout the celebrations. Testimonials from Brides in Brahampur Ankita P., Brahampur: "Ladyfair made my wedding day stress-free and magical! The makeup was stunning and stayed perfect all day." Simran K., Brahampur: "I couldn’t have asked for a better experience. The artist understood my vision and delivered exactly what I wanted." Neetu R., Brahampur: "Highly recommend Ladyfair for bridal makeup! The at-home service was a blessing, and the result was flawless." Preparation Tips for Your Bridal Makeup Session Stay Hydrated: Drink plenty of water for glowing skin. Follow a Skincare Routine: Cleanse, exfoliate, and moisturize regularly. Avoid New Products: Stick to trusted products to prevent skin reactions. Share Your Preferences: Be open about your style and vision during the consultation. Other Services by Ladyfair Apart from bridal makeup, we offer: Engagement Makeup: For your pre-wedding celebrations. Party Makeup: Perfect for guests and other events. Daily Wear Makeup: Subtle and polished looks for casual occasions. Why Brides in Brahampur Trust Ladyfair Ladyfair is synonymous with reliability, creativity, and excellence. We go the extra mile to ensure every bride feels special and confident on her wedding day. FAQs 1. How do I book Ladyfair’s bridal makeup services in Brahampur? Call 7004721239 to book your appointment and discuss your needs. 2. Do you offer trial sessions? Yes, we provide trial sessions to help you finalize your bridal look. 3. What makeup styles are available? We specialize in traditional, contemporary, and fusion bridal makeup styles. 4. What kind of products do you use? We use premium, skin-friendly, and long-lasting makeup products. 5. Do you offer other makeup services? Yes, we also offer engagement, party, and everyday makeup services.

Posted By: 25th December 2024
best bridal makeup artist in nawanagar
Introduction Your wedding day is the most cherished event of your life, and looking flawless is every bride’s dream. With Ladyfair, the leading bridal makeup service in Nawanagar, your dream bridal look becomes a reality. Experience professional, at-home makeup services tailored to your needs. Call us today at 7004721239 to book your session! In this blog, we’ll explore why Ladyfair is the top choice for brides in Nawanagar and how our expert makeup services can make your special day even more memorable. The Importance of Bridal Makeup Bridal makeup is not just about cosmetics; it’s about highlighting your natural beauty and ensuring your look lasts throughout the celebrations. Here’s why professional bridal makeup is essential: Enhances your features for stunning photographs and videos. Creates a polished, long-lasting look for the entire day. Boosts your confidence as you walk down the aisle. At Ladyfair, we specialize in crafting unique, timeless looks that match every bride's vision. Why Ladyfair is the Best in Nawanagar Convenient At-Home Services Forget the hassle of visiting a salon on your big day. Ladyfair brings the salon experience to your home, ensuring you feel relaxed and pampered. Skilled Makeup Artists Our expert makeup artist has years of experience in creating breathtaking bridal looks. Whether you want a traditional appearance or something more contemporary, we deliver it with perfection. Premium Products We use only high-quality, skin-friendly products to ensure a flawless finish and long-lasting results. Personalized Consultations We understand that every bride is unique. That’s why we provide personalized consultations to design a look that complements your outfit, jewelry, and personal style. Popular Bridal Makeup Styles in Nawanagar Traditional Grace Classic bridal looks with bold eyes, defined contours, and vibrant lips to match traditional bridal wear. Modern Minimalism For brides who prefer a natural and understated look, this style focuses on soft tones and a radiant glow. Fusion Flair A blend of traditional and contemporary elements, perfect for a one-of-a-kind appearance. Our Bridal Makeup Process Booking: Call 7004721239 to secure your bridal makeup session. Consultation: Share your ideas and preferences during a personalized session. Trial Makeup: Preview your look and finalize any adjustments. Wedding Day: Relax as we create your dream bridal look at your location. Optional Touch-Ups: Ensure your makeup stays fresh throughout the celebrations. Testimonials from Nawanagar Brides Pooja R., Nawanagar: "Ladyfair made my wedding day magical! The makeup was flawless, and the at-home service was so convenient." Ritika K., Nawanagar: "I loved the personalized consultation. They understood exactly what I wanted and delivered the perfect bridal look." Neha S., Nawanagar: "Highly recommend Ladyfair! My makeup was elegant and stayed perfect the whole day. Thank you!" Preparation Tips for Your Bridal Makeup Session Hydrate Your Skin: Drink water regularly to keep your skin healthy. Follow a Skincare Routine: Cleanse, exfoliate, and moisturize to prepare your skin. Stick to Trusted Products: Avoid experimenting with new products before your big day. Discuss Your Vision: Be open about your preferences during the consultation. Additional Makeup Services by Ladyfair In addition to bridal makeup, we offer: Engagement Makeup: Stunning looks for pre-wedding ceremonies. Party Makeup: Perfect for wedding guests and other occasions. Everyday Makeup: Simple and polished makeup for casual events. Why Brides in Nawanagar Trust Ladyfair At Ladyfair, we prioritize your happiness and satisfaction. Our expert team ensures you look and feel your best on your wedding day with a seamless, stress-free experience. FAQs 1. How do I book Ladyfair’s bridal makeup services in Nawanagar? Call 7004721239 to book your appointment and discuss your needs. 2. Do you provide trial sessions? Yes, we offer trial sessions to help you finalize your bridal look. 3. What makeup styles do you offer? We specialize in traditional, minimalist, and fusion bridal makeup styles. 4. What kind of products do you use? We use premium, skin-friendly products that ensure a flawless and long-lasting finish. 5. Can you provide other makeup services? Yes, we also offer engagement, party, and everyday makeup services.

Posted By: 25th December 2024
best bridal makeup artist in dumraon
Introduction Your wedding day is one of the most memorable days of your life, and looking your absolute best is essential. With Ladyfair, the top bridal makeup service in Dumraon, you’ll achieve a stunning, picture-perfect look right at the comfort of your home. To schedule your session, call us at 7004721239 today. This blog will guide you through the importance of professional bridal makeup, why Ladyfair is the most trusted name in Dumraon, and how we ensure a stress-free, luxurious experience for every bride. Why Bridal Makeup Matters Bridal makeup isn’t just about enhancing your features; it’s about creating a timeless look that reflects your beauty and elegance. Professional makeup offers: A flawless appearance in photographs and videos. Long-lasting results to withstand the day’s emotions and celebrations. A confident and radiant look that shines throughout your special day. At Ladyfair, we take pride in customizing every bride’s makeup to match her personality, outfit, and wedding style. Why Choose Ladyfair in Dumraon Convenient At-Home Service Skip the stress of visiting a salon on your wedding day. With our at-home service, we bring expert bridal makeup right to your doorstep, ensuring a comfortable and relaxing experience. Expert Makeup Artist Our makeup artist is experienced in crafting exquisite bridal looks, from traditional styles to modern trends. We work closely with you to create a look that suits your preferences and enhances your natural beauty. Top-Quality Products We use only premium, skin-friendly products that provide long-lasting, flawless results. These products are gentle on the skin and deliver the perfect finish for your big day. Personalized Pre-Wedding Consultation Every bride is unique, and we offer one-on-one consultations to discuss your desired look, ensuring a personalized and tailored experience. Trending Bridal Makeup Styles in Dumraon Classic Traditional Look A timeless choice featuring bold eye makeup, vibrant lips, and intricate detailing to match traditional bridal attire. Minimalist Elegance For brides who prefer a simple yet sophisticated look, minimalist makeup focuses on natural tones and a radiant glow. Contemporary Fusion Blending traditional and modern elements, this style is ideal for brides who want a one-of-a-kind look. The Ladyfair Bridal Makeup Process Book Your Appointment: Call 7004721239 to schedule your bridal makeup session. Consultation: Discuss your vision and preferences with our expert makeup artist. Trial Session: Get a preview of your bridal look and make adjustments as needed. Wedding Day Makeup: Enjoy a seamless and stress-free experience as we perfect your look. Optional Touch-Ups: Keep your makeup fresh with our post-wedding touch-up service. Testimonials from Brides in Dumraon Aarti S., Dumraon: "Ladyfair made my wedding day unforgettable. Their at-home service was so convenient, and my makeup was flawless!" Riya K., Dumraon: "I loved how Ladyfair understood my preferences and gave me the perfect bridal look. Highly recommend their services!" Sneha P., Dumraon: "The trial session was so helpful, and the final result exceeded my expectations. Thank you, Ladyfair, for making me feel beautiful!" Preparation Tips for Your Bridal Makeup Session Hydrate Your Skin: Drink plenty of water to keep your skin healthy and glowing. Follow a Skincare Routine: Cleanse, exfoliate, and moisturize regularly to prepare your skin for makeup. Avoid Experimenting: Stick to your usual skincare products to prevent any adverse reactions. Be Open About Your Preferences: Share your ideas during the consultation for the best results. Additional Services by Ladyfair Apart from bridal makeup, we also offer: Engagement Makeup: Elegant looks for your engagement ceremony. Party Makeup: Perfect for wedding guests and other celebrations. Everyday Makeup: Subtle and professional makeup for casual or daily events. Why Brides in Dumraon Trust Ladyfair At Ladyfair, we prioritize your satisfaction and strive to make your wedding day truly special. With our professional expertise and personalized approach, you’ll feel confident, beautiful, and ready to take on your big day. FAQs 1. How can I book Ladyfair’s bridal makeup services in Dumraon? Simply call 7004721239 to schedule your appointment and discuss your requirements. 2. What bridal makeup styles do you specialize in? We specialize in traditional, minimalist, and fusion bridal makeup styles. 3. Do you offer trial sessions? Yes, we provide trial sessions to help you finalize your bridal look. 4. What products do you use for bridal makeup? We use high-quality, skin-friendly products that ensure a flawless and long-lasting finish. 5. Are additional makeup services available? Yes, we also offer engagement, party, and everyday makeup services.

Posted By: 25th December 2024
best bridal makeup artist in rajpur
Introduction Every bride dreams of looking stunning on her wedding day, and Ladyfair is here to make that dream come true. We offer the best professional bridal makeup services in Rajpur, ensuring you look flawless and radiant for your big day. With our unique at-home service, you can enjoy a relaxing and personalized experience. To book your appointment, call us at 7004721239. In this blog, we’ll explore why bridal makeup is essential, what makes Ladyfair the top choice in Rajpur, and how we ensure a stress-free and luxurious makeup experience for every bride. Why Bridal Makeup Matters Bridal makeup is more than just cosmetics; it’s an essential part of your wedding day that highlights your natural beauty and enhances your overall look. With professional bridal makeup: You’ll look stunning in photographs and videos. Your makeup will last through all the emotions and celebrations. You’ll feel confident and beautiful throughout your wedding day. At Ladyfair, our skilled makeup artist ensures your makeup complements your outfit, jewelry, and the wedding theme. Why Choose Ladyfair in Rajpur Convenience of At-Home Service Say goodbye to the hassle of visiting a salon on your wedding day. Ladyfair brings expert bridal makeup services directly to your home, allowing you to relax and enjoy the process. Experienced Makeup Artist Our makeup artist is highly trained and experienced in creating diverse bridal looks, from traditional to modern. We ensure your makeup is tailored to your preferences, highlighting your unique beauty. Premium Products We use only high-quality, skin-friendly products that ensure long-lasting and flawless makeup. These products are safe for all skin types and provide the perfect finish for your special day. Customized Pre-Wedding Consultation Every bride is unique, and so is her vision for her wedding day. We offer a personalized consultation to discuss your preferences and conduct a trial session to finalize your look. Trending Bridal Makeup Styles in Rajpur Traditional Bridal Makeup This timeless style includes bold eye makeup, vibrant lips, and flawless contouring to complement traditional wedding attire. Modern Minimalist Makeup For brides who prefer a subtle, elegant look, modern minimalist makeup focuses on soft tones, natural highlights, and a radiant glow. Fusion Makeup A mix of traditional and contemporary styles, fusion makeup is perfect for brides looking for a unique and personalized look. The Ladyfair Bridal Makeup Process Booking Your Appointment: Call 7004721239 to schedule your bridal makeup session. Pre-Wedding Consultation: Share your vision and preferences during a personalized consultation. Trial Session: Experience a preview of your bridal look and make adjustments if needed. Wedding Day Makeup: Our expert makeup artist will arrive at your location and ensure a flawless application. Post-Wedding Touch-Ups: Keep your makeup fresh with our optional touch-up services. What Brides in Rajpur Say About Ladyfair Pooja S., Rajpur: "Ladyfair made my wedding day so special. The makeup was exactly what I wanted, and their at-home service was so convenient!" Neha T., Rajpur: "I loved the personalized attention I received from Ladyfair. My makeup was perfect, and I got so many compliments on my wedding day!" Ritika K., Rajpur: "The trial session helped me finalize my bridal look, and the result was amazing. Thank you, Ladyfair, for making me feel like a queen!" How to Prepare for Your Bridal Makeup Session Stay Hydrated: Keep your skin healthy and glowing by drinking plenty of water. Follow a Skincare Routine: Cleanse, exfoliate, and moisturize regularly for smooth skin. Avoid New Products: Stick to your regular skincare products to prevent any skin issues. Share Your Vision: Communicate your preferences clearly during the consultation. Additional Services by Ladyfair In addition to bridal makeup, we offer: Engagement Makeup: Flawless looks for your engagement ceremony. Party Makeup: Perfect for wedding guests and other special occasions. Everyday Makeup: Subtle and elegant makeup for daily wear or casual events. Why Brides in Rajpur Choose Ladyfair At Ladyfair, we take pride in creating beautiful and memorable bridal looks. Our professional makeup artist ensures a stress-free, luxurious experience, so you can focus on enjoying your wedding day. FAQs 1. How do I book Ladyfair’s bridal makeup services? Call 7004721239 to book your appointment and discuss your makeup needs. 2. What bridal makeup styles do you offer? We specialize in traditional, modern, and fusion bridal makeup styles. 3. Can I book a trial session? Yes, we offer trial sessions to help you decide on your final look. 4. What products do you use? We use high-quality, skin-friendly products that are safe and long-lasting. 5. Do you offer any additional services? Yes, we also provide engagement, party, and everyday makeup services.

Posted By: 22nd December 2024
Bridal makeup artist in Sasaram
Introduction In Sasaram, Ladyfair is renowned for providing expert bridal makeup services directly at your home. Whether you're dreaming of a traditional bridal look, a flawless HD finish, or the perfection of airbrush makeup, our talented makeup artist is here to bring your vision to life. Contact us at 7004721239 to schedule your appointment today and experience the best bridal makeup service in Sasaram. Why Ladyfair is the Best Choice for Bridal Makeup in Sasaram Skilled and Experienced Makeup Artist Our makeup artist in Sasaram has extensive experience in bridal makeup, ensuring you receive a look that complements your personality, attire, and preferences. Convenient At-Home Makeup Service Ladyfair provides the ultimate convenience by offering at-home makeup services in Sasaram, allowing you to prepare for your big day without leaving the comfort of your home. High-Quality Makeup Products We use only premium, professional-grade makeup products to guarantee a long-lasting, flawless look that will keep you radiant throughout your wedding day. Bridal Makeup Pricing in Sasaram Our pricing is designed to cater to various needs and budgets: Basic Bridal Makeup: ₹10,000 HD Bridal Makeup: ₹12,000 Airbrush Bridal Makeup: ₹18,000 For engagement and reception makeup: Basic Engagement/Reception Makeup: ₹6,000 HD Engagement/Reception Makeup: ₹8,000 Airbrush Engagement/Reception Makeup: ₹12,000 For parties: Basic Party Makeup: ₹2,500 HD Party Makeup: ₹3,500 Popular Bridal Makeup Styles in Sasaram Traditional Bridal Makeup For those who want a timeless and classic look, our traditional bridal makeup in Sasaram features bold and vibrant tones, creating an elegant and traditional style that perfectly complements your wedding attire. HD Bridal Makeup HD bridal makeup ensures you look flawless in both photos and real life, giving you a camera-ready appearance that’s picture-perfect throughout the day. Airbrush Bridal Makeup Airbrush makeup offers a smooth, lightweight, and long-lasting finish. It’s ideal for brides seeking a natural, radiant look that stays fresh all day long. How to Book Your Bridal Makeup with Ladyfair in Sasaram Initial Contact: Call us at 7004721239 to discuss your needs and book an appointment. Consultation: Our makeup artist will work with you to understand your vision and create a makeup plan that complements your wedding theme. Makeup Trial: We offer trial makeup sessions to ensure that your bridal look is exactly what you desire. Wedding Day Makeup: On your wedding day, our makeup artist will arrive at your home in Sasaram, providing a flawless makeup experience without any stress. Testimonials from Brides in Sasaram Riya S., Sasaram: "I loved the convenience of having Ladyfair come to my home. My makeup was perfect, and I got so many compliments on my wedding day." Neha T., Sasaram: "The HD makeup was exactly what I needed for all the photos. Ladyfair’s service was professional and seamless." Pallavi J., Sasaram: "The airbrush makeup lasted all day without needing any touch-ups. I couldn’t have been happier with my bridal look!" Preparing for Your Bridal Makeup Session To ensure your makeup looks perfect on your big day, follow these tips: Stay Hydrated: Drink plenty of water to keep your skin glowing. Maintain Your Skincare Routine: Stick to a consistent skincare routine to keep your skin in optimal condition. Avoid New Skincare Products: Using unfamiliar products before your wedding may lead to breakouts or skin reactions. Communicate Your Preferences: Be clear with our makeup artist about the look you want to achieve during your consultation and trial session. Additional Beauty Services by Ladyfair Ladyfair also offers a range of makeup services for other special occasions in Sasaram: Engagement and Reception Makeup: Tailored looks for all your pre-wedding events. Party Makeup: Perfect for birthdays, anniversaries, and other special celebrations. Everyday Makeup: Enhance your daily look with professional makeup. Special Occasion Makeup: Glamorous makeup for any important life event. The Future of Bridal Makeup in Sasaram Ladyfair is revolutionizing bridal beauty by offering high-quality, at-home makeup services in Sasaram. As more brides experience our exceptional artistry and personalized service, we continue to grow as the premier choice for bridal makeup. Q&A with Ladyfair’s Bridal Makeup Artist in Sasaram Q1: Why is Ladyfair the top choice for bridal makeup in Sasaram? A1: Ladyfair offers expert at-home bridal makeup services, ensuring you receive a flawless look in the comfort of your own home. Q2: What are the prices for bridal makeup services in Sasaram? A2: Our bridal makeup prices start at ₹10,000 for basic makeup, with HD and airbrush options also available. Q3: How do I book Ladyfair’s bridal makeup services in Sasaram? A3: You can call us at 7004721239 to book our services, and we offer consultations and makeup trials to ensure your desired look is achieved. Q4: What types of bridal makeup does Ladyfair offer in Sasaram? A4: We offer traditional, HD, and airbrush bridal makeup styles to suit your preferences. Q5: Are makeup trials available before the wedding day? A5: Yes, we provide trial sessions so you can preview your bridal look and make any adjustments before the big day. Q6: What kind of products does Ladyfair use for bridal makeup? A6: We use high-quality, professional-grade makeup products to ensure a flawless and long-lasting finish. Q7: What other makeup services does Ladyfair offer in Sasaram? A7: Besides bridal makeup, we offer engagement, reception, party, and everyday makeup services for all occasions.

Posted By: 20th December 2024
Bridal makeup Artist in Banmankhi
Introduction In Banmankhi, Ladyfair is renowned for providing expert bridal makeup services directly at your home. Whether you're dreaming of a traditional bridal look, a flawless HD finish, or the perfection of airbrush makeup, our talented makeup artist is here to bring your vision to life. Contact us at 7004721239 to schedule your appointment today and experience the best bridal makeup service in Banmankhi. Why Ladyfair is the Best Choice for Bridal Makeup in Banmankhi Skilled and Experienced Makeup Artist Our makeup artist in Banmankhi has extensive experience in bridal makeup, ensuring you receive a look that complements your personality, attire, and preferences. Convenient At-Home Makeup Service Ladyfair provides the ultimate convenience by offering at-home makeup services in Banmankhi, allowing you to prepare for your big day without leaving the comfort of your home. High-Quality Makeup Products We use only premium, professional-grade makeup products to guarantee a long-lasting, flawless look that will keep you radiant throughout your wedding day. Bridal Makeup Pricing in Banmankhi Our pricing is designed to cater to various needs and budgets: Basic Bridal Makeup: ₹10,000 HD Bridal Makeup: ₹12,000 Airbrush Bridal Makeup: ₹18,000 For engagement and reception makeup: Basic Engagement/Reception Makeup: ₹6,000 HD Engagement/Reception Makeup: ₹8,000 Airbrush Engagement/Reception Makeup: ₹12,000 For parties: Basic Party Makeup: ₹2,500 HD Party Makeup: ₹3,500 Popular Bridal Makeup Styles in Banmankhi Traditional Bridal Makeup For those who want a timeless and classic look, our traditional bridal makeup in Banmankhi features bold and vibrant tones, creating an elegant and traditional style that perfectly complements your wedding attire. HD Bridal Makeup HD bridal makeup ensures you look flawless in both photos and real life, giving you a camera-ready appearance that’s picture-perfect throughout the day. Airbrush Bridal Makeup Airbrush makeup offers a smooth, lightweight, and long-lasting finish. It’s ideal for brides seeking a natural, radiant look that stays fresh all day long. How to Book Your Bridal Makeup with Ladyfair in Banmankhi Initial Contact: Call us at 7004721239 to discuss your needs and book an appointment. Consultation: Our makeup artist will work with you to understand your vision and create a makeup plan that complements your wedding theme. Makeup Trial: We offer trial makeup sessions to ensure that your bridal look is exactly what you desire. Wedding Day Makeup: On your wedding day, our makeup artist will arrive at your home in Banmankhi, providing a flawless makeup experience without any stress. Testimonials from Brides in Banmankhi Riya S., Banmankhi: "I loved the convenience of having Ladyfair come to my home. My makeup was perfect, and I got so many compliments on my wedding day." Neha T., Banmankhi: "The HD makeup was exactly what I needed for all the photos. Ladyfair’s service was professional and seamless." Pallavi J., Banmankhi: "The airbrush makeup lasted all day without needing any touch-ups. I couldn’t have been happier with my bridal look!" Preparing for Your Bridal Makeup Session To ensure your makeup looks perfect on your big day, follow these tips: Stay Hydrated: Drink plenty of water to keep your skin glowing. Maintain Your Skincare Routine: Stick to a consistent skincare routine to keep your skin in optimal condition. Avoid New Skincare Products: Using unfamiliar products before your wedding may lead to breakouts or skin reactions. Communicate Your Preferences: Be clear with our makeup artist about the look you want to achieve during your consultation and trial session. Additional Beauty Services by Ladyfair Ladyfair also offers a range of makeup services for other special occasions in Banmankhi: Engagement and Reception Makeup: Tailored looks for all your pre-wedding events. Party Makeup: Perfect for birthdays, anniversaries, and other special celebrations. Everyday Makeup: Enhance your daily look with professional makeup. Special Occasion Makeup: Glamorous makeup for any important life event. The Future of Bridal Makeup in Banmankhi Ladyfair is revolutionizing bridal beauty by offering high-quality, at-home makeup services in Banmankhi. As more brides experience our exceptional artistry and personalized service, we continue to grow as the premier choice for bridal makeup. Q&A with Ladyfair’s Bridal Makeup Artist in Banmankhi Q1: Why is Ladyfair the top choice for bridal makeup in Banmankhi? A1: Ladyfair offers expert at-home bridal makeup services, ensuring you receive a flawless look in the comfort of your own home. Q2: What are the prices for bridal makeup services in Banmankhi? A2: Our bridal makeup prices start at ₹10,000 for basic makeup, with HD and airbrush options also available. Q3: How do I book Ladyfair’s bridal makeup services in Banmankhi? A3: You can call us at 7004721239 to book our services, and we offer consultations and makeup trials to ensure your desired look is achieved. Q4: What types of bridal makeup does Ladyfair offer in Banmankhi? A4: We offer traditional, HD, and airbrush bridal makeup styles to suit your preferences. Q5: Are makeup trials available before the wedding day? A5: Yes, we provide trial sessions so you can preview your bridal look and make any adjustments before the big day. Q6: What kind of products does Ladyfair use for bridal makeup? A6: We use high-quality, professional-grade makeup products to ensure a flawless and long-lasting finish. Q7: What other makeup services does Ladyfair offer in Banmankhi? A7: Besides bridal makeup, we offer engagement, reception, party, and everyday makeup services for all occasions.

Posted By: 20th December 2024
Bridal makeup Artist in Dagarua
Introduction In Dagarua, Ladyfair is renowned for providing expert bridal makeup services directly at your home. Whether you're dreaming of a traditional bridal look, a flawless HD finish, or the perfection of airbrush makeup, our talented makeup artist is here to bring your vision to life. Contact us at 7004721239 to schedule your appointment today and experience the best bridal makeup service in Dagarua. Why Ladyfair is the Best Choice for Bridal Makeup in Dagarua Skilled and Experienced Makeup Artist Our makeup artist in Dagarua has extensive experience in bridal makeup, ensuring you receive a look that complements your personality, attire, and preferences. Convenient At-Home Makeup Service Ladyfair provides the ultimate convenience by offering at-home makeup services in Dagarua, allowing you to prepare for your big day without leaving the comfort of your home. High-Quality Makeup Products We use only premium, professional-grade makeup products to guarantee a long-lasting, flawless look that will keep you radiant throughout your wedding day. Bridal Makeup Pricing in Dagarua Our pricing is designed to cater to various needs and budgets: Basic Bridal Makeup: ₹10,000 HD Bridal Makeup: ₹12,000 Airbrush Bridal Makeup: ₹18,000 For engagement and reception makeup: Basic Engagement/Reception Makeup: ₹6,000 HD Engagement/Reception Makeup: ₹8,000 Airbrush Engagement/Reception Makeup: ₹12,000 For parties: Basic Party Makeup: ₹2,500 HD Party Makeup: ₹3,500 Popular Bridal Makeup Styles in Dagarua Traditional Bridal Makeup For those who want a timeless and classic look, our traditional bridal makeup in Dagarua features bold and vibrant tones, creating an elegant and traditional style that perfectly complements your wedding attire. HD Bridal Makeup HD bridal makeup ensures you look flawless in both photos and real life, giving you a camera-ready appearance that’s picture-perfect throughout the day. Airbrush Bridal Makeup Airbrush makeup offers a smooth, lightweight, and long-lasting finish. It’s ideal for brides seeking a natural, radiant look that stays fresh all day long. How to Book Your Bridal Makeup with Ladyfair in Dagarua Initial Contact: Call us at 7004721239 to discuss your needs and book an appointment. Consultation: Our makeup artist will work with you to understand your vision and create a makeup plan that complements your wedding theme. Makeup Trial: We offer trial makeup sessions to ensure that your bridal look is exactly what you desire. Wedding Day Makeup: On your wedding day, our makeup artist will arrive at your home in Dagarua, providing a flawless makeup experience without any stress. Testimonials from Brides in Dagarua Riya S., Dagarua: "I loved the convenience of having Ladyfair come to my home. My makeup was perfect, and I got so many compliments on my wedding day." Neha T., Dagarua: "The HD makeup was exactly what I needed for all the photos. Ladyfair’s service was professional and seamless." Pallavi J., Dagarua: "The airbrush makeup lasted all day without needing any touch-ups. I couldn’t have been happier with my bridal look!" Preparing for Your Bridal Makeup Session To ensure your makeup looks perfect on your big day, follow these tips: Stay Hydrated: Drink plenty of water to keep your skin glowing. Maintain Your Skincare Routine: Stick to a consistent skincare routine to keep your skin in optimal condition. Avoid New Skincare Products: Using unfamiliar products before your wedding may lead to breakouts or skin reactions. Communicate Your Preferences: Be clear with our makeup artist about the look you want to achieve during your consultation and trial session. Additional Beauty Services by Ladyfair Ladyfair also offers a range of makeup services for other special occasions in Dagarua: Engagement and Reception Makeup: Tailored looks for all your pre-wedding events. Party Makeup: Perfect for birthdays, anniversaries, and other special celebrations. Everyday Makeup: Enhance your daily look with professional makeup. Special Occasion Makeup: Glamorous makeup for any important life event. The Future of Bridal Makeup in Dagarua Ladyfair is revolutionizing bridal beauty by offering high-quality, at-home makeup services in Dagarua. As more brides experience our exceptional artistry and personalized service, we continue to grow as the premier choice for bridal makeup. Q&A with Ladyfair’s Bridal Makeup Artist in Dagarua Q1: Why is Ladyfair the top choice for bridal makeup in Dagarua? A1: Ladyfair offers expert at-home bridal makeup services, ensuring you receive a flawless look in the comfort of your own home. Q2: What are the prices for bridal makeup services in Dagarua? A2: Our bridal makeup prices start at ₹10,000 for basic makeup, with HD and airbrush options also available. Q3: How do I book Ladyfair’s bridal makeup services in Dagarua? A3: You can call us at 7004721239 to book our services, and we offer consultations and makeup trials to ensure your desired look is achieved. Q4: What types of bridal makeup does Ladyfair offer in Dagarua? A4: We offer traditional, HD, and airbrush bridal makeup styles to suit your preferences. Q5: Are makeup trials available before the wedding day? A5: Yes, we provide trial sessions so you can preview your bridal look and make any adjustments before the big day. Q6: What kind of products does Ladyfair use for bridal makeup? A6: We use high-quality, professional-grade makeup products to ensure a flawless and long-lasting finish. Q7: What other makeup services does Ladyfair offer in Dagarua? A7: Besides bridal makeup, we offer engagement, reception, party, and everyday makeup services for all occasions.

Posted By: 20th December 2024
Bridal makeup Artist in Baisi
Introduction In Baisi, Ladyfair is renowned for providing expert bridal makeup services directly at your home. Whether you're dreaming of a traditional bridal look, a flawless HD finish, or the perfection of airbrush makeup, our talented makeup artist is here to bring your vision to life. Contact us at 7004721239 to schedule your appointment today and experience the best bridal makeup service in Baisi. Why Ladyfair is the Best Choice for Bridal Makeup in Baisi Skilled and Experienced Makeup Artist Our makeup artist in Baisi has extensive experience in bridal makeup, ensuring you receive a look that complements your personality, attire, and preferences. Convenient At-Home Makeup Service Ladyfair provides the ultimate convenience by offering at-home makeup services in Baisi, allowing you to prepare for your big day without leaving the comfort of your home. High-Quality Makeup Products We use only premium, professional-grade makeup products to guarantee a long-lasting, flawless look that will keep you radiant throughout your wedding day. Bridal Makeup Pricing in Baisi Our pricing is designed to cater to various needs and budgets: Basic Bridal Makeup: ₹10,000 HD Bridal Makeup: ₹12,000 Airbrush Bridal Makeup: ₹18,000 For engagement and reception makeup: Basic Engagement/Reception Makeup: ₹6,000 HD Engagement/Reception Makeup: ₹8,000 Airbrush Engagement/Reception Makeup: ₹12,000 For parties: Basic Party Makeup: ₹2,500 HD Party Makeup: ₹3,500 Popular Bridal Makeup Styles in Baisi Traditional Bridal Makeup For those who want a timeless and classic look, our traditional bridal makeup in Baisi features bold and vibrant tones, creating an elegant and traditional style that perfectly complements your wedding attire. HD Bridal Makeup HD bridal makeup ensures you look flawless in both photos and real life, giving you a camera-ready appearance that’s picture-perfect throughout the day. Airbrush Bridal Makeup Airbrush makeup offers a smooth, lightweight, and long-lasting finish. It’s ideal for brides seeking a natural, radiant look that stays fresh all day long. How to Book Your Bridal Makeup with Ladyfair in Baisi Initial Contact: Call us at 7004721239 to discuss your needs and book an appointment. Consultation: Our makeup artist will work with you to understand your vision and create a makeup plan that complements your wedding theme. Makeup Trial: We offer trial makeup sessions to ensure that your bridal look is exactly what you desire. Wedding Day Makeup: On your wedding day, our makeup artist will arrive at your home in Baisi, providing a flawless makeup experience without any stress. Testimonials from Brides in Baisi Riya S., Baisi: "I loved the convenience of having Ladyfair come to my home. My makeup was perfect, and I got so many compliments on my wedding day." Neha T., Baisi: "The HD makeup was exactly what I needed for all the photos. Ladyfair’s service was professional and seamless." Pallavi J., Baisi: "The airbrush makeup lasted all day without needing any touch-ups. I couldn’t have been happier with my bridal look!" Preparing for Your Bridal Makeup Session To ensure your makeup looks perfect on your big day, follow these tips: Stay Hydrated: Drink plenty of water to keep your skin glowing. Maintain Your Skincare Routine: Stick to a consistent skincare routine to keep your skin in optimal condition. Avoid New Skincare Products: Using unfamiliar products before your wedding may lead to breakouts or skin reactions. Communicate Your Preferences: Be clear with our makeup artist about the look you want to achieve during your consultation and trial session. Additional Beauty Services by Ladyfair Ladyfair also offers a range of makeup services for other special occasions in Baisi: Engagement and Reception Makeup: Tailored looks for all your pre-wedding events. Party Makeup: Perfect for birthdays, anniversaries, and other special celebrations. Everyday Makeup: Enhance your daily look with professional makeup. Special Occasion Makeup: Glamorous makeup for any important life event. The Future of Bridal Makeup in Baisi Ladyfair is revolutionizing bridal beauty by offering high-quality, at-home makeup services in Baisi. As more brides experience our exceptional artistry and personalized service, we continue to grow as the premier choice for bridal makeup. Q&A with Ladyfair’s Bridal Makeup Artist in Baisi Q1: Why is Ladyfair the top choice for bridal makeup in Baisi? A1: Ladyfair offers expert at-home bridal makeup services, ensuring you receive a flawless look in the comfort of your own home. Q2: What are the prices for bridal makeup services in Baisi? A2: Our bridal makeup prices start at ₹10,000 for basic makeup, with HD and airbrush options also available. Q3: How do I book Ladyfair’s bridal makeup services in Baisi? A3: You can call us at 7004721239 to book our services, and we offer consultations and makeup trials to ensure your desired look is achieved. Q4: What types of bridal makeup does Ladyfair offer in Baisi? A4: We offer traditional, HD, and airbrush bridal makeup styles to suit your preferences. Q5: Are makeup trials available before the wedding day? A5: Yes, we provide trial sessions so you can preview your bridal look and make any adjustments before the big day. Q6: What kind of products does Ladyfair use for bridal makeup? A6: We use high-quality, professional-grade makeup products to ensure a flawless and long-lasting finish. Q7: What other makeup services does Ladyfair offer in Baisi? A7: Besides bridal makeup, we offer engagement, reception, party, and everyday makeup services for all occasions.

Posted By: 20th December 2024
Bridal makeup Artist in Baisa
Introduction In Baisa, Ladyfair is renowned for providing expert bridal makeup services directly at your home. Whether you're dreaming of a traditional bridal look, a flawless HD finish, or the perfection of airbrush makeup, our talented makeup artist is here to bring your vision to life. Contact us at 7004721239 to schedule your appointment today and experience the best bridal makeup service in Baisa. Why Ladyfair is the Best Choice for Bridal Makeup in Baisa Skilled and Experienced Makeup Artist Our makeup artist in Baisa has extensive experience in bridal makeup, ensuring you receive a look that complements your personality, attire, and preferences. Convenient At-Home Makeup Service Ladyfair provides the ultimate convenience by offering at-home makeup services in Baisa, allowing you to prepare for your big day without leaving the comfort of your home. High-Quality Makeup Products We use only premium, professional-grade makeup products to guarantee a long-lasting, flawless look that will keep you radiant throughout your wedding day. Bridal Makeup Pricing in Baisa Our pricing is designed to cater to various needs and budgets: Basic Bridal Makeup: ₹10,000 HD Bridal Makeup: ₹12,000 Airbrush Bridal Makeup: ₹18,000 For engagement and reception makeup: Basic Engagement/Reception Makeup: ₹6,000 HD Engagement/Reception Makeup: ₹8,000 Airbrush Engagement/Reception Makeup: ₹12,000 For parties: Basic Party Makeup: ₹2,500 HD Party Makeup: ₹3,500 Popular Bridal Makeup Styles in Baisa Traditional Bridal Makeup For those who want a timeless and classic look, our traditional bridal makeup in Baisa features bold and vibrant tones, creating an elegant and traditional style that perfectly complements your wedding attire. HD Bridal Makeup HD bridal makeup ensures you look flawless in both photos and real life, giving you a camera-ready appearance that’s picture-perfect throughout the day. Airbrush Bridal Makeup Airbrush makeup offers a smooth, lightweight, and long-lasting finish. It’s ideal for brides seeking a natural, radiant look that stays fresh all day long. How to Book Your Bridal Makeup with Ladyfair in Baisa Initial Contact: Call us at 7004721239 to discuss your needs and book an appointment. Consultation: Our makeup artist will work with you to understand your vision and create a makeup plan that complements your wedding theme. Makeup Trial: We offer trial makeup sessions to ensure that your bridal look is exactly what you desire. Wedding Day Makeup: On your wedding day, our makeup artist will arrive at your home in Baisa, providing a flawless makeup experience without any stress. Testimonials from Brides in Baisa Riya S., Baisa: "I loved the convenience of having Ladyfair come to my home. My makeup was perfect, and I got so many compliments on my wedding day." Neha T., Baisa: "The HD makeup was exactly what I needed for all the photos. Ladyfair’s service was professional and seamless." Pallavi J., Baisa: "The airbrush makeup lasted all day without needing any touch-ups. I couldn’t have been happier with my bridal look!" Preparing for Your Bridal Makeup Session To ensure your makeup looks perfect on your big day, follow these tips: Stay Hydrated: Drink plenty of water to keep your skin glowing. Maintain Your Skincare Routine: Stick to a consistent skincare routine to keep your skin in optimal condition. Avoid New Skincare Products: Using unfamiliar products before your wedding may lead to breakouts or skin reactions. Communicate Your Preferences: Be clear with our makeup artist about the look you want to achieve during your consultation and trial session. Additional Beauty Services by Ladyfair Ladyfair also offers a range of makeup services for other special occasions in Baisa: Engagement and Reception Makeup: Tailored looks for all your pre-wedding events. Party Makeup: Perfect for birthdays, anniversaries, and other special celebrations. Everyday Makeup: Enhance your daily look with professional makeup. Special Occasion Makeup: Glamorous makeup for any important life event. The Future of Bridal Makeup in Baisa Ladyfair is revolutionizing bridal beauty by offering high-quality, at-home makeup services in Baisa. As more brides experience our exceptional artistry and personalized service, we continue to grow as the premier choice for bridal makeup. Q&A with Ladyfair’s Bridal Makeup Artist in Baisa Q1: Why is Ladyfair the top choice for bridal makeup in Baisa? A1: Ladyfair offers expert at-home bridal makeup services, ensuring you receive a flawless look in the comfort of your own home. Q2: What are the prices for bridal makeup services in Baisa? A2: Our bridal makeup prices start at ₹10,000 for basic makeup, with HD and airbrush options also available. Q3: How do I book Ladyfair’s bridal makeup services in Baisa? A3: You can call us at 7004721239 to book our services, and we offer consultations and makeup trials to ensure your desired look is achieved. Q4: What types of bridal makeup does Ladyfair offer in Baisa? A4: We offer traditional, HD, and airbrush bridal makeup styles to suit your preferences. Q5: Are makeup trials available before the wedding day? A5: Yes, we provide trial sessions so you can preview your bridal look and make any adjustments before the big day. Q6: What kind of products does Ladyfair use for bridal makeup? A6: We use high-quality, professional-grade makeup products to ensure a flawless and long-lasting finish. Q7: What other makeup services does Ladyfair offer in Baisa? A7: Besides bridal makeup, we offer engagement, reception, party, and everyday makeup services for all occasions.

Posted By: 20th December 2024
Bridal makeup Artist in Amour
Introduction In Amour, Ladyfair is renowned for providing expert bridal makeup services directly at your home. Whether you're dreaming of a traditional bridal look, a flawless HD finish, or the perfection of airbrush makeup, our talented makeup artist is here to bring your vision to life. Contact us at 7004721239 to schedule your appointment today and experience the best bridal makeup service in Amour. Why Ladyfair is the Best Choice for Bridal Makeup in Amour Skilled and Experienced Makeup Artist Our makeup artist in Amour has extensive experience in bridal makeup, ensuring you receive a look that complements your personality, attire, and preferences. Convenient At-Home Makeup Service Ladyfair provides the ultimate convenience by offering at-home makeup services in Amour, allowing you to prepare for your big day without leaving the comfort of your home. High-Quality Makeup Products We use only premium, professional-grade makeup products to guarantee a long-lasting, flawless look that will keep you radiant throughout your wedding day. Bridal Makeup Pricing in Amour Our pricing is designed to cater to various needs and budgets: Basic Bridal Makeup: ₹10,000 HD Bridal Makeup: ₹12,000 Airbrush Bridal Makeup: ₹18,000 For engagement and reception makeup: Basic Engagement/Reception Makeup: ₹6,000 HD Engagement/Reception Makeup: ₹8,000 Airbrush Engagement/Reception Makeup: ₹12,000 For parties: Basic Party Makeup: ₹2,500 HD Party Makeup: ₹3,500 Popular Bridal Makeup Styles in Amour Traditional Bridal Makeup For those who want a timeless and classic look, our traditional bridal makeup in Amour features bold and vibrant tones, creating an elegant and traditional style that perfectly complements your wedding attire. HD Bridal Makeup HD bridal makeup ensures you look flawless in both photos and real life, giving you a camera-ready appearance that’s picture-perfect throughout the day. Airbrush Bridal Makeup Airbrush makeup offers a smooth, lightweight, and long-lasting finish. It’s ideal for brides seeking a natural, radiant look that stays fresh all day long. How to Book Your Bridal Makeup with Ladyfair in Amour Initial Contact: Call us at 7004721239 to discuss your needs and book an appointment. Consultation: Our makeup artist will work with you to understand your vision and create a makeup plan that complements your wedding theme. Makeup Trial: We offer trial makeup sessions to ensure that your bridal look is exactly what you desire. Wedding Day Makeup: On your wedding day, our makeup artist will arrive at your home in Amour, providing a flawless makeup experience without any stress. Testimonials from Brides in Amour Riya S., Amour: "I loved the convenience of having Ladyfair come to my home. My makeup was perfect, and I got so many compliments on my wedding day." Neha T., Amour: "The HD makeup was exactly what I needed for all the photos. Ladyfair’s service was professional and seamless." Pallavi J., Amour: "The airbrush makeup lasted all day without needing any touch-ups. I couldn’t have been happier with my bridal look!" Preparing for Your Bridal Makeup Session To ensure your makeup looks perfect on your big day, follow these tips: Stay Hydrated: Drink plenty of water to keep your skin glowing. Maintain Your Skincare Routine: Stick to a consistent skincare routine to keep your skin in optimal condition. Avoid New Skincare Products: Using unfamiliar products before your wedding may lead to breakouts or skin reactions. Communicate Your Preferences: Be clear with our makeup artist about the look you want to achieve during your consultation and trial session. Additional Beauty Services by Ladyfair Ladyfair also offers a range of makeup services for other special occasions in Amour: Engagement and Reception Makeup: Tailored looks for all your pre-wedding events. Party Makeup: Perfect for birthdays, anniversaries, and other special celebrations. Everyday Makeup: Enhance your daily look with professional makeup. Special Occasion Makeup: Glamorous makeup for any important life event. The Future of Bridal Makeup in Amour Ladyfair is revolutionizing bridal beauty by offering high-quality, at-home makeup services in Amour. As more brides experience our exceptional artistry and personalized service, we continue to grow as the premier choice for bridal makeup. Q&A with Ladyfair’s Bridal Makeup Artist in Amour Q1: Why is Ladyfair the top choice for bridal makeup in Amour? A1: Ladyfair offers expert at-home bridal makeup services, ensuring you receive a flawless look in the comfort of your own home. Q2: What are the prices for bridal makeup services in Amour? A2: Our bridal makeup prices start at ₹10,000 for basic makeup, with HD and airbrush options also available. Q3: How do I book Ladyfair’s bridal makeup services in Amour? A3: You can call us at 7004721239 to book our services, and we offer consultations and makeup trials to ensure your desired look is achieved. Q4: What types of bridal makeup does Ladyfair offer in Amour? A4: We offer traditional, HD, and airbrush bridal makeup styles to suit your preferences. Q5: Are makeup trials available before the wedding day? A5: Yes, we provide trial sessions so you can preview your bridal look and make any adjustments before the big day. Q6: What kind of products does Ladyfair use for bridal makeup? A6: We use high-quality, professional-grade makeup products to ensure a flawless and long-lasting finish. Q7: What other makeup services does Ladyfair offer in Amour? A7: Besides bridal makeup, we offer engagement, reception, party, and everyday makeup services for all occasions.

Posted By: 20th December 2024
Skincare Routine: Your Ultimate Guide to Radiant and Healthy Skin
Skincare Routine: Your Ultimate Guide to Radiant Skin Taking care of your skin is not just about looking good; it’s about feeling good and maintaining your skin’s health for the long term. A well-structured skincare routine can work wonders for your complexion, leaving you with glowing, youthful skin. This blog dives deep into creating the perfect skincare routine, tailored to your skin type and lifestyle. Whether you are a beginner or a seasoned skincare enthusiast, this guide will help you optimize your daily regimen. Why Skincare Is Important Your skin is the body’s largest organ and acts as a protective barrier against harmful elements. Here are some compelling reasons why skincare should be a priority: Protects Against Environmental Damage: UV rays, pollution, and dirt can cause premature aging and other skin issues. Prevents Skin Issues: A proper routine can reduce acne, dryness, and sensitivity. Boosts Confidence: Healthy skin makes you feel more confident and radiant. Improves Overall Health: Skincare routines often include facial massages, which boost blood circulation and relax facial muscles. Understanding Your Skin Type Before you start building a skincare routine, it’s essential to understand your skin type: Normal Skin: Balanced skin with minimal issues. Dry Skin: Flaky, rough texture with a feeling of tightness. Oily Skin: Shiny skin prone to acne and enlarged pores. Combination Skin: Oily in the T-zone and dry on the cheeks. Sensitive Skin: Easily irritated, often red or itchy. How to Determine Your Skin Type Wash your face with a gentle cleanser. Wait an hour without applying any product. Observe how your skin feels: Tightness indicates dryness. Shine all over suggests oily skin. Shine only in the T-zone points to combination skin. No significant issues point to normal skin. Redness or irritation indicates sensitivity. The Essential Skincare Routine A good skincare routine consists of morning and evening regimens. Let’s break it down step by step: Morning Skincare Routine Cleanser Removes dirt and oil accumulated overnight. Use a gentle cleanser suitable for your skin type. Toner Balances your skin’s pH and preps it for the next steps. Opt for hydrating toners if you have dry skin or clarifying toners for oily skin. Serum Targets specific skin concerns such as dullness, fine lines, or dark spots. Vitamin C serums are great for morning use as they brighten the skin and protect against UV damage. Moisturizer Keeps your skin hydrated throughout the day. Lightweight, gel-based moisturizers work best for oily skin, while cream-based ones suit dry skin. Sunscreen Protects against harmful UV rays and prevents premature aging. Use SPF 30 or higher, and reapply every 2-3 hours if exposed to sunlight. Evening Skincare Routine Makeup Remover If you wear makeup, always remove it first using micellar water or an oil-based cleanser. Cleanser Follow up with your regular cleanser to ensure a clean slate. Exfoliation (2-3 times a week) Removes dead skin cells and unclogs pores. Use chemical exfoliants like AHAs (glycolic acid) or BHAs (salicylic acid) for gentle and effective exfoliation. Toner Helps restore balance after cleansing and exfoliating. Treatment Products Use retinol or other targeted treatments to address specific issues like acne or wrinkles. Moisturizer Apply a thicker moisturizer or a sleeping mask for overnight hydration. Additional Steps to Enhance Your Skincare Routine Face Masks Use a face mask once or twice a week to address specific concerns. Clay masks work well for oily skin, while sheet masks are hydrating for dry skin. Eye Cream Reduces puffiness and dark circles. Apply a small amount under the eyes using your ring finger. Facial Oils Lock in moisture and add a radiant glow. Best suited for dry or mature skin types. Common Skincare Mistakes to Avoid Skipping Sunscreen Even on cloudy days, UV rays can harm your skin. Over-Exfoliating Too much exfoliation can damage your skin barrier and cause irritation. Not Removing Makeup Before Bed Leaving makeup on overnight clogs pores and causes breakouts. Using Too Many Products Overloading your skin with products can do more harm than good. Ignoring Your Neck and Hands These areas are just as exposed to environmental damage and need care too. DIY Skincare Tips For those who love natural remedies, here are some simple DIY skincare tips: Honey and Lemon Mask Mix 1 tablespoon of honey with a few drops of lemon juice. Apply for 10 minutes to brighten your skin. Aloe Vera Gel Apply fresh aloe vera gel to soothe irritation and hydrate the skin. Cucumber and Yogurt Pack Blend cucumber and yogurt for a cooling, hydrating mask. Green Tea Toner Brew green tea, let it cool, and use it as a toner to reduce redness and inflammation. Choosing the Right Products For Dry Skin Hydrating cleansers and moisturizers with ceramides or hyaluronic acid. For Oily Skin Oil-free, non-comedogenic products with salicylic acid or niacinamide. For Sensitive Skin Fragrance-free, hypoallergenic products with soothing ingredients like aloe vera or chamomile. Frequently Asked Questions About Skincare 1. How often should I exfoliate my skin? Exfoliate 2-3 times a week, depending on your skin’s tolerance. 2. Can I skip sunscreen if I’m indoors all day? No, UV rays can penetrate windows. Always wear sunscreen. 3. What is the best way to treat acne? Use a cleanser with salicylic acid, spot treatments with benzoyl peroxide, and avoid picking at your skin. 4. Is it okay to mix different active ingredients? Some actives, like retinol and AHAs/BHAs, shouldn’t be used together. Consult with a dermatologist to avoid irritation.

Posted By: 19th December 2024
Bridal Makeup Artist in Bhawanipur
Introduction In Bhawanipur, Ladyfair is the premier choice for brides looking to achieve the perfect wedding day look with our professional at-home bridal makeup services. Whether you desire a traditional bridal look, an HD finish, or the flawless perfection of airbrush makeup, our expert makeup artist in Bhawanipur ensures that you shine on your special day. Contact us today at 7004721239 to schedule your appointment. Why Choose Ladyfair for Bridal Makeup in Bhawanipur Experienced Makeup Artist Our makeup artist in Bhawanipur has years of experience in bridal makeup, creating personalized looks that complement your natural beauty and align with your style and preferences. Convenient At-Home Service Forget the stress of traveling to a salon. Ladyfair brings luxury beauty treatments directly to your doorstep with our at-home bridal makeup services, offering a truly personalized experience. Premium Makeup Products We use only high-quality, professional-grade makeup products to ensure a flawless, long-lasting look that remains perfect throughout your big day. Bridal Makeup Pricing in Bhawanipur Our bridal makeup services in Bhawanipur are tailored to fit different styles and budgets: Basic Bridal Makeup: ₹10,000 HD Bridal Makeup: ₹12,000 Airbrush Bridal Makeup: ₹18,000 For engagement and reception makeup: Basic Engagement/Reception Makeup: ₹6,000 HD Engagement/Reception Makeup: ₹8,000 Airbrush Engagement/Reception Makeup: ₹12,000 For parties: Basic Party Makeup: ₹2,500 HD Party Makeup: ₹3,500 Popular Bridal Makeup Styles in Bhawanipur Traditional Bridal Makeup Our traditional bridal makeup in Bhawanipur incorporates bold colors and intricate detailing to complement your wedding attire, creating an elegant and timeless look. HD Bridal Makeup For a high-definition finish that looks flawless both in photos and in person, HD bridal makeup is the perfect choice for brides who want a picture-perfect appearance all day. Airbrush Bridal Makeup Our airbrush makeup offers a lightweight, full-coverage finish that lasts all day, giving you a smooth and natural look while ensuring long-lasting perfection. How to Book Your Bridal Makeup with Ladyfair in Bhawanipur Initial Contact: Call us at 7004721239 to discuss your makeup needs and schedule your appointment. Consultation Session: Meet with our makeup artist to discuss your wedding look, review your attire, and plan the perfect makeup style. Makeup Trial: We offer trial sessions to help you preview your bridal makeup look and make any adjustments. Wedding Day Makeup: On your wedding day, our makeup artist will arrive at your location in Bhawanipur to provide flawless, hassle-free makeup service. Testimonials from Brides in Bhawanipur Priya R., Bhawanipur: "Ladyfair provided amazing service on my wedding day. The airbrush makeup looked flawless and lasted all day." Ritu K., Bhawanipur: "I loved the HD makeup! It was perfect for my photos, and the at-home service was so convenient." Sneha S., Bhawanipur: "My traditional bridal makeup was exactly what I wanted, and Ladyfair made the entire process stress-free." Preparing for Your Bridal Makeup Session To get the best results for your bridal makeup: Stay Hydrated: Keep your skin looking fresh by drinking plenty of water. Consistent Skincare: Stick to your regular skincare routine to maintain healthy, glowing skin. Avoid New Products: Use familiar products to prevent any reactions before your wedding day. Clear Communication: Discuss your makeup preferences and any concerns with our artist during the consultation. Additional Beauty Services by Ladyfair Beyond bridal makeup, Ladyfair offers a variety of beauty services in Bhawanipur: Engagement and Reception Makeup: Customized looks for all pre-wedding events. Party Makeup: Perfect for birthdays, anniversaries, and special occasions. Everyday Makeup: Enhance your daily look with our expert makeup services. Special Occasion Makeup: Professional makeup for parties, celebrations, and formal events. The Future of Bridal Makeup in Bhawanipur Ladyfair is dedicated to setting new standards in bridal beauty in Bhawanipur with our innovative at-home services. As we continue to offer exceptional service, more brides are choosing Ladyfair as their preferred makeup provider. Q&A with Ladyfair’s Bridal Makeup Artist in Bhawanipur Q1: What makes Ladyfair the best choice for bridal makeup in Bhawanipur? A1: Ladyfair offers expert bridal makeup services at home, using high-quality products to ensure a flawless and long-lasting look. Q2: What are the prices for bridal makeup in Bhawanipur? A2: Our bridal makeup packages start at ₹10,000 for basic makeup, ₹12,000 for HD makeup, and ₹18,000 for airbrush makeup. Q3: How do I book Ladyfair’s bridal makeup services in Bhawanipur? A3: You can book our services by calling 7004721239. We also offer consultations and trial sessions to ensure you get the look you want. Q4: What bridal makeup styles does Ladyfair offer in Bhawanipur? A4: Ladyfair offers traditional, HD, and airbrush bridal makeup to suit different preferences and needs. Q5: Are makeup trials available before my wedding? A5: Yes, we offer trial sessions so you can finalize your bridal look ahead of time. Q6: What products does Ladyfair use for bridal makeup? A6: We use professional-grade, high-quality makeup products that are safe for all skin types and ensure a flawless finish. Q7: What other services does Ladyfair provide in Bhawanipur? A7: In addition to bridal makeup, we offer makeup for engagements, receptions, parties, and other special occasions. Ladyfair is your ultimate choice for professional, at-home bridal makeup services in Bhawanipur, ensuring a flawless and stress-free experience on your special day.

Posted By: 19th December 2024
Bridal Makeup Artist in Rupauli
Introduction In Rupauli, Ladyfair is the premier choice for brides looking to achieve the perfect wedding day look with our professional at-home bridal makeup services. Whether you desire a traditional bridal look, an HD finish, or the flawless perfection of airbrush makeup, our expert makeup artist in Rupauli ensures that you shine on your special day. Contact us today at 7004721239 to schedule your appointment. Why Choose Ladyfair for Bridal Makeup in Rupauli Experienced Makeup Artist Our makeup artist in Rupauli has years of experience in bridal makeup, creating personalized looks that complement your natural beauty and align with your style and preferences. Convenient At-Home Service Forget the stress of traveling to a salon. Ladyfair brings luxury beauty treatments directly to your doorstep with our at-home bridal makeup services, offering a truly personalized experience. Premium Makeup Products We use only high-quality, professional-grade makeup products to ensure a flawless, long-lasting look that remains perfect throughout your big day. Bridal Makeup Pricing in Rupauli Our bridal makeup services in Rupauli are tailored to fit different styles and budgets: Basic Bridal Makeup: ₹10,000 HD Bridal Makeup: ₹12,000 Airbrush Bridal Makeup: ₹18,000 For engagement and reception makeup: Basic Engagement/Reception Makeup: ₹6,000 HD Engagement/Reception Makeup: ₹8,000 Airbrush Engagement/Reception Makeup: ₹12,000 For parties: Basic Party Makeup: ₹2,500 HD Party Makeup: ₹3,500 Popular Bridal Makeup Styles in Rupauli Traditional Bridal Makeup Our traditional bridal makeup in Rupauli incorporates bold colors and intricate detailing to complement your wedding attire, creating an elegant and timeless look. HD Bridal Makeup For a high-definition finish that looks flawless both in photos and in person, HD bridal makeup is the perfect choice for brides who want a picture-perfect appearance all day. Airbrush Bridal Makeup Our airbrush makeup offers a lightweight, full-coverage finish that lasts all day, giving you a smooth and natural look while ensuring long-lasting perfection. How to Book Your Bridal Makeup with Ladyfair in Rupauli Initial Contact: Call us at 7004721239 to discuss your makeup needs and schedule your appointment. Consultation Session: Meet with our makeup artist to discuss your wedding look, review your attire, and plan the perfect makeup style. Makeup Trial: We offer trial sessions to help you preview your bridal makeup look and make any adjustments. Wedding Day Makeup: On your wedding day, our makeup artist will arrive at your location in Rupauli to provide flawless, hassle-free makeup service. Testimonials from Brides in Rupauli Priya R., Rupauli: "Ladyfair provided amazing service on my wedding day. The airbrush makeup looked flawless and lasted all day." Ritu K., Rupauli: "I loved the HD makeup! It was perfect for my photos, and the at-home service was so convenient." Sneha S., Rupauli: "My traditional bridal makeup was exactly what I wanted, and Ladyfair made the entire process stress-free." Preparing for Your Bridal Makeup Session To get the best results for your bridal makeup: Stay Hydrated: Keep your skin looking fresh by drinking plenty of water. Consistent Skincare: Stick to your regular skincare routine to maintain healthy, glowing skin. Avoid New Products: Use familiar products to prevent any reactions before your wedding day. Clear Communication: Discuss your makeup preferences and any concerns with our artist during the consultation. Additional Beauty Services by Ladyfair Beyond bridal makeup, Ladyfair offers a variety of beauty services in Rupauli: Engagement and Reception Makeup: Customized looks for all pre-wedding events. Party Makeup: Perfect for birthdays, anniversaries, and special occasions. Everyday Makeup: Enhance your daily look with our expert makeup services. Special Occasion Makeup: Professional makeup for parties, celebrations, and formal events. The Future of Bridal Makeup in Rupauli Ladyfair is dedicated to setting new standards in bridal beauty in Rupauli with our innovative at-home services. As we continue to offer exceptional service, more brides are choosing Ladyfair as their preferred makeup provider. Q&A with Ladyfair’s Bridal Makeup Artist in Rupauli Q1: What makes Ladyfair the best choice for bridal makeup in Rupauli? A1: Ladyfair offers expert bridal makeup services at home, using high-quality products to ensure a flawless and long-lasting look. Q2: What are the prices for bridal makeup in Rupauli? A2: Our bridal makeup packages start at ₹10,000 for basic makeup, ₹12,000 for HD makeup, and ₹18,000 for airbrush makeup. Q3: How do I book Ladyfair’s bridal makeup services in Rupauli? A3: You can book our services by calling 7004721239. We also offer consultations and trial sessions to ensure you get the look you want. Q4: What bridal makeup styles does Ladyfair offer in Rupauli? A4: Ladyfair offers traditional, HD, and airbrush bridal makeup to suit different preferences and needs. Q5: Are makeup trials available before my wedding? A5: Yes, we offer trial sessions so you can finalize your bridal look ahead of time. Q6: What products does Ladyfair use for bridal makeup? A6: We use professional-grade, high-quality makeup products that are safe for all skin types and ensure a flawless finish. Q7: What other services does Ladyfair provide in Rupauli? A7: In addition to bridal makeup, we offer makeup for engagements, receptions, parties, and other special occasions. Ladyfair is your ultimate choice for professional, at-home bridal makeup services in Rupauli, ensuring a flawless and stress-free experience on your special day.

Posted By: 19th December 2024
Bridal Makeup Artist in Dhamdaha
Introduction In Dhamdaha, Ladyfair is the premier choice for brides looking to achieve the perfect wedding day look with our professional at-home bridal makeup services. Whether you desire a traditional bridal look, an HD finish, or the flawless perfection of airbrush makeup, our expert makeup artist in Dhamdaha ensures that you shine on your special day. Contact us today at 7004721239 to schedule your appointment. Why Choose Ladyfair for Bridal Makeup in Dhamdaha Experienced Makeup Artist Our makeup artist in Dhamdaha has years of experience in bridal makeup, creating personalized looks that complement your natural beauty and align with your style and preferences. Convenient At-Home Service Forget the stress of traveling to a salon. Ladyfair brings luxury beauty treatments directly to your doorstep with our at-home bridal makeup services, offering a truly personalized experience. Premium Makeup Products We use only high-quality, professional-grade makeup products to ensure a flawless, long-lasting look that remains perfect throughout your big day. Bridal Makeup Pricing in Dhamdaha Our bridal makeup services in Dhamdaha are tailored to fit different styles and budgets: Basic Bridal Makeup: ₹10,000 HD Bridal Makeup: ₹12,000 Airbrush Bridal Makeup: ₹18,000 For engagement and reception makeup: Basic Engagement/Reception Makeup: ₹6,000 HD Engagement/Reception Makeup: ₹8,000 Airbrush Engagement/Reception Makeup: ₹12,000 For parties: Basic Party Makeup: ₹2,500 HD Party Makeup: ₹3,500 Popular Bridal Makeup Styles in Dhamdaha Traditional Bridal Makeup Our traditional bridal makeup in Dhamdaha incorporates bold colors and intricate detailing to complement your wedding attire, creating an elegant and timeless look. HD Bridal Makeup For a high-definition finish that looks flawless both in photos and in person, HD bridal makeup is the perfect choice for brides who want a picture-perfect appearance all day. Airbrush Bridal Makeup Our airbrush makeup offers a lightweight, full-coverage finish that lasts all day, giving you a smooth and natural look while ensuring long-lasting perfection. How to Book Your Bridal Makeup with Ladyfair in Dhamdaha Initial Contact: Call us at 7004721239 to discuss your makeup needs and schedule your appointment. Consultation Session: Meet with our makeup artist to discuss your wedding look, review your attire, and plan the perfect makeup style. Makeup Trial: We offer trial sessions to help you preview your bridal makeup look and make any adjustments. Wedding Day Makeup: On your wedding day, our makeup artist will arrive at your location in Dhamdaha to provide flawless, hassle-free makeup service. Testimonials from Brides in Dhamdaha Priya R., Dhamdaha: "Ladyfair provided amazing service on my wedding day. The airbrush makeup looked flawless and lasted all day." Ritu K., Dhamdaha: "I loved the HD makeup! It was perfect for my photos, and the at-home service was so convenient." Sneha S., Dhamdaha: "My traditional bridal makeup was exactly what I wanted, and Ladyfair made the entire process stress-free." Preparing for Your Bridal Makeup Session To get the best results for your bridal makeup: Stay Hydrated: Keep your skin looking fresh by drinking plenty of water. Consistent Skincare: Stick to your regular skincare routine to maintain healthy, glowing skin. Avoid New Products: Use familiar products to prevent any reactions before your wedding day. Clear Communication: Discuss your makeup preferences and any concerns with our artist during the consultation. Additional Beauty Services by Ladyfair Beyond bridal makeup, Ladyfair offers a variety of beauty services in Dhamdaha: Engagement and Reception Makeup: Customized looks for all pre-wedding events. Party Makeup: Perfect for birthdays, anniversaries, and special occasions. Everyday Makeup: Enhance your daily look with our expert makeup services. Special Occasion Makeup: Professional makeup for parties, celebrations, and formal events. The Future of Bridal Makeup in Dhamdaha Ladyfair is dedicated to setting new standards in bridal beauty in Dhamdaha with our innovative at-home services. As we continue to offer exceptional service, more brides are choosing Ladyfair as their preferred makeup provider. Q&A with Ladyfair’s Bridal Makeup Artist in Dhamdaha Q1: What makes Ladyfair the best choice for bridal makeup in Dhamdaha? A1: Ladyfair offers expert bridal makeup services at home, using high-quality products to ensure a flawless and long-lasting look. Q2: What are the prices for bridal makeup in Dhamdaha? A2: Our bridal makeup packages start at ₹10,000 for basic makeup, ₹12,000 for HD makeup, and ₹18,000 for airbrush makeup. Q3: How do I book Ladyfair’s bridal makeup services in Dhamdaha? A3: You can book our services by calling 7004721239. We also offer consultations and trial sessions to ensure you get the look you want. Q4: What bridal makeup styles does Ladyfair offer in Dhamdaha? A4: Ladyfair offers traditional, HD, and airbrush bridal makeup to suit different preferences and needs. Q5: Are makeup trials available before my wedding? A5: Yes, we offer trial sessions so you can finalize your bridal look ahead of time. Q6: What products does Ladyfair use for bridal makeup? A6: We use professional-grade, high-quality makeup products that are safe for all skin types and ensure a flawless finish. Q7: What other services does Ladyfair provide in Dhamdaha? A7: In addition to bridal makeup, we offer makeup for engagements, receptions, parties, and other special occasions. Ladyfair is your ultimate choice for professional, at-home bridal makeup services in Dhamdaha, ensuring a flawless and stress-free experience on your special day.

Posted By: 19th December 2024
Bridal Makeup Artist in Srinagar
Introduction In Srinagar, Ladyfair is the premier choice for brides looking to achieve the perfect wedding day look with our professional at-home bridal makeup services. Whether you desire a traditional bridal look, an HD finish, or the flawless perfection of airbrush makeup, our expert makeup artist in Srinagar ensures that you shine on your special day. Contact us today at 7004721239 to schedule your appointment. Why Choose Ladyfair for Bridal Makeup in Srinagar Experienced Makeup Artist Our makeup artist in Srinagar has years of experience in bridal makeup, creating personalized looks that complement your natural beauty and align with your style and preferences. Convenient At-Home Service Forget the stress of traveling to a salon. Ladyfair brings luxury beauty treatments directly to your doorstep with our at-home bridal makeup services, offering a truly personalized experience. Premium Makeup Products We use only high-quality, professional-grade makeup products to ensure a flawless, long-lasting look that remains perfect throughout your big day. Bridal Makeup Pricing in Srinagar Our bridal makeup services in Srinagar are tailored to fit different styles and budgets: Basic Bridal Makeup: ₹10,000 HD Bridal Makeup: ₹12,000 Airbrush Bridal Makeup: ₹18,000 For engagement and reception makeup: Basic Engagement/Reception Makeup: ₹6,000 HD Engagement/Reception Makeup: ₹8,000 Airbrush Engagement/Reception Makeup: ₹12,000 For parties: Basic Party Makeup: ₹2,500 HD Party Makeup: ₹3,500 Popular Bridal Makeup Styles in Srinagar Traditional Bridal Makeup Our traditional bridal makeup in Srinagar incorporates bold colors and intricate detailing to complement your wedding attire, creating an elegant and timeless look. HD Bridal Makeup For a high-definition finish that looks flawless both in photos and in person, HD bridal makeup is the perfect choice for brides who want a picture-perfect appearance all day. Airbrush Bridal Makeup Our airbrush makeup offers a lightweight, full-coverage finish that lasts all day, giving you a smooth and natural look while ensuring long-lasting perfection. How to Book Your Bridal Makeup with Ladyfair in Srinagar Initial Contact: Call us at 7004721239 to discuss your makeup needs and schedule your appointment. Consultation Session: Meet with our makeup artist to discuss your wedding look, review your attire, and plan the perfect makeup style. Makeup Trial: We offer trial sessions to help you preview your bridal makeup look and make any adjustments. Wedding Day Makeup: On your wedding day, our makeup artist will arrive at your location in Srinagar to provide flawless, hassle-free makeup service. Testimonials from Brides in Srinagar Priya R., Srinagar: "Ladyfair provided amazing service on my wedding day. The airbrush makeup looked flawless and lasted all day." Ritu K., Srinagar: "I loved the HD makeup! It was perfect for my photos, and the at-home service was so convenient." Sneha S., Srinagar: "My traditional bridal makeup was exactly what I wanted, and Ladyfair made the entire process stress-free." Preparing for Your Bridal Makeup Session To get the best results for your bridal makeup: Stay Hydrated: Keep your skin looking fresh by drinking plenty of water. Consistent Skincare: Stick to your regular skincare routine to maintain healthy, glowing skin. Avoid New Products: Use familiar products to prevent any reactions before your wedding day. Clear Communication: Discuss your makeup preferences and any concerns with our artist during the consultation. Additional Beauty Services by Ladyfair Beyond bridal makeup, Ladyfair offers a variety of beauty services in Srinagar: Engagement and Reception Makeup: Customized looks for all pre-wedding events. Party Makeup: Perfect for birthdays, anniversaries, and special occasions. Everyday Makeup: Enhance your daily look with our expert makeup services. Special Occasion Makeup: Professional makeup for parties, celebrations, and formal events. The Future of Bridal Makeup in Srinagar Ladyfair is dedicated to setting new standards in bridal beauty in Srinagar with our innovative at-home services. As we continue to offer exceptional service, more brides are choosing Ladyfair as their preferred makeup provider. Q&A with Ladyfair’s Bridal Makeup Artist in Srinagar Q1: What makes Ladyfair the best choice for bridal makeup in Srinagar? A1: Ladyfair offers expert bridal makeup services at home, using high-quality products to ensure a flawless and long-lasting look. Q2: What are the prices for bridal makeup in Srinagar? A2: Our bridal makeup packages start at ₹10,000 for basic makeup, ₹12,000 for HD makeup, and ₹18,000 for airbrush makeup. Q3: How do I book Ladyfair’s bridal makeup services in Srinagar? A3: You can book our services by calling 7004721239. We also offer consultations and trial sessions to ensure you get the look you want. Q4: What bridal makeup styles does Ladyfair offer in Srinagar? A4: Ladyfair offers traditional, HD, and airbrush bridal makeup to suit different preferences and needs. Q5: Are makeup trials available before my wedding? A5: Yes, we offer trial sessions so you can finalize your bridal look ahead of time. Q6: What products does Ladyfair use for bridal makeup? A6: We use professional-grade, high-quality makeup products that are safe for all skin types and ensure a flawless finish. Q7: What other services does Ladyfair provide in Srinagar? A7: In addition to bridal makeup, we offer makeup for engagements, receptions, parties, and other special occasions. Ladyfair is your ultimate choice for professional, at-home bridal makeup services in Srinagar, ensuring a flawless and stress-free experience on your special day.

Posted By: 19th December 2024
Bridal Makeup Artist in Krityanand Nagar
Introduction In Krityanand Nagar, Ladyfair is the premier choice for brides looking to achieve the perfect wedding day look with our professional at-home bridal makeup services. Whether you desire a traditional bridal look, an HD finish, or the flawless perfection of airbrush makeup, our expert makeup artist in Krityanand Nagar ensures that you shine on your special day. Contact us today at 7004721239 to schedule your appointment. Why Choose Ladyfair for Bridal Makeup in Krityanand Nagar Experienced Makeup Artist Our makeup artist in Krityanand Nagar has years of experience in bridal makeup, creating personalized looks that complement your natural beauty and align with your style and preferences. Convenient At-Home Service Forget the stress of traveling to a salon. Ladyfair brings luxury beauty treatments directly to your doorstep with our at-home bridal makeup services, offering a truly personalized experience. Premium Makeup Products We use only high-quality, professional-grade makeup products to ensure a flawless, long-lasting look that remains perfect throughout your big day. Bridal Makeup Pricing in Krityanand Nagar Our bridal makeup services in Krityanand Nagar are tailored to fit different styles and budgets: Basic Bridal Makeup: ₹10,000 HD Bridal Makeup: ₹12,000 Airbrush Bridal Makeup: ₹18,000 For engagement and reception makeup: Basic Engagement/Reception Makeup: ₹6,000 HD Engagement/Reception Makeup: ₹8,000 Airbrush Engagement/Reception Makeup: ₹12,000 For parties: Basic Party Makeup: ₹2,500 HD Party Makeup: ₹3,500 Popular Bridal Makeup Styles in Krityanand Nagar Traditional Bridal Makeup Our traditional bridal makeup in Krityanand Nagar incorporates bold colors and intricate detailing to complement your wedding attire, creating an elegant and timeless look. HD Bridal Makeup For a high-definition finish that looks flawless both in photos and in person, HD bridal makeup is the perfect choice for brides who want a picture-perfect appearance all day. Airbrush Bridal Makeup Our airbrush makeup offers a lightweight, full-coverage finish that lasts all day, giving you a smooth and natural look while ensuring long-lasting perfection. How to Book Your Bridal Makeup with Ladyfair in Krityanand Nagar Initial Contact: Call us at 7004721239 to discuss your makeup needs and schedule your appointment. Consultation Session: Meet with our makeup artist to discuss your wedding look, review your attire, and plan the perfect makeup style. Makeup Trial: We offer trial sessions to help you preview your bridal makeup look and make any adjustments. Wedding Day Makeup: On your wedding day, our makeup artist will arrive at your location in Krityanand Nagar to provide flawless, hassle-free makeup service. Testimonials from Brides in Krityanand Nagar Priya R., Krityanand Nagar: "Ladyfair provided amazing service on my wedding day. The airbrush makeup looked flawless and lasted all day." Ritu K., Krityanand Nagar: "I loved the HD makeup! It was perfect for my photos, and the at-home service was so convenient." Sneha S., Krityanand Nagar: "My traditional bridal makeup was exactly what I wanted, and Ladyfair made the entire process stress-free." Preparing for Your Bridal Makeup Session To get the best results for your bridal makeup: Stay Hydrated: Keep your skin looking fresh by drinking plenty of water. Consistent Skincare: Stick to your regular skincare routine to maintain healthy, glowing skin. Avoid New Products: Use familiar products to prevent any reactions before your wedding day. Clear Communication: Discuss your makeup preferences and any concerns with our artist during the consultation. Additional Beauty Services by Ladyfair Beyond bridal makeup, Ladyfair offers a variety of beauty services in Krityanand Nagar: Engagement and Reception Makeup: Customized looks for all pre-wedding events. Party Makeup: Perfect for birthdays, anniversaries, and special occasions. Everyday Makeup: Enhance your daily look with our expert makeup services. Special Occasion Makeup: Professional makeup for parties, celebrations, and formal events. The Future of Bridal Makeup in Krityanand Nagar Ladyfair is dedicated to setting new standards in bridal beauty in Krityanand Nagar with our innovative at-home services. As we continue to offer exceptional service, more brides are choosing Ladyfair as their preferred makeup provider. Q&A with Ladyfair’s Bridal Makeup Artist in Krityanand Nagar Q1: What makes Ladyfair the best choice for bridal makeup in Krityanand Nagar? A1: Ladyfair offers expert bridal makeup services at home, using high-quality products to ensure a flawless and long-lasting look. Q2: What are the prices for bridal makeup in Krityanand Nagar? A2: Our bridal makeup packages start at ₹10,000 for basic makeup, ₹12,000 for HD makeup, and ₹18,000 for airbrush makeup. Q3: How do I book Ladyfair’s bridal makeup services in Krityanand Nagar? A3: You can book our services by calling 7004721239. We also offer consultations and trial sessions to ensure you get the look you want. Q4: What bridal makeup styles does Ladyfair offer in Krityanand Nagar? A4: Ladyfair offers traditional, HD, and airbrush bridal makeup to suit different preferences and needs. Q5: Are makeup trials available before my wedding? A5: Yes, we offer trial sessions so you can finalize your bridal look ahead of time. Q6: What products does Ladyfair use for bridal makeup? A6: We use professional-grade, high-quality makeup products that are safe for all skin types and ensure a flawless finish. Q7: What other services does Ladyfair provide in Krityanand Nagar? A7: In addition to bridal makeup, we offer makeup for engagements, receptions, parties, and other special occasions. Ladyfair is your ultimate choice for professional, at-home bridal makeup services in Krityanand Nagar, ensuring a flawless and stress-free experience on your special day.

Posted By: 19th December 2024
Bridal Makeup Artist in kasba
Introduction In Kasba, Ladyfair is the premier choice for brides looking to achieve the perfect wedding day look with our professional at-home bridal makeup services. Whether you desire a traditional bridal look, an HD finish, or the flawless perfection of airbrush makeup, our expert makeup artist in Kasba ensures that you shine on your special day. Contact us today at 7004721239 to schedule your appointment. Why Choose Ladyfair for Bridal Makeup in Kasba Experienced Makeup Artist Our makeup artist in Kasba has years of experience in bridal makeup, creating personalized looks that complement your natural beauty and align with your style and preferences. Convenient At-Home Service Forget the stress of traveling to a salon. Ladyfair brings luxury beauty treatments directly to your doorstep with our at-home bridal makeup services, offering a truly personalized experience. Premium Makeup Products We use only high-quality, professional-grade makeup products to ensure a flawless, long-lasting look that remains perfect throughout your big day. Bridal Makeup Pricing in Kasba Our bridal makeup services in Kasba are tailored to fit different styles and budgets: Basic Bridal Makeup: ₹10,000 HD Bridal Makeup: ₹12,000 Airbrush Bridal Makeup: ₹18,000 For engagement and reception makeup: Basic Engagement/Reception Makeup: ₹6,000 HD Engagement/Reception Makeup: ₹8,000 Airbrush Engagement/Reception Makeup: ₹12,000 For parties: Basic Party Makeup: ₹2,500 HD Party Makeup: ₹3,500 Popular Bridal Makeup Styles in Kasba Traditional Bridal Makeup Our traditional bridal makeup in Kasba incorporates bold colors and intricate detailing to complement your wedding attire, creating an elegant and timeless look. HD Bridal Makeup For a high-definition finish that looks flawless both in photos and in person, HD bridal makeup is the perfect choice for brides who want a picture-perfect appearance all day. Airbrush Bridal Makeup Our airbrush makeup offers a lightweight, full-coverage finish that lasts all day, giving you a smooth and natural look while ensuring long-lasting perfection. How to Book Your Bridal Makeup with Ladyfair in Kasba Initial Contact: Call us at 7004721239 to discuss your makeup needs and schedule your appointment. Consultation Session: Meet with our makeup artist to discuss your wedding look, review your attire, and plan the perfect makeup style. Makeup Trial: We offer trial sessions to help you preview your bridal makeup look and make any adjustments. Wedding Day Makeup: On your wedding day, our makeup artist will arrive at your location in Kasba to provide flawless, hassle-free makeup service. Testimonials from Brides in Kasba Priya R., Kasba: "Ladyfair provided amazing service on my wedding day. The airbrush makeup looked flawless and lasted all day." Ritu K., Kasba: "I loved the HD makeup! It was perfect for my photos, and the at-home service was so convenient." Sneha S., Kasba: "My traditional bridal makeup was exactly what I wanted, and Ladyfair made the entire process stress-free." Preparing for Your Bridal Makeup Session To get the best results for your bridal makeup: Stay Hydrated: Keep your skin looking fresh by drinking plenty of water. Consistent Skincare: Stick to your regular skincare routine to maintain healthy, glowing skin. Avoid New Products: Use familiar products to prevent any reactions before your wedding day. Clear Communication: Discuss your makeup preferences and any concerns with our artist during the consultation. Additional Beauty Services by Ladyfair Beyond bridal makeup, Ladyfair offers a variety of beauty services in Kasba: Engagement and Reception Makeup: Customized looks for all pre-wedding events. Party Makeup: Perfect for birthdays, anniversaries, and special occasions. Everyday Makeup: Enhance your daily look with our expert makeup services. Special Occasion Makeup: Professional makeup for parties, celebrations, and formal events. The Future of Bridal Makeup in Kasba Ladyfair is dedicated to setting new standards in bridal beauty in Kasba with our innovative at-home services. As we continue to offer exceptional service, more brides are choosing Ladyfair as their preferred makeup provider. Q&A with Ladyfair’s Bridal Makeup Artist in Kasba Q1: What makes Ladyfair the best choice for bridal makeup in Kasba? A1: Ladyfair offers expert bridal makeup services at home, using high-quality products to ensure a flawless and long-lasting look. Q2: What are the prices for bridal makeup in Kasba? A2: Our bridal makeup packages start at ₹10,000 for basic makeup, ₹12,000 for HD makeup, and ₹18,000 for airbrush makeup. Q3: How do I book Ladyfair’s bridal makeup services in Kasba? A3: You can book our services by calling 7004721239. We also offer consultations and trial sessions to ensure you get the look you want. Q4: What bridal makeup styles does Ladyfair offer in Kasba? A4: Ladyfair offers traditional, HD, and airbrush bridal makeup to suit different preferences and needs. Q5: Are makeup trials available before my wedding? A5: Yes, we offer trial sessions so you can finalize your bridal look ahead of time. Q6: What products does Ladyfair use for bridal makeup? A6: We use professional-grade, high-quality makeup products that are safe for all skin types and ensure a flawless finish. Q7: What other services does Ladyfair provide in Kasba? A7: In addition to bridal makeup, we offer makeup for engagements, receptions, parties, and other special occasions. Ladyfair is your ultimate choice for professional, at-home bridal makeup services in Kasba, ensuring a flawless and stress-free experience on your special day.

Posted By: 19th December 2024
Bridal Makeup Artist in Jalalgarh
Introduction In Jalalgarh, Ladyfair is the premier choice for brides looking to achieve the perfect wedding day look with our professional at-home bridal makeup services. Whether you desire a traditional bridal look, an HD finish, or the flawless perfection of airbrush makeup, our expert makeup artist in Jalalgarh ensures that you shine on your special day. Contact us today at 7004721239 to schedule your appointment. Why Choose Ladyfair for Bridal Makeup in Jalalgarh Experienced Makeup Artist Our makeup artist in Jalalgarh has years of experience in bridal makeup, creating personalized looks that complement your natural beauty and align with your style and preferences. Convenient At-Home Service Forget the stress of traveling to a salon. Ladyfair brings luxury beauty treatments directly to your doorstep with our at-home bridal makeup services, offering a truly personalized experience. Premium Makeup Products We use only high-quality, professional-grade makeup products to ensure a flawless, long-lasting look that remains perfect throughout your big day. Bridal Makeup Pricing in Jalalgarh Our bridal makeup services in Jalalgarh are tailored to fit different styles and budgets: Basic Bridal Makeup: ₹10,000 HD Bridal Makeup: ₹12,000 Airbrush Bridal Makeup: ₹18,000 For engagement and reception makeup: Basic Engagement/Reception Makeup: ₹6,000 HD Engagement/Reception Makeup: ₹8,000 Airbrush Engagement/Reception Makeup: ₹12,000 For parties: Basic Party Makeup: ₹2,500 HD Party Makeup: ₹3,500 Popular Bridal Makeup Styles in Jalalgarh Traditional Bridal Makeup Our traditional bridal makeup in Jalalgarh incorporates bold colors and intricate detailing to complement your wedding attire, creating an elegant and timeless look. HD Bridal Makeup For a high-definition finish that looks flawless both in photos and in person, HD bridal makeup is the perfect choice for brides who want a picture-perfect appearance all day. Airbrush Bridal Makeup Our airbrush makeup offers a lightweight, full-coverage finish that lasts all day, giving you a smooth and natural look while ensuring long-lasting perfection. How to Book Your Bridal Makeup with Ladyfair in Jalalgarh Initial Contact: Call us at 7004721239 to discuss your makeup needs and schedule your appointment. Consultation Session: Meet with our makeup artist to discuss your wedding look, review your attire, and plan the perfect makeup style. Makeup Trial: We offer trial sessions to help you preview your bridal makeup look and make any adjustments. Wedding Day Makeup: On your wedding day, our makeup artist will arrive at your location in Jalalgarh to provide flawless, hassle-free makeup service. Testimonials from Brides in Jalalgarh Priya R., Jalalgarh: "Ladyfair provided amazing service on my wedding day. The airbrush makeup looked flawless and lasted all day." Ritu K., Jalalgarh: "I loved the HD makeup! It was perfect for my photos, and the at-home service was so convenient." Sneha S., Jalalgarh: "My traditional bridal makeup was exactly what I wanted, and Ladyfair made the entire process stress-free." Preparing for Your Bridal Makeup Session To get the best results for your bridal makeup: Stay Hydrated: Keep your skin looking fresh by drinking plenty of water. Consistent Skincare: Stick to your regular skincare routine to maintain healthy, glowing skin. Avoid New Products: Use familiar products to prevent any reactions before your wedding day. Clear Communication: Discuss your makeup preferences and any concerns with our artist during the consultation. Additional Beauty Services by Ladyfair Beyond bridal makeup, Ladyfair offers a variety of beauty services in Jalalgarh: Engagement and Reception Makeup: Customized looks for all pre-wedding events. Party Makeup: Perfect for birthdays, anniversaries, and special occasions. Everyday Makeup: Enhance your daily look with our expert makeup services. Special Occasion Makeup: Professional makeup for parties, celebrations, and formal events. The Future of Bridal Makeup in Jalalgarh Ladyfair is dedicated to setting new standards in bridal beauty in Jalalgarh with our innovative at-home services. As we continue to offer exceptional service, more brides are choosing Ladyfair as their preferred makeup provider. Q&A with Ladyfair’s Bridal Makeup Artist in Jalalgarh Q1: What makes Ladyfair the best choice for bridal makeup in Jalalgarh? A1: Ladyfair offers expert bridal makeup services at home, using high-quality products to ensure a flawless and long-lasting look. Q2: What are the prices for bridal makeup in Jalalgarh? A2: Our bridal makeup packages start at ₹10,000 for basic makeup, ₹12,000 for HD makeup, and ₹18,000 for airbrush makeup. Q3: How do I book Ladyfair’s bridal makeup services in Jalalgarh? A3: You can book our services by calling 7004721239. We also offer consultations and trial sessions to ensure you get the look you want. Q4: What bridal makeup styles does Ladyfair offer in Jalalgarh? A4: Ladyfair offers traditional, HD, and airbrush bridal makeup to suit different preferences and needs. Q5: Are makeup trials available before my wedding? A5: Yes, we offer trial sessions so you can finalize your bridal look ahead of time. Q6: What products does Ladyfair use for bridal makeup? A6: We use professional-grade, high-quality makeup products that are safe for all skin types and ensure a flawless finish. Q7: What other services does Ladyfair provide in Jalalgarh? A7: In addition to bridal makeup, we offer makeup for engagements, receptions, parties, and other special occasions. Ladyfair is your ultimate choice for professional, at-home bridal makeup services in Jalalgarh, ensuring a flawless and stress-free experience on your special day.

Posted By: 19th December 2024
Bridal Makeup Artist in Purnea east
Introduction In Purnea East, Ladyfair is the premier choice for brides looking to achieve the perfect wedding day look with our professional at-home bridal makeup services. Whether you desire a traditional bridal look, an HD finish, or the flawless perfection of airbrush makeup, our expert makeup artist in Purnea East ensures that you shine on your special day. Contact us today at 7004721239 to schedule your appointment. Why Choose Ladyfair for Bridal Makeup in Purnea East Experienced Makeup Artist Our makeup artist in Purnea East has years of experience in bridal makeup, creating personalized looks that complement your natural beauty and align with your style and preferences. Convenient At-Home Service Forget the stress of traveling to a salon. Ladyfair brings luxury beauty treatments directly to your doorstep with our at-home bridal makeup services, offering a truly personalized experience. Premium Makeup Products We use only high-quality, professional-grade makeup products to ensure a flawless, long-lasting look that remains perfect throughout your big day. Bridal Makeup Pricing in Purnea East Our bridal makeup services in Purnea East are tailored to fit different styles and budgets: Basic Bridal Makeup: ₹10,000 HD Bridal Makeup: ₹12,000 Airbrush Bridal Makeup: ₹18,000 For engagement and reception makeup: Basic Engagement/Reception Makeup: ₹6,000 HD Engagement/Reception Makeup: ₹8,000 Airbrush Engagement/Reception Makeup: ₹12,000 For parties: Basic Party Makeup: ₹2,500 HD Party Makeup: ₹3,500 Popular Bridal Makeup Styles in Purnea East Traditional Bridal Makeup Our traditional bridal makeup in Purnea East incorporates bold colors and intricate detailing to complement your wedding attire, creating an elegant and timeless look. HD Bridal Makeup For a high-definition finish that looks flawless both in photos and in person, HD bridal makeup is the perfect choice for brides who want a picture-perfect appearance all day. Airbrush Bridal Makeup Our airbrush makeup offers a lightweight, full-coverage finish that lasts all day, giving you a smooth and natural look while ensuring long-lasting perfection. How to Book Your Bridal Makeup with Ladyfair in Purnea East Initial Contact: Call us at 7004721239 to discuss your makeup needs and schedule your appointment. Consultation Session: Meet with our makeup artist to discuss your wedding look, review your attire, and plan the perfect makeup style. Makeup Trial: We offer trial sessions to help you preview your bridal makeup look and make any adjustments. Wedding Day Makeup: On your wedding day, our makeup artist will arrive at your location in Purnea East to provide flawless, hassle-free makeup service. Testimonials from Brides in Purnea East Priya R., Purnea East: "Ladyfair provided amazing service on my wedding day. The airbrush makeup looked flawless and lasted all day." Ritu K., Purnea East: "I loved the HD makeup! It was perfect for my photos, and the at-home service was so convenient." Sneha S., Purnea East: "My traditional bridal makeup was exactly what I wanted, and Ladyfair made the entire process stress-free." Preparing for Your Bridal Makeup Session To get the best results for your bridal makeup: Stay Hydrated: Keep your skin looking fresh by drinking plenty of water. Consistent Skincare: Stick to your regular skincare routine to maintain healthy, glowing skin. Avoid New Products: Use familiar products to prevent any reactions before your wedding day. Clear Communication: Discuss your makeup preferences and any concerns with our artist during the consultation. Additional Beauty Services by Ladyfair Beyond bridal makeup, Ladyfair offers a variety of beauty services in Purnea East: Engagement and Reception Makeup: Customized looks for all pre-wedding events. Party Makeup: Perfect for birthdays, anniversaries, and special occasions. Everyday Makeup: Enhance your daily look with our expert makeup services. Special Occasion Makeup: Professional makeup for parties, celebrations, and formal events. The Future of Bridal Makeup in Purnea East Ladyfair is dedicated to setting new standards in bridal beauty in Purnea East with our innovative at-home services. As we continue to offer exceptional service, more brides are choosing Ladyfair as their preferred makeup provider. Q&A with Ladyfair’s Bridal Makeup Artist in Purnea East Q1: What makes Ladyfair the best choice for bridal makeup in Purnea East? A1: Ladyfair offers expert bridal makeup services at home, using high-quality products to ensure a flawless and long-lasting look. Q2: What are the prices for bridal makeup in Purnea East? A2: Our bridal makeup packages start at ₹10,000 for basic makeup, ₹12,000 for HD makeup, and ₹18,000 for airbrush makeup. Q3: How do I book Ladyfair’s bridal makeup services in Purnea East? A3: You can book our services by calling 7004721239. We also offer consultations and trial sessions to ensure you get the look you want. Q4: What bridal makeup styles does Ladyfair offer in Purnea East? A4: Ladyfair offers traditional, HD, and airbrush bridal makeup to suit different preferences and needs. Q5: Are makeup trials available before my wedding? A5: Yes, we offer trial sessions so you can finalize your bridal look ahead of time. Q6: What products does Ladyfair use for bridal makeup? A6: We use professional-grade, high-quality makeup products that are safe for all skin types and ensure a flawless finish. Q7: What other services does Ladyfair provide in Purnea East? A7: In addition to bridal makeup, we offer makeup for engagements, receptions, parties, and other special occasions. Ladyfair is your ultimate choice for professional, at-home bridal makeup services in Purnea East, ensuring a flawless and stress-free experience on your special day.

Posted By: 19th December 2024
Bridal Makeup Artist in Alamnagar
Introduction In Alamnagar, Ladyfair is the premier choice for brides looking to achieve the perfect wedding day look with our professional at-home bridal makeup services. Whether you desire a traditional bridal look, an HD finish, or the flawless perfection of airbrush makeup, our expert makeup artist in Alamnagar ensures that you shine on your special day. Contact us today at 7004721239 to schedule your appointment. Why Choose Ladyfair for Bridal Makeup in Alamnagar Experienced Makeup Artist Our makeup artist in Alamnagar has years of experience in bridal makeup, creating personalized looks that complement your natural beauty and align with your style and preferences. Convenient At-Home Service Forget the stress of traveling to a salon. Ladyfair brings luxury beauty treatments directly to your doorstep with our at-home bridal makeup services, offering a truly personalized experience. Premium Makeup Products We use only high-quality, professional-grade makeup products to ensure a flawless, long-lasting look that remains perfect throughout your big day. Bridal Makeup Pricing in Alamnagar Our bridal makeup services in Alamnagar are tailored to fit different styles and budgets: Basic Bridal Makeup: ₹10,000 HD Bridal Makeup: ₹12,000 Airbrush Bridal Makeup: ₹18,000 For engagement and reception makeup: Basic Engagement/Reception Makeup: ₹6,000 HD Engagement/Reception Makeup: ₹8,000 Airbrush Engagement/Reception Makeup: ₹12,000 For parties: Basic Party Makeup: ₹2,500 HD Party Makeup: ₹3,500 Popular Bridal Makeup Styles in Alamnagar Traditional Bridal Makeup Our traditional bridal makeup in Alamnagar incorporates bold colors and intricate detailing to complement your wedding attire, creating an elegant and timeless look. HD Bridal Makeup For a high-definition finish that looks flawless both in photos and in person, HD bridal makeup is the perfect choice for brides who want a picture-perfect appearance all day. Airbrush Bridal Makeup Our airbrush makeup offers a lightweight, full-coverage finish that lasts all day, giving you a smooth and natural look while ensuring long-lasting perfection. How to Book Your Bridal Makeup with Ladyfair in Alamnagar Initial Contact: Call us at 7004721239 to discuss your makeup needs and schedule your appointment. Consultation Session: Meet with our makeup artist to discuss your wedding look, review your attire, and plan the perfect makeup style. Makeup Trial: We offer trial sessions to help you preview your bridal makeup look and make any adjustments. Wedding Day Makeup: On your wedding day, our makeup artist will arrive at your location in Alamnagar to provide flawless, hassle-free makeup service. Testimonials from Brides in Alamnagar Priya R., Alamnagar: "Ladyfair provided amazing service on my wedding day. The airbrush makeup looked flawless and lasted all day." Ritu K., Alamnagar: "I loved the HD makeup! It was perfect for my photos, and the at-home service was so convenient." Sneha S., Alamnagar: "My traditional bridal makeup was exactly what I wanted, and Ladyfair made the entire process stress-free." Preparing for Your Bridal Makeup Session To get the best results for your bridal makeup: Stay Hydrated: Keep your skin looking fresh by drinking plenty of water. Consistent Skincare: Stick to your regular skincare routine to maintain healthy, glowing skin. Avoid New Products: Use familiar products to prevent any reactions before your wedding day. Clear Communication: Discuss your makeup preferences and any concerns with our artist during the consultation. Additional Beauty Services by Ladyfair Beyond bridal makeup, Ladyfair offers a variety of beauty services in Alamnagar: Engagement and Reception Makeup: Customized looks for all pre-wedding events. Party Makeup: Perfect for birthdays, anniversaries, and special occasions. Everyday Makeup: Enhance your daily look with our expert makeup services. Special Occasion Makeup: Professional makeup for parties, celebrations, and formal events. The Future of Bridal Makeup in Alamnagar Ladyfair is dedicated to setting new standards in bridal beauty in Alamnagar with our innovative at-home services. As we continue to offer exceptional service, more brides are choosing Ladyfair as their preferred makeup provider. Q&A with Ladyfair’s Bridal Makeup Artist in Alamnagar Q1: What makes Ladyfair the best choice for bridal makeup in Alamnagar? A1: Ladyfair offers expert bridal makeup services at home, using high-quality products to ensure a flawless and long-lasting look. Q2: What are the prices for bridal makeup in Alamnagar? A2: Our bridal makeup packages start at ₹10,000 for basic makeup, ₹12,000 for HD makeup, and ₹18,000 for airbrush makeup. Q3: How do I book Ladyfair’s bridal makeup services in Alamnagar? A3: You can book our services by calling 7004721239. We also offer consultations and trial sessions to ensure you get the look you want. Q4: What bridal makeup styles does Ladyfair offer in Alamnagar? A4: Ladyfair offers traditional, HD, and airbrush bridal makeup to suit different preferences and needs. Q5: Are makeup trials available before my wedding? A5: Yes, we offer trial sessions so you can finalize your bridal look ahead of time. Q6: What products does Ladyfair use for bridal makeup? A6: We use professional-grade, high-quality makeup products that are safe for all skin types and ensure a flawless finish. Q7: What other services does Ladyfair provide in Alamnagar? A7: In addition to bridal makeup, we offer makeup for engagements, receptions, parties, and other special occasions. Ladyfair is your ultimate choice for professional, at-home bridal makeup services in Alamnagar, ensuring a flawless and stress-free experience on your special day.

Posted By: 19th December 2024
Bridal Makeup Artist in Udakishunganj
Introduction In Udakishunganj, Ladyfair is the premier choice for brides looking to achieve the perfect wedding day look with our professional at-home bridal makeup services. Whether you desire a traditional bridal look, an HD finish, or the flawless perfection of airbrush makeup, our expert makeup artist in Udakishunganj ensures that you shine on your special day. Contact us today at 7004721239 to schedule your appointment. Why Choose Ladyfair for Bridal Makeup in Udakishunganj Experienced Makeup Artist Our makeup artist in Udakishunganj has years of experience in bridal makeup, creating personalized looks that complement your natural beauty and align with your style and preferences. Convenient At-Home Service Forget the stress of traveling to a salon. Ladyfair brings luxury beauty treatments directly to your doorstep with our at-home bridal makeup services, offering a truly personalized experience. Premium Makeup Products We use only high-quality, professional-grade makeup products to ensure a flawless, long-lasting look that remains perfect throughout your big day. Bridal Makeup Pricing in Udakishunganj Our bridal makeup services in Udakishunganj are tailored to fit different styles and budgets: Basic Bridal Makeup: ₹10,000 HD Bridal Makeup: ₹12,000 Airbrush Bridal Makeup: ₹18,000 For engagement and reception makeup: Basic Engagement/Reception Makeup: ₹6,000 HD Engagement/Reception Makeup: ₹8,000 Airbrush Engagement/Reception Makeup: ₹12,000 For parties: Basic Party Makeup: ₹2,500 HD Party Makeup: ₹3,500 Popular Bridal Makeup Styles in Udakishunganj Traditional Bridal Makeup Our traditional bridal makeup in Udakishunganj incorporates bold colors and intricate detailing to complement your wedding attire, creating an elegant and timeless look. HD Bridal Makeup For a high-definition finish that looks flawless both in photos and in person, HD bridal makeup is the perfect choice for brides who want a picture-perfect appearance all day. Airbrush Bridal Makeup Our airbrush makeup offers a lightweight, full-coverage finish that lasts all day, giving you a smooth and natural look while ensuring long-lasting perfection. How to Book Your Bridal Makeup with Ladyfair in Udakishunganj Initial Contact: Call us at 7004721239 to discuss your makeup needs and schedule your appointment. Consultation Session: Meet with our makeup artist to discuss your wedding look, review your attire, and plan the perfect makeup style. Makeup Trial: We offer trial sessions to help you preview your bridal makeup look and make any adjustments. Wedding Day Makeup: On your wedding day, our makeup artist will arrive at your location in Udakishunganj to provide flawless, hassle-free makeup service. Testimonials from Brides in Udakishunganj Priya R., Udakishunganj: "Ladyfair provided amazing service on my wedding day. The airbrush makeup looked flawless and lasted all day." Ritu K., Udakishunganj: "I loved the HD makeup! It was perfect for my photos, and the at-home service was so convenient." Sneha S., Udakishunganj: "My traditional bridal makeup was exactly what I wanted, and Ladyfair made the entire process stress-free." Preparing for Your Bridal Makeup Session To get the best results for your bridal makeup: Stay Hydrated: Keep your skin looking fresh by drinking plenty of water. Consistent Skincare: Stick to your regular skincare routine to maintain healthy, glowing skin. Avoid New Products: Use familiar products to prevent any reactions before your wedding day. Clear Communication: Discuss your makeup preferences and any concerns with our artist during the consultation. Additional Beauty Services by Ladyfair Beyond bridal makeup, Ladyfair offers a variety of beauty services in Udakishunganj: Engagement and Reception Makeup: Customized looks for all pre-wedding events. Party Makeup: Perfect for birthdays, anniversaries, and special occasions. Everyday Makeup: Enhance your daily look with our expert makeup services. Special Occasion Makeup: Professional makeup for parties, celebrations, and formal events. The Future of Bridal Makeup in Udakishunganj Ladyfair is dedicated to setting new standards in bridal beauty in Udakishunganj with our innovative at-home services. As we continue to offer exceptional service, more brides are choosing Ladyfair as their preferred makeup provider. Q&A with Ladyfair’s Bridal Makeup Artist in Udakishunganj Q1: What makes Ladyfair the best choice for bridal makeup in Udakishunganj? A1: Ladyfair offers expert bridal makeup services at home, using high-quality products to ensure a flawless and long-lasting look. Q2: What are the prices for bridal makeup in Udakishunganj? A2: Our bridal makeup packages start at ₹10,000 for basic makeup, ₹12,000 for HD makeup, and ₹18,000 for airbrush makeup. Q3: How do I book Ladyfair’s bridal makeup services in Udakishunganj? A3: You can book our services by calling 7004721239. We also offer consultations and trial sessions to ensure you get the look you want. Q4: What bridal makeup styles does Ladyfair offer in Udakishunganj? A4: Ladyfair offers traditional, HD, and airbrush bridal makeup to suit different preferences and needs. Q5: Are makeup trials available before my wedding? A5: Yes, we offer trial sessions so you can finalize your bridal look ahead of time. Q6: What products does Ladyfair use for bridal makeup? A6: We use professional-grade, high-quality makeup products that are safe for all skin types and ensure a flawless finish. Q7: What other services does Ladyfair provide in Udakishunganj? A7: In addition to bridal makeup, we offer makeup for engagements, receptions, parties, and other special occasions. Ladyfair is your ultimate choice for professional, at-home bridal makeup services in Udakishunganj, ensuring a flawless and stress-free experience on your special day.

Posted By: 19th December 2024
Bridal Makeup Artist in Bihariganj
Introduction In Bihariganj, Ladyfair is the premier choice for brides looking to achieve the perfect wedding day look with our professional at-home bridal makeup services. Whether you desire a traditional bridal look, an HD finish, or the flawless perfection of airbrush makeup, our expert makeup artist in Bihariganj ensures that you shine on your special day. Contact us today at 7004721239 to schedule your appointment. Why Choose Ladyfair for Bridal Makeup in Bihariganj Experienced Makeup Artist Our makeup artist in Bihariganj has years of experience in bridal makeup, creating personalized looks that complement your natural beauty and align with your style and preferences. Convenient At-Home Service Forget the stress of traveling to a salon. Ladyfair brings luxury beauty treatments directly to your doorstep with our at-home bridal makeup services, offering a truly personalized experience. Premium Makeup Products We use only high-quality, professional-grade makeup products to ensure a flawless, long-lasting look that remains perfect throughout your big day. Bridal Makeup Pricing in Bihariganj Our bridal makeup services in Bihariganj are tailored to fit different styles and budgets: Basic Bridal Makeup: ₹10,000 HD Bridal Makeup: ₹12,000 Airbrush Bridal Makeup: ₹18,000 For engagement and reception makeup: Basic Engagement/Reception Makeup: ₹6,000 HD Engagement/Reception Makeup: ₹8,000 Airbrush Engagement/Reception Makeup: ₹12,000 For parties: Basic Party Makeup: ₹2,500 HD Party Makeup: ₹3,500 Popular Bridal Makeup Styles in Bihariganj Traditional Bridal Makeup Our traditional bridal makeup in Bihariganj incorporates bold colors and intricate detailing to complement your wedding attire, creating an elegant and timeless look. HD Bridal Makeup For a high-definition finish that looks flawless both in photos and in person, HD bridal makeup is the perfect choice for brides who want a picture-perfect appearance all day. Airbrush Bridal Makeup Our airbrush makeup offers a lightweight, full-coverage finish that lasts all day, giving you a smooth and natural look while ensuring long-lasting perfection. How to Book Your Bridal Makeup with Ladyfair in Bihariganj Initial Contact: Call us at 7004721239 to discuss your makeup needs and schedule your appointment. Consultation Session: Meet with our makeup artist to discuss your wedding look, review your attire, and plan the perfect makeup style. Makeup Trial: We offer trial sessions to help you preview your bridal makeup look and make any adjustments. Wedding Day Makeup: On your wedding day, our makeup artist will arrive at your location in Bihariganj to provide flawless, hassle-free makeup service. Testimonials from Brides in Bihariganj Priya R., Bihariganj: "Ladyfair provided amazing service on my wedding day. The airbrush makeup looked flawless and lasted all day." Ritu K., Bihariganj: "I loved the HD makeup! It was perfect for my photos, and the at-home service was so convenient." Sneha S., Bihariganj: "My traditional bridal makeup was exactly what I wanted, and Ladyfair made the entire process stress-free." Preparing for Your Bridal Makeup Session To get the best results for your bridal makeup: Stay Hydrated: Keep your skin looking fresh by drinking plenty of water. Consistent Skincare: Stick to your regular skincare routine to maintain healthy, glowing skin. Avoid New Products: Use familiar products to prevent any reactions before your wedding day. Clear Communication: Discuss your makeup preferences and any concerns with our artist during the consultation. Additional Beauty Services by Ladyfair Beyond bridal makeup, Ladyfair offers a variety of beauty services in Bihariganj: Engagement and Reception Makeup: Customized looks for all pre-wedding events. Party Makeup: Perfect for birthdays, anniversaries, and special occasions. Everyday Makeup: Enhance your daily look with our expert makeup services. Special Occasion Makeup: Professional makeup for parties, celebrations, and formal events. The Future of Bridal Makeup in Bihariganj Ladyfair is dedicated to setting new standards in bridal beauty in Bihariganj with our innovative at-home services. As we continue to offer exceptional service, more brides are choosing Ladyfair as their preferred makeup provider. Q&A with Ladyfair’s Bridal Makeup Artist in Bihariganj Q1: What makes Ladyfair the best choice for bridal makeup in Bihariganj? A1: Ladyfair offers expert bridal makeup services at home, using high-quality products to ensure a flawless and long-lasting look. Q2: What are the prices for bridal makeup in Bihariganj? A2: Our bridal makeup packages start at ₹10,000 for basic makeup, ₹12,000 for HD makeup, and ₹18,000 for airbrush makeup. Q3: How do I book Ladyfair’s bridal makeup services in Bihariganj? A3: You can book our services by calling 7004721239. We also offer consultations and trial sessions to ensure you get the look you want. Q4: What bridal makeup styles does Ladyfair offer in Bihariganj? A4: Ladyfair offers traditional, HD, and airbrush bridal makeup to suit different preferences and needs. Q5: Are makeup trials available before my wedding? A5: Yes, we offer trial sessions so you can finalize your bridal look ahead of time. Q6: What products does Ladyfair use for bridal makeup? A6: We use professional-grade, high-quality makeup products that are safe for all skin types and ensure a flawless finish. Q7: What other services does Ladyfair provide in Bihariganj? A7: In addition to bridal makeup, we offer makeup for engagements, receptions, parties, and other special occasions. Ladyfair is your ultimate choice for professional, at-home bridal makeup services in Bihariganj, ensuring a flawless and stress-free experience on your special day.

Posted By: 19th December 2024
Bridal Makeup Artist in Gwalpara
Introduction In Gwalpara, Ladyfair is the premier choice for brides looking to achieve the perfect wedding day look with our professional at-home bridal makeup services. Whether you desire a traditional bridal look, an HD finish, or the flawless perfection of airbrush makeup, our expert makeup artist in Gwalpara ensures that you shine on your special day. Contact us today at 7004721239 to schedule your appointment. Why Choose Ladyfair for Bridal Makeup in Gwalpara Experienced Makeup Artist Our makeup artist in Gwalpara has years of experience in bridal makeup, creating personalized looks that complement your natural beauty and align with your style and preferences. Convenient At-Home Service Forget the stress of traveling to a salon. Ladyfair brings luxury beauty treatments directly to your doorstep with our at-home bridal makeup services, offering a truly personalized experience. Premium Makeup Products We use only high-quality, professional-grade makeup products to ensure a flawless, long-lasting look that remains perfect throughout your big day. Bridal Makeup Pricing in Gwalpara Our bridal makeup services in Gwalpara are tailored to fit different styles and budgets: Basic Bridal Makeup: ₹10,000 HD Bridal Makeup: ₹12,000 Airbrush Bridal Makeup: ₹18,000 For engagement and reception makeup: Basic Engagement/Reception Makeup: ₹6,000 HD Engagement/Reception Makeup: ₹8,000 Airbrush Engagement/Reception Makeup: ₹12,000 For parties: Basic Party Makeup: ₹2,500 HD Party Makeup: ₹3,500 Popular Bridal Makeup Styles in Gwalpara Traditional Bridal Makeup Our traditional bridal makeup in Gwalpara incorporates bold colors and intricate detailing to complement your wedding attire, creating an elegant and timeless look. HD Bridal Makeup For a high-definition finish that looks flawless both in photos and in person, HD bridal makeup is the perfect choice for brides who want a picture-perfect appearance all day. Airbrush Bridal Makeup Our airbrush makeup offers a lightweight, full-coverage finish that lasts all day, giving you a smooth and natural look while ensuring long-lasting perfection. How to Book Your Bridal Makeup with Ladyfair in Gwalpara Initial Contact: Call us at 7004721239 to discuss your makeup needs and schedule your appointment. Consultation Session: Meet with our makeup artist to discuss your wedding look, review your attire, and plan the perfect makeup style. Makeup Trial: We offer trial sessions to help you preview your bridal makeup look and make any adjustments. Wedding Day Makeup: On your wedding day, our makeup artist will arrive at your location in Gwalpara to provide flawless, hassle-free makeup service. Testimonials from Brides in Gwalpara Priya R., Gwalpara: "Ladyfair provided amazing service on my wedding day. The airbrush makeup looked flawless and lasted all day." Ritu K., Gwalpara: "I loved the HD makeup! It was perfect for my photos, and the at-home service was so convenient." Sneha S., Gwalpara: "My traditional bridal makeup was exactly what I wanted, and Ladyfair made the entire process stress-free." Preparing for Your Bridal Makeup Session To get the best results for your bridal makeup: Stay Hydrated: Keep your skin looking fresh by drinking plenty of water. Consistent Skincare: Stick to your regular skincare routine to maintain healthy, glowing skin. Avoid New Products: Use familiar products to prevent any reactions before your wedding day. Clear Communication: Discuss your makeup preferences and any concerns with our artist during the consultation. Additional Beauty Services by Ladyfair Beyond bridal makeup, Ladyfair offers a variety of beauty services in Gwalpara: Engagement and Reception Makeup: Customized looks for all pre-wedding events. Party Makeup: Perfect for birthdays, anniversaries, and special occasions. Everyday Makeup: Enhance your daily look with our expert makeup services. Special Occasion Makeup: Professional makeup for parties, celebrations, and formal events. The Future of Bridal Makeup in Gwalpara Ladyfair is dedicated to setting new standards in bridal beauty in Gwalpara with our innovative at-home services. As we continue to offer exceptional service, more brides are choosing Ladyfair as their preferred makeup provider. Q&A with Ladyfair’s Bridal Makeup Artist in Gwalpara Q1: What makes Ladyfair the best choice for bridal makeup in Gwalpara? A1: Ladyfair offers expert bridal makeup services at home, using high-quality products to ensure a flawless and long-lasting look. Q2: What are the prices for bridal makeup in Gwalpara? A2: Our bridal makeup packages start at ₹10,000 for basic makeup, ₹12,000 for HD makeup, and ₹18,000 for airbrush makeup. Q3: How do I book Ladyfair’s bridal makeup services in Gwalpara? A3: You can book our services by calling 7004721239. We also offer consultations and trial sessions to ensure you get the look you want. Q4: What bridal makeup styles does Ladyfair offer in Gwalpara? A4: Ladyfair offers traditional, HD, and airbrush bridal makeup to suit different preferences and needs. Q5: Are makeup trials available before my wedding? A5: Yes, we offer trial sessions so you can finalize your bridal look ahead of time. Q6: What products does Ladyfair use for bridal makeup? A6: We use professional-grade, high-quality makeup products that are safe for all skin types and ensure a flawless finish. Q7: What other services does Ladyfair provide in Gwalpara? A7: In addition to bridal makeup, we offer makeup for engagements, receptions, parties, and other special occasions. Ladyfair is your ultimate choice for professional, at-home bridal makeup services in Gwalpara, ensuring a flawless and stress-free experience on your special day.

Posted By: 19th December 2024
Bridal Makeup Artist in Puraini
Introduction In Puraini, Ladyfair is the premier choice for brides looking to achieve the perfect wedding day look with our professional at-home bridal makeup services. Whether you desire a traditional bridal look, an HD finish, or the flawless perfection of airbrush makeup, our expert makeup artist in Puraini ensures that you shine on your special day. Contact us today at 7004721239 to schedule your appointment. Why Choose Ladyfair for Bridal Makeup in Puraini Experienced Makeup Artist Our makeup artist in Puraini has years of experience in bridal makeup, creating personalized looks that complement your natural beauty and align with your style and preferences. Convenient At-Home Service Forget the stress of traveling to a salon. Ladyfair brings luxury beauty treatments directly to your doorstep with our at-home bridal makeup services, offering a truly personalized experience. Premium Makeup Products We use only high-quality, professional-grade makeup products to ensure a flawless, long-lasting look that remains perfect throughout your big day. Bridal Makeup Pricing in Puraini Our bridal makeup services in Puraini are tailored to fit different styles and budgets: Basic Bridal Makeup: ₹10,000 HD Bridal Makeup: ₹12,000 Airbrush Bridal Makeup: ₹18,000 For engagement and reception makeup: Basic Engagement/Reception Makeup: ₹6,000 HD Engagement/Reception Makeup: ₹8,000 Airbrush Engagement/Reception Makeup: ₹12,000 For parties: Basic Party Makeup: ₹2,500 HD Party Makeup: ₹3,500 Popular Bridal Makeup Styles in Puraini Traditional Bridal Makeup Our traditional bridal makeup in Puraini incorporates bold colors and intricate detailing to complement your wedding attire, creating an elegant and timeless look. HD Bridal Makeup For a high-definition finish that looks flawless both in photos and in person, HD bridal makeup is the perfect choice for brides who want a picture-perfect appearance all day. Airbrush Bridal Makeup Our airbrush makeup offers a lightweight, full-coverage finish that lasts all day, giving you a smooth and natural look while ensuring long-lasting perfection. How to Book Your Bridal Makeup with Ladyfair in Puraini Initial Contact: Call us at 7004721239 to discuss your makeup needs and schedule your appointment. Consultation Session: Meet with our makeup artist to discuss your wedding look, review your attire, and plan the perfect makeup style. Makeup Trial: We offer trial sessions to help you preview your bridal makeup look and make any adjustments. Wedding Day Makeup: On your wedding day, our makeup artist will arrive at your location in Puraini to provide flawless, hassle-free makeup service. Testimonials from Brides in Puraini Priya R., Puraini: "Ladyfair provided amazing service on my wedding day. The airbrush makeup looked flawless and lasted all day." Ritu K., Puraini: "I loved the HD makeup! It was perfect for my photos, and the at-home service was so convenient." Sneha S., Puraini: "My traditional bridal makeup was exactly what I wanted, and Ladyfair made the entire process stress-free." Preparing for Your Bridal Makeup Session To get the best results for your bridal makeup: Stay Hydrated: Keep your skin looking fresh by drinking plenty of water. Consistent Skincare: Stick to your regular skincare routine to maintain healthy, glowing skin. Avoid New Products: Use familiar products to prevent any reactions before your wedding day. Clear Communication: Discuss your makeup preferences and any concerns with our artist during the consultation. Additional Beauty Services by Ladyfair Beyond bridal makeup, Ladyfair offers a variety of beauty services in Puraini: Engagement and Reception Makeup: Customized looks for all pre-wedding events. Party Makeup: Perfect for birthdays, anniversaries, and special occasions. Everyday Makeup: Enhance your daily look with our expert makeup services. Special Occasion Makeup: Professional makeup for parties, celebrations, and formal events. The Future of Bridal Makeup in Puraini Ladyfair is dedicated to setting new standards in bridal beauty in Puraini with our innovative at-home services. As we continue to offer exceptional service, more brides are choosing Ladyfair as their preferred makeup provider. Q&A with Ladyfair’s Bridal Makeup Artist in Puraini Q1: What makes Ladyfair the best choice for bridal makeup in Puraini? A1: Ladyfair offers expert bridal makeup services at home, using high-quality products to ensure a flawless and long-lasting look. Q2: What are the prices for bridal makeup in Puraini? A2: Our bridal makeup packages start at ₹10,000 for basic makeup, ₹12,000 for HD makeup, and ₹18,000 for airbrush makeup. Q3: How do I book Ladyfair’s bridal makeup services in Puraini? A3: You can book our services by calling 7004721239. We also offer consultations and trial sessions to ensure you get the look you want. Q4: What bridal makeup styles does Ladyfair offer in Puraini? A4: Ladyfair offers traditional, HD, and airbrush bridal makeup to suit different preferences and needs. Q5: Are makeup trials available before my wedding? A5: Yes, we offer trial sessions so you can finalize your bridal look ahead of time. Q6: What products does Ladyfair use for bridal makeup? A6: We use professional-grade, high-quality makeup products that are safe for all skin types and ensure a flawless finish. Q7: What other services does Ladyfair provide in Puraini? A7: In addition to bridal makeup, we offer makeup for engagements, receptions, parties, and other special occasions. Ladyfair is your ultimate choice for professional, at-home bridal makeup services in Puraini, ensuring a flawless and stress-free experience on your special day.

Posted By: 18th December 2024
Bridal Makeup Artist in Chausa
Introduction In Chausa, Ladyfair is the premier choice for brides looking to achieve the perfect wedding day look with our professional at-home bridal makeup services. Whether you desire a traditional bridal look, an HD finish, or the flawless perfection of airbrush makeup, our expert makeup artist in Chausa ensures that you shine on your special day. Contact us today at 7004721239 to schedule your appointment. Why Choose Ladyfair for Bridal Makeup in Chausa Experienced Makeup Artist Our makeup artist in Chausa has years of experience in bridal makeup, creating personalized looks that complement your natural beauty and align with your style and preferences. Convenient At-Home Service Forget the stress of traveling to a salon. Ladyfair brings luxury beauty treatments directly to your doorstep with our at-home bridal makeup services, offering a truly personalized experience. Premium Makeup Products We use only high-quality, professional-grade makeup products to ensure a flawless, long-lasting look that remains perfect throughout your big day. Bridal Makeup Pricing in Chausa Our bridal makeup services in Chausa are tailored to fit different styles and budgets: Basic Bridal Makeup: ₹10,000 HD Bridal Makeup: ₹12,000 Airbrush Bridal Makeup: ₹18,000 For engagement and reception makeup: Basic Engagement/Reception Makeup: ₹6,000 HD Engagement/Reception Makeup: ₹8,000 Airbrush Engagement/Reception Makeup: ₹12,000 For parties: Basic Party Makeup: ₹2,500 HD Party Makeup: ₹3,500 Popular Bridal Makeup Styles in Chausa Traditional Bridal Makeup Our traditional bridal makeup in Chausa incorporates bold colors and intricate detailing to complement your wedding attire, creating an elegant and timeless look. HD Bridal Makeup For a high-definition finish that looks flawless both in photos and in person, HD bridal makeup is the perfect choice for brides who want a picture-perfect appearance all day. Airbrush Bridal Makeup Our airbrush makeup offers a lightweight, full-coverage finish that lasts all day, giving you a smooth and natural look while ensuring long-lasting perfection. How to Book Your Bridal Makeup with Ladyfair in Chausa Initial Contact: Call us at 7004721239 to discuss your makeup needs and schedule your appointment. Consultation Session: Meet with our makeup artist to discuss your wedding look, review your attire, and plan the perfect makeup style. Makeup Trial: We offer trial sessions to help you preview your bridal makeup look and make any adjustments. Wedding Day Makeup: On your wedding day, our makeup artist will arrive at your location in Chausa to provide flawless, hassle-free makeup service. Testimonials from Brides in Chausa Priya R., Chausa: "Ladyfair provided amazing service on my wedding day. The airbrush makeup looked flawless and lasted all day." Ritu K., Chausa: "I loved the HD makeup! It was perfect for my photos, and the at-home service was so convenient." Sneha S., Chausa: "My traditional bridal makeup was exactly what I wanted, and Ladyfair made the entire process stress-free." Preparing for Your Bridal Makeup Session To get the best results for your bridal makeup: Stay Hydrated: Keep your skin looking fresh by drinking plenty of water. Consistent Skincare: Stick to your regular skincare routine to maintain healthy, glowing skin. Avoid New Products: Use familiar products to prevent any reactions before your wedding day. Clear Communication: Discuss your makeup preferences and any concerns with our artist during the consultation. Additional Beauty Services by Ladyfair Beyond bridal makeup, Ladyfair offers a variety of beauty services in Chausa: Engagement and Reception Makeup: Customized looks for all pre-wedding events. Party Makeup: Perfect for birthdays, anniversaries, and special occasions. Everyday Makeup: Enhance your daily look with our expert makeup services. Special Occasion Makeup: Professional makeup for parties, celebrations, and formal events. The Future of Bridal Makeup in Chausa Ladyfair is dedicated to setting new standards in bridal beauty in Chausa with our innovative at-home services. As we continue to offer exceptional service, more brides are choosing Ladyfair as their preferred makeup provider. Q&A with Ladyfair’s Bridal Makeup Artist in Chausa Q1: What makes Ladyfair the best choice for bridal makeup in Chausa? A1: Ladyfair offers expert bridal makeup services at home, using high-quality products to ensure a flawless and long-lasting look. Q2: What are the prices for bridal makeup in Chausa? A2: Our bridal makeup packages start at ₹10,000 for basic makeup, ₹12,000 for HD makeup, and ₹18,000 for airbrush makeup. Q3: How do I book Ladyfair’s bridal makeup services in Chausa? A3: You can book our services by calling 7004721239. We also offer consultations and trial sessions to ensure you get the look you want. Q4: What bridal makeup styles does Ladyfair offer in Chausa? A4: Ladyfair offers traditional, HD, and airbrush bridal makeup to suit different preferences and needs. Q5: Are makeup trials available before my wedding? A5: Yes, we offer trial sessions so you can finalize your bridal look ahead of time. Q6: What products does Ladyfair use for bridal makeup? A6: We use professional-grade, high-quality makeup products that are safe for all skin types and ensure a flawless finish. Q7: What other services does Ladyfair provide in Chausa? A7: In addition to bridal makeup, we offer makeup for engagements, receptions, parties, and other special occasions. Ladyfair is your ultimate choice for professional, at-home bridal makeup services in Chausa, ensuring a flawless and stress-free experience on your special day.

Posted By: 18th December 2024
Bridal Makeup Artist in Shankarpur
Introduction In Shankarpur, Ladyfair is the premier choice for brides looking to achieve the perfect wedding day look with our professional at-home bridal makeup services. Whether you desire a traditional bridal look, an HD finish, or the flawless perfection of airbrush makeup, our expert makeup artist in Shankarpur ensures that you shine on your special day. Contact us today at 7004721239 to schedule your appointment. Why Choose Ladyfair for Bridal Makeup in Shankarpur Experienced Makeup Artist Our makeup artist in Shankarpur has years of experience in bridal makeup, creating personalized looks that complement your natural beauty and align with your style and preferences. Convenient At-Home Service Forget the stress of traveling to a salon. Ladyfair brings luxury beauty treatments directly to your doorstep with our at-home bridal makeup services, offering a truly personalized experience. Premium Makeup Products We use only high-quality, professional-grade makeup products to ensure a flawless, long-lasting look that remains perfect throughout your big day. Bridal Makeup Pricing in Shankarpur Our bridal makeup services in Shankarpur are tailored to fit different styles and budgets: Basic Bridal Makeup: ₹10,000 HD Bridal Makeup: ₹12,000 Airbrush Bridal Makeup: ₹18,000 For engagement and reception makeup: Basic Engagement/Reception Makeup: ₹6,000 HD Engagement/Reception Makeup: ₹8,000 Airbrush Engagement/Reception Makeup: ₹12,000 For parties: Basic Party Makeup: ₹2,500 HD Party Makeup: ₹3,500 Popular Bridal Makeup Styles in Shankarpur Traditional Bridal Makeup Our traditional bridal makeup in Shankarpur incorporates bold colors and intricate detailing to complement your wedding attire, creating an elegant and timeless look. HD Bridal Makeup For a high-definition finish that looks flawless both in photos and in person, HD bridal makeup is the perfect choice for brides who want a picture-perfect appearance all day. Airbrush Bridal Makeup Our airbrush makeup offers a lightweight, full-coverage finish that lasts all day, giving you a smooth and natural look while ensuring long-lasting perfection. How to Book Your Bridal Makeup with Ladyfair in Shankarpur Initial Contact: Call us at 7004721239 to discuss your makeup needs and schedule your appointment. Consultation Session: Meet with our makeup artist to discuss your wedding look, review your attire, and plan the perfect makeup style. Makeup Trial: We offer trial sessions to help you preview your bridal makeup look and make any adjustments. Wedding Day Makeup: On your wedding day, our makeup artist will arrive at your location in Shankarpur to provide flawless, hassle-free makeup service. Testimonials from Brides in Shankarpur Priya R., Shankarpur: "Ladyfair provided amazing service on my wedding day. The airbrush makeup looked flawless and lasted all day." Ritu K., Shankarpur: "I loved the HD makeup! It was perfect for my photos, and the at-home service was so convenient." Sneha S., Shankarpur: "My traditional bridal makeup was exactly what I wanted, and Ladyfair made the entire process stress-free." Preparing for Your Bridal Makeup Session To get the best results for your bridal makeup: Stay Hydrated: Keep your skin looking fresh by drinking plenty of water. Consistent Skincare: Stick to your regular skincare routine to maintain healthy, glowing skin. Avoid New Products: Use familiar products to prevent any reactions before your wedding day. Clear Communication: Discuss your makeup preferences and any concerns with our artist during the consultation. Additional Beauty Services by Ladyfair Beyond bridal makeup, Ladyfair offers a variety of beauty services in Shankarpur: Engagement and Reception Makeup: Customized looks for all pre-wedding events. Party Makeup: Perfect for birthdays, anniversaries, and special occasions. Everyday Makeup: Enhance your daily look with our expert makeup services. Special Occasion Makeup: Professional makeup for parties, celebrations, and formal events. The Future of Bridal Makeup in Shankarpur Ladyfair is dedicated to setting new standards in bridal beauty in Shankarpur with our innovative at-home services. As we continue to offer exceptional service, more brides are choosing Ladyfair as their preferred makeup provider. Q&A with Ladyfair’s Bridal Makeup Artist in Shankarpur Q1: What makes Ladyfair the best choice for bridal makeup in Shankarpur? A1: Ladyfair offers expert bridal makeup services at home, using high-quality products to ensure a flawless and long-lasting look. Q2: What are the prices for bridal makeup in Shankarpur? A2: Our bridal makeup packages start at ₹10,000 for basic makeup, ₹12,000 for HD makeup, and ₹18,000 for airbrush makeup. Q3: How do I book Ladyfair’s bridal makeup services in Shankarpur? A3: You can book our services by calling 7004721239. We also offer consultations and trial sessions to ensure you get the look you want. Q4: What bridal makeup styles does Ladyfair offer in Shankarpur? A4: Ladyfair offers traditional, HD, and airbrush bridal makeup to suit different preferences and needs. Q5: Are makeup trials available before my wedding? A5: Yes, we offer trial sessions so you can finalize your bridal look ahead of time. Q6: What products does Ladyfair use for bridal makeup? A6: We use professional-grade, high-quality makeup products that are safe for all skin types and ensure a flawless finish. Q7: What other services does Ladyfair provide in Shankarpur? A7: In addition to bridal makeup, we offer makeup for engagements, receptions, parties, and other special occasions. Ladyfair is your ultimate choice for professional, at-home bridal makeup services in Shankarpur, ensuring a flawless and stress-free experience on your special day.

Posted By: 18th December 2024
Bridal Makeup Artist in Kumarkhand
Introduction In Kumarkhand, Ladyfair is the premier choice for brides looking to achieve the perfect wedding day look with our professional at-home bridal makeup services. Whether you desire a traditional bridal look, an HD finish, or the flawless perfection of airbrush makeup, our expert makeup artist in Kumarkhand ensures that you shine on your special day. Contact us today at 7004721239 to schedule your appointment. Why Choose Ladyfair for Bridal Makeup in Kumarkhand Experienced Makeup Artist Our makeup artist in Kumarkhand has years of experience in bridal makeup, creating personalized looks that complement your natural beauty and align with your style and preferences. Convenient At-Home Service Forget the stress of traveling to a salon. Ladyfair brings luxury beauty treatments directly to your doorstep with our at-home bridal makeup services, offering a truly personalized experience. Premium Makeup Products We use only high-quality, professional-grade makeup products to ensure a flawless, long-lasting look that remains perfect throughout your big day. Bridal Makeup Pricing in Kumarkhand Our bridal makeup services in Kumarkhand are tailored to fit different styles and budgets: Basic Bridal Makeup: ₹10,000 HD Bridal Makeup: ₹12,000 Airbrush Bridal Makeup: ₹18,000 For engagement and reception makeup: Basic Engagement/Reception Makeup: ₹6,000 HD Engagement/Reception Makeup: ₹8,000 Airbrush Engagement/Reception Makeup: ₹12,000 For parties: Basic Party Makeup: ₹2,500 HD Party Makeup: ₹3,500 Popular Bridal Makeup Styles in Kumarkhand Traditional Bridal Makeup Our traditional bridal makeup in Kumarkhand incorporates bold colors and intricate detailing to complement your wedding attire, creating an elegant and timeless look. HD Bridal Makeup For a high-definition finish that looks flawless both in photos and in person, HD bridal makeup is the perfect choice for brides who want a picture-perfect appearance all day. Airbrush Bridal Makeup Our airbrush makeup offers a lightweight, full-coverage finish that lasts all day, giving you a smooth and natural look while ensuring long-lasting perfection. How to Book Your Bridal Makeup with Ladyfair in Kumarkhand Initial Contact: Call us at 7004721239 to discuss your makeup needs and schedule your appointment. Consultation Session: Meet with our makeup artist to discuss your wedding look, review your attire, and plan the perfect makeup style. Makeup Trial: We offer trial sessions to help you preview your bridal makeup look and make any adjustments. Wedding Day Makeup: On your wedding day, our makeup artist will arrive at your location in Kumarkhand to provide flawless, hassle-free makeup service. Testimonials from Brides in Kumarkhand Priya R., Kumarkhand: "Ladyfair provided amazing service on my wedding day. The airbrush makeup looked flawless and lasted all day." Ritu K., Kumarkhand: "I loved the HD makeup! It was perfect for my photos, and the at-home service was so convenient." Sneha S., Kumarkhand: "My traditional bridal makeup was exactly what I wanted, and Ladyfair made the entire process stress-free." Preparing for Your Bridal Makeup Session To get the best results for your bridal makeup: Stay Hydrated: Keep your skin looking fresh by drinking plenty of water. Consistent Skincare: Stick to your regular skincare routine to maintain healthy, glowing skin. Avoid New Products: Use familiar products to prevent any reactions before your wedding day. Clear Communication: Discuss your makeup preferences and any concerns with our artist during the consultation. Additional Beauty Services by Ladyfair Beyond bridal makeup, Ladyfair offers a variety of beauty services in Kumarkhand: Engagement and Reception Makeup: Customized looks for all pre-wedding events. Party Makeup: Perfect for birthdays, anniversaries, and special occasions. Everyday Makeup: Enhance your daily look with our expert makeup services. Special Occasion Makeup: Professional makeup for parties, celebrations, and formal events. The Future of Bridal Makeup in Kumarkhand Ladyfair is dedicated to setting new standards in bridal beauty in Kumarkhand with our innovative at-home services. As we continue to offer exceptional service, more brides are choosing Ladyfair as their preferred makeup provider. Q&A with Ladyfair’s Bridal Makeup Artist in Kumarkhand Q1: What makes Ladyfair the best choice for bridal makeup in Kumarkhand? A1: Ladyfair offers expert bridal makeup services at home, using high-quality products to ensure a flawless and long-lasting look. Q2: What are the prices for bridal makeup in Kumarkhand? A2: Our bridal makeup packages start at ₹10,000 for basic makeup, ₹12,000 for HD makeup, and ₹18,000 for airbrush makeup. Q3: How do I book Ladyfair’s bridal makeup services in Kumarkhand? A3: You can book our services by calling 7004721239. We also offer consultations and trial sessions to ensure you get the look you want. Q4: What bridal makeup styles does Ladyfair offer in Kumarkhand? A4: Ladyfair offers traditional, HD, and airbrush bridal makeup to suit different preferences and needs. Q5: Are makeup trials available before my wedding? A5: Yes, we offer trial sessions so you can finalize your bridal look ahead of time. Q6: What products does Ladyfair use for bridal makeup? A6: We use professional-grade, high-quality makeup products that are safe for all skin types and ensure a flawless finish. Q7: What other services does Ladyfair provide in Kumarkhand? A7: In addition to bridal makeup, we offer makeup for engagements, receptions, parties, and other special occasions. Ladyfair is your ultimate choice for professional, at-home bridal makeup services in Kumarkhand, ensuring a flawless and stress-free experience on your special day.

Posted By: 18th December 2024
Bridal Makeup Artist in Ghailar
Introduction In Ghailar, Ladyfair is the premier choice for brides looking to achieve the perfect wedding day look with our professional at-home bridal makeup services. Whether you desire a traditional bridal look, an HD finish, or the flawless perfection of airbrush makeup, our expert makeup artist in Ghailar ensures that you shine on your special day. Contact us today at 7004721239 to schedule your appointment. Why Choose Ladyfair for Bridal Makeup in Ghailar Experienced Makeup Artist Our makeup artist in Ghailar has years of experience in bridal makeup, creating personalized looks that complement your natural beauty and align with your style and preferences. Convenient At-Home Service Forget the stress of traveling to a salon. Ladyfair brings luxury beauty treatments directly to your doorstep with our at-home bridal makeup services, offering a truly personalized experience. Premium Makeup Products We use only high-quality, professional-grade makeup products to ensure a flawless, long-lasting look that remains perfect throughout your big day. Bridal Makeup Pricing in Ghailar Our bridal makeup services in Ghailar are tailored to fit different styles and budgets: Basic Bridal Makeup: ₹10,000 HD Bridal Makeup: ₹12,000 Airbrush Bridal Makeup: ₹18,000 For engagement and reception makeup: Basic Engagement/Reception Makeup: ₹6,000 HD Engagement/Reception Makeup: ₹8,000 Airbrush Engagement/Reception Makeup: ₹12,000 For parties: Basic Party Makeup: ₹2,500 HD Party Makeup: ₹3,500 Popular Bridal Makeup Styles in Ghailar Traditional Bridal Makeup Our traditional bridal makeup in Ghailar incorporates bold colors and intricate detailing to complement your wedding attire, creating an elegant and timeless look. HD Bridal Makeup For a high-definition finish that looks flawless both in photos and in person, HD bridal makeup is the perfect choice for brides who want a picture-perfect appearance all day. Airbrush Bridal Makeup Our airbrush makeup offers a lightweight, full-coverage finish that lasts all day, giving you a smooth and natural look while ensuring long-lasting perfection. How to Book Your Bridal Makeup with Ladyfair in Ghailar Initial Contact: Call us at 7004721239 to discuss your makeup needs and schedule your appointment. Consultation Session: Meet with our makeup artist to discuss your wedding look, review your attire, and plan the perfect makeup style. Makeup Trial: We offer trial sessions to help you preview your bridal makeup look and make any adjustments. Wedding Day Makeup: On your wedding day, our makeup artist will arrive at your location in Ghailar to provide flawless, hassle-free makeup service. Testimonials from Brides in Ghailar Priya R., Ghailar: "Ladyfair provided amazing service on my wedding day. The airbrush makeup looked flawless and lasted all day." Ritu K., Ghailar: "I loved the HD makeup! It was perfect for my photos, and the at-home service was so convenient." Sneha S., Ghailar: "My traditional bridal makeup was exactly what I wanted, and Ladyfair made the entire process stress-free." Preparing for Your Bridal Makeup Session To get the best results for your bridal makeup: Stay Hydrated: Keep your skin looking fresh by drinking plenty of water. Consistent Skincare: Stick to your regular skincare routine to maintain healthy, glowing skin. Avoid New Products: Use familiar products to prevent any reactions before your wedding day. Clear Communication: Discuss your makeup preferences and any concerns with our artist during the consultation. Additional Beauty Services by Ladyfair Beyond bridal makeup, Ladyfair offers a variety of beauty services in Ghailar: Engagement and Reception Makeup: Customized looks for all pre-wedding events. Party Makeup: Perfect for birthdays, anniversaries, and special occasions. Everyday Makeup: Enhance your daily look with our expert makeup services. Special Occasion Makeup: Professional makeup for parties, celebrations, and formal events. The Future of Bridal Makeup in Ghailar Ladyfair is dedicated to setting new standards in bridal beauty in Ghailar with our innovative at-home services. As we continue to offer exceptional service, more brides are choosing Ladyfair as their preferred makeup provider. Q&A with Ladyfair’s Bridal Makeup Artist in Ghailar Q1: What makes Ladyfair the best choice for bridal makeup in Ghailar? A1: Ladyfair offers expert bridal makeup services at home, using high-quality products to ensure a flawless and long-lasting look. Q2: What are the prices for bridal makeup in Ghailar? A2: Our bridal makeup packages start at ₹10,000 for basic makeup, ₹12,000 for HD makeup, and ₹18,000 for airbrush makeup. Q3: How do I book Ladyfair’s bridal makeup services in Ghailar? A3: You can book our services by calling 7004721239. We also offer consultations and trial sessions to ensure you get the look you want. Q4: What bridal makeup styles does Ladyfair offer in Ghailar? A4: Ladyfair offers traditional, HD, and airbrush bridal makeup to suit different preferences and needs. Q5: Are makeup trials available before my wedding? A5: Yes, we offer trial sessions so you can finalize your bridal look ahead of time. Q6: What products does Ladyfair use for bridal makeup? A6: We use professional-grade, high-quality makeup products that are safe for all skin types and ensure a flawless finish. Q7: What other services does Ladyfair provide in Ghailar? A7: In addition to bridal makeup, we offer makeup for engagements, receptions, parties, and other special occasions. Ladyfair is your ultimate choice for professional, at-home bridal makeup services in Ghailar, ensuring a flawless and stress-free experience on your special day.

Posted By: 18th December 2024
Bridal Makeup Artist in Gamharia
Introduction In Gamharia, Ladyfair is the premier choice for brides looking to achieve the perfect wedding day look with our professional at-home bridal makeup services. Whether you desire a traditional bridal look, an HD finish, or the flawless perfection of airbrush makeup, our expert makeup artist in Gamharia ensures that you shine on your special day. Contact us today at 7004721239 to schedule your appointment. Why Choose Ladyfair for Bridal Makeup in Gamharia Experienced Makeup Artist Our makeup artist in Gamharia has years of experience in bridal makeup, creating personalized looks that complement your natural beauty and align with your style and preferences. Convenient At-Home Service Forget the stress of traveling to a salon. Ladyfair brings luxury beauty treatments directly to your doorstep with our at-home bridal makeup services, offering a truly personalized experience. Premium Makeup Products We use only high-quality, professional-grade makeup products to ensure a flawless, long-lasting look that remains perfect throughout your big day. Bridal Makeup Pricing in Gamharia Our bridal makeup services in Gamharia are tailored to fit different styles and budgets: Basic Bridal Makeup: ₹10,000 HD Bridal Makeup: ₹12,000 Airbrush Bridal Makeup: ₹18,000 For engagement and reception makeup: Basic Engagement/Reception Makeup: ₹6,000 HD Engagement/Reception Makeup: ₹8,000 Airbrush Engagement/Reception Makeup: ₹12,000 For parties: Basic Party Makeup: ₹2,500 HD Party Makeup: ₹3,500 Popular Bridal Makeup Styles in Gamharia Traditional Bridal Makeup Our traditional bridal makeup in Gamharia incorporates bold colors and intricate detailing to complement your wedding attire, creating an elegant and timeless look. HD Bridal Makeup For a high-definition finish that looks flawless both in photos and in person, HD bridal makeup is the perfect choice for brides who want a picture-perfect appearance all day. Airbrush Bridal Makeup Our airbrush makeup offers a lightweight, full-coverage finish that lasts all day, giving you a smooth and natural look while ensuring long-lasting perfection. How to Book Your Bridal Makeup with Ladyfair in Gamharia Initial Contact: Call us at 7004721239 to discuss your makeup needs and schedule your appointment. Consultation Session: Meet with our makeup artist to discuss your wedding look, review your attire, and plan the perfect makeup style. Makeup Trial: We offer trial sessions to help you preview your bridal makeup look and make any adjustments. Wedding Day Makeup: On your wedding day, our makeup artist will arrive at your location in Gamharia to provide flawless, hassle-free makeup service. Testimonials from Brides in Gamharia Priya R., Gamharia: "Ladyfair provided amazing service on my wedding day. The airbrush makeup looked flawless and lasted all day." Ritu K., Gamharia: "I loved the HD makeup! It was perfect for my photos, and the at-home service was so convenient." Sneha S., Gamharia: "My traditional bridal makeup was exactly what I wanted, and Ladyfair made the entire process stress-free." Preparing for Your Bridal Makeup Session To get the best results for your bridal makeup: Stay Hydrated: Keep your skin looking fresh by drinking plenty of water. Consistent Skincare: Stick to your regular skincare routine to maintain healthy, glowing skin. Avoid New Products: Use familiar products to prevent any reactions before your wedding day. Clear Communication: Discuss your makeup preferences and any concerns with our artist during the consultation. Additional Beauty Services by Ladyfair Beyond bridal makeup, Ladyfair offers a variety of beauty services in Gamharia: Engagement and Reception Makeup: Customized looks for all pre-wedding events. Party Makeup: Perfect for birthdays, anniversaries, and special occasions. Everyday Makeup: Enhance your daily look with our expert makeup services. Special Occasion Makeup: Professional makeup for parties, celebrations, and formal events. The Future of Bridal Makeup in Gamharia Ladyfair is dedicated to setting new standards in bridal beauty in Gamharia with our innovative at-home services. As we continue to offer exceptional service, more brides are choosing Ladyfair as their preferred makeup provider. Q&A with Ladyfair’s Bridal Makeup Artist in Gamharia Q1: What makes Ladyfair the best choice for bridal makeup in Gamharia? A1: Ladyfair offers expert bridal makeup services at home, using high-quality products to ensure a flawless and long-lasting look. Q2: What are the prices for bridal makeup in Gamharia? A2: Our bridal makeup packages start at ₹10,000 for basic makeup, ₹12,000 for HD makeup, and ₹18,000 for airbrush makeup. Q3: How do I book Ladyfair’s bridal makeup services in Gamharia? A3: You can book our services by calling 7004721239. We also offer consultations and trial sessions to ensure you get the look you want. Q4: What bridal makeup styles does Ladyfair offer in Gamharia? A4: Ladyfair offers traditional, HD, and airbrush bridal makeup to suit different preferences and needs. Q5: Are makeup trials available before my wedding? A5: Yes, we offer trial sessions so you can finalize your bridal look ahead of time. Q6: What products does Ladyfair use for bridal makeup? A6: We use professional-grade, high-quality makeup products that are safe for all skin types and ensure a flawless finish. Q7: What other services does Ladyfair provide in Gamharia? A7: In addition to bridal makeup, we offer makeup for engagements, receptions, parties, and other special occasions. Ladyfair is your ultimate choice for professional, at-home bridal makeup services in Gamharia, ensuring a flawless and stress-free experience on your special day.

Posted By: 18th December 2024
Bridal Makeup Artist in Murliganj
Introduction In Murliganj, Ladyfair is the premier choice for brides looking to achieve the perfect wedding day look with our professional at-home bridal makeup services. Whether you desire a traditional bridal look, an HD finish, or the flawless perfection of airbrush makeup, our expert makeup artist in Murliganj ensures that you shine on your special day. Contact us today at 7004721239 to schedule your appointment. Why Choose Ladyfair for Bridal Makeup in Murliganj Experienced Makeup Artist Our makeup artist in Murliganj has years of experience in bridal makeup, creating personalized looks that complement your natural beauty and align with your style and preferences. Convenient At-Home Service Forget the stress of traveling to a salon. Ladyfair brings luxury beauty treatments directly to your doorstep with our at-home bridal makeup services, offering a truly personalized experience. Premium Makeup Products We use only high-quality, professional-grade makeup products to ensure a flawless, long-lasting look that remains perfect throughout your big day. Bridal Makeup Pricing in Murliganj Our bridal makeup services in Murliganj are tailored to fit different styles and budgets: Basic Bridal Makeup: ₹10,000 HD Bridal Makeup: ₹12,000 Airbrush Bridal Makeup: ₹18,000 For engagement and reception makeup: Basic Engagement/Reception Makeup: ₹6,000 HD Engagement/Reception Makeup: ₹8,000 Airbrush Engagement/Reception Makeup: ₹12,000 For parties: Basic Party Makeup: ₹2,500 HD Party Makeup: ₹3,500 Popular Bridal Makeup Styles in Murliganj Traditional Bridal Makeup Our traditional bridal makeup in Murliganj incorporates bold colors and intricate detailing to complement your wedding attire, creating an elegant and timeless look. HD Bridal Makeup For a high-definition finish that looks flawless both in photos and in person, HD bridal makeup is the perfect choice for brides who want a picture-perfect appearance all day. Airbrush Bridal Makeup Our airbrush makeup offers a lightweight, full-coverage finish that lasts all day, giving you a smooth and natural look while ensuring long-lasting perfection. How to Book Your Bridal Makeup with Ladyfair in Murliganj Initial Contact: Call us at 7004721239 to discuss your makeup needs and schedule your appointment. Consultation Session: Meet with our makeup artist to discuss your wedding look, review your attire, and plan the perfect makeup style. Makeup Trial: We offer trial sessions to help you preview your bridal makeup look and make any adjustments. Wedding Day Makeup: On your wedding day, our makeup artist will arrive at your location in Murliganj to provide flawless, hassle-free makeup service. Testimonials from Brides in Murliganj Priya R., Murliganj: "Ladyfair provided amazing service on my wedding day. The airbrush makeup looked flawless and lasted all day." Ritu K., Murliganj: "I loved the HD makeup! It was perfect for my photos, and the at-home service was so convenient." Sneha S., Murliganj: "My traditional bridal makeup was exactly what I wanted, and Ladyfair made the entire process stress-free." Preparing for Your Bridal Makeup Session To get the best results for your bridal makeup: Stay Hydrated: Keep your skin looking fresh by drinking plenty of water. Consistent Skincare: Stick to your regular skincare routine to maintain healthy, glowing skin. Avoid New Products: Use familiar products to prevent any reactions before your wedding day. Clear Communication: Discuss your makeup preferences and any concerns with our artist during the consultation. Additional Beauty Services by Ladyfair Beyond bridal makeup, Ladyfair offers a variety of beauty services in Murliganj: Engagement and Reception Makeup: Customized looks for all pre-wedding events. Party Makeup: Perfect for birthdays, anniversaries, and special occasions. Everyday Makeup: Enhance your daily look with our expert makeup services. Special Occasion Makeup: Professional makeup for parties, celebrations, and formal events. The Future of Bridal Makeup in Murliganj Ladyfair is dedicated to setting new standards in bridal beauty in Murliganj with our innovative at-home services. As we continue to offer exceptional service, more brides are choosing Ladyfair as their preferred makeup provider. Q&A with Ladyfair’s Bridal Makeup Artist in Murliganj Q1: What makes Ladyfair the best choice for bridal makeup in Murliganj? A1: Ladyfair offers expert bridal makeup services at home, using high-quality products to ensure a flawless and long-lasting look. Q2: What are the prices for bridal makeup in Murliganj? A2: Our bridal makeup packages start at ₹10,000 for basic makeup, ₹12,000 for HD makeup, and ₹18,000 for airbrush makeup. Q3: How do I book Ladyfair’s bridal makeup services in Murliganj? A3: You can book our services by calling 7004721239. We also offer consultations and trial sessions to ensure you get the look you want. Q4: What bridal makeup styles does Ladyfair offer in Murliganj? A4: Ladyfair offers traditional, HD, and airbrush bridal makeup to suit different preferences and needs. Q5: Are makeup trials available before my wedding? A5: Yes, we offer trial sessions so you can finalize your bridal look ahead of time. Q6: What products does Ladyfair use for bridal makeup? A6: We use professional-grade, high-quality makeup products that are safe for all skin types and ensure a flawless finish. Q7: What other services does Ladyfair provide in Murliganj? A7: In addition to bridal makeup, we offer makeup for engagements, receptions, parties, and other special occasions. Ladyfair is your ultimate choice for professional, at-home bridal makeup services in Murliganj, ensuring a flawless and stress-free experience on your special day.

Posted By: 18th December 2024
Bridal Makeup Artist in Singheshwar
Introduction In Singheshwar, Ladyfair is the premier choice for brides looking to achieve the perfect wedding day look with our professional at-home bridal makeup services. Whether you desire a traditional bridal look, an HD finish, or the flawless perfection of airbrush makeup, our expert makeup artist in Singheshwar ensures that you shine on your special day. Contact us today at 7004721239 to schedule your appointment. Why Choose Ladyfair for Bridal Makeup in Singheshwar Experienced Makeup Artist Our makeup artist in Singheshwar has years of experience in bridal makeup, creating personalized looks that complement your natural beauty and align with your style and preferences. Convenient At-Home Service Forget the stress of traveling to a salon. Ladyfair brings luxury beauty treatments directly to your doorstep with our at-home bridal makeup services, offering a truly personalized experience. Premium Makeup Products We use only high-quality, professional-grade makeup products to ensure a flawless, long-lasting look that remains perfect throughout your big day. Bridal Makeup Pricing in Singheshwar Our bridal makeup services in Singheshwar are tailored to fit different styles and budgets: Basic Bridal Makeup: ₹10,000 HD Bridal Makeup: ₹12,000 Airbrush Bridal Makeup: ₹18,000 For engagement and reception makeup: Basic Engagement/Reception Makeup: ₹6,000 HD Engagement/Reception Makeup: ₹8,000 Airbrush Engagement/Reception Makeup: ₹12,000 For parties: Basic Party Makeup: ₹2,500 HD Party Makeup: ₹3,500 Popular Bridal Makeup Styles in Singheshwar Traditional Bridal Makeup Our traditional bridal makeup in Singheshwar incorporates bold colors and intricate detailing to complement your wedding attire, creating an elegant and timeless look. HD Bridal Makeup For a high-definition finish that looks flawless both in photos and in person, HD bridal makeup is the perfect choice for brides who want a picture-perfect appearance all day. Airbrush Bridal Makeup Our airbrush makeup offers a lightweight, full-coverage finish that lasts all day, giving you a smooth and natural look while ensuring long-lasting perfection. How to Book Your Bridal Makeup with Ladyfair in Singheshwar Initial Contact: Call us at 7004721239 to discuss your makeup needs and schedule your appointment. Consultation Session: Meet with our makeup artist to discuss your wedding look, review your attire, and plan the perfect makeup style. Makeup Trial: We offer trial sessions to help you preview your bridal makeup look and make any adjustments. Wedding Day Makeup: On your wedding day, our makeup artist will arrive at your location in Singheshwar to provide flawless, hassle-free makeup service. Testimonials from Brides in Singheshwar Priya R., Singheshwar: "Ladyfair provided amazing service on my wedding day. The airbrush makeup looked flawless and lasted all day." Ritu K., Singheshwar: "I loved the HD makeup! It was perfect for my photos, and the at-home service was so convenient." Sneha S., Singheshwar: "My traditional bridal makeup was exactly what I wanted, and Ladyfair made the entire process stress-free." Preparing for Your Bridal Makeup Session To get the best results for your bridal makeup: Stay Hydrated: Keep your skin looking fresh by drinking plenty of water. Consistent Skincare: Stick to your regular skincare routine to maintain healthy, glowing skin. Avoid New Products: Use familiar products to prevent any reactions before your wedding day. Clear Communication: Discuss your makeup preferences and any concerns with our artist during the consultation. Additional Beauty Services by Ladyfair Beyond bridal makeup, Ladyfair offers a variety of beauty services in Singheshwar: Engagement and Reception Makeup: Customized looks for all pre-wedding events. Party Makeup: Perfect for birthdays, anniversaries, and special occasions. Everyday Makeup: Enhance your daily look with our expert makeup services. Special Occasion Makeup: Professional makeup for parties, celebrations, and formal events. The Future of Bridal Makeup in Singheshwar Ladyfair is dedicated to setting new standards in bridal beauty in Singheshwar with our innovative at-home services. As we continue to offer exceptional service, more brides are choosing Ladyfair as their preferred makeup provider. Q&A with Ladyfair’s Bridal Makeup Artist in Singheshwar Q1: What makes Ladyfair the best choice for bridal makeup in Singheshwar? A1: Ladyfair offers expert bridal makeup services at home, using high-quality products to ensure a flawless and long-lasting look. Q2: What are the prices for bridal makeup in Singheshwar? A2: Our bridal makeup packages start at ₹10,000 for basic makeup, ₹12,000 for HD makeup, and ₹18,000 for airbrush makeup. Q3: How do I book Ladyfair’s bridal makeup services in Singheshwar? A3: You can book our services by calling 7004721239. We also offer consultations and trial sessions to ensure you get the look you want. Q4: What bridal makeup styles does Ladyfair offer in Singheshwar? A4: Ladyfair offers traditional, HD, and airbrush bridal makeup to suit different preferences and needs. Q5: Are makeup trials available before my wedding? A5: Yes, we offer trial sessions so you can finalize your bridal look ahead of time. Q6: What products does Ladyfair use for bridal makeup? A6: We use professional-grade, high-quality makeup products that are safe for all skin types and ensure a flawless finish. Q7: What other services does Ladyfair provide in Singheshwar? A7: In addition to bridal makeup, we offer makeup for engagements, receptions, parties, and other special occasions. Ladyfair is your ultimate choice for professional, at-home bridal makeup services in Singheshwar, ensuring a flawless and stress-free experience on your special day.
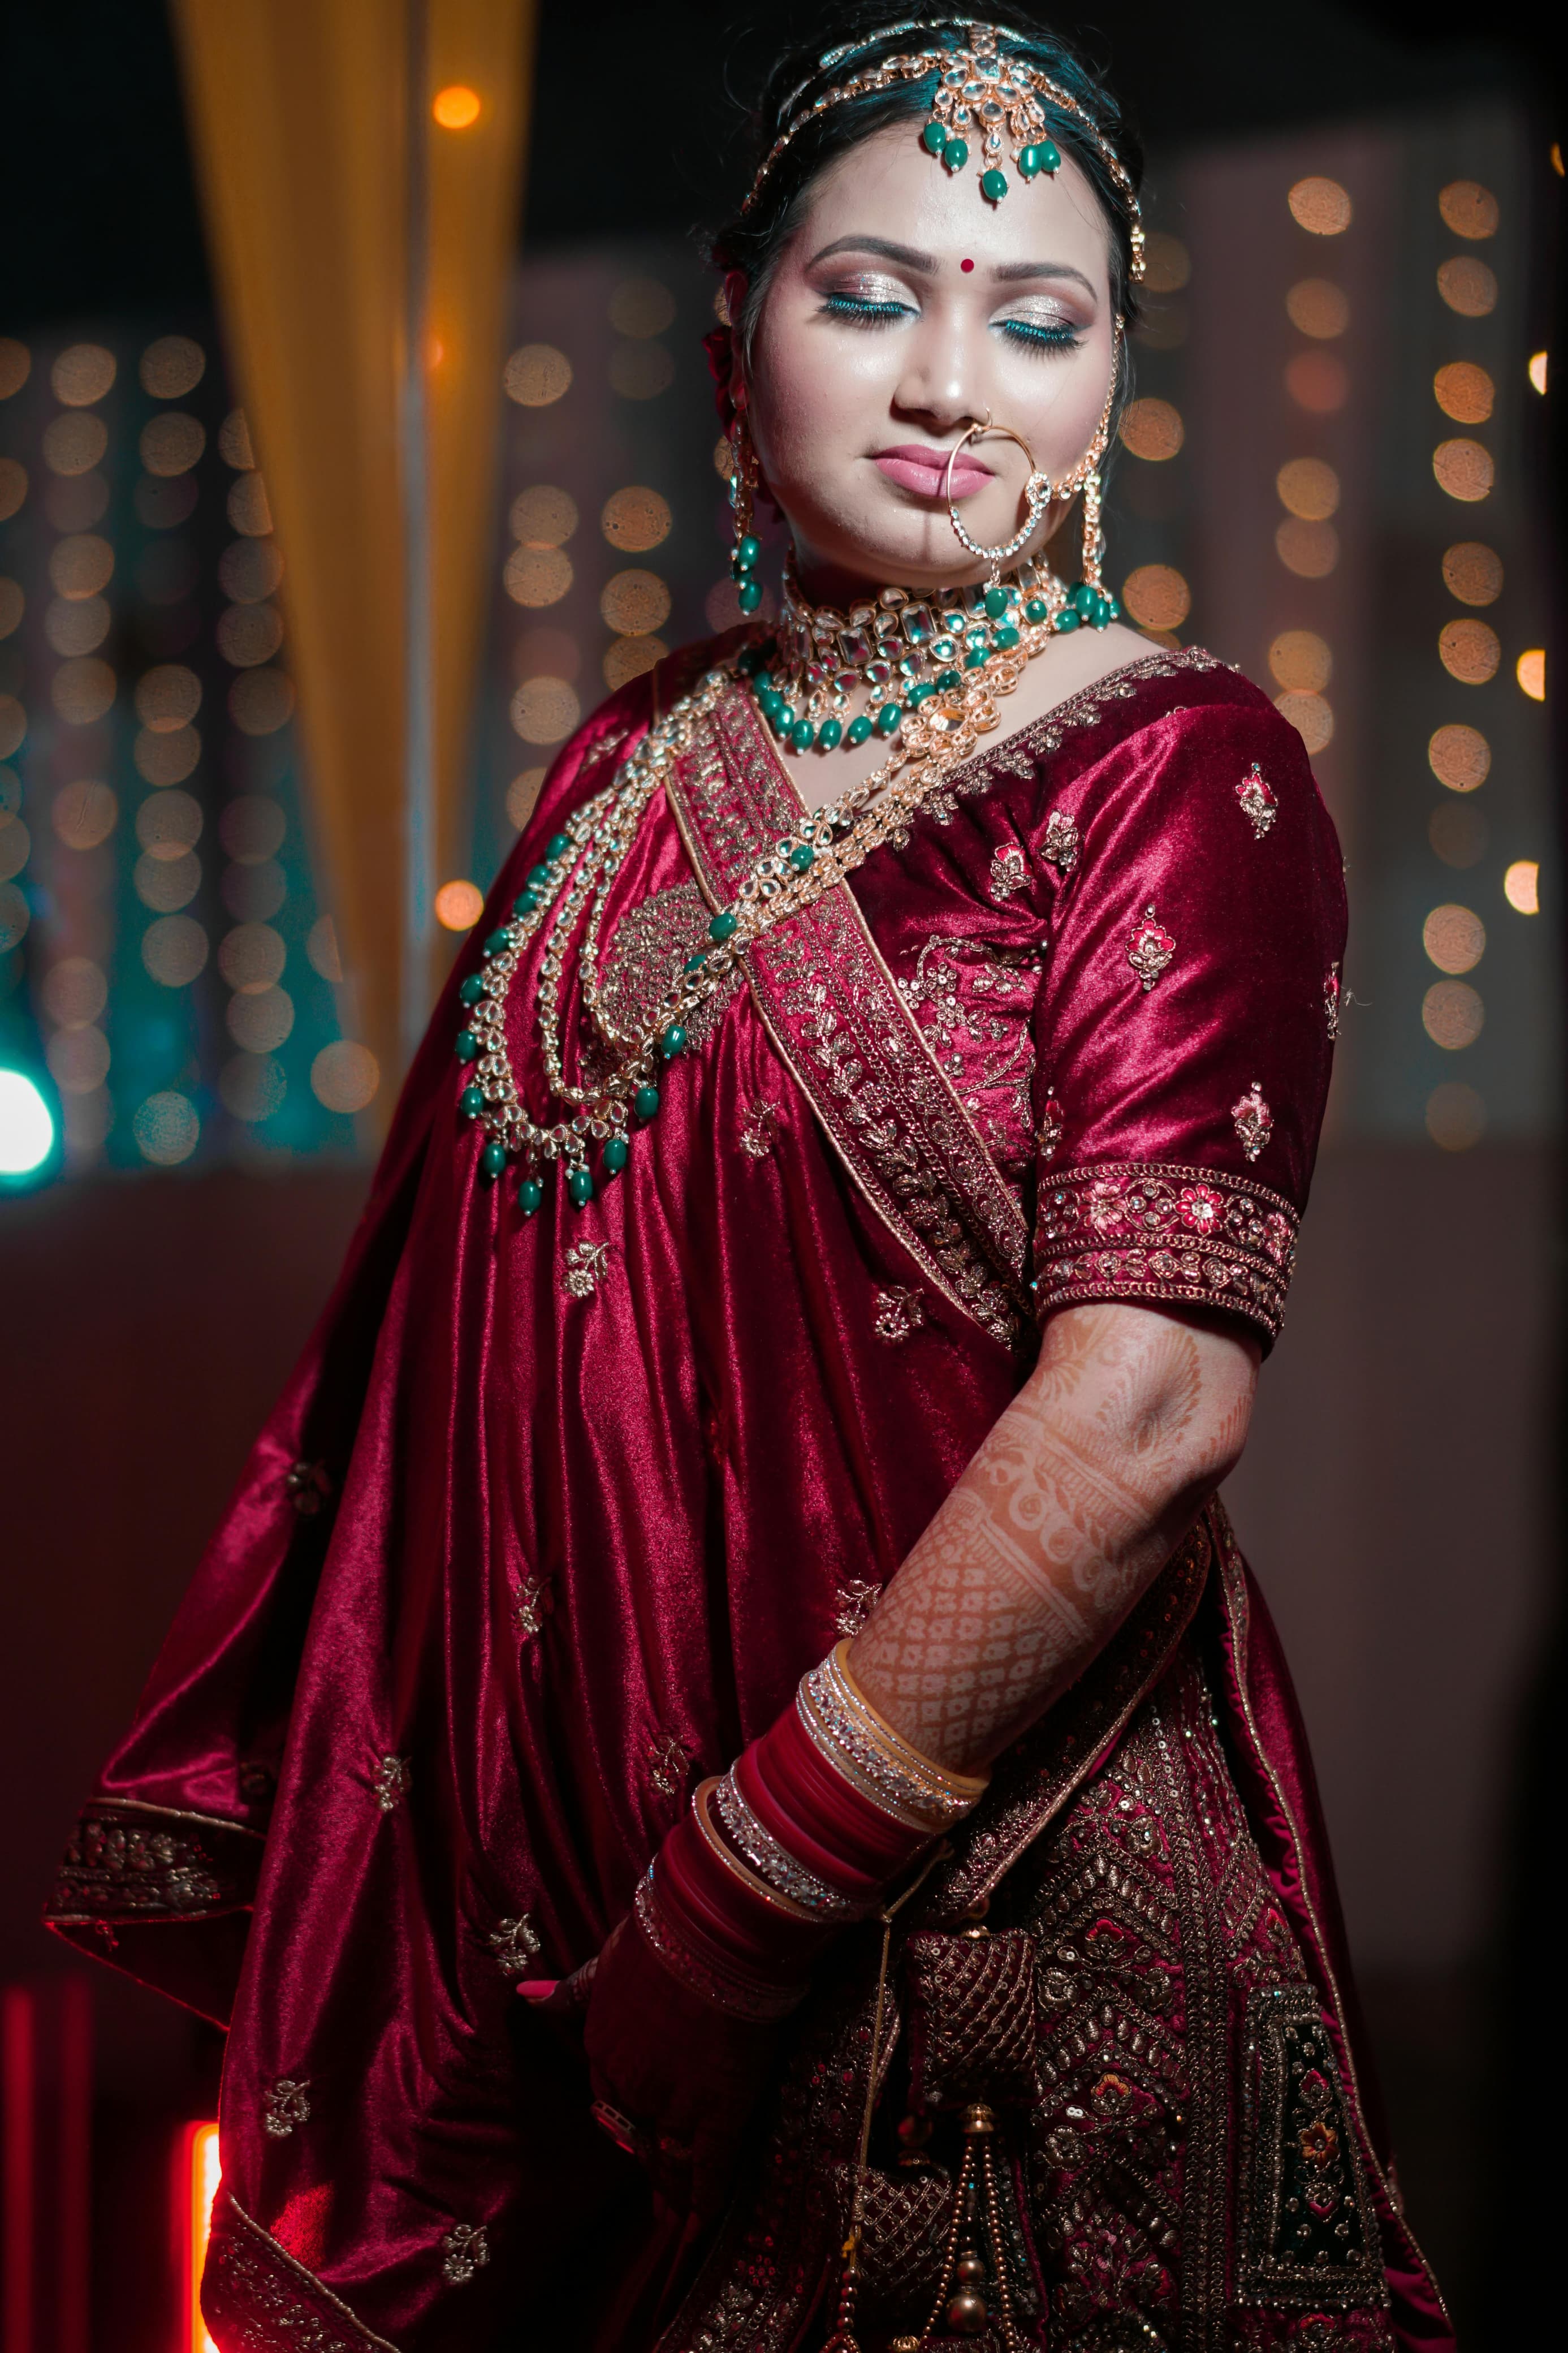
Posted By: 18th December 2024
Bridal Makeup Artist in Madhepura
Introduction In Madhepura, Ladyfair is the premier choice for brides looking to achieve the perfect wedding day look with our professional at-home bridal makeup services. Whether you desire a traditional bridal look, an HD finish, or the flawless perfection of airbrush makeup, our expert makeup artist in Madhepura ensures that you shine on your special day. Contact us today at 7004721239 to schedule your appointment. Why Choose Ladyfair for Bridal Makeup in Madhepura Experienced Makeup Artist Our makeup artist in Madhepura has years of experience in bridal makeup, creating personalized looks that complement your natural beauty and align with your style and preferences. Convenient At-Home Service Forget the stress of traveling to a salon. Ladyfair brings luxury beauty treatments directly to your doorstep with our at-home bridal makeup services, offering a truly personalized experience. Premium Makeup Products We use only high-quality, professional-grade makeup products to ensure a flawless, long-lasting look that remains perfect throughout your big day. Bridal Makeup Pricing in Madhepura Our bridal makeup services in Madhepura are tailored to fit different styles and budgets: Basic Bridal Makeup: ₹10,000 HD Bridal Makeup: ₹12,000 Airbrush Bridal Makeup: ₹18,000 For engagement and reception makeup: Basic Engagement/Reception Makeup: ₹6,000 HD Engagement/Reception Makeup: ₹8,000 Airbrush Engagement/Reception Makeup: ₹12,000 For parties: Basic Party Makeup: ₹2,500 HD Party Makeup: ₹3,500 Popular Bridal Makeup Styles in Madhepura Traditional Bridal Makeup Our traditional bridal makeup in Madhepura incorporates bold colors and intricate detailing to complement your wedding attire, creating an elegant and timeless look. HD Bridal Makeup For a high-definition finish that looks flawless both in photos and in person, HD bridal makeup is the perfect choice for brides who want a picture-perfect appearance all day. Airbrush Bridal Makeup Our airbrush makeup offers a lightweight, full-coverage finish that lasts all day, giving you a smooth and natural look while ensuring long-lasting perfection. How to Book Your Bridal Makeup with Ladyfair in Madhepura Initial Contact: Call us at 7004721239 to discuss your makeup needs and schedule your appointment. Consultation Session: Meet with our makeup artist to discuss your wedding look, review your attire, and plan the perfect makeup style. Makeup Trial: We offer trial sessions to help you preview your bridal makeup look and make any adjustments. Wedding Day Makeup: On your wedding day, our makeup artist will arrive at your location in Madhepura to provide flawless, hassle-free makeup service. Testimonials from Brides in Madhepura Priya R., Madhepura: "Ladyfair provided amazing service on my wedding day. The airbrush makeup looked flawless and lasted all day." Ritu K., Madhepura: "I loved the HD makeup! It was perfect for my photos, and the at-home service was so convenient." Sneha S., Madhepura: "My traditional bridal makeup was exactly what I wanted, and Ladyfair made the entire process stress-free." Preparing for Your Bridal Makeup Session To get the best results for your bridal makeup: Stay Hydrated: Keep your skin looking fresh by drinking plenty of water. Consistent Skincare: Stick to your regular skincare routine to maintain healthy, glowing skin. Avoid New Products: Use familiar products to prevent any reactions before your wedding day. Clear Communication: Discuss your makeup preferences and any concerns with our artist during the consultation. Additional Beauty Services by Ladyfair Beyond bridal makeup, Ladyfair offers a variety of beauty services in Madhepura: Engagement and Reception Makeup: Customized looks for all pre-wedding events. Party Makeup: Perfect for birthdays, anniversaries, and special occasions. Everyday Makeup: Enhance your daily look with our expert makeup services. Special Occasion Makeup: Professional makeup for parties, celebrations, and formal events. The Future of Bridal Makeup in Madhepura Ladyfair is dedicated to setting new standards in bridal beauty in Madhepura with our innovative at-home services. As we continue to offer exceptional service, more brides are choosing Ladyfair as their preferred makeup provider. Q&A with Ladyfair’s Bridal Makeup Artist in Madhepura Q1: What makes Ladyfair the best choice for bridal makeup in Madhepura? A1: Ladyfair offers expert bridal makeup services at home, using high-quality products to ensure a flawless and long-lasting look. Q2: What are the prices for bridal makeup in Madhepura? A2: Our bridal makeup packages start at ₹10,000 for basic makeup, ₹12,000 for HD makeup, and ₹18,000 for airbrush makeup. Q3: How do I book Ladyfair’s bridal makeup services in Madhepura? A3: You can book our services by calling 7004721239. We also offer consultations and trial sessions to ensure you get the look you want. Q4: What bridal makeup styles does Ladyfair offer in Madhepura? A4: Ladyfair offers traditional, HD, and airbrush bridal makeup to suit different preferences and needs. Q5: Are makeup trials available before my wedding? A5: Yes, we offer trial sessions so you can finalize your bridal look ahead of time. Q6: What products does Ladyfair use for bridal makeup? A6: We use professional-grade, high-quality makeup products that are safe for all skin types and ensure a flawless finish. Q7: What other services does Ladyfair provide in Madhepura? A7: In addition to bridal makeup, we offer makeup for engagements, receptions, parties, and other special occasions. Ladyfair is your ultimate choice for professional, at-home bridal makeup services in Madhepura, ensuring a flawless and stress-free experience on your special day.

Posted By: 18th December 2024
Bridal Makeup Artist in Asarganj
Introduction In Asarganj, Ladyfair is the premier choice for brides looking to achieve the perfect wedding day look with our professional at-home bridal makeup services. Whether you desire a traditional bridal look, an HD finish, or the flawless perfection of airbrush makeup, our expert makeup artist in Asarganj ensures that you shine on your special day. Contact us today at 7004721239 to schedule your appointment. Why Choose Ladyfair for Bridal Makeup in Asarganj Experienced Makeup Artist Our makeup artist in Asarganj has years of experience in bridal makeup, creating personalized looks that complement your natural beauty and align with your style and preferences. Convenient At-Home Service Forget the stress of traveling to a salon. Ladyfair brings luxury beauty treatments directly to your doorstep with our at-home bridal makeup services, offering a truly personalized experience. Premium Makeup Products We use only high-quality, professional-grade makeup products to ensure a flawless, long-lasting look that remains perfect throughout your big day. Bridal Makeup Pricing in Asarganj Our bridal makeup services in Asarganj are tailored to fit different styles and budgets: Basic Bridal Makeup: ₹10,000 HD Bridal Makeup: ₹12,000 Airbrush Bridal Makeup: ₹18,000 For engagement and reception makeup: Basic Engagement/Reception Makeup: ₹6,000 HD Engagement/Reception Makeup: ₹8,000 Airbrush Engagement/Reception Makeup: ₹12,000 For parties: Basic Party Makeup: ₹2,500 HD Party Makeup: ₹3,500 Popular Bridal Makeup Styles in Asarganj Traditional Bridal Makeup Our traditional bridal makeup in Asarganj incorporates bold colors and intricate detailing to complement your wedding attire, creating an elegant and timeless look. HD Bridal Makeup For a high-definition finish that looks flawless both in photos and in person, HD bridal makeup is the perfect choice for brides who want a picture-perfect appearance all day. Airbrush Bridal Makeup Our airbrush makeup offers a lightweight, full-coverage finish that lasts all day, giving you a smooth and natural look while ensuring long-lasting perfection. How to Book Your Bridal Makeup with Ladyfair in Asarganj Initial Contact: Call us at 7004721239 to discuss your makeup needs and schedule your appointment. Consultation Session: Meet with our makeup artist to discuss your wedding look, review your attire, and plan the perfect makeup style. Makeup Trial: We offer trial sessions to help you preview your bridal makeup look and make any adjustments. Wedding Day Makeup: On your wedding day, our makeup artist will arrive at your location in Asarganj to provide flawless, hassle-free makeup service. Testimonials from Brides in Asarganj Priya R., Asarganj: "Ladyfair provided amazing service on my wedding day. The airbrush makeup looked flawless and lasted all day." Ritu K., Asarganj: "I loved the HD makeup! It was perfect for my photos, and the at-home service was so convenient." Sneha S., Asarganj: "My traditional bridal makeup was exactly what I wanted, and Ladyfair made the entire process stress-free." Preparing for Your Bridal Makeup Session To get the best results for your bridal makeup: Stay Hydrated: Keep your skin looking fresh by drinking plenty of water. Consistent Skincare: Stick to your regular skincare routine to maintain healthy, glowing skin. Avoid New Products: Use familiar products to prevent any reactions before your wedding day. Clear Communication: Discuss your makeup preferences and any concerns with our artist during the consultation. Additional Beauty Services by Ladyfair Beyond bridal makeup, Ladyfair offers a variety of beauty services in Asarganj: Engagement and Reception Makeup: Customized looks for all pre-wedding events. Party Makeup: Perfect for birthdays, anniversaries, and special occasions. Everyday Makeup: Enhance your daily look with our expert makeup services. Special Occasion Makeup: Professional makeup for parties, celebrations, and formal events. The Future of Bridal Makeup in Asarganj Ladyfair is dedicated to setting new standards in bridal beauty in Asarganj with our innovative at-home services. As we continue to offer exceptional service, more brides are choosing Ladyfair as their preferred makeup provider. Q&A with Ladyfair’s Bridal Makeup Artist in Asarganj Q1: What makes Ladyfair the best choice for bridal makeup in Asarganj? A1: Ladyfair offers expert bridal makeup services at home, using high-quality products to ensure a flawless and long-lasting look. Q2: What are the prices for bridal makeup in Asarganj? A2: Our bridal makeup packages start at ₹10,000 for basic makeup, ₹12,000 for HD makeup, and ₹18,000 for airbrush makeup. Q3: How do I book Ladyfair’s bridal makeup services in Asarganj? A3: You can book our services by calling 7004721239. We also offer consultations and trial sessions to ensure you get the look you want. Q4: What bridal makeup styles does Ladyfair offer in Asarganj? A4: Ladyfair offers traditional, HD, and airbrush bridal makeup to suit different preferences and needs. Q5: Are makeup trials available before my wedding? A5: Yes, we offer trial sessions so you can finalize your bridal look ahead of time. Q6: What products does Ladyfair use for bridal makeup? A6: We use professional-grade, high-quality makeup products that are safe for all skin types and ensure a flawless finish. Q7: What other services does Ladyfair provide in Asarganj? A7: In addition to bridal makeup, we offer makeup for engagements, receptions, parties, and other special occasions. Ladyfair is your ultimate choice for professional, at-home bridal makeup services in Asarganj, ensuring a flawless and stress-free experience on your special day.

Posted By: 18th December 2024
Bridal Makeup Artist in Tarapur
Introduction In Tarapur, Ladyfair is the premier choice for brides looking to achieve the perfect wedding day look with our professional at-home bridal makeup services. Whether you desire a traditional bridal look, an HD finish, or the flawless perfection of airbrush makeup, our expert makeup artist in Tarapur ensures that you shine on your special day. Contact us today at 7004721239 to schedule your appointment. Why Choose Ladyfair for Bridal Makeup in Tarapur Experienced Makeup Artist Our makeup artist in Tarapur has years of experience in bridal makeup, creating personalized looks that complement your natural beauty and align with your style and preferences. Convenient At-Home Service Forget the stress of traveling to a salon. Ladyfair brings luxury beauty treatments directly to your doorstep with our at-home bridal makeup services, offering a truly personalized experience. Premium Makeup Products We use only high-quality, professional-grade makeup products to ensure a flawless, long-lasting look that remains perfect throughout your big day. Bridal Makeup Pricing in Tarapur Our bridal makeup services in Tarapur are tailored to fit different styles and budgets: Basic Bridal Makeup: ₹10,000 HD Bridal Makeup: ₹12,000 Airbrush Bridal Makeup: ₹18,000 For engagement and reception makeup: Basic Engagement/Reception Makeup: ₹6,000 HD Engagement/Reception Makeup: ₹8,000 Airbrush Engagement/Reception Makeup: ₹12,000 For parties: Basic Party Makeup: ₹2,500 HD Party Makeup: ₹3,500 Popular Bridal Makeup Styles in Tarapur Traditional Bridal Makeup Our traditional bridal makeup in Tarapur incorporates bold colors and intricate detailing to complement your wedding attire, creating an elegant and timeless look. HD Bridal Makeup For a high-definition finish that looks flawless both in photos and in person, HD bridal makeup is the perfect choice for brides who want a picture-perfect appearance all day. Airbrush Bridal Makeup Our airbrush makeup offers a lightweight, full-coverage finish that lasts all day, giving you a smooth and natural look while ensuring long-lasting perfection. How to Book Your Bridal Makeup with Ladyfair in Tarapur Initial Contact: Call us at 7004721239 to discuss your makeup needs and schedule your appointment. Consultation Session: Meet with our makeup artist to discuss your wedding look, review your attire, and plan the perfect makeup style. Makeup Trial: We offer trial sessions to help you preview your bridal makeup look and make any adjustments. Wedding Day Makeup: On your wedding day, our makeup artist will arrive at your location in Tarapur to provide flawless, hassle-free makeup service. Testimonials from Brides in Tarapur Priya R., Tarapur: "Ladyfair provided amazing service on my wedding day. The airbrush makeup looked flawless and lasted all day." Ritu K., Tarapur: "I loved the HD makeup! It was perfect for my photos, and the at-home service was so convenient." Sneha S., Tarapur: "My traditional bridal makeup was exactly what I wanted, and Ladyfair made the entire process stress-free." Preparing for Your Bridal Makeup Session To get the best results for your bridal makeup: Stay Hydrated: Keep your skin looking fresh by drinking plenty of water. Consistent Skincare: Stick to your regular skincare routine to maintain healthy, glowing skin. Avoid New Products: Use familiar products to prevent any reactions before your wedding day. Clear Communication: Discuss your makeup preferences and any concerns with our artist during the consultation. Additional Beauty Services by Ladyfair Beyond bridal makeup, Ladyfair offers a variety of beauty services in Tarapur: Engagement and Reception Makeup: Customized looks for all pre-wedding events. Party Makeup: Perfect for birthdays, anniversaries, and special occasions. Everyday Makeup: Enhance your daily look with our expert makeup services. Special Occasion Makeup: Professional makeup for parties, celebrations, and formal events. The Future of Bridal Makeup in Tarapur Ladyfair is dedicated to setting new standards in bridal beauty in Tarapur with our innovative at-home services. As we continue to offer exceptional service, more brides are choosing Ladyfair as their preferred makeup provider. Q&A with Ladyfair’s Bridal Makeup Artist in Tarapur Q1: What makes Ladyfair the best choice for bridal makeup in Tarapur? A1: Ladyfair offers expert bridal makeup services at home, using high-quality products to ensure a flawless and long-lasting look. Q2: What are the prices for bridal makeup in Tarapur? A2: Our bridal makeup packages start at ₹10,000 for basic makeup, ₹12,000 for HD makeup, and ₹18,000 for airbrush makeup. Q3: How do I book Ladyfair’s bridal makeup services in Tarapur? A3: You can book our services by calling 7004721239. We also offer consultations and trial sessions to ensure you get the look you want. Q4: What bridal makeup styles does Ladyfair offer in Tarapur? A4: Ladyfair offers traditional, HD, and airbrush bridal makeup to suit different preferences and needs. Q5: Are makeup trials available before my wedding? A5: Yes, we offer trial sessions so you can finalize your bridal look ahead of time. Q6: What products does Ladyfair use for bridal makeup? A6: We use professional-grade, high-quality makeup products that are safe for all skin types and ensure a flawless finish. Q7: What other services does Ladyfair provide in Tarapur? A7: In addition to bridal makeup, we offer makeup for engagements, receptions, parties, and other special occasions. Ladyfair is your ultimate choice for professional, at-home bridal makeup services in Tarapur, ensuring a flawless and stress-free experience on your special day.

Posted By: 18th December 2024
Bridal Makeup Artist in Tetiyabambar
Introduction In Tetiyabambar, Ladyfair is the premier choice for brides looking to achieve the perfect wedding day look with our professional at-home bridal makeup services. Whether you desire a traditional bridal look, an HD finish, or the flawless perfection of airbrush makeup, our expert makeup artist in Tetiyabambar ensures that you shine on your special day. Contact us today at 7004721239 to schedule your appointment. Why Choose Ladyfair for Bridal Makeup in Tetiyabambar Experienced Makeup Artist Our makeup artist in Tetiyabambar has years of experience in bridal makeup, creating personalized looks that complement your natural beauty and align with your style and preferences. Convenient At-Home Service Forget the stress of traveling to a salon. Ladyfair brings luxury beauty treatments directly to your doorstep with our at-home bridal makeup services, offering a truly personalized experience. Premium Makeup Products We use only high-quality, professional-grade makeup products to ensure a flawless, long-lasting look that remains perfect throughout your big day. Bridal Makeup Pricing in Tetiyabambar Our bridal makeup services in Tetiyabambar are tailored to fit different styles and budgets: Basic Bridal Makeup: ₹10,000 HD Bridal Makeup: ₹12,000 Airbrush Bridal Makeup: ₹18,000 For engagement and reception makeup: Basic Engagement/Reception Makeup: ₹6,000 HD Engagement/Reception Makeup: ₹8,000 Airbrush Engagement/Reception Makeup: ₹12,000 For parties: Basic Party Makeup: ₹2,500 HD Party Makeup: ₹3,500 Popular Bridal Makeup Styles in Tetiyabambar Traditional Bridal Makeup Our traditional bridal makeup in Tetiyabambar incorporates bold colors and intricate detailing to complement your wedding attire, creating an elegant and timeless look. HD Bridal Makeup For a high-definition finish that looks flawless both in photos and in person, HD bridal makeup is the perfect choice for brides who want a picture-perfect appearance all day. Airbrush Bridal Makeup Our airbrush makeup offers a lightweight, full-coverage finish that lasts all day, giving you a smooth and natural look while ensuring long-lasting perfection. How to Book Your Bridal Makeup with Ladyfair in Tetiyabambar Initial Contact: Call us at 7004721239 to discuss your makeup needs and schedule your appointment. Consultation Session: Meet with our makeup artist to discuss your wedding look, review your attire, and plan the perfect makeup style. Makeup Trial: We offer trial sessions to help you preview your bridal makeup look and make any adjustments. Wedding Day Makeup: On your wedding day, our makeup artist will arrive at your location in Tetiyabambar to provide flawless, hassle-free makeup service. Testimonials from Brides in Tetiyabambar Priya R., Tetiyabambar: "Ladyfair provided amazing service on my wedding day. The airbrush makeup looked flawless and lasted all day." Ritu K., Tetiyabambar: "I loved the HD makeup! It was perfect for my photos, and the at-home service was so convenient." Sneha S., Tetiyabambar: "My traditional bridal makeup was exactly what I wanted, and Ladyfair made the entire process stress-free." Preparing for Your Bridal Makeup Session To get the best results for your bridal makeup: Stay Hydrated: Keep your skin looking fresh by drinking plenty of water. Consistent Skincare: Stick to your regular skincare routine to maintain healthy, glowing skin. Avoid New Products: Use familiar products to prevent any reactions before your wedding day. Clear Communication: Discuss your makeup preferences and any concerns with our artist during the consultation. Additional Beauty Services by Ladyfair Beyond bridal makeup, Ladyfair offers a variety of beauty services in Tetiyabambar: Engagement and Reception Makeup: Customized looks for all pre-wedding events. Party Makeup: Perfect for birthdays, anniversaries, and special occasions. Everyday Makeup: Enhance your daily look with our expert makeup services. Special Occasion Makeup: Professional makeup for parties, celebrations, and formal events. The Future of Bridal Makeup in Tetiyabambar Ladyfair is dedicated to setting new standards in bridal beauty in Tetiyabambar with our innovative at-home services. As we continue to offer exceptional service, more brides are choosing Ladyfair as their preferred makeup provider. Q&A with Ladyfair’s Bridal Makeup Artist in Tetiyabambar Q1: What makes Ladyfair the best choice for bridal makeup in Tetiyabambar? A1: Ladyfair offers expert bridal makeup services at home, using high-quality products to ensure a flawless and long-lasting look. Q2: What are the prices for bridal makeup in Tetiyabambar? A2: Our bridal makeup packages start at ₹10,000 for basic makeup, ₹12,000 for HD makeup, and ₹18,000 for airbrush makeup. Q3: How do I book Ladyfair’s bridal makeup services in Tetiyabambar? A3: You can book our services by calling 7004721239. We also offer consultations and trial sessions to ensure you get the look you want. Q4: What bridal makeup styles does Ladyfair offer in Tetiyabambar? A4: Ladyfair offers traditional, HD, and airbrush bridal makeup to suit different preferences and needs. Q5: Are makeup trials available before my wedding? A5: Yes, we offer trial sessions so you can finalize your bridal look ahead of time. Q6: What products does Ladyfair use for bridal makeup? A6: We use professional-grade, high-quality makeup products that are safe for all skin types and ensure a flawless finish. Q7: What other services does Ladyfair provide in Tetiyabambar? A7: In addition to bridal makeup, we offer makeup for engagements, receptions, parties, and other special occasions. Ladyfair is your ultimate choice for professional, at-home bridal makeup services in Tetiyabambar, ensuring a flawless and stress-free experience on your special day.

Posted By: 18th December 2024
Bridal Makeup Artist in H. Kharagpur
Introduction In H. Kharagpur, Ladyfair is the premier choice for brides looking to achieve the perfect wedding day look with our professional at-home bridal makeup services. Whether you desire a traditional bridal look, an HD finish, or the flawless perfection of airbrush makeup, our expert makeup artist in H. Kharagpur ensures that you shine on your special day. Contact us today at 7004721239 to schedule your appointment. Why Choose Ladyfair for Bridal Makeup in H. Kharagpur Experienced Makeup Artist Our makeup artist in H. Kharagpur has years of experience in bridal makeup, creating personalized looks that complement your natural beauty and align with your style and preferences. Convenient At-Home Service Forget the stress of traveling to a salon. Ladyfair brings luxury beauty treatments directly to your doorstep with our at-home bridal makeup services, offering a truly personalized experience. Premium Makeup Products We use only high-quality, professional-grade makeup products to ensure a flawless, long-lasting look that remains perfect throughout your big day. Bridal Makeup Pricing in H. Kharagpur Our bridal makeup services in H. Kharagpur are tailored to fit different styles and budgets: Basic Bridal Makeup: ₹10,000 HD Bridal Makeup: ₹12,000 Airbrush Bridal Makeup: ₹18,000 For engagement and reception makeup: Basic Engagement/Reception Makeup: ₹6,000 HD Engagement/Reception Makeup: ₹8,000 Airbrush Engagement/Reception Makeup: ₹12,000 For parties: Basic Party Makeup: ₹2,500 HD Party Makeup: ₹3,500 Popular Bridal Makeup Styles in H. Kharagpur Traditional Bridal Makeup Our traditional bridal makeup in H. Kharagpur incorporates bold colors and intricate detailing to complement your wedding attire, creating an elegant and timeless look. HD Bridal Makeup For a high-definition finish that looks flawless both in photos and in person, HD bridal makeup is the perfect choice for brides who want a picture-perfect appearance all day. Airbrush Bridal Makeup Our airbrush makeup offers a lightweight, full-coverage finish that lasts all day, giving you a smooth and natural look while ensuring long-lasting perfection. How to Book Your Bridal Makeup with Ladyfair in H. Kharagpur Initial Contact: Call us at 7004721239 to discuss your makeup needs and schedule your appointment. Consultation Session: Meet with our makeup artist to discuss your wedding look, review your attire, and plan the perfect makeup style. Makeup Trial: We offer trial sessions to help you preview your bridal makeup look and make any adjustments. Wedding Day Makeup: On your wedding day, our makeup artist will arrive at your location in H. Kharagpur to provide flawless, hassle-free makeup service. Testimonials from Brides in H. Kharagpur Priya R., H. Kharagpur: "Ladyfair provided amazing service on my wedding day. The airbrush makeup looked flawless and lasted all day." Ritu K., H. Kharagpur: "I loved the HD makeup! It was perfect for my photos, and the at-home service was so convenient." Sneha S., H. Kharagpur: "My traditional bridal makeup was exactly what I wanted, and Ladyfair made the entire process stress-free." Preparing for Your Bridal Makeup Session To get the best results for your bridal makeup: Stay Hydrated: Keep your skin looking fresh by drinking plenty of water. Consistent Skincare: Stick to your regular skincare routine to maintain healthy, glowing skin. Avoid New Products: Use familiar products to prevent any reactions before your wedding day. Clear Communication: Discuss your makeup preferences and any concerns with our artist during the consultation. Additional Beauty Services by Ladyfair Beyond bridal makeup, Ladyfair offers a variety of beauty services in H. Kharagpur: Engagement and Reception Makeup: Customized looks for all pre-wedding events. Party Makeup: Perfect for birthdays, anniversaries, and special occasions. Everyday Makeup: Enhance your daily look with our expert makeup services. Special Occasion Makeup: Professional makeup for parties, celebrations, and formal events. The Future of Bridal Makeup in H. Kharagpur Ladyfair is dedicated to setting new standards in bridal beauty in H. Kharagpur with our innovative at-home services. As we continue to offer exceptional service, more brides are choosing Ladyfair as their preferred makeup provider. Q&A with Ladyfair’s Bridal Makeup Artist in H. Kharagpur Q1: What makes Ladyfair the best choice for bridal makeup in H. Kharagpur? A1: Ladyfair offers expert bridal makeup services at home, using high-quality products to ensure a flawless and long-lasting look. Q2: What are the prices for bridal makeup in H. Kharagpur? A2: Our bridal makeup packages start at ₹10,000 for basic makeup, ₹12,000 for HD makeup, and ₹18,000 for airbrush makeup. Q3: How do I book Ladyfair’s bridal makeup services in H. Kharagpur? A3: You can book our services by calling 7004721239. We also offer consultations and trial sessions to ensure you get the look you want. Q4: What bridal makeup styles does Ladyfair offer in H. Kharagpur? A4: Ladyfair offers traditional, HD, and airbrush bridal makeup to suit different preferences and needs. Q5: Are makeup trials available before my wedding? A5: Yes, we offer trial sessions so you can finalize your bridal look ahead of time. Q6: What products does Ladyfair use for bridal makeup? A6: We use professional-grade, high-quality makeup products that are safe for all skin types and ensure a flawless finish. Q7: What other services does Ladyfair provide in H. Kharagpur? A7: In addition to bridal makeup, we offer makeup for engagements, receptions, parties, and other special occasions. Ladyfair is your ultimate choice for professional, at-home bridal makeup services in H. Kharagpur, ensuring a flawless and stress-free experience on your special day.

Posted By: 18th December 2024
Bridal Makeup Artist in Dharhara
Introduction In Dharhara, Ladyfair is the premier choice for brides looking to achieve the perfect wedding day look with our professional at-home bridal makeup services. Whether you desire a traditional bridal look, an HD finish, or the flawless perfection of airbrush makeup, our expert makeup artist in Dharhara ensures that you shine on your special day. Contact us today at 7004721239 to schedule your appointment. Why Choose Ladyfair for Bridal Makeup in Dharhara Experienced Makeup Artist Our makeup artist in Dharhara has years of experience in bridal makeup, creating personalized looks that complement your natural beauty and align with your style and preferences. Convenient At-Home Service Forget the stress of traveling to a salon. Ladyfair brings luxury beauty treatments directly to your doorstep with our at-home bridal makeup services, offering a truly personalized experience. Premium Makeup Products We use only high-quality, professional-grade makeup products to ensure a flawless, long-lasting look that remains perfect throughout your big day. Bridal Makeup Pricing in Dharhara Our bridal makeup services in Dharhara are tailored to fit different styles and budgets: Basic Bridal Makeup: ₹10,000 HD Bridal Makeup: ₹12,000 Airbrush Bridal Makeup: ₹18,000 For engagement and reception makeup: Basic Engagement/Reception Makeup: ₹6,000 HD Engagement/Reception Makeup: ₹8,000 Airbrush Engagement/Reception Makeup: ₹12,000 For parties: Basic Party Makeup: ₹2,500 HD Party Makeup: ₹3,500 Popular Bridal Makeup Styles in Dharhara Traditional Bridal Makeup Our traditional bridal makeup in Dharhara incorporates bold colors and intricate detailing to complement your wedding attire, creating an elegant and timeless look. HD Bridal Makeup For a high-definition finish that looks flawless both in photos and in person, HD bridal makeup is the perfect choice for brides who want a picture-perfect appearance all day. Airbrush Bridal Makeup Our airbrush makeup offers a lightweight, full-coverage finish that lasts all day, giving you a smooth and natural look while ensuring long-lasting perfection. How to Book Your Bridal Makeup with Ladyfair in Dharhara Initial Contact: Call us at 7004721239 to discuss your makeup needs and schedule your appointment. Consultation Session: Meet with our makeup artist to discuss your wedding look, review your attire, and plan the perfect makeup style. Makeup Trial: We offer trial sessions to help you preview your bridal makeup look and make any adjustments. Wedding Day Makeup: On your wedding day, our makeup artist will arrive at your location in Dharhara to provide flawless, hassle-free makeup service. Testimonials from Brides in Dharhara Priya R., Dharhara: "Ladyfair provided amazing service on my wedding day. The airbrush makeup looked flawless and lasted all day." Ritu K., Dharhara: "I loved the HD makeup! It was perfect for my photos, and the at-home service was so convenient." Sneha S., Dharhara: "My traditional bridal makeup was exactly what I wanted, and Ladyfair made the entire process stress-free." Preparing for Your Bridal Makeup Session To get the best results for your bridal makeup: Stay Hydrated: Keep your skin looking fresh by drinking plenty of water. Consistent Skincare: Stick to your regular skincare routine to maintain healthy, glowing skin. Avoid New Products: Use familiar products to prevent any reactions before your wedding day. Clear Communication: Discuss your makeup preferences and any concerns with our artist during the consultation. Additional Beauty Services by Ladyfair Beyond bridal makeup, Ladyfair offers a variety of beauty services in Dharhara: Engagement and Reception Makeup: Customized looks for all pre-wedding events. Party Makeup: Perfect for birthdays, anniversaries, and special occasions. Everyday Makeup: Enhance your daily look with our expert makeup services. Special Occasion Makeup: Professional makeup for parties, celebrations, and formal events. The Future of Bridal Makeup in Dharhara Ladyfair is dedicated to setting new standards in bridal beauty in Dharhara with our innovative at-home services. As we continue to offer exceptional service, more brides are choosing Ladyfair as their preferred makeup provider. Q&A with Ladyfair’s Bridal Makeup Artist in Dharhara Q1: What makes Ladyfair the best choice for bridal makeup in Dharhara? A1: Ladyfair offers expert bridal makeup services at home, using high-quality products to ensure a flawless and long-lasting look. Q2: What are the prices for bridal makeup in Dharhara? A2: Our bridal makeup packages start at ₹10,000 for basic makeup, ₹12,000 for HD makeup, and ₹18,000 for airbrush makeup. Q3: How do I book Ladyfair’s bridal makeup services in Dharhara? A3: You can book our services by calling 7004721239. We also offer consultations and trial sessions to ensure you get the look you want. Q4: What bridal makeup styles does Ladyfair offer in Dharhara? A4: Ladyfair offers traditional, HD, and airbrush bridal makeup to suit different preferences and needs. Q5: Are makeup trials available before my wedding? A5: Yes, we offer trial sessions so you can finalize your bridal look ahead of time. Q6: What products does Ladyfair use for bridal makeup? A6: We use professional-grade, high-quality makeup products that are safe for all skin types and ensure a flawless finish. Q7: What other services does Ladyfair provide in Dharhara? A7: In addition to bridal makeup, we offer makeup for engagements, receptions, parties, and other special occasions. Ladyfair is your ultimate choice for professional, at-home bridal makeup services in Dharhara, ensuring a flawless and stress-free experience on your special day.

Posted By: 18th December 2024
Bridal Makeup Artist in Bariyarpur
Introduction In Bariyarpur, Ladyfair is the premier choice for brides looking to achieve the perfect wedding day look with our professional at-home bridal makeup services. Whether you desire a traditional bridal look, an HD finish, or the flawless perfection of airbrush makeup, our expert makeup artist in Bariyarpur ensures that you shine on your special day. Contact us today at 7004721239 to schedule your appointment. Why Choose Ladyfair for Bridal Makeup in Bariyarpur Experienced Makeup Artist Our makeup artist in Bariyarpur has years of experience in bridal makeup, creating personalized looks that complement your natural beauty and align with your style and preferences. Convenient At-Home Service Forget the stress of traveling to a salon. Ladyfair brings luxury beauty treatments directly to your doorstep with our at-home bridal makeup services, offering a truly personalized experience. Premium Makeup Products We use only high-quality, professional-grade makeup products to ensure a flawless, long-lasting look that remains perfect throughout your big day. Bridal Makeup Pricing in Bariyarpur Our bridal makeup services in Bariyarpur are tailored to fit different styles and budgets: Basic Bridal Makeup: ₹10,000 HD Bridal Makeup: ₹12,000 Airbrush Bridal Makeup: ₹18,000 For engagement and reception makeup: Basic Engagement/Reception Makeup: ₹6,000 HD Engagement/Reception Makeup: ₹8,000 Airbrush Engagement/Reception Makeup: ₹12,000 For parties: Basic Party Makeup: ₹2,500 HD Party Makeup: ₹3,500 Popular Bridal Makeup Styles in Bariyarpur Traditional Bridal Makeup Our traditional bridal makeup in Bariyarpur incorporates bold colors and intricate detailing to complement your wedding attire, creating an elegant and timeless look. HD Bridal Makeup For a high-definition finish that looks flawless both in photos and in person, HD bridal makeup is the perfect choice for brides who want a picture-perfect appearance all day. Airbrush Bridal Makeup Our airbrush makeup offers a lightweight, full-coverage finish that lasts all day, giving you a smooth and natural look while ensuring long-lasting perfection. How to Book Your Bridal Makeup with Ladyfair in Bariyarpur Initial Contact: Call us at 7004721239 to discuss your makeup needs and schedule your appointment. Consultation Session: Meet with our makeup artist to discuss your wedding look, review your attire, and plan the perfect makeup style. Makeup Trial: We offer trial sessions to help you preview your bridal makeup look and make any adjustments. Wedding Day Makeup: On your wedding day, our makeup artist will arrive at your location in Bariyarpur to provide flawless, hassle-free makeup service. Testimonials from Brides in Bariyarpur Priya R., Bariyarpur: "Ladyfair provided amazing service on my wedding day. The airbrush makeup looked flawless and lasted all day." Ritu K., Bariyarpur: "I loved the HD makeup! It was perfect for my photos, and the at-home service was so convenient." Sneha S., Bariyarpur: "My traditional bridal makeup was exactly what I wanted, and Ladyfair made the entire process stress-free." Preparing for Your Bridal Makeup Session To get the best results for your bridal makeup: Stay Hydrated: Keep your skin looking fresh by drinking plenty of water. Consistent Skincare: Stick to your regular skincare routine to maintain healthy, glowing skin. Avoid New Products: Use familiar products to prevent any reactions before your wedding day. Clear Communication: Discuss your makeup preferences and any concerns with our artist during the consultation. Additional Beauty Services by Ladyfair Beyond bridal makeup, Ladyfair offers a variety of beauty services in Bariyarpur: Engagement and Reception Makeup: Customized looks for all pre-wedding events. Party Makeup: Perfect for birthdays, anniversaries, and special occasions. Everyday Makeup: Enhance your daily look with our expert makeup services. Special Occasion Makeup: Professional makeup for parties, celebrations, and formal events. The Future of Bridal Makeup in Bariyarpur Ladyfair is dedicated to setting new standards in bridal beauty in Bariyarpur with our innovative at-home services. As we continue to offer exceptional service, more brides are choosing Ladyfair as their preferred makeup provider. Q&A with Ladyfair’s Bridal Makeup Artist in Bariyarpur Q1: What makes Ladyfair the best choice for bridal makeup in Bariyarpur? A1: Ladyfair offers expert bridal makeup services at home, using high-quality products to ensure a flawless and long-lasting look. Q2: What are the prices for bridal makeup in Bariyarpur? A2: Our bridal makeup packages start at ₹10,000 for basic makeup, ₹12,000 for HD makeup, and ₹18,000 for airbrush makeup. Q3: How do I book Ladyfair’s bridal makeup services in Bariyarpur? A3: You can book our services by calling 7004721239. We also offer consultations and trial sessions to ensure you get the look you want. Q4: What bridal makeup styles does Ladyfair offer in Bariyarpur? A4: Ladyfair offers traditional, HD, and airbrush bridal makeup to suit different preferences and needs. Q5: Are makeup trials available before my wedding? A5: Yes, we offer trial sessions so you can finalize your bridal look ahead of time. Q6: What products does Ladyfair use for bridal makeup? A6: We use professional-grade, high-quality makeup products that are safe for all skin types and ensure a flawless finish. Q7: What other services does Ladyfair provide in Bariyarpur? A7: In addition to bridal makeup, we offer makeup for engagements, receptions, parties, and other special occasions. Ladyfair is your ultimate choice for professional, at-home bridal makeup services in Bariyarpur, ensuring a flawless and stress-free experience on your special day.

Posted By: 18th December 2024
Best Bridal Makeup in Chausa
Introduction Your wedding day is the most special day of your life, and you deserve to look radiant and beautiful. At Ladyfair, we provide professional bridal makeup services in Chausa, ensuring you look flawless throughout your wedding day. With our exclusive at-home bridal makeup services, you can enjoy a personalized, stress-free experience in the comfort of your home. To book your appointment, call us at 7004721239. In this blog, we’ll discuss why professional bridal makeup is crucial, what makes Ladyfair stand out in Chausa, and why we are the top choice for brides in the region. The Importance of Bridal Makeup Bridal makeup is not just about applying cosmetics—it’s an art form that enhances your natural beauty, ensuring you look stunning in person and in photographs. Professional bridal makeup boosts your confidence, so you can enjoy your special day to the fullest. At Ladyfair, we combine traditional and modern makeup techniques to create a bridal look that is perfectly suited to your style, personality, and wedding attire. Why Ladyfair is the Best Choice in Chausa Convenience of At-Home Service Forget about the hassle of going to a salon. With Ladyfair, our expert makeup artist will come to your location, offering professional bridal makeup services in the comfort of your home. You can relax and enjoy a personalized experience, eliminating the stress of traveling. Expert Makeup Artist Our makeup artist is highly skilled, with years of experience in creating beautiful bridal looks. Whether you prefer traditional bold makeup or a soft, modern appearance, we’ll ensure your makeup perfectly complements your wedding theme and attire. High-Quality Products We use only the finest, skin-safe makeup products that provide long-lasting coverage. These premium products are suitable for all skin types and guarantee that your makeup stays fresh and flawless throughout your wedding day. Personalized Pre-Wedding Consultation Every bride is unique, and Ladyfair offers personalized pre-wedding consultations to discuss your vision and try different styles. We ensure that your final bridal look aligns with your preferences, wedding theme, and attire. Bridal Makeup Trends in Chausa Traditional Bridal Makeup Traditional bridal makeup includes bold eyeliner, vibrant lip colors, and intricate contouring, designed to complement cultural wedding attire and create a timeless bridal look. Modern Bridal Makeup For a more minimalist approach, modern bridal makeup focuses on soft tones, subtle highlights, and a natural glow. It’s a fresh, elegant look for brides who prefer understated beauty. Fusion Bridal Makeup Fusion bridal makeup combines the best of both worlds—traditional boldness with modern simplicity. At Ladyfair, we specialize in creating fusion looks that are tailored to each bride’s individual style. The Ladyfair Bridal Makeup Experience Book Your Appointment: Call 7004721239 to schedule your bridal makeup session and discuss your requirements. Pre-Wedding Consultation: Meet with our makeup artist to review your vision, wedding attire, and finalize your desired makeup style. Trial Session: Experience a trial makeup session to preview your bridal look and make any adjustments needed. Wedding Day Makeup: On your big day, our makeup artist will arrive at your location to provide a flawless bridal look. Post-Wedding Touch-Ups: We also offer touch-up services to keep your makeup fresh throughout the day. What Brides in Chausa Are Saying About Ladyfair Sita R., Chausa: "Ladyfair’s at-home service made my wedding day stress-free. The makeup artist was professional, and my look was stunning. I felt beautiful all day!" Ravi T., Chausa: "I had a trial session with Ladyfair before my wedding, and it gave me the confidence to choose the right look. The makeup was perfect, and the artist was so professional." Anjali K., Chausa: "My wedding makeup was a perfect blend of traditional and modern styles. Ladyfair really listened to my preferences and created a look I loved." How to Prepare for Your Bridal Makeup Session Stay Hydrated: Drink plenty of water before your wedding day to keep your skin hydrated and glowing. Follow a Skincare Routine: Cleanse, tone, and moisturize regularly for smooth, radiant skin. Avoid New Products: Stick to your regular skincare routine to avoid any allergic reactions or skin issues. Communicate Your Vision: Share your preferences and concerns during the consultation to ensure your makeup is perfect. Additional Services Offered by Ladyfair In addition to bridal makeup, Ladyfair also offers: Party Makeup: Perfect for wedding guests and other special occasions. Everyday Makeup: Subtle makeup for daily wear or casual outings. Special Occasion Makeup: Ideal for engagements, anniversaries, and other milestone events. Why Choose Ladyfair in Chausa At Ladyfair, we aim to make every bride’s wedding day unforgettable with our professional, personalized bridal makeup services. From the first consultation to the final touch-up, we ensure you look and feel your best. FAQs 1. How can I book Ladyfair’s bridal makeup services? Call 7004721239 to schedule your appointment and discuss your bridal makeup needs. 2. What bridal makeup styles does Ladyfair specialize in? We specialize in traditional, modern, and fusion bridal makeup styles tailored to each bride's preferences. 3. Do you offer a trial session? Yes, we offer a trial session to help you decide on your perfect bridal look. 4. What products do you use? We use high-quality, safe makeup products that are long-lasting and suitable for all skin types. 5. How should I prepare for my bridal makeup session? Stay hydrated, follow your skincare routine, and communicate your preferences during the consultation. 6. Can Ladyfair accommodate cultural makeup requirements? Yes, we incorporate cultural and traditional elements into your bridal makeup to reflect your heritage.

Posted By: 18th December 2024
Best Bridal Makeup Artist in Itarhi
Introduction Your wedding day is one of the most cherished moments of your life, and looking your absolute best is every bride's dream. At Ladyfair, we offer professional bridal makeup services in Itarhi, ensuring that you look radiant and flawless on your special day. With our exclusive at-home bridal makeup services, you can enjoy a stress-free and personalized experience in the comfort of your home. To book your appointment, call us at 7004721239. In this blog, we’ll explore why professional bridal makeup is essential, what makes Ladyfair stand out in Itarhi, and why we are the preferred choice for brides in the region. The Importance of Bridal Makeup Bridal makeup is more than just cosmetics; it’s an art that enhances your natural beauty and ensures you look stunning both in person and in photographs. Professional bridal makeup boosts your confidence, allowing you to shine on your wedding day. At Ladyfair, we combine traditional and modern techniques to create a personalized bridal look that complements your wedding attire and highlights your unique features. Why Ladyfair is the Best Choice in Itarhi Convenience of At-Home Service With Ladyfair, you don’t need to leave the comfort of your home. Our makeup artist will come to you, offering professional bridal makeup services in a relaxed, stress-free environment, saving you the time and effort of traveling to a salon. Expert Makeup Artist Our skilled makeup artist has years of experience in creating flawless bridal looks, whether you prefer bold, traditional styles or soft, modern aesthetics. Ladyfair ensures your makeup is perfectly suited to your wedding theme, attire, and personality. High-Quality Products We use only premium, skin-safe makeup products that provide long-lasting, flawless coverage. These high-quality products are suitable for all skin types and ensure your makeup stays intact throughout your wedding day. Personalized Pre-Wedding Consultation At Ladyfair, we believe every bride is unique. We offer pre-wedding consultations to discuss your vision, try out different looks, and finalize your bridal makeup. This personalized approach ensures that your makeup reflects your style and complements your attire perfectly. Bridal Makeup Trends in Itarhi Traditional Bridal Makeup Traditional bridal makeup is timeless, often featuring bold eyeliner, vibrant lips, and dramatic contouring that complements cultural wedding attire. Modern Bridal Makeup For brides seeking a minimalist look, modern bridal makeup focuses on soft tones, natural radiance, and subtle highlighting for a fresh and glowing appearance. Fusion Bridal Makeup Fusion bridal makeup blends the best of both traditional and modern styles, offering a balanced and elegant look that reflects the bride’s personality and the wedding’s theme. The Ladyfair Bridal Makeup Experience Book Your Appointment: Call 7004721239 to schedule your bridal makeup session and discuss your needs. Pre-Wedding Consultation: Meet with our makeup artist to share your vision, finalize the look, and review your attire. Trial Session: Experience a trial makeup session to see your bridal look in action and make any necessary adjustments. Wedding Day Makeup: On your big day, our makeup artist will arrive at your location to provide a flawless bridal look. Post-Wedding Touch-Ups: We offer touch-up services to ensure your makeup stays fresh and beautiful throughout the day. What Brides in Itarhi Are Saying About Ladyfair Pooja R., Itarhi: "Ladyfair’s at-home service made my wedding day stress-free. The makeup was perfect, and it lasted all day! I felt so confident and beautiful." Suman K., Itarhi: "The makeup artist took the time to understand my vision, and the trial session helped me finalize the perfect look. I’m so happy with my bridal makeup!" Anjali M., Itarhi: "My fusion bridal makeup was exactly what I wanted. Ladyfair combined traditional elements with a modern twist, and I couldn’t have been happier with the final look." How to Prepare for Your Bridal Makeup Session Stay Hydrated: Drink plenty of water in the days leading up to your wedding to ensure your skin stays hydrated and glowing. Follow a Skincare Routine: Cleanse, tone, and moisturize your skin daily for a smooth and radiant complexion. Avoid New Products: Stick to skincare products you are familiar with to prevent any skin reactions. Communicate Your Vision: Share your ideas, preferences, and concerns during the consultation to ensure your bridal look is perfect. Additional Services Offered by Ladyfair In addition to bridal makeup, Ladyfair also offers: Party Makeup: Ideal for wedding guests and other special occasions. Everyday Makeup: Subtle and fresh looks for casual outings or daily wear. Special Occasion Makeup: Perfect for engagements, anniversaries, and other important events. Why Choose Ladyfair in Itarhi At Ladyfair, we’re committed to providing the best bridal makeup experience in Itarhi. Our focus on high-quality products, personalized service, and expert techniques makes us the top choice for brides. We guarantee that you’ll feel beautiful, confident, and radiant on your wedding day. FAQs 1. How do I book Ladyfair’s bridal makeup services? Call us at 7004721239 to schedule your appointment and discuss your bridal makeup needs. 2. What bridal makeup styles does Ladyfair specialize in? We specialize in traditional, modern, and fusion bridal makeup styles tailored to your preferences. 3. Does Ladyfair offer trial sessions? Yes, we offer trial sessions to help you decide on the perfect bridal look. 4. Are the products safe for all skin types? Yes, we use high-quality, skin-safe makeup products suitable for all skin types. 5. Can Ladyfair accommodate cultural makeup requirements? Yes, we incorporate traditional and cultural elements into your bridal makeup to reflect your heritage. 6. Do you offer post-wedding touch-up services? Yes, we offer touch-up services to ensure your makeup remains fresh throughout your wedding day.

Posted By: 18th December 2024
Bridal Makeup Artist in Jamalpur
Here’s the updated version with Sadar replaced by Jamalpur, along with the updated blog tag, meta title, meta keywords, and meta description: Blog Tag: Bridal Makeup in Jamalpur, Makeup Artist Jamalpur, Ladyfair Makeup Services, HD Bridal Makeup, Airbrush Bridal Makeup Meta Title: Professional Bridal Makeup Artist in Jamalpur | Ladyfair Meta Keywords: Bridal makeup Jamalpur, makeup artist Jamalpur, HD bridal makeup Jamalpur, airbrush makeup Jamalpur, at-home bridal makeup Jamalpur Meta Description: Looking for the perfect bridal makeup in Jamalpur? Ladyfair offers expert at-home services for traditional, HD, and airbrush makeup, ensuring a flawless look for your big day. Introduction In Jamalpur, Ladyfair is the premier choice for brides looking to achieve the perfect wedding day look with our professional at-home bridal makeup services. Whether you desire a traditional bridal look, an HD finish, or the flawless perfection of airbrush makeup, our expert makeup artist in Jamalpur ensures that you shine on your special day. Contact us today at 7004721239 to schedule your appointment. Why Choose Ladyfair for Bridal Makeup in Jamalpur Experienced Makeup Artist Our makeup artist in Jamalpur has years of experience in bridal makeup, creating personalized looks that complement your natural beauty and align with your style and preferences. Convenient At-Home Service Forget the stress of traveling to a salon. Ladyfair brings luxury beauty treatments directly to your doorstep with our at-home bridal makeup services, offering a truly personalized experience. Premium Makeup Products We use only high-quality, professional-grade makeup products to ensure a flawless, long-lasting look that remains perfect throughout your big day. Bridal Makeup Pricing in Jamalpur Our bridal makeup services in Jamalpur are tailored to fit different styles and budgets: Basic Bridal Makeup: ₹10,000 HD Bridal Makeup: ₹12,000 Airbrush Bridal Makeup: ₹18,000 For engagement and reception makeup: Basic Engagement/Reception Makeup: ₹6,000 HD Engagement/Reception Makeup: ₹8,000 Airbrush Engagement/Reception Makeup: ₹12,000 For parties: Basic Party Makeup: ₹2,500 HD Party Makeup: ₹3,500 Popular Bridal Makeup Styles in Jamalpur Traditional Bridal Makeup Our traditional bridal makeup in Jamalpur incorporates bold colors and intricate detailing to complement your wedding attire, creating an elegant and timeless look. HD Bridal Makeup For a high-definition finish that looks flawless both in photos and in person, HD bridal makeup is the perfect choice for brides who want a picture-perfect appearance all day. Airbrush Bridal Makeup Our airbrush makeup offers a lightweight, full-coverage finish that lasts all day, giving you a smooth and natural look while ensuring long-lasting perfection. How to Book Your Bridal Makeup with Ladyfair in Jamalpur Initial Contact: Call us at 7004721239 to discuss your makeup needs and schedule your appointment. Consultation Session: Meet with our makeup artist to discuss your wedding look, review your attire, and plan the perfect makeup style. Makeup Trial: We offer trial sessions to help you preview your bridal makeup look and make any adjustments. Wedding Day Makeup: On your wedding day, our makeup artist will arrive at your location in Jamalpur to provide flawless, hassle-free makeup service. Testimonials from Brides in Jamalpur Priya R., Jamalpur: "Ladyfair provided amazing service on my wedding day. The airbrush makeup looked flawless and lasted all day." Ritu K., Jamalpur: "I loved the HD makeup! It was perfect for my photos, and the at-home service was so convenient." Sneha S., Jamalpur: "My traditional bridal makeup was exactly what I wanted, and Ladyfair made the entire process stress-free." Preparing for Your Bridal Makeup Session To get the best results for your bridal makeup: Stay Hydrated: Keep your skin looking fresh by drinking plenty of water. Consistent Skincare: Stick to your regular skincare routine to maintain healthy, glowing skin. Avoid New Products: Use familiar products to prevent any reactions before your wedding day. Clear Communication: Discuss your makeup preferences and any concerns with our artist during the consultation. Additional Beauty Services by Ladyfair Beyond bridal makeup, Ladyfair offers a variety of beauty services in Jamalpur: Engagement and Reception Makeup: Customized looks for all pre-wedding events. Party Makeup: Perfect for birthdays, anniversaries, and special occasions. Everyday Makeup: Enhance your daily look with our expert makeup services. Special Occasion Makeup: Professional makeup for parties, celebrations, and formal events. The Future of Bridal Makeup in Jamalpur Ladyfair is dedicated to setting new standards in bridal beauty in Jamalpur with our innovative at-home services. As we continue to offer exceptional service, more brides are choosing Ladyfair as their preferred makeup provider. Q&A with Ladyfair’s Bridal Makeup Artist in Jamalpur Q1: What makes Ladyfair the best choice for bridal makeup in Jamalpur? A1: Ladyfair offers expert bridal makeup services at home, using high-quality products to ensure a flawless and long-lasting look. Q2: What are the prices for bridal makeup in Jamalpur? A2: Our bridal makeup packages start at ₹10,000 for basic makeup, ₹12,000 for HD makeup, and ₹18,000 for airbrush makeup. Q3: How do I book Ladyfair’s bridal makeup services in Jamalpur? A3: You can book our services by calling 7004721239. We also offer consultations and trial sessions to ensure you get the look you want. Q4: What bridal makeup styles does Ladyfair offer in Jamalpur? A4: Ladyfair offers traditional, HD, and airbrush bridal makeup to suit different preferences and needs. Q5: Are makeup trials available before my wedding? A5: Yes, we offer trial sessions so you can finalize your bridal look ahead of time. Q6: What products does Ladyfair use for bridal makeup? A6: We use professional-grade, high-quality makeup products that are safe for all skin types and ensure a flawless finish. Q7: What other services does Ladyfair provide in Jamalpur? A7: In addition to bridal makeup, we offer makeup for engagements, receptions, parties, and other special occasions. Ladyfair is your ultimate choice for professional, at-home bridal makeup services in Jamalpur, ensuring a flawless and stress-free experience on your special day.

Posted By: 18th December 2024
Best Bridal Makeup Artist in Buxar
Introduction Your wedding day is one of the most important moments of your life, and every bride wants to look radiant and flawless as she begins this new chapter. At Ladyfair, we offer professional bridal makeup services in Buxar, ensuring that every bride looks her best on her big day. With our exclusive at-home bridal makeup services, you can enjoy a personalized experience right in the comfort of your home. To book your appointment, call us at 7004721239. In this blog, we’ll discuss why professional bridal makeup is essential, what makes Ladyfair stand out in Buxar, and why we are the top choice for brides in the region. The Importance of Bridal Makeup Bridal makeup is an essential part of your wedding day look, enhancing your natural beauty and ensuring you look perfect both in person and in photos. It gives you the confidence to shine on your special day. At Ladyfair, our experienced makeup artist combines modern and traditional techniques to create a bridal look that highlights your personality and complements your wedding attire. Why Ladyfair is the Best Choice in Buxar Convenience of At-Home Service No need to travel to a salon—Ladyfair brings professional bridal makeup to your doorstep. Our at-home service ensures a relaxing and stress-free experience, so you can enjoy your day without worry. Expert Makeup Artist With years of experience, our makeup artist specializes in creating stunning bridal looks tailored to your preferences. Whether you prefer a traditional, modern, or fusion style, Ladyfair delivers a look that’s perfect for your wedding day. High-Quality Makeup Products We only use premium makeup products that are safe for all skin types and provide long-lasting, flawless results throughout your wedding day. Personalized Pre-Wedding Consultation Every bride has unique preferences, and we ensure that your makeup is exactly as you envision it. Our pre-wedding consultations allow us to discuss your desired look, try out different styles, and finalize your bridal makeup. Bridal Makeup Trends in Buxar Traditional Bridal Makeup A timeless favorite, traditional bridal makeup includes bold eyeliner, vibrant lip colors, and intricate contouring that complements cultural wedding attire. Modern Bridal Makeup For brides seeking a more minimalist approach, modern bridal makeup emphasizes soft tones, subtle highlights, and a radiant glow for a fresh, natural look. Fusion Bridal Makeup Fusion bridal makeup combines the best of both traditional and modern styles, creating a perfect blend of elegance and contemporary flair. The Ladyfair Bridal Makeup Experience Book Your Appointment: Call 7004721239 to schedule your bridal makeup service. Pre-Wedding Consultation: Meet with our makeup artist to share your vision and finalize your desired look. Trial Session: Experience a trial makeup session to preview your look and make any necessary adjustments. Wedding Day Makeup: On your wedding day, our artist will come to your location to create a flawless bridal look. Post-Wedding Touch-Ups: We offer touch-up services to ensure your makeup stays fresh throughout the day. What Brides in Buxar Are Saying About Ladyfair Anjali S., Buxar: "I couldn’t be happier with my bridal makeup. The at-home service was so convenient, and the makeup artist was incredibly talented. My look was exactly what I wanted!" Neha P., Buxar: "The trial session gave me the confidence I needed. Ladyfair’s products were high-quality, and my makeup lasted all day without any touch-ups." Ritu K., Buxar: "My fusion bridal makeup was a perfect mix of traditional and modern. Ladyfair made me feel beautiful and confident!" How to Prepare for Your Bridal Makeup Session Stay Hydrated: Drink plenty of water to keep your skin hydrated and glowing. Follow a Skincare Routine: Cleanse, tone, and moisturize your skin daily for a smooth and radiant complexion. Avoid New Products: Stick to products that you are familiar with to avoid skin reactions before your wedding. Communicate Your Vision: Be sure to share your preferences and ideas during your consultation to ensure your bridal look is exactly as you want it. Additional Services Offered by Ladyfair At Ladyfair, we offer more than just bridal makeup: Party Makeup: Ideal for guests and family members. Everyday Makeup: Subtle and fresh looks for casual outings. Special Occasion Makeup: Perfect for engagements, anniversaries, and other special events. Why Choose Ladyfair in Buxar With our focus on quality, convenience, and personalization, Ladyfair is transforming the bridal makeup experience in Buxar. We are committed to making every bride look and feel stunning on her wedding day, ensuring a stress-free and enjoyable experience from start to finish. FAQs 1. How do I book Ladyfair’s bridal makeup services? Simply call us at 7004721239 to schedule your appointment and discuss your bridal makeup needs. 2. What bridal makeup styles does Ladyfair specialize in? We specialize in traditional, modern, and fusion bridal makeup styles tailored to each bride’s preferences. 3. Does Ladyfair provide trial sessions? Yes, we offer trial sessions to ensure that your bridal look is exactly as you envisioned it. 4. Are the products used safe for all skin types? Yes, we only use high-quality, skin-safe products to ensure flawless results for all skin types. 5. Can Ladyfair accommodate cultural makeup requirements? Absolutely! We incorporate cultural and traditional elements into your bridal makeup to suit your heritage. 6. Do you offer post-wedding touch-up services? Yes, we offer touch-up services to ensure your makeup stays fresh and flawless throughout your wedding day.

Posted By: 18th December 2024
Bridal Makeup Artist in Sadar
Here’s the updated version with Laukahi replaced by Sadar, along with the updated blog tag, meta title, meta keywords, and meta description: Blog Tag: Bridal Makeup in Sadar, Makeup Artist Sadar, Ladyfair Makeup Services, HD Bridal Makeup, Airbrush Bridal Makeup Meta Title: Professional Bridal Makeup Artist in Sadar | Ladyfair Meta Keywords: Bridal makeup Sadar, makeup artist Sadar, HD bridal makeup Sadar, airbrush makeup Sadar, at-home bridal makeup Sadar Meta Description: Looking for the perfect bridal makeup in Sadar? Ladyfair offers expert at-home services for traditional, HD, and airbrush makeup, ensuring a flawless look for your big day. Introduction In Sadar, Ladyfair is the premier choice for brides looking to achieve the perfect wedding day look with our professional at-home bridal makeup services. Whether you desire a traditional bridal look, an HD finish, or the flawless perfection of airbrush makeup, our expert makeup artist in Sadar ensures that you shine on your special day. Contact us today at 7004721239 to schedule your appointment. Why Choose Ladyfair for Bridal Makeup in Sadar Experienced Makeup Artist Our makeup artist in Sadar has years of experience in bridal makeup, creating personalized looks that complement your natural beauty and align with your style and preferences. Convenient At-Home Service Forget the stress of traveling to a salon. Ladyfair brings luxury beauty treatments directly to your doorstep with our at-home bridal makeup services, offering a truly personalized experience. Premium Makeup Products We use only high-quality, professional-grade makeup products to ensure a flawless, long-lasting look that remains perfect throughout your big day. Bridal Makeup Pricing in Sadar Our bridal makeup services in Sadar are tailored to fit different styles and budgets: Basic Bridal Makeup: ₹10,000 HD Bridal Makeup: ₹12,000 Airbrush Bridal Makeup: ₹18,000 For engagement and reception makeup: Basic Engagement/Reception Makeup: ₹6,000 HD Engagement/Reception Makeup: ₹8,000 Airbrush Engagement/Reception Makeup: ₹12,000 For parties: Basic Party Makeup: ₹2,500 HD Party Makeup: ₹3,500 Popular Bridal Makeup Styles in Sadar Traditional Bridal Makeup Our traditional bridal makeup in Sadar incorporates bold colors and intricate detailing to complement your wedding attire, creating an elegant and timeless look. HD Bridal Makeup For a high-definition finish that looks flawless both in photos and in person, HD bridal makeup is the perfect choice for brides who want a picture-perfect appearance all day. Airbrush Bridal Makeup Our airbrush makeup offers a lightweight, full-coverage finish that lasts all day, giving you a smooth and natural look while ensuring long-lasting perfection. How to Book Your Bridal Makeup with Ladyfair in Sadar Initial Contact: Call us at 7004721239 to discuss your makeup needs and schedule your appointment. Consultation Session: Meet with our makeup artist to discuss your wedding look, review your attire, and plan the perfect makeup style. Makeup Trial: We offer trial sessions to help you preview your bridal makeup look and make any adjustments. Wedding Day Makeup: On your wedding day, our makeup artist will arrive at your location in Sadar to provide flawless, hassle-free makeup service. Testimonials from Brides in Sadar Priya R., Sadar: "Ladyfair provided amazing service on my wedding day. The airbrush makeup looked flawless and lasted all day." Ritu K., Sadar: "I loved the HD makeup! It was perfect for my photos, and the at-home service was so convenient." Sneha S., Sadar: "My traditional bridal makeup was exactly what I wanted, and Ladyfair made the entire process stress-free." Preparing for Your Bridal Makeup Session To get the best results for your bridal makeup: Stay Hydrated: Keep your skin looking fresh by drinking plenty of water. Consistent Skincare: Stick to your regular skincare routine to maintain healthy, glowing skin. Avoid New Products: Use familiar products to prevent any reactions before your wedding day. Clear Communication: Discuss your makeup preferences and any concerns with our artist during the consultation. Additional Beauty Services by Ladyfair Beyond bridal makeup, Ladyfair offers a variety of beauty services in Sadar: Engagement and Reception Makeup: Customized looks for all pre-wedding events. Party Makeup: Perfect for birthdays, anniversaries, and special occasions. Everyday Makeup: Enhance your daily look with our expert makeup services. Special Occasion Makeup: Professional makeup for parties, celebrations, and formal events. The Future of Bridal Makeup in Sadar Ladyfair is dedicated to setting new standards in bridal beauty in Sadar with our innovative at-home services. As we continue to offer exceptional service, more brides are choosing Ladyfair as their preferred makeup provider. Q&A with Ladyfair’s Bridal Makeup Artist in Sadar Q1: What makes Ladyfair the best choice for bridal makeup in Sadar? A1: Ladyfair offers expert bridal makeup services at home, using high-quality products to ensure a flawless and long-lasting look. Q2: What are the prices for bridal makeup in Sadar? A2: Our bridal makeup packages start at ₹10,000 for basic makeup, ₹12,000 for HD makeup, and ₹18,000 for airbrush makeup. Q3: How do I book Ladyfair’s bridal makeup services in Sadar? A3: You can book our services by calling 7004721239. We also offer consultations and trial sessions to ensure you get the look you want. Q4: What bridal makeup styles does Ladyfair offer in Sadar? A4: Ladyfair offers traditional, HD, and airbrush bridal makeup to suit different preferences and needs. Q5: Are makeup trials available before my wedding? A5: Yes, we offer trial sessions so you can finalize your bridal look ahead of time. Q6: What products does Ladyfair use for bridal makeup? A6: We use professional-grade, high-quality makeup products that are safe for all skin types and ensure a flawless finish. Q7: What other services does Ladyfair provide in Sadar? A7: In addition to bridal makeup, we offer makeup for engagements, receptions, parties, and other special occasions. Ladyfair is your ultimate choice for professional, at-home bridal makeup services in Sadar, ensuring a flawless and stress-free experience on your special day.

Posted By: 18th December 2024
Bridal Makeup Artist in Laukahi
Introduction In Laukahi, Ladyfair is the premier choice for brides looking to achieve the perfect wedding day look with our professional at-home bridal makeup services. Whether you desire a traditional bridal look, an HD finish, or the flawless perfection of airbrush makeup, our expert makeup artist in Laukahi ensures that you shine on your special day. Contact us today at 7004721239 to schedule your appointment. Why Choose Ladyfair for Bridal Makeup in Laukahi Experienced Makeup Artist Our makeup artist in Laukahi has years of experience in bridal makeup, creating personalized looks that complement your natural beauty and align with your style and preferences. Convenient At-Home Service Forget the stress of traveling to a salon. Ladyfair brings luxury beauty treatments directly to your doorstep with our at-home bridal makeup services, offering a truly personalized experience. Premium Makeup Products We use only high-quality, professional-grade makeup products to ensure a flawless, long-lasting look that remains perfect throughout your big day. Bridal Makeup Pricing in Laukahi Our bridal makeup services in Laukahi are tailored to fit different styles and budgets: Basic Bridal Makeup: ₹10,000 HD Bridal Makeup: ₹12,000 Airbrush Bridal Makeup: ₹18,000 For engagement and reception makeup: Basic Engagement/Reception Makeup: ₹6,000 HD Engagement/Reception Makeup: ₹8,000 Airbrush Engagement/Reception Makeup: ₹12,000 For parties: Basic Party Makeup: ₹2,500 HD Party Makeup: ₹3,500 Popular Bridal Makeup Styles in Laukahi Traditional Bridal Makeup Our traditional bridal makeup in Laukahi incorporates bold colors and intricate detailing to complement your wedding attire, creating an elegant and timeless look. HD Bridal Makeup For a high-definition finish that looks flawless both in photos and in person, HD bridal makeup is the perfect choice for brides who want a picture-perfect appearance all day. Airbrush Bridal Makeup Our airbrush makeup offers a lightweight, full-coverage finish that lasts all day, giving you a smooth and natural look while ensuring long-lasting perfection. How to Book Your Bridal Makeup with Ladyfair in Laukahi Initial Contact: Call us at 7004721239 to discuss your makeup needs and schedule your appointment. Consultation Session: Meet with our makeup artist to discuss your wedding look, review your attire, and plan the perfect makeup style. Makeup Trial: We offer trial sessions to help you preview your bridal makeup look and make any adjustments. Wedding Day Makeup: On your wedding day, our makeup artist will arrive at your location in Laukahi to provide flawless, hassle-free makeup service. Testimonials from Brides in Laukahi \ Priya R., Laukahi: "Ladyfair provided amazing service on my wedding day. The airbrush makeup looked flawless and lasted all day." Ritu K., Laukahi: "I loved the HD makeup! It was perfect for my photos, and the at-home service was so convenient." Sneha S., Laukahi: "My traditional bridal makeup was exactly what I wanted, and Ladyfair made the entire process stress-free." Preparing for Your Bridal Makeup Session To get the best results for your bridal makeup: Stay Hydrated: Keep your skin looking fresh by drinking plenty of water. Consistent Skincare: Stick to your regular skincare routine to maintain healthy, glowing skin. Avoid New Products: Use familiar products to prevent any reactions before your wedding day. Clear Communication: Discuss your makeup preferences and any concerns with our artist during the consultation. Additional Beauty Services by Ladyfair Beyond bridal makeup, Ladyfair offers a variety of beauty services in Laukahi: Engagement and Reception Makeup: Customized looks for all pre-wedding events. Party Makeup: Perfect for birthdays, anniversaries, and special occasions. Everyday Makeup: Enhance your daily look with our expert makeup services. Special Occasion Makeup: Professional makeup for parties, celebrations, and formal events. The Future of Bridal Makeup in Laukahi Ladyfair is dedicated to setting new standards in bridal beauty in Laukahi with our innovative at-home services. As we continue to offer exceptional service, more brides are choosing Ladyfair as their preferred makeup provider. Q&A with Ladyfair’s Bridal Makeup Artist in Laukahi Q1: What makes Ladyfair the best choice for bridal makeup in Laukahi? A1: Ladyfair offers expert bridal makeup services at home, using high-quality products to ensure a flawless and long-lasting look. Q2: What are the prices for bridal makeup in Laukahi? A2: Our bridal makeup packages start at ₹10,000 for basic makeup, ₹12,000 for HD makeup, and ₹18,000 for airbrush makeup. Q3: How do I book Ladyfair’s bridal makeup services in Laukahi? A3: You can book our services by calling 7004721239. We also offer consultations and trial sessions to ensure you get the look you want. Q4: What bridal makeup styles does Ladyfair offer in Laukahi? A4: Ladyfair offers traditional, HD, and airbrush bridal makeup to suit different preferences and needs. Q5: Are makeup trials available before my wedding? A5: Yes, we offer trial sessions so you can finalize your bridal look ahead of time. Q6: What products does Ladyfair use for bridal makeup? A6: We use professional-grade, high-quality makeup products that are safe for all skin types and ensure a flawless finish. Q7: What other services does Ladyfair provide in Laukahi? A7: In addition to bridal makeup, we offer makeup for engagements, receptions, parties, and other special occasions. Ladyfair is your ultimate choice for professional, at-home bridal makeup services in Laukahi, ensuring a flawless and stress-free experience on your special day.

Posted By: 18th December 2024
Best Bridal Makeup Artist in Sambhuganj
Introduction Every bride deserves to shine on her wedding day, looking flawless and confident as she embarks on a new journey. At Ladyfair, we bring professional bridal makeup services to your doorstep in Sambhuganj, Banka District. With our personalized at-home services, you can relax and focus on enjoying your special day. To book an appointment, call us at 7004721239. In this blog, we’ll share why professional bridal makeup matters, how Ladyfair stands out in Sambhuganj, and why we are the trusted choice for brides in Banka District. The Importance of Bridal Makeup Bridal makeup is more than just enhancing beauty; it’s about creating a timeless look that complements your attire, jewelry, and personality. It ensures you look radiant in person and in photos, leaving you confident throughout your wedding day. At Ladyfair, our experienced artist combines modern and traditional techniques to craft a look that is uniquely yours, ensuring every detail aligns with your vision. Why Ladyfair is the Top Choice in Sambhuganj, Banka District Convenient At-Home Service No need to visit a salon—we bring professional bridal makeup services directly to your home, making the experience stress-free and personalized. Expert Makeup Artist Our makeup artist specializes in various bridal styles, from traditional bold looks to modern minimalism. We tailor every detail to match your wedding theme and preferences. High-Quality Products We use premium makeup products that are safe for all skin types, ensuring long-lasting and flawless results throughout your wedding day. Pre-Wedding Consultations We understand that every bride is unique. Our pre-wedding consultations allow us to understand your preferences, try different styles, and finalize the perfect bridal look. Bridal Makeup Trends in Sambhuganj Traditional Bridal Makeup Bold, glamorous, and timeless—this style features vibrant lip colors, striking eyeliner, and defined contours that complement cultural wedding attire. Modern Bridal Makeup Soft, natural tones with subtle highlights and a radiant glow define modern bridal makeup, perfect for minimalist brides. Fusion Bridal Makeup For brides seeking the best of both worlds, fusion bridal makeup combines traditional elegance with contemporary charm. The Ladyfair Bridal Makeup Process Book Your Appointment: Call 7004721239 to discuss your needs and schedule a session. Pre-Wedding Consultation: Share your vision, review your attire, and finalize your desired makeup style. Trial Makeup Session: Preview your bridal look during a trial session and make adjustments as needed. Wedding Day Makeup: Our artist arrives at your home to create a flawless look tailored to your preferences. Optional Touch-Ups: Keep your makeup fresh all day with touch-up services, if required. What Brides in Sambhuganj Say About Ladyfair Shruti J., Sambhuganj: "Ladyfair’s at-home service was so convenient! The makeup artist was professional, and my bridal look was absolutely stunning." Priya N., Sambhuganj: "The trial session gave me confidence in my wedding day look. Ladyfair’s attention to detail was impressive!" Ankita S., Sambhuganj: "I loved my fusion bridal makeup. It was a perfect mix of tradition and modern elegance. Highly recommend Ladyfair!" Preparing for Your Bridal Makeup Session Hydrate: Drink plenty of water to keep your skin glowing. Skincare Routine: Cleanse, tone, and moisturize daily for smooth and radiant skin. Stick to Familiar Products: Avoid trying new products before your wedding to prevent skin irritation. Communicate: Share your preferences and ideas during the consultation to achieve your dream look. Additional Services Offered by Ladyfair Beyond bridal makeup, Ladyfair offers: Party Makeup: Ideal for guests and family members. Everyday Makeup: Subtle looks for casual outings. Special Occasion Makeup: Perfect for engagements, anniversaries, and more. Why Choose Ladyfair in Sambhuganj Ladyfair is transforming bridal makeup services in Sambhuganj with convenience, expertise, and exceptional quality. We are dedicated to making every bride feel beautiful, confident, and stress-free on her big day. FAQs 1. How can I book Ladyfair’s services in Sambhuganj? Call us at 7004721239 to schedule your bridal makeup appointment. 2. What types of makeup styles do you offer? We specialize in traditional, modern, and fusion bridal makeup styles. 3. Do you provide trial sessions? Yes, we offer trial sessions to ensure your final look matches your vision. 4. Are the products you use safe for all skin types? Yes, we use premium, skin-safe, and long-lasting makeup products. 5. Can you include cultural elements in the makeup? Absolutely! We can incorporate traditional and cultural elements into your bridal look. 6. Do you offer touch-up services during the wedding? Yes, optional touch-up services are available to keep your makeup fresh throughout the day.

Posted By: 18th December 2024
Bridal Makeup Artist in Khutauna
Introduction In Khutauna, Ladyfair is the premier choice for brides looking to achieve the perfect wedding day look with our professional at-home bridal makeup services. Whether you desire a traditional bridal look, an HD finish, or the flawless perfection of airbrush makeup, our expert makeup artist in Khutauna ensures that you shine on your special day. Contact us today at 7004721239 to schedule your appointment. Why Choose Ladyfair for Bridal Makeup in Khutauna Experienced Makeup Artist Our makeup artist in Khutauna has years of experience in bridal makeup, creating personalized looks that complement your natural beauty and align with your style and preferences. Convenient At-Home Service Forget the stress of traveling to a salon. Ladyfair brings luxury beauty treatments directly to your doorstep with our at-home bridal makeup services, offering a truly personalized experience. Premium Makeup Products We use only high-quality, professional-grade makeup products to ensure a flawless, long-lasting look that remains perfect throughout your big day. Bridal Makeup Pricing in Khutauna Our bridal makeup services in Khutauna are tailored to fit different styles and budgets: Basic Bridal Makeup: ₹10,000 HD Bridal Makeup: ₹12,000 Airbrush Bridal Makeup: ₹18,000 For engagement and reception makeup: Basic Engagement/Reception Makeup: ₹6,000 HD Engagement/Reception Makeup: ₹8,000 Airbrush Engagement/Reception Makeup: ₹12,000 For parties: Basic Party Makeup: ₹2,500 HD Party Makeup: ₹3,500 Popular Bridal Makeup Styles in Khutauna Traditional Bridal Makeup Our traditional bridal makeup in Khutauna incorporates bold colors and intricate detailing to complement your wedding attire, creating an elegant and timeless look. HD Bridal Makeup For a high-definition finish that looks flawless both in photos and in person, HD bridal makeup is the perfect choice for brides who want a picture-perfect appearance all day. Airbrush Bridal Makeup Our airbrush makeup offers a lightweight, full-coverage finish that lasts all day, giving you a smooth and natural look while ensuring long-lasting perfection. How to Book Your Bridal Makeup with Ladyfair in Khutauna Initial Contact: Call us at 7004721239 to discuss your makeup needs and schedule your appointment. Consultation Session: Meet with our makeup artist to discuss your wedding look, review your attire, and plan the perfect makeup style. Makeup Trial: We offer trial sessions to help you preview your bridal makeup look and make any adjustments. Wedding Day Makeup: On your wedding day, our makeup artist will arrive at your location in Khutauna to provide flawless, hassle-free makeup service. Testimonials from Brides in Khutauna Priya R., Khutauna: "Ladyfair provided amazing service on my wedding day. The airbrush makeup looked flawless and lasted all day." Ritu K., Khutauna: "I loved the HD makeup! It was perfect for my photos, and the at-home service was so convenient." Sneha S., Khutauna: "My traditional bridal makeup was exactly what I wanted, and Ladyfair made the entire process stress-free." Preparing for Your Bridal Makeup Session To get the best results for your bridal makeup: Stay Hydrated: Keep your skin looking fresh by drinking plenty of water. Consistent Skincare: Stick to your regular skincare routine to maintain healthy, glowing skin. Avoid New Products: Use familiar products to prevent any reactions before your wedding day. Clear Communication: Discuss your makeup preferences and any concerns with our artist during the consultation. Additional Beauty Services by Ladyfair Beyond bridal makeup, Ladyfair offers a variety of beauty services in Khutauna: Engagement and Reception Makeup: Customized looks for all pre-wedding events. Party Makeup: Perfect for birthdays, anniversaries, and special occasions. Everyday Makeup: Enhance your daily look with our expert makeup services. Special Occasion Makeup: Professional makeup for parties, celebrations, and formal events. The Future of Bridal Makeup in Khutauna Ladyfair is dedicated to setting new standards in bridal beauty in Khutauna with our innovative at-home services. As we continue to offer exceptional service, more brides are choosing Ladyfair as their preferred makeup provider. Q&A with Ladyfair’s Bridal Makeup Artist in Khutauna Q1: What makes Ladyfair the best choice for bridal makeup in Khutauna? A1: Ladyfair offers expert bridal makeup services at home, using high-quality products to ensure a flawless and long-lasting look. Q2: What are the prices for bridal makeup in Khutauna? A2: Our bridal makeup packages start at ₹10,000 for basic makeup, ₹12,000 for HD makeup, and ₹18,000 for airbrush makeup. Q3: How do I book Ladyfair’s bridal makeup services in Khutauna? A3: You can book our services by calling 7004721239. We also offer consultations and trial sessions to ensure you get the look you want. Q4: What bridal makeup styles does Ladyfair offer in Khutauna? A4: Ladyfair offers traditional, HD, and airbrush bridal makeup to suit different preferences and needs. Q5: Are makeup trials available before my wedding? A5: Yes, we offer trial sessions so you can finalize your bridal look ahead of time. Q6: What products does Ladyfair use for bridal makeup? A6: We use professional-grade, high-quality makeup products that are safe for all skin types and ensure a flawless finish. Q7: What other services does Ladyfair provide in Khutauna? A7: In addition to bridal makeup, we offer makeup for engagements, receptions, parties, and other special occasions. Ladyfair is your ultimate choice for professional, at-home bridal makeup services in Khutauna, ensuring a flawless and stress-free experience on your special day.

Posted By: 18th December 2024
Bridal Makeup Artist in Ghoghardiha
Introduction In Ghoghardiha, Ladyfair is the premier choice for brides looking to achieve the perfect wedding day look with our professional at-home bridal makeup services. Whether you desire a traditional bridal look, an HD finish, or the flawless perfection of airbrush makeup, our expert makeup artist in Ghoghardiha ensures that you shine on your special day. Contact us today at 7004721239 to schedule your appointment. Why Choose Ladyfair for Bridal Makeup in Ghoghardiha Experienced Makeup Artist Our makeup artist in Ghoghardiha has years of experience in bridal makeup, creating personalized looks that complement your natural beauty and align with your style and preferences. Convenient At-Home Service Forget the stress of traveling to a salon. Ladyfair brings luxury beauty treatments directly to your doorstep with our at-home bridal makeup services, offering a truly personalized experience. Premium Makeup Products We use only high-quality, professional-grade makeup products to ensure a flawless, long-lasting look that remains perfect throughout your big day. Bridal Makeup Pricing in Ghoghardiha Our bridal makeup services in Ghoghardiha are tailored to fit different styles and budgets: Basic Bridal Makeup: ₹10,000 HD Bridal Makeup: ₹12,000 Airbrush Bridal Makeup: ₹18,000 For engagement and reception makeup: Basic Engagement/Reception Makeup: ₹6,000 HD Engagement/Reception Makeup: ₹8,000 Airbrush Engagement/Reception Makeup: ₹12,000 For parties: Basic Party Makeup: ₹2,500 HD Party Makeup: ₹3,500 Popular Bridal Makeup Styles in Ghoghardiha Traditional Bridal Makeup Our traditional bridal makeup in Ghoghardiha incorporates bold colors and intricate detailing to complement your wedding attire, creating an elegant and timeless look. HD Bridal Makeup For a high-definition finish that looks flawless both in photos and in person, HD bridal makeup is the perfect choice for brides who want a picture-perfect appearance all day. Airbrush Bridal Makeup Our airbrush makeup offers a lightweight, full-coverage finish that lasts all day, giving you a smooth and natural look while ensuring long-lasting perfection. How to Book Your Bridal Makeup with Ladyfair in Ghoghardiha Initial Contact: Call us at 7004721239 to discuss your makeup needs and schedule your appointment. Consultation Session: Meet with our makeup artist to discuss your wedding look, review your attire, and plan the perfect makeup style. Makeup Trial: We offer trial sessions to help you preview your bridal makeup look and make any adjustments. Wedding Day Makeup: On your wedding day, our makeup artist will arrive at your location in Ghoghardiha to provide flawless, hassle-free makeup service. Testimonials from Brides in Ghoghardiha Priya R., Ghoghardiha: "Ladyfair provided amazing service on my wedding day. The airbrush makeup looked flawless and lasted all day." Ritu K., Ghoghardiha: "I loved the HD makeup! It was perfect for my photos, and the at-home service was so convenient." Sneha S., Ghoghardiha: "My traditional bridal makeup was exactly what I wanted, and Ladyfair made the entire process stress-free." Preparing for Your Bridal Makeup Session To get the best results for your bridal makeup: Stay Hydrated: Keep your skin looking fresh by drinking plenty of water. Consistent Skincare: Stick to your regular skincare routine to maintain healthy, glowing skin. Avoid New Products: Use familiar products to prevent any reactions before your wedding day. Clear Communication: Discuss your makeup preferences and any concerns with our artist during the consultation. Additional Beauty Services by Ladyfair Beyond bridal makeup, Ladyfair offers a variety of beauty services in Ghoghardiha: Engagement and Reception Makeup: Customized looks for all pre-wedding events. Party Makeup: Perfect for birthdays, anniversaries, and special occasions. Everyday Makeup: Enhance your daily look with our expert makeup services. Special Occasion Makeup: Professional makeup for parties, celebrations, and formal events. The Future of Bridal Makeup in Ghoghardiha Ladyfair is dedicated to setting new standards in bridal beauty in Ghoghardiha with our innovative at-home services. As we continue to offer exceptional service, more brides are choosing Ladyfair as their preferred makeup provider. Q&A with Ladyfair’s Bridal Makeup Artist in Ghoghardiha Q1: What makes Ladyfair the best choice for bridal makeup in Ghoghardiha? A1: Ladyfair offers expert bridal makeup services at home, using high-quality products to ensure a flawless and long-lasting look. Q2: What are the prices for bridal makeup in Ghoghardiha? A2: Our bridal makeup packages start at ₹10,000 for basic makeup, ₹12,000 for HD makeup, and ₹18,000 for airbrush makeup. Q3: How do I book Ladyfair’s bridal makeup services in Ghoghardiha? A3: You can book our services by calling 7004721239. We also offer consultations and trial sessions to ensure you get the look you want. Q4: What bridal makeup styles does Ladyfair offer in Ghoghardiha? A4: Ladyfair offers traditional, HD, and airbrush bridal makeup to suit different preferences and needs. Q5: Are makeup trials available before my wedding? A5: Yes, we offer trial sessions so you can finalize your bridal look ahead of time. Q6: What products does Ladyfair use for bridal makeup? A6: We use professional-grade, high-quality makeup products that are safe for all skin types and ensure a flawless finish. Q7: What other services does Ladyfair provide in Ghoghardiha? A7: In addition to bridal makeup, we offer makeup for engagements, receptions, parties, and other special occasions. Ladyfair is your ultimate choice for professional, at-home bridal makeup services in Ghoghardiha, ensuring a flawless and stress-free experience on your special day.

Posted By: 18th December 2024
Bridal Makeup Artist in Phulparas
Introduction In Phulparas, Ladyfair is the premier choice for brides looking to achieve the perfect wedding day look with our professional at-home bridal makeup services. Whether you desire a traditional bridal look, an HD finish, or the flawless perfection of airbrush makeup, our expert makeup artist in Phulparas ensures that you shine on your special day. Contact us today at 7004721239 to schedule your appointment. Why Choose Ladyfair for Bridal Makeup in Phulparas Experienced Makeup Artist Our makeup artist in Phulparas has years of experience in bridal makeup, creating personalized looks that complement your natural beauty and align with your style and preferences. Convenient At-Home Service Forget the stress of traveling to a salon. Ladyfair brings luxury beauty treatments directly to your doorstep with our at-home bridal makeup services, offering a truly personalized experience. Premium Makeup Products We use only high-quality, professional-grade makeup products to ensure a flawless, long-lasting look that remains perfect throughout your big day. Bridal Makeup Pricing in Phulparas Our bridal makeup services in Phulparas are tailored to fit different styles and budgets: Basic Bridal Makeup: ₹10,000 HD Bridal Makeup: ₹12,000 Airbrush Bridal Makeup: ₹18,000 For engagement and reception makeup: Basic Engagement/Reception Makeup: ₹6,000 HD Engagement/Reception Makeup: ₹8,000 Airbrush Engagement/Reception Makeup: ₹12,000 For parties: Basic Party Makeup: ₹2,500 HD Party Makeup: ₹3,500 Popular Bridal Makeup Styles in Phulparas Traditional Bridal Makeup Our traditional bridal makeup in Phulparas incorporates bold colors and intricate detailing to complement your wedding attire, creating an elegant and timeless look. HD Bridal Makeup For a high-definition finish that looks flawless both in photos and in person, HD bridal makeup is the perfect choice for brides who want a picture-perfect appearance all day. Airbrush Bridal Makeup Our airbrush makeup offers a lightweight, full-coverage finish that lasts all day, giving you a smooth and natural look while ensuring long-lasting perfection. How to Book Your Bridal Makeup with Ladyfair in Phulparas Initial Contact: Call us at 7004721239 to discuss your makeup needs and schedule your appointment. Consultation Session: Meet with our makeup artist to discuss your wedding look, review your attire, and plan the perfect makeup style. Makeup Trial: We offer trial sessions to help you preview your bridal makeup look and make any adjustments. Wedding Day Makeup: On your wedding day, our makeup artist will arrive at your location in Phulparas to provide flawless, hassle-free makeup service. Testimonials from Brides in Phulparas Priya R., Phulparas: "Ladyfair provided amazing service on my wedding day. The airbrush makeup looked flawless and lasted all day." Ritu K., Phulparas: "I loved the HD makeup! It was perfect for my photos, and the at-home service was so convenient." Sneha S., Phulparas: "My traditional bridal makeup was exactly what I wanted, and Ladyfair made the entire process stress-free." Preparing for Your Bridal Makeup Session To get the best results for your bridal makeup: Stay Hydrated: Keep your skin looking fresh by drinking plenty of water. Consistent Skincare: Stick to your regular skincare routine to maintain healthy, glowing skin. Avoid New Products: Use familiar products to prevent any reactions before your wedding day. Clear Communication: Discuss your makeup preferences and any concerns with our artist during the consultation. Additional Beauty Services by Ladyfair Beyond bridal makeup, Ladyfair offers a variety of beauty services in Phulparas: Engagement and Reception Makeup: Customized looks for all pre-wedding events. Party Makeup: Perfect for birthdays, anniversaries, and special occasions. Everyday Makeup: Enhance your daily look with our expert makeup services. Special Occasion Makeup: Professional makeup for parties, celebrations, and formal events. The Future of Bridal Makeup in Phulparas Ladyfair is dedicated to setting new standards in bridal beauty in Phulparas with our innovative at-home services. As we continue to offer exceptional service, more brides are choosing Ladyfair as their preferred makeup provider. Q&A with Ladyfair’s Bridal Makeup Artist in Phulparas Q1: What makes Ladyfair the best choice for bridal makeup in Phulparas? A1: Ladyfair offers expert bridal makeup services at home, using high-quality products to ensure a flawless and long-lasting look. Q2: What are the prices for bridal makeup in Phulparas? A2: Our bridal makeup packages start at ₹10,000 for basic makeup, ₹12,000 for HD makeup, and ₹18,000 for airbrush makeup. Q3: How do I book Ladyfair’s bridal makeup services in Phulparas? A3: You can book our services by calling 7004721239. We also offer consultations and trial sessions to ensure you get the look you want. Q4: What bridal makeup styles does Ladyfair offer in Phulparas? A4: Ladyfair offers traditional, HD, and airbrush bridal makeup to suit different preferences and needs. Q5: Are makeup trials available before my wedding? A5: Yes, we offer trial sessions so you can finalize your bridal look ahead of time. Q6: What products does Ladyfair use for bridal makeup? A6: We use professional-grade, high-quality makeup products that are safe for all skin types and ensure a flawless finish. Q7: What other services does Ladyfair provide in Phulparas? A7: In addition to bridal makeup, we offer makeup for engagements, receptions, parties, and other special occasions. Ladyfair is your ultimate choice for professional, at-home bridal makeup services in Phulparas, ensuring a flawless and stress-free experience on your special day.

Posted By: 18th December 2024
Bridal Makeup Artist in Madhepur
Introduction In Madhepur, Ladyfair is the premier choice for brides looking to achieve the perfect wedding day look with our professional at-home bridal makeup services. Whether you desire a traditional bridal look, an HD finish, or the flawless perfection of airbrush makeup, our expert makeup artist in Madhepur ensures that you shine on your special day. Contact us today at 7004721239 to schedule your appointment. Why Choose Ladyfair for Bridal Makeup in Madhepur Experienced Makeup Artist Our makeup artist in Madhepur has years of experience in bridal makeup, creating personalized looks that complement your natural beauty and align with your style and preferences. Convenient At-Home Service Forget the stress of traveling to a salon. Ladyfair brings luxury beauty treatments directly to your doorstep with our at-home bridal makeup services, offering a truly personalized experience. Premium Makeup Products We use only high-quality, professional-grade makeup products to ensure a flawless, long-lasting look that remains perfect throughout your big day. Bridal Makeup Pricing in Madhepur Our bridal makeup services in Madhepur are tailored to fit different styles and budgets: Basic Bridal Makeup: ₹10,000 HD Bridal Makeup: ₹12,000 Airbrush Bridal Makeup: ₹18,000 For engagement and reception makeup: Basic Engagement/Reception Makeup: ₹6,000 HD Engagement/Reception Makeup: ₹8,000 Airbrush Engagement/Reception Makeup: ₹12,000 For parties: Basic Party Makeup: ₹2,500 HD Party Makeup: ₹3,500 Popular Bridal Makeup Styles in Madhepur Traditional Bridal Makeup Our traditional bridal makeup in Madhepur incorporates bold colors and intricate detailing to complement your wedding attire, creating an elegant and timeless look. HD Bridal Makeup For a high-definition finish that looks flawless both in photos and in person, HD bridal makeup is the perfect choice for brides who want a picture-perfect appearance all day. Airbrush Bridal Makeup Our airbrush makeup offers a lightweight, full-coverage finish that lasts all day, giving you a smooth and natural look while ensuring long-lasting perfection. How to Book Your Bridal Makeup with Ladyfair in Madhepur Initial Contact: Call us at 7004721239 to discuss your makeup needs and schedule your appointment. Consultation Session: Meet with our makeup artist to discuss your wedding look, review your attire, and plan the perfect makeup style. Makeup Trial: We offer trial sessions to help you preview your bridal makeup look and make any adjustments. Wedding Day Makeup: On your wedding day, our makeup artist will arrive at your location in Madhepur to provide flawless, hassle-free makeup service. Testimonials from Brides in Madhepur Priya R., Madhepur: "Ladyfair provided amazing service on my wedding day. The airbrush makeup looked flawless and lasted all day." Ritu K., Madhepur: "I loved the HD makeup! It was perfect for my photos, and the at-home service was so convenient." Sneha S., Madhepur: "My traditional bridal makeup was exactly what I wanted, and Ladyfair made the entire process stress-free." Preparing for Your Bridal Makeup Session To get the best results for your bridal makeup: Stay Hydrated: Keep your skin looking fresh by drinking plenty of water. Consistent Skincare: Stick to your regular skincare routine to maintain healthy, glowing skin. Avoid New Products: Use familiar products to prevent any reactions before your wedding day. Clear Communication: Discuss your makeup preferences and any concerns with our artist during the consultation. Additional Beauty Services by Ladyfair Beyond bridal makeup, Ladyfair offers a variety of beauty services in Madhepur: Engagement and Reception Makeup: Customized looks for all pre-wedding events. Party Makeup: Perfect for birthdays, anniversaries, and special occasions. Everyday Makeup: Enhance your daily look with our expert makeup services. Special Occasion Makeup: Professional makeup for parties, celebrations, and formal events. The Future of Bridal Makeup in Madhepur Ladyfair is dedicated to setting new standards in bridal beauty in Madhepur with our innovative at-home services. As we continue to offer exceptional service, more brides are choosing Ladyfair as their preferred makeup provider. Q&A with Ladyfair’s Bridal Makeup Artist in Madhepur Q1: What makes Ladyfair the best choice for bridal makeup in Madhepur? A1: Ladyfair offers expert bridal makeup services at home, using high-quality products to ensure a flawless and long-lasting look. Q2: What are the prices for bridal makeup in Madhepur? A2: Our bridal makeup packages start at ₹10,000 for basic makeup, ₹12,000 for HD makeup, and ₹18,000 for airbrush makeup. Q3: How do I book Ladyfair’s bridal makeup services in Madhepur? A3: You can book our services by calling 7004721239. We also offer consultations and trial sessions to ensure you get the look you want. Q4: What bridal makeup styles does Ladyfair offer in Madhepur? A4: Ladyfair offers traditional, HD, and airbrush bridal makeup to suit different preferences and needs. Q5: Are makeup trials available before my wedding? A5: Yes, we offer trial sessions so you can finalize your bridal look ahead of time. Q6: What products does Ladyfair use for bridal makeup? A6: We use professional-grade, high-quality makeup products that are safe for all skin types and ensure a flawless finish. Q7: What other services does Ladyfair provide in Madhepur? A7: In addition to bridal makeup, we offer makeup for engagements, receptions, parties, and other special occasions. Ladyfair is your ultimate choice for professional, at-home bridal makeup services in Madhepur, ensuring a flawless and stress-free experience on your special day.

Posted By: 18th December 2024
Best Bridal Makeup Artist in Rajoun
Introduction Your wedding day is a celebration of love, and every bride deserves to feel stunning and confident. At Ladyfair, we specialize in creating flawless bridal looks with our exclusive at-home makeup services in Rajoun, Banka District. Enjoy a personalized experience in the comfort of your home with our expert makeup artist. To book your session, call us at 7004721239. In this blog, we’ll explore why bridal makeup is essential, what sets Ladyfair apart in Rajoun, and how we help brides across the Banka District shine on their special day. The Importance of Bridal Makeup Bridal makeup isn’t just about applying cosmetics; it’s an art that enhances your natural beauty and complements your wedding attire. It ensures you look radiant both in person and in photographs, helping you feel confident throughout the most important day of your life. At Ladyfair, we craft bridal looks that align with your personal style, blending traditional and modern techniques for a timeless result. Why Ladyfair is the Best Choice in Rajoun, Banka District Convenient At-Home Services Skip the hassle of traveling to a salon—our skilled makeup artist comes to you, offering a relaxed and personalized experience right at your doorstep. Expertise in Bridal Makeup From bold traditional looks to soft modern styles, our makeup artist has extensive experience in creating bridal looks that perfectly match your vision and wedding theme. Premium Quality Products We use only high-quality, skin-safe, and long-lasting makeup products to ensure your look stays flawless throughout the day. Pre-Wedding Consultations We offer personalized consultations to understand your preferences, plan your makeup style, and even provide trial sessions for complete satisfaction. Bridal Makeup Trends in Rajoun Traditional Bridal Makeup Bold colors, striking eyeliner, and radiant skin define this timeless style, perfect for brides embracing cultural traditions. Modern Bridal Makeup Soft tones, subtle highlights, and a natural glow are hallmarks of modern bridal makeup, ideal for minimalist brides. Fusion Bridal Makeup For brides looking to merge tradition with contemporary aesthetics, our fusion makeup style is the perfect choice. The Ladyfair Bridal Makeup Process Book an Appointment: Call 7004721239 to discuss your bridal makeup needs and schedule a session. Pre-Wedding Consultation: Share your vision, review your attire, and finalize your makeup style with our expert. Trial Session: Preview your bridal look with a trial session to ensure it’s exactly what you envision. Wedding Day Makeup: Relax while our makeup artist creates a flawless bridal look at your home. Touch-Ups (Optional): Keep your makeup fresh with additional touch-up services if needed. Testimonials from Rajoun Brides Neha R., Rajoun: "Ladyfair made my wedding day truly special. The makeup artist was professional and created a stunning look that matched my outfit perfectly!" Pooja T., Rajoun: "The trial session helped me feel confident about my bridal look. I couldn’t have asked for a better experience!" Ananya S., Rajoun: "I wanted a blend of traditional and modern styles, and Ladyfair exceeded my expectations. My makeup lasted all day, and I got so many compliments!" Tips to Prepare for Your Bridal Makeup Session Hydrate Your Skin: Drink plenty of water to ensure a healthy glow. Stick to Your Skincare Routine: Cleanse, tone, and moisturize daily for smooth and radiant skin. Avoid New Products: Use only familiar products to prevent skin irritation. Communicate Your Vision: Share your ideas and preferences during the consultation for a perfect result. Additional Services Offered by Ladyfair Apart from bridal makeup, we provide: Party Makeup: Perfect for wedding guests and other special occasions. Everyday Makeup: Light, natural looks for casual outings. Special Occasion Makeup: Ideal for engagements, anniversaries, and celebrations. Why Ladyfair is Transforming Bridal Makeup in Rajoun Ladyfair is redefining bridal makeup with a focus on convenience, quality, and personalization. Our at-home services make it easy for brides in Rajoun to achieve their dream look without any stress. FAQs 1. How do I book Ladyfair’s services in Rajoun? Call us at 7004721239 to schedule your bridal makeup session. 2. What types of makeup styles do you offer? We specialize in traditional, modern, and fusion bridal makeup styles. 3. Do you offer trial sessions? Yes, we provide trial sessions to ensure your bridal look is perfect before the big day. 4. What products do you use? We use premium, skin-safe, and long-lasting makeup products. 5. Can you include cultural elements in the makeup? Yes, we can incorporate cultural and traditional touches to honor your heritage. 6. Do you provide touch-up services during the event? Optional touch-up services are available to keep your makeup looking fresh all day.
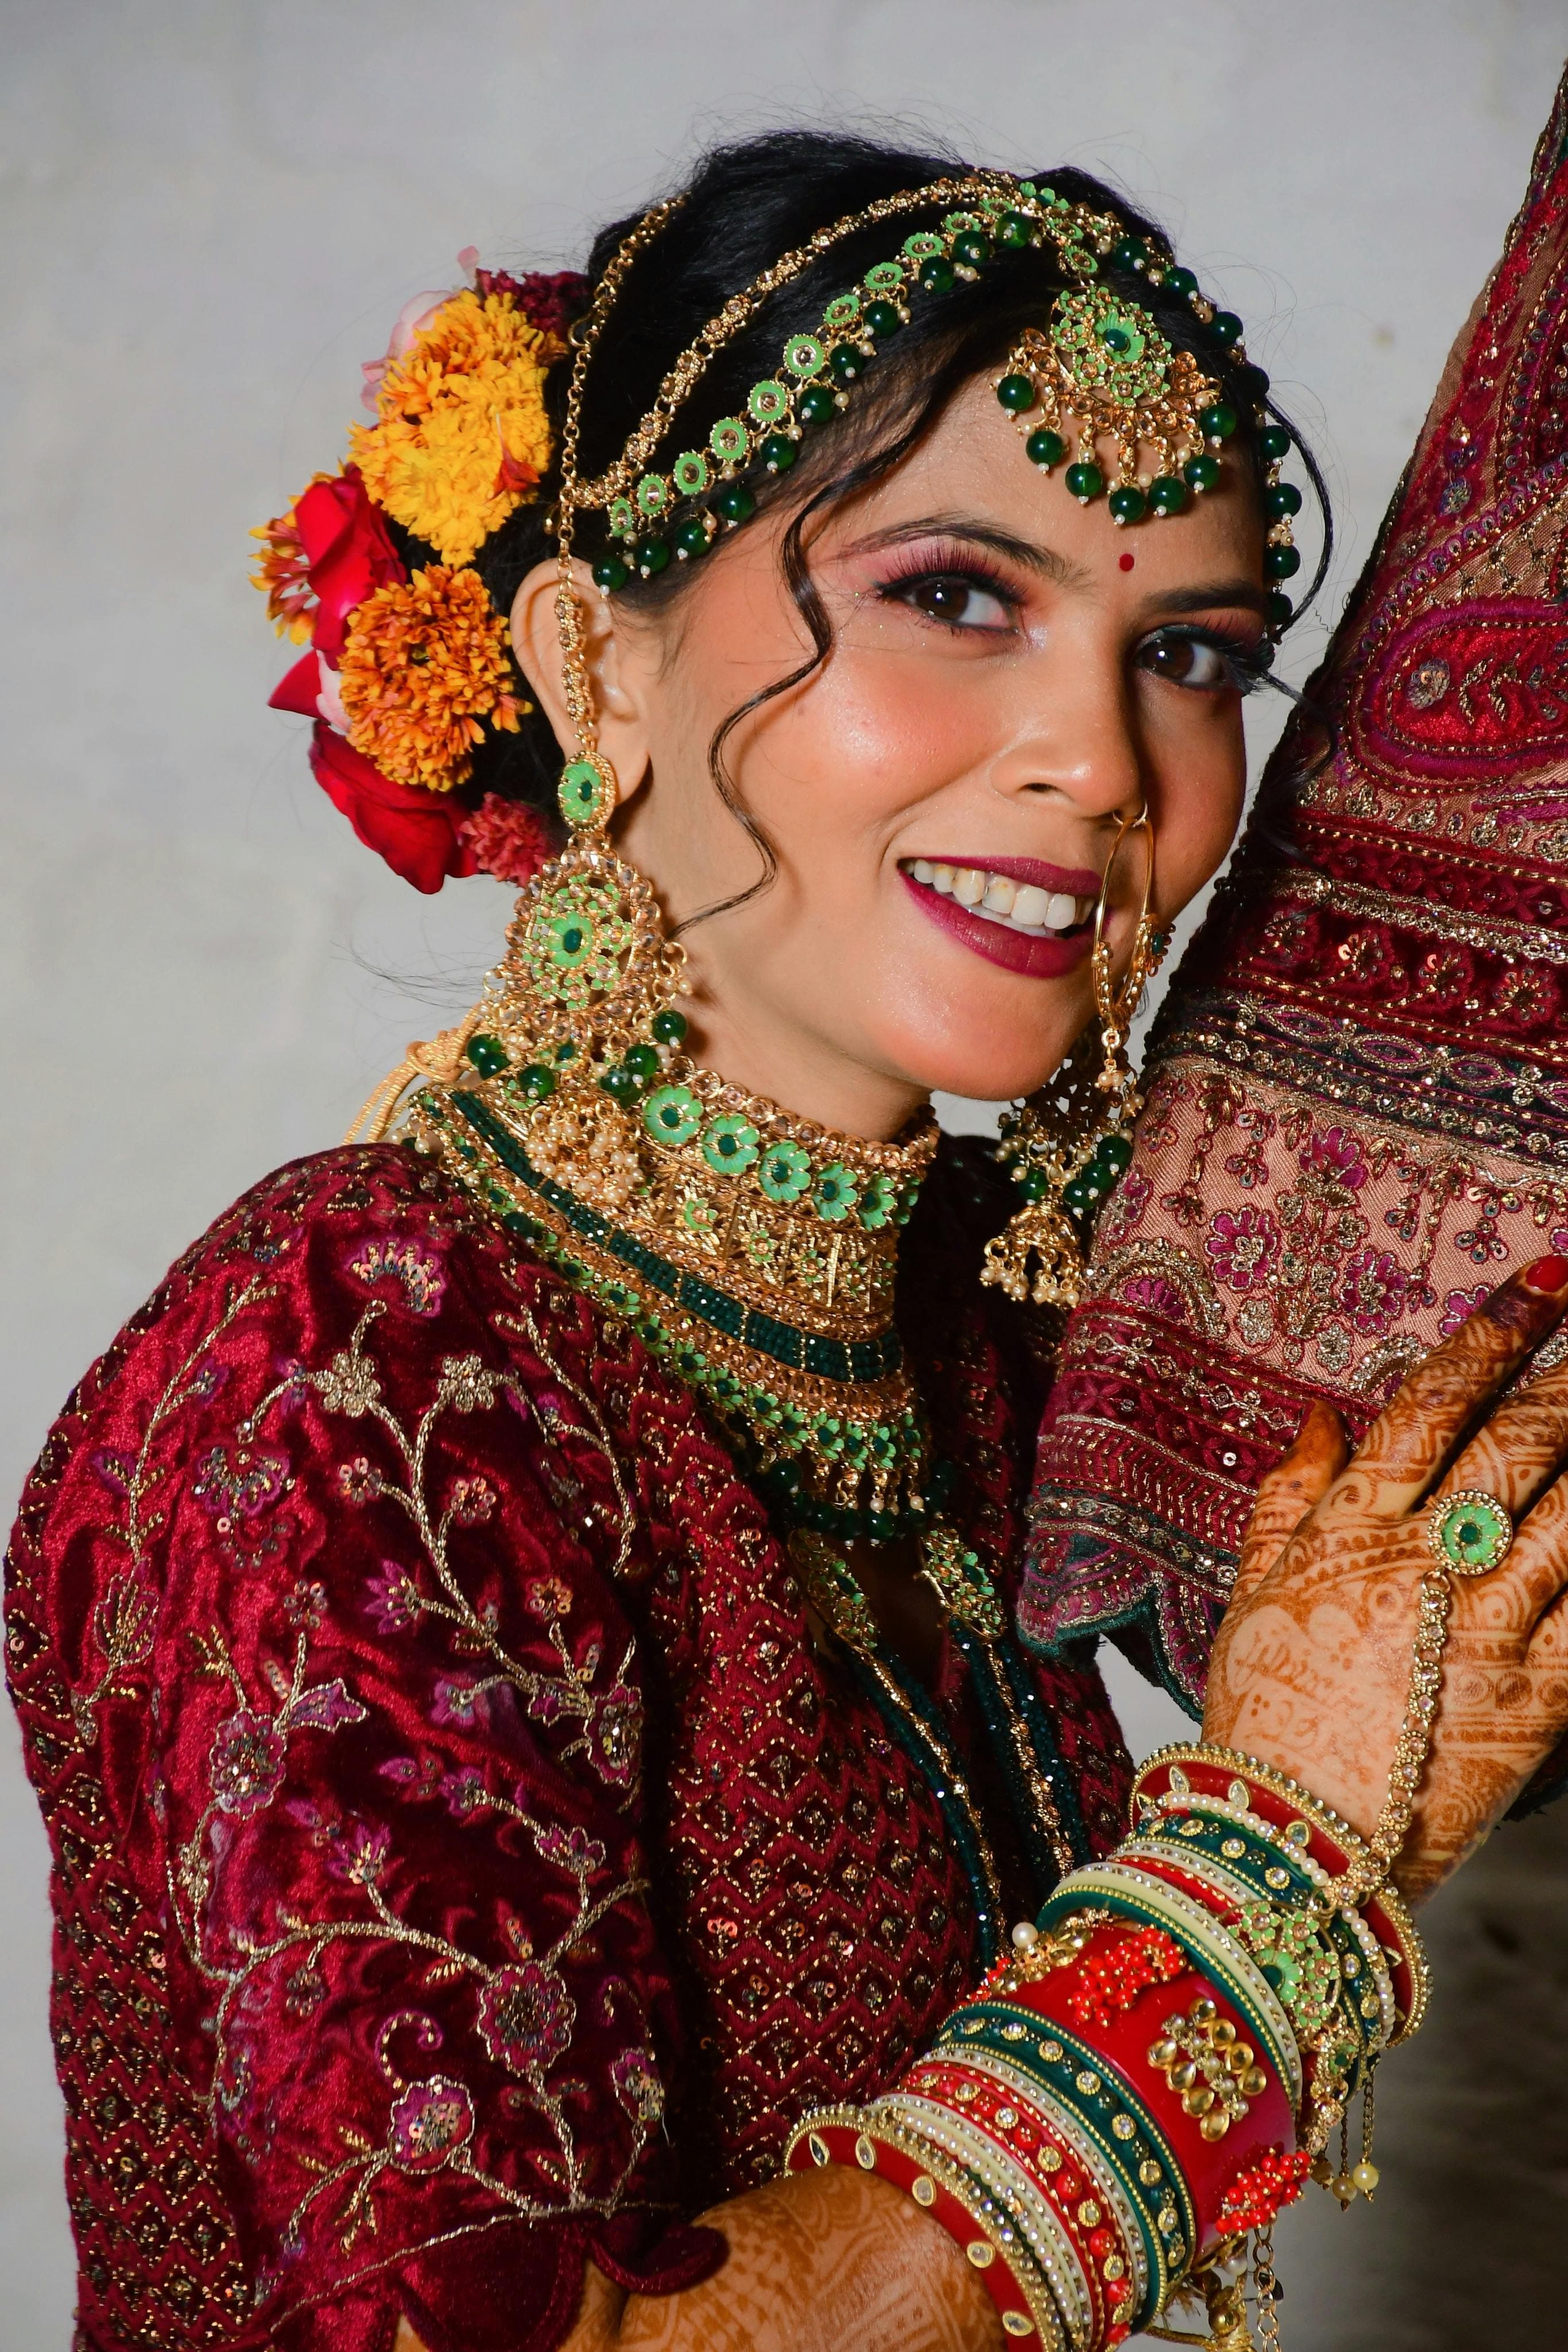
Posted By: 18th December 2024
Bridal Makeup Artist in Lakhnaur
Introduction In Lakhnaur, Ladyfair is the premier choice for brides looking to achieve the perfect wedding day look with our professional at-home bridal makeup services. Whether you desire a traditional bridal look, an HD finish, or the flawless perfection of airbrush makeup, our expert makeup artist in Lakhnaur ensures that you shine on your special day. Contact us today at 7004721239 to schedule your appointment. Why Choose Ladyfair for Bridal Makeup in Lakhnaur Experienced Makeup Artist Our makeup artist in Lakhnaur has years of experience in bridal makeup, creating personalized looks that complement your natural beauty and align with your style and preferences. Convenient At-Home Service Forget the stress of traveling to a salon. Ladyfair brings luxury beauty treatments directly to your doorstep with our at-home bridal makeup services, offering a truly personalized experience. Premium Makeup Products We use only high-quality, professional-grade makeup products to ensure a flawless, long-lasting look that remains perfect throughout your big day. Bridal Makeup Pricing in Lakhnaur Our bridal makeup services in Lakhnaur are tailored to fit different styles and budgets: Basic Bridal Makeup: ₹10,000 HD Bridal Makeup: ₹12,000 Airbrush Bridal Makeup: ₹18,000 For engagement and reception makeup: Basic Engagement/Reception Makeup: ₹6,000 HD Engagement/Reception Makeup: ₹8,000 Airbrush Engagement/Reception Makeup: ₹12,000 For parties: Basic Party Makeup: ₹2,500 HD Party Makeup: ₹3,500 Popular Bridal Makeup Styles in Lakhnaur Traditional Bridal Makeup Our traditional bridal makeup in Lakhnaur incorporates bold colors and intricate detailing to complement your wedding attire, creating an elegant and timeless look. HD Bridal Makeup For a high-definition finish that looks flawless both in photos and in person, HD bridal makeup is the perfect choice for brides who want a picture-perfect appearance all day. Airbrush Bridal Makeup Our airbrush makeup offers a lightweight, full-coverage finish that lasts all day, giving you a smooth and natural look while ensuring long-lasting perfection. How to Book Your Bridal Makeup with Ladyfair in Lakhnaur Initial Contact: Call us at 7004721239 to discuss your makeup needs and schedule your appointment. Consultation Session: Meet with our makeup artist to discuss your wedding look, review your attire, and plan the perfect makeup style. Makeup Trial: We offer trial sessions to help you preview your bridal makeup look and make any adjustments. Wedding Day Makeup: On your wedding day, our makeup artist will arrive at your location in Lakhnaur to provide flawless, hassle-free makeup service. Testimonials from Brides in Lakhnaur Priya R., Lakhnaur: "Ladyfair provided amazing service on my wedding day. The airbrush makeup looked flawless and lasted all day." Ritu K., Lakhnaur: "I loved the HD makeup! It was perfect for my photos, and the at-home service was so convenient." Sneha S., Lakhnaur: "My traditional bridal makeup was exactly what I wanted, and Ladyfair made the entire process stress-free." Preparing for Your Bridal Makeup Session To get the best results for your bridal makeup: Stay Hydrated: Keep your skin looking fresh by drinking plenty of water. Consistent Skincare: Stick to your regular skincare routine to maintain healthy, glowing skin. Avoid New Products: Use familiar products to prevent any reactions before your wedding day. Clear Communication: Discuss your makeup preferences and any concerns with our artist during the consultation. Additional Beauty Services by Ladyfair Beyond bridal makeup, Ladyfair offers a variety of beauty services in Lakhnaur: Engagement and Reception Makeup: Customized looks for all pre-wedding events. Party Makeup: Perfect for birthdays, anniversaries, and special occasions. Everyday Makeup: Enhance your daily look with our expert makeup services. Special Occasion Makeup: Professional makeup for parties, celebrations, and formal events. The Future of Bridal Makeup in Lakhnaur Ladyfair is dedicated to setting new standards in bridal beauty in Lakhnaur with our innovative at-home services. As we continue to offer exceptional service, more brides are choosing Ladyfair as their preferred makeup provider. Q&A with Ladyfair’s Bridal Makeup Artist in Lakhnaur Q1: What makes Ladyfair the best choice for bridal makeup in Lakhnaur? A1: Ladyfair offers expert bridal makeup services at home, using high-quality products to ensure a flawless and long-lasting look. Q2: What are the prices for bridal makeup in Lakhnaur? A2: Our bridal makeup packages start at ₹10,000 for basic makeup, ₹12,000 for HD makeup, and ₹18,000 for airbrush makeup. Q3: How do I book Ladyfair’s bridal makeup services in Lakhnaur? A3: You can book our services by calling 7004721239. We also offer consultations and trial sessions to ensure you get the look you want. Q4: What bridal makeup styles does Ladyfair offer in Lakhnaur? A4: Ladyfair offers traditional, HD, and airbrush bridal makeup to suit different preferences and needs. Q5: Are makeup trials available before my wedding? A5: Yes, we offer trial sessions so you can finalize your bridal look ahead of time. Q6: What products does Ladyfair use for bridal makeup? A6: We use professional-grade, high-quality makeup products that are safe for all skin types and ensure a flawless finish. Q7: What other services does Ladyfair provide in Lakhnaur? A7: In addition to bridal makeup, we offer makeup for engagements, receptions, parties, and other special occasions. Ladyfair is your ultimate choice for professional, at-home bridal makeup services in Lakhnaur, ensuring a flawless and stress-free experience on your special day.

Posted By: 18th December 2024
Best Bridal Makeup in Katoriya
Introduction Every bride dreams of looking perfect on her wedding day, and at Ladyfair, we make that dream a reality. Offering the best at-home bridal makeup services in Katoriya, Banka District, we ensure a stress-free, personalized experience right at your doorstep. To book your session with our expert makeup artist, call us at 7004721239. In this blog, we’ll highlight why bridal makeup is crucial, why Ladyfair is the preferred choice in Katoriya, and how we cater to brides throughout the Banka District. The Importance of Bridal Makeup Your wedding day is a once-in-a-lifetime event, and your makeup should reflect its significance. Bridal makeup is not just about looking good; it’s about feeling confident and beautiful. It enhances your natural features, complements your attire, and ensures that your radiance shines through in every photograph. At Ladyfair, we specialize in creating bridal looks that are unique to each bride’s personality and style. Why Ladyfair is the Best Choice in Katoriya, Banka District Hassle-Free At-Home Services No need to visit salons or deal with traffic—our makeup artist comes to you, ensuring comfort and convenience. Expert Makeup Artists With years of experience, our artist delivers stunning bridal looks that range from classic traditional styles to modern minimalist aesthetics. High-Quality Products We use premium, skin-safe, and long-lasting products to ensure your makeup stays flawless throughout the day. Tailored Pre-Wedding Consultations Our pre-wedding consultations help us understand your vision and preferences, allowing us to craft a bridal look that feels uniquely yours. Bridal Makeup Trends in Katoriya Traditional Bridal Makeup Rich colors, bold eyeliner, and radiant skin are hallmarks of traditional bridal makeup. Perfect for brides who want a timeless look. Modern Bridal Makeup Soft, natural tones with subtle highlights define modern bridal makeup, ideal for brides who prefer an understated yet elegant style. Fusion Bridal Makeup A blend of traditional and contemporary elements, fusion bridal makeup is perfect for brides who want the best of both worlds. The Ladyfair Bridal Makeup Process Book an Appointment: Call us at 7004721239 to discuss your requirements and schedule your bridal makeup session. Pre-Wedding Consultation: Share your vision and finalize your makeup style with our expert. Trial Makeup Session: Try out your bridal look ahead of the wedding to ensure it’s perfect. Wedding Day Makeup: Enjoy a flawless and relaxing makeup session at your home. Optional Touch-Ups: Keep your look fresh with touch-up services, if needed. Testimonials from Katoriya Brides Priya R., Katoriya: "Ladyfair made my wedding day stress-free with their at-home service. My makeup was flawless, and I received endless compliments!" Sunita T., Katoriya: "The pre-wedding consultation and trial session helped me feel confident about my look. The final result was absolutely stunning." Anjali S., Katoriya: "I wanted a modern bridal look, and Ladyfair delivered beyond my expectations. Their service was professional and convenient." Tips to Prepare for Your Bridal Makeup Session Hydrate Your Skin: Drink plenty of water to keep your skin glowing. Stick to a Skincare Routine: Cleanse and moisturize daily to ensure smooth application. Avoid New Products: Prevent skin reactions by using familiar products before the wedding. Be Clear About Your Vision: Share your ideas and concerns during the consultation. Additional Services Offered by Ladyfair In addition to bridal makeup, we provide: Party Makeup: For wedding guests and special occasions. Everyday Makeup: Light and elegant looks for casual events. Special Occasion Makeup: For engagements, anniversaries, and more. Why Choose Ladyfair in Katoriya? Ladyfair is transforming bridal makeup in Katoriya by blending professionalism with personalized care. We believe every bride deserves to feel beautiful on her big day, and we’re here to make it happen. FAQs 1. How do I book Ladyfair’s services in Katoriya? Call us at 7004721239 to schedule a consultation and book your makeup session. 2. What types of bridal looks do you offer? We specialize in traditional, modern, and fusion bridal makeup styles. 3. Do you offer trial sessions? Yes, we offer trial sessions to ensure you’re happy with your bridal look before the big day. 4. What products do you use? We use premium, skin-safe, and long-lasting makeup products. 5. Can you work with specific cultural or traditional elements? Absolutely! We customize makeup styles to honor your cultural preferences. 6. What if I need touch-ups during the event? We offer optional touch-up services to keep your look fresh throughout your wedding.

Posted By: 18th December 2024
Best Bridal Makeup in Fullidumer
Introduction Your wedding day is one of the most cherished occasions of your life, and every bride deserves to look stunning and feel confident. In Fullidumer, Banka District, Ladyfair ensures you step into your new journey looking your absolute best. With our exclusive at-home bridal makeup services, you can enjoy a stress-free, customized experience without leaving the comfort of your home. To book your appointment, call us at 7004721239. In this blog, we’ll explore why professional bridal makeup is vital, why Ladyfair is the top choice in Fullidumer, and how we cater to brides across the Banka District. The Importance of Bridal Makeup Bridal makeup is more than just applying cosmetics—it’s an art that enhances your natural beauty, complements your wedding attire, and ensures you shine on your big day. It also ensures you look flawless in both real life and wedding photos. At Ladyfair, we use modern techniques combined with timeless traditions to give you a look that reflects your personality and style. Why Ladyfair Stands Out in Fullidumer, Banka District Convenience of At-Home Services Say goodbye to salon visits on your wedding day! Ladyfair provides professional bridal makeup at your doorstep, making the experience relaxing and personal. Expertise in Bridal Makeup Our experienced makeup artist is skilled in creating stunning bridal looks, from bold traditional styles to soft modern aesthetics, tailored to your preferences and wedding theme. Premium Products We use only high-quality, skin-safe products that ensure your makeup stays flawless and long-lasting throughout your wedding celebrations. Pre-Wedding Consultations Every bride is unique, and Ladyfair ensures that your makeup is too. Our pre-wedding consultations help us understand your vision, try different styles, and finalize the perfect look for your big day. Bridal Makeup Trends in Fullidumer Traditional Bridal Makeup Bold, vibrant, and timeless—traditional bridal makeup features striking eyeliner, bright lips, and detailed contouring to complement cultural wedding attire. Modern Bridal Makeup Soft tones, natural highlights, and a radiant glow define modern bridal makeup, perfect for brides seeking a minimalist look. Fusion Bridal Makeup For brides looking for a blend of tradition and modernity, fusion bridal makeup combines the best of both worlds. Ladyfair specializes in creating custom fusion styles to suit your vision. The Ladyfair Experience: From Consultation to Final Look Initial Contact: Call us at 7004721239 to discuss your bridal makeup needs and book an appointment. Pre-Wedding Consultation: Meet with our artist to share your vision, review your attire, and finalize your style. Makeup Trial: Experience a trial session to preview your bridal look and make any necessary adjustments. Final Makeup Session: On your wedding day, our artist will arrive at your location to provide a flawless makeup experience. Post-Wedding Touch-Ups: If needed, we also offer touch-up services to keep your makeup looking fresh all day. Client Testimonials Neha P., Fullidumer: "Ladyfair’s at-home service was a lifesaver! The makeup was stunning and lasted all day. Highly recommend them to every bride." Ritika S., Fullidumer: "The trial session was perfect for planning my look. The final result was flawless, and the artist was so professional." Kavita J., Fullidumer: "I wanted a mix of traditional and modern makeup, and Ladyfair exceeded my expectations. Everyone complimented my bridal look!" Preparing for Your Bridal Makeup Session To ensure the best results, follow these tips: Stay Hydrated: Keep your skin glowing by drinking plenty of water. Stick to a Skincare Routine: Cleanse, tone, and moisturize daily to maintain smooth skin. Avoid New Products: Prevent allergic reactions by sticking to familiar skincare items. Communicate Your Vision: Be open about your preferences and concerns during consultations. Beyond Bridal Makeup: Ladyfair’s Additional Services Ladyfair also provides: Party Makeup: Perfect for wedding guests or special occasions. Everyday Makeup: Light and subtle makeup for casual events. Special Occasion Makeup: Ideal for engagements, anniversaries, and celebrations. Looking Ahead: The Future of Bridal Makeup in Fullidumer Ladyfair is dedicated to redefining bridal makeup services in Fullidumer. By blending innovation with personalized care, we aim to make every bride’s special day unforgettable. FAQs 1. What makes Ladyfair unique in Fullidumer? We offer professional, at-home bridal makeup services, making the process stress-free and convenient. 2. What styles of makeup do you offer? We specialize in traditional, modern, and fusion bridal looks tailored to each bride's preferences. 3. How does the at-home service work? Our artist visits your location, starting with a consultation, followed by a trial session, and finally providing the full bridal makeup service on your wedding day. 4. What products do you use? We use high-quality, skin-friendly, and long-lasting makeup products. 5. Can you incorporate cultural elements into the makeup? Absolutely! We can customize your makeup to honor cultural and traditional elements. 6. How do I book Ladyfair’s services? Call us at 7004721239 to discuss your requirements and schedule an appointment.

Posted By: 18th December 2024
best bridal makeup in dhoraiya
Introduction Your wedding day is a once-in-a-lifetime event, and every bride desires to look her absolute best. In Dhoraiya, Banka District, Ladyfair ensures that you shine like a star on your special day. With our exclusive at-home bridal makeup services, we bring elegance and convenience straight to your doorstep. To book your appointment, call us at 7004721239. In this blog, we’ll explore the importance of professional bridal makeup, how Ladyfair stands out in Dhoraiya, and why brides across Banka District trust us for their big day. The Importance of Bridal Makeup Bridal makeup is not just about looking good—it’s about feeling confident and radiant as you step into a new chapter. Professional makeup enhances your natural beauty while ensuring you look stunning in both real life and photographs. At Ladyfair, we use a blend of traditional and contemporary techniques to craft a bridal look that highlights your individuality and matches your wedding attire perfectly. Why Ladyfair Stands Out in Dhoraiya, Banka District Convenience of At-Home Services Ladyfair eliminates the hassle of traveling to salons on your wedding day. Our professional makeup artist comes to your location, ensuring a stress-free and personalized experience. Expertise in Bridal Makeup Our experienced makeup artist specializes in creating a variety of bridal looks, ranging from bold traditional styles to modern minimalist aesthetics, tailored to your preferences. Premium Quality Products We use high-quality, skin-safe makeup products that provide long-lasting results, ensuring you look flawless throughout your special day. Personalized Pre-Wedding Consultations Every bride is unique, and Ladyfair prioritizes understanding your vision. We conduct detailed pre-wedding consultations to plan your look, ensuring your makeup complements your outfit and personality. Bridal Makeup Trends in Dhoraiya Traditional Bridal Makeup This style remains a favorite among brides, featuring bold lips, dramatic eyeliner, and defined contours to complement cultural wedding outfits. Modern Bridal Makeup Soft tones, glowing skin, and minimalistic makeup define this trend. It’s perfect for brides looking for a natural yet elegant look. Fusion Bridal Makeup Ladyfair excels in combining the charm of traditional makeup with the elegance of modern styles, creating a balanced and unique bridal look. The Ladyfair Experience: From Consultation to Final Look Initial Contact: Call us at 7004721239 to discuss your requirements and schedule an appointment. Pre-Wedding Consultation: Share your vision, review your attire, and finalize the makeup style with our artist. Makeup Trial: Experience a trial session to ensure your desired look is perfect. Final Makeup Session: On your wedding day, our artist will create your stunning bridal look at your location. Post-Wedding Touch-Ups: If required, we provide touch-up services to maintain your flawless look throughout the day. Client Testimonials Surbhi S., Dhoraiya: "Ladyfair’s at-home service made my wedding day so much easier. The makeup artist was professional, and my look was absolutely stunning!" Ritika J., Dhoraiya: "I loved the trial session. It gave me so much confidence, and the final result was exactly what I imagined!" Neha R., Dhoraiya: "Ladyfair blended traditional and modern elements beautifully. My makeup lasted all day, and I received so many compliments!" Preparing for Your Bridal Makeup Session Stay Hydrated: Keep your skin glowing by drinking plenty of water. Follow a Skincare Routine: Cleanse, tone, and moisturize regularly for smooth skin. Avoid New Products: Stick to your usual skincare products to avoid reactions. Communicate Your Vision: Share your expectations with our makeup artist during the consultation. Beyond Bridal Makeup: Ladyfair’s Additional Services Party Makeup: Perfect for wedding guests and celebratory events. Everyday Makeup: Subtle and natural makeup for casual occasions. Special Occasion Makeup: Ideal for engagements, anniversaries, and other events. Looking Ahead: The Future of Bridal Makeup in Dhoraiya Ladyfair is dedicated to redefining bridal makeup services in Dhoraiya. With innovative techniques, premium products, and unparalleled customer service, we aim to make every bride’s special day truly unforgettable. FAQs What makes Ladyfair unique in Dhoraiya? Ladyfair offers at-home bridal makeup services, ensuring convenience and a personalized experience. What bridal styles does Ladyfair specialize in? We specialize in traditional, modern, and fusion bridal makeup styles. How do the at-home services work? Our artist comes to your location, offering consultations, trial sessions, and the final bridal makeup service. What products do you use? Ladyfair uses premium, skin-safe, and long-lasting makeup products. How should I prepare for my session? Stay hydrated, follow a skincare routine, and communicate your preferences during the consultation. Can Ladyfair handle cultural makeup requirements? Yes, we integrate cultural elements into your bridal look to honor your traditions. What do clients say about Ladyfair? Brides love our professional approach, high-quality products, and flawless results. How can I book Ladyfair’s services? Call us at 7004721239 to book your bridal makeup appointment.

Posted By: 18th December 2024
Bridal Makeup Artist in Andhrathadi
Introduction In Andhrathadi, Ladyfair is the premier choice for brides looking to achieve the perfect wedding day look with our professional at-home bridal makeup services. Whether you desire a traditional bridal look, an HD finish, or the flawless perfection of airbrush makeup, our expert makeup artist in Andhrathadi ensures that you shine on your special day. Contact us today at 7004721239 to schedule your appointment. Why Choose Ladyfair for Bridal Makeup in Andhrathadi Experienced Makeup Artist Our makeup artist in Andhrathadi has years of experience in bridal makeup, creating personalized looks that complement your natural beauty and align with your style and preferences. Convenient At-Home Service Forget the stress of traveling to a salon. Ladyfair brings luxury beauty treatments directly to your doorstep with our at-home bridal makeup services, offering a truly personalized experience. Premium Makeup Products We use only high-quality, professional-grade makeup products to ensure a flawless, long-lasting look that remains perfect throughout your big day. Bridal Makeup Pricing in Andhrathadi Our bridal makeup services in Andhrathadi are tailored to fit different styles and budgets: Basic Bridal Makeup: ₹10,000 HD Bridal Makeup: ₹12,000 Airbrush Bridal Makeup: ₹18,000 For engagement and reception makeup: Basic Engagement/Reception Makeup: ₹6,000 HD Engagement/Reception Makeup: ₹8,000 Airbrush Engagement/Reception Makeup: ₹12,000 For parties: Basic Party Makeup: ₹2,500 HD Party Makeup: ₹3,500 Popular Bridal Makeup Styles in Andhrathadi Traditional Bridal Makeup Our traditional bridal makeup in Andhrathadi incorporates bold colors and intricate detailing to complement your wedding attire, creating an elegant and timeless look. HD Bridal Makeup For a high-definition finish that looks flawless both in photos and in person, HD bridal makeup is the perfect choice for brides who want a picture-perfect appearance all day. Airbrush Bridal Makeup Our airbrush makeup offers a lightweight, full-coverage finish that lasts all day, giving you a smooth and natural look while ensuring long-lasting perfection. How to Book Your Bridal Makeup with Ladyfair in Andhrathadi Initial Contact: Call us at 7004721239 to discuss your makeup needs and schedule your appointment. Consultation Session: Meet with our makeup artist to discuss your wedding look, review your attire, and plan the perfect makeup style. Makeup Trial: We offer trial sessions to help you preview your bridal makeup look and make any adjustments. Wedding Day Makeup: On your wedding day, our makeup artist will arrive at your location in Andhrathadi to provide flawless, hassle-free makeup service. Testimonials from Brides in Andhrathadi Priya R., Andhrathadi: "Ladyfair provided amazing service on my wedding day. The airbrush makeup looked flawless and lasted all day." Ritu K., Andhrathadi: "I loved the HD makeup! It was perfect for my photos, and the at-home service was so convenient." Sneha S., Andhrathadi: "My traditional bridal makeup was exactly what I wanted, and Ladyfair made the entire process stress-free." Preparing for Your Bridal Makeup Session To get the best results for your bridal makeup: Stay Hydrated: Keep your skin looking fresh by drinking plenty of water. Consistent Skincare: Stick to your regular skincare routine to maintain healthy, glowing skin. Avoid New Products: Use familiar products to prevent any reactions before your wedding day. Clear Communication: Discuss your makeup preferences and any concerns with our artist during the consultation. Additional Beauty Services by Ladyfair Beyond bridal makeup, Ladyfair offers a variety of beauty services in Andhrathadi: Engagement and Reception Makeup: Customized looks for all pre-wedding events. Party Makeup: Perfect for birthdays, anniversaries, and special occasions. Everyday Makeup: Enhance your daily look with our expert makeup services. Special Occasion Makeup: Professional makeup for parties, celebrations, and formal events. The Future of Bridal Makeup in Andhrathadi Ladyfair is dedicated to setting new standards in bridal beauty in Andhrathadi with our innovative at-home services. As we continue to offer exceptional service, more brides are choosing Ladyfair as their preferred makeup provider. Q&A with Ladyfair’s Bridal Makeup Artist in Andhrathadi Q1: What makes Ladyfair the best choice for bridal makeup in Andhrathadi? A1: Ladyfair offers expert bridal makeup services at home, using high-quality products to ensure a flawless and long-lasting look. Q2: What are the prices for bridal makeup in Andhrathadi? A2: Our bridal makeup packages start at ₹10,000 for basic makeup, ₹12,000 for HD makeup, and ₹18,000 for airbrush makeup. Q3: How do I book Ladyfair’s bridal makeup services in Andhrathadi? A3: You can book our services by calling 7004721239. We also offer consultations and trial sessions to ensure you get the look you want. Q4: What bridal makeup styles does Ladyfair offer in Andhrathadi? A4: Ladyfair offers traditional, HD, and airbrush bridal makeup to suit different preferences and needs. Q5: Are makeup trials available before my wedding? A5: Yes, we offer trial sessions so you can finalize your bridal look ahead of time. Q6: What products does Ladyfair use for bridal makeup? A6: We use professional-grade, high-quality makeup products that are safe for all skin types and ensure a flawless finish. Q7: What other services does Ladyfair provide in Andhrathadi? A7: In addition to bridal makeup, we offer makeup for engagements, receptions, parties, and other special occasions. Ladyfair is your ultimate choice for professional, at-home bridal makeup services in Andhrathadi, ensuring a flawless and stress-free experience on your special day.

Posted By: 18th December 2024
Bridal Makeup Artist in Jhanjarpur
Introduction In Jhanjarpur, Ladyfair is the premier choice for brides looking to achieve the perfect wedding day look with our professional at-home bridal makeup services. Whether you desire a traditional bridal look, an HD finish, or the flawless perfection of airbrush makeup, our expert makeup artist in Jhanjarpur ensures that you shine on your special day. Contact us today at 7004721239 to schedule your appointment. Why Choose Ladyfair for Bridal Makeup in Jhanjarpur Experienced Makeup Artist Our makeup artist in Jhanjarpur has years of experience in bridal makeup, creating personalized looks that complement your natural beauty and align with your style and preferences. Convenient At-Home Service Forget the stress of traveling to a salon. Ladyfair brings luxury beauty treatments directly to your doorstep with our at-home bridal makeup services, offering a truly personalized experience. Premium Makeup Products We use only high-quality, professional-grade makeup products to ensure a flawless, long-lasting look that remains perfect throughout your big day. Bridal Makeup Pricing in Jhanjarpur Our bridal makeup services in Jhanjarpur are tailored to fit different styles and budgets: Basic Bridal Makeup: ₹10,000 HD Bridal Makeup: ₹12,000 Airbrush Bridal Makeup: ₹18,000 For engagement and reception makeup: Basic Engagement/Reception Makeup: ₹6,000 HD Engagement/Reception Makeup: ₹8,000 Airbrush Engagement/Reception Makeup: ₹12,000 For parties: Basic Party Makeup: ₹2,500 HD Party Makeup: ₹3,500 Popular Bridal Makeup Styles in Jhanjarpur Traditional Bridal Makeup Our traditional bridal makeup in Jhanjarpur incorporates bold colors and intricate detailing to complement your wedding attire, creating an elegant and timeless look. HD Bridal Makeup For a high-definition finish that looks flawless both in photos and in person, HD bridal makeup is the perfect choice for brides who want a picture-perfect appearance all day. Airbrush Bridal Makeup Our airbrush makeup offers a lightweight, full-coverage finish that lasts all day, giving you a smooth and natural look while ensuring long-lasting perfection. How to Book Your Bridal Makeup with Ladyfair in Jhanjarpur Initial Contact: Call us at 7004721239 to discuss your makeup needs and schedule your appointment. Consultation Session: Meet with our makeup artist to discuss your wedding look, review your attire, and plan the perfect makeup style. Makeup Trial: We offer trial sessions to help you preview your bridal makeup look and make any adjustments. Wedding Day Makeup: On your wedding day, our makeup artist will arrive at your location in Jhanjarpur to provide flawless, hassle-free makeup service. Testimonials from Brides in Jhanjarpur Priya R., Jhanjarpur: "Ladyfair provided amazing service on my wedding day. The airbrush makeup looked flawless and lasted all day." Ritu K., Jhanjarpur: "I loved the HD makeup! It was perfect for my photos, and the at-home service was so convenient." Sneha S., Jhanjarpur: "My traditional bridal makeup was exactly what I wanted, and Ladyfair made the entire process stress-free." Preparing for Your Bridal Makeup Session To get the best results for your bridal makeup: Stay Hydrated: Keep your skin looking fresh by drinking plenty of water. Consistent Skincare: Stick to your regular skincare routine to maintain healthy, glowing skin. Avoid New Products: Use familiar products to prevent any reactions before your wedding day. Clear Communication: Discuss your makeup preferences and any concerns with our artist during the consultation. Additional Beauty Services by Ladyfair Beyond bridal makeup, Ladyfair offers a variety of beauty services in Jhanjarpur: Engagement and Reception Makeup: Customized looks for all pre-wedding events. Party Makeup: Perfect for birthdays, anniversaries, and special occasions. Everyday Makeup: Enhance your daily look with our expert makeup services. Special Occasion Makeup: Professional makeup for parties, celebrations, and formal events. The Future of Bridal Makeup in Jhanjarpur Ladyfair is dedicated to setting new standards in bridal beauty in Jhanjarpur with our innovative at-home services. As we continue to offer exceptional service, more brides are choosing Ladyfair as their preferred makeup provider. Q&A with Ladyfair’s Bridal Makeup Artist in Jhanjarpur Q1: What makes Ladyfair the best choice for bridal makeup in Jhanjarpur? A1: Ladyfair offers expert bridal makeup services at home, using high-quality products to ensure a flawless and long-lasting look. Q2: What are the prices for bridal makeup in Jhanjarpur? A2: Our bridal makeup packages start at ₹10,000 for basic makeup, ₹12,000 for HD makeup, and ₹18,000 for airbrush makeup. Q3: How do I book Ladyfair’s bridal makeup services in Jhanjarpur? A3: You can book our services by calling 7004721239. We also offer consultations and trial sessions to ensure you get the look you want. Q4: What bridal makeup styles does Ladyfair offer in Jhanjarpur? A4: Ladyfair offers traditional, HD, and airbrush bridal makeup to suit different preferences and needs. Q5: Are makeup trials available before my wedding? A5: Yes, we offer trial sessions so you can finalize your bridal look ahead of time. Q6: What products does Ladyfair use for bridal makeup? A6: We use professional-grade, high-quality makeup products that are safe for all skin types and ensure a flawless finish. Q7: What other services does Ladyfair provide in Jhanjarpur? A7: In addition to bridal makeup, we offer makeup for engagements, receptions, parties, and other special occasions. Ladyfair is your ultimate choice for professional, at-home bridal makeup services in Jhanjarpur, ensuring a flawless and stress-free experience on your special day.

Posted By: 18th December 2024
Bridal Makeup Artist in Madhwapur
Introduction In Madhwapur, Ladyfair is the premier choice for brides looking to achieve the perfect wedding day look with our professional at-home bridal makeup services. Whether you desire a traditional bridal look, an HD finish, or the flawless perfection of airbrush makeup, our expert makeup artist in Madhwapur ensures that you shine on your special day. Contact us today at 7004721239 to schedule your appointment. Why Choose Ladyfair for Bridal Makeup in Madhwapur Experienced Makeup Artist Our makeup artist in Madhwapur has years of experience in bridal makeup, creating personalized looks that complement your natural beauty and align with your style and preferences. Convenient At-Home Service Forget the stress of traveling to a salon. Ladyfair brings luxury beauty treatments directly to your doorstep with our at-home bridal makeup services, offering a truly personalized experience. Premium Makeup Products We use only high-quality, professional-grade makeup products to ensure a flawless, long-lasting look that remains perfect throughout your big day. Bridal Makeup Pricing in Madhwapur Our bridal makeup services in Madhwapur are tailored to fit different styles and budgets: Basic Bridal Makeup: ₹10,000 HD Bridal Makeup: ₹12,000 Airbrush Bridal Makeup: ₹18,000 For engagement and reception makeup: Basic Engagement/Reception Makeup: ₹6,000 HD Engagement/Reception Makeup: ₹8,000 Airbrush Engagement/Reception Makeup: ₹12,000 For parties: Basic Party Makeup: ₹2,500 HD Party Makeup: ₹3,500 Popular Bridal Makeup Styles in Madhwapur Traditional Bridal Makeup Our traditional bridal makeup in Madhwapur incorporates bold colors and intricate detailing to complement your wedding attire, creating an elegant and timeless look. HD Bridal Makeup For a high-definition finish that looks flawless both in photos and in person, HD bridal makeup is the perfect choice for brides who want a picture-perfect appearance all day. Airbrush Bridal Makeup Our airbrush makeup offers a lightweight, full-coverage finish that lasts all day, giving you a smooth and natural look while ensuring long-lasting perfection. How to Book Your Bridal Makeup with Ladyfair in Madhwapur Initial Contact: Call us at 7004721239 to discuss your makeup needs and schedule your appointment. Consultation Session: Meet with our makeup artist to discuss your wedding look, review your attire, and plan the perfect makeup style. Makeup Trial: We offer trial sessions to help you preview your bridal makeup look and make any adjustments. Wedding Day Makeup: On your wedding day, our makeup artist will arrive at your location in Madhwapur to provide flawless, hassle-free makeup service. Testimonials from Brides in Madhwapur Priya R., Madhwapur: "Ladyfair provided amazing service on my wedding day. The airbrush makeup looked flawless and lasted all day." Ritu K., Madhwapur: "I loved the HD makeup! It was perfect for my photos, and the at-home service was so convenient." Sneha S., Madhwapur: "My traditional bridal makeup was exactly what I wanted, and Ladyfair made the entire process stress-free." Preparing for Your Bridal Makeup Session To get the best results for your bridal makeup: Stay Hydrated: Keep your skin looking fresh by drinking plenty of water. Consistent Skincare: Stick to your regular skincare routine to maintain healthy, glowing skin. Avoid New Products: Use familiar products to prevent any reactions before your wedding day. Clear Communication: Discuss your makeup preferences and any concerns with our artist during the consultation. Additional Beauty Services by Ladyfair Beyond bridal makeup, Ladyfair offers a variety of beauty services in Madhwapur: Engagement and Reception Makeup: Customized looks for all pre-wedding events. Party Makeup: Perfect for birthdays, anniversaries, and special occasions. Everyday Makeup: Enhance your daily look with our expert makeup services. Special Occasion Makeup: Professional makeup for parties, celebrations, and formal events. The Future of Bridal Makeup in Madhwapur Ladyfair is dedicated to setting new standards in bridal beauty in Madhwapur with our innovative at-home services. As we continue to offer exceptional service, more brides are choosing Ladyfair as their preferred makeup provider. Q&A with Ladyfair’s Bridal Makeup Artist in Madhwapur Q1: What makes Ladyfair the best choice for bridal makeup in Madhwapur? A1: Ladyfair offers expert bridal makeup services at home, using high-quality products to ensure a flawless and long-lasting look. Q2: What are the prices for bridal makeup in Madhwapur? A2: Our bridal makeup packages start at ₹10,000 for basic makeup, ₹12,000 for HD makeup, and ₹18,000 for airbrush makeup. Q3: How do I book Ladyfair’s bridal makeup services in Madhwapur? A3: You can book our services by calling 7004721239. We also offer consultations and trial sessions to ensure you get the look you want. Q4: What bridal makeup styles does Ladyfair offer in Madhwapur? A4: Ladyfair offers traditional, HD, and airbrush bridal makeup to suit different preferences and needs. Q5: Are makeup trials available before my wedding? A5: Yes, we offer trial sessions so you can finalize your bridal look ahead of time. Q6: What products does Ladyfair use for bridal makeup? A6: We use professional-grade, high-quality makeup products that are safe for all skin types and ensure a flawless finish. Q7: What other services does Ladyfair provide in Madhwapur? A7: In addition to bridal makeup, we offer makeup for engagements, receptions, parties, and other special occasions. Ladyfair is your ultimate choice for professional, at-home bridal makeup services in Madhwapur, ensuring a flawless and stress-free experience on your special day.

Posted By: 18th December 2024
Bridal Makeup Artist in Harlakhi
Introduction In Harlakhi, Ladyfair is the premier choice for brides looking to achieve the perfect wedding day look with our professional at-home bridal makeup services. Whether you desire a traditional bridal look, an HD finish, or the flawless perfection of airbrush makeup, our expert makeup artist in Harlakhi ensures that you shine on your special day. Contact us today at 7004721239 to schedule your appointment. Why Choose Ladyfair for Bridal Makeup in Harlakhi Experienced Makeup Artist Our makeup artist in Harlakhi has years of experience in bridal makeup, creating personalized looks that complement your natural beauty and align with your style and preferences. Convenient At-Home Service Forget the stress of traveling to a salon. Ladyfair brings luxury beauty treatments directly to your doorstep with our at-home bridal makeup services, offering a truly personalized experience. Premium Makeup Products We use only high-quality, professional-grade makeup products to ensure a flawless, long-lasting look that remains perfect throughout your big day. Bridal Makeup Pricing in Harlakhi Our bridal makeup services in Harlakhi are tailored to fit different styles and budgets: Basic Bridal Makeup: ₹10,000 HD Bridal Makeup: ₹12,000 Airbrush Bridal Makeup: ₹18,000 For engagement and reception makeup: Basic Engagement/Reception Makeup: ₹6,000 HD Engagement/Reception Makeup: ₹8,000 Airbrush Engagement/Reception Makeup: ₹12,000 For parties: Basic Party Makeup: ₹2,500 HD Party Makeup: ₹3,500 Popular Bridal Makeup Styles in Harlakhi Traditional Bridal Makeup Our traditional bridal makeup in Harlakhi incorporates bold colors and intricate detailing to complement your wedding attire, creating an elegant and timeless look. HD Bridal Makeup For a high-definition finish that looks flawless both in photos and in person, HD bridal makeup is the perfect choice for brides who want a picture-perfect appearance all day. Airbrush Bridal Makeup Our airbrush makeup offers a lightweight, full-coverage finish that lasts all day, giving you a smooth and natural look while ensuring long-lasting perfection. How to Book Your Bridal Makeup with Ladyfair in Harlakhi Initial Contact: Call us at 7004721239 to discuss your makeup needs and schedule your appointment. Consultation Session: Meet with our makeup artist to discuss your wedding look, review your attire, and plan the perfect makeup style. Makeup Trial: We offer trial sessions to help you preview your bridal makeup look and make any adjustments. Wedding Day Makeup: On your wedding day, our makeup artist will arrive at your location in Harlakhi to provide flawless, hassle-free makeup service. Testimonials from Brides in Harlakhi Priya R., Harlakhi: "Ladyfair provided amazing service on my wedding day. The airbrush makeup looked flawless and lasted all day." Ritu K., Harlakhi: "I loved the HD makeup! It was perfect for my photos, and the at-home service was so convenient." Sneha S., Harlakhi: "My traditional bridal makeup was exactly what I wanted, and Ladyfair made the entire process stress-free." Preparing for Your Bridal Makeup Session To get the best results for your bridal makeup: Stay Hydrated: Keep your skin looking fresh by drinking plenty of water. Consistent Skincare: Stick to your regular skincare routine to maintain healthy, glowing skin. Avoid New Products: Use familiar products to prevent any reactions before your wedding day. Clear Communication: Discuss your makeup preferences and any concerns with our artist during the consultation. Additional Beauty Services by Ladyfair Beyond bridal makeup, Ladyfair offers a variety of beauty services in Harlakhi: Engagement and Reception Makeup: Customized looks for all pre-wedding events. Party Makeup: Perfect for birthdays, anniversaries, and special occasions. Everyday Makeup: Enhance your daily look with our expert makeup services. Special Occasion Makeup: Professional makeup for parties, celebrations, and formal events. The Future of Bridal Makeup in Harlakhi Ladyfair is dedicated to setting new standards in bridal beauty in Harlakhi with our innovative at-home services. As we continue to offer exceptional service, more brides are choosing Ladyfair as their preferred makeup provider. Q&A with Ladyfair’s Bridal Makeup Artist in Harlakhi Q1: What makes Ladyfair the best choice for bridal makeup in Harlakhi? A1: Ladyfair offers expert bridal makeup services at home, using high-quality products to ensure a flawless and long-lasting look. Q2: What are the prices for bridal makeup in Harlakhi? A2: Our bridal makeup packages start at ₹10,000 for basic makeup, ₹12,000 for HD makeup, and ₹18,000 for airbrush makeup. Q3: How do I book Ladyfair’s bridal makeup services in Harlakhi? A3: You can book our services by calling 7004721239. We also offer consultations and trial sessions to ensure you get the look you want. Q4: What bridal makeup styles does Ladyfair offer in Harlakhi? A4: Ladyfair offers traditional, HD, and airbrush bridal makeup to suit different preferences and needs. Q5: Are makeup trials available before my wedding? A5: Yes, we offer trial sessions so you can finalize your bridal look ahead of time. Q6: What products does Ladyfair use for bridal makeup? A6: We use professional-grade, high-quality makeup products that are safe for all skin types and ensure a flawless finish. Q7: What other services does Ladyfair provide in Harlakhi? A7: In addition to bridal makeup, we offer makeup for engagements, receptions, parties, and other special occasions. Ladyfair is your ultimate choice for professional, at-home bridal makeup services in Harlakhi, ensuring a flawless and stress-free experience on your special day.

Posted By: 18th December 2024
Bridal Makeup Artist in Bisfi
Introduction In Bisfi, Ladyfair is the premier choice for brides looking to achieve the perfect wedding day look with our professional at-home bridal makeup services. Whether you desire a traditional bridal look, an HD finish, or the flawless perfection of airbrush makeup, our expert makeup artist in Bisfi ensures that you shine on your special day. Contact us today at 7004721239 to schedule your appointment. Why Choose Ladyfair for Bridal Makeup in Bisfi Experienced Makeup Artist Our makeup artist in Bisfi has years of experience in bridal makeup, creating personalized looks that complement your natural beauty and align with your style and preferences. Convenient At-Home Service Forget the stress of traveling to a salon. Ladyfair brings luxury beauty treatments directly to your doorstep with our at-home bridal makeup services, offering a truly personalized experience. Premium Makeup Products We use only high-quality, professional-grade makeup products to ensure a flawless, long-lasting look that remains perfect throughout your big day. Bridal Makeup Pricing in Bisfi Our bridal makeup services in Bisfi are tailored to fit different styles and budgets: Basic Bridal Makeup: ₹10,000 HD Bridal Makeup: ₹12,000 Airbrush Bridal Makeup: ₹18,000 For engagement and reception makeup: Basic Engagement/Reception Makeup: ₹6,000 HD Engagement/Reception Makeup: ₹8,000 Airbrush Engagement/Reception Makeup: ₹12,000 For parties: Basic Party Makeup: ₹2,500 HD Party Makeup: ₹3,500 Popular Bridal Makeup Styles in Bisfi Traditional Bridal Makeup Our traditional bridal makeup in Bisfi incorporates bold colors and intricate detailing to complement your wedding attire, creating an elegant and timeless look. HD Bridal Makeup For a high-definition finish that looks flawless both in photos and in person, HD bridal makeup is the perfect choice for brides who want a picture-perfect appearance all day. Airbrush Bridal Makeup Our airbrush makeup offers a lightweight, full-coverage finish that lasts all day, giving you a smooth and natural look while ensuring long-lasting perfection. How to Book Your Bridal Makeup with Ladyfair in Bisfi Initial Contact: Call us at 7004721239 to discuss your makeup needs and schedule your appointment. Consultation Session: Meet with our makeup artist to discuss your wedding look, review your attire, and plan the perfect makeup style. Makeup Trial: We offer trial sessions to help you preview your bridal makeup look and make any adjustments. Wedding Day Makeup: On your wedding day, our makeup artist will arrive at your location in Bisfi to provide flawless, hassle-free makeup service. Testimonials from Brides in Bisfi Priya R., Bisfi: "Ladyfair provided amazing service on my wedding day. The airbrush makeup looked flawless and lasted all day." Ritu K., Bisfi: "I loved the HD makeup! It was perfect for my photos, and the at-home service was so convenient." Sneha S., Bisfi: "My traditional bridal makeup was exactly what I wanted, and Ladyfair made the entire process stress-free." Preparing for Your Bridal Makeup Session To get the best results for your bridal makeup: Stay Hydrated: Keep your skin looking fresh by drinking plenty of water. Consistent Skincare: Stick to your regular skincare routine to maintain healthy, glowing skin. Avoid New Products: Use familiar products to prevent any reactions before your wedding day. Clear Communication: Discuss your makeup preferences and any concerns with our artist during the consultation. Additional Beauty Services by Ladyfair Beyond bridal makeup, Ladyfair offers a variety of beauty services in Bisfi: Engagement and Reception Makeup: Customized looks for all pre-wedding events. Party Makeup: Perfect for birthdays, anniversaries, and special occasions. Everyday Makeup: Enhance your daily look with our expert makeup services. Special Occasion Makeup: Professional makeup for parties, celebrations, and formal events. The Future of Bridal Makeup in Bisfi Ladyfair is dedicated to setting new standards in bridal beauty in Bisfi with our innovative at-home services. As we continue to offer exceptional service, more brides are choosing Ladyfair as their preferred makeup provider. Q&A with Ladyfair’s Bridal Makeup Artist in Bisfi Q1: What makes Ladyfair the best choice for bridal makeup in Bisfi? A1: Ladyfair offers expert bridal makeup services at home, using high-quality products to ensure a flawless and long-lasting look. Q2: What are the prices for bridal makeup in Bisfi? A2: Our bridal makeup packages start at ₹10,000 for basic makeup, ₹12,000 for HD makeup, and ₹18,000 for airbrush makeup. Q3: How do I book Ladyfair’s bridal makeup services in Bisfi? A3: You can book our services by calling 7004721239. We also offer consultations and trial sessions to ensure you get the look you want. Q4: What bridal makeup styles does Ladyfair offer in Bisfi? A4: Ladyfair offers traditional, HD, and airbrush bridal makeup to suit different preferences and needs. Q5: Are makeup trials available before my wedding? A5: Yes, we offer trial sessions so you can finalize your bridal look ahead of time. Q6: What products does Ladyfair use for bridal makeup? A6: We use professional-grade, high-quality makeup products that are safe for all skin types and ensure a flawless finish. Q7: What other services does Ladyfair provide in Bisfi? A7: In addition to bridal makeup, we offer makeup for engagements, receptions, parties, and other special occasions. Ladyfair is your ultimate choice for professional, at-home bridal makeup services in Bisfi, ensuring a flawless and stress-free experience on your special day.

Posted By: 18th December 2024
Bridal Makeup Artist in Benipatti
Introduction In Benipatti, Ladyfair is the premier choice for brides looking to achieve the perfect wedding day look with our professional at-home bridal makeup services. Whether you desire a traditional bridal look, an HD finish, or the flawless perfection of airbrush makeup, our expert makeup artist in Benipatti ensures that you shine on your special day. Contact us today at 7004721239 to schedule your appointment. Why Choose Ladyfair for Bridal Makeup in Benipatti Experienced Makeup Artist Our makeup artist in Benipatti has years of experience in bridal makeup, creating personalized looks that complement your natural beauty and align with your style and preferences. Convenient At-Home Service Forget the stress of traveling to a salon. Ladyfair brings luxury beauty treatments directly to your doorstep with our at-home bridal makeup services, offering a truly personalized experience. Premium Makeup Products We use only high-quality, professional-grade makeup products to ensure a flawless, long-lasting look that remains perfect throughout your big day. Bridal Makeup Pricing in Benipatti Our bridal makeup services in Benipatti are tailored to fit different styles and budgets: Basic Bridal Makeup: ₹10,000 HD Bridal Makeup: ₹12,000 Airbrush Bridal Makeup: ₹18,000 For engagement and reception makeup: Basic Engagement/Reception Makeup: ₹6,000 HD Engagement/Reception Makeup: ₹8,000 Airbrush Engagement/Reception Makeup: ₹12,000 For parties: Basic Party Makeup: ₹2,500 HD Party Makeup: ₹3,500 Popular Bridal Makeup Styles in Benipatti Traditional Bridal Makeup Our traditional bridal makeup in Benipatti incorporates bold colors and intricate detailing to complement your wedding attire, creating an elegant and timeless look. HD Bridal Makeup For a high-definition finish that looks flawless both in photos and in person, HD bridal makeup is the perfect choice for brides who want a picture-perfect appearance all day. Airbrush Bridal Makeup Our airbrush makeup offers a lightweight, full-coverage finish that lasts all day, giving you a smooth and natural look while ensuring long-lasting perfection. How to Book Your Bridal Makeup with Ladyfair in Benipatti Initial Contact: Call us at 7004721239 to discuss your makeup needs and schedule your appointment. Consultation Session: Meet with our makeup artist to discuss your wedding look, review your attire, and plan the perfect makeup style. Makeup Trial: We offer trial sessions to help you preview your bridal makeup look and make any adjustments. Wedding Day Makeup: On your wedding day, our makeup artist will arrive at your location in Benipatti to provide flawless, hassle-free makeup service. Testimonials from Brides in Benipatti Priya R., Benipatti: "Ladyfair provided amazing service on my wedding day. The airbrush makeup looked flawless and lasted all day." Ritu K., Benipatti: "I loved the HD makeup! It was perfect for my photos, and the at-home service was so convenient." Sneha S., Benipatti: "My traditional bridal makeup was exactly what I wanted, and Ladyfair made the entire process stress-free." Preparing for Your Bridal Makeup Session To get the best results for your bridal makeup: Stay Hydrated: Keep your skin looking fresh by drinking plenty of water. Consistent Skincare: Stick to your regular skincare routine to maintain healthy, glowing skin. Avoid New Products: Use familiar products to prevent any reactions before your wedding day. Clear Communication: Discuss your makeup preferences and any concerns with our artist during the consultation. Additional Beauty Services by Ladyfair Beyond bridal makeup, Ladyfair offers a variety of beauty services in Benipatti: Engagement and Reception Makeup: Customized looks for all pre-wedding events. Party Makeup: Perfect for birthdays, anniversaries, and special occasions. Everyday Makeup: Enhance your daily look with our expert makeup services. Special Occasion Makeup: Professional makeup for parties, celebrations, and formal events. The Future of Bridal Makeup in Benipatti Ladyfair is dedicated to setting new standards in bridal beauty in Benipatti with our innovative at-home services. As we continue to offer exceptional service, more brides are choosing Ladyfair as their preferred makeup provider. Q&A with Ladyfair’s Bridal Makeup Artist in Benipatti Q1: What makes Ladyfair the best choice for bridal makeup in Benipatti? A1: Ladyfair offers expert bridal makeup services at home, using high-quality products to ensure a flawless and long-lasting look. Q2: What are the prices for bridal makeup in Benipatti? A2: Our bridal makeup packages start at ₹10,000 for basic makeup, ₹12,000 for HD makeup, and ₹18,000 for airbrush makeup. Q3: How do I book Ladyfair’s bridal makeup services in Benipatti? A3: You can book our services by calling 7004721239. We also offer consultations and trial sessions to ensure you get the look you want. Q4: What bridal makeup styles does Ladyfair offer in Benipatti? A4: Ladyfair offers traditional, HD, and airbrush bridal makeup to suit different preferences and needs. Q5: Are makeup trials available before my wedding? A5: Yes, we offer trial sessions so you can finalize your bridal look ahead of time. Q6: What products does Ladyfair use for bridal makeup? A6: We use professional-grade, high-quality makeup products that are safe for all skin types and ensure a flawless finish. Q7: What other services does Ladyfair provide in Benipatti? A7: In addition to bridal makeup, we offer makeup for engagements, receptions, parties, and other special occasions. Ladyfair is your ultimate choice for professional, at-home bridal makeup services in Benipatti, ensuring a flawless and stress-free experience on your special day.

Posted By: 18th December 2024
Bridal Makeup Artist in Basopatti
Introduction In Basopatti, Ladyfair is the premier choice for brides looking to achieve the perfect wedding day look with our professional at-home bridal makeup services. Whether you desire a traditional bridal look, an HD finish, or the flawless perfection of airbrush makeup, our expert makeup artist in Basopatti ensures that you shine on your special day. Contact us today at 7004721239 to schedule your appointment. Why Choose Ladyfair for Bridal Makeup in Basopatti Experienced Makeup Artist Our makeup artist in Basopatti has years of experience in bridal makeup, creating personalized looks that complement your natural beauty and align with your style and preferences. Convenient At-Home Service Forget the stress of traveling to a salon. Ladyfair brings luxury beauty treatments directly to your doorstep with our at-home bridal makeup services, offering a truly personalized experience. Premium Makeup Products We use only high-quality, professional-grade makeup products to ensure a flawless, long-lasting look that remains perfect throughout your big day. Bridal Makeup Pricing in Basopatti Our bridal makeup services in Basopatti are tailored to fit different styles and budgets: Basic Bridal Makeup: ₹10,000 HD Bridal Makeup: ₹12,000 Airbrush Bridal Makeup: ₹18,000 For engagement and reception makeup: Basic Engagement/Reception Makeup: ₹6,000 HD Engagement/Reception Makeup: ₹8,000 Airbrush Engagement/Reception Makeup: ₹12,000 HD + Airbrush (Celebrity makeup): ₹15,000 For parties: Basic Party Makeup: ₹2,500 HD Party Makeup: ₹3,500 Airbrush Makeup: ₹6,000 HD + Airbrush (Celebrity makeup): ₹12,000 Popular Bridal Makeup Styles in Basopatti Traditional Bridal Makeup Our traditional bridal makeup in Basopatti incorporates bold colors and intricate detailing to complement your wedding attire, creating an elegant and timeless look. HD Bridal Makeup For a high-definition finish that looks flawless both in photos and in person, HD bridal makeup is the perfect choice for brides who want a picture-perfect appearance all day. Airbrush Bridal Makeup Our airbrush makeup offers a lightweight, full-coverage finish that lasts all day, giving you a smooth and natural look while ensuring long-lasting perfection. How to Book Your Bridal Makeup with Ladyfair in Basopatti Initial Contact: Call us at 7004721239 to discuss your makeup needs and schedule your appointment. Consultation Session: Meet with our makeup artist to discuss your wedding look, review your attire, and plan the perfect makeup style. Makeup Trial: We offer trial sessions to help you preview your bridal makeup look and make any adjustments. Wedding Day Makeup: On your wedding day, our makeup artist will arrive at your location in Basopatti to provide flawless, hassle-free makeup service. Testimonials from Brides in Basopatti Priya R., Basopatti: "Ladyfair provided amazing service on my wedding day. The airbrush makeup looked flawless and lasted all day." Ritu K., Basopatti: "I loved the HD makeup! It was perfect for my photos, and the at-home service was so convenient." Sneha S., Basopatti: "My traditional bridal makeup was exactly what I wanted, and Ladyfair made the entire process stress-free." Preparing for Your Bridal Makeup Session To get the best results for your bridal makeup: Stay Hydrated: Keep your skin looking fresh by drinking plenty of water. Consistent Skincare: Stick to your regular skincare routine to maintain healthy, glowing skin. Avoid New Products: Use familiar products to prevent any reactions before your wedding day. Clear Communication: Discuss your makeup preferences and any concerns with our artist during the consultation. Additional Beauty Services by Ladyfair Beyond bridal makeup, Ladyfair offers a variety of beauty services in Basopatti: Engagement and Reception Makeup: Customized looks for all pre-wedding events. Party Makeup: Perfect for birthdays, anniversaries, and special occasions. Everyday Makeup: Enhance your daily look with our expert makeup services. Special Occasion Makeup: Professional makeup for parties, celebrations, and formal events. The Future of Bridal Makeup in Basopatti Ladyfair is dedicated to setting new standards in bridal beauty in Basopatti with our innovative at-home services. As we continue to offer exceptional service, more brides are choosing Ladyfair as their preferred makeup provider. Q&A with Ladyfair’s Bridal Makeup Artist in Basopatti Q1: What makes Ladyfair the best choice for bridal makeup in Basopatti? A1: Ladyfair offers expert bridal makeup services at home, using high-quality products to ensure a flawless and long-lasting look. Q2: What are the prices for bridal makeup in Basopatti? A2: Our bridal makeup packages start at ₹10,000 for basic makeup, ₹12,000 for HD makeup, and ₹18,000 for airbrush makeup. Q3: How do I book Ladyfair’s bridal makeup services in Basopatti? A3: You can book our services by calling 7004721239. We also offer consultations and trial sessions to ensure you get the look you want. Q4: What bridal makeup styles does Ladyfair offer in Basopatti? A4: Ladyfair offers traditional, HD, and airbrush bridal makeup to suit different preferences and needs. Q5: Are makeup trials available before my wedding? A5: Yes, we offer trial sessions so you can finalize your bridal look ahead of time. Q6: What products does Ladyfair use for bridal makeup? A6: We use professional-grade, high-quality makeup products that are safe for all skin types and ensure a flawless finish. Q7: What other services does Ladyfair provide in Basopatti? A7: In addition to bridal makeup, we offer makeup for engagements, receptions, parties, and other special occasions. Ladyfair is your ultimate choice for professional, at-home bridal makeup services in Basopatti, ensuring a flawless and stress-free experience on your special day.

Posted By: 18th December 2024
Bridal Makeup Artist in Ladania
Introduction In Ladania, Ladyfair is the premier choice for brides looking to achieve the perfect wedding day look with our professional at-home bridal makeup services. Whether you desire a traditional bridal look, an HD finish, or the flawless perfection of airbrush makeup, our expert makeup artist in Ladania ensures that you shine on your special day. Contact us today at 7004721239 to schedule your appointment. Why Choose Ladyfair for Bridal Makeup in Ladania Experienced Makeup Artist Our makeup artist in Ladania has years of experience in bridal makeup, creating personalized looks that complement your natural beauty and align with your style and preferences. Convenient At-Home Service Forget the stress of traveling to a salon. Ladyfair brings luxury beauty treatments directly to your doorstep with our at-home bridal makeup services, offering a truly personalized experience. Premium Makeup Products We use only high-quality, professional-grade makeup products to ensure a flawless, long-lasting look that remains perfect throughout your big day. Bridal Makeup Pricing in Ladania Our bridal makeup services in Ladania are tailored to fit different styles and budgets: Basic Bridal Makeup: ₹10,000 HD Bridal Makeup: ₹12,000 Airbrush Bridal Makeup: ₹18,000 For engagement and reception makeup: Basic Engagement/Reception Makeup: ₹6,000 HD Engagement/Reception Makeup: ₹8,000 Airbrush Engagement/Reception Makeup: ₹12,000 For parties: Basic Party Makeup: ₹2,500 HD Party Makeup: ₹3,500 Popular Bridal Makeup Styles in Ladania Traditional Bridal Makeup Our traditional bridal makeup in Ladania incorporates bold colors and intricate detailing to complement your wedding attire, creating an elegant and timeless look. HD Bridal Makeup For a high-definition finish that looks flawless both in photos and in person, HD bridal makeup is the perfect choice for brides who want a picture-perfect appearance all day. Airbrush Bridal Makeup Our airbrush makeup offers a lightweight, full-coverage finish that lasts all day, giving you a smooth and natural look while ensuring long-lasting perfection. How to Book Your Bridal Makeup with Ladyfair in Ladania Initial Contact: Call us at 7004721239 to discuss your makeup needs and schedule your appointment. Consultation Session: Meet with our makeup artist to discuss your wedding look, review your attire, and plan the perfect makeup style. Makeup Trial: We offer trial sessions to help you preview your bridal makeup look and make any adjustments. Wedding Day Makeup: On your wedding day, our makeup artist will arrive at your location in Ladania to provide flawless, hassle-free makeup service. Testimonials from Brides in Ladania Priya R., Ladania: "Ladyfair provided amazing service on my wedding day. The airbrush makeup looked flawless and lasted all day." Ritu K., Ladania: "I loved the HD makeup! It was perfect for my photos, and the at-home service was so convenient." Sneha S., Ladania: "My traditional bridal makeup was exactly what I wanted, and Ladyfair made the entire process stress-free." Preparing for Your Bridal Makeup Session To get the best results for your bridal makeup: Stay Hydrated: Keep your skin looking fresh by drinking plenty of water. Consistent Skincare: Stick to your regular skincare routine to maintain healthy, glowing skin. Avoid New Products: Use familiar products to prevent any reactions before your wedding day. Clear Communication: Discuss your makeup preferences and any concerns with our artist during the consultation. Additional Beauty Services by Ladyfair Beyond bridal makeup, Ladyfair offers a variety of beauty services in Ladania: Engagement and Reception Makeup: Customized looks for all pre-wedding events. Party Makeup: Perfect for birthdays, anniversaries, and special occasions. Everyday Makeup: Enhance your daily look with our expert makeup services. Special Occasion Makeup: Professional makeup for parties, celebrations, and formal events. The Future of Bridal Makeup in Ladania Ladyfair is dedicated to setting new standards in bridal beauty in Ladania with our innovative at-home services. As we continue to offer exceptional service, more brides are choosing Ladyfair as their preferred makeup provider. Q&A with Ladyfair’s Bridal Makeup Artist in Ladania Q1: What makes Ladyfair the best choice for bridal makeup in Ladania? A1: Ladyfair offers expert bridal makeup services at home, using high-quality products to ensure a flawless and long-lasting look. Q2: What are the prices for bridal makeup in Ladania? A2: Our bridal makeup packages start at ₹10,000 for basic makeup, ₹12,000 for HD makeup, and ₹18,000 for airbrush makeup. Q3: How do I book Ladyfair’s bridal makeup services in Ladania? A3: You can book our services by calling 7004721239. We also offer consultations and trial sessions to ensure you get the look you want. Q4: What bridal makeup styles does Ladyfair offer in Ladania? A4: Ladyfair offers traditional, HD, and airbrush bridal makeup to suit different preferences and needs. Q5: Are makeup trials available before my wedding? A5: Yes, we offer trial sessions so you can finalize your bridal look ahead of time. Q6: What products does Ladyfair use for bridal makeup? A6: We use professional-grade, high-quality makeup products that are safe for all skin types and ensure a flawless finish. Q7: What other services does Ladyfair provide in Ladania? A7: In addition to bridal makeup, we offer makeup for engagements, receptions, parties, and other special occasions. Ladyfair is your ultimate choice for professional, at-home bridal makeup services in Ladania, ensuring a flawless and stress-free experience on your special day

Posted By: 18th December 2024
Bridal Makeup Artist in Jainagar
Introduction In Jainagar, Ladyfair is the premier choice for brides looking to achieve the perfect wedding day look with our professional at-home bridal makeup services. Whether you desire a traditional bridal look, an HD finish, or the flawless perfection of airbrush makeup, our expert makeup artist in Jainagar ensures that you shine on your special day. Contact us today at 7004721239 to schedule your appointment. Why Choose Ladyfair for Bridal Makeup in Jainagar Experienced Makeup Artist Our makeup artist in Jainagar has years of experience in bridal makeup, creating personalized looks that complement your natural beauty and align with your style and preferences. Convenient At-Home Service Forget the stress of traveling to a salon. Ladyfair brings luxury beauty treatments directly to your doorstep with our at-home bridal makeup services, offering a truly personalized experience. Premium Makeup Products We use only high-quality, professional-grade makeup products to ensure a flawless, long-lasting look that remains perfect throughout your big day. Bridal Makeup Pricing in Jainagar Our bridal makeup services in Jainagar are tailored to fit different styles and budgets: Basic Bridal Makeup: ₹10,000 HD Bridal Makeup: ₹12,000 Airbrush Bridal Makeup: ₹18,000 For engagement and reception makeup: Basic Engagement/Reception Makeup: ₹6,000 HD Engagement/Reception Makeup: ₹8,000 Airbrush Engagement/Reception Makeup: ₹12,000 For parties: Basic Party Makeup: ₹2,500 HD Party Makeup: ₹3,500 Popular Bridal Makeup Styles in Jainagar Traditional Bridal Makeup Our traditional bridal makeup in Jainagar incorporates bold colors and intricate detailing to complement your wedding attire, creating an elegant and timeless look. HD Bridal Makeup For a high-definition finish that looks flawless both in photos and in person, HD bridal makeup is the perfect choice for brides who want a picture-perfect appearance all day. Airbrush Bridal Makeup Our airbrush makeup offers a lightweight, full-coverage finish that lasts all day, giving you a smooth and natural look while ensuring long-lasting perfection. How to Book Your Bridal Makeup with Ladyfair in Jainagar Initial Contact: Call us at 7004721239 to discuss your makeup needs and schedule your appointment. Consultation Session: Meet with our makeup artist to discuss your wedding look, review your attire, and plan the perfect makeup style. Makeup Trial: We offer trial sessions to help you preview your bridal makeup look and make any adjustments. Wedding Day Makeup: On your wedding day, our makeup artist will arrive at your location in Jainagar to provide flawless, hassle-free makeup service. Testimonials from Brides in Jainagar Priya R., Jainagar: "Ladyfair provided amazing service on my wedding day. The airbrush makeup looked flawless and lasted all day." Ritu K., Jainagar: "I loved the HD makeup! It was perfect for my photos, and the at-home service was so convenient." Sneha S., Jainagar: "My traditional bridal makeup was exactly what I wanted, and Ladyfair made the entire process stress-free." Preparing for Your Bridal Makeup Session To get the best results for your bridal makeup: Stay Hydrated: Keep your skin looking fresh by drinking plenty of water. Consistent Skincare: Stick to your regular skincare routine to maintain healthy, glowing skin. Avoid New Products: Use familiar products to prevent any reactions before your wedding day. Clear Communication: Discuss your makeup preferences and any concerns with our artist during the consultation. Additional Beauty Services by Ladyfair Beyond bridal makeup, Ladyfair offers a variety of beauty services in Jainagar: Engagement and Reception Makeup: Customized looks for all pre-wedding events. Party Makeup: Perfect for birthdays, anniversaries, and special occasions. Everyday Makeup: Enhance your daily look with our expert makeup services. Special Occasion Makeup: Professional makeup for parties, celebrations, and formal events. The Future of Bridal Makeup in Jainagar Ladyfair is dedicated to setting new standards in bridal beauty in Jainagar with our innovative at-home services. As we continue to offer exceptional service, more brides are choosing Ladyfair as their preferred makeup provider. Q&A with Ladyfair’s Bridal Makeup Artist in Jainagar Q1: What makes Ladyfair the best choice for bridal makeup in Jainagar? A1: Ladyfair offers expert bridal makeup services at home, using high-quality products to ensure a flawless and long-lasting look. Q2: What are the prices for bridal makeup in Jainagar? A2: Our bridal makeup packages start at ₹10,000 for basic makeup, ₹12,000 for HD makeup, and ₹18,000 for airbrush makeup. Q3: How do I book Ladyfair’s bridal makeup services in Jainagar? A3: You can book our services by calling 7004721239. We also offer consultations and trial sessions to ensure you get the look you want. Q4: What bridal makeup styles does Ladyfair offer in Jainagar? A4: Ladyfair offers traditional, HD, and airbrush bridal makeup to suit different preferences and needs. Q5: Are makeup trials available before my wedding? A5: Yes, we offer trial sessions so you can finalize your bridal look ahead of time. Q6: What products does Ladyfair use for bridal makeup? A6: We use professional-grade, high-quality makeup products that are safe for all skin types and ensure a flawless finish. Q7: What other services does Ladyfair provide in Jainagar? A7: In addition to bridal makeup, we offer makeup for engagements, receptions, parties, and other special occasions. Ladyfair is your ultimate choice for professional, at-home bridal makeup services in Jainagar, ensuring a flawless and stress-free experience on your special day.

Posted By: 18th December 2024
Bridal Makeup Artist in Khjauli
Introduction In Khjauli, Ladyfair is the premier choice for brides looking to achieve the perfect wedding day look with our professional at-home bridal makeup services. Whether you desire a traditional bridal look, an HD finish, or the flawless perfection of airbrush makeup, our expert makeup artist in Khjauli ensures that you shine on your special day. Contact us today at 7004721239 to schedule your appointment. Why Choose Ladyfair for Bridal Makeup in Khjauli Experienced Makeup Artist Our makeup artist in Khjauli has years of experience in bridal makeup, creating personalized looks that complement your natural beauty and align with your style and preferences. Convenient At-Home Service Forget the stress of traveling to a salon. Ladyfair brings luxury beauty treatments directly to your doorstep with our at-home bridal makeup services, offering a truly personalized experience. Premium Makeup Products We use only high-quality, professional-grade makeup products to ensure a flawless, long-lasting look that remains perfect throughout your big day. Bridal Makeup Pricing in Khjauli Our bridal makeup services in Khjauli are tailored to fit different styles and budgets: Basic Bridal Makeup: ₹10,000 HD Bridal Makeup: ₹12,000 Airbrush Bridal Makeup: ₹18,000 For engagement and reception makeup: Basic Engagement/Reception Makeup: ₹6,000 HD Engagement/Reception Makeup: ₹8,000 Airbrush Engagement/Reception Makeup: ₹12,000 For parties: Basic Party Makeup: ₹2,500 HD Party Makeup: ₹3,500 Popular Bridal Makeup Styles in Khjauli Traditional Bridal Makeup Our traditional bridal makeup in Khjauli incorporates bold colors and intricate detailing to complement your wedding attire, creating an elegant and timeless look. HD Bridal Makeup For a high-definition finish that looks flawless both in photos and in person, HD bridal makeup is the perfect choice for brides who want a picture-perfect appearance all day. Airbrush Bridal Makeup Our airbrush makeup offers a lightweight, full-coverage finish that lasts all day, giving you a smooth and natural look while ensuring long-lasting perfection. How to Book Your Bridal Makeup with Ladyfair in Khjauli Initial Contact: Call us at 7004721239 to discuss your makeup needs and schedule your appointment. Consultation Session: Meet with our makeup artist to discuss your wedding look, review your attire, and plan the perfect makeup style. Makeup Trial: We offer trial sessions to help you preview your bridal makeup look and make any adjustments. Wedding Day Makeup: On your wedding day, our makeup artist will arrive at your location in Khjauli to provide flawless, hassle-free makeup service. Testimonials from Brides in Khjauli Priya R., Khjauli: "Ladyfair provided amazing service on my wedding day. The airbrush makeup looked flawless and lasted all day." Ritu K., Khjauli: "I loved the HD makeup! It was perfect for my photos, and the at-home service was so convenient." Sneha S., Khjauli: "My traditional bridal makeup was exactly what I wanted, and Ladyfair made the entire process stress-free." Preparing for Your Bridal Makeup Session To get the best results for your bridal makeup: Stay Hydrated: Keep your skin looking fresh by drinking plenty of water. Consistent Skincare: Stick to your regular skincare routine to maintain healthy, glowing skin. Avoid New Products: Use familiar products to prevent any reactions before your wedding day. Clear Communication: Discuss your makeup preferences and any concerns with our artist during the consultation. Additional Beauty Services by Ladyfair Beyond bridal makeup, Ladyfair offers a variety of beauty services in Khjauli: Engagement and Reception Makeup: Customized looks for all pre-wedding events. Party Makeup: Perfect for birthdays, anniversaries, and special occasions. Everyday Makeup: Enhance your daily look with our expert makeup services. Special Occasion Makeup: Professional makeup for parties, celebrations, and formal events. The Future of Bridal Makeup in Khjauli Ladyfair is dedicated to setting new standards in bridal beauty in Khjauli with our innovative at-home services. As we continue to offer exceptional service, more brides are choosing Ladyfair as their preferred makeup provider. Q&A with Ladyfair’s Bridal Makeup Artist in Khjauli Q1: What makes Ladyfair the best choice for bridal makeup in Khjauli? A1: Ladyfair offers expert bridal makeup services at home, using high-quality products to ensure a flawless and long-lasting look. Q2: What are the prices for bridal makeup in Khjauli? A2: Our bridal makeup packages start at ₹10,000 for basic makeup, ₹12,000 for HD makeup, and ₹18,000 for airbrush makeup. Q3: How do I book Ladyfair’s bridal makeup services in Khjauli? A3: You can book our services by calling 7004721239. We also offer consultations and trial sessions to ensure you get the look you want. Q4: What bridal makeup styles does Ladyfair offer in Khjauli? A4: Ladyfair offers traditional, HD, and airbrush bridal makeup to suit different preferences and needs. Q5: Are makeup trials available before my wedding? A5: Yes, we offer trial sessions so you can finalize your bridal look ahead of time. Q6: What products does Ladyfair use for bridal makeup? A6: We use professional-grade, high-quality makeup products that are safe for all skin types and ensure a flawless finish. Q7: What other services does Ladyfair provide in Khjauli? A7: In addition to bridal makeup, we offer makeup for engagements, receptions, parties, and other special occasions. Ladyfair is your ultimate choice for professional, at-home bridal makeup services in Khjauli, ensuring a flawless and stress-free experience on your special day.

Posted By: 18th December 2024
Bridal Makeup Artist in Kaluahi
Introduction In Kaluahi, Ladyfair is the premier choice for brides looking to achieve the perfect wedding day look with our professional at-home bridal makeup services. Whether you desire a traditional bridal look, an HD finish, or the flawless perfection of airbrush makeup, our expert makeup artist in Kaluahi ensures that you shine on your special day. Contact us today at 7004721239 to schedule your appointment. Why Choose Ladyfair for Bridal Makeup in Kaluahi Experienced Makeup Artist Our makeup artist in Kaluahi has years of experience in bridal makeup, creating personalized looks that complement your natural beauty and align with your style and preferences. Convenient At-Home Service Forget the stress of traveling to a salon. Ladyfair brings luxury beauty treatments directly to your doorstep with our at-home bridal makeup services, offering a truly personalized experience. Premium Makeup Products We use only high-quality, professional-grade makeup products to ensure a flawless, long-lasting look that remains perfect throughout your big day. Bridal Makeup Pricing in Kaluahi Our bridal makeup services in Kaluahi are tailored to fit different styles and budgets: Basic Bridal Makeup: ₹10,000 HD Bridal Makeup: ₹12,000 Airbrush Bridal Makeup: ₹18,000 For engagement and reception makeup: Basic Engagement/Reception Makeup: ₹6,000 HD Engagement/Reception Makeup: ₹8,000 Airbrush Engagement/Reception Makeup: ₹12,000 For parties: Basic Party Makeup: ₹2,500 HD Party Makeup: ₹3,500 Popular Bridal Makeup Styles in Kaluahi Traditional Bridal Makeup Our traditional bridal makeup in Kaluahi incorporates bold colors and intricate detailing to complement your wedding attire, creating an elegant and timeless look. HD Bridal Makeup For a high-definition finish that looks flawless both in photos and in person, HD bridal makeup is the perfect choice for brides who want a picture-perfect appearance all day. Airbrush Bridal Makeup Our airbrush makeup offers a lightweight, full-coverage finish that lasts all day, giving you a smooth and natural look while ensuring long-lasting perfection. How to Book Your Bridal Makeup with Ladyfair in Kaluahi Initial Contact: Call us at 7004721239 to discuss your makeup needs and schedule your appointment. Consultation Session: Meet with our makeup artist to discuss your wedding look, review your attire, and plan the perfect makeup style. Makeup Trial: We offer trial sessions to help you preview your bridal makeup look and make any adjustments. Wedding Day Makeup: On your wedding day, our makeup artist will arrive at your location in Kaluahi to provide flawless, hassle-free makeup service. Testimonials from Brides in Kaluahi Priya R., Kaluahi: "Ladyfair provided amazing service on my wedding day. The airbrush makeup looked flawless and lasted all day." Ritu K., Kaluahi: "I loved the HD makeup! It was perfect for my photos, and the at-home service was so convenient." Sneha S., Kaluahi: "My traditional bridal makeup was exactly what I wanted, and Ladyfair made the entire process stress-free." Preparing for Your Bridal Makeup Session To get the best results for your bridal makeup: Stay Hydrated: Keep your skin looking fresh by drinking plenty of water. Consistent Skincare: Stick to your regular skincare routine to maintain healthy, glowing skin. Avoid New Products: Use familiar products to prevent any reactions before your wedding day. Clear Communication: Discuss your makeup preferences and any concerns with our artist during the consultation. Additional Beauty Services by Ladyfair Beyond bridal makeup, Ladyfair offers a variety of beauty services in Kaluahi: Engagement and Reception Makeup: Customized looks for all pre-wedding events. Party Makeup: Perfect for birthdays, anniversaries, and special occasions. Everyday Makeup: Enhance your daily look with our expert makeup services. Special Occasion Makeup: Professional makeup for parties, celebrations, and formal events. The Future of Bridal Makeup in Kaluahi Ladyfair is dedicated to setting new standards in bridal beauty in Kaluahi with our innovative at-home services. As we continue to offer exceptional service, more brides are choosing Ladyfair as their preferred makeup provider. Q&A with Ladyfair’s Bridal Makeup Artist in Kaluahi Q1: What makes Ladyfair the best choice for bridal makeup in Kaluahi? A1: Ladyfair offers expert bridal makeup services at home, using high-quality products to ensure a flawless and long-lasting look. Q2: What are the prices for bridal makeup in Kaluahi? A2: Our bridal makeup packages start at ₹10,000 for basic makeup, ₹12,000 for HD makeup, and ₹18,000 for airbrush makeup. Q3: How do I book Ladyfair’s bridal makeup services in Kaluahi? A3: You can book our services by calling 7004721239. We also offer consultations and trial sessions to ensure you get the look you want. Q4: What bridal makeup styles does Ladyfair offer in Kaluahi? A4: Ladyfair offers traditional, HD, and airbrush bridal makeup to suit different preferences and needs. Q5: Are makeup trials available before my wedding? A5: Yes, we offer trial sessions so you can finalize your bridal look ahead of time. Q6: What products does Ladyfair use for bridal makeup? A6: We use professional-grade, high-quality makeup products that are safe for all skin types and ensure a flawless finish. Q7: What other services does Ladyfair provide in Kaluahi? A7: In addition to bridal makeup, we offer makeup for engagements, receptions, parties, and other special occasions. Ladyfair is your ultimate choice for professional, at-home bridal makeup services in Kaluahi, ensuring a flawless and stress-free experience on your special day.

Posted By: 18th December 2024
Bridal Makeup Artist in Babubarhi
Introduction In Babubarhi, Ladyfair is the premier choice for brides looking to achieve the perfect wedding day look with our professional at-home bridal makeup services. Whether you desire a traditional bridal look, an HD finish, or the flawless perfection of airbrush makeup, our expert makeup artist in Babubarhi ensures that you shine on your special day. Contact us today at 7004721239 to schedule your appointment. Why Choose Ladyfair for Bridal Makeup in Babubarhi Experienced Makeup Artist Our makeup artist in Babubarhi has years of experience in bridal makeup, creating personalized looks that complement your natural beauty and align with your style and preferences. Convenient At-Home Service Forget the stress of traveling to a salon. Ladyfair brings luxury beauty treatments directly to your doorstep with our at-home bridal makeup services, offering a truly personalized experience. Premium Makeup Products We use only high-quality, professional-grade makeup products to ensure a flawless, long-lasting look that remains perfect throughout your big day. Bridal Makeup Pricing in Babubarhi Our bridal makeup services in Babubarhi are tailored to fit different styles and budgets: Basic Bridal Makeup: ₹10,000 HD Bridal Makeup: ₹12,000 Airbrush Bridal Makeup: ₹18,000 For engagement and reception makeup: Basic Engagement/Reception Makeup: ₹6,000 HD Engagement/Reception Makeup: ₹8,000 Airbrush Engagement/Reception Makeup: ₹12,000 For parties: Basic Party Makeup: ₹2,500 HD Party Makeup: ₹3,500 Popular Bridal Makeup Styles in Babubarhi Traditional Bridal Makeup Our traditional bridal makeup in Babubarhi incorporates bold colors and intricate detailing to complement your wedding attire, creating an elegant and timeless look. HD Bridal Makeup For a high-definition finish that looks flawless both in photos and in person, HD bridal makeup is the perfect choice for brides who want a picture-perfect appearance all day. Airbrush Bridal Makeup Our airbrush makeup offers a lightweight, full-coverage finish that lasts all day, giving you a smooth and natural look while ensuring long-lasting perfection. How to Book Your Bridal Makeup with Ladyfair in Babubarhi Initial Contact: Call us at 7004721239 to discuss your makeup needs and schedule your appointment. Consultation Session: Meet with our makeup artist to discuss your wedding look, review your attire, and plan the perfect makeup style. Makeup Trial: We offer trial sessions to help you preview your bridal makeup look and make any adjustments. Wedding Day Makeup: On your wedding day, our makeup artist will arrive at your location in Babubarhi to provide flawless, hassle-free makeup service. Testimonials from Brides in Babubarhi Priya R., Babubarhi: "Ladyfair provided amazing service on my wedding day. The airbrush makeup looked flawless and lasted all day." Ritu K., Babubarhi: "I loved the HD makeup! It was perfect for my photos, and the at-home service was so convenient." Sneha S., Babubarhi: "My traditional bridal makeup was exactly what I wanted, and Ladyfair made the entire process stress-free." Preparing for Your Bridal Makeup Session To get the best results for your bridal makeup: Stay Hydrated: Keep your skin looking fresh by drinking plenty of water. Consistent Skincare: Stick to your regular skincare routine to maintain healthy, glowing skin. Avoid New Products: Use familiar products to prevent any reactions before your wedding day. Clear Communication: Discuss your makeup preferences and any concerns with our artist during the consultation. Additional Beauty Services by Ladyfair Beyond bridal makeup, Ladyfair offers a variety of beauty services in Babubarhi: Engagement and Reception Makeup: Customized looks for all pre-wedding events. Party Makeup: Perfect for birthdays, anniversaries, and special occasions. Everyday Makeup: Enhance your daily look with our expert makeup services. Special Occasion Makeup: Professional makeup for parties, celebrations, and formal events. The Future of Bridal Makeup in Babubarhi Ladyfair is dedicated to setting new standards in bridal beauty in Babubarhi with our innovative at-home services. As we continue to offer exceptional service, more brides are choosing Ladyfair as their preferred makeup provider. Q&A with Ladyfair’s Bridal Makeup Artist in Babubarhi Q1: What makes Ladyfair the best choice for bridal makeup in Babubarhi? A1: Ladyfair offers expert bridal makeup services at home, using high-quality products to ensure a flawless and long-lasting look. Q2: What are the prices for bridal makeup in Babubarhi? A2: Our bridal makeup packages start at ₹10,000 for basic makeup, ₹12,000 for HD makeup, and ₹18,000 for airbrush makeup. Q3: How do I book Ladyfair’s bridal makeup services in Babubarhi? A3: You can book our services by calling 7004721239. We also offer consultations and trial sessions to ensure you get the look you want. Q4: What bridal makeup styles does Ladyfair offer in Babubarhi? A4: Ladyfair offers traditional, HD, and airbrush bridal makeup to suit different preferences and needs. Q5: Are makeup trials available before my wedding? A5: Yes, we offer trial sessions so you can finalize your bridal look ahead of time. Q6: What products does Ladyfair use for bridal makeup? A6: We use professional-grade, high-quality makeup products that are safe for all skin types and ensure a flawless finish. Q7: What other services does Ladyfair provide in Babubarhi? A7: In addition to bridal makeup, we offer makeup for engagements, receptions, parties, and other special occasions. Ladyfair is your ultimate choice for professional, at-home bridal makeup services in Babubarhi, ensuring a flawless and stress-free experience on your special day.

Posted By: 18th December 2024
Bridal Makeup Artist in Rajnagar
Introduction In Rajnagar, Ladyfair is the premier choice for brides looking to achieve the perfect wedding day look with our professional at-home bridal makeup services. Whether you desire a traditional bridal look, an HD finish, or the flawless perfection of airbrush makeup, our expert makeup artist in Rajnagar ensures that you shine on your special day. Contact us today at 7004721239 to schedule your appointment. Why Choose Ladyfair for Bridal Makeup in Rajnagar Experienced Makeup Artist Our makeup artist in Rajnagar has years of experience in bridal makeup, creating personalized looks that complement your natural beauty and align with your style and preferences. Convenient At-Home Service Forget the stress of traveling to a salon. Ladyfair brings luxury beauty treatments directly to your doorstep with our at-home bridal makeup services, offering a truly personalized experience. Premium Makeup Products We use only high-quality, professional-grade makeup products to ensure a flawless, long-lasting look that remains perfect throughout your big day. Bridal Makeup Pricing in Rajnagar Our bridal makeup services in Rajnagar are tailored to fit different styles and budgets: Basic Bridal Makeup: ₹10,000 HD Bridal Makeup: ₹12,000 Airbrush Bridal Makeup: ₹18,000 For engagement and reception makeup: Basic Engagement/Reception Makeup: ₹6,000 HD Engagement/Reception Makeup: ₹8,000 Airbrush Engagement/Reception Makeup: ₹12,000 For parties: Basic Party Makeup: ₹2,500 HD Party Makeup: ₹3,500 Popular Bridal Makeup Styles in Rajnagar Traditional Bridal Makeup Our traditional bridal makeup in Rajnagar incorporates bold colors and intricate detailing to complement your wedding attire, creating an elegant and timeless look. HD Bridal Makeup For a high-definition finish that looks flawless both in photos and in person, HD bridal makeup is the perfect choice for brides who want a picture-perfect appearance all day. Airbrush Bridal Makeup Our airbrush makeup offers a lightweight, full-coverage finish that lasts all day, giving you a smooth and natural look while ensuring long-lasting perfection. How to Book Your Bridal Makeup with Ladyfair in Rajnagar Initial Contact: Call us at 7004721239 to discuss your makeup needs and schedule your appointment. Consultation Session: Meet with our makeup artist to discuss your wedding look, review your attire, and plan the perfect makeup style. Makeup Trial: We offer trial sessions to help you preview your bridal makeup look and make any adjustments. Wedding Day Makeup: On your wedding day, our makeup artist will arrive at your location in Rajnagar to provide flawless, hassle-free makeup service. Testimonials from Brides in Rajnagar Priya R., Rajnagar: "Ladyfair provided amazing service on my wedding day. The airbrush makeup looked flawless and lasted all day." Ritu K., Rajnagar: "I loved the HD makeup! It was perfect for my photos, and the at-home service was so convenient." Sneha S., Rajnagar: "My traditional bridal makeup was exactly what I wanted, and Ladyfair made the entire process stress-free." Preparing for Your Bridal Makeup Session To get the best results for your bridal makeup: Stay Hydrated: Keep your skin looking fresh by drinking plenty of water. Consistent Skincare: Stick to your regular skincare routine to maintain healthy, glowing skin. Avoid New Products: Use familiar products to prevent any reactions before your wedding day. Clear Communication: Discuss your makeup preferences and any concerns with our artist during the consultation. Additional Beauty Services by Ladyfair Beyond bridal makeup, Ladyfair offers a variety of beauty services in Rajnagar: Engagement and Reception Makeup: Customized looks for all pre-wedding events. Party Makeup: Perfect for birthdays, anniversaries, and special occasions. Everyday Makeup: Enhance your daily look with our expert makeup services. Special Occasion Makeup: Professional makeup for parties, celebrations, and formal events. The Future of Bridal Makeup in Rajnagar Ladyfair is dedicated to setting new standards in bridal beauty in Rajnagar with our innovative at-home services. As we continue to offer exceptional service, more brides are choosing Ladyfair as their preferred makeup provider. Q&A with Ladyfair’s Bridal Makeup Artist in Rajnagar Q1: What makes Ladyfair the best choice for bridal makeup in Rajnagar? A1: Ladyfair offers expert bridal makeup services at home, using high-quality products to ensure a flawless and long-lasting look. Q2: What are the prices for bridal makeup in Rajnagar? A2: Our bridal makeup packages start at ₹10,000 for basic makeup, ₹12,000 for HD makeup, and ₹18,000 for airbrush makeup. Q3: How do I book Ladyfair’s bridal makeup services in Rajnagar? A3: You can book our services by calling 7004721239. We also offer consultations and trial sessions to ensure you get the look you want. Q4: What bridal makeup styles does Ladyfair offer in Rajnagar? A4: Ladyfair offers traditional, HD, and airbrush bridal makeup to suit different preferences and needs. Q5: Are makeup trials available before my wedding? A5: Yes, we offer trial sessions so you can finalize your bridal look ahead of time. Q6: What products does Ladyfair use for bridal makeup? A6: We use professional-grade, high-quality makeup products that are safe for all skin types and ensure a flawless finish. Q7: What other services does Ladyfair provide in Rajnagar? A7: In addition to bridal makeup, we offer makeup for engagements, receptions, parties, and other special occasions. Ladyfair is your ultimate choice for professional, at-home bridal makeup services in Rajnagar, ensuring a flawless and stress-free experience on your special day.

Posted By: 18th December 2024
Bridal Makeup Artist in Pandaul
Introduction In Pandaul, Ladyfair is the premier choice for brides looking to achieve the perfect wedding day look with our professional at-home bridal makeup services. Whether you desire a traditional bridal look, an HD finish, or the flawless perfection of airbrush makeup, our expert makeup artist in Pandaul ensures that you shine on your special day. Contact us today at 7004721239 to schedule your appointment. Why Choose Ladyfair for Bridal Makeup in Pandaul Experienced Makeup Artist Our makeup artist in Pandaul has years of experience in bridal makeup, creating personalized looks that complement your natural beauty and align with your style and preferences. Convenient At-Home Service Forget the stress of traveling to a salon. Ladyfair brings luxury beauty treatments directly to your doorstep with our at-home bridal makeup services, offering a truly personalized experience. Premium Makeup Products We use only high-quality, professional-grade makeup products to ensure a flawless, long-lasting look that remains perfect throughout your big day. Bridal Makeup Pricing in Pandaul Our bridal makeup services in Pandaul are tailored to fit different styles and budgets: Basic Bridal Makeup: ₹10,000 HD Bridal Makeup: ₹12,000 Airbrush Bridal Makeup: ₹18,000 For engagement and reception makeup: Basic Engagement/Reception Makeup: ₹6,000 HD Engagement/Reception Makeup: ₹8,000 Airbrush Engagement/Reception Makeup: ₹12,000 For parties: Basic Party Makeup: ₹2,500 HD Party Makeup: ₹3,500 Popular Bridal Makeup Styles in Pandaul Traditional Bridal Makeup Our traditional bridal makeup in Pandaul incorporates bold colors and intricate detailing to complement your wedding attire, creating an elegant and timeless look. HD Bridal Makeup For a high-definition finish that looks flawless both in photos and in person, HD bridal makeup is the perfect choice for brides who want a picture-perfect appearance all day. Airbrush Bridal Makeup Our airbrush makeup offers a lightweight, full-coverage finish that lasts all day, giving you a smooth and natural look while ensuring long-lasting perfection. How to Book Your Bridal Makeup with Ladyfair in Pandaul Initial Contact: Call us at 7004721239 to discuss your makeup needs and schedule your appointment. Consultation Session: Meet with our makeup artist to discuss your wedding look, review your attire, and plan the perfect makeup style. Makeup Trial: We offer trial sessions to help you preview your bridal makeup look and make any adjustments. Wedding Day Makeup: On your wedding day, our makeup artist will arrive at your location in Pandaul to provide flawless, hassle-free makeup service. Testimonials from Brides in Pandaul Priya R., Pandaul: "Ladyfair provided amazing service on my wedding day. The airbrush makeup looked flawless and lasted all day." Ritu K., Pandaul: "I loved the HD makeup! It was perfect for my photos, and the at-home service was so convenient." Sneha S., Pandaul: "My traditional bridal makeup was exactly what I wanted, and Ladyfair made the entire process stress-free." Preparing for Your Bridal Makeup Session To get the best results for your bridal makeup: Stay Hydrated: Keep your skin looking fresh by drinking plenty of water. Consistent Skincare: Stick to your regular skincare routine to maintain healthy, glowing skin. Avoid New Products: Use familiar products to prevent any reactions before your wedding day. Clear Communication: Discuss your makeup preferences and any concerns with our artist during the consultation. Additional Beauty Services by Ladyfair Beyond bridal makeup, Ladyfair offers a variety of beauty services in Pandaul: Engagement and Reception Makeup: Customized looks for all pre-wedding events. Party Makeup: Perfect for birthdays, anniversaries, and special occasions. Everyday Makeup: Enhance your daily look with our expert makeup services. Special Occasion Makeup: Professional makeup for parties, celebrations, and formal events. The Future of Bridal Makeup in Pandaul Ladyfair is dedicated to setting new standards in bridal beauty in Pandaul with our innovative at-home services. As we continue to offer exceptional service, more brides are choosing Ladyfair as their preferred makeup provider. Q&A with Ladyfair’s Bridal Makeup Artist in Pandaul Q1: What makes Ladyfair the best choice for bridal makeup in Pandaul? A1: Ladyfair offers expert bridal makeup services at home, using high-quality products to ensure a flawless and long-lasting look. Q2: What are the prices for bridal makeup in Pandaul? A2: Our bridal makeup packages start at ₹10,000 for basic makeup, ₹12,000 for HD makeup, and ₹18,000 for airbrush makeup. Q3: How do I book Ladyfair’s bridal makeup services in Pandaul? A3: You can book our services by calling 7004721239. We also offer consultations and trial sessions to ensure you get the look you want. Q4: What bridal makeup styles does Ladyfair offer in Pandaul? A4: Ladyfair offers traditional, HD, and airbrush bridal makeup to suit different preferences and needs. Q5: Are makeup trials available before my wedding? A5: Yes, we offer trial sessions so you can finalize your bridal look ahead of time. Q6: What products does Ladyfair use for bridal makeup? A6: We use professional-grade, high-quality makeup products that are safe for all skin types and ensure a flawless finish. Q7: What other services does Ladyfair provide in Pandaul? A7: In addition to bridal makeup, we offer makeup for engagements, receptions, parties, and other special occasions. Ladyfair is your ultimate choice for professional, at-home bridal makeup services in Pandaul, ensuring a flawless and stress-free experience on your special day.

Posted By: 18th December 2024
Bridal Makeup Artist in Rahika
Introduction In Rahika, Ladyfair is the premier choice for brides looking to achieve the perfect wedding day look with our professional at-home bridal makeup services. Whether you desire a traditional bridal look, an HD finish, or the flawless perfection of airbrush makeup, our expert makeup artist in Rahika ensures that you shine on your special day. Contact us today at 7004721239 to schedule your appointment. Why Choose Ladyfair for Bridal Makeup in Rahika Experienced Makeup Artist Our makeup artist in Rahika has years of experience in bridal makeup, creating personalized looks that complement your natural beauty and align with your style and preferences. Convenient At-Home Service Forget the stress of traveling to a salon. Ladyfair brings luxury beauty treatments directly to your doorstep with our at-home bridal makeup services, offering a truly personalized experience. Premium Makeup Products We use only high-quality, professional-grade makeup products to ensure a flawless, long-lasting look that remains perfect throughout your big day. Bridal Makeup Pricing in Rahika Our bridal makeup services in Rahika are tailored to fit different styles and budgets: Basic Bridal Makeup: ₹10,000 HD Bridal Makeup: ₹12,000 Airbrush Bridal Makeup: ₹18,000 For engagement and reception makeup: Basic Engagement/Reception Makeup: ₹6,000 HD Engagement/Reception Makeup: ₹8,000 Airbrush Engagement/Reception Makeup: ₹12,000 For parties: Basic Party Makeup: ₹2,500 HD Party Makeup: ₹3,500 Popular Bridal Makeup Styles in Rahika Traditional Bridal Makeup Our traditional bridal makeup in Rahika incorporates bold colors and intricate detailing to complement your wedding attire, creating an elegant and timeless look. HD Bridal Makeup For a high-definition finish that looks flawless both in photos and in person, HD bridal makeup is the perfect choice for brides who want a picture-perfect appearance all day. Airbrush Bridal Makeup Our airbrush makeup offers a lightweight, full-coverage finish that lasts all day, giving you a smooth and natural look while ensuring long-lasting perfection. How to Book Your Bridal Makeup with Ladyfair in Rahika Initial Contact: Call us at 7004721239 to discuss your makeup needs and schedule your appointment. Consultation Session: Meet with our makeup artist to discuss your wedding look, review your attire, and plan the perfect makeup style. Makeup Trial: We offer trial sessions to help you preview your bridal makeup look and make any adjustments. Wedding Day Makeup: On your wedding day, our makeup artist will arrive at your location in Rahika to provide flawless, hassle-free makeup service. Testimonials from Brides in Rahika Priya R., Rahika: "Ladyfair provided amazing service on my wedding day. The airbrush makeup looked flawless and lasted all day." Ritu K., Rahika: "I loved the HD makeup! It was perfect for my photos, and the at-home service was so convenient." Sneha S., Rahika: "My traditional bridal makeup was exactly what I wanted, and Ladyfair made the entire process stress-free." Preparing for Your Bridal Makeup Session To get the best results for your bridal makeup: Stay Hydrated: Keep your skin looking fresh by drinking plenty of water. Consistent Skincare: Stick to your regular skincare routine to maintain healthy, glowing skin. Avoid New Products: Use familiar products to prevent any reactions before your wedding day. Clear Communication: Discuss your makeup preferences and any concerns with our artist during the consultation. Additional Beauty Services by Ladyfair Beyond bridal makeup, Ladyfair offers a variety of beauty services in Rahika: Engagement and Reception Makeup: Customized looks for all pre-wedding events. Party Makeup: Perfect for birthdays, anniversaries, and special occasions. Everyday Makeup: Enhance your daily look with our expert makeup services. Special Occasion Makeup: Professional makeup for parties, celebrations, and formal events. The Future of Bridal Makeup in Rahika Ladyfair is dedicated to setting new standards in bridal beauty in Rahika with our innovative at-home services. As we continue to offer exceptional service, more brides are choosing Ladyfair as their preferred makeup provider. Q&A with Ladyfair’s Bridal Makeup Artist in Rahika Q1: What makes Ladyfair the best choice for bridal makeup in Rahika? A1: Ladyfair offers expert bridal makeup services at home, using high-quality products to ensure a flawless and long-lasting look. Q2: What are the prices for bridal makeup in Rahika? A2: Our bridal makeup packages start at ₹10,000 for basic makeup, ₹12,000 for HD makeup, and ₹18,000 for airbrush makeup. Q3: How do I book Ladyfair’s bridal makeup services in Rahika? A3: You can book our services by calling 7004721239. We also offer consultations and trial sessions to ensure you get the look you want. Q4: What bridal makeup styles does Ladyfair offer in Rahika? A4: Ladyfair offers traditional, HD, and airbrush bridal makeup to suit different preferences and needs. Q5: Are makeup trials available before my wedding? A5: Yes, we offer trial sessions so you can finalize your bridal look ahead of time. Q6: What products does Ladyfair use for bridal makeup? A6: We use professional-grade, high-quality makeup products that are safe for all skin types and ensure a flawless finish. Q7: What other services does Ladyfair provide in Rahika? A7: In addition to bridal makeup, we offer makeup for engagements, receptions, parties, and other special occasions. Ladyfair is your ultimate choice for professional, at-home bridal makeup services in Rahika, ensuring a flawless and stress-free experience on your special day.

Posted By: 17th December 2024
best bridal makeup in chandan
Introduction Your wedding day is one of the most memorable moments of your life, and every bride dreams of looking flawless and radiant. In Chandan, Banka District, Ladyfair ensures you step into your new chapter looking your absolute best. With our exclusive at-home bridal makeup services, you can enjoy a stress-free, personalized experience in the comfort of your home. To book your appointment, call us at 7004721239. In this blog, we’ll discuss why professional bridal makeup is essential, what makes Ladyfair stand out in Chandan, and why we are the top choice for brides in Banka District. The Importance of Bridal Makeup Bridal makeup is more than just cosmetics—it’s a transformative art that enhances your natural features and complements your wedding attire. Professional bridal makeup ensures you look stunning in person and in photographs, boosting your confidence throughout your special day. At Ladyfair, we combine traditional and modern techniques to create a bridal look that reflects your unique style and personality. Why Ladyfair Stands Out in Chandan, Banka District Convenience of At-Home Services Ladyfair offers the convenience of professional bridal makeup at your doorstep. Brides in Chandan no longer need to travel to salons; instead, our skilled makeup artist arrives at your location, providing a relaxing and personalized experience. Expertise in Bridal Makeup Our makeup artist has extensive experience in creating stunning bridal looks. From traditional bold styles to modern minimalist aesthetics, Ladyfair delivers makeup that perfectly matches your wedding theme and attire. High-Quality Products Ladyfair uses premium makeup products that are safe for all skin types and provide long-lasting results. These high-quality products ensure your makeup stays flawless throughout your wedding day. Thorough Pre-Wedding Consultations Every bride is unique, and Ladyfair understands the importance of personalized services. We offer pre-wedding consultations to plan your look, try out styles, and ensure your final makeup aligns with your vision. Bridal Makeup Trends in Chandan Traditional Bridal Makeup Traditional bridal makeup is a timeless favorite, featuring bold eyeliner, vibrant lip colors, and intricate contouring that complements cultural wedding attire. Modern Bridal Makeup Modern bridal makeup focuses on a minimalist, natural appearance with soft tones, subtle highlights, and a radiant glow. Fusion Bridal Makeup For brides seeking a blend of tradition and modernity, fusion bridal makeup combines the best of both worlds. Ladyfair specializes in crafting fusion looks tailored to your preferences. The Ladyfair Experience: From Consultation to Final Look Initial Contact: Call us at 7004721239 to discuss your bridal makeup requirements and book an appointment. Pre-Wedding Consultation: Meet our makeup artist to share your vision, review your attire, and finalize your desired makeup style. Makeup Trial: Experience a trial session to preview your bridal look and make any necessary adjustments. Final Makeup Session: On your wedding day, our artist will provide the full bridal makeup service at your location. Post-Wedding Touch-Ups: If required, we offer touch-up services to keep your makeup fresh throughout the day. Client Testimonials Pooja M., Chandan: "Ladyfair’s at-home service made my wedding day stress-free. The makeup artist created a stunning look that matched my outfit perfectly!" Radhika T., Chandan: "The trial session gave me confidence in my final look. The makeup artist was so professional, and the products were top-notch. Highly recommend Ladyfair!" Anjali K., Chandan: "I wanted a blend of traditional and modern styles, and Ladyfair delivered beautifully. My makeup was flawless and lasted all day." Preparing for Your Bridal Makeup Session To achieve the best results, follow these tips: Stay Hydrated: Drink plenty of water to keep your skin healthy and glowing. Follow a Skincare Routine: Cleanse, tone, and moisturize daily for smooth, radiant skin. Avoid New Products: Stick to familiar skincare products to prevent reactions. Communicate Your Vision: Share your preferences and concerns during the consultation to ensure the perfect look. Beyond Bridal Makeup: Ladyfair’s Additional Services Ladyfair also offers: Party Makeup: Ideal for wedding guests and special events. Everyday Makeup: Subtle makeup for casual outings and daily activities. Special Occasion Makeup: Perfect for engagements, anniversaries, and more. Looking Ahead: The Future of Bridal Makeup in Chandan Ladyfair is committed to revolutionizing bridal makeup services in Chandan. With a focus on innovation, premium products, and exceptional customer service, we aim to make every bride’s special day unforgettable. FAQs What makes Ladyfair unique in Chandan? Ladyfair provides professional at-home bridal makeup services, offering convenience and a personalized experience for brides. What makeup styles does Ladyfair specialize in? We specialize in traditional, modern, and fusion bridal makeup styles tailored to each bride's preferences. How does the at-home service work? Our makeup artist comes to your location, starting with a consultation, a trial session, and finally providing the full bridal makeup service on your wedding day. What products do you use? We use high-quality, safe, and long-lasting makeup products suitable for all skin types. How can a bride prepare for her session? Stay hydrated, follow a consistent skincare routine, and share your vision during the consultation. Can Ladyfair accommodate cultural makeup requirements? Yes, we incorporate cultural and traditional elements into your bridal makeup to honor your heritage. What do clients say about Ladyfair? Clients love the convenience, quality, and professionalism of Ladyfair’s services, often praising how beautiful and confident they felt on their wedding day. How do I book Ladyfair’s services? Call us at 7004721239 to discuss your bridal makeup needs and schedule an appointment.

Posted By: 17th December 2024
bridal makeup artist bounsi
Introduction Your wedding day is a cherished occasion, and every bride deserves to radiate beauty and confidence. In Bounsi, Banka District, Ladyfair is redefining the bridal makeup experience with premium at-home services. Our expert team ensures you look your absolute best without the stress of traveling to a salon. For inquiries or bookings, call us at 7004721239. This blog delves into why professional bridal makeup is essential, how Ladyfair sets itself apart in Bounsi, and why brides are increasingly choosing Ladyfair for their special day. The Importance of Bridal Makeup Bridal makeup is more than just cosmetics; it’s an art that highlights your natural beauty while enhancing your wedding attire. With professional makeup, you can achieve a flawless, picture-perfect look that lasts throughout the celebrations. Ladyfair specializes in blending traditional and modern makeup styles to reflect each bride’s unique vision, ensuring you feel beautiful and confident on your big day. Why Ladyfair Stands Out in Bounsi Convenience of At-Home Services Ladyfair’s at-home bridal makeup services provide unmatched convenience. Brides in Bounsi can avoid the hassle of traveling by enjoying a luxurious makeover in their home or wedding venue. Expertise in Bridal Makeup Our skilled makeup artist is known for her ability to create breathtaking bridal looks. Whether it’s a traditional style or a modern touch, Ladyfair ensures every bride feels her most beautiful. Premium Products for Lasting Results Ladyfair uses only high-quality, safe, and long-lasting products. These ensure your makeup looks fresh throughout the day while being gentle on all skin types. Personalized Pre-Wedding Consultations Ladyfair offers comprehensive consultations, allowing brides to discuss their preferences, explore different styles, and finalize their wedding day look. This ensures a tailored and cohesive appearance. Bridal Makeup Trends in Bounsi Traditional Bridal Makeup Traditional makeup styles in Bounsi often emphasize bold features, such as dramatic eyes and vibrant lip colors, complementing traditional wedding outfits. Modern Bridal Makeup Brides preferring subtlety opt for modern makeup, which focuses on soft tones and minimalistic highlights, creating an elegant and natural look. Fusion Bridal Makeup For brides who want the best of both worlds, fusion makeup combines traditional elements with modern techniques. Ladyfair excels in crafting such unique looks to reflect individual styles. The Ladyfair Experience: From Consultation to Wedding Day Initial Contact: Call us at 7004721239 to discuss your needs and schedule your appointment. Pre-Wedding Consultation: Meet with our artist to plan your makeup style, ensuring it aligns with your attire and preferences. Makeup Trial: Experience a trial session to refine and finalize your bridal look. Wedding Day Service: Our artist arrives at your location to deliver a flawless and professional makeover. Touch-Up Services: Optional touch-ups are available to maintain your radiant look throughout the event. Client Testimonials Pooja K., Bounsi: “Ladyfair exceeded all my expectations. The convenience of their at-home service made everything stress-free, and my makeup was flawless!” Neha T., Bounsi: “I loved how personalized the service was. The pre-wedding consultation and trial helped me feel confident in my final look. Highly recommend Ladyfair!” Shruti B., Bounsi: “Thanks to Ladyfair, I received endless compliments on my wedding day. The makeup was stunning and stayed perfect all day long.” Preparing for Your Bridal Makeup Session To make the most of your bridal makeup experience, follow these tips: Hydrate: Keep your skin glowing by drinking plenty of water. Skincare: Stick to a consistent skincare routine leading up to your wedding. Avoid New Products: Use familiar products to avoid adverse reactions. Communicate: Clearly discuss your desired look during the consultation. Beyond Bridal Makeup: Ladyfair’s Additional Services Ladyfair also provides: Party Makeup: For wedding guests, parties, and other celebrations. Everyday Makeup: Perfect for casual outings and daily activities. Special Occasion Makeup: For engagements, anniversaries, and festive events. Looking Ahead: Bridal Makeup in Bounsi As Ladyfair expands in Bounsi, more brides are experiencing the ease and excellence of our at-home services. Our dedication to staying ahead of trends ensures that every bride receives a personalized, memorable beauty experience. Frequently Asked Questions (FAQs) Q1: What sets Ladyfair apart in Bounsi? A1: Ladyfair offers professional at-home bridal makeup services, providing a personalized and stress-free experience tailored to each bride’s preferences. Q2: What styles does Ladyfair specialize in? A2: Ladyfair creates traditional, modern, and fusion bridal looks, catering to all preferences and themes. Q3: How does the at-home service work? A3: From initial consultation to wedding day service, our process ensures a seamless and luxurious experience. Q4: What products does Ladyfair use? A4: Ladyfair uses premium, safe, and long-lasting makeup products suited for all skin types. Q5: How should a bride prepare for her session? A5: Stay hydrated, follow a skincare routine, and clearly communicate your preferences during the consultation. Q6: Can Ladyfair accommodate cultural preferences? A6: Yes, Ladyfair specializes in creating makeup looks that honor cultural traditions while adding a modern flair. Q7: How can brides book Ladyfair’s services in Bounsi? A7: Call us at 7004721239 to schedule an appointment and start planning your dream bridal look today!

Posted By: 24th November 2024
BEST BRIDAL MAKEUP ARTIST IN GARKHA
BEST BRIDAL MAKEUP ARTIST IN GARKHA Introduction Planning your wedding in Garkha and looking for the perfect bridal makeup? Look no further than Ladyfair! Our expert makeup artists specialize in creating stunning bridal looks tailored to your style and preferences. Experience the luxury of professional makeup services right at your doorstep. Call us at 7004721239 to book your appointment today! Why Choose Ladyfair for Bridal Makeup in Garkha? Experienced Professionals: Highly skilled artists with years of expertise in bridal makeup. At-Home Convenience: We bring our services to your doorstep for a hassle-free experience. Premium Products: Only the best products are used for flawless, long-lasting results. Customizable Packages: Choose from a variety of packages to suit your needs and budget. Bridal Makeup Packages in Garkha Our makeup packages are designed to meet every bride's expectations: Basic Bridal Makeup: ₹10,000 HD Bridal Makeup: ₹12,000 Airbrush Bridal Makeup: ₹18,000 Additional Services: Engagement Makeup (Basic): ₹6,000 Engagement Makeup (HD): ₹8,000 Engagement Makeup (Airbrush): ₹12,000 Party Makeup (Basic): ₹2,500 Party Makeup (HD): ₹3,500 Bridal Makeup Styles Offered in Garkha Traditional Bridal Makeup: Highlight your natural beauty with timeless techniques. HD Bridal Makeup: Perfect for capturing high-definition photos and videos. Airbrush Bridal Makeup: Lightweight and long-lasting makeup for a radiant finish. How to Book Your Bridal Makeup in Garkha Contact Us: Call 7004721239 to schedule your booking. Style Consultation: Discuss your desired look with our experts. Trial Session: Opt for a trial to finalize your bridal makeup. Enjoy Your Day: Let us take care of your makeup while you focus on your big day. Testimonials from Brides in Garkha Meera J., Garkha: "The Ladyfair team made me look and feel like a queen on my wedding day!" Ritika S., Garkha: "The HD makeup was perfect and stayed flawless all day long." Anjali P., Garkha: "The convenience of at-home service made my day stress-free. Highly recommended!" Bridal Makeup Tips for Brides in Garkha Start Early: Begin skincare routines months in advance for glowing skin. Hydration is Key: Keep your skin hydrated for a natural glow. Schedule a Trial: Finalize your look with a trial session before the wedding. Additional Makeup Services in Garkha Reception Makeup Party Makeup Engagement Makeup Festive Makeup Why Ladyfair is the Best Choice for Bridal Makeup in Garkha At Ladyfair, we are committed to making every bride's dream look a reality. Our experienced team, premium products, and personalized services ensure that your wedding day is unforgettable. Frequently Asked Questions Q1: Do you offer at-home bridal makeup services in Garkha? A1: Yes, our professional artists bring all the services to your doorstep. Q2: What is the cost of your bridal makeup packages? A2: Our bridal makeup starts at ₹10,000 and goes up to ₹18,000, depending on the package. Q3: Can I book a trial session for my bridal makeup? A3: Yes, trial sessions are available to help you finalize your perfect look. Q4: Do you offer makeup for events other than weddings? A4: Yes, we provide makeup services for engagements, receptions, and parties. Digi-follower.com Digi-follower.com Digi-follower.com Digi-follower.com Digi-follower.com Digi-follower.com Digi-follower.com Digi-follower.com Digi-follower.com Digi-follower.com Digi-follower.com Digi-follower.com dg-ads.com dg-ads.com dg-ads.com dg-ads.com dg-ads.com dg-ads.com dg-ads.com dg-ads.com dg-ads.com dg-ads.com dg-ads.com digi-members.com digi-members.com digi-members.com digi-members.com digi-members.com digi-members.com digi-members.com digi-members.com digi-members.com digi-members.com digi-members.com digi-members.com buy-follower.co buy-follower.co buy-follower.co buy-follower.co buy-follower.co buy-follower.co buy-follower.co buy-follower.co buy-follower.co buy-follower.co buy-follower.co buy-follower.co nabfollower.com nabfollower.com nabfollower.com nabfollower.com nabfollower.com nabfollower.com nabfollower.com nabfollower.com nabfollower.com nabfollower.com nabfollower.com nabfollower.com خريدهاست.com خريدهاست.com خريدهاست.com خريدهاست.com خريدهاست.com خريدهاست.com خريدهاست.com خريدهاست.com خريدهاست.com خريدهاست.com خريدهاست.com خریدفالوورایرانی.com قیمت-لیر-ترکیه.com هاب فالوور smmpro.vip digi-follower.com/en/

Posted By: 24th November 2024
BEST BRIDAL MAKEUP ARTIST IN ISUAPUR
BEST BRIDAL MAKEUP ARTIST IN ISUAPUR Introduction Are you a bride-to-be in Isuapur searching for flawless and professional bridal makeup? Look no further than Ladyfair! Our expert makeup artists specialize in crafting stunning bridal looks that match your style and personality, all from the comfort of your home. Call us at 7004721239 to book your appointment today! Why Choose Ladyfair for Bridal Makeup in Isuapur? Professional Makeup Artists: Our team has years of experience in bridal beauty. At-Home Services: Enjoy a stress-free experience with our doorstep service. High-Quality Products: We use premium products for long-lasting results. Customizable Packages: Tailored to suit your preferences and budget. Bridal Makeup Packages in Isuapur Select from our comprehensive range of packages: Basic Bridal Makeup: ₹10,000 HD Bridal Makeup: ₹12,000 Airbrush Bridal Makeup: ₹18,000 Additional Services: Engagement Makeup (Basic): ₹6,000 Engagement Makeup (HD): ₹8,000 Engagement Makeup (Airbrush): ₹12,000 Party Makeup (Basic): ₹2,500 Party Makeup (HD): ₹3,500 Bridal Makeup Styles Offered in Isuapur Traditional Bridal Makeup: Embrace elegance with a look inspired by tradition. HD Bridal Makeup: Ensure picture-perfect moments with high-definition makeup techniques. Airbrush Bridal Makeup: Enjoy a lightweight, long-lasting finish for your big day. How to Book Your Bridal Makeup in Isuapur Reach Out: Call 7004721239 to schedule your booking. Discuss Your Style: Collaborate with our artists to plan your bridal look. Trial Makeup Session: Opt for a trial to finalize your perfect appearance. Relax on Your Wedding Day: Let our experts handle your makeup while you enjoy your moment. Testimonials from Brides in Isuapur Priya S., Isuapur: "My bridal makeup was flawless, and the team ensured I was comfortable throughout!" Nidhi K., Isuapur: "Ladyfair’s HD makeup gave me a radiant and natural look that lasted all day." Richa P., Isuapur: "The doorstep service was so convenient. The airbrush makeup was incredible!" Bridal Makeup Tips for Brides in Isuapur Start Early: Begin a skincare routine months before the wedding. Hydrate: Drink water regularly for glowing skin. Trial Session: Book a trial to finalize your bridal makeup. Additional Makeup Services in Isuapur Engagement Makeup Reception Makeup Party Makeup Festive Makeup Why Ladyfair is the Best Choice for Bridal Makeup in Isuapur At Ladyfair, we are committed to making every bride look and feel extraordinary. Our professional approach, coupled with premium products and personalized service, ensures a seamless experience for brides in Isuapur. Frequently Asked Questions Q1: Do you provide at-home bridal makeup services in Isuapur? A1: Yes, we specialize in delivering professional bridal makeup services at your home. Q2: What are your bridal makeup charges? A2: Bridal makeup packages start at ₹10,000, with options for HD and airbrush makeup. Q3: Are trial makeup sessions available? A3: Yes, we offer trial sessions to help you decide on your ideal look. Q4: Can you handle makeup for other events besides weddings? A4: Yes, we provide makeup services for engagements, parties, and festivals.

Posted By: 24th November 2024
BEST BRIDAL MAKEUP ARTIST IN JALALPUR
BEST BRIDAL MAKEUP ARTIST IN JALALPUR Introduction Looking for exceptional bridal makeup services in Jalalpur? Ladyfair is your trusted partner for creating stunning bridal looks on your special day. Our skilled makeup artists deliver premium at-home services, ensuring a stress-free and radiant wedding experience. Call us at 7004721239 to book your bridal makeup appointment today! Why Choose Ladyfair for Bridal Makeup in Jalalpur? Experienced Professionals: Our team is skilled in crafting personalized bridal looks. At-Home Service: Relax and get ready in the comfort of your home. Top-Quality Products: We use only high-end products for long-lasting results. Affordable Packages: Customized solutions to suit every budget and preference. Bridal Makeup Packages in Jalalpur Choose from our wide range of packages: Basic Bridal Makeup: ₹10,000 HD Bridal Makeup: ₹12,000 Airbrush Bridal Makeup: ₹18,000 Additional Services: Engagement Makeup (Basic): ₹6,000 Engagement Makeup (HD): ₹8,000 Engagement Makeup (Airbrush): ₹12,000 Party Makeup (Basic): ₹2,500 Party Makeup (HD): ₹3,500 Bridal Makeup Styles Available in Jalalpur Traditional Bridal Makeup: Celebrate your cultural heritage with a traditional bridal look. HD Bridal Makeup: Capture flawless photos and videos with high-definition makeup techniques. Airbrush Bridal Makeup: Enjoy lightweight, long-lasting, and flawless coverage for your big day. How to Book Bridal Makeup in Jalalpur Contact Us: Call 7004721239 to schedule your appointment. Discuss Your Look: Share your vision and preferences with our makeup experts. Trial Session: Book a trial makeup session for confidence and perfection. Wedding Day Service: Let us handle your makeup while you enjoy your moment. Testimonials from Brides in Jalalpur Aarti R., Jalalpur: "Ladyfair’s airbrush bridal makeup made me look absolutely stunning. Highly recommend!" Sneha P., Jalalpur: "The at-home service was a blessing. My makeup was flawless and lasted all day." Pooja K., Jalalpur: "Ladyfair’s team is professional and talented. My HD makeup looked great in photos." Bridal Makeup Tips for Brides in Jalalpur Stay Hydrated: Drink plenty of water for glowing skin. Prepare Your Skin Early: Begin a skincare routine months before your wedding. Be Clear About Your Preferences: Communicate your ideas to your makeup artist. Additional Makeup Services in Jalalpur Engagement Makeup Reception Makeup Party Makeup Festival Makeup Why Ladyfair is the Best Bridal Makeup Artist in Jalalpur At Ladyfair, we combine expertise, premium products, and a personalized approach to make every bride feel beautiful and confident. Enjoy a seamless experience with our doorstep service in Jalalpur. Frequently Asked Questions Q1: Do you provide at-home bridal makeup in Jalalpur? A1: Yes, we specialize in delivering professional makeup services at your home. Q2: What are the charges for bridal makeup? A2: Bridal makeup packages start at ₹10,000, with customizable options. Q3: Do you offer trial makeup sessions? A3: Yes, trial sessions are available to help you decide your perfect look. Q4: Do you provide other makeup services apart from bridal makeup? A4: Yes, we offer makeup for engagements, parties, and festive occasions.

Posted By: 24th November 2024
BEST BRIDAL MAKEUP ARTIST IN DIGHWARA
BEST BRIDAL MAKEUP ARTIST IN DIGHWARA Introduction Are you looking for the best bridal makeup services in Dighwara? Look no further than Ladyfair! We specialize in crafting stunning bridal looks that make your special day unforgettable. With our at-home services and skilled makeup artists, you can achieve a flawless, radiant look without stepping out of your home. Call us now at 7004721239 to book your bridal makeup appointment! Why Choose Ladyfair for Bridal Makeup in Dighwara? Professional Makeup Artists: Our team is experienced in creating bespoke bridal looks. At-Home Service: Enjoy a stress-free experience with our doorstep makeup services. Premium Products: We use only high-quality, skin-safe products for a long-lasting glow. Customized Packages: Bridal makeup solutions tailored to your preferences. Bridal Makeup Packages in Dighwara Our affordable and customizable bridal makeup packages include: Basic Bridal Makeup: ₹10,000 HD Bridal Makeup: ₹12,000 Airbrush Bridal Makeup: ₹18,000 Additional Services: Engagement Makeup (Basic): ₹6,000 Engagement Makeup (HD): ₹8,000 Engagement Makeup (Airbrush): ₹12,000 Party Makeup (Basic): ₹2,500 Party Makeup (HD): ₹3,500 Bridal Makeup Styles in Dighwara Traditional Bridal Makeup Perfect for brides who want to embrace their cultural heritage. HD Bridal Makeup Ideal for high-definition photos and videos, capturing every detail beautifully. Airbrush Bridal Makeup Lightweight and flawless, it stays intact throughout your event. How to Book Your Bridal Makeup in Dighwara Contact Us: Call 7004721239 to schedule your appointment. Discuss Preferences: Share your desired look and ideas with our makeup experts. Trial Session: Opt for a trial makeup session to ensure perfection. Wedding Day Service: Relax as we transform you into a radiant bride. Testimonials from Brides in Dighwara Neha K., Dighwara: "Ladyfair made me look stunning on my wedding day. The HD makeup was amazing!" Ritika S., Dighwara: "I loved the at-home service. The team was punctual and very professional." Priya J., Dighwara: "My airbrush bridal makeup was flawless and lasted all day. Highly recommend Ladyfair!" Bridal Makeup Tips for Brides in Dighwara Hydrate Regularly: Ensure glowing skin by drinking plenty of water. Start Skincare Early: Follow a skincare routine at least a month before your wedding. Communicate Your Vision: Share your ideas to achieve your dream look. Additional Makeup Services in Dighwara Engagement Makeup Reception Makeup Party Makeup Festival Makeup Why Ladyfair is the Best Choice for Bridal Makeup in Dighwara At Ladyfair, we aim to make every bride feel confident and beautiful. Our professional approach, use of premium products, and at-home convenience ensure a memorable bridal experience. Frequently Asked Questions Q1: Do you provide at-home bridal makeup in Dighwara? A1: Yes, our services are available at your doorstep for your convenience. Q2: What are the charges for bridal makeup? A2: Our bridal makeup packages start at ₹10,000. Q3: Can I get a trial makeup session? A3: Yes, we offer trial sessions to help you decide on your look. Q4: Do you provide makeup services for other occasions? A4: Yes, we offer makeup for engagements, parties, and festivals.

Posted By: 24th November 2024
BEST BRIDAL MAKEUP ARTIST IN DARIYAPUR
BEST BRIDAL MAKEUP ARTIST IN DARIYAPUR Introduction Looking for the best bridal makeup services in Dariyapur? Your search ends with Ladyfair! Our professional makeup artists specialize in crafting stunning bridal looks right at your doorstep. Whether it’s a traditional ceremony or a modern celebration, we ensure you look flawless on your big day. Call us today at 7004721239 to book your dream bridal makeover. Why Choose Ladyfair for Bridal Makeup in Dariyapur? Expert Makeup Artists: Our skilled team creates customized looks that complement your personality. At-Home Service: Enjoy premium makeup services in the comfort of your home. High-Quality Products: We use skin-safe, top-tier products for a radiant and long-lasting finish. Bridal Makeup Packages in Dariyapur We offer tailored packages to suit every bride’s needs: Basic Bridal Makeup: ₹10,000 HD Bridal Makeup: ₹12,000 Airbrush Bridal Makeup: ₹18,000 Additional Services: Engagement Makeup (Basic): ₹6,000 Engagement Makeup (HD): ₹8,000 Engagement Makeup (Airbrush): ₹12,000 Party Makeup (Basic): ₹2,500 Party Makeup (HD): ₹3,500 Bridal Makeup Styles in Dariyapur Traditional Bridal Makeup Enhance your natural beauty with a timeless, culturally rich look. HD Bridal Makeup Perfect for high-definition photography to capture every detail beautifully. Airbrush Bridal Makeup Lightweight, flawless, and long-lasting for the entire event. How to Book Your Bridal Makeup in Dariyapur Contact Us: Call us at 7004721239 to book your slot. Discuss Your Look: Share your preferences and ideas with our experts. Trial Makeup Session: Opt for a trial to finalize your perfect bridal look. Wedding Day Glam: Sit back and let us handle your transformation. Testimonials from Brides in Dariyapur Pooja R., Dariyapur: "Ladyfair made my special day even more memorable. The airbrush makeup was flawless!" Sneha T., Dariyapur: "The makeup team was professional and punctual. I loved my bridal look!" Anjali M., Dariyapur: "I received so many compliments on my wedding day. Thank you, Ladyfair!" Bridal Makeup Tips for Brides in Dariyapur Stay Hydrated: Drink water to keep your skin glowing. Start Early: Begin a skincare routine at least a month before your wedding. Trust the Experts: Ladyfair ensures you’ll look stunning on your big day. Additional Services in Dariyapur Engagement Makeup Reception Makeup Party Makeup Festival Makeup Why Ladyfair is the Best Bridal Makeup Choice in Dariyapur At Ladyfair, we understand how important your wedding day is. Our team of professional makeup artists, premium products, and at-home services ensure you look picture-perfect for every moment. Frequently Asked Questions Q1: Do you offer at-home bridal makeup in Dariyapur? A1: Yes, we provide professional makeup services at your home. Q2: What is the starting price for bridal makeup? A2: Bridal makeup packages start at ₹10,000. Q3: Can I book a trial makeup session? A3: Yes, we recommend trials to finalize your look. Q4: Do you provide party makeup services? A4: Yes, we cater to all occasions, including parties, engagements, and festivals.

Posted By: 24th November 2024
BRIDAL MAKEUP ARTIST IN LAHLADPUR
BEST BRIDAL MAKEUP ARTIST IN LAHLADPUR Introduction Searching for the best bridal makeup services in Lahladpur? Look no further than Ladyfair! We specialize in making brides look stunning on their special day with flawless, professional makeup services delivered at the comfort of your home. Call us today at 7004721239 to book your appointment and turn your wedding into an unforgettable memory. Why Choose Ladyfair for Bridal Makeup in Lahladpur? Professional Artists: Our experienced makeup artists create customized looks that enhance your natural beauty. Convenient At-Home Service: Save time and relax as we bring our expertise to your doorstep. Top-Quality Products: We use premium, skin-friendly makeup products to ensure a radiant, long-lasting look. Bridal Makeup Packages in Lahladpur We offer customizable bridal makeup packages: Basic Bridal Makeup: ₹10,000 HD Bridal Makeup: ₹12,000 Airbrush Bridal Makeup: ₹18,000 Additional Services: Engagement Makeup (Basic): ₹6,000 Engagement Makeup (HD): ₹8,000 Engagement Makeup (Airbrush): ₹12,000 Party Makeup (Basic): ₹2,500 Party Makeup (HD): ₹3,500 Bridal Makeup Styles in Lahladpur Traditional Bridal Makeup Perfect for a timeless, cultural bridal look. HD Bridal Makeup Ideal for high-definition photography to capture every detail. Airbrush Bridal Makeup Lightweight and flawless, designed to last all day without smudging. How to Book Your Bridal Makeup in Lahladpur Contact Us: Call 7004721239 to schedule your appointment. Discuss Your Preferences: Share your dream bridal look with our experts. Trial Session: Opt for a trial to finalize your perfect look. Wedding Day: Sit back, relax, and let us transform you for your big day. Testimonials from Brides in Lahladpur Nidhi K., Lahladpur: "Ladyfair gave me a flawless look on my wedding day. Everyone loved my makeup!" Richa T., Lahladpur: "The airbrush makeup was lightweight yet perfect for the whole event. Highly recommend Ladyfair!" Aarti S., Lahladpur: "The team was professional and created a stunning look for my engagement. I couldn’t be happier!" Bridal Makeup Tips for Brides in Lahladpur Hydrate: Drink plenty of water for glowing skin. Skincare Routine: Follow a skincare routine leading up to the wedding. Trust the Experts: Ladyfair will make you look and feel your best. Additional Services in Lahladpur Engagement Makeup Reception Makeup Party Makeup Festival Makeup Why Ladyfair is the Best Choice for Bridal Makeup in Lahladpur At Ladyfair, we believe every bride deserves to feel confident and beautiful on her special day. Our professional makeup artists, top-quality products, and at-home services ensure that you’ll look picture-perfect on your wedding day. Frequently Asked Questions Q1: Do you provide at-home bridal makeup in Lahladpur? A1: Yes, we bring our professional makeup services directly to your home. Q2: What are the charges for bridal makeup? A2: Bridal makeup packages start at ₹10,000. Q3: Can I book a trial session? A3: Absolutely! We encourage trials to ensure you’re happy with your look. Q4: Do you offer party makeup services? A4: Yes, we offer makeup services for parties, engagements, and other occasions.

Posted By: 24th November 2024
BEST BRIDAL MAKEUP ARTIST IN LAHLADPUR
BEST BRIDAL MAKEUP ARTIST IN LAHLADPUR Introduction Searching for the best bridal makeup services in Lahladpur? Look no further than Ladyfair! We specialize in making brides look stunning on their special day with flawless, professional makeup services delivered at the comfort of your home. Call us today at 7004721239 to book your appointment and turn your wedding into an unforgettable memory. Why Choose Ladyfair for Bridal Makeup in Lahladpur? Professional Artists: Our experienced makeup artists create customized looks that enhance your natural beauty. Convenient At-Home Service: Save time and relax as we bring our expertise to your doorstep. Top-Quality Products: We use premium, skin-friendly makeup products to ensure a radiant, long-lasting look. Bridal Makeup Packages in Lahladpur We offer customizable bridal makeup packages: Basic Bridal Makeup: ₹10,000 HD Bridal Makeup: ₹12,000 Airbrush Bridal Makeup: ₹18,000 Additional Services: Engagement Makeup (Basic): ₹6,000 Engagement Makeup (HD): ₹8,000 Engagement Makeup (Airbrush): ₹12,000 Party Makeup (Basic): ₹2,500 Party Makeup (HD): ₹3,500 Bridal Makeup Styles in Lahladpur Traditional Bridal Makeup Perfect for a timeless, cultural bridal look. HD Bridal Makeup Ideal for high-definition photography to capture every detail. Airbrush Bridal Makeup Lightweight and flawless, designed to last all day without smudging. How to Book Your Bridal Makeup in Lahladpur Contact Us: Call 7004721239 to schedule your appointment. Discuss Your Preferences: Share your dream bridal look with our experts. Trial Session: Opt for a trial to finalize your perfect look. Wedding Day: Sit back, relax, and let us transform you for your big day. Testimonials from Brides in Lahladpur Nidhi K., Lahladpur: "Ladyfair gave me a flawless look on my wedding day. Everyone loved my makeup!" Richa T., Lahladpur: "The airbrush makeup was lightweight yet perfect for the whole event. Highly recommend Ladyfair!" Aarti S., Lahladpur: "The team was professional and created a stunning look for my engagement. I couldn’t be happier!" Bridal Makeup Tips for Brides in Lahladpur Hydrate: Drink plenty of water for glowing skin. Skincare Routine: Follow a skincare routine leading up to the wedding. Trust the Experts: Ladyfair will make you look and feel your best. Additional Services in Lahladpur Engagement Makeup Reception Makeup Party Makeup Festival Makeup Why Ladyfair is the Best Choice for Bridal Makeup in Lahladpur At Ladyfair, we believe every bride deserves to feel confident and beautiful on her special day. Our professional makeup artists, top-quality products, and at-home services ensure that you’ll look picture-perfect on your wedding day. Frequently Asked Questions Q1: Do you provide at-home bridal makeup in Lahladpur? A1: Yes, we bring our professional makeup services directly to your home. Q2: What are the charges for bridal makeup? A2: Bridal makeup packages start at ₹10,000. Q3: Can I book a trial session? A3: Absolutely! We encourage trials to ensure you’re happy with your look. Q4: Do you offer party makeup services? A4: Yes, we offer makeup services for parties, engagements, and other occasions.

Posted By: 24th November 2024
BEST BRIDAL MAKEUP ARTIST IN MANJHI
BEST BRIDAL MAKEUP ARTIST IN MANJHI Introduction Looking for top-tier bridal makeup services in Manjhi? Let Ladyfair elevate your special day with flawless, professional makeup done at the comfort of your home. Call us at 7004721239 and make your wedding, engagement, or event unforgettable with our expert services. Why Ladyfair is the Best Choice for Bridal Makeup in Manjhi 1. Expert Makeup Artists Our skilled artists specialize in crafting unique bridal looks tailored to your preferences. 2. At-Home Convenience Enjoy premium services without leaving your home. 3. High-Quality Products We use only top-grade, skin-safe products for a radiant, long-lasting finish. Bridal Makeup Packages in Manjhi Choose from our tailored packages to meet your needs: Basic Bridal Makeup: ₹10,000 HD Bridal Makeup: ₹12,000 Airbrush Bridal Makeup: ₹18,000 Additional Services: Engagement Makeup (Basic): ₹6,000 Engagement Makeup (HD): ₹8,000 Engagement Makeup (Airbrush): ₹12,000 Party Makeup (Basic): ₹2,500 Party Makeup (HD): ₹3,500 Bridal Makeup Styles in Manjhi Traditional Bridal Makeup Celebrate cultural elegance with a classic, traditional look. HD Bridal Makeup Perfect for close-ups and high-definition photography. Airbrush Bridal Makeup Experience a flawless, lightweight finish that lasts all day. Booking Process for Bridal Makeup in Manjhi Contact Us: Call 7004721239 to schedule your appointment. Discuss Your Look: Share your bridal makeup ideas with our artists. Trial Session: Schedule a trial to finalize your perfect look. Wedding Day: Relax and let us make you shine. Testimonials from Happy Brides in Manjhi Priya S., Manjhi: "Ladyfair made my wedding day extra special. The makeup was flawless and lasted all day!" Sneha T., Manjhi: "I loved the airbrush makeup! The team was professional and attentive to details." Ritika D., Manjhi: "Their HD makeup was perfect for my wedding photos. Highly recommend Ladyfair!" Bridal Makeup Tips for Brides in Manjhi Start Early: Begin skincare routines months before your wedding. Stay Hydrated: Proper hydration ensures glowing skin. Get a Trial: Finalize your look in advance to avoid last-minute stress. Relax: Trust Ladyfair to create a stunning look for your big day. Additional Makeup Services in Manjhi Engagement Makeup Reception Makeup Party Makeup Festival Makeup Why Ladyfair is Trusted for Bridal Makeup in Manjhi At Ladyfair, we prioritize making every bride feel confident and beautiful. With expert artists, top-quality products, and excellent service, we’re the most trusted choice for bridal makeup in Manjhi. Frequently Asked Questions Q1: Do you offer at-home makeup services in Manjhi? A1: Yes, we provide professional at-home makeup services for your convenience. Q2: What is the cost of bridal makeup? A2: Our bridal makeup packages start at ₹10,000. Q3: Can I book a trial session? A3: Yes, trial sessions are available to finalize your look. Q4: Do you offer other types of makeup? A4: Yes, we provide makeup services for engagements, parties, and other occasions.

Posted By: 24th November 2024
Bridal Makeup Artist in Bikram
Introduction In Bikram, Ladyfair is the premier choice for brides looking to achieve the perfect wedding day look with our professional at-home bridal makeup services. Whether you desire a traditional bridal look, an HD finish, or the flawless perfection of airbrush makeup, our expert makeup artist in Bikram ensures that you shine on your special day. Contact us today at 7004721239 to schedule your appointment. Why Choose Ladyfair for Bridal Makeup in Bikram Experienced Makeup Artist Our makeup artist in Bikram has years of experience in bridal makeup, creating personalized looks that complement your natural beauty and align with your style and preferences. Convenient At-Home Service Forget the stress of traveling to a salon. Ladyfair brings luxury beauty treatments directly to your doorstep with our at-home bridal makeup services, offering a truly personalized experience. Premium Makeup Products We use only high-quality, professional-grade makeup products to ensure a flawless, long-lasting look that remains perfect throughout your big day. Bridal Makeup Pricing in Bikram Our bridal makeup services in Bikram are tailored to fit different styles and budgets: Basic Bridal Makeup: ₹10,000 HD Bridal Makeup: ₹12,000 Airbrush Bridal Makeup: ₹18,000 For engagement and reception makeup: Basic Engagement/Reception Makeup: ₹6,000 HD Engagement/Reception Makeup: ₹8,000 Airbrush Engagement/Reception Makeup: ₹12,000 For parties: Basic Party Makeup: ₹2,500 HD Party Makeup: ₹3,500 Popular Bridal Makeup Styles in Bikram Traditional Bridal Makeup Our traditional bridal makeup in Bikram incorporates bold colors and intricate detailing to complement your wedding attire, creating an elegant and timeless look. HD Bridal Makeup For a high-definition finish that looks flawless both in photos and in person, HD bridal makeup is the perfect choice for brides who want a picture-perfect appearance all day. Airbrush Bridal Makeup Our airbrush makeup offers a lightweight, full-coverage finish that lasts all day, giving you a smooth and natural look while ensuring long-lasting perfection. How to Book Your Bridal Makeup with Ladyfair in Bikram Initial Contact: Call us at 7004721239 to discuss your makeup needs and schedule your appointment. Consultation Session: Meet with our makeup artist to discuss your wedding look, review your attire, and plan the perfect makeup style. Makeup Trial: We offer trial sessions to help you preview your bridal makeup look and make any adjustments. Wedding Day Makeup: On your wedding day, our makeup artist will arrive at your location in Bikram to provide flawless, hassle-free makeup service. Testimonials from Brides in Bikram Priya R., Bikram: "Ladyfair provided amazing service on my wedding day. The airbrush makeup looked flawless and lasted all day." Ritu K., Bikram: "I loved the HD makeup! It was perfect for my photos, and the at-home service was so convenient." Sneha S., Bikram: "My traditional bridal makeup was exactly what I wanted, and Ladyfair made the entire process stress-free." Preparing for Your Bridal Makeup Session To get the best results for your bridal makeup: Stay Hydrated: Keep your skin looking fresh by drinking plenty of water. Consistent Skincare: Stick to your regular skincare routine to maintain healthy, glowing skin. Avoid New Products: Use familiar products to prevent any reactions before your wedding day. Clear Communication: Discuss your makeup preferences and any concerns with our artist during the consultation. Additional Beauty Services by Ladyfair Beyond bridal makeup, Ladyfair offers a variety of beauty services in Bikram: Engagement and Reception Makeup: Customized looks for all pre-wedding events. Party Makeup: Perfect for birthdays, anniversaries, and special occasions. Everyday Makeup: Enhance your daily look with our expert makeup services. Special Occasion Makeup: Professional makeup for parties, celebrations, and formal events. The Future of Bridal Makeup in Bikram Ladyfair is dedicated to setting new standards in bridal beauty in Bikram with our innovative at-home services. As we continue to offer exceptional service, more brides are choosing Ladyfair as their preferred makeup provider. Q&A with Ladyfair’s Bridal Makeup Artist in Bikram Q1: What makes Ladyfair the best choice for bridal makeup in Bikram? A1: Ladyfair offers expert bridal makeup services at home, using high-quality products to ensure a flawless and long-lasting look. Q2: What are the prices for bridal makeup in Bikram? A2: Our bridal makeup packages start at ₹10,000 for basic makeup, ₹12,000 for HD makeup, and ₹18,000 for airbrush makeup. Q3: How do I book Ladyfair’s bridal makeup services in Bikram? A3: You can book our services by calling 7004721239. We also offer consultations and trial sessions to ensure you get the look you want. Q4: What bridal makeup styles does Ladyfair offer in Bikram? A4: Ladyfair offers traditional, HD, and airbrush bridal makeup to suit different preferences and needs. Q5: Are makeup trials available before my wedding? A5: Yes, we offer trial sessions so you can finalize your bridal look ahead of time. Q6: What products does Ladyfair use for bridal makeup? A6: We use professional-grade, high-quality makeup products that are safe for all skin types and ensure a flawless finish. Q7: What other services does Ladyfair provide in Bikram? A7: In addition to bridal makeup, we offer makeup for engagements, receptions, parties, and other special occasions. Ladyfair is your ultimate choice for professional, at-home bridal makeup services in Bikram, ensuring a flawless and stress-free experience on your special day.

Posted By: 24th November 2024
BEST BRIDAL MAKEUP ARTIST IN MAKER
BEST BRIDAL MAKEUP ARTIST IN MAKER Introduction Looking for professional bridal makeup services in Maker? Ladyfair brings you flawless, at-home bridal makeup to make your special day unforgettable. Call us at 7004721239 and let our expert makeup artists craft a perfect look for your wedding, engagement, or other important occasions. Why Choose Ladyfair for Bridal Makeup in Maker? 1. Skilled Makeup Artists Our team specializes in creating stunning, customized bridal looks. 2. At-Home Comfort Enjoy professional makeup services in the comfort and convenience of your home. 3. Premium-Quality Products We use high-end, skin-friendly makeup products for a long-lasting and radiant finish. Bridal Makeup Packages in Maker Choose from our bridal makeup packages designed to suit every bride's preferences: Basic Bridal Makeup: ₹10,000 HD Bridal Makeup: ₹12,000 Airbrush Bridal Makeup: ₹18,000 Additional Services: Engagement Makeup (Basic): ₹6,000 Engagement Makeup (HD): ₹8,000 Engagement Makeup (Airbrush): ₹12,000 Party Makeup (Basic): ₹2,500 Party Makeup (HD): ₹3,500 Bridal Makeup Styles in Maker Traditional Bridal Makeup Celebrate your culture with a traditional bridal style that’s picture-perfect. HD Bridal Makeup Get a camera-ready look for high-definition photographs. Airbrush Bridal Makeup Achieve a natural, lightweight finish that lasts all day. Booking Your Bridal Makeup in Maker Call Us: Dial 7004721239 to book your appointment. Discuss Your Vision: Share your preferred bridal look with our experts. Trial Session: Finalize your look through a trial session. Wedding Day: Relax while we make you look stunning for your special day. Testimonials from Brides in Maker Neha S., Maker: "Ladyfair did an incredible job on my wedding makeup. Highly recommended!" Ankita P., Maker: "The HD bridal makeup was flawless and perfect for my photos. Thank you, Ladyfair!" Ritika J., Maker: "I chose airbrush makeup, and it stayed perfect all day. The artists were amazing!" Bridal Makeup Tips for Brides in Maker Start a Skincare Routine: Begin months in advance for glowing skin. Stay Hydrated: Keep your skin fresh and supple by drinking water. Plan Ahead: Schedule your bridal makeup trial early. Relax on Your Day: Trust Ladyfair to make you look your absolute best. Additional Makeup Services in Maker Engagement Makeup Reception Makeup Party Makeup Festival Makeup Why Ladyfair is Maker’s Top Choice for Bridal Makeup At Ladyfair, we prioritize making every bride feel confident and beautiful on her big day. With experienced artists, premium products, and outstanding customer service, we are the most trusted bridal makeup service in Maker. Frequently Asked Questions Q1: Do you offer at-home bridal makeup in Maker? A1: Yes, we specialize in providing professional at-home makeup services. Q2: What is the starting price for bridal makeup? A2: Bridal makeup packages start at ₹10,000. Q3: Do you offer trial makeup sessions? A3: Yes, we recommend trial sessions to finalize your bridal look. Q4: Can you do makeup for other occasions? A4: Yes, we provide makeup services for engagements, parties, and festivals.

Posted By: 24th November 2024
Bridal Makeup Artist in Dulhinbazar
Introduction In Dulhinbazar, Ladyfair is the premier choice for brides looking to achieve the perfect wedding day look with our professional at-home bridal makeup services. Whether you desire a traditional bridal look, an HD finish, or the flawless perfection of airbrush makeup, our expert makeup artist in Dulhinbazar ensures that you shine on your special day. Contact us today at 7004721239 to schedule your appointment. Why Choose Ladyfair for Bridal Makeup in Dulhinbazar Experienced Makeup Artist Our makeup artist in Dulhinbazar has years of experience in bridal makeup, creating personalized looks that complement your natural beauty and align with your style and preferences. Convenient At-Home Service Forget the stress of traveling to a salon. Ladyfair brings luxury beauty treatments directly to your doorstep with our at-home bridal makeup services, offering a truly personalized experience. Premium Makeup Products We use only high-quality, professional-grade makeup products to ensure a flawless, long-lasting look that remains perfect throughout your big day. Bridal Makeup Pricing in Dulhinbazar Our bridal makeup services in Dulhinbazar are tailored to fit different styles and budgets: Basic Bridal Makeup: ₹10,000 HD Bridal Makeup: ₹12,000 Airbrush Bridal Makeup: ₹18,000 For engagement and reception makeup: Basic Engagement/Reception Makeup: ₹6,000 HD Engagement/Reception Makeup: ₹8,000 Airbrush Engagement/Reception Makeup: ₹12,000 For parties: Basic Party Makeup: ₹2,500 HD Party Makeup: ₹3,500 Popular Bridal Makeup Styles in Dulhinbazar Traditional Bridal Makeup Our traditional bridal makeup in Dulhinbazar incorporates bold colors and intricate detailing to complement your wedding attire, creating an elegant and timeless look. HD Bridal Makeup For a high-definition finish that looks flawless both in photos and in person, HD bridal makeup is the perfect choice for brides who want a picture-perfect appearance all day. Airbrush Bridal Makeup Our airbrush makeup offers a lightweight, full-coverage finish that lasts all day, giving you a smooth and natural look while ensuring long-lasting perfection. How to Book Your Bridal Makeup with Ladyfair in Dulhinbazar Initial Contact: Call us at 7004721239 to discuss your makeup needs and schedule your appointment. Consultation Session: Meet with our makeup artist to discuss your wedding look, review your attire, and plan the perfect makeup style. Makeup Trial: We offer trial sessions to help you preview your bridal makeup look and make any adjustments. Wedding Day Makeup: On your wedding day, our makeup artist will arrive at your location in Dulhinbazar to provide flawless, hassle-free makeup service. Testimonials from Brides in Dulhinbazar Priya R., Dulhinbazar: "Ladyfair provided amazing service on my wedding day. The airbrush makeup looked flawless and lasted all day." Ritu K., Dulhinbazar: "I loved the HD makeup! It was perfect for my photos, and the at-home service was so convenient." Sneha S., Dulhinbazar: "My traditional bridal makeup was exactly what I wanted, and Ladyfair made the entire process stress-free." Preparing for Your Bridal Makeup Session To get the best results for your bridal makeup: Stay Hydrated: Keep your skin looking fresh by drinking plenty of water. Consistent Skincare: Stick to your regular skincare routine to maintain healthy, glowing skin. Avoid New Products: Use familiar products to prevent any reactions before your wedding day. Clear Communication: Discuss your makeup preferences and any concerns with our artist during the consultation. Additional Beauty Services by Ladyfair Beyond bridal makeup, Ladyfair offers a variety of beauty services in Dulhinbazar: Engagement and Reception Makeup: Customized looks for all pre-wedding events. Party Makeup: Perfect for birthdays, anniversaries, and special occasions. Everyday Makeup: Enhance your daily look with our expert makeup services. Special Occasion Makeup: Professional makeup for parties, celebrations, and formal events. The Future of Bridal Makeup in Dulhinbazar Ladyfair is dedicated to setting new standards in bridal beauty in Dulhinbazar with our innovative at-home services. As we continue to offer exceptional service, more brides are choosing Ladyfair as their preferred makeup provider. Q&A with Ladyfair’s Bridal Makeup Artist in Dulhinbazar Q1: What makes Ladyfair the best choice for bridal makeup in Dulhinbazar? A1: Ladyfair offers expert bridal makeup services at home, using high-quality products to ensure a flawless and long-lasting look. Q2: What are the prices for bridal makeup in Dulhinbazar? A2: Our bridal makeup packages start at ₹10,000 for basic makeup, ₹12,000 for HD makeup, and ₹18,000 for airbrush makeup. Q3: How do I book Ladyfair’s bridal makeup services in Dulhinbazar? A3: You can book our services by calling 7004721239. We also offer consultations and trial sessions to ensure you get the look you want. Q4: What bridal makeup styles does Ladyfair offer in Dulhinbazar? A4: Ladyfair offers traditional, HD, and airbrush bridal makeup to suit different preferences and needs. Q5: Are makeup trials available before my wedding? A5: Yes, we offer trial sessions so you can finalize your bridal look ahead of time. Q6: What products does Ladyfair use for bridal makeup? A6: We use professional-grade, high-quality makeup products that are safe for all skin types and ensure a flawless finish. Q7: What other services does Ladyfair provide in Dulhinbazar? A7: In addition to bridal makeup, we offer makeup for engagements, receptions, parties, and other special occasions. Ladyfair is your ultimate choice for professional, at-home bridal makeup services in Dulhinbazar, ensuring a flawless and stress-free experience on your special day.

Posted By: 24th November 2024
BEST BRIDAL MAKEUP ARTIST IN CHAPRA SADAR
BEST BRIDAL MAKEUP ARTIST IN CHAPRA SADAR Introduction Searching for the best bridal makeup services in Chapra Sadar? Ladyfair is here to make your wedding day truly special with flawless at-home bridal makeup services. Call us at 7004721239 and let our expert makeup artists create the perfect look for your big day, engagement, or any special occasion. Why Choose Ladyfair for Bridal Makeup in Chapra Sadar? 1. Experienced Makeup Artists Our team specializes in crafting stunning bridal looks, tailored to your preferences. 2. Comfort of At-Home Services Avoid the stress of travel and enjoy professional services in the comfort of your home. 3. Premium Makeup Products We use high-quality, long-lasting products to enhance your natural beauty. Bridal Makeup Packages in Chapra Sadar Explore our customizable packages designed to meet every bride's needs: Basic Bridal Makeup: ₹10,000 HD Bridal Makeup: ₹12,000 Airbrush Bridal Makeup: ₹18,000 Additional Services: Engagement Makeup (Basic): ₹6,000 Engagement Makeup (HD): ₹8,000 Engagement Makeup (Airbrush): ₹12,000 Party Makeup (Basic): ₹2,500 Party Makeup (HD): ₹3,500 Bridal Makeup Styles in Chapra Sadar Traditional Bridal Makeup Celebrate your cultural roots with a traditional bridal look. HD Bridal Makeup Perfect for flawless, high-definition photography. Airbrush Bridal Makeup Enjoy a lightweight, natural finish with long-lasting effects. Booking Your Bridal Makeup Service Contact Us: Call 7004721239 to schedule your appointment. Consultation: Share your bridal vision with our experts. Trial Session: Experiment with different styles before the big day. Wedding Day: Sit back as we create the perfect bridal look for you. Testimonials from Brides in Chapra Sadar Anjali K., Chapra Sadar: "Ladyfair made my wedding day extra special. Their makeup artists are amazing!" Priya T., Chapra Sadar: "The HD bridal makeup was stunning and lasted all day. Highly recommend their services." Sonal R., Chapra Sadar: "Airbrush makeup was a game-changer for me. I felt beautiful and comfortable throughout the day." Bridal Makeup Tips for Brides in Chapra Sadar Start Early: Begin your skincare routine months before your wedding for glowing skin. Stay Hydrated: Drink plenty of water for a fresh, hydrated look. Schedule a Trial: Finalize your makeup style with a trial session. Relax and Enjoy: Trust Ladyfair’s professionals to handle everything. Additional Services in Chapra Sadar Engagement Makeup Reception Makeup Party Makeup Festival Makeup Why Ladyfair is Chapra Sadar’s Go-To Bridal Makeup Service Ladyfair is committed to creating exceptional bridal looks that leave lasting impressions. With skilled artists, high-quality products, and excellent customer service, we are the preferred choice for brides in Chapra Sadar. Frequently Asked Questions Q1: Do you offer at-home bridal makeup services in Chapra Sadar? A1: Yes, we specialize in providing professional at-home makeup services. Q2: What is the starting price for bridal makeup? A2: Our bridal makeup packages start at ₹10,000. Q3: Are trial sessions available? A3: Yes, we recommend booking a trial session to finalize your look. Q4: Do you provide makeup services for other occasions? A4: Yes, we offer makeup for engagements, parties, and festivals.

Posted By: 24th November 2024
Bridal Makeup Artist in Paliganj
Introduction In Paliganj, Ladyfair is the premier choice for brides looking to achieve the perfect wedding day look with our professional at-home bridal makeup services. Whether you desire a traditional bridal look, an HD finish, or the flawless perfection of airbrush makeup, our expert makeup artist in Paliganj ensures that you shine on your special day. Contact us today at 7004721239 to schedule your appointment. Why Choose Ladyfair for Bridal Makeup in Paliganj Experienced Makeup Artist Our makeup artist in Paliganj has years of experience in bridal makeup, creating personalized looks that complement your natural beauty and align with your style and preferences. Convenient At-Home Service Forget the stress of traveling to a salon. Ladyfair brings luxury beauty treatments directly to your doorstep with our at-home bridal makeup services, offering a truly personalized experience. Premium Makeup Products We use only high-quality, professional-grade makeup products to ensure a flawless, long-lasting look that remains perfect throughout your big day. Bridal Makeup Pricing in Paliganj Our bridal makeup services in Paliganj are tailored to fit different styles and budgets: Basic Bridal Makeup: ₹10,000 HD Bridal Makeup: ₹12,000 Airbrush Bridal Makeup: ₹18,000 For engagement and reception makeup: Basic Engagement/Reception Makeup: ₹6,000 HD Engagement/Reception Makeup: ₹8,000 Airbrush Engagement/Reception Makeup: ₹12,000 For parties: Basic Party Makeup: ₹2,500 HD Party Makeup: ₹3,500 Popular Bridal Makeup Styles in Paliganj Traditional Bridal Makeup Our traditional bridal makeup in Paliganj incorporates bold colors and intricate detailing to complement your wedding attire, creating an elegant and timeless look. HD Bridal Makeup For a high-definition finish that looks flawless both in photos and in person, HD bridal makeup is the perfect choice for brides who want a picture-perfect appearance all day. Airbrush Bridal Makeup Our airbrush makeup offers a lightweight, full-coverage finish that lasts all day, giving you a smooth and natural look while ensuring long-lasting perfection. How to Book Your Bridal Makeup with Ladyfair in Paliganj Initial Contact: Call us at 7004721239 to discuss your makeup needs and schedule your appointment. Consultation Session: Meet with our makeup artist to discuss your wedding look, review your attire, and plan the perfect makeup style. Makeup Trial: We offer trial sessions to help you preview your bridal makeup look and make any adjustments. Wedding Day Makeup: On your wedding day, our makeup artist will arrive at your location in Paliganj to provide flawless, hassle-free makeup service. Testimonials from Brides in Paliganj Priya R., Paliganj: "Ladyfair provided amazing service on my wedding day. The airbrush makeup looked flawless and lasted all day." Ritu K., Paliganj: "I loved the HD makeup! It was perfect for my photos, and the at-home service was so convenient." Sneha S., Paliganj: "My traditional bridal makeup was exactly what I wanted, and Ladyfair made the entire process stress-free." Preparing for Your Bridal Makeup Session To get the best results for your bridal makeup: Stay Hydrated: Keep your skin looking fresh by drinking plenty of water. Consistent Skincare: Stick to your regular skincare routine to maintain healthy, glowing skin. Avoid New Products: Use familiar products to prevent any reactions before your wedding day. Clear Communication: Discuss your makeup preferences and any concerns with our artist during the consultation. Additional Beauty Services by Ladyfair Beyond bridal makeup, Ladyfair offers a variety of beauty services in Paliganj: Engagement and Reception Makeup: Customized looks for all pre-wedding events. Party Makeup: Perfect for birthdays, anniversaries, and special occasions. Everyday Makeup: Enhance your daily look with our expert makeup services. Special Occasion Makeup: Professional makeup for parties, celebrations, and formal events. The Future of Bridal Makeup in Paliganj Ladyfair is dedicated to setting new standards in bridal beauty in Paliganj with our innovative at-home services. As we continue to offer exceptional service, more brides are choosing Ladyfair as their preferred makeup provider. Q&A with Ladyfair’s Bridal Makeup Artist in Paliganj Q1: What makes Ladyfair the best choice for bridal makeup in Paliganj? A1: Ladyfair offers expert bridal makeup services at home, using high-quality products to ensure a flawless and long-lasting look. Q2: What are the prices for bridal makeup in Paliganj? A2: Our bridal makeup packages start at ₹10,000 for basic makeup, ₹12,000 for HD makeup, and ₹18,000 for airbrush makeup. Q3: How do I book Ladyfair’s bridal makeup services in Paliganj? A3: You can book our services by calling 7004721239. We also offer consultations and trial sessions to ensure you get the look you want. Q4: What bridal makeup styles does Ladyfair offer in Paliganj? A4: Ladyfair offers traditional, HD, and airbrush bridal makeup to suit different preferences and needs. Q5: Are makeup trials available before my wedding? A5: Yes, we offer trial sessions so you can finalize your bridal look ahead of time. Q6: What products does Ladyfair use for bridal makeup? A6: We use professional-grade, high-quality makeup products that are safe for all skin types and ensure a flawless finish. Q7: What other services does Ladyfair provide in Paliganj? A7: In addition to bridal makeup, we offer makeup for engagements, receptions, parties, and other special occasions. Ladyfair is your ultimate choice for professional, at-home bridal makeup services in Paliganj, ensuring a flawless and stress-free experience on your special day.

Posted By: 24th November 2024
BEST BRIDAL MAKEUP ARTIST IN BANIYAPUR
BEST BRIDAL MAKEUP ARTIST IN BANIYAPUR Introduction Looking for top-notch bridal makeup services in Baniyapur? Ladyfair is here to make your big day unforgettable with professional at-home bridal makeup services. Dial 7004721239 and let our skilled artists craft the perfect look for your wedding, engagement, or any special occasion. Why Ladyfair is the Best Bridal Makeup Choice in Baniyapur 1. Professional Makeup Artists Our experts have years of experience delivering flawless bridal transformations. 2. At-Home Services Enjoy the comfort of professional services in your home without the hassle of visiting a salon. 3. Premium-Quality Products We use only the best makeup products to ensure a radiant, long-lasting finish. Bridal Makeup Packages in Baniyapur Our packages are designed to suit every bride's needs: Basic Bridal Makeup: ₹10,000 HD Bridal Makeup: ₹12,000 Airbrush Bridal Makeup: ₹18,000 Additional Services: Engagement Makeup (Basic): ₹6,000 Engagement Makeup (HD): ₹8,000 Engagement Makeup (Airbrush): ₹12,000 Party Makeup (Basic): ₹2,500 Party Makeup (HD): ₹3,500 Bridal Makeup Styles Offered in Baniyapur Traditional Bridal Makeup Embrace timeless beauty with a look that highlights your cultural heritage. HD Bridal Makeup Achieve a picture-perfect, radiant look ideal for high-definition photography. Airbrush Bridal Makeup Experience a light, natural, and long-lasting makeup finish with advanced airbrush techniques. How to Book Bridal Makeup Services in Baniyapur Call Us: Reach out at 7004721239 to book your slot. Consultation: Discuss your preferences and bridal vision with our artists. Trial Session: Experiment with styles to lock in your desired look. Wedding Day: Sit back and relax as we create your dream bridal look. Testimonials from Brides in Baniyapur Neha J., Baniyapur: "Ladyfair's team gave me the perfect bridal look. Their at-home service is a game-changer!" Pooja R., Baniyapur: "I loved their HD makeup! It stayed flawless all day and looked amazing in photos." Ankita T., Baniyapur: "The airbrush makeup was so lightweight and natural. Highly recommend Ladyfair!" Bridal Makeup Tips for Brides in Baniyapur Plan Ahead: Start your skincare routine early to achieve a healthy glow. Stay Hydrated: Drinking water helps keep your skin fresh and hydrated. Book a Trial: Ensure you're happy with your final look by booking a trial session. Relax on Your Big Day: Trust Ladyfair's experts to handle your makeup needs. Additional Services in Baniyapur Engagement Makeup Reception Makeup Party Makeup Festival Makeup Why Choose Ladyfair for Bridal Makeup in Baniyapur Ladyfair is dedicated to making every bride look and feel extraordinary. With experienced artists, premium products, and a focus on customer satisfaction, we are the preferred choice for bridal makeup services in Baniyapur. Frequently Asked Questions Q1: Do you provide at-home bridal makeup services in Baniyapur? A1: Yes, we specialize in offering professional makeup services at home. Q2: What is the starting price for bridal makeup in Baniyapur? A2: Our bridal makeup packages start at ₹10,000. Q3: Are trial sessions available? A3: Yes, trial sessions can be booked to finalize your look. Q4: Do you provide makeup for occasions other than weddings? A4: Yes, we offer makeup services for engagements, parties, and festivals.

Posted By: 24th November 2024
Bridal Makeup Artist in Naubatpur
Introduction In Naubatpur, Ladyfair is the premier choice for brides looking to achieve the perfect wedding day look with our professional at-home bridal makeup services. Whether you desire a traditional bridal look, an HD finish, or the flawless perfection of airbrush makeup, our expert makeup artist in Naubatpur ensures that you shine on your special day. Contact us today at 7004721239 to schedule your appointment. Why Choose Ladyfair for Bridal Makeup in Naubatpur Experienced Makeup Artist Our makeup artist in Naubatpur has years of experience in bridal makeup, creating personalized looks that complement your natural beauty and align with your style and preferences. Convenient At-Home Service Forget the stress of traveling to a salon. Ladyfair brings luxury beauty treatments directly to your doorstep with our at-home bridal makeup services, offering a truly personalized experience. Premium Makeup Products We use only high-quality, professional-grade makeup products to ensure a flawless, long-lasting look that remains perfect throughout your big day. Bridal Makeup Pricing in Naubatpur Our bridal makeup services in Naubatpur are tailored to fit different styles and budgets: Basic Bridal Makeup: ₹10,000 HD Bridal Makeup: ₹12,000 Airbrush Bridal Makeup: ₹18,000 For engagement and reception makeup: Basic Engagement/Reception Makeup: ₹6,000 HD Engagement/Reception Makeup: ₹8,000 Airbrush Engagement/Reception Makeup: ₹12,000 For parties: Basic Party Makeup: ₹2,500 HD Party Makeup: ₹3,500 Popular Bridal Makeup Styles in Naubatpur Traditional Bridal Makeup Our traditional bridal makeup in Naubatpur incorporates bold colors and intricate detailing to complement your wedding attire, creating an elegant and timeless look. HD Bridal Makeup For a high-definition finish that looks flawless both in photos and in person, HD bridal makeup is the perfect choice for brides who want a picture-perfect appearance all day. Airbrush Bridal Makeup Our airbrush makeup offers a lightweight, full-coverage finish that lasts all day, giving you a smooth and natural look while ensuring long-lasting perfection. How to Book Your Bridal Makeup with Ladyfair in Naubatpur Initial Contact: Call us at 7004721239 to discuss your makeup needs and schedule your appointment. Consultation Session: Meet with our makeup artist to discuss your wedding look, review your attire, and plan the perfect makeup style. Makeup Trial: We offer trial sessions to help you preview your bridal makeup look and make any adjustments. Wedding Day Makeup: On your wedding day, our makeup artist will arrive at your location in Naubatpur to provide flawless, hassle-free makeup service. Testimonials from Brides in Naubatpur Priya R., Naubatpur: "Ladyfair provided amazing service on my wedding day. The airbrush makeup looked flawless and lasted all day." Ritu K., Naubatpur: "I loved the HD makeup! It was perfect for my photos, and the at-home service was so convenient." Sneha S., Naubatpur: "My traditional bridal makeup was exactly what I wanted, and Ladyfair made the entire process stress-free." Preparing for Your Bridal Makeup Session To get the best results for your bridal makeup: Stay Hydrated: Keep your skin looking fresh by drinking plenty of water. Consistent Skincare: Stick to your regular skincare routine to maintain healthy, glowing skin. Avoid New Products: Use familiar products to prevent any reactions before your wedding day. Clear Communication: Discuss your makeup preferences and any concerns with our artist during the consultation. Additional Beauty Services by Ladyfair Beyond bridal makeup, Ladyfair offers a variety of beauty services in Naubatpur: Engagement and Reception Makeup: Customized looks for all pre-wedding events. Party Makeup: Perfect for birthdays, anniversaries, and special occasions. Everyday Makeup: Enhance your daily look with our expert makeup services. Special Occasion Makeup: Professional makeup for parties, celebrations, and formal events. The Future of Bridal Makeup in Naubatpur Ladyfair is dedicated to setting new standards in bridal beauty in Naubatpur with our innovative at-home services. As we continue to offer exceptional service, more brides are choosing Ladyfair as their preferred makeup provider. Q&A with Ladyfair’s Bridal Makeup Artist in Naubatpur Q1: What makes Ladyfair the best choice for bridal makeup in Naubatpur? A1: Ladyfair offers expert bridal makeup services at home, using high-quality products to ensure a flawless and long-lasting look. Q2: What are the prices for bridal makeup in Naubatpur? A2: Our bridal makeup packages start at ₹10,000 for basic makeup, ₹12,000 for HD makeup, and ₹18,000 for airbrush makeup. Q3: How do I book Ladyfair’s bridal makeup services in Naubatpur? A3: You can book our services by calling 7004721239. We also offer consultations and trial sessions to ensure you get the look you want. Q4: What bridal makeup styles does Ladyfair offer in Naubatpur? A4: Ladyfair offers traditional, HD, and airbrush bridal makeup to suit different preferences and needs. Q5: Are makeup trials available before my wedding? A5: Yes, we offer trial sessions so you can finalize your bridal look ahead of time. Q6: What products does Ladyfair use for bridal makeup? A6: We use professional-grade, high-quality makeup products that are safe for all skin types and ensure a flawless finish. Q7: What other services does Ladyfair provide in Naubatpur? A7: In addition to bridal makeup, we offer makeup for engagements, receptions, parties, and other special occasions. Ladyfair is your ultimate choice for professional, at-home bridal makeup services in Naubatpur, ensuring a flawless and stress-free experience on your special day.

Posted By: 24th November 2024
BEST BRIDAL MAKEUP ARTIST IN AMNOUR
BEST BRIDAL MAKEUP ARTIST IN AMNOUR Introduction Looking for the best bridal makeup services in Amnour? Ladyfair brings the ultimate convenience and elegance to your doorstep with our at-home bridal makeup services. Call 7004721239 to book our skilled makeup artists and make your wedding day even more special with a flawless look tailored just for you! Why Choose Ladyfair for Bridal Makeup in Amnour 1. Experienced Makeup Professionals Our experts specialize in creating stunning looks that complement your unique features and style. 2. Convenient At-Home Services Relax at home while we bring salon-quality services to you in Amnour. 3. Use of Premium Products We use high-quality, skin-friendly products to ensure long-lasting, picture-perfect results. Bridal Makeup Packages in Amnour We offer competitive and customizable packages: Basic Bridal Makeup: ₹10,000 HD Bridal Makeup: ₹12,000 Airbrush Bridal Makeup: ₹18,000 Additional Services: Engagement Makeup (Basic): ₹6,000 Engagement Makeup (HD): ₹8,000 Engagement Makeup (Airbrush): ₹12,000 Party Makeup (Basic): ₹2,500 Party Makeup (HD): ₹3,500 Bridal Makeup Styles in Amnour Traditional Bridal Makeup Reflect your cultural beauty with a classic and timeless bridal look. HD Bridal Makeup Perfect for high-definition photography, giving you a flawless and radiant appearance. Airbrush Bridal Makeup Enjoy a lightweight, natural, and long-lasting finish with our advanced airbrush technique. How to Book Bridal Makeup in Amnour Call Us: Dial 7004721239 to reserve your booking. Consultation: Share your preferences and bridal vision with our team. Trial Session: Try different styles to finalize the perfect look. Wedding Day: Relax and let us handle your bridal transformation. Testimonials from Brides in Amnour Priya S., Amnour: "Ladyfair's team is amazing! My bridal look was elegant and exactly what I wanted." Ritika D., Amnour: "Super convenient and professional service. My HD makeup stayed flawless throughout the event!" Sneha T., Amnour: "Highly recommend their airbrush makeup! It looked so natural and lasted all day." Bridal Makeup Tips for Brides in Amnour Start Early: Begin your skincare routine a few months before the wedding. Hydration is Key: Drink plenty of water for healthy and glowing skin. Book a Trial: Lock in your perfect look ahead of time with a trial session. Trust the Process: Relax and let Ladyfair's experts handle your makeup needs. Additional Makeup Services in Amnour Engagement Makeup Reception Makeup Party Makeup Festival Makeup Why Ladyfair is the Best Choice for Bridal Makeup in Amnour Ladyfair is committed to making every bride feel confident and radiant. Our professional services, premium products, and attention to detail make us the top choice for bridal makeup in Amnour. Frequently Asked Questions Q1: Do you provide at-home bridal makeup services in Amnour? A1: Yes, we offer at-home bridal makeup services for your convenience. Q2: What is the starting price for your bridal makeup packages? A2: Our bridal makeup packages start at ₹10,000. Q3: Can I book a trial session? A3: Yes, trial sessions are available to help you finalize your look. Q4: Do you offer makeup services for events other than weddings? A4: Yes, we provide makeup services for engagements, parties, festivals, and more.

Posted By: 24th November 2024
Bridal Makeup Artist in Bihta
Introduction In Bihta, Ladyfair is the premier choice for brides looking to achieve the perfect wedding day look with our professional at-home bridal makeup services. Whether you desire a traditional bridal look, an HD finish, or the flawless perfection of airbrush makeup, our expert makeup artist in Bihta ensures that you shine on your special day. Contact us today at 7004721239 to schedule your appointment. Why Choose Ladyfair for Bridal Makeup in Bihta Experienced Makeup Artist Our makeup artist in Bihta has years of experience in bridal makeup, creating personalized looks that complement your natural beauty and align with your style and preferences. Convenient At-Home Service Forget the stress of traveling to a salon. Ladyfair brings luxury beauty treatments directly to your doorstep with our at-home bridal makeup services, offering a truly personalized experience. Premium Makeup Products We use only high-quality, professional-grade makeup products to ensure a flawless, long-lasting look that remains perfect throughout your big day. Bridal Makeup Pricing in Bihta Our bridal makeup services in Bihta are tailored to fit different styles and budgets: Basic Bridal Makeup: ₹10,000 HD Bridal Makeup: ₹12,000 Airbrush Bridal Makeup: ₹18,000 For engagement and reception makeup: Basic Engagement/Reception Makeup: ₹6,000 HD Engagement/Reception Makeup: ₹8,000 Airbrush Engagement/Reception Makeup: ₹12,000 For parties: Basic Party Makeup: ₹2,500 HD Party Makeup: ₹3,500 Popular Bridal Makeup Styles in Bihta Traditional Bridal Makeup Our traditional bridal makeup in Bihta incorporates bold colors and intricate detailing to complement your wedding attire, creating an elegant and timeless look. HD Bridal Makeup For a high-definition finish that looks flawless both in photos and in person, HD bridal makeup is the perfect choice for brides who want a picture-perfect appearance all day. Airbrush Bridal Makeup Our airbrush makeup offers a lightweight, full-coverage finish that lasts all day, giving you a smooth and natural look while ensuring long-lasting perfection. How to Book Your Bridal Makeup with Ladyfair in Bihta Initial Contact: Call us at 7004721239 to discuss your makeup needs and schedule your appointment. Consultation Session: Meet with our makeup artist to discuss your wedding look, review your attire, and plan the perfect makeup style. Makeup Trial: We offer trial sessions to help you preview your bridal makeup look and make any adjustments. Wedding Day Makeup: On your wedding day, our makeup artist will arrive at your location in Bihta to provide flawless, hassle-free makeup service. Testimonials from Brides in Bihta Priya R., Bihta: "Ladyfair provided amazing service on my wedding day. The airbrush makeup looked flawless and lasted all day." Ritu K., Bihta: "I loved the HD makeup! It was perfect for my photos, and the at-home service was so convenient." Sneha S., Bihta: "My traditional bridal makeup was exactly what I wanted, and Ladyfair made the entire process stress-free." Preparing for Your Bridal Makeup Session To get the best results for your bridal makeup: Stay Hydrated: Keep your skin looking fresh by drinking plenty of water. Consistent Skincare: Stick to your regular skincare routine to maintain healthy, glowing skin. Avoid New Products: Use familiar products to prevent any reactions before your wedding day. Clear Communication: Discuss your makeup preferences and any concerns with our artist during the consultation. Additional Beauty Services by Ladyfair Beyond bridal makeup, Ladyfair offers a variety of beauty services in Bihta: Engagement and Reception Makeup: Customized looks for all pre-wedding events. Party Makeup: Perfect for birthdays, anniversaries, and special occasions. Everyday Makeup: Enhance your daily look with our expert makeup services. Special Occasion Makeup: Professional makeup for parties, celebrations, and formal events. The Future of Bridal Makeup in Bihta Ladyfair is dedicated to setting new standards in bridal beauty in Bihta with our innovative at-home services. As we continue to offer exceptional service, more brides are choosing Ladyfair as their preferred makeup provider. Q&A with Ladyfair’s Bridal Makeup Artist in Bihta Q1: What makes Ladyfair the best choice for bridal makeup in Bihta? A1: Ladyfair offers expert bridal makeup services at home, using high-quality products to ensure a flawless and long-lasting look. Q2: What are the prices for bridal makeup in Bihta? A2: Our bridal makeup packages start at ₹10,000 for basic makeup, ₹12,000 for HD makeup, and ₹18,000 for airbrush makeup. Q3: How do I book Ladyfair’s bridal makeup services in Bihta? A3: You can book our services by calling 7004721239. We also offer consultations and trial sessions to ensure you get the look you want. Q4: What bridal makeup styles does Ladyfair offer in Bihta? A4: Ladyfair offers traditional, HD, and airbrush bridal makeup to suit different preferences and needs. Q5: Are makeup trials available before my wedding? A5: Yes, we offer trial sessions so you can finalize your bridal look ahead of time. Q6: What products does Ladyfair use for bridal makeup? A6: We use professional-grade, high-quality makeup products that are safe for all skin types and ensure a flawless finish. Q7: What other services does Ladyfair provide in Bihta? A7: In addition to bridal makeup, we offer makeup for engagements, receptions, parties, and other special occasions. Ladyfair is your ultimate choice for professional, at-home bridal makeup services in Bihta, ensuring a flawless and stress-free experience on your special day.

Posted By: 24th November 2024
Bridal Makeup Artist in Maner
Introduction In Maner, Ladyfair is the premier choice for brides looking to achieve the perfect wedding day look with our professional at-home bridal makeup services. Whether you desire a traditional bridal look, an HD finish, or the flawless perfection of airbrush makeup, our expert makeup artist in Maner ensures that you shine on your special day. Contact us today at 7004721239 to schedule your appointment. Why Choose Ladyfair for Bridal Makeup in Maner Experienced Makeup Artist Our makeup artist in Maner has years of experience in bridal makeup, creating personalized looks that complement your natural beauty and align with your style and preferences. Convenient At-Home Service Forget the stress of traveling to a salon. Ladyfair brings luxury beauty treatments directly to your doorstep with our at-home bridal makeup services, offering a truly personalized experience. Premium Makeup Products We use only high-quality, professional-grade makeup products to ensure a flawless, long-lasting look that remains perfect throughout your big day. Bridal Makeup Pricing in Maner Our bridal makeup services in Maner are tailored to fit different styles and budgets: Basic Bridal Makeup: ₹10,000 HD Bridal Makeup: ₹12,000 Airbrush Bridal Makeup: ₹18,000 For engagement and reception makeup: Basic Engagement/Reception Makeup: ₹6,000 HD Engagement/Reception Makeup: ₹8,000 Airbrush Engagement/Reception Makeup: ₹12,000 For parties: Basic Party Makeup: ₹2,500 HD Party Makeup: ₹3,500 Popular Bridal Makeup Styles in Maner Traditional Bridal Makeup Our traditional bridal makeup in Maner incorporates bold colors and intricate detailing to complement your wedding attire, creating an elegant and timeless look. HD Bridal Makeup For a high-definition finish that looks flawless both in photos and in person, HD bridal makeup is the perfect choice for brides who want a picture-perfect appearance all day. Airbrush Bridal Makeup Our airbrush makeup offers a lightweight, full-coverage finish that lasts all day, giving you a smooth and natural look while ensuring long-lasting perfection. How to Book Your Bridal Makeup with Ladyfair in Maner Initial Contact: Call us at 7004721239 to discuss your makeup needs and schedule your appointment. Consultation Session: Meet with our makeup artist to discuss your wedding look, review your attire, and plan the perfect makeup style. Makeup Trial: We offer trial sessions to help you preview your bridal makeup look and make any adjustments. Wedding Day Makeup: On your wedding day, our makeup artist will arrive at your location in Maner to provide flawless, hassle-free makeup service. Testimonials from Brides in Maner Priya R., Maner: "Ladyfair provided amazing service on my wedding day. The airbrush makeup looked flawless and lasted all day." Ritu K., Maner: "I loved the HD makeup! It was perfect for my photos, and the at-home service was so convenient." Sneha S., Maner: "My traditional bridal makeup was exactly what I wanted, and Ladyfair made the entire process stress-free." Preparing for Your Bridal Makeup Session To get the best results for your bridal makeup: Stay Hydrated: Keep your skin looking fresh by drinking plenty of water. Consistent Skincare: Stick to your regular skincare routine to maintain healthy, glowing skin. Avoid New Products: Use familiar products to prevent any reactions before your wedding day. Clear Communication: Discuss your makeup preferences and any concerns with our artist during the consultation. Additional Beauty Services by Ladyfair Beyond bridal makeup, Ladyfair offers a variety of beauty services in Maner: Engagement and Reception Makeup: Customized looks for all pre-wedding events. Party Makeup: Perfect for birthdays, anniversaries, and special occasions. Everyday Makeup: Enhance your daily look with our expert makeup services. Special Occasion Makeup: Professional makeup for parties, celebrations, and formal events. The Future of Bridal Makeup in Maner Ladyfair is dedicated to setting new standards in bridal beauty in Maner with our innovative at-home services. As we continue to offer exceptional service, more brides are choosing Ladyfair as their preferred makeup provider. Q&A with Ladyfair’s Bridal Makeup Artist in Maner Q1: What makes Ladyfair the best choice for bridal makeup in Maner? A1: Ladyfair offers expert bridal makeup services at home, using high-quality products to ensure a flawless and long-lasting look. Q2: What are the prices for bridal makeup in Maner? A2: Our bridal makeup packages start at ₹10,000 for basic makeup, ₹12,000 for HD makeup, and ₹18,000 for airbrush makeup. Q3: How do I book Ladyfair’s bridal makeup services in Maner? A3: You can book our services by calling 7004721239. We also offer consultations and trial sessions to ensure you get the look you want. Q4: What bridal makeup styles does Ladyfair offer in Maner? A4: Ladyfair offers traditional, HD, and airbrush bridal makeup to suit different preferences and needs. Q5: Are makeup trials available before my wedding? A5: Yes, we offer trial sessions so you can finalize your bridal look ahead of time. Q6: What products does Ladyfair use for bridal makeup? A6: We use professional-grade, high-quality makeup products that are safe for all skin types and ensure a flawless finish. Q7: What other services does Ladyfair provide in Maner? A7: In addition to bridal makeup, we offer makeup for engagements, receptions, parties, and other special occasions. Ladyfair is your ultimate choice for professional, at-home bridal makeup services in Maner, ensuring a flawless and stress-free experience on your special day.

Posted By: 24th November 2024
Bridal Makeup Artist in Danapur
Introduction In Danapur, Ladyfair is the premier choice for brides looking to achieve the perfect wedding day look with our professional at-home bridal makeup services. Whether you desire a traditional bridal look, an HD finish, or the flawless perfection of airbrush makeup, our expert makeup artist in Danapur ensures that you shine on your special day. Contact us today at 7004721239 to schedule your appointment. Why Choose Ladyfair for Bridal Makeup in Danapur Experienced Makeup Artist Our makeup artist in Danapur has years of experience in bridal makeup, creating personalized looks that complement your natural beauty and align with your style and preferences. Convenient At-Home Service Forget the stress of traveling to a salon. Ladyfair brings luxury beauty treatments directly to your doorstep with our at-home bridal makeup services, offering a truly personalized experience. Premium Makeup Products We use only high-quality, professional-grade makeup products to ensure a flawless, long-lasting look that remains perfect throughout your big day. Bridal Makeup Pricing in Danapur Our bridal makeup services in Danapur are tailored to fit different styles and budgets: Basic Bridal Makeup: ₹10,000 HD Bridal Makeup: ₹12,000 Airbrush Bridal Makeup: ₹18,000 For engagement and reception makeup: Basic Engagement/Reception Makeup: ₹6,000 HD Engagement/Reception Makeup: ₹8,000 Airbrush Engagement/Reception Makeup: ₹12,000 For parties: Basic Party Makeup: ₹2,500 HD Party Makeup: ₹3,500 Popular Bridal Makeup Styles in Danapur Traditional Bridal Makeup Our traditional bridal makeup in Danapur incorporates bold colors and intricate detailing to complement your wedding attire, creating an elegant and timeless look. HD Bridal Makeup For a high-definition finish that looks flawless both in photos and in person, HD bridal makeup is the perfect choice for brides who want a picture-perfect appearance all day. Airbrush Bridal Makeup Our airbrush makeup offers a lightweight, full-coverage finish that lasts all day, giving you a smooth and natural look while ensuring long-lasting perfection. How to Book Your Bridal Makeup with Ladyfair in Danapur Initial Contact: Call us at 7004721239 to discuss your makeup needs and schedule your appointment. Consultation Session: Meet with our makeup artist to discuss your wedding look, review your attire, and plan the perfect makeup style. Makeup Trial: We offer trial sessions to help you preview your bridal makeup look and make any adjustments. Wedding Day Makeup: On your wedding day, our makeup artist will arrive at your location in Danapur to provide flawless, hassle-free makeup service. Testimonials from Brides in Danapur Priya R., Danapur: "Ladyfair provided amazing service on my wedding day. The airbrush makeup looked flawless and lasted all day." Ritu K., Danapur: "I loved the HD makeup! It was perfect for my photos, and the at-home service was so convenient." Sneha S., Danapur: "My traditional bridal makeup was exactly what I wanted, and Ladyfair made the entire process stress-free." Preparing for Your Bridal Makeup Session To get the best results for your bridal makeup: Stay Hydrated: Keep your skin looking fresh by drinking plenty of water. Consistent Skincare: Stick to your regular skincare routine to maintain healthy, glowing skin. Avoid New Products: Use familiar products to prevent any reactions before your wedding day. Clear Communication: Discuss your makeup preferences and any concerns with our artist during the consultation. Additional Beauty Services by Ladyfair Beyond bridal makeup, Ladyfair offers a variety of beauty services in Danapur: Engagement and Reception Makeup: Customized looks for all pre-wedding events. Party Makeup: Perfect for birthdays, anniversaries, and special occasions. Everyday Makeup: Enhance your daily look with our expert makeup services. Special Occasion Makeup: Professional makeup for parties, celebrations, and formal events. The Future of Bridal Makeup in Danapur Ladyfair is dedicated to setting new standards in bridal beauty in Danapur with our innovative at-home services. As we continue to offer exceptional service, more brides are choosing Ladyfair as their preferred makeup provider. Q&A with Ladyfair’s Bridal Makeup Artist in Danapur Q1: What makes Ladyfair the best choice for bridal makeup in Danapur? A1: Ladyfair offers expert bridal makeup services at home, using high-quality products to ensure a flawless and long-lasting look. Q2: What are the prices for bridal makeup in Danapur? A2: Our bridal makeup packages start at ₹10,000 for basic makeup, ₹12,000 for HD makeup, and ₹18,000 for airbrush makeup. Q3: How do I book Ladyfair’s bridal makeup services in Danapur? A3: You can book our services by calling 7004721239. We also offer consultations and trial sessions to ensure you get the look you want. Q4: What bridal makeup styles does Ladyfair offer in Danapur? A4: Ladyfair offers traditional, HD, and airbrush bridal makeup to suit different preferences and needs. Q5: Are makeup trials available before my wedding? A5: Yes, we offer trial sessions so you can finalize your bridal look ahead of time. Q6: What products does Ladyfair use for bridal makeup? A6: We use professional-grade, high-quality makeup products that are safe for all skin types and ensure a flawless finish. Q7: What other services does Ladyfair provide in Danapur? A7: In addition to bridal makeup, we offer makeup for engagements, receptions, parties, and other special occasions. Ladyfair is your ultimate choice for professional, at-home bridal makeup services in Danapur, ensuring a flawless and stress-free experience on your special day.

Posted By: 24th November 2024
Bridal Makeup Artist in Dhanarua
Introduction In Dhanarua, Ladyfair is the premier choice for brides looking to achieve the perfect wedding day look with our professional at-home bridal makeup services. Whether you desire a traditional bridal look, an HD finish, or the flawless perfection of airbrush makeup, our expert makeup artist in Dhanarua ensures that you shine on your special day. Contact us today at 7004721239 to schedule your appointment. Why Choose Ladyfair for Bridal Makeup in Dhanarua Experienced Makeup Artist Our makeup artist in Dhanarua has years of experience in bridal makeup, creating personalized looks that complement your natural beauty and align with your style and preferences. Convenient At-Home Service Forget the stress of traveling to a salon. Ladyfair brings luxury beauty treatments directly to your doorstep with our at-home bridal makeup services, offering a truly personalized experience. Premium Makeup Products We use only high-quality, professional-grade makeup products to ensure a flawless, long-lasting look that remains perfect throughout your big day. Bridal Makeup Pricing in Dhanarua Our bridal makeup services in Dhanarua are tailored to fit different styles and budgets: Basic Bridal Makeup: ₹10,000 HD Bridal Makeup: ₹12,000 Airbrush Bridal Makeup: ₹18,000 For engagement and reception makeup: Basic Engagement/Reception Makeup: ₹6,000 HD Engagement/Reception Makeup: ₹8,000 Airbrush Engagement/Reception Makeup: ₹12,000 For parties: Basic Party Makeup: ₹2,500 HD Party Makeup: ₹3,500 Popular Bridal Makeup Styles in Dhanarua Traditional Bridal Makeup Our traditional bridal makeup in Dhanarua incorporates bold colors and intricate detailing to complement your wedding attire, creating an elegant and timeless look. HD Bridal Makeup For a high-definition finish that looks flawless both in photos and in person, HD bridal makeup is the perfect choice for brides who want a picture-perfect appearance all day. Airbrush Bridal Makeup Our airbrush makeup offers a lightweight, full-coverage finish that lasts all day, giving you a smooth and natural look while ensuring long-lasting perfection. How to Book Your Bridal Makeup with Ladyfair in Dhanarua Initial Contact: Call us at 7004721239 to discuss your makeup needs and schedule your appointment. Consultation Session: Meet with our makeup artist to discuss your wedding look, review your attire, and plan the perfect makeup style. Makeup Trial: We offer trial sessions to help you preview your bridal makeup look and make any adjustments. Wedding Day Makeup: On your wedding day, our makeup artist will arrive at your location in Dhanarua to provide flawless, hassle-free makeup service. Testimonials from Brides in Dhanarua Priya R., Dhanarua: "Ladyfair provided amazing service on my wedding day. The airbrush makeup looked flawless and lasted all day." Ritu K., Dhanarua: "I loved the HD makeup! It was perfect for my photos, and the at-home service was so convenient." Sneha S., Dhanarua: "My traditional bridal makeup was exactly what I wanted, and Ladyfair made the entire process stress-free." Preparing for Your Bridal Makeup Session To get the best results for your bridal makeup: Stay Hydrated: Keep your skin looking fresh by drinking plenty of water. Consistent Skincare: Stick to your regular skincare routine to maintain healthy, glowing skin. Avoid New Products: Use familiar products to prevent any reactions before your wedding day. Clear Communication: Discuss your makeup preferences and any concerns with our artist during the consultation. Additional Beauty Services by Ladyfair Beyond bridal makeup, Ladyfair offers a variety of beauty services in Dhanarua: Engagement and Reception Makeup: Customized looks for all pre-wedding events. Party Makeup: Perfect for birthdays, anniversaries, and special occasions. Everyday Makeup: Enhance your daily look with our expert makeup services. Special Occasion Makeup: Professional makeup for parties, celebrations, and formal events. The Future of Bridal Makeup in Dhanarua Ladyfair is dedicated to setting new standards in bridal beauty in Dhanarua with our innovative at-home services. As we continue to offer exceptional service, more brides are choosing Ladyfair as their preferred makeup provider. Q&A with Ladyfair’s Bridal Makeup Artist in Dhanarua Q1: What makes Ladyfair the best choice for bridal makeup in Dhanarua? A1: Ladyfair offers expert bridal makeup services at home, using high-quality products to ensure a flawless and long-lasting look. Q2: What are the prices for bridal makeup in Dhanarua? A2: Our bridal makeup packages start at ₹10,000 for basic makeup, ₹12,000 for HD makeup, and ₹18,000 for airbrush makeup. Q3: How do I book Ladyfair’s bridal makeup services in Dhanarua? A3: You can book our services by calling 7004721239. We also offer consultations and trial sessions to ensure you get the look you want. Q4: What bridal makeup styles does Ladyfair offer in Dhanarua? A4: Ladyfair offers traditional, HD, and airbrush bridal makeup to suit different preferences and needs. Q5: Are makeup trials available before my wedding? A5: Yes, we offer trial sessions so you can finalize your bridal look ahead of time. Q6: What products does Ladyfair use for bridal makeup? A6: We use professional-grade, high-quality makeup products that are safe for all skin types and ensure a flawless finish. Q7: What other services does Ladyfair provide in Dhanarua? A7: In addition to bridal makeup, we offer makeup for engagements, receptions, parties, and other special occasions. Ladyfair is your ultimate choice for professional, at-home bridal makeup services in Dhanarua, ensuring a flawless and stress-free experience on your special day.

Posted By: 24th November 2024
Bridal Makeup Artist in Punpun
Introduction In Punpun, Ladyfair is the premier choice for brides looking to achieve the perfect wedding day look with our professional at-home bridal makeup services. Whether you desire a traditional bridal look, an HD finish, or the flawless perfection of airbrush makeup, our expert makeup artist in Punpun ensures that you shine on your special day. Contact us today at 7004721239 to schedule your appointment. Why Choose Ladyfair for Bridal Makeup in Punpun Experienced Makeup Artist Our makeup artist in Punpun has years of experience in bridal makeup, creating personalized looks that complement your natural beauty and align with your style and preferences. Convenient At-Home Service Forget the stress of traveling to a salon. Ladyfair brings luxury beauty treatments directly to your doorstep with our at-home bridal makeup services, offering a truly personalized experience. Premium Makeup Products We use only high-quality, professional-grade makeup products to ensure a flawless, long-lasting look that remains perfect throughout your big day. Bridal Makeup Pricing in Punpun Our bridal makeup services in Punpun are tailored to fit different styles and budgets: Basic Bridal Makeup: ₹10,000 HD Bridal Makeup: ₹12,000 Airbrush Bridal Makeup: ₹18,000 For engagement and reception makeup: Basic Engagement/Reception Makeup: ₹6,000 HD Engagement/Reception Makeup: ₹8,000 Airbrush Engagement/Reception Makeup: ₹12,000 For parties: Basic Party Makeup: ₹2,500 HD Party Makeup: ₹3,500 Popular Bridal Makeup Styles in Punpun Traditional Bridal Makeup Our traditional bridal makeup in Punpun incorporates bold colors and intricate detailing to complement your wedding attire, creating an elegant and timeless look. HD Bridal Makeup For a high-definition finish that looks flawless both in photos and in person, HD bridal makeup is the perfect choice for brides who want a picture-perfect appearance all day. Airbrush Bridal Makeup Our airbrush makeup offers a lightweight, full-coverage finish that lasts all day, giving you a smooth and natural look while ensuring long-lasting perfection. How to Book Your Bridal Makeup with Ladyfair in Punpun Initial Contact: Call us at 7004721239 to discuss your makeup needs and schedule your appointment. Consultation Session: Meet with our makeup artist to discuss your wedding look, review your attire, and plan the perfect makeup style. Makeup Trial: We offer trial sessions to help you preview your bridal makeup look and make any adjustments. Wedding Day Makeup: On your wedding day, our makeup artist will arrive at your location in Punpun to provide flawless, hassle-free makeup service. Testimonials from Brides in Punpun Priya R., Punpun: "Ladyfair provided amazing service on my wedding day. The airbrush makeup looked flawless and lasted all day." Ritu K., Punpun: "I loved the HD makeup! It was perfect for my photos, and the at-home service was so convenient." Sneha S., Punpun: "My traditional bridal makeup was exactly what I wanted, and Ladyfair made the entire process stress-free." Preparing for Your Bridal Makeup Session To get the best results for your bridal makeup: Stay Hydrated: Keep your skin looking fresh by drinking plenty of water. Consistent Skincare: Stick to your regular skincare routine to maintain healthy, glowing skin. Avoid New Products: Use familiar products to prevent any reactions before your wedding day. Clear Communication: Discuss your makeup preferences and any concerns with our artist during the consultation. Additional Beauty Services by Ladyfair Beyond bridal makeup, Ladyfair offers a variety of beauty services in Punpun: Engagement and Reception Makeup: Customized looks for all pre-wedding events. Party Makeup: Perfect for birthdays, anniversaries, and special occasions. Everyday Makeup: Enhance your daily look with our expert makeup services. Special Occasion Makeup: Professional makeup for parties, celebrations, and formal events. The Future of Bridal Makeup in Punpun Ladyfair is dedicated to setting new standards in bridal beauty in Punpun with our innovative at-home services. As we continue to offer exceptional service, more brides are choosing Ladyfair as their preferred makeup provider. Q&A with Ladyfair’s Bridal Makeup Artist in Punpun Q1: What makes Ladyfair the best choice for bridal makeup in Punpun? A1: Ladyfair offers expert bridal makeup services at home, using high-quality products to ensure a flawless and long-lasting look. Q2: What are the prices for bridal makeup in Punpun? A2: Our bridal makeup packages start at ₹10,000 for basic makeup, ₹12,000 for HD makeup, and ₹18,000 for airbrush makeup. Q3: How do I book Ladyfair’s bridal makeup services in Punpun? A3: You can book our services by calling 7004721239. We also offer consultations and trial sessions to ensure you get the look you want. Q4: What bridal makeup styles does Ladyfair offer in Punpun? A4: Ladyfair offers traditional, HD, and airbrush bridal makeup to suit different preferences and needs. Q5: Are makeup trials available before my wedding? A5: Yes, we offer trial sessions so you can finalize your bridal look ahead of time. Q6: What products does Ladyfair use for bridal makeup? A6: We use professional-grade, high-quality makeup products that are safe for all skin types and ensure a flawless finish. Q7: What other services does Ladyfair provide in Punpun? A7: In addition to bridal makeup, we offer makeup for engagements, receptions, parties, and other special occasions. Ladyfair is your ultimate choice for professional, at-home bridal makeup services in Punpun, ensuring a flawless and stress-free experience on your special day.

Posted By: 24th November 2024
Bridal Makeup Artist in Masaurhi
Introduction In Masaurhi, Ladyfair is the premier choice for brides looking to achieve the perfect wedding day look with our professional at-home bridal makeup services. Whether you desire a traditional bridal look, an HD finish, or the flawless perfection of airbrush makeup, our expert makeup artist in Masaurhi ensures that you shine on your special day. Contact us today at 7004721239 to schedule your appointment. Why Choose Ladyfair for Bridal Makeup in Masaurhi Experienced Makeup Artist Our makeup artist in Masaurhi has years of experience in bridal makeup, creating personalized looks that complement your natural beauty and align with your style and preferences. Convenient At-Home Service Forget the stress of traveling to a salon. Ladyfair brings luxury beauty treatments directly to your doorstep with our at-home bridal makeup services, offering a truly personalized experience. Premium Makeup Products We use only high-quality, professional-grade makeup products to ensure a flawless, long-lasting look that remains perfect throughout your big day. Bridal Makeup Pricing in Masaurhi Our bridal makeup services in Masaurhi are tailored to fit different styles and budgets: Basic Bridal Makeup: ₹10,000 HD Bridal Makeup: ₹12,000 Airbrush Bridal Makeup: ₹18,000 For engagement and reception makeup: Basic Engagement/Reception Makeup: ₹6,000 HD Engagement/Reception Makeup: ₹8,000 Airbrush Engagement/Reception Makeup: ₹12,000 For parties: Basic Party Makeup: ₹2,500 HD Party Makeup: ₹3,500 Popular Bridal Makeup Styles in Masaurhi Traditional Bridal Makeup Our traditional bridal makeup in Masaurhi incorporates bold colors and intricate detailing to complement your wedding attire, creating an elegant and timeless look. HD Bridal Makeup For a high-definition finish that looks flawless both in photos and in person, HD bridal makeup is the perfect choice for brides who want a picture-perfect appearance all day. Airbrush Bridal Makeup Our airbrush makeup offers a lightweight, full-coverage finish that lasts all day, giving you a smooth and natural look while ensuring long-lasting perfection. How to Book Your Bridal Makeup with Ladyfair in Masaurhi Initial Contact: Call us at 7004721239 to discuss your makeup needs and schedule your appointment. Consultation Session: Meet with our makeup artist to discuss your wedding look, review your attire, and plan the perfect makeup style. Makeup Trial: We offer trial sessions to help you preview your bridal makeup look and make any adjustments. Wedding Day Makeup: On your wedding day, our makeup artist will arrive at your location in Masaurhi to provide flawless, hassle-free makeup service. Testimonials from Brides in Masaurhi Priya R., Masaurhi: "Ladyfair provided amazing service on my wedding day. The airbrush makeup looked flawless and lasted all day." Ritu K., Masaurhi: "I loved the HD makeup! It was perfect for my photos, and the at-home service was so convenient." Sneha S., Masaurhi: "My traditional bridal makeup was exactly what I wanted, and Ladyfair made the entire process stress-free." Preparing for Your Bridal Makeup Session To get the best results for your bridal makeup: Stay Hydrated: Keep your skin looking fresh by drinking plenty of water. Consistent Skincare: Stick to your regular skincare routine to maintain healthy, glowing skin. Avoid New Products: Use familiar products to prevent any reactions before your wedding day. Clear Communication: Discuss your makeup preferences and any concerns with our artist during the consultation. Additional Beauty Services by Ladyfair Beyond bridal makeup, Ladyfair offers a variety of beauty services in Masaurhi: Engagement and Reception Makeup: Customized looks for all pre-wedding events. Party Makeup: Perfect for birthdays, anniversaries, and special occasions. Everyday Makeup: Enhance your daily look with our expert makeup services. Special Occasion Makeup: Professional makeup for parties, celebrations, and formal events. The Future of Bridal Makeup in Masaurhi Ladyfair is dedicated to setting new standards in bridal beauty in Masaurhi with our innovative at-home services. As we continue to offer exceptional service, more brides are choosing Ladyfair as their preferred makeup provider. Q&A with Ladyfair’s Bridal Makeup Artist in Masaurhi Q1: What makes Ladyfair the best choice for bridal makeup in Masaurhi? A1: Ladyfair offers expert bridal makeup services at home, using high-quality products to ensure a flawless and long-lasting look. Q2: What are the prices for bridal makeup in Masaurhi? A2: Our bridal makeup packages start at ₹10,000 for basic makeup, ₹12,000 for HD makeup, and ₹18,000 for airbrush makeup. Q3: How do I book Ladyfair’s bridal makeup services in Masaurhi? A3: You can book our services by calling 7004721239. We also offer consultations and trial sessions to ensure you get the look you want. Q4: What bridal makeup styles does Ladyfair offer in Masaurhi? A4: Ladyfair offers traditional, HD, and airbrush bridal makeup to suit different preferences and needs. Q5: Are makeup trials available before my wedding? A5: Yes, we offer trial sessions so you can finalize your bridal look ahead of time. Q6: What products does Ladyfair use for bridal makeup? A6: We use professional-grade, high-quality makeup products that are safe for all skin types and ensure a flawless finish. Q7: What other services does Ladyfair provide in Masaurhi? A7: In addition to bridal makeup, we offer makeup for engagements, receptions, parties, and other special occasions. Ladyfair is your ultimate choice for professional, at-home bridal makeup services in Masaurhi, ensuring a flawless and stress-free experience on your special day.

Posted By: 24th November 2024
Bridal Makeup Artist in Barh
Introduction In Barh, Ladyfair is the premier choice for brides looking to achieve the perfect wedding day look with our professional at-home bridal makeup services. Whether you desire a traditional bridal look, an HD finish, or the flawless perfection of airbrush makeup, our expert makeup artist in Barh ensures that you shine on your special day. Contact us today at 7004721239 to schedule your appointment. Why Choose Ladyfair for Bridal Makeup in Barh Experienced Makeup Artist Our makeup artist in Barh has years of experience in bridal makeup, creating personalized looks that complement your natural beauty and align with your style and preferences. Convenient At-Home Service Forget the stress of traveling to a salon. Ladyfair brings luxury beauty treatments directly to your doorstep with our at-home bridal makeup services, offering a truly personalized experience. Premium Makeup Products We use only high-quality, professional-grade makeup products to ensure a flawless, long-lasting look that remains perfect throughout your big day. Bridal Makeup Pricing in Barh Our bridal makeup services in Barh are tailored to fit different styles and budgets: Basic Bridal Makeup: ₹10,000 HD Bridal Makeup: ₹12,000 Airbrush Bridal Makeup: ₹18,000 For engagement and reception makeup: Basic Engagement/Reception Makeup: ₹6,000 HD Engagement/Reception Makeup: ₹8,000 Airbrush Engagement/Reception Makeup: ₹12,000 For parties: Basic Party Makeup: ₹2,500 HD Party Makeup: ₹3,500 Popular Bridal Makeup Styles in Barh Traditional Bridal Makeup Our traditional bridal makeup in Barh incorporates bold colors and intricate detailing to complement your wedding attire, creating an elegant and timeless look. HD Bridal Makeup For a high-definition finish that looks flawless both in photos and in person, HD bridal makeup is the perfect choice for brides who want a picture-perfect appearance all day. Airbrush Bridal Makeup Our airbrush makeup offers a lightweight, full-coverage finish that lasts all day, giving you a smooth and natural look while ensuring long-lasting perfection. How to Book Your Bridal Makeup with Ladyfair in Barh Initial Contact: Call us at 7004721239 to discuss your makeup needs and schedule your appointment. Consultation Session: Meet with our makeup artist to discuss your wedding look, review your attire, and plan the perfect makeup style. Makeup Trial: We offer trial sessions to help you preview your bridal makeup look and make any adjustments. Wedding Day Makeup: On your wedding day, our makeup artist will arrive at your location in Barh to provide flawless, hassle-free makeup service. Testimonials from Brides in Barh Priya R., Barh: "Ladyfair provided amazing service on my wedding day. The airbrush makeup looked flawless and lasted all day." Ritu K., Barh: "I loved the HD makeup! It was perfect for my photos, and the at-home service was so convenient." Sneha S., Barh: "My traditional bridal makeup was exactly what I wanted, and Ladyfair made the entire process stress-free." Preparing for Your Bridal Makeup Session To get the best results for your bridal makeup: Stay Hydrated: Keep your skin looking fresh by drinking plenty of water. Consistent Skincare: Stick to your regular skincare routine to maintain healthy, glowing skin. Avoid New Products: Use familiar products to prevent any reactions before your wedding day. Clear Communication: Discuss your makeup preferences and any concerns with our artist during the consultation. Additional Beauty Services by Ladyfair Beyond bridal makeup, Ladyfair offers a variety of beauty services in Barh: Engagement and Reception Makeup: Customized looks for all pre-wedding events. Party Makeup: Perfect for birthdays, anniversaries, and special occasions. Everyday Makeup: Enhance your daily look with our expert makeup services. Special Occasion Makeup: Professional makeup for parties, celebrations, and formal events. The Future of Bridal Makeup in Barh Ladyfair is dedicated to setting new standards in bridal beauty in Barh with our innovative at-home services. As we continue to offer exceptional service, more brides are choosing Ladyfair as their preferred makeup provider. Q&A with Ladyfair’s Bridal Makeup Artist in Barh Q1: What makes Ladyfair the best choice for bridal makeup in Barh? A1: Ladyfair offers expert bridal makeup services at home, using high-quality products to ensure a flawless and long-lasting look. Q2: What are the prices for bridal makeup in Barh? A2: Our bridal makeup packages start at ₹10,000 for basic makeup, ₹12,000 for HD makeup, and ₹18,000 for airbrush makeup. Q3: How do I book Ladyfair’s bridal makeup services in Barh? A3: You can book our services by calling 7004721239. We also offer consultations and trial sessions to ensure you get the look you want. Q4: What bridal makeup styles does Ladyfair offer in Barh? A4: Ladyfair offers traditional, HD, and airbrush bridal makeup to suit different preferences and needs. Q5: Are makeup trials available before my wedding? A5: Yes, we offer trial sessions so you can finalize your bridal look ahead of time. Q6: What products does Ladyfair use for bridal makeup? A6: We use professional-grade, high-quality makeup products that are safe for all skin types and ensure a flawless finish. Q7: What other services does Ladyfair provide in Barh? A7: In addition to bridal makeup, we offer makeup for engagements, receptions, parties, and other special occasions. Ladyfair is your ultimate choice for professional, at-home bridal makeup services in Barh, ensuring a flawless and stress-free experience on your special day.

Posted By: 24th November 2024
Bridal Makeup Artist in Bakhtiyarpur
Introduction In Bakhtiyarpur, Ladyfair is the premier choice for brides looking to achieve the perfect wedding day look with our professional at-home bridal makeup services. Whether you desire a traditional bridal look, an HD finish, or the flawless perfection of airbrush makeup, our expert makeup artist in Bakhtiyarpur ensures that you shine on your special day. Contact us today at 7004721239 to schedule your appointment. Why Choose Ladyfair for Bridal Makeup in Bakhtiyarpur Experienced Makeup Artist Our makeup artist in Bakhtiyarpur has years of experience in bridal makeup, creating personalized looks that complement your natural beauty and align with your style and preferences. Convenient At-Home Service Forget the stress of traveling to a salon. Ladyfair brings luxury beauty treatments directly to your doorstep with our at-home bridal makeup services, offering a truly personalized experience. Premium Makeup Products We use only high-quality, professional-grade makeup products to ensure a flawless, long-lasting look that remains perfect throughout your big day. Bridal Makeup Pricing in Bakhtiyarpur Our bridal makeup services in Bakhtiyarpur are tailored to fit different styles and budgets: Basic Bridal Makeup: ₹10,000 HD Bridal Makeup: ₹12,000 Airbrush Bridal Makeup: ₹18,000 For engagement and reception makeup: Basic Engagement/Reception Makeup: ₹6,000 HD Engagement/Reception Makeup: ₹8,000 Airbrush Engagement/Reception Makeup: ₹12,000 For parties: Basic Party Makeup: ₹2,500 HD Party Makeup: ₹3,500 Popular Bridal Makeup Styles in Bakhtiyarpur Traditional Bridal Makeup Our traditional bridal makeup in Bakhtiyarpur incorporates bold colors and intricate detailing to complement your wedding attire, creating an elegant and timeless look. HD Bridal Makeup For a high-definition finish that looks flawless both in photos and in person, HD bridal makeup is the perfect choice for brides who want a picture-perfect appearance all day. Airbrush Bridal Makeup Our airbrush makeup offers a lightweight, full-coverage finish that lasts all day, giving you a smooth and natural look while ensuring long-lasting perfection. How to Book Your Bridal Makeup with Ladyfair in Bakhtiyarpur Initial Contact: Call us at 7004721239 to discuss your makeup needs and schedule your appointment. Consultation Session: Meet with our makeup artist to discuss your wedding look, review your attire, and plan the perfect makeup style. Makeup Trial: We offer trial sessions to help you preview your bridal makeup look and make any adjustments. Wedding Day Makeup: On your wedding day, our makeup artist will arrive at your location in Bakhtiyarpur to provide flawless, hassle-free makeup service. Testimonials from Brides in Bakhtiyarpur Priya R., Bakhtiyarpur: "Ladyfair provided amazing service on my wedding day. The airbrush makeup looked flawless and lasted all day." Ritu K., Bakhtiyarpur: "I loved the HD makeup! It was perfect for my photos, and the at-home service was so convenient." Sneha S., Bakhtiyarpur: "My traditional bridal makeup was exactly what I wanted, and Ladyfair made the entire process stress-free." Preparing for Your Bridal Makeup Session To get the best results for your bridal makeup: Stay Hydrated: Keep your skin looking fresh by drinking plenty of water. Consistent Skincare: Stick to your regular skincare routine to maintain healthy, glowing skin. Avoid New Products: Use familiar products to prevent any reactions before your wedding day. Clear Communication: Discuss your makeup preferences and any concerns with our artist during the consultation. Additional Beauty Services by Ladyfair Beyond bridal makeup, Ladyfair offers a variety of beauty services in Bakhtiyarpur: Engagement and Reception Makeup: Customized looks for all pre-wedding events. Party Makeup: Perfect for birthdays, anniversaries, and special occasions. Everyday Makeup: Enhance your daily look with our expert makeup services. Special Occasion Makeup: Professional makeup for parties, celebrations, and formal events. The Future of Bridal Makeup in Bakhtiyarpur Ladyfair is dedicated to setting new standards in bridal beauty in Bakhtiyarpur with our innovative at-home services. As we continue to offer exceptional service, more brides are choosing Ladyfair as their preferred makeup provider. Q&A with Ladyfair’s Bridal Makeup Artist in Bakhtiyarpur Q1: What makes Ladyfair the best choice for bridal makeup in Bakhtiyarpur? A1: Ladyfair offers expert bridal makeup services at home, using high-quality products to ensure a flawless and long-lasting look. Q2: What are the prices for bridal makeup in Bakhtiyarpur? A2: Our bridal makeup packages start at ₹10,000 for basic makeup, ₹12,000 for HD makeup, and ₹18,000 for airbrush makeup. Q3: How do I book Ladyfair’s bridal makeup services in Bakhtiyarpur? A3: You can book our services by calling 7004721239. We also offer consultations and trial sessions to ensure you get the look you want. Q4: What bridal makeup styles does Ladyfair offer in Bakhtiyarpur? A4: Ladyfair offers traditional, HD, and airbrush bridal makeup to suit different preferences and needs. Q5: Are makeup trials available before my wedding? A5: Yes, we offer trial sessions so you can finalize your bridal look ahead of time. Q6: What products does Ladyfair use for bridal makeup? A6: We use professional-grade, high-quality makeup products that are safe for all skin types and ensure a flawless finish. Q7: What other services does Ladyfair provide in Bakhtiyarpur? A7: In addition to bridal makeup, we offer makeup for engagements, receptions, parties, and other special occasions. Ladyfair is your ultimate choice for professional, at-home bridal makeup services in Bakhtiyarpur, ensuring a flawless and stress-free experience on your special day.

Posted By: 24th November 2024
Bridal Makeup Artist in Pandarak
Introduction In Pandarak, Ladyfair is the premier choice for brides looking to achieve the perfect wedding day look with our professional at-home bridal makeup services. Whether you desire a traditional bridal look, an HD finish, or the flawless perfection of airbrush makeup, our expert makeup artist in Pandarak ensures that you shine on your special day. Contact us today at 7004721239 to schedule your appointment. Why Choose Ladyfair for Bridal Makeup in Pandarak Experienced Makeup Artist Our makeup artist in Pandarak has years of experience in bridal makeup, creating personalized looks that complement your natural beauty and align with your style and preferences. Convenient At-Home Service Forget the stress of traveling to a salon. Ladyfair brings luxury beauty treatments directly to your doorstep with our at-home bridal makeup services, offering a truly personalized experience. Premium Makeup Products We use only high-quality, professional-grade makeup products to ensure a flawless, long-lasting look that remains perfect throughout your big day. Bridal Makeup Pricing in Pandarak Our bridal makeup services in Pandarak are tailored to fit different styles and budgets: Basic Bridal Makeup: ₹10,000 HD Bridal Makeup: ₹12,000 Airbrush Bridal Makeup: ₹18,000 For engagement and reception makeup: Basic Engagement/Reception Makeup: ₹6,000 HD Engagement/Reception Makeup: ₹8,000 Airbrush Engagement/Reception Makeup: ₹12,000 For parties: Basic Party Makeup: ₹2,500 HD Party Makeup: ₹3,500 Popular Bridal Makeup Styles in Pandarak Traditional Bridal Makeup Our traditional bridal makeup in Pandarak incorporates bold colors and intricate detailing to complement your wedding attire, creating an elegant and timeless look. HD Bridal Makeup For a high-definition finish that looks flawless both in photos and in person, HD bridal makeup is the perfect choice for brides who want a picture-perfect appearance all day. Airbrush Bridal Makeup Our airbrush makeup offers a lightweight, full-coverage finish that lasts all day, giving you a smooth and natural look while ensuring long-lasting perfection. How to Book Your Bridal Makeup with Ladyfair in Pandarak Initial Contact: Call us at 7004721239 to discuss your makeup needs and schedule your appointment. Consultation Session: Meet with our makeup artist to discuss your wedding look, review your attire, and plan the perfect makeup style. Makeup Trial: We offer trial sessions to help you preview your bridal makeup look and make any adjustments. Wedding Day Makeup: On your wedding day, our makeup artist will arrive at your location in Pandarak to provide flawless, hassle-free makeup service. Testimonials from Brides in Pandarak Priya R., Pandarak: "Ladyfair provided amazing service on my wedding day. The airbrush makeup looked flawless and lasted all day." Ritu K., Pandarak: "I loved the HD makeup! It was perfect for my photos, and the at-home service was so convenient." Sneha S., Pandarak: "My traditional bridal makeup was exactly what I wanted, and Ladyfair made the entire process stress-free." Preparing for Your Bridal Makeup Session To get the best results for your bridal makeup: Stay Hydrated: Keep your skin looking fresh by drinking plenty of water. Consistent Skincare: Stick to your regular skincare routine to maintain healthy, glowing skin. Avoid New Products: Use familiar products to prevent any reactions before your wedding day. Clear Communication: Discuss your makeup preferences and any concerns with our artist during the consultation. Additional Beauty Services by Ladyfair Beyond bridal makeup, Ladyfair offers a variety of beauty services in Pandarak: Engagement and Reception Makeup: Customized looks for all pre-wedding events. Party Makeup: Perfect for birthdays, anniversaries, and special occasions. Everyday Makeup: Enhance your daily look with our expert makeup services. Special Occasion Makeup: Professional makeup for parties, celebrations, and formal events. The Future of Bridal Makeup in Pandarak Ladyfair is dedicated to setting new standards in bridal beauty in Pandarak with our innovative at-home services. As we continue to offer exceptional service, more brides are choosing Ladyfair as their preferred makeup provider. Q&A with Ladyfair’s Bridal Makeup Artist in Pandarak Q1: What makes Ladyfair the best choice for bridal makeup in Pandarak? A1: Ladyfair offers expert bridal makeup services at home, using high-quality products to ensure a flawless and long-lasting look. Q2: What are the prices for bridal makeup in Pandarak? A2: Our bridal makeup packages start at ₹10,000 for basic makeup, ₹12,000 for HD makeup, and ₹18,000 for airbrush makeup. Q3: How do I book Ladyfair’s bridal makeup services in Pandarak? A3: You can book our services by calling 7004721239. We also offer consultations and trial sessions to ensure you get the look you want. Q4: What bridal makeup styles does Ladyfair offer in Pandarak? A4: Ladyfair offers traditional, HD, and airbrush bridal makeup to suit different preferences and needs. Q5: Are makeup trials available before my wedding? A5: Yes, we offer trial sessions so you can finalize your bridal look ahead of time. Q6: What products does Ladyfair use for bridal makeup? A6: We use professional-grade, high-quality makeup products that are safe for all skin types and ensure a flawless finish. Q7: What other services does Ladyfair provide in Pandarak? A7: In addition to bridal makeup, we offer makeup for engagements, receptions, parties, and other special occasions. Ladyfair is your ultimate choice for professional, at-home bridal makeup services in Pandarak, ensuring a flawless and stress-free experience on your special day.

Posted By: 24th November 2024
Bridal Makeup Artist in Ghoswari
Introduction In Ghoswari, Ladyfair is the premier choice for brides looking to achieve the perfect wedding day look with our professional at-home bridal makeup services. Whether you desire a traditional bridal look, an HD finish, or the flawless perfection of airbrush makeup, our expert makeup artist in Ghoswari ensures that you shine on your special day. Contact us today at 7004721239 to schedule your appointment. Why Choose Ladyfair for Bridal Makeup in Ghoswari Experienced Makeup Artist Our makeup artist in Ghoswari has years of experience in bridal makeup, creating personalized looks that complement your natural beauty and align with your style and preferences. Convenient At-Home Service Forget the stress of traveling to a salon. Ladyfair brings luxury beauty treatments directly to your doorstep with our at-home bridal makeup services, offering a truly personalized experience. Premium Makeup Products We use only high-quality, professional-grade makeup products to ensure a flawless, long-lasting look that remains perfect throughout your big day. Bridal Makeup Pricing in Ghoswari Our bridal makeup services in Ghoswari are tailored to fit different styles and budgets: Basic Bridal Makeup: ₹10,000 HD Bridal Makeup: ₹12,000 Airbrush Bridal Makeup: ₹18,000 For engagement and reception makeup: Basic Engagement/Reception Makeup: ₹6,000 HD Engagement/Reception Makeup: ₹8,000 Airbrush Engagement/Reception Makeup: ₹12,000 For parties: Basic Party Makeup: ₹2,500 HD Party Makeup: ₹3,500 Popular Bridal Makeup Styles in Ghoswari Traditional Bridal Makeup Our traditional bridal makeup in Ghoswari incorporates bold colors and intricate detailing to complement your wedding attire, creating an elegant and timeless look. HD Bridal Makeup For a high-definition finish that looks flawless both in photos and in person, HD bridal makeup is the perfect choice for brides who want a picture-perfect appearance all day. Airbrush Bridal Makeup Our airbrush makeup offers a lightweight, full-coverage finish that lasts all day, giving you a smooth and natural look while ensuring long-lasting perfection. How to Book Your Bridal Makeup with Ladyfair in Ghoswari Initial Contact: Call us at 7004721239 to discuss your makeup needs and schedule your appointment. Consultation Session: Meet with our makeup artist to discuss your wedding look, review your attire, and plan the perfect makeup style. Makeup Trial: We offer trial sessions to help you preview your bridal makeup look and make any adjustments. Wedding Day Makeup: On your wedding day, our makeup artist will arrive at your location in Ghoswari to provide flawless, hassle-free makeup service. Testimonials from Brides in Ghoswari Priya R., Ghoswari: "Ladyfair provided amazing service on my wedding day. The airbrush makeup looked flawless and lasted all day." Ritu K., Ghoswari: "I loved the HD makeup! It was perfect for my photos, and the at-home service was so convenient." Sneha S., Ghoswari: "My traditional bridal makeup was exactly what I wanted, and Ladyfair made the entire process stress-free." Preparing for Your Bridal Makeup Session To get the best results for your bridal makeup: Stay Hydrated: Keep your skin looking fresh by drinking plenty of water. Consistent Skincare: Stick to your regular skincare routine to maintain healthy, glowing skin. Avoid New Products: Use familiar products to prevent any reactions before your wedding day. Clear Communication: Discuss your makeup preferences and any concerns with our artist during the consultation. Additional Beauty Services by Ladyfair Beyond bridal makeup, Ladyfair offers a variety of beauty services in Ghoswari: Engagement and Reception Makeup: Customized looks for all pre-wedding events. Party Makeup: Perfect for birthdays, anniversaries, and special occasions. Everyday Makeup: Enhance your daily look with our expert makeup services. Special Occasion Makeup: Professional makeup for parties, celebrations, and formal events. The Future of Bridal Makeup in Ghoswari Ladyfair is dedicated to setting new standards in bridal beauty in Ghoswari with our innovative at-home services. As we continue to offer exceptional service, more brides are choosing Ladyfair as their preferred makeup provider. Q&A with Ladyfair’s Bridal Makeup Artist in Ghoswari Q1: What makes Ladyfair the best choice for bridal makeup in Ghoswari? A1: Ladyfair offers expert bridal makeup services at home, using high-quality products to ensure a flawless and long-lasting look. Q2: What are the prices for bridal makeup in Ghoswari? A2: Our bridal makeup packages start at ₹10,000 for basic makeup, ₹12,000 for HD makeup, and ₹18,000 for airbrush makeup. Q3: How do I book Ladyfair’s bridal makeup services in Ghoswari? A3: You can book our services by calling 7004721239. We also offer consultations and trial sessions to ensure you get the look you want. Q4: What bridal makeup styles does Ladyfair offer in Ghoswari? A4: Ladyfair offers traditional, HD, and airbrush bridal makeup to suit different preferences and needs. Q5: Are makeup trials available before my wedding? A5: Yes, we offer trial sessions so you can finalize your bridal look ahead of time. Q6: What products does Ladyfair use for bridal makeup? A6: We use professional-grade, high-quality makeup products that are safe for all skin types and ensure a flawless finish. Q7: What other services does Ladyfair provide in Ghoswari? A7: In addition to bridal makeup, we offer makeup for engagements, receptions, parties, and other special occasions. Ladyfair is your ultimate choice for professional, at-home bridal makeup services in Ghoswari, ensuring a flawless and stress-free experience on your special day.

Posted By: 24th November 2024
Bridal Makeup Artist in Belchhi
Introduction In Belchhi, Ladyfair is the premier choice for brides looking to achieve the perfect wedding day look with our professional at-home bridal makeup services. Whether you desire a traditional bridal look, an HD finish, or the flawless perfection of airbrush makeup, our expert makeup artist in Belchhi ensures that you shine on your special day. Contact us today at 7004721239 to schedule your appointment. Why Choose Ladyfair for Bridal Makeup in Belchhi Experienced Makeup Artist Our makeup artist in Belchhi has years of experience in bridal makeup, creating personalized looks that complement your natural beauty and align with your style and preferences. Convenient At-Home Service Forget the stress of traveling to a salon. Ladyfair brings luxury beauty treatments directly to your doorstep with our at-home bridal makeup services, offering a truly personalized experience. Premium Makeup Products We use only high-quality, professional-grade makeup products to ensure a flawless, long-lasting look that remains perfect throughout your big day. Bridal Makeup Pricing in Belchhi Our bridal makeup services in Belchhi are tailored to fit different styles and budgets: Basic Bridal Makeup: ₹10,000 HD Bridal Makeup: ₹12,000 Airbrush Bridal Makeup: ₹18,000 For engagement and reception makeup: Basic Engagement/Reception Makeup: ₹6,000 HD Engagement/Reception Makeup: ₹8,000 Airbrush Engagement/Reception Makeup: ₹12,000 For parties: Basic Party Makeup: ₹2,500 HD Party Makeup: ₹3,500 Popular Bridal Makeup Styles in Belchhi Traditional Bridal Makeup Our traditional bridal makeup in Belchhi incorporates bold colors and intricate detailing to complement your wedding attire, creating an elegant and timeless look. HD Bridal Makeup For a high-definition finish that looks flawless both in photos and in person, HD bridal makeup is the perfect choice for brides who want a picture-perfect appearance all day. Airbrush Bridal Makeup Our airbrush makeup offers a lightweight, full-coverage finish that lasts all day, giving you a smooth and natural look while ensuring long-lasting perfection. How to Book Your Bridal Makeup with Ladyfair in Belchhi Initial Contact: Call us at 7004721239 to discuss your makeup needs and schedule your appointment. Consultation Session: Meet with our makeup artist to discuss your wedding look, review your attire, and plan the perfect makeup style. Makeup Trial: We offer trial sessions to help you preview your bridal makeup look and make any adjustments. Wedding Day Makeup: On your wedding day, our makeup artist will arrive at your location in Belchhi to provide flawless, hassle-free makeup service. Testimonials from Brides in Belchhi Priya R., Belchhi: "Ladyfair provided amazing service on my wedding day. The airbrush makeup looked flawless and lasted all day." Ritu K., Belchhi: "I loved the HD makeup! It was perfect for my photos, and the at-home service was so convenient." Sneha S., Belchhi: "My traditional bridal makeup was exactly what I wanted, and Ladyfair made the entire process stress-free." Preparing for Your Bridal Makeup Session To get the best results for your bridal makeup: Stay Hydrated: Keep your skin looking fresh by drinking plenty of water. Consistent Skincare: Stick to your regular skincare routine to maintain healthy, glowing skin. Avoid New Products: Use familiar products to prevent any reactions before your wedding day. Clear Communication: Discuss your makeup preferences and any concerns with our artist during the consultation. Additional Beauty Services by Ladyfair Beyond bridal makeup, Ladyfair offers a variety of beauty services in Belchhi: Engagement and Reception Makeup: Customized looks for all pre-wedding events. Party Makeup: Perfect for birthdays, anniversaries, and special occasions. Everyday Makeup: Enhance your daily look with our expert makeup services. Special Occasion Makeup: Professional makeup for parties, celebrations, and formal events. The Future of Bridal Makeup in Belchhi Ladyfair is dedicated to setting new standards in bridal beauty in Belchhi with our innovative at-home services. As we continue to offer exceptional service, more brides are choosing Ladyfair as their preferred makeup provider. Q&A with Ladyfair’s Bridal Makeup Artist in Belchhi Q1: What makes Ladyfair the best choice for bridal makeup in Belchhi? A1: Ladyfair offers expert bridal makeup services at home, using high-quality products to ensure a flawless and long-lasting look. Q2: What are the prices for bridal makeup in Belchhi? A2: Our bridal makeup packages start at ₹10,000 for basic makeup, ₹12,000 for HD makeup, and ₹18,000 for airbrush makeup. Q3: How do I book Ladyfair’s bridal makeup services in Belchhi? A3: You can book our services by calling 7004721239. We also offer consultations and trial sessions to ensure you get the look you want. Q4: What bridal makeup styles does Ladyfair offer in Belchhi? A4: Ladyfair offers traditional, HD, and airbrush bridal makeup to suit different preferences and needs. Q5: Are makeup trials available before my wedding? A5: Yes, we offer trial sessions so you can finalize your bridal look ahead of time. Q6: What products does Ladyfair use for bridal makeup? A6: We use professional-grade, high-quality makeup products that are safe for all skin types and ensure a flawless finish. Q7: What other services does Ladyfair provide in Belchhi? A7: In addition to bridal makeup, we offer makeup for engagements, receptions, parties, and other special occasions. Ladyfair is your ultimate choice for professional, at-home bridal makeup services in Belchhi, ensuring a flawless and stress-free experience on your special day.

Posted By: 24th November 2024
Bridal Makeup Artist in Mokama
Introduction In Mokama, Ladyfair is the premier choice for brides looking to achieve the perfect wedding day look with our professional at-home bridal makeup services. Whether you desire a traditional bridal look, an HD finish, or the flawless perfection of airbrush makeup, our expert makeup artist in Mokama ensures that you shine on your special day. Contact us today at 7004721239 to schedule your appointment. Why Choose Ladyfair for Bridal Makeup in Mokama Experienced Makeup Artist Our makeup artist in Mokama has years of experience in bridal makeup, creating personalized looks that complement your natural beauty and align with your style and preferences. Convenient At-Home Service Forget the stress of traveling to a salon. Ladyfair brings luxury beauty treatments directly to your doorstep with our at-home bridal makeup services, offering a truly personalized experience. Premium Makeup Products We use only high-quality, professional-grade makeup products to ensure a flawless, long-lasting look that remains perfect throughout your big day. Bridal Makeup Pricing in Mokama Our bridal makeup services in Mokama are tailored to fit different styles and budgets: Basic Bridal Makeup: ₹10,000 HD Bridal Makeup: ₹12,000 Airbrush Bridal Makeup: ₹18,000 For engagement and reception makeup: Basic Engagement/Reception Makeup: ₹6,000 HD Engagement/Reception Makeup: ₹8,000 Airbrush Engagement/Reception Makeup: ₹12,000 For parties: Basic Party Makeup: ₹2,500 HD Party Makeup: ₹3,500 Popular Bridal Makeup Styles in Mokama Traditional Bridal Makeup Our traditional bridal makeup in Mokama incorporates bold colors and intricate detailing to complement your wedding attire, creating an elegant and timeless look. HD Bridal Makeup For a high-definition finish that looks flawless both in photos and in person, HD bridal makeup is the perfect choice for brides who want a picture-perfect appearance all day. Airbrush Bridal Makeup Our airbrush makeup offers a lightweight, full-coverage finish that lasts all day, giving you a smooth and natural look while ensuring long-lasting perfection. How to Book Your Bridal Makeup with Ladyfair in Mokama Initial Contact: Call us at 7004721239 to discuss your makeup needs and schedule your appointment. Consultation Session: Meet with our makeup artist to discuss your wedding look, review your attire, and plan the perfect makeup style. Makeup Trial: We offer trial sessions to help you preview your bridal makeup look and make any adjustments. Wedding Day Makeup: On your wedding day, our makeup artist will arrive at your location in Mokama to provide flawless, hassle-free makeup service. Testimonials from Brides in Mokama Priya R., Mokama: "Ladyfair provided amazing service on my wedding day. The airbrush makeup looked flawless and lasted all day." Ritu K., Mokama: "I loved the HD makeup! It was perfect for my photos, and the at-home service was so convenient." Sneha S., Mokama: "My traditional bridal makeup was exactly what I wanted, and Ladyfair made the entire process stress-free." Preparing for Your Bridal Makeup Session To get the best results for your bridal makeup: Stay Hydrated: Keep your skin looking fresh by drinking plenty of water. Consistent Skincare: Stick to your regular skincare routine to maintain healthy, glowing skin. Avoid New Products: Use familiar products to prevent any reactions before your wedding day. Clear Communication: Discuss your makeup preferences and any concerns with our artist during the consultation. Additional Beauty Services by Ladyfair Beyond bridal makeup, Ladyfair offers a variety of beauty services in Mokama: Engagement and Reception Makeup: Customized looks for all pre-wedding events. Party Makeup: Perfect for birthdays, anniversaries, and special occasions. Everyday Makeup: Enhance your daily look with our expert makeup services. Special Occasion Makeup: Professional makeup for parties, celebrations, and formal events. The Future of Bridal Makeup in Mokama Ladyfair is dedicated to setting new standards in bridal beauty in Mokama with our innovative at-home services. As we continue to offer exceptional service, more brides are choosing Ladyfair as their preferred makeup provider. Q&A with Ladyfair’s Bridal Makeup Artist in Mokama Q1: What makes Ladyfair the best choice for bridal makeup in Mokama? A1: Ladyfair offers expert bridal makeup services at home, using high-quality products to ensure a flawless and long-lasting look. Q2: What are the prices for bridal makeup in Mokama? A2: Our bridal makeup packages start at ₹10,000 for basic makeup, ₹12,000 for HD makeup, and ₹18,000 for airbrush makeup. Q3: How do I book Ladyfair’s bridal makeup services in Mokama? A3: You can book our services by calling 7004721239. We also offer consultations and trial sessions to ensure you get the look you want. Q4: What bridal makeup styles does Ladyfair offer in Mokama? A4: Ladyfair offers traditional, HD, and airbrush bridal makeup to suit different preferences and needs. Q5: Are makeup trials available before my wedding? A5: Yes, we offer trial sessions so you can finalize your bridal look ahead of time. Q6: What products does Ladyfair use for bridal makeup? A6: We use professional-grade, high-quality makeup products that are safe for all skin types and ensure a flawless finish. Q7: What other services does Ladyfair provide in Mokama? A7: In addition to bridal makeup, we offer makeup for engagements, receptions, parties, and other special occasions. Ladyfair is your ultimate choice for professional, at-home bridal makeup services in Mokama, ensuring a flawless and stress-free experience on your special day.

Posted By: 24th November 2024
Bridal Makeup Artist in Athmal gola
Introduction In Athmal Gola, Ladyfair is the premier choice for brides looking to achieve the perfect wedding day look with our professional at-home bridal makeup services. Whether you desire a traditional bridal look, an HD finish, or the flawless perfection of airbrush makeup, our expert makeup artist in Athmal Gola ensures that you shine on your special day. Contact us today at 7004721239 to schedule your appointment. Why Choose Ladyfair for Bridal Makeup in Athmal Gola Experienced Makeup Artist Our makeup artist in Athmal Gola has years of experience in bridal makeup, creating personalized looks that complement your natural beauty and align with your style and preferences. Convenient At-Home Service Forget the stress of traveling to a salon. Ladyfair brings luxury beauty treatments directly to your doorstep with our at-home bridal makeup services, offering a truly personalized experience. Premium Makeup Products We use only high-quality, professional-grade makeup products to ensure a flawless, long-lasting look that remains perfect throughout your big day. Bridal Makeup Pricing in Athmal Gola Our bridal makeup services in Athmal Gola are tailored to fit different styles and budgets: Basic Bridal Makeup: ₹10,000 HD Bridal Makeup: ₹12,000 Airbrush Bridal Makeup: ₹18,000 For engagement and reception makeup: Basic Engagement/Reception Makeup: ₹6,000 HD Engagement/Reception Makeup: ₹8,000 Airbrush Engagement/Reception Makeup: ₹12,000 For parties: Basic Party Makeup: ₹2,500 HD Party Makeup: ₹3,500 Popular Bridal Makeup Styles in Athmal Gola Traditional Bridal Makeup Our traditional bridal makeup in Athmal Gola incorporates bold colors and intricate detailing to complement your wedding attire, creating an elegant and timeless look. HD Bridal Makeup For a high-definition finish that looks flawless both in photos and in person, HD bridal makeup is the perfect choice for brides who want a picture-perfect appearance all day. Airbrush Bridal Makeup Our airbrush makeup offers a lightweight, full-coverage finish that lasts all day, giving you a smooth and natural look while ensuring long-lasting perfection. How to Book Your Bridal Makeup with Ladyfair in Athmal Gola Initial Contact: Call us at 7004721239 to discuss your makeup needs and schedule your appointment. Consultation Session: Meet with our makeup artist to discuss your wedding look, review your attire, and plan the perfect makeup style. Makeup Trial: We offer trial sessions to help you preview your bridal makeup look and make any adjustments. Wedding Day Makeup: On your wedding day, our makeup artist will arrive at your location in Athmal Gola to provide flawless, hassle-free makeup service. Testimonials from Brides in Athmal Gola Priya R., Athmal Gola: "Ladyfair provided amazing service on my wedding day. The airbrush makeup looked flawless and lasted all day." Ritu K., Athmal Gola: "I loved the HD makeup! It was perfect for my photos, and the at-home service was so convenient." Sneha S., Athmal Gola: "My traditional bridal makeup was exactly what I wanted, and Ladyfair made the entire process stress-free." Preparing for Your Bridal Makeup Session To get the best results for your bridal makeup: Stay Hydrated: Keep your skin looking fresh by drinking plenty of water. Consistent Skincare: Stick to your regular skincare routine to maintain healthy, glowing skin. Avoid New Products: Use familiar products to prevent any reactions before your wedding day. Clear Communication: Discuss your makeup preferences and any concerns with our artist during the consultation. Additional Beauty Services by Ladyfair Beyond bridal makeup, Ladyfair offers a variety of beauty services in Athmal Gola: Engagement and Reception Makeup: Customized looks for all pre-wedding events. Party Makeup: Perfect for birthdays, anniversaries, and special occasions. Everyday Makeup: Enhance your daily look with our expert makeup services. Special Occasion Makeup: Professional makeup for parties, celebrations, and formal events. The Future of Bridal Makeup in Athmal Gola Ladyfair is dedicated to setting new standards in bridal beauty in Athmal Gola with our innovative at-home services. As we continue to offer exceptional service, more brides are choosing Ladyfair as their preferred makeup provider. Q&A with Ladyfair’s Bridal Makeup Artist in Athmal Gola Q1: What makes Ladyfair the best choice for bridal makeup in Athmal Gola? A1: Ladyfair offers expert bridal makeup services at home, using high-quality products to ensure a flawless and long-lasting look. Q2: What are the prices for bridal makeup in Athmal Gola? A2: Our bridal makeup packages start at ₹10,000 for basic makeup, ₹12,000 for HD makeup, and ₹18,000 for airbrush makeup. Q3: How do I book Ladyfair’s bridal makeup services in Athmal Gola? A3: You can book our services by calling 7004721239. We also offer consultations and trial sessions to ensure you get the look you want. Q4: What bridal makeup styles does Ladyfair offer in Athmal Gola? A4: Ladyfair offers traditional, HD, and airbrush bridal makeup to suit different preferences and needs. Q5: Are makeup trials available before my wedding? A5: Yes, we offer trial sessions so you can finalize your bridal look ahead of time. Q6: What products does Ladyfair use for bridal makeup? A6: We use professional-grade, high-quality makeup products that are safe for all skin types and ensure a flawless finish. Q7: What other services does Ladyfair provide in Athmal Gola? A7: In addition to bridal makeup, we offer makeup for engagements, receptions, parties, and other special occasions. Ladyfair is your ultimate choice for professional, at-home bridal makeup services in Athmal Gola, ensuring a flawless and stress-free experience on your special day.

Posted By: 24th November 2024
Bridal Makeup Artist in Khusrupur
Introduction In Khusrupur, Ladyfair is the premier choice for brides looking to achieve the perfect wedding day look with our professional at-home bridal makeup services. Whether you desire a traditional bridal look, an HD finish, or the flawless perfection of airbrush makeup, our expert makeup artist in Khusrupur ensures that you shine on your special day. Contact us today at 7004721239 to schedule your appointment. Why Choose Ladyfair for Bridal Makeup in Khusrupur Experienced Makeup Artist Our makeup artist in Khusrupur has years of experience in bridal makeup, creating personalized looks that complement your natural beauty and align with your style and preferences. Convenient At-Home Service Forget the stress of traveling to a salon. Ladyfair brings luxury beauty treatments directly to your doorstep with our at-home bridal makeup services, offering a truly personalized experience. Premium Makeup Products We use only high-quality, professional-grade makeup products to ensure a flawless, long-lasting look that remains perfect throughout your big day. Bridal Makeup Pricing in Khusrupur Our bridal makeup services in Khusrupur are tailored to fit different styles and budgets: Basic Bridal Makeup: ₹10,000 HD Bridal Makeup: ₹12,000 Airbrush Bridal Makeup: ₹18,000 For engagement and reception makeup: Basic Engagement/Reception Makeup: ₹6,000 HD Engagement/Reception Makeup: ₹8,000 Airbrush Engagement/Reception Makeup: ₹12,000 For parties: Basic Party Makeup: ₹2,500 HD Party Makeup: ₹3,500 Popular Bridal Makeup Styles in Khusrupur Traditional Bridal Makeup Our traditional bridal makeup in Khusrupur incorporates bold colors and intricate detailing to complement your wedding attire, creating an elegant and timeless look. HD Bridal Makeup For a high-definition finish that looks flawless both in photos and in person, HD bridal makeup is the perfect choice for brides who want a picture-perfect appearance all day. Airbrush Bridal Makeup Our airbrush makeup offers a lightweight, full-coverage finish that lasts all day, giving you a smooth and natural look while ensuring long-lasting perfection. How to Book Your Bridal Makeup with Ladyfair in Khusrupur Initial Contact: Call us at 7004721239 to discuss your makeup needs and schedule your appointment. Consultation Session: Meet with our makeup artist to discuss your wedding look, review your attire, and plan the perfect makeup style. Makeup Trial: We offer trial sessions to help you preview your bridal makeup look and make any adjustments. Wedding Day Makeup: On your wedding day, our makeup artist will arrive at your location in Khusrupur to provide flawless, hassle-free makeup service. Testimonials from Brides in Khusrupur Priya R., Khusrupur: "Ladyfair provided amazing service on my wedding day. The airbrush makeup looked flawless and lasted all day." Ritu K., Khusrupur: "I loved the HD makeup! It was perfect for my photos, and the at-home service was so convenient." Sneha S., Khusrupur: "My traditional bridal makeup was exactly what I wanted, and Ladyfair made the entire process stress-free." Preparing for Your Bridal Makeup Session To get the best results for your bridal makeup: Stay Hydrated: Keep your skin looking fresh by drinking plenty of water. Consistent Skincare: Stick to your regular skincare routine to maintain healthy, glowing skin. Avoid New Products: Use familiar products to prevent any reactions before your wedding day. Clear Communication: Discuss your makeup preferences and any concerns with our artist during the consultation. Additional Beauty Services by Ladyfair Beyond bridal makeup, Ladyfair offers a variety of beauty services in Khusrupur: Engagement and Reception Makeup: Customized looks for all pre-wedding events. Party Makeup: Perfect for birthdays, anniversaries, and special occasions. Everyday Makeup: Enhance your daily look with our expert makeup services. Special Occasion Makeup: Professional makeup for parties, celebrations, and formal events. The Future of Bridal Makeup in Khusrupur Ladyfair is dedicated to setting new standards in bridal beauty in Khusrupur with our innovative at-home services. As we continue to offer exceptional service, more brides are choosing Ladyfair as their preferred makeup provider. Q&A with Ladyfair’s Bridal Makeup Artist in Khusrupur Q1: What makes Ladyfair the best choice for bridal makeup in Khusrupur? A1: Ladyfair offers expert bridal makeup services at home, using high-quality products to ensure a flawless and long-lasting look. Q2: What are the prices for bridal makeup in Khusrupur? A2: Our bridal makeup packages start at ₹10,000 for basic makeup, ₹12,000 for HD makeup, and ₹18,000 for airbrush makeup. Q3: How do I book Ladyfair’s bridal makeup services in Khusrupur? A3: You can book our services by calling 7004721239. We also offer consultations and trial sessions to ensure you get the look you want. Q4: What bridal makeup styles does Ladyfair offer in Khusrupur? A4: Ladyfair offers traditional, HD, and airbrush bridal makeup to suit different preferences and needs. Q5: Are makeup trials available before my wedding? A5: Yes, we offer trial sessions so you can finalize your bridal look ahead of time. Q6: What products does Ladyfair use for bridal makeup? A6: We use professional-grade, high-quality makeup products that are safe for all skin types and ensure a flawless finish. Q7: What other services does Ladyfair provide in Khusrupur? A7: In addition to bridal makeup, we offer makeup for engagements, receptions, parties, and other special occasions. Ladyfair is your ultimate choice for professional, at-home bridal makeup services in Khusrupur, ensuring a flawless and stress-free experience on your special day.

Posted By: 24th November 2024
Bridal Makeup Artist in Daniyawan
Introduction In Daniyawan, Ladyfair is the premier choice for brides looking to achieve the perfect wedding day look with our professional at-home bridal makeup services. Whether you desire a traditional bridal look, an HD finish, or the flawless perfection of airbrush makeup, our expert makeup artist in Daniyawan ensures that you shine on your special day. Contact us today at 7004721239 to schedule your appointment. Why Choose Ladyfair for Bridal Makeup in Daniyawan Experienced Makeup Artist Our makeup artist in Daniyawan has years of experience in bridal makeup, creating personalized looks that complement your natural beauty and align with your style and preferences. Convenient At-Home Service Forget the stress of traveling to a salon. Ladyfair brings luxury beauty treatments directly to your doorstep with our at-home bridal makeup services, offering a truly personalized experience. Premium Makeup Products We use only high-quality, professional-grade makeup products to ensure a flawless, long-lasting look that remains perfect throughout your big day. Bridal Makeup Pricing in Daniyawan Our bridal makeup services in Daniyawan are tailored to fit different styles and budgets: Basic Bridal Makeup: ₹10,000 HD Bridal Makeup: ₹12,000 Airbrush Bridal Makeup: ₹18,000 For engagement and reception makeup: Basic Engagement/Reception Makeup: ₹6,000 HD Engagement/Reception Makeup: ₹8,000 Airbrush Engagement/Reception Makeup: ₹12,000 For parties: Basic Party Makeup: ₹2,500 HD Party Makeup: ₹3,500 Popular Bridal Makeup Styles in Daniyawan Traditional Bridal Makeup Our traditional bridal makeup in Daniyawan incorporates bold colors and intricate detailing to complement your wedding attire, creating an elegant and timeless look. HD Bridal Makeup For a high-definition finish that looks flawless both in photos and in person, HD bridal makeup is the perfect choice for brides who want a picture-perfect appearance all day. Airbrush Bridal Makeup Our airbrush makeup offers a lightweight, full-coverage finish that lasts all day, giving you a smooth and natural look while ensuring long-lasting perfection. How to Book Your Bridal Makeup with Ladyfair in Daniyawan Initial Contact: Call us at 7004721239 to discuss your makeup needs and schedule your appointment. Consultation Session: Meet with our makeup artist to discuss your wedding look, review your attire, and plan the perfect makeup style. Makeup Trial: We offer trial sessions to help you preview your bridal makeup look and make any adjustments. Wedding Day Makeup: On your wedding day, our makeup artist will arrive at your location in Daniyawan to provide flawless, hassle-free makeup service. Testimonials from Brides in Daniyawan Priya R., Daniyawan: "Ladyfair provided amazing service on my wedding day. The airbrush makeup looked flawless and lasted all day." Ritu K., Daniyawan: "I loved the HD makeup! It was perfect for my photos, and the at-home service was so convenient." Sneha S., Daniyawan: "My traditional bridal makeup was exactly what I wanted, and Ladyfair made the entire process stress-free." Preparing for Your Bridal Makeup Session To get the best results for your bridal makeup: Stay Hydrated: Keep your skin looking fresh by drinking plenty of water. Consistent Skincare: Stick to your regular skincare routine to maintain healthy, glowing skin. Avoid New Products: Use familiar products to prevent any reactions before your wedding day. Clear Communication: Discuss your makeup preferences and any concerns with our artist during the consultation. Additional Beauty Services by Ladyfair Beyond bridal makeup, Ladyfair offers a variety of beauty services in Daniyawan: Engagement and Reception Makeup: Customized looks for all pre-wedding events. Party Makeup: Perfect for birthdays, anniversaries, and special occasions. Everyday Makeup: Enhance your daily look with our expert makeup services. Special Occasion Makeup: Professional makeup for parties, celebrations, and formal events. The Future of Bridal Makeup in Daniyawan Ladyfair is dedicated to setting new standards in bridal beauty in Daniyawan with our innovative at-home services. As we continue to offer exceptional service, more brides are choosing Ladyfair as their preferred makeup provider. Q&A with Ladyfair’s Bridal Makeup Artist in Daniyawan Q1: What makes Ladyfair the best choice for bridal makeup in Daniyawan? A1: Ladyfair offers expert bridal makeup services at home, using high-quality products to ensure a flawless and long-lasting look. Q2: What are the prices for bridal makeup in Daniyawan? A2: Our bridal makeup packages start at ₹10,000 for basic makeup, ₹12,000 for HD makeup, and ₹18,000 for airbrush makeup. Q3: How do I book Ladyfair’s bridal makeup services in Daniyawan? A3: You can book our services by calling 7004721239. We also offer consultations and trial sessions to ensure you get the look you want. Q4: What bridal makeup styles does Ladyfair offer in Daniyawan? A4: Ladyfair offers traditional, HD, and airbrush bridal makeup to suit different preferences and needs. Q5: Are makeup trials available before my wedding? A5: Yes, we offer trial sessions so you can finalize your bridal look ahead of time. Q6: What products does Ladyfair use for bridal makeup? A6: We use professional-grade, high-quality makeup products that are safe for all skin types and ensure a flawless finish. Q7: What other services does Ladyfair provide in Daniyawan? A7: In addition to bridal makeup, we offer makeup for engagements, receptions, parties, and other special occasions. Ladyfair is your ultimate choice for professional, at-home bridal makeup services in Daniyawan, ensuring a flawless and stress-free experience on your special day.
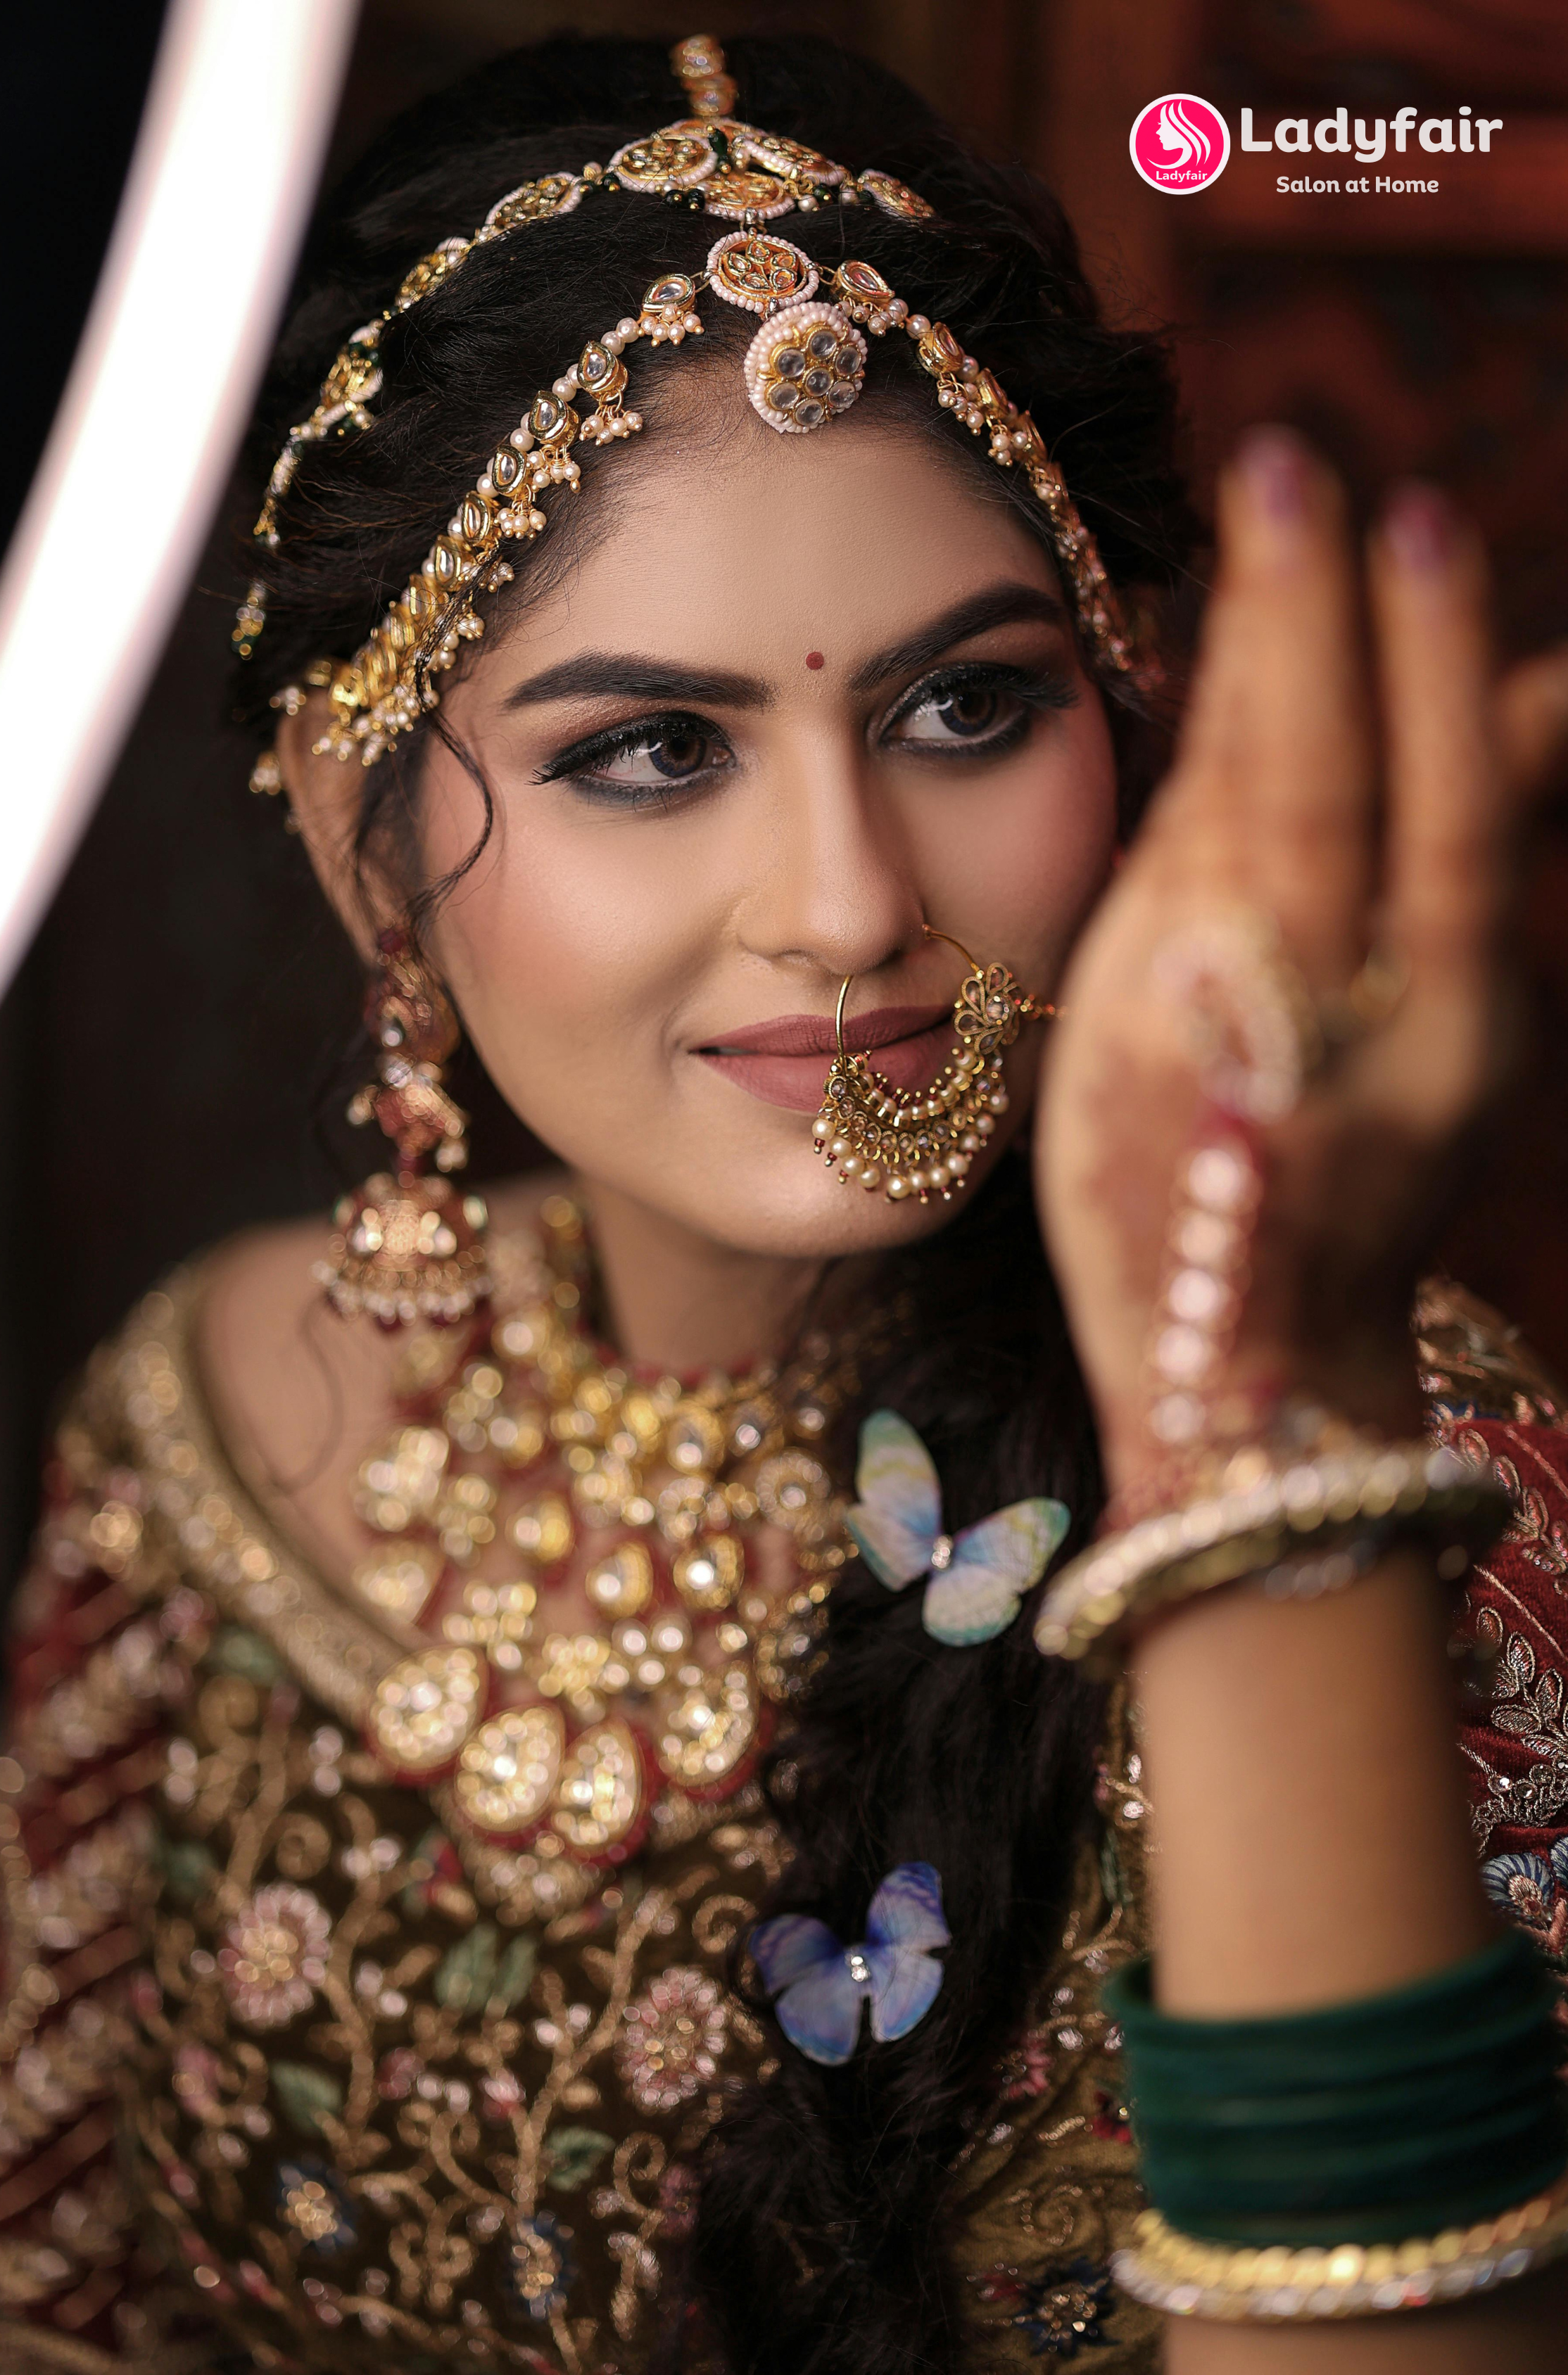
Posted By: 24th November 2024
Bridal Makeup Artist in Fatwah
Introduction In Fatwah, Ladyfair is the premier choice for brides looking to achieve the perfect wedding day look with our professional at-home bridal makeup services. Whether you desire a traditional bridal look, an HD finish, or the flawless perfection of airbrush makeup, our expert makeup artist in Fatwah ensures that you shine on your special day. Contact us today at 7004721239 to schedule your appointment. Why Choose Ladyfair for Bridal Makeup in Fatwah Experienced Makeup Artist Our makeup artist in Fatwah has years of experience in bridal makeup, creating personalized looks that complement your natural beauty and align with your style and preferences. Convenient At-Home Service Forget the stress of traveling to a salon. Ladyfair brings luxury beauty treatments directly to your doorstep with our at-home bridal makeup services, offering a truly personalized experience. Premium Makeup Products We use only high-quality, professional-grade makeup products to ensure a flawless, long-lasting look that remains perfect throughout your big day. Bridal Makeup Pricing in Fatwah Our bridal makeup services in Fatwah are tailored to fit different styles and budgets: Basic Bridal Makeup: ₹10,000 HD Bridal Makeup: ₹12,000 Airbrush Bridal Makeup: ₹18,000 For engagement and reception makeup: Basic Engagement/Reception Makeup: ₹6,000 HD Engagement/Reception Makeup: ₹8,000 Airbrush Engagement/Reception Makeup: ₹12,000 For parties: Basic Party Makeup: ₹2,500 HD Party Makeup: ₹3,500 Popular Bridal Makeup Styles in Fatwah Traditional Bridal Makeup Our traditional bridal makeup in Fatwah incorporates bold colors and intricate detailing to complement your wedding attire, creating an elegant and timeless look. HD Bridal Makeup For a high-definition finish that looks flawless both in photos and in person, HD bridal makeup is the perfect choice for brides who want a picture-perfect appearance all day. Airbrush Bridal Makeup Our airbrush makeup offers a lightweight, full-coverage finish that lasts all day, giving you a smooth and natural look while ensuring long-lasting perfection. How to Book Your Bridal Makeup with Ladyfair in Fatwah Initial Contact: Call us at 7004721239 to discuss your makeup needs and schedule your appointment. Consultation Session: Meet with our makeup artist to discuss your wedding look, review your attire, and plan the perfect makeup style. Makeup Trial: We offer trial sessions to help you preview your bridal makeup look and make any adjustments. Wedding Day Makeup: On your wedding day, our makeup artist will arrive at your location in Fatwah to provide flawless, hassle-free makeup service. Testimonials from Brides in Fatwah Priya R., Fatwah: "Ladyfair provided amazing service on my wedding day. The airbrush makeup looked flawless and lasted all day." Ritu K., Fatwah: "I loved the HD makeup! It was perfect for my photos, and the at-home service was so convenient." Sneha S., Fatwah: "My traditional bridal makeup was exactly what I wanted, and Ladyfair made the entire process stress-free." Preparing for Your Bridal Makeup Session To get the best results for your bridal makeup: Stay Hydrated: Keep your skin looking fresh by drinking plenty of water. Consistent Skincare: Stick to your regular skincare routine to maintain healthy, glowing skin. Avoid New Products: Use familiar products to prevent any reactions before your wedding day. Clear Communication: Discuss your makeup preferences and any concerns with our artist during the consultation. Additional Beauty Services by Ladyfair Beyond bridal makeup, Ladyfair offers a variety of beauty services in Fatwah: Engagement and Reception Makeup: Customized looks for all pre-wedding events. Party Makeup: Perfect for birthdays, anniversaries, and special occasions. Everyday Makeup: Enhance your daily look with our expert makeup services. Special Occasion Makeup: Professional makeup for parties, celebrations, and formal events. The Future of Bridal Makeup in Fatwah Ladyfair is dedicated to setting new standards in bridal beauty in Fatwah with our innovative at-home services. As we continue to offer exceptional service, more brides are choosing Ladyfair as their preferred makeup provider. Q&A with Ladyfair’s Bridal Makeup Artist in Fatwah Q1: What makes Ladyfair the best choice for bridal makeup in Fatwah? A1: Ladyfair offers expert bridal makeup services at home, using high-quality products to ensure a flawless and long-lasting look. Q2: What are the prices for bridal makeup in Fatwah? A2: Our bridal makeup packages start at ₹10,000 for basic makeup, ₹12,000 for HD makeup, and ₹18,000 for airbrush makeup. Q3: How do I book Ladyfair’s bridal makeup services in Fatwah? A3: You can book our services by calling 7004721239. We also offer consultations and trial sessions to ensure you get the look you want. Q4: What bridal makeup styles does Ladyfair offer in Fatwah? A4: Ladyfair offers traditional, HD, and airbrush bridal makeup to suit different preferences and needs. Q5: Are makeup trials available before my wedding? A5: Yes, we offer trial sessions so you can finalize your bridal look ahead of time. Q6: What products does Ladyfair use for bridal makeup? A6: We use professional-grade, high-quality makeup products that are safe for all skin types and ensure a flawless finish. Q7: What other services does Ladyfair provide in Fatwah? A7: In addition to bridal makeup, we offer makeup for engagements, receptions, parties, and other special occasions. Ladyfair is your ultimate choice for professional, at-home bridal makeup services in Fatwah, ensuring a flawless and stress-free experience on your special day.

Posted By: 24th November 2024
Bridal Makeup Artist in Phulwarisarif
Introduction In Phulwarisarif, Ladyfair is the premier choice for brides looking to achieve the perfect wedding day look with our professional at-home bridal makeup services. Whether you desire a traditional bridal look, an HD finish, or the flawless perfection of airbrush makeup, our expert makeup artist in Phulwarisarif ensures that you shine on your special day. Contact us today at 7004721239 to schedule your appointment. Why Choose Ladyfair for Bridal Makeup in Phulwarisarif Experienced Makeup Artist Our makeup artist in Phulwarisarif has years of experience in bridal makeup, creating personalized looks that complement your natural beauty and align with your style and preferences. Convenient At-Home Service Forget the stress of traveling to a salon. Ladyfair brings luxury beauty treatments directly to your doorstep with our at-home bridal makeup services, offering a truly personalized experience. Premium Makeup Products We use only high-quality, professional-grade makeup products to ensure a flawless, long-lasting look that remains perfect throughout your big day. Bridal Makeup Pricing in Phulwarisarif Our bridal makeup services in Phulwarisarif are tailored to fit different styles and budgets: Basic Bridal Makeup: ₹10,000 HD Bridal Makeup: ₹12,000 Airbrush Bridal Makeup: ₹18,000 For engagement and reception makeup: Basic Engagement/Reception Makeup: ₹6,000 HD Engagement/Reception Makeup: ₹8,000 Airbrush Engagement/Reception Makeup: ₹12,000 For parties: Basic Party Makeup: ₹2,500 HD Party Makeup: ₹3,500 Popular Bridal Makeup Styles in Phulwarisarif Traditional Bridal Makeup Our traditional bridal makeup in Phulwarisarif incorporates bold colors and intricate detailing to complement your wedding attire, creating an elegant and timeless look. HD Bridal Makeup For a high-definition finish that looks flawless both in photos and in person, HD bridal makeup is the perfect choice for brides who want a picture-perfect appearance all day. Airbrush Bridal Makeup Our airbrush makeup offers a lightweight, full-coverage finish that lasts all day, giving you a smooth and natural look while ensuring long-lasting perfection. How to Book Your Bridal Makeup with Ladyfair in Phulwarisarif Initial Contact: Call us at 7004721239 to discuss your makeup needs and schedule your appointment. Consultation Session: Meet with our makeup artist to discuss your wedding look, review your attire, and plan the perfect makeup style. Makeup Trial: We offer trial sessions to help you preview your bridal makeup look and make any adjustments. Wedding Day Makeup: On your wedding day, our makeup artist will arrive at your location in Phulwarisarif to provide flawless, hassle-free makeup service. Testimonials from Brides in Phulwarisarif Priya R., Phulwarisarif: "Ladyfair provided amazing service on my wedding day. The airbrush makeup looked flawless and lasted all day." Ritu K., Phulwarisarif: "I loved the HD makeup! It was perfect for my photos, and the at-home service was so convenient." Sneha S., Phulwarisarif: "My traditional bridal makeup was exactly what I wanted, and Ladyfair made the entire process stress-free." Preparing for Your Bridal Makeup Session To get the best results for your bridal makeup: Stay Hydrated: Keep your skin looking fresh by drinking plenty of water. Consistent Skincare: Stick to your regular skincare routine to maintain healthy, glowing skin. Avoid New Products: Use familiar products to prevent any reactions before your wedding day. Clear Communication: Discuss your makeup preferences and any concerns with our artist during the consultation. Additional Beauty Services by Ladyfair Beyond bridal makeup, Ladyfair offers a variety of beauty services in Phulwarisarif: Engagement and Reception Makeup: Customized looks for all pre-wedding events. Party Makeup: Perfect for birthdays, anniversaries, and special occasions. Everyday Makeup: Enhance your daily look with our expert makeup services. Special Occasion Makeup: Professional makeup for parties, celebrations, and formal events. The Future of Bridal Makeup in Phulwarisarif Ladyfair is dedicated to setting new standards in bridal beauty in Phulwarisarif with our innovative at-home services. As we continue to offer exceptional service, more brides are choosing Ladyfair as their preferred makeup provider. Q&A with Ladyfair’s Bridal Makeup Artist in Phulwarisarif Q1: What makes Ladyfair the best choice for bridal makeup in Phulwarisarif? A1: Ladyfair offers expert bridal makeup services at home, using high-quality products to ensure a flawless and long-lasting look. Q2: What are the prices for bridal makeup in Phulwarisarif? A2: Our bridal makeup packages start at ₹10,000 for basic makeup, ₹12,000 for HD makeup, and ₹18,000 for airbrush makeup. Q3: How do I book Ladyfair’s bridal makeup services in Phulwarisarif? A3: You can book our services by calling 7004721239. We also offer consultations and trial sessions to ensure you get the look you want. Q4: What bridal makeup styles does Ladyfair offer in Phulwarisarif? A4: Ladyfair offers traditional, HD, and airbrush bridal makeup to suit different preferences and needs. Q5: Are makeup trials available before my wedding? A5: Yes, we offer trial sessions so you can finalize your bridal look ahead of time. Q6: What products does Ladyfair use for bridal makeup? A6: We use professional-grade, high-quality makeup products that are safe for all skin types and ensure a flawless finish. Q7: What other services does Ladyfair provide in Phulwarisarif? A7: In addition to bridal makeup, we offer makeup for engagements, receptions, parties, and other special occasions. Ladyfair is your ultimate choice for professional, at-home bridal makeup services in Phulwarisarif, ensuring a flawless and stress-free experience on your special day.

Posted By: 24th November 2024
Bridal Makeup Artist in Sampatchak
Introduction In Sampatchak, Ladyfair is the premier choice for brides looking to achieve the perfect wedding day look with our professional at-home bridal makeup services. Whether you desire a traditional bridal look, an HD finish, or the flawless perfection of airbrush makeup, our expert makeup artist in Sampatchak ensures that you shine on your special day. Contact us today at 7004721239 to schedule your appointment. Why Choose Ladyfair for Bridal Makeup in Sampatchak Experienced Makeup Artist Our makeup artist in Sampatchak has years of experience in bridal makeup, creating personalized looks that complement your natural beauty and align with your style and preferences. Convenient At-Home Service Forget the stress of traveling to a salon. Ladyfair brings luxury beauty treatments directly to your doorstep with our at-home bridal makeup services, offering a truly personalized experience. Premium Makeup Products We use only high-quality, professional-grade makeup products to ensure a flawless, long-lasting look that remains perfect throughout your big day. Bridal Makeup Pricing in Sampatchak Our bridal makeup services in Sampatchak are tailored to fit different styles and budgets: Basic Bridal Makeup: ₹10,000 HD Bridal Makeup: ₹12,000 Airbrush Bridal Makeup: ₹18,000 For engagement and reception makeup: Basic Engagement/Reception Makeup: ₹6,000 HD Engagement/Reception Makeup: ₹8,000 Airbrush Engagement/Reception Makeup: ₹12,000 For parties: Basic Party Makeup: ₹2,500 HD Party Makeup: ₹3,500 Popular Bridal Makeup Styles in Sampatchak Traditional Bridal Makeup Our traditional bridal makeup in Sampatchak incorporates bold colors and intricate detailing to complement your wedding attire, creating an elegant and timeless look. HD Bridal Makeup For a high-definition finish that looks flawless both in photos and in person, HD bridal makeup is the perfect choice for brides who want a picture-perfect appearance all day. Airbrush Bridal Makeup Our airbrush makeup offers a lightweight, full-coverage finish that lasts all day, giving you a smooth and natural look while ensuring long-lasting perfection. How to Book Your Bridal Makeup with Ladyfair in Sampatchak Initial Contact: Call us at 7004721239 to discuss your makeup needs and schedule your appointment. Consultation Session: Meet with our makeup artist to discuss your wedding look, review your attire, and plan the perfect makeup style. Makeup Trial: We offer trial sessions to help you preview your bridal makeup look and make any adjustments. Wedding Day Makeup: On your wedding day, our makeup artist will arrive at your location in Sampatchak to provide flawless, hassle-free makeup service. Testimonials from Brides in Sampatchak Priya R., Sampatchak: "Ladyfair provided amazing service on my wedding day. The airbrush makeup looked flawless and lasted all day." Ritu K., Sampatchak: "I loved the HD makeup! It was perfect for my photos, and the at-home service was so convenient." Sneha S., Sampatchak: "My traditional bridal makeup was exactly what I wanted, and Ladyfair made the entire process stress-free." Preparing for Your Bridal Makeup Session To get the best results for your bridal makeup: Stay Hydrated: Keep your skin looking fresh by drinking plenty of water. Consistent Skincare: Stick to your regular skincare routine to maintain healthy, glowing skin. Avoid New Products: Use familiar products to prevent any reactions before your wedding day. Clear Communication: Discuss your makeup preferences and any concerns with our artist during the consultation. Additional Beauty Services by Ladyfair Beyond bridal makeup, Ladyfair offers a variety of beauty services in Sampatchak: Engagement and Reception Makeup: Customized looks for all pre-wedding events. Party Makeup: Perfect for birthdays, anniversaries, and special occasions. Everyday Makeup: Enhance your daily look with our expert makeup services. Special Occasion Makeup: Professional makeup for parties, celebrations, and formal events. The Future of Bridal Makeup in Sampatchak Ladyfair is dedicated to setting new standards in bridal beauty in Sampatchak with our innovative at-home services. As we continue to offer exceptional service, more brides are choosing Ladyfair as their preferred makeup provider. Q&A with Ladyfair’s Bridal Makeup Artist in Sampatchak Q1: What makes Ladyfair the best choice for bridal makeup in Sampatchak? A1: Ladyfair offers expert bridal makeup services at home, using high-quality products to ensure a flawless and long-lasting look. Q2: What are the prices for bridal makeup in Sampatchak? A2: Our bridal makeup packages start at ₹10,000 for basic makeup, ₹12,000 for HD makeup, and ₹18,000 for airbrush makeup. Q3: How do I book Ladyfair’s bridal makeup services in Sampatchak? A3: You can book our services by calling 7004721239. We also offer consultations and trial sessions to ensure you get the look you want. Q4: What bridal makeup styles does Ladyfair offer in Sampatchak? A4: Ladyfair offers traditional, HD, and airbrush bridal makeup to suit different preferences and needs. Q5: Are makeup trials available before my wedding? A5: Yes, we offer trial sessions so you can finalize your bridal look ahead of time. Q6: What products does Ladyfair use for bridal makeup? A6: We use professional-grade, high-quality makeup products that are safe for all skin types and ensure a flawless finish. Q7: What other services does Ladyfair provide in Sampatchak? A7: In addition to bridal makeup, we offer makeup for engagements, receptions, parties, and other special occasions. Ladyfair is your ultimate choice for professional, at-home bridal makeup services in Sampatchak, ensuring a flawless and stress-free experience on your special day.

Posted By: 24th November 2024
Bridal Makeup Artist in Patna Sadar
Introduction In Patna Sadar, Ladyfair is the premier choice for brides looking to achieve the perfect wedding day look with our professional at-home bridal makeup services. Whether you desire a traditional bridal look, an HD finish, or the flawless perfection of airbrush makeup, our expert makeup artist in Patna Sadar ensures that you shine on your special day. Contact us today at 7004721239 to schedule your appointment. Why Choose Ladyfair for Bridal Makeup in Patna Sadar Experienced Makeup Artist Our makeup artist in Patna Sadar has years of experience in bridal makeup, creating personalized looks that complement your natural beauty and align with your style and preferences. Convenient At-Home Service Forget the stress of traveling to a salon. Ladyfair brings luxury beauty treatments directly to your doorstep with our at-home bridal makeup services, offering a truly personalized experience. Premium Makeup Products We use only high-quality, professional-grade makeup products to ensure a flawless, long-lasting look that remains perfect throughout your big day. Bridal Makeup Pricing in Patna Sadar Our bridal makeup services in Patna Sadar are tailored to fit different styles and budgets: Basic Bridal Makeup: ₹10,000 HD Bridal Makeup: ₹12,000 Airbrush Bridal Makeup: ₹18,000 For engagement and reception makeup: Basic Engagement/Reception Makeup: ₹6,000 HD Engagement/Reception Makeup: ₹8,000 Airbrush Engagement/Reception Makeup: ₹12,000 For parties: Basic Party Makeup: ₹2,500 HD Party Makeup: ₹3,500 Popular Bridal Makeup Styles in Patna Sadar Traditional Bridal Makeup Our traditional bridal makeup in Patna Sadar incorporates bold colors and intricate detailing to complement your wedding attire, creating an elegant and timeless look. HD Bridal Makeup For a high-definition finish that looks flawless both in photos and in person, HD bridal makeup is the perfect choice for brides who want a picture-perfect appearance all day. Airbrush Bridal Makeup Our airbrush makeup offers a lightweight, full-coverage finish that lasts all day, giving you a smooth and natural look while ensuring long-lasting perfection. How to Book Your Bridal Makeup with Ladyfair in Patna Sadar Initial Contact: Call us at 7004721239 to discuss your makeup needs and schedule your appointment. Consultation Session: Meet with our makeup artist to discuss your wedding look, review your attire, and plan the perfect makeup style. Makeup Trial: We offer trial sessions to help you preview your bridal makeup look and make any adjustments. Wedding Day Makeup: On your wedding day, our makeup artist will arrive at your location in Patna Sadar to provide flawless, hassle-free makeup service. Testimonials from Brides in Patna Sadar Priya R., Patna Sadar: "Ladyfair provided amazing service on my wedding day. The airbrush makeup looked flawless and lasted all day." Ritu K., Patna Sadar: "I loved the HD makeup! It was perfect for my photos, and the at-home service was so convenient." Sneha S., Patna Sadar: "My traditional bridal makeup was exactly what I wanted, and Ladyfair made the entire process stress-free." Preparing for Your Bridal Makeup Session To get the best results for your bridal makeup: Stay Hydrated: Keep your skin looking fresh by drinking plenty of water. Consistent Skincare: Stick to your regular skincare routine to maintain healthy, glowing skin. Avoid New Products: Use familiar products to prevent any reactions before your wedding day. Clear Communication: Discuss your makeup preferences and any concerns with our artist during the consultation. Additional Beauty Services by Ladyfair Beyond bridal makeup, Ladyfair offers a variety of beauty services in Patna Sadar: Engagement and Reception Makeup: Customized looks for all pre-wedding events. Party Makeup: Perfect for birthdays, anniversaries, and special occasions. Everyday Makeup: Enhance your daily look with our expert makeup services. Special Occasion Makeup: Professional makeup for parties, celebrations, and formal events. The Future of Bridal Makeup in Patna Sadar Ladyfair is dedicated to setting new standards in bridal beauty in Patna Sadar with our innovative at-home services. As we continue to offer exceptional service, more brides are choosing Ladyfair as their preferred makeup provider. Q&A with Ladyfair’s Bridal Makeup Artist in Patna Sadar Q1: What makes Ladyfair the best choice for bridal makeup in Patna Sadar? A1: Ladyfair offers expert bridal makeup services at home, using high-quality products to ensure a flawless and long-lasting look. Q2: What are the prices for bridal makeup in Patna Sadar? A2: Our bridal makeup packages start at ₹10,000 for basic makeup, ₹12,000 for HD makeup, and ₹18,000 for airbrush makeup. Q3: How do I book Ladyfair’s bridal makeup services in Patna Sadar? A3: You can book our services by calling 7004721239. We also offer consultations and trial sessions to ensure you get the look you want. Q4: What bridal makeup styles does Ladyfair offer in Patna Sadar? A4: Ladyfair offers traditional, HD, and airbrush bridal makeup to suit different preferences and needs. Q5: Are makeup trials available before my wedding? A5: Yes, we offer trial sessions so you can finalize your bridal look ahead of time. Q6: What products does Ladyfair use for bridal makeup? A6: We use professional-grade, high-quality makeup products that are safe for all skin types and ensure a flawless finish. Q7: What other services does Ladyfair provide in Patna Sadar? A7: In addition to bridal makeup, we offer makeup for engagements, receptions, parties, and other special occasions. Ladyfair is your ultimate choice for professional, at-home bridal makeup services in Patna Sadar, ensuring a flawless and stress-free experience on your special day.

Posted By: 24th November 2024
Bridal Makeup Artist in Motipur
Introduction In Motipur, Ladyfair is the premier choice for brides looking to achieve the perfect wedding day look with our professional at-home bridal makeup services. Whether you desire a traditional bridal look, an HD finish, or the flawless perfection of airbrush makeup, our expert makeup artist in Motipur ensures that you shine on your special day. Contact us today at 7004721239 to schedule your appointment. Why Choose Ladyfair for Bridal Makeup in Motipur Experienced Makeup Artist Our makeup artist in Motipur has years of experience in bridal makeup, creating personalized looks that complement your natural beauty and align with your style and preferences. Convenient At-Home Service Forget the stress of traveling to a salon. Ladyfair brings luxury beauty treatments directly to your doorstep with our at-home bridal makeup services, offering a truly personalized experience. Premium Makeup Products We use only high-quality, professional-grade makeup products to ensure a flawless, long-lasting look that remains perfect throughout your big day. Bridal Makeup Pricing in Motipur Our bridal makeup services in Motipur are tailored to fit different styles and budgets: Basic Bridal Makeup: ₹10,000 HD Bridal Makeup: ₹12,000 Airbrush Bridal Makeup: ₹18,000 For engagement and reception makeup: Basic Engagement/Reception Makeup: ₹6,000 HD Engagement/Reception Makeup: ₹8,000 Airbrush Engagement/Reception Makeup: ₹12,000 For parties: Basic Party Makeup: ₹2,500 HD Party Makeup: ₹3,500 Popular Bridal Makeup Styles in Motipur Traditional Bridal Makeup Our traditional bridal makeup in Motipur incorporates bold colors and intricate detailing to complement your wedding attire, creating an elegant and timeless look. HD Bridal Makeup For a high-definition finish that looks flawless both in photos and in person, HD bridal makeup is the perfect choice for brides who want a picture-perfect appearance all day. Airbrush Bridal Makeup Our airbrush makeup offers a lightweight, full-coverage finish that lasts all day, giving you a smooth and natural look while ensuring long-lasting perfection. How to Book Your Bridal Makeup with Ladyfair in Motipur Initial Contact: Call us at 7004721239 to discuss your makeup needs and schedule your appointment. Consultation Session: Meet with our makeup artist to discuss your wedding look, review your attire, and plan the perfect makeup style. Makeup Trial: We offer trial sessions to help you preview your bridal makeup look and make any adjustments. Wedding Day Makeup: On your wedding day, our makeup artist will arrive at your location in Motipur to provide flawless, hassle-free makeup service. Testimonials from Brides in Motipur Priya R., Motipur: "Ladyfair provided amazing service on my wedding day. The airbrush makeup looked flawless and lasted all day." Ritu K., Motipur: "I loved the HD makeup! It was perfect for my photos, and the at-home service was so convenient." Sneha S., Motipur: "My traditional bridal makeup was exactly what I wanted, and Ladyfair made the entire process stress-free." Preparing for Your Bridal Makeup Session To get the best results for your bridal makeup: Stay Hydrated: Keep your skin looking fresh by drinking plenty of water. Consistent Skincare: Stick to your regular skincare routine to maintain healthy, glowing skin. Avoid New Products: Use familiar products to prevent any reactions before your wedding day. Clear Communication: Discuss your makeup preferences and any concerns with our artist during the consultation. Additional Beauty Services by Ladyfair Beyond bridal makeup, Ladyfair offers a variety of beauty services in Motipur: Engagement and Reception Makeup: Customized looks for all pre-wedding events. Party Makeup: Perfect for birthdays, anniversaries, and special occasions. Everyday Makeup: Enhance your daily look with our expert makeup services. Special Occasion Makeup: Professional makeup for parties, celebrations, and formal events. The Future of Bridal Makeup in Motipur Ladyfair is dedicated to setting new standards in bridal beauty in Motipur with our innovative at-home services. As we continue to offer exceptional service, more brides are choosing Ladyfair as their preferred makeup provider. Q&A with Ladyfair’s Bridal Makeup Artist in Motipur Q1: What makes Ladyfair the best choice for bridal makeup in Motipur? A1: Ladyfair offers expert bridal makeup services at home, using high-quality products to ensure a flawless and long-lasting look. Q2: What are the prices for bridal makeup in Motipur? A2: Our bridal makeup packages start at ₹10,000 for basic makeup, ₹12,000 for HD makeup, and ₹18,000 for airbrush makeup. Q3: How do I book Ladyfair’s bridal makeup services in Motipur? A3: You can book our services by calling 7004721239. We also offer consultations and trial sessions to ensure you get the look you want. Q4: What bridal makeup styles does Ladyfair offer in Motipur? A4: Ladyfair offers traditional, HD, and airbrush bridal makeup to suit different preferences and needs. Q5: Are makeup trials available before my wedding? A5: Yes, we offer trial sessions so you can finalize your bridal look ahead of time. Q6: What products does Ladyfair use for bridal makeup? A6: We use professional-grade, high-quality makeup products that are safe for all skin types and ensure a flawless finish. Q7: What other services does Ladyfair provide in Motipur? A7: In addition to bridal makeup, we offer makeup for engagements, receptions, parties, and other special occasions. Ladyfair is your ultimate choice for professional, at-home bridal makeup services in Motipur, ensuring a flawless and stress-free experience on your special day.

Posted By: 24th November 2024
Bridal Makeup Artist in Saraiya
Introduction In Saraiya, Ladyfair is the premier choice for brides looking to achieve the perfect wedding day look with our professional at-home bridal makeup services. Whether you desire a traditional bridal look, an HD finish, or the flawless perfection of airbrush makeup, our expert makeup artist in Saraiya ensures that you shine on your special day. Contact us today at 7004721239 to schedule your appointment. Why Choose Ladyfair for Bridal Makeup in Saraiya Experienced Makeup Artist Our makeup artist in Saraiya has years of experience in bridal makeup, creating personalized looks that complement your natural beauty and align with your style and preferences. Convenient At-Home Service Forget the stress of traveling to a salon. Ladyfair brings luxury beauty treatments directly to your doorstep with our at-home bridal makeup services, offering a truly personalized experience. Premium Makeup Products We use only high-quality, professional-grade makeup products to ensure a flawless, long-lasting look that remains perfect throughout your big day. Bridal Makeup Pricing in Saraiya Our bridal makeup services in Saraiya are tailored to fit different styles and budgets: Basic Bridal Makeup: ₹10,000 HD Bridal Makeup: ₹12,000 Airbrush Bridal Makeup: ₹18,000 For engagement and reception makeup: Basic Engagement/Reception Makeup: ₹6,000 HD Engagement/Reception Makeup: ₹8,000 Airbrush Engagement/Reception Makeup: ₹12,000 For parties: Basic Party Makeup: ₹2,500 HD Party Makeup: ₹3,500 Popular Bridal Makeup Styles in Saraiya Traditional Bridal Makeup Our traditional bridal makeup in Saraiya incorporates bold colors and intricate detailing to complement your wedding attire, creating an elegant and timeless look. HD Bridal Makeup For a high-definition finish that looks flawless both in photos and in person, HD bridal makeup is the perfect choice for brides who want a picture-perfect appearance all day. Airbrush Bridal Makeup Our airbrush makeup offers a lightweight, full-coverage finish that lasts all day, giving you a smooth and natural look while ensuring long-lasting perfection. How to Book Your Bridal Makeup with Ladyfair in Saraiya Initial Contact: Call us at 7004721239 to discuss your makeup needs and schedule your appointment. Consultation Session: Meet with our makeup artist to discuss your wedding look, review your attire, and plan the perfect makeup style. Makeup Trial: We offer trial sessions to help you preview your bridal makeup look and make any adjustments. Wedding Day Makeup: On your wedding day, our makeup artist will arrive at your location in Saraiya to provide flawless, hassle-free makeup service. Testimonials from Brides in Saraiya Priya R., Saraiya: "Ladyfair provided amazing service on my wedding day. The airbrush makeup looked flawless and lasted all day." Ritu K., Saraiya: "I loved the HD makeup! It was perfect for my photos, and the at-home service was so convenient." Sneha S., Saraiya: "My traditional bridal makeup was exactly what I wanted, and Ladyfair made the entire process stress-free." Preparing for Your Bridal Makeup Session To get the best results for your bridal makeup: Stay Hydrated: Keep your skin looking fresh by drinking plenty of water. Consistent Skincare: Stick to your regular skincare routine to maintain healthy, glowing skin. Avoid New Products: Use familiar products to prevent any reactions before your wedding day. Clear Communication: Discuss your makeup preferences and any concerns with our artist during the consultation. Additional Beauty Services by Ladyfair Beyond bridal makeup, Ladyfair offers a variety of beauty services in Saraiya: Engagement and Reception Makeup: Customized looks for all pre-wedding events. Party Makeup: Perfect for birthdays, anniversaries, and special occasions. Everyday Makeup: Enhance your daily look with our expert makeup services. Special Occasion Makeup: Professional makeup for parties, celebrations, and formal events. The Future of Bridal Makeup in Saraiya Ladyfair is dedicated to setting new standards in bridal beauty in Saraiya with our innovative at-home services. As we continue to offer exceptional service, more brides are choosing Ladyfair as their preferred makeup provider. Q&A with Ladyfair’s Bridal Makeup Artist in Saraiya Q1: What makes Ladyfair the best choice for bridal makeup in Saraiya? A1: Ladyfair offers expert bridal makeup services at home, using high-quality products to ensure a flawless and long-lasting look. Q2: What are the prices for bridal makeup in Saraiya? A2: Our bridal makeup packages start at ₹10,000 for basic makeup, ₹12,000 for HD makeup, and ₹18,000 for airbrush makeup. Q3: How do I book Ladyfair’s bridal makeup services in Saraiya? A3: You can book our services by calling 7004721239. We also offer consultations and trial sessions to ensure you get the look you want. Q4: What bridal makeup styles does Ladyfair offer in Saraiya? A4: Ladyfair offers traditional, HD, and airbrush bridal makeup to suit different preferences and needs. Q5: Are makeup trials available before my wedding? A5: Yes, we offer trial sessions so you can finalize your bridal look ahead of time. Q6: What products does Ladyfair use for bridal makeup? A6: We use professional-grade, high-quality makeup products that are safe for all skin types and ensure a flawless finish. Q7: What other services does Ladyfair provide in Saraiya? A7: In addition to bridal makeup, we offer makeup for engagements, receptions, parties, and other special occasions. Ladyfair is your ultimate choice for professional, at-home bridal makeup services in Saraiya, ensuring a flawless and stress-free experience on your special day.

Posted By: 24th November 2024
Bridal Makeup Artist in Sahebganj
Introduction In Sahebganj, Ladyfair is the premier choice for brides looking to achieve the perfect wedding day look with our professional at-home bridal makeup services. Whether you desire a traditional bridal look, an HD finish, or the flawless perfection of airbrush makeup, our expert makeup artist in Sahebganj ensures that you shine on your special day. Contact us today at 7004721239 to schedule your appointment. Why Choose Ladyfair for Bridal Makeup in Sahebganj Experienced Makeup Artist Our makeup artist in Sahebganj has years of experience in bridal makeup, creating personalized looks that complement your natural beauty and align with your style and preferences. Convenient At-Home Service Forget the stress of traveling to a salon. Ladyfair brings luxury beauty treatments directly to your doorstep with our at-home bridal makeup services, offering a truly personalized experience. Premium Makeup Products We use only high-quality, professional-grade makeup products to ensure a flawless, long-lasting look that remains perfect throughout your big day. Bridal Makeup Pricing in Sahebganj Our bridal makeup services in Sahebganj are tailored to fit different styles and budgets: Basic Bridal Makeup: ₹10,000 HD Bridal Makeup: ₹12,000 Airbrush Bridal Makeup: ₹18,000 For engagement and reception makeup: Basic Engagement/Reception Makeup: ₹6,000 HD Engagement/Reception Makeup: ₹8,000 Airbrush Engagement/Reception Makeup: ₹12,000 For parties: Basic Party Makeup: ₹2,500 HD Party Makeup: ₹3,500 Popular Bridal Makeup Styles in Sahebganj Traditional Bridal Makeup Our traditional bridal makeup in Sahebganj incorporates bold colors and intricate detailing to complement your wedding attire, creating an elegant and timeless look. HD Bridal Makeup For a high-definition finish that looks flawless both in photos and in person, HD bridal makeup is the perfect choice for brides who want a picture-perfect appearance all day. Airbrush Bridal Makeup Our airbrush makeup offers a lightweight, full-coverage finish that lasts all day, giving you a smooth and natural look while ensuring long-lasting perfection. How to Book Your Bridal Makeup with Ladyfair in Sahebganj Initial Contact: Call us at 7004721239 to discuss your makeup needs and schedule your appointment. Consultation Session: Meet with our makeup artist to discuss your wedding look, review your attire, and plan the perfect makeup style. Makeup Trial: We offer trial sessions to help you preview your bridal makeup look and make any adjustments. Wedding Day Makeup: On your wedding day, our makeup artist will arrive at your location in Sahebganj to provide flawless, hassle-free makeup service. Testimonials from Brides in Sahebganj Priya R., Sahebganj: "Ladyfair provided amazing service on my wedding day. The airbrush makeup looked flawless and lasted all day." Ritu K., Sahebganj: "I loved the HD makeup! It was perfect for my photos, and the at-home service was so convenient." Sneha S., Sahebganj: "My traditional bridal makeup was exactly what I wanted, and Ladyfair made the entire process stress-free." Preparing for Your Bridal Makeup Session To get the best results for your bridal makeup: Stay Hydrated: Keep your skin looking fresh by drinking plenty of water. Consistent Skincare: Stick to your regular skincare routine to maintain healthy, glowing skin. Avoid New Products: Use familiar products to prevent any reactions before your wedding day. Clear Communication: Discuss your makeup preferences and any concerns with our artist during the consultation. Additional Beauty Services by Ladyfair Beyond bridal makeup, Ladyfair offers a variety of beauty services in Sahebganj: Engagement and Reception Makeup: Customized looks for all pre-wedding events. Party Makeup: Perfect for birthdays, anniversaries, and special occasions. Everyday Makeup: Enhance your daily look with our expert makeup services. Special Occasion Makeup: Professional makeup for parties, celebrations, and formal events. The Future of Bridal Makeup in Sahebganj Ladyfair is dedicated to setting new standards in bridal beauty in Sahebganj with our innovative at-home services. As we continue to offer exceptional service, more brides are choosing Ladyfair as their preferred makeup provider. Q&A with Ladyfair’s Bridal Makeup Artist in Sahebganj Q1: What makes Ladyfair the best choice for bridal makeup in Sahebganj? A1: Ladyfair offers expert bridal makeup services at home, using high-quality products to ensure a flawless and long-lasting look. Q2: What are the prices for bridal makeup in Sahebganj? A2: Our bridal makeup packages start at ₹10,000 for basic makeup, ₹12,000 for HD makeup, and ₹18,000 for airbrush makeup. Q3: How do I book Ladyfair’s bridal makeup services in Sahebganj? A3: You can book our services by calling 7004721239. We also offer consultations and trial sessions to ensure you get the look you want. Q4: What bridal makeup styles does Ladyfair offer in Sahebganj? A4: Ladyfair offers traditional, HD, and airbrush bridal makeup to suit different preferences and needs. Q5: Are makeup trials available before my wedding? A5: Yes, we offer trial sessions so you can finalize your bridal look ahead of time. Q6: What products does Ladyfair use for bridal makeup? A6: We use professional-grade, high-quality makeup products that are safe for all skin types and ensure a flawless finish. Q7: What other services does Ladyfair provide in Sahebganj? A7: In addition to bridal makeup, we offer makeup for engagements, receptions, parties, and other special occasions. Ladyfair is your ultimate choice for professional, at-home bridal makeup services in Sahebganj, ensuring a flawless and stress-free experience on your special day.

Posted By: 24th November 2024
Bridal Makeup Artist in Paroo
Introduction In Paroo, Ladyfair is the premier choice for brides looking to achieve the perfect wedding day look with our professional at-home bridal makeup services. Whether you desire a traditional bridal look, an HD finish, or the flawless perfection of airbrush makeup, our expert makeup artist in Paroo ensures that you shine on your special day. Contact us today at 7004721239 to schedule your appointment. Why Choose Ladyfair for Bridal Makeup in Paroo Experienced Makeup Artist Our makeup artist in Paroo has years of experience in bridal makeup, creating personalized looks that complement your natural beauty and align with your style and preferences. Convenient At-Home Service Forget the stress of traveling to a salon. Ladyfair brings luxury beauty treatments directly to your doorstep with our at-home bridal makeup services, offering a truly personalized experience. Premium Makeup Products We use only high-quality, professional-grade makeup products to ensure a flawless, long-lasting look that remains perfect throughout your big day. Bridal Makeup Pricing in Paroo Our bridal makeup services in Paroo are tailored to fit different styles and budgets: Basic Bridal Makeup: ₹10,000 HD Bridal Makeup: ₹12,000 Airbrush Bridal Makeup: ₹18,000 For engagement and reception makeup: Basic Engagement/Reception Makeup: ₹6,000 HD Engagement/Reception Makeup: ₹8,000 Airbrush Engagement/Reception Makeup: ₹12,000 For parties: Basic Party Makeup: ₹2,500 HD Party Makeup: ₹3,500 Popular Bridal Makeup Styles in Paroo Traditional Bridal Makeup Our traditional bridal makeup in Paroo incorporates bold colors and intricate detailing to complement your wedding attire, creating an elegant and timeless look. HD Bridal Makeup For a high-definition finish that looks flawless both in photos and in person, HD bridal makeup is the perfect choice for brides who want a picture-perfect appearance all day. Airbrush Bridal Makeup Our airbrush makeup offers a lightweight, full-coverage finish that lasts all day, giving you a smooth and natural look while ensuring long-lasting perfection. How to Book Your Bridal Makeup with Ladyfair in Paroo Initial Contact: Call us at 7004721239 to discuss your makeup needs and schedule your appointment. Consultation Session: Meet with our makeup artist to discuss your wedding look, review your attire, and plan the perfect makeup style. Makeup Trial: We offer trial sessions to help you preview your bridal makeup look and make any adjustments. Wedding Day Makeup: On your wedding day, our makeup artist will arrive at your location in Paroo to provide flawless, hassle-free makeup service. Testimonials from Brides in Paroo Priya R., Paroo: "Ladyfair provided amazing service on my wedding day. The airbrush makeup looked flawless and lasted all day." Ritu K., Paroo: "I loved the HD makeup! It was perfect for my photos, and the at-home service was so convenient." Sneha S., Paroo: "My traditional bridal makeup was exactly what I wanted, and Ladyfair made the entire process stress-free." Preparing for Your Bridal Makeup Session To get the best results for your bridal makeup: Stay Hydrated: Keep your skin looking fresh by drinking plenty of water. Consistent Skincare: Stick to your regular skincare routine to maintain healthy, glowing skin. Avoid New Products: Use familiar products to prevent any reactions before your wedding day. Clear Communication: Discuss your makeup preferences and any concerns with our artist during the consultation. Additional Beauty Services by Ladyfair Beyond bridal makeup, Ladyfair offers a variety of beauty services in Paroo: Engagement and Reception Makeup: Customized looks for all pre-wedding events. Party Makeup: Perfect for birthdays, anniversaries, and special occasions. Everyday Makeup: Enhance your daily look with our expert makeup services. Special Occasion Makeup: Professional makeup for parties, celebrations, and formal events. The Future of Bridal Makeup in Paroo Ladyfair is dedicated to setting new standards in bridal beauty in Paroo with our innovative at-home services. As we continue to offer exceptional service, more brides are choosing Ladyfair as their preferred makeup provider. Q&A with Ladyfair’s Bridal Makeup Artist in Paroo Q1: What makes Ladyfair the best choice for bridal makeup in Paroo? A1: Ladyfair offers expert bridal makeup services at home, using high-quality products to ensure a flawless and long-lasting look. Q2: What are the prices for bridal makeup in Paroo? A2: Our bridal makeup packages start at ₹10,000 for basic makeup, ₹12,000 for HD makeup, and ₹18,000 for airbrush makeup. Q3: How do I book Ladyfair’s bridal makeup services in Paroo? A3: You can book our services by calling 7004721239. We also offer consultations and trial sessions to ensure you get the look you want. Q4: What bridal makeup styles does Ladyfair offer in Paroo? A4: Ladyfair offers traditional, HD, and airbrush bridal makeup to suit different preferences and needs. Q5: Are makeup trials available before my wedding? A5: Yes, we offer trial sessions so you can finalize your bridal look ahead of time. Q6: What products does Ladyfair use for bridal makeup? A6: We use professional-grade, high-quality makeup products that are safe for all skin types and ensure a flawless finish. Q7: What other services does Ladyfair provide in Paroo? A7: In addition to bridal makeup, we offer makeup for engagements, receptions, parties, and other special occasions. Ladyfair is your ultimate choice for professional, at-home bridal makeup services in Paroo, ensuring a flawless and stress-free experience on your special day.

Posted By: 24th November 2024
Bridal Makeup Artist in Marwan
Introduction In Marwan, Ladyfair is the premier choice for brides looking to achieve the perfect wedding day look with our professional at-home bridal makeup services. Whether you desire a traditional bridal look, an HD finish, or the flawless perfection of airbrush makeup, our expert makeup artist in Marwan ensures that you shine on your special day. Contact us today at 7004721239 to schedule your appointment. Why Choose Ladyfair for Bridal Makeup in Marwan Experienced Makeup Artist Our makeup artist in Marwan has years of experience in bridal makeup, creating personalized looks that complement your natural beauty and align with your style and preferences. Convenient At-Home Service Forget the stress of traveling to a salon. Ladyfair brings luxury beauty treatments directly to your doorstep with our at-home bridal makeup services, offering a truly personalized experience. Premium Makeup Products We use only high-quality, professional-grade makeup products to ensure a flawless, long-lasting look that remains perfect throughout your big day. Bridal Makeup Pricing in Marwan Our bridal makeup services in Marwan are tailored to fit different styles and budgets: Basic Bridal Makeup: ₹10,000 HD Bridal Makeup: ₹12,000 Airbrush Bridal Makeup: ₹18,000 For engagement and reception makeup: Basic Engagement/Reception Makeup: ₹6,000 HD Engagement/Reception Makeup: ₹8,000 Airbrush Engagement/Reception Makeup: ₹12,000 For parties: Basic Party Makeup: ₹2,500 HD Party Makeup: ₹3,500 Popular Bridal Makeup Styles in Marwan Traditional Bridal Makeup Our traditional bridal makeup in Marwan incorporates bold colors and intricate detailing to complement your wedding attire, creating an elegant and timeless look. HD Bridal Makeup For a high-definition finish that looks flawless both in photos and in person, HD bridal makeup is the perfect choice for brides who want a picture-perfect appearance all day. Airbrush Bridal Makeup Our airbrush makeup offers a lightweight, full-coverage finish that lasts all day, giving you a smooth and natural look while ensuring long-lasting perfection. How to Book Your Bridal Makeup with Ladyfair in Marwan Initial Contact: Call us at 7004721239 to discuss your makeup needs and schedule your appointment. Consultation Session: Meet with our makeup artist to discuss your wedding look, review your attire, and plan the perfect makeup style. Makeup Trial: We offer trial sessions to help you preview your bridal makeup look and make any adjustments. Wedding Day Makeup: On your wedding day, our makeup artist will arrive at your location in Marwan to provide flawless, hassle-free makeup service. Testimonials from Brides in Marwan Priya R., Marwan: "Ladyfair provided amazing service on my wedding day. The airbrush makeup looked flawless and lasted all day." Ritu K., Marwan: "I loved the HD makeup! It was perfect for my photos, and the at-home service was so convenient." Sneha S., Marwan: "My traditional bridal makeup was exactly what I wanted, and Ladyfair made the entire process stress-free." Preparing for Your Bridal Makeup Session To get the best results for your bridal makeup: Stay Hydrated: Keep your skin looking fresh by drinking plenty of water. Consistent Skincare: Stick to your regular skincare routine to maintain healthy, glowing skin. Avoid New Products: Use familiar products to prevent any reactions before your wedding day. Clear Communication: Discuss your makeup preferences and any concerns with our artist during the consultation. Additional Beauty Services by Ladyfair Beyond bridal makeup, Ladyfair offers a variety of beauty services in Marwan: Engagement and Reception Makeup: Customized looks for all pre-wedding events. Party Makeup: Perfect for birthdays, anniversaries, and special occasions. Everyday Makeup: Enhance your daily look with our expert makeup services. Special Occasion Makeup: Professional makeup for parties, celebrations, and formal events. The Future of Bridal Makeup in Marwan Ladyfair is dedicated to setting new standards in bridal beauty in Marwan with our innovative at-home services. As we continue to offer exceptional service, more brides are choosing Ladyfair as their preferred makeup provider. Q&A with Ladyfair’s Bridal Makeup Artist in Marwan Q1: What makes Ladyfair the best choice for bridal makeup in Marwan? A1: Ladyfair offers expert bridal makeup services at home, using high-quality products to ensure a flawless and long-lasting look. Q2: What are the prices for bridal makeup in Marwan? A2: Our bridal makeup packages start at ₹10,000 for basic makeup, ₹12,000 for HD makeup, and ₹18,000 for airbrush makeup. Q3: How do I book Ladyfair’s bridal makeup services in Marwan? A3: You can book our services by calling 7004721239. We also offer consultations and trial sessions to ensure you get the look you want. Q4: What bridal makeup styles does Ladyfair offer in Marwan? A4: Ladyfair offers traditional, HD, and airbrush bridal makeup to suit different preferences and needs. Q5: Are makeup trials available before my wedding? A5: Yes, we offer trial sessions so you can finalize your bridal look ahead of time. Q6: What products does Ladyfair use for bridal makeup? A6: We use professional-grade, high-quality makeup products that are safe for all skin types and ensure a flawless finish. Q7: What other services does Ladyfair provide in Marwan? A7: In addition to bridal makeup, we offer makeup for engagements, receptions, parties, and other special occasions. Ladyfair is your ultimate choice for professional, at-home bridal makeup services in Marwan, ensuring a flawless and stress-free experience on your special day.

Posted By: 24th November 2024
Bridal Makeup Artist in Kurhani
Introduction In Kurhani, Ladyfair is the premier choice for brides looking to achieve the perfect wedding day look with our professional at-home bridal makeup services. Whether you desire a traditional bridal look, an HD finish, or the flawless perfection of airbrush makeup, our expert makeup artist in Kurhani ensures that you shine on your special day. Contact us today at 7004721239 to schedule your appointment. Why Choose Ladyfair for Bridal Makeup in Kurhani Experienced Makeup Artist Our makeup artist in Kurhani has years of experience in bridal makeup, creating personalized looks that complement your natural beauty and align with your style and preferences. Convenient At-Home Service Forget the stress of traveling to a salon. Ladyfair brings luxury beauty treatments directly to your doorstep with our at-home bridal makeup services, offering a truly personalized experience. Premium Makeup Products We use only high-quality, professional-grade makeup products to ensure a flawless, long-lasting look that remains perfect throughout your big day. Bridal Makeup Pricing in Kurhani Our bridal makeup services in Kurhani are tailored to fit different styles and budgets: Basic Bridal Makeup: ₹10,000 HD Bridal Makeup: ₹12,000 Airbrush Bridal Makeup: ₹18,000 For engagement and reception makeup: Basic Engagement/Reception Makeup: ₹6,000 HD Engagement/Reception Makeup: ₹8,000 Airbrush Engagement/Reception Makeup: ₹12,000 For parties: Basic Party Makeup: ₹2,500 HD Party Makeup: ₹3,500 Popular Bridal Makeup Styles in Kurhani Traditional Bridal Makeup Our traditional bridal makeup in Kurhani incorporates bold colors and intricate detailing to complement your wedding attire, creating an elegant and timeless look. HD Bridal Makeup For a high-definition finish that looks flawless both in photos and in person, HD bridal makeup is the perfect choice for brides who want a picture-perfect appearance all day. Airbrush Bridal Makeup Our airbrush makeup offers a lightweight, full-coverage finish that lasts all day, giving you a smooth and natural look while ensuring long-lasting perfection. How to Book Your Bridal Makeup with Ladyfair in Kurhani Initial Contact: Call us at 7004721239 to discuss your makeup needs and schedule your appointment. Consultation Session: Meet with our makeup artist to discuss your wedding look, review your attire, and plan the perfect makeup style. Makeup Trial: We offer trial sessions to help you preview your bridal makeup look and make any adjustments. Wedding Day Makeup: On your wedding day, our makeup artist will arrive at your location in Kurhani to provide flawless, hassle-free makeup service. Testimonials from Brides in Kurhani Priya R., Kurhani: "Ladyfair provided amazing service on my wedding day. The airbrush makeup looked flawless and lasted all day." Ritu K., Kurhani: "I loved the HD makeup! It was perfect for my photos, and the at-home service was so convenient." Sneha S., Kurhani: "My traditional bridal makeup was exactly what I wanted, and Ladyfair made the entire process stress-free." Preparing for Your Bridal Makeup Session To get the best results for your bridal makeup: Stay Hydrated: Keep your skin looking fresh by drinking plenty of water. Consistent Skincare: Stick to your regular skincare routine to maintain healthy, glowing skin. Avoid New Products: Use familiar products to prevent any reactions before your wedding day. Clear Communication: Discuss your makeup preferences and any concerns with our artist during the consultation. Additional Beauty Services by Ladyfair Beyond bridal makeup, Ladyfair offers a variety of beauty services in Kurhani: Engagement and Reception Makeup: Customized looks for all pre-wedding events. Party Makeup: Perfect for birthdays, anniversaries, and special occasions. Everyday Makeup: Enhance your daily look with our expert makeup services. Special Occasion Makeup: Professional makeup for parties, celebrations, and formal events. The Future of Bridal Makeup in Kurhani Ladyfair is dedicated to setting new standards in bridal beauty in Kurhani with our innovative at-home services. As we continue to offer exceptional service, more brides are choosing Ladyfair as their preferred makeup provider. Q&A with Ladyfair’s Bridal Makeup Artist in Kurhani Q1: What makes Ladyfair the best choice for bridal makeup in Kurhani? A1: Ladyfair offers expert bridal makeup services at home, using high-quality products to ensure a flawless and long-lasting look. Q2: What are the prices for bridal makeup in Kurhani? A2: Our bridal makeup packages start at ₹10,000 for basic makeup, ₹12,000 for HD makeup, and ₹18,000 for airbrush makeup. Q3: How do I book Ladyfair’s bridal makeup services in Kurhani? A3: You can book our services by calling 7004721239. We also offer consultations and trial sessions to ensure you get the look you want. Q4: What bridal makeup styles does Ladyfair offer in Kurhani? A4: Ladyfair offers traditional, HD, and airbrush bridal makeup to suit different preferences and needs. Q5: Are makeup trials available before my wedding? A5: Yes, we offer trial sessions so you can finalize your bridal look ahead of time. Q6: What products does Ladyfair use for bridal makeup? A6: We use professional-grade, high-quality makeup products that are safe for all skin types and ensure a flawless finish. Q7: What other services does Ladyfair provide in Kurhani? A7: In addition to bridal makeup, we offer makeup for engagements, receptions, parties, and other special occasions. Ladyfair is your ultimate choice for professional, at-home bridal makeup services in Kurhani, ensuring a flawless and stress-free experience on your special day.

Posted By: 24th November 2024
Bridal Makeup Artist in Kanti
Introduction In Kanti, Ladyfair is the premier choice for brides looking to achieve the perfect wedding day look with our professional at-home bridal makeup services. Whether you desire a traditional bridal look, an HD finish, or the flawless perfection of airbrush makeup, our expert makeup artist in Kanti ensures that you shine on your special day. Contact us today at 7004721239 to schedule your appointment. Why Choose Ladyfair for Bridal Makeup in Kanti Experienced Makeup Artist Our makeup artist in Kanti has years of experience in bridal makeup, creating personalized looks that complement your natural beauty and align with your style and preferences. Convenient At-Home Service Forget the stress of traveling to a salon. Ladyfair brings luxury beauty treatments directly to your doorstep with our at-home bridal makeup services, offering a truly personalized experience. Premium Makeup Products We use only high-quality, professional-grade makeup products to ensure a flawless, long-lasting look that remains perfect throughout your big day. Bridal Makeup Pricing in Kanti Our bridal makeup services in Kanti are tailored to fit different styles and budgets: Basic Bridal Makeup: ₹10,000 HD Bridal Makeup: ₹12,000 Airbrush Bridal Makeup: ₹18,000 For engagement and reception makeup: Basic Engagement/Reception Makeup: ₹6,000 HD Engagement/Reception Makeup: ₹8,000 Airbrush Engagement/Reception Makeup: ₹12,000 For parties: Basic Party Makeup: ₹2,500 HD Party Makeup: ₹3,500 Popular Bridal Makeup Styles in Kanti Traditional Bridal Makeup Our traditional bridal makeup in Kanti incorporates bold colors and intricate detailing to complement your wedding attire, creating an elegant and timeless look. HD Bridal Makeup For a high-definition finish that looks flawless both in photos and in person, HD bridal makeup is the perfect choice for brides who want a picture-perfect appearance all day. Airbrush Bridal Makeup Our airbrush makeup offers a lightweight, full-coverage finish that lasts all day, giving you a smooth and natural look while ensuring long-lasting perfection. How to Book Your Bridal Makeup with Ladyfair in Kanti Initial Contact: Call us at 7004721239 to discuss your makeup needs and schedule your appointment. Consultation Session: Meet with our makeup artist to discuss your wedding look, review your attire, and plan the perfect makeup style. Makeup Trial: We offer trial sessions to help you preview your bridal makeup look and make any adjustments. Wedding Day Makeup: On your wedding day, our makeup artist will arrive at your location in Kanti to provide flawless, hassle-free makeup service. Testimonials from Brides in Kanti Priya R., Kanti: "Ladyfair provided amazing service on my wedding day. The airbrush makeup looked flawless and lasted all day." Ritu K., Kanti: "I loved the HD makeup! It was perfect for my photos, and the at-home service was so convenient." Sneha S., Kanti: "My traditional bridal makeup was exactly what I wanted, and Ladyfair made the entire process stress-free." Preparing for Your Bridal Makeup Session To get the best results for your bridal makeup: Stay Hydrated: Keep your skin looking fresh by drinking plenty of water. Consistent Skincare: Stick to your regular skincare routine to maintain healthy, glowing skin. Avoid New Products: Use familiar products to prevent any reactions before your wedding day. Clear Communication: Discuss your makeup preferences and any concerns with our artist during the consultation. Additional Beauty Services by Ladyfair Beyond bridal makeup, Ladyfair offers a variety of beauty services in Kanti: Engagement and Reception Makeup: Customized looks for all pre-wedding events. Party Makeup: Perfect for birthdays, anniversaries, and special occasions. Everyday Makeup: Enhance your daily look with our expert makeup services. Special Occasion Makeup: Professional makeup for parties, celebrations, and formal events. The Future of Bridal Makeup in Kanti Ladyfair is dedicated to setting new standards in bridal beauty in Kanti with our innovative at-home services. As we continue to offer exceptional service, more brides are choosing Ladyfair as their preferred makeup provider. Q&A with Ladyfair’s Bridal Makeup Artist in Kanti Q1: What makes Ladyfair the best choice for bridal makeup in Kanti? A1: Ladyfair offers expert bridal makeup services at home, using high-quality products to ensure a flawless and long-lasting look. Q2: What are the prices for bridal makeup in Kanti? A2: Our bridal makeup packages start at ₹10,000 for basic makeup, ₹12,000 for HD makeup, and ₹18,000 for airbrush makeup. Q3: How do I book Ladyfair’s bridal makeup services in Kanti? A3: You can book our services by calling 7004721239. We also offer consultations and trial sessions to ensure you get the look you want. Q4: What bridal makeup styles does Ladyfair offer in Kanti? A4: Ladyfair offers traditional, HD, and airbrush bridal makeup to suit different preferences and needs. Q5: Are makeup trials available before my wedding? A5: Yes, we offer trial sessions so you can finalize your bridal look ahead of time. Q6: What products does Ladyfair use for bridal makeup? A6: We use professional-grade, high-quality makeup products that are safe for all skin types and ensure a flawless finish. Q7: What other services does Ladyfair provide in Kanti? A7: In addition to bridal makeup, we offer makeup for engagements, receptions, parties, and other special occasions. Ladyfair is your ultimate choice for professional, at-home bridal makeup services in Kanti, ensuring a flawless and stress-free experience on your special day.

Posted By: 24th November 2024
Bridal Makeup Artist in Sakra
Introduction In Sakra, Ladyfair is the premier choice for brides looking to achieve the perfect wedding day look with our professional at-home bridal makeup services. Whether you desire a traditional bridal look, an HD finish, or the flawless perfection of airbrush makeup, our expert makeup artist in Sakra ensures that you shine on your special day. Contact us today at 7004721239 to schedule your appointment. Why Choose Ladyfair for Bridal Makeup in Sakra Experienced Makeup Artist Our makeup artist in Sakra has years of experience in bridal makeup, creating personalized looks that complement your natural beauty and align with your style and preferences. Convenient At-Home Service Forget the stress of traveling to a salon. Ladyfair brings luxury beauty treatments directly to your doorstep with our at-home bridal makeup services, offering a truly personalized experience. Premium Makeup Products We use only high-quality, professional-grade makeup products to ensure a flawless, long-lasting look that remains perfect throughout your big day. Bridal Makeup Pricing in Sakra Our bridal makeup services in Sakra are tailored to fit different styles and budgets: Basic Bridal Makeup: ₹10,000 HD Bridal Makeup: ₹12,000 Airbrush Bridal Makeup: ₹18,000 For engagement and reception makeup: Basic Engagement/Reception Makeup: ₹6,000 HD Engagement/Reception Makeup: ₹8,000 Airbrush Engagement/Reception Makeup: ₹12,000 For parties: Basic Party Makeup: ₹2,500 HD Party Makeup: ₹3,500 Popular Bridal Makeup Styles in Sakra Traditional Bridal Makeup Our traditional bridal makeup in Sakra incorporates bold colors and intricate detailing to complement your wedding attire, creating an elegant and timeless look. HD Bridal Makeup For a high-definition finish that looks flawless both in photos and in person, HD bridal makeup is the perfect choice for brides who want a picture-perfect appearance all day. Airbrush Bridal Makeup Our airbrush makeup offers a lightweight, full-coverage finish that lasts all day, giving you a smooth and natural look while ensuring long-lasting perfection. How to Book Your Bridal Makeup with Ladyfair in Sakra Initial Contact: Call us at 7004721239 to discuss your makeup needs and schedule your appointment. Consultation Session: Meet with our makeup artist to discuss your wedding look, review your attire, and plan the perfect makeup style. Makeup Trial: We offer trial sessions to help you preview your bridal makeup look and make any adjustments. Wedding Day Makeup: On your wedding day, our makeup artist will arrive at your location in Sakra to provide flawless, hassle-free makeup service. Testimonials from Brides in Sakra Priya R., Sakra: "Ladyfair provided amazing service on my wedding day. The airbrush makeup looked flawless and lasted all day." Ritu K., Sakra: "I loved the HD makeup! It was perfect for my photos, and the at-home service was so convenient." Sneha S., Sakra: "My traditional bridal makeup was exactly what I wanted, and Ladyfair made the entire process stress-free." Preparing for Your Bridal Makeup Session To get the best results for your bridal makeup: Stay Hydrated: Keep your skin looking fresh by drinking plenty of water. Consistent Skincare: Stick to your regular skincare routine to maintain healthy, glowing skin. Avoid New Products: Use familiar products to prevent any reactions before your wedding day. Clear Communication: Discuss your makeup preferences and any concerns with our artist during the consultation. Additional Beauty Services by Ladyfair Beyond bridal makeup, Ladyfair offers a variety of beauty services in Sakra: Engagement and Reception Makeup: Customized looks for all pre-wedding events. Party Makeup: Perfect for birthdays, anniversaries, and special occasions. Everyday Makeup: Enhance your daily look with our expert makeup services. Special Occasion Makeup: Professional makeup for parties, celebrations, and formal events. The Future of Bridal Makeup in Sakra Ladyfair is dedicated to setting new standards in bridal beauty in Sakra with our innovative at-home services. As we continue to offer exceptional service, more brides are choosing Ladyfair as their preferred makeup provider. Q&A with Ladyfair’s Bridal Makeup Artist in Sakra Q1: What makes Ladyfair the best choice for bridal makeup in Sakra? A1: Ladyfair offers expert bridal makeup services at home, using high-quality products to ensure a flawless and long-lasting look. Q2: What are the prices for bridal makeup in Sakra? A2: Our bridal makeup packages start at ₹10,000 for basic makeup, ₹12,000 for HD makeup, and ₹18,000 for airbrush makeup. Q3: How do I book Ladyfair’s bridal makeup services in Sakra? A3: You can book our services by calling 7004721239. We also offer consultations and trial sessions to ensure you get the look you want. Q4: What bridal makeup styles does Ladyfair offer in Sakra? A4: Ladyfair offers traditional, HD, and airbrush bridal makeup to suit different preferences and needs. Q5: Are makeup trials available before my wedding? A5: Yes, we offer trial sessions so you can finalize your bridal look ahead of time. Q6: What products does Ladyfair use for bridal makeup? A6: We use professional-grade, high-quality makeup products that are safe for all skin types and ensure a flawless finish. Q7: What other services does Ladyfair provide in Sakra? A7: In addition to bridal makeup, we offer makeup for engagements, receptions, parties, and other special occasions. Ladyfair is your ultimate choice for professional, at-home bridal makeup services in Sakra, ensuring a flawless and stress-free experience on your special day.

Posted By: 24th November 2024
Bridal Makeup Artist in Muraul
Introduction In Muraul, Ladyfair is the premier choice for brides looking to achieve the perfect wedding day look with our professional at-home bridal makeup services. Whether you desire a traditional bridal look, an HD finish, or the flawless perfection of airbrush makeup, our expert makeup artist in Muraul ensures that you shine on your special day. Contact us today at 7004721239 to schedule your appointment. Why Choose Ladyfair for Bridal Makeup in Muraul Experienced Makeup Artist Our makeup artist in Muraul has years of experience in bridal makeup, creating personalized looks that complement your natural beauty and align with your style and preferences. Convenient At-Home Service Forget the stress of traveling to a salon. Ladyfair brings luxury beauty treatments directly to your doorstep with our at-home bridal makeup services, offering a truly personalized experience. Premium Makeup Products We use only high-quality, professional-grade makeup products to ensure a flawless, long-lasting look that remains perfect throughout your big day. Bridal Makeup Pricing in Muraul Our bridal makeup services in Muraul are tailored to fit different styles and budgets: Basic Bridal Makeup: ₹10,000 HD Bridal Makeup: ₹12,000 Airbrush Bridal Makeup: ₹18,000 For engagement and reception makeup: Basic Engagement/Reception Makeup: ₹6,000 HD Engagement/Reception Makeup: ₹8,000 Airbrush Engagement/Reception Makeup: ₹12,000 For parties: Basic Party Makeup: ₹2,500 HD Party Makeup: ₹3,500 Popular Bridal Makeup Styles in Muraul Traditional Bridal Makeup Our traditional bridal makeup in Muraul incorporates bold colors and intricate detailing to complement your wedding attire, creating an elegant and timeless look. HD Bridal Makeup For a high-definition finish that looks flawless both in photos and in person, HD bridal makeup is the perfect choice for brides who want a picture-perfect appearance all day. Airbrush Bridal Makeup Our airbrush makeup offers a lightweight, full-coverage finish that lasts all day, giving you a smooth and natural look while ensuring long-lasting perfection. How to Book Your Bridal Makeup with Ladyfair in Muraul Initial Contact: Call us at 7004721239 to discuss your makeup needs and schedule your appointment. Consultation Session: Meet with our makeup artist to discuss your wedding look, review your attire, and plan the perfect makeup style. Makeup Trial: We offer trial sessions to help you preview your bridal makeup look and make any adjustments. Wedding Day Makeup: On your wedding day, our makeup artist will arrive at your location in Muraul to provide flawless, hassle-free makeup service. Testimonials from Brides in Muraul Priya R., Muraul: "Ladyfair provided amazing service on my wedding day. The airbrush makeup looked flawless and lasted all day." Ritu K., Muraul: "I loved the HD makeup! It was perfect for my photos, and the at-home service was so convenient." Sneha S., Muraul: "My traditional bridal makeup was exactly what I wanted, and Ladyfair made the entire process stress-free." Preparing for Your Bridal Makeup Session To get the best results for your bridal makeup: Stay Hydrated: Keep your skin looking fresh by drinking plenty of water. Consistent Skincare: Stick to your regular skincare routine to maintain healthy, glowing skin. Avoid New Products: Use familiar products to prevent any reactions before your wedding day. Clear Communication: Discuss your makeup preferences and any concerns with our artist during the consultation. Additional Beauty Services by Ladyfair Beyond bridal makeup, Ladyfair offers a variety of beauty services in Muraul: Engagement and Reception Makeup: Customized looks for all pre-wedding events. Party Makeup: Perfect for birthdays, anniversaries, and special occasions. Everyday Makeup: Enhance your daily look with our expert makeup services. Special Occasion Makeup: Professional makeup for parties, celebrations, and formal events. The Future of Bridal Makeup in Muraul Ladyfair is dedicated to setting new standards in bridal beauty in Muraul with our innovative at-home services. As we continue to offer exceptional service, more brides are choosing Ladyfair as their preferred makeup provider. Q&A with Ladyfair’s Bridal Makeup Artist in Muraul Q1: What makes Ladyfair the best choice for bridal makeup in Muraul? A1: Ladyfair offers expert bridal makeup services at home, using high-quality products to ensure a flawless and long-lasting look. Q2: What are the prices for bridal makeup in Muraul? A2: Our bridal makeup packages start at ₹10,000 for basic makeup, ₹12,000 for HD makeup, and ₹18,000 for airbrush makeup. Q3: How do I book Ladyfair’s bridal makeup services in Muraul? A3: You can book our services by calling 7004721239. We also offer consultations and trial sessions to ensure you get the look you want. Q4: What bridal makeup styles does Ladyfair offer in Muraul? A4: Ladyfair offers traditional, HD, and airbrush bridal makeup to suit different preferences and needs. Q5: Are makeup trials available before my wedding? A5: Yes, we offer trial sessions so you can finalize your bridal look ahead of time. Q6: What products does Ladyfair use for bridal makeup? A6: We use professional-grade, high-quality makeup products that are safe for all skin types and ensure a flawless finish. Q7: What other services does Ladyfair provide in Muraul? A7: In addition to bridal makeup, we offer makeup for engagements, receptions, parties, and other special occasions. Ladyfair is your ultimate choice for professional, at-home bridal makeup services in Muraul, ensuring a flawless and stress-free experience on your special day.

Posted By: 24th November 2024
Bridal Makeup Artist in Minapur
Introduction In Minapur, Ladyfair is the premier choice for brides looking to achieve the perfect wedding day look with our professional at-home bridal makeup services. Whether you desire a traditional bridal look, an HD finish, or the flawless perfection of airbrush makeup, our expert makeup artist in Minapur ensures that you shine on your special day. Contact us today at 7004721239 to schedule your appointment. Why Choose Ladyfair for Bridal Makeup in Minapur Experienced Makeup Artist Our makeup artist in Minapur has years of experience in bridal makeup, creating personalized looks that complement your natural beauty and align with your style and preferences. Convenient At-Home Service Forget the stress of traveling to a salon. Ladyfair brings luxury beauty treatments directly to your doorstep with our at-home bridal makeup services, offering a truly personalized experience. Premium Makeup Products We use only high-quality, professional-grade makeup products to ensure a flawless, long-lasting look that remains perfect throughout your big day. Bridal Makeup Pricing in Minapur Our bridal makeup services in Minapur are tailored to fit different styles and budgets: Basic Bridal Makeup: ₹10,000 HD Bridal Makeup: ₹12,000 Airbrush Bridal Makeup: ₹18,000 For engagement and reception makeup: Basic Engagement/Reception Makeup: ₹6,000 HD Engagement/Reception Makeup: ₹8,000 Airbrush Engagement/Reception Makeup: ₹12,000 For parties: Basic Party Makeup: ₹2,500 HD Party Makeup: ₹3,500 Popular Bridal Makeup Styles in Minapur Traditional Bridal Makeup Our traditional bridal makeup in Minapur incorporates bold colors and intricate detailing to complement your wedding attire, creating an elegant and timeless look. HD Bridal Makeup For a high-definition finish that looks flawless both in photos and in person, HD bridal makeup is the perfect choice for brides who want a picture-perfect appearance all day. Airbrush Bridal Makeup Our airbrush makeup offers a lightweight, full-coverage finish that lasts all day, giving you a smooth and natural look while ensuring long-lasting perfection. How to Book Your Bridal Makeup with Ladyfair in Minapur Initial Contact: Call us at 7004721239 to discuss your makeup needs and schedule your appointment. Consultation Session: Meet with our makeup artist to discuss your wedding look, review your attire, and plan the perfect makeup style. Makeup Trial: We offer trial sessions to help you preview your bridal makeup look and make any adjustments. Wedding Day Makeup: On your wedding day, our makeup artist will arrive at your location in Minapur to provide flawless, hassle-free makeup service. Testimonials from Brides in Minapur Priya R., Minapur: "Ladyfair provided amazing service on my wedding day. The airbrush makeup looked flawless and lasted all day." Ritu K., Minapur: "I loved the HD makeup! It was perfect for my photos, and the at-home service was so convenient." Sneha S., Minapur: "My traditional bridal makeup was exactly what I wanted, and Ladyfair made the entire process stress-free." Preparing for Your Bridal Makeup Session To get the best results for your bridal makeup: Stay Hydrated: Keep your skin looking fresh by drinking plenty of water. Consistent Skincare: Stick to your regular skincare routine to maintain healthy, glowing skin. Avoid New Products: Use familiar products to prevent any reactions before your wedding day. Clear Communication: Discuss your makeup preferences and any concerns with our artist during the consultation. Additional Beauty Services by Ladyfair Beyond bridal makeup, Ladyfair offers a variety of beauty services in Minapur: Engagement and Reception Makeup: Customized looks for all pre-wedding events. Party Makeup: Perfect for birthdays, anniversaries, and special occasions. Everyday Makeup: Enhance your daily look with our expert makeup services. Special Occasion Makeup: Professional makeup for parties, celebrations, and formal events. The Future of Bridal Makeup in Minapur Ladyfair is dedicated to setting new standards in bridal beauty in Minapur with our innovative at-home services. As we continue to offer exceptional service, more brides are choosing Ladyfair as their preferred makeup provider. Q&A with Ladyfair’s Bridal Makeup Artist in Minapur Q1: What makes Ladyfair the best choice for bridal makeup in Minapur? A1: Ladyfair offers expert bridal makeup services at home, using high-quality products to ensure a flawless and long-lasting look. Q2: What are the prices for bridal makeup in Minapur? A2: Our bridal makeup packages start at ₹10,000 for basic makeup, ₹12,000 for HD makeup, and ₹18,000 for airbrush makeup. Q3: How do I book Ladyfair’s bridal makeup services in Minapur? A3: You can book our services by calling 7004721239. We also offer consultations and trial sessions to ensure you get the look you want. Q4: What bridal makeup styles does Ladyfair offer in Minapur? A4: Ladyfair offers traditional, HD, and airbrush bridal makeup to suit different preferences and needs. Q5: Are makeup trials available before my wedding? A5: Yes, we offer trial sessions so you can finalize your bridal look ahead of time. Q6: What products does Ladyfair use for bridal makeup? A6: We use professional-grade, high-quality makeup products that are safe for all skin types and ensure a flawless finish. Q7: What other services does Ladyfair provide in Minapur? A7: In addition to bridal makeup, we offer makeup for engagements, receptions, parties, and other special occasions. Ladyfair is your ultimate choice for professional, at-home bridal makeup services in Minapur, ensuring a flawless and stress-free experience on your special day.

Posted By: 24th November 2024
Bridal Makeup Artist in Katra
Introduction In Katra, Ladyfair is the premier choice for brides looking to achieve the perfect wedding day look with our professional at-home bridal makeup services. Whether you desire a traditional bridal look, an HD finish, or the flawless perfection of airbrush makeup, our expert makeup artist in Katra ensures that you shine on your special day. Contact us today at 7004721239 to schedule your appointment. Why Choose Ladyfair for Bridal Makeup in Katra Experienced Makeup Artist Our makeup artist in Katra has years of experience in bridal makeup, creating personalized looks that complement your natural beauty and align with your style and preferences. Convenient At-Home Service Forget the stress of traveling to a salon. Ladyfair brings luxury beauty treatments directly to your doorstep with our at-home bridal makeup services, offering a truly personalized experience. Premium Makeup Products We use only high-quality, professional-grade makeup products to ensure a flawless, long-lasting look that remains perfect throughout your big day. Bridal Makeup Pricing in Katra Our bridal makeup services in Katra are tailored to fit different styles and budgets: Basic Bridal Makeup: ₹10,000 HD Bridal Makeup: ₹12,000 Airbrush Bridal Makeup: ₹18,000 For engagement and reception makeup: Basic Engagement/Reception Makeup: ₹6,000 HD Engagement/Reception Makeup: ₹8,000 Airbrush Engagement/Reception Makeup: ₹12,000 For parties: Basic Party Makeup: ₹2,500 HD Party Makeup: ₹3,500 Popular Bridal Makeup Styles in Katra Traditional Bridal Makeup Our traditional bridal makeup in Katra incorporates bold colors and intricate detailing to complement your wedding attire, creating an elegant and timeless look. HD Bridal Makeup For a high-definition finish that looks flawless both in photos and in person, HD bridal makeup is the perfect choice for brides who want a picture-perfect appearance all day. Airbrush Bridal Makeup Our airbrush makeup offers a lightweight, full-coverage finish that lasts all day, giving you a smooth and natural look while ensuring long-lasting perfection. How to Book Your Bridal Makeup with Ladyfair in Katra Initial Contact: Call us at 7004721239 to discuss your makeup needs and schedule your appointment. Consultation Session: Meet with our makeup artist to discuss your wedding look, review your attire, and plan the perfect makeup style. Makeup Trial: We offer trial sessions to help you preview your bridal makeup look and make any adjustments. Wedding Day Makeup: On your wedding day, our makeup artist will arrive at your location in Katra to provide flawless, hassle-free makeup service. Testimonials from Brides in Katra Priya R., Katra: "Ladyfair provided amazing service on my wedding day. The airbrush makeup looked flawless and lasted all day." Ritu K., Katra: "I loved the HD makeup! It was perfect for my photos, and the at-home service was so convenient." Sneha S., Katra: "My traditional bridal makeup was exactly what I wanted, and Ladyfair made the entire process stress-free." Preparing for Your Bridal Makeup Session To get the best results for your bridal makeup: Stay Hydrated: Keep your skin looking fresh by drinking plenty of water. Consistent Skincare: Stick to your regular skincare routine to maintain healthy, glowing skin. Avoid New Products: Use familiar products to prevent any reactions before your wedding day. Clear Communication: Discuss your makeup preferences and any concerns with our artist during the consultation. Additional Beauty Services by Ladyfair Beyond bridal makeup, Ladyfair offers a variety of beauty services in Katra: Engagement and Reception Makeup: Customized looks for all pre-wedding events. Party Makeup: Perfect for birthdays, anniversaries, and special occasions. Everyday Makeup: Enhance your daily look with our expert makeup services. Special Occasion Makeup: Professional makeup for parties, celebrations, and formal events. The Future of Bridal Makeup in Katra Ladyfair is dedicated to setting new standards in bridal beauty in Katra with our innovative at-home services. As we continue to offer exceptional service, more brides are choosing Ladyfair as their preferred makeup provider. Q&A with Ladyfair’s Bridal Makeup Artist in Katra Q1: What makes Ladyfair the best choice for bridal makeup in Katra? A1: Ladyfair offers expert bridal makeup services at home, using high-quality products to ensure a flawless and long-lasting look. Q2: What are the prices for bridal makeup in Katra? A2: Our bridal makeup packages start at ₹10,000 for basic makeup, ₹12,000 for HD makeup, and ₹18,000 for airbrush makeup. Q3: How do I book Ladyfair’s bridal makeup services in Katra? A3: You can book our services by calling 7004721239. We also offer consultations and trial sessions to ensure you get the look you want. Q4: What bridal makeup styles does Ladyfair offer in Katra? A4: Ladyfair offers traditional, HD, and airbrush bridal makeup to suit different preferences and needs. Q5: Are makeup trials available before my wedding? A5: Yes, we offer trial sessions so you can finalize your bridal look ahead of time. Q6: What products does Ladyfair use for bridal makeup? A6: We use professional-grade, high-quality makeup products that are safe for all skin types and ensure a flawless finish. Q7: What other services does Ladyfair provide in Katra? A7: In addition to bridal makeup, we offer makeup for engagements, receptions, parties, and other special occasions. Ladyfair is your ultimate choice for professional, at-home bridal makeup services in Katra, ensuring a flawless and stress-free experience on your special day.

Posted By: 24th November 2024
Bridal Makeup Artist in Mushahari
Introduction In Mushahari, Ladyfair is the premier choice for brides looking to achieve the perfect wedding day look with our professional at-home bridal makeup services. Whether you desire a traditional bridal look, an HD finish, or the flawless perfection of airbrush makeup, our expert makeup artist in Mushahari ensures that you shine on your special day. Contact us today at 7004721239 to schedule your appointment. Why Choose Ladyfair for Bridal Makeup in Mushahari Experienced Makeup Artist Our makeup artist in Mushahari has years of experience in bridal makeup, creating personalized looks that complement your natural beauty and align with your style and preferences. Convenient At-Home Service Forget the stress of traveling to a salon. Ladyfair brings luxury beauty treatments directly to your doorstep with our at-home bridal makeup services, offering a truly personalized experience. Premium Makeup Products We use only high-quality, professional-grade makeup products to ensure a flawless, long-lasting look that remains perfect throughout your big day. Bridal Makeup Pricing in Mushahari Our bridal makeup services in Mushahari are tailored to fit different styles and budgets: Basic Bridal Makeup: ₹10,000 HD Bridal Makeup: ₹12,000 Airbrush Bridal Makeup: ₹18,000 For engagement and reception makeup: Basic Engagement/Reception Makeup: ₹6,000 HD Engagement/Reception Makeup: ₹8,000 Airbrush Engagement/Reception Makeup: ₹12,000 For parties: Basic Party Makeup: ₹2,500 HD Party Makeup: ₹3,500 Popular Bridal Makeup Styles in Mushahari Traditional Bridal Makeup Our traditional bridal makeup in Mushahari incorporates bold colors and intricate detailing to complement your wedding attire, creating an elegant and timeless look. HD Bridal Makeup For a high-definition finish that looks flawless both in photos and in person, HD bridal makeup is the perfect choice for brides who want a picture-perfect appearance all day. Airbrush Bridal Makeup Our airbrush makeup offers a lightweight, full-coverage finish that lasts all day, giving you a smooth and natural look while ensuring long-lasting perfection. How to Book Your Bridal Makeup with Ladyfair in Mushahari Initial Contact: Call us at 7004721239 to discuss your makeup needs and schedule your appointment. Consultation Session: Meet with our makeup artist to discuss your wedding look, review your attire, and plan the perfect makeup style. Makeup Trial: We offer trial sessions to help you preview your bridal makeup look and make any adjustments. Wedding Day Makeup: On your wedding day, our makeup artist will arrive at your location in Mushahari to provide flawless, hassle-free makeup service. Testimonials from Brides in Mushahari Priya R., Mushahari: "Ladyfair provided amazing service on my wedding day. The airbrush makeup looked flawless and lasted all day." Ritu K., Mushahari: "I loved the HD makeup! It was perfect for my photos, and the at-home service was so convenient." Sneha S., Mushahari: "My traditional bridal makeup was exactly what I wanted, and Ladyfair made the entire process stress-free." Preparing for Your Bridal Makeup Session To get the best results for your bridal makeup: Stay Hydrated: Keep your skin looking fresh by drinking plenty of water. Consistent Skincare: Stick to your regular skincare routine to maintain healthy, glowing skin. Avoid New Products: Use familiar products to prevent any reactions before your wedding day. Clear Communication: Discuss your makeup preferences and any concerns with our artist during the consultation. Additional Beauty Services by Ladyfair Beyond bridal makeup, Ladyfair offers a variety of beauty services in Mushahari: Engagement and Reception Makeup: Customized looks for all pre-wedding events. Party Makeup: Perfect for birthdays, anniversaries, and special occasions. Everyday Makeup: Enhance your daily look with our expert makeup services. Special Occasion Makeup: Professional makeup for parties, celebrations, and formal events. The Future of Bridal Makeup in Mushahari Ladyfair is dedicated to setting new standards in bridal beauty in Mushahari with our innovative at-home services. As we continue to offer exceptional service, more brides are choosing Ladyfair as their preferred makeup provider. Q&A with Ladyfair’s Bridal Makeup Artist in Mushahari Q1: What makes Ladyfair the best choice for bridal makeup in Mushahari? A1: Ladyfair offers expert bridal makeup services at home, using high-quality products to ensure a flawless and long-lasting look. Q2: What are the prices for bridal makeup in Mushahari? A2: Our bridal makeup packages start at ₹10,000 for basic makeup, ₹12,000 for HD makeup, and ₹18,000 for airbrush makeup. Q3: How do I book Ladyfair’s bridal makeup services in Mushahari? A3: You can book our services by calling 7004721239. We also offer consultations and trial sessions to ensure you get the look you want. Q4: What bridal makeup styles does Ladyfair offer in Mushahari? A4: Ladyfair offers traditional, HD, and airbrush bridal makeup to suit different preferences and needs. Q5: Are makeup trials available before my wedding? A5: Yes, we offer trial sessions so you can finalize your bridal look ahead of time. Q6: What products does Ladyfair use for bridal makeup? A6: We use professional-grade, high-quality makeup products that are safe for all skin types and ensure a flawless finish. Q7: What other services does Ladyfair provide in Mushahari? A7: In addition to bridal makeup, we offer makeup for engagements, receptions, parties, and other special occasions. Ladyfair is your ultimate choice for professional, at-home bridal makeup services in Mushahari, ensuring a flawless and stress-free experience on your special day.

Posted By: 24th November 2024
Bridal Makeup Artist in Gaighat
Introduction In Gaighat, Ladyfair is the premier choice for brides looking to achieve the perfect wedding day look with our professional at-home bridal makeup services. Whether you desire a traditional bridal look, an HD finish, or the flawless perfection of airbrush makeup, our expert makeup artist in Gaighat ensures that you shine on your special day. Contact us today at 7004721239 to schedule your appointment. Why Choose Ladyfair for Bridal Makeup in Gaighat Experienced Makeup Artist Our makeup artist in Gaighat has years of experience in bridal makeup, creating personalized looks that complement your natural beauty and align with your style and preferences. Convenient At-Home Service Forget the stress of traveling to a salon. Ladyfair brings luxury beauty treatments directly to your doorstep with our at-home bridal makeup services, offering a truly personalized experience. Premium Makeup Products We use only high-quality, professional-grade makeup products to ensure a flawless, long-lasting look that remains perfect throughout your big day. Bridal Makeup Pricing in Gaighat Our bridal makeup services in Gaighat are tailored to fit different styles and budgets: Basic Bridal Makeup: ₹10,000 HD Bridal Makeup: ₹12,000 Airbrush Bridal Makeup: ₹18,000 For engagement and reception makeup: Basic Engagement/Reception Makeup: ₹6,000 HD Engagement/Reception Makeup: ₹8,000 Airbrush Engagement/Reception Makeup: ₹12,000 For parties: Basic Party Makeup: ₹2,500 HD Party Makeup: ₹3,500 Popular Bridal Makeup Styles in Gaighat Traditional Bridal Makeup Our traditional bridal makeup in Gaighat incorporates bold colors and intricate detailing to complement your wedding attire, creating an elegant and timeless look. HD Bridal Makeup For a high-definition finish that looks flawless both in photos and in person, HD bridal makeup is the perfect choice for brides who want a picture-perfect appearance all day. Airbrush Bridal Makeup Our airbrush makeup offers a lightweight, full-coverage finish that lasts all day, giving you a smooth and natural look while ensuring long-lasting perfection. How to Book Your Bridal Makeup with Ladyfair in Gaighat Initial Contact: Call us at 7004721239 to discuss your makeup needs and schedule your appointment. Consultation Session: Meet with our makeup artist to discuss your wedding look, review your attire, and plan the perfect makeup style. Makeup Trial: We offer trial sessions to help you preview your bridal makeup look and make any adjustments. Wedding Day Makeup: On your wedding day, our makeup artist will arrive at your location in Gaighat to provide flawless, hassle-free makeup service. Testimonials from Brides in Gaighat Priya R., Gaighat: "Ladyfair provided amazing service on my wedding day. The airbrush makeup looked flawless and lasted all day." Ritu K., Gaighat: "I loved the HD makeup! It was perfect for my photos, and the at-home service was so convenient." Sneha S., Gaighat: "My traditional bridal makeup was exactly what I wanted, and Ladyfair made the entire process stress-free." Preparing for Your Bridal Makeup Session To get the best results for your bridal makeup: Stay Hydrated: Keep your skin looking fresh by drinking plenty of water. Consistent Skincare: Stick to your regular skincare routine to maintain healthy, glowing skin. Avoid New Products: Use familiar products to prevent any reactions before your wedding day. Clear Communication: Discuss your makeup preferences and any concerns with our artist during the consultation. Additional Beauty Services by Ladyfair Beyond bridal makeup, Ladyfair offers a variety of beauty services in Gaighat: Engagement and Reception Makeup: Customized looks for all pre-wedding events. Party Makeup: Perfect for birthdays, anniversaries, and special occasions. Everyday Makeup: Enhance your daily look with our expert makeup services. Special Occasion Makeup: Professional makeup for parties, celebrations, and formal events. The Future of Bridal Makeup in Gaighat Ladyfair is dedicated to setting new standards in bridal beauty in Gaighat with our innovative at-home services. As we continue to offer exceptional service, more brides are choosing Ladyfair as their preferred makeup provider. Q&A with Ladyfair’s Bridal Makeup Artist in Gaighat Q1: What makes Ladyfair the best choice for bridal makeup in Gaighat? A1: Ladyfair offers expert bridal makeup services at home, using high-quality products to ensure a flawless and long-lasting look. Q2: What are the prices for bridal makeup in Gaighat? A2: Our bridal makeup packages start at ₹10,000 for basic makeup, ₹12,000 for HD makeup, and ₹18,000 for airbrush makeup. Q3: How do I book Ladyfair’s bridal makeup services in Gaighat? A3: You can book our services by calling 7004721239. We also offer consultations and trial sessions to ensure you get the look you want. Q4: What bridal makeup styles does Ladyfair offer in Gaighat? A4: Ladyfair offers traditional, HD, and airbrush bridal makeup to suit different preferences and needs. Q5: Are makeup trials available before my wedding? A5: Yes, we offer trial sessions so you can finalize your bridal look ahead of time. Q6: What products does Ladyfair use for bridal makeup? A6: We use professional-grade, high-quality makeup products that are safe for all skin types and ensure a flawless finish. Q7: What other services does Ladyfair provide in Gaighat? A7: In addition to bridal makeup, we offer makeup for engagements, receptions, parties, and other special occasions. Ladyfair is your ultimate choice for professional, at-home bridal makeup services in Gaighat, ensuring a flawless and stress-free experience on your special day.

Posted By: 24th November 2024
BEST BRIDAL MAKEUP ARTIST IN MASHRAK
BEST BRIDAL MAKEUP ARTIST IN MASHRAK Introduction Searching for the best bridal makeup services in Mashrak? Look no further than Ladyfair, your trusted partner for stunning bridal transformations. We offer at-home bridal makeup services in Mashrak, ensuring convenience and perfection for your big day. Call 7004721239 now to book your session with our experienced makeup artists and achieve the flawless look you've always dreamed of! Why Choose Ladyfair for Bridal Makeup in Mashrak 1. Skilled Makeup Professionals Our expert makeup artists specialize in creating personalized looks to enhance your natural beauty. 2. Hassle-Free At-Home Services Stay comfortable and stress-free as we bring the salon experience to your home in Mashrak. 3. Premium Products for a Radiant Finish We use top-quality, skin-friendly products to ensure a long-lasting, flawless look. Bridal Makeup Packages in Mashrak Our competitive and customizable packages include: Basic Bridal Makeup: ₹10,000 HD Bridal Makeup: ₹12,000 Airbrush Bridal Makeup: ₹18,000 Additional Services: Engagement Makeup (Basic): ₹6,000 Engagement Makeup (HD): ₹8,000 Engagement Makeup (Airbrush): ₹12,000 Party Makeup (Basic): ₹2,500 Party Makeup (HD): ₹3,500 Bridal Makeup Styles in Mashrak Traditional Bridal Makeup Celebrate your heritage with timeless elegance, featuring traditional makeup that enhances your features beautifully. HD Bridal Makeup Perfect for photography and videography, our HD makeup offers a flawless and camera-ready look. Airbrush Bridal Makeup Lightweight yet durable, our airbrush makeup ensures a natural and radiant finish for your wedding day. How to Book Bridal Makeup in Mashrak Call Us: Dial 7004721239 to secure your booking. Consultation: Share your preferences with our experienced team for a customized look. Trial Session: Opt for a trial session to finalize your bridal makeup style. Wedding Day Glam: Relax as we ensure you're the most radiant bride in Mashrak. Testimonials from Happy Brides in Mashrak Renu P., Mashrak: "Ladyfair transformed me into a dream bride! The HD makeup was just perfect for my photos." Simran T., Mashrak: "Highly recommend their at-home service. The team is punctual and professional!" Anjali K., Mashrak: "The airbrush makeup was flawless and stayed intact the entire day. Thank you, Ladyfair!" Bridal Makeup Tips for Brides in Mashrak Skin Preparation: Start your skincare routine months in advance for a radiant glow. Stay Hydrated: Drinking water is key to fresh and healthy skin. Opt for Trials: Book a trial session to finalize your look and avoid last-minute stress. Relax: Trust Ladyfair to handle your bridal beauty needs with expertise. Additional Makeup Services in Mashrak Engagement Makeup Reception Makeup Party Makeup Festival Makeup Why Ladyfair is the Best Choice for Bridal Makeup in Mashrak At Ladyfair, we pride ourselves on delivering unmatched bridal makeup services in Mashrak. Our attention to detail, high-quality products, and personalized approach ensure every bride looks and feels her best on her special day. Frequently Asked Questions Q1: Do you offer bridal makeup at home in Mashrak? A1: Yes, we provide convenient at-home bridal makeup services in Mashrak. Q2: What are your bridal makeup package prices? A2: Our packages start at ₹10,000 for Basic Bridal Makeup. Q3: Can I book a trial session? A3: Absolutely! We encourage trials to finalize your perfect wedding look. Q4: Do you offer makeup for other events? A4: Yes, we provide makeup services for engagements, parties, receptions, and more.

Posted By: 24th November 2024
BEST BRIDAL MAKEUP ARTIST IN NAGRA
BEST BRIDAL MAKEUP ARTIST IN NAGRA Introduction Looking for premium bridal makeup services in Nagra? Your search ends with Ladyfair, the go-to choice for brides seeking a flawless, stunning look. We offer convenient at-home bridal makeup services, ensuring you feel beautiful and stress-free on your big day. Call 7004721239 now to book your session with our expert makeup artists. Why Choose Ladyfair for Bridal Makeup in Nagra 1. Experienced Makeup Artists Our professional team specializes in creating customized looks that suit your style and personality. 2. At-Home Services Skip the salon visits! We bring our expertise directly to your home in Nagra. 3. High-Quality Products We use top-tier, skin-safe products to ensure a long-lasting and radiant finish. Bridal Makeup Packages in Nagra Explore our competitive and flexible bridal makeup packages: Basic Bridal Makeup: ₹10,000 HD Bridal Makeup: ₹12,000 Airbrush Bridal Makeup: ₹18,000 Additional Services: Engagement Makeup (Basic): ₹6,000 Engagement Makeup (HD): ₹8,000 Engagement Makeup (Airbrush): ₹12,000 Party Makeup (Basic): ₹2,500 Party Makeup (HD): ₹3,500 Bridal Makeup Styles in Nagra Traditional Bridal Makeup Embrace timeless elegance with a classic look that enhances your natural beauty. HD Bridal Makeup Achieve a picture-perfect finish, ideal for photography and videography. Airbrush Bridal Makeup Experience a lightweight, breathable, and long-lasting application for a flawless appearance. How to Book Bridal Makeup in Nagra Contact Us: Call 7004721239 to book your slot. Consultation: Share your preferences and requirements with our expert team. Trial Session: Opt for a trial to finalize your wedding-day look. Wedding Day: Sit back as we make you look stunning on your special day. Testimonials from Nagra Brides Ritika S., Nagra: "Ladyfair gave me the perfect bridal look! Their team is highly professional and talented." Pooja T., Nagra: "The HD makeup was flawless and stayed perfect all day. Thank you, Ladyfair!" Sneha J., Nagra: "I loved the at-home service—super convenient and stress-free. Highly recommend Ladyfair!" Bridal Makeup Tips for Brides in Nagra Start Early: Begin your skincare routine months before the wedding for glowing skin. Hydrate: Drink plenty of water to keep your skin fresh and hydrated. Trial Makeup: Always book a trial session to ensure your desired look. Trust the Experts: Let Ladyfair take care of your bridal beauty needs. Additional Makeup Services Available in Nagra Engagement Makeup Reception Makeup Party Makeup Festival Makeup Why Ladyfair is the Top Choice for Bridal Makeup in Nagra At Ladyfair, we are committed to making every bride feel special and confident. Our combination of professional expertise, high-quality products, and personalized attention ensures a memorable experience. Frequently Asked Questions Q1: Do you offer bridal makeup services at home in Nagra? A1: Yes, we provide professional at-home makeup services in Nagra for your convenience. Q2: What is the cost of your bridal makeup packages? A2: Our packages start from ₹10,000 for Basic Bridal Makeup. Q3: Can I book a trial session before my wedding? A3: Yes, we recommend trial sessions to finalize your bridal look. Q4: Do you provide makeup services for events other than weddings? A4: Absolutely! We also offer makeup for engagements, parties, and receptions.

Posted By: 24th November 2024
BEST BRIDAL MAKEUP ARTIST IN PANAPUR
BEST BRIDAL MAKEUP ARTIST IN PANAPUR Introduction Are you in Panapur and searching for the best bridal makeup services? Look no further than Ladyfair, where beauty meets perfection. We provide at-home bridal makeup services, ensuring you look radiant on your special day. Call 7004721239 to book your makeup session and experience professional artistry tailored just for you! Why Choose Ladyfair for Bridal Makeup in Panapur Expert Makeup Artists Our experienced team brings creativity and skill to craft the perfect bridal look, tailored to your preferences. Convenient At-Home Services Avoid the hassle of visiting a salon—we bring our professional services to your home in Panapur. Premium Products We use only high-quality, skin-friendly products to ensure a flawless and long-lasting finish. Bridal Makeup Packages in Panapur Choose from our wide range of makeup packages: Basic Bridal Makeup: ₹10,000 HD Bridal Makeup: ₹12,000 Airbrush Bridal Makeup: ₹18,000 Other Services: Engagement Makeup (Basic): ₹6,000 Engagement Makeup (HD): ₹8,000 Engagement Makeup (Airbrush): ₹12,000 Party Makeup (Basic): ₹2,500 Party Makeup (HD): ₹3,500 Bridal Makeup Styles Offered in Panapur Traditional Bridal Makeup A timeless look that reflects your cultural roots and enhances your natural beauty. HD Bridal Makeup Achieve a camera-ready look with a smooth, flawless finish, perfect for photographs. Airbrush Bridal Makeup Ideal for brides who want lightweight, long-lasting coverage that feels natural. How to Book Bridal Makeup in Panapur Contact Us: Call 7004721239 to schedule your session. Consultation: Discuss your desired look and preferences with our experts. Trial Session: Opt for a trial session to finalize your wedding-day look. Wedding Day: Relax while our team ensures you look stunning on your big day. Testimonials from Brides in Panapur Sunita K., Panapur: "Ladyfair's bridal makeup made me look and feel like a queen on my wedding day. Highly recommended!" Richa P., Panapur: "The HD makeup was flawless and stayed intact all day. Loved the experience!" Neha M., Panapur: "Excellent service, professional team, and amazing results. Thank you, Ladyfair!" Bridal Makeup Tips for Brides in Panapur Hydrate: Drink plenty of water to keep your skin glowing. Skincare Routine: Follow a skincare regimen leading up to your wedding. Trial Session: Book a makeup trial to avoid last-minute surprises. Relax: Trust our professionals to take care of your bridal look. Other Makeup Services Available in Panapur Engagement Makeup Reception Makeup Party Makeup Festival Makeup Why Ladyfair Stands Out in Panapur Ladyfair is a trusted name in bridal makeup, offering personalized services to make every bride feel special. With a commitment to excellence, we ensure that you shine on your big day with confidence and beauty. Frequently Asked Questions Q1: Do you provide at-home makeup services in Panapur? A1: Yes, our team offers professional at-home services for your convenience. Q2: What are your bridal makeup packages? A2: Our packages range from ₹10,000 for Basic Bridal Makeup to ₹18,000 for Airbrush Bridal Makeup. Q3: Can I book a trial session? A3: Absolutely! Call 7004721239 to schedule a trial. Q4: Do you offer other makeup services apart from bridal makeup? A4: Yes, we provide engagement, party, and reception makeup services. Blog Tags: Bridal Makeup Panapur, HD Bridal Makeup Panapur, Airbrush Makeup Panapur, Wedding Makeup Artist Panapur, At-Home Makeup Services Panapur, Engagement Makeup Panapur, Party Makeup Panapur Meta Title: Professional Bridal Makeup Services in Panapur – Ladyfair Meta Keywords: Bridal Makeup Panapur, Wedding Makeup Panapur, HD Bridal Makeup Panapur, Airbrush Makeup Panapur, Makeup Artist Panapur, At-Home Bridal Makeup Panapur Meta Description: Ladyfair offers professional bridal makeup services in Panapur, including traditional, HD, and airbrush styles. Call 7004721239 today to book your session and look stunning on your wedding day! 4o You said: write for nagra ChatGPT said: ChatGPT Introduction Looking for premium bridal makeup services in Nagra? Your search ends with Ladyfair, the go-to choice for brides seeking a flawless, stunning look. We offer convenient at-home bridal makeup services, ensuring you feel beautiful and stress-free on your big day. Call 7004721239 now to book your session with our expert makeup artists. Why Choose Ladyfair for Bridal Makeup in Nagra 1. Experienced Makeup Artists Our professional team specializes in creating customized looks that suit your style and personality. 2. At-Home Services Skip the salon visits! We bring our expertise directly to your home in Nagra. 3. High-Quality Products We use top-tier, skin-safe products to ensure a long-lasting and radiant finish. Bridal Makeup Packages in Nagra Explore our competitive and flexible bridal makeup packages: Basic Bridal Makeup: ₹10,000 HD Bridal Makeup: ₹12,000 Airbrush Bridal Makeup: ₹18,000 Additional Services: Engagement Makeup (Basic): ₹6,000 Engagement Makeup (HD): ₹8,000 Engagement Makeup (Airbrush): ₹12,000 Party Makeup (Basic): ₹2,500 Party Makeup (HD): ₹3,500 Bridal Makeup Styles in Nagra Traditional Bridal Makeup Embrace timeless elegance with a classic look that enhances your natural beauty. HD Bridal Makeup Achieve a picture-perfect finish, ideal for photography and videography. Airbrush Bridal Makeup Experience a lightweight, breathable, and long-lasting application for a flawless appearance. How to Book Bridal Makeup in Nagra Contact Us: Call 7004721239 to book your slot. Consultation: Share your preferences and requirements with our expert team. Trial Session: Opt for a trial to finalize your wedding-day look. Wedding Day: Sit back as we make you look stunning on your special day. Testimonials from Nagra Brides Ritika S., Nagra: "Ladyfair gave me the perfect bridal look! Their team is highly professional and talented." Pooja T., Nagra: "The HD makeup was flawless and stayed perfect all day. Thank you, Ladyfair!" Sneha J., Nagra: "I loved the at-home service—super convenient and stress-free. Highly recommend Ladyfair!" Bridal Makeup Tips for Brides in Nagra Start Early: Begin your skincare routine months before the wedding for glowing skin. Hydrate: Drink plenty of water to keep your skin fresh and hydrated. Trial Makeup: Always book a trial session to ensure your desired look. Trust the Experts: Let Ladyfair take care of your bridal beauty needs. Additional Makeup Services Available in Nagra Engagement Makeup Reception Makeup Party Makeup Festival Makeup Why Ladyfair is the Top Choice for Bridal Makeup in Nagra At Ladyfair, we are committed to making every bride feel special and confident. Our combination of professional expertise, high-quality products, and personalized attention ensures a memorable experience. Frequently Asked Questions Q1: Do you offer bridal makeup services at home in Nagra? A1: Yes, we provide professional at-home makeup services in Nagra for your convenience. Q2: What is the cost of your bridal makeup packages? A2: Our packages start from ₹10,000 for Basic Bridal Makeup. Q3: Can I book a trial session before my wedding? A3: Yes, we recommend trial sessions to finalize your bridal look. Q4: Do you provide makeup services for events other than weddings? A4: Absolutely! We also offer makeup for engagements, parties, and receptions.

Posted By: 24th November 2024
BEST BRIDAL MAKEUP ARTIST IN PARSA
BEST BRIDAL MAKEUP ARTIST IN PARSA Introduction Searching for expert bridal makeup services in Parsa? Ladyfair provides professional at-home makeup services to help you look stunning on your big day. With a team of skilled makeup artists, we specialize in creating beautiful bridal looks tailored to your style. Book your bridal makeup session today by calling 7004721239 and get ready to shine! Why Choose Ladyfair for Bridal Makeup in Parsa Experienced Makeup Artists Our highly trained artists bring years of expertise to give you the perfect bridal look that enhances your natural beauty. Convenient At-Home Service Skip the stress of visiting a salon—our team brings professional bridal makeup services right to your doorstep. High-Quality Products We use premium-quality products to ensure a flawless, long-lasting finish for your special day. Bridal Makeup Packages in Parsa Our makeup packages cater to different needs and budgets: Basic Bridal Makeup: ₹10,000 HD Bridal Makeup: ₹12,000 Airbrush Bridal Makeup: ₹18,000 Additional Services: Engagement Makeup (Basic): ₹6,000 Engagement Makeup (HD): ₹8,000 Engagement Makeup (Airbrush): ₹12,000 Party Makeup (Basic): ₹2,500 Party Makeup (HD): ₹3,500 Bridal Makeup Styles Offered in Parsa Traditional Bridal Makeup This style focuses on rich, vibrant colors and classic techniques to give you a timeless look. HD Bridal Makeup Perfect for photography, HD makeup creates a flawless, picture-perfect finish. Airbrush Bridal Makeup Lightweight and long-lasting, airbrush makeup is ideal for all-day wear, even in humid conditions. How to Book Bridal Makeup in Parsa Contact Us: Call 7004721239 to schedule your appointment. Consultation: Discuss your desired look and preferences with our makeup experts. Trial Session: Book a trial to finalize your look ahead of the big day. Wedding Day: Relax as our artists create your perfect bridal look at home. Testimonials from Parsa Brides Priya S., Parsa: "Ladyfair gave me the perfect bridal makeup. Their team made me feel confident and beautiful!" Meera T., Parsa: "The HD makeup was flawless and lasted all day. Thank you, Ladyfair, for an amazing experience." Ankita J., Parsa: "From consultation to the final look, everything was perfect. Highly recommend Ladyfair for bridal makeup!" Bridal Makeup Tips for Brides in Parsa Hydrate Your Skin: Start moisturizing and drinking plenty of water weeks before the wedding. Pre-Wedding Skincare: Follow a proper skincare routine for a glowing complexion. Plan Early: Secure your makeup appointment well in advance to avoid last-minute stress. Discuss Your Look: Communicate your preferences clearly during the consultation. Other Makeup Services Available in Parsa Engagement Makeup Reception Makeup Party Makeup Festival Makeup Why Ladyfair Stands Out in Parsa At Ladyfair, we prioritize customer satisfaction and use only high-quality products to create unique, stunning bridal looks. Our focus on providing personalized service ensures that every bride in Parsa feels confident and beautiful on her wedding day. Frequently Asked Questions Q1: What makes Ladyfair a trusted name for bridal makeup in Parsa? A1: Our skilled team, use of premium products, and at-home services make us a top choice. Q2: Can I book a makeup trial session? A2: Yes, we offer trial sessions. Call 7004721239 to book yours. Q3: What are your bridal makeup package prices? A3: Packages range from ₹10,000 for Basic Bridal Makeup to ₹18,000 for Airbrush Bridal Makeup. Q4: Do you provide other makeup services in Parsa? A4: Yes, we offer engagement, reception, party, and festival makeup services.

Posted By: 24th November 2024
BEST BRIDAL MAKEUP ARTIST IN MARHAURA
BEST BRIDAL MAKEUP ARTIST IN MARHAURA Introduction Looking for professional bridal makeup services in Marhaura? At Ladyfair, we provide expert at-home makeup services to make your special day even more beautiful. Our skilled makeup artists will work with you to create a flawless look that reflects your unique style. Call 7004721239 today to book your bridal makeup session in Marhaura! Why Ladyfair is the Best Choice for Bridal Makeup in Marhaura Skilled Makeup Artists Our experienced makeup artists specialize in creating stunning bridal looks that highlight your natural beauty and complement your wedding theme. Convenient Home Services Enjoy the luxury of having your makeup done in the comfort of your home. We bring all the makeup tools and products needed for a professional finish. Quality Products for a Long-Lasting Look We use high-end makeup products to ensure your bridal look lasts throughout the ceremony, reception, and even beyond! Bridal Makeup Packages in Marhaura We offer several bridal makeup packages that cater to every need: Basic Bridal Makeup: ₹10,000 HD Bridal Makeup: ₹12,000 Airbrush Bridal Makeup: ₹18,000 Additional Services: Engagement Makeup (Basic): ₹6,000 Engagement Makeup (HD): ₹8,000 Engagement Makeup (Airbrush): ₹12,000 Party Makeup (Basic): ₹2,500 Party Makeup (HD): ₹3,500 Bridal Makeup Styles Offered in Marhaura Traditional Bridal Makeup Perfect for brides who wish to embrace classic beauty with rich colors and traditional makeup styles. HD Bridal Makeup This makeup style uses high-definition products to create a flawless and camera-ready finish, ideal for photographs and videos. Airbrush Bridal Makeup Achieve a smooth, lightweight, and long-lasting look with airbrush makeup, perfect for humid weather or long ceremonies. How to Book Your Bridal Makeup in Marhaura Contact Us: Reach us at 7004721239 to book your appointment. Consultation: Discuss your preferred bridal look and style with our makeup artists. Trial Session: Book a trial to finalize your makeup look before the big day. Wedding Day: Relax while we take care of your bridal makeup in the comfort of your home. Testimonials from Brides in Marhaura Anjali R., Marhaura: "I was so happy with my bridal makeup from Ladyfair. The team did an amazing job, and I felt so beautiful!" Rani K., Marhaura: "The airbrush makeup was perfect for my wedding! It lasted all day, and I received so many compliments." Suman P., Marhaura: "I loved my HD bridal makeup. Ladyfair made sure I looked flawless for all the wedding photos!" Bridal Makeup Tips for Brides in Marhaura Prep Your Skin Early: Start a skincare routine months before the wedding to ensure radiant skin. Stay Hydrated: Drink plenty of water for healthy, glowing skin on your big day. Book Your Appointment Early: Secure your spot by booking Ladyfair as soon as possible. Communicate Your Look: Let your makeup artist know your vision, including colors and style preferences. Other Beauty Services Offered by Ladyfair in Marhaura Engagement Makeup Reception Makeup Party Makeup Casual Makeup The Future of Bridal Makeup in Marhaura Ladyfair stays on top of the latest bridal makeup trends while preserving timeless beauty. Our team is dedicated to providing the best bridal makeup experience, ensuring every bride in Marhaura looks and feels perfect on their wedding day. Frequently Asked Questions Q1: Why choose Ladyfair for bridal makeup in Marhaura? A1: We offer expert makeup artistry, premium products, and at-home services for a flawless bridal look. Q2: What are your bridal makeup package prices? A2: Our packages start from ₹10,000, with options for HD and airbrush makeup. Q3: Can I book a trial session? A3: Yes, we offer trial sessions. Call 7004721239 to schedule yours. Q4: Do you provide makeup services for events other than weddings? A4: Yes, we offer makeup for engagements, receptions, parties, and more.

Posted By: 24th November 2024
Bridal Makeup Artist Gaighat
Introduction In Gaighat, Ladyfair is the premier choice for brides looking to achieve the perfect wedding day look with our professional at-home bridal makeup services. Whether you desire a traditional bridal look, an HD finish, or the flawless perfection of airbrush makeup, our expert makeup artist in Gaighat ensures that you shine on your special day. Contact us today at 7004721239 to schedule your appointment. Why Choose Ladyfair for Bridal Makeup in Gaighat Experienced Makeup Artist Our makeup artist in Gaighat has years of experience in bridal makeup, creating personalized looks that complement your natural beauty and align with your style and preferences. Convenient At-Home Service Forget the stress of traveling to a salon. Ladyfair brings luxury beauty treatments directly to your doorstep with our at-home bridal makeup services, offering a truly personalized experience. Premium Makeup Products We use only high-quality, professional-grade makeup products to ensure a flawless, long-lasting look that remains perfect throughout your big day. Bridal Makeup Pricing in Gaighat Our bridal makeup services in Gaighat are tailored to fit different styles and budgets: Basic Bridal Makeup: ₹10,000 HD Bridal Makeup: ₹12,000 Airbrush Bridal Makeup: ₹18,000 For engagement and reception makeup: Basic Engagement/Reception Makeup: ₹6,000 HD Engagement/Reception Makeup: ₹8,000 Airbrush Engagement/Reception Makeup: ₹12,000 For parties: Basic Party Makeup: ₹2,500 HD Party Makeup: ₹3,500 Popular Bridal Makeup Styles in Gaighat Traditional Bridal Makeup Our traditional bridal makeup in Gaighat incorporates bold colors and intricate detailing to complement your wedding attire, creating an elegant and timeless look. HD Bridal Makeup For a high-definition finish that looks flawless both in photos and in person, HD bridal makeup is the perfect choice for brides who want a picture-perfect appearance all day. Airbrush Bridal Makeup Our airbrush makeup offers a lightweight, full-coverage finish that lasts all day, giving you a smooth and natural look while ensuring long-lasting perfection. How to Book Your Bridal Makeup with Ladyfair in Gaighat Initial Contact: Call us at 7004721239 to discuss your makeup needs and schedule your appointment. Consultation Session: Meet with our makeup artist to discuss your wedding look, review your attire, and plan the perfect makeup style. Makeup Trial: We offer trial sessions to help you preview your bridal makeup look and make any adjustments. Wedding Day Makeup: On your wedding day, our makeup artist will arrive at your location in Gaighat to provide flawless, hassle-free makeup service. Testimonials from Brides in Gaighat Priya R., Gaighat: "Ladyfair provided amazing service on my wedding day. The airbrush makeup looked flawless and lasted all day." Ritu K., Gaighat: "I loved the HD makeup! It was perfect for my photos, and the at-home service was so convenient." Sneha S., Gaighat: "My traditional bridal makeup was exactly what I wanted, and Ladyfair made the entire process stress-free." Preparing for Your Bridal Makeup Session To get the best results for your bridal makeup: Stay Hydrated: Keep your skin looking fresh by drinking plenty of water. Consistent Skincare: Stick to your regular skincare routine to maintain healthy, glowing skin. Avoid New Products: Use familiar products to prevent any reactions before your wedding day. Clear Communication: Discuss your makeup preferences and any concerns with our artist during the consultation. Additional Beauty Services by Ladyfair Beyond bridal makeup, Ladyfair offers a variety of beauty services in Gaighat: Engagement and Reception Makeup: Customized looks for all pre-wedding events. Party Makeup: Perfect for birthdays, anniversaries, and special occasions. Everyday Makeup: Enhance your daily look with our expert makeup services. Special Occasion Makeup: Professional makeup for parties, celebrations, and formal events. The Future of Bridal Makeup in Gaighat Ladyfair is dedicated to setting new standards in bridal beauty in Gaighat with our innovative at-home services. As we continue to offer exceptional service, more brides are choosing Ladyfair as their preferred makeup provider. Q&A with Ladyfair’s Bridal Makeup Artist in Gaighat Q1: What makes Ladyfair the best choice for bridal makeup in Gaighat? A1: Ladyfair offers expert bridal makeup services at home, using high-quality products to ensure a flawless and long-lasting look. Q2: What are the prices for bridal makeup in Gaighat? A2: Our bridal makeup packages start at ₹10,000 for basic makeup, ₹12,000 for HD makeup, and ₹18,000 for airbrush makeup. Q3: How do I book Ladyfair’s bridal makeup services in Gaighat? A3: You can book our services by calling 7004721239. We also offer consultations and trial sessions to ensure you get the look you want. Q4: What bridal makeup styles does Ladyfair offer in Gaighat? A4: Ladyfair offers traditional, HD, and airbrush bridal makeup to suit different preferences and needs. Q5: Are makeup trials available before my wedding? A5: Yes, we offer trial sessions so you can finalize your bridal look ahead of time. Q6: What products does Ladyfair use for bridal makeup? A6: We use professional-grade, high-quality makeup products that are safe for all skin types and ensure a flawless finish. Q7: What other services does Ladyfair provide in Gaighat? A7: In addition to bridal makeup, we offer makeup for engagements, receptions, parties, and other special occasions. Ladyfair is your ultimate choice for professional, at-home bridal makeup services in Gaighat, ensuring a flawless and stress-free experience on your special day.

Posted By: 24th November 2024
Bridal Makeup Artist in Bochahan
Introduction In Bochahan, Ladyfair is the premier choice for brides looking to achieve the perfect wedding day look with our professional at-home bridal makeup services. Whether you desire a traditional bridal look, an HD finish, or the flawless perfection of airbrush makeup, our expert makeup artist in Bochahan ensures that you shine on your special day. Contact us today at 7004721239 to schedule your appointment. Why Choose Ladyfair for Bridal Makeup in Bochahan Experienced Makeup Artist Our makeup artist in Bochahan has years of experience in bridal makeup, creating personalized looks that complement your natural beauty and align with your style and preferences. Convenient At-Home Service Forget the stress of traveling to a salon. Ladyfair brings luxury beauty treatments directly to your doorstep with our at-home bridal makeup services, offering a truly personalized experience. Premium Makeup Products We use only high-quality, professional-grade makeup products to ensure a flawless, long-lasting look that remains perfect throughout your big day. Bridal Makeup Pricing in Bochahan Our bridal makeup services in Bochahan are tailored to fit different styles and budgets: Basic Bridal Makeup: ₹10,000 HD Bridal Makeup: ₹12,000 Airbrush Bridal Makeup: ₹18,000 For engagement and reception makeup: Basic Engagement/Reception Makeup: ₹6,000 HD Engagement/Reception Makeup: ₹8,000 Airbrush Engagement/Reception Makeup: ₹12,000 For parties: Basic Party Makeup: ₹2,500 HD Party Makeup: ₹3,500 Popular Bridal Makeup Styles in Bochahan Traditional Bridal Makeup Our traditional bridal makeup in Bochahan incorporates bold colors and intricate detailing to complement your wedding attire, creating an elegant and timeless look. HD Bridal Makeup For a high-definition finish that looks flawless both in photos and in person, HD bridal makeup is the perfect choice for brides who want a picture-perfect appearance all day. Airbrush Bridal Makeup Our airbrush makeup offers a lightweight, full-coverage finish that lasts all day, giving you a smooth and natural look while ensuring long-lasting perfection. How to Book Your Bridal Makeup with Ladyfair in Bochahan Initial Contact: Call us at 7004721239 to discuss your makeup needs and schedule your appointment. Consultation Session: Meet with our makeup artist to discuss your wedding look, review your attire, and plan the perfect makeup style. Makeup Trial: We offer trial sessions to help you preview your bridal makeup look and make any adjustments. Wedding Day Makeup: On your wedding day, our makeup artist will arrive at your location in Bochahan to provide flawless, hassle-free makeup service. Testimonials from Brides in Bochahan Priya R., Bochahan: "Ladyfair provided amazing service on my wedding day. The airbrush makeup looked flawless and lasted all day." Ritu K., Bochahan: "I loved the HD makeup! It was perfect for my photos, and the at-home service was so convenient." Sneha S., Bochahan: "My traditional bridal makeup was exactly what I wanted, and Ladyfair made the entire process stress-free." Preparing for Your Bridal Makeup Session To get the best results for your bridal makeup: Stay Hydrated: Keep your skin looking fresh by drinking plenty of water. Consistent Skincare: Stick to your regular skincare routine to maintain healthy, glowing skin. Avoid New Products: Use familiar products to prevent any reactions before your wedding day. Clear Communication: Discuss your makeup preferences and any concerns with our artist during the consultation. Additional Beauty Services by Ladyfair Beyond bridal makeup, Ladyfair offers a variety of beauty services in Bochahan: Engagement and Reception Makeup: Customized looks for all pre-wedding events. Party Makeup: Perfect for birthdays, anniversaries, and special occasions. Everyday Makeup: Enhance your daily look with our expert makeup services. Special Occasion Makeup: Professional makeup for parties, celebrations, and formal events. The Future of Bridal Makeup in Bochahan Ladyfair is dedicated to setting new standards in bridal beauty in Bochahan with our innovative at-home services. As we continue to offer exceptional service, more brides are choosing Ladyfair as their preferred makeup provider. Q&A with Ladyfair’s Bridal Makeup Artist in Bochahan Q1: What makes Ladyfair the best choice for bridal makeup in Bochahan? A1: Ladyfair offers expert bridal makeup services at home, using high-quality products to ensure a flawless and long-lasting look. Q2: What are the prices for bridal makeup in Bochahan? A2: Our bridal makeup packages start at ₹10,000 for basic makeup, ₹12,000 for HD makeup, and ₹18,000 for airbrush makeup. Q3: How do I book Ladyfair’s bridal makeup services in Bochahan? A3: You can book our services by calling 7004721239. We also offer consultations and trial sessions to ensure you get the look you want. Q4: What bridal makeup styles does Ladyfair offer in Bochahan? A4: Ladyfair offers traditional, HD, and airbrush bridal makeup to suit different preferences and needs. Q5: Are makeup trials available before my wedding? A5: Yes, we offer trial sessions so you can finalize your bridal look ahead of time. Q6: What products does Ladyfair use for bridal makeup? A6: We use professional-grade, high-quality makeup products that are safe for all skin types and ensure a flawless finish. Q7: What other services does Ladyfair provide in Bochahan? A7: In addition to bridal makeup, we offer makeup for engagements, receptions, parties, and other special occasions. Ladyfair is your ultimate choice for professional, at-home bridal makeup services in Bochahan, ensuring a flawless and stress-free experience on your special day.

Posted By: 24th November 2024
Bridal Makeup Artist in Bandra
Introduction In Bandra, Ladyfair is the premier choice for brides looking to achieve the perfect wedding day look with our professional at-home bridal makeup services. Whether you desire a traditional bridal look, an HD finish, or the flawless perfection of airbrush makeup, our expert makeup artist in Bandra ensures that you shine on your special day. Contact us today at 7004721239 to schedule your appointment. Why Choose Ladyfair for Bridal Makeup in Bandra Experienced Makeup Artist Our makeup artist in Bandra has years of experience in bridal makeup, creating personalized looks that complement your natural beauty and align with your style and preferences. Convenient At-Home Service Forget the stress of traveling to a salon. Ladyfair brings luxury beauty treatments directly to your doorstep with our at-home bridal makeup services, offering a truly personalized experience. Premium Makeup Products We use only high-quality, professional-grade makeup products to ensure a flawless, long-lasting look that remains perfect throughout your big day. Bridal Makeup Pricing in Bandra Our bridal makeup services in Bandra are tailored to fit different styles and budgets: Basic Bridal Makeup: ₹10,000 HD Bridal Makeup: ₹12,000 Airbrush Bridal Makeup: ₹18,000 For engagement and reception makeup: Basic Engagement/Reception Makeup: ₹6,000 HD Engagement/Reception Makeup: ₹8,000 Airbrush Engagement/Reception Makeup: ₹12,000 For parties: Basic Party Makeup: ₹2,500 HD Party Makeup: ₹3,500 Popular Bridal Makeup Styles in Bandra Traditional Bridal Makeup Our traditional bridal makeup in Bandra incorporates bold colors and intricate detailing to complement your wedding attire, creating an elegant and timeless look. HD Bridal Makeup For a high-definition finish that looks flawless both in photos and in person, HD bridal makeup is the perfect choice for brides who want a picture-perfect appearance all day. Airbrush Bridal Makeup Our airbrush makeup offers a lightweight, full-coverage finish that lasts all day, giving you a smooth and natural look while ensuring long-lasting perfection. How to Book Your Bridal Makeup with Ladyfair in Bandra Initial Contact: Call us at 7004721239 to discuss your makeup needs and schedule your appointment. Consultation Session: Meet with our makeup artist to discuss your wedding look, review your attire, and plan the perfect makeup style. Makeup Trial: We offer trial sessions to help you preview your bridal makeup look and make any adjustments. Wedding Day Makeup: On your wedding day, our makeup artist will arrive at your location in Bandra to provide flawless, hassle-free makeup service. Testimonials from Brides in Bandra Priya R., Bandra: "Ladyfair provided amazing service on my wedding day. The airbrush makeup looked flawless and lasted all day." Ritu K., Bandra: "I loved the HD makeup! It was perfect for my photos, and the at-home service was so convenient." Sneha S., Bandra: "My traditional bridal makeup was exactly what I wanted, and Ladyfair made the entire process stress-free." Preparing for Your Bridal Makeup Session To get the best results for your bridal makeup: Stay Hydrated: Keep your skin looking fresh by drinking plenty of water. Consistent Skincare: Stick to your regular skincare routine to maintain healthy, glowing skin. Avoid New Products: Use familiar products to prevent any reactions before your wedding day. Clear Communication: Discuss your makeup preferences and any concerns with our artist during the consultation. Additional Beauty Services by Ladyfair Beyond bridal makeup, Ladyfair offers a variety of beauty services in Bandra: Engagement and Reception Makeup: Customized looks for all pre-wedding events. Party Makeup: Perfect for birthdays, anniversaries, and special occasions. Everyday Makeup: Enhance your daily look with our expert makeup services. Special Occasion Makeup: Professional makeup for parties, celebrations, and formal events. The Future of Bridal Makeup in Bandra Ladyfair is dedicated to setting new standards in bridal beauty in Bandra with our innovative at-home services. As we continue to offer exceptional service, more brides are choosing Ladyfair as their preferred makeup provider. Q&A with Ladyfair’s Bridal Makeup Artist in Bandra Q1: What makes Ladyfair the best choice for bridal makeup in Bandra? A1: Ladyfair offers expert bridal makeup services at home, using high-quality products to ensure a flawless and long-lasting look. Q2: What are the prices for bridal makeup in Bandra? A2: Our bridal makeup packages start at ₹10,000 for basic makeup, ₹12,000 for HD makeup, and ₹18,000 for airbrush makeup. Q3: How do I book Ladyfair’s bridal makeup services in Bandra? A3: You can book our services by calling 7004721239. We also offer consultations and trial sessions to ensure you get the look you want. Q4: What bridal makeup styles does Ladyfair offer in Bandra? A4: Ladyfair offers traditional, HD, and airbrush bridal makeup to suit different preferences and needs. Q5: Are makeup trials available before my wedding? A5: Yes, we offer trial sessions so you can finalize your bridal look ahead of time. Q6: What products does Ladyfair use for bridal makeup? A6: We use professional-grade, high-quality makeup products that are safe for all skin types and ensure a flawless finish. Q7: What other services does Ladyfair provide in Bandra? A7: In addition to bridal makeup, we offer makeup for engagements, receptions, parties, and other special occasions. Ladyfair is your ultimate choice for professional, at-home bridal makeup services in Bandra, ensuring a flawless and stress-free experience on your special day.

Posted By: 24th November 2024
Bridal Makeup Artist in Aurai
Introduction In Aurai, Ladyfair is the premier choice for brides looking to achieve the perfect wedding day look with our professional at-home bridal makeup services. Whether you desire a traditional bridal look, an HD finish, or the flawless perfection of airbrush makeup, our expert makeup artist in Aurai ensures that you shine on your special day. Contact us today at 7004721239 to schedule your appointment. Why Choose Ladyfair for Bridal Makeup in Aurai Experienced Makeup Artist Our makeup artist in Aurai has years of experience in bridal makeup, creating personalized looks that complement your natural beauty and align with your style and preferences. Convenient At-Home Service Forget the stress of traveling to a salon. Ladyfair brings luxury beauty treatments directly to your doorstep with our at-home bridal makeup services, offering a truly personalized experience. Premium Makeup Products We use only high-quality, professional-grade makeup products to ensure a flawless, long-lasting look that remains perfect throughout your big day. Bridal Makeup Pricing in Aurai Our bridal makeup services in Aurai are tailored to fit different styles and budgets: Basic Bridal Makeup: ₹10,000 HD Bridal Makeup: ₹12,000 Airbrush Bridal Makeup: ₹18,000 For engagement and reception makeup: Basic Engagement/Reception Makeup: ₹6,000 HD Engagement/Reception Makeup: ₹8,000 Airbrush Engagement/Reception Makeup: ₹12,000 For parties: Basic Party Makeup: ₹2,500 HD Party Makeup: ₹3,500 Popular Bridal Makeup Styles in Aurai Traditional Bridal Makeup Our traditional bridal makeup in Aurai incorporates bold colors and intricate detailing to complement your wedding attire, creating an elegant and timeless look. HD Bridal Makeup For a high-definition finish that looks flawless both in photos and in person, HD bridal makeup is the perfect choice for brides who want a picture-perfect appearance all day. Airbrush Bridal Makeup Our airbrush makeup offers a lightweight, full-coverage finish that lasts all day, giving you a smooth and natural look while ensuring long-lasting perfection. How to Book Your Bridal Makeup with Ladyfair in Aurai Initial Contact: Call us at 7004721239 to discuss your makeup needs and schedule your appointment. Consultation Session: Meet with our makeup artist to discuss your wedding look, review your attire, and plan the perfect makeup style. Makeup Trial: We offer trial sessions to help you preview your bridal makeup look and make any adjustments. Wedding Day Makeup: On your wedding day, our makeup artist will arrive at your location in Aurai to provide flawless, hassle-free makeup service. Testimonials from Brides in Aurai Priya R., Aurai: "Ladyfair provided amazing service on my wedding day. The airbrush makeup looked flawless and lasted all day." Ritu K., Aurai: "I loved the HD makeup! It was perfect for my photos, and the at-home service was so convenient." Sneha S., Aurai: "My traditional bridal makeup was exactly what I wanted, and Ladyfair made the entire process stress-free." Preparing for Your Bridal Makeup Session To get the best results for your bridal makeup: Stay Hydrated: Keep your skin looking fresh by drinking plenty of water. Consistent Skincare: Stick to your regular skincare routine to maintain healthy, glowing skin. Avoid New Products: Use familiar products to prevent any reactions before your wedding day. Clear Communication: Discuss your makeup preferences and any concerns with our artist during the consultation. Additional Beauty Services by Ladyfair Beyond bridal makeup, Ladyfair offers a variety of beauty services in Aurai: Engagement and Reception Makeup: Customized looks for all pre-wedding events. Party Makeup: Perfect for birthdays, anniversaries, and special occasions. Everyday Makeup: Enhance your daily look with our expert makeup services. Special Occasion Makeup: Professional makeup for parties, celebrations, and formal events. The Future of Bridal Makeup in Aurai Ladyfair is dedicated to setting new standards in bridal beauty in Aurai with our innovative at-home services. As we continue to offer exceptional service, more brides are choosing Ladyfair as their preferred makeup provider. Q&A with Ladyfair’s Bridal Makeup Artist in Aurai Q1: What makes Ladyfair the best choice for bridal makeup in Aurai? A1: Ladyfair offers expert bridal makeup services at home, using high-quality products to ensure a flawless and long-lasting look. Q2: What are the prices for bridal makeup in Aurai? A2: Our bridal makeup packages start at ₹10,000 for basic makeup, ₹12,000 for HD makeup, and ₹18,000 for airbrush makeup. Q3: How do I book Ladyfair’s bridal makeup services in Aurai? A3: You can book our services by calling 7004721239. We also offer consultations and trial sessions to ensure you get the look you want. Q4: What bridal makeup styles does Ladyfair offer in Aurai? A4: Ladyfair offers traditional, HD, and airbrush bridal makeup to suit different preferences and needs. Q5: Are makeup trials available before my wedding? A5: Yes, we offer trial sessions so you can finalize your bridal look ahead of time. Q6: What products does Ladyfair use for bridal makeup? A6: We use professional-grade, high-quality makeup products that are safe for all skin types and ensure a flawless finish. Q7: What other services does Ladyfair provide in Aurai? A7: In addition to bridal makeup, we offer makeup for engagements, receptions, parties, and other special occasions. Ladyfair is your ultimate choice for professional, at-home bridal makeup services in Aurai, ensuring a flawless and stress-free experience on your special day.

Posted By: 24th November 2024
BEST BRIDAL MAKEUP ARTIST IN RIVILGANJ
BEST BRIDAL MAKEUP ARTIST IN RIVILGANJ Introduction Rivilganj, a serene town in Bihar, offers the perfect backdrop for weddings steeped in culture and tradition. At Ladyfair, we specialize in bridal makeup services in Rivilganj, providing professional, at-home solutions to make your wedding day magical. Contact us at 7004721239 to book expert makeup services tailored to your style and preferences. Why Choose Ladyfair for Bridal Makeup in Rivilganj? Experienced Makeup Professionals Our team of highly skilled makeup artists ensures a stunning bridal look that matches your personality and wedding theme. Convenient Home Services We bring our services to your doorstep, letting you enjoy a hassle-free and relaxing experience. Premium Makeup Products Using high-quality, long-lasting products, we create flawless, picture-perfect looks for your special day. Bridal Makeup Packages in Rivilganj We offer customizable bridal makeup packages to suit every need: Basic Bridal Makeup: ₹10,000 HD Bridal Makeup: ₹12,000 Airbrush Bridal Makeup: ₹18,000 Additional Services: Engagement Makeup (Basic): ₹6,000 Engagement Makeup (HD): ₹8,000 Engagement Makeup (Airbrush): ₹12,000 Party Makeup (Basic): ₹2,500 Party Makeup (HD): ₹3,500 Bridal Makeup Styles in Rivilganj Traditional Bridal Makeup Celebrate your roots with a classic look that enhances your natural beauty. HD Bridal Makeup Perfect for photo and video shoots, HD makeup ensures a flawless appearance under the spotlight. Airbrush Bridal Makeup Achieve a lightweight, radiant, and long-lasting finish with our airbrush makeup. How to Book Your Bridal Makeup in Rivilganj Contact Us: Call 7004721239 to schedule your appointment. Consultation: Discuss your desired look with our expert artists. Trial Session: Opt for a trial session to finalize your bridal style. Wedding Day: Relax and let us create your perfect look in the comfort of your home. Testimonials from Brides in Rivilganj Ankita S., Rivilganj: "Ladyfair provided exceptional service. My bridal makeup was flawless, and I felt amazing all day!" Meera P., Rivilganj: "The team was so professional and kind. I loved my HD bridal makeup!" Rhea M., Rivilganj: "My airbrush makeup was perfect for the humid weather, and I got compliments all day." Bridal Makeup Tips for Brides in Rivilganj Follow a Skincare Routine: Start at least three months in advance for glowing skin. Hydrate: Keep your skin hydrated by drinking plenty of water. Book Early: Ensure you secure your preferred date with Ladyfair. Communicate Clearly: Share your vision with your makeup artist for a tailored look. Other Beauty Services by Ladyfair in Rivilganj Engagement Makeup Reception Makeup Party Makeup Casual Makeup The Future of Bridal Makeup in Rivilganj At Ladyfair, we stay updated with the latest makeup trends while honoring traditional styles. Our goal is to make every bride in Rivilganj feel confident, beautiful, and photo-ready for her big day. Frequently Asked Questions Q1: Why choose Ladyfair for bridal makeup in Rivilganj? A1: Our expert artists, high-quality products, and at-home services ensure a flawless bridal experience. Q2: What are your bridal makeup prices? A2: Packages start at ₹10,000, with options for HD and airbrush makeup. Q3: Can I book a trial session? A3: Yes, we offer trial sessions. Call 7004721239 to schedule yours. Q4: Do you provide makeup for other events? A4: Yes, we offer makeup services for engagements, receptions, parties, and casual events.

Posted By: 24th November 2024
BEST BRIDAL MAKEUP ARTIST IN ADHAURA
BEST BRIDAL MAKEUP ARTIST IN ADHAURA Introduction Adhaura, nestled amidst natural beauty and vibrant traditions, is the perfect setting for a memorable wedding. At Ladyfair, we provide expert bridal makeup services in Adhaura, ensuring you look breathtaking on your big day. With our professional, at-home services, we bring convenience and elegance right to your doorstep. Call us at 7004721239 to book your appointment and transform your wedding look into a dream come true. Why Choose Ladyfair for Bridal Makeup in Adhaura? Skilled Makeup Artists Our experienced team specializes in creating stunning bridal looks tailored to your unique style and preferences. Convenient At-Home Services Avoid the stress of traveling; our experts come to you for a relaxing and flawless experience. Premium Quality Products We use high-quality, long-lasting makeup products to ensure your look stays perfect throughout your special day. Bridal Makeup Packages in Adhaura We offer customizable packages to meet all your bridal makeup needs: Basic Bridal Makeup: ₹10,000 HD Bridal Makeup: ₹12,000 Airbrush Bridal Makeup: ₹18,000 Additional services include: Engagement Makeup (Basic): ₹6,000 Engagement Makeup (HD): ₹8,000 Engagement Makeup (Airbrush): ₹12,000 Party Makeup (Basic): ₹2,500 Party Makeup (HD): ₹3,500 Bridal Makeup Styles in Adhaura Traditional Bridal Makeup Celebrate your heritage with a timeless look that enhances your natural beauty and traditional attire. HD Bridal Makeup Perfect for photography, HD makeup provides a flawless finish that looks radiant in every frame. Airbrush Bridal Makeup Get a light, breathable, and long-lasting finish with airbrush makeup for a truly glamorous look. How to Book Your Bridal Makeup in Adhaura Contact Us: Call 7004721239 to schedule your appointment. Consultation: Discuss your wedding theme, attire, and desired look with our expert artist. Trial Session: Opt for a trial to finalize your bridal makeup style. Wedding Day: Relax while we create your perfect bridal look in the comfort of your home. Testimonials from Brides in Adhaura Ritika P., Adhaura: "Ladyfair made my wedding day unforgettable with their stunning bridal makeup. Highly recommended!" Priya S., Adhaura: "The HD makeup was flawless, and the team was so professional. I felt like a queen!" Anjali M., Adhaura: "I loved the airbrush makeup! It was so light yet stayed perfect the entire day." Bridal Makeup Tips for Brides in Adhaura Hydrate Regularly: Keep your skin glowing by drinking plenty of water. Start Early: Begin a skincare routine at least three months before your wedding. Communicate Your Vision: Share your ideas and preferences with the makeup artist. Book Early: Reserve your spot well in advance to secure your desired date. Other Beauty Services by Ladyfair in Adhaura Engagement Makeup: Tailored looks for your pre-wedding events. Reception Makeup: Dazzle at your post-wedding celebrations. Party Makeup: Perfect for festivals, birthdays, or other joyous occasions. Casual Makeup: Enhance your everyday look with subtle makeup. The Future of Bridal Makeup in Adhaura Ladyfair remains dedicated to staying at the forefront of bridal makeup trends while preserving the essence of traditional beauty. With a focus on client satisfaction, we continue to redefine elegance for every bride in Adhaura. Frequently Asked Questions Q1: Why should I choose Ladyfair for bridal makeup in Adhaura? A1: Ladyfair combines expert artistry, premium products, and convenient at-home services to create a perfect bridal experience. Q2: What are your bridal makeup prices? A2: Our packages start at ₹10,000, with HD and airbrush options available. Q3: Can I book a trial session? A3: Absolutely! Call us at 7004721239 to schedule a trial makeup session. Q4: Do you offer other makeup services? A4: Yes, we provide makeup for engagements, receptions, parties, and casual events.

Posted By: 24th November 2024
BEST BRIDAL MAKEUP ARTIST IN BHABHUA
BEST BRIDAL MAKEUP ARTIST IN BHABHUA Introduction Bhabhua, a culturally vibrant city, is home to countless celebrations and traditions. At Ladyfair, we specialize in bridal makeup services in Bhabhua, ensuring every bride feels beautiful and confident on her wedding day. From traditional looks to modern glam, our expert makeup artists bring your dream bridal look to life. Book your at-home bridal makeup service in Bhabhua today by calling 7004721239 and let us make your special day unforgettable. Why Choose Ladyfair for Bridal Makeup in Bhabhua? Expert Makeup Artists Our professional team has extensive experience in creating stunning bridal looks tailored to your preferences. At-Home Comfort No need to step out on your big day; our at-home services bring expert beauty solutions to your doorstep. High-Quality Products We use only premium makeup brands to ensure a flawless and lasting look. Bridal Makeup Packages in Bhabhua We offer a variety of packages to suit your needs and budget: Basic Bridal Makeup: ₹10,000 HD Bridal Makeup: ₹12,000 Airbrush Bridal Makeup: ₹18,000 Additional services: Engagement Makeup (Basic): ₹6,000 Engagement Makeup (HD): ₹8,000 Engagement Makeup (Airbrush): ₹12,000 Party Makeup (Basic): ₹2,500 Party Makeup (HD): ₹3,500 Bridal Makeup Styles in Bhabhua Traditional Bridal Makeup Celebrate your special day with a timeless, elegant look that complements your cultural heritage. HD Bridal Makeup Achieve a camera-ready, flawless finish that enhances your natural beauty in wedding photographs. Airbrush Bridal Makeup For a lightweight, long-lasting, and radiant look, airbrush makeup is the perfect choice. How to Book Your Bridal Makeup in Bhabhua Call Us: Reach out at 7004721239 to schedule your appointment. Consultation: Discuss your preferences and wedding theme with our expert artist. Trial Session: Opt for a trial session to finalize your bridal look. Wedding Day: Relax while we bring your dream look to life in the comfort of your home. Testimonials from Brides in Bhabhua Ankita R., Bhabhua: "Ladyfair made me look like a queen on my wedding day. The team was professional and friendly, and the results were amazing!" Neelam S., Bhabhua: "My HD bridal makeup was flawless and lasted all day. I couldn’t have asked for better service!" Pooja J., Bhabhua: "The airbrush makeup was stunning and so lightweight. It gave me the perfect glow for my big day." Bridal Makeup Tips for Brides in Bhabhua Hydrate Regularly: Drinking water keeps your skin fresh and glowing. Plan Early: Begin your skincare routine months before the wedding. Communicate Clearly: Share your ideas and preferences with the makeup artist. Secure Your Slot: Book early to ensure availability. Other Beauty Services by Ladyfair in Bhabhua Engagement Makeup: Get the perfect look for your pre-wedding celebrations. Reception Makeup: Shine bright at your post-wedding events. Party Makeup: Ideal for birthdays, anniversaries, or festive occasions. Casual Makeup: Light and natural looks for everyday moments. The Future of Bridal Makeup in Bhabhua Ladyfair continues to innovate and stay updated with the latest bridal makeup trends. We are committed to delivering excellence and ensuring every bride in Bhabhua feels her most beautiful. Frequently Asked Questions Q1: What makes Ladyfair the best choice for bridal makeup in Bhabhua? A1: Ladyfair provides personalized, high-quality, at-home bridal makeup services tailored to your unique preferences. Q2: What are your bridal makeup prices? A2: Our bridal makeup packages start at ₹10,000. HD and airbrush options are also available. Q3: Do you offer other types of makeup services? A3: Yes, we provide makeup for engagements, receptions, parties, and casual events. Q4: How do I book a trial session? A4: Call us at 7004721239 to schedule your trial makeup session.

Posted By: 24th November 2024
BEST BRIDAL MAKEUP ARTIST IN BHAGWANPUR
BEST BRIDAL MAKEUP ARTIST IN BHAGWANPUR Introduction Bhagwanpur, a vibrant town rich in culture and traditions, is the perfect backdrop for celebrating life's significant milestones. At Ladyfair, we specialize in bridal makeup services in Bhagwanpur, ensuring every bride shines with confidence and grace on her special day. Whether you're envisioning a traditional look or a modern, glamorous style, our expert team is here to bring your vision to life. Call us at 7004721239 and book your at-home bridal makeup services in Bhagwanpur today! Why Choose Ladyfair for Bridal Makeup in Bhagwanpur? Experienced Makeup Artists Our team comprises skilled professionals who understand the art of creating stunning, personalized bridal looks for every bride. Convenient At-Home Services Enjoy the comfort of getting ready at home while our experts deliver flawless makeup services, saving you the stress of traveling on your big day. Top-Quality Products We use premium makeup products to ensure a radiant and long-lasting look, perfect for every wedding moment. Bridal Makeup Packages in Bhagwanpur We offer a range of packages to suit your needs: Basic Bridal Makeup: ₹10,000 HD Bridal Makeup: ₹12,000 Airbrush Bridal Makeup: ₹18,000 Additional services: Engagement Makeup (Basic): ₹6,000 Engagement Makeup (HD): ₹8,000 Engagement Makeup (Airbrush): ₹12,000 Party Makeup (Basic): ₹2,500 Party Makeup (HD): ₹3,500 Bridal Makeup Styles in Bhagwanpur Traditional Bridal Makeup Highlight your natural beauty with a timeless, traditional look that complements your outfit and jewelry. HD Bridal Makeup Achieve a flawless and photo-ready finish with our HD makeup, ideal for creating unforgettable wedding memories. Airbrush Bridal Makeup For a lightweight and seamless appearance, airbrush makeup offers exceptional coverage and durability. How to Book Your Bridal Makeup in Bhagwanpur Call Us: Dial 7004721239 to reserve your slot. Consultation: Share your preferences and bridal theme with our makeup artist. Trial Session: Opt for a trial session to finalize your desired look. Wedding Day: Relax as our experts work their magic at your home. Testimonials from Brides in Bhagwanpur Ritu S., Bhagwanpur: "Ladyfair made my big day truly special! My makeup was flawless, and I received so many compliments. Highly recommended!" Neha P., Bhagwanpur: "The airbrush makeup gave me such a natural glow. The team was professional and friendly. Thank you, Ladyfair!" Sneha J., Bhagwanpur: "My bridal look was exactly how I envisioned it. The trial session really helped, and the final result was perfect!" Bridal Makeup Tips for Brides in Bhagwanpur Hydrate Daily: Drinking enough water keeps your skin healthy and glowing. Begin Early: Start a skincare routine months in advance for the best results. Discuss Preferences: Clearly communicate your expectations with the makeup artist. Book Early: Secure your slot to avoid last-minute hassles. Other Beauty Services by Ladyfair in Bhagwanpur Engagement Makeup: Look stunning for your pre-wedding celebrations. Reception Makeup: Be the star of your reception with a glamorous look. Party Makeup: Perfect for any celebration or festive occasion. Casual Makeup: Light and simple looks for everyday events. The Future of Bridal Makeup in Bhagwanpur Ladyfair is dedicated to keeping up with the latest trends and techniques in bridal makeup, ensuring every bride feels confident and radiant. Trust us to deliver exceptional results tailored to your needs. Frequently Asked Questions Q1: What makes Ladyfair unique for bridal makeup in Bhagwanpur? A1: Ladyfair offers personalized services with skilled artists, premium products, and the convenience of at-home makeup. Q2: How much does your bridal makeup cost? A2: Bridal makeup packages start at ₹10,000, with HD and airbrush options available for ₹12,000 and ₹18,000 respectively. Q3: Do you offer other event makeup services? A3: Yes, we provide makeup for engagements, receptions, parties, and casual occasions. Q4: Is a trial session necessary? A4: While optional, a trial session helps ensure you achieve the look you desire.

Posted By: 24th November 2024
BEST BRIDAL MAKEUP ARTIST IN CHAINPUR
BEST BRIDAL MAKEUP ARTIST IN CHAINPUR Introduction Chainpur, a charming town known for its cultural richness and vibrant traditions, is the ideal place for celebrating life's special moments. At Ladyfair, we specialize in enhancing these celebrations with our bridal makeup services in Chainpur, ensuring every bride looks breathtakingly beautiful on her big day. Whether you dream of a classic bridal look or a contemporary style, our expert makeup artists are here to make it happen. Call us at 7004721239 to book your at-home bridal makeup services in Chainpur today! Why Choose Ladyfair for Bridal Makeup in Chainpur? Experienced Makeup Artists Our professional makeup artists have extensive experience in creating stunning bridal looks. We ensure every bride radiates confidence and elegance. Convenient At-Home Services We bring our services to you, saving you the hassle of traveling. Enjoy the convenience of getting ready in the comfort of your home with our at-home bridal makeup services in Chainpur. Premium Makeup Products We use only top-quality makeup products to ensure a flawless finish that lasts all day, keeping you picture-perfect for every moment. Bridal Makeup Packages in Chainpur Our packages are designed to meet your unique needs and budget: Basic Bridal Makeup: ₹10,000 HD Bridal Makeup: ₹12,000 Airbrush Bridal Makeup: ₹18,000 Additional services: Engagement Makeup (Basic): ₹6,000 Engagement Makeup (HD): ₹8,000 Engagement Makeup (Airbrush): ₹12,000 Party Makeup (Basic): ₹2,500 Party Makeup (HD): ₹3,500 Bridal Makeup Styles in Chainpur Traditional Bridal Makeup Our traditional bridal makeup highlights your natural beauty while complementing your attire, jewelry, and wedding theme. HD Bridal Makeup High-definition makeup provides a flawless finish that photographs beautifully, ensuring you look radiant in every shot. Airbrush Bridal Makeup For a lightweight, long-lasting look, our airbrush makeup delivers a natural glow and impeccable coverage. How to Book Your Bridal Makeup in Chainpur Call Us: Dial 7004721239 to book your appointment. Consultation: Discuss your preferences and bridal theme with our experts. Trial Session: Schedule a trial session to finalize your perfect bridal look. Wedding Day: Relax as our team creates a flawless look at your home. Testimonials from Brides in Chainpur Priya M., Chainpur: "Ladyfair's team was fantastic! My makeup was flawless, and it stayed perfect throughout the day. Highly recommended!" Anjali K., Chainpur: "The airbrush makeup made my skin look so natural and radiant. The team was professional and accommodating. Loved it!" Meera S., Chainpur: "I felt so comfortable during the entire process. The makeup artist understood exactly what I wanted and delivered beyond my expectations!" Bridal Makeup Tips for Brides in Chainpur Hydrate Your Skin: Drinking plenty of water helps maintain healthy, glowing skin. Start Skincare Early: Begin a consistent skincare routine months before your wedding. Trial is Key: A trial session ensures your desired look is perfected before your big day. Communicate Clearly: Share your preferences and ideas with your makeup artist. Other Beauty Services by Ladyfair in Chainpur Engagement Makeup: Be photo-ready for your engagement with our expert services. Reception Makeup: Shine like a star at your reception with a tailored look. Party Makeup: Elevate your style for any celebration. Casual Makeup: Perfect for everyday elegance and casual outings. The Future of Bridal Makeup in Chainpur Ladyfair is dedicated to staying ahead of bridal trends, providing services that are modern, stylish, and timeless. Trust us to make you look and feel your best on your most memorable day. Frequently Asked Questions Q1: What makes Ladyfair unique for bridal makeup in Chainpur? A1: Ladyfair offers personalized bridal makeup services with skilled artistry and premium products, delivered right at your doorstep. Q2: How much do your bridal makeup services cost? A2: Our bridal makeup packages start at ₹10,000, with HD and airbrush options available at ₹12,000 and ₹18,000 respectively. Q3: Do you offer makeup for other events besides weddings? A3: Yes, we provide makeup services for engagements, receptions, parties, and other occasions. Q4: Is a trial session necessary? A4: While not mandatory, we highly recommend a trial session to finalize your bridal look.

Posted By: 24th November 2024
BEST BRIDAL MAKEUP ARTIST IN CHAND
BEST BRIDAL MAKEUP ARTIST IN CHAND Introduction Chand, a serene town known for its vibrant culture and traditions, offers the perfect backdrop for creating unforgettable wedding memories. At Ladyfair, we specialize in providing top-notch bridal makeup services in Chand, ensuring that every bride looks stunning and radiant on her special day. Whether you prefer a traditional look or something modern and chic, our skilled makeup artists will craft the perfect bridal appearance just for you. Book our at-home bridal makeup services in Chand by calling 7004721239 today! Why Choose Ladyfair for Bridal Makeup in Chand? Expert Makeup Artists Our team of expert makeup artists has years of experience in transforming brides into their most beautiful selves. From bold, glamorous looks to subtle, natural styles, we deliver exceptional results that suit your preferences. At-Home Services We understand how stressful wedding preparations can be, which is why we offer at-home bridal makeup services in Chand. Our team will arrive at your doorstep, giving you the comfort and convenience of getting ready in your own space. High-Quality Makeup Products We use premium makeup products to ensure your bridal look remains flawless and fresh throughout your wedding day. Our techniques and tools are carefully selected to match your skin type and desired style. Bridal Makeup Packages in Chand We offer a variety of packages designed to suit your budget and needs: Basic Bridal Makeup: ₹10,000 HD Bridal Makeup: ₹12,000 Airbrush Bridal Makeup: ₹18,000 Additional services: Engagement/Reception Makeup (Basic): ₹6,000 Engagement/Reception Makeup (HD): ₹8,000 Engagement/Reception Makeup (Airbrush): ₹12,000 Party Makeup (Basic): ₹2,500 Party Makeup (HD): ₹3,500 Bridal Makeup Styles in Chand Traditional Bridal Makeup For a timeless and elegant appearance, traditional bridal makeup enhances your natural beauty while complementing your attire and jewelry. HD Bridal Makeup Perfect for both in-person and photos, HD makeup ensures a smooth, radiant finish that looks flawless in every frame. Airbrush Bridal Makeup With a lightweight, long-lasting finish, airbrush makeup provides a natural glow and impeccable coverage, ideal for all-day celebrations. How to Book Your Bridal Makeup in Chand Call Us: Dial 7004721239 to discuss your requirements and book your appointment. Consultation: Share your preferences, wedding theme, and desired look during a consultation. Trial Session: Opt for a trial session to finalize your bridal look before the big day. Wedding Day Service: Relax and let our expert artists create a flawless bridal look at your home. Testimonials from Brides in Chand Ritika S., Chand: "I chose Ladyfair for my bridal makeup, and I couldn’t be happier with the results. The team was professional and attentive, and my makeup stayed perfect all day!" Megha P., Chand: "The airbrush makeup was amazing! It gave me a natural yet radiant look that lasted the entire day. Ladyfair made my wedding day even more special." Nisha T., Chand: "From the trial session to the wedding day, everything was seamless. Ladyfair’s team is truly talented, and they made me feel like the most beautiful bride!" Bridal Makeup Tips for Brides in Chand Start Early with Skincare: A good skincare routine helps create a flawless base for your makeup. Communicate Your Preferences: Be clear about the style you want, whether traditional, modern, or something unique. Schedule a Trial Session: A trial ensures there are no surprises on your wedding day. Stay Hydrated: Hydrated skin is healthy skin, so drink plenty of water leading up to your wedding. Other Beauty Services by Ladyfair in Chand Engagement Makeup: Look picture-perfect for your engagement ceremony. Reception Makeup: Shine bright at your reception with our expert makeup services. Party Makeup: Be the center of attention at any celebration. Casual Makeup: Get a quick and polished look for everyday occasions. The Future of Bridal Makeup in Chand At Ladyfair, we continually update our techniques to keep up with the latest bridal trends. Whether you’re looking for a traditional bridal appearance or a modern, glamorous look, our skilled artists ensure you’re at your best on your special day. Frequently Asked Questions Q1: Why should I choose Ladyfair for bridal makeup in Chand? A1: Ladyfair offers personalized, professional bridal makeup services using high-quality products and skilled artistry. Q2: How much does bridal makeup cost in Chand? A2: Bridal makeup packages start at ₹10,000, with HD and airbrush options available at ₹12,000 and ₹18,000 respectively. Q3: Can I book makeup for events other than my wedding? A3: Yes, we offer makeup services for engagements, receptions, parties, and other special occasions. Q4: Is a trial session recommended for bridal makeup? A4: Yes, a trial session ensures your desired look is perfected before your wedding day.

Posted By: 24th November 2024
BEST BRIDAL MAKEUP ARTIST IN RAMPUR
BEST BRIDAL MAKEUP ARTIST IN RAMPUR Introduction Rampur, a town known for its rich culture and heritage, is the perfect place to begin your new journey as a bride. At Ladyfair, we specialize in offering bridal makeup services in Rampur, ensuring you look flawless and radiant on your wedding day. Our professional makeup artists are experts in creating stunning bridal looks tailored to your personal style, whether traditional or modern. If you’re looking for at-home bridal makeup services in Rampur, call us today at 7004721239 to book your appointment! Why Choose Ladyfair for Bridal Makeup in Rampur? Experienced Makeup Artists At Ladyfair, our team of expert makeup artists has extensive experience in transforming brides into their most beautiful selves. Whether you want a bold, dramatic look or a soft, natural finish, our team ensures that you look picture-perfect and feel confident on your wedding day. At-Home Bridal Makeup Services To make your wedding day as smooth and comfortable as possible, we offer at-home bridal makeup services in Rampur. Our artists will come to your location, saving you time and letting you enjoy the comfort of preparing for your big day at home. Flawless Makeup That Lasts All Day We use only high-quality makeup products to ensure that your bridal makeup remains flawless throughout your wedding day. Whether it’s the ceremony, reception, or party, your makeup will look as fresh and radiant at the end of the day as it did when first applied. Bridal Makeup Packages in Rampur Ladyfair offers a range of bridal makeup packages to suit every style and budget. Our packages ensure that every bride looks her best while feeling pampered on her special day. Basic Bridal Makeup: ₹10,000 HD Bridal Makeup: ₹12,000 Airbrush Bridal Makeup: ₹18,000 Additionally, we offer makeup services for other wedding-related events: Engagement/Reception Makeup (Basic): ₹6,000 Engagement/Reception Makeup (HD): ₹8,000 Engagement/Reception Makeup (Airbrush): ₹12,000 Other services include: Party Makeup (Basic): ₹2,500 Party Makeup (HD): ₹3,500 Bridal Makeup Styles in Rampur Traditional Bridal Makeup For brides who want a classic and timeless look, traditional bridal makeup is a perfect choice. This style often features bold eyes, bright lips, and a radiant complexion, complementing the rich colors of bridal attire and jewelry. HD Bridal Makeup HD makeup is designed to provide a flawless, natural look that’s perfect for both in-person and photo sessions. The makeup feels light but creates a smooth, radiant finish, giving you a glowing look for the entire day. Airbrush Bridal Makeup Airbrush makeup offers a lightweight, flawless finish that lasts throughout your wedding day. Using an airbrush gun, makeup is applied in fine layers, giving your skin a smooth, dewy appearance and ensuring that you look fresh and beautiful all day long. How to Book Your Bridal Makeup in Rampur Booking your bridal makeup with Ladyfair is easy and convenient: Call Us: Dial 7004721239 to discuss your bridal makeup requirements and schedule your appointment. Consultation: During the consultation, we’ll talk about your wedding theme, makeup preferences, and any special requests. Trial Session: We recommend booking a trial session so we can perfect your look ahead of your wedding day. Wedding Day Makeup: On the day of your wedding, our expert makeup artist will arrive at your home in Rampur to provide you with stunning bridal makeup. Testimonials from Brides in Rampur Shivani T., Rampur: "I had the most amazing experience with Ladyfair for my bridal makeup. The team made me look absolutely gorgeous, and the makeup lasted throughout the day. I felt so beautiful and confident. Highly recommended!" Neha P., Rampur: "Ladyfair gave me the perfect bridal look! I chose the HD makeup package, and it was flawless. I loved how natural and radiant my skin looked, and the makeup stayed intact through all the celebrations. Thank you, Ladyfair!" Rekha M., Rampur: "Airbrush makeup for my wedding was a game-changer! It gave me such a smooth, glowing finish that lasted the entire day. The team was so professional and made me feel like a queen on my special day." Bridal Makeup Tips for Brides in Rampur Prep Your Skin Early: Start your skincare routine several weeks before your wedding to ensure your skin is hydrated and glowing. Regular facials and moisturization can make a big difference in how your makeup applies. Choose the Right Look: Talk to your makeup artist about the look you envision for your wedding day. Whether it’s bold and glamorous or soft and natural, knowing your style will help the artist achieve your perfect bridal look. Don’t Forget Your Trial Session: A trial session ensures that your bridal makeup is exactly what you want. It gives you time to try different looks and make adjustments before the big day. Long-Lasting Products: At Ladyfair, we use long-lasting, high-quality makeup that stays flawless all day, so you don’t have to worry about touch-ups during your wedding. Other Beauty Services by Ladyfair in Rampur Ladyfair is not only your go-to for bridal makeup, but we also offer makeup services for other special occasions: Engagement Makeup: Let us help you look beautiful and confident on your engagement day. Reception Makeup: Celebrate your wedding reception with a glamorous and flawless makeup look. Party Makeup: For birthdays, anniversaries, and other special events, our party makeup services will make you feel stunning. Casual Makeup: For everyday beauty or a quick touch-up before an event, our casual makeup services will enhance your natural beauty. The Future of Bridal Makeup in Rampur At Ladyfair, we keep up with the latest bridal makeup trends and techniques to ensure that our brides are always on-trend. Whether you're seeking a classic bridal look or something modern and chic, we’ll work with you to create the perfect makeup that complements your style and makes you feel fabulous. Frequently Asked Questions Q1: Why should I choose Ladyfair for bridal makeup in Rampur? A1: Ladyfair provides personalized, professional bridal makeup services with a focus on making every bride feel beautiful and confident. Our expert team uses high-quality products and techniques to ensure you look stunning throughout your special day. Q2: How much does bridal makeup cost in Rampur? A2: Bridal makeup packages start at ₹10,000 for basic makeup, with HD and airbrush options available for ₹12,000 and ₹18,000, respectively. Q3: Can I book makeup for other events? A3: Yes, we offer makeup services for engagements, receptions, parties, and more. Q4: Is a trial session necessary for bridal makeup? A4: While a trial session is not mandatory, we highly recommend it to ensure you are fully satisfied with your bridal look before the wedding.

Posted By: 24th November 2024
BEST BRIDAL MAKEUP ARTIST IN NUAON
BEST BRIDAL MAKEUP ARTIST IN NUAON Introduction Nuaon, a beautiful town known for its cultural heritage, is the perfect backdrop for a bride to feel beautiful and confident on her wedding day. At Ladyfair, we specialize in offering exceptional bridal makeup services in Nuaon, ensuring that you look absolutely stunning and feel your best on your special day. Whether you're dreaming of a traditional bridal look or something more modern and glamorous, our expert makeup artists will help you achieve the perfect wedding look. For at-home bridal makeup services in Nuaon, reach out today at 7004721239 to book your appointment. Why Choose Ladyfair for Bridal Makeup in Nuaon? Experienced Professional Makeup Artists Our team of professional makeup artists at Ladyfair has years of experience in creating beautiful bridal looks. From traditional to contemporary styles, we tailor your makeup to match your personal preferences and the theme of your wedding, ensuring you look stunning for the entire celebration. Convenient At-Home Makeup Services We understand how busy your wedding day can be, which is why we offer at-home bridal makeup in Nuaon. Our team will come to your home, giving you the luxury of being pampered in the comfort of your own space while you prepare for your big day. Flawless and Long-Lasting Makeup Using high-quality makeup products, our team ensures that your bridal makeup stays flawless throughout your wedding day. From the ceremony to the reception, your makeup will remain fresh and perfect, allowing you to focus on enjoying the celebration without worrying about touch-ups. Bridal Makeup Packages in Nuaon At Ladyfair, we offer a variety of bridal makeup packages to suit different preferences and budgets. Whether you prefer a natural look or a more glamorous style, we have a package for every bride. Basic Bridal Makeup: ₹10,000 HD Bridal Makeup: ₹12,000 Airbrush Bridal Makeup: ₹18,000 We also provide makeup services for other events such as engagements and receptions: Engagement or Reception Makeup (Basic): ₹6,000 Engagement or Reception Makeup (HD): ₹8,000 Engagement or Reception Makeup (Airbrush): ₹12,000 Other services include: Party Makeup (Basic): ₹2,500 Party Makeup (HD): ₹3,500 Bridal Makeup Styles in Nuaon Traditional Bridal Makeup For brides who want to celebrate their cultural heritage, we offer traditional bridal makeup that enhances your natural beauty while keeping your look authentic and timeless. This style typically includes bold eyes, bright lips, and traditional bridal attire. HD Bridal Makeup HD makeup is perfect for brides who want a radiant and natural look that feels light yet glamorous. This technique ensures a smooth, flawless finish that’s ideal for both in-person and camera-ready looks. Airbrush Bridal Makeup Airbrush makeup provides an even, lightweight finish and is ideal for brides who want a long-lasting, smooth complexion. The airbrush technique offers a flawless, dewy look that will make you feel like a princess throughout the day. How to Book Your Bridal Makeup in Nuaon Booking your bridal makeup with Ladyfair is simple and convenient: Call Us: Dial 7004721239 to discuss your bridal makeup requirements and schedule an appointment. Consultation: We’ll consult with you to understand your style, wedding theme, and preferences for your makeup look. Trial Session: We recommend a trial session to ensure everything is perfect before your big day. Wedding Day Makeup: On your wedding day, our expert makeup artist will arrive at your home in Nuaon to provide the perfect makeup for your ceremony and celebration. Testimonials from Brides in Nuaon Ritu S., Nuaon: "Ladyfair transformed me into the bride I always dreamed of being. My makeup was flawless, and it lasted all day. I felt so comfortable and relaxed, knowing that I was in expert hands. I highly recommend Ladyfair to every bride in Nuaon!" Aarti M., Nuaon: "I had the HD bridal makeup done for my wedding, and I couldn’t be happier with the results! The makeup was light, fresh, and perfect for my skin tone. Ladyfair truly knows how to make a bride feel special." Neelam R., Nuaon: "The airbrush makeup for my wedding was incredible! I felt like I was glowing all day, and the makeup stayed intact even through the reception. Thank you, Ladyfair, for making me feel so beautiful on my big day!" Bridal Makeup Tips for Brides in Nuaon Prep Your Skin Early: Start your skincare routine months before your wedding to ensure your skin is hydrated and glowing. Regular moisturizing and facials can help create a smooth canvas for your makeup. Know Your Style: Discuss your vision with your makeup artist during the consultation. Whether you prefer a classic look or something more modern, understanding your preferences will help the artist create the perfect makeup. Choose Long-Lasting Products: At Ladyfair, we use high-quality, long-lasting products that are perfect for wedding-day makeup. You won’t need to worry about touch-ups throughout the day. Don’t Skip the Trial: A trial session will give you a chance to test different looks and ensure you are 100% satisfied with your makeup before the big day. Other Beauty Services by Ladyfair in Nuaon In addition to bridal makeup, Ladyfair also offers a range of beauty services for other occasions: Engagement Makeup: Get the perfect look for your engagement ceremony with our professional makeup services. Reception Makeup: Make a lasting impression at your wedding reception with customized makeup packages. Party Makeup: For birthdays, anniversaries, and other celebrations, we provide stunning party makeup services. Casual Makeup: Whether you need a fresh, everyday look or a simple event makeup, our casual makeup services will enhance your natural beauty. The Future of Bridal Makeup in Nuaon Ladyfair stays at the forefront of bridal makeup trends, ensuring that our brides in Nuaon always have access to the latest styles and techniques. Our commitment to excellence means that you’ll always receive high-quality makeup services that help you feel confident and beautiful on your wedding day. Frequently Asked Questions Q1: Why should I choose Ladyfair for bridal makeup in Nuaon? A1: Ladyfair offers personalized bridal makeup services, using only the highest-quality products. We provide a professional and comfortable experience, ensuring you look flawless on your wedding day. Q2: What is the cost of bridal makeup in Nuaon? A2: Our bridal makeup packages start at ₹10,000 for basic makeup, with HD and airbrush options available for ₹12,000 and ₹18,000, respectively. Q3: Can I book makeup for other events? A3: Yes, we offer makeup services for engagements, receptions, parties, and casual events. Q4: Is a trial session required for bridal makeup? A4: While a trial session is not mandatory, it is highly recommended to ensure you are happy with your bridal look before the wedding day.

Posted By: 24th November 2024
BEST BRIDAL MAKEUP ARTIST IN RAMGARH
BEST BRIDAL MAKEUP ARTIST IN RAMGARH Introduction Ramgarh, a city filled with charm and beauty, is the perfect setting for a bride to shine on her wedding day. At Ladyfair, we specialize in offering the finest bridal makeup services in Ramgarh, ensuring you look radiant and stunning for your big day. Whether you desire a traditional bridal look or a modern, glamorous appearance, our team of expert makeup artists will bring your vision to life. For at-home bridal makeup in Ramgarh, contact us today at 7004721239 to book your appointment and make your wedding unforgettable. Why Choose Ladyfair for Bridal Makeup in Ramgarh? Experienced and Skilled Makeup Artists Our team of professional makeup artists is highly skilled and experienced in delivering beautiful bridal looks for weddings of all styles. Whether you're looking for a soft, natural look or a bold, glamorous appearance, we tailor each makeup style to suit your personality and wedding theme. Convenient At-Home Makeup Services We understand that wedding day preparations can be stressful, which is why we offer at-home bridal makeup services in Ramgarh. This means you can relax and enjoy your special day in the comfort of your home while we take care of your makeup. Long-Lasting, Flawless Makeup We use high-quality makeup products that ensure your look lasts throughout the day and night. From the ceremony to the reception, our makeup will keep you looking fresh, glowing, and flawless no matter the time. Bridal Makeup Packages in Ramgarh Ladyfair offers customized bridal makeup packages designed to suit different preferences and budgets. Whether you're looking for a simple yet elegant look or a more extravagant style, we’ve got you covered. Basic Bridal Makeup: ₹10,000 HD Bridal Makeup: ₹12,000 Airbrush Bridal Makeup: ₹18,000 We also offer makeup services for other events, including: Engagement or Reception Makeup (Basic): ₹6,000 Engagement or Reception Makeup (HD): ₹8,000 Engagement or Reception Makeup (Airbrush): ₹12,000 Other services include: Party Makeup (Basic): ₹2,500 Party Makeup (HD): ₹3,500 Bridal Makeup Styles in Ramgarh Traditional Bridal Makeup For brides who wish to celebrate the rich cultural traditions of Indian weddings, we offer traditional bridal makeup that highlights your beauty with timeless elegance. Bold eyes, intricate jewelry, and rich colors complete this regal look. HD Bridal Makeup HD makeup is ideal for brides who want a natural, dewy finish that looks perfect on camera. This technique provides a smooth, flawless appearance that enhances your features while keeping the look fresh and glowing. Airbrush Bridal Makeup Airbrush makeup gives a flawless, lightweight finish with an airbrush machine, ensuring that your makeup lasts longer and looks perfect all day. It's ideal for brides who want to achieve a smooth, radiant complexion. How to Book Your Bridal Makeup in Ramgarh Booking your bridal makeup with Ladyfair is simple and easy: Call Us: Dial 7004721239 to discuss your makeup requirements and schedule your appointment. Consultation: We’ll consult with you to understand your wedding theme and your desired bridal look. Trial Session: We recommend a trial session to ensure we get your look just right and make any adjustments ahead of the big day. Wedding Day Makeup: On your wedding day, our professional makeup artist will arrive at your home in Ramgarh to work their magic and ensure you look perfect for the ceremony. Testimonials from Brides in Ramgarh Neha S., Ramgarh: "Ladyfair did an amazing job on my bridal makeup. I was so impressed with how beautiful and fresh I looked. The makeup stayed flawless all day, and I received so many compliments. Highly recommend!" Priya M., Ramgarh: "I was so happy with the HD makeup for my wedding. The team at Ladyfair made me feel so comfortable, and my makeup was perfect. It lasted all day and looked amazing in my wedding photos!" Sonia R., Ramgarh: "The airbrush makeup was a game changer for me! It was light, yet gave me such a glowing and radiant look. The Ladyfair team made me feel like a true queen on my special day." Bridal Makeup Tips for Brides in Ramgarh Prep Your Skin Early: Start moisturizing and hydrating your skin 1-2 months before your wedding to ensure a smooth and glowing complexion. Know Your Style: Share your preferred bridal look with your makeup artist during the consultation. Whether you prefer a natural or glamorous look, knowing your style will help us create the perfect makeup for you. Choose Long-Lasting Products: At Ladyfair, we only use high-quality products that ensure your makeup lasts throughout your wedding day. Don’t Skip the Trial Session: A trial session ensures your makeup is exactly what you want before the big day, giving you peace of mind on your wedding day. Other Beauty Services by Ladyfair in Ramgarh Apart from bridal makeup, we also offer a range of beauty services for every occasion: Engagement Makeup: Get ready for your engagement ceremony with our expert makeup services. Reception Makeup: Make a lasting impression at your wedding reception with our specialized makeup packages. Party Makeup: For birthdays, anniversaries, and other events, we offer beautiful makeup to make you look your best. Casual Makeup: Whether it’s a simple gathering or day-to-day makeup, we offer natural, easy-to-wear looks that enhance your beauty. The Future of Bridal Makeup in Ramgarh At Ladyfair, we are always evolving and incorporating the latest bridal makeup trends to ensure we offer the best service to our brides in Ramgarh. Our team is committed to delivering exceptional bridal makeup that helps each bride feel beautiful, confident, and radiant. Frequently Asked Questions Q1: Why should I choose Ladyfair for bridal makeup in Ramgarh? A1: Ladyfair offers personalized bridal makeup services, ensuring you get the perfect look for your wedding day. We provide a professional, relaxing experience with high-quality products that last all day. Q2: How much does bridal makeup cost in Ramgarh? A2: Bridal makeup packages start at ₹10,000, with HD and airbrush options available for ₹12,000 and ₹18,000, respectively. Q3: Can I book makeup for other events? A3: Yes, we offer makeup services for engagements, receptions, and other events, including parties and casual occasions. Q4: Do I need a trial session for bridal makeup? A4: Yes, a trial session is highly recommended to finalize your bridal look and make any adjustments ahead of your wedding day.

Posted By: 24th November 2024
BEST BRIDAL MAKEUP ARTIST IN MOHANIA
BEST BRIDAL MAKEUP ARTIST IN MOHANIA Introduction Mohania, a quaint town with a charming atmosphere, offers a beautiful backdrop for any bride's big day. At Ladyfair, we are dedicated to providing exceptional bridal makeup services in Mohania, ensuring that every bride looks stunning and radiant. Whether you envision a traditional, glamorous, or modern bridal look, our skilled makeup artists are here to help you achieve the perfect style. Contact us today at 7004721239 to book your at-home bridal makeup and make your wedding day even more special. Why Choose Ladyfair for Bridal Makeup in Mohania? Experienced Makeup Artists Our professional makeup artists are highly trained and experienced in creating beautiful bridal looks for every occasion. From soft, natural makeup to bold, dramatic styles, we ensure that your bridal look is flawless and complements your wedding theme. Convenience of At-Home Services We offer at-home bridal makeup services in Mohania, bringing our beauty expertise directly to your doorstep. This allows you to relax and enjoy the process without worrying about traveling to a salon on your big day. Long-Lasting, Beautiful Makeup Our makeup is designed to last all day, keeping you looking fresh and glowing from the ceremony to the last dance. We use high-quality products that ensure your makeup stays intact and your skin remains radiant throughout the day. Bridal Makeup Packages in Mohania At Ladyfair, we offer a variety of bridal makeup packages that are tailored to suit different preferences and budgets. Our packages include expert consultation and personalized services for a look that is uniquely yours. Basic Bridal Makeup: ₹10,000 HD Bridal Makeup: ₹12,000 Airbrush Bridal Makeup: ₹18,000 We also offer makeup services for other wedding events, including: Engagement or Reception Makeup (Basic): ₹6,000 Engagement or Reception Makeup (HD): ₹8,000 Engagement or Reception Makeup (Airbrush): ₹12,000 For other events, we offer: Party Makeup (Basic): ₹2,500 Party Makeup (HD): ₹3,500 Bridal Makeup Styles in Mohania Traditional Bridal Makeup For brides who want to embrace the rich traditions of Indian weddings, we offer traditional bridal makeup that is timeless and beautiful. This style often includes bold colors, defined eyes, and a classic look that highlights your best features. HD Bridal Makeup HD makeup is a lighter, camera-friendly option that creates a smooth, flawless finish. Ideal for brides who want a natural, glowing look, HD makeup enhances your features while keeping the look light and elegant. Airbrush Bridal Makeup For a long-lasting and flawless finish, airbrush makeup is a perfect choice. This technique ensures an even, smooth coverage that looks perfect in photos and feels weightless. Airbrush makeup is ideal for brides who want a dewy, radiant look on their wedding day. How to Book Your Bridal Makeup in Mohania Booking your bridal makeup service with Ladyfair is simple and straightforward: Call Us: Dial 7004721239 to discuss your makeup requirements and book your appointment. Consultation: We’ll work with you to understand your wedding theme and your makeup preferences, ensuring you get the look you’ve always dreamed of. Trial Session: We recommend a trial session where we can finalize your bridal look before the big day, making sure you’re completely satisfied. Wedding Day Makeup: On your wedding day, we’ll arrive at your location in Mohania, ready to work our magic and help you look and feel your best. Testimonials from Brides in Mohania Suman R., Mohania: "I chose Ladyfair for my bridal makeup, and I couldn’t have been happier! The makeup was flawless, and I felt so confident and beautiful. The team was professional, and the makeup stayed perfect all day long." Shweta P., Mohania: "Thank you Ladyfair for making me look and feel like a queen on my wedding day! The airbrush makeup was amazing, and it lasted through the ceremony and reception. I received so many compliments!" Priya K., Mohania: "My experience with Ladyfair was wonderful! The HD makeup they did for my wedding was perfect, not too heavy, just the right amount of glow. It was everything I wanted and more!" Bridal Makeup Tips for Brides in Mohania Hydrate Your Skin: Begin moisturizing and hydrating your skin at least 1-2 months before your wedding to ensure a glowing complexion. Communicate Your Style: It’s important to share your ideas and preferences with your makeup artist during the consultation. Let us know your wedding theme, makeup style, and color preferences. Choose Long-Lasting Makeup: At Ladyfair, we use only high-quality, long-lasting makeup products to ensure you look gorgeous all day, even through the most emotional moments. Trial Session Is Key: A trial session helps you finalize your bridal look and allows you to make adjustments before your wedding day. It’s an essential step to achieving the perfect makeup. Other Beauty Services by Ladyfair in Mohania Aside from bridal makeup, Ladyfair offers a variety of other beauty services for any occasion: Engagement Makeup: Get ready for your engagement ceremony with makeup that enhances your natural beauty. Reception Makeup: Make a statement at your wedding reception with our professional makeup services that ensure you look your best. Party Makeup: Whether it’s for a birthday, anniversary, or any other special event, we offer makeup services tailored to your needs. Casual Makeup: For day-to-day events or smaller gatherings, we offer simple yet beautiful makeup options. The Future of Bridal Makeup in Mohania Ladyfair is constantly evolving and keeping up with the latest bridal makeup trends to offer the best services to brides in Mohania. We are committed to helping each bride feel like the most beautiful version of herself on her wedding day. Frequently Asked Questions Q1: Why should I choose Ladyfair for bridal makeup in Mohania? A1: Ladyfair offers professional, personalized bridal makeup services that are tailored to your style and wedding theme, ensuring you look flawless on your special day. Q2: How much does bridal makeup cost in Mohania? A2: Bridal makeup packages start at ₹10,000, with HD and airbrush options available at ₹12,000 and ₹18,000, respectively. Q3: Can I book makeup for other wedding events? A3: Yes, we offer makeup services for engagements, receptions, and other events like parties and casual gatherings. Q4: Do I need a trial session for bridal makeup? A4: Yes, we highly recommend a trial session to help you finalize your bridal look and ensure you’re happy with your makeup on the big day.

Posted By: 24th November 2024
BEST BRIDAL MAKEUP ARTIST IN KUDRA
BEST BRIDAL MAKEUP ARTIST IN KUDRA Introduction Kudra, a serene town with rich culture and vibrant traditions, is an excellent choice for brides seeking an unforgettable wedding experience. At Ladyfair, we understand the importance of looking your best on your wedding day, and that's why we offer bridal makeup services in Kudra tailored to your specific needs and style. Whether you prefer a traditional or modern bridal look, our experienced makeup artists will help you achieve the perfect look that complements your personality and wedding theme. Contact us today at 7004721239 to book your at-home bridal makeup service. Why Choose Ladyfair for Bridal Makeup in Kudra? Expert Makeup Artists Our team of professional makeup artists is highly skilled and trained to create a variety of bridal looks. Whether you're envisioning a classic, bold, or contemporary bridal look, we ensure that you feel confident, stunning, and ready for your special day. At-Home Makeup Services We offer at-home bridal makeup services in Kudra, ensuring a comfortable and stress-free experience on your wedding day. We come directly to your home, allowing you to relax and enjoy the experience of getting ready without the hassle of traveling. Long-Lasting Makeup We use only the finest makeup products to ensure that your bridal makeup lasts all day. Our makeup artists ensure your look remains flawless from the first photo to the last dance, keeping you glowing throughout the celebration. Bridal Makeup Packages in Kudra At Ladyfair, we offer a variety of bridal makeup packages to meet different preferences and budgets. Each package includes expert consultation and personalized makeup tailored to enhance your natural beauty. Basic Bridal Makeup: ₹10,000 HD Bridal Makeup: ₹12,000 Airbrush Bridal Makeup: ₹18,000 In addition to bridal makeup, we also offer makeup services for other wedding events, including: Basic Makeup for Engagement or Reception: ₹6,000 HD Makeup for Engagement or Reception: ₹8,000 Airbrush Makeup for Engagement or Reception: ₹12,000 For other events like parties or gatherings, we offer: Basic Party Makeup: ₹2,500 HD Party Makeup: ₹3,500 Bridal Makeup Styles in Kudra Traditional Bridal Makeup For brides who wish to embrace the cultural elegance of a traditional look, we create stunning, bold makeup that highlights your features and complements your bridal attire. Traditional bridal makeup often includes rich tones and intricate details, ensuring you stand out on your special day. HD Bridal Makeup If you’re aiming for a smooth, natural, and camera-ready look, HD makeup is perfect. This style is ideal for brides who want to enhance their beauty without looking too heavy or overdone. It gives a flawless finish that looks beautiful both in person and in photographs. Airbrush Bridal Makeup Airbrush makeup is a great option for brides who want a flawless, long-lasting finish. It provides a smooth, lightweight feel while ensuring that your makeup stays put throughout your wedding day. It’s perfect for brides who prefer a dewy and natural appearance. How to Book Your Bridal Makeup in Kudra Booking your bridal makeup service with Ladyfair is easy: Call Us: Dial 7004721239 to discuss your makeup requirements and book your appointment. Consultation: We’ll help you choose the best makeup style to suit your wedding theme and personal preferences. Trial Session: We recommend a trial session to finalize your look before the big day, ensuring that you’re 100% satisfied with your bridal makeup. Wedding Day Makeup: On the day of your wedding, our professional makeup artists will arrive at your location in Kudra, ready to make you look absolutely gorgeous. Testimonials from Brides in Kudra Priya M., Kudra: "Ladyfair's bridal makeup team did an incredible job on my wedding day. They understood exactly what I wanted and created the perfect look that lasted all day. I felt so confident and beautiful. Highly recommended!" Neha P., Kudra: "I’m so glad I chose Ladyfair for my bridal makeup! They created a perfect traditional bridal look for me that matched my outfit beautifully. The makeup stayed flawless all day, and I received so many compliments." Rita D., Kudra: "I opted for HD makeup, and I was absolutely delighted with the result. The makeup was light but gave me a beautiful, glowing look. I felt amazing and comfortable throughout the ceremony and reception." Bridal Makeup Tips for Brides in Kudra Start Skincare Early: Begin a good skincare routine at least 2-3 months before your wedding to ensure your skin is clear, hydrated, and glowing. Discuss Your Vision: Be sure to communicate your makeup style, preferences, and wedding theme with your makeup artist during your consultation. Choose Long-Lasting Products: We use high-quality, long-lasting makeup products to ensure that you look radiant all day long without worrying about touch-ups. Have a Trial Session: A trial session will help you finalize your bridal look well before the wedding day, ensuring you’re satisfied with your choice. Other Beauty Services by Ladyfair in Kudra Apart from bridal makeup, Ladyfair also offers a variety of beauty services to enhance your look for any occasion: Engagement Makeup: Get a stunning look for your engagement ceremony, complete with flawless makeup that enhances your features. Reception Makeup: Look your best during your wedding reception with professional makeup services. Party Makeup: Whether it’s a birthday, anniversary, or any celebration, we offer makeup services that fit the occasion. Casual Makeup: For day-to-day events or smaller gatherings, we provide simple and elegant makeup solutions. The Future of Bridal Makeup in Kudra At Ladyfair, we are committed to staying on top of bridal makeup trends, bringing innovative and personalized services to brides in Kudra. Our goal is to make every bride feel beautiful, confident, and radiant on her wedding day. Frequently Asked Questions Q1: Why should I choose Ladyfair for bridal makeup in Kudra? A1: Ladyfair offers personalized and professional bridal makeup services designed to suit your style and preferences, ensuring you look flawless on your special day. Q2: How much does bridal makeup cost in Kudra? A2: Bridal makeup at Ladyfair starts at ₹10,000, with HD and airbrush options priced at ₹12,000 and ₹18,000, respectively. Q3: Can I book makeup for other events besides my wedding? A3: Yes, we offer makeup services for engagements, receptions, parties, and more. Q4: Do I need a trial session for bridal makeup? A4: Yes, a trial session is highly recommended to finalize your look and ensure you're satisfied with your makeup before your wedding day.

Posted By: 24th November 2024
BEST BRIDAL MAKEUP ARTIST IN DURGAWATI
BEST BRIDAL MAKEUP ARTIST IN DURGAWATI Introduction DurgaWati, a charming town full of history and culture, is an ideal place for a beautiful wedding celebration. At Ladyfair, we understand that your wedding day is one of the most significant moments in your life, and we strive to make sure you look and feel your very best. Our bridal makeup services in DurgaWati are tailored to your specific needs, ensuring that you walk down the aisle with confidence, radiance, and elegance. Whether you prefer a traditional or contemporary bridal look, our team of skilled makeup artists is here to make your dream bridal look a reality. Call us today at 7004721239 to book your at-home bridal makeup service. Why Choose Ladyfair for Bridal Makeup in DurgaWati? Expert Makeup Artists Our makeup artists are highly experienced in bridal makeup and skilled in creating customized looks that perfectly match your personality and wedding theme. Whether you desire a timeless, classic, or modern bridal look, we bring your vision to life. At-Home Makeup Services We know how stressful wedding days can be, which is why we offer at-home bridal makeup services in DurgaWati. Our team will come to your home, ensuring that you can enjoy a relaxing and hassle-free makeup experience before your big day. Long-Lasting and Flawless Makeup We use top-quality products designed for long-lasting wear, so you don’t need to worry about touch-ups throughout your celebration. Whether it's a ceremony, reception, or after-party, your makeup will stay fresh and beautiful. Bridal Makeup Packages in DurgaWati At Ladyfair, we offer a variety of bridal makeup packages designed to suit different preferences and budgets. Each package includes expert consultation and tailored makeup to ensure that you look stunning on your wedding day. Basic Bridal Makeup: ₹10,000 HD Bridal Makeup: ₹12,000 Airbrush Bridal Makeup: ₹18,000 In addition to bridal makeup, we also offer makeup services for other wedding events, including: Basic Makeup for Engagement or Reception: ₹6,000 HD Makeup for Engagement or Reception: ₹8,000 Airbrush Makeup for Engagement or Reception: ₹12,000 If you're attending other events like parties or gatherings, we offer: Basic Party Makeup: ₹2,500 HD Party Makeup: ₹3,500 Bridal Makeup Styles in DurgaWati Traditional Bridal Makeup Traditional bridal makeup is ideal for brides who want to embrace cultural elegance. Our team is skilled in creating bold, classic looks with intricate details to match your traditional attire. HD Bridal Makeup For brides who want a flawless and smooth finish, HD makeup is the perfect choice. This style enhances your natural beauty, creating a stunning, camera-ready look for both close-ups and long-distance shots. Airbrush Bridal Makeup Airbrush makeup provides a lightweight, flawless finish that’s perfect for long hours of wear. Ideal for brides who want a fresh, dewy, and natural look without worrying about makeup fading or smudging. How to Book Your Bridal Makeup in DurgaWati Booking your bridal makeup with Ladyfair is simple and stress-free: Call Us: Dial 7004721239 to discuss your bridal makeup requirements and schedule your appointment. Consultation: We'll help you choose the best makeup style for your wedding theme and personal preferences. Trial Session: We recommend a trial session to make sure you're 100% satisfied with your bridal look before the big day. Wedding Day Makeup: On your wedding day, our professional makeup artists will arrive at your location in DurgaWati and make sure you look absolutely stunning. Testimonials from Brides in DurgaWati Neelam G., DurgaWati: "I had Ladyfair for my bridal makeup, and they did an amazing job! The makeup lasted throughout my wedding day, and I felt so confident and beautiful. Thank you for making my day special!" Simran K., DurgaWati: "The team at Ladyfair exceeded my expectations. They created a perfect traditional bridal look for me that matched my outfit beautifully. I was so happy with my makeup, and I felt like a queen!" Priya S., DurgaWati: "I was looking for a natural bridal look, and Ladyfair's HD makeup was perfect! The makeup stayed intact all day, and I received so many compliments. Highly recommend!" Bridal Makeup Tips for Brides in DurgaWati Start Your Skincare Early: Begin a skincare routine at least a few months before your wedding to ensure your skin is glowing and ready for makeup. Communicate Your Vision: Share your preferred makeup style, wedding theme, and any specific requirements with your makeup artist during your consultation. Opt for Long-Lasting Products: Ladyfair uses makeup products specifically designed to stay intact throughout the ceremony, photoshoots, and celebrations. Book a Trial Session: We recommend a trial session to finalize your makeup look well before your wedding day, ensuring you're comfortable and confident with your choice. Other Beauty Services by Ladyfair in DurgaWati In addition to bridal makeup, we offer a range of other beauty services to enhance your look for every occasion: Engagement Makeup: Get a glamorous and flawless look for your engagement ceremony. Reception Makeup: Be the center of attention at your wedding reception with personalized makeup. Party Makeup: Whether it's a birthday, anniversary, or casual event, we’ll help you look fabulous. Casual Makeup: For a day-to-day natural look or smaller events, we provide stylish and simple makeup solutions. The Future of Bridal Makeup in DurgaWati Ladyfair is committed to staying at the forefront of bridal makeup trends, continuously enhancing our services to provide brides in DurgaWati with the best bridal makeup experience. Our aim is to help every bride feel her best, looking gorgeous and radiant throughout her wedding day. Frequently Asked Questions Q1: Why choose Ladyfair for bridal makeup in DurgaWati? A1: Ladyfair offers professional bridal makeup services that are tailored to your specific needs and preferences, ensuring you look flawless on your special day. Q2: What is the cost of bridal makeup in DurgaWati? A2: Bridal makeup at Ladyfair starts at ₹10,000, with HD and airbrush options priced at ₹12,000 and ₹18,000, respectively. Q3: Can I book makeup services for other events apart from my wedding? A3: Yes, we provide makeup services for engagements, receptions, parties, and more. Q4: Should I have a trial session before my wedding day? A4: A trial session is highly recommended to ensure you’re completely happy with your bridal look and to make any adjustments before your wedding day.

Posted By: 24th November 2024
BEST BRIDAL MAKEUP ARTIST IN HARNAUT
BEST BRIDAL MAKEUP ARTIST IN HARNAUT Introduction Harnaut, a beautiful town steeped in tradition and culture, is the perfect setting for your wedding day. At Ladyfair, we know how important it is to look and feel your absolute best on this once-in-a-lifetime occasion. Our bridal makeup services in Harnaut are designed to help you achieve the perfect look, whether you’re aiming for a classic, modern, or glamorous bridal style. With our talented team of makeup artists, we ensure that you feel confident and radiant on your special day. Call us now at 7004721239 to book your at-home bridal makeup service. Why Choose Ladyfair for Bridal Makeup in Harnaut? Professional Makeup Artists Our makeup artists are highly skilled and experienced in bridal makeup. Whether you're looking for a traditional, contemporary, or unique bridal look, we have the expertise to create the perfect style that reflects your personality and enhances your features. At-Home Makeup Service Our team brings the salon experience to your doorstep. With our at-home bridal makeup services, you can relax in the comfort of your home while our expert makeup artists work to create the bridal look of your dreams. Long-Lasting Makeup Your wedding day is filled with emotions, photos, and celebrations, and your makeup should stay fresh and flawless all day long. Ladyfair uses top-quality products designed for longevity, so you don’t have to worry about touch-ups throughout your special day. Bridal Makeup Packages in Harnaut At Ladyfair, we offer a range of bridal makeup packages to suit various preferences and budgets. Our services are tailored to provide the best value and experience for your wedding day. Basic Bridal Makeup: ₹10,000 HD Bridal Makeup: ₹12,000 Airbrush Bridal Makeup: ₹18,000 We also offer makeup services for other events related to your wedding, such as: Basic Makeup for Engagement or Reception: ₹6,000 HD Makeup for Engagement or Reception: ₹8,000 Airbrush Makeup for Engagement or Reception: ₹12,000 If you're attending parties or casual events, we have: Basic Party Makeup: ₹2,500 HD Party Makeup: ₹3,500 Bridal Makeup Styles in Harnaut Traditional Bridal Makeup Traditional bridal makeup is perfect for brides who want to embrace their cultural roots. At Ladyfair, we specialize in creating traditional bridal looks with bold colors, intricate detailing, and a radiant finish to complement your wedding attire. HD Bridal Makeup For brides looking for a flawless, smooth, and refined appearance, HD makeup is the ideal choice. It enhances your natural beauty while ensuring that your makeup looks impeccable in high-definition photos, no matter the lighting. Airbrush Bridal Makeup Airbrush makeup offers a light, natural feel with full coverage. It's perfect for brides who want a long-lasting, radiant look that won’t fade, ensuring you look picture-perfect all day long. Airbrush makeup is ideal for smooth, flawless skin without the heaviness of traditional makeup. How to Book Your Bridal Makeup in Harnaut Booking your bridal makeup service with Ladyfair is simple and convenient: Call Us: Dial 7004721239 to discuss your bridal makeup needs and schedule your appointment. Consultation: We'll help you choose the best makeup style that aligns with your preferences and wedding theme. Trial Session: We recommend a trial session to make sure you're 100% happy with your bridal look before your big day. Wedding Day Makeup: On your wedding day, our expert makeup artists will arrive at your Harnaut location and transform you into the bride you’ve always dreamed of. Testimonials from Brides in Harnaut Simran K., Harnaut: "I booked Ladyfair for my bridal makeup, and I couldn't be happier. The team was professional, and the makeup lasted all day without needing any touch-ups. The airbrush makeup gave me such a flawless finish. Thank you, Ladyfair!" Rina M., Harnaut: "I wanted a traditional bridal look for my wedding, and Ladyfair delivered exactly what I had imagined. The makeup was perfect, and the artist was very friendly and patient. I felt like the best version of myself!" Aarti S., Harnaut: "Ladyfair made my wedding day even more special. The makeup was flawless, and I received so many compliments. I was so impressed with how well the makeup lasted from the ceremony to the reception." Bridal Makeup Tips for Brides in Harnaut Start Skincare Early: Begin a skincare routine several months before your wedding to ensure your skin is healthy and glowing for your makeup. Communicate Your Preferences: Let your makeup artist know your style preferences, wedding theme, and any specific requests. Long-Lasting Products: At Ladyfair, we use high-quality makeup products designed for long-lasting wear, so you don’t have to worry about touch-ups. Trial Session is Key: A trial session is a great way to ensure you're comfortable with your makeup and allows you to make any necessary adjustments before your big day. Other Beauty Services by Ladyfair in Harnaut In addition to bridal makeup, we offer a variety of beauty services to help you look and feel your best for all your wedding events: Engagement Makeup: Get a glamorous and personalized look for your engagement ceremony. Reception Makeup: Look flawless for your reception with a customized makeup look. Party Makeup: Whether it’s a birthday, anniversary, or any other celebration, we can make sure you look stunning. Casual Makeup: For a natural, easy-going look on a regular day or for smaller events. The Future of Bridal Makeup in Harnaut At Ladyfair, we continually evolve our services and keep up with the latest makeup trends to offer brides in Harnaut the best experience possible. Our goal is to make sure every bride feels her most beautiful, confident, and radiant on her wedding day. Frequently Asked Questions Q1: Why should I choose Ladyfair for bridal makeup in Harnaut? A1: Ladyfair offers personalized bridal makeup services with professional artists who specialize in creating stunning looks using top-quality products that last all day. Q2: How much does bridal makeup in Harnaut cost? A2: Bridal makeup at Ladyfair starts from ₹10,000 for basic makeup, with HD and airbrush options available at ₹12,000 and ₹18,000, respectively. Q3: Can I book makeup services for other events besides the wedding? A3: Yes, we offer makeup services for engagements, receptions, parties, and other special occasions. Q4: Should I get a trial session before my wedding? A4: While it’s not mandatory, we highly recommend a trial session to ensure you’re completely satisfied with your bridal look before your wedding day.

Posted By: 24th November 2024
BEST BRIDAL MAKEUP ARTIST IN HILSA
BEST BRIDAL MAKEUP ARTIST IN HILSA Introduction Hilsa, a charming town with a rich cultural heritage, offers the perfect setting for your wedding day. At Ladyfair, we understand how important it is for you to look and feel your best on your special day, and our bridal makeup services in Hilsa are designed to make you feel radiant and confident. Our team of expert makeup artists specializes in creating flawless bridal looks, tailored to suit your individual style. Whether you're getting married at home or at a venue in Hilsa, we’ll ensure you look stunning from the moment you walk down the aisle. Call us now at 7004721239 to book your at-home bridal makeup service. Why Choose Ladyfair for Bridal Makeup in Hilsa? Professional Makeup Artists At Ladyfair, our makeup artists are skilled professionals with years of experience in bridal makeup. We specialize in creating a range of bridal looks, from traditional to contemporary, using high-quality products to ensure a flawless, long-lasting finish. At-Home Makeup Service We bring the salon experience to your doorstep. Our makeup artists will travel to your location in Hilsa, offering you the convenience of getting ready in the comfort of your home. Relax while our experts work their magic and create the bridal look of your dreams. Long-Lasting Makeup Your wedding day is filled with emotions and celebrations, and we make sure your bridal makeup lasts throughout the day. Ladyfair uses premium products that stay fresh and flawless, so you can enjoy your wedding day without worrying about touch-ups. Bridal Makeup Packages in Hilsa We offer a variety of bridal makeup packages to suit different styles and budgets. Our packages include: Basic Bridal Makeup: ₹10,000 HD Bridal Makeup: ₹12,000 Airbrush Bridal Makeup: ₹18,000 We also offer makeup services for other wedding events, including: Basic Makeup for Engagement or Reception: ₹6,000 HD Makeup for Engagement or Reception: ₹8,000 Airbrush Makeup for Engagement or Reception: ₹12,000 For other events, such as parties or casual occasions, we offer: Basic Party Makeup: ₹2,500 HD Party Makeup: ₹3,500 Bridal Makeup Styles in Hilsa Traditional Bridal Makeup Traditional bridal makeup is a timeless classic. At Ladyfair, we specialize in creating this look, focusing on bold and vibrant colors, intricate details, and a radiant finish that perfectly complements your cultural attire. HD Bridal Makeup For brides who prefer a flawless, smooth look, HD bridal makeup is the perfect choice. It gives you an airbrushed finish and ensures that your makeup looks stunning in both natural and artificial light, leaving you picture-perfect all day long. Airbrush Bridal Makeup Airbrush makeup offers a light, natural feel with full coverage. This technique is ideal for brides who want a radiant glow and a smooth, long-lasting finish. The airbrush technique ensures that your makeup stays fresh and beautiful from the start of the ceremony until the last dance. How to Book Your Bridal Makeup in Hilsa Booking your bridal makeup service with Ladyfair is easy: Call Us: Dial 7004721239 to discuss your bridal makeup needs and schedule your appointment. Consultation: We will go over your preferences and help you choose the best makeup style for your wedding. Trial Session: We offer trial sessions to ensure you're completely satisfied with your bridal look before your big day. Wedding Day Makeup: On your wedding day, our expert makeup artists will come to your location in Hilsa and create a beautiful bridal look. Testimonials from Brides in Hilsa Priya S., Hilsa: "My bridal makeup was done by Ladyfair, and it was absolutely stunning. I loved the natural yet glamorous look they created for me. The makeup lasted all day, and I felt beautiful throughout the ceremony. Highly recommend!" Neelam R., Hilsa: "I had an amazing experience with Ladyfair for my wedding makeup. The team was professional and understood exactly what I wanted. The airbrush makeup was light, flawless, and long-lasting—just perfect for my big day." Kavita M., Hilsa: "The makeup artists at Ladyfair are true professionals! They created a perfect bridal look that matched my wedding theme. I received so many compliments throughout the day, and the makeup stayed fresh until the evening." Bridal Makeup Tips for Brides in Hilsa Start Skincare Early: A good skincare routine months before your wedding ensures smooth, glowing skin for your makeup. Communicate Your Preferences: Share your ideas, wedding theme, and makeup preferences with your makeup artist to create a personalized look. Choose Long-Lasting Products: Ladyfair uses premium products that ensure your makeup stays in place all day, so you don’t need to worry about touch-ups. Don’t Skip the Trial Session: A trial session will help you confirm your bridal look and ensure everything goes smoothly on the wedding day. Other Beauty Services by Ladyfair in Hilsa Ladyfair doesn’t just offer bridal makeup services; we also offer beauty treatments for all your special occasions: Engagement Makeup: Get a glamorous look for your engagement ceremony. Reception Makeup: Look stunning for your reception with a customized makeup look. Party Makeup: Perfect for birthdays, anniversaries, or any other celebration. Casual Makeup: Natural and light makeup for daily activities or outings. The Future of Bridal Makeup in Hilsa At Ladyfair, we’re constantly evolving and keeping up with the latest makeup trends to ensure that brides in Hilsa always receive the best services. We believe that every bride deserves to look and feel her best, and we’re here to make that happen. Frequently Asked Questions Q1: Why should I choose Ladyfair for bridal makeup in Hilsa? A1: Ladyfair provides personalized, high-quality bridal makeup services in Hilsa, offering a range of styles including HD and airbrush makeup for long-lasting, flawless results. Q2: What is the cost of bridal makeup in Hilsa? A2: Bridal makeup packages at Ladyfair start at ₹10,000 for basic makeup, with HD and airbrush options available at ₹12,000 and ₹18,000, respectively. Q3: Can I book makeup services for other events besides the wedding? A3: Yes, Ladyfair offers makeup services for engagements, receptions, parties, and other special occasions. Q4: Do I need a trial session before my wedding? A4: While it's optional, we recommend a trial session to make sure you're happy with your bridal makeup before your big day.

Posted By: 24th November 2024
BEST BRIDAL MAKEUP ARTIST IN ASTHAWAN
BEST BRIDAL MAKEUP ARTIST IN ASTHAWAN Introduction Asthawan, a serene town with historical significance, is the perfect backdrop for your wedding day. At Ladyfair, we understand the importance of looking flawless on such a special occasion, and our expert bridal makeup services in Asthawan are designed to ensure you feel beautiful and confident. Our team of professional makeup artists specializes in creating timeless bridal looks that enhance your natural beauty. Whether you're getting ready at home or at a venue in Asthawan, we’ll make sure you look radiant for your big day. Call us now at 7004721239 to book your at-home bridal makeup service. Why Choose Ladyfair for Bridal Makeup in Asthawan? Expert Makeup Artists At Ladyfair, our makeup artists are trained professionals with years of experience in bridal makeup. We specialize in creating diverse bridal looks, whether traditional or contemporary, using only high-quality products to ensure a flawless finish. Convenient At-Home Service Experience the comfort and convenience of having your bridal makeup done at home. Our expert makeup artists will arrive at your doorstep in Asthawan, ensuring that you feel relaxed and pampered without the hassle of visiting a salon. Long-Lasting Makeup Your wedding day is full of emotion, excitement, and celebration, and you deserve a bridal look that stays fresh throughout. At Ladyfair, we use premium products designed to provide long-lasting coverage, ensuring your makeup looks as stunning at the end of the day as it did when you first put it on. Bridal Makeup Packages in Asthawan Ladyfair offers a variety of bridal makeup packages to suit every need and budget. Our packages include: Basic Bridal Makeup: ₹10,000 HD Bridal Makeup: ₹12,000 Airbrush Bridal Makeup: ₹18,000 We also offer packages for other events such as engagements and receptions: Basic Makeup: ₹6,000 HD Makeup: ₹8,000 Airbrush Makeup: ₹12,000 For parties and casual events: Basic Party Makeup: ₹2,500 HD Party Makeup: ₹3,500 Bridal Makeup Styles in Asthawan Traditional Bridal Makeup Traditional bridal makeup focuses on creating a timeless look that complements your cultural attire. Ladyfair’s artists excel in crafting this classic style, using rich colors and bold accents to enhance your features and give you an unforgettable bridal appearance. HD Bridal Makeup HD makeup is perfect for brides who want a smooth, flawless complexion. The high-definition makeup gives your skin a beautiful, airbrushed effect and ensures your makeup looks picture-perfect in both natural light and under the camera flash. Airbrush Bridal Makeup Airbrush makeup is ideal for brides who want a lightweight yet long-lasting finish. This technique delivers full coverage while allowing your skin to breathe, providing a natural, dewy glow that stays fresh all day long. How to Book Your Bridal Makeup in Asthawan Booking your bridal makeup service with Ladyfair is simple and straightforward: Call Us: Dial 7004721239 to discuss your bridal makeup requirements and schedule your appointment. Consultation: We’ll discuss your preferences and help you choose the right makeup style for your wedding day. Trial Session: We offer trial sessions to ensure you’re completely satisfied with your bridal look before the wedding day. Wedding Day Makeup: On your big day, our expert artists will arrive at your location in Asthawan and provide the bridal makeup service to make you look stunning. Testimonials from Brides in Asthawan Neha P., Asthawan: "Ladyfair made my wedding day so special! The makeup was flawless and exactly what I wanted. I felt beautiful and confident throughout the ceremony. Highly recommend their services." Rita J., Asthawan: "I chose the airbrush makeup option for my wedding, and I loved how light and natural it felt. The makeup stayed in place all day, and I got so many compliments. Thank you, Ladyfair!" Sunita M., Asthawan: "The team at Ladyfair was professional and skilled. They listened to my preferences and created a bridal look that made me feel like a queen. I couldn’t be happier with the service." Bridal Makeup Tips for Brides in Asthawan Start Skincare Early: Begin a skincare regimen well in advance of your wedding to ensure your skin is hydrated and radiant for your makeup. Communicate Your Style: Let your makeup artist know about your wedding theme and personal preferences so they can create a look that aligns with your vision. Choose Long-Lasting Products: With Ladyfair’s long-lasting makeup products, you can be assured your bridal makeup will stay fresh from the ceremony to the reception. Don’t Skip the Trial: A trial session ensures you're completely happy with your look before your big day, giving you peace of mind. Other Beauty Services by Ladyfair in Asthawan In addition to bridal makeup, Ladyfair also offers a variety of other beauty services for all your special occasions: Engagement Makeup: Get a radiant look for your engagement ceremony. Reception Makeup: Opt for a glamorous makeup look for your reception. Party Makeup: Perfect for birthdays, anniversaries, and any other celebration. Casual Makeup: Light and fresh makeup for day-to-day activities and outings. The Future of Bridal Makeup in Asthawan Ladyfair is committed to bringing the latest bridal makeup trends and techniques to Asthawan. Our team is constantly learning and innovating to ensure that every bride receives the best possible service and looks stunning on her wedding day. Frequently Asked Questions Q1: Why should I choose Ladyfair for my bridal makeup in Asthawan? A1: Ladyfair provides personalized, high-quality bridal makeup services at home, using top-tier products to ensure a flawless and long-lasting finish. Q2: How much does bridal makeup cost in Asthawan? A2: Bridal makeup packages at Ladyfair start at ₹10,000, with HD and airbrush options available at ₹12,000 and ₹18,000, respectively. Q3: Can I book makeup services for other events besides the wedding? A3: Yes, we offer makeup services for engagements, receptions, parties, and more. Q4: Do I need a trial session for my bridal makeup? A4: We recommend a trial session to ensure that you’re happy with your bridal look before the big day.

Posted By: 24th November 2024
BEST BRIDAL MAKEUP ARTIST IN BIHARSHARIF
BEST BRIDAL MAKEUP ARTIST IN BIHARSHARIF Introduction Bihar Sharif is a historical city with a rich cultural heritage, and on your special day, you deserve to look nothing short of spectacular. At Ladyfair, we specialize in offering top-notch bridal makeup services in Bihar Sharif, ensuring that you feel confident and beautiful as you step into the next chapter of your life. Our team of expert makeup artists is skilled in creating stunning bridal looks that perfectly match your style and personality. Book your at-home bridal makeup service today by calling 7004721239 and experience the luxury of personalized beauty on your wedding day. Why Choose Ladyfair for Bridal Makeup in Bihar Sharif? Expert Makeup Artists Our talented and experienced makeup artists are experts in enhancing your natural beauty. We use premium products and techniques to ensure your bridal makeup is flawless, whether you're opting for a traditional, contemporary, or glamorous bridal look. Convenient At-Home Service Ladyfair brings the beauty studio to your doorstep! Our at-home bridal makeup service is convenient and stress-free, allowing you to relax and enjoy your special day while we take care of your makeup needs. No more running to salons – we’ll handle everything right at your home in Bihar Sharif. Long-Lasting Makeup Your wedding day can be long, and you need makeup that lasts through every moment. At Ladyfair, we ensure that your bridal makeup is designed to stay flawless throughout the ceremony, reception, and beyond, using high-quality, long-lasting products that ensure you look perfect from start to finish. Bridal Makeup Packages in Bihar Sharif Ladyfair offers a range of bridal makeup packages tailored to meet different needs and budgets. Our offerings include: Basic Bridal Makeup: ₹10,000 HD Bridal Makeup: ₹12,000 Airbrush Bridal Makeup: ₹18,000 We also offer makeup services for other wedding-related events such as engagement and reception: Basic Makeup: ₹6,000 HD Makeup: ₹8,000 Airbrush Makeup: ₹12,000 For parties and casual events: Basic Party Makeup: ₹2,500 HD Party Makeup: ₹3,500 Bridal Makeup Styles in Bihar Sharif Traditional Bridal Makeup If you’re going for a traditional bridal look, Ladyfair can create an elegant and timeless style that complements your cultural heritage. Rich colors and bold accents enhance your features while preserving a classic bridal appearance. HD Bridal Makeup HD makeup is perfect for brides who want a flawless, smooth complexion that looks great in photographs. This technique uses specialized products to give you a polished, natural look, ensuring your skin is radiant and even-toned. Airbrush Bridal Makeup For a lightweight, long-lasting, and natural finish, airbrush bridal makeup is the best option. It’s ideal for brides who want a flawless, glowing look that feels light on the skin. The technique provides full coverage with minimal product, allowing for a fresh, natural look that stays put all day. How to Book Your Bridal Makeup in Bihar Sharif Booking your bridal makeup service with Ladyfair is easy: Call Us: Simply call 7004721239 to discuss your requirements and book your appointment. Consultation: We’ll work with you to understand your preferences and suggest the best makeup style to match your wedding theme. Trial Session: We recommend a trial session to help you decide on the perfect bridal look and make sure you’re happy with the style. Wedding Day Makeup: On the big day, our expert makeup artist will arrive at your home in Bihar Sharif, ensuring you look gorgeous and feel confident. Testimonials from Brides in Bihar Sharif Aarti M., Bihar Sharif: "Ladyfair made me feel like a queen on my wedding day! The makeup was flawless, and I loved the convenience of having everything done at home. I highly recommend their services." Priyanka R., Bihar Sharif: "I chose the airbrush makeup option, and I couldn't have been happier with how it turned out! My makeup stayed fresh all day long, and I got so many compliments." Sunita T., Bihar Sharif: "The bridal makeup by Ladyfair was beyond my expectations. It was exactly what I wanted, and the makeup artist was so professional. I felt beautiful and confident on my special day!" Bridal Makeup Tips for Brides in Bihar Sharif Prepare Your Skin: Begin a skincare routine a few weeks before your wedding to ensure smooth, glowing skin for your makeup. Be Clear About Your Preferences: Share your makeup vision with your artist to ensure the look aligns with your style. Go for Long-Lasting Products: Choose makeup products that will last throughout the day, especially if you have a long wedding day ahead. Try Before the Wedding: A trial session is the best way to confirm your bridal look and make any necessary adjustments before the big day. Other Beauty Services by Ladyfair in Bihar Sharif In addition to bridal makeup, Ladyfair offers a wide range of beauty services to enhance your special occasions: Engagement Makeup: For a glowing, elegant look on your engagement day. Reception Makeup: Glamorous and sophisticated makeup for your wedding reception. Party Makeup: Perfect for any other event, from birthdays to anniversaries. Casual Makeup: Light and fresh makeup for day-to-day outings. The Future of Bridal Makeup in Bihar Sharif Ladyfair is committed to bringing the latest bridal makeup trends to Bihar Sharif. Our team is constantly improving and innovating to ensure that every bride looks her absolute best. We continue to strive for excellence, providing you with unforgettable bridal experiences. Frequently Asked Questions Q1: Why is Ladyfair the best choice for bridal makeup in Bihar Sharif? A1: Ladyfair provides personalized, at-home bridal makeup services with expert artists who are skilled in both traditional and modern makeup techniques, ensuring a perfect look for your special day. Q2: How much does bridal makeup cost in Bihar Sharif? A2: Bridal makeup packages start at ₹10,000, with HD and airbrush makeup options available for ₹12,000 and ₹18,000, respectively. Q3: Can I book makeup for events other than my wedding? A3: Yes, Ladyfair offers makeup services for engagements, receptions, parties, and more. Q4: Do I need a trial session before my wedding? A4: Yes, we highly recommend a trial session to ensure you’re happy with your bridal look before the big day.

Posted By: 24th November 2024
BEST BRIDAL MAKEUP ARTIST IN EKMA
BEST BRIDAL MAKEUP ARTIST IN EKMA Introduction If you're getting married in Ekma and looking for the best bridal makeup, Ladyfair is here to help you look and feel your best on your special day. Our expert makeup artists specialize in creating stunning bridal looks, tailored to your unique style. Whether you want a traditional, modern, or glamorous appearance, we ensure that your makeup enhances your natural beauty. Book your at-home bridal makeup service today by calling 7004721239 and let us transform you into the bride of your dreams! Why Choose Ladyfair for Bridal Makeup in Ekma? Experienced Makeup Artists Our makeup artists have years of experience, and they know how to highlight your best features. We work with every skin tone and type to ensure you look flawless throughout the day. Whether you’re going for a subtle look or something bold, we can help you achieve your desired style. Convenient At-Home Service Ladyfair offers the convenience of at-home bridal makeup in Ekma. No need to worry about traveling to a salon – we bring all the tools and products necessary to create a perfect bridal look, right to your doorstep. Long-Lasting Results Your wedding day is an emotional journey, and your makeup should last all day. Ladyfair uses high-quality products that ensure your bridal makeup stays fresh from the morning ceremony to the evening celebration. Bridal Makeup Packages in Ekma Ladyfair offers a variety of bridal makeup packages to suit different needs and budgets. Here's a breakdown of what we offer: Basic Bridal Makeup: ₹10,000 HD Bridal Makeup: ₹12,000 Airbrush Bridal Makeup: ₹18,000 We also offer makeup services for engagement and reception: Basic Makeup: ₹6,000 HD Makeup: ₹8,000 Airbrush Makeup: ₹12,000 For party makeup: Basic Party Makeup: ₹2,500 HD Party Makeup: ₹3,500 Bridal Makeup Styles in Ekma Traditional Bridal Makeup A traditional bridal look focuses on classic elegance. With rich colors and bold eyes, we create a timeless and beautiful style that’s perfect for brides who want a more traditional, cultural look on their wedding day. HD Bridal Makeup Ideal for brides who want flawless skin and stunning photos, HD makeup gives you a perfect, smooth finish. This technique uses special products that are ideal for high-definition cameras, so you’ll look picture-perfect from every angle. Airbrush Bridal Makeup Airbrush makeup offers a lightweight, long-lasting, and natural finish. It's perfect for brides who want a radiant and glowing look while maintaining a fresh and natural appearance. The airbrush technique provides full coverage with a light touch. How to Book Your Bridal Makeup in Ekma Booking bridal makeup with Ladyfair is easy and quick: Call Us: Reach us at 7004721239 to discuss your makeup needs and book your appointment. Consultation: Our makeup artist will talk to you about your preferences and suggest the best makeup style for your wedding day. Trial Session: A trial session is available to help you find the perfect look, ensuring everything is just as you want it. Wedding Day Makeup: On your wedding day, our expert artist will come to your home in Ekma, giving you a beautiful bridal makeover. Testimonials from Brides in Ekma Sonia S., Ekma: "I was thrilled with my bridal makeup from Ladyfair! The makeup artist did an incredible job. I looked beautiful and felt confident all day long. Highly recommended!" Meera K., Ekma: "I opted for the airbrush bridal makeup package, and it was perfect! My makeup stayed intact throughout the day, and I got so many compliments. Thank you, Ladyfair!" Priya P., Ekma: "Ladyfair’s team made me feel like a princess on my wedding day! The makeup was flawless, and the convenience of at-home service made everything so easy. I couldn’t have asked for a better experience!" Bridal Makeup Tips for Brides in Ekma Pre-Wedding Skincare: Start a skincare regimen at least a month before your wedding to ensure your skin is glowing and clear for makeup. Communicate Your Style: Be sure to share your vision with the makeup artist during the consultation. Whether you want a soft, natural look or a bold, dramatic style, communication is key. Choose the Right Foundation: Pick a foundation that matches your skin tone perfectly, and ensure it’s long-lasting for the entire day. Do a Trial Run: A trial session is essential to perfect your bridal look and help you feel confident on the big day. Other Beauty Services by Ladyfair in Ekma Besides bridal makeup, Ladyfair offers a variety of beauty services for other occasions: Engagement Makeup: Elegant and sophisticated looks to make your engagement day unforgettable. Reception Makeup: Glamorous makeup for your post-wedding reception, ensuring you shine. Party Makeup: Perfect for any occasion, whether it's a birthday, anniversary, or special event. Casual Makeup: Subtle and fresh makeup for day-to-day events and casual outings. The Future of Bridal Makeup in Ekma Ladyfair is committed to providing the highest quality bridal makeup in Ekma. As we continue to evolve with the latest makeup trends, we aim to bring out the best in every bride. We look forward to helping more brides create unforgettable memories with a flawless bridal look. Frequently Asked Questions Q1: Why should I choose Ladyfair for bridal makeup in Ekma? A1: Ladyfair provides expert bridal makeup services at home, offering a variety of makeup styles and packages to suit every bride's needs. Q2: What are the prices for bridal makeup in Ekma? A2: Bridal makeup packages start at ₹10,000, with HD and airbrush options available for ₹12,000 and ₹18,000. Q3: Do you offer makeup services for other occasions besides weddings? A3: Yes, we offer makeup services for engagements, receptions, parties, and more. Q4: Can I try out my bridal makeup look before the wedding? A4: Yes, we recommend a trial session to make sure we get your bridal look just right before the big day.

Posted By: 24th November 2024
BEST BRIDAL MAKEUP ARTIST IN PALIGANJ
BEST BRIDAL MAKEUP ARTIST IN PALIGANJ Introduction Looking for the perfect bridal makeup in Paliganj? Look no further! Ladyfair is here to provide exceptional at-home bridal makeup services that will leave you feeling gorgeous and radiant on your special day. Our team of skilled makeup artists specializes in creating personalized bridal looks, ensuring you look your best. Whether you’re seeking a traditional, modern, or glamorous look, we’re here to make it happen. Call 7004721239 today to book your appointment! Why Choose Ladyfair for Bridal Makeup in Paliganj? Expert Makeup Artists Ladyfair’s makeup artists are experienced and trained to handle all types of skin tones and textures, ensuring a flawless finish for every bride. We create personalized looks that reflect your style, so you feel confident and beautiful on your wedding day. Convenient At-Home Service With Ladyfair, you don’t need to worry about traveling to a salon on your big day. We provide at-home bridal makeup services in Paliganj, bringing everything you need right to your doorstep. Relax and let us work our magic while you enjoy your wedding preparations. Long-Lasting Results We use high-quality makeup products that ensure a long-lasting finish. From your wedding ceremony to your reception, your makeup will stay fresh and flawless, allowing you to enjoy every moment without worrying about touch-ups. Bridal Makeup Packages in Paliganj Ladyfair offers a range of bridal makeup packages designed to suit different budgets and preferences. Here’s a look at our offerings: Basic Bridal Makeup: ₹10,000 HD Bridal Makeup: ₹12,000 Airbrush Bridal Makeup: ₹18,000 We also provide packages for engagement and reception makeup: Basic Makeup: ₹6,000 HD Makeup: ₹8,000 Airbrush Makeup: ₹12,000 For party makeup: Basic Party Makeup: ₹2,500 HD Party Makeup: ₹3,500 Bridal Makeup Styles in Paliganj Traditional Bridal Makeup For a classic and timeless bridal look, we use rich, deep tones that complement traditional bridal attire. This style focuses on highlighting your natural beauty while maintaining the elegance of a traditional bride. HD Bridal Makeup HD makeup is designed to create a flawless, high-definition finish that looks stunning both in person and in photos. Ideal for brides looking to shine in every picture, HD makeup provides a smooth, poreless look with high-quality coverage. Airbrush Bridal Makeup Airbrush makeup provides a lightweight, breathable, and smooth finish. Ideal for brides who want a radiant look that lasts all day, airbrush makeup offers full coverage without the heaviness of traditional foundation. How to Book Your Bridal Makeup in Paliganj Booking bridal makeup with Ladyfair is simple and hassle-free: Call Us: Reach out to us at 7004721239 to discuss your requirements and schedule an appointment. Consultation: Our makeup artist will talk to you about your preferences and suggest the best makeup style for your wedding. Trial Session: We recommend a trial session to ensure that we perfect your bridal look before the big day. Wedding Day Makeup: On your wedding day, our expert makeup artist will arrive at your location in Paliganj to give you a gorgeous bridal makeover. Testimonials from Brides in Paliganj Aarti R., Paliganj: "Thank you, Ladyfair! The makeup was flawless, and I felt so beautiful on my wedding day. The at-home service was so convenient, and I didn’t have to worry about a thing!" Neha P., Paliganj: "I chose the HD bridal makeup package, and I’m so glad I did! My makeup was perfect and stayed fresh the whole day. I got so many compliments. Highly recommend Ladyfair for all brides!" Simran T., Paliganj: "I had an airbrush bridal makeup session, and the results were stunning! It was light, radiant, and comfortable. Thank you, Ladyfair, for making my wedding day even more special!" Bridal Makeup Tips for Brides in Paliganj Hydration is Key: Keep your skin hydrated in the weeks leading up to your wedding day to ensure your makeup applies smoothly and lasts longer. Do a Skin Test: To avoid any potential allergic reactions, make sure to test out your makeup products a few weeks before the wedding. Go for a Trial Run: It’s a good idea to schedule a makeup trial session to finalize your look and ensure you’re happy with the results. Choose Your Look Wisely: Whether you prefer traditional, modern, or bold, make sure to communicate your vision clearly with your makeup artist. Other Beauty Services by Ladyfair in Paliganj In addition to bridal makeup, Ladyfair offers a wide range of beauty services for any occasion: Engagement Makeup: Elegant and sophisticated looks for your engagement ceremony. Reception Makeup: Glamorous makeup for your post-wedding reception celebration. Party Makeup: Perfect looks for birthdays, anniversaries, and other celebrations. Casual Makeup: Subtle makeup for everyday occasions, work, or get-togethers. The Future of Bridal Makeup in Paliganj Ladyfair is committed to providing the best bridal makeup experience in Paliganj. Our professional makeup artists ensure that every bride gets the perfect look to suit their individual style. We look forward to continuing our tradition of excellence and helping brides feel confident and beautiful on their wedding day. Frequently Asked Questions Q1: Why should I choose Ladyfair for bridal makeup in Paliganj? A1: Ladyfair offers expert bridal makeup services in Paliganj with at-home convenience, using only high-quality products to ensure a flawless look. Q2: What is the cost of bridal makeup in Paliganj? A2: Bridal makeup packages start at ₹10,000 for a basic look, with HD and airbrush options available for ₹12,000 and ₹18,000. Q3: Do you provide makeup services for other events besides weddings? A3: Yes, we offer engagement, reception, party, and casual makeup services for a variety of occasions. Q4: Can I schedule a makeup trial before my wedding day? A4: Yes, we recommend a trial session to ensure your bridal look is perfect and just as you envision it.

Posted By: 24th November 2024
BEST BRIDAL MAKEUP ARTIST IN RAJGIR
BEST BRIDAL MAKEUP ARTIST IN RAJGIR Introduction When it comes to bridal makeup in Rajgir, Ladyfair is the name you can trust to make your wedding day unforgettable. With years of expertise and a keen eye for detail, our makeup artists ensure that every bride looks radiant and stunning. We specialize in at-home bridal makeup services, bringing all the tools and products you need for a flawless look, directly to your doorstep. Ready to get started? Call 7004721239 to book your appointment today! Why Choose Ladyfair for Bridal Makeup in Rajgir? Experienced Makeup Artists Our team of highly skilled makeup artists is dedicated to creating the perfect bridal look tailored specifically to your preferences. Whether you want a traditional, modern, or glamorous look, we ensure you look nothing short of beautiful. Convenient At-Home Service On your wedding day, the last thing you want to worry about is traveling to a makeup studio. With Ladyfair’s at-home bridal makeup service, we bring all the products and tools to your doorstep in Rajgir, ensuring you enjoy a stress-free and relaxed experience while we work our magic. Long-Lasting Makeup Products We use only premium makeup products that are long-lasting and suit all skin types. Our products ensure that your bridal look stays intact throughout the ceremony and beyond, so you can enjoy your day without a single worry. Bridal Makeup Packages in Rajgir Ladyfair offers a variety of bridal makeup packages to suit different budgets and needs. Here’s a breakdown: Basic Bridal Makeup: ₹10,000 HD Bridal Makeup: ₹12,000 Airbrush Bridal Makeup: ₹18,000 We also offer services for engagement and reception makeup: Basic Makeup: ₹6,000 HD Makeup: ₹8,000 Airbrush Makeup: ₹12,000 For party makeup: Basic Party Makeup: ₹2,500 HD Party Makeup: ₹3,500 Bridal Makeup Styles in Rajgir Traditional Bridal Makeup The traditional bridal look is all about rich, bold colors and a timeless style. We create a classic, elegant appearance that highlights your beauty while complementing your bridal attire. HD Bridal Makeup HD bridal makeup is perfect for creating a flawless, camera-ready look. Using high-definition makeup techniques, we ensure you have smooth, glowing skin, ideal for both in-person and photographable moments. Airbrush Bridal Makeup Airbrush makeup provides a lightweight, smooth finish that feels natural but looks flawless. Perfect for brides seeking a fresh, radiant appearance that lasts for hours without feeling heavy. How to Book Your Bridal Makeup in Rajgir Booking with Ladyfair is quick and easy: Call Us: Call 7004721239 to discuss your bridal makeup needs and schedule an appointment. Consultation: Our makeup artist will work with you to understand your vision, making sure the makeup suits your personal style. Trial Session: We recommend a trial session to perfect the look before your wedding day. Wedding Day Makeup: On your big day, our artist will arrive at your location in Rajgir to create the flawless bridal look you’ve always dreamed of. Testimonials from Brides in Rajgir Ritika P., Rajgir: "I couldn’t have asked for a better bridal makeup experience! The makeup was absolutely stunning, and I received so many compliments. Ladyfair made my day even more special." Meera S., Rajgir: "The airbrush makeup was perfect for my skin type. It stayed fresh throughout the entire wedding, and I felt like a queen. Highly recommend Ladyfair for all brides!" Shivani T., Rajgir: "The makeup trial was a great experience, and the actual bridal look was flawless. I was so happy with the results. Thank you, Ladyfair!" Bridal Makeup Tips for Brides in Rajgir Hydrate Well: Drink plenty of water leading up to your wedding to keep your skin healthy and glowing. Skincare Before the Big Day: Maintain a good skincare routine to ensure clear and smooth skin for the makeup artist to work with. Choose Your Makeup Style Wisely: Think about the kind of look you want — traditional, modern, or bold — and communicate this clearly to your makeup artist. Don’t Experiment: Stick to makeup styles that you know work for you, and trust your makeup artist’s expertise. Other Beauty Services by Ladyfair in Rajgir Ladyfair offers a wide range of makeup services for any occasion, not just weddings: Engagement Makeup: Elegant looks to ensure you shine during your engagement ceremony. Reception Makeup: Glamorous makeup for your post-wedding celebration. Party Makeup: Perfect looks for birthdays, anniversaries, and other events. Casual Makeup: Look beautiful every day with simple, natural makeup for work or other occasions. The Future of Bridal Makeup in Rajgir At Ladyfair, we strive to stay at the forefront of bridal makeup trends while also providing personalized services to every bride. Our focus remains on quality, customer satisfaction, and making every bride feel her best. We look forward to continuing to offer top-notch services in Rajgir and creating memories that last a lifetime. Frequently Asked Questions Q1: Why should I choose Ladyfair for bridal makeup in Rajgir? A1: Ladyfair offers professional, at-home bridal makeup with experienced artists who tailor the look to your style and preferences, ensuring a flawless look on your wedding day. Q2: What is the cost of bridal makeup in Rajgir? A2: Bridal makeup packages start at ₹10,000 for a basic look, with HD and airbrush options available for ₹12,000 and ₹18,000. Q3: Can I schedule a trial session before my wedding? A3: Yes, we offer a makeup trial to ensure you’re completely satisfied with your bridal look. Q4: What makeup styles do you offer? A4: We offer traditional, HD, and airbrush makeup styles to meet various bride preferences. Q5: Do you provide makeup services for other events besides weddings? A5: Yes, we offer services for engagements, receptions, parties, and other special occasions.

Posted By: 24th November 2024
BEST BRIDAL MAKEUP ARTIST IN PAWAPURI
BEST BRIDAL MAKEUP ARTIST IN PAWAPURI Introduction If you're looking for the best bridal makeup services in Pawapuri, Ladyfair is here to make your wedding day unforgettable. We specialize in providing expert at-home bridal makeup that ensures you look radiant, beautiful, and confident throughout your big day. Our makeup artists are highly skilled, and we offer customized packages for every bride. Call 7004721239 to book your appointment today! Why Choose Ladyfair for Bridal Makeup in Pawapuri? Experienced and Skilled Makeup Artists Our team consists of experienced makeup artists who are dedicated to creating the perfect bridal look tailored to your unique style and personality. Whether you want a classic, contemporary, or bold look, we’ve got you covered. Convenience of At-Home Makeup Forget the stress of traveling on your big day. With Ladyfair’s at-home bridal makeup service, we bring all the essentials right to your doorstep in Pawapuri, ensuring a comfortable, relaxing environment as you get ready for the most important day of your life. High-Quality Makeup Products We only use premium, long-lasting makeup products to ensure that your bridal look stays flawless all day long. Our products are carefully selected to suit different skin types, and we take extra care to create a radiant, natural finish that lasts through all the celebrations. Bridal Makeup Packages in Pawapuri Ladyfair offers a variety of bridal makeup packages to suit your needs and preferences: Basic Bridal Makeup: ₹10,000 HD Bridal Makeup: ₹12,000 Airbrush Bridal Makeup: ₹18,000 For engagement and reception makeup: Basic Makeup: ₹6,000 HD Makeup: ₹8,000 Airbrush Makeup: ₹12,000 For party makeup: Basic Party Makeup: ₹2,500 HD Party Makeup: ₹3,500 Popular Bridal Makeup Styles in Pawapuri Traditional Bridal Makeup Traditional bridal makeup is all about rich, deep colors and a timeless look. We focus on highlighting your natural beauty while complementing your bridal attire with the perfect balance of elegance and grace. HD Bridal Makeup HD bridal makeup is designed to provide a flawless, camera-ready finish. Using high-definition techniques, we give you a smooth, glowing look that looks perfect both in person and in photographs. Airbrush Bridal Makeup Airbrush makeup creates a smooth, weightless finish that feels like second skin. This technique is ideal for brides looking for a natural, radiant look that stays fresh throughout the wedding day and night. How to Book Your Bridal Makeup in Pawapuri Booking your bridal makeup service with Ladyfair is easy: Call Us: Call 7004721239 to book your appointment and discuss your bridal makeup requirements. Consultation: During the consultation, our expert makeup artist will listen to your preferences and help you decide on the best bridal look. Makeup Trial: A trial session can be scheduled to ensure you’re happy with your bridal look before the wedding day. Wedding Day Makeup: On the big day, our artist will arrive at your location in Pawapuri and create a flawless bridal look that will make you feel like a queen. Testimonials from Brides in Pawapuri Priya M., Pawapuri: "I chose Ladyfair for my bridal makeup, and I couldn’t be happier! The artist was professional, and the makeup was flawless. I felt beautiful all day long!" Neha S., Pawapuri: "The airbrush bridal makeup was perfect for my skin. It looked so natural yet stunning. I received so many compliments. Thank you, Ladyfair!" Simran R., Pawapuri: "I was so happy with my bridal makeup. It lasted all day and looked amazing in all my photos. I highly recommend Ladyfair for any bride!" Bridal Makeup Tips for Brides in Pawapuri Stay Hydrated: Drinking plenty of water will keep your skin healthy and glowing. Pre-Wedding Skincare: Follow a good skincare routine to ensure your skin is clear and radiant. Choose the Right Makeup Style: Share your vision with us so we can customize the makeup to suit your style and personality. Avoid Trial and Error: Stick to products and techniques that you know work well for you to avoid any reactions or surprises. Other Beauty Services by Ladyfair in Pawapuri Ladyfair isn’t just about bridal makeup; we also offer makeup services for other occasions: Engagement Makeup: Elegant and timeless looks for your engagement ceremony. Reception Makeup: Glamorous looks for your wedding reception. Party Makeup: Stunning makeup for birthdays, anniversaries, and other celebrations. Everyday Makeup: Simple yet beautiful makeup for your daily needs or casual events. The Future of Bridal Makeup in Pawapuri At Ladyfair, we are committed to providing the best bridal makeup services in Pawapuri. Our goal is to make every bride feel beautiful, confident, and stress-free on her wedding day. As we grow, we continue to focus on delivering personalized makeup services that leave brides glowing with happiness. Frequently Asked Questions Q1: Why should I choose Ladyfair for bridal makeup in Pawapuri? A1: Ladyfair offers professional, at-home bridal makeup services with high-quality products and skilled artists to ensure you look and feel amazing on your wedding day. Q2: How much does bridal makeup cost in Pawapuri? A2: Bridal makeup starts at ₹10,000 for a basic look, with HD and airbrush options available for ₹12,000 and ₹18,000, respectively. Q3: Can I get a makeup trial before the wedding? A3: Yes, we offer makeup trials to ensure you’re completely satisfied with your bridal look. Q4: What bridal makeup styles do you offer? A4: We offer traditional, HD, and airbrush bridal makeup styles to cater to different preferences. Q5: Do you offer makeup services for other occasions besides weddings? A5: Yes, we offer makeup services for engagements, receptions, parties, and other special occasions.

Posted By: 24th November 2024
BEST BRIDAL MAKEUP ARTIST IN SHERGHATI
BEST BRIDAL MAKEUP ARTIST IN SHERGHATI Introduction Looking for the perfect bridal makeup artist in Sherghati? Ladyfair offers a premium at-home bridal makeup service that ensures you look your best on your wedding day. Our expert makeup artists in Sherghati specialize in creating customized bridal looks, whether you prefer a natural glow or a more glamorous appearance. Book your bridal makeup appointment today at 7004721239 and enjoy a stress-free, flawless look on your special day! Why Choose Ladyfair for Bridal Makeup in Sherghati? Expert Makeup Artists Our team consists of highly skilled and experienced makeup artists who are adept at creating the perfect bridal look tailored to your style and preferences. From classic to contemporary bridal makeup, we guarantee a look that will leave you feeling beautiful and confident. Convenience of At-Home Bridal Makeup We bring the bridal salon to you! Our at-home bridal makeup service in Sherghati means you can enjoy a hassle-free experience, getting ready in the comfort of your own space. We arrive fully equipped with all the necessary tools and makeup products, so you can relax while we work our magic. High-Quality Products We only use top-quality makeup brands to ensure long-lasting, flawless results. Our products are carefully selected to suit all skin types and to create a radiant, natural look that lasts all day. Bridal Makeup Packages in Sherghati Ladyfair offers a variety of bridal makeup packages to suit your needs: Basic Bridal Makeup: ₹10,000 HD Bridal Makeup: ₹12,000 Airbrush Bridal Makeup: ₹18,000 For engagement and reception makeup: Basic Makeup: ₹6,000 HD Makeup: ₹8,000 Airbrush Makeup: ₹12,000 For party makeup: Basic Party Makeup: ₹2,500 HD Party Makeup: ₹3,500 Popular Bridal Makeup Styles in Sherghati Traditional Bridal Makeup Traditional bridal makeup involves deep, rich hues and timeless styles that highlight your natural beauty and complement your cultural attire. This look is perfect for brides looking for a classic, elegant wedding style. HD Bridal Makeup HD bridal makeup provides a flawless, camera-ready finish. It uses special techniques to ensure your makeup is smooth, glowing, and imperfection-free, ideal for brides who want to look perfect on camera. Airbrush Bridal Makeup Airbrush makeup is lightweight and natural, offering a flawless, long-lasting finish that feels like second skin. This style is ideal for brides looking for a modern, radiant look that stays fresh throughout the day and night. How to Book Your Bridal Makeup in Sherghati Booking your bridal makeup with Ladyfair is simple and stress-free: Contact Us: Call 7004721239 to discuss your requirements and schedule your makeup appointment. Consultation: Our expert makeup artist will discuss your vision for your bridal look, ensuring we understand your preferences. Makeup Trial: We offer a trial session before the wedding to ensure you're happy with the chosen style and makeup. Wedding Day Makeup: On the big day, our artist will come to your location in Sherghati and give you a flawless bridal look to make you feel your best. Testimonials from Brides in Sherghati Priya S., Sherghati: "Ladyfair made my wedding day so special! The makeup was perfect, and the artist was so professional. I felt beautiful and confident all day." Neha R., Sherghati: "I loved my bridal makeup! The airbrush technique gave me a smooth, glowing look that lasted all through my wedding ceremony and reception. Thank you, Ladyfair!" Simran K., Sherghati: "The HD bridal makeup was exactly what I wanted – fresh, natural, and long-lasting. I received so many compliments throughout the day!" Bridal Makeup Preparation Tips Follow these tips to ensure your bridal makeup turns out perfect: Hydrate Your Skin: Drink plenty of water in the days leading up to your wedding to keep your skin glowing and hydrated. Stick to Your Skincare Routine: Continue your skincare regimen to maintain healthy, clear skin. Avoid New Products: Avoid using new skincare or makeup products just before the wedding to prevent any allergic reactions. Share Your Preferences: Be sure to discuss your bridal makeup preferences with us during your consultation to achieve the look you desire. Additional Beauty Services by Ladyfair in Sherghati In addition to bridal makeup, Ladyfair offers a variety of other makeup services for any occasion: Engagement Makeup: Elegant, timeless looks for your engagement ceremony. Reception Makeup: Glamorous and sophisticated makeup for your wedding reception. Party Makeup: Perfect makeup for birthdays, anniversaries, and other celebrations. Everyday Makeup: Enhancing your look for daily wear or special occasions. The Future of Bridal Makeup in Sherghati As Ladyfair continues to grow, we are proud to provide exceptional bridal makeup services in Sherghati. Our mission is to make every bride feel beautiful, confident, and stress-free on her wedding day. We are committed to delivering high-quality, personalized makeup services that will leave you glowing on your special day. Frequently Asked Questions Q1: Why choose Ladyfair for bridal makeup in Sherghati? A1: Ladyfair provides expert bridal makeup services with high-quality products, professional artists, and the convenience of at-home makeup in Sherghati. Q2: How much does bridal makeup cost in Sherghati? A2: Bridal makeup starts at ₹10,000 for a basic look, with HD and airbrush options available for ₹12,000 and ₹18,000, respectively. Q3: Do I get a makeup trial before the wedding? A3: Yes, we offer a makeup trial to ensure you are completely satisfied with your look before your big day. Q4: What bridal makeup styles are available? A4: We offer traditional, HD, and airbrush bridal makeup options to cater to different styles and preferences. Q5: Does Ladyfair offer makeup for other events besides weddings? A5: Yes, we offer makeup services for engagements, receptions, parties, and other special occasions.

Posted By: 24th November 2024
BEST BRIDAL MAKEUP ARTIST IN NOKHA
BEST BRIDAL MAKEUP ARTIST IN NOKHA Introduction Looking for the perfect bridal makeup artist in Nokha? Ladyfair offers a premium, at-home bridal makeup service designed to make you look and feel your best on your special day. Whether you prefer a natural, timeless bridal look or a glamorous, camera-ready style, our expert makeup artists in Nokha will work with you to create the perfect look. Call us today at 7004721239 to book your appointment and experience the best bridal makeup in Nokha! Why Choose Ladyfair for Bridal Makeup in Nokha? Experienced Makeup Artists Our professional makeup artists have years of experience working with brides in Nokha. From traditional looks to modern styles, they are skilled in creating a customized bridal look that will highlight your natural beauty. At-Home Bridal Makeup Ladyfair offers a convenient at-home bridal makeup service, allowing you to relax and get ready for your big day without any stress. We come to your location in Nokha with all the necessary tools and products, ensuring a hassle-free experience. High-Quality Makeup Products We use only the best makeup products that are long-lasting and suit all skin types, ensuring that you stay flawless throughout your wedding day. Bridal Makeup Packages in Nokha Ladyfair provides flexible bridal makeup packages to suit your needs: Basic Bridal Makeup: ₹10,000 HD Bridal Makeup: ₹12,000 Airbrush Bridal Makeup: ₹18,000 For engagement and reception makeup: Basic Makeup: ₹6,000 HD Makeup: ₹8,000 Airbrush Makeup: ₹12,000 For parties: Basic Party Makeup: ₹2,500 HD Party Makeup: ₹3,500 Popular Bridal Makeup Styles in Nokha Traditional Bridal Makeup For a timeless bridal look, we offer traditional bridal makeup, featuring rich colors and intricate details that complement your wedding attire and culture. HD Bridal Makeup HD makeup is perfect for brides looking for flawless, camera-ready skin. It’s designed to give you a natural, glowing look, even under high-definition cameras. Airbrush Bridal Makeup Airbrush makeup provides a lightweight, smooth finish that lasts throughout the day. It’s ideal for brides who want a natural, radiant appearance on their wedding day. How to Book Your Bridal Makeup in Nokha Booking your bridal makeup with Ladyfair is easy: Contact Us: Call 7004721239 to discuss your requirements and book your appointment. Consultation: Our expert makeup artist will work with you to understand your bridal look preferences. Makeup Trial: We offer a makeup trial before your wedding day to ensure the look is just what you want. Wedding Day Makeup: On the big day, our makeup artist will arrive at your location in Nokha to ensure you look flawless and feel confident. Testimonials from Brides in Nokha Ritu K., Nokha: "Ladyfair made me feel like a queen on my wedding day. The at-home service was so convenient, and the makeup was absolutely perfect!" Shalini P., Nokha: "I chose HD bridal makeup for my wedding, and it was flawless! My makeup stayed in place all day, and I felt beautiful in every photo." Anjali M., Nokha: "The airbrush makeup was so light and natural. It gave me a fresh look that lasted throughout my wedding ceremony and reception." Bridal Makeup Preparation Tips Here are some tips to help you prepare for your bridal makeup: Stay Hydrated: Drink plenty of water leading up to your wedding day to keep your skin hydrated. Follow Your Skincare Routine: Stick to your regular skincare routine to ensure your skin looks its best. Avoid New Products: Avoid trying new skincare products close to your wedding day to prevent any unexpected reactions. Discuss Your Preferences: Share your vision for your bridal makeup with our artist during your consultation so we can make your dream look a reality. Additional Beauty Services by Ladyfair in Nokha Ladyfair also offers a variety of other makeup services for different occasions: Engagement Makeup: Elegant looks for your engagement ceremony. Reception Makeup: Glamorous makeup for your wedding reception. Party Makeup: Perfect makeup for birthdays, anniversaries, and other special events. Everyday Makeup: Enhance your look for any occasion with professional makeup. The Future of Bridal Makeup in Nokha As Ladyfair continues to provide exceptional bridal makeup services in Nokha, we are proud to be the trusted choice for brides who value quality, convenience, and personalized service. Frequently Asked Questions Q1: Why should I choose Ladyfair for bridal makeup in Nokha? A1: Ladyfair offers expert, at-home bridal makeup services that make your wedding day stress-free and unforgettable. Q2: How much does bridal makeup cost in Nokha? A2: Bridal makeup starts at ₹10,000, with HD and airbrush options available for ₹12,000 and ₹18,000, respectively. Q3: Can I have a makeup trial before my wedding? A3: Yes, we offer makeup trials to ensure you are happy with your look before the big day. Q4: What styles of bridal makeup are available? A4: We offer traditional, HD, and airbrush bridal makeup to suit your personal style. Q5: Do you provide makeup for other occasions? A5: Yes, we also offer makeup for engagements, parties, and other special events.

Posted By: 24th November 2024
BEST BRIDAL MAKEUP ARTIST IN ISLAMPUR
BEST BRIDAL MAKEUP ARTIST IN ISLAMPUR Introduction Ladyfair is proud to offer exceptional bridal makeup services in Islampur, bringing beauty and elegance to your doorstep. Whether you’re looking for a traditional bridal look, flawless HD makeup, or the lightweight perfection of airbrush makeup, our expert makeup artist ensures you shine on your special day. Book an appointment today at 7004721239 and experience the best bridal makeup in Islampur for a look that’s nothing short of perfection. Why Ladyfair is the Best Choice for Bridal Makeup in Islampur Skilled Makeup Artist With years of experience in bridal makeup, our talented artist in Islampur will create a custom look that enhances your features and complements your wedding theme. At-Home Makeup Service Ladyfair offers the ultimate convenience with professional at-home makeup services, so you can relax and enjoy your wedding preparation in the comfort of your home. High-Quality Makeup Products We use only premium, professional-grade makeup products that guarantee a flawless and long-lasting look that lasts throughout your special day. Bridal Makeup Packages in Islampur Ladyfair offers various packages to suit your needs: Basic Bridal Makeup: ₹10,000 HD Bridal Makeup: ₹12,000 Airbrush Bridal Makeup: ₹18,000 For engagement and reception: Basic Makeup: ₹6,000 HD Makeup: ₹8,000 Airbrush Makeup: ₹12,000 For parties: Basic Party Makeup: ₹2,500 HD Party Makeup: ₹3,500 Popular Bridal Makeup Styles in Islampur Traditional Bridal Makeup If you desire a timeless, classic bridal look, our traditional makeup features bold colors and elegant details, perfectly complementing your wedding attire. HD Bridal Makeup Designed for perfect photos and real-life perfection, HD bridal makeup ensures a flawless, camera-ready look that lasts all day. Airbrush Bridal Makeup For a natural, fresh look that stays flawless throughout the day, airbrush makeup offers a lightweight, smooth finish. How to Book Your Bridal Makeup with Ladyfair in Islampur Contact Us: Call 7004721239 to discuss your needs and book your appointment. Consultation: Our expert makeup artist will work with you to understand your vision and customize your bridal look. Makeup Trial: We offer trial sessions to ensure your bridal look is exactly what you want. Wedding Day Makeup: On your wedding day, our makeup artist will come to your home in Islampur, ensuring a stress-free, flawless makeup experience. Testimonials from Brides in Islampur Priya M., Islampur: "Ladyfair made my wedding day perfect. The at-home service was so convenient, and my makeup was flawless!" Suman T., Islampur: "I chose HD makeup for my wedding, and it was perfect. It looked great in all my photos, and I felt confident all day!" Neha P., Islampur: "The airbrush makeup was lightweight and stayed on all day. I couldn't have asked for a better bridal look." Preparing for Your Bridal Makeup Session Follow these simple steps to ensure your makeup looks flawless: Stay Hydrated: Drinking water will help your skin stay fresh and glowing. Maintain Your Skincare Routine: Follow your regular skincare routine to keep your skin in great condition leading up to the wedding. Avoid New Skincare Products: Try not to use unfamiliar skincare products just before your wedding to avoid skin reactions. Communicate Your Preferences: Share your bridal makeup preferences with our artist during your consultation so we can make your vision a reality. Additional Beauty Services by Ladyfair in Islampur Ladyfair also offers a range of makeup services for other special occasions: Engagement Makeup: Glamorous looks for your engagement ceremony. Reception Makeup: Elegant and flawless makeup for your reception. Party Makeup: Makeup for birthdays, anniversaries, or any celebration. Everyday Makeup: Enhance your daily look with professional makeup. The Future of Bridal Makeup in Islampur As we continue to provide exceptional bridal makeup services in Islampur, Ladyfair is becoming the go-to choice for brides who value convenience, professionalism, and quality. Frequently Asked Questions Q1: Why choose Ladyfair for bridal makeup in Islampur? A1: Ladyfair offers expert at-home bridal makeup services to make your wedding day stress-free and beautiful. Q2: What is the price for bridal makeup? A2: Bridal makeup starts at ₹10,000, with options for HD and airbrush makeup. Q3: Can I book a makeup trial? A3: Yes, we offer makeup trials to ensure you are happy with your look before your wedding day. Q4: What types of bridal makeup styles are available? A4: We offer traditional, HD, and airbrush bridal makeup to suit your style and preferences. Q5: Do you provide services for other occasions? A5: Yes, we offer makeup for engagements, parties, and special events.

Posted By: 24th November 2024
BRIDAL MAKEUP ARTIST IN THAKURGANJ
BRIDAL MAKEUP ARTIST IN THAKURGANJ Introduction In Thakurganj, Ladyfair offers top-tier bridal makeup services, bringing beauty and elegance right to your doorstep. Whether it’s traditional bridal makeup, flawless HD looks, or the magic of airbrush makeup, Ladyfair ensures you look radiant on your big day. Contact us at 7004721239 to book your appointment and make your wedding truly unforgettable with professional makeup services in Thakurganj. Why Choose Ladyfair for Bridal Makeup in Thakurganj Professional Makeup Expertise Ladyfair’s skilled makeup artist specializes in creating customized bridal looks that reflect your style and enhance your natural beauty. At-Home Convenience Our bridal makeup services in Thakurganj are provided at your home, saving you time and effort during wedding preparations. High-Quality Products We use only premium, skin-friendly products to ensure a flawless, long-lasting finish. Bridal Makeup Packages in Thakurganj We offer flexible packages to suit every need: Basic Bridal Makeup: ₹10,000 HD Bridal Makeup: ₹12,000 Airbrush Bridal Makeup: ₹18,000 For engagement and reception: Basic Makeup: ₹6,000 HD Makeup: ₹8,000 Airbrush Makeup: ₹12,000 For parties: Basic Party Makeup: ₹2,500 HD Party Makeup: ₹3,500 Popular Bridal Makeup Styles in Thakurganj Traditional Bridal Makeup Create a timeless bridal look with traditional makeup that reflects cultural richness and elegance. HD Bridal Makeup Perfect for both the camera and the crowd, HD makeup ensures you look flawless in photos and in person. Airbrush Bridal Makeup Lightweight yet stunning, airbrush makeup provides a radiant finish that lasts all day. Booking Your Bridal Makeup in Thakurganj Contact Us: Call 7004721239 to book your appointment and discuss your bridal look. Consultation: Share your preferences and receive expert advice to design your ideal bridal style. Makeup Trial: Opt for a trial session to preview your look. Wedding Day Service: Enjoy stress-free, professional makeup services at your home in Thakurganj. Testimonials from Brides in Thakurganj Riya P., Thakurganj: "Ladyfair made my wedding preparation seamless. The at-home service was amazing, and my makeup was perfect for my big day!" Anjali S., Thakurganj: "I chose HD makeup, and it was flawless. Everyone complimented me on how stunning I looked!" Nisha K., Thakurganj: "The airbrush makeup was so light and natural. Ladyfair truly made me feel special on my wedding day." Tips for Preparing for Your Bridal Makeup Stay Hydrated: Drink plenty of water for glowing skin. Follow a Routine: Stick to a skincare routine leading up to the wedding. Avoid New Products: Prevent unexpected skin reactions by avoiding unfamiliar skincare products. Communicate Your Style: Clearly discuss your desired look with our makeup artist during your consultation. Additional Makeup Services in Thakurganj In addition to bridal makeup, we offer: Engagement Makeup: Glamorous looks for pre-wedding events. Party Makeup: Stylish makeup for any celebration. Everyday Makeup: Professional makeup for regular wear. Special Occasion Makeup: Eye-catching looks for birthdays, anniversaries, and more. Why Choose Ladyfair for Makeup Services in Thakurganj Ladyfair combines convenience, expertise, and premium products to make your special occasions unforgettable. Our personalized approach ensures you receive a stunning look tailored to your unique style. Frequently Asked Questions Q1: Why choose Ladyfair in Thakurganj? A1: Ladyfair offers professional bridal makeup services with the convenience of at-home appointments. Q2: What is the cost of bridal makeup? A2: Prices start at ₹10,000 for bridal makeup, with HD and airbrush options available. Q3: Can I book a makeup trial? A3: Yes, we offer makeup trials to ensure your satisfaction before the wedding day. Q4: What makeup styles are available? A4: We specialize in traditional, HD, and airbrush makeup styles. Q5: Do you provide services for other occasions? A5: Yes, we offer makeup for engagements, parties, and other special events.

Posted By: 24th November 2024
BEST BRIDAL MAKEUP ARTIST IN TERHAGACHH
BEST BRIDAL MAKEUP ARTIST IN TERHAGACHH Introduction In Terhagachh, Ladyfair is the go-to destination for exceptional bridal makeup services, delivered right to your doorstep. Whether you desire a traditional bridal look, flawless HD makeup, or the elegance of airbrush makeup, our skilled makeup artist ensures you look stunning on your special day. Call us at 7004721239 to book your appointment and experience the finest bridal makeup services in Terhagachh. Why Choose Ladyfair for Bridal Makeup in Terhagachh Experienced Makeup Artist Ladyfair’s makeup artist in Terhagachh is highly experienced in creating personalized bridal looks, ensuring your makeup complements your personality, attire, and wedding theme. Convenient At-Home Service We bring professional bridal makeup services to your home in Terhagachh, allowing you to prepare for your wedding day without any stress or hassle. Premium Quality Products We use only high-quality, professional-grade products to deliver a flawless, long-lasting finish that keeps you radiant throughout your big day. Bridal Makeup Packages in Terhagachh We offer a variety of packages to suit your needs and budget: Basic Bridal Makeup: ₹10,000 HD Bridal Makeup: ₹12,000 Airbrush Bridal Makeup: ₹18,000 For engagement and reception: Basic Makeup: ₹6,000 HD Makeup: ₹8,000 Airbrush Makeup: ₹12,000 For parties: Basic Party Makeup: ₹2,500 HD Party Makeup: ₹3,500 Popular Bridal Makeup Styles in Terhagachh Traditional Bridal Makeup Our traditional bridal makeup focuses on bold and elegant tones, perfect for creating a timeless look that reflects cultural traditions. HD Bridal Makeup HD makeup ensures your look is flawless both in photographs and in person, enhancing your natural beauty for a picture-perfect appearance. Airbrush Bridal Makeup Airbrush makeup delivers a lightweight, smooth, and long-lasting finish, ideal for brides seeking a radiant and natural look. Booking Your Bridal Makeup in Terhagachh Contact Us: Call 7004721239 to discuss your requirements and secure your appointment. Consultation: Collaborate with our makeup artist to design a look that matches your preferences and wedding theme. Makeup Trial: Preview your bridal look to ensure it meets your expectations. Wedding Day Service: Enjoy professional, stress-free makeup services at your home in Terhagachh. Testimonials from Brides in Terhagachh Priya S., Terhagachh: "Ladyfair made my wedding day so special. The at-home service was incredibly convenient, and the makeup was flawless!" Ankita T., Terhagachh: "The HD makeup was stunning and lasted throughout the day. I received so many compliments on my bridal look!" Neelam K., Terhagachh: "I chose airbrush makeup, and it felt so light yet stayed perfect all day. Ladyfair exceeded my expectations!" Tips for Preparing for Your Bridal Makeup Hydrate Your Skin: Drink plenty of water to keep your skin glowing. Follow a Skincare Routine: Stick to a consistent skincare regimen for optimal results. Avoid New Products: Avoid experimenting with new skincare products before your wedding to prevent any adverse reactions. Share Your Vision: Be clear with our makeup artist about your desired look during your consultation. Additional Makeup Services in Terhagachh In addition to bridal makeup, Ladyfair offers: Engagement Makeup: Tailored looks for pre-wedding events. Party Makeup: Gorgeous styles for birthdays, anniversaries, and other celebrations. Everyday Makeup: Subtle, professional makeup for daily wear. Special Occasion Makeup: Glamorous looks for any important event. Why Ladyfair is the Trusted Choice for Bridal Makeup in Terhagachh Ladyfair’s personalized approach, premium products, and professional artistry make us the leading bridal makeup service in Terhagachh. We ensure every bride looks and feels her best on the most important day of her life. Frequently Asked Questions Q1: Why should I choose Ladyfair in Terhagachh? A1: Ladyfair provides expert at-home bridal makeup services, offering convenience and exceptional results. Q2: What are the bridal makeup costs? A2: Bridal makeup starts at ₹10,000, with HD and airbrush options available. Q3: Can I get a makeup trial before my wedding? A3: Yes, we offer makeup trials to ensure your bridal look meets your expectations. Q4: What types of makeup are available? A4: We specialize in traditional, HD, and airbrush makeup styles. Q5: Do you offer other makeup services? A5: Yes, we provide makeup for engagements, receptions, parties, and other special occasions.

Posted By: 24th November 2024
BRIDAL MAKEUP ARTIST IN POTHIA
BRIDAL MAKEUP ARTIST IN POTHIA Introduction In Pothia, Ladyfair is the trusted name for exceptional bridal makeup services, bringing professional artistry to your doorstep. Whether you envision a classic bridal look, flawless HD makeup, or the elegance of airbrush makeup, our expert makeup artist ensures you look radiant on your big day. Contact us at 7004721239 to schedule your appointment and experience the finest bridal makeup services in Pothia. Why Ladyfair is the Top Choice for Bridal Makeup in Pothia Experienced Makeup Artist Ladyfair’s makeup artist in Pothia has years of experience creating stunning bridal looks tailored to each bride's unique preferences and wedding themes. Convenient At-Home Service We eliminate the hassle of traveling by offering professional at-home makeup services, ensuring a stress-free preparation for your wedding day. Premium Products Our team uses only high-quality, professional-grade makeup products to deliver a flawless and long-lasting finish. Bridal Makeup Packages in Pothia Choose from our tailored packages to match your style and budget: Basic Bridal Makeup: ₹10,000 HD Bridal Makeup: ₹12,000 Airbrush Bridal Makeup: ₹18,000 For engagement and reception: Basic Makeup: ₹6,000 HD Makeup: ₹8,000 Airbrush Makeup: ₹12,000 For parties: Basic Party Makeup: ₹2,500 HD Party Makeup: ₹3,500 Popular Bridal Makeup Styles in Pothia Traditional Bridal Makeup For a timeless look that complements cultural traditions, our traditional bridal makeup is perfect, featuring bold and elegant tones. HD Bridal Makeup HD makeup ensures you’re picture-perfect for every photograph and video, with a flawless finish that enhances your natural beauty. Airbrush Bridal Makeup Airbrush makeup provides a smooth, lightweight, and long-lasting look, ideal for brides seeking a natural and radiant appearance. How to Book Ladyfair’s Services in Pothia Contact Us: Call 7004721239 to discuss your requirements and secure your appointment. Consultation: Work with our makeup artist to customize your look according to your wedding theme. Makeup Trial: Preview your bridal look to ensure it aligns with your vision. Wedding Day Service: Enjoy a seamless, professional makeup experience at your home in Pothia. Testimonials from Brides in Pothia Ritika K., Pothia: "I couldn’t have asked for better service! Ladyfair’s team made me look stunning without the stress of leaving home." Sneha R., Pothia: "The HD makeup was flawless and stayed intact throughout the day. I got so many compliments on my wedding look!" Anjali T., Pothia: "The airbrush makeup was so light and natural. It made me feel confident and beautiful all day long." Tips for a Perfect Bridal Makeup Experience Stay Hydrated: Drink plenty of water to keep your skin glowing. Stick to a Skincare Routine: Maintain a consistent skincare regimen leading up to your wedding. Communicate Clearly: Share your preferences and expectations with our makeup artist during your consultation. Additional Makeup Services in Pothia Ladyfair caters to various special occasions, including: Engagement Makeup: Glamorous looks for your pre-wedding events. Party Makeup: Stunning styles for birthdays, anniversaries, and celebrations. Everyday Makeup: Professional makeup for your daily needs. Special Occasion Makeup: Elegant looks for any life event. Why Ladyfair is Pothia’s Trusted Bridal Makeup Service Ladyfair combines expertise, convenience, and high-quality products to deliver unparalleled bridal makeup services in Pothia. Our personalized approach ensures every bride feels confident and beautiful on her big day. Frequently Asked Questions Q1: What makes Ladyfair unique in Pothia? A1: Ladyfair provides expert at-home bridal makeup services with a focus on quality and personalization. Q2: What are the costs for bridal makeup? A2: Bridal makeup starts at ₹10,000, with HD and airbrush options available. Q3: Can I book a makeup trial? A3: Yes, we offer makeup trials to ensure your bridal look is exactly as you desire. Q4: What types of makeup does Ladyfair offer? A4: We specialize in traditional, HD, and airbrush makeup styles. Q5: Do you provide makeup services for other occasions? A5: Yes, we offer makeup for engagements, parties, and other special events.

Posted By: 24th November 2024
BEST BRIDAL MAKEUP ARTIST IN KOCHADHAMAN
BEST BRIDAL MAKEUP ARTIST IN KOCHADHAMAN Introduction In Kochadhaman, Ladyfair has established itself as the ultimate destination for expert bridal makeup services, offering brides unmatched beauty transformations with convenience at their doorstep. From classic traditional looks to modern HD and airbrush makeup styles, we ensure every bride looks and feels radiant on her special day. Call us at 7004721239 to book your appointment with Ladyfair and experience the best bridal makeup services in Kochadhaman. Why Choose Ladyfair for Bridal Makeup in Kochadhaman? Expert Makeup Artist Our skilled makeup artist in Kochadhaman specializes in creating customized bridal looks that enhance your natural beauty and complement your wedding theme. At-Home Makeup Services Ladyfair provides the luxury of professional makeup services right at your home, ensuring a hassle-free experience on your wedding day. Top-Quality Products We use premium-grade makeup products to guarantee long-lasting, flawless results. Bridal Makeup Packages in Kochadhaman Ladyfair offers a variety of bridal makeup packages to suit different preferences and budgets: Basic Bridal Makeup: ₹10,000 HD Bridal Makeup: ₹12,000 Airbrush Bridal Makeup: ₹18,000 Engagement and reception makeup: Basic Makeup: ₹6,000 HD Makeup: ₹8,000 Airbrush Makeup: ₹12,000 Party makeup packages: Basic Party Makeup: ₹2,500 HD Party Makeup: ₹3,500 Bridal Makeup Styles Popular in Kochadhaman Traditional Bridal Makeup For brides who love a timeless, elegant look, our traditional makeup enhances natural beauty with bold tones and intricate detailing. HD Bridal Makeup HD makeup offers a flawless, camera-ready finish, ensuring perfection in both photographs and in person. Airbrush Bridal Makeup Airbrush makeup provides a natural, lightweight finish that is durable and perfect for long celebrations. How to Book Ladyfair’s Bridal Makeup Services in Kochadhaman Call Us: Reach out at 7004721239 to book your appointment and share your requirements. Consultation: Work with our expert makeup artist to design a look tailored to your preferences. Makeup Trial: Try out your bridal look beforehand for complete confidence on your big day. Wedding Day: Enjoy a stress-free, professional service at home in Kochadhaman. Testimonials from Brides in Kochadhaman Riya S., Kochadhaman: "I loved the convenience of Ladyfair’s at-home service. The makeup was flawless, and I felt amazing on my wedding day!" Meera J., Kochadhaman: "The HD makeup was stunning. It looked perfect in photos and lasted all day. Highly recommend Ladyfair!" Priyanka T., Kochadhaman: "Ladyfair’s airbrush makeup was so light and natural, yet it stayed perfect through the entire event. Thank you for making my day special!" Tips to Prepare for Your Bridal Makeup Follow a Skincare Routine: Keep your skin hydrated and healthy for the best makeup results. Avoid Experimentation: Stick to familiar products to avoid unexpected skin reactions. Share Your Vision: Communicate your preferred style and ideas with our makeup artist. Other Beauty Services in Kochadhaman Ladyfair is not just about bridal makeup. We offer: Engagement Makeup: Glamorous looks for pre-wedding events. Party Makeup: Perfect for birthdays, anniversaries, and celebrations. Everyday Makeup: Subtle and professional styles for daily wear. Special Occasion Makeup: Dazzling makeup for formal events. The Ladyfair Advantage in Kochadhaman Ladyfair is revolutionizing bridal makeup in Kochadhaman with its commitment to quality, convenience, and personalized service. Our expertise, combined with premium products, ensures every bride looks radiant and feels confident on her wedding day. Frequently Asked Questions Q1: What makes Ladyfair the best in Kochadhaman for bridal makeup? A1: Ladyfair offers professional at-home services, skilled makeup artists, and personalized looks for every bride. Q2: How much does bridal makeup cost? A2: Our bridal makeup packages start at ₹10,000, with HD and airbrush options available. Q3: How do I book Ladyfair’s services? A3: Call 7004721239 to book your appointment and discuss your needs. Q4: Do you provide makeup trials? A4: Yes, makeup trials are available to ensure your satisfaction with the final look. Q5: What makeup products do you use? A5: We use premium-grade, professional products for flawless results. Q6: Can Ladyfair do makeup for other events? A6: Absolutely! We offer makeup for engagements, parties, and other occasions.

Posted By: 24th November 2024
BEST BRIDAL MAKEUP ARTIST IN ARIYARI
BEST BRIDAL MAKEUP ARTIST IN ARIYARI Introduction In Ariyari, Ladyfair provides top-notch bridal makeup services, bringing beauty and convenience together. Whether you prefer a traditional bridal look, the impeccable finish of HD makeup, or the elegance of airbrush makeup, our professional makeup artist will create a look that matches your vision perfectly. Call 7004721239 today to schedule your appointment and enjoy premium bridal makeup services in Ariyari. Why Choose Ladyfair for Bridal Makeup in Ariyari Expert Makeup Artist Our skilled makeup artist in Ariyari has years of experience in creating stunning bridal looks tailored to your personality, attire, and preferences. At-Home Convenience Ladyfair’s at-home bridal makeup service in Ariyari allows you to prepare for your wedding day stress-free, in the comfort of your own space. High-Quality Products We use professional-grade makeup products to ensure a flawless and long-lasting look, perfect for your special day. Bridal Makeup Packages in Ariyari We offer a range of bridal makeup packages to suit different needs and budgets: Basic Bridal Makeup: ₹10,000 HD Bridal Makeup: ₹12,000 Airbrush Bridal Makeup: ₹18,000 Makeup for engagement and reception: Basic Engagement/Reception Makeup: ₹6,000 HD Engagement/Reception Makeup: ₹8,000 Airbrush Engagement/Reception Makeup: ₹12,000 Party makeup packages: Basic Party Makeup: ₹2,500 HD Party Makeup: ₹3,500 Popular Bridal Makeup Styles in Ariyari Traditional Bridal Makeup Ladyfair offers timeless traditional bridal makeup in Ariyari, emphasizing bold tones and elegant styles to enhance your wedding attire. HD Bridal Makeup HD makeup ensures a flawless finish, making you look radiant in both photographs and real life. Airbrush Bridal Makeup For a natural and radiant glow, airbrush makeup provides a lightweight, long-lasting finish, ideal for all-day events. Booking Bridal Makeup Services in Ariyari Contact Us: Call 7004721239 to book an appointment. Consultation: Discuss your preferences with our makeup artist to plan your ideal bridal look. Makeup Trial: We offer trial sessions to ensure your bridal makeup is exactly as you imagined. Wedding Day Service: Our artist will come to your home in Ariyari to provide stress-free, professional makeup services. Testimonials from Brides in Ariyari Pooja S., Ariyari: "Ladyfair made my wedding preparations so easy with their at-home service. My bridal look was perfect and received endless compliments!" Sneha K., Ariyari: "The HD makeup made me feel like a celebrity. It was flawless and stunning throughout the day." Meera T., Ariyari: "The airbrush makeup was light and lasted the entire day without needing touch-ups. Highly recommend Ladyfair!" Bridal Makeup Preparation Tips Hydrate: Drink plenty of water to keep your skin glowing. Stick to Your Skincare Routine: Consistent care ensures your skin is in the best condition for makeup application. Avoid New Products: Prevent breakouts or irritation by avoiding unfamiliar products. Be Clear with Your Preferences: Share your vision with the makeup artist during your consultation and trial. Additional Makeup Services in Ariyari Ladyfair also offers makeup for various other occasions: Engagement and Reception Makeup: Tailored looks for pre-wedding events. Party Makeup: Enhance your look for birthdays, anniversaries, and celebrations. Everyday Makeup: Subtle, professional makeup for daily enhancement. Special Occasion Makeup: Perfect for any important event. The Future of Bridal Makeup in Ariyari Ladyfair is redefining the bridal beauty experience in Ariyari with expert at-home makeup services. By combining artistry, convenience, and premium products, we continue to be the trusted choice for brides in Ariyari. Q&A with Ladyfair’s Bridal Makeup Artist in Ariyari Q1: Why should I choose Ladyfair for bridal makeup in Ariyari? A1: Ladyfair provides expert at-home makeup services to ensure a flawless and stress-free experience. Q2: What is the price range for bridal makeup in Ariyari? A2: Prices start at ₹10,000 for basic makeup, with HD and airbrush options available. Q3: How do I book Ladyfair’s services? A3: Call 7004721239 to schedule an appointment or consultation. Q4: Do you provide trial sessions? A4: Yes, we offer makeup trials to perfect your bridal look. Q5: What products do you use? A5: We use high-quality, professional-grade products for a flawless result. Q6: Do you provide makeup for events other than weddings? A6: Yes, we offer makeup for engagements, receptions, parties, and other occasions.

Posted By: 24th November 2024
BEST BRIDAL MAKEUP IN SHEIKHOPUR SARA
BEST BRIDAL MAKEUP IN SHEIKHOPUR SARA Introduction In Sheikhopur Sara, Ladyfair brings you premium bridal makeup services right at your doorstep. Whether you envision a traditional bridal look, a flawless HD finish, or the elegance of airbrush makeup, our professional makeup artist ensures you look breathtaking on your big day. Call 7004721239 to book your appointment and enjoy the finest bridal makeup services in Sheikhopur Sara. Why Ladyfair is the Best Choice for Bridal Makeup in Sheikhopur Sara Experienced Makeup Artist Our skilled makeup artist in Sheikhopur Sara ensures your bridal look is tailored to complement your personality, outfit, and preferences. Convenient At-Home Service Ladyfair provides at-home bridal makeup services in Sheikhopur Sara, saving you time and offering unmatched convenience on your special day. High-Quality Products We use only top-tier, professional-grade makeup products to guarantee a flawless and long-lasting look. Bridal Makeup Packages in Sheikhopur Sara Select from our range of bridal makeup packages: Basic Bridal Makeup: ₹10,000 HD Bridal Makeup: ₹12,000 Airbrush Bridal Makeup: ₹18,000 Engagement and reception makeup packages: Basic Engagement/Reception Makeup: ₹6,000 HD Engagement/Reception Makeup: ₹8,000 Airbrush Engagement/Reception Makeup: ₹12,000 Party makeup packages: Basic Party Makeup: ₹2,500 HD Party Makeup: ₹3,500 Popular Bridal Makeup Styles in Sheikhopur Sara Traditional Bridal Makeup Our traditional bridal makeup in Sheikhopur Sara highlights bold and vibrant tones, giving you a timeless and elegant look. HD Bridal Makeup HD makeup ensures you look stunning in photos and in person, offering a camera-ready look throughout the day. Airbrush Bridal Makeup For a natural and radiant finish, our airbrush makeup delivers a lightweight, long-lasting glow perfect for your wedding day. How to Book Ladyfair’s Bridal Makeup Services in Sheikhopur Sara Contact Us: Call 7004721239 to discuss your requirements and book an appointment. Consultation: Collaborate with our makeup artist to design a look tailored to your wedding theme. Makeup Trial: Schedule a trial session to finalize your bridal look. Wedding Day Service: Our artist will arrive at your home in Sheikhopur Sara to provide a stress-free, flawless makeup experience. Testimonials from Brides in Sheikhopur Sara Ananya R., Sheikhopur Sara: "Ladyfair made my wedding day stress-free with their at-home makeup service. The results were absolutely perfect!" Megha T., Sheikhopur Sara: "The HD makeup was flawless and made me feel like a princess. I couldn’t be happier!" Sanya J., Sheikhopur Sara: "The airbrush makeup lasted all day and looked so natural. Ladyfair exceeded my expectations!" Tips to Prepare for Your Bridal Makeup Hydrate Your Skin: Drink plenty of water for glowing skin. Stick to Your Skincare Routine: Maintain consistent skincare to keep your skin healthy. Avoid New Products: Steer clear of unfamiliar products to prevent reactions. Communicate Clearly: Share your vision and preferences during consultations and trials. Additional Makeup Services in Sheikhopur Sara Ladyfair also offers a variety of makeup services for other occasions: Engagement and Reception Makeup: Special looks for all your pre-wedding events. Party Makeup: Glamorous makeup for birthdays, anniversaries, and celebrations. Everyday Makeup: Subtle yet professional makeup to enhance your daily look. Special Occasion Makeup: Perfect for any significant life event. The Future of Bridal Makeup in Sheikhopur Sara Ladyfair is redefining bridal beauty in Sheikhopur Sara with high-quality, at-home makeup services. With our personalized approach and attention to detail, we’re becoming the preferred choice for brides looking for a flawless and stress-free experience. Q&A with Ladyfair’s Bridal Makeup Artist in Sheikhopur Sara Q1: Why choose Ladyfair for bridal makeup in Sheikhopur Sara? A1: Ladyfair offers expert at-home bridal makeup services for a seamless, convenient, and stunning experience. Q2: What are the prices for bridal makeup services in Sheikhopur Sara? A2: Bridal makeup prices start at ₹10,000 for basic packages, with HD and airbrush options available. Q3: How do I book your services? A3: Call us at 7004721239 to schedule your appointment and consultation. Q4: What types of bridal makeup do you offer? A4: We specialize in traditional, HD, and airbrush bridal makeup styles. Q5: Do you provide makeup trials? A5: Yes, trial sessions are available to ensure your desired look is achieved. Q6: What products do you use? A6: We use high-quality, professional-grade products for flawless results. Q7: Do you offer makeup for other events? A7: Yes, we provide makeup services for engagements, receptions, parties, and other occasions.

Posted By: 24th November 2024
BEST BRIDAL MAKEUP ARTIST IN BARBIGHA
BRIDAL MAKEUP ARTIST IN BARBIGHA Introduction In Barbigha, Ladyfair is your go-to destination for premium bridal makeup services delivered right to your home. Whether you desire a traditional bridal look, a flawless HD finish, or the elegance of airbrush makeup, our professional makeup artist ensures you look stunning on your special day. Call 7004721239 to book your appointment and experience the best bridal makeup services in Barbigha. Why Ladyfair is the Best Choice for Bridal Makeup in Barbigha Experienced Makeup Artist Our skilled makeup artist in Barbigha has extensive experience in creating bridal looks that reflect your personality, outfit, and preferences. Convenient At-Home Service Ladyfair offers at-home bridal makeup services in Barbigha, allowing you to prepare for your wedding in the comfort of your own home. High-Quality Products We use premium, professional-grade makeup products to ensure a flawless, long-lasting look for your big day. Bridal Makeup Packages in Barbigha Choose from our range of bridal makeup packages: Basic Bridal Makeup: ₹10,000 HD Bridal Makeup: ₹12,000 Airbrush Bridal Makeup: ₹18,000 Engagement and reception makeup packages: Basic Engagement/Reception Makeup: ₹6,000 HD Engagement/Reception Makeup: ₹8,000 Airbrush Engagement/Reception Makeup: ₹12,000 Party makeup packages: Basic Party Makeup: ₹2,500 HD Party Makeup: ₹3,500 Popular Bridal Makeup Styles in Barbigha Traditional Bridal Makeup Ladyfair’s traditional bridal makeup in Barbigha offers bold, vibrant tones for a classic look that complements your wedding attire. HD Bridal Makeup Our HD bridal makeup ensures a flawless appearance, perfect for photos and real-life moments throughout the day. Airbrush Bridal Makeup For a natural and radiant look, our airbrush makeup provides a lightweight, smooth, and long-lasting finish. How to Book Ladyfair’s Bridal Makeup Services in Barbigha Contact Us: Call 7004721239 to discuss your requirements and schedule your appointment. Consultation: Collaborate with our expert makeup artist to design your perfect bridal look. Makeup Trial: Schedule a trial session to finalize your bridal makeup. Wedding Day Service: Enjoy stress-free preparation as our artist delivers exceptional makeup services at your home in Barbigha. Testimonials from Brides in Barbigha Pooja K., Barbigha: "My makeup was stunning, and the convenience of at-home service made my wedding day even more special!" Neha S., Barbigha: "The HD makeup was flawless and looked perfect in all my wedding photos. Highly recommended!" Anjali J., Barbigha: "The airbrush makeup was light, smooth, and lasted all day. Ladyfair did an amazing job!" Tips to Prepare for Your Bridal Makeup Stay Hydrated: Keep your skin glowing by drinking plenty of water. Follow Your Skincare Routine: Consistent skincare ensures your skin is in top condition. Avoid New Products: Stick to familiar skincare products to avoid reactions. Communicate Your Vision: Share your preferences clearly during consultations and trials. Additional Makeup Services in Barbigha Ladyfair also provides professional makeup services for various occasions: Engagement and Reception Makeup: Tailored looks for pre-wedding events. Party Makeup: Glamorous makeup for birthdays, anniversaries, and other celebrations. Everyday Makeup: Subtle and professional makeup to enhance your daily look. Special Occasion Makeup: Perfect for any significant life event. The Future of Bridal Makeup in Barbigha Ladyfair is transforming bridal beauty in Barbigha by offering convenient, high-quality at-home makeup services. With personalized artistry and a commitment to excellence, Ladyfair continues to be the top choice for brides seeking a stress-free and flawless wedding day. Q&A with Ladyfair’s Bridal Makeup Artist in Barbigha Q1: Why choose Ladyfair for bridal makeup in Barbigha? A1: Ladyfair provides expert at-home bridal makeup services for a seamless and stunning experience. Q2: What are the prices for bridal makeup services in Barbigha? A2: Bridal makeup starts at ₹10,000 for basic packages, with HD and airbrush options available. Q3: How do I book your services? A3: Call us at 7004721239 to schedule an appointment and consultation. Q4: What makeup styles do you offer? A4: We specialize in traditional, HD, and airbrush bridal makeup styles. Q5: Do you provide makeup trials? A5: Yes, trial sessions are available to ensure your desired look is achieved. Q6: What products do you use? A6: We use high-quality, professional-grade products for flawless results. Q7: Do you offer makeup for other events? A7: Yes, we provide makeup services for engagements, receptions, parties, and daily occasions.

Posted By: 24th November 2024
BRIDAL MAKEUP ARTIST IN CHEWARA
BRIDAL MAKEUP ARTIST IN CHEWARA Introduction In Chewara, Ladyfair is your trusted partner for top-tier bridal makeup services delivered right at your doorstep. Whether you’re looking for a traditional bridal look, a flawless HD finish, or the elegance of airbrush makeup, our skilled makeup artist is here to make your wedding day truly unforgettable. Call 7004721239 to book your appointment and experience exceptional bridal makeup services in Chewara. Why Choose Ladyfair for Bridal Makeup in Chewara? Expert Makeup Artist Our experienced makeup artist in Chewara specializes in creating customized bridal looks that align perfectly with your personality, attire, and preferences. Convenient At-Home Service Ladyfair offers the ultimate convenience by providing at-home bridal makeup services in Chewara, ensuring you can prepare for your big day stress-free. High-Quality Makeup Products We use only premium, professional-grade makeup products to deliver a flawless, long-lasting finish that keeps you radiant throughout your special day. Bridal Makeup Packages in Chewara Choose from our customizable bridal makeup packages: Basic Bridal Makeup: ₹10,000 HD Bridal Makeup: ₹12,000 Airbrush Bridal Makeup: ₹18,000 Engagement and reception packages: Basic Engagement/Reception Makeup: ₹6,000 HD Engagement/Reception Makeup: ₹8,000 Airbrush Engagement/Reception Makeup: ₹12,000 Party makeup packages: Basic Party Makeup: ₹2,500 HD Party Makeup: ₹3,500 Popular Bridal Makeup Styles in Chewara Traditional Bridal Makeup Ladyfair’s traditional bridal makeup in Chewara highlights bold and vibrant tones, giving you a classic and timeless look that perfectly complements your wedding ensemble. HD Bridal Makeup Our HD bridal makeup ensures you look picture-perfect, enhancing your features for a flawless appearance in both photos and real life. Airbrush Bridal Makeup For a natural and radiant look, our airbrush makeup provides a lightweight, smooth, and long-lasting finish that stays fresh all day. How to Book Ladyfair’s Bridal Makeup Services in Chewara Call Us: Dial 7004721239 to discuss your requirements and schedule your appointment. Consultation: Collaborate with our expert to design your perfect bridal look. Makeup Trial: Schedule a trial session to finalize your bridal makeup. Wedding Day Service: Sit back and relax as our makeup artist delivers a flawless look at your home in Chewara. Testimonials from Brides in Chewara Ritika K., Chewara: "My bridal makeup was perfect! The convenience of having Ladyfair’s service at home made my wedding day stress-free and enjoyable." Simran T., Chewara: "I loved the HD makeup! It made my features stand out beautifully in all the wedding photos." Aparna J., Chewara: "The airbrush makeup was lightweight and stayed intact all day. Ladyfair truly exceeded my expectations!" Tips to Prepare for Your Bridal Makeup Stay Hydrated: Drink plenty of water to maintain glowing skin. Stick to Your Skincare Routine: Follow a consistent routine to keep your skin healthy. Avoid New Products: Avoid experimenting with unfamiliar products before your wedding to prevent breakouts or reactions. Be Clear About Your Vision: Communicate your desired look during consultations and trial sessions. Additional Makeup Services in Chewara Ladyfair also provides makeup services for all occasions, including: Engagement and Reception Makeup: Tailored looks for pre-wedding events. Party Makeup: Glamorous makeup for birthdays, anniversaries, and special occasions. Everyday Makeup: Subtle makeup to enhance your daily look. Special Occasion Makeup: Perfect for any important life event. The Future of Bridal Makeup in Chewara Ladyfair is revolutionizing bridal beauty in Chewara by offering premium at-home makeup services. Our dedication to quality, convenience, and artistry makes us the preferred choice for brides seeking a stress-free and flawless wedding day experience. Q&A with Ladyfair’s Bridal Makeup Artist in Chewara Q1: Why should I choose Ladyfair for bridal makeup in Chewara? A1: Ladyfair provides expert at-home bridal makeup services, ensuring a flawless and stress-free experience. Q2: What are the prices for bridal makeup in Chewara? A2: Prices start at ₹10,000 for basic bridal makeup, with HD and airbrush options available. Q3: How do I book Ladyfair’s services? A3: Call us at 7004721239 to schedule an appointment and consultation. Q4: What makeup styles are available? A4: We offer traditional, HD, and airbrush bridal makeup styles. Q5: Do you offer makeup trials? A5: Yes, trial sessions are available to ensure your desired bridal look. Q6: What products do you use? A6: We use high-quality, professional-grade products for a flawless and long-lasting finish. Q7: Do you provide services for other events? A7: Yes, we offer makeup services for engagements, receptions, parties, and everyday occasions.

Posted By: 24th November 2024
BEST BRIDAL MAKEUP ARTIST IN GHATKUSUMBHA
BEST BRIDAL MAKEUP ARTIST IN GHATKUSUMBHA Introduction In Ghatkusumbha, Ladyfair is the go-to name for premium bridal makeup services offered at your doorstep. Whether you're envisioning a traditional bridal style, a flawless HD finish, or the elegance of airbrush makeup, our skilled makeup artist ensures your look is as special as your day. Call 7004721239 to book your appointment and experience unmatched bridal makeup services in Ghatkusumbha. Why Choose Ladyfair for Bridal Makeup in Ghatkusumbha? Expert Makeup Artist Ladyfair’s experienced makeup artist in Ghatkusumbha specializes in creating custom bridal looks that complement your personality, attire, and preferences. Convenient At-Home Service Forget the hassle of traveling to salons. Ladyfair’s at-home bridal makeup service in Ghatkusumbha lets you enjoy professional makeup in the comfort of your home. Top-Quality Products We use high-quality, professional-grade makeup products to ensure a long-lasting, flawless finish that keeps you glowing throughout your special day. Bridal Makeup Packages in Ghatkusumbha Choose from our tailored bridal makeup packages: Basic Bridal Makeup: ₹10,000 HD Bridal Makeup: ₹12,000 Airbrush Bridal Makeup: ₹18,000 Engagement and reception packages: Basic Engagement/Reception Makeup: ₹6,000 HD Engagement/Reception Makeup: ₹8,000 Airbrush Engagement/Reception Makeup: ₹12,000 Party makeup packages: Basic Party Makeup: ₹2,500 HD Party Makeup: ₹3,500 Popular Bridal Makeup Styles in Ghatkusumbha Traditional Bridal Makeup Our traditional bridal makeup in Ghatkusumbha features bold tones and intricate details, creating a timeless look that enhances your wedding ensemble. HD Bridal Makeup Look flawless in every photo and video with our HD makeup, offering a polished, camera-ready finish. Airbrush Bridal Makeup For a natural and radiant appearance, our airbrush makeup provides a lightweight, seamless, and long-lasting finish. How to Book Ladyfair’s Bridal Makeup Services in Ghatkusumbha Call Us: Contact us at 7004721239 to discuss your requirements and book an appointment. Consultation: Work with our expert to design your ideal bridal look. Makeup Trial: Schedule a trial session to finalize your bridal makeup. Wedding Day Service: Relax as our makeup artist delivers a flawless look at your home in Ghatkusumbha. Testimonials from Brides in Ghatkusumbha Pooja R., Ghatkusumbha: "My traditional bridal look was stunning! Ladyfair’s at-home service was incredibly convenient and stress-free." Nidhi S., Ghatkusumbha: "I opted for HD makeup, and it was perfect for my wedding photos. Ladyfair’s professionalism is top-notch!" Meera K., Ghatkusumbha: "The airbrush makeup was flawless and lasted all day. Ladyfair made my big day even more special." Tips to Prepare for Your Bridal Makeup Hydrate: Keep your skin radiant by drinking plenty of water. Stick to Your Skincare Routine: Maintain consistency with your skincare regimen for glowing skin. Avoid New Products: Steer clear of unfamiliar products to prevent reactions. Communicate Your Vision: Clearly share your desired look during the consultation and trial session. Additional Makeup Services in Ghatkusumbha Ladyfair offers a variety of makeup services for all occasions: Engagement and Reception Makeup: Customized looks for pre-wedding events. Party Makeup: Perfect for birthdays, anniversaries, and celebrations. Everyday Makeup: Subtle makeup for enhancing your daily appearance. Special Occasion Makeup: Glamorous looks for any important event. The Future of Bridal Makeup in Ghatkusumbha Ladyfair is redefining bridal beauty in Ghatkusumbha with its at-home makeup services. Our commitment to quality, convenience, and artistry ensures that we remain the preferred choice for brides seeking perfection on their wedding day. Q&A with Ladyfair’s Bridal Makeup Artist in Ghatkusumbha Q1: Why should I choose Ladyfair for bridal makeup in Ghatkusumbha? A1: Ladyfair offers expert at-home bridal makeup services for a stress-free experience and stunning results. Q2: What are the prices for bridal makeup in Ghatkusumbha? A2: Prices start at ₹10,000 for basic bridal makeup, with HD and airbrush options available. Q3: How do I book Ladyfair’s makeup services? A3: Simply call 7004721239 to book an appointment. Q4: What bridal makeup styles do you offer? A4: We provide traditional, HD, and airbrush makeup styles tailored to your preferences. Q5: Are trial sessions available? A5: Yes, we offer trial sessions to ensure your bridal look is perfect. Q6: What kind of products do you use? A6: We use high-quality, professional-grade products for a flawless and long-lasting finish. Q7: Do you offer makeup services for other events? A7: Yes, we provide makeup services for engagements, receptions, parties, and other occasions.

Posted By: 24th November 2024
BRIDAL MAKEUP ARTIST IN SHEIKHPURA
BEST BRIDAL MAKEUP ARTIST IN SHEIKHPURA Introduction In Sheikhpura, Ladyfair is the trusted name for delivering professional bridal makeup services at your doorstep. Whether you desire a classic traditional bridal look, a stunning HD finish, or the elegance of airbrush makeup, our expert makeup artist will make your dream look a reality. Contact 7004721239 to schedule your appointment and experience the best bridal makeup services in Sheikhpura. Why Choose Ladyfair for Bridal Makeup in Sheikhpura? Experienced Makeup Artist Ladyfair’s makeup artist in Sheikhpura brings years of experience in crafting personalized bridal looks that suit your style, personality, and wedding attire. Convenient At-Home Services Skip the hassle of traveling! Ladyfair provides at-home bridal makeup services in Sheikhpura, making your wedding preparation stress-free and convenient. High-Quality Products We use only premium, professional-grade makeup products to ensure your look stays flawless and radiant throughout your special day. Bridal Makeup Packages in Sheikhpura Choose from our range of bridal makeup packages tailored to fit your needs and budget: Basic Bridal Makeup: ₹10,000 HD Bridal Makeup: ₹12,000 Airbrush Bridal Makeup: ₹18,000 Engagement and reception makeup packages: Basic Engagement/Reception Makeup: ₹6,000 HD Engagement/Reception Makeup: ₹8,000 Airbrush Engagement/Reception Makeup: ₹12,000 Party makeup packages: Basic Party Makeup: ₹2,500 HD Party Makeup: ₹3,500 Popular Bridal Makeup Styles in Sheikhpura Traditional Bridal Makeup Perfect for those seeking a timeless look, our traditional bridal makeup highlights bold and vibrant tones, creating an elegant style that complements your wedding attire. HD Bridal Makeup HD makeup ensures a picture-perfect, flawless look that shines in photos and real life, making it an ideal choice for your big day. Airbrush Bridal Makeup For a lightweight, natural, and long-lasting finish, our airbrush makeup offers a radiant glow that stays fresh throughout your wedding celebrations. How to Book Ladyfair’s Bridal Makeup Services in Sheikhpura Call Us: Dial 7004721239 to discuss your needs and book an appointment. Consultation: Work with our makeup artist to design a look that suits your style and preferences. Makeup Trial: Schedule a trial session to ensure your bridal makeup is perfect for your special day. Wedding Day Service: Our expert makeup artist will arrive at your home in Sheikhpura to deliver a flawless bridal look. Testimonials from Brides in Sheikhpura Anamika R., Sheikhpura: "The airbrush makeup was incredible! It lasted all day and looked so natural. Ladyfair’s at-home service made my day stress-free." Preeti S., Sheikhpura: "Ladyfair gave me the perfect traditional bridal look I always dreamed of. I couldn’t be happier with their service!" Rashmi T., Sheikhpura: "My HD bridal makeup was stunning and stayed flawless throughout the day. Ladyfair’s professionalism is unmatched!" Tips to Prepare for Your Bridal Makeup Stay Hydrated: Keep your skin glowing by drinking plenty of water. Follow Your Skincare Routine: Maintain a consistent skincare regimen leading up to your wedding. Avoid New Products: Refrain from experimenting with new skincare products before your big day. Communicate Your Vision: Be clear about your preferences and desired look during your consultation and trial session. Additional Makeup Services in Sheikhpura Ladyfair offers a variety of professional makeup services to suit all occasions: Engagement and Reception Makeup: Customized looks for pre-wedding events. Party Makeup: Glamorous makeup for birthdays, anniversaries, and special celebrations. Everyday Makeup: Enhance your daily appearance with professional-grade makeup. Special Occasion Makeup: Stunning looks for any important life event. The Future of Bridal Makeup in Sheikhpura Ladyfair is transforming bridal beauty in Sheikhpura with its at-home makeup services and exceptional artistry. Our growing popularity among brides ensures that we remain the top choice for flawless bridal makeup. Q&A with Ladyfair’s Bridal Makeup Artist in Sheikhpura Q1: Why is Ladyfair the top choice for bridal makeup in Sheikhpura? A1: Ladyfair offers expert at-home bridal makeup services for a hassle-free and flawless experience. Q2: What are the prices for bridal makeup services in Sheikhpura? A2: Bridal makeup starts at ₹10,000 for basic makeup, with HD and airbrush options also available. Q3: How do I book Ladyfair’s bridal makeup services? A3: Call 7004721239 to schedule your appointment and consultation. Q4: What types of bridal makeup does Ladyfair offer? A4: We provide traditional, HD, and airbrush bridal makeup styles. Q5: Are makeup trial sessions available? A5: Yes, we offer trial sessions to ensure your bridal look meets your expectations. Q6: What kind of products does Ladyfair use for makeup? A6: We use high-quality, professional-grade makeup products for a flawless and long-lasting finish. Q7: Does Ladyfair offer makeup for other occasions? A7: Yes, we provide makeup services for engagements, receptions, parties, and other special events.

Posted By: 24th November 2024
BEST BRIDAL MAKEUP ARTIST IN TARAIYA
BEST BRIDAL MAKEUP ARTIST IN TARAIYA Introduction In Taraiya, Ladyfair is the go-to name for professional bridal makeup services delivered right to your doorstep. Whether you envision a traditional bridal look, a flawless HD finish, or the elegance of airbrush makeup, our skilled makeup artist will bring your dream wedding look to life. Call 7004721239 today to book your appointment and experience the best bridal makeup services in Taraiya. Why Choose Ladyfair for Bridal Makeup in Taraiya? Expert Makeup Artist Our makeup artist in Taraiya has extensive experience in creating stunning bridal looks tailored to your personality, attire, and preferences. Convenient At-Home Service Enjoy the ultimate convenience with Ladyfair’s at-home bridal makeup services, ensuring a stress-free preparation for your big day. Premium Products for a Flawless Look Ladyfair uses top-quality, professional-grade makeup products to provide a long-lasting and picture-perfect finish for your special day. Bridal Makeup Packages in Taraiya Ladyfair offers affordable and customizable bridal makeup packages: Basic Bridal Makeup: ₹10,000 HD Bridal Makeup: ₹12,000 Airbrush Bridal Makeup: ₹18,000 For engagement and reception makeup: Basic Engagement/Reception Makeup: ₹6,000 HD Engagement/Reception Makeup: ₹8,000 Airbrush Engagement/Reception Makeup: ₹12,000 For parties: Basic Party Makeup: ₹2,500 HD Party Makeup: ₹3,500 Popular Bridal Makeup Styles in Taraiya Traditional Bridal Makeup Bold colors and classic styles define our traditional bridal makeup, perfect for creating an elegant and timeless wedding look. HD Bridal Makeup HD bridal makeup ensures a flawless appearance both in photographs and in real life, making your big day truly memorable. Airbrush Bridal Makeup Airbrush makeup provides a lightweight, natural, and long-lasting finish, ideal for brides seeking a radiant and effortless glow throughout their wedding. How to Book Ladyfair’s Bridal Makeup in Taraiya Initial Contact: Call 7004721239 to discuss your needs and schedule an appointment. Consultation: Collaborate with our makeup artist to create your desired bridal look. Makeup Trial: Opt for a trial session to ensure your wedding makeup is perfect. Wedding Day Makeup: Our makeup artist will arrive at your home in Taraiya to deliver a flawless bridal look with no stress. Testimonials from Brides in Taraiya Sneha K., Taraiya: "The airbrush makeup was amazing and stayed fresh all day. The at-home service made my wedding day preparations so convenient!" Anjali M., Taraiya: "My HD bridal look was stunning and exactly what I wanted. Ladyfair’s service was exceptional!" Pooja S., Taraiya: "Ladyfair made my dream bridal look come true. The traditional makeup was flawless, and I couldn’t be happier!" Tips for Preparing for Your Bridal Makeup Hydrate Your Skin: Drink plenty of water to keep your skin glowing and healthy. Stick to Your Routine: Maintain a consistent skincare routine for optimal results. Avoid New Products: Refrain from trying new skincare products before your wedding to avoid skin issues. Communicate Clearly: Share your preferences and ideas with our makeup artist during your consultation and trial session. Additional Makeup Services in Taraiya Ladyfair offers expert makeup services for all occasions: Engagement and Reception Makeup: Look stunning at all your pre-wedding events. Party Makeup: Glamorous looks for birthdays, anniversaries, and celebrations. Everyday Makeup: Enhance your everyday look with professional makeup. Special Occasion Makeup: Perfect makeup for any important event in Taraiya. The Future of Bridal Makeup in Taraiya Ladyfair is revolutionizing bridal beauty in Taraiya by offering high-quality, at-home makeup services. As more brides choose Ladyfair for their special day, we continue to grow as the most trusted name in bridal makeup. Q&A with Ladyfair’s Bridal Makeup Artist in Taraiya Q1: Why is Ladyfair the top choice for bridal makeup in Taraiya? A1: Ladyfair provides expert at-home bridal makeup services, ensuring a stress-free and flawless experience. Q2: What are the prices for bridal makeup services in Taraiya? A2: Bridal makeup prices start at ₹10,000 for basic makeup, with HD and airbrush options available. Q3: How do I book Ladyfair’s services? A3: Call 7004721239 to schedule your appointment and consultation. Q4: What types of bridal makeup does Ladyfair offer? A4: Ladyfair specializes in traditional, HD, and airbrush bridal makeup styles. Q5: Are trial sessions available before the wedding day? A5: Yes, trial sessions are available to ensure your bridal look is perfect. Q6: What kind of products does Ladyfair use for bridal makeup? A6: We use premium, professional-grade products for a long-lasting and flawless finish. Q7: Does Ladyfair offer makeup for other occasions? A7: Yes, we provide makeup services for engagements, receptions, parties, and other special occasions.

Posted By: 24th November 2024
BRIDAL MAKEUP ARTIST IN SONEPUR
BRIDAL MAKEUP ARTIST IN SONEPUR Introduction In Sonepur, Ladyfair stands out as the trusted name for professional bridal makeup services, offering unmatched convenience and quality at your doorstep. Whether you’re looking for a traditional bridal appearance, HD makeup perfection, or the light elegance of airbrush makeup, our experienced makeup artist ensures you look radiant on your big day. Call 7004721239 now to book your appointment and experience Ladyfair’s expert bridal makeup services in Sonepur. Why Choose Ladyfair for Bridal Makeup in Sonepur? Skilled and Professional Makeup Artist Our makeup artist in Sonepur specializes in creating custom bridal looks, ensuring your makeup enhances your personality, attire, and wedding theme. Convenient At-Home Services Skip the hassle of salon visits with Ladyfair’s at-home bridal makeup services, designed to make your preparation stress-free and comfortable. Premium-Quality Makeup Products We use only high-quality, professional-grade makeup products to ensure a flawless and long-lasting finish, making you picture-perfect throughout the day. Bridal Makeup Packages in Sonepur Ladyfair offers a range of affordable bridal makeup packages: Basic Bridal Makeup: ₹10,000 HD Bridal Makeup: ₹12,000 Airbrush Bridal Makeup: ₹18,000 For engagement and reception makeup: Basic Engagement/Reception Makeup: ₹6,000 HD Engagement/Reception Makeup: ₹8,000 Airbrush Engagement/Reception Makeup: ₹12,000 For parties: Basic Party Makeup: ₹2,500 HD Party Makeup: ₹3,500 Bridal Makeup Styles in Sonepur Traditional Bridal Makeup Our traditional bridal makeup features bold colors and classic styling to create a timeless and elegant look that complements your wedding attire. HD Bridal Makeup HD bridal makeup ensures you look flawless both in real life and photographs, making your wedding moments truly unforgettable. Airbrush Bridal Makeup Airbrush makeup provides a lightweight, natural finish that is long-lasting, ideal for brides who want a fresh and radiant look throughout their celebrations. How to Book Ladyfair’s Bridal Makeup in Sonepur Contact Us: Call 7004721239 to discuss your requirements and schedule an appointment. Consultation: Collaborate with our makeup artist to design your dream bridal look. Makeup Trial: Book a trial session to ensure your look matches your vision. Wedding Day Makeup: On your big day, our makeup artist will arrive at your home in Sonepur to deliver a flawless bridal look. Testimonials from Brides in Sonepur Priya S., Sonepur: "The HD makeup was stunning, and I received countless compliments. Ladyfair’s service was seamless and professional!" Meera R., Sonepur: "The airbrush makeup stayed fresh all day, and the at-home service made everything so convenient. Highly recommend!" Sonal P., Sonepur: "My traditional bridal look was exactly what I dreamed of. Thank you, Ladyfair, for making my day so special!" Tips for Preparing for Your Bridal Makeup Hydrate Well: Drink plenty of water to keep your skin healthy and glowing. Stick to Your Skincare Routine: Consistent care ensures your skin is ready for flawless makeup. Avoid New Products: Don’t experiment with new skincare products before your wedding to avoid reactions. Communicate Clearly: Share your preferences and ideas during the consultation and trial session. Additional Makeup Services in Sonepur Ladyfair provides professional makeup for all occasions: Engagement/Reception Makeup: Tailored looks for pre-wedding events. Party Makeup: Glamorous makeup for birthdays, anniversaries, and other celebrations. Everyday Makeup: Enhance your daily look with expert techniques. Special Occasion Makeup: Perfect for any significant event in Sonepur. The Future of Bridal Makeup in Sonepur Ladyfair is redefining bridal makeup services in Sonepur with high-quality, personalized at-home experiences. As more brides choose Ladyfair, we continue to establish ourselves as the premier choice for bridal makeup in the region. Q&A with Ladyfair’s Bridal Makeup Artist in Sonepur Q1: Why choose Ladyfair for bridal makeup in Sonepur? A1: Ladyfair offers professional, at-home bridal makeup services, ensuring a stress-free and flawless experience. Q2: What are the prices for bridal makeup services in Sonepur? A2: Bridal makeup prices start at ₹10,000, with HD and airbrush options available. Q3: How do I book Ladyfair’s services? A3: Call 7004721239 to schedule your appointment and consultation. Q4: What makeup styles are offered? A4: We specialize in traditional, HD, and airbrush bridal makeup styles. Q5: Are trial sessions available? A5: Yes, Ladyfair offers trial sessions to ensure your bridal look is perfect. Q6: What products does Ladyfair use? A6: We use premium, professional-grade makeup products for a long-lasting and flawless finish. Q7: Does Ladyfair offer makeup for other events? A7: Yes, we provide makeup services for engagements, receptions, parties, and other special occasions.

Posted By: 24th November 2024
BRIDAL MAKEUP ARTIST IN PURNAHIYA
BRIDAL MAKEUP ARTIST IN PURNAHIYA Introduction In Purnahiya, Ladyfair is the go-to choice for professional bridal makeup services that bring beauty and convenience to your doorstep. Whether you desire a traditional bridal look, flawless HD makeup, or the lightweight elegance of airbrush makeup, our expert makeup artist ensures you shine on your special day. Call us at 7004721239 to schedule your appointment and experience exceptional makeup services in Purnahiya. Why Choose Ladyfair for Bridal Makeup in Purnahiya? Skilled and Experienced Makeup Artist Our makeup artist specializes in crafting bespoke bridal looks, ensuring your makeup complements your style, attire, and personality. Convenient At-Home Services Ladyfair eliminates the stress of salon visits by offering at-home bridal makeup services in Purnahiya, providing a seamless preparation experience. Top-Quality Makeup Products We use only premium, professional-grade makeup products to create a flawless, long-lasting look that keeps you radiant throughout your big day. Bridal Makeup Packages in Purnahiya Our packages are tailored to suit a variety of needs and budgets: Basic Bridal Makeup: ₹10,000 HD Bridal Makeup: ₹12,000 Airbrush Bridal Makeup: ₹18,000 For engagement and reception: Basic Engagement/Reception Makeup: ₹6,000 HD Engagement/Reception Makeup: ₹8,000 Airbrush Engagement/Reception Makeup: ₹12,000 For parties: Basic Party Makeup: ₹2,500 HD Party Makeup: ₹3,500 Signature Bridal Makeup Styles in Purnahiya Traditional Bridal Makeup Our traditional bridal makeup enhances your natural beauty while creating a timeless, classic look that pairs perfectly with traditional wedding attire. HD Bridal Makeup HD bridal makeup guarantees a flawless finish for both the camera and real life, ensuring you look picture-perfect all day. Airbrush Bridal Makeup Airbrush makeup provides a lightweight, natural finish that is ideal for brides seeking a radiant look that lasts through the festivities. How to Book Your Ladyfair Bridal Makeup in Purnahiya Contact Us: Call 7004721239 to discuss your needs and book your appointment. Consultation: Work with our makeup artist to design your dream bridal look. Makeup Trial: Preview your bridal look with a trial session to ensure satisfaction. Wedding Day Makeup: On your big day, our makeup artist will come to your home in Purnahiya to deliver a flawless makeup experience. Testimonials from Brides in Purnahiya Kritika R., Purnahiya: "My bridal look was stunning, and the airbrush makeup stayed perfect all day. Ladyfair’s service is truly amazing!" Swati P., Purnahiya: "I chose HD bridal makeup, and the results were incredible. The at-home service made everything so convenient. Thank you, Ladyfair!" Anushka T., Purnahiya: "The traditional bridal makeup was exactly what I envisioned. I received so many compliments on my wedding day!" Tips to Prepare for Your Bridal Makeup Stay Hydrated: Drink plenty of water to keep your skin healthy and glowing. Follow Your Skincare Routine: Maintain a consistent routine to prepare your skin for flawless makeup. Avoid New Products: Don’t use new skincare products to prevent any unwanted reactions. Communicate Clearly: Share your preferences with our makeup artist during consultations and trials. Additional Makeup Services in Purnahiya Ladyfair offers a variety of makeup services for every occasion: Engagement/Reception Makeup: Stunning looks for your pre-wedding events. Party Makeup: Glamorous makeup for birthdays, anniversaries, and celebrations. Daily Makeup: Enhance your everyday look with professional expertise. Special Occasion Makeup: Perfect for any significant event in Purnahiya. The Future of Bridal Makeup in Purnahiya Ladyfair is transforming the bridal beauty experience in Purnahiya with high-quality, personalized, at-home makeup services. Our dedication to excellence and convenience makes us the top choice for brides in the area. Q&A with Ladyfair’s Bridal Makeup Artist in Purnahiya Q1: Why is Ladyfair the best option for bridal makeup in Purnahiya? A1: Ladyfair offers expert at-home bridal makeup services, ensuring a stress-free and flawless experience. Q2: What are the prices for bridal makeup in Purnahiya? A2: Our prices start at ₹10,000 for basic bridal makeup, with HD and airbrush options available. Q3: How can I book Ladyfair’s services? A3: Call us at 7004721239 to schedule your appointment and consultation. Q4: What bridal makeup styles are offered in Purnahiya? A4: We specialize in traditional, HD, and airbrush bridal makeup styles. Q5: Are makeup trials available? A5: Yes, we provide trials to ensure your bridal look matches your expectations. Q6: What products are used for bridal makeup? A6: We use premium, professional-grade makeup products for flawless and long-lasting results. Q7: What other makeup services are available? A7: We offer engagement, reception, party, and everyday makeup services for all occasions.

Posted By: 24th November 2024
BRIDAL MAKEUP ARTIST IN PIPRAHI
BRIDAL MAKEUP ARTIST IN PIPRAHI Introduction In Piprahi, Ladyfair is the trusted name for professional bridal makeup services that come to your doorstep. Whether you want a traditional bridal look, the perfection of HD makeup, or the lightweight finish of airbrush makeup, our experienced makeup artist ensures you look flawless on your special day. Call us at 7004721239 to book an appointment and enjoy exceptional makeup services in Piprahi. Why Choose Ladyfair for Bridal Makeup in Piprahi? Expert Makeup Artist Our makeup artist specializes in bridal makeup, crafting stunning looks tailored to your preferences, outfit, and unique style. At-Home Service for Convenience Ladyfair brings top-tier bridal makeup services to your home in Piprahi, eliminating the hassle of salon visits during wedding preparations. Premium Products for Perfect Results We use high-quality, professional-grade makeup products to achieve a flawless and long-lasting finish that keeps you glowing throughout your special day. Bridal Makeup Packages in Piprahi Our packages are designed to suit various styles and budgets: Basic Bridal Makeup: ₹10,000 HD Bridal Makeup: ₹12,000 Airbrush Bridal Makeup: ₹18,000 For engagement and reception: Basic Engagement/Reception Makeup: ₹6,000 HD Engagement/Reception Makeup: ₹8,000 Airbrush Engagement/Reception Makeup: ₹12,000 For parties: Basic Party Makeup: ₹2,500 HD Party Makeup: ₹3,500 Signature Bridal Makeup Styles in Piprahi Traditional Bridal Makeup Our traditional bridal makeup creates a timeless, elegant look that complements your wedding attire. HD Bridal Makeup Get a flawless, photo-ready look with our HD bridal makeup, ensuring you look stunning in every wedding picture. Airbrush Bridal Makeup Achieve a radiant, lightweight finish with our airbrush makeup, designed to last throughout your wedding festivities. How to Book Your Ladyfair Bridal Makeup in Piprahi Contact Us: Call 7004721239 to discuss your requirements and schedule an appointment. Consultation: Collaborate with our makeup artist to create your dream bridal look. Trial Session: Opt for a trial session to ensure your makeup aligns with your expectations. Wedding Day Makeup: Our makeup artist will arrive at your home in Piprahi to deliver a seamless and exceptional makeup experience. Testimonials from Brides in Piprahi Anjali S., Piprahi: "Ladyfair made my wedding day stress-free. The HD makeup was flawless and lasted all day. Highly recommended!" Priyanka J., Piprahi: "I loved the airbrush makeup – it felt so light and looked perfect in every photo. Thank you, Ladyfair!" Ritika K., Piprahi: "My traditional bridal makeup was exactly what I imagined. The at-home service was a bonus!" Tips to Prepare for Your Bridal Makeup Hydrate: Drink plenty of water to maintain your skin's natural glow. Follow Your Skincare Routine: Keep up with your regular skincare routine for the best results. Avoid New Products: Don’t experiment with new skincare products close to your wedding day. Communicate Preferences: Share your expectations and ideas with our makeup artist during consultations. Additional Makeup Services in Piprahi Ladyfair offers makeup services for all occasions: Engagement/Reception Makeup: Stand out during pre-wedding events with tailored looks. Party Makeup: Glamorous makeup for parties and celebrations. Daily Makeup: Enhance your everyday look with professional expertise. Special Occasion Makeup: Perfect makeup for any special event in Piprahi. The Future of Bridal Makeup in Piprahi Ladyfair is revolutionizing bridal beauty in Piprahi with convenient, high-quality, at-home makeup services. By combining expertise and personalized care, we ensure every bride feels confident and beautiful on her big day. Q&A with Ladyfair’s Bridal Makeup Artist in Piprahi Q1: Why should I choose Ladyfair for bridal makeup in Piprahi? A1: Ladyfair offers professional, at-home bridal makeup services, ensuring a stress-free and flawless experience. Q2: What are the bridal makeup prices in Piprahi? A2: Prices start at ₹10,000 for basic bridal makeup, with HD and airbrush options available. Q3: How do I book Ladyfair’s bridal makeup services in Piprahi? A3: Simply call us at 7004721239 to schedule your appointment and consultation. Q4: What bridal makeup styles does Ladyfair offer? A4: We specialize in traditional, HD, and airbrush bridal makeup styles. Q5: Do you offer trial makeup sessions? A5: Yes, trial sessions are available to ensure your bridal look meets your expectations. Q6: What products do you use for makeup? A6: We use high-quality, professional-grade makeup products for long-lasting, flawless results. Q7: What other makeup services are available in Piprahi? A7: We provide makeup services for engagements, receptions, parties, and daily wear. Ladyfair is dedicated to making every bride in Piprahi look her absolute best with personalized and professional bridal makeup services at home.

Posted By: 24th November 2024
BRIDAL MAKEUP ARTIST IN DUMRI KATSARI
BRIDAL MAKEUP ARTIST IN DUMRI KATSARI Introduction In Dumri Katsari, Ladyfair is widely known for providing professional bridal makeup services at your doorstep. Whether you desire a traditional bridal look, a flawless HD finish, or the elegance of airbrush makeup, our skilled makeup artist is here to bring your vision to life. Call us at 7004721239 to book your appointment and experience the best bridal makeup service in Dumri Katsari. Why Ladyfair is the Best Choice for Bridal Makeup in Dumri Katsari Skilled and Experienced Makeup Artist Our makeup artist in Dumri Katsari specializes in bridal makeup, ensuring a look that perfectly matches your personality, attire, and preferences. Convenient At-Home Makeup Service Ladyfair’s at-home makeup services in Dumri Katsari let you prepare for your big day in the comfort of your own home, saving you time and effort. High-Quality Makeup Products We use only high-quality, professional-grade products to ensure a long-lasting and flawless finish, keeping you radiant throughout your wedding day. Bridal Makeup Pricing in Dumri Katsari Our pricing caters to a range of preferences and budgets: Basic Bridal Makeup: ₹10,000 HD Bridal Makeup: ₹12,000 Airbrush Bridal Makeup: ₹18,000 For engagement and reception makeup: Basic Engagement/Reception Makeup: ₹6,000 HD Engagement/Reception Makeup: ₹8,000 Airbrush Engagement/Reception Makeup: ₹12,000 For parties: Basic Party Makeup: ₹2,500 HD Party Makeup: ₹3,500 Popular Bridal Makeup Styles in Dumri Katsari Traditional Bridal Makeup Achieve a timeless and classic look with our traditional bridal makeup in Dumri Katsari, featuring bold and vibrant tones that perfectly complement your wedding attire. HD Bridal Makeup Our HD bridal makeup ensures a flawless, camera-ready appearance, perfect for photographs and real life on your special day. Airbrush Bridal Makeup Airbrush makeup provides a lightweight, natural, and long-lasting finish, ideal for brides who want a radiant glow that lasts all day. How to Book Your Bridal Makeup with Ladyfair in Dumri Katsari Initial Contact: Call us at 7004721239 to discuss your requirements and schedule your appointment. Consultation: Our makeup artist will help you design a look that complements your vision and theme. Makeup Trial: We offer trial sessions to ensure your bridal look meets your expectations. Wedding Day Makeup: On your wedding day, our makeup artist will arrive at your home in Dumri Katsari to provide a seamless and flawless makeup experience. Testimonials from Brides in Dumri Katsari Sonal K., Dumri Katsari: "Ladyfair provided a stress-free experience on my wedding day. My makeup was exactly how I wanted, and I received endless compliments." Anamika P., Dumri Katsari: "The HD makeup was perfect for photos and lasted all day. The professionalism of Ladyfair made the process so smooth!" Swati R., Dumri Katsari: "I chose airbrush makeup, and it was flawless and lightweight. I felt confident and beautiful throughout the day." Preparing for Your Bridal Makeup Session To ensure your makeup is perfect for your big day, follow these tips: Stay Hydrated: Keep your skin radiant by drinking plenty of water. Maintain Your Skincare Routine: Stick to your regular skincare routine to keep your skin in optimal condition. Avoid New Products: Do not use unfamiliar skincare products before your wedding to avoid breakouts or reactions. Communicate Clearly: Share your preferences and expectations with our makeup artist during consultations and trials. Additional Beauty Services by Ladyfair Ladyfair offers a range of makeup services for special occasions in Dumri Katsari: Engagement and Reception Makeup: Custom looks for your pre-wedding events. Party Makeup: Glamorous makeup for birthdays, anniversaries, and celebrations. Everyday Makeup: Enhance your daily look with professional makeup. Special Occasion Makeup: Perfect for life’s most important events. The Future of Bridal Makeup in Dumri Katsari Ladyfair is transforming bridal beauty in Dumri Katsari by offering high-quality, at-home makeup services. With our expertise and personalized approach, we are the premier choice for bridal makeup, ensuring every bride looks her absolute best. Q&A with Ladyfair’s Bridal Makeup Artist in Dumri Katsari Q1: Why choose Ladyfair for bridal makeup in Dumri Katsari? A1: Ladyfair provides expert at-home bridal makeup services, ensuring a flawless look in the comfort of your home. Q2: What are the prices for bridal makeup services in Dumri Katsari? A2: Our prices start at ₹10,000 for basic bridal makeup, with HD and airbrush options available. Q3: How can I book Ladyfair’s bridal makeup services in Dumri Katsari? A3: Call us at 7004721239 to book your appointment. We offer consultations and trial sessions to perfect your look. Q4: What types of bridal makeup does Ladyfair offer in Dumri Katsari? A4: We specialize in traditional, HD, and airbrush bridal makeup styles. Q5: Are makeup trials available before the wedding day? A5: Yes, we provide trial sessions to ensure your bridal look is exactly what you envision. Q6: What kind of products does Ladyfair use for bridal makeup? A6: We use only professional-grade, high-quality products for a flawless and long-lasting finish. Q7: What other makeup services does Ladyfair offer in Dumri Katsari? A7: In addition to bridal makeup, we offer engagement, reception, party, and everyday makeup services. Ladyfair is your trusted partner for stunning at-home bridal makeup services in Dumri Katsari, ensuring you look radiant and flawless on your special day.

Posted By: 24th November 2024
BRIDAL MAKEUP ARTIST IN TARIYANI
BRIDAL MAKEUP ARTIST IN TARIYANI Introduction In Tariyani, Ladyfair is celebrated for offering expert bridal makeup services right at your doorstep. Whether you envision a traditional bridal look, a flawless HD finish, or the elegance of airbrush makeup, our skilled makeup artist will bring your dream look to reality. Contact us at 7004721239 to schedule your appointment today and experience the finest bridal makeup service in Tariyani. Why Ladyfair is the Best Choice for Bridal Makeup in Tariyani Skilled and Experienced Makeup Artist Our makeup artist in Tariyani has years of experience in creating stunning bridal looks tailored to your personality, attire, and preferences. Convenient At-Home Makeup Service Ladyfair brings unparalleled convenience by providing at-home makeup services in Tariyani, allowing you to prepare for your special day in the comfort of your home. High-Quality Makeup Products We use only professional-grade, premium makeup products to ensure a flawless, long-lasting look that keeps you glowing throughout your wedding day. Bridal Makeup Pricing in Tariyani Our pricing is designed to suit a variety of preferences and budgets: Basic Bridal Makeup: ₹10,000 HD Bridal Makeup: ₹12,000 Airbrush Bridal Makeup: ₹18,000 For engagement and reception makeup: Basic Engagement/Reception Makeup: ₹6,000 HD Engagement/Reception Makeup: ₹8,000 Airbrush Engagement/Reception Makeup: ₹12,000 For parties: Basic Party Makeup: ₹2,500 HD Party Makeup: ₹3,500 Popular Bridal Makeup Styles in Tariyani Traditional Bridal Makeup For a timeless and classic look, our traditional bridal makeup in Tariyani uses bold tones to create a style that perfectly complements your wedding attire. HD Bridal Makeup HD bridal makeup ensures you look flawless in photos and in person, giving you a camera-ready appearance that’s perfect for your big day. Airbrush Bridal Makeup Airbrush makeup offers a lightweight, smooth, and long-lasting finish. It’s ideal for brides who want a natural, radiant look that lasts all day. How to Book Your Bridal Makeup with Ladyfair in Tariyani Initial Contact: Call us at 7004721239 to discuss your needs and book your appointment. Consultation: Our makeup artist will work with you to understand your vision and create a customized plan. Makeup Trial: We offer trial sessions to ensure your bridal look is exactly what you desire. Wedding Day Makeup: On your wedding day, our makeup artist will arrive at your home in Tariyani to deliver a stress-free, flawless makeup experience. Testimonials from Brides in Tariyani Priya R., Tariyani: "Ladyfair made my wedding day stress-free with their at-home services. My makeup was flawless and exactly what I wanted!" Anjali M., Tariyani: "The HD makeup was stunning and perfect for all the photos. The service was professional and reliable." Komal S., Tariyani: "The airbrush makeup lasted all day, and I received countless compliments. I couldn’t have asked for a better bridal makeup experience!" Preparing for Your Bridal Makeup Session To ensure your makeup looks perfect, follow these tips: Stay Hydrated: Drink plenty of water to keep your skin radiant. Maintain Your Skincare Routine: Consistent skincare ensures your skin is in optimal condition. Avoid New Skincare Products: Avoid experimenting with unfamiliar products to prevent breakouts. Communicate Your Preferences: Be clear with our makeup artist about the look you want during your consultation and trial. Additional Beauty Services by Ladyfair Ladyfair offers a variety of makeup services for special occasions in Tariyani: Engagement and Reception Makeup: Tailored looks for all your pre-wedding events. Party Makeup: Perfect for birthdays, anniversaries, and other celebrations. Everyday Makeup: Professional makeup to enhance your daily look. Special Occasion Makeup: Glamorous makeup for any important event. The Future of Bridal Makeup in Tariyani Ladyfair is redefining bridal beauty by offering top-notch at-home makeup services in Tariyani. As more brides discover our artistry and personalized service, we continue to grow as the go-to choice for bridal makeup. Q&A with Ladyfair’s Bridal Makeup Artist in Tariyani Q1: Why is Ladyfair the top choice for bridal makeup in Tariyani? A1: Ladyfair offers expert at-home bridal makeup services, ensuring a flawless look in the comfort of your home. Q2: What are the prices for bridal makeup services in Tariyani? A2: Prices start at ₹10,000 for basic makeup, with HD and airbrush options available. Q3: How do I book Ladyfair’s bridal makeup services in Tariyani? A3: Call 7004721239 to book your appointment. We also offer consultations and trial sessions. Q4: What types of bridal makeup does Ladyfair offer in Tariyani? A4: We offer traditional, HD, and airbrush bridal makeup styles. Q5: Are makeup trials available before the wedding day? A5: Yes, trial sessions are available to ensure your look is perfect. Q6: What kind of products does Ladyfair use for bridal makeup? A6: We use high-quality, professional-grade makeup products for a flawless finish. Q7: What other makeup services does Ladyfair offer in Tariyani? A7: Besides bridal makeup, we provide engagement, reception, party, and everyday makeup services. Ladyfair is your trusted partner for stunning at-home bridal makeup services in Tariyani, ensuring you look radiant and flawless on your special day.

Posted By: 24th November 2024
Bridal Makeup Artist in Sheohar
BRIDAL MAKEUP ARTIST IN SHEOHAR Introduction In Sheohar, Ladyfair is renowned for providing expert bridal makeup services directly at your home. Whether you're dreaming of a traditional bridal look, a flawless HD finish, or the perfection of airbrush makeup, our talented makeup artist is here to bring your vision to life. Contact us at 7004721239 to schedule your appointment today and experience the best bridal makeup service in Sheohar. Why Ladyfair is the Best Choice for Bridal Makeup in Sheohar Skilled and Experienced Makeup Artist Our makeup artist in Sheohar has extensive experience in bridal makeup, ensuring you receive a look that complements your personality, attire, and preferences. Convenient At-Home Makeup Service Ladyfair provides the ultimate convenience by offering at-home makeup services in Sheohar, allowing you to prepare for your big day without leaving the comfort of your home. High-Quality Makeup Products We use only premium, professional-grade makeup products to guarantee a long-lasting, flawless look that will keep you radiant throughout your wedding day. Bridal Makeup Pricing in Sheohar Our pricing is designed to cater to various needs and budgets: Bridal Makeup: Basic Bridal Makeup: ₹10,000 HD Bridal Makeup: ₹12,000 Airbrush Bridal Makeup: ₹18,000 Engagement and Reception Makeup: Basic Engagement/Reception Makeup: ₹6,000 HD Engagement/Reception Makeup: ₹8,000 Airbrush Engagement/Reception Makeup: ₹12,000 Party Makeup: Basic Party Makeup: ₹2,500 HD Party Makeup: ₹3,500 Popular Bridal Makeup Styles in Sheohar Traditional Bridal Makeup For a timeless and classic look, our traditional bridal makeup in Sheohar features bold and vibrant tones, creating an elegant style that perfectly complements your wedding attire. HD Bridal Makeup HD bridal makeup ensures you look flawless in photos and real life, giving you a camera-ready appearance that lasts all day. Airbrush Bridal Makeup Airbrush makeup offers a smooth, lightweight, and long-lasting finish. It’s ideal for brides seeking a natural, radiant look that stays fresh throughout the day. How to Book Your Bridal Makeup with Ladyfair in Sheohar Initial Contact: Call us at 7004721239 to discuss your needs and book an appointment. Consultation: Our makeup artist will work with you to understand your vision and create a makeup plan that complements your wedding theme. Makeup Trial: We offer trial makeup sessions to ensure your bridal look is exactly what you desire. Wedding Day Makeup: On your wedding day, our makeup artist will arrive at your home in Sheohar, providing a flawless makeup experience without any stress. Testimonials from Brides in Sheohar Pooja K., Sheohar: "Ladyfair made my wedding day stress-free with their at-home service. My makeup was stunning, and I received so many compliments." Anjali M., Sheohar: "The HD bridal makeup made me feel like a queen. Ladyfair truly exceeded my expectations with their professionalism." Shweta R., Sheohar: "The airbrush makeup was flawless and lasted the entire day. I highly recommend Ladyfair for any bride in Sheohar!" Preparing for Your Bridal Makeup Session To ensure your makeup looks perfect on your big day, follow these tips: Stay Hydrated: Drink plenty of water to keep your skin glowing. Maintain Your Skincare Routine: Stick to a consistent skincare routine to keep your skin in optimal condition. Avoid New Skincare Products: Using unfamiliar products before your wedding may lead to breakouts or skin reactions. Communicate Your Preferences: Be clear with our makeup artist about the look you want to achieve during your consultation and trial session. Additional Beauty Services by Ladyfair Ladyfair also offers a range of makeup services for other special occasions in Sheohar: Engagement and Reception Makeup: Tailored looks for all your pre-wedding events. Party Makeup: Perfect for birthdays, anniversaries, and other celebrations. Everyday Makeup: Enhance your daily look with professional makeup. Special Occasion Makeup: Glamorous makeup for any important life event. The Future of Bridal Makeup in Sheohar Ladyfair is revolutionizing bridal beauty by offering high-quality, at-home makeup services in Sheohar. As more brides experience our exceptional artistry and personalized service, we continue to grow as the premier choice for bridal makeup. Q&A with Ladyfair’s Bridal Makeup Artist in Sheohar Q1: Why is Ladyfair the top choice for bridal makeup in Sheohar? A1: Ladyfair offers expert at-home bridal makeup services, ensuring you receive a flawless look in the comfort of your own home. Q2: What are the prices for bridal makeup services in Sheohar? A2: Our bridal makeup prices start at ₹10,000 for basic makeup, with HD and airbrush options also available. Q3: How do I book Ladyfair’s bridal makeup services in Sheohar? A3: You can call us at 7004721239 to book our services, and we offer consultations and makeup trials to ensure your desired look is achieved. Q4: What types of bridal makeup does Ladyfair offer in Sheohar? A4: We offer traditional, HD, and airbrush bridal makeup styles to suit your preferences. Q5: Are makeup trials available before the wedding day? A5: Yes, we provide trial sessions so you can preview your bridal look and make any adjustments before the big day. Q6: What kind of products does Ladyfair use for bridal makeup? A6: We use high-quality, professional-grade makeup products to ensure a flawless and long-lasting finish. Q7: What other makeup services does Ladyfair offer in Sheohar? A7: Besides bridal makeup, we offer engagement, reception, party, and everyday makeup services for all occasions. Ladyfair is your trusted partner for stunning at-home bridal makeup services in Sheohar, ensuring you look radiant and flawless on your special day.

Posted By: 23rd November 2024
Bridal Makeup Artist in Sursand
Introduction In Sursand, Ladyfair is the premier choice for brides looking to achieve the perfect wedding day look with our professional at-home bridal makeup services. Whether you desire a traditional bridal look, an HD finish, or the flawless perfection of airbrush makeup, our expert makeup artist in Sursand ensures that you shine on your special day. Contact us today at 7004721239 to schedule your appointment. Why Choose Ladyfair for Bridal Makeup in Sursand Experienced Makeup Artist Our makeup artist in Sursand has years of experience in bridal makeup, creating personalized looks that complement your natural beauty and align with your style and preferences. Convenient At-Home Service Forget the stress of traveling to a salon. Ladyfair brings luxury beauty treatments directly to your doorstep with our at-home bridal makeup services, offering a truly personalized experience. Premium Makeup Products We use only high-quality, professional-grade makeup products to ensure a flawless, long-lasting look that remains perfect throughout your big day. Bridal Makeup Pricing in Sursand Our bridal makeup services in Sursand are tailored to fit different styles and budgets: Basic Bridal Makeup: ₹10,000 HD Bridal Makeup: ₹12,000 Airbrush Bridal Makeup: ₹18,000 For engagement and reception makeup: Basic Engagement/Reception Makeup: ₹6,000 HD Engagement/Reception Makeup: ₹8,000 Airbrush Engagement/Reception Makeup: ₹12,000 For parties: Basic Party Makeup: ₹2,500 HD Party Makeup: ₹3,500 Popular Bridal Makeup Styles in Sursand Traditional Bridal Makeup Our traditional bridal makeup in Sursand incorporates bold colors and intricate detailing to complement your wedding attire, creating an elegant and timeless look. HD Bridal Makeup For a high-definition finish that looks flawless both in photos and in person, HD bridal makeup is the perfect choice for brides who want a picture-perfect appearance all day. Airbrush Bridal Makeup Our airbrush makeup offers a lightweight, full-coverage finish that lasts all day, giving you a smooth and natural look while ensuring long-lasting perfection. How to Book Your Bridal Makeup with Ladyfair in Sursand Initial Contact: Call us at 7004721239 to discuss your makeup needs and schedule your appointment. Consultation Session: Meet with our makeup artist to discuss your wedding look, review your attire, and plan the perfect makeup style. Makeup Trial: We offer trial sessions to help you preview your bridal makeup look and make any adjustments. Wedding Day Makeup: On your wedding day, our makeup artist will arrive at your location in Sursand to provide flawless, hassle-free makeup service. Testimonials from Brides in Sursand Priya R., Sursand: "Ladyfair provided amazing service on my wedding day. The airbrush makeup looked flawless and lasted all day." Ritu K., Sursand: "I loved the HD makeup! It was perfect for my photos, and the at-home service was so convenient." Sneha S., Sursand: "My traditional bridal makeup was exactly what I wanted, and Ladyfair made the entire process stress-free." Preparing for Your Bridal Makeup Session To get the best results for your bridal makeup: Stay Hydrated: Keep your skin looking fresh by drinking plenty of water. Consistent Skincare: Stick to your regular skincare routine to maintain healthy, glowing skin. Avoid New Products: Use familiar products to prevent any reactions before your wedding day. Clear Communication: Discuss your makeup preferences and any concerns with our artist during the consultation. Additional Beauty Services by Ladyfair Beyond bridal makeup, Ladyfair offers a variety of beauty services in Sursand: Engagement and Reception Makeup: Customized looks for all pre-wedding events. Party Makeup: Perfect for birthdays, anniversaries, and special occasions. Everyday Makeup: Enhance your daily look with our expert makeup services. Special Occasion Makeup: Professional makeup for parties, celebrations, and formal events. The Future of Bridal Makeup in Sursand Ladyfair is dedicated to setting new standards in bridal beauty in Sursand with our innovative at-home services. As we continue to offer exceptional service, more brides are choosing Ladyfair as their preferred makeup provider. Q&A with Ladyfair’s Bridal Makeup Artist in Sursand Q1: What makes Ladyfair the best choice for bridal makeup in Sursand? A1: Ladyfair offers expert bridal makeup services at home, using high-quality products to ensure a flawless and long-lasting look. Q2: What are the prices for bridal makeup in Sursand? A2: Our bridal makeup packages start at ₹10,000 for basic makeup, ₹12,000 for HD makeup, and ₹18,000 for airbrush makeup. Q3: How do I book Ladyfair’s bridal makeup services in Sursand? A3: You can book our services by calling 7004721239. We also offer consultations and trial sessions to ensure you get the look you want. Q4: What bridal makeup styles does Ladyfair offer in Sursand? A4: Ladyfair offers traditional, HD, and airbrush bridal makeup to suit different preferences and needs. Q5: Are makeup trials available before my wedding? A5: Yes, we offer trial sessions so you can finalize your bridal look ahead of time. Q6: What products does Ladyfair use for bridal makeup? A6: We use professional-grade, high-quality makeup products that are safe for all skin types and ensure a flawless finish. Q7: What other services does Ladyfair provide in Sursand? A7: In addition to bridal makeup, we offer makeup for engagements, receptions, parties, and other special occasions. Ladyfair is your ultimate choice for professional, at-home bridal makeup services in Sursand, ensuring a flawless and stress-free experience on your special day.

Posted By: 23rd November 2024
Bridal Makeup Artist in Suppi
Introduction In Suppi, Ladyfair is the premier choice for brides looking to achieve the perfect wedding day look with our professional at-home bridal makeup services. Whether you desire a traditional bridal look, an HD finish, or the flawless perfection of airbrush makeup, our expert makeup artist in Suppi ensures that you shine on your special day. Contact us today at 7004721239 to schedule your appointment. Why Choose Ladyfair for Bridal Makeup in Suppi Experienced Makeup Artist Our makeup artist in Suppi has years of experience in bridal makeup, creating personalized looks that complement your natural beauty and align with your style and preferences. Convenient At-Home Service Forget the stress of traveling to a salon. Ladyfair brings luxury beauty treatments directly to your doorstep with our at-home bridal makeup services, offering a truly personalized experience. Premium Makeup Products We use only high-quality, professional-grade makeup products to ensure a flawless, long-lasting look that remains perfect throughout your big day. Bridal Makeup Pricing in Suppi Our bridal makeup services in Suppi are tailored to fit different styles and budgets: Basic Bridal Makeup: ₹10,000 HD Bridal Makeup: ₹12,000 Airbrush Bridal Makeup: ₹18,000 For engagement and reception makeup: Basic Engagement/Reception Makeup: ₹6,000 HD Engagement/Reception Makeup: ₹8,000 Airbrush Engagement/Reception Makeup: ₹12,000 For parties: Basic Party Makeup: ₹2,500 HD Party Makeup: ₹3,500 Popular Bridal Makeup Styles in Suppi Traditional Bridal Makeup Our traditional bridal makeup in Suppi incorporates bold colors and intricate detailing to complement your wedding attire, creating an elegant and timeless look. HD Bridal Makeup For a high-definition finish that looks flawless both in photos and in person, HD bridal makeup is the perfect choice for brides who want a picture-perfect appearance all day. Airbrush Bridal Makeup Our airbrush makeup offers a lightweight, full-coverage finish that lasts all day, giving you a smooth and natural look while ensuring long-lasting perfection. How to Book Your Bridal Makeup with Ladyfair in Suppi Initial Contact: Call us at 7004721239 to discuss your makeup needs and schedule your appointment. Consultation Session: Meet with our makeup artist to discuss your wedding look, review your attire, and plan the perfect makeup style. Makeup Trial: We offer trial sessions to help you preview your bridal makeup look and make any adjustments. Wedding Day Makeup: On your wedding day, our makeup artist will arrive at your location in Suppi to provide flawless, hassle-free makeup service. Testimonials from Brides in Suppi Priya R., Suppi: "Ladyfair provided amazing service on my wedding day. The airbrush makeup looked flawless and lasted all day." Ritu K., Suppi: "I loved the HD makeup! It was perfect for my photos, and the at-home service was so convenient." Sneha S., Suppi: "My traditional bridal makeup was exactly what I wanted, and Ladyfair made the entire process stress-free." Preparing for Your Bridal Makeup Session To get the best results for your bridal makeup: Stay Hydrated: Keep your skin looking fresh by drinking plenty of water. Consistent Skincare: Stick to your regular skincare routine to maintain healthy, glowing skin. Avoid New Products: Use familiar products to prevent any reactions before your wedding day. Clear Communication: Discuss your makeup preferences and any concerns with our artist during the consultation. Additional Beauty Services by Ladyfair Beyond bridal makeup, Ladyfair offers a variety of beauty services in Suppi: Engagement and Reception Makeup: Customized looks for all pre-wedding events. Party Makeup: Perfect for birthdays, anniversaries, and special occasions. Everyday Makeup: Enhance your daily look with our expert makeup services. Special Occasion Makeup: Professional makeup for parties, celebrations, and formal events. The Future of Bridal Makeup in Suppi Ladyfair is dedicated to setting new standards in bridal beauty in Suppi with our innovative at-home services. As we continue to offer exceptional service, more brides are choosing Ladyfair as their preferred makeup provider. Q&A with Ladyfair’s Bridal Makeup Artist in Suppi Q1: What makes Ladyfair the best choice for bridal makeup in Suppi? A1: Ladyfair offers expert bridal makeup services at home, using high-quality products to ensure a flawless and long-lasting look. Q2: What are the prices for bridal makeup in Suppi? A2: Our bridal makeup packages start at ₹10,000 for basic makeup, ₹12,000 for HD makeup, and ₹18,000 for airbrush makeup. Q3: How do I book Ladyfair’s bridal makeup services in Suppi? A3: You can book our services by calling 7004721239. We also offer consultations and trial sessions to ensure you get the look you want. Q4: What bridal makeup styles does Ladyfair offer in Suppi? A4: Ladyfair offers traditional, HD, and airbrush bridal makeup to suit different preferences and needs. Q5: Are makeup trials available before my wedding? A5: Yes, we offer trial sessions so you can finalize your bridal look ahead of time. Q6: What products does Ladyfair use for bridal makeup? A6: We use professional-grade, high-quality makeup products that are safe for all skin types and ensure a flawless finish. Q7: What other services does Ladyfair provide in Suppi? A7: In addition to bridal makeup, we offer makeup for engagements, receptions, parties, and other special occasions. Ladyfair is your ultimate choice for professional, at-home bridal makeup services in Suppi, ensuring a flawless and stress-free experience on your special day.

Posted By: 23rd November 2024
Bridal Makeup Artist in Sonbarsa
Introduction In Sonbarsa, Ladyfair is the premier choice for brides looking to achieve the perfect wedding day look with our professional at-home bridal makeup services. Whether you desire a traditional bridal look, an HD finish, or the flawless perfection of airbrush makeup, our expert makeup artist in Sonbarsa ensures that you shine on your special day. Contact us today at 7004721239 to schedule your appointment. Why Choose Ladyfair for Bridal Makeup in Sonbarsa Experienced Makeup Artist Our makeup artist in Sonbarsa has years of experience in bridal makeup, creating personalized looks that complement your natural beauty and align with your style and preferences. Convenient At-Home Service Forget the stress of traveling to a salon. Ladyfair brings luxury beauty treatments directly to your doorstep with our at-home bridal makeup services, offering a truly personalized experience. Premium Makeup Products We use only high-quality, professional-grade makeup products to ensure a flawless, long-lasting look that remains perfect throughout your big day. Bridal Makeup Pricing in Sonbarsa Our bridal makeup services in Sonbarsa are tailored to fit different styles and budgets: Basic Bridal Makeup: ₹10,000 HD Bridal Makeup: ₹12,000 Airbrush Bridal Makeup: ₹18,000 For engagement and reception makeup: Basic Engagement/Reception Makeup: ₹6,000 HD Engagement/Reception Makeup: ₹8,000 Airbrush Engagement/Reception Makeup: ₹12,000 For parties: Basic Party Makeup: ₹2,500 HD Party Makeup: ₹3,500 Popular Bridal Makeup Styles in Sonbarsa Traditional Bridal Makeup Our traditional bridal makeup in Sonbarsa incorporates bold colors and intricate detailing to complement your wedding attire, creating an elegant and timeless look. HD Bridal Makeup For a high-definition finish that looks flawless both in photos and in person, HD bridal makeup is the perfect choice for brides who want a picture-perfect appearance all day. Airbrush Bridal Makeup Our airbrush makeup offers a lightweight, full-coverage finish that lasts all day, giving you a smooth and natural look while ensuring long-lasting perfection. How to Book Your Bridal Makeup with Ladyfair in Sonbarsa Initial Contact: Call us at 7004721239 to discuss your makeup needs and schedule your appointment. Consultation Session: Meet with our makeup artist to discuss your wedding look, review your attire, and plan the perfect makeup style. Makeup Trial: We offer trial sessions to help you preview your bridal makeup look and make any adjustments. Wedding Day Makeup: On your wedding day, our makeup artist will arrive at your location in Sonbarsa to provide flawless, hassle-free makeup service. Testimonials from Brides in Sonbarsa Priya R., Sonbarsa: "Ladyfair provided amazing service on my wedding day. The airbrush makeup looked flawless and lasted all day." Ritu K., Sonbarsa: "I loved the HD makeup! It was perfect for my photos, and the at-home service was so convenient." Sneha S., Sonbarsa: "My traditional bridal makeup was exactly what I wanted, and Ladyfair made the entire process stress-free." Preparing for Your Bridal Makeup Session To get the best results for your bridal makeup: Stay Hydrated: Keep your skin looking fresh by drinking plenty of water. Consistent Skincare: Stick to your regular skincare routine to maintain healthy, glowing skin. Avoid New Products: Use familiar products to prevent any reactions before your wedding day. Clear Communication: Discuss your makeup preferences and any concerns with our artist during the consultation. Additional Beauty Services by Ladyfair Beyond bridal makeup, Ladyfair offers a variety of beauty services in Sonbarsa: Engagement and Reception Makeup: Customized looks for all pre-wedding events. Party Makeup: Perfect for birthdays, anniversaries, and special occasions. Everyday Makeup: Enhance your daily look with our expert makeup services. Special Occasion Makeup: Professional makeup for parties, celebrations, and formal events. The Future of Bridal Makeup in Sonbarsa Ladyfair is dedicated to setting new standards in bridal beauty in Sonbarsa with our innovative at-home services. As we continue to offer exceptional service, more brides are choosing Ladyfair as their preferred makeup provider. Q&A with Ladyfair’s Bridal Makeup Artist in Sonbarsa Q1: What makes Ladyfair the best choice for bridal makeup in Sonbarsa? A1: Ladyfair offers expert bridal makeup services at home, using high-quality products to ensure a flawless and long-lasting look. Q2: What are the prices for bridal makeup in Sonbarsa? A2: Our bridal makeup packages start at ₹10,000 for basic makeup, ₹12,000 for HD makeup, and ₹18,000 for airbrush makeup. Q3: How do I book Ladyfair’s bridal makeup services in Sonbarsa? A3: You can book our services by calling 7004721239. We also offer consultations and trial sessions to ensure you get the look you want. Q4: What bridal makeup styles does Ladyfair offer in Sonbarsa? A4: Ladyfair offers traditional, HD, and airbrush bridal makeup to suit different preferences and needs. Q5: Are makeup trials available before my wedding? A5: Yes, we offer trial sessions so you can finalize your bridal look ahead of time. Q6: What products does Ladyfair use for bridal makeup? A6: We use professional-grade, high-quality makeup products that are safe for all skin types and ensure a flawless finish. Q7: What other services does Ladyfair provide in Sonbarsa? A7: In addition to bridal makeup, we offer makeup for engagements, receptions, parties, and other special occasions. Ladyfair is your ultimate choice for professional, at-home bridal makeup services in Sonbarsa, ensuring a flawless and stress-free experience on your special day.

Posted By: 23rd November 2024
Bridal Makeup Artist in Runni Saidpur
Introduction In Runni Saidpur, Ladyfair is the premier choice for brides looking to achieve the perfect wedding day look with our professional at-home bridal makeup services. Whether you desire a traditional bridal look, an HD finish, or the flawless perfection of airbrush makeup, our expert makeup artist in Runni Saidpur ensures that you shine on your special day. Contact us today at 7004721239 to schedule your appointment. Why Choose Ladyfair for Bridal Makeup in Runni Saidpur Experienced Makeup Artist Our makeup artist in Runni Saidpur has years of experience in bridal makeup, creating personalized looks that complement your natural beauty and align with your style and preferences. Convenient At-Home Service Forget the stress of traveling to a salon. Ladyfair brings luxury beauty treatments directly to your doorstep with our at-home bridal makeup services, offering a truly personalized experience. Premium Makeup Products We use only high-quality, professional-grade makeup products to ensure a flawless, long-lasting look that remains perfect throughout your big day. Bridal Makeup Pricing in Runni Saidpur Our bridal makeup services in Runni Saidpur are tailored to fit different styles and budgets: Basic Bridal Makeup: ₹10,000 HD Bridal Makeup: ₹12,000 Airbrush Bridal Makeup: ₹18,000 For engagement and reception makeup: Basic Engagement/Reception Makeup: ₹6,000 HD Engagement/Reception Makeup: ₹8,000 Airbrush Engagement/Reception Makeup: ₹12,000 For parties: Basic Party Makeup: ₹2,500 HD Party Makeup: ₹3,500 Popular Bridal Makeup Styles in Runni Saidpur Traditional Bridal Makeup Our traditional bridal makeup in Runni Saidpur incorporates bold colors and intricate detailing to complement your wedding attire, creating an elegant and timeless look. HD Bridal Makeup For a high-definition finish that looks flawless both in photos and in person, HD bridal makeup is the perfect choice for brides who want a picture-perfect appearance all day. Airbrush Bridal Makeup Our airbrush makeup offers a lightweight, full-coverage finish that lasts all day, giving you a smooth and natural look while ensuring long-lasting perfection. How to Book Your Bridal Makeup with Ladyfair in Runni Saidpur Initial Contact: Call us at 7004721239 to discuss your makeup needs and schedule your appointment. Consultation Session: Meet with our makeup artist to discuss your wedding look, review your attire, and plan the perfect makeup style. Makeup Trial: We offer trial sessions to help you preview your bridal makeup look and make any adjustments. Wedding Day Makeup: On your wedding day, our makeup artist will arrive at your location in Runni Saidpur to provide flawless, hassle-free makeup service. Testimonials from Brides in Runni Saidpur Priya R., Runni Saidpur: "Ladyfair provided amazing service on my wedding day. The airbrush makeup looked flawless and lasted all day." Ritu K., Runni Saidpur: "I loved the HD makeup! It was perfect for my photos, and the at-home service was so convenient." Sneha S., Runni Saidpur: "My traditional bridal makeup was exactly what I wanted, and Ladyfair made the entire process stress-free." Preparing for Your Bridal Makeup Session To get the best results for your bridal makeup: Stay Hydrated: Keep your skin looking fresh by drinking plenty of water. Consistent Skincare: Stick to your regular skincare routine to maintain healthy, glowing skin. Avoid New Products: Use familiar products to prevent any reactions before your wedding day. Clear Communication: Discuss your makeup preferences and any concerns with our artist during the consultation. Additional Beauty Services by Ladyfair Beyond bridal makeup, Ladyfair offers a variety of beauty services in Runni Saidpur: Engagement and Reception Makeup: Customized looks for all pre-wedding events. Party Makeup: Perfect for birthdays, anniversaries, and special occasions. Everyday Makeup: Enhance your daily look with our expert makeup services. Special Occasion Makeup: Professional makeup for parties, celebrations, and formal events. The Future of Bridal Makeup in Runni Saidpur Ladyfair is dedicated to setting new standards in bridal beauty in Runni Saidpur with our innovative at-home services. As we continue to offer exceptional service, more brides are choosing Ladyfair as their preferred makeup provider. Q&A with Ladyfair’s Bridal Makeup Artist in Runni Saidpur Q1: What makes Ladyfair the best choice for bridal makeup in Runni Saidpur? A1: Ladyfair offers expert bridal makeup services at home, using high-quality products to ensure a flawless and long-lasting look. Q2: What are the prices for bridal makeup in Runni Saidpur? A2: Our bridal makeup packages start at ₹10,000 for basic makeup, ₹12,000 for HD makeup, and ₹18,000 for airbrush makeup. Q3: How do I book Ladyfair’s bridal makeup services in Runni Saidpur? A3: You can book our services by calling 7004721239. We also offer consultations and trial sessions to ensure you get the look you want. Q4: What bridal makeup styles does Ladyfair offer in Runni Saidpur? A4: Ladyfair offers traditional, HD, and airbrush bridal makeup to suit different preferences and needs. Q5: Are makeup trials available before my wedding? A5: Yes, we offer trial sessions so you can finalize your bridal look ahead of time. Q6: What products does Ladyfair use for bridal makeup? A6: We use professional-grade, high-quality makeup products that are safe for all skin types and ensure a flawless finish. Q7: What other services does Ladyfair provide in Runni Saidpur? A7: In addition to bridal makeup, we offer makeup for engagements, receptions, parties, and other special occasions. Ladyfair is your ultimate choice for professional, at-home bridal makeup services in Runni Saidpur, ensuring a flawless and stress-free experience on your special day.

Posted By: 23rd November 2024
Bridal Makeup Artist in Riga
Introduction In Riga, Ladyfair is the premier choice for brides looking to achieve the perfect wedding day look with our professional at-home bridal makeup services. Whether you desire a traditional bridal look, an HD finish, or the flawless perfection of airbrush makeup, our expert makeup artist in Riga ensures that you shine on your special day. Contact us today at 7004721239 to schedule your appointment. Why Choose Ladyfair for Bridal Makeup in Riga Experienced Makeup Artist Our makeup artist in Riga has years of experience in bridal makeup, creating personalized looks that complement your natural beauty and align with your style and preferences. Convenient At-Home Service Forget the stress of traveling to a salon. Ladyfair brings luxury beauty treatments directly to your doorstep with our at-home bridal makeup services, offering a truly personalized experience. Premium Makeup Products We use only high-quality, professional-grade makeup products to ensure a flawless, long-lasting look that remains perfect throughout your big day. Bridal Makeup Pricing in Riga Our bridal makeup services in Riga are tailored to fit different styles and budgets: Basic Bridal Makeup: ₹10,000 HD Bridal Makeup: ₹12,000 Airbrush Bridal Makeup: ₹18,000 For engagement and reception makeup: Basic Engagement/Reception Makeup: ₹6,000 HD Engagement/Reception Makeup: ₹8,000 Airbrush Engagement/Reception Makeup: ₹12,000 For parties: Basic Party Makeup: ₹2,500 HD Party Makeup: ₹3,500 Popular Bridal Makeup Styles in Riga Traditional Bridal Makeup Our traditional bridal makeup in Riga incorporates bold colors and intricate detailing to complement your wedding attire, creating an elegant and timeless look. HD Bridal Makeup For a high-definition finish that looks flawless both in photos and in person, HD bridal makeup is the perfect choice for brides who want a picture-perfect appearance all day. Airbrush Bridal Makeup Our airbrush makeup offers a lightweight, full-coverage finish that lasts all day, giving you a smooth and natural look while ensuring long-lasting perfection. How to Book Your Bridal Makeup with Ladyfair in Riga Initial Contact: Call us at 7004721239 to discuss your makeup needs and schedule your appointment. Consultation Session: Meet with our makeup artist to discuss your wedding look, review your attire, and plan the perfect makeup style. Makeup Trial: We offer trial sessions to help you preview your bridal makeup look and make any adjustments. Wedding Day Makeup: On your wedding day, our makeup artist will arrive at your location in Riga to provide flawless, hassle-free makeup service. Testimonials from Brides in Riga Priya R., Riga: "Ladyfair provided amazing service on my wedding day. The airbrush makeup looked flawless and lasted all day." Ritu K., Riga: "I loved the HD makeup! It was perfect for my photos, and the at-home service was so convenient." Sneha S., Riga: "My traditional bridal makeup was exactly what I wanted, and Ladyfair made the entire process stress-free." Preparing for Your Bridal Makeup Session To get the best results for your bridal makeup: Stay Hydrated: Keep your skin looking fresh by drinking plenty of water. Consistent Skincare: Stick to your regular skincare routine to maintain healthy, glowing skin. Avoid New Products: Use familiar products to prevent any reactions before your wedding day. Clear Communication: Discuss your makeup preferences and any concerns with our artist during the consultation. Additional Beauty Services by Ladyfair Beyond bridal makeup, Ladyfair offers a variety of beauty services in Riga: Engagement and Reception Makeup: Customized looks for all pre-wedding events. Party Makeup: Perfect for birthdays, anniversaries, and special occasions. Everyday Makeup: Enhance your daily look with our expert makeup services. Special Occasion Makeup: Professional makeup for parties, celebrations, and formal events. The Future of Bridal Makeup in Riga Ladyfair is dedicated to setting new standards in bridal beauty in Riga with our innovative at-home services. As we continue to offer exceptional service, more brides are choosing Ladyfair as their preferred makeup provider. Q&A with Ladyfair’s Bridal Makeup Artist in Riga Q1: What makes Ladyfair the best choice for bridal makeup in Riga? A1: Ladyfair offers expert bridal makeup services at home, using high-quality products to ensure a flawless and long-lasting look. Q2: What are the prices for bridal makeup in Riga? A2: Our bridal makeup packages start at ₹10,000 for basic makeup, ₹12,000 for HD makeup, and ₹18,000 for airbrush makeup. Q3: How do I book Ladyfair’s bridal makeup services in Riga? A3: You can book our services by calling 7004721239. We also offer consultations and trial sessions to ensure you get the look you want. Q4: What bridal makeup styles does Ladyfair offer in Riga? A4: Ladyfair offers traditional, HD, and airbrush bridal makeup to suit different preferences and needs. Q5: Are makeup trials available before my wedding? A5: Yes, we offer trial sessions so you can finalize your bridal look ahead of time. Q6: What products does Ladyfair use for bridal makeup? A6: We use professional-grade, high-quality makeup products that are safe for all skin types and ensure a flawless finish. Q7: What other services does Ladyfair provide in Riga? A7: In addition to bridal makeup, we offer makeup for engagements, receptions, parties, and other special occasions. Ladyfair is your ultimate choice for professional, at-home bridal makeup services in Riga, ensuring a flawless and stress-free experience on your special day.

Posted By: 23rd November 2024
Bridal Makeup Artist in Pupri
Introduction In Pupri, Ladyfair is the premier choice for brides looking to achieve the perfect wedding day look with our professional at-home bridal makeup services. Whether you desire a traditional bridal look, an HD finish, or the flawless perfection of airbrush makeup, our expert makeup artist in Pupri ensures that you shine on your special day. Contact us today at 7004721239 to schedule your appointment. Why Choose Ladyfair for Bridal Makeup in Pupri Experienced Makeup Artist Our makeup artist in Pupri has years of experience in bridal makeup, creating personalized looks that complement your natural beauty and align with your style and preferences. Convenient At-Home Service Forget the stress of traveling to a salon. Ladyfair brings luxury beauty treatments directly to your doorstep with our at-home bridal makeup services, offering a truly personalized experience. Premium Makeup Products We use only high-quality, professional-grade makeup products to ensure a flawless, long-lasting look that remains perfect throughout your big day. Bridal Makeup Pricing in Pupri Our bridal makeup services in Pupri are tailored to fit different styles and budgets: Basic Bridal Makeup: ₹10,000 HD Bridal Makeup: ₹12,000 Airbrush Bridal Makeup: ₹18,000 For engagement and reception makeup: Basic Engagement/Reception Makeup: ₹6,000 HD Engagement/Reception Makeup: ₹8,000 Airbrush Engagement/Reception Makeup: ₹12,000 For parties: Basic Party Makeup: ₹2,500 HD Party Makeup: ₹3,500 Popular Bridal Makeup Styles in Pupri Traditional Bridal Makeup Our traditional bridal makeup in Pupri incorporates bold colors and intricate detailing to complement your wedding attire, creating an elegant and timeless look. HD Bridal Makeup For a high-definition finish that looks flawless both in photos and in person, HD bridal makeup is the perfect choice for brides who want a picture-perfect appearance all day. Airbrush Bridal Makeup Our airbrush makeup offers a lightweight, full-coverage finish that lasts all day, giving you a smooth and natural look while ensuring long-lasting perfection. How to Book Your Bridal Makeup with Ladyfair in Pupri Initial Contact: Call us at 7004721239 to discuss your makeup needs and schedule your appointment. Consultation Session: Meet with our makeup artist to discuss your wedding look, review your attire, and plan the perfect makeup style. Makeup Trial: We offer trial sessions to help you preview your bridal makeup look and make any adjustments. Wedding Day Makeup: On your wedding day, our makeup artist will arrive at your location in Pupri to provide flawless, hassle-free makeup service. Testimonials from Brides in Pupri Priya R., Pupri: "Ladyfair provided amazing service on my wedding day. The airbrush makeup looked flawless and lasted all day." Ritu K., Pupri: "I loved the HD makeup! It was perfect for my photos, and the at-home service was so convenient." Sneha S., Pupri: "My traditional bridal makeup was exactly what I wanted, and Ladyfair made the entire process stress-free." Preparing for Your Bridal Makeup Session To get the best results for your bridal makeup: Stay Hydrated: Keep your skin looking fresh by drinking plenty of water. Consistent Skincare: Stick to your regular skincare routine to maintain healthy, glowing skin. Avoid New Products: Use familiar products to prevent any reactions before your wedding day. Clear Communication: Discuss your makeup preferences and any concerns with our artist during the consultation. Additional Beauty Services by Ladyfair Beyond bridal makeup, Ladyfair offers a variety of beauty services in Pupri: Engagement and Reception Makeup: Customized looks for all pre-wedding events. Party Makeup: Perfect for birthdays, anniversaries, and special occasions. Everyday Makeup: Enhance your daily look with our expert makeup services. Special Occasion Makeup: Professional makeup for parties, celebrations, and formal events. The Future of Bridal Makeup in Pupri Ladyfair is dedicated to setting new standards in bridal beauty in Pupri with our innovative at-home services. As we continue to offer exceptional service, more brides are choosing Ladyfair as their preferred makeup provider. Q&A with Ladyfair’s Bridal Makeup Artist in Pupri Q1: What makes Ladyfair the best choice for bridal makeup in Pupri? A1: Ladyfair offers expert bridal makeup services at home, using high-quality products to ensure a flawless and long-lasting look. Q2: What are the prices for bridal makeup in Pupri? A2: Our bridal makeup packages start at ₹10,000 for basic makeup, ₹12,000 for HD makeup, and ₹18,000 for airbrush makeup. Q3: How do I book Ladyfair’s bridal makeup services in Pupri? A3: You can book our services by calling 7004721239. We also offer consultations and trial sessions to ensure you get the look you want. Q4: What bridal makeup styles does Ladyfair offer in Pupri? A4: Ladyfair offers traditional, HD, and airbrush bridal makeup to suit different preferences and needs. Q5: Are makeup trials available before my wedding? A5: Yes, we offer trial sessions so you can finalize your bridal look ahead of time. Q6: What products does Ladyfair use for bridal makeup? A6: We use professional-grade, high-quality makeup products that are safe for all skin types and ensure a flawless finish. Q7: What other services does Ladyfair provide in Pupri? A7: In addition to bridal makeup, we offer makeup for engagements, receptions, parties, and other special occasions. Ladyfair is your ultimate choice for professional, at-home bridal makeup services in Pupri, ensuring a flawless and stress-free experience on your special day.

Posted By: 23rd November 2024
Bridal Makeup Artist in Parsauni
Introduction In Parsauni, Ladyfair is the premier choice for brides looking to achieve the perfect wedding day look with our professional at-home bridal makeup services. Whether you desire a traditional bridal look, an HD finish, or the flawless perfection of airbrush makeup, our expert makeup artist in Parsauni ensures that you shine on your special day. Contact us today at 7004721239 to schedule your appointment. Why Choose Ladyfair for Bridal Makeup in Parsauni Experienced Makeup Artist Our makeup artist in Parsauni has years of experience in bridal makeup, creating personalized looks that complement your natural beauty and align with your style and preferences. Convenient At-Home Service Forget the stress of traveling to a salon. Ladyfair brings luxury beauty treatments directly to your doorstep with our at-home bridal makeup services, offering a truly personalized experience. Premium Makeup Products We use only high-quality, professional-grade makeup products to ensure a flawless, long-lasting look that remains perfect throughout your big day. Bridal Makeup Pricing in Parsauni Our bridal makeup services in Parsauni are tailored to fit different styles and budgets: Basic Bridal Makeup: ₹10,000 HD Bridal Makeup: ₹12,000 Airbrush Bridal Makeup: ₹18,000 For engagement and reception makeup: Basic Engagement/Reception Makeup: ₹6,000 HD Engagement/Reception Makeup: ₹8,000 Airbrush Engagement/Reception Makeup: ₹12,000 For parties: Basic Party Makeup: ₹2,500 HD Party Makeup: ₹3,500 Popular Bridal Makeup Styles in Parsauni Traditional Bridal Makeup Our traditional bridal makeup in Parsauni incorporates bold colors and intricate detailing to complement your wedding attire, creating an elegant and timeless look. HD Bridal Makeup For a high-definition finish that looks flawless both in photos and in person, HD bridal makeup is the perfect choice for brides who want a picture-perfect appearance all day. Airbrush Bridal Makeup Our airbrush makeup offers a lightweight, full-coverage finish that lasts all day, giving you a smooth and natural look while ensuring long-lasting perfection. How to Book Your Bridal Makeup with Ladyfair in Parsauni Initial Contact: Call us at 7004721239 to discuss your makeup needs and schedule your appointment. Consultation Session: Meet with our makeup artist to discuss your wedding look, review your attire, and plan the perfect makeup style. Makeup Trial: We offer trial sessions to help you preview your bridal makeup look and make any adjustments. Wedding Day Makeup: On your wedding day, our makeup artist will arrive at your location in Parsauni to provide flawless, hassle-free makeup service. Testimonials from Brides in Parsauni Priya R., Parsauni: "Ladyfair provided amazing service on my wedding day. The airbrush makeup looked flawless and lasted all day." Ritu K., Parsauni: "I loved the HD makeup! It was perfect for my photos, and the at-home service was so convenient." Sneha S., Parsauni: "My traditional bridal makeup was exactly what I wanted, and Ladyfair made the entire process stress-free." Preparing for Your Bridal Makeup Session To get the best results for your bridal makeup: Stay Hydrated: Keep your skin looking fresh by drinking plenty of water. Consistent Skincare: Stick to your regular skincare routine to maintain healthy, glowing skin. Avoid New Products: Use familiar products to prevent any reactions before your wedding day. Clear Communication: Discuss your makeup preferences and any concerns with our artist during the consultation. Additional Beauty Services by Ladyfair Beyond bridal makeup, Ladyfair offers a variety of beauty services in Parsauni: Engagement and Reception Makeup: Customized looks for all pre-wedding events. Party Makeup: Perfect for birthdays, anniversaries, and special occasions. Everyday Makeup: Enhance your daily look with our expert makeup services. Special Occasion Makeup: Professional makeup for parties, celebrations, and formal events. The Future of Bridal Makeup in Parsauni Ladyfair is dedicated to setting new standards in bridal beauty in Parsauni with our innovative at-home services. As we continue to offer exceptional service, more brides are choosing Ladyfair as their preferred makeup provider. Q&A with Ladyfair’s Bridal Makeup Artist in Parsauni Q1: What makes Ladyfair the best choice for bridal makeup in Parsauni? A1: Ladyfair offers expert bridal makeup services at home, using high-quality products to ensure a flawless and long-lasting look. Q2: What are the prices for bridal makeup in Parsauni? A2: Our bridal makeup packages start at ₹10,000 for basic makeup, ₹12,000 for HD makeup, and ₹18,000 for airbrush makeup. Q3: How do I book Ladyfair’s bridal makeup services in Parsauni? A3: You can book our services by calling 7004721239. We also offer consultations and trial sessions to ensure you get the look you want. Q4: What bridal makeup styles does Ladyfair offer in Parsauni? A4: Ladyfair offers traditional, HD, and airbrush bridal makeup to suit different preferences and needs. Q5: Are makeup trials available before my wedding? A5: Yes, we offer trial sessions so you can finalize your bridal look ahead of time. Q6: What products does Ladyfair use for bridal makeup? A6: We use professional-grade, high-quality makeup products that are safe for all skin types and ensure a flawless finish. Q7: What other services does Ladyfair provide in Parsauni? A7: In addition to bridal makeup, we offer makeup for engagements, receptions, parties, and other special occasions. Ladyfair is your ultimate choice for professional, at-home bridal makeup services in Parsauni, ensuring a flawless and stress-free experience on your special day.

Posted By: 23rd November 2024
Bridal Makeup Artist in Parihar
Introduction In Parihar, Ladyfair is the premier choice for brides looking to achieve the perfect wedding day look with our professional at-home bridal makeup services. Whether you desire a traditional bridal look, an HD finish, or the flawless perfection of airbrush makeup, our expert makeup artist in Parihar ensures that you shine on your special day. Contact us today at 7004721239 to schedule your appointment. Why Choose Ladyfair for Bridal Makeup in Parihar Experienced Makeup Artist Our makeup artist in Parihar has years of experience in bridal makeup, creating personalized looks that complement your natural beauty and align with your style and preferences. Convenient At-Home Service Forget the stress of traveling to a salon. Ladyfair brings luxury beauty treatments directly to your doorstep with our at-home bridal makeup services, offering a truly personalized experience. Premium Makeup Products We use only high-quality, professional-grade makeup products to ensure a flawless, long-lasting look that remains perfect throughout your big day. Bridal Makeup Pricing in Parihar Our bridal makeup services in Parihar are tailored to fit different styles and budgets: Basic Bridal Makeup: ₹10,000 HD Bridal Makeup: ₹12,000 Airbrush Bridal Makeup: ₹18,000 For engagement and reception makeup: Basic Engagement/Reception Makeup: ₹6,000 HD Engagement/Reception Makeup: ₹8,000 Airbrush Engagement/Reception Makeup: ₹12,000 For parties: Basic Party Makeup: ₹2,500 HD Party Makeup: ₹3,500 Popular Bridal Makeup Styles in Parihar Traditional Bridal Makeup Our traditional bridal makeup in Parihar incorporates bold colors and intricate detailing to complement your wedding attire, creating an elegant and timeless look. HD Bridal Makeup For a high-definition finish that looks flawless both in photos and in person, HD bridal makeup is the perfect choice for brides who want a picture-perfect appearance all day. Airbrush Bridal Makeup Our airbrush makeup offers a lightweight, full-coverage finish that lasts all day, giving you a smooth and natural look while ensuring long-lasting perfection. How to Book Your Bridal Makeup with Ladyfair in Parihar Initial Contact: Call us at 7004721239 to discuss your makeup needs and schedule your appointment. Consultation Session: Meet with our makeup artist to discuss your wedding look, review your attire, and plan the perfect makeup style. Makeup Trial: We offer trial sessions to help you preview your bridal makeup look and make any adjustments. Wedding Day Makeup: On your wedding day, our makeup artist will arrive at your location in Parihar to provide flawless, hassle-free makeup service. Testimonials from Brides in Parihar Priya R., Parihar: "Ladyfair provided amazing service on my wedding day. The airbrush makeup looked flawless and lasted all day." Ritu K., Parihar: "I loved the HD makeup! It was perfect for my photos, and the at-home service was so convenient." Sneha S., Parihar: "My traditional bridal makeup was exactly what I wanted, and Ladyfair made the entire process stress-free." Preparing for Your Bridal Makeup Session To get the best results for your bridal makeup: Stay Hydrated: Keep your skin looking fresh by drinking plenty of water. Consistent Skincare: Stick to your regular skincare routine to maintain healthy, glowing skin. Avoid New Products: Use familiar products to prevent any reactions before your wedding day. Clear Communication: Discuss your makeup preferences and any concerns with our artist during the consultation. Additional Beauty Services by Ladyfair Beyond bridal makeup, Ladyfair offers a variety of beauty services in Parihar: Engagement and Reception Makeup: Customized looks for all pre-wedding events. Party Makeup: Perfect for birthdays, anniversaries, and special occasions. Everyday Makeup: Enhance your daily look with our expert makeup services. Special Occasion Makeup: Professional makeup for parties, celebrations, and formal events. The Future of Bridal Makeup in Parihar Ladyfair is dedicated to setting new standards in bridal beauty in Parihar with our innovative at-home services. As we continue to offer exceptional service, more brides are choosing Ladyfair as their preferred makeup provider. Q&A with Ladyfair’s Bridal Makeup Artist in Parihar Q1: What makes Ladyfair the best choice for bridal makeup in Parihar? A1: Ladyfair offers expert bridal makeup services at home, using high-quality products to ensure a flawless and long-lasting look. Q2: What are the prices for bridal makeup in Parihar? A2: Our bridal makeup packages start at ₹10,000 for basic makeup, ₹12,000 for HD makeup, and ₹18,000 for airbrush makeup. Q3: How do I book Ladyfair’s bridal makeup services in Parihar? A3: You can book our services by calling 7004721239. We also offer consultations and trial sessions to ensure you get the look you want. Q4: What bridal makeup styles does Ladyfair offer in Parihar? A4: Ladyfair offers traditional, HD, and airbrush bridal makeup to suit different preferences and needs. Q5: Are makeup trials available before my wedding? A5: Yes, we offer trial sessions so you can finalize your bridal look ahead of time. Q6: What products does Ladyfair use for bridal makeup? A6: We use professional-grade, high-quality makeup products that are safe for all skin types and ensure a flawless finish. Q7: What other services does Ladyfair provide in Parihar? A7: In addition to bridal makeup, we offer makeup for engagements, receptions, parties, and other special occasions. Ladyfair is your ultimate choice for professional, at-home bridal makeup services in Parihar, ensuring a flawless and stress-free experience on your special day.

Posted By: 23rd November 2024
Bridal Makeup Artist in Nanpur
Introduction In Nanpur, Ladyfair is the premier choice for brides looking to achieve the perfect wedding day look with our professional at-home bridal makeup services. Whether you desire a traditional bridal look, an HD finish, or the flawless perfection of airbrush makeup, our expert makeup artist in Nanpur ensures that you shine on your special day. Contact us today at 7004721239 to schedule your appointment. Why Choose Ladyfair for Bridal Makeup in Nanpur Experienced Makeup Artist Our makeup artist in Nanpur has years of experience in bridal makeup, creating personalized looks that complement your natural beauty and align with your style and preferences. Convenient At-Home Service Forget the stress of traveling to a salon. Ladyfair brings luxury beauty treatments directly to your doorstep with our at-home bridal makeup services, offering a truly personalized experience. Premium Makeup Products We use only high-quality, professional-grade makeup products to ensure a flawless, long-lasting look that remains perfect throughout your big day. Bridal Makeup Pricing in Nanpur Our bridal makeup services in Nanpur are tailored to fit different styles and budgets: Basic Bridal Makeup: ₹10,000 HD Bridal Makeup: ₹12,000 Airbrush Bridal Makeup: ₹18,000 For engagement and reception makeup: Basic Engagement/Reception Makeup: ₹6,000 HD Engagement/Reception Makeup: ₹8,000 Airbrush Engagement/Reception Makeup: ₹12,000 For parties: Basic Party Makeup: ₹2,500 HD Party Makeup: ₹3,500 Popular Bridal Makeup Styles in Nanpur Traditional Bridal Makeup Our traditional bridal makeup in Nanpur incorporates bold colors and intricate detailing to complement your wedding attire, creating an elegant and timeless look. HD Bridal Makeup For a high-definition finish that looks flawless both in photos and in person, HD bridal makeup is the perfect choice for brides who want a picture-perfect appearance all day. Airbrush Bridal Makeup Our airbrush makeup offers a lightweight, full-coverage finish that lasts all day, giving you a smooth and natural look while ensuring long-lasting perfection. How to Book Your Bridal Makeup with Ladyfair in Nanpur Initial Contact: Call us at 7004721239 to discuss your makeup needs and schedule your appointment. Consultation Session: Meet with our makeup artist to discuss your wedding look, review your attire, and plan the perfect makeup style. Makeup Trial: We offer trial sessions to help you preview your bridal makeup look and make any adjustments. Wedding Day Makeup: On your wedding day, our makeup artist will arrive at your location in Nanpur to provide flawless, hassle-free makeup service. Testimonials from Brides in Nanpur Priya R., Nanpur: "Ladyfair provided amazing service on my wedding day. The airbrush makeup looked flawless and lasted all day." Ritu K., Nanpur: "I loved the HD makeup! It was perfect for my photos, and the at-home service was so convenient." Sneha S., Nanpur: "My traditional bridal makeup was exactly what I wanted, and Ladyfair made the entire process stress-free." Preparing for Your Bridal Makeup Session To get the best results for your bridal makeup: Stay Hydrated: Keep your skin looking fresh by drinking plenty of water. Consistent Skincare: Stick to your regular skincare routine to maintain healthy, glowing skin. Avoid New Products: Use familiar products to prevent any reactions before your wedding day. Clear Communication: Discuss your makeup preferences and any concerns with our artist during the consultation. Additional Beauty Services by Ladyfair Beyond bridal makeup, Ladyfair offers a variety of beauty services in Nanpur: Engagement and Reception Makeup: Customized looks for all pre-wedding events. Party Makeup: Perfect for birthdays, anniversaries, and special occasions. Everyday Makeup: Enhance your daily look with our expert makeup services. Special Occasion Makeup: Professional makeup for parties, celebrations, and formal events. The Future of Bridal Makeup in Nanpur Ladyfair is dedicated to setting new standards in bridal beauty in Nanpur with our innovative at-home services. As we continue to offer exceptional service, more brides are choosing Ladyfair as their preferred makeup provider. Q&A with Ladyfair’s Bridal Makeup Artist in Nanpur Q1: What makes Ladyfair the best choice for bridal makeup in Nanpur? A1: Ladyfair offers expert bridal makeup services at home, using high-quality products to ensure a flawless and long-lasting look. Q2: What are the prices for bridal makeup in Nanpur? A2: Our bridal makeup packages start at ₹10,000 for basic makeup, ₹12,000 for HD makeup, and ₹18,000 for airbrush makeup. Q3: How do I book Ladyfair’s bridal makeup services in Nanpur? A3: You can book our services by calling 7004721239. We also offer consultations and trial sessions to ensure you get the look you want. Q4: What bridal makeup styles does Ladyfair offer in Nanpur? A4: Ladyfair offers traditional, HD, and airbrush bridal makeup to suit different preferences and needs. Q5: Are makeup trials available before my wedding? A5: Yes, we offer trial sessions so you can finalize your bridal look ahead of time. Q6: What products does Ladyfair use for bridal makeup? A6: We use professional-grade, high-quality makeup products that are safe for all skin types and ensure a flawless finish. Q7: What other services does Ladyfair provide in Nanpur? A7: In addition to bridal makeup, we offer makeup for engagements, receptions, parties, and other special occasions. Ladyfair is your ultimate choice for professional, at-home bridal makeup services in Nanpur, ensuring a flawless and stress-free experience on your special day.

Posted By: 23rd November 2024
Bridal Makeup Artist in Majorganj
Introduction In Majorganj, Ladyfair is the premier choice for brides looking to achieve the perfect wedding day look with our professional at-home bridal makeup services. Whether you desire a traditional bridal look, an HD finish, or the flawless perfection of airbrush makeup, our expert makeup artist in Majorganj ensures that you shine on your special day. Contact us today at 7004721239 to schedule your appointment. Why Choose Ladyfair for Bridal Makeup in Majorganj Experienced Makeup Artist Our makeup artist in Majorganj has years of experience in bridal makeup, creating personalized looks that complement your natural beauty and align with your style and preferences. Convenient At-Home Service Forget the stress of traveling to a salon. Ladyfair brings luxury beauty treatments directly to your doorstep with our at-home bridal makeup services, offering a truly personalized experience. Premium Makeup Products We use only high-quality, professional-grade makeup products to ensure a flawless, long-lasting look that remains perfect throughout your big day. Bridal Makeup Pricing in Majorganj Our bridal makeup services in Majorganj are tailored to fit different styles and budgets: Basic Bridal Makeup: ₹10,000 HD Bridal Makeup: ₹12,000 Airbrush Bridal Makeup: ₹18,000 For engagement and reception makeup: Basic Engagement/Reception Makeup: ₹6,000 HD Engagement/Reception Makeup: ₹8,000 Airbrush Engagement/Reception Makeup: ₹12,000 For parties: Basic Party Makeup: ₹2,500 HD Party Makeup: ₹3,500 Popular Bridal Makeup Styles in Majorganj Traditional Bridal Makeup Our traditional bridal makeup in Majorganj incorporates bold colors and intricate detailing to complement your wedding attire, creating an elegant and timeless look. HD Bridal Makeup For a high-definition finish that looks flawless both in photos and in person, HD bridal makeup is the perfect choice for brides who want a picture-perfect appearance all day. Airbrush Bridal Makeup Our airbrush makeup offers a lightweight, full-coverage finish that lasts all day, giving you a smooth and natural look while ensuring long-lasting perfection. How to Book Your Bridal Makeup with Ladyfair in Majorganj Initial Contact: Call us at 7004721239 to discuss your makeup needs and schedule your appointment. Consultation Session: Meet with our makeup artist to discuss your wedding look, review your attire, and plan the perfect makeup style. Makeup Trial: We offer trial sessions to help you preview your bridal makeup look and make any adjustments. Wedding Day Makeup: On your wedding day, our makeup artist will arrive at your location in Majorganj to provide flawless, hassle-free makeup service. Testimonials from Brides in Majorganj Priya R., Majorganj: "Ladyfair provided amazing service on my wedding day. The airbrush makeup looked flawless and lasted all day." Ritu K., Majorganj: "I loved the HD makeup! It was perfect for my photos, and the at-home service was so convenient." Sneha S., Majorganj: "My traditional bridal makeup was exactly what I wanted, and Ladyfair made the entire process stress-free." Preparing for Your Bridal Makeup Session To get the best results for your bridal makeup: Stay Hydrated: Keep your skin looking fresh by drinking plenty of water. Consistent Skincare: Stick to your regular skincare routine to maintain healthy, glowing skin. Avoid New Products: Use familiar products to prevent any reactions before your wedding day. Clear Communication: Discuss your makeup preferences and any concerns with our artist during the consultation. Additional Beauty Services by Ladyfair Beyond bridal makeup, Ladyfair offers a variety of beauty services in Majorganj: Engagement and Reception Makeup: Customized looks for all pre-wedding events. Party Makeup: Perfect for birthdays, anniversaries, and special occasions. Everyday Makeup: Enhance your daily look with our expert makeup services. Special Occasion Makeup: Professional makeup for parties, celebrations, and formal events. The Future of Bridal Makeup in Majorganj Ladyfair is dedicated to setting new standards in bridal beauty in Majorganj with our innovative at-home services. As we continue to offer exceptional service, more brides are choosing Ladyfair as their preferred makeup provider. Q&A with Ladyfair’s Bridal Makeup Artist in Majorganj Q1: What makes Ladyfair the best choice for bridal makeup in Majorganj? A1: Ladyfair offers expert bridal makeup services at home, using high-quality products to ensure a flawless and long-lasting look. Q2: What are the prices for bridal makeup in Majorganj? A2: Our bridal makeup packages start at ₹10,000 for basic makeup, ₹12,000 for HD makeup, and ₹18,000 for airbrush makeup. Q3: How do I book Ladyfair’s bridal makeup services in Majorganj? A3: You can book our services by calling 7004721239. We also offer consultations and trial sessions to ensure you get the look you want. Q4: What bridal makeup styles does Ladyfair offer in Majorganj? A4: Ladyfair offers traditional, HD, and airbrush bridal makeup to suit different preferences and needs. Q5: Are makeup trials available before my wedding? A5: Yes, we offer trial sessions so you can finalize your bridal look ahead of time. Q6: What products does Ladyfair use for bridal makeup? A6: We use professional-grade, high-quality makeup products that are safe for all skin types and ensure a flawless finish. Q7: What other services does Ladyfair provide in Majorganj? A7: In addition to bridal makeup, we offer makeup for engagements, receptions, parties, and other special occasions. Ladyfair is your ultimate choice for professional, at-home bridal makeup services in Majorganj, ensuring a flawless and stress-free experience on your special day.

Posted By: 23rd November 2024
Bridal Makeup Artist in Dumra
Introduction In Dumra, Ladyfair is the premier choice for brides looking to achieve the perfect wedding day look with our professional at-home bridal makeup services. Whether you desire a traditional bridal look, an HD finish, or the flawless perfection of airbrush makeup, our expert makeup artist in Dumra ensures that you shine on your special day. Contact us today at 7004721239 to schedule your appointment. Why Choose Ladyfair for Bridal Makeup in Dumra Experienced Makeup Artist Our makeup artist in Dumra has years of experience in bridal makeup, creating personalized looks that complement your natural beauty and align with your style and preferences. Convenient At-Home Service Forget the stress of traveling to a salon. Ladyfair brings luxury beauty treatments directly to your doorstep with our at-home bridal makeup services, offering a truly personalized experience. Premium Makeup Products We use only high-quality, professional-grade makeup products to ensure a flawless, long-lasting look that remains perfect throughout your big day. Bridal Makeup Pricing in Dumra Our bridal makeup services in Dumra are tailored to fit different styles and budgets: Basic Bridal Makeup: ₹10,000 HD Bridal Makeup: ₹12,000 Airbrush Bridal Makeup: ₹18,000 For engagement and reception makeup: Basic Engagement/Reception Makeup: ₹6,000 HD Engagement/Reception Makeup: ₹8,000 Airbrush Engagement/Reception Makeup: ₹12,000 For parties: Basic Party Makeup: ₹2,500 HD Party Makeup: ₹3,500 Popular Bridal Makeup Styles in Dumra Traditional Bridal Makeup Our traditional bridal makeup in Dumra incorporates bold colors and intricate detailing to complement your wedding attire, creating an elegant and timeless look. HD Bridal Makeup For a high-definition finish that looks flawless both in photos and in person, HD bridal makeup is the perfect choice for brides who want a picture-perfect appearance all day. Airbrush Bridal Makeup Our airbrush makeup offers a lightweight, full-coverage finish that lasts all day, giving you a smooth and natural look while ensuring long-lasting perfection. How to Book Your Bridal Makeup with Ladyfair in Dumra Initial Contact: Call us at 7004721239 to discuss your makeup needs and schedule your appointment. Consultation Session: Meet with our makeup artist to discuss your wedding look, review your attire, and plan the perfect makeup style. Makeup Trial: We offer trial sessions to help you preview your bridal makeup look and make any adjustments. Wedding Day Makeup: On your wedding day, our makeup artist will arrive at your location in Dumra to provide flawless, hassle-free makeup service. Testimonials from Brides in Dumra Priya R., Dumra: "Ladyfair provided amazing service on my wedding day. The airbrush makeup looked flawless and lasted all day." Ritu K., Dumra: "I loved the HD makeup! It was perfect for my photos, and the at-home service was so convenient." Sneha S., Dumra: "My traditional bridal makeup was exactly what I wanted, and Ladyfair made the entire process stress-free." Preparing for Your Bridal Makeup Session To get the best results for your bridal makeup: Stay Hydrated: Keep your skin looking fresh by drinking plenty of water. Consistent Skincare: Stick to your regular skincare routine to maintain healthy, glowing skin. Avoid New Products: Use familiar products to prevent any reactions before your wedding day. Clear Communication: Discuss your makeup preferences and any concerns with our artist during the consultation. Additional Beauty Services by Ladyfair Beyond bridal makeup, Ladyfair offers a variety of beauty services in Dumra: Engagement and Reception Makeup: Customized looks for all pre-wedding events. Party Makeup: Perfect for birthdays, anniversaries, and special occasions. Everyday Makeup: Enhance your daily look with our expert makeup services. Special Occasion Makeup: Professional makeup for parties, celebrations, and formal events. The Future of Bridal Makeup in Dumra Ladyfair is dedicated to setting new standards in bridal beauty in Dumra with our innovative at-home services. As we continue to offer exceptional service, more brides are choosing Ladyfair as their preferred makeup provider. Q&A with Ladyfair’s Bridal Makeup Artist in Dumra Q1: What makes Ladyfair the best choice for bridal makeup in Dumra? A1: Ladyfair offers expert bridal makeup services at home, using high-quality products to ensure a flawless and long-lasting look. Q2: What are the prices for bridal makeup in Dumra? A2: Our bridal makeup packages start at ₹10,000 for basic makeup, ₹12,000 for HD makeup, and ₹18,000 for airbrush makeup. Q3: How do I book Ladyfair’s bridal makeup services in Dumra? A3: You can book our services by calling 7004721239. We also offer consultations and trial sessions to ensure you get the look you want. Q4: What bridal makeup styles does Ladyfair offer in Dumra? A4: Ladyfair offers traditional, HD, and airbrush bridal makeup to suit different preferences and needs. Q5: Are makeup trials available before my wedding? A5: Yes, we offer trial sessions so you can finalize your bridal look ahead of time. Q6: What products does Ladyfair use for bridal makeup? A6: We use professional-grade, high-quality makeup products that are safe for all skin types and ensure a flawless finish. Q7: What other services does Ladyfair provide in Dumra? A7: In addition to bridal makeup, we offer makeup for engagements, receptions, parties, and other special occasions. Ladyfair is your ultimate choice for professional, at-home bridal makeup services in Dumra, ensuring a flawless and stress-free experience on your special day.

Posted By: 23rd November 2024
Bridal Makeup Artist in Choraut
Introduction In Choraut, Ladyfair is the premier choice for brides looking to achieve the perfect wedding day look with our professional at-home bridal makeup services. Whether you desire a traditional bridal look, an HD finish, or the flawless perfection of airbrush makeup, our expert makeup artist in Choraut ensures that you shine on your special day. Contact us today at 7004721239 to schedule your appointment. Why Choose Ladyfair for Bridal Makeup in Choraut Experienced Makeup Artist Our makeup artist in Choraut has years of experience in bridal makeup, creating personalized looks that complement your natural beauty and align with your style and preferences. Convenient At-Home Service Forget the stress of traveling to a salon. Ladyfair brings luxury beauty treatments directly to your doorstep with our at-home bridal makeup services, offering a truly personalized experience. Premium Makeup Products We use only high-quality, professional-grade makeup products to ensure a flawless, long-lasting look that remains perfect throughout your big day. Bridal Makeup Pricing in Choraut Our bridal makeup services in Choraut are tailored to fit different styles and budgets: Basic Bridal Makeup: ₹10,000 HD Bridal Makeup: ₹12,000 Airbrush Bridal Makeup: ₹18,000 For engagement and reception makeup: Basic Engagement/Reception Makeup: ₹6,000 HD Engagement/Reception Makeup: ₹8,000 Airbrush Engagement/Reception Makeup: ₹12,000 For parties: Basic Party Makeup: ₹2,500 HD Party Makeup: ₹3,500 Popular Bridal Makeup Styles in Choraut Traditional Bridal Makeup Our traditional bridal makeup in Choraut incorporates bold colors and intricate detailing to complement your wedding attire, creating an elegant and timeless look. HD Bridal Makeup For a high-definition finish that looks flawless both in photos and in person, HD bridal makeup is the perfect choice for brides who want a picture-perfect appearance all day. Airbrush Bridal Makeup Our airbrush makeup offers a lightweight, full-coverage finish that lasts all day, giving you a smooth and natural look while ensuring long-lasting perfection. How to Book Your Bridal Makeup with Ladyfair in Choraut Initial Contact: Call us at 7004721239 to discuss your makeup needs and schedule your appointment. Consultation Session: Meet with our makeup artist to discuss your wedding look, review your attire, and plan the perfect makeup style. Makeup Trial: We offer trial sessions to help you preview your bridal makeup look and make any adjustments. Wedding Day Makeup: On your wedding day, our makeup artist will arrive at your location in Choraut to provide flawless, hassle-free makeup service. Testimonials from Brides in Choraut Priya R., Choraut: "Ladyfair provided amazing service on my wedding day. The airbrush makeup looked flawless and lasted all day." Ritu K., Choraut: "I loved the HD makeup! It was perfect for my photos, and the at-home service was so convenient." Sneha S., Choraut: "My traditional bridal makeup was exactly what I wanted, and Ladyfair made the entire process stress-free." Preparing for Your Bridal Makeup Session To get the best results for your bridal makeup: Stay Hydrated: Keep your skin looking fresh by drinking plenty of water. Consistent Skincare: Stick to your regular skincare routine to maintain healthy, glowing skin. Avoid New Products: Use familiar products to prevent any reactions before your wedding day. Clear Communication: Discuss your makeup preferences and any concerns with our artist during the consultation. Additional Beauty Services by Ladyfair Beyond bridal makeup, Ladyfair offers a variety of beauty services in Choraut: Engagement and Reception Makeup: Customized looks for all pre-wedding events. Party Makeup: Perfect for birthdays, anniversaries, and special occasions. Everyday Makeup: Enhance your daily look with our expert makeup services. Special Occasion Makeup: Professional makeup for parties, celebrations, and formal events. The Future of Bridal Makeup in Choraut Ladyfair is dedicated to setting new standards in bridal beauty in Choraut with our innovative at-home services. As we continue to offer exceptional service, more brides are choosing Ladyfair as their preferred makeup provider. Q&A with Ladyfair’s Bridal Makeup Artist in Choraut Q1: What makes Ladyfair the best choice for bridal makeup in Choraut? A1: Ladyfair offers expert bridal makeup services at home, using high-quality products to ensure a flawless and long-lasting look. Q2: What are the prices for bridal makeup in Choraut? A2: Our bridal makeup packages start at ₹10,000 for basic makeup, ₹12,000 for HD makeup, and ₹18,000 for airbrush makeup. Q3: How do I book Ladyfair’s bridal makeup services in Choraut? A3: You can book our services by calling 7004721239. We also offer consultations and trial sessions to ensure you get the look you want. Q4: What bridal makeup styles does Ladyfair offer in Choraut? A4: Ladyfair offers traditional, HD, and airbrush bridal makeup to suit different preferences and needs. Q5: Are makeup trials available before my wedding? A5: Yes, we offer trial sessions so you can finalize your bridal look ahead of time. Q6: What products does Ladyfair use for bridal makeup? A6: We use professional-grade, high-quality makeup products that are safe for all skin types and ensure a flawless finish. Q7: What other services does Ladyfair provide in Choraut? A7: In addition to bridal makeup, we offer makeup for engagements, receptions, parties, and other special occasions. Ladyfair is your ultimate choice for professional, at-home bridal makeup services in Choraut, ensuring a flawless and stress-free experience on your special day.

Posted By: 23rd November 2024
Bridal Makeup Artist in Bokhra
Introduction In Bokhra, Ladyfair is the premier choice for brides looking to achieve the perfect wedding day look with our professional at-home bridal makeup services. Whether you desire a traditional bridal look, an HD finish, or the flawless perfection of airbrush makeup, our expert makeup artist in Bokhra ensures that you shine on your special day. Contact us today at 7004721239 to schedule your appointment. Why Choose Ladyfair for Bridal Makeup in Bokhra Experienced Makeup Artist Our makeup artist in Bokhra has years of experience in bridal makeup, creating personalized looks that complement your natural beauty and align with your style and preferences. Convenient At-Home Service Forget the stress of traveling to a salon. Ladyfair brings luxury beauty treatments directly to your doorstep with our at-home bridal makeup services, offering a truly personalized experience. Premium Makeup Products We use only high-quality, professional-grade makeup products to ensure a flawless, long-lasting look that remains perfect throughout your big day. Bridal Makeup Pricing in Bokhra Our bridal makeup services in Bokhra are tailored to fit different styles and budgets: Basic Bridal Makeup: ₹10,000 HD Bridal Makeup: ₹12,000 Airbrush Bridal Makeup: ₹18,000 For engagement and reception makeup: Basic Engagement/Reception Makeup: ₹6,000 HD Engagement/Reception Makeup: ₹8,000 Airbrush Engagement/Reception Makeup: ₹12,000 For parties: Basic Party Makeup: ₹2,500 HD Party Makeup: ₹3,500 Popular Bridal Makeup Styles in Bokhra Traditional Bridal Makeup Our traditional bridal makeup in Bokhra incorporates bold colors and intricate detailing to complement your wedding attire, creating an elegant and timeless look. HD Bridal Makeup For a high-definition finish that looks flawless both in photos and in person, HD bridal makeup is the perfect choice for brides who want a picture-perfect appearance all day. Airbrush Bridal Makeup Our airbrush makeup offers a lightweight, full-coverage finish that lasts all day, giving you a smooth and natural look while ensuring long-lasting perfection. How to Book Your Bridal Makeup with Ladyfair in Bokhra Initial Contact: Call us at 7004721239 to discuss your makeup needs and schedule your appointment. Consultation Session: Meet with our makeup artist to discuss your wedding look, review your attire, and plan the perfect makeup style. Makeup Trial: We offer trial sessions to help you preview your bridal makeup look and make any adjustments. Wedding Day Makeup: On your wedding day, our makeup artist will arrive at your location in Bokhra to provide flawless, hassle-free makeup service. Testimonials from Brides in Bokhra Priya R., Bokhra: "Ladyfair provided amazing service on my wedding day. The airbrush makeup looked flawless and lasted all day." Ritu K., Bokhra: "I loved the HD makeup! It was perfect for my photos, and the at-home service was so convenient." Sneha S., Bokhra: "My traditional bridal makeup was exactly what I wanted, and Ladyfair made the entire process stress-free." Preparing for Your Bridal Makeup Session To get the best results for your bridal makeup: Stay Hydrated: Keep your skin looking fresh by drinking plenty of water. Consistent Skincare: Stick to your regular skincare routine to maintain healthy, glowing skin. Avoid New Products: Use familiar products to prevent any reactions before your wedding day. Clear Communication: Discuss your makeup preferences and any concerns with our artist during the consultation. Additional Beauty Services by Ladyfair Beyond bridal makeup, Ladyfair offers a variety of beauty services in Bokhra: Engagement and Reception Makeup: Customized looks for all pre-wedding events. Party Makeup: Perfect for birthdays, anniversaries, and special occasions. Everyday Makeup: Enhance your daily look with our expert makeup services. Special Occasion Makeup: Professional makeup for parties, celebrations, and formal events. The Future of Bridal Makeup in Bokhra Ladyfair is dedicated to setting new standards in bridal beauty in Bokhra with our innovative at-home services. As we continue to offer exceptional service, more brides are choosing Ladyfair as their preferred makeup provider. Q&A with Ladyfair’s Bridal Makeup Artist in Bokhra Q1: What makes Ladyfair the best choice for bridal makeup in Bokhra? A1: Ladyfair offers expert bridal makeup services at home, using high-quality products to ensure a flawless and long-lasting look. Q2: What are the prices for bridal makeup in Bokhra? A2: Our bridal makeup packages start at ₹10,000 for basic makeup, ₹12,000 for HD makeup, and ₹18,000 for airbrush makeup. Q3: How do I book Ladyfair’s bridal makeup services in Bokhra? A3: You can book our services by calling 7004721239. We also offer consultations and trial sessions to ensure you get the look you want. Q4: What bridal makeup styles does Ladyfair offer in Bokhra? A4: Ladyfair offers traditional, HD, and airbrush bridal makeup to suit different preferences and needs. Q5: Are makeup trials available before my wedding? A5: Yes, we offer trial sessions so you can finalize your bridal look ahead of time. Q6: What products does Ladyfair use for bridal makeup? A6: We use professional-grade, high-quality makeup products that are safe for all skin types and ensure a flawless finish. Q7: What other services does Ladyfair provide in Bokhra? A7: In addition to bridal makeup, we offer makeup for engagements, receptions, parties, and other special occasions. Ladyfair is your ultimate choice for professional, at-home bridal makeup services in Bokhra, ensuring a flawless and stress-free experience on your special day.

Posted By: 23rd November 2024
Bridal Makeup Artist in Belsand
Introduction In Belsand, Ladyfair is the premier choice for brides looking to achieve the perfect wedding day look with our professional at-home bridal makeup services. Whether you desire a traditional bridal look, an HD finish, or the flawless perfection of airbrush makeup, our expert makeup artist in Belsand ensures that you shine on your special day. Contact us today at 7004721239 to schedule your appointment. Why Choose Ladyfair for Bridal Makeup in Belsand Experienced Makeup Artist Our makeup artist in Belsand has years of experience in bridal makeup, creating personalized looks that complement your natural beauty and align with your style and preferences. Convenient At-Home Service Forget the stress of traveling to a salon. Ladyfair brings luxury beauty treatments directly to your doorstep with our at-home bridal makeup services, offering a truly personalized experience. Premium Makeup Products We use only high-quality, professional-grade makeup products to ensure a flawless, long-lasting look that remains perfect throughout your big day. Bridal Makeup Pricing in Belsand Our bridal makeup services in Belsand are tailored to fit different styles and budgets: Basic Bridal Makeup: ₹10,000 HD Bridal Makeup: ₹12,000 Airbrush Bridal Makeup: ₹18,000 For engagement and reception makeup: Basic Engagement/Reception Makeup: ₹6,000 HD Engagement/Reception Makeup: ₹8,000 Airbrush Engagement/Reception Makeup: ₹12,000 For parties: Basic Party Makeup: ₹2,500 HD Party Makeup: ₹3,500 Popular Bridal Makeup Styles in Belsand Traditional Bridal Makeup Our traditional bridal makeup in Belsand incorporates bold colors and intricate detailing to complement your wedding attire, creating an elegant and timeless look. HD Bridal Makeup For a high-definition finish that looks flawless both in photos and in person, HD bridal makeup is the perfect choice for brides who want a picture-perfect appearance all day. Airbrush Bridal Makeup Our airbrush makeup offers a lightweight, full-coverage finish that lasts all day, giving you a smooth and natural look while ensuring long-lasting perfection. How to Book Your Bridal Makeup with Ladyfair in Belsand Initial Contact: Call us at 7004721239 to discuss your makeup needs and schedule your appointment. Consultation Session: Meet with our makeup artist to discuss your wedding look, review your attire, and plan the perfect makeup style. Makeup Trial: We offer trial sessions to help you preview your bridal makeup look and make any adjustments. Wedding Day Makeup: On your wedding day, our makeup artist will arrive at your location in Belsand to provide flawless, hassle-free makeup service. Testimonials from Brides in Belsand Priya R., Belsand: "Ladyfair provided amazing service on my wedding day. The airbrush makeup looked flawless and lasted all day." Ritu K., Belsand: "I loved the HD makeup! It was perfect for my photos, and the at-home service was so convenient." Sneha S., Belsand: "My traditional bridal makeup was exactly what I wanted, and Ladyfair made the entire process stress-free." Preparing for Your Bridal Makeup Session To get the best results for your bridal makeup: Stay Hydrated: Keep your skin looking fresh by drinking plenty of water. Consistent Skincare: Stick to your regular skincare routine to maintain healthy, glowing skin. Avoid New Products: Use familiar products to prevent any reactions before your wedding day. Clear Communication: Discuss your makeup preferences and any concerns with our artist during the consultation. Additional Beauty Services by Ladyfair Beyond bridal makeup, Ladyfair offers a variety of beauty services in Belsand: Engagement and Reception Makeup: Customized looks for all pre-wedding events. Party Makeup: Perfect for birthdays, anniversaries, and special occasions. Everyday Makeup: Enhance your daily look with our expert makeup services. Special Occasion Makeup: Professional makeup for parties, celebrations, and formal events. The Future of Bridal Makeup in Belsand Ladyfair is dedicated to setting new standards in bridal beauty in Belsand with our innovative at-home services. As we continue to offer exceptional service, more brides are choosing Ladyfair as their preferred makeup provider. Q&A with Ladyfair’s Bridal Makeup Artist in Belsand Q1: What makes Ladyfair the best choice for bridal makeup in Belsand? A1: Ladyfair offers expert bridal makeup services at home, using high-quality products to ensure a flawless and long-lasting look. Q2: What are the prices for bridal makeup in Belsand? A2: Our bridal makeup packages start at ₹10,000 for basic makeup, ₹12,000 for HD makeup, and ₹18,000 for airbrush makeup. Q3: How do I book Ladyfair’s bridal makeup services in Belsand? A3: You can book our services by calling 7004721239. We also offer consultations and trial sessions to ensure you get the look you want. Q4: What bridal makeup styles does Ladyfair offer in Belsand? A4: Ladyfair offers traditional, HD, and airbrush bridal makeup to suit different preferences and needs. Q5: Are makeup trials available before my wedding? A5: Yes, we offer trial sessions so you can finalize your bridal look ahead of time. Q6: What products does Ladyfair use for bridal makeup? A6: We use professional-grade, high-quality makeup products that are safe for all skin types and ensure a flawless finish. Q7: What other services does Ladyfair provide in Belsand? A7: In addition to bridal makeup, we offer makeup for engagements, receptions, parties, and other special occasions. Ladyfair is your ultimate choice for professional, at-home bridal makeup services in Belsand, ensuring a flawless and stress-free experience on your special day.u

Posted By: 23rd November 2024
Bridal Makeup Artist in Bathnaha
Introduction In Bathnaha, Ladyfair is the premier choice for brides looking to achieve the perfect wedding day look with our professional at-home bridal makeup services. Whether you desire a traditional bridal look, an HD finish, or the flawless perfection of airbrush makeup, our expert makeup artist in Bathnaha ensures that you shine on your special day. Contact us today at 7004721239 to schedule your appointment. Why Choose Ladyfair for Bridal Makeup in Bathnaha Experienced Makeup Artist Our makeup artist in Bathnaha has years of experience in bridal makeup, creating personalized looks that complement your natural beauty and align with your style and preferences. Convenient At-Home Service Forget the stress of traveling to a salon. Ladyfair brings luxury beauty treatments directly to your doorstep with our at-home bridal makeup services, offering a truly personalized experience. Premium Makeup Products We use only high-quality, professional-grade makeup products to ensure a flawless, long-lasting look that remains perfect throughout your big day. Bridal Makeup Pricing in Bathnaha Our bridal makeup services in Bathnaha are tailored to fit different styles and budgets: Basic Bridal Makeup: ₹10,000 HD Bridal Makeup: ₹12,000 Airbrush Bridal Makeup: ₹18,000 For engagement and reception makeup: Basic Engagement/Reception Makeup: ₹6,000 HD Engagement/Reception Makeup: ₹8,000 Airbrush Engagement/Reception Makeup: ₹12,000 For parties: Basic Party Makeup: ₹2,500 HD Party Makeup: ₹3,500 Popular Bridal Makeup Styles in Bathnaha Traditional Bridal Makeup Our traditional bridal makeup in Bathnaha incorporates bold colors and intricate detailing to complement your wedding attire, creating an elegant and timeless look. HD Bridal Makeup For a high-definition finish that looks flawless both in photos and in person, HD bridal makeup is the perfect choice for brides who want a picture-perfect appearance all day. Airbrush Bridal Makeup Our airbrush makeup offers a lightweight, full-coverage finish that lasts all day, giving you a smooth and natural look while ensuring long-lasting perfection. How to Book Your Bridal Makeup with Ladyfair in Bathnaha Initial Contact: Call us at 7004721239 to discuss your makeup needs and schedule your appointment. Consultation Session: Meet with our makeup artist to discuss your wedding look, review your attire, and plan the perfect makeup style. Makeup Trial: We offer trial sessions to help you preview your bridal makeup look and make any adjustments. Wedding Day Makeup: On your wedding day, our makeup artist will arrive at your location in Bathnaha to provide flawless, hassle-free makeup service. Testimonials from Brides in Bathnaha Priya R., Bathnaha: "Ladyfair provided amazing service on my wedding day. The airbrush makeup looked flawless and lasted all day." Ritu K., Bathnaha: "I loved the HD makeup! It was perfect for my photos, and the at-home service was so convenient." Sneha S., Bathnaha: "My traditional bridal makeup was exactly what I wanted, and Ladyfair made the entire process stress-free." Preparing for Your Bridal Makeup Session To get the best results for your bridal makeup: Stay Hydrated: Keep your skin looking fresh by drinking plenty of water. Consistent Skincare: Stick to your regular skincare routine to maintain healthy, glowing skin. Avoid New Products: Use familiar products to prevent any reactions before your wedding day. Clear Communication: Discuss your makeup preferences and any concerns with our artist during the consultation. Additional Beauty Services by Ladyfair Beyond bridal makeup, Ladyfair offers a variety of beauty services in Bathnaha: Engagement and Reception Makeup: Customized looks for all pre-wedding events. Party Makeup: Perfect for birthdays, anniversaries, and special occasions. Everyday Makeup: Enhance your daily look with our expert makeup services. Special Occasion Makeup: Professional makeup for parties, celebrations, and formal events. The Future of Bridal Makeup in Bathnaha Ladyfair is dedicated to setting new standards in bridal beauty in Bathnaha with our innovative at-home services. As we continue to offer exceptional service, more brides are choosing Ladyfair as their preferred makeup provider. Q&A with Ladyfair’s Bridal Makeup Artist in Bathnaha Q1: What makes Ladyfair the best choice for bridal makeup in Bathnaha? A1: Ladyfair offers expert bridal makeup services at home, using high-quality products to ensure a flawless and long-lasting look. Q2: What are the prices for bridal makeup in Bathnaha? A2: Our bridal makeup packages start at ₹10,000 for basic makeup, ₹12,000 for HD makeup, and ₹18,000 for airbrush makeup. Q3: How do I book Ladyfair’s bridal makeup services in Bathnaha? A3: You can book our services by calling 7004721239. We also offer consultations and trial sessions to ensure you get the look you want. Q4: What bridal makeup styles does Ladyfair offer in Bathnaha? A4: Ladyfair offers traditional, HD, and airbrush bridal makeup to suit different preferences and needs. Q5: Are makeup trials available before my wedding? A5: Yes, we offer trial sessions so you can finalize your bridal look ahead of time. Q6: What products does Ladyfair use for bridal makeup? A6: We use professional-grade, high-quality makeup products that are safe for all skin types and ensure a flawless finish. Q7: What other services does Ladyfair provide in Bathnaha? A7: In addition to bridal makeup, we offer makeup for engagements, receptions, parties, and other special occasions. Ladyfair is your ultimate choice for professional, at-home bridal makeup services in Bathnaha, ensuring a flawless and stress-free experience on your special day.

Posted By: 23rd November 2024
Bridal Makeup Artist in Bajpatti
Introduction In Bajpatti, Ladyfair is the premier choice for brides looking to achieve the perfect wedding day look with our professional at-home bridal makeup services. Whether you desire a traditional bridal look, an HD finish, or the flawless perfection of airbrush makeup, our expert makeup artist in Bajpatti ensures that you shine on your special day. Contact us today at 7004721239 to schedule your appointment. Why Choose Ladyfair for Bridal Makeup in Bajpatti Experienced Makeup Artist Our makeup artist in Bajpatti has years of experience in bridal makeup, creating personalized looks that complement your natural beauty and align with your style and preferences. Convenient At-Home Service Forget the stress of traveling to a salon. Ladyfair brings luxury beauty treatments directly to your doorstep with our at-home bridal makeup services, offering a truly personalized experience. Premium Makeup Products We use only high-quality, professional-grade makeup products to ensure a flawless, long-lasting look that remains perfect throughout your big day. Bridal Makeup Pricing in Bajpatti Our bridal makeup services in Bajpatti are tailored to fit different styles and budgets: Basic Bridal Makeup: ₹10,000 HD Bridal Makeup: ₹12,000 Airbrush Bridal Makeup: ₹18,000 For engagement and reception makeup: Basic Engagement/Reception Makeup: ₹6,000 HD Engagement/Reception Makeup: ₹8,000 Airbrush Engagement/Reception Makeup: ₹12,000 For parties: Basic Party Makeup: ₹2,500 HD Party Makeup: ₹3,500 Popular Bridal Makeup Styles in Bajpatti Traditional Bridal Makeup Our traditional bridal makeup in Bajpatti incorporates bold colors and intricate detailing to complement your wedding attire, creating an elegant and timeless look. HD Bridal Makeup For a high-definition finish that looks flawless both in photos and in person, HD bridal makeup is the perfect choice for brides who want a picture-perfect appearance all day. Airbrush Bridal Makeup Our airbrush makeup offers a lightweight, full-coverage finish that lasts all day, giving you a smooth and natural look while ensuring long-lasting perfection. How to Book Your Bridal Makeup with Ladyfair in Bajpatti Initial Contact: Call us at 7004721239 to discuss your makeup needs and schedule your appointment. Consultation Session: Meet with our makeup artist to discuss your wedding look, review your attire, and plan the perfect makeup style. Makeup Trial: We offer trial sessions to help you preview your bridal makeup look and make any adjustments. Wedding Day Makeup: On your wedding day, our makeup artist will arrive at your location in Bajpatti to provide flawless, hassle-free makeup service. Testimonials from Brides in Bajpatti Priya R., Bajpatti: "Ladyfair provided amazing service on my wedding day. The airbrush makeup looked flawless and lasted all day." Ritu K., Bajpatti: "I loved the HD makeup! It was perfect for my photos, and the at-home service was so convenient." Sneha S., Bajpatti: "My traditional bridal makeup was exactly what I wanted, and Ladyfair made the entire process stress-free." Preparing for Your Bridal Makeup Session To get the best results for your bridal makeup: Stay Hydrated: Keep your skin looking fresh by drinking plenty of water. Consistent Skincare: Stick to your regular skincare routine to maintain healthy, glowing skin. Avoid New Products: Use familiar products to prevent any reactions before your wedding day. Clear Communication: Discuss your makeup preferences and any concerns with our artist during the consultation. Additional Beauty Services by Ladyfair Beyond bridal makeup, Ladyfair offers a variety of beauty services in Bajpatti: Engagement and Reception Makeup: Customized looks for all pre-wedding events. Party Makeup: Perfect for birthdays, anniversaries, and special occasions. Everyday Makeup: Enhance your daily look with our expert makeup services. Special Occasion Makeup: Professional makeup for parties, celebrations, and formal events. The Future of Bridal Makeup in Bajpatti Ladyfair is dedicated to setting new standards in bridal beauty in Bajpatti with our innovative at-home services. As we continue to offer exceptional service, more brides are choosing Ladyfair as their preferred makeup provider. Q&A with Ladyfair’s Bridal Makeup Artist in Bajpatti Q1: What makes Ladyfair the best choice for bridal makeup in Bajpatti? A1: Ladyfair offers expert bridal makeup services at home, using high-quality products to ensure a flawless and long-lasting look. Q2: What are the prices for bridal makeup in Bajpatti? A2: Our bridal makeup packages start at ₹10,000 for basic makeup, ₹12,000 for HD makeup, and ₹18,000 for airbrush makeup. Q3: How do I book Ladyfair’s bridal makeup services in Bajpatti? A3: You can book our services by calling 7004721239. We also offer consultations and trial sessions to ensure you get the look you want. Q4: What bridal makeup styles does Ladyfair offer in Bajpatti? A4: Ladyfair offers traditional, HD, and airbrush bridal makeup to suit different preferences and needs. Q5: Are makeup trials available before my wedding? A5: Yes, we offer trial sessions so you can finalize your bridal look ahead of time. Q6: What products does Ladyfair use for bridal makeup? A6: We use professional-grade, high-quality makeup products that are safe for all skin types and ensure a flawless finish. Q7: What other services does Ladyfair provide in Bajpatti? A7: In addition to bridal makeup, we offer makeup for engagements, receptions, parties, and other special occasions. Ladyfair is your ultimate choice for professional, at-home bridal makeup services in Bajpatti, ensuring a flawless and stress-free experience on your special day.

Posted By: 23rd November 2024
Bridal Makeup Artist in Bairgania
Introduction In Bairgania, Ladyfair is the premier choice for brides looking to achieve the perfect wedding day look with our professional at-home bridal makeup services. Whether you desire a traditional bridal look, an HD finish, or the flawless perfection of airbrush makeup, our expert makeup artist in Bairgania ensures that you shine on your special day. Contact us today at 7004721239 to schedule your appointment. Why Choose Ladyfair for Bridal Makeup in Bairgania Experienced Makeup Artist Our makeup artist in Bairgania has years of experience in bridal makeup, creating personalized looks that complement your natural beauty and align with your style and preferences. Convenient At-Home Service Forget the stress of traveling to a salon. Ladyfair brings luxury beauty treatments directly to your doorstep with our at-home bridal makeup services, offering a truly personalized experience. Premium Makeup Products We use only high-quality, professional-grade makeup products to ensure a flawless, long-lasting look that remains perfect throughout your big day. Bridal Makeup Pricing in Bairgania Our bridal makeup services in Bairgania are tailored to fit different styles and budgets: Basic Bridal Makeup: ₹10,000 HD Bridal Makeup: ₹12,000 Airbrush Bridal Makeup: ₹18,000 For engagement and reception makeup: Basic Engagement/Reception Makeup: ₹6,000 HD Engagement/Reception Makeup: ₹8,000 Airbrush Engagement/Reception Makeup: ₹12,000 For parties: Basic Party Makeup: ₹2,500 HD Party Makeup: ₹3,500 Popular Bridal Makeup Styles in Bairgania Traditional Bridal Makeup Our traditional bridal makeup in Bairgania incorporates bold colors and intricate detailing to complement your wedding attire, creating an elegant and timeless look. HD Bridal Makeup For a high-definition finish that looks flawless both in photos and in person, HD bridal makeup is the perfect choice for brides who want a picture-perfect appearance all day. Airbrush Bridal Makeup Our airbrush makeup offers a lightweight, full-coverage finish that lasts all day, giving you a smooth and natural look while ensuring long-lasting perfection. How to Book Your Bridal Makeup with Ladyfair in Bairgania Initial Contact: Call us at 7004721239 to discuss your makeup needs and schedule your appointment. Consultation Session: Meet with our makeup artist to discuss your wedding look, review your attire, and plan the perfect makeup style. Makeup Trial: We offer trial sessions to help you preview your bridal makeup look and make any adjustments. Wedding Day Makeup: On your wedding day, our makeup artist will arrive at your location in Bairgania to provide flawless, hassle-free makeup service. Testimonials from Brides in Bairgania Priya R., Bairgania: "Ladyfair provided amazing service on my wedding day. The airbrush makeup looked flawless and lasted all day." Ritu K., Bairgania: "I loved the HD makeup! It was perfect for my photos, and the at-home service was so convenient." Sneha S., Bairgania: "My traditional bridal makeup was exactly what I wanted, and Ladyfair made the entire process stress-free." Preparing for Your Bridal Makeup Session To get the best results for your bridal makeup: Stay Hydrated: Keep your skin looking fresh by drinking plenty of water. Consistent Skincare: Stick to your regular skincare routine to maintain healthy, glowing skin. Avoid New Products: Use familiar products to prevent any reactions before your wedding day. Clear Communication: Discuss your makeup preferences and any concerns with our artist during the consultation. Additional Beauty Services by Ladyfair Beyond bridal makeup, Ladyfair offers a variety of beauty services in Bairgania: Engagement and Reception Makeup: Customized looks for all pre-wedding events. Party Makeup: Perfect for birthdays, anniversaries, and special occasions. Everyday Makeup: Enhance your daily look with our expert makeup services. Special Occasion Makeup: Professional makeup for parties, celebrations, and formal events. The Future of Bridal Makeup in Bairgania Ladyfair is dedicated to setting new standards in bridal beauty in Bairgania with our innovative at-home services. As we continue to offer exceptional service, more brides are choosing Ladyfair as their preferred makeup provider. Q&A with Ladyfair’s Bridal Makeup Artist in Bairgania Q1: What makes Ladyfair the best choice for bridal makeup in Bairgania? A1: Ladyfair offers expert bridal makeup services at home, using high-quality products to ensure a flawless and long-lasting look. Q2: What are the prices for bridal makeup in Bairgania? A2: Our bridal makeup packages start at ₹10,000 for basic makeup, ₹12,000 for HD makeup, and ₹18,000 for airbrush makeup. Q3: How do I book Ladyfair’s bridal makeup services in Bairgania? A3: You can book our services by calling 7004721239. We also offer consultations and trial sessions to ensure you get the look you want. Q4: What bridal makeup styles does Ladyfair offer in Bairgania? A4: Ladyfair offers traditional, HD, and airbrush bridal makeup to suit different preferences and needs. Q5: Are makeup trials available before my wedding? A5: Yes, we offer trial sessions so you can finalize your bridal look ahead of time. Q6: What products does Ladyfair use for bridal makeup? A6: We use professional-grade, high-quality makeup products that are safe for all skin types and ensure a flawless finish. Q7: What other services does Ladyfair provide in Bairgania? A7: In addition to bridal makeup, we offer makeup for engagements, receptions, parties, and other special occasions. Ladyfair is your ultimate choice for professional, at-home bridal makeup services in Bairgania, ensuring a flawless and stress-free experience on your special day.

Posted By: 23rd November 2024
Bridal Makeup Artist in Pratapganj
Introduction In Pratapganj, Ladyfair is the premier choice for brides looking to achieve the perfect wedding day look with our professional at-home bridal makeup services. Whether you desire a traditional bridal look, an HD finish, or the flawless perfection of airbrush makeup, our expert makeup artist in Pratapganj ensures that you shine on your special day. Contact us today at 7004721239 to schedule your appointment. Why Choose Ladyfair for Bridal Makeup in Pratapganj Experienced Makeup Artist Our makeup artist in Pratapganj has years of experience in bridal makeup, creating personalized looks that complement your natural beauty and align with your style and preferences. Convenient At-Home Service Forget the stress of traveling to a salon. Ladyfair brings luxury beauty treatments directly to your doorstep with our at-home bridal makeup services, offering a truly personalized experience. Premium Makeup Products We use only high-quality, professional-grade makeup products to ensure a flawless, long-lasting look that remains perfect throughout your big day. Bridal Makeup Pricing in Pratapganj Our bridal makeup services in Pratapganj are tailored to fit different styles and budgets: Basic Bridal Makeup: ₹10,000 HD Bridal Makeup: ₹12,000 Airbrush Bridal Makeup: ₹18,000 For engagement and reception makeup: Basic Engagement/Reception Makeup: ₹6,000 HD Engagement/Reception Makeup: ₹8,000 Airbrush Engagement/Reception Makeup: ₹12,000 For parties: Basic Party Makeup: ₹2,500 HD Party Makeup: ₹3,500 Popular Bridal Makeup Styles in Pratapganj Traditional Bridal Makeup Our traditional bridal makeup in Pratapganj incorporates bold colors and intricate detailing to complement your wedding attire, creating an elegant and timeless look. HD Bridal Makeup For a high-definition finish that looks flawless both in photos and in person, HD bridal makeup is the perfect choice for brides who want a picture-perfect appearance all day. Airbrush Bridal Makeup Our airbrush makeup offers a lightweight, full-coverage finish that lasts all day, giving you a smooth and natural look while ensuring long-lasting perfection. How to Book Your Bridal Makeup with Ladyfair in Pratapganj Initial Contact: Call us at 7004721239 to discuss your makeup needs and schedule your appointment. Consultation Session: Meet with our makeup artist to discuss your wedding look, review your attire, and plan the perfect makeup style. Makeup Trial: We offer trial sessions to help you preview your bridal makeup look and make any adjustments. Wedding Day Makeup: On your wedding day, our makeup artist will arrive at your location in Pratapganj to provide flawless, hassle-free makeup service. Testimonials from Brides in Pratapganj Priya R., Pratapganj: "Ladyfair provided amazing service on my wedding day. The airbrush makeup looked flawless and lasted all day." Ritu K., Pratapganj: "I loved the HD makeup! It was perfect for my photos, and the at-home service was so convenient." Sneha S., Pratapganj: "My traditional bridal makeup was exactly what I wanted, and Ladyfair made the entire process stress-free." Preparing for Your Bridal Makeup Session To get the best results for your bridal makeup: Stay Hydrated: Keep your skin looking fresh by drinking plenty of water. Consistent Skincare: Stick to your regular skincare routine to maintain healthy, glowing skin. Avoid New Products: Use familiar products to prevent any reactions before your wedding day. Clear Communication: Discuss your makeup preferences and any concerns with our artist during the consultation. Additional Beauty Services by Ladyfair Beyond bridal makeup, Ladyfair offers a variety of beauty services in Pratapganj: Engagement and Reception Makeup: Customized looks for all pre-wedding events. Party Makeup: Perfect for birthdays, anniversaries, and special occasions. Everyday Makeup: Enhance your daily look with our expert makeup services. Special Occasion Makeup: Professional makeup for parties, celebrations, and formal events. The Future of Bridal Makeup in Pratapganj Ladyfair is dedicated to setting new standards in bridal beauty in Pratapganj with our innovative at-home services. As we continue to offer exceptional service, more brides are choosing Ladyfair as their preferred makeup provider. Q&A with Ladyfair’s Bridal Makeup Artist in Pratapganj Q1: What makes Ladyfair the best choice for bridal makeup in Pratapganj? A1: Ladyfair offers expert bridal makeup services at home, using high-quality products to ensure a flawless and long-lasting look. Q2: What are the prices for bridal makeup in Pratapganj? A2: Our bridal makeup packages start at ₹10,000 for basic makeup, ₹12,000 for HD makeup, and ₹18,000 for airbrush makeup. Q3: How do I book Ladyfair’s bridal makeup services in Pratapganj? A3: You can book our services by calling 7004721239. We also offer consultations and trial sessions to ensure you get the look you want. Q4: What bridal makeup styles does Ladyfair offer in Pratapganj? A4: Ladyfair offers traditional, HD, and airbrush bridal makeup to suit different preferences and needs. Q5: Are makeup trials available before my wedding? A5: Yes, we offer trial sessions so you can finalize your bridal look ahead of time. Q6: What products does Ladyfair use for bridal makeup? A6: We use professional-grade, high-quality makeup products that are safe for all skin types and ensure a flawless finish. Q7: What other services does Ladyfair provide in Pratapganj? A7: In addition to bridal makeup, we offer makeup for engagements, receptions, parties, and other special occasions. Ladyfair is your ultimate choice for professional, at-home bridal makeup services in Pratapganj, ensuring a flawless and stress-free experience on your special day.

Posted By: 23rd November 2024
Bridal Makeup Artist in Marauna
Introduction In Marauna, Ladyfair is the premier choice for brides looking to achieve the perfect wedding day look with our professional at-home bridal makeup services. Whether you desire a traditional bridal look, an HD finish, or the flawless perfection of airbrush makeup, our expert makeup artist in Marauna ensures that you shine on your special day. Contact us today at 7004721239 to schedule your appointment. Why Choose Ladyfair for Bridal Makeup in Marauna Experienced Makeup Artist Our makeup artist in Marauna has years of experience in bridal makeup, creating personalized looks that complement your natural beauty and align with your style and preferences. Convenient At-Home Service Forget the stress of traveling to a salon. Ladyfair brings luxury beauty treatments directly to your doorstep with our at-home bridal makeup services, offering a truly personalized experience. Premium Makeup Products We use only high-quality, professional-grade makeup products to ensure a flawless, long-lasting look that remains perfect throughout your big day. Bridal Makeup Pricing in Marauna Our bridal makeup services in Marauna are tailored to fit different styles and budgets: Basic Bridal Makeup: ₹10,000 HD Bridal Makeup: ₹12,000 Airbrush Bridal Makeup: ₹18,000 For engagement and reception makeup: Basic Engagement/Reception Makeup: ₹6,000 HD Engagement/Reception Makeup: ₹8,000 Airbrush Engagement/Reception Makeup: ₹12,000 For parties: Basic Party Makeup: ₹2,500 HD Party Makeup: ₹3,500 Popular Bridal Makeup Styles in Marauna Traditional Bridal Makeup Our traditional bridal makeup in Marauna incorporates bold colors and intricate detailing to complement your wedding attire, creating an elegant and timeless look. HD Bridal Makeup For a high-definition finish that looks flawless both in photos and in person, HD bridal makeup is the perfect choice for brides who want a picture-perfect appearance all day. Airbrush Bridal Makeup Our airbrush makeup offers a lightweight, full-coverage finish that lasts all day, giving you a smooth and natural look while ensuring long-lasting perfection. How to Book Your Bridal Makeup with Ladyfair in Marauna Initial Contact: Call us at 7004721239 to discuss your makeup needs and schedule your appointment. Consultation Session: Meet with our makeup artist to discuss your wedding look, review your attire, and plan the perfect makeup style. Makeup Trial: We offer trial sessions to help you preview your bridal makeup look and make any adjustments. Wedding Day Makeup: On your wedding day, our makeup artist will arrive at your location in Marauna to provide flawless, hassle-free makeup service. Testimonials from Brides in Marauna Priya R., Marauna: "Ladyfair provided amazing service on my wedding day. The airbrush makeup looked flawless and lasted all day." Ritu K., Marauna: "I loved the HD makeup! It was perfect for my photos, and the at-home service was so convenient." Sneha S., Marauna: "My traditional bridal makeup was exactly what I wanted, and Ladyfair made the entire process stress-free." Preparing for Your Bridal Makeup Session To get the best results for your bridal makeup: Stay Hydrated: Keep your skin looking fresh by drinking plenty of water. Consistent Skincare: Stick to your regular skincare routine to maintain healthy, glowing skin. Avoid New Products: Use familiar products to prevent any reactions before your wedding day. Clear Communication: Discuss your makeup preferences and any concerns with our artist during the consultation. Additional Beauty Services by Ladyfair Beyond bridal makeup, Ladyfair offers a variety of beauty services in Marauna: Engagement and Reception Makeup: Customized looks for all pre-wedding events. Party Makeup: Perfect for birthdays, anniversaries, and special occasions. Everyday Makeup: Enhance your daily look with our expert makeup services. Special Occasion Makeup: Professional makeup for parties, celebrations, and formal events. The Future of Bridal Makeup in Marauna Ladyfair is dedicated to setting new standards in bridal beauty in Marauna with our innovative at-home services. As we continue to offer exceptional service, more brides are choosing Ladyfair as their preferred makeup provider. Q&A with Ladyfair’s Bridal Makeup Artist in Marauna Q1: What makes Ladyfair the best choice for bridal makeup in Marauna? A1: Ladyfair offers expert bridal makeup services at home, using high-quality products to ensure a flawless and long-lasting look. Q2: What are the prices for bridal makeup in Marauna? A2: Our bridal makeup packages start at ₹10,000 for basic makeup, ₹12,000 for HD makeup, and ₹18,000 for airbrush makeup. Q3: How do I book Ladyfair’s bridal makeup services in Marauna? A3: You can book our services by calling 7004721239. We also offer consultations and trial sessions to ensure you get the look you want. Q4: What bridal makeup styles does Ladyfair offer in Marauna? A4: Ladyfair offers traditional, HD, and airbrush bridal makeup to suit different preferences and needs. Q5: Are makeup trials available before my wedding? A5: Yes, we offer trial sessions so you can finalize your bridal look ahead of time. Q6: What products does Ladyfair use for bridal makeup? A6: We use professional-grade, high-quality makeup products that are safe for all skin types and ensure a flawless finish. Q7: What other services does Ladyfair provide in Marauna? A7: In addition to bridal makeup, we offer makeup for engagements, receptions, parties, and other special occasions. Ladyfair is your ultimate choice for professional, at-home bridal makeup services in Marauna, ensuring a flawless and stress-free experience on your special day.

Posted By: 23rd November 2024
Bridal Makeup Artist in Nirmali
Introduction In Nirmali, Ladyfair is the premier choice for brides looking to achieve the perfect wedding day look with our professional at-home bridal makeup services. Whether you desire a traditional bridal look, an HD finish, or the flawless perfection of airbrush makeup, our expert makeup artist in Nirmali ensures that you shine on your special day. Contact us today at 7004721239 to schedule your appointment. Why Choose Ladyfair for Bridal Makeup in Nirmali Experienced Makeup Artist Our makeup artist in Nirmali has years of experience in bridal makeup, creating personalized looks that complement your natural beauty and align with your style and preferences. Convenient At-Home Service Forget the stress of traveling to a salon. Ladyfair brings luxury beauty treatments directly to your doorstep with our at-home bridal makeup services, offering a truly personalized experience. Premium Makeup Products We use only high-quality, professional-grade makeup products to ensure a flawless, long-lasting look that remains perfect throughout your big day. Bridal Makeup Pricing in Nirmali Our bridal makeup services in Nirmali are tailored to fit different styles and budgets: Basic Bridal Makeup: ₹10,000 HD Bridal Makeup: ₹12,000 Airbrush Bridal Makeup: ₹18,000 For engagement and reception makeup: Basic Engagement/Reception Makeup: ₹6,000 HD Engagement/Reception Makeup: ₹8,000 Airbrush Engagement/Reception Makeup: ₹12,000 For parties: Basic Party Makeup: ₹2,500 HD Party Makeup: ₹3,500 Popular Bridal Makeup Styles in Nirmali Traditional Bridal Makeup Our traditional bridal makeup in Nirmali incorporates bold colors and intricate detailing to complement your wedding attire, creating an elegant and timeless look. HD Bridal Makeup For a high-definition finish that looks flawless both in photos and in person, HD bridal makeup is the perfect choice for brides who want a picture-perfect appearance all day. Airbrush Bridal Makeup Our airbrush makeup offers a lightweight, full-coverage finish that lasts all day, giving you a smooth and natural look while ensuring long-lasting perfection. How to Book Your Bridal Makeup with Ladyfair in Nirmali Initial Contact: Call us at 7004721239 to discuss your makeup needs and schedule your appointment. Consultation Session: Meet with our makeup artist to discuss your wedding look, review your attire, and plan the perfect makeup style. Makeup Trial: We offer trial sessions to help you preview your bridal makeup look and make any adjustments. Wedding Day Makeup: On your wedding day, our makeup artist will arrive at your location in Nirmali to provide flawless, hassle-free makeup service. Testimonials from Brides in Nirmali Priya R., Nirmali: "Ladyfair provided amazing service on my wedding day. The airbrush makeup looked flawless and lasted all day." Ritu K., Nirmali: "I loved the HD makeup! It was perfect for my photos, and the at-home service was so convenient." Sneha S., Nirmali: "My traditional bridal makeup was exactly what I wanted, and Ladyfair made the entire process stress-free." Preparing for Your Bridal Makeup Session To get the best results for your bridal makeup: Stay Hydrated: Keep your skin looking fresh by drinking plenty of water. Consistent Skincare: Stick to your regular skincare routine to maintain healthy, glowing skin. Avoid New Products: Use familiar products to prevent any reactions before your wedding day. Clear Communication: Discuss your makeup preferences and any concerns with our artist during the consultation. Additional Beauty Services by Ladyfair Beyond bridal makeup, Ladyfair offers a variety of beauty services in Nirmali: Engagement and Reception Makeup: Customized looks for all pre-wedding events. Party Makeup: Perfect for birthdays, anniversaries, and special occasions. Everyday Makeup: Enhance your daily look with our expert makeup services. Special Occasion Makeup: Professional makeup for parties, celebrations, and formal events. The Future of Bridal Makeup in Nirmali Ladyfair is dedicated to setting new standards in bridal beauty in Nirmali with our innovative at-home services. As we continue to offer exceptional service, more brides are choosing Ladyfair as their preferred makeup provider. Q&A with Ladyfair’s Bridal Makeup Artist in Nirmali Q1: What makes Ladyfair the best choice for bridal makeup in Nirmali? A1: Ladyfair offers expert bridal makeup services at home, using high-quality products to ensure a flawless and long-lasting look. Q2: What are the prices for bridal makeup in Nirmali? A2: Our bridal makeup packages start at ₹10,000 for basic makeup, ₹12,000 for HD makeup, and ₹18,000 for airbrush makeup. Q3: How do I book Ladyfair’s bridal makeup services in Nirmali? A3: You can book our services by calling 7004721239. We also offer consultations and trial sessions to ensure you get the look you want. Q4: What bridal makeup styles does Ladyfair offer in Nirmali? A4: Ladyfair offers traditional, HD, and airbrush bridal makeup to suit different preferences and needs. Q5: Are makeup trials available before my wedding? A5: Yes, we offer trial sessions so you can finalize your bridal look ahead of time. Q6: What products does Ladyfair use for bridal makeup? A6: We use professional-grade, high-quality makeup products that are safe for all skin types and ensure a flawless finish. Q7: What other services does Ladyfair provide in Nirmali? A7: In addition to bridal makeup, we offer makeup for engagements, receptions, parties, and other special occasions. Ladyfair is your ultimate choice for professional, at-home bridal makeup services in Nirmali, ensuring a flawless and stress-free experience on your special day.

Posted By: 23rd November 2024
Bridal Makeup Artist in Chhatapur
Introduction In Chhatapur, Ladyfair is the premier choice for brides looking to achieve the perfect wedding day look with our professional at-home bridal makeup services. Whether you desire a traditional bridal look, an HD finish, or the flawless perfection of airbrush makeup, our expert makeup artist in Chhatapur ensures that you shine on your special day. Contact us today at 7004721239 to schedule your appointment. Why Choose Ladyfair for Bridal Makeup in Chhatapur Experienced Makeup Artist Our makeup artist in Chhatapur has years of experience in bridal makeup, creating personalized looks that complement your natural beauty and align with your style and preferences. Convenient At-Home Service Forget the stress of traveling to a salon. Ladyfair brings luxury beauty treatments directly to your doorstep with our at-home bridal makeup services, offering a truly personalized experience. Premium Makeup Products We use only high-quality, professional-grade makeup products to ensure a flawless, long-lasting look that remains perfect throughout your big day. Bridal Makeup Pricing in Chhatapur Our bridal makeup services in Chhatapur are tailored to fit different styles and budgets: Basic Bridal Makeup: ₹10,000 HD Bridal Makeup: ₹12,000 Airbrush Bridal Makeup: ₹18,000 For engagement and reception makeup: Basic Engagement/Reception Makeup: ₹6,000 HD Engagement/Reception Makeup: ₹8,000 Airbrush Engagement/Reception Makeup: ₹12,000 For parties: Basic Party Makeup: ₹2,500 HD Party Makeup: ₹3,500 Popular Bridal Makeup Styles in Chhatapur Traditional Bridal Makeup Our traditional bridal makeup in Chhatapur incorporates bold colors and intricate detailing to complement your wedding attire, creating an elegant and timeless look. HD Bridal Makeup For a high-definition finish that looks flawless both in photos and in person, HD bridal makeup is the perfect choice for brides who want a picture-perfect appearance all day. Airbrush Bridal Makeup Our airbrush makeup offers a lightweight, full-coverage finish that lasts all day, giving you a smooth and natural look while ensuring long-lasting perfection. How to Book Your Bridal Makeup with Ladyfair in Chhatapur Initial Contact: Call us at 7004721239 to discuss your makeup needs and schedule your appointment. Consultation Session: Meet with our makeup artist to discuss your wedding look, review your attire, and plan the perfect makeup style. Makeup Trial: We offer trial sessions to help you preview your bridal makeup look and make any adjustments. Wedding Day Makeup: On your wedding day, our makeup artist will arrive at your location in Chhatapur to provide flawless, hassle-free makeup service. Testimonials from Brides in Chhatapur Priya R., Chhatapur: "Ladyfair provided amazing service on my wedding day. The airbrush makeup looked flawless and lasted all day." Ritu K., Chhatapur: "I loved the HD makeup! It was perfect for my photos, and the at-home service was so convenient." Sneha S., Chhatapur: "My traditional bridal makeup was exactly what I wanted, and Ladyfair made the entire process stress-free." Preparing for Your Bridal Makeup Session To get the best results for your bridal makeup: Stay Hydrated: Keep your skin looking fresh by drinking plenty of water. Consistent Skincare: Stick to your regular skincare routine to maintain healthy, glowing skin. Avoid New Products: Use familiar products to prevent any reactions before your wedding day. Clear Communication: Discuss your makeup preferences and any concerns with our artist during the consultation. Additional Beauty Services by Ladyfair Beyond bridal makeup, Ladyfair offers a variety of beauty services in Chhatapur: Engagement and Reception Makeup: Customized looks for all pre-wedding events. Party Makeup: Perfect for birthdays, anniversaries, and special occasions. Everyday Makeup: Enhance your daily look with our expert makeup services. Special Occasion Makeup: Professional makeup for parties, celebrations, and formal events. The Future of Bridal Makeup in Chhatapur Ladyfair is dedicated to setting new standards in bridal beauty in Chhatapur with our innovative at-home services. As we continue to offer exceptional service, more brides are choosing Ladyfair as their preferred makeup provider. Q&A with Ladyfair’s Bridal Makeup Artist in Chhatapur Q1: What makes Ladyfair the best choice for bridal makeup in Chhatapur? A1: Ladyfair offers expert bridal makeup services at home, using high-quality products to ensure a flawless and long-lasting look. Q2: What are the prices for bridal makeup in Chhatapur? A2: Our bridal makeup packages start at ₹10,000 for basic makeup, ₹12,000 for HD makeup, and ₹18,000 for airbrush makeup. Q3: How do I book Ladyfair’s bridal makeup services in Chhatapur? A3: You can book our services by calling 7004721239. We also offer consultations and trial sessions to ensure you get the look you want. Q4: What bridal makeup styles does Ladyfair offer in Chhatapur? A4: Ladyfair offers traditional, HD, and airbrush bridal makeup to suit different preferences and needs. Q5: Are makeup trials available before my wedding? A5: Yes, we offer trial sessions so you can finalize your bridal look ahead of time. Q6: What products does Ladyfair use for bridal makeup? A6: We use professional-grade, high-quality makeup products that are safe for all skin types and ensure a flawless finish. Q7: What other services does Ladyfair provide in Chhatapur? A7: In addition to bridal makeup, we offer makeup for engagements, receptions, parties, and other special occasions. Ladyfair is your ultimate choice for professional, at-home bridal makeup services in Chhatapur, ensuring a flawless and stress-free experience on your special day.

Posted By: 23rd November 2024
Bridal Makeup Artist in Raghopur
Introduction In Raghopur, Ladyfair is the premier choice for brides looking to achieve the perfect wedding day look with our professional at-home bridal makeup services. Whether you desire a traditional bridal look, an HD finish, or the flawless perfection of airbrush makeup, our expert makeup artist in Raghopur ensures that you shine on your special day. Contact us today at 7004721239 to schedule your appointment. Why Choose Ladyfair for Bridal Makeup in Raghopur Experienced Makeup Artist Our makeup artist in Raghopur has years of experience in bridal makeup, creating personalized looks that complement your natural beauty and align with your style and preferences. Convenient At-Home Service Forget the stress of traveling to a salon. Ladyfair brings luxury beauty treatments directly to your doorstep with our at-home bridal makeup services, offering a truly personalized experience. Premium Makeup Products We use only high-quality, professional-grade makeup products to ensure a flawless, long-lasting look that remains perfect throughout your big day. Bridal Makeup Pricing in Raghopur Our bridal makeup services in Raghopur are tailored to fit different styles and budgets: Basic Bridal Makeup: ₹10,000 HD Bridal Makeup: ₹12,000 Airbrush Bridal Makeup: ₹18,000 For engagement and reception makeup: Basic Engagement/Reception Makeup: ₹6,000 HD Engagement/Reception Makeup: ₹8,000 Airbrush Engagement/Reception Makeup: ₹12,000 For parties: Basic Party Makeup: ₹2,500 HD Party Makeup: ₹3,500 Popular Bridal Makeup Styles in Raghopur Traditional Bridal Makeup Our traditional bridal makeup in Raghopur incorporates bold colors and intricate detailing to complement your wedding attire, creating an elegant and timeless look. HD Bridal Makeup For a high-definition finish that looks flawless both in photos and in person, HD bridal makeup is the perfect choice for brides who want a picture-perfect appearance all day. Airbrush Bridal Makeup Our airbrush makeup offers a lightweight, full-coverage finish that lasts all day, giving you a smooth and natural look while ensuring long-lasting perfection. How to Book Your Bridal Makeup with Ladyfair in Raghopur Initial Contact: Call us at 7004721239 to discuss your makeup needs and schedule your appointment. Consultation Session: Meet with our makeup artist to discuss your wedding look, review your attire, and plan the perfect makeup style. Makeup Trial: We offer trial sessions to help you preview your bridal makeup look and make any adjustments. Wedding Day Makeup: On your wedding day, our makeup artist will arrive at your location in Raghopur to provide flawless, hassle-free makeup service. Testimonials from Brides in Raghopur Priya R., Raghopur: "Ladyfair provided amazing service on my wedding day. The airbrush makeup looked flawless and lasted all day." Ritu K., Raghopur: "I loved the HD makeup! It was perfect for my photos, and the at-home service was so convenient." Sneha S., Raghopur: "My traditional bridal makeup was exactly what I wanted, and Ladyfair made the entire process stress-free." Preparing for Your Bridal Makeup Session To get the best results for your bridal makeup: Stay Hydrated: Keep your skin looking fresh by drinking plenty of water. Consistent Skincare: Stick to your regular skincare routine to maintain healthy, glowing skin. Avoid New Products: Use familiar products to prevent any reactions before your wedding day. Clear Communication: Discuss your makeup preferences and any concerns with our artist during the consultation. Additional Beauty Services by Ladyfair Beyond bridal makeup, Ladyfair offers a variety of beauty services in Raghopur: Engagement and Reception Makeup: Customized looks for all pre-wedding events. Party Makeup: Perfect for birthdays, anniversaries, and special occasions. Everyday Makeup: Enhance your daily look with our expert makeup services. Special Occasion Makeup: Professional makeup for parties, celebrations, and formal events. The Future of Bridal Makeup in Raghopur Ladyfair is dedicated to setting new standards in bridal beauty in Raghopur with our innovative at-home services. As we continue to offer exceptional service, more brides are choosing Ladyfair as their preferred makeup provider. Q&A with Ladyfair’s Bridal Makeup Artist in Raghopur Q1: What makes Ladyfair the best choice for bridal makeup in Raghopur? A1: Ladyfair offers expert bridal makeup services at home, using high-quality products to ensure a flawless and long-lasting look. Q2: What are the prices for bridal makeup in Raghopur? A2: Our bridal makeup packages start at ₹10,000 for basic makeup, ₹12,000 for HD makeup, and ₹18,000 for airbrush makeup. Q3: How do I book Ladyfair’s bridal makeup services in Raghopur? A3: You can book our services by calling 7004721239. We also offer consultations and trial sessions to ensure you get the look you want. Q4: What bridal makeup styles does Ladyfair offer in Raghopur? A4: Ladyfair offers traditional, HD, and airbrush bridal makeup to suit different preferences and needs. Q5: Are makeup trials available before my wedding? A5: Yes, we offer trial sessions so you can finalize your bridal look ahead of time. Q6: What products does Ladyfair use for bridal makeup? A6: We use professional-grade, high-quality makeup products that are safe for all skin types and ensure a flawless finish. Q7: What other services does Ladyfair provide in Raghopur? A7: In addition to bridal makeup, we offer makeup for engagements, receptions, parties, and other special occasions. Ladyfair is your ultimate choice for professional, at-home bridal makeup services in Raghopur, ensuring a flawless and stress-free experience on your special day.

Posted By: 23rd November 2024
Bridal Makeup Artist in Triveniganj
Introduction In Triveniganj, Ladyfair is the premier choice for brides looking to achieve the perfect wedding day look with our professional at-home bridal makeup services. Whether you desire a traditional bridal look, an HD finish, or the flawless perfection of airbrush makeup, our expert makeup artist in Triveniganj ensures that you shine on your special day. Contact us today at 7004721239 to schedule your appointment. Why Choose Ladyfair for Bridal Makeup in Triveniganj Experienced Makeup Artist Our makeup artist in Triveniganj has years of experience in bridal makeup, creating personalized looks that complement your natural beauty and align with your style and preferences. Convenient At-Home Service Forget the stress of traveling to a salon. Ladyfair brings luxury beauty treatments directly to your doorstep with our at-home bridal makeup services, offering a truly personalized experience. Premium Makeup Products We use only high-quality, professional-grade makeup products to ensure a flawless, long-lasting look that remains perfect throughout your big day. Bridal Makeup Pricing in Triveniganj Our bridal makeup services in Triveniganj are tailored to fit different styles and budgets: Basic Bridal Makeup: ₹10,000 HD Bridal Makeup: ₹12,000 Airbrush Bridal Makeup: ₹18,000 For engagement and reception makeup: Basic Engagement/Reception Makeup: ₹6,000 HD Engagement/Reception Makeup: ₹8,000 Airbrush Engagement/Reception Makeup: ₹12,000 For parties: Basic Party Makeup: ₹2,500 HD Party Makeup: ₹3,500 Popular Bridal Makeup Styles in Triveniganj Traditional Bridal Makeup Our traditional bridal makeup in Triveniganj incorporates bold colors and intricate detailing to complement your wedding attire, creating an elegant and timeless look. HD Bridal Makeup For a high-definition finish that looks flawless both in photos and in person, HD bridal makeup is the perfect choice for brides who want a picture-perfect appearance all day. Airbrush Bridal Makeup Our airbrush makeup offers a lightweight, full-coverage finish that lasts all day, giving you a smooth and natural look while ensuring long-lasting perfection. How to Book Your Bridal Makeup with Ladyfair in Triveniganj Initial Contact: Call us at 7004721239 to discuss your makeup needs and schedule your appointment. Consultation Session: Meet with our makeup artist to discuss your wedding look, review your attire, and plan the perfect makeup style. Makeup Trial: We offer trial sessions to help you preview your bridal makeup look and make any adjustments. Wedding Day Makeup: On your wedding day, our makeup artist will arrive at your location in Triveniganj to provide flawless, hassle-free makeup service. Testimonials from Brides in Triveniganj Priya R., Triveniganj: "Ladyfair provided amazing service on my wedding day. The airbrush makeup looked flawless and lasted all day." Ritu K., Triveniganj: "I loved the HD makeup! It was perfect for my photos, and the at-home service was so convenient." Sneha S., Triveniganj: "My traditional bridal makeup was exactly what I wanted, and Ladyfair made the entire process stress-free." Preparing for Your Bridal Makeup Session To get the best results for your bridal makeup: Stay Hydrated: Keep your skin looking fresh by drinking plenty of water. Consistent Skincare: Stick to your regular skincare routine to maintain healthy, glowing skin. Avoid New Products: Use familiar products to prevent any reactions before your wedding day. Clear Communication: Discuss your makeup preferences and any concerns with our artist during the consultation. Additional Beauty Services by Ladyfair Beyond bridal makeup, Ladyfair offers a variety of beauty services in Triveniganj: Engagement and Reception Makeup: Customized looks for all pre-wedding events. Party Makeup: Perfect for birthdays, anniversaries, and special occasions. Everyday Makeup: Enhance your daily look with our expert makeup services. Special Occasion Makeup: Professional makeup for parties, celebrations, and formal events. The Future of Bridal Makeup in Triveniganj Ladyfair is dedicated to setting new standards in bridal beauty in Triveniganj with our innovative at-home services. As we continue to offer exceptional service, more brides are choosing Ladyfair as their preferred makeup provider. Q&A with Ladyfair’s Bridal Makeup Artist in Triveniganj Q1: What makes Ladyfair the best choice for bridal makeup in Triveniganj? A1: Ladyfair offers expert bridal makeup services at home, using high-quality products to ensure a flawless and long-lasting look. Q2: What are the prices for bridal makeup in Triveniganj? A2: Our bridal makeup packages start at ₹10,000 for basic makeup, ₹12,000 for HD makeup, and ₹18,000 for airbrush makeup. Q3: How do I book Ladyfair’s bridal makeup services in Triveniganj? A3: You can book our services by calling 7004721239. We also offer consultations and trial sessions to ensure you get the look you want. Q4: What bridal makeup styles does Ladyfair offer in Triveniganj? A4: Ladyfair offers traditional, HD, and airbrush bridal makeup to suit different preferences and needs. Q5: Are makeup trials available before my wedding? A5: Yes, we offer trial sessions so you can finalize your bridal look ahead of time. Q6: What products does Ladyfair use for bridal makeup? A6: We use professional-grade, high-quality makeup products that are safe for all skin types and ensure a flawless finish. Q7: What other services does Ladyfair provide in Triveniganj? A7: In addition to bridal makeup, we offer makeup for engagements, receptions, parties, and other special occasions. Ladyfair is your ultimate choice for professional, at-home bridal makeup services in Triveniganj, ensuring a flawless and stress-free experience on your special day.

Posted By: 23rd November 2024
Bridal Makeup Artist in Pipra
Introduction In Pipra, Ladyfair is the premier choice for brides looking to achieve the perfect wedding day look with our professional at-home bridal makeup services. Whether you desire a traditional bridal look, an HD finish, or the flawless perfection of airbrush makeup, our expert makeup artist in Pipra ensures that you shine on your special day. Contact us today at 7004721239 to schedule your appointment. Why Choose Ladyfair for Bridal Makeup in Pipra Experienced Makeup Artist Our makeup artist in Pipra has years of experience in bridal makeup, creating personalized looks that complement your natural beauty and align with your style and preferences. Convenient At-Home Service Forget the stress of traveling to a salon. Ladyfair brings luxury beauty treatments directly to your doorstep with our at-home bridal makeup services, offering a truly personalized experience. Premium Makeup Products We use only high-quality, professional-grade makeup products to ensure a flawless, long-lasting look that remains perfect throughout your big day. Bridal Makeup Pricing in Pipra Our bridal makeup services in Pipra are tailored to fit different styles and budgets: Basic Bridal Makeup: ₹10,000 HD Bridal Makeup: ₹12,000 Airbrush Bridal Makeup: ₹18,000 For engagement and reception makeup: Basic Engagement/Reception Makeup: ₹6,000 HD Engagement/Reception Makeup: ₹8,000 Airbrush Engagement/Reception Makeup: ₹12,000 For parties: Basic Party Makeup: ₹2,500 HD Party Makeup: ₹3,500 Popular Bridal Makeup Styles in Pipra Traditional Bridal Makeup Our traditional bridal makeup in Pipra incorporates bold colors and intricate detailing to complement your wedding attire, creating an elegant and timeless look. HD Bridal Makeup For a high-definition finish that looks flawless both in photos and in person, HD bridal makeup is the perfect choice for brides who want a picture-perfect appearance all day. Airbrush Bridal Makeup Our airbrush makeup offers a lightweight, full-coverage finish that lasts all day, giving you a smooth and natural look while ensuring long-lasting perfection. How to Book Your Bridal Makeup with Ladyfair in Pipra Initial Contact: Call us at 7004721239 to discuss your makeup needs and schedule your appointment. Consultation Session: Meet with our makeup artist to discuss your wedding look, review your attire, and plan the perfect makeup style. Makeup Trial: We offer trial sessions to help you preview your bridal makeup look and make any adjustments. Wedding Day Makeup: On your wedding day, our makeup artist will arrive at your location in Pipra to provide flawless, hassle-free makeup service. Testimonials from Brides in Pipra Priya R., Pipra: "Ladyfair provided amazing service on my wedding day. The airbrush makeup looked flawless and lasted all day." Ritu K., Pipra: "I loved the HD makeup! It was perfect for my photos, and the at-home service was so convenient." Sneha S., Pipra: "My traditional bridal makeup was exactly what I wanted, and Ladyfair made the entire process stress-free." Preparing for Your Bridal Makeup Session To get the best results for your bridal makeup: Stay Hydrated: Keep your skin looking fresh by drinking plenty of water. Consistent Skincare: Stick to your regular skincare routine to maintain healthy, glowing skin. Avoid New Products: Use familiar products to prevent any reactions before your wedding day. Clear Communication: Discuss your makeup preferences and any concerns with our artist during the consultation. Additional Beauty Services by Ladyfair Beyond bridal makeup, Ladyfair offers a variety of beauty services in Pipra: Engagement and Reception Makeup: Customized looks for all pre-wedding events. Party Makeup: Perfect for birthdays, anniversaries, and special occasions. Everyday Makeup: Enhance your daily look with our expert makeup services. Special Occasion Makeup: Professional makeup for parties, celebrations, and formal events. The Future of Bridal Makeup in Pipra Ladyfair is dedicated to setting new standards in bridal beauty in Pipra with our innovative at-home services. As we continue to offer exceptional service, more brides are choosing Ladyfair as their preferred makeup provider. Q&A with Ladyfair’s Bridal Makeup Artist in Pipra Q1: What makes Ladyfair the best choice for bridal makeup in Pipra? A1: Ladyfair offers expert bridal makeup services at home, using high-quality products to ensure a flawless and long-lasting look. Q2: What are the prices for bridal makeup in Pipra? A2: Our bridal makeup packages start at ₹10,000 for basic makeup, ₹12,000 for HD makeup, and ₹18,000 for airbrush makeup. Q3: How do I book Ladyfair’s bridal makeup services in Pipra? A3: You can book our services by calling 7004721239. We also offer consultations and trial sessions to ensure you get the look you want. Q4: What bridal makeup styles does Ladyfair offer in Pipra? A4: Ladyfair offers traditional, HD, and airbrush bridal makeup to suit different preferences and needs. Q5: Are makeup trials available before my wedding? A5: Yes, we offer trial sessions so you can finalize your bridal look ahead of time. Q6: What products does Ladyfair use for bridal makeup? A6: We use professional-grade, high-quality makeup products that are safe for all skin types and ensure a flawless finish. Q7: What other services does Ladyfair provide in Pipra? A7: In addition to bridal makeup, we offer makeup for engagements, receptions, parties, and other special occasions. Ladyfair is your ultimate choice for professional, at-home bridal makeup services in Pipra, ensuring a flawless and stress-free experience on your special day.

Posted By: 23rd November 2024
Bridal Makeup Artist in Saraigarh-Bhaptiyahi
Introduction In Saraigarh-Bhaptiyahi, Ladyfair is the premier choice for brides looking to achieve the perfect wedding day look with our professional at-home bridal makeup services. Whether you desire a traditional bridal look, an HD finish, or the flawless perfection of airbrush makeup, our expert makeup artist in Saraigarh-Bhaptiyahi ensures that you shine on your special day. Contact us today at 7004721239 to schedule your appointment. Why Choose Ladyfair for Bridal Makeup in Saraigarh-Bhaptiyahi Experienced Makeup Artist Our makeup artist in Saraigarh-Bhaptiyahi has years of experience in bridal makeup, creating personalized looks that complement your natural beauty and align with your style and preferences. Convenient At-Home Service Forget the stress of traveling to a salon. Ladyfair brings luxury beauty treatments directly to your doorstep with our at-home bridal makeup services, offering a truly personalized experience. Premium Makeup Products We use only high-quality, professional-grade makeup products to ensure a flawless, long-lasting look that remains perfect throughout your big day. Bridal Makeup Pricing in Saraigarh-Bhaptiyahi Our bridal makeup services in Saraigarh-Bhaptiyahi are tailored to fit different styles and budgets: Basic Bridal Makeup: ₹10,000 HD Bridal Makeup: ₹12,000 Airbrush Bridal Makeup: ₹18,000 For engagement and reception makeup: Basic Engagement/Reception Makeup: ₹6,000 HD Engagement/Reception Makeup: ₹8,000 Airbrush Engagement/Reception Makeup: ₹12,000 For parties: Basic Party Makeup: ₹2,500 HD Party Makeup: ₹3,500 Popular Bridal Makeup Styles in Saraigarh-Bhaptiyahi Traditional Bridal Makeup Our traditional bridal makeup in Saraigarh-Bhaptiyahi incorporates bold colors and intricate detailing to complement your wedding attire, creating an elegant and timeless look. HD Bridal Makeup For a high-definition finish that looks flawless both in photos and in person, HD bridal makeup is the perfect choice for brides who want a picture-perfect appearance all day. Airbrush Bridal Makeup Our airbrush makeup offers a lightweight, full-coverage finish that lasts all day, giving you a smooth and natural look while ensuring long-lasting perfection. How to Book Your Bridal Makeup with Ladyfair in Saraigarh-Bhaptiyahi Initial Contact: Call us at 7004721239 to discuss your makeup needs and schedule your appointment. Consultation Session: Meet with our makeup artist to discuss your wedding look, review your attire, and plan the perfect makeup style. Makeup Trial: We offer trial sessions to help you preview your bridal makeup look and make any adjustments. Wedding Day Makeup: On your wedding day, our makeup artist will arrive at your location in Saraigarh-Bhaptiyahi to provide flawless, hassle-free makeup service. Testimonials from Brides in Saraigarh-Bhaptiyahi Priya R., Saraigarh-Bhaptiyahi: "Ladyfair provided amazing service on my wedding day. The airbrush makeup looked flawless and lasted all day." Ritu K., Saraigarh-Bhaptiyahi: "I loved the HD makeup! It was perfect for my photos, and the at-home service was so convenient." Sneha S., Saraigarh-Bhaptiyahi: "My traditional bridal makeup was exactly what I wanted, and Ladyfair made the entire process stress-free." Preparing for Your Bridal Makeup Session To get the best results for your bridal makeup: Stay Hydrated: Keep your skin looking fresh by drinking plenty of water. Consistent Skincare: Stick to your regular skincare routine to maintain healthy, glowing skin. Avoid New Products: Use familiar products to prevent any reactions before your wedding day. Clear Communication: Discuss your makeup preferences and any concerns with our artist during the consultation. Additional Beauty Services by Ladyfair Beyond bridal makeup, Ladyfair offers a variety of beauty services in Saraigarh-Bhaptiyahi: Engagement and Reception Makeup: Customized looks for all pre-wedding events. Party Makeup: Perfect for birthdays, anniversaries, and special occasions. Everyday Makeup: Enhance your daily look with our expert makeup services. Special Occasion Makeup: Professional makeup for parties, celebrations, and formal events. The Future of Bridal Makeup in Saraigarh-Bhaptiyahi Ladyfair is dedicated to setting new standards in bridal beauty in Saraigarh-Bhaptiyahi with our innovative at-home services. As we continue to offer exceptional service, more brides are choosing Ladyfair as their preferred makeup provider. Q&A with Ladyfair’s Bridal Makeup Artist in Saraigarh-Bhaptiyahi Q1: What makes Ladyfair the best choice for bridal makeup in Saraigarh-Bhaptiyahi? A1: Ladyfair offers expert bridal makeup services at home, using high-quality products to ensure a flawless and long-lasting look. Q2: What are the prices for bridal makeup in Saraigarh-Bhaptiyahi? A2: Our bridal makeup packages start at ₹10,000 for basic makeup, ₹12,000 for HD makeup, and ₹18,000 for airbrush makeup. Q3: How do I book Ladyfair’s bridal makeup services in Saraigarh-Bhaptiyahi? A3: You can book our services by calling 7004721239. We also offer consultations and trial sessions to ensure you get the look you want. Q4: What bridal makeup styles does Ladyfair offer in Saraigarh-Bhaptiyahi? A4: Ladyfair offers traditional, HD, and airbrush bridal makeup to suit different preferences and needs. Q5: Are makeup trials available before my wedding? A5: Yes, we offer trial sessions so you can finalize your bridal look ahead of time. Q6: What products does Ladyfair use for bridal makeup? A6: We use professional-grade, high-quality makeup products that are safe for all skin types and ensure a flawless finish. Q7: What other services does Ladyfair provide in Saraigarh-Bhaptiyahi? A7: In addition to bridal makeup, we offer makeup for engagements, receptions, parties, and other special occasions. Ladyfair is your ultimate choice for professional, at-home bridal makeup services in Saraigarh-Bhaptiyahi, ensuring a flawless and stress-free experience on your special day.

Posted By: 23rd November 2024
Bridal Makeup Artist in Ziradei
Introduction In Ziradei, Ladyfair is the premier choice for brides looking to achieve the perfect wedding day look with our professional at-home bridal makeup services. Whether you desire a traditional bridal look, an HD finish, or the flawless perfection of airbrush makeup, our expert makeup artist in Ziradei ensures that you shine on your special day. Contact us today at 7004721239 to schedule your appointment. Why Choose Ladyfair for Bridal Makeup in Ziradei Experienced Makeup Artist Our makeup artist in Ziradei has years of experience in bridal makeup, creating personalized looks that complement your natural beauty and align with your style and preferences. Convenient At-Home Service Forget the stress of traveling to a salon. Ladyfair brings luxury beauty treatments directly to your doorstep with our at-home bridal makeup services, offering a truly personalized experience. Premium Makeup Products We use only high-quality, professional-grade makeup products to ensure a flawless, long-lasting look that remains perfect throughout your big day. Bridal Makeup Pricing in Ziradei Our bridal makeup services in Ziradei are tailored to fit different styles and budgets: Basic Bridal Makeup: ₹10,000 HD Bridal Makeup: ₹12,000 Airbrush Bridal Makeup: ₹18,000 For engagement and reception makeup: Basic Engagement/Reception Makeup: ₹6,000 HD Engagement/Reception Makeup: ₹8,000 Airbrush Engagement/Reception Makeup: ₹12,000 For parties: Basic Party Makeup: ₹2,500 HD Party Makeup: ₹3,500 Popular Bridal Makeup Styles in Ziradei Traditional Bridal Makeup Our traditional bridal makeup in Ziradei incorporates bold colors and intricate detailing to complement your wedding attire, creating an elegant and timeless look. HD Bridal Makeup For a high-definition finish that looks flawless both in photos and in person, HD bridal makeup is the perfect choice for brides who want a picture-perfect appearance all day. Airbrush Bridal Makeup Our airbrush makeup offers a lightweight, full-coverage finish that lasts all day, giving you a smooth and natural look while ensuring long-lasting perfection. How to Book Your Bridal Makeup with Ladyfair in Ziradei Initial Contact: Call us at 7004721239 to discuss your makeup needs and schedule your appointment. Consultation Session: Meet with our makeup artist to discuss your wedding look, review your attire, and plan the perfect makeup style. Makeup Trial: We offer trial sessions to help you preview your bridal makeup look and make any adjustments. Wedding Day Makeup: On your wedding day, our makeup artist will arrive at your location in Ziradei to provide flawless, hassle-free makeup service. Testimonials from Brides in Ziradei Priya R., Ziradei: "Ladyfair provided amazing service on my wedding day. The airbrush makeup looked flawless and lasted all day." Ritu K., Ziradei: "I loved the HD makeup! It was perfect for my photos, and the at-home service was so convenient." Sneha S., Ziradei: "My traditional bridal makeup was exactly what I wanted, and Ladyfair made the entire process stress-free." Preparing for Your Bridal Makeup Session To get the best results for your bridal makeup: Stay Hydrated: Keep your skin looking fresh by drinking plenty of water. Consistent Skincare: Stick to your regular skincare routine to maintain healthy, glowing skin. Avoid New Products: Use familiar products to prevent any reactions before your wedding day. Clear Communication: Discuss your makeup preferences and any concerns with our artist during the consultation. Additional Beauty Services by Ladyfair Beyond bridal makeup, Ladyfair offers a variety of beauty services in Ziradei: Engagement and Reception Makeup: Customized looks for all pre-wedding events. Party Makeup: Perfect for birthdays, anniversaries, and special occasions. Everyday Makeup: Enhance your daily look with our expert makeup services. Special Occasion Makeup: Professional makeup for parties, celebrations, and formal events. The Future of Bridal Makeup in Ziradei Ladyfair is dedicated to setting new standards in bridal beauty in Ziradei with our innovative at-home services. As we continue to offer exceptional service, more brides are choosing Ladyfair as their preferred makeup provider. Q&A with Ladyfair’s Bridal Makeup Artist in Ziradei Q1: What makes Ladyfair the best choice for bridal makeup in Ziradei? A1: Ladyfair offers expert bridal makeup services at home, using high-quality products to ensure a flawless and long-lasting look. Q2: What are the prices for bridal makeup in Ziradei? A2: Our bridal makeup packages start at ₹10,000 for basic makeup, ₹12,000 for HD makeup, and ₹18,000 for airbrush makeup. Q3: How do I book Ladyfair’s bridal makeup services in Ziradei? A3: You can book our services by calling 7004721239. We also offer consultations and trial sessions to ensure you get the look you want. Q4: What bridal makeup styles does Ladyfair offer in Ziradei? A4: Ladyfair offers traditional, HD, and airbrush bridal makeup to suit different preferences and needs. Q5: Are makeup trials available before my wedding? A5: Yes, we offer trial sessions so you can finalize your bridal look ahead of time. Q6: What products does Ladyfair use for bridal makeup? A6: We use professional-grade, high-quality makeup products that are safe for all skin types and ensure a flawless finish. Q7: What other services does Ladyfair provide in Ziradei? A7: In addition to bridal makeup, we offer makeup for engagements, receptions, parties, and other special occasions. Ladyfair is your ultimate choice for professional, at-home bridal makeup services in Ziradei, ensuring a flawless and stress-free experience on your special day.

Posted By: 23rd November 2024
Bridal Makeup Artist in Kishanpur
Introduction In Kishanpur, Ladyfair is the premier choice for brides looking to achieve the perfect wedding day look with our professional at-home bridal makeup services. Whether you desire a traditional bridal look, an HD finish, or the flawless perfection of airbrush makeup, our expert makeup artist in Kishanpur ensures that you shine on your special day. Contact us today at 7004721239 to schedule your appointment. Why Choose Ladyfair for Bridal Makeup in Kishanpur Experienced Makeup Artist Our makeup artist in Kishanpur has years of experience in bridal makeup, creating personalized looks that complement your natural beauty and align with your style and preferences. Convenient At-Home Service Forget the stress of traveling to a salon. Ladyfair brings luxury beauty treatments directly to your doorstep with our at-home bridal makeup services, offering a truly personalized experience. Premium Makeup Products We use only high-quality, professional-grade makeup products to ensure a flawless, long-lasting look that remains perfect throughout your big day. Bridal Makeup Pricing in Kishanpur Our bridal makeup services in Kishanpur are tailored to fit different styles and budgets: Basic Bridal Makeup: ₹10,000 HD Bridal Makeup: ₹12,000 Airbrush Bridal Makeup: ₹18,000 For engagement and reception makeup: Basic Engagement/Reception Makeup: ₹6,000 HD Engagement/Reception Makeup: ₹8,000 Airbrush Engagement/Reception Makeup: ₹12,000 For parties: Basic Party Makeup: ₹2,500 HD Party Makeup: ₹3,500 Popular Bridal Makeup Styles in Kishanpur Traditional Bridal Makeup Our traditional bridal makeup in Kishanpur incorporates bold colors and intricate detailing to complement your wedding attire, creating an elegant and timeless look. HD Bridal Makeup For a high-definition finish that looks flawless both in photos and in person, HD bridal makeup is the perfect choice for brides who want a picture-perfect appearance all day. Airbrush Bridal Makeup Our airbrush makeup offers a lightweight, full-coverage finish that lasts all day, giving you a smooth and natural look while ensuring long-lasting perfection. How to Book Your Bridal Makeup with Ladyfair in Kishanpur Initial Contact: Call us at 7004721239 to discuss your makeup needs and schedule your appointment. Consultation Session: Meet with our makeup artist to discuss your wedding look, review your attire, and plan the perfect makeup style. Makeup Trial: We offer trial sessions to help you preview your bridal makeup look and make any adjustments. Wedding Day Makeup: On your wedding day, our makeup artist will arrive at your location in Kishanpur to provide flawless, hassle-free makeup service. Testimonials from Brides in Kishanpur Priya R., Kishanpur: "Ladyfair provided amazing service on my wedding day. The airbrush makeup looked flawless and lasted all day." Ritu K., Kishanpur: "I loved the HD makeup! It was perfect for my photos, and the at-home service was so convenient." Sneha S., Kishanpur: "My traditional bridal makeup was exactly what I wanted, and Ladyfair made the entire process stress-free." Preparing for Your Bridal Makeup Session To get the best results for your bridal makeup: Stay Hydrated: Keep your skin looking fresh by drinking plenty of water. Consistent Skincare: Stick to your regular skincare routine to maintain healthy, glowing skin. Avoid New Products: Use familiar products to prevent any reactions before your wedding day. Clear Communication: Discuss your makeup preferences and any concerns with our artist during the consultation. Additional Beauty Services by Ladyfair Beyond bridal makeup, Ladyfair offers a variety of beauty services in Kishanpur: Engagement and Reception Makeup: Customized looks for all pre-wedding events. Party Makeup: Perfect for birthdays, anniversaries, and special occasions. Everyday Makeup: Enhance your daily look with our expert makeup services. Special Occasion Makeup: Professional makeup for parties, celebrations, and formal events. The Future of Bridal Makeup in Kishanpur Ladyfair is dedicated to setting new standards in bridal beauty in Kishanpur with our innovative at-home services. As we continue to offer exceptional service, more brides are choosing Ladyfair as their preferred makeup provider. Q&A with Ladyfair’s Bridal Makeup Artist in Kishanpur Q1: What makes Ladyfair the best choice for bridal makeup in Kishanpur? A1: Ladyfair offers expert bridal makeup services at home, using high-quality products to ensure a flawless and long-lasting look. Q2: What are the prices for bridal makeup in Kishanpur? A2: Our bridal makeup packages start at ₹10,000 for basic makeup, ₹12,000 for HD makeup, and ₹18,000 for airbrush makeup. Q3: How do I book Ladyfair’s bridal makeup services in Kishanpur? A3: You can book our services by calling 7004721239. We also offer consultations and trial sessions to ensure you get the look you want. Q4: What bridal makeup styles does Ladyfair offer in Kishanpur? A4: Ladyfair offers traditional, HD, and airbrush bridal makeup to suit different preferences and needs. Q5: Are makeup trials available before my wedding? A5: Yes, we offer trial sessions so you can finalize your bridal look ahead of time. Q6: What products does Ladyfair use for bridal makeup? A6: We use professional-grade, high-quality makeup products that are safe for all skin types and ensure a flawless finish. Q7: What other services does Ladyfair provide in Kishanpur? A7: In addition to bridal makeup, we offer makeup for engagements, receptions, parties, and other special occasions. Ladyfair is your ultimate choice for professional, at-home bridal makeup services in Kishanpur, ensuring a flawless and stress-free experience on your special day.

Posted By: 23rd November 2024
Bridal Makeup Artist in Siwan Sadar
Introduction In Siwan Sadar, Ladyfair is the premier choice for brides looking to achieve the perfect wedding day look with our professional at-home bridal makeup services. Whether you desire a traditional bridal look, an HD finish, or the flawless perfection of airbrush makeup, our expert makeup artist in Siwan Sadar ensures that you shine on your special day. Contact us today at 7004721239 to schedule your appointment. Why Choose Ladyfair for Bridal Makeup in Siwan Sadar Experienced Makeup Artist Our makeup artist in Siwan Sadar has years of experience in bridal makeup, creating personalized looks that complement your natural beauty and align with your style and preferences. Convenient At-Home Service Forget the stress of traveling to a salon. Ladyfair brings luxury beauty treatments directly to your doorstep with our at-home bridal makeup services, offering a truly personalized experience. Premium Makeup Products We use only high-quality, professional-grade makeup products to ensure a flawless, long-lasting look that remains perfect throughout your big day. Bridal Makeup Pricing in Siwan Sadar Our bridal makeup services in Siwan Sadar are tailored to fit different styles and budgets: Basic Bridal Makeup: ₹10,000 HD Bridal Makeup: ₹12,000 Airbrush Bridal Makeup: ₹18,000 For engagement and reception makeup: Basic Engagement/Reception Makeup: ₹6,000 HD Engagement/Reception Makeup: ₹8,000 Airbrush Engagement/Reception Makeup: ₹12,000 For parties: Basic Party Makeup: ₹2,500 HD Party Makeup: ₹3,500 Popular Bridal Makeup Styles in Siwan Sadar Traditional Bridal Makeup Our traditional bridal makeup in Siwan Sadar incorporates bold colors and intricate detailing to complement your wedding attire, creating an elegant and timeless look. HD Bridal Makeup For a high-definition finish that looks flawless both in photos and in person, HD bridal makeup is the perfect choice for brides who want a picture-perfect appearance all day. Airbrush Bridal Makeup Our airbrush makeup offers a lightweight, full-coverage finish that lasts all day, giving you a smooth and natural look while ensuring long-lasting perfection. How to Book Your Bridal Makeup with Ladyfair in Siwan Sadar Initial Contact: Call us at 7004721239 to discuss your makeup needs and schedule your appointment. Consultation Session: Meet with our makeup artist to discuss your wedding look, review your attire, and plan the perfect makeup style. Makeup Trial: We offer trial sessions to help you preview your bridal makeup look and make any adjustments. Wedding Day Makeup: On your wedding day, our makeup artist will arrive at your location in Siwan Sadar to provide flawless, hassle-free makeup service. Testimonials from Brides in Siwan Sadar Priya R., Siwan Sadar: "Ladyfair provided amazing service on my wedding day. The airbrush makeup looked flawless and lasted all day." Ritu K., Siwan Sadar: "I loved the HD makeup! It was perfect for my photos, and the at-home service was so convenient." Sneha S., Siwan Sadar: "My traditional bridal makeup was exactly what I wanted, and Ladyfair made the entire process stress-free." Preparing for Your Bridal Makeup Session To get the best results for your bridal makeup: Stay Hydrated: Keep your skin looking fresh by drinking plenty of water. Consistent Skincare: Stick to your regular skincare routine to maintain healthy, glowing skin. Avoid New Products: Use familiar products to prevent any reactions before your wedding day. Clear Communication: Discuss your makeup preferences and any concerns with our artist during the consultation. Additional Beauty Services by Ladyfair Beyond bridal makeup, Ladyfair offers a variety of beauty services in Siwan Sadar: Engagement and Reception Makeup: Customized looks for all pre-wedding events. Party Makeup: Perfect for birthdays, anniversaries, and special occasions. Everyday Makeup: Enhance your daily look with our expert makeup services. Special Occasion Makeup: Professional makeup for parties, celebrations, and formal events. The Future of Bridal Makeup in Siwan Sadar Ladyfair is dedicated to setting new standards in bridal beauty in Siwan Sadar with our innovative at-home services. As we continue to offer exceptional service, more brides are choosing Ladyfair as their preferred makeup provider. Q&A with Ladyfair’s Bridal Makeup Artist in Siwan Sadar Q1: What makes Ladyfair the best choice for bridal makeup in Siwan Sadar? A1: Ladyfair offers expert bridal makeup services at home, using high-quality products to ensure a flawless and long-lasting look. Q2: What are the prices for bridal makeup in Siwan Sadar? A2: Our bridal makeup packages start at ₹10,000 for basic makeup, ₹12,000 for HD makeup, and ₹18,000 for airbrush makeup. Q3: How do I book Ladyfair’s bridal makeup services in Siwan Sadar? A3: You can book our services by calling 7004721239. We also offer consultations and trial sessions to ensure you get the look you want. Q4: What bridal makeup styles does Ladyfair offer in Siwan Sadar? A4: Ladyfair offers traditional, HD, and airbrush bridal makeup to suit different preferences and needs. Q5: Are makeup trials available before my wedding? A5: Yes, we offer trial sessions so you can finalize your bridal look ahead of time. Q6: What products does Ladyfair use for bridal makeup? A6: We use professional-grade, high-quality makeup products that are safe for all skin types and ensure a flawless finish. Q7: What other services does Ladyfair provide in Siwan Sadar? A7: In addition to bridal makeup, we offer makeup for engagements, receptions, parties, and other special occasions. Ladyfair is your ultimate choice for professional, at-home bridal makeup services in Siwan Sadar, ensuring a flawless and stress-free experience on your special day.

Posted By: 23rd November 2024
Bridal Makeup Artist in Siswan
Introduction In Siswan, Ladyfair is the premier choice for brides looking to achieve the perfect wedding day look with our professional at-home bridal makeup services. Whether you desire a traditional bridal look, an HD finish, or the flawless perfection of airbrush makeup, our expert makeup artist in Siswan ensures that you shine on your special day. Contact us today at 7004721239 to schedule your appointment. Why Choose Ladyfair for Bridal Makeup in Siswan Experienced Makeup Artist Our makeup artist in Siswan has years of experience in bridal makeup, creating personalized looks that complement your natural beauty and align with your style and preferences. Convenient At-Home Service Forget the stress of traveling to a salon. Ladyfair brings luxury beauty treatments directly to your doorstep with our at-home bridal makeup services, offering a truly personalized experience. Premium Makeup Products We use only high-quality, professional-grade makeup products to ensure a flawless, long-lasting look that remains perfect throughout your big day. Bridal Makeup Pricing in Siswan Our bridal makeup services in Siswan are tailored to fit different styles and budgets: Basic Bridal Makeup: ₹10,000 HD Bridal Makeup: ₹12,000 Airbrush Bridal Makeup: ₹18,000 For engagement and reception makeup: Basic Engagement/Reception Makeup: ₹6,000 HD Engagement/Reception Makeup: ₹8,000 Airbrush Engagement/Reception Makeup: ₹12,000 For parties: Basic Party Makeup: ₹2,500 HD Party Makeup: ₹3,500 Popular Bridal Makeup Styles in Siswan Traditional Bridal Makeup Our traditional bridal makeup in Siswan incorporates bold colors and intricate detailing to complement your wedding attire, creating an elegant and timeless look. HD Bridal Makeup For a high-definition finish that looks flawless both in photos and in person, HD bridal makeup is the perfect choice for brides who want a picture-perfect appearance all day. Airbrush Bridal Makeup Our airbrush makeup offers a lightweight, full-coverage finish that lasts all day, giving you a smooth and natural look while ensuring long-lasting perfection. How to Book Your Bridal Makeup with Ladyfair in Siswan Initial Contact: Call us at 7004721239 to discuss your makeup needs and schedule your appointment. Consultation Session: Meet with our makeup artist to discuss your wedding look, review your attire, and plan the perfect makeup style. Makeup Trial: We offer trial sessions to help you preview your bridal makeup look and make any adjustments. Wedding Day Makeup: On your wedding day, our makeup artist will arrive at your location in Siswan to provide flawless, hassle-free makeup service. Testimonials from Brides in Siswan Priya R., Siswan: "Ladyfair provided amazing service on my wedding day. The airbrush makeup looked flawless and lasted all day." Ritu K., Siswan: "I loved the HD makeup! It was perfect for my photos, and the at-home service was so convenient." Sneha S., Siswan: "My traditional bridal makeup was exactly what I wanted, and Ladyfair made the entire process stress-free." Preparing for Your Bridal Makeup Session To get the best results for your bridal makeup: Stay Hydrated: Keep your skin looking fresh by drinking plenty of water. Consistent Skincare: Stick to your regular skincare routine to maintain healthy, glowing skin. Avoid New Products: Use familiar products to prevent any reactions before your wedding day. Clear Communication: Discuss your makeup preferences and any concerns with our artist during the consultation. Additional Beauty Services by Ladyfair Beyond bridal makeup, Ladyfair offers a variety of beauty services in Siswan: Engagement and Reception Makeup: Customized looks for all pre-wedding events. Party Makeup: Perfect for birthdays, anniversaries, and special occasions. Everyday Makeup: Enhance your daily look with our expert makeup services. Special Occasion Makeup: Professional makeup for parties, celebrations, and formal events. The Future of Bridal Makeup in Siswan Ladyfair is dedicated to setting new standards in bridal beauty in Siswan with our innovative at-home services. As we continue to offer exceptional service, more brides are choosing Ladyfair as their preferred makeup provider. Q&A with Ladyfair’s Bridal Makeup Artist in Siswan Q1: What makes Ladyfair the best choice for bridal makeup in Siswan? A1: Ladyfair offers expert bridal makeup services at home, using high-quality products to ensure a flawless and long-lasting look. Q2: What are the prices for bridal makeup in Siswan? A2: Our bridal makeup packages start at ₹10,000 for basic makeup, ₹12,000 for HD makeup, and ₹18,000 for airbrush makeup. Q3: How do I book Ladyfair’s bridal makeup services in Siswan? A3: You can book our services by calling 7004721239. We also offer consultations and trial sessions to ensure you get the look you want. Q4: What bridal makeup styles does Ladyfair offer in Siswan? A4: Ladyfair offers traditional, HD, and airbrush bridal makeup to suit different preferences and needs. Q5: Are makeup trials available before my wedding? A5: Yes, we offer trial sessions so you can finalize your bridal look ahead of time. Q6: What products does Ladyfair use for bridal makeup? A6: We use professional-grade, high-quality makeup products that are safe for all skin types and ensure a flawless finish. Q7: What other services does Ladyfair provide in Siswan? A7: In addition to bridal makeup, we offer makeup for engagements, receptions, parties, and other special occasions. Ladyfair is your ultimate choice for professional, at-home bridal makeup services in Siswan, ensuring a flawless and stress-free experience on your special day.

Posted By: 23rd November 2024
Bridal Makeup Artist in Raghunathpur
Introduction In Raghunathpur, Ladyfair is the premier choice for brides looking to achieve the perfect wedding day look with our professional at-home bridal makeup services. Whether you desire a traditional bridal look, an HD finish, or the flawless perfection of airbrush makeup, our expert makeup artist in Raghunathpur ensures that you shine on your special day. Contact us today at 7004721239 to schedule your appointment. Why Choose Ladyfair for Bridal Makeup in Raghunathpur Experienced Makeup Artist Our makeup artist in Raghunathpur has years of experience in bridal makeup, creating personalized looks that complement your natural beauty and align with your style and preferences. Convenient At-Home Service Forget the stress of traveling to a salon. Ladyfair brings luxury beauty treatments directly to your doorstep with our at-home bridal makeup services, offering a truly personalized experience. Premium Makeup Products We use only high-quality, professional-grade makeup products to ensure a flawless, long-lasting look that remains perfect throughout your big day. Bridal Makeup Pricing in Raghunathpur Our bridal makeup services in Raghunathpur are tailored to fit different styles and budgets: Basic Bridal Makeup: ₹10,000 HD Bridal Makeup: ₹12,000 Airbrush Bridal Makeup: ₹18,000 For engagement and reception makeup: Basic Engagement/Reception Makeup: ₹6,000 HD Engagement/Reception Makeup: ₹8,000 Airbrush Engagement/Reception Makeup: ₹12,000 For parties: Basic Party Makeup: ₹2,500 HD Party Makeup: ₹3,500 Popular Bridal Makeup Styles in Raghunathpur Traditional Bridal Makeup Our traditional bridal makeup in Raghunathpur incorporates bold colors and intricate detailing to complement your wedding attire, creating an elegant and timeless look. HD Bridal Makeup For a high-definition finish that looks flawless both in photos and in person, HD bridal makeup is the perfect choice for brides who want a picture-perfect appearance all day. Airbrush Bridal Makeup Our airbrush makeup offers a lightweight, full-coverage finish that lasts all day, giving you a smooth and natural look while ensuring long-lasting perfection. How to Book Your Bridal Makeup with Ladyfair in Raghunathpur Initial Contact: Call us at 7004721239 to discuss your makeup needs and schedule your appointment. Consultation Session: Meet with our makeup artist to discuss your wedding look, review your attire, and plan the perfect makeup style. Makeup Trial: We offer trial sessions to help you preview your bridal makeup look and make any adjustments. Wedding Day Makeup: On your wedding day, our makeup artist will arrive at your location in Raghunathpur to provide flawless, hassle-free makeup service. Testimonials from Brides in Raghunathpur Priya R., Raghunathpur: "Ladyfair provided amazing service on my wedding day. The airbrush makeup looked flawless and lasted all day." Ritu K., Raghunathpur: "I loved the HD makeup! It was perfect for my photos, and the at-home service was so convenient." Sneha S., Raghunathpur: "My traditional bridal makeup was exactly what I wanted, and Ladyfair made the entire process stress-free." Preparing for Your Bridal Makeup Session To get the best results for your bridal makeup: Stay Hydrated: Keep your skin looking fresh by drinking plenty of water. Consistent Skincare: Stick to your regular skincare routine to maintain healthy, glowing skin. Avoid New Products: Use familiar products to prevent any reactions before your wedding day. Clear Communication: Discuss your makeup preferences and any concerns with our artist during the consultation. Additional Beauty Services by Ladyfair Beyond bridal makeup, Ladyfair offers a variety of beauty services in Raghunathpur: Engagement and Reception Makeup: Customized looks for all pre-wedding events. Party Makeup: Perfect for birthdays, anniversaries, and special occasions. Everyday Makeup: Enhance your daily look with our expert makeup services. Special Occasion Makeup: Professional makeup for parties, celebrations, and formal events. The Future of Bridal Makeup in Raghunathpur Ladyfair is dedicated to setting new standards in bridal beauty in Raghunathpur with our innovative at-home services. As we continue to offer exceptional service, more brides are choosing Ladyfair as their preferred makeup provider. Q&A with Ladyfair’s Bridal Makeup Artist in Raghunathpur Q1: What makes Ladyfair the best choice for bridal makeup in Raghunathpur? A1: Ladyfair offers expert bridal makeup services at home, using high-quality products to ensure a flawless and long-lasting look. Q2: What are the prices for bridal makeup in Raghunathpur? A2: Our bridal makeup packages start at ₹10,000 for basic makeup, ₹12,000 for HD makeup, and ₹18,000 for airbrush makeup. Q3: How do I book Ladyfair’s bridal makeup services in Raghunathpur? A3: You can book our services by calling 7004721239. We also offer consultations and trial sessions to ensure you get the look you want. Q4: What bridal makeup styles does Ladyfair offer in Raghunathpur? A4: Ladyfair offers traditional, HD, and airbrush bridal makeup to suit different preferences and needs. Q5: Are makeup trials available before my wedding? A5: Yes, we offer trial sessions so you can finalize your bridal look ahead of time. Q6: What products does Ladyfair use for bridal makeup? A6: We use professional-grade, high-quality makeup products that are safe for all skin types and ensure a flawless finish. Q7: What other services does Ladyfair provide in Raghunathpur? A7: In addition to bridal makeup, we offer makeup for engagements, receptions, parties, and other special occasions. Ladyfair is your ultimate choice for professional, at-home bridal makeup services in Raghunathpur, ensuring a flawless and stress-free experience on your special day.

Posted By: 23rd November 2024
Bridal Makeup Artist in Pachrukhi
Introduction In Pachrukhi, Ladyfair is the premier choice for brides looking to achieve the perfect wedding day look with our professional at-home bridal makeup services. Whether you desire a traditional bridal look, an HD finish, or the flawless perfection of airbrush makeup, our expert makeup artist in Pachrukhi ensures that you shine on your special day. Contact us today at 7004721239 to schedule your appointment. Why Choose Ladyfair for Bridal Makeup in Pachrukhi Experienced Makeup Artist Our makeup artist in Pachrukhi has years of experience in bridal makeup, creating personalized looks that complement your natural beauty and align with your style and preferences. Convenient At-Home Service Forget the stress of traveling to a salon. Ladyfair brings luxury beauty treatments directly to your doorstep with our at-home bridal makeup services, offering a truly personalized experience. Premium Makeup Products We use only high-quality, professional-grade makeup products to ensure a flawless, long-lasting look that remains perfect throughout your big day. Bridal Makeup Pricing in Pachrukhi Our bridal makeup services in Pachrukhi are tailored to fit different styles and budgets: Basic Bridal Makeup: ₹10,000 HD Bridal Makeup: ₹12,000 Airbrush Bridal Makeup: ₹18,000 For engagement and reception makeup: Basic Engagement/Reception Makeup: ₹6,000 HD Engagement/Reception Makeup: ₹8,000 Airbrush Engagement/Reception Makeup: ₹12,000 For parties: Basic Party Makeup: ₹2,500 HD Party Makeup: ₹3,500 Popular Bridal Makeup Styles in Pachrukhi Traditional Bridal Makeup Our traditional bridal makeup in Pachrukhi incorporates bold colors and intricate detailing to complement your wedding attire, creating an elegant and timeless look. HD Bridal Makeup For a high-definition finish that looks flawless both in photos and in person, HD bridal makeup is the perfect choice for brides who want a picture-perfect appearance all day. Airbrush Bridal Makeup Our airbrush makeup offers a lightweight, full-coverage finish that lasts all day, giving you a smooth and natural look while ensuring long-lasting perfection. How to Book Your Bridal Makeup with Ladyfair in Pachrukhi Initial Contact: Call us at 7004721239 to discuss your makeup needs and schedule your appointment. Consultation Session: Meet with our makeup artist to discuss your wedding look, review your attire, and plan the perfect makeup style. Makeup Trial: We offer trial sessions to help you preview your bridal makeup look and make any adjustments. Wedding Day Makeup: On your wedding day, our makeup artist will arrive at your location in Pachrukhi to provide flawless, hassle-free makeup service. Testimonials from Brides in Pachrukhi Priya R., Pachrukhi: "Ladyfair provided amazing service on my wedding day. The airbrush makeup looked flawless and lasted all day." Ritu K., Pachrukhi: "I loved the HD makeup! It was perfect for my photos, and the at-home service was so convenient." Sneha S., Pachrukhi: "My traditional bridal makeup was exactly what I wanted, and Ladyfair made the entire process stress-free." Preparing for Your Bridal Makeup Session To get the best results for your bridal makeup: Stay Hydrated: Keep your skin looking fresh by drinking plenty of water. Consistent Skincare: Stick to your regular skincare routine to maintain healthy, glowing skin. Avoid New Products: Use familiar products to prevent any reactions before your wedding day. Clear Communication: Discuss your makeup preferences and any concerns with our artist during the consultation. Additional Beauty Services by Ladyfair Beyond bridal makeup, Ladyfair offers a variety of beauty services in Pachrukhi: Engagement and Reception Makeup: Customized looks for all pre-wedding events. Party Makeup: Perfect for birthdays, anniversaries, and special occasions. Everyday Makeup: Enhance your daily look with our expert makeup services. Special Occasion Makeup: Professional makeup for parties, celebrations, and formal events. The Future of Bridal Makeup in Pachrukhi Ladyfair is dedicated to setting new standards in bridal beauty in Pachrukhi with our innovative at-home services. As we continue to offer exceptional service, more brides are choosing Ladyfair as their preferred makeup provider. Q&A with Ladyfair’s Bridal Makeup Artist in Pachrukhi Q1: What makes Ladyfair the best choice for bridal makeup in Pachrukhi? A1: Ladyfair offers expert bridal makeup services at home, using high-quality products to ensure a flawless and long-lasting look. Q2: What are the prices for bridal makeup in Pachrukhi? A2: Our bridal makeup packages start at ₹10,000 for basic makeup, ₹12,000 for HD makeup, and ₹18,000 for airbrush makeup. Q3: How do I book Ladyfair’s bridal makeup services in Pachrukhi? A3: You can book our services by calling 7004721239. We also offer consultations and trial sessions to ensure you get the look you want. Q4: What bridal makeup styles does Ladyfair offer in Pachrukhi? A4: Ladyfair offers traditional, HD, and airbrush bridal makeup to suit different preferences and needs. Q5: Are makeup trials available before my wedding? A5: Yes, we offer trial sessions so you can finalize your bridal look ahead of time. Q6: What products does Ladyfair use for bridal makeup? A6: We use professional-grade, high-quality makeup products that are safe for all skin types and ensure a flawless finish. Q7: What other services does Ladyfair provide in Pachrukhi? A7: In addition to bridal makeup, we offer makeup for engagements, receptions, parties, and other special occasions. Ladyfair is your ultimate choice for professional, at-home bridal makeup services in Pachrukhi, ensuring a flawless and stress-free experience on your special day.

Posted By: 23rd November 2024
Bridal Makeup Artist in Nautan
Introduction In Nautan, Ladyfair is the premier choice for brides looking to achieve the perfect wedding day look with our professional at-home bridal makeup services. Whether you desire a traditional bridal look, an HD finish, or the flawless perfection of airbrush makeup, our expert makeup artist in Nautan ensures that you shine on your special day. Contact us today at 7004721239 to schedule your appointment. Why Choose Ladyfair for Bridal Makeup in Nautan Experienced Makeup Artist Our makeup artist in Nautan has years of experience in bridal makeup, creating personalized looks that complement your natural beauty and align with your style and preferences. Convenient At-Home Service Forget the stress of traveling to a salon. Ladyfair brings luxury beauty treatments directly to your doorstep with our at-home bridal makeup services, offering a truly personalized experience. Premium Makeup Products We use only high-quality, professional-grade makeup products to ensure a flawless, long-lasting look that remains perfect throughout your big day. Bridal Makeup Pricing in Nautan Our bridal makeup services in Nautan are tailored to fit different styles and budgets: Basic Bridal Makeup: ₹10,000 HD Bridal Makeup: ₹12,000 Airbrush Bridal Makeup: ₹18,000 For engagement and reception makeup: Basic Engagement/Reception Makeup: ₹6,000 HD Engagement/Reception Makeup: ₹8,000 Airbrush Engagement/Reception Makeup: ₹12,000 For parties: Basic Party Makeup: ₹2,500 HD Party Makeup: ₹3,500 Popular Bridal Makeup Styles in Nautan Traditional Bridal Makeup Our traditional bridal makeup in Nautan incorporates bold colors and intricate detailing to complement your wedding attire, creating an elegant and timeless look. HD Bridal Makeup For a high-definition finish that looks flawless both in photos and in person, HD bridal makeup is the perfect choice for brides who want a picture-perfect appearance all day. Airbrush Bridal Makeup Our airbrush makeup offers a lightweight, full-coverage finish that lasts all day, giving you a smooth and natural look while ensuring long-lasting perfection. How to Book Your Bridal Makeup with Ladyfair in Nautan Initial Contact: Call us at 7004721239 to discuss your makeup needs and schedule your appointment. Consultation Session: Meet with our makeup artist to discuss your wedding look, review your attire, and plan the perfect makeup style. Makeup Trial: We offer trial sessions to help you preview your bridal makeup look and make any adjustments. Wedding Day Makeup: On your wedding day, our makeup artist will arrive at your location in Nautan to provide flawless, hassle-free makeup service. Testimonials from Brides in Nautan Priya R., Nautan: "Ladyfair provided amazing service on my wedding day. The airbrush makeup looked flawless and lasted all day." Ritu K., Nautan: "I loved the HD makeup! It was perfect for my photos, and the at-home service was so convenient." Sneha S., Nautan: "My traditional bridal makeup was exactly what I wanted, and Ladyfair made the entire process stress-free." Preparing for Your Bridal Makeup Session To get the best results for your bridal makeup: Stay Hydrated: Keep your skin looking fresh by drinking plenty of water. Consistent Skincare: Stick to your regular skincare routine to maintain healthy, glowing skin. Avoid New Products: Use familiar products to prevent any reactions before your wedding day. Clear Communication: Discuss your makeup preferences and any concerns with our artist during the consultation. Additional Beauty Services by Ladyfair Beyond bridal makeup, Ladyfair offers a variety of beauty services in Nautan: Engagement and Reception Makeup: Customized looks for all pre-wedding events. Party Makeup: Perfect for birthdays, anniversaries, and special occasions. Everyday Makeup: Enhance your daily look with our expert makeup services. Special Occasion Makeup: Professional makeup for parties, celebrations, and formal events. The Future of Bridal Makeup in Nautan Ladyfair is dedicated to setting new standards in bridal beauty in Nautan with our innovative at-home services. As we continue to offer exceptional service, more brides are choosing Ladyfair as their preferred makeup provider. Q&A with Ladyfair’s Bridal Makeup Artist in Nautan Q1: What makes Ladyfair the best choice for bridal makeup in Nautan? A1: Ladyfair offers expert bridal makeup services at home, using high-quality products to ensure a flawless and long-lasting look. Q2: What are the prices for bridal makeup in Nautan? A2: Our bridal makeup packages start at ₹10,000 for basic makeup, ₹12,000 for HD makeup, and ₹18,000 for airbrush makeup. Q3: How do I book Ladyfair’s bridal makeup services in Nautan? A3: You can book our services by calling 7004721239. We also offer consultations and trial sessions to ensure you get the look you want. Q4: What bridal makeup styles does Ladyfair offer in Nautan? A4: Ladyfair offers traditional, HD, and airbrush bridal makeup to suit different preferences and needs. Q5: Are makeup trials available before my wedding? A5: Yes, we offer trial sessions so you can finalize your bridal look ahead of time. Q6: What products does Ladyfair use for bridal makeup? A6: We use professional-grade, high-quality makeup products that are safe for all skin types and ensure a flawless finish. Q7: What other services does Ladyfair provide in Nautan? A7: In addition to bridal makeup, we offer makeup for engagements, receptions, parties, and other special occasions. Ladyfair is your ultimate choice for professional, at-home bridal makeup services in Nautan, ensuring a flawless and stress-free experience on your special day.

Posted By: 23rd November 2024
Bridal Makeup Artist in Mairwa
Introduction In Mairwa, Ladyfair is the premier choice for brides looking to achieve the perfect wedding day look with our professional at-home bridal makeup services. Whether you desire a traditional bridal look, an HD finish, or the flawless perfection of airbrush makeup, our expert makeup artist in Mairwa ensures that you shine on your special day. Contact us today at 7004721239 to schedule your appointment. Why Choose Ladyfair for Bridal Makeup in Mairwa Experienced Makeup Artist Our makeup artist in Mairwa has years of experience in bridal makeup, creating personalized looks that complement your natural beauty and align with your style and preferences. Convenient At-Home Service Forget the stress of traveling to a salon. Ladyfair brings luxury beauty treatments directly to your doorstep with our at-home bridal makeup services, offering a truly personalized experience. Premium Makeup Products We use only high-quality, professional-grade makeup products to ensure a flawless, long-lasting look that remains perfect throughout your big day. Bridal Makeup Pricing in Mairwa Our bridal makeup services in Mairwa are tailored to fit different styles and budgets: Basic Bridal Makeup: ₹10,000 HD Bridal Makeup: ₹12,000 Airbrush Bridal Makeup: ₹18,000 For engagement and reception makeup: Basic Engagement/Reception Makeup: ₹6,000 HD Engagement/Reception Makeup: ₹8,000 Airbrush Engagement/Reception Makeup: ₹12,000 For parties: Basic Party Makeup: ₹2,500 HD Party Makeup: ₹3,500 Popular Bridal Makeup Styles in Mairwa Traditional Bridal Makeup Our traditional bridal makeup in Mairwa incorporates bold colors and intricate detailing to complement your wedding attire, creating an elegant and timeless look. HD Bridal Makeup For a high-definition finish that looks flawless both in photos and in person, HD bridal makeup is the perfect choice for brides who want a picture-perfect appearance all day. Airbrush Bridal Makeup Our airbrush makeup offers a lightweight, full-coverage finish that lasts all day, giving you a smooth and natural look while ensuring long-lasting perfection. How to Book Your Bridal Makeup with Ladyfair in Mairwa Initial Contact: Call us at 7004721239 to discuss your makeup needs and schedule your appointment. Consultation Session: Meet with our makeup artist to discuss your wedding look, review your attire, and plan the perfect makeup style. Makeup Trial: We offer trial sessions to help you preview your bridal makeup look and make any adjustments. Wedding Day Makeup: On your wedding day, our makeup artist will arrive at your location in Mairwa to provide flawless, hassle-free makeup service. Testimonials from Brides in Mairwa Priya R., Mairwa: "Ladyfair provided amazing service on my wedding day. The airbrush makeup looked flawless and lasted all day." Ritu K., Mairwa: "I loved the HD makeup! It was perfect for my photos, and the at-home service was so convenient." Sneha S., Mairwa: "My traditional bridal makeup was exactly what I wanted, and Ladyfair made the entire process stress-free." Preparing for Your Bridal Makeup Session To get the best results for your bridal makeup: Stay Hydrated: Keep your skin looking fresh by drinking plenty of water. Consistent Skincare: Stick to your regular skincare routine to maintain healthy, glowing skin. Avoid New Products: Use familiar products to prevent any reactions before your wedding day. Clear Communication: Discuss your makeup preferences and any concerns with our artist during the consultation. Additional Beauty Services by Ladyfair Beyond bridal makeup, Ladyfair offers a variety of beauty services in Mairwa: Engagement and Reception Makeup: Customized looks for all pre-wedding events. Party Makeup: Perfect for birthdays, anniversaries, and special occasions. Everyday Makeup: Enhance your daily look with our expert makeup services. Special Occasion Makeup: Professional makeup for parties, celebrations, and formal events. The Future of Bridal Makeup in Mairwa Ladyfair is dedicated to setting new standards in bridal beauty in Mairwa with our innovative at-home services. As we continue to offer exceptional service, more brides are choosing Ladyfair as their preferred makeup provider. Q&A with Ladyfair’s Bridal Makeup Artist in Mairwa Q1: What makes Ladyfair the best choice for bridal makeup in Mairwa? A1: Ladyfair offers expert bridal makeup services at home, using high-quality products to ensure a flawless and long-lasting look. Q2: What are the prices for bridal makeup in Mairwa? A2: Our bridal makeup packages start at ₹10,000 for basic makeup, ₹12,000 for HD makeup, and ₹18,000 for airbrush makeup. Q3: How do I book Ladyfair’s bridal makeup services in Mairwa? A3: You can book our services by calling 7004721239. We also offer consultations and trial sessions to ensure you get the look you want. Q4: What bridal makeup styles does Ladyfair offer in Mairwa? A4: Ladyfair offers traditional, HD, and airbrush bridal makeup to suit different preferences and needs. Q5: Are makeup trials available before my wedding? A5: Yes, we offer trial sessions so you can finalize your bridal look ahead of time. Q6: What products does Ladyfair use for bridal makeup? A6: We use professional-grade, high-quality makeup products that are safe for all skin types and ensure a flawless finish. Q7: What other services does Ladyfair provide in Mairwa? A7: In addition to bridal makeup, we offer makeup for engagements, receptions, parties, and other special occasions. Ladyfair is your ultimate choice for professional, at-home bridal makeup services in Mairwa, ensuring a flawless and stress-free experience on your special day.

Posted By: 23rd November 2024
Bridal Makeup Artist in Hussainganj
Introduction In Hussainganj, Ladyfair is the premier choice for brides looking to achieve the perfect wedding day look with our professional at-home bridal makeup services. Whether you desire a traditional bridal look, an HD finish, or the flawless perfection of airbrush makeup, our expert makeup artist in Hussainganj ensures that you shine on your special day. Contact us today at 7004721239 to schedule your appointment. Why Choose Ladyfair for Bridal Makeup in Hussainganj Experienced Makeup Artist Our makeup artist in Hussainganj has years of experience in bridal makeup, creating personalized looks that complement your natural beauty and align with your style and preferences. Convenient At-Home Service Forget the stress of traveling to a salon. Ladyfair brings luxury beauty treatments directly to your doorstep with our at-home bridal makeup services, offering a truly personalized experience. Premium Makeup Products We use only high-quality, professional-grade makeup products to ensure a flawless, long-lasting look that remains perfect throughout your big day. Bridal Makeup Pricing in Hussainganj Our bridal makeup services in Hussainganj are tailored to fit different styles and budgets: Basic Bridal Makeup: ₹10,000 HD Bridal Makeup: ₹12,000 Airbrush Bridal Makeup: ₹18,000 For engagement and reception makeup: Basic Engagement/Reception Makeup: ₹6,000 HD Engagement/Reception Makeup: ₹8,000 Airbrush Engagement/Reception Makeup: ₹12,000 For parties: Basic Party Makeup: ₹2,500 HD Party Makeup: ₹3,500 Popular Bridal Makeup Styles in Hussainganj Traditional Bridal Makeup Our traditional bridal makeup in Hussainganj incorporates bold colors and intricate detailing to complement your wedding attire, creating an elegant and timeless look. HD Bridal Makeup For a high-definition finish that looks flawless both in photos and in person, HD bridal makeup is the perfect choice for brides who want a picture-perfect appearance all day. Airbrush Bridal Makeup Our airbrush makeup offers a lightweight, full-coverage finish that lasts all day, giving you a smooth and natural look while ensuring long-lasting perfection. How to Book Your Bridal Makeup with Ladyfair in Hussainganj Initial Contact: Call us at 7004721239 to discuss your makeup needs and schedule your appointment. Consultation Session: Meet with our makeup artist to discuss your wedding look, review your attire, and plan the perfect makeup style. Makeup Trial: We offer trial sessions to help you preview your bridal makeup look and make any adjustments. Wedding Day Makeup: On your wedding day, our makeup artist will arrive at your location in Hussainganj to provide flawless, hassle-free makeup service. Testimonials from Brides in Hussainganj Priya R., Hussainganj: "Ladyfair provided amazing service on my wedding day. The airbrush makeup looked flawless and lasted all day." Ritu K., Hussainganj: "I loved the HD makeup! It was perfect for my photos, and the at-home service was so convenient." Sneha S., Hussainganj: "My traditional bridal makeup was exactly what I wanted, and Ladyfair made the entire process stress-free." Preparing for Your Bridal Makeup Session To get the best results for your bridal makeup: Stay Hydrated: Keep your skin looking fresh by drinking plenty of water. Consistent Skincare: Stick to your regular skincare routine to maintain healthy, glowing skin. Avoid New Products: Use familiar products to prevent any reactions before your wedding day. Clear Communication: Discuss your makeup preferences and any concerns with our artist during the consultation. Additional Beauty Services by Ladyfair Beyond bridal makeup, Ladyfair offers a variety of beauty services in Hussainganj: Engagement and Reception Makeup: Customized looks for all pre-wedding events. Party Makeup: Perfect for birthdays, anniversaries, and special occasions. Everyday Makeup: Enhance your daily look with our expert makeup services. Special Occasion Makeup: Professional makeup for parties, celebrations, and formal events. The Future of Bridal Makeup in Hussainganj Ladyfair is dedicated to setting new standards in bridal beauty in Hussainganj with our innovative at-home services. As we continue to offer exceptional service, more brides are choosing Ladyfair as their preferred makeup provider. Q&A with Ladyfair’s Bridal Makeup Artist in Hussainganj Q1: What makes Ladyfair the best choice for bridal makeup in Hussainganj? A1: Ladyfair offers expert bridal makeup services at home, using high-quality products to ensure a flawless and long-lasting look. Q2: What are the prices for bridal makeup in Hussainganj? A2: Our bridal makeup packages start at ₹10,000 for basic makeup, ₹12,000 for HD makeup, and ₹18,000 for airbrush makeup. Q3: How do I book Ladyfair’s bridal makeup services in Hussainganj? A3: You can book our services by calling 7004721239. We also offer consultations and trial sessions to ensure you get the look you want. Q4: What bridal makeup styles does Ladyfair offer in Hussainganj? A4: Ladyfair offers traditional, HD, and airbrush bridal makeup to suit different preferences and needs. Q5: Are makeup trials available before my wedding? A5: Yes, we offer trial sessions so you can finalize your bridal look ahead of time. Q6: What products does Ladyfair use for bridal makeup? A6: We use professional-grade, high-quality makeup products that are safe for all skin types and ensure a flawless finish. Q7: What other services does Ladyfair provide in Hussainganj? A7: In addition to bridal makeup, we offer makeup for engagements, receptions, parties, and other special occasions. Ladyfair is your ultimate choice for professional, at-home bridal makeup services in Hussainganj, ensuring a flawless and stress-free experience on your special day.

Posted By: 22nd November 2024
Bridal Makeup Artist in Hasan Pura
Introduction In Hasan Pura, Ladyfair is the premier choice for brides looking to achieve the perfect wedding day look with our professional at-home bridal makeup services. Whether you desire a traditional bridal look, an HD finish, or the flawless perfection of airbrush makeup, our expert makeup artist in Hasan Pura ensures that you shine on your special day. Contact us today at 7004721239 to schedule your appointment. Why Choose Ladyfair for Bridal Makeup in Hasan Pura Experienced Makeup Artist Our makeup artist in Hasan Pura has years of experience in bridal makeup, creating personalized looks that complement your natural beauty and align with your style and preferences. Convenient At-Home Service Forget the stress of traveling to a salon. Ladyfair brings luxury beauty treatments directly to your doorstep with our at-home bridal makeup services, offering a truly personalized experience. Premium Makeup Products We use only high-quality, professional-grade makeup products to ensure a flawless, long-lasting look that remains perfect throughout your big day. Bridal Makeup Pricing in Hasan Pura Our bridal makeup services in Hasan Pura are tailored to fit different styles and budgets: Basic Bridal Makeup: ₹10,000 HD Bridal Makeup: ₹12,000 Airbrush Bridal Makeup: ₹18,000 For engagement and reception makeup: Basic Engagement/Reception Makeup: ₹6,000 HD Engagement/Reception Makeup: ₹8,000 Airbrush Engagement/Reception Makeup: ₹12,000 For parties: Basic Party Makeup: ₹2,500 HD Party Makeup: ₹3,500 Popular Bridal Makeup Styles in Hasan Pura Traditional Bridal Makeup Our traditional bridal makeup in Hasan Pura incorporates bold colors and intricate detailing to complement your wedding attire, creating an elegant and timeless look. HD Bridal Makeup For a high-definition finish that looks flawless both in photos and in person, HD bridal makeup is the perfect choice for brides who want a picture-perfect appearance all day. Airbrush Bridal Makeup Our airbrush makeup offers a lightweight, full-coverage finish that lasts all day, giving you a smooth and natural look while ensuring long-lasting perfection. How to Book Your Bridal Makeup with Ladyfair in Hasan Pura Initial Contact: Call us at 7004721239 to discuss your makeup needs and schedule your appointment. Consultation Session: Meet with our makeup artist to discuss your wedding look, review your attire, and plan the perfect makeup style. Makeup Trial: We offer trial sessions to help you preview your bridal makeup look and make any adjustments. Wedding Day Makeup: On your wedding day, our makeup artist will arrive at your location in Hasan Pura to provide flawless, hassle-free makeup service. Testimonials from Brides in Hasan Pura Priya R., Hasan Pura: "Ladyfair provided amazing service on my wedding day. The airbrush makeup looked flawless and lasted all day." Ritu K., Hasan Pura: "I loved the HD makeup! It was perfect for my photos, and the at-home service was so convenient." Sneha S., Hasan Pura: "My traditional bridal makeup was exactly what I wanted, and Ladyfair made the entire process stress-free." Preparing for Your Bridal Makeup Session To get the best results for your bridal makeup: Stay Hydrated: Keep your skin looking fresh by drinking plenty of water. Consistent Skincare: Stick to your regular skincare routine to maintain healthy, glowing skin. Avoid New Products: Use familiar products to prevent any reactions before your wedding day. Clear Communication: Discuss your makeup preferences and any concerns with our artist during the consultation. Additional Beauty Services by Ladyfair Beyond bridal makeup, Ladyfair offers a variety of beauty services in Hasan Pura: Engagement and Reception Makeup: Customized looks for all pre-wedding events. Party Makeup: Perfect for birthdays, anniversaries, and special occasions. Everyday Makeup: Enhance your daily look with our expert makeup services. Special Occasion Makeup: Professional makeup for parties, celebrations, and formal events. The Future of Bridal Makeup in Hasan Pura Ladyfair is dedicated to setting new standards in bridal beauty in Hasan Pura with our innovative at-home services. As we continue to offer exceptional service, more brides are choosing Ladyfair as their preferred makeup provider. Q&A with Ladyfair’s Bridal Makeup Artist in Hasan Pura Q1: What makes Ladyfair the best choice for bridal makeup in Hasan Pura? A1: Ladyfair offers expert bridal makeup services at home, using high-quality products to ensure a flawless and long-lasting look. Q2: What are the prices for bridal makeup in Hasan Pura? A2: Our bridal makeup packages start at ₹10,000 for basic makeup, ₹12,000 for HD makeup, and ₹18,000 for airbrush makeup. Q3: How do I book Ladyfair’s bridal makeup services in Hasan Pura? A3: You can book our services by calling 7004721239. We also offer consultations and trial sessions to ensure you get the look you want. Q4: What bridal makeup styles does Ladyfair offer in Hasan Pura? A4: Ladyfair offers traditional, HD, and airbrush bridal makeup to suit different preferences and needs. Q5: Are makeup trials available before my wedding? A5: Yes, we offer trial sessions so you can finalize your bridal look ahead of time. Q6: What products does Ladyfair use for bridal makeup? A6: We use professional-grade, high-quality makeup products that are safe for all skin types and ensure a flawless finish. Q7: What other services does Ladyfair provide in Hasan Pura? A7: In addition to bridal makeup, we offer makeup for engagements, receptions, parties, and other special occasions. Ladyfair is your ultimate choice for professional, at-home bridal makeup services in Hasan Pura, ensuring a flawless and stress-free experience on your special day.

Posted By: 22nd November 2024
Bridal Makeup Artist in Guthani
Introduction In Guthani, Ladyfair is the premier choice for brides looking to achieve the perfect wedding day look with our professional at-home bridal makeup services. Whether you desire a traditional bridal look, an HD finish, or the flawless perfection of airbrush makeup, our expert makeup artist in Guthani ensures that you shine on your special day. Contact us today at 7004721239 to schedule your appointment. Why Choose Ladyfair for Bridal Makeup in Guthani Experienced Makeup Artist Our makeup artist in Guthani has years of experience in bridal makeup, creating personalized looks that complement your natural beauty and align with your style and preferences. Convenient At-Home Service Forget the stress of traveling to a salon. Ladyfair brings luxury beauty treatments directly to your doorstep with our at-home bridal makeup services, offering a truly personalized experience. Premium Makeup Products We use only high-quality, professional-grade makeup products to ensure a flawless, long-lasting look that remains perfect throughout your big day. Bridal Makeup Pricing in Guthani Our bridal makeup services in Guthani are tailored to fit different styles and budgets: Basic Bridal Makeup: ₹10,000 HD Bridal Makeup: ₹12,000 Airbrush Bridal Makeup: ₹18,000 For engagement and reception makeup: Basic Engagement/Reception Makeup: ₹6,000 HD Engagement/Reception Makeup: ₹8,000 Airbrush Engagement/Reception Makeup: ₹12,000 For parties: Basic Party Makeup: ₹2,500 HD Party Makeup: ₹3,500 Popular Bridal Makeup Styles in Guthani Traditional Bridal Makeup Our traditional bridal makeup in Guthani incorporates bold colors and intricate detailing to complement your wedding attire, creating an elegant and timeless look. HD Bridal Makeup For a high-definition finish that looks flawless both in photos and in person, HD bridal makeup is the perfect choice for brides who want a picture-perfect appearance all day. Airbrush Bridal Makeup Our airbrush makeup offers a lightweight, full-coverage finish that lasts all day, giving you a smooth and natural look while ensuring long-lasting perfection. How to Book Your Bridal Makeup with Ladyfair in Guthani Initial Contact: Call us at 7004721239 to discuss your makeup needs and schedule your appointment. Consultation Session: Meet with our makeup artist to discuss your wedding look, review your attire, and plan the perfect makeup style. Makeup Trial: We offer trial sessions to help you preview your bridal makeup look and make any adjustments. Wedding Day Makeup: On your wedding day, our makeup artist will arrive at your location in Guthani to provide flawless, hassle-free makeup service. Testimonials from Brides in Guthani Priya R., Guthani: "Ladyfair provided amazing service on my wedding day. The airbrush makeup looked flawless and lasted all day." Ritu K., Guthani: "I loved the HD makeup! It was perfect for my photos, and the at-home service was so convenient." Sneha S., Guthani: "My traditional bridal makeup was exactly what I wanted, and Ladyfair made the entire process stress-free." Preparing for Your Bridal Makeup Session To get the best results for your bridal makeup: Stay Hydrated: Keep your skin looking fresh by drinking plenty of water. Consistent Skincare: Stick to your regular skincare routine to maintain healthy, glowing skin. Avoid New Products: Use familiar products to prevent any reactions before your wedding day. Clear Communication: Discuss your makeup preferences and any concerns with our artist during the consultation. Additional Beauty Services by Ladyfair Beyond bridal makeup, Ladyfair offers a variety of beauty services in Guthani: Engagement and Reception Makeup: Customized looks for all pre-wedding events. Party Makeup: Perfect for birthdays, anniversaries, and special occasions. Everyday Makeup: Enhance your daily look with our expert makeup services. Special Occasion Makeup: Professional makeup for parties, celebrations, and formal events. The Future of Bridal Makeup in Guthani Ladyfair is dedicated to setting new standards in bridal beauty in Guthani with our innovative at-home services. As we continue to offer exceptional service, more brides are choosing Ladyfair as their preferred makeup provider. Q&A with Ladyfair’s Bridal Makeup Artist in Guthani Q1: What makes Ladyfair the best choice for bridal makeup in Guthani? A1: Ladyfair offers expert bridal makeup services at home, using high-quality products to ensure a flawless and long-lasting look. Q2: What are the prices for bridal makeup in Guthani? A2: Our bridal makeup packages start at ₹10,000 for basic makeup, ₹12,000 for HD makeup, and ₹18,000 for airbrush makeup. Q3: How do I book Ladyfair’s bridal makeup services in Guthani? A3: You can book our services by calling 7004721239. We also offer consultations and trial sessions to ensure you get the look you want. Q4: What bridal makeup styles does Ladyfair offer in Guthani? A4: Ladyfair offers traditional, HD, and airbrush bridal makeup to suit different preferences and needs. Q5: Are makeup trials available before my wedding? A5: Yes, we offer trial sessions so you can finalize your bridal look ahead of time. Q6: What products does Ladyfair use for bridal makeup? A6: We use professional-grade, high-quality makeup products that are safe for all skin types and ensure a flawless finish. Q7: What other services does Ladyfair provide in Guthani? A7: In addition to bridal makeup, we offer makeup for engagements, receptions, parties, and other special occasions. Ladyfair is your ultimate choice for professional, at-home bridal makeup services in Guthani, ensuring a flawless and stress-free experience on your special day.

Posted By: 22nd November 2024
Bridal Makeup Artist in Darauli
Introduction In Darauli, Ladyfair is the premier choice for brides looking to achieve the perfect wedding day look with our professional at-home bridal makeup services. Whether you desire a traditional bridal look, an HD finish, or the flawless perfection of airbrush makeup, our expert makeup artist in Darauli ensures that you shine on your special day. Contact us today at 7004721239 to schedule your appointment. Why Choose Ladyfair for Bridal Makeup in Darauli Experienced Makeup Artist Our makeup artist in Darauli has years of experience in bridal makeup, creating personalized looks that complement your natural beauty and align with your style and preferences. Convenient At-Home Service Forget the stress of traveling to a salon. Ladyfair brings luxury beauty treatments directly to your doorstep with our at-home bridal makeup services, offering a truly personalized experience. Premium Makeup Products We use only high-quality, professional-grade makeup products to ensure a flawless, long-lasting look that remains perfect throughout your big day. Bridal Makeup Pricing in Darauli Our bridal makeup services in Darauli are tailored to fit different styles and budgets: Basic Bridal Makeup: ₹10,000 HD Bridal Makeup: ₹12,000 Airbrush Bridal Makeup: ₹18,000 For engagement and reception makeup: Basic Engagement/Reception Makeup: ₹6,000 HD Engagement/Reception Makeup: ₹8,000 Airbrush Engagement/Reception Makeup: ₹12,000 For parties: Basic Party Makeup: ₹2,500 HD Party Makeup: ₹3,500 Popular Bridal Makeup Styles in Darauli Traditional Bridal Makeup Our traditional bridal makeup in Darauli incorporates bold colors and intricate detailing to complement your wedding attire, creating an elegant and timeless look. HD Bridal Makeup For a high-definition finish that looks flawless both in photos and in person, HD bridal makeup is the perfect choice for brides who want a picture-perfect appearance all day. Airbrush Bridal Makeup Our airbrush makeup offers a lightweight, full-coverage finish that lasts all day, giving you a smooth and natural look while ensuring long-lasting perfection. How to Book Your Bridal Makeup with Ladyfair in Darauli Initial Contact: Call us at 7004721239 to discuss your makeup needs and schedule your appointment. Consultation Session: Meet with our makeup artist to discuss your wedding look, review your attire, and plan the perfect makeup style. Makeup Trial: We offer trial sessions to help you preview your bridal makeup look and make any adjustments. Wedding Day Makeup: On your wedding day, our makeup artist will arrive at your location in Darauli to provide flawless, hassle-free makeup service. Testimonials from Brides in Darauli Priya R., Darauli: "Ladyfair provided amazing service on my wedding day. The airbrush makeup looked flawless and lasted all day." Ritu K., Darauli: "I loved the HD makeup! It was perfect for my photos, and the at-home service was so convenient." Sneha S., Darauli: "My traditional bridal makeup was exactly what I wanted, and Ladyfair made the entire process stress-free." Preparing for Your Bridal Makeup Session To get the best results for your bridal makeup: Stay Hydrated: Keep your skin looking fresh by drinking plenty of water. Consistent Skincare: Stick to your regular skincare routine to maintain healthy, glowing skin. Avoid New Products: Use familiar products to prevent any reactions before your wedding day. Clear Communication: Discuss your makeup preferences and any concerns with our artist during the consultation. Additional Beauty Services by Ladyfair Beyond bridal makeup, Ladyfair offers a variety of beauty services in Darauli: Engagement and Reception Makeup: Customized looks for all pre-wedding events. Party Makeup: Perfect for birthdays, anniversaries, and special occasions. Everyday Makeup: Enhance your daily look with our expert makeup services. Special Occasion Makeup: Professional makeup for parties, celebrations, and formal events. The Future of Bridal Makeup in Darauli Ladyfair is dedicated to setting new standards in bridal beauty in Darauli with our innovative at-home services. As we continue to offer exceptional service, more brides are choosing Ladyfair as their preferred makeup provider. Q&A with Ladyfair’s Bridal Makeup Artist in Darauli Q1: What makes Ladyfair the best choice for bridal makeup in Darauli? A1: Ladyfair offers expert bridal makeup services at home, using high-quality products to ensure a flawless and long-lasting look. Q2: What are the prices for bridal makeup in Darauli? A2: Our bridal makeup packages start at ₹10,000 for basic makeup, ₹12,000 for HD makeup, and ₹18,000 for airbrush makeup. Q3: How do I book Ladyfair’s bridal makeup services in Darauli? A3: You can book our services by calling 7004721239. We also offer consultations and trial sessions to ensure you get the look you want. Q4: What bridal makeup styles does Ladyfair offer in Darauli? A4: Ladyfair offers traditional, HD, and airbrush bridal makeup to suit different preferences and needs. Q5: Are makeup trials available before my wedding? A5: Yes, we offer trial sessions so you can finalize your bridal look ahead of time. Q6: What products does Ladyfair use for bridal makeup? A6: We use professional-grade, high-quality makeup products that are safe for all skin types and ensure a flawless finish. Q7: What other services does Ladyfair provide in Darauli? A7: In addition to bridal makeup, we offer makeup for engagements, receptions, parties, and other special occasions. Ladyfair is your ultimate choice for professional, at-home bridal makeup services in Darauli, ensuring a flawless and stress-free experience on your special day.

Posted By: 22nd November 2024
Bridal Makeup Artist in BARHARIA
Introduction In Barharia, Ladyfair is the premier choice for brides looking to achieve the perfect wedding day look with our professional at-home bridal makeup services. Whether you desire a traditional bridal look, an HD finish, or the flawless perfection of airbrush makeup, our expert makeup artist in Barharia ensures that you shine on your special day. Contact us today at 7004721239 to schedule your appointment. Why Choose Ladyfair for Bridal Makeup in Barharia Experienced Makeup Artist Our makeup artist in Barharia has years of experience in bridal makeup, creating personalized looks that complement your natural beauty and align with your style and preferences. Convenient At-Home Service Forget the stress of traveling to a salon. Ladyfair brings luxury beauty treatments directly to your doorstep with our at-home bridal makeup services, offering a truly personalized experience. Premium Makeup Products We use only high-quality, professional-grade makeup products to ensure a flawless, long-lasting look that remains perfect throughout your big day. Bridal Makeup Pricing in Barharia Our bridal makeup services in Barharia are tailored to fit different styles and budgets: Basic Bridal Makeup: ₹10,000 HD Bridal Makeup: ₹12,000 Airbrush Bridal Makeup: ₹18,000 For engagement and reception makeup: Basic Engagement/Reception Makeup: ₹6,000 HD Engagement/Reception Makeup: ₹8,000 Airbrush Engagement/Reception Makeup: ₹12,000 For parties: Basic Party Makeup: ₹2,500 HD Party Makeup: ₹3,500 Popular Bridal Makeup Styles in Barharia Traditional Bridal Makeup Our traditional bridal makeup in Barharia incorporates bold colors and intricate detailing to complement your wedding attire, creating an elegant and timeless look. HD Bridal Makeup For a high-definition finish that looks flawless both in photos and in person, HD bridal makeup is the perfect choice for brides who want a picture-perfect appearance all day. Airbrush Bridal Makeup Our airbrush makeup offers a lightweight, full-coverage finish that lasts all day, giving you a smooth and natural look while ensuring long-lasting perfection. How to Book Your Bridal Makeup with Ladyfair in Barharia Initial Contact: Call us at 7004721239 to discuss your makeup needs and schedule your appointment. Consultation Session: Meet with our makeup artist to discuss your wedding look, review your attire, and plan the perfect makeup style. Makeup Trial: We offer trial sessions to help you preview your bridal makeup look and make any adjustments. Wedding Day Makeup: On your wedding day, our makeup artist will arrive at your location in Barharia to provide flawless, hassle-free makeup service. Testimonials from Brides in Barharia Priya R., Barharia: "Ladyfair provided amazing service on my wedding day. The airbrush makeup looked flawless and lasted all day." Ritu K., Barharia: "I loved the HD makeup! It was perfect for my photos, and the at-home service was so convenient." Sneha S., Barharia: "My traditional bridal makeup was exactly what I wanted, and Ladyfair made the entire process stress-free." Preparing for Your Bridal Makeup Session To get the best results for your bridal makeup: Stay Hydrated: Keep your skin looking fresh by drinking plenty of water. Consistent Skincare: Stick to your regular skincare routine to maintain healthy, glowing skin. Avoid New Products: Use familiar products to prevent any reactions before your wedding day. Clear Communication: Discuss your makeup preferences and any concerns with our artist during the consultation. Additional Beauty Services by Ladyfair Beyond bridal makeup, Ladyfair offers a variety of beauty services in Barharia: Engagement and Reception Makeup: Customized looks for all pre-wedding events. Party Makeup: Perfect for birthdays, anniversaries, and special occasions. Everyday Makeup: Enhance your daily look with our expert makeup services. Special Occasion Makeup: Professional makeup for parties, celebrations, and formal events. The Future of Bridal Makeup in Barharia Ladyfair is dedicated to setting new standards in bridal beauty in Barharia with our innovative at-home services. As we continue to offer exceptional service, more brides are choosing Ladyfair as their preferred makeup provider. Q&A with Ladyfair’s Bridal Makeup Artist in Barharia Q1: What makes Ladyfair the best choice for bridal makeup in Barharia? A1: Ladyfair offers expert bridal makeup services at home, using high-quality products to ensure a flawless and long-lasting look. Q2: What are the prices for bridal makeup in Barharia? A2: Our bridal makeup packages start at ₹10,000 for basic makeup, ₹12,000 for HD makeup, and ₹18,000 for airbrush makeup. Q3: How do I book Ladyfair’s bridal makeup services in Barharia? A3: You can book our services by calling 7004721239. We also offer consultations and trial sessions to ensure you get the look you want. Q4: What bridal makeup styles does Ladyfair offer in Barharia? A4: Ladyfair offers traditional, HD, and airbrush bridal makeup to suit different preferences and needs. Q5: Are makeup trials available before my wedding? A5: Yes, we offer trial sessions so you can finalize your bridal look ahead of time. Q6: What products does Ladyfair use for bridal makeup? A6: We use professional-grade, high-quality makeup products that are safe for all skin types and ensure a flawless finish. Q7: What other services does Ladyfair provide in Barharia? A7: In addition to bridal makeup, we offer makeup for engagements, receptions, parties, and other special occasions. Ladyfair is your ultimate choice for professional, at-home bridal makeup services in Barharia, ensuring a flawless and stress-free experience on your special day.

Posted By: 22nd November 2024
Bridal Makeup Artist in ANDAR
Introduction In Andar, Ladyfair is the premier choice for brides looking to achieve the perfect wedding day look with our professional at-home bridal makeup services. Whether you desire a traditional bridal look, an HD finish, or the flawless perfection of airbrush makeup, our expert makeup artist in Andar ensures that you shine on your special day. Contact us today at 7004721239 to schedule your appointment. Why Choose Ladyfair for Bridal Makeup in Andar Experienced Makeup Artist Our makeup artist in Andar has years of experience in bridal makeup, creating personalized looks that complement your natural beauty and align with your style and preferences. Convenient At-Home Service Forget the stress of traveling to a salon. Ladyfair brings luxury beauty treatments directly to your doorstep with our at-home bridal makeup services, offering a truly personalized experience. Premium Makeup Products We use only high-quality, professional-grade makeup products to ensure a flawless, long-lasting look that remains perfect throughout your big day. Bridal Makeup Pricing in Andar Our bridal makeup services in Andar are tailored to fit different styles and budgets: Basic Bridal Makeup: ₹10,000 HD Bridal Makeup: ₹12,000 Airbrush Bridal Makeup: ₹18,000 For engagement and reception makeup: Basic Engagement/Reception Makeup: ₹6,000 HD Engagement/Reception Makeup: ₹8,000 Airbrush Engagement/Reception Makeup: ₹12,000 For parties: Basic Party Makeup: ₹2,500 HD Party Makeup: ₹3,500 Popular Bridal Makeup Styles in Andar Traditional Bridal Makeup Our traditional bridal makeup in Andar incorporates bold colors and intricate detailing to complement your wedding attire, creating an elegant and timeless look. HD Bridal Makeup For a high-definition finish that looks flawless both in photos and in person, HD bridal makeup is the perfect choice for brides who want a picture-perfect appearance all day. Airbrush Bridal Makeup Our airbrush makeup offers a lightweight, full-coverage finish that lasts all day, giving you a smooth and natural look while ensuring long-lasting perfection. How to Book Your Bridal Makeup with Ladyfair in Andar Initial Contact: Call us at 7004721239 to discuss your makeup needs and schedule your appointment. Consultation Session: Meet with our makeup artist to discuss your wedding look, review your attire, and plan the perfect makeup style. Makeup Trial: We offer trial sessions to help you preview your bridal makeup look and make any adjustments. Wedding Day Makeup: On your wedding day, our makeup artist will arrive at your location in Andar to provide flawless, hassle-free makeup service. Testimonials from Brides in Andar Priya R., Andar: "Ladyfair provided amazing service on my wedding day. The airbrush makeup looked flawless and lasted all day." Ritu K., Andar: "I loved the HD makeup! It was perfect for my photos, and the at-home service was so convenient." Sneha S., Andar: "My traditional bridal makeup was exactly what I wanted, and Ladyfair made the entire process stress-free." Preparing for Your Bridal Makeup Session To get the best results for your bridal makeup: Stay Hydrated: Keep your skin looking fresh by drinking plenty of water. Consistent Skincare: Stick to your regular skincare routine to maintain healthy, glowing skin. Avoid New Products: Use familiar products to prevent any reactions before your wedding day. Clear Communication: Discuss your makeup preferences and any concerns with our artist during the consultation. Additional Beauty Services by Ladyfair Beyond bridal makeup, Ladyfair offers a variety of beauty services in Andar: Engagement and Reception Makeup: Customized looks for all pre-wedding events. Party Makeup: Perfect for birthdays, anniversaries, and special occasions. Everyday Makeup: Enhance your daily look with our expert makeup services. Special Occasion Makeup: Professional makeup for parties, celebrations, and formal events. The Future of Bridal Makeup in Andar Ladyfair is dedicated to setting new standards in bridal beauty in Andar with our innovative at-home services. As we continue to offer exceptional service, more brides are choosing Ladyfair as their preferred makeup provider. Q&A with Ladyfair’s Bridal Makeup Artist in Andar Q1: What makes Ladyfair the best choice for bridal makeup in Andar? A1: Ladyfair offers expert bridal makeup services at home, using high-quality products to ensure a flawless and long-lasting look. Q2: What are the prices for bridal makeup in Andar? A2: Our bridal makeup packages start at ₹10,000 for basic makeup, ₹12,000 for HD makeup, and ₹18,000 for airbrush makeup. Q3: How do I book Ladyfair’s bridal makeup services in Andar? A3: You can book our services by calling 7004721239. We also offer consultations and trial sessions to ensure you get the look you want. Q4: What bridal makeup styles does Ladyfair offer in Andar? A4: Ladyfair offers traditional, HD, and airbrush bridal makeup to suit different preferences and needs. Q5: Are makeup trials available before my wedding? A5: Yes, we offer trial sessions so you can finalize your bridal look ahead of time. Q6: What products does Ladyfair use for bridal makeup? A6: We use professional-grade, high-quality makeup products that are safe for all skin types and ensure a flawless finish. Q7: What other services does Ladyfair provide in Andar? A7: In addition to bridal makeup, we offer makeup for engagements, receptions, parties, and other special occasions. Ladyfair is your ultimate choice for professional, at-home bridal makeup services in Andar, ensuring a flawless and stress-free experience on your special day.

Posted By: 22nd November 2024
Bridal Makeup Artist in DARAUNDHA
Introduction In Daraundha, Ladyfair is the premier choice for brides looking to achieve the perfect wedding day look with our professional at-home bridal makeup services. Whether you desire a traditional bridal look, an HD finish, or the flawless perfection of airbrush makeup, our expert makeup artist in Daraundha ensures that you shine on your special day. Contact us today at 7004721239 to schedule your appointment. Why Choose Ladyfair for Bridal Makeup in Daraundha Experienced Makeup Artist Our makeup artist in Daraundha has years of experience in bridal makeup, creating personalized looks that complement your natural beauty and align with your style and preferences. Convenient At-Home Service Forget the stress of traveling to a salon. Ladyfair brings luxury beauty treatments directly to your doorstep with our at-home bridal makeup services, offering a truly personalized experience. Premium Makeup Products We use only high-quality, professional-grade makeup products to ensure a flawless, long-lasting look that remains perfect throughout your big day. Bridal Makeup Pricing in Daraundha Our bridal makeup services in Daraundha are tailored to fit different styles and budgets: Basic Bridal Makeup: ₹10,000 HD Bridal Makeup: ₹12,000 Airbrush Bridal Makeup: ₹18,000 For engagement and reception makeup: Basic Engagement/Reception Makeup: ₹6,000 HD Engagement/Reception Makeup: ₹8,000 Airbrush Engagement/Reception Makeup: ₹12,000 For parties: Basic Party Makeup: ₹2,500 HD Party Makeup: ₹3,500 Popular Bridal Makeup Styles in Daraundha Traditional Bridal Makeup Our traditional bridal makeup in Daraundha incorporates bold colors and intricate detailing to complement your wedding attire, creating an elegant and timeless look. HD Bridal Makeup For a high-definition finish that looks flawless both in photos and in person, HD bridal makeup is the perfect choice for brides who want a picture-perfect appearance all day. Airbrush Bridal Makeup Our airbrush makeup offers a lightweight, full-coverage finish that lasts all day, giving you a smooth and natural look while ensuring long-lasting perfection. How to Book Your Bridal Makeup with Ladyfair in Daraundha Initial Contact: Call us at 7004721239 to discuss your makeup needs and schedule your appointment. Consultation Session: Meet with our makeup artist to discuss your wedding look, review your attire, and plan the perfect makeup style. Makeup Trial: We offer trial sessions to help you preview your bridal makeup look and make any adjustments. Wedding Day Makeup: On your wedding day, our makeup artist will arrive at your location in Daraundha to provide flawless, hassle-free makeup service. Testimonials from Brides in Daraundha Priya R., Daraundha: "Ladyfair provided amazing service on my wedding day. The airbrush makeup looked flawless and lasted all day." Ritu K., Daraundha: "I loved the HD makeup! It was perfect for my photos, and the at-home service was so convenient." Sneha S., Daraundha: "My traditional bridal makeup was exactly what I wanted, and Ladyfair made the entire process stress-free." Preparing for Your Bridal Makeup Session To get the best results for your bridal makeup: Stay Hydrated: Keep your skin looking fresh by drinking plenty of water. Consistent Skincare: Stick to your regular skincare routine to maintain healthy, glowing skin. Avoid New Products: Use familiar products to prevent any reactions before your wedding day. Clear Communication: Discuss your makeup preferences and any concerns with our artist during the consultation. Additional Beauty Services by Ladyfair Beyond bridal makeup, Ladyfair offers a variety of beauty services in Daraundha: Engagement and Reception Makeup: Customized looks for all pre-wedding events. Party Makeup: Perfect for birthdays, anniversaries, and special occasions. Everyday Makeup: Enhance your daily look with our expert makeup services. Special Occasion Makeup: Professional makeup for parties, celebrations, and formal events. The Future of Bridal Makeup in Daraundha Ladyfair is dedicated to setting new standards in bridal beauty in Daraundha with our innovative at-home services. As we continue to offer exceptional service, more brides are choosing Ladyfair as their preferred makeup provider. Q&A with Ladyfair’s Bridal Makeup Artist in Daraundha Q1: What makes Ladyfair the best choice for bridal makeup in Daraundha? A1: Ladyfair offers expert bridal makeup services at home, using high-quality products to ensure a flawless and long-lasting look. Q2: What are the prices for bridal makeup in Daraundha? A2: Our bridal makeup packages start at ₹10,000 for basic makeup, ₹12,000 for HD makeup, and ₹18,000 for airbrush makeup. Q3: How do I book Ladyfair’s bridal makeup services in Daraundha? A3: You can book our services by calling 7004721239. We also offer consultations and trial sessions to ensure you get the look you want. Q4: What bridal makeup styles does Ladyfair offer in Daraundha? A4: Ladyfair offers traditional, HD, and airbrush bridal makeup to suit different preferences and needs. Q5: Are makeup trials available before my wedding? A5: Yes, we offer trial sessions so you can finalize your bridal look ahead of time. Q6: What products does Ladyfair use for bridal makeup? A6: We use professional-grade, high-quality makeup products that are safe for all skin types and ensure a flawless finish. Q7: What other services does Ladyfair provide in Daraundha? A7: In addition to bridal makeup, we offer makeup for engagements, receptions, parties, and other special occasions. Ladyfair is your ultimate choice for professional, at-home bridal makeup services in Daraundha, ensuring a flawless and stress-free experience on your special day.

Posted By: 15th November 2024
Bridal makeup artist in Siradala
Ladyfair Bridal Makeup Services in Siradala: Bringing Beauty to Your Special Day A bride’s wedding day is one of the most cherished and memorable moments of her life. At Ladyfair, we understand that you want to look and feel your best on this big day. Our expert bridal makeup services in Siradala bring the elegance, grace, and style every bride dreams of. Whether you prefer a classic, HD, or airbrush makeup look, Ladyfair ensures your makeup is flawless, so you can focus on making memories. Why Choose Ladyfair Bridal Makeup in Siradala? 1. Skilled and Experienced Makeup Artists Our team of experienced makeup artists is dedicated to creating the perfect bridal look for each bride. From traditional looks to high-definition glam, Ladyfair’s artists have the expertise to craft a look that matches your style and enhances your natural beauty. 2. Convenient At-Home Service Ladyfair makes it easy by bringing salon-quality makeup services directly to you. Our at-home makeup service in Siradala ensures you can enjoy the full luxury of professional makeup without leaving your home, making the experience more relaxed and stress-free. 3. High-Quality Makeup Products We only use premium, professional-grade products that are long-lasting, safe, and designed to stay flawless throughout your wedding day. Each product we use has been chosen to provide a glowing, durable finish to keep you looking fresh and beautiful in every photo. Bridal Makeup Packages & Pricing in Siradala Ladyfair offers various bridal packages to suit different preferences and budgets, ensuring that you get the best service for your wedding day. Bridal Makeup Packages: Basic Bridal Makeup: ₹10,000 A subtle, elegant look that highlights your natural beauty for a timeless appearance. HD Bridal Makeup: ₹12,000 Ideal for brides who want a high-definition, smooth finish that looks perfect in both photos and real life. Airbrush Bridal Makeup: ₹18,000 Lightweight and full-coverage, airbrush makeup provides a flawless complexion that lasts all day, making it ideal for long events. Engagement & Reception Makeup: Basic Engagement/Reception Makeup: ₹6,000 HD Engagement/Reception Makeup: ₹8,000 Airbrush Engagement/Reception Makeup: ₹12,000 Party Makeup: Basic Party Makeup: ₹2,500 HD Party Makeup: ₹3,500 We offer tailored pricing so that every bride can access premium quality makeup without compromise. Popular Bridal Makeup Styles in Siradala 1. Traditional Bridal Makeup This look is for brides who prefer a timeless style. With bold eyes, beautifully contoured features, and rich lip colors, the traditional bridal makeup style complements cultural and traditional wedding attire. 2. HD Bridal Makeup High-definition makeup provides a seamless, polished look, perfect for brides who want every photo to capture a flawless complexion. This style provides a smooth finish that remains stunning throughout the day. 3. Airbrush Bridal Makeup Airbrush makeup is ideal for brides looking for a long-lasting, lightweight, and natural look. It’s perfect for longer ceremonies and keeps the bride looking radiant without needing touch-ups. How to Book Your Bridal Makeup with Ladyfair in Siradala Booking Ladyfair’s bridal makeup service is easy and convenient. Follow these simple steps: Step 1: Initial Contact Call us at 7004721239 to discuss your bridal makeup needs and schedule your appointment. Our team will guide you through the available options to help you select the best package. Step 2: Consultation During your consultation, our makeup artist will discuss your wedding attire, color scheme, and personal style to create a custom look that fits your vision. Step 3: Makeup Trial Our trial session allows you to preview your bridal look, giving you the confidence that everything will be perfect on your big day. Step 4: Wedding Day Makeup On your wedding day, our makeup artist will arrive at your location in Siradala to provide a seamless, relaxing, and professional experience. Sit back, relax, and let us create the look you’ve dreamed of. Frequently Asked Questions About Ladyfair Bridal Makeup in Siradala Q1: Why should I choose Ladyfair for my bridal makeup in Siradala? A: Ladyfair offers at-home bridal makeup services that are personalized, high-quality, and performed by experienced artists to make you feel beautiful and confident on your big day. Q2: What are the prices for bridal makeup in Siradala? A: Our bridal makeup starts at ₹10,000 for basic makeup, ₹12,000 for HD makeup, and ₹18,000 for airbrush makeup. We also offer packages for engagement and reception makeup. Q3: How do I book Ladyfair’s bridal makeup services in Siradala? A: Simply call us at 7004721239. Our team will guide you through the process, including consultation and trial options. Q4: What makeup styles does Ladyfair offer? A: We offer traditional, HD, and airbrush makeup to suit every bride’s unique preferences and wedding themes. Q5: Is a makeup trial available before the wedding day? A: Yes, we offer makeup trials to ensure you’re completely satisfied with your bridal look ahead of your wedding. Q6: What kind of products do you use for bridal makeup? A: We use only professional-grade, high-quality makeup products to ensure a flawless and long-lasting finish for all skin types. Q7: Can I book Ladyfair for other makeup services in Siradala? A: Absolutely! In addition to bridal makeup, we provide engagement, reception, party, and special occasion makeup services to ensure you look perfect for every event. Book Your Bridal Makeup Today! Let Ladyfair help you look your absolute best on your wedding day. With our expert services, personalized packages, and commitment to quality, we’ll make sure you feel beautiful and confident for this once-in-a-lifetime event. Contact us at 7004721239 to book your bridal makeup in Siradala and let us bring your vision to life!

Posted By: 14th November 2024
Bridal makeup artist in Roh
Ladyfair Bridal Makeup Services in Roh: Making Your Wedding Day Unforgettable Your wedding day is one of the most special and memorable days of your life. At Ladyfair, we understand the importance of looking your best on this occasion. Our expert makeup artists in Roh are here to provide you with the perfect bridal look that suits your style, personality, and wedding theme. Whether you prefer a traditional, HD, or airbrush makeup style, Ladyfair offers personalized services to make you feel like royalty on your big day. Why Choose Ladyfair Bridal Makeup in Roh? 1. Experienced Makeup Artists At Ladyfair, we take pride in our team of skilled makeup artists who specialize in bridal makeup. They have extensive experience in creating a wide range of looks that cater to every bride’s unique preferences. From a classic, traditional look to a glamorous, high-definition finish, our makeup artists in Roh know how to highlight your natural beauty and make you look stunning for your wedding. 2. At-Home Bridal Makeup Services We bring the salon experience to your doorstep. Our at-home bridal makeup service in Roh ensures that you enjoy a luxurious, stress-free experience in the comfort of your home. No need to worry about rushing to a salon or dealing with traffic—our makeup artists arrive at your location with all the tools and products needed to make you look your absolute best. 3. High-Quality Makeup Products We understand that long-lasting, flawless makeup is essential for a wedding day. That’s why we only use professional-grade, high-quality makeup products. Our makeup is designed to stay fresh and flawless throughout the day and night, ensuring that you look picture-perfect no matter the lighting or angle. Bridal Makeup Services & Pricing in Roh At Ladyfair, we offer a variety of bridal makeup packages tailored to different needs and preferences. Whether you're on a budget or looking for a luxurious look, we have the perfect package for you. Bridal Makeup Packages: Basic Bridal Makeup: ₹10,000 A simple, elegant look that highlights your natural beauty for a timeless, classic bridal appearance. HD Bridal Makeup: ₹12,000 This high-definition makeup is designed to give a smooth, flawless finish, perfect for capturing every moment in high-quality photos. Airbrush Bridal Makeup: ₹18,000 For a lightweight, full-coverage look, airbrush makeup is ideal. It offers a seamless finish that lasts all day, giving you a fresh, polished look. Engagement & Reception Makeup: Basic Engagement/Reception Makeup: ₹6,000 HD Engagement/Reception Makeup: ₹8,000 Airbrush Engagement/Reception Makeup: ₹12,000 Party Makeup: Basic Party Makeup: ₹2,500 HD Party Makeup: ₹3,500 We offer competitive pricing with options to suit every bride, ensuring that you get the best quality makeup for your budget. Popular Bridal Makeup Styles in Roh 1. Traditional Bridal Makeup A traditional bridal look includes bold eye makeup, defined brows, and vibrant lipstick shades. This style complements the richness of traditional bridal attire and is perfect for brides who want a timeless, elegant appearance on their wedding day. 2. HD Bridal Makeup For brides who want a flawless finish in both photos and in person, HD makeup is the way to go. It provides a smooth, airbrushed effect that ensures you look stunning from every angle, with makeup that holds up beautifully through all your wedding photos. 3. Airbrush Bridal Makeup Airbrush makeup is ideal for brides who want a lightweight, full-coverage look. This style creates a flawless complexion with a natural, glowing finish. It’s perfect for long wedding days as it stays put and looks fresh throughout your celebration. How to Book Your Bridal Makeup with Ladyfair in Roh Booking your bridal makeup with Ladyfair is simple. Follow these steps to get started: Step 1: Contact Us Give us a call at 7004721239 to discuss your bridal makeup needs and schedule your appointment. Our team will guide you through the available services and help you choose the best option for your big day. Step 2: Consultation Meet with our makeup artist to talk about your preferences, your bridal attire, and your wedding theme. We will work with you to design a makeup look that perfectly complements your vision. Step 3: Makeup Trial A trial session is essential to ensure you are completely satisfied with your bridal makeup. During the trial, you can test different looks and make any necessary adjustments. Step 4: Wedding Day Makeup On the day of your wedding, our professional makeup artist will arrive at your location in Roh to apply your makeup. Relax and enjoy the experience while we transform you into the stunning bride you’ve always dreamed of. Frequently Asked Questions About Ladyfair Bridal Makeup in Roh Q1: Why should I choose Ladyfair for bridal makeup in Roh? A: Ladyfair offers personalized bridal makeup services with experienced artists and high-quality products, all from the comfort of your home. Our goal is to ensure you look flawless and feel confident on your wedding day. Q2: What are the prices for bridal makeup in Roh? A: Our bridal makeup services start at ₹10,000 for basic makeup, ₹12,000 for HD makeup, and ₹18,000 for airbrush makeup. We also offer makeup for engagements, receptions, and parties at affordable prices. Q3: How do I book my bridal makeup with Ladyfair? A: Simply call us at 7004721239 to schedule your appointment. We also offer consultations and makeup trials to ensure your bridal look is perfect. Q4: What makeup styles do you offer? A: We offer traditional, HD, and airbrush bridal makeup to suit different preferences and wedding themes. Q5: Can I have a makeup trial before the wedding day? A: Yes! We offer makeup trials so you can preview your bridal look and make any changes before your wedding day. Q6: What kind of products do you use for bridal makeup? A: We use professional-grade, high-quality makeup products to ensure a long-lasting and flawless finish. All of our products are safe for different skin types. Q7: Does Ladyfair offer other makeup services in Roh? A: Yes, in addition to bridal makeup, we offer engagement, reception, and party makeup services to ensure you look stunning for any occasion. Book Your Bridal Makeup Today! Your wedding day deserves to be as flawless as your makeup. At Ladyfair, we are committed to making you feel beautiful and confident on your special day. Contact us at 7004721239 to book your bridal makeup session and let us help you create the perfect bridal look that you’ll cherish forever.

Posted By: 14th November 2024
Bridal makeup artist in Rajauli
Ladyfair Bridal Makeup Services in Rajauli: Look Stunning on Your Big Day Your wedding day is one of the most memorable days of your life, and at Ladyfair, we believe that every bride deserves to look and feel her best. Our expert makeup artists in Rajauli are dedicated to delivering exceptional bridal makeup services that will leave you feeling like royalty. Whether you're dreaming of a traditional bridal look, a modern HD finish, or the elegance of airbrush makeup, we’ve got you covered. Why Choose Ladyfair Bridal Makeup in Rajauli? 1. Experienced Makeup Artists Our team of skilled makeup artists in Rajauli has extensive experience in bridal makeup, offering customized looks that enhance your natural beauty. Whether you want a soft, natural glow or a bold, glamorous appearance, our artists will create a look that complements your personality and wedding style. 2. At-Home Bridal Makeup Services At Ladyfair, we bring the salon experience to your doorstep. Our at-home bridal makeup service in Rajauli ensures that you enjoy a stress-free and comfortable experience. No need to worry about traveling or last-minute rushes—our expert team will come to you, bringing all the necessary products and tools to make you feel beautiful. 3. High-Quality Makeup Products We understand that long-lasting, flawless makeup is crucial for a wedding day. That’s why we only use professional-grade, high-quality makeup products that suit all skin types. Our products are designed to give you a radiant finish, ensuring that your makeup stays fresh from the morning ceremony to the late-night celebrations. Bridal Makeup Services & Pricing in Rajauli At Ladyfair, we offer a variety of bridal makeup packages tailored to different needs and budgets. No matter what your preferences are, you can count on us to provide the perfect bridal look. Bridal Makeup Packages: Basic Bridal Makeup: ₹10,000 A timeless look with soft, elegant makeup to highlight your natural beauty. HD Bridal Makeup: ₹12,000 This high-definition makeup gives a smooth, flawless finish, ideal for photos and in-person events. Airbrush Bridal Makeup: ₹18,000 Airbrush makeup offers lightweight, full-coverage, and long-lasting results for brides who want a seamless, natural look. Engagement & Reception Makeup: Basic Engagement/Reception Makeup: ₹6,000 HD Engagement/Reception Makeup: ₹8,000 Airbrush Engagement/Reception Makeup: ₹12,000 Party Makeup: Basic Party Makeup: ₹2,500 HD Party Makeup: ₹3,500 We strive to provide our brides with options that fit their needs, whether they’re looking for a simple makeup style or something more dramatic. Popular Bridal Makeup Styles in Rajauli 1. Traditional Bridal Makeup A traditional bridal look is bold and vibrant, with a focus on accentuating the bride's features to complement her attire. This style often includes rich colors, strong eye makeup, and intricate detailing to create a regal, timeless appearance. 2. HD Bridal Makeup Perfect for brides who want to look flawless in both photos and real life, HD makeup gives a polished, smooth finish. It provides a high-definition look that is camera-ready, ensuring you look picture-perfect all day long. 3. Airbrush Bridal Makeup For brides who want a flawless, natural look, airbrush makeup is an ideal choice. It’s lightweight, provides full coverage, and ensures your makeup stays fresh throughout the day. Airbrush makeup is perfect for long events and gives a smooth, radiant appearance. How to Book Your Bridal Makeup with Ladyfair in Rajauli Booking your bridal makeup with Ladyfair is easy. Follow these steps to get started: Step 1: Contact Us Call us at 7004721239 to discuss your bridal makeup needs. We will walk you through the available packages and help you choose the one that suits your style and budget. Step 2: Consultation Meet with our makeup artist to discuss your vision for the big day. We’ll review your bridal attire, color schemes, and personal preferences to design a look that complements your style. Step 3: Makeup Trial A makeup trial is an essential part of the process. It gives you a chance to see the makeup style in person and make adjustments if necessary. We want to ensure that you’re completely happy with your look before your wedding day. Step 4: Wedding Day Makeup On your wedding day, our makeup artist will arrive at your location in Rajauli to create a flawless bridal look. You can sit back, relax, and enjoy the pampering while we make sure you look beautiful and confident for your special day. Frequently Asked Questions About Ladyfair Bridal Makeup in Rajauli Q1: Why should I choose Ladyfair for bridal makeup in Rajauli? A: Ladyfair offers experienced makeup artists, premium-quality products, and a convenient at-home makeup service. Our goal is to make you look stunning while providing a stress-free experience. Q2: What are the prices for bridal makeup in Rajauli? A: Our prices start at ₹10,000 for basic bridal makeup, ₹12,000 for HD makeup, and ₹18,000 for airbrush makeup. We also offer packages for engagement, reception, and parties. Q3: How can I book my bridal makeup with Ladyfair? A: You can call us at 7004721239 to discuss your needs and book your bridal makeup session. We also offer consultations and makeup trials to ensure you get the perfect look. Q4: What makeup styles do you offer? A: We offer traditional, HD, and airbrush bridal makeup to suit your unique preferences and wedding style. Q5: Is a makeup trial available before the wedding day? A: Yes, we strongly recommend scheduling a makeup trial to finalize your bridal look and make any necessary adjustments before the big day. Q6: What kind of products do you use for bridal makeup? A: We use professional-grade, high-quality makeup products to ensure a long-lasting, flawless finish that’s perfect for your wedding day. Q7: Does Ladyfair offer other makeup services besides bridal? A: Yes, we offer makeup services for engagements, receptions, parties, and other special occasions, in addition to bridal makeup. Book Your Bridal Makeup with Ladyfair Today! Your wedding day is a once-in-a-lifetime event, and Ladyfair is here to make sure you look absolutely stunning. With our expert team of makeup artists, luxurious products, and convenient at-home services, you can trust us to make your bridal makeup experience in Rajauli unforgettable. Call 7004721239 today to book your appointment and get ready to look your best on your special day!

Posted By: 14th November 2024
Bridal makeup artist in Narhat
Ladyfair Bridal Makeup Services in Narhat: The Perfect Look for Your Special Day Your wedding day is one of the most important milestones in your life, and looking your best is essential. At Ladyfair, we are committed to ensuring that your bridal makeup in Narhat is flawless, radiant, and perfectly suited to your style. Our expert team of makeup artists provides a range of services designed to make you feel beautiful and confident, whether you're looking for a classic bridal look or a more contemporary style. Why Choose Ladyfair Bridal Makeup in Narhat? 1. Experienced Makeup Artists Ladyfair’s makeup artists have years of experience in bridal makeup, and we know exactly how to enhance your natural beauty while reflecting your unique style. From traditional bridal looks to modern, elegant styles, our artists are skilled at crafting the perfect look for you. 2. At-Home Bridal Makeup Services We understand that on your wedding day, you want to relax and enjoy the experience without having to travel. That’s why Ladyfair offers at-home bridal makeup services in Narhat. Our team comes to your location, bringing all the necessary tools and high-end products to make you look beautiful from head to toe. 3. Premium Makeup Products To ensure a long-lasting, flawless finish, we use only premium-quality, professional-grade makeup products. We carefully select each product to match your skin tone and type, ensuring that your makeup feels comfortable, looks stunning, and stays in place throughout the day. Bridal Makeup Services & Pricing in Narhat We offer a range of bridal makeup services at competitive prices to fit different budgets and preferences. Whether you're having a simple ceremony or a grand celebration, we have the perfect makeup package for you. Bridal Makeup Packages: Basic Bridal Makeup: ₹10,000 This package includes a natural and elegant makeup look that enhances your features while keeping it classic. HD Bridal Makeup: ₹12,000 HD makeup offers a high-definition finish that ensures you look flawless in photos and in person. Perfect for brides who want a polished, smooth look. Airbrush Bridal Makeup: ₹18,000 Airbrush makeup is a lightweight, full-coverage option that creates a flawless, natural look. It’s perfect for long-lasting results throughout your wedding day. Engagement & Reception Makeup: Basic Engagement/Reception Makeup: ₹6,000 HD Engagement/Reception Makeup: ₹8,000 Airbrush Engagement/Reception Makeup: ₹12,000 Party Makeup: Basic Party Makeup: ₹2,500 HD Party Makeup: ₹3,500 Each package is designed to ensure that you look your best, no matter the event, and we guarantee that you’ll feel confident and beautiful. Popular Bridal Makeup Styles in Narhat 1. Traditional Bridal Makeup Traditional bridal makeup features bold colors and rich accents that complement heavy wedding attire. This style is ideal for brides looking for a royal, timeless look that stands out. 2. HD Bridal Makeup This makeup style uses high-definition techniques that create a smooth, even complexion, making it perfect for brides who want to look stunning in both photos and in person. It’s perfect for long-lasting beauty throughout the day. 3. Airbrush Bridal Makeup Airbrush makeup is the latest trend in bridal beauty. It’s lightweight, provides a flawless finish, and is ideal for brides who want a natural yet polished look that stays in place for hours. It’s the best choice for brides looking for comfort and durability. How to Book Your Bridal Makeup with Ladyfair in Narhat Booking your bridal makeup with Ladyfair is simple and easy. Follow these steps to get started: Step 1: Initial Contact Contact us at 7004721239 to inquire about our bridal makeup services in Narhat. We’ll discuss your needs and help you choose the perfect package for your wedding day. Step 2: Consultation We offer a consultation where you can share your ideas, preferences, and wedding details with our makeup artist. We’ll work with you to create a personalized look that complements your bridal attire and overall vision for your wedding. Step 3: Makeup Trial We recommend scheduling a makeup trial to perfect your look ahead of the wedding day. During the trial, we’ll make any adjustments needed to ensure you’re completely happy with the look. Step 4: Wedding Day Makeup On your wedding day, our makeup artist will arrive at your location in Narhat to create the perfect bridal look. Sit back, relax, and enjoy the pampering while we make you feel like the most beautiful bride. Frequently Asked Questions About Ladyfair Bridal Makeup in Narhat Q1: What makes Ladyfair the best choice for bridal makeup in Narhat? A: Ladyfair offers professional makeup artists, premium products, and at-home services, ensuring you get a personalized, luxurious bridal makeup experience. Q2: What are the prices for bridal makeup services in Narhat? A: Bridal makeup starts at ₹10,000 for basic makeup, ₹12,000 for HD makeup, and ₹18,000 for airbrush makeup. We also offer services for engagement, reception, and parties. Q3: How can I book Ladyfair’s bridal makeup services in Narhat? A: You can book by calling 7004721239. We also offer consultations and makeup trials to make sure you’re completely satisfied with your bridal look. Q4: What makeup styles do you offer? A: We offer traditional, HD, and airbrush bridal makeup styles to suit your unique preferences and wedding vision. Q5: Do you offer makeup trials before the wedding day? A: Yes, we highly recommend a makeup trial to perfect your look before your big day. Q6: What kind of products do you use for bridal makeup? A: We use professional-grade, high-quality makeup products that are safe for all skin types and designed to provide a flawless finish. Q7: Do you offer makeup services for other events like engagement and reception? A: Yes, we offer makeup services for engagements, receptions, parties, and other special occasions, in addition to bridal makeup. Book Your Bridal Makeup with Ladyfair Today! At Ladyfair, we’re dedicated to making your wedding day unforgettable by providing expert bridal makeup services in Narhat. Let us help you look and feel your best on your big day.

Posted By: 14th November 2024
Bridal makeup artist in Meskaur
Ladyfair Bridal Makeup Services in Meskaur: Make Your Wedding Day Unforgettable Your wedding day is one of the most significant events of your life, and at Ladyfair, we believe every bride deserves to look and feel her absolute best. Our bridal makeup services in Meskaur offer a range of styles that cater to your unique preferences, from traditional elegance to modern, flawless finishes. Whether you prefer a soft, natural look or a more dramatic, bold appearance, Ladyfair’s expert makeup artists are here to create your dream wedding look. Why Choose Ladyfair Bridal Makeup Services in Meskaur? 1. Experienced Makeup Artists Our team of professional makeup artists in Meskaur has extensive experience in creating stunning bridal looks. We understand that your wedding makeup should reflect your personal style while enhancing your natural beauty. From subtle elegance to bold glamour, we tailor each look to suit your personality, attire, and wedding theme. 2. Convenient At-Home Service The Ladyfair bridal makeup experience is designed to be as stress-free as possible. We offer at-home makeup services in Meskaur, bringing the salon to your doorstep. This way, you can relax and enjoy your special day in the comfort of your own home while we work to perfect your bridal look. 3. Premium Makeup Products We use only high-quality, professional-grade makeup products to ensure that you look radiant all day long. Our products are chosen to provide a flawless finish, ensuring that your makeup stays in place and looks fresh for hours, even through tears, photos, and celebrations. Bridal Makeup Services and Pricing in Meskaur At Ladyfair, we offer a variety of bridal makeup packages designed to meet different preferences and budgets. Whether you’re planning a simple wedding or a grand celebration, we have the perfect package for you. Bridal Makeup Packages: Basic Bridal Makeup: ₹10,000 A natural, elegant look that enhances your beauty without overwhelming it. HD Bridal Makeup: ₹12,000 A high-definition finish that ensures you look stunning both in person and in photos. Airbrush Bridal Makeup: ₹18,000 For a lightweight, flawless look that provides full coverage and lasts throughout your wedding day. Engagement & Reception Makeup: Basic Engagement/Reception Makeup: ₹6,000 HD Engagement/Reception Makeup: ₹8,000 Airbrush Engagement/Reception Makeup: ₹12,000 Party Makeup: Basic Party Makeup: ₹2,500 HD Party Makeup: ₹3,500 Each of these services is designed to provide you with the best value for your wedding makeup, ensuring you feel like the most beautiful version of yourself. Popular Bridal Makeup Styles in Meskaur 1. Traditional Bridal Makeup Traditional bridal makeup is bold, vibrant, and perfectly suited for complementing a rich bridal outfit. With deep colors and a flawless finish, this style is timeless and creates a regal look that stands out. 2. HD Bridal Makeup High-definition makeup is perfect for brides who want to ensure that they look flawless in both real life and photos. This style uses advanced techniques to create a smooth, airbrushed finish, perfect for close-ups and candid moments. 3. Airbrush Bridal Makeup Airbrush makeup is a lightweight, full-coverage option that offers a natural yet polished look. This style is ideal for brides who want long-lasting makeup that feels comfortable and fresh throughout the day. How to Book Your Bridal Makeup with Ladyfair in Meskaur Booking your bridal makeup with Ladyfair is simple. Here’s how you can secure your spot for the big day: Step 1: Initial Contact Call us at 7004721239 to inquire about our bridal makeup services in Meskaur. We’ll discuss your needs and help you choose the right makeup package for your wedding day. Step 2: Consultation Once you’ve booked your appointment, we’ll schedule a consultation to discuss your preferences. Our makeup artist will help you choose a look that matches your style, bridal outfit, and the overall theme of your wedding. Step 3: Makeup Trial We recommend a makeup trial before your wedding day to ensure that you’re completely satisfied with your bridal look. During the trial, we can make any adjustments to your makeup to ensure it’s exactly how you envision it. Step 4: Wedding Day Makeup On your wedding day, our artist will arrive at your location in Meskaur with all the necessary tools and products to create the perfect look for you. You can relax and enjoy your day knowing you’re in expert hands. FAQs About Ladyfair Bridal Makeup Services in Meskaur Q1: What makes Ladyfair the best choice for bridal makeup in Meskaur? A: Ladyfair provides experienced makeup artists, at-home services, and premium-quality products, ensuring that you look stunning on your wedding day. Q2: How much does bridal makeup cost in Meskaur? A: Bridal makeup starts at ₹10,000 for basic makeup, ₹12,000 for HD makeup, and ₹18,000 for airbrush makeup. We also offer makeup services for engagement and reception events. Q3: How can I book my bridal makeup with Ladyfair? A: You can book by calling 7004721239. We also offer consultations and makeup trials to ensure you’re fully satisfied with your bridal look. Q4: What makeup styles do you offer? A: We offer traditional, HD, and airbrush makeup styles, each designed to enhance your beauty and suit your wedding vision. Q5: Do you offer makeup trials before the wedding? A: Yes, we recommend a makeup trial to ensure your bridal look is perfect ahead of your big day. Q6: What products do you use for bridal makeup? A: We use high-quality, professional-grade makeup products that are safe for all skin types and ensure a flawless finish. Q7: Do you provide makeup for other events like engagements and parties? A: Yes, we offer makeup services for engagement, reception, parties, and other special occasions in addition to bridal makeup. Get Ready for Your Wedding with Ladyfair Bridal Makeup in Meskaur At Ladyfair, we are dedicated to making your wedding day as special and memorable as possible. With our expert bridal makeup services in Meskaur, you can relax knowing you’ll look stunning on your big day. Contact us at 7004721239 to book your bridal makeup session and let us help you create a flawless wedding look that’s sure to turn heads!

Posted By: 14th November 2024
Bridal makeup artist in Govindpur
Ladyfair Bridal Makeup Services in Govindpur: Your Dream Bridal Look Awaits Your wedding day is one of the most important days of your life, and every bride deserves to look and feel her best. At Ladyfair, we offer professional bridal makeup services in Govindpur, making sure that you are picture-perfect on your special day. Whether you're looking for a traditional bridal look, a flawless HD finish, or the elegance of airbrush makeup, Ladyfair is here to provide a luxurious, personalized experience at your doorstep. Why Ladyfair is the Best Choice for Bridal Makeup in Govindpur 1. Experienced Makeup Artists At Ladyfair, we understand that every bride has a unique vision for her wedding day. Our skilled makeup artists have extensive experience in bridal makeup, ensuring that your look is customized to suit your preferences, personality, and wedding theme. From soft, romantic looks to bold, dramatic styles, we create a bridal makeup look that enhances your natural beauty. 2. Convenient At-Home Service Forget the hassle of visiting a salon on your big day. With Ladyfair, we bring the salon-quality makeup service directly to your home in Govindpur. This means less stress and more comfort, allowing you to relax and focus on your wedding day while our artists work their magic. Our team arrives at your home with all the professional tools and products needed for a flawless finish. 3. Premium Quality Makeup Products Ladyfair uses only high-end, professional-grade makeup products to ensure a long-lasting, radiant finish that stays perfect from morning to night. Our makeup is suitable for all skin types, giving you a smooth, flawless complexion without the need for touch-ups throughout the day. Bridal Makeup Packages and Pricing in Govindpur At Ladyfair, we believe every bride should feel beautiful, regardless of her budget. We offer competitive pricing for bridal makeup services in Govindpur, ensuring that you get the best value without compromising on quality. Bridal Makeup Packages: Basic Bridal Makeup: ₹10,000 Perfect for brides who want a natural, elegant look that enhances their beauty. HD Bridal Makeup: ₹12,000 A high-definition finish that ensures you look flawless in both photos and real life. Airbrush Bridal Makeup: ₹18,000 Lightweight, smooth, and full coverage, this makeup style provides a natural yet polished look that lasts all day. Engagement & Reception Makeup: Basic Engagement/Reception Makeup: ₹6,000 HD Engagement/Reception Makeup: ₹8,000 Airbrush Engagement/Reception Makeup: ₹12,000 Party Makeup: Basic Party Makeup: ₹2,500 HD Party Makeup: ₹3,500 We also offer customized bridal packages, so feel free to reach out for specific requirements or additional services for your wedding events. Popular Bridal Makeup Styles in Govindpur 1. Traditional Bridal Makeup For brides who prefer a classic, bold look, traditional bridal makeup uses vibrant colors and sharp features to complement the rich designs of bridal wear. This timeless style is perfect for creating a stunning presence on your wedding day. 2. HD Bridal Makeup High-definition makeup ensures that your skin looks flawless and smooth in both high-resolution photos and in-person. This style is designed to give you a fresh, radiant look that lasts throughout your wedding day. 3. Airbrush Bridal Makeup Airbrush makeup is lightweight and offers full coverage without feeling heavy on the skin. Ideal for brides who want a flawless, natural look that lasts long and stays fresh through emotional moments, photos, and celebrations. How to Book Ladyfair Bridal Makeup Services in Govindpur Booking your bridal makeup with Ladyfair is simple and hassle-free. Here’s a step-by-step guide to get started: Step 1: Initial Contact Call us at 7004721239 to inquire about our bridal makeup services. We’ll help you choose the right package based on your preferences and schedule a consultation. Step 2: Consultation Our makeup artists will meet with you to discuss your vision for your wedding makeup. We’ll consider your attire, style, and any skin concerns you may have to design a personalized look that suits you perfectly. Step 3: Makeup Trial A makeup trial is recommended to ensure you’re happy with your bridal look ahead of time. During the trial, we’ll adjust the makeup to make sure it’s just right for your wedding day. Step 4: Wedding Day Makeup On the big day, our expert artists will arrive at your home in Govindpur with all the tools and makeup products necessary for your flawless bridal look. We’ll work with you to create the perfect look that reflects your personal style and ensures you feel confident. FAQs About Ladyfair Bridal Makeup Services in Govindpur Q1: Why should I choose Ladyfair for bridal makeup in Govindpur? A: Ladyfair offers expert makeup artists, at-home services, and high-quality products to ensure you look your best on your wedding day. Q2: What is the price of bridal makeup in Govindpur? A: Bridal makeup starts at ₹10,000 for basic makeup, ₹12,000 for HD makeup, and ₹18,000 for airbrush makeup. We also offer packages for engagement and reception makeup. Q3: How can I book my bridal makeup with Ladyfair? A: You can book by calling 7004721239. We also provide consultations and makeup trials to ensure you’re fully satisfied with your bridal look. Q4: What types of bridal makeup do you offer? A: We offer traditional, HD, and airbrush bridal makeup styles to suit every bride’s needs and preferences. Q5: Do you offer makeup trials? A: Yes, we recommend a makeup trial before your wedding day to ensure the perfect bridal look. Q6: What products do you use for bridal makeup? A: We use high-end, professional-grade makeup products to provide long-lasting, flawless results. Q7: Do you provide makeup for other events like engagements or parties? A: Yes, we offer engagement, reception, party, and special occasion makeup services in addition to bridal makeup. Tips for Preparing for Your Bridal Makeup Session Hydrate well: Drink plenty of water to ensure your skin is healthy and glowing. Follow a skincare routine: Stick to your regular skincare routine leading up to your wedding to ensure your skin is in its best condition. Avoid new products: Avoid using new skincare or beauty products before your wedding to prevent potential allergic reactions. Communicate your vision: Share your preferences with our makeup artists during your consultation to ensure your makeup matches your vision. Make Your Wedding Day Unforgettable with Ladyfair Bridal Makeup in Govindpur At Ladyfair, we’re passionate about making your wedding day as beautiful as possible. Whether you’re after a classic bridal look or something more modern, we’re here to provide you with a flawless, stunning makeup experience that will leave you feeling confident and radiant.

Posted By: 14th November 2024
Bridal makeup artist in Akbarpur
Ladyfair Bridal Makeup Services in Akbarpur: Flawless Bridal Beauty at Your Doorstep Your wedding day is a once-in-a-lifetime event, and looking your best is essential. At Ladyfair, we specialize in offering premium bridal makeup services in Akbarpur, bringing professional beauty treatments right to your home. Whether you desire a traditional bridal look, a picture-perfect HD finish, or the elegance of airbrush makeup, Ladyfair is the perfect choice to make you feel beautiful and confident on your special day. Why Choose Ladyfair Bridal Makeup Services in Akbarpur? 1. Experienced and Skilled Makeup Artists Our team of expert makeup artists in Akbarpur is well-versed in the art of bridal makeup. With years of experience, we know how to create a personalized look that enhances your natural beauty while complementing your wedding attire and theme. No matter what your vision is, we’ll bring it to life with precision and care. 2. Convenience with At-Home Makeup Services Why stress about traveling to a salon on your wedding day? Ladyfair offers at-home bridal makeup services in Akbarpur, ensuring you enjoy a luxurious, stress-free experience in the comfort of your own space. Our artists come directly to you, bringing all the professional tools and products needed to create a flawless bridal look. 3. Premium Quality Products for a Long-Lasting Finish We use only the highest quality, professional-grade makeup products that are designed to last all day, ensuring you look radiant from the moment you say “I do” until the final celebration. Our products are also gentle on all skin types, leaving you with a smooth, flawless complexion without the need for touch-ups throughout the day. Bridal Makeup Packages and Pricing in Akbarpur At Ladyfair, we believe every bride deserves to feel beautiful, no matter their budget. Our pricing structure is designed to offer flexibility and affordability without compromising on quality. Choose from a variety of bridal makeup services tailored to meet your unique needs. Bridal Makeup Packages: Basic Bridal Makeup: ₹10,000 Ideal for brides who want a natural, elegant look with a timeless appeal. HD Bridal Makeup: ₹12,000 Perfect for brides seeking a flawless, photo-ready finish that looks stunning in high-definition pictures. Airbrush Bridal Makeup: ₹18,000 This lightweight yet full-coverage makeup style gives a smooth, natural finish that lasts all day and is ideal for long wedding events. Engagement & Reception Makeup: Basic Engagement/Reception Makeup: ₹6,000 HD Engagement/Reception Makeup: ₹8,000 Airbrush Engagement/Reception Makeup: ₹12,000 Party Makeup: Basic Party Makeup: ₹2,500 HD Party Makeup: ₹3,500 We offer a range of services, ensuring there is something perfect for your bridal, engagement, reception, and other pre-wedding events. Popular Bridal Makeup Styles in Akbarpur Traditional Bridal Makeup This style is designed for brides who want a bold, rich look that complements traditional wedding attire. Expect vibrant colors, defined eyes, and a radiant glow that exudes elegance and grace. HD Bridal Makeup HD makeup is ideal for brides who want a flawless finish both in person and in photos. It provides a smooth and polished look, ensuring you look your best from every angle. Airbrush Bridal Makeup Airbrush makeup is lightweight and gives full coverage with a smooth, natural finish. It’s perfect for brides looking for a long-lasting look that feels comfortable throughout the entire wedding day. How to Book Your Bridal Makeup with Ladyfair in Akbarpur Step 1: Initial Contact Call us at 7004721239 to book your bridal makeup service. Our team will be happy to discuss your specific requirements and help you choose the perfect package. Step 2: Consultation We offer a personalized consultation to understand your vision for your wedding day makeup. During this session, we’ll discuss your attire, makeup preferences, and any skin concerns you may have. Step 3: Makeup Trial A makeup trial is highly recommended to perfect your bridal look before the big day. During the trial, we’ll experiment with different styles and adjust your look to ensure you feel confident and beautiful. Step 4: Wedding Day Makeup On your wedding day, we’ll arrive at your home in Akbarpur, bringing all the professional tools and products necessary for your bridal makeup. Our artist will create a flawless look, ensuring you are picture-perfect for every moment of your celebration. FAQs About Ladyfair Bridal Makeup in Akbarpur Q1: What makes Ladyfair Bridal Makeup the best choice in Akbarpur? A: Ladyfair provides professional, at-home bridal makeup services with expert artists, using premium products to create flawless, personalized looks for every bride. Q2: What are the prices for bridal makeup in Akbarpur? A: Bridal makeup services start at ₹10,000 for basic makeup, ₹12,000 for HD makeup, and ₹18,000 for airbrush makeup. We also offer packages for engagement and reception events. Q3: How can I book Ladyfair’s bridal makeup services? A: You can easily book by calling 7004721239. We’ll guide you through the process, including consultations and makeup trials to ensure the perfect look. Q4: What types of makeup styles do you offer? A: We offer traditional, HD, and airbrush makeup styles, each designed to suit different preferences and wedding themes. Q5: Are makeup trials available? A: Yes, we offer makeup trials before your wedding to ensure your bridal look is exactly what you envision. Q6: What makeup products do you use? A: We use only high-quality, professional-grade products to ensure long-lasting results and a flawless finish. Q7: Does Ladyfair offer makeup services for other occasions? A: Yes, we also provide engagement, reception, party, and special occasion makeup services in Akbarpur. Tips for Preparing for Your Bridal Makeup Session Hydrate: Drink plenty of water to ensure your skin stays hydrated and glowing. Skincare Routine: Stick to your regular skincare routine leading up to the wedding to achieve the best base for makeup. Avoid New Products: Avoid using new skincare products before the wedding to avoid potential allergic reactions. Discuss Your Preferences: Make sure to communicate your makeup preferences and any concerns during your consultation. Make Your Wedding Day Special with Ladyfair Bridal Makeup in Akbarpur At Ladyfair, we are committed to providing top-quality bridal makeup services that ensure you look flawless and feel confident on your wedding day. Whether you prefer a classic, traditional look or a modern, HD finish, we’ll help you achieve the bridal look of your dreams.

Posted By: 14th November 2024
Bridal makeup artist in Warisaliganj
Ladyfair Bridal Makeup Services in Warisaliganj: The Perfect Wedding Look Awaits Your wedding day is one of the most important moments of your life, and it deserves the perfect look. Ladyfair Bridal Makeup Services in Warisaliganj offers an exceptional at-home bridal makeup experience, ensuring you look and feel stunning on your special day. Whether you're looking for a traditional bridal look, a flawless HD finish, or the elegance of airbrush makeup, Ladyfair has the expertise and premium products to create a personalized, breathtaking bridal look. Why Choose Ladyfair Bridal Makeup in Warisaliganj? 1. Experienced Makeup Artist Our makeup artist is highly experienced and skilled in the art of bridal makeup. We understand that every bride has a unique style and vision for their wedding day. With Ladyfair, you will receive a customized makeup experience that highlights your natural beauty, complementing your attire and the overall wedding theme. 2. Convenient At-Home Service Forget the stress of traveling to a salon on your wedding day. Ladyfair brings professional makeup services to your doorstep in Warisaliganj. We ensure you enjoy a relaxed, luxurious makeup experience at home, where you can focus on getting ready for your big day in comfort and peace. 3. Premium Makeup Products At Ladyfair, we use only high-quality, professional-grade makeup products to ensure a flawless finish. Our products are chosen for their longevity and ability to withstand the entire wedding day, keeping you radiant and picture-perfect from start to finish. Bridal Makeup Packages and Pricing in Warisaliganj Ladyfair offers a range of packages to cater to different budgets and preferences. Whether you want a simple yet elegant look or a high-definition finish for flawless photos, we have something for everyone. Bridal Makeup Packages: Basic Bridal Makeup: ₹10,000 A soft, elegant look that enhances your natural beauty and provides a timeless bridal appearance. HD Bridal Makeup: ₹12,000 This high-definition makeup gives you a flawless, photo-ready finish, perfect for close-up shots and high-quality photography. Airbrush Bridal Makeup: ₹18,000 Ideal for long wedding days, airbrush makeup offers a lightweight yet full-coverage look, giving you a smooth, even complexion that lasts for hours. Engagement & Reception Makeup: Basic Engagement/Reception Makeup: ₹6,000 HD Engagement/Reception Makeup: ₹8,000 Airbrush Engagement/Reception Makeup: ₹12,000 Party Makeup: Basic Party Makeup: ₹2,500 HD Party Makeup: ₹3,500 We offer these flexible packages so you can choose the right service for your wedding or any pre-wedding event. Bridal Makeup Styles Offered in Warisaliganj Traditional Bridal Makeup This bold, vibrant style is perfect for brides who want a rich, classic look that complements traditional wedding attire. Expect defined eyes, bold lips, and a stunning, timeless glow. HD Bridal Makeup HD makeup is designed to ensure you look flawless both in person and in photographs. With a smooth, seamless finish, this makeup style gives you a natural, polished appearance that’s perfect for wedding photos. Airbrush Bridal Makeup Known for its lightweight, smooth finish, airbrush makeup is ideal for brides who want a long-lasting look that feels as natural as it appears. The airbrush technique gives a flawless finish, perfect for brides looking for a glowing complexion without the heaviness of traditional makeup. How to Book Ladyfair Bridal Makeup in Warisaliganj Step 1: Initial Contact Call 7004721239 to discuss your bridal makeup needs. Our team will help you select the right package based on your preferences, wedding theme, and budget. Step 2: Consultation Meet with our makeup artist to discuss your vision, skin type, and the style of your wedding attire. We will work with you to create a customized look that aligns with your bridal vision. Step 3: Makeup Trial Before the big day, we offer a trial session to ensure your look is just as you envisioned. During the trial, we’ll make any necessary adjustments so that you feel confident and beautiful on your wedding day. Step 4: Wedding Day Makeup On your wedding day, our artist will arrive at your location in Warisaliganj to provide flawless makeup application. We ensure that you look picture-perfect and ready for every special moment. Frequently Asked Questions About Ladyfair Bridal Makeup in Warisaliganj Q1: What makes Ladyfair Bridal Makeup the best choice in Warisaliganj? A: Ladyfair offers skilled, at-home makeup services using premium products. Our experienced artists provide customized bridal looks that ensure you look and feel your best on your wedding day. Q2: What are the prices for bridal makeup services in Warisaliganj? A: Prices start at ₹10,000 for basic bridal makeup, ₹12,000 for HD makeup, and ₹18,000 for airbrush makeup. We also offer affordable options for engagement and reception makeup. Q3: How can I book Ladyfair’s bridal makeup services? A: Simply call 7004721239 to book your bridal makeup appointment. We also offer consultations and makeup trials to help you achieve your desired look. Q4: What makeup styles are available? A: We offer traditional, HD, and airbrush makeup styles to suit every bride’s preference and wedding theme. Q5: Are makeup trials available before the wedding day? A: Yes, we offer makeup trials to ensure that you are happy with your bridal look before the big day. Q6: What products do you use for bridal makeup? A: We use professional-grade, high-quality makeup products that are safe for all skin types, ensuring a flawless finish that lasts all day. Q7: Does Ladyfair offer other makeup services in Warisaliganj? A: Yes, in addition to bridal makeup, we also offer engagement, reception, party, and special occasion makeup services. Preparing for Your Bridal Makeup Session Stay Hydrated: Drinking water leading up to your wedding day helps maintain healthy, glowing skin. Stick to Your Skincare Routine: Follow a consistent skincare routine before the wedding for a smooth base for your makeup. Avoid New Products: Stick with the skincare products you know and trust to avoid potential reactions. Communicate Your Preferences: Be clear about the look you want during your consultation so that we can create a look that fits your vision. Ladyfair Bridal Makeup: The Ideal Choice for Warisaliganj Brides Ladyfair Bridal Makeup Services in Warisaliganj is committed to making you look and feel your best on your wedding day. We combine expert makeup artistry with high-quality products to create flawless, personalized looks. Let us help you achieve the perfect bridal look with our at-home services, ensuring that your wedding day is as beautiful as you are.

Posted By: 14th November 2024
Bridal makeup artist in Pakribarawan
Ladyfair Bridal Makeup Services in Pakribarawan: Making Your Wedding Day Unforgettable Your wedding day is a day to shine, and Ladyfair Bridal Makeup Services in Pakribarawan is here to bring out your beauty, confidence, and elegance. Specializing in at-home bridal makeup, Ladyfair provides expert services that make you look stunning on your big day without needing to step out. With makeup styles that include traditional, HD, and airbrush finishes, our skilled artist crafts a personalized look that suits your attire, skin type, and vision for the day. Why Choose Ladyfair for Bridal Makeup in Pakribarawan? 1. Experienced Makeup Artist Ladyfair’s makeup artist brings years of experience in bridal makeup, using techniques tailored to accentuate your unique features and complement your wedding theme. Each look is customized, helping you achieve a style that reflects your personality. 2. Convenient At-Home Service We know that wedding preparations can be hectic, so we bring our professional makeup services directly to you in Pakribarawan. Relax and enjoy the experience of high-quality makeup application from the comfort of your home or wedding venue, allowing you to focus on enjoying every moment. 3. High-Quality Makeup Products For a look that lasts throughout your celebration, Ladyfair only uses premium, professional-grade products. Our selections are safe for sensitive skin, ensuring a long-lasting and flawless finish that holds up well in photos and throughout the day. Bridal Makeup Packages and Pricing in Pakribarawan Ladyfair offers flexible packages designed to cater to your specific preferences and budget, ensuring every bride can find the perfect option. Bridal Makeup Options: Basic Bridal Makeup: ₹10,000 A beautiful, natural style that enhances your features with a soft, timeless look. HD Bridal Makeup: ₹12,000 Ideal for high-definition photos, this makeup style offers a flawless, photo-ready finish that looks stunning in close-up shots. Airbrush Bridal Makeup: ₹18,000 Lightweight yet full-coverage, airbrush makeup is ideal for long events, providing an even, glowing finish that feels natural. Engagement & Reception Makeup: Basic Engagement/Reception Makeup: ₹6,000 HD Engagement/Reception Makeup: ₹8,000 Airbrush Engagement/Reception Makeup: ₹12,000 Party Makeup: Basic Party Makeup: ₹2,500 HD Party Makeup: ₹3,500 These packages cover your bridal and pre-wedding event needs, ensuring you look radiant for each occasion. Bridal Makeup Styles Available in Pakribarawan Traditional Bridal Makeup This style features bold, defined makeup that pairs beautifully with traditional wedding attire, providing a classic look rooted in elegance and tradition. HD Bridal Makeup HD makeup is specially designed for high-definition photography, offering a smooth and seamless look. This finish looks impeccable in person and on camera, perfect for today’s photography demands. Airbrush Bridal Makeup Known for its lightweight feel and long-lasting effect, airbrush makeup provides a natural yet polished look, ideal for brides seeking a radiant, effortless glow. How to Book Ladyfair Bridal Makeup in Pakribarawan Step 1: Contact Us Call 7004721239 to discuss your bridal makeup needs and book an appointment. Our team will help you select a package that best suits your vision. Step 2: Consultation Session During your consultation, you’ll meet with our makeup artist to discuss your wedding style, color palette, and any preferences, creating a makeup plan that aligns perfectly with your day. Step 3: Makeup Trial A trial session is available to preview your look and make any adjustments, ensuring you feel absolutely confident in your bridal makeup. Step 4: Wedding Day Makeup On your wedding day, our makeup artist will arrive at your location in Pakribarawan, fully prepared to create the perfect look that reflects your style and brings out your beauty. Frequently Asked Questions About Ladyfair Bridal Makeup in Pakribarawan Q1: What makes Ladyfair a great choice for bridal makeup in Pakribarawan? A: Ladyfair provides professional at-home makeup services using top-quality products, ensuring a flawless and stunning bridal look that lasts all day. Q2: What are the prices for bridal makeup in Pakribarawan? A: Prices start at ₹10,000 for basic bridal makeup, ₹12,000 for HD makeup, and ₹18,000 for airbrush makeup. We also offer affordable engagement and reception packages. Q3: How do I book Ladyfair’s bridal makeup services? A: Simply call us at 7004721239 to book your appointment. We offer consultations and trial sessions to ensure you achieve your ideal bridal look. Q4: What types of makeup styles are available? A: We offer traditional, HD, and airbrush makeup styles, allowing you to choose the perfect look for your wedding. Q5: Are makeup trials available before the wedding day? A: Yes, we provide a trial session to preview your bridal look and make any adjustments ahead of your wedding day. Q6: What type of products does Ladyfair use? A: We use professional-grade, high-quality products that are safe for all skin types and provide a flawless, long-lasting finish. Q7: Does Ladyfair offer services for other events in Pakribarawan? A: Yes, we also provide makeup services for engagement ceremonies, receptions, parties, and other special events. Preparing for Your Bridal Makeup Session Stay Hydrated: Drinking water in the days leading up to your wedding will keep your skin looking fresh and glowing. Follow Your Skincare Routine: Consistent skincare ensures your makeup applies smoothly and lasts longer. Stick to Familiar Products: Avoid trying new skincare products close to your wedding to prevent unexpected reactions. Share Your Preferences: Communicate clearly with your makeup artist during the consultation to achieve your desired look. Ladyfair Bridal Makeup: Your Perfect Wedding Look Awaits in Pakribarawan Ladyfair Bridal Makeup Services in Pakribarawan is committed to making your wedding day as special and memorable as possible. With our convenient, high-quality at-home services, we bring the salon to you, delivering a luxurious experience and a look that is both timeless and radiant.

Posted By: 14th November 2024
Bridal makeup artist in Nardiganj
Ladyfair Bridal Makeup Services in Nardiganj: Achieving Your Dream Bridal Look Your wedding day is one of the most cherished moments of your life, and Ladyfair Bridal Makeup Services in Nardiganj is here to ensure you look and feel your best. Specializing in professional at-home bridal makeup, Ladyfair combines beauty expertise with convenience, bringing salon-quality services to your doorstep. From traditional styles that honor heritage to flawless HD and airbrush finishes for a modern touch, Ladyfair’s skilled makeup artist creates looks that highlight each bride’s unique beauty and style. Why Ladyfair Is the Top Choice for Bridal Makeup in Nardiganj 1. Experienced and Skilled Makeup Artist Ladyfair’s makeup artist has years of experience crafting beautiful bridal looks, providing custom styles to match each bride’s unique preferences. With a deep understanding of makeup techniques, we ensure a look that not only enhances your natural beauty but also complements your attire and wedding theme. 2. Convenient At-Home Makeup Service Planning a wedding can be overwhelming, and Ladyfair’s at-home service brings luxury and relaxation to your preparations. Avoid the hassle of traveling on your big day—our makeup artist arrives fully prepared at your location, ensuring a calm and seamless experience. 3. Premium Quality Makeup Products To create a look that lasts throughout your special day, we use only high-quality, professional-grade makeup products. Our selection of trusted brands is safe for all skin types, providing a radiant, long-lasting finish ideal for both photography and in-person viewing. Bridal Makeup Packages and Pricing in Nardiganj Ladyfair’s bridal makeup packages are designed to cater to various needs, offering flexibility for different budgets and preferences. Bridal Makeup Options: Basic Bridal Makeup: ₹10,000 A timeless, elegant look that emphasizes natural beauty with subtle enhancements. HD Bridal Makeup: ₹12,000 Crafted for high-definition photography, HD makeup ensures a flawless, camera-ready finish. Airbrush Bridal Makeup: ₹18,000 Lightweight and long-wearing, airbrush makeup provides an even, radiant glow ideal for extended wear. Engagement & Reception Makeup: Basic Engagement/Reception Makeup: ₹6,000 HD Engagement/Reception Makeup: ₹8,000 Airbrush Engagement/Reception Makeup: ₹12,000 Party Makeup: Basic Party Makeup: ₹2,500 HD Party Makeup: ₹3,500 These packages cover various wedding-related events, ensuring you look stunning for every occasion. Bridal Makeup Styles Available in Nardiganj Traditional Bridal Makeup Inspired by classic bridal looks, traditional makeup features bold, refined details that pair beautifully with cultural attire, providing an elegant, timeless appeal. HD Bridal Makeup Known for its high-definition effect, HD makeup ensures a polished, smooth finish that holds up in close-up photos, making you look flawless from every angle. Airbrush Bridal Makeup Lightweight yet full-coverage, airbrush makeup is perfect for brides wanting a natural, glowing look that lasts all day. It provides a breathable, even finish without a heavy feel. How to Book Ladyfair Bridal Makeup in Nardiganj Step 1: Reach Out to Us Call 7004721239 to discuss your bridal makeup requirements and schedule an appointment. Our team is here to help you choose the best package for your needs. Step 2: Consultation Session During the consultation, you’ll meet with our makeup artist to discuss your desired style, attire, and wedding details, ensuring your makeup matches your vision. Step 3: Makeup Trial To perfect your look, a trial session is available, allowing you to preview and adjust your bridal style so that everything is just right for your wedding day. Step 4: Wedding Day Makeup On your big day, our makeup artist will arrive at your location in Nardiganj, equipped and ready to create the bridal look you’ve always dreamed of. Frequently Asked Questions About Ladyfair Bridal Makeup in Nardiganj Q1: Why is Ladyfair a popular choice for bridal makeup in Nardiganj? A: Ladyfair offers expert at-home makeup services with experienced artists and premium products, delivering stunning, personalized looks for brides. Q2: What is the price range for bridal makeup services in Nardiganj? A: Prices start at ₹10,000 for basic bridal makeup, ₹12,000 for HD makeup, and ₹18,000 for airbrush makeup. We also offer affordable packages for engagement and reception makeup. Q3: How do I book Ladyfair’s bridal makeup services in Nardiganj? A: Call us at 7004721239 to book an appointment. We provide consultations and makeup trials to ensure your look is exactly as you envision. Q4: What makeup styles does Ladyfair offer in Nardiganj? A: We provide traditional, HD, and airbrush makeup styles to suit different preferences and wedding themes. Q5: Can I have a trial makeup session before the wedding? A: Yes, we offer a trial session to help you achieve the perfect look before the big day. Q6: What type of products does Ladyfair use for bridal makeup? A: We use professional-grade, high-quality products that are safe and long-lasting for all skin types, ensuring a flawless finish. Q7: Does Ladyfair offer makeup services for events other than weddings? A: Yes, in addition to bridal makeup, we offer engagement, reception, party, and special occasion makeup services. Preparing for Your Bridal Makeup Session Stay Hydrated: Keeping your skin hydrated enhances its natural glow. Stick to Your Skincare Routine: Regular skincare helps makeup apply smoothly and last longer. Avoid Trying New Products: To prevent skin reactions, use only familiar skincare products close to your wedding day. Discuss Preferences with Your Artist: Clear communication with your makeup artist ensures your look is exactly as you envision. Book Your Dream Bridal Makeup with Ladyfair in Nardiganj At Ladyfair, we are dedicated to making each bride feel beautiful, confident, and ready for one of the most unforgettable days of her life. Our professional, at-home bridal makeup services in Nardiganj bring convenience, quality, and artistry together, ensuring a seamless, stress-free experience. From consultation to wedding day, we work to create a look that enhances your natural beauty while reflecting your personality and style. Contact us at 7004721239 to schedule your bridal makeup session with Ladyfair in Nardiganj. Let us be part of your journey to wedded bliss, helping you shine on your special day.

Posted By: 14th November 2024
Bridal makeup artist in Kawakole
Ladyfair Bridal Makeup Services in Kawakole: Making Your Wedding Day Extraordinary Every bride dreams of looking her absolute best on her wedding day, and Ladyfair Bridal Makeup Services in Kawakole is here to make that dream a reality. With a commitment to providing exceptional, at-home bridal makeup, Ladyfair brings beauty and convenience together, creating an unforgettable experience for brides in Kawakole. Whether you envision a traditional bridal look, a smooth HD finish, or a flawless airbrush effect, our skilled makeup artist tailors each look to suit your style, enhancing your natural beauty for one of the most memorable days of your life. Why Choose Ladyfair Bridal Makeup in Kawakole? 1. Professional and Experienced Makeup Artist Our makeup artist at Ladyfair has years of experience in bridal makeup, mastering techniques that highlight each bride's unique features. We focus on creating custom looks that make you feel confident and radiant on your wedding day. 2. At-Home Service for a Relaxing Experience Ladyfair understands the importance of convenience, especially on such an important day. By providing at-home bridal makeup services, we allow you to relax in a familiar space while our artist transforms you for the big day. You don’t need to worry about the stress of traveling; we bring the salon experience to your doorstep. 3. Premium Quality Products for a Flawless Look To ensure a long-lasting, flawless finish, we use only high-end, professional-grade makeup products. Our products are safe for all skin types, helping you look stunning in person and in photos throughout your wedding celebrations. Bridal Makeup Packages and Pricing in Kawakole Ladyfair offers a range of bridal makeup packages that cater to different budgets and style preferences, ensuring every bride can find the perfect fit. Bridal Makeup Packages: Basic Bridal Makeup: ₹10,000 A natural, timeless look that enhances your features without overpowering them. HD Bridal Makeup: ₹12,000 Ideal for high-definition photography, this option provides a smooth, polished look that’s picture-perfect. Airbrush Bridal Makeup: ₹18,000 Lightweight and long-lasting, airbrush makeup gives a radiant, natural finish that lasts all day. Engagement & Reception Makeup: Basic Engagement/Reception Makeup: ₹6,000 HD Engagement/Reception Makeup: ₹8,000 Airbrush Engagement/Reception Makeup: ₹12,000 Party Makeup: Basic Party Makeup: ₹2,500 HD Party Makeup: ₹3,500 These packages cover everything from pre-wedding events to post-wedding celebrations, allowing you to look stunning at every event. Bridal Makeup Styles Available in Kawakole Traditional Bridal Makeup Bold and elegant, traditional bridal makeup pairs beautifully with classic wedding attire, creating a timeless look for brides who want something vibrant and detailed. HD Bridal Makeup Designed to look flawless under high-definition photography, HD makeup offers a smooth, picture-perfect finish that enhances your natural beauty for both in-person and camera looks. Airbrush Bridal Makeup Known for its light feel and seamless coverage, airbrush makeup provides a radiant, long-lasting glow, making it ideal for brides who want a polished yet natural look. How to Book Ladyfair Bridal Makeup in Kawakole Step 1: Get in Touch Call us at 7004721239 to discuss your makeup requirements and schedule an appointment. Our team will help you select the package that suits your needs. Step 2: Consultation Session During the consultation, our makeup artist will discuss your wedding attire, preferences, and desired style, ensuring that your look complements every aspect of your wedding day. Step 3: Makeup Trial A makeup trial lets you preview your bridal look and make adjustments if necessary, so you feel fully confident on the big day. Step 4: Wedding Day Makeup On your wedding day, our artist will arrive at your home fully equipped and ready to create the perfect bridal look. Frequently Asked Questions About Ladyfair Bridal Makeup in Kawakole Q1: What makes Ladyfair a popular choice for bridal makeup in Kawakole? A: Ladyfair provides professional at-home makeup services with experienced artists and top-quality products, ensuring a flawless, personalized look for brides. Q2: What are the prices for bridal makeup services in Kawakole? A: Bridal makeup prices start at ₹10,000 for basic makeup, ₹12,000 for HD, and ₹18,000 for airbrush makeup. We also offer packages for engagement and reception makeup. Q3: How do I book Ladyfair’s bridal makeup services in Kawakole? A: Call 7004721239 to book an appointment. We offer consultations and trial sessions to make sure your bridal look is exactly as you envision. Q4: What makeup styles does Ladyfair offer in Kawakole? A: We offer traditional, HD, and airbrush makeup styles to suit different bridal preferences. Q5: Is a trial makeup session available before the wedding day? A: Yes, a trial session is available to help perfect your look before the wedding day. Q6: What kind of products does Ladyfair use for bridal makeup? A: We use high-quality, professional-grade products that are safe, long-lasting, and suitable for all skin types. Q7: Does Ladyfair offer other makeup services besides bridal makeup? A: Yes, we also provide makeup services for engagement, reception, parties, and other special occasions. Tips to Prepare for Your Bridal Makeup Session Stay Hydrated: Drinking water regularly helps keep your skin glowing and fresh. Follow a Skincare Routine: Consistent skincare enhances your natural beauty and helps makeup apply smoothly. Avoid New Products: Stick to familiar products to avoid any skin reactions close to the wedding day. Communicate with Your Makeup Artist: Share your style and preferences to ensure your look matches your vision. Transform Your Wedding Experience with Ladyfair Bridal Makeup in Kawakole At Ladyfair, we are dedicated to making every bride look and feel beautiful. Our at-home makeup services in Kawakole ensure a stress-free, luxurious experience that allows you to focus on enjoying your special day. From classic bridal looks to modern airbrush techniques, our talented makeup artist provides a flawless finish that enhances your natural beauty.

Posted By: 14th November 2024
Bridal makeup artist in Kashichak
Ladyfair Bridal Makeup Services in Kashichak: A Beautiful Beginning to Your Wedding Day Your wedding day is one of the most memorable events of your life, and at Ladyfair Bridal Makeup Services in Kashichak, we are committed to helping you look your absolute best. Offering high-quality, at-home makeup services, Ladyfair ensures that every bride in Kashichak receives a personalized and luxurious experience on her special day. Whether you prefer a classic look, a high-definition (HD) finish, or the elegance of airbrush makeup, our experienced makeup artist brings your vision to life, right in the comfort of your home. Why Choose Ladyfair Bridal Makeup in Kashichak? 1. Professional Makeup Artist with Years of Experience Our Ladyfair makeup artist is highly trained and experienced in creating custom bridal looks. We focus on enhancing your natural beauty while ensuring that the style matches your personal taste, attire, and wedding theme. 2. At-Home Convenience Planning a wedding can be hectic. That’s why Ladyfair brings the salon experience to you, allowing you to get ready in the familiar setting of your own home. You can relax while we transform you into a beautiful bride, taking care of all the details. 3. Premium Makeup Products To ensure a long-lasting, flawless finish, we use only high-end, professional-grade makeup products. Our products are carefully selected to suit all skin types, so you’ll look radiant and camera-ready all day. Bridal Makeup Packages and Pricing in Kashichak Ladyfair offers flexible pricing and packages to suit various needs and budgets, ensuring you get the perfect bridal look without compromising on quality. Bridal Makeup Packages: Basic Bridal Makeup: ₹10,000 A natural, elegant look that enhances your beauty without overpowering your features. HD Bridal Makeup: ₹12,000 For high-definition photography, this option creates a smooth, polished look perfect for photographs. Airbrush Bridal Makeup: ₹18,000 Lightweight and long-lasting, airbrush makeup provides a flawless, natural finish that holds up throughout the day. Engagement & Reception Makeup: Basic Engagement/Reception Makeup: ₹6,000 HD Engagement/Reception Makeup: ₹8,000 Airbrush Engagement/Reception Makeup: ₹12,000 Party Makeup: Basic Party Makeup: ₹2,500 HD Party Makeup: ₹3,500 Each package is designed to meet the needs of brides and guests for all occasions, from pre-wedding events to post-wedding celebrations. Bridal Makeup Styles Offered in Kashichak Traditional Bridal Makeup Our traditional makeup style is bold and vibrant, ideal for pairing with classic bridal attire. It’s meticulously applied to create a timeless, elegant look. HD Bridal Makeup Perfect for brides who want to look flawless in high-definition photographs. HD makeup provides a smooth, polished look, ideal for both close-ups and wide shots. Airbrush Bridal Makeup Lightweight and natural, airbrush makeup provides long-lasting coverage, giving you a radiant look without the heavy feel. It’s ideal for brides who want a polished yet subtle glow. How to Book Ladyfair Bridal Makeup in Kashichak Step 1: Contact Us Call 7004721239 to discuss your makeup preferences and book an appointment. Our team will help you choose the package that best suits your needs. Step 2: Consultation Session During the consultation, our makeup artist will discuss your wedding attire, preferences, and style. This is an excellent opportunity to share any specific ideas you have. Step 3: Makeup Trial A trial session gives you a preview of your bridal look, so you can feel confident in your appearance on the big day. Adjustments can be made if needed. Step 4: Wedding Day Makeup On the day of your wedding, our artist will arrive at your home fully prepared to create the beautiful bridal look you envision. FAQs about Ladyfair Bridal Makeup in Kashichak Q1: Why is Ladyfair a popular choice for bridal makeup in Kashichak? A: Ladyfair offers professional at-home makeup services, using high-quality products and customized styles that make brides look and feel amazing. Q2: What are the prices for bridal makeup services in Kashichak? A: Bridal makeup prices begin at ₹10,000 for basic makeup, ₹12,000 for HD, and ₹18,000 for airbrush makeup. Packages for engagement and reception makeup are also available. Q3: How can I book Ladyfair’s bridal makeup services in Kashichak? A: Simply call 7004721239 to book. We also offer consultations and makeup trials to ensure you get the look you desire. Q4: What makeup styles does Ladyfair offer? A: We provide traditional, HD, and airbrush makeup styles, allowing you to choose the look that suits your wedding style. Q5: Is a trial makeup session available? A: Yes, trial sessions are available to help you finalize your bridal look before the wedding day. Q6: What type of products does Ladyfair use for bridal makeup? A: We use professional, high-quality makeup products that are safe, long-lasting, and suitable for all skin types. Q7: Does Ladyfair offer other makeup services in Kashichak? A: Yes, we offer makeup for engagement, reception, parties, and other special occasions. Tips to Prepare for Your Bridal Makeup Session To ensure you look your best on your wedding day, here are a few tips to prepare for your makeup session: Hydrate: Drinking plenty of water will keep your skin looking fresh and radiant. Follow a Consistent Skincare Routine: Regular skincare helps keep your skin healthy, making the makeup look even better. Avoid New Products: Stick to products you know well to prevent skin reactions. Communicate Your Preferences: Be open with your makeup artist about your desired look so that you’re delighted with the final results. Make Your Wedding Day Unforgettable with Ladyfair in Kashichak At Ladyfair, we believe that every bride should feel beautiful and confident on her wedding day. With our at-home makeup service in Kashichak, we offer a personalized experience to help you look radiant and stunning for one of the most important days of your life.

Posted By: 14th November 2024
Bridal makeup artist in Hisua
Ladyfair Bridal Makeup Services in Hisua: Making Your Wedding Day Unforgettable Your wedding day is a momentous occasion, and at Ladyfair Bridal Makeup Services in Hisua, we understand the importance of looking and feeling your absolute best. Our skilled makeup artist provides top-notch, at-home bridal makeup services tailored to meet the unique style and preferences of each bride. Whether you envision a classic traditional look, a flawless HD finish, or a sophisticated airbrush effect, our team is dedicated to bringing your bridal vision to life. Why Choose Ladyfair for Bridal Makeup in Hisua? 1. Professional and Experienced Makeup Artist Our Ladyfair makeup artist has years of experience creating customized bridal looks that complement each bride's style, skin tone, and attire. We focus on enhancing natural beauty while ensuring you feel comfortable and confident on your big day. 2. Convenient At-Home Service With all the hustle and bustle of wedding preparations, Ladyfair provides the convenience of at-home makeup services, allowing you to relax in a comfortable environment while our makeup artist creates your perfect bridal look. Our professional setup and tools ensure salon-quality results right at your doorstep. 3. High-Quality Makeup Products We use only high-end, professional-grade makeup products to guarantee a long-lasting, radiant finish. Our products are carefully selected to suit all skin types, ensuring that you look flawless from morning to night. Bridal Makeup Packages and Pricing in Hisua Our bridal makeup packages are designed to fit a range of preferences and budgets, allowing you to select a look that’s perfect for your special day. Bridal Makeup Packages: Basic Bridal Makeup: ₹10,000 A natural yet elegant look that enhances your features without overpowering them. HD Bridal Makeup: ₹12,000 Perfect for high-definition photography, this style provides a smooth, even finish that looks impeccable both in person and on camera. Airbrush Bridal Makeup: ₹18,000 Lightweight and long-lasting, airbrush makeup provides full coverage with a natural, dewy finish, ideal for brides who want to look polished throughout the day. Engagement & Reception Makeup: Basic Engagement/Reception Makeup: ₹6,000 HD Engagement/Reception Makeup: ₹8,000 Airbrush Engagement/Reception Makeup: ₹12,000 Party Makeup: Basic Party Makeup: ₹2,500 HD Party Makeup: ₹3,500 Each package is crafted to suit your specific needs and ensure that you look fabulous for every occasion leading up to your wedding day. Bridal Makeup Styles Available in Hisua Traditional Bridal Makeup A bold, classic look that complements traditional bridal attire, featuring rich colors and meticulous application to create an elegant, timeless appearance. HD Bridal Makeup For brides who want to look flawless in every photograph, HD makeup offers a smooth, polished finish that’s perfect for high-resolution pictures. Airbrush Bridal Makeup Known for its lightweight feel and natural finish, airbrush makeup is ideal for brides who want full coverage that lasts all day. How to Book Your Bridal Makeup with Ladyfair in Hisua Step 1: Contact Us Call 7004721239 to discuss your makeup preferences and book an appointment. We will guide you through our packages and help you choose the right one for your wedding day. Step 2: Consultation Session We’ll schedule a consultation to discuss your bridal look, considering your dress, theme, and unique style. This is the perfect time to share any inspirations or specific requests. Step 3: Makeup Trial Our trial session lets you preview your bridal makeup, allowing you to make any adjustments before your big day. Step 4: Wedding Day Makeup On the day of your wedding, our artist will arrive fully prepared at your location in Hisua to create the flawless bridal look you’ve always dreamed of. Frequently Asked Questions (FAQs) Q1: Why is Ladyfair a top choice for bridal makeup in Hisua? A: Ladyfair offers skilled at-home makeup services with a focus on personalized bridal looks, using high-quality products to ensure brides look stunning and feel comfortable. Q2: What are the prices for bridal makeup services in Hisua? A: Bridal makeup prices start at ₹10,000 for basic makeup, ₹12,000 for HD, and ₹18,000 for airbrush makeup. We also offer affordable packages for engagement and reception makeup. Q3: How do I book Ladyfair’s bridal makeup services in Hisua? A: You can book by calling 7004721239. We also offer consultations and makeup trials to help you plan your look ahead of time. Q4: What makeup styles do you offer for brides in Hisua? A: We offer traditional, HD, and airbrush makeup styles to suit each bride’s personal style and wedding theme. Q5: Are makeup trials available before the wedding day? A: Yes, we provide trial sessions to ensure you’re happy with your look before the big day. Q6: What products does Ladyfair use for bridal makeup? A: We use professional-grade makeup products that are safe, long-lasting, and suitable for all skin types, providing a radiant and flawless finish. Q7: Does Ladyfair offer other makeup services in Hisua? A: Yes, we provide makeup services for engagements, receptions, parties, and other special occasions. Bridal Beauty Tips to Prepare for Your Makeup Session To ensure you look your best on your wedding day, here are some tips for preparing for your makeup session: Hydrate: Drinking water regularly helps keep your skin glowing. Stick to Your Skincare Routine: Consistent skincare in the weeks leading up to your wedding will help keep your skin healthy. Avoid New Products: Using new products close to your wedding day could cause skin reactions. Communicate with Your Makeup Artist: Discuss your preferences and any specific requests to achieve the look you envision. Experience the Ladyfair Difference in Hisua At Ladyfair, we believe that every bride deserves to feel beautiful and confident on her wedding day. Our professional makeup artist is dedicated to providing a personalized, at-home makeup service that will ensure you look radiant and unforgettable.

Posted By: 14th November 2024
Bridal makeup artist in Mohiuddin Nagar
Ladyfair Bridal Makeup Services in Mohiuddin Nagar: Your Dream Wedding Look Awaits Your wedding day is one of the most special moments in your life, and Ladyfair Bridal Makeup Services in Mohiuddin Nagar is here to help you look and feel your best. We specialize in providing expert bridal makeup services right at your doorstep, ensuring that you experience a luxurious and stress-free beauty session on your big day. Whether you're envisioning a timeless traditional bridal look, a flawless HD finish, or a sophisticated airbrush style, our skilled makeup artist in Mohiuddin Nagar is here to turn your vision into reality. Why Ladyfair is the Best Choice for Bridal Makeup in Mohiuddin Nagar 1. Experienced and Professional Makeup Artist At Ladyfair, our makeup artist is highly skilled in bridal makeup, ensuring that every bride looks her best on her wedding day. We take time to understand your personal style, wedding theme, and attire to craft a look that highlights your natural beauty. 2. Convenient At-Home Service We understand how busy wedding planning can be, which is why we offer at-home bridal makeup services in Mohiuddin Nagar. You can relax in the comfort of your home while our makeup artist works their magic to create your perfect bridal look. 3. Premium-Quality Makeup Products We use only high-quality, professional-grade makeup products that ensure long-lasting, flawless results. From foundation to lashes, everything is selected to ensure you look radiant throughout your wedding day, from the ceremony to the reception. Bridal Makeup Packages and Pricing in Mohiuddin Nagar We offer a range of bridal makeup packages designed to fit different preferences and budgets. Whether you're planning a simple ceremony or an extravagant celebration, our pricing is designed to ensure you receive a fantastic bridal look without any surprises. Bridal Makeup Packages: Basic Bridal Makeup: ₹10,000 A natural, refined look that enhances your features with elegance and grace. HD Bridal Makeup: ₹12,000 This makeup style is perfect for high-definition photography, offering a flawless, smooth finish that looks stunning both in person and on camera. Airbrush Bridal Makeup: ₹18,000 Lightweight, long-lasting, and breathable, airbrush makeup ensures you stay fresh and radiant throughout your wedding day. Engagement & Reception Makeup: Basic Engagement/Reception Makeup: ₹6,000 HD Engagement/Reception Makeup: ₹8,000 Airbrush Engagement/Reception Makeup: ₹12,000 Party Makeup: Basic Party Makeup: ₹2,500 HD Party Makeup: ₹3,500 Each package is customized to suit your needs, ensuring that you look and feel your best for every special occasion leading up to your wedding day. Bridal Makeup Styles Available in Mohiuddin Nagar Traditional Bridal Makeup Ideal for brides who want a bold, vibrant look that complements traditional bridal attire. This style focuses on rich colors and precise application, creating an elegant and timeless appearance. HD Bridal Makeup High-definition makeup is the go-to choice for brides looking to ensure their makeup looks flawless in every photo and video. This style provides a smooth, polished finish that is perfect for high-resolution photography. Airbrush Bridal Makeup Airbrush makeup offers a lightweight, long-lasting solution that provides full coverage and a natural look. It is ideal for brides who want a soft, dewy finish that lasts throughout the day. How to Book Your Bridal Makeup with Ladyfair in Mohiuddin Nagar Step 1: Contact Us Call us at 7004721239 to discuss your makeup needs and preferences. We'll guide you through our available packages and help you choose the right one for your wedding day. Step 2: Consultation Session We'll schedule a consultation to discuss your bridal look, considering your wedding dress, theme, and personal style. This is a great time to share your ideas and vision with us. Step 3: Makeup Trial A trial session allows you to preview your bridal makeup, giving you the opportunity to make any necessary adjustments before the big day. Step 4: Wedding Day Makeup On your wedding day, our artist will arrive at your location in Mohiuddin Nagar, fully equipped to create the perfect bridal look that will make you shine on your special day. Frequently Asked Questions (FAQs) Q1: What makes Ladyfair a great choice for bridal makeup in Mohiuddin Nagar? A: Ladyfair offers professional at-home bridal makeup services, using high-quality products and providing personalized looks that make brides feel beautiful and confident on their big day. Q2: How much does bridal makeup cost in Mohiuddin Nagar? A: Bridal makeup prices range from ₹10,000 for basic makeup to ₹18,000 for airbrush makeup. We also offer affordable options for engagement and reception makeup. Q3: Can I book Ladyfair’s bridal makeup services in advance? A: Yes, you can book our services by calling 7004721239. We recommend booking as early as possible to secure your preferred date. Q4: What types of makeup styles do you offer? A: We offer traditional, HD, and airbrush bridal makeup to cater to different preferences and wedding themes. Q5: Are makeup trials available? A: Yes, we recommend a trial session so you can preview your bridal look and make any necessary adjustments before the big day. Q6: What kind of makeup products do you use? A: We use high-end, professional-grade makeup products that are safe for all skin types and provide a flawless finish that lasts throughout the wedding day. Q7: Does Ladyfair offer other makeup services in Mohiuddin Nagar? A: Yes, we offer engagement, reception, party, and special occasion makeup services to ensure you look stunning for all events leading up to your wedding. Beauty Tips for Your Bridal Makeup Session To help you achieve the best bridal makeup, here are a few tips: Stay Hydrated: Drinking plenty of water in the days leading up to your wedding helps keep your skin glowing and healthy. Skincare Routine: Maintain a consistent skincare routine to prep your skin and avoid dryness or irritation. Stick to What You Know: Avoid using new skincare or makeup products right before your wedding to prevent any reactions. Discuss Your Preferences: Be sure to communicate your makeup preferences during the consultation so we can create the perfect look for you. Experience the Ladyfair Difference in Mohiuddin Nagar At Ladyfair, we understand that every bride is unique, and we are dedicated to helping you look and feel your best on your wedding day. With our professional makeup services, high-quality products, and personalized approach, we make sure you get the bridal look of your dreams. Contact us today at 7004721239 to book your bridal makeup session in Mohiuddin Nagar and let us help you shine on your special day!

Posted By: 14th November 2024
Bridal makeup artist in Patori
Ladyfair Bridal Makeup Services in Patori: Making Your Wedding Day Truly Unforgettable Your wedding day is a once-in-a-lifetime event, and Ladyfair Bridal Makeup Services in Patori is here to ensure you look stunning from start to finish. With expert at-home bridal makeup, Ladyfair offers convenience, comfort, and artistry right at your doorstep. Our experienced makeup artist can create your dream look, whether it’s a timeless traditional style, a high-definition finish for flawless photos, or a lightweight, full-coverage airbrush application that lasts all day. When you choose Ladyfair, you’re choosing a luxurious beauty experience without leaving the comfort of your home, designed to suit your individual style and enhance your natural beauty. Why Choose Ladyfair for Bridal Makeup in Patori? 1. Expert Makeup Artist with Years of Experience Our professional makeup artist in Patori brings extensive expertise in bridal makeup, creating personalized looks tailored to highlight each bride’s unique beauty and complement her wedding attire. With Ladyfair, you can be confident in receiving an elegant, polished finish that enhances your special day. 2. At-Home Service for Ultimate Comfort On such an important day, you deserve to be comfortable and relaxed. Our at-home service brings salon-quality beauty treatments directly to your location in Patori, ensuring a seamless, stress-free experience. 3. High-Quality Makeup Products for a Long-Lasting Look We use only premium, professional-grade products to provide a flawless finish that stays radiant all day. From top brands trusted in the beauty industry, our products are safe, skin-friendly, and chosen for their durability. Bridal Makeup Packages and Pricing in Patori We offer a range of packages to suit different needs and budgets, ensuring that every bride can have a magical look for her wedding day. Bridal Makeup Packages: Basic Bridal Makeup: ₹10,000 A refined, elegant look that enhances natural beauty with a soft, sophisticated finish. HD Bridal Makeup: ₹12,000 Perfect for high-definition photography, HD makeup gives you a smooth, flawless look that looks stunning both in person and on camera. Airbrush Bridal Makeup: ₹18,000 Our lightweight airbrush application offers full coverage that’s long-lasting, comfortable, and provides a radiant, natural finish. Engagement & Reception Makeup: Basic Engagement/Reception Makeup: ₹6,000 HD Engagement/Reception Makeup: ₹8,000 Airbrush Engagement/Reception Makeup: ₹12,000 Party Makeup: Basic Party Makeup: ₹2,500 HD Party Makeup: ₹3,500 These packages are available for various wedding events, from the engagement to the reception, ensuring a picture-perfect look for each special occasion. Bridal Makeup Styles Available in Patori Traditional Bridal Makeup For brides who want a classic, vibrant look, our traditional makeup style is carefully applied to complement traditional attire, bringing out elegance and timeless beauty. HD Bridal Makeup This high-definition makeup style is ideal for photos and videos, offering a flawless finish that ensures your makeup looks smooth and natural both on camera and up close. Airbrush Bridal Makeup Lightweight, seamless, and durable, airbrush makeup provides full coverage that’s comfortable, long-lasting, and perfect for outdoor weddings or all-day events. Steps to Book Your Bridal Makeup with Ladyfair in Patori Step 1: Contact Us Call us at 7004721239 to discuss your makeup preferences and choose a package that meets your needs. Our team will help you select the perfect style. Step 2: Consultation During the consultation, we’ll go over your bridal attire, preferred look, and wedding theme to create a makeup plan that enhances your unique beauty and style. Step 3: Makeup Trial Book a makeup trial to preview your look and make any necessary adjustments, ensuring absolute confidence in your bridal makeup on the big day. Step 4: Wedding Day Makeup Our artist will arrive at your location in Patori on the wedding day, fully equipped to bring your dream bridal look to life. Frequently Asked Questions (FAQs) Q1: Why is Ladyfair a top choice for bridal makeup in Patori? A: Ladyfair combines professional expertise with convenient at-home services, using high-quality products to create a stunning, long-lasting look for your wedding day. Q2: What is the price range for bridal makeup in Patori? A: Bridal makeup packages start at ₹10,000 for basic makeup, with HD makeup at ₹12,000 and airbrush makeup at ₹18,000. We also have packages for engagement and other events. Q3: How can I book Ladyfair’s makeup services? A: Call us at 7004721239 to discuss options and book a consultation. We also offer trial sessions to ensure you’re happy with your look. Q4: What makeup styles does Ladyfair offer? A: We offer traditional, HD, and airbrush makeup styles to suit different bridal preferences and wedding themes. Q5: Are makeup trials available before the wedding day? A: Yes, we recommend a trial session to help you preview your bridal look and make any adjustments needed. Q6: What products are used for Ladyfair bridal makeup? A: We use premium, professional-grade products that are long-lasting and safe for all skin types, ensuring you look radiant all day. Q7: Does Ladyfair offer makeup services for other occasions? A: Yes, we offer engagement, reception, party, and special occasion makeup services to help you look beautiful for any celebration. Beauty Tips for Your Bridal Makeup Session To achieve the best results, here are some tips to prepare for your makeup session: Stay Hydrated: Drinking water consistently in the days leading up to your wedding keeps your skin glowing and healthy. Follow a Skincare Routine: Maintaining a regular skincare routine helps ensure smooth, well-prepped skin. Avoid New Products: Refrain from using unfamiliar products close to your wedding to avoid any potential reactions. Communicate Your Preferences: Discuss your makeup style and preferences with our artist to ensure you get the look you want. Ladyfair Bridal Makeup in Patori: Bringing Out the Best in Every Bride Ladyfair is committed to providing an unforgettable bridal beauty experience for brides in Patori. Our at-home services, expert makeup artist, and high-quality products ensure that you look radiant and flawless throughout your wedding day. Contact us at 7004721239 to book your Ladyfair bridal makeup session in Patori and let us help you create memories that will last a lifetime.

Posted By: 14th November 2024
Bridal makeup artist in Vidyapatinagar
Ladyfair Bridal Makeup Services in Vidyapatinagar: Crafting Perfect Wedding Day Looks Your wedding day is one of life’s most cherished moments, and achieving a flawless look is essential. Ladyfair Bridal Makeup Services in Vidyapatinagar provides professional, at-home makeup services to ensure you look radiant and camera-ready from start to finish. Whether you prefer a traditional look, a photo-perfect HD finish, or a seamless airbrush application, Ladyfair’s experienced makeup artist will help make your wedding day truly memorable. With our at-home bridal makeup service, you can enjoy a luxurious beauty experience right at your doorstep, removing the stress of travel and bringing salon-quality services to the comfort of your own space. Why Choose Ladyfair for Your Bridal Makeup in Vidyapatinagar? 1. Skilled Makeup Artists Our expert makeup artist in Vidyapatinagar brings years of experience in bridal makeup, creating customized looks that enhance your natural beauty and suit your style. Whether you’re looking for a bold, traditional look or something more natural, we make sure you look flawless. 2. Convenient At-Home Service With Ladyfair’s at-home makeup service, you don’t have to worry about scheduling salon visits or dealing with the rush of wedding day preparations. We bring the entire experience to you, ensuring you have a comfortable, stress-free experience. 3. High-Quality, Long-Lasting Products We use only professional-grade makeup products that provide a flawless finish and long-lasting wear. Every product is carefully selected to ensure that your makeup stays perfect throughout the day, from ceremony to celebration. Bridal Makeup Packages and Pricing in Vidyapatinagar We understand every bride has unique preferences and budgets. Our bridal makeup packages in Vidyapatinagar are designed to provide flexibility and options for each bride: Bridal Makeup Packages: Basic Bridal Makeup: ₹10,000 A refined and natural look that enhances your features with a soft, elegant finish. HD Bridal Makeup: ₹12,000 High-definition makeup that ensures a smooth, camera-ready look that stays perfect in person and in photos. Airbrush Bridal Makeup: ₹18,000 This lightweight, airbrush application provides full coverage that’s long-lasting and feels light on the skin for a flawless, polished look. Engagement & Reception Makeup: Basic Engagement/Reception Makeup: ₹6,000 HD Engagement/Reception Makeup: ₹8,000 Airbrush Engagement/Reception Makeup: ₹12,000 Party Makeup: Basic Party Makeup: ₹2,500 HD Party Makeup: ₹3,500 These packages are perfect for all your wedding events, from engagement to reception, and each service is tailored to ensure your makeup is as unique as your celebration. Bridal Makeup Styles We Offer in Vidyapatinagar Traditional Bridal Makeup Classic, bold, and timeless, our traditional bridal makeup is tailored to match traditional wedding attire, ensuring an elegant, vibrant look that shines through in both photos and real life. HD Bridal Makeup For brides seeking a flawless, high-definition finish, HD bridal makeup provides a smooth, natural look ideal for photographs and videos, as well as for up-close moments. Airbrush Bridal Makeup Lightweight and highly durable, airbrush bridal makeup offers full coverage that lasts all day, leaving you with a beautiful, polished appearance that feels comfortable and fresh. How to Book Your Bridal Makeup with Ladyfair in Vidyapatinagar Step 1: Contact Us Call us at 7004721239 to discuss your bridal makeup needs, preferences, and the package that suits you best. Our team will guide you through all options and help you schedule a convenient time. Step 2: Consultation During your consultation, we’ll go over your desired look, color scheme, and style preferences, ensuring your makeup is perfectly aligned with your wedding attire and theme. Step 3: Makeup Trial A makeup trial session is a great way to preview your bridal look. This allows you to make any adjustments before the wedding day to ensure absolute perfection. Step 4: Wedding Day Makeup On your big day, our artist will arrive at your location in Vidyapatinagar, fully prepared to create your stunning bridal look, so you can focus on celebrating this special moment. Frequently Asked Questions (FAQs) Q1: What makes Ladyfair a great choice for bridal makeup in Vidyapatinagar? A: Ladyfair provides expert bridal makeup with convenient at-home services, using top-quality products to ensure you look radiant on your wedding day. Q2: How much does bridal makeup cost in Vidyapatinagar? A: Our pricing begins at ₹10,000 for basic bridal makeup, ₹12,000 for HD makeup, and ₹18,000 for airbrush makeup. We offer tailored packages for engagement, reception, and other events as well. Q3: How can I book an appointment with Ladyfair in Vidyapatinagar? A: Simply call us at 7004721239. We’ll help you arrange a consultation and makeup trial to ensure the perfect look. Q4: What styles of bridal makeup are available? A: We offer traditional, HD, and airbrush makeup styles to meet your aesthetic preferences and ensure a picture-perfect look. Q5: Can I have a makeup trial before my wedding day? A: Yes, we recommend booking a trial session to preview your bridal makeup look and make any necessary adjustments. Q6: What kind of makeup products does Ladyfair use? A: We use only professional-grade products known for their quality, longevity, and safe application across all skin types. Q7: Does Ladyfair offer other types of makeup services? A: Yes, we also provide makeup services for engagements, receptions, parties, and other special occasions. Tips for Preparing for Your Bridal Makeup Session To help you achieve the best results, follow these tips in the days leading up to your wedding: Stay Hydrated: Drink plenty of water to keep your skin healthy and glowing. Consistent Skincare: Stick to a regular skincare routine to maintain a smooth, hydrated complexion. Avoid New Products: To avoid allergic reactions, refrain from using unfamiliar products close to your wedding day. Clear Communication: During your consultation, openly share your makeup preferences and any specific requests with our artist. Experience the Best Bridal Makeup Service with Ladyfair in Vidyapatinagar! At Ladyfair, we’re passionate about creating beautiful bridal looks tailored to each bride’s unique style. Our expert makeup artist and at-home services make it easy for brides in Vidyapatinagar to enjoy a seamless, luxurious experience. Call 7004721239 to book your bridal makeup with Ladyfair and let us help make your wedding day look unforgettable!

Posted By: 13th November 2024
Bridal makeup artist in Ujiyarpur
Ladyfair Bridal Makeup Services in Ujiyarpur: Perfecting Your Wedding Day Look Your wedding day is one of the most special occasions in your life, and you deserve to look and feel absolutely stunning. Ladyfair Bridal Makeup Services in Ujiyarpur offers expert bridal makeup to help you shine on your big day. Whether you dream of a classic bridal look or something more modern, our experienced makeup artist will help you achieve the flawless, radiant look you’ve always imagined. We specialize in at-home bridal makeup services, bringing a professional salon experience right to your doorstep. From consultation to your wedding day, Ladyfair ensures that your makeup is perfectly tailored to match your style, attire, and personality. Why Choose Ladyfair Bridal Makeup Services in Ujiyarpur? 1. Experienced Makeup Artists Our makeup artist in Ujiyarpur is highly skilled and experienced in bridal makeup. Whether you prefer a bold, traditional look or a soft, natural finish, we’ll create a personalized makeup look that enhances your beauty and complements your style. 2. At-Home Convenience Our at-home bridal makeup service means that you can relax and get ready in the comfort of your own home. No need to stress about traveling to a salon – we bring the salon-quality makeup service to you, ensuring that you enjoy a seamless, stress-free experience. 3. Premium Quality Products We use only the best, professional-grade makeup products to ensure that your look stays flawless all day long. Our products are long-lasting, ensuring you remain radiant throughout your wedding day, from the ceremony to the reception. Bridal Makeup Packages and Pricing in Ujiyarpur At Ladyfair, we offer a variety of bridal makeup packages designed to suit different preferences and budgets. Here’s a breakdown of our popular bridal makeup services: Bridal Makeup Services: Basic Bridal Makeup: ₹10,000 A natural look that enhances your beauty for a classic, understated bridal appearance. HD Bridal Makeup: ₹12,000 A high-definition finish perfect for both in-person and photos. Ideal for brides who want a smooth, flawless look. Airbrush Bridal Makeup: ₹18,000 For a lightweight, smooth, and long-lasting look, airbrush makeup provides full coverage while maintaining a natural appearance. Engagement & Reception Makeup: Basic Engagement/Reception Makeup: ₹6,000 HD Engagement/Reception Makeup: ₹8,000 Airbrush Engagement/Reception Makeup: ₹12,000 Party Makeup: Basic Party Makeup: ₹2,500 HD Party Makeup: ₹3,500 These packages provide flexibility, offering the perfect makeup options for every occasion – from weddings to engagements and receptions. Popular Bridal Makeup Styles in Ujiyarpur At Ladyfair, we offer several makeup styles to match every bride's vision: Traditional Bridal Makeup This bold and vibrant makeup style is perfect for brides who are going for a more traditional, elegant look. It includes dramatic eye makeup, defined brows, and a glowing complexion to complement the classic wedding attire. HD Bridal Makeup High-definition makeup is designed to look flawless both in person and in photos. It offers smooth coverage that enhances your features, providing a radiant and camera-ready finish. Airbrush Bridal Makeup Airbrush makeup is perfect for brides who want a flawless, lightweight finish. It provides full coverage while maintaining a natural, fresh look. Ideal for long hours and all-day wear, airbrush makeup ensures you stay looking stunning throughout your wedding day. How to Book Your Bridal Makeup with Ladyfair in Ujiyarpur Booking your bridal makeup with Ladyfair is simple and easy: Step 1: Contact Us Call us at 7004721239 to discuss your bridal makeup needs. We’ll help you choose the right package and schedule your appointment. Step 2: Consultation During the consultation, our makeup artist will discuss your desired look, taking into account your attire, wedding theme, and personal preferences. This ensures that your makeup perfectly complements your overall bridal look. Step 3: Makeup Trial We recommend scheduling a makeup trial before the wedding. This gives you a chance to try out your look and make any adjustments in advance, ensuring you’re completely satisfied with your bridal makeup. Step 4: Wedding Day Makeup On the big day, our makeup artist will arrive at your location in Ujiyarpur to deliver flawless makeup. We’ll make sure you look absolutely radiant as you walk down the aisle. Frequently Asked Questions (FAQs) Q1: Why should I choose Ladyfair for bridal makeup in Ujiyarpur? A: Ladyfair is the best choice for bridal makeup in Ujiyarpur because of our experienced makeup artists, premium products, and personalized service. We bring salon-quality makeup to your home for a relaxed and seamless experience. Q2: What are the prices for bridal makeup services in Ujiyarpur? A: Our bridal makeup services start at ₹10,000 for basic makeup, ₹12,000 for HD makeup, and ₹18,000 for airbrush makeup. We also offer packages for engagement, reception, and party makeup. Q3: How do I book bridal makeup with Ladyfair in Ujiyarpur? A: You can book your bridal makeup by calling 7004721239. We offer consultations and makeup trials to ensure your look is perfect for your wedding day. Q4: What makeup styles are available for brides in Ujiyarpur? A: We offer traditional, HD, and airbrush bridal makeup styles, so you can choose the one that best suits your personal style and wedding theme. Q5: Is a makeup trial available before the wedding day? A: Yes, we offer makeup trials to help you preview your bridal look before the big day. This ensures that you’re happy with your choice and allows us to make any necessary adjustments. Q6: What kind of products do you use for bridal makeup? A: We use only high-quality, professional-grade makeup products to ensure a flawless, long-lasting finish. Our products are safe for all skin types. Q7: Does Ladyfair offer other makeup services in Ujiyarpur? A: Yes, in addition to bridal makeup, we offer engagement, reception, party, and special occasion makeup services. Preparing for Your Bridal Makeup Session To ensure your makeup looks its best, here are some tips: Stay Hydrated: Drinking water keeps your skin healthy and glowing. Skincare Routine: Stick to a regular skincare routine leading up to your wedding to keep your skin smooth and radiant. Avoid New Products: Avoid introducing new skincare products right before the wedding to prevent potential allergic reactions. Communicate Your Vision: Be sure to discuss your makeup preferences clearly with our artist during the consultation. Book Your Bridal Makeup with Ladyfair Today! Ladyfair’s bridal makeup services in Ujiyarpur are designed to ensure that you look and feel beautiful on your wedding day. From our expert makeup artists to our high-quality products and at-home service, we guarantee a flawless look that will make your big day unforgettable. Call 7004721239 today to book your bridal makeup and let us make your wedding day beauty dreams come true!

Posted By: 13th November 2024
Bridal makeup artist in Daisinghsarai
Ladyfair Bridal Makeup Services in Daisinghsarai: Transforming Your Wedding Day Look Your wedding day is one of the most important days of your life, and every bride deserves to look her absolute best. Ladyfair Bridal Makeup Services in Daisinghsarai offers expert makeup services to help you achieve a flawless, radiant, and unforgettable bridal look. Whether you’re envisioning a traditional bridal style, a modern twist, or something in between, our skilled makeup artist in Daisinghsarai is here to bring your vision to life. We specialize in at-home bridal makeup services, ensuring that you can enjoy a stress-free and luxurious beauty experience in the comfort of your own home. From the first consultation to your big day, we’re dedicated to making you look stunning and feeling confident. Why Choose Ladyfair Bridal Makeup Services in Daisinghsarai? 1. Skilled and Experienced Makeup Artists At Ladyfair, we pride ourselves on the expertise of our makeup artists. Our bridal makeup artist in Daisinghsarai is highly skilled and experienced in crafting personalized looks that highlight your natural beauty while matching your unique style. Whether you prefer a bold, traditional look or a soft, natural finish, our artist will tailor the makeup to suit your preferences. 2. Convenient At-Home Service Forget about the hassle of traveling to a salon on your wedding day. Ladyfair’s at-home bridal makeup service in Daisinghsarai ensures you receive the best beauty treatments without leaving the comfort of your home. You can relax, enjoy the process, and get ready for your big day in a familiar and stress-free environment. 3. High-Quality Products for a Long-Lasting Finish We understand how important it is to look flawless throughout the day, which is why we only use premium, professional-grade makeup products. Our products are designed to last all day and night, ensuring that you stay radiant, no matter how long your celebration lasts. Bridal Makeup Packages and Pricing in Daisinghsarai We offer a variety of bridal makeup packages to suit different budgets and preferences. Our pricing is transparent, and we provide a range of options to ensure you can find the perfect look for your wedding day. Bridal Makeup Services: Basic Bridal Makeup: ₹10,000 This service provides a natural bridal look, perfect for brides who want to look effortlessly beautiful. HD Bridal Makeup: ₹12,000 HD makeup offers a high-definition finish that looks flawless both in person and in photos. It’s perfect for brides who want to shine on their special day. Airbrush Bridal Makeup: ₹18,000 Airbrush makeup offers a lightweight, full-coverage look with a smooth, natural finish. This style is ideal for brides who want a long-lasting, flawless appearance. Engagement & Reception Makeup: Basic Engagement/Reception Makeup: ₹6,000 HD Engagement/Reception Makeup: ₹8,000 Airbrush Engagement/Reception Makeup: ₹12,000 Party Makeup: Basic Party Makeup: ₹2,500 HD Party Makeup: ₹3,500 These packages provide you with a perfect makeup look for every event, from the engagement ceremony to the reception and beyond. Popular Bridal Makeup Styles in Daisinghsarai At Ladyfair, we offer a variety of makeup styles to help you achieve your dream bridal look. Here are some of the most popular choices: Traditional Bridal Makeup Bold and vibrant, traditional bridal makeup complements classic wedding attire, with an emphasis on dramatic eye makeup, defined brows, and a rich, luminous complexion. HD Bridal Makeup HD makeup offers a flawless, picture-perfect finish that’s designed to look stunning in high-definition photography. This style provides smooth, even coverage for a glowing, natural look. Airbrush Bridal Makeup Lightweight and comfortable, airbrush makeup delivers full coverage while maintaining a smooth, natural finish. It’s ideal for brides who want a flawless look that lasts all day long. How to Book Your Bridal Makeup with Ladyfair in Daisinghsarai Booking your bridal makeup session with Ladyfair is easy! Here’s how the process works: Step 1: Initial Contact Call us at 7004721239 to discuss your bridal makeup needs. We’ll guide you through our packages and help you select the perfect one for your wedding day. Step 2: Consultation Our makeup artist will schedule a consultation to discuss your vision for your wedding day look. This is the perfect time to talk about your attire, makeup preferences, and any specific ideas you have. Step 3: Makeup Trial We highly recommend a makeup trial before your wedding day. During the trial, you can try out different looks to ensure that you’re completely satisfied with the final choice. Step 4: Wedding Day Makeup On your wedding day, our makeup artist will arrive at your location in Daisinghsarai, ready to make you look radiant. We’ll use the best products and techniques to ensure that you look stunning throughout your ceremony and reception. Frequently Asked Questions (FAQs) Q1: What makes Ladyfair the best choice for bridal makeup in Daisinghsarai? A: Ladyfair offers expert makeup services that are tailored to your unique style. Our skilled makeup artists use high-quality products to create a flawless finish, ensuring you look stunning on your wedding day. Q2: What are the prices for bridal makeup services in Daisinghsarai? A: Bridal makeup services start at ₹10,000 for basic makeup, ₹12,000 for HD makeup, and ₹18,000 for airbrush makeup. We also offer special pricing for engagement, reception, and party makeup. Q3: How do I book bridal makeup with Ladyfair? A: To book your bridal makeup, simply call 7004721239. We’ll guide you through the booking process and help you select the best package for your needs. Q4: What bridal makeup styles do you offer? A: We offer traditional, HD, and airbrush bridal makeup styles, ensuring there’s a perfect look for every bride. Q5: Can I have a makeup trial before my wedding day? A: Yes, we offer makeup trials so you can preview your bridal look before the big day and make any necessary adjustments. Q6: What types of makeup products do you use? A: We only use premium, professional-grade makeup products to ensure a long-lasting, flawless finish on your wedding day. Q7: Does Ladyfair offer other makeup services? A: Yes, in addition to bridal makeup, we offer engagement, reception, party, and special occasion makeup services. Preparing for Your Bridal Makeup Session To ensure your makeup looks flawless on your wedding day, here are some tips: Stay Hydrated: Drinking plenty of water helps keep your skin glowing and healthy. Maintain a Skincare Routine: A consistent skincare routine will give your skin a smooth, radiant appearance. Stick to Familiar Products: Avoid using new skincare products just before the wedding to avoid skin irritation. Communicate Your Vision: Be sure to discuss your preferences and ideas with your makeup artist during your consultation. Book Your Bridal Makeup with Ladyfair in Daisinghsarai Today! Ladyfair’s bridal makeup services in Daisinghsarai are designed to ensure that you look and feel your best on your special day. With our professional makeup artists, at-home service, and high-quality products, we guarantee a flawless bridal look. Ready to book your bridal makeup? Call us now at 7004721239 and let us make your wedding day beauty dreams come true!

Posted By: 13th November 2024
Bridal makeup artist in Bibhutipur
Ladyfair Bridal Makeup Services in Bibhutipur: Your Perfect Wedding Look Awaits Your wedding day is one of the most memorable moments of your life, and every bride deserves to look her best on this special day. Ladyfair Bridal Makeup Services in Bibhutipur offers expert bridal makeup that will make you feel radiant, confident, and absolutely stunning. Whether you’re planning a traditional wedding, a modern celebration, or an intimate ceremony, our skilled makeup artist will work with you to create the perfect look for your big day. At Ladyfair, we specialize in providing at-home bridal makeup services, so you can enjoy a stress-free and luxurious experience without stepping out of your home. With our top-quality products and personalized approach, we ensure that your wedding day beauty is flawless from start to finish. Why Choose Ladyfair Bridal Makeup Services in Bibhutipur? 1. Experienced Makeup Artists Our professional makeup artist in Bibhutipur is highly experienced in bridal makeup and skilled in creating customized looks that highlight your natural beauty. Whether you're looking for a traditional bridal look, a flawless HD finish, or a lightweight airbrush makeup application, we have the expertise to deliver the perfect look. 2. Convenient At-Home Service Weddings are busy enough, and traveling to a salon on your big day can add unnecessary stress. That’s why we bring the salon experience directly to you. Ladyfair’s at-home bridal makeup service in Bibhutipur allows you to enjoy a relaxing, convenient, and luxurious experience while preparing for your wedding without leaving your home. 3. Premium Quality Makeup Products We understand how important it is to look your best, and we ensure that only the highest-quality products are used for your bridal makeup. Our professional-grade products are designed to provide a long-lasting, flawless finish, keeping you looking beautiful throughout your wedding day. Whether you have sensitive skin or need a full coverage look, we have the right products for you. Bridal Makeup Packages and Pricing in Bibhutipur Ladyfair offers a range of bridal makeup packages to fit your needs and budget, giving you the flexibility to choose the perfect look for your wedding day. Bridal Makeup Services: Basic Bridal Makeup: ₹10,000 This package gives you a beautiful, natural bridal look, perfect for complementing your traditional wedding attire. HD Bridal Makeup: ₹12,000 HD makeup is designed for a high-definition finish, perfect for looking flawless in photos and in real life. This package ensures you look radiant all day long. Airbrush Bridal Makeup: ₹18,000 Airbrush makeup provides a lightweight, full-coverage look with a natural finish. This style is long-lasting and perfect for brides who want to look effortlessly beautiful. Engagement & Reception Makeup: Basic Engagement/Reception Makeup: ₹6,000 HD Engagement/Reception Makeup: ₹8,000 Airbrush Engagement/Reception Makeup: ₹12,000 Party Makeup Services: Basic Party Makeup: ₹2,500 HD Party Makeup: ₹3,500 We offer competitive pricing, ensuring you get the perfect bridal look within your budget. Popular Bridal Makeup Styles in Bibhutipur Every bride deserves to look and feel beautiful in her own way. That’s why Ladyfair offers various bridal makeup styles to choose from. Here are some of the most popular looks we provide: Traditional Bridal Makeup A bold and dramatic look designed to complement traditional bridal attire. This makeup style focuses on accentuating the bride’s natural beauty, ensuring she stands out in her wedding photos. HD Bridal Makeup HD makeup is perfect for brides who want a flawless, picture-perfect look. This makeup provides high-definition coverage that ensures you look amazing in person and on camera. The finish is smooth and natural, giving you a glowing complexion. Airbrush Bridal Makeup Airbrush makeup offers a lightweight yet flawless finish that feels comfortable on your skin. It’s ideal for brides who want full coverage without feeling weighed down. The makeup is applied using an airbrush machine, providing a smooth and even layer that lasts all day. How to Book Your Bridal Makeup with Ladyfair in Bibhutipur Booking your bridal makeup with Ladyfair is simple and hassle-free. Here’s how the process works: Step 1: Initial Contact Call us at 7004721239 to discuss your bridal makeup needs and schedule an appointment. We’ll guide you through our services and help you choose the perfect package for your wedding day. Step 2: Consultation Session We’ll arrange a consultation with our expert makeup artist to discuss your desired bridal look. This is the perfect time to share your ideas and preferences, whether you want a traditional look or something more contemporary. Step 3: Makeup Trial We recommend a makeup trial before your wedding day to ensure that your look is perfect. During the trial session, you can try different makeup styles and make any adjustments to the look before the big day. Step 4: Wedding Day Makeup On the day of your wedding, our makeup artist will arrive at your location in Bibhutipur and begin working on your bridal makeup. You can relax and enjoy the experience while we create the perfect look for you. Frequently Asked Questions (FAQs) Q1: Why should I choose Ladyfair for bridal makeup in Bibhutipur? A: Ladyfair provides expert bridal makeup services with a focus on personalized beauty. Our professional makeup artist uses high-quality products to create a look that enhances your natural beauty, ensuring you look stunning on your special day. Q2: What are the prices for bridal makeup in Bibhutipur? A: Bridal makeup prices start at ₹10,000 for basic makeup, ₹12,000 for HD makeup, and ₹18,000 for airbrush makeup. We also offer special pricing for engagement, reception, and party makeup. Q3: How do I book my bridal makeup session with Ladyfair? A: You can book by calling 7004721239. We also offer consultation and makeup trials to help you perfect your bridal look. Q4: What bridal makeup styles do you offer? A: We offer traditional, HD, and airbrush bridal makeup styles to suit your preferences. Each style is designed to enhance your natural beauty and provide a long-lasting, flawless finish. Q5: Can I have a makeup trial before the wedding? A: Yes, we offer makeup trials so you can preview your bridal look and make adjustments before the wedding day. Q6: What kind of makeup products do you use? A: We use professional-grade makeup products that are safe for all skin types, ensuring a flawless and long-lasting finish for your bridal makeup. Q7: Does Ladyfair offer makeup for other occasions besides weddings? A: Yes, we also offer makeup services for engagements, receptions, parties, and other special occasions. Preparing for Your Bridal Makeup Session with Ladyfair To ensure your makeup looks flawless, here are some tips to prepare: Stay Hydrated: Drink plenty of water to keep your skin healthy and glowing. Maintain a Skincare Routine: Consistent skincare in the weeks leading up to your wedding ensures smooth and radiant skin. Stick to Known Products: Avoid trying new skincare or makeup products close to your wedding to prevent reactions. Communicate Your Preferences: Discuss your vision with your makeup artist during the consultation. Book Your Bridal Makeup with Ladyfair in Bibhutipur Today! Ladyfair’s bridal makeup services in Bibhutipur are designed to make you look and feel beautiful on your wedding day. From consultation to the final look, we provide personalized services that ensure your beauty shines. Ready to book your bridal makeup session? Call us today at 7004721239 and let us help you look flawless on your special day!

Posted By: 13th November 2024
Bridal makeup artist in Singhiya
Ladyfair Bridal Makeup Services in Singhiya: Your Perfect Wedding Look Starts Here Your wedding day is one of the most important days of your life, and every bride deserves to look and feel her best. Ladyfair Bridal Makeup Services in Singhiya is here to make that dream come true. Whether you’re planning a grand celebration or an intimate ceremony, we offer top-tier at-home makeup services that ensure you look flawless, radiant, and confident as you walk down the aisle. From traditional bridal looks to modern HD and airbrush makeup, our experienced makeup artist in Singhiya will work with you to create the perfect look that complements your personality and style. With Ladyfair, your wedding day will be stress-free, and your beauty will shine through, all from the comfort of your own home. Why Choose Ladyfair Bridal Makeup in Singhiya? 1. Experienced Makeup Artist At Ladyfair, we believe in providing only the best for our brides. Our skilled makeup artist in Singhiya has years of experience specializing in bridal makeup. Whether you want a classic traditional look, a flawless HD finish, or a modern airbrush application, our artist has the expertise to make you look your best. 2. At-Home Service for Your Convenience Weddings are already busy enough without having to worry about salon appointments. Ladyfair brings the salon experience to you! Our at-home bridal makeup services allow you to relax and enjoy your big day without having to leave your home. We bring all the necessary products and tools, so you can focus on enjoying every moment of your celebration. 3. Premium Quality Makeup Products We only use high-quality, professional-grade makeup products that are safe, long-lasting, and suited for all skin types. From foundation to finishing sprays, we ensure that every product we use delivers the flawless look you deserve, making you look radiant from start to finish. Bridal Makeup Packages and Pricing in Singhiya Ladyfair offers a range of bridal makeup packages to suit different needs and budgets, giving you the flexibility to choose the perfect look for your wedding day. Bridal Makeup Services: Basic Bridal Makeup: ₹10,000 This package offers a beautiful, natural bridal look that enhances your features and complements traditional wedding attire. HD Bridal Makeup: ₹12,000 Perfect for brides who want a flawless finish that looks great in both real life and in photos. This makeup is designed to look impeccable on camera, ensuring you shine through in every shot. Airbrush Bridal Makeup: ₹18,000 For a lightweight, long-lasting, and natural finish, airbrush makeup provides full coverage that stays flawless throughout your entire wedding day. Engagement & Reception Makeup: Basic Engagement/Reception Makeup: ₹6,000 HD Engagement/Reception Makeup: ₹8,000 Airbrush Engagement/Reception Makeup: ₹12,000 Party Makeup Services: Basic Party Makeup: ₹2,500 HD Party Makeup: ₹3,500 These pricing options allow flexibility and provide a solution for various types of events, ensuring that you always look your best. Popular Bridal Makeup Styles by Ladyfair in Singhiya Ladyfair offers a wide range of makeup styles, so each bride can choose a look that best suits her personality and wedding theme. Traditional Bridal Makeup A bold and elegant look, traditional bridal makeup complements the richness of a classic bridal ensemble. The makeup is designed to highlight your best features and work harmoniously with your wedding attire. HD Bridal Makeup HD makeup gives you a flawless finish that is ideal for high-definition photography. This look ensures you look picture-perfect all day long, even under close-up scrutiny. Airbrush Bridal Makeup Light, smooth, and long-lasting, airbrush makeup offers a perfect blend of coverage and natural elegance. It’s a favorite among brides who want to feel comfortable while still looking stunning. How to Book Your Bridal Makeup with Ladyfair in Singhiya Booking your bridal makeup session with Ladyfair is easy. Here’s how: Step 1: Contact Us Call us at 7004721239 to discuss your bridal makeup needs and book an appointment. You can choose from our various packages and we’ll guide you through the booking process. Step 2: Consultation Session Once you’ve booked your appointment, you’ll meet with our makeup artist to discuss your vision for your wedding day. We’ll consider your attire, wedding theme, and personal style preferences to create a customized makeup plan. Step 3: Makeup Trial Our makeup trial gives you the opportunity to test out your bridal look before the big day. You can make any adjustments to ensure that you’re 100% satisfied with your final look. Step 4: Wedding Day Makeup On the day of your wedding, our makeup artist will arrive at your location in Singhiya, ready to create the perfect look for you. You can relax while we work our magic, making sure you feel beautiful and confident as you walk down the aisle. Frequently Asked Questions (FAQs) Q1: What makes Ladyfair the best choice for bridal makeup in Singhiya? A: Ladyfair offers professional, at-home bridal makeup services using top-quality products and skilled artists. We ensure a flawless, long-lasting look for every bride, making your wedding day stress-free and beautiful. Q2: What are the prices for bridal makeup in Singhiya? A: Prices start at ₹10,000 for basic bridal makeup, ₹12,000 for HD bridal makeup, and ₹18,000 for airbrush makeup. We also offer special rates for engagements, receptions, and party makeup. Q3: How do I book Ladyfair’s bridal makeup services? A: Simply call us at 7004721239 to discuss your bridal makeup needs. We offer a consultation and trial session to ensure your look is perfect for your big day. Q4: Can I get a makeup trial before my wedding day? A: Yes, Ladyfair offers makeup trials so you can preview and adjust your bridal look in advance of your wedding day. Q5: What makeup styles does Ladyfair offer? A: We offer traditional, HD, and airbrush bridal makeup styles, allowing you to choose the look that best suits your personal style and wedding theme. Q6: What products do you use for bridal makeup? A: We use only professional-grade, high-quality makeup products that provide a long-lasting, flawless finish. Q7: Does Ladyfair offer makeup for other events besides weddings? A: Yes, we also provide makeup services for engagements, receptions, parties, and other special occasions. Preparing for Your Bridal Makeup Session with Ladyfair To ensure a flawless makeup application, here are a few tips for preparing for your session: Hydrate: Drink plenty of water in the days leading up to your wedding to keep your skin healthy and glowing. Skincare: Stick to your regular skincare routine to ensure your skin is smooth and well-prepped for makeup. Avoid New Products: Stick to skincare products you know to avoid any allergic reactions before your big day. Communicate: Be sure to discuss your preferred look, style, and any concerns you may have with your makeup artist during the consultation. Book Your Bridal Makeup with Ladyfair in Singhiya Today! Ladyfair’s bridal makeup services in Singhiya are designed to ensure every bride feels pampered, confident, and beautiful on her special day. From the initial consultation to the final look, we work with you to create a personalized bridal experience that leaves you looking stunning. Ready to book your bridal makeup session? Call us today at 7004721239 and let us help you achieve the perfect look for your wedding day!

Posted By: 13th November 2024
Bridal makeup artist in Shivajinagar
Ladyfair Bridal Makeup Services in Shivajinagar: Bringing Luxury Makeup to Your Doorstep In Shivajinagar, every bride dreams of looking her best on her special day. Ladyfair Bridal Makeup Services is here to transform that dream into reality with professional, at-home bridal makeup services. By offering a range of makeup styles and packages, we make sure that every bride in Shivajinagar feels pampered, confident, and beautifully herself. Whether you’re looking for a classic traditional look, a flawless HD finish, or the modern elegance of airbrush makeup, Ladyfair’s skilled makeup artist is dedicated to making your wedding day unforgettable. Why Ladyfair Bridal Makeup in Shivajinagar is the Perfect Choice 1. Professional Makeup Artist with Experience Ladyfair’s makeup artist in Shivajinagar is an expert in creating a variety of bridal looks, from bold and glamorous to soft and natural. With an eye for detail and a deep understanding of how to highlight each bride’s unique features, we ensure a personalized, beautiful look tailored to your style. 2. Convenient At-Home Service Ladyfair brings the salon experience to you, eliminating the need to visit a busy salon on your wedding day. Our makeup artist comes prepared to create your dream bridal look in the comfort of your own home, so you can relax and enjoy the excitement of your big day. 3. Premium Quality Products We use only high-quality, professional-grade makeup products to achieve a long-lasting, flawless finish that will look stunning throughout your wedding day. Our products are safe, skin-friendly, and chosen to provide a radiant look in both photographs and in person. Bridal Makeup Packages and Pricing in Shivajinagar Ladyfair offers a variety of bridal makeup packages in Shivajinagar, providing options for every budget and preference. Bridal Makeup Packages Basic Bridal Makeup: ₹10,000 A classic and beautiful look that enhances natural beauty and complements traditional attire. HD Bridal Makeup: ₹12,000 This package offers a high-definition finish, ensuring you look flawless in photos and up-close. Airbrush Bridal Makeup: ₹18,000 Lightweight and smooth, this makeup provides a polished look that lasts all day with full coverage. Engagement & Reception Makeup Packages Basic Engagement/Reception Makeup: ₹6,000 HD Engagement/Reception Makeup: ₹8,000 Airbrush Engagement/Reception Makeup: ₹12,000 Party Makeup Packages Basic Party Makeup: ₹2,500 HD Party Makeup: ₹3,500 These options provide flexibility for brides and guests alike, making it easy to find a package that matches your event and budget. Bridal Makeup Styles by Ladyfair in Shivajinagar Ladyfair offers a variety of styles, so each bride can select a look that perfectly suits her personal style and wedding theme. Traditional Bridal Makeup Perfect for pairing with traditional attire, this bold and vibrant look offers elegance and sophistication for a classic bridal appearance. HD Bridal Makeup This makeup style provides a high-definition finish, ideal for close-up photos, and offers a smooth, radiant look that appears flawless in person and in pictures. Airbrush Bridal Makeup Light, natural, and polished, airbrush makeup offers full coverage with a soft-focus effect that stays flawless throughout the day. How to Book Your Bridal Makeup with Ladyfair in Shivajinagar Step 1: Contact Us Call us at 7004721239 to discuss your bridal makeup needs and secure your booking date. Our team will assist you in selecting the best package to suit your preferences and wedding theme. Step 2: Consultation Session After booking, you’ll meet with our makeup artist to discuss your wedding attire, preferred style, and the look you envision. This ensures that your makeup will harmonize with your overall look. Step 3: Makeup Trial A makeup trial allows you to preview your bridal look and make any adjustments, so you feel completely confident in the final result on your wedding day. Step 4: Wedding Day Makeup Our makeup artist will arrive at your location in Shivajinagar, fully prepared to deliver a beautiful, lasting makeup application that complements your bridal look. FAQs: Ladyfair Bridal Makeup Services in Shivajinagar Q1: What sets Ladyfair apart for bridal makeup in Shivajinagar? A: Ladyfair provides a stress-free at-home service with top-quality products and skilled artistry, ensuring you look stunning and feel comfortable on your big day. Q2: What are the pricing options for bridal makeup in Shivajinagar? A: We offer three main packages: Basic Bridal Makeup at ₹10,000, HD Bridal Makeup at ₹12,000, and Airbrush Bridal Makeup at ₹18,000, with additional packages for engagements, receptions, and parties. Q3: How do I book Ladyfair’s bridal makeup service? A: Call us at 7004721239 to schedule your appointment. Our team will guide you through the consultation and offer a trial session to finalize your look. Q4: Can I book a makeup trial before the wedding? A: Yes, Ladyfair offers makeup trials to help you choose the perfect look, giving you peace of mind before your wedding day. Q5: What makeup products does Ladyfair use for bridal makeup? A: We use only professional-grade, high-quality products that are safe, long-lasting, and provide a flawless finish on all skin types. Q6: Does Ladyfair offer makeup services for other events besides the wedding day? A: Absolutely! Ladyfair provides makeup services for engagements, receptions, parties, and other special occasions to help you look your best. Preparing for Your Bridal Makeup Session with Ladyfair To ensure your makeup application is smooth and flawless, here are some tips for preparing for your Ladyfair session: Stay Hydrated: Drinking water helps keep your skin healthy and glowing. Follow a Consistent Skincare Routine: Regular cleansing, exfoliating, and moisturizing will prepare your skin for smooth makeup application. Stick to Known Products: Avoid trying new skincare products close to your wedding day to prevent any allergic reactions. Communicate with Your Makeup Artist: Discuss your preferences, style, and desired look with our artist during the consultation. Testimonials from Ladyfair Brides in Shivajinagar Ladyfair has proudly served brides in Shivajinagar, helping them achieve the perfect look for their wedding day. Here are some words from our clients: Aarti K., Shivajinagar: “Ladyfair’s at-home makeup service was so convenient. The makeup artist was professional and listened to all my preferences. I looked and felt amazing!” Sneha M., Shivajinagar: “I opted for the airbrush makeup, and it was flawless! It lasted all day and felt so light on my skin. Ladyfair made my wedding day stress-free and memorable.” Additional Makeup Services by Ladyfair In addition to bridal makeup, Ladyfair offers a variety of beauty services for other occasions: Engagement & Reception Makeup: Customized looks for pre-wedding events to ensure you look stunning at every celebration. Party Makeup: Whether it’s a birthday, anniversary, or festive gathering, our party makeup is designed to make you look your best. Special Occasion Makeup: Ladyfair provides makeup services for any important event, helping you feel confident and beautiful. Book Your Bridal Makeup with Ladyfair in Shivajinagar Today Ladyfair’s at-home bridal makeup services offer a high-quality, exclusive experience for brides in Shivajinagar. From the consultation to the final look, our expert team ensures that you feel pampered and prepared for your big day. Ready to book your perfect bridal look? Call Ladyfair at 7004721239 to schedule your consultation and trial today!

Posted By: 13th November 2024
Bridal makeup atist in Rosera
Ladyfair Bridal Makeup Services in Rosera: Transforming Brides with At-Home Beauty Expertise Every bride dreams of looking radiant and beautiful on her wedding day, and in Rosera, Ladyfair Bridal Makeup Services is dedicated to making that dream a reality. Known for our expert at-home bridal makeup services, Ladyfair ensures every bride in Rosera enjoys a luxurious, personalized beauty experience right in the comfort of her own space. Whether you’re seeking a timeless traditional look, a flawless HD finish, or the elegant polish of airbrush makeup, our skilled makeup artist is here to help you achieve your perfect bridal look. Why Choose Ladyfair Bridal Makeup Services in Rosera? 1. Experienced Makeup Artist Ladyfair’s professional makeup artist in Rosera is experienced in all styles of bridal makeup, from bold traditional looks to soft and natural finishes. With an eye for detail and a commitment to enhancing each bride’s natural beauty, our artist creates a personalized look that complements your style and enhances your confidence. 2. Convenient At-Home Service Avoid the stress of traveling to a salon by choosing Ladyfair’s at-home service. Our professional makeup artist comes to your location, bringing salon-quality makeup application directly to you. You can relax and enjoy the preparation process from the comfort of your own home, with all the attention on your special day. 3. Premium Products for Long-Lasting Beauty Ladyfair uses only high-quality, professional-grade makeup products to ensure that your look remains radiant and flawless throughout the wedding day. Our selection includes products specifically chosen for their longevity, comfort, and suitability for all skin types. Bridal Makeup Packages and Pricing in Rosera Ladyfair offers flexible bridal makeup packages in Rosera to accommodate different budgets and preferences, ensuring every bride finds the perfect fit. Bridal Makeup Packages Basic Bridal Makeup: ₹10,000 A beautiful, timeless look that highlights your natural beauty. HD Bridal Makeup: ₹12,000 This package ensures a high-definition, flawless finish that looks perfect both in photos and in person. Airbrush Bridal Makeup: ₹18,000 Lightweight, smooth, and long-lasting, airbrush makeup offers a polished, natural look that lasts all day. Engagement & Reception Makeup Packages Basic Engagement/Reception Makeup: ₹6,000 HD Engagement/Reception Makeup: ₹8,000 Airbrush Engagement/Reception Makeup: ₹12,000 Party Makeup Packages Basic Party Makeup: ₹2,500 HD Party Makeup: ₹3,500 These packages provide a range of options to meet the needs of brides and wedding guests alike, ensuring everyone can feel confident and beautiful on this important occasion. Bridal Makeup Styles Available in Rosera Every bride has her own vision of beauty, and Ladyfair offers various bridal makeup styles to suit individual preferences: Traditional Bridal Makeup Ideal for brides who want a timeless, elegant look that pairs perfectly with traditional wedding attire. This style incorporates rich, bold colors to create a classic look. HD Bridal Makeup Designed for flawless, high-definition coverage, this makeup style is perfect for brides who want to look camera-ready all day. It smooths and enhances natural features, ensuring you look stunning in every photograph. Airbrush Bridal Makeup Lightweight and natural, airbrush makeup offers a refined, even finish with excellent coverage that lasts throughout the wedding day, giving a polished, soft-focus look. How to Book Your Bridal Makeup with Ladyfair in Rosera Step 1: Initial Contact Call us at 7004721239 to discuss your bridal makeup needs and reserve your date. Our team will help you select the perfect package based on your preferences and budget. Step 2: Consultation Session Once you book, you’ll meet with our makeup artist to discuss your desired look, wedding attire, and styling. This session allows us to tailor a look that complements your personality and the overall theme of your wedding. Step 3: Makeup Trial A trial session lets you preview your look and make adjustments as needed. This ensures you’re completely happy with the final outcome on your big day. Step 4: Wedding Day Makeup On the wedding day, our artist will arrive at your location in Rosera, equipped to deliver a flawless makeup application that will leave you feeling beautiful and confident. FAQs: Ladyfair Bridal Makeup Services in Rosera Q1: What makes Ladyfair the best choice for bridal makeup in Rosera? A: Ladyfair’s at-home service combines professional artistry with top-quality products, providing brides with a relaxing and luxurious beauty experience in the comfort of their own home. Q2: What bridal makeup packages are available in Rosera? A: We offer Basic Bridal Makeup at ₹10,000, HD Bridal Makeup at ₹12,000, and Airbrush Bridal Makeup at ₹18,000. Additional packages are available for engagement, reception, and party makeup. Q3: How do I book my bridal makeup with Ladyfair? A: Simply call 7004721239 to schedule your appointment. We also offer a consultation and makeup trial to ensure your look aligns perfectly with your vision. Q4: Does Ladyfair provide makeup trials before the wedding day? A: Yes, trial sessions are available to preview your look and make adjustments as needed, so you can feel confident about your makeup on the big day. Q5: What makeup products does Ladyfair use for bridal makeup? A: We use only high-quality, professional-grade makeup products, selected for their safety, longevity, and flawless finish on all skin types. Q6: Are there other makeup services available besides bridal makeup? A: Yes, Ladyfair offers makeup services for engagement, reception, and parties, as well as special occasion makeup for any significant event. Preparing for Your Bridal Makeup Session To get the most out of your makeup session with Ladyfair, here are a few tips to prepare your skin: Stay Hydrated: Drinking water keeps your skin healthy and glowing. Follow a Skincare Routine: Cleansing, exfoliating, and moisturizing will prepare your skin for smooth makeup application. Avoid Trying New Products: To prevent potential allergic reactions, stick to skincare products you know. Clear Communication: Discuss your vision and preferences with our makeup artist during your consultation to achieve the perfect look. Testimonials from Ladyfair Brides in Rosera Ladyfair is proud to have helped many brides in Rosera look and feel their best on their special day. Here are some of their experiences: Priya S., Rosera: “Ladyfair’s at-home service was so convenient, and the makeup artist was amazing. She listened to exactly what I wanted and made me look beautiful!” Neha R., Rosera: “I chose the airbrush makeup, and it was perfect. It felt light but covered all my imperfections. I highly recommend Ladyfair for any bride-to-be.” Additional Makeup Services by Ladyfair Beyond bridal makeup, Ladyfair offers an array of beauty services for other occasions: Engagement & Reception Makeup: Tailored for pre-wedding celebrations to ensure you look stunning for all your important events. Party Makeup: For birthdays, anniversaries, and other celebrations. Special Occasion Makeup: Perfect for any event where you want to make an impression. Elevate Your Wedding Day Look with Ladyfair in Rosera Ladyfair Bridal Makeup Services in Rosera offers an exclusive, high-quality experience for brides who want convenience and perfection on their big day. With our professional at-home services, flexible packages, and expert makeup artist, you’ll receive the attention and care you deserve to make your wedding day truly unforgettable. Ready to book your bridal makeup? Call Ladyfair at 7004721239 to start planning your flawless wedding look today!

Posted By: 13th November 2024
Bridal makeup artist in Sarairanjan
Ladyfair Bridal Makeup Services in Sarairanjan: Perfecting Your Bridal Look at Home In the heart of Sarairanjan, every bride dreams of looking stunning and radiant on her wedding day. Ladyfair Bridal Makeup Services is here to make that dream come true, bringing professional makeup services right to your doorstep. With traditional, high-definition, and airbrush makeup options, Ladyfair ensures a luxurious, stress-free experience for brides looking for convenience and elegance in one package. Below, we’ll guide you through Ladyfair’s services and answer some common questions brides in Sarairanjan have about booking bridal makeup services. Why Choose Ladyfair Bridal Makeup Services in Sarairanjan? Experienced Makeup Artist: Our makeup artist is highly skilled and experienced in bridal techniques, tailoring each look to highlight every bride’s natural beauty and style. Convenient At-Home Service: Ladyfair offers salon-quality makeup right at your home, eliminating the stress of travel and allowing you to relax on your big day. Premium Products: We use only high-quality, professional-grade makeup products to ensure a flawless, long-lasting look that will keep you radiant from ceremony to celebration. Ladyfair’s Bridal Makeup Packages and Pricing in Sarairanjan Ladyfair offers several bridal makeup packages to suit different budgets and preferences: Basic Bridal Makeup: ₹10,000 HD Bridal Makeup: ₹12,000 Airbrush Bridal Makeup: ₹18,000 For pre-wedding events: Basic Engagement/Reception Makeup: ₹6,000 HD Engagement/Reception Makeup: ₹8,000 Airbrush Engagement/Reception Makeup: ₹12,000 For other special occasions: Basic Party Makeup: ₹2,500 HD Party Makeup: ₹3,500 Popular Bridal Makeup Styles Ladyfair offers three distinct styles of bridal makeup to suit every bride’s aesthetic: Traditional Bridal Makeup: Bold, elegant, and perfect for pairing with traditional attire. HD Bridal Makeup: Offers a flawless, high-definition look ideal for photos and in-person beauty. Airbrush Bridal Makeup: Lightweight, natural, and perfect for all-day wear with a soft, polished finish. Booking Process for Ladyfair’s Bridal Makeup Services Initial Contact: Call us at 7004721239 to discuss your bridal makeup needs. Consultation Session: Meet with our makeup artist to customize your look according to your dress, preferences, and theme. Makeup Trial: A trial session ensures you’re happy with your look. Wedding Day Makeup: Our artist arrives at your location in Sarairanjan, ready to give you a flawless look. FAQs: Ladyfair Bridal Makeup Services in Sarairanjan Q1: What makes Ladyfair the best choice for bridal makeup in Sarairanjan? A: Ladyfair’s at-home service brings a convenient, professional beauty experience to brides, using top-quality products and skilled artistry to ensure you look stunning on your special day. Q2: What bridal makeup packages are available? A: Ladyfair offers three main bridal packages: Basic Bridal Makeup at ₹10,000, HD Bridal Makeup at ₹12,000, and Airbrush Bridal Makeup at ₹18,000. Engagement, reception, and party makeup packages are also available. Q3: How do I book my bridal makeup with Ladyfair? A: To book, simply call us at 7004721239. After an initial consultation, we’ll plan your bridal look and can even schedule a makeup trial to perfect your look. Q4: Do you offer makeup trials before the wedding day? A: Yes, we provide makeup trial sessions to ensure you’re happy with your chosen look, making adjustments if necessary. Q5: What kind of makeup products does Ladyfair use? A: Ladyfair uses professional-grade, high-quality products that are safe, long-lasting, and suitable for all skin types, ensuring a flawless finish. Q6: Can I book Ladyfair for events other than the wedding day? A: Absolutely! Ladyfair offers makeup services for engagement, reception, and any other special occasions, ensuring you look your best for all of your events. Q7: How should I prepare for my bridal makeup session? A: Keep your skin hydrated, maintain a regular skincare routine, and communicate your preferences with our makeup artist during the consultation. Testimonials from Brides in Sarairanjan Sneha T., Sarairanjan: “Ladyfair’s at-home service was a dream come true. The makeup was stunning, and I felt so beautiful. I would highly recommend Ladyfair to any bride.” Pooja R., Sarairanjan: “The airbrush makeup was amazing! It felt so light and looked flawless all day. Ladyfair made my wedding day so much easier.” Additional Makeup Services by Ladyfair In addition to bridal makeup, Ladyfair offers: Engagement and Reception Makeup Party Makeup for any occasion Special Occasion Makeup Experience Luxury with Ladyfair Bridal Makeup in Sarairanjan Ladyfair’s at-home bridal makeup services provide Sarairanjan brides with an exclusive, comfortable, and high-quality beauty experience. From consultation to final application, our expert team is dedicated to helping you look and feel your best. Ready to book? Call Ladyfair at 7004721239 today to start planning your unforgettable bridal look!

Posted By: 10th November 2024
Bridal Makeup Artist in Maharajganj
Introduction In Maharajganj, Ladyfair is the premier choice for brides looking to achieve the perfect wedding day look with our professional at-home bridal makeup services. Whether you desire a traditional bridal look, an HD finish, or the flawless perfection of airbrush makeup, our expert makeup artist in Maharajganj ensures that you shine on your special day. Contact us today at 7004721239 to schedule your appointment. Why Choose Ladyfair for Bridal Makeup in Maharajganj Experienced Makeup Artist Our makeup artist in Maharajganj has years of experience in bridal makeup, creating personalized looks that complement your natural beauty and align with your style and preferences. Convenient At-Home Service Forget the stress of traveling to a salon. Ladyfair brings luxury beauty treatments directly to your doorstep with our at-home bridal makeup services, offering a truly personalized experience. Premium Makeup Products We use only high-quality, professional-grade makeup products to ensure a flawless, long-lasting look that remains perfect throughout your big day. Bridal Makeup Pricing in Maharajganj Our bridal makeup services in Maharajganj are tailored to fit different styles and budgets: Basic Bridal Makeup: ₹10,000 HD Bridal Makeup: ₹12,000 Airbrush Bridal Makeup: ₹18,000 For engagement and reception makeup: Basic Engagement/Reception Makeup: ₹6,000 HD Engagement/Reception Makeup: ₹8,000 Airbrush Engagement/Reception Makeup: ₹12,000 For parties: Basic Party Makeup: ₹2,500 HD Party Makeup: ₹3,500 Popular Bridal Makeup Styles in Maharajganj Traditional Bridal Makeup Our traditional bridal makeup in Maharajganj incorporates bold colors and intricate detailing to complement your wedding attire, creating an elegant and timeless look. HD Bridal Makeup For a high-definition finish that looks flawless both in photos and in person, HD bridal makeup is the perfect choice for brides who want a picture-perfect appearance all day. Airbrush Bridal Makeup Our airbrush makeup offers a lightweight, full-coverage finish that lasts all day, giving you a smooth and natural look while ensuring long-lasting perfection. How to Book Your Bridal Makeup with Ladyfair in Maharajganj Initial Contact: Call us at 7004721239 to discuss your makeup needs and schedule your appointment. Consultation Session: Meet with our makeup artist to discuss your wedding look, review your attire, and plan the perfect makeup style. Makeup Trial: We offer trial sessions to help you preview your bridal makeup look and make any adjustments. Wedding Day Makeup: On your wedding day, our makeup artist will arrive at your location in Maharajganj to provide flawless, hassle-free makeup service. Testimonials from Brides in Maharajganj Priya R., Maharajganj: "Ladyfair provided amazing service on my wedding day. The airbrush makeup looked flawless and lasted all day." Ritu K., Maharajganj: "I loved the HD makeup! It was perfect for my photos, and the at-home service was so convenient." Sneha S., Maharajganj: "My traditional bridal makeup was exactly what I wanted, and Ladyfair made the entire process stress-free." Preparing for Your Bridal Makeup Session To get the best results for your bridal makeup: Stay Hydrated: Keep your skin looking fresh by drinking plenty of water. Consistent Skincare: Stick to your regular skincare routine to maintain healthy, glowing skin. Avoid New Products: Use familiar products to prevent any reactions before your wedding day. Clear Communication: Discuss your makeup preferences and any concerns with our artist during the consultation. Additional Beauty Services by Ladyfair Beyond bridal makeup, Ladyfair offers a variety of beauty services in Maharajganj: Engagement and Reception Makeup: Customized looks for all pre-wedding events. Party Makeup: Perfect for birthdays, anniversaries, and special occasions. Everyday Makeup: Enhance your daily look with our expert makeup services. Special Occasion Makeup: Professional makeup for parties, celebrations, and formal events. The Future of Bridal Makeup in Maharajganj Ladyfair is dedicated to setting new standards in bridal beauty in Maharajganj with our innovative at-home services. As we continue to offer exceptional service, more brides are choosing Ladyfair as their preferred makeup provider. Q&A with Ladyfair’s Bridal Makeup Artist in Maharajganj Q1: What makes Ladyfair the best choice for bridal makeup in Maharajganj? A1: Ladyfair offers expert bridal makeup services at home, using high-quality products to ensure a flawless and long-lasting look. Q2: What are the prices for bridal makeup in Maharajganj? A2: Our bridal makeup packages start at ₹10,000 for basic makeup, ₹12,000 for HD makeup, and ₹18,000 for airbrush makeup. Q3: How do I book Ladyfair’s bridal makeup services in Maharajganj? A3: You can book our services by calling 7004721239. We also offer consultations and trial sessions to ensure you get the look you want. Q4: What bridal makeup styles does Ladyfair offer in Maharajganj? A4: Ladyfair offers traditional, HD, and airbrush bridal makeup to suit different preferences and needs. Q5: Are makeup trials available before my wedding? A5: Yes, we offer trial sessions so you can finalize your bridal look ahead of time. Q6: What products does Ladyfair use for bridal makeup? A6: We use professional-grade, high-quality makeup products that are safe for all skin types and ensure a flawless finish. Q7: What other services does Ladyfair provide in Maharajganj? A7: In addition to bridal makeup, we offer makeup for engagements, receptions, parties, and other special occasions. Ladyfair is your ultimate choice for professional, at-home bridal makeup services in Maharajganj, ensuring a flawless and stress-free experience on your special day.

Posted By: 10th November 2024
Bridal Makeup Artist in Lakri Nabiganj
Introduction In Lakri Nabiganj, Ladyfair is the premier choice for brides looking to achieve the perfect wedding day look with our professional at-home bridal makeup services. Whether you desire a traditional bridal look, an HD finish, or the flawless perfection of airbrush makeup, our expert makeup artist in Lakri Nabiganj ensures that you shine on your special day. Contact us today at 7004721239 to schedule your appointment. Why Choose Ladyfair for Bridal Makeup in Lakri Nabiganj Experienced Makeup Artist Our makeup artist in Lakri Nabiganj has years of experience in bridal makeup, creating personalized looks that complement your natural beauty and align with your style and preferences. Convenient At-Home Service Forget the stress of traveling to a salon. Ladyfair brings luxury beauty treatments directly to your doorstep with our at-home bridal makeup services, offering a truly personalized experience. Premium Makeup Products We use only high-quality, professional-grade makeup products to ensure a flawless, long-lasting look that remains perfect throughout your big day. Bridal Makeup Pricing in Lakri Nabiganj Our bridal makeup services in Lakri Nabiganj are tailored to fit different styles and budgets: Basic Bridal Makeup: ₹10,000 HD Bridal Makeup: ₹12,000 Airbrush Bridal Makeup: ₹18,000 For engagement and reception makeup: Basic Engagement/Reception Makeup: ₹6,000 HD Engagement/Reception Makeup: ₹8,000 Airbrush Engagement/Reception Makeup: ₹12,000 For parties: Basic Party Makeup: ₹2,500 HD Party Makeup: ₹3,500 Popular Bridal Makeup Styles in Lakri Nabiganj Traditional Bridal Makeup Our traditional bridal makeup in Lakri Nabiganj incorporates bold colors and intricate detailing to complement your wedding attire, creating an elegant and timeless look. HD Bridal Makeup For a high-definition finish that looks flawless both in photos and in person, HD bridal makeup is the perfect choice for brides who want a picture-perfect appearance all day. Airbrush Bridal Makeup Our airbrush makeup offers a lightweight, full-coverage finish that lasts all day, giving you a smooth and natural look while ensuring long-lasting perfection. How to Book Your Bridal Makeup with Ladyfair in Lakri Nabiganj Initial Contact: Call us at 7004721239 to discuss your makeup needs and schedule your appointment. Consultation Session: Meet with our makeup artist to discuss your wedding look, review your attire, and plan the perfect makeup style. Makeup Trial: We offer trial sessions to help you preview your bridal makeup look and make any adjustments. Wedding Day Makeup: On your wedding day, our makeup artist will arrive at your location in Lakri Nabiganj to provide flawless, hassle-free makeup service. Testimonials from Brides in Lakri Nabiganj Priya R., Lakri Nabiganj: "Ladyfair provided amazing service on my wedding day. The airbrush makeup looked flawless and lasted all day." Ritu K., Lakri Nabiganj: "I loved the HD makeup! It was perfect for my photos, and the at-home service was so convenient." Sneha S., Lakri Nabiganj: "My traditional bridal makeup was exactly what I wanted, and Ladyfair made the entire process stress-free." Preparing for Your Bridal Makeup Session To get the best results for your bridal makeup: Stay Hydrated: Keep your skin looking fresh by drinking plenty of water. Consistent Skincare: Stick to your regular skincare routine to maintain healthy, glowing skin. Avoid New Products: Use familiar products to prevent any reactions before your wedding day. Clear Communication: Discuss your makeup preferences and any concerns with our artist during the consultation. Additional Beauty Services by Ladyfair Beyond bridal makeup, Ladyfair offers a variety of beauty services in Lakri Nabiganj: Engagement and Reception Makeup: Customized looks for all pre-wedding events. Party Makeup: Perfect for birthdays, anniversaries, and special occasions. Everyday Makeup: Enhance your daily look with our expert makeup services. Special Occasion Makeup: Professional makeup for parties, celebrations, and formal events. The Future of Bridal Makeup in Lakri Nabiganj Ladyfair is dedicated to setting new standards in bridal beauty in Lakri Nabiganj with our innovative at-home services. As we continue to offer exceptional service, more brides are choosing Ladyfair as their preferred makeup provider. Q&A with Ladyfair’s Bridal Makeup Artist in Lakri Nabiganj Q1: What makes Ladyfair the best choice for bridal makeup in Lakri Nabiganj? A1: Ladyfair offers expert bridal makeup services at home, using high-quality products to ensure a flawless and long-lasting look. Q2: What are the prices for bridal makeup in Lakri Nabiganj? A2: Our bridal makeup packages start at ₹10,000 for basic makeup, ₹12,000 for HD makeup, and ₹18,000 for airbrush makeup. Q3: How do I book Ladyfair’s bridal makeup services in Lakri Nabiganj? A3: You can book our services by calling 7004721239. We also offer consultations and trial sessions to ensure you get the look you want. Q4: What bridal makeup styles does Ladyfair offer in Lakri Nabiganj? A4: Ladyfair offers traditional, HD, and airbrush bridal makeup to suit different preferences and needs. Q5: Are makeup trials available before my wedding? A5: Yes, we offer trial sessions so you can finalize your bridal look ahead of time. Q6: What products does Ladyfair use for bridal makeup? A6: We use professional-grade, high-quality makeup products that are safe for all skin types and ensure a flawless finish. Q7: What other services does Ladyfair provide in Lakri Nabiganj? A7: In addition to bridal makeup, we offer makeup for engagements, receptions, parties, and other special occasions. Ladyfair is your ultimate choice for professional, at-home bridal makeup services in Lakri Nabiganj, ensuring a flawless and stress-free experience on your special day.

Posted By: 10th November 2024
Bridal Makeup Artist in Goriakothi
Introduction In Goriakothi, Ladyfair is the premier choice for brides looking to achieve the perfect wedding day look with our professional at-home bridal makeup services. Whether you desire a traditional bridal look, an HD finish, or the flawless perfection of airbrush makeup, our expert makeup artist in Goriakothi ensures that you shine on your special day. Contact us today at 7004721239 to schedule your appointment. Why Choose Ladyfair for Bridal Makeup in Goriakothi Experienced Makeup Artist Our makeup artist in Goriakothi has years of experience in bridal makeup, creating personalized looks that complement your natural beauty and align with your style and preferences. Convenient At-Home Service Forget the stress of traveling to a salon. Ladyfair brings luxury beauty treatments directly to your doorstep with our at-home bridal makeup services, offering a truly personalized experience. Premium Makeup Products We use only high-quality, professional-grade makeup products to ensure a flawless, long-lasting look that remains perfect throughout your big day. Bridal Makeup Pricing in Goriakothi Our bridal makeup services in Goriakothi are tailored to fit different styles and budgets: Basic Bridal Makeup: ₹10,000 HD Bridal Makeup: ₹12,000 Airbrush Bridal Makeup: ₹18,000 For engagement and reception makeup: Basic Engagement/Reception Makeup: ₹6,000 HD Engagement/Reception Makeup: ₹8,000 Airbrush Engagement/Reception Makeup: ₹12,000 For parties: Basic Party Makeup: ₹2,500 HD Party Makeup: ₹3,500 Popular Bridal Makeup Styles in Goriakothi Traditional Bridal Makeup Our traditional bridal makeup in Goriakothi incorporates bold colors and intricate detailing to complement your wedding attire, creating an elegant and timeless look. HD Bridal Makeup For a high-definition finish that looks flawless both in photos and in person, HD bridal makeup is the perfect choice for brides who want a picture-perfect appearance all day. Airbrush Bridal Makeup Our airbrush makeup offers a lightweight, full-coverage finish that lasts all day, giving you a smooth and natural look while ensuring long-lasting perfection. How to Book Your Bridal Makeup with Ladyfair in Goriakothi Initial Contact: Call us at 7004721239 to discuss your makeup needs and schedule your appointment. Consultation Session: Meet with our makeup artist to discuss your wedding look, review your attire, and plan the perfect makeup style. Makeup Trial: We offer trial sessions to help you preview your bridal makeup look and make any adjustments. Wedding Day Makeup: On your wedding day, our makeup artist will arrive at your location in Goriakothi to provide flawless, hassle-free makeup service. Testimonials from Brides in Goriakothi Priya R., Goriakothi: "Ladyfair provided amazing service on my wedding day. The airbrush makeup looked flawless and lasted all day." Ritu K., Goriakothi: "I loved the HD makeup! It was perfect for my photos, and the at-home service was so convenient." Sneha S., Goriakothi: "My traditional bridal makeup was exactly what I wanted, and Ladyfair made the entire process stress-free." Preparing for Your Bridal Makeup Session To get the best results for your bridal makeup: Stay Hydrated: Keep your skin looking fresh by drinking plenty of water. Consistent Skincare: Stick to your regular skincare routine to maintain healthy, glowing skin. Avoid New Products: Use familiar products to prevent any reactions before your wedding day. Clear Communication: Discuss your makeup preferences and any concerns with our artist during the consultation. Additional Beauty Services by Ladyfair Beyond bridal makeup, Ladyfair offers a variety of beauty services in Goriakothi: Engagement and Reception Makeup: Customized looks for all pre-wedding events. Party Makeup: Perfect for birthdays, anniversaries, and special occasions. Everyday Makeup: Enhance your daily look with our expert makeup services. Special Occasion Makeup: Professional makeup for parties, celebrations, and formal events. The Future of Bridal Makeup in Goriakothi Ladyfair is dedicated to setting new standards in bridal beauty in Goriakothi with our innovative at-home services. As we continue to offer exceptional service, more brides are choosing Ladyfair as their preferred makeup provider. Q&A with Ladyfair’s Bridal Makeup Artist in Goriakothi Q1: What makes Ladyfair the best choice for bridal makeup in Goriakothi? A1: Ladyfair offers expert bridal makeup services at home, using high-quality products to ensure a flawless and long-lasting look. Q2: What are the prices for bridal makeup in Goriakothi? A2: Our bridal makeup packages start at ₹10,000 for basic makeup, ₹12,000 for HD makeup, and ₹18,000 for airbrush makeup. Q3: How do I book Ladyfair’s bridal makeup services in Goriakothi? A3: You can book our services by calling 7004721239. We also offer consultations and trial sessions to ensure you get the look you want. Q4: What bridal makeup styles does Ladyfair offer in Goriakothi? A4: Ladyfair offers traditional, HD, and airbrush bridal makeup to suit different preferences and needs. Q5: Are makeup trials available before my wedding? A5: Yes, we offer trial sessions so you can finalize your bridal look ahead of time. Q6: What products does Ladyfair use for bridal makeup? A6: We use professional-grade, high-quality makeup products that are safe for all skin types and ensure a flawless finish. Q7: What other services does Ladyfair provide in Goriakothi? A7: In addition to bridal makeup, we offer makeup for engagements, receptions, parties, and other special occasions. Ladyfair is your ultimate choice for professional, at-home bridal makeup services in Goriakothi, ensuring a flawless and stress-free experience on your special day.

Posted By: 10th November 2024
Bridal Makeup Artist in BHAGWANPUR HAT
Introduction In Bhagwanpur Hat, Ladyfair is the premier choice for brides looking to achieve the perfect wedding day look with our professional at-home bridal makeup services. Whether you desire a traditional bridal look, an HD finish, or the flawless perfection of airbrush makeup, our expert makeup artist in Bhagwanpur Hat ensures that you shine on your special day. Contact us today at 7004721239 to schedule your appointment. Why Choose Ladyfair for Bridal Makeup in Bhagwanpur Hat Experienced Makeup Artist Our makeup artist in Bhagwanpur Hat has years of experience in bridal makeup, creating personalized looks that complement your natural beauty and align with your style and preferences. Convenient At-Home Service Forget the stress of traveling to a salon. Ladyfair brings luxury beauty treatments directly to your doorstep with our at-home bridal makeup services, offering a truly personalized experience. Premium Makeup Products We use only high-quality, professional-grade makeup products to ensure a flawless, long-lasting look that remains perfect throughout your big day. Bridal Makeup Pricing in Bhagwanpur Hat Our bridal makeup services in Bhagwanpur Hat are tailored to fit different styles and budgets: Basic Bridal Makeup: ₹10,000 HD Bridal Makeup: ₹12,000 Airbrush Bridal Makeup: ₹18,000 For engagement and reception makeup: Basic Engagement/Reception Makeup: ₹6,000 HD Engagement/Reception Makeup: ₹8,000 Airbrush Engagement/Reception Makeup: ₹12,000 For parties: Basic Party Makeup: ₹2,500 HD Party Makeup: ₹3,500 Popular Bridal Makeup Styles in Bhagwanpur Hat Traditional Bridal Makeup Our traditional bridal makeup in Bhagwanpur Hat incorporates bold colors and intricate detailing to complement your wedding attire, creating an elegant and timeless look. HD Bridal Makeup For a high-definition finish that looks flawless both in photos and in person, HD bridal makeup is the perfect choice for brides who want a picture-perfect appearance all day. Airbrush Bridal Makeup Our airbrush makeup offers a lightweight, full-coverage finish that lasts all day, giving you a smooth and natural look while ensuring long-lasting perfection. How to Book Your Bridal Makeup with Ladyfair in Bhagwanpur Hat Initial Contact: Call us at 7004721239 to discuss your makeup needs and schedule your appointment. Consultation Session: Meet with our makeup artist to discuss your wedding look, review your attire, and plan the perfect makeup style. Makeup Trial: We offer trial sessions to help you preview your bridal makeup look and make any adjustments. Wedding Day Makeup: On your wedding day, our makeup artist will arrive at your location in Bhagwanpur Hat to provide flawless, hassle-free makeup service. Testimonials from Brides in Bhagwanpur Hat Priya R., Bhagwanpur Hat: "Ladyfair provided amazing service on my wedding day. The airbrush makeup looked flawless and lasted all day." Ritu K., Bhagwanpur Hat: "I loved the HD makeup! It was perfect for my photos, and the at-home service was so convenient." Sneha S., Bhagwanpur Hat: "My traditional bridal makeup was exactly what I wanted, and Ladyfair made the entire process stress-free." Preparing for Your Bridal Makeup Session To get the best results for your bridal makeup: Stay Hydrated: Keep your skin looking fresh by drinking plenty of water. Consistent Skincare: Stick to your regular skincare routine to maintain healthy, glowing skin. Avoid New Products: Use familiar products to prevent any reactions before your wedding day. Clear Communication: Discuss your makeup preferences and any concerns with our artist during the consultation. Additional Beauty Services by Ladyfair Beyond bridal makeup, Ladyfair offers a variety of beauty services in Bhagwanpur Hat: Engagement and Reception Makeup: Customized looks for all pre-wedding events. Party Makeup: Perfect for birthdays, anniversaries, and special occasions. Everyday Makeup: Enhance your daily look with our expert makeup services. Special Occasion Makeup: Professional makeup for parties, celebrations, and formal events. The Future of Bridal Makeup in Bhagwanpur Hat Ladyfair is dedicated to setting new standards in bridal beauty in Bhagwanpur Hat with our innovative at-home services. As we continue to offer exceptional service, more brides are choosing Ladyfair as their preferred makeup provider. Q&A with Ladyfair’s Bridal Makeup Artist in Bhagwanpur Hat Q1: What makes Ladyfair the best choice for bridal makeup in Bhagwanpur Hat? A1: Ladyfair offers expert bridal makeup services at home, using high-quality products to ensure a flawless and long-lasting look. Q2: What are the prices for bridal makeup in Bhagwanpur Hat? A2: Our bridal makeup packages start at ₹10,000 for basic makeup, ₹12,000 for HD makeup, and ₹18,000 for airbrush makeup. Q3: How do I book Ladyfair’s bridal makeup services in Bhagwanpur Hat? A3: You can book our services by calling 7004721239. We also offer consultations and trial sessions to ensure you get the look you want. Q4: What bridal makeup styles does Ladyfair offer in Bhagwanpur Hat? A4: Ladyfair offers traditional, HD, and airbrush bridal makeup to suit different preferences and needs. Q5: Are makeup trials available before my wedding? A5: Yes, we offer trial sessions so you can finalize your bridal look ahead of time. Q6: What products does Ladyfair use for bridal makeup? A6: We use professional-grade, high-quality makeup products that are safe for all skin types and ensure a flawless finish. Q7: What other services does Ladyfair provide in Bhagwanpur Hat? A7: In addition to bridal makeup, we offer makeup for engagements, receptions, parties, and other special occasions. Ladyfair is your ultimate choice for professional, at-home bridal makeup services in Bhagwanpur Hat, ensuring a flawless and stress-free experience on your special day.

Posted By: 10th November 2024
Bridal Makeup Artist in BASANTPUR
Introduction In Basantpur, Ladyfair is the premier choice for brides looking to achieve the perfect wedding day look with our professional at-home bridal makeup services. Whether you desire a traditional bridal look, an HD finish, or the flawless perfection of airbrush makeup, our expert makeup artist in Basantpur ensures that you shine on your special day. Contact us today at 7004721239 to schedule your appointment. Why Choose Ladyfair for Bridal Makeup in Basantpur Experienced Makeup Artist Our makeup artist in Basantpur has years of experience in bridal makeup, creating personalized looks that complement your natural beauty and align with your style and preferences. Convenient At-Home Service Forget the stress of traveling to a salon. Ladyfair brings luxury beauty treatments directly to your doorstep with our at-home bridal makeup services, offering a truly personalized experience. Premium Makeup Products We use only high-quality, professional-grade makeup products to ensure a flawless, long-lasting look that remains perfect throughout your big day. Bridal Makeup Pricing in Basantpur Our bridal makeup services in Basantpur are tailored to fit different styles and budgets: Basic Bridal Makeup: ₹10,000 HD Bridal Makeup: ₹12,000 Airbrush Bridal Makeup: ₹18,000 For engagement and reception makeup: Basic Engagement/Reception Makeup: ₹6,000 HD Engagement/Reception Makeup: ₹8,000 Airbrush Engagement/Reception Makeup: ₹12,000 For parties: Basic Party Makeup: ₹2,500 HD Party Makeup: ₹3,500 Popular Bridal Makeup Styles in Basantpur Traditional Bridal Makeup Our traditional bridal makeup in Basantpur incorporates bold colors and intricate detailing to complement your wedding attire, creating an elegant and timeless look. HD Bridal Makeup For a high-definition finish that looks flawless both in photos and in person, HD bridal makeup is the perfect choice for brides who want a picture-perfect appearance all day. Airbrush Bridal Makeup Our airbrush makeup offers a lightweight, full-coverage finish that lasts all day, giving you a smooth and natural look while ensuring long-lasting perfection. How to Book Your Bridal Makeup with Ladyfair in Basantpur Initial Contact: Call us at 7004721239 to discuss your makeup needs and schedule your appointment. Consultation Session: Meet with our makeup artist to discuss your wedding look, review your attire, and plan the perfect makeup style. Makeup Trial: We offer trial sessions to help you preview your bridal makeup look and make any adjustments. Wedding Day Makeup: On your wedding day, our makeup artist will arrive at your location in Basantpur to provide flawless, hassle-free makeup service. Testimonials from Brides in Basantpur Priya R., Basantpur: "Ladyfair provided amazing service on my wedding day. The airbrush makeup looked flawless and lasted all day." Ritu K., Basantpur: "I loved the HD makeup! It was perfect for my photos, and the at-home service was so convenient." Sneha S., Basantpur: "My traditional bridal makeup was exactly what I wanted, and Ladyfair made the entire process stress-free." Preparing for Your Bridal Makeup Session To get the best results for your bridal makeup: Stay Hydrated: Keep your skin looking fresh by drinking plenty of water. Consistent Skincare: Stick to your regular skincare routine to maintain healthy, glowing skin. Avoid New Products: Use familiar products to prevent any reactions before your wedding day. Clear Communication: Discuss your makeup preferences and any concerns with our artist during the consultation. Additional Beauty Services by Ladyfair Beyond bridal makeup, Ladyfair offers a variety of beauty services in Basantpur: Engagement and Reception Makeup: Customized looks for all pre-wedding events. Party Makeup: Perfect for birthdays, anniversaries, and special occasions. Everyday Makeup: Enhance your daily look with our expert makeup services. Special Occasion Makeup: Professional makeup for parties, celebrations, and formal events. The Future of Bridal Makeup in Basantpur Ladyfair is dedicated to setting new standards in bridal beauty in Basantpur with our innovative at-home services. As we continue to offer exceptional service, more brides are choosing Ladyfair as their preferred makeup provider. Q&A with Ladyfair’s Bridal Makeup Artist in Basantpur Q1: What makes Ladyfair the best choice for bridal makeup in Basantpur? A1: Ladyfair offers expert bridal makeup services at home, using high-quality products to ensure a flawless and long-lasting look. Q2: What are the prices for bridal makeup in Basantpur? A2: Our bridal makeup packages start at ₹10,000 for basic makeup, ₹12,000 for HD makeup, and ₹18,000 for airbrush makeup. Q3: How do I book Ladyfair’s bridal makeup services in Basantpur? A3: You can book our services by calling 7004721239. We also offer consultations and trial sessions to ensure you get the look you want. Q4: What bridal makeup styles does Ladyfair offer in Basantpur? A4: Ladyfair offers traditional, HD, and airbrush bridal makeup to suit different preferences and needs. Q5: Are makeup trials available before my wedding? A5: Yes, we offer trial sessions so you can finalize your bridal look ahead of time. Q6: What products does Ladyfair use for bridal makeup? A6: We use professional-grade, high-quality makeup products that are safe for all skin types and ensure a flawless finish. Q7: What other services does Ladyfair provide in Basantpur? A7: In addition to bridal makeup, we offer makeup for engagements, receptions, parties, and other special occasions. Ladyfair is your ultimate choice for professional, at-home bridal makeup services in Basantpur, ensuring a flawless and stress-free experience on your special day.

Posted By: 29th October 2024
Bridal makrup artist in Shivajinagar
Ladyfair Bridal Makeup Services in Shivajinagar: Your Dream Wedding Look Awaits For brides in Shivajinagar seeking to look stunning on their special day, Ladyfair Bridal Makeup Services offers an exceptional at-home makeup experience. Whether you envision a classic bridal look, a flawless HD finish, or the sophisticated elegance of airbrush makeup, our skilled makeup artist is dedicated to making your bridal dreams come true. Here’s everything you need to know about our premium bridal makeup services in Shivajinagar. Why Choose Ladyfair for Bridal Makeup in Shivajinagar? 1. Skilled Makeup Artist with a Personal Touch At Ladyfair, our experienced makeup artist specializes in crafting personalized bridal looks that enhance your natural beauty and reflect your unique style. 2. Convenient At-Home Service Enjoy the luxury of professional makeup without leaving the comfort of your home. Our at-home service allows you to relax and indulge in a pampering experience on your wedding day. 3. Top-Quality Makeup Products We believe in using only the finest professional-grade makeup products, ensuring a long-lasting, flawless finish that keeps you glowing throughout your celebrations. Bridal Makeup Packages in Shivajinagar Ladyfair offers a variety of makeup packages designed to meet every bride's needs and budget: Basic Bridal Makeup: ₹10,000 HD Bridal Makeup: ₹12,000 Airbrush Bridal Makeup: ₹18,000 For engagements and receptions: Basic Engagement/Reception Makeup: ₹6,000 HD Engagement/Reception Makeup: ₹8,000 Airbrush Engagement/Reception Makeup: ₹12,000 For other special occasions: Basic Party Makeup: ₹2,500 HD Party Makeup: ₹3,500 Signature Bridal Makeup Styles by Ladyfair in Shivajinagar Traditional Bridal Makeup Embrace a timeless elegance with our traditional bridal makeup, featuring bold and colorful designs that beautifully complement ethnic attire. HD Bridal Makeup This modern style ensures a flawless, high-definition finish, perfect for capturing stunning photos throughout your wedding day. Airbrush Bridal Makeup Known for its lightweight feel and smooth finish, airbrush makeup provides a natural yet polished look that lasts from dawn till dusk. Booking Your Bridal Makeup with Ladyfair in Shivajinagar Step 1: Initial Contact Call us at 7004721239 to discuss your bridal makeup preferences and set up an appointment. Step 2: Consultation Meet with our makeup artist to conceptualize your bridal look, considering your wedding attire, themes, and personal style. Step 3: Makeup Trial Experience a trial session to preview your bridal look, allowing for any adjustments to achieve your ideal appearance. Step 4: Wedding Day Makeup On your wedding day, our artist will arrive at your designated location in Shivajinagar, ready to deliver exceptional makeup tailored to your vision. Preparing for Your Bridal Makeup Session Stay Hydrated: Drink plenty of water leading up to your wedding to keep your skin fresh and glowing. Maintain a Skincare Routine: A consistent skincare routine ensures your complexion is smooth and radiant for your special day. Avoid New Products: Stick to familiar skincare and makeup products to prevent any allergic reactions before your wedding. Communicate Your Vision: Clearly discuss your desired look and any specific styles you love with our artist during the consultation. Ladyfair Bridal Makeup Services Q&A Q1: What makes Ladyfair the best choice for bridal makeup in Shivajinagar? A1: Ladyfair stands out for its expert at-home bridal makeup services that prioritize quality and personalization, ensuring every bride feels unique and beautiful on her wedding day. Q2: What is the price range for bridal makeup services in Shivajinagar? A2: Our bridal makeup services start at ₹10,000 for basic makeup, ₹12,000 for HD makeup, and ₹18,000 for airbrush options. We also offer competitive prices for engagement and reception makeup. Q3: Can I schedule a trial before my wedding day? A3: Absolutely! We encourage scheduling a trial session to help you visualize your bridal look and make any necessary adjustments before your big day. Q4: What types of makeup styles do you offer? A4: We offer a variety of styles, including traditional, HD, and airbrush bridal makeup to cater to different tastes and wedding themes. Q5: What kind of products does Ladyfair use? A5: We use only top-tier professional-grade makeup products that provide a flawless finish and are suitable for all skin types, ensuring you look your best throughout the day. Q6: Are other makeup services available in Shivajinagar? A6: Yes, in addition to bridal makeup, we provide engagement, reception, party, and special occasion makeup services. Hear from Our Brides in Shivajinagar Sonal P., Shivajinagar "Choosing Ladyfair for my wedding makeup was a fantastic decision! The makeup was stunning, and the artist was incredibly professional." Rhea K., Shivajinagar "I opted for airbrush makeup, and it was absolutely flawless! I felt beautiful, and it lasted all day long—highly recommend Ladyfair!" Ready to Book Ladyfair Bridal Makeup in Shivajinagar? If you’re ready to elevate your wedding day look with Ladyfair’s expert bridal makeup services, contact us at 7004721239 to schedule your session or learn more about our offerings. With Ladyfair, expect a personalized, professional makeup experience that brings your bridal vision to life!

Posted By: 29th October 2024
Bridal makeup artist in Bithan
Ladyfair Bridal Makeup Services in Bithan: Your Perfect Wedding Look Awaits For brides in Bithan who desire a stunning and memorable appearance on their wedding day, Ladyfair Bridal Makeup Services offers the ultimate at-home makeup experience. Whether you dream of a classic, traditional look, a flawless HD finish, or the elegance of airbrush makeup, our talented makeup artist is committed to making your bridal vision a reality. Here’s everything you need to know about our exceptional bridal makeup services in Bithan. Why Choose Ladyfair for Bridal Makeup in Bithan? 1. Expert Makeup Artist with Personalized Service At Ladyfair, our skilled makeup artist specializes in creating customized bridal looks that enhance your natural beauty while reflecting your unique style and personality. 2. Convenient At-Home Service Experience the luxury of salon-quality makeup without leaving your home. Our at-home service allows you to relax and enjoy a pampering experience on your wedding day. 3. High-Quality Makeup Products We use only the best professional-grade makeup products, ensuring a long-lasting, flawless finish that keeps you radiant throughout your celebrations. Bridal Makeup Packages in Bithan Ladyfair offers a range of makeup packages designed to meet every bride's needs and budget: Basic Bridal Makeup: ₹10,000 HD Bridal Makeup: ₹12,000 Airbrush Bridal Makeup: ₹18,000 For engagements and receptions: Basic Engagement/Reception Makeup: ₹6,000 HD Engagement/Reception Makeup: ₹8,000 Airbrush Engagement/Reception Makeup: ₹12,000 For other special occasions: Basic Party Makeup: ₹2,500 HD Party Makeup: ₹3,500 Signature Bridal Makeup Styles by Ladyfair in Bithan Traditional Bridal Makeup For brides who want a timeless and classic appearance, our traditional bridal makeup features vibrant colors and intricate designs that beautifully complement ethnic attire. HD Bridal Makeup This modern style provides a high-definition finish, ensuring you look stunning in photos and throughout the wedding day celebrations. Airbrush Bridal Makeup Known for its lightweight feel and smooth application, airbrush makeup offers a natural yet polished look that lasts from dawn to dusk. Booking Your Bridal Makeup with Ladyfair in Bithan Step 1: Initial Contact Call us at 7004721239 to discuss your bridal makeup preferences and schedule an appointment. Step 2: Consultation Meet with our makeup artist to conceptualize your bridal look, considering your wedding attire, themes, and personal style. Step 3: Makeup Trial Experience a trial session to preview your bridal look, making any necessary adjustments to ensure you are completely satisfied. Step 4: Wedding Day Makeup On your special day, our artist will arrive at your designated location in Bithan, ready to create a stunning look tailored to your vision. Preparing for Your Bridal Makeup Session Stay Hydrated: Drink plenty of water in the days leading up to your wedding to keep your skin fresh and glowing. Maintain a Skincare Routine: A consistent skincare routine ensures your complexion is smooth and radiant for your special day. Avoid New Products: Stick to familiar skincare and makeup products to prevent any allergic reactions before your wedding. Communicate Your Vision: Clearly discuss your desired look and any specific styles you love with our artist during the consultation. Ladyfair Bridal Makeup Services Q&A Q1: What makes Ladyfair the best choice for bridal makeup in Bithan? A1: Ladyfair stands out for its expert at-home bridal makeup services that prioritize quality and personalization, ensuring every bride feels unique and beautiful on her wedding day. Q2: What is the price range for bridal makeup services in Bithan? A2: Our bridal makeup services start at ₹10,000 for basic makeup, ₹12,000 for HD makeup, and ₹18,000 for airbrush options. We also offer competitive prices for engagement and reception makeup. Q3: Can I schedule a trial before my wedding day? A3: Yes! We encourage scheduling a trial session to help you visualize your bridal look and make any necessary adjustments before your big day. Q4: What types of makeup styles do you offer? A4: We offer a range of styles, including traditional, HD, and airbrush bridal makeup, catering to different tastes and wedding themes. Q5: What kind of products does Ladyfair use? A5: We use only professional-grade makeup products that provide a flawless finish and are suitable for all skin types, ensuring you look your best throughout the day. Q6: Do you provide other makeup services in Bithan? A6: Yes, in addition to bridal makeup, we offer services for engagements, receptions, parties, and other special occasions. Hear from Our Brides in Bithan Nisha R., Bithan "Choosing Ladyfair for my wedding makeup was the best decision! The artist was professional, and I loved how beautiful I felt on my special day." Ananya K., Bithan "I opted for HD makeup, and it was stunning! It lasted all day long and looked flawless in photos. I highly recommend Ladyfair!" Ready to Book Ladyfair Bridal Makeup in Bithan? If you’re ready to transform your wedding day look with Ladyfair’s expert bridal makeup services, contact us at 7004721239 to schedule your session or learn more about our offerings. With Ladyfair, expect a personalized, professional makeup experience that brings your bridal vision to life!

Posted By: 29th October 2024
Bridal makeup artist in Hasanpur
Ladyfair Bridal Makeup Services in Hasanpur: Elevate Your Wedding Day Look For brides in Hasanpur seeking a flawless and unforgettable appearance on their special day, Ladyfair Bridal Makeup Services is here to provide the ultimate at-home makeup experience. Whether you desire a classic, traditional look, the perfection of HD makeup, or the sophisticated charm of airbrush makeup, our talented makeup artist is dedicated to making your bridal dreams come true. Here’s everything you need to know about our exceptional bridal makeup services in Hasanpur. Why Choose Ladyfair for Bridal Makeup in Hasanpur? 1. Expert Makeup Artist with a Personalized Touch At Ladyfair, our skilled makeup artist specializes in creating customized bridal looks that enhance your natural beauty while reflecting your unique style and personality. 2. Convenient At-Home Service Enjoy the luxury of salon-quality makeup in the comfort of your own home. Our at-home service allows you to relax and indulge in a pampering experience on your wedding day. 3. High-Quality Makeup Products We use only top-tier professional-grade makeup products to ensure a long-lasting, flawless finish that keeps you radiant throughout your celebrations. Bridal Makeup Packages in Hasanpur Ladyfair offers a variety of makeup packages designed to fit every bride's needs and budget: Basic Bridal Makeup: ₹10,000 HD Bridal Makeup: ₹12,000 Airbrush Bridal Makeup: ₹18,000 For engagements and receptions: Basic Engagement/Reception Makeup: ₹6,000 HD Engagement/Reception Makeup: ₹8,000 Airbrush Engagement/Reception Makeup: ₹12,000 For other special occasions: Basic Party Makeup: ₹2,500 HD Party Makeup: ₹3,500 Signature Bridal Makeup Styles by Ladyfair in Hasanpur Traditional Bridal Makeup For brides who wish to embrace a timeless look, our traditional bridal makeup features vibrant colors and intricate designs that beautifully complement ethnic attire. HD Bridal Makeup This modern style provides a high-definition finish, ensuring you look stunning in photos and throughout your wedding day celebrations. Airbrush Bridal Makeup Known for its lightweight and smooth application, airbrush makeup offers a natural yet polished look that lasts from dawn to dusk. Booking Your Bridal Makeup with Ladyfair in Hasanpur Step 1: Initial Contact Call us at 7004721239 to discuss your bridal makeup preferences and schedule an appointment. Step 2: Consultation Meet with our makeup artist to conceptualize your bridal look, considering your wedding attire, themes, and personal style. Step 3: Makeup Trial Experience a trial session to preview your bridal look, making any necessary adjustments to ensure you are completely satisfied. Step 4: Wedding Day Makeup On your big day, our artist will arrive at your chosen location in Hasanpur, ready to create a stunning look tailored to your vision. Preparing for Your Bridal Makeup Session Stay Hydrated: Drink plenty of water in the days leading up to your wedding to keep your skin fresh and glowing. Maintain a Skincare Routine: A consistent skincare routine ensures your complexion is smooth and radiant for your special day. Avoid New Products: Stick to familiar skincare and makeup products to prevent any allergic reactions before your wedding. Communicate Your Vision: Clearly discuss your desired look and any specific styles you love with our artist during the consultation. Ladyfair Bridal Makeup Services Q&A Q1: What makes Ladyfair the best choice for bridal makeup in Hasanpur? A1: Ladyfair stands out for its expert at-home bridal makeup services that prioritize quality and personalization, ensuring every bride feels unique and beautiful on her wedding day. Q2: What is the price range for bridal makeup services in Hasanpur? A2: Our bridal makeup services start at ₹10,000 for basic makeup, ₹12,000 for HD makeup, and ₹18,000 for airbrush options. We also offer competitive prices for engagement and reception makeup. Q3: Can I schedule a trial before my wedding day? A3: Yes! We encourage scheduling a trial session to help you visualize your bridal look and make any necessary adjustments before your big day. Q4: What types of makeup styles do you offer? A4: We offer a range of styles, including traditional, HD, and airbrush bridal makeup, catering to different tastes and wedding themes. Q5: What kind of products does Ladyfair use? A5: We use only professional-grade makeup products that provide a flawless finish and are suitable for all skin types, ensuring you look your best throughout the day. Q6: Do you provide other makeup services in Hasanpur? A6: Yes, in addition to bridal makeup, we offer services for engagements, receptions, parties, and other special occasions. Hear from Our Brides in Hasanpur Pooja R., Hasanpur "Ladyfair made my wedding day truly special! The makeup was perfect, and I loved the convenience of having it done at home." Sakshi M., Hasanpur "I chose airbrush makeup, and it was absolutely flawless! I felt beautiful all day long. Highly recommend Ladyfair!" Ready to Book Ladyfair Bridal Makeup in Hasanpur? If you’re ready to transform your wedding day look with Ladyfair’s expert bridal makeup services, contact us at 7004721239 to schedule your session or learn more about our offerings. With Ladyfair, expect a personalized, professional makeup experience that brings your bridal vision to life!

Posted By: 29th October 2024
Bridal makeup artist in Rosera
Ladyfair Bridal Makeup Services in Rosera: Your Dream Wedding Look Awaits For brides in Rosera seeking a stunning and unforgettable appearance on their wedding day, Ladyfair Bridal Makeup Services offers the ultimate at-home makeup experience. Whether you envision a classic, traditional look, a flawless HD finish, or the elegance of airbrush makeup, our skilled makeup artist is dedicated to making your bridal dreams come true. Here’s everything you need to know about our exceptional bridal makeup services in Rosera. Why Choose Ladyfair for Bridal Makeup in Rosera? 1. Experienced and Talented Makeup Artist At Ladyfair, our expert makeup artist specializes in crafting personalized bridal looks that enhance your natural beauty and reflect your unique style. 2. Convenient At-Home Service We bring the luxury of salon-quality makeup directly to you. With our at-home service, you can relax and enjoy the process of getting ready in the comfort of your own space. 3. Top-Quality Makeup Products We believe in using only the finest professional-grade makeup products, ensuring a long-lasting and flawless finish that keeps you glowing throughout your celebrations. Bridal Makeup Packages in Rosera Ladyfair offers a variety of makeup packages to suit every bride’s budget and style preferences: Basic Bridal Makeup: ₹10,000 HD Bridal Makeup: ₹12,000 Airbrush Bridal Makeup: ₹18,000 For engagements and receptions: Basic Engagement/Reception Makeup: ₹6,000 HD Engagement/Reception Makeup: ₹8,000 Airbrush Engagement/Reception Makeup: ₹12,000 For other special occasions: Basic Party Makeup: ₹2,500 HD Party Makeup: ₹3,500 Signature Bridal Makeup Styles by Ladyfair in Rosera Traditional Bridal Makeup For brides who want a timeless, classic look, our traditional bridal makeup features bold colors and intricate designs that beautifully complement traditional attire. HD Bridal Makeup This modern style provides a flawless, high-definition finish that’s perfect for capturing stunning photos and ensuring you look your best throughout the day. Airbrush Bridal Makeup Known for its lightweight feel and smooth finish, airbrush makeup offers a natural yet polished look that lasts from dawn to dusk, making it ideal for long wedding days. Booking Your Bridal Makeup with Ladyfair in Rosera Step 1: Initial Contact Call us at 7004721239 to discuss your bridal makeup preferences and set up an appointment. Step 2: Consultation Meet with our makeup artist to conceptualize your bridal look, considering your wedding attire and personal style. Step 3: Makeup Trial Experience a trial session to preview your bridal look and make any adjustments to achieve your ideal appearance. Step 4: Wedding Day Makeup On your wedding day, our artist will arrive at your designated location in Rosera, ready to deliver exceptional makeup tailored to your vision. Preparing for Your Bridal Makeup Session Stay Hydrated: Drinking plenty of water keeps your skin looking fresh and glowing. Maintain a Skincare Routine: Consistent skincare leading up to your wedding day ensures your complexion is smooth and radiant. Avoid New Products: Stick to familiar skincare and makeup products to prevent allergic reactions before your big day. Communicate Clearly: Discuss your desired look and any specific makeup styles you love with our artist during the consultation. Ladyfair Bridal Makeup Services Q&A Q1: What sets Ladyfair apart for bridal makeup in Rosera? A1: Ladyfair offers expert, at-home bridal makeup services with a focus on quality and personalization. We strive to make every bride feel special and beautiful on her wedding day. Q2: What is the price range for bridal makeup services in Rosera? A2: Our bridal makeup services start at ₹10,000 for basic makeup, ₹12,000 for HD makeup, and ₹18,000 for airbrush options. We also provide engagement and reception makeup services. Q3: Can I schedule a trial before the wedding day? A3: Absolutely! We encourage trial sessions so that you can preview and perfect your bridal look before your special day. Q4: What styles of makeup are available at Ladyfair? A4: We offer a variety of styles, including traditional, HD, and airbrush bridal makeup, to suit different preferences and wedding themes. Q5: What kind of products does Ladyfair use? A5: We use only top-tier, professional-grade makeup products that provide a flawless finish and are suitable for all skin types, ensuring you look radiant all day long. Q6: Are other makeup services available in Rosera? A6: Yes, in addition to bridal makeup, we offer makeup services for engagements, receptions, parties, and other special occasions. Hear from Our Brides in Rosera Meera K., Rosera "Choosing Ladyfair was the best decision! The makeup was stunning, and having it done at home made my day so much more enjoyable." Anjali P., Rosera "I opted for airbrush makeup, and it was absolutely flawless. I felt beautiful, and it lasted all day long—highly recommend Ladyfair!" Ready to Book Ladyfair Bridal Makeup in Rosera? If you’re ready to elevate your wedding day look with Ladyfair’s expert bridal makeup services, contact us at 7004721239 to schedule your session or learn more about our offerings. With Ladyfair, you can expect a personalized and professional makeup experience that brings your bridal vision to life!

Posted By: 29th October 2024
Bridal makeup artist in Warishnagar
Ladyfair Bridal Makeup Services in Warishnagar: Creating Your Dream Wedding Look For brides in Warishnagar who want to make their wedding day as memorable as possible, Ladyfair Bridal Makeup Services offers a luxurious, at-home makeup experience. Whether you’re looking for the timeless beauty of traditional makeup, the flawless finish of HD, or the smooth elegance of airbrush makeup, Ladyfair is dedicated to making you look and feel your best. Here’s everything you need to know about Ladyfair’s premier bridal makeup services in Warishnagar. Why Choose Ladyfair for Bridal Makeup in Warishnagar? 1. Expert Makeup Artist with Tailored Approach Our skilled makeup artist specializes in personalized bridal looks that highlight each bride’s natural beauty while capturing their unique style. 2. At-Home Convenience Ladyfair offers the ultimate convenience with at-home makeup services, so you can relax and focus on enjoying your special day without the hassle of travel. 3. High-Quality Makeup Products We use only the finest, professional-grade makeup products that ensure a flawless, long-lasting look. You’ll stay radiant and picture-perfect from the ceremony through the reception. Bridal Makeup Packages in Warishnagar Ladyfair offers a variety of makeup packages to suit your budget and style: Basic Bridal Makeup: ₹10,000 HD Bridal Makeup: ₹12,000 Airbrush Bridal Makeup: ₹18,000 For engagements and receptions: Basic Engagement/Reception Makeup: ₹6,000 HD Engagement/Reception Makeup: ₹8,000 Airbrush Engagement/Reception Makeup: ₹12,000 For other occasions: Basic Party Makeup: ₹2,500 HD Party Makeup: ₹3,500 Signature Bridal Makeup Styles by Ladyfair in Warishnagar Traditional Bridal Makeup For brides who want a timeless, elegant look, our traditional bridal makeup enhances your natural beauty with bold, striking colors that perfectly complement traditional wedding attire. HD Bridal Makeup For a flawless, high-definition finish, our HD bridal makeup style is designed to keep you looking stunning in photos and videos throughout the day. Airbrush Bridal Makeup Our airbrush makeup provides a lightweight, polished look that lasts from morning to night, creating a natural yet glamorous effect. Booking Your Bridal Makeup with Ladyfair in Warishnagar Step 1: Initial Contact Call us at 7004721239 to discuss your bridal makeup preferences and schedule an appointment. Step 2: Consultation During your consultation, our makeup artist will collaborate with you to design a look that matches your attire, style, and wedding vision. Step 3: Makeup Trial We offer a trial session to preview your bridal look and make adjustments, ensuring you’re completely happy with your final look. Step 4: Wedding Day Makeup On your big day, our artist will arrive at your location in Warishnagar, ready to bring your bridal beauty vision to life, so you can enjoy a stress-free experience. Preparing for Your Bridal Makeup Session Stay Hydrated: Drinking plenty of water helps your skin stay fresh and glowing. Maintain a Skincare Routine: Consistent skincare ensures your complexion is smooth and radiant on your wedding day. Avoid New Products: Stick to familiar products to avoid last-minute skin reactions. Communicate Your Vision: Share your desired look and any inspiration with our artist to achieve your perfect bridal appearance. Ladyfair Bridal Makeup Services Q&A Q1: What sets Ladyfair apart for bridal makeup in Warishnagar? A1: Ladyfair provides expert, at-home bridal makeup services with a focus on quality and personalization. We bring a salon experience directly to you, allowing for a luxurious and convenient preparation for your wedding day. Q2: What is the price range for Ladyfair’s bridal makeup services in Warishnagar? A2: Bridal makeup services start at ₹10,000 for basic makeup, ₹12,000 for HD makeup, and ₹18,000 for airbrush makeup. We also offer engagement, reception, and party makeup options. Q3: Can I book a makeup trial before the wedding? A3: Yes! We highly recommend a trial session to ensure you’re delighted with your bridal look. It’s a wonderful way to feel confident about your appearance on your big day. Q4: What makeup styles does Ladyfair offer? A4: We offer various styles, including traditional, HD, and airbrush bridal makeup, to suit a range of preferences—from classic to modern and natural. Q5: What kind of products does Ladyfair use? A5: We use only premium, professional-grade makeup products that provide a flawless, long-lasting finish. Our products are suitable for all skin types and ensure you look radiant and beautiful. Q6: Do you offer other makeup services in Warishnagar? A6: Yes, in addition to bridal makeup, we provide engagement, reception, party, and special occasion makeup services. Testimonials from Our Brides in Warishnagar Neha S., Warishnagar "Ladyfair truly made my wedding day stress-free. The at-home service was a game-changer, and the makeup was everything I hoped for!" Sonal R., Warishnagar "I went with the HD makeup, and it looked perfect in every photo. Ladyfair listened to my vision and created a look I loved!" Ready to Book Ladyfair Bridal Makeup in Warishnagar? If you’re ready to make your wedding day magical with Ladyfair’s expert bridal makeup services, contact us at 7004721239 to schedule your session or learn more about our offerings. With Ladyfair, you can count on a personalized, professional makeup experience that brings your bridal vision to life!

Posted By: 29th October 2024
Bridal makeup artist in Pusa
Ladyfair Bridal Makeup Services in Pusa: Making Your Wedding Day Truly Unforgettable In Pusa, Ladyfair Bridal Makeup Services offers brides luxurious, at-home makeup experiences, ensuring they look radiant and feel fabulous on their special day. Whether you desire a timeless traditional look, a flawless HD finish, or the smooth elegance of airbrush makeup, Ladyfair has you covered. Here’s everything you need to know about why Ladyfair is the preferred bridal makeup service in Pusa. Why Choose Ladyfair Bridal Makeup in Pusa? 1. Skilled and Experienced Makeup Artist Our talented makeup artist combines skill and creativity to design a bridal look that enhances each bride’s natural beauty and personal style. 2. Convenient At-Home Service Ladyfair brings the luxury of salon-quality makeup to you, right at home, so you can enjoy a stress-free and pampering experience. 3. Premium Makeup Products We use only professional-grade, long-lasting products, ensuring your makeup stays fresh and beautiful throughout your wedding celebrations. Bridal Makeup Packages in Pusa Ladyfair offers a variety of makeup packages to suit every bride’s budget and style preferences: Basic Bridal Makeup: ₹10,000 HD Bridal Makeup: ₹12,000 Airbrush Bridal Makeup: ₹18,000 For engagement and reception: Basic Engagement/Reception Makeup: ₹6,000 HD Engagement/Reception Makeup: ₹8,000 Airbrush Engagement/Reception Makeup: ₹12,000 For other occasions: Basic Party Makeup: ₹2,500 HD Party Makeup: ₹3,500 Ladyfair’s Signature Bridal Makeup Styles in Pusa Traditional Bridal Makeup For brides who love a classic, bold look, our traditional bridal makeup complements cultural attire and ensures you’re the center of attention. HD Bridal Makeup This high-definition style is ideal for modern brides who want a flawless look in photos and in person throughout the day. Airbrush Bridal Makeup Airbrush makeup is known for its lightweight feel and smooth, polished finish. It’s perfect for long-lasting coverage and a natural yet refined look. Booking Ladyfair Bridal Makeup Services in Pusa Step 1: Initial Contact Call us at 7004721239 to discuss your bridal makeup preferences and schedule an appointment. Step 2: Consultation Our makeup artist will meet with you to design your bridal look, taking into consideration your attire, style, and any specific preferences. Step 3: Makeup Trial We offer a trial session where you can preview your bridal look and make any adjustments to achieve your ideal appearance. Step 4: Wedding Day Makeup On the big day, our makeup artist will arrive at your location in Pusa to deliver your perfect bridal look, ensuring a relaxing and enjoyable experience. Preparing for Your Bridal Makeup Session Stay Hydrated: Drinking plenty of water keeps your skin glowing and fresh. Stick to a Skincare Routine: A consistent skincare routine ensures smooth, radiant skin on your wedding day. Avoid New Products: Avoid experimenting with new products to prevent any adverse reactions. Communicate Your Vision: Discuss your desired look and any inspirations with our artist to achieve your perfect bridal appearance. Ladyfair Bridal Makeup Services Q&A Q1: What makes Ladyfair unique for bridal makeup in Pusa? A1: Ladyfair offers at-home bridal makeup services with a focus on quality and personalization. We bring the salon experience to you, ensuring a luxurious and comfortable preparation for your wedding day. Q2: What is the price range for Ladyfair’s bridal makeup services in Pusa? A2: Bridal makeup services begin at ₹10,000 for basic makeup, with HD makeup priced at ₹12,000, and airbrush options at ₹18,000. We also offer engagement, reception, and party makeup services. Q3: Can I book a makeup trial before the wedding? A3: Yes, we highly recommend a trial session to ensure you’re satisfied with your bridal look. It’s an excellent way to feel confident about your appearance on the big day. Q4: What types of makeup styles does Ladyfair offer? A4: We offer traditional, HD, and airbrush bridal makeup to suit various preferences, from classic to modern and natural styles. Q5: What kind of products does Ladyfair use? A5: We use only high-quality, professional-grade products to ensure a flawless finish and long-lasting makeup. Our products are suitable for all skin types and deliver a radiant look. Q6: Are other makeup services besides bridal makeup available in Pusa? A6: Yes, in addition to bridal makeup, we provide makeup for engagements, receptions, and other special occasions, as well as party makeup. Hear from Our Brides in Pusa Priya S., Pusa "Ladyfair made my wedding day so much easier. The at-home service was incredibly convenient, and the makeup was stunning—exactly how I wanted it!" Ritu T., Pusa "I chose the airbrush makeup, and it felt light and lasted all day. Ladyfair understood my style perfectly and delivered beyond my expectations!" Ready to Book Ladyfair Bridal Makeup in Pusa? If you’re ready to make your wedding day magical with Ladyfair’s expert bridal makeup services, contact us at 7004721239 to schedule your session or learn more about our offerings. With Ladyfair, you can count on a personalized, professional makeup experience that brings your bridal vision to life!

Posted By: 29th October 2024
Best bridal makeup artist in Sarairanjan
Ladyfair Bridal Makeup Services in Sarairanjan: Exquisite Looks for Your Special Day Planning a wedding in Sarairanjan? Ladyfair Bridal Makeup Services is here to help make your day truly unforgettable with our luxurious, at-home makeup service. From traditional bridal looks to flawless HD and airbrush finishes, Ladyfair provides everything to ensure you look radiant on your special day. Here’s what makes Ladyfair the top choice for brides in Sarairanjan. Why Ladyfair is Sarairanjan’s Preferred Choice for Bridal Makeup 1. Experienced and Talented Makeup Artist Our skilled makeup artist has extensive experience creating unique and beautiful bridal looks that reflect each bride’s individual style. With an eye for detail and a deep understanding of different skin tones and types, Ladyfair ensures that every bride looks her absolute best. 2. Convenient At-Home Service Ladyfair offers the luxury of professional makeup services at your doorstep. Relax in the comfort of your own space as we bring the salon experience to you, making your wedding preparations stress-free. 3. Top-Quality Makeup Products We believe in using only the best, long-lasting products that ensure flawless results. With professional-grade, high-quality products, our makeup will stay fresh and radiant from the ceremony to the reception. Bridal Makeup Packages in Sarairanjan Ladyfair offers a range of makeup packages to suit every occasion, with transparent pricing to help you plan your budget: Basic Bridal Makeup: ₹10,000 HD Bridal Makeup: ₹12,000 Airbrush Bridal Makeup: ₹18,000 For engagement and reception events: Basic Engagement/Reception Makeup: ₹6,000 HD Engagement/Reception Makeup: ₹8,000 Airbrush Engagement/Reception Makeup: ₹12,000 For other special occasions: Basic Party Makeup: ₹2,500 HD Party Makeup: ₹3,500 Trending Bridal Makeup Styles at Ladyfair in Sarairanjan Traditional Bridal Makeup For brides who want a classic, bold look with colors that enhance traditional attire, our traditional makeup style ensures you’ll be the center of attention. HD Bridal Makeup Perfect for high-definition photos, HD makeup provides a flawless finish, ensuring you look stunning from every angle throughout the day. Airbrush Bridal Makeup Airbrush makeup is known for its light, smooth feel and natural finish. This technique creates a long-lasting look that stays fresh from dawn to dusk. Booking Ladyfair Bridal Makeup Services in Sarairanjan Step 1: Initial Contact Call us at 7004721239 to discuss your preferences and set up an appointment. Step 2: Consultation During your consultation, you’ll meet with our makeup artist to design your bridal look, taking into account your attire, style, and any preferences. Step 3: Makeup Trial To ensure complete satisfaction, we offer a trial session where you can preview your look and make any adjustments. Step 4: Wedding Day Makeup On the big day, our artist will arrive at your chosen location in Sarairanjan to deliver your desired look, ensuring a relaxed and enjoyable experience. Preparing for Your Bridal Makeup Session Stay Hydrated: Keeping your skin hydrated ensures a glowing, fresh appearance. Maintain a Consistent Skincare Routine: Stick to a regular skincare routine to create a smooth base for makeup. Avoid Trying New Products: Avoid experimenting with new skincare or makeup products right before your wedding to prevent any adverse reactions. Communicate Your Preferences: Share your vision and any specific makeup styles you love with our artist to create your dream look. Additional Beauty Services by Ladyfair In addition to bridal makeup, Ladyfair offers a variety of makeup services to enhance your look for other wedding-related and special events: Engagement & Reception Makeup: Beautifully crafted looks for all your pre-wedding festivities. Party Makeup: Ideal for birthdays, anniversaries, or other celebrations. Everyday Makeup: Perfect for those who want a little extra glam in their daily beauty routine. Heartfelt Testimonials from Brides in Sarairanjan Anjali S., Sarairanjan "Ladyfair made my bridal makeup experience feel so personal and luxurious. I loved every moment, and it made my day even more special." Neha T., Sarairanjan "The airbrush makeup I chose was flawless and comfortable all day long. Ladyfair brought my vision to life effortlessly!" Q&A with Ladyfair’s Bridal Makeup Artist in Sarairanjan Q1: What sets Ladyfair apart from other bridal makeup services in Sarairanjan? A1: Ladyfair combines the convenience of at-home makeup service with a high standard of quality and personalization. We take the time to understand each bride’s vision, using premium products to ensure a flawless finish. Q2: What is the price range for bridal makeup in Sarairanjan? A2: Our bridal makeup starts at ₹10,000 for the basic package, with HD makeup priced at ₹12,000 and airbrush makeup at ₹18,000. We also have packages for engagement, reception, and party makeup. Q3: Can I schedule a trial before the wedding day? A3: Yes, we highly recommend a trial session to finalize your look and make sure you’re completely happy with it. It’s a great way to feel confident about your appearance on the big day. Q4: What makeup styles are available for brides? A4: We offer traditional, HD, and airbrush makeup styles to suit a range of preferences. Each style offers its unique finish, from timeless elegance to flawless modern and natural looks. Q5: What products does Ladyfair use? A5: We only use top-tier, professional-grade products that are suitable for all skin types and provide long-lasting coverage. We prioritize quality to ensure your makeup stays fresh and radiant throughout the day. Q6: Do you offer other makeup services besides bridal makeup? A6: Yes, we provide engagement, reception, party, and everyday makeup services to meet the needs of all our clients. Ready to Book Your Bridal Makeup in Sarairanjan? Ladyfair is here to make your wedding day beautiful and memorable. Call 7004721239 to book your bridal makeup session or to learn more about our services. With Ladyfair, your makeup experience will be luxurious, convenient, and customized to create the look of your dreams. Let us make you feel like the best version of yourself on your special day!

Posted By: 21st October 2024
Bridal makeup artist in Khanpur
Ladyfair Bridal Makeup Services in Khanpur In Khanpur, Ladyfair is the ultimate destination for exquisite bridal makeup services, tailored to make your special day truly unforgettable. Our expert makeup artist specializes in providing luxurious at-home makeup experiences, ensuring you look radiant and feel fabulous on your wedding day. Whether you prefer a classic bridal look, a flawless HD finish, or the sophisticated charm of airbrush makeup, Ladyfair is here to cater to your needs. To schedule your bridal makeup consultation, call us at 7004721239. Why Ladyfair Stands Out for Bridal Makeup in Khanpur Skilled and Talented Makeup Artist Our makeup artist in Khanpur possesses extensive expertise in bridal makeup, crafting personalized looks that accentuate your natural beauty and reflect your unique style. Convenient At-Home Service Enjoy the luxury of salon-quality makeup without stepping out of your home. Ladyfair’s at-home service allows you to relax and indulge in a pampering experience on your wedding day. Top-Quality Makeup Products We believe in using only the finest professional-grade products, ensuring a long-lasting and impeccable finish that keeps you glowing throughout your celebrations. Bridal Makeup Pricing in Khanpur Basic Bridal Makeup: ₹10,000 HD Bridal Makeup: ₹12,000 Airbrush Bridal Makeup: ₹18,000 For engagement and reception: Basic Engagement/Reception Makeup: ₹6,000 HD Engagement/Reception Makeup: ₹8,000 Airbrush Engagement/Reception Makeup: ₹12,000 For other special occasions: Basic Party Makeup: ₹2,500 HD Party Makeup: ₹3,500 Trending Bridal Makeup Styles in Khanpur Traditional Bridal Makeup Embrace a timeless elegance with bold and colorful makeup that complements traditional attire, making you the center of attention. HD Bridal Makeup Designed for modern brides, this style ensures a flawless, high-definition finish, perfect for capturing stunning photos throughout the day. Airbrush Bridal Makeup Known for its lightweight feel and smooth finish, airbrush makeup provides a natural yet polished look that lasts from dawn till dusk. How to Book Your Bridal Makeup with Ladyfair in Khanpur Step 1: Initial Contact Give us a call at 7004721239 to discuss your bridal makeup preferences and set up an appointment. Step 2: Consultation Meet with our makeup artist to conceptualize your bridal look, taking into account your wedding attire and personal style. Step 3: Makeup Trial Experience a trial session to preview your bridal look, allowing for any adjustments to achieve your ideal appearance. Step 4: Wedding Day Makeup On your wedding day, our artist will arrive at your designated location in Khanpur to deliver exceptional makeup tailored to your vision. Heartfelt Testimonials from Brides in Khanpur Aarohi S., Khanpur "Choosing Ladyfair was the best decision! The makeup was stunning, and having it done at home made my day so much more enjoyable." Tanvi R., Khanpur "I opted for airbrush makeup, and it was absolutely flawless. I felt beautiful, and it lasted all day long—highly recommend Ladyfair!" Preparing for Your Bridal Makeup Session Stay Hydrated: Drinking ample water keeps your skin looking fresh and glowing. Maintain a Skincare Routine: Consistent skincare leading up to your wedding day ensures your complexion is smooth and radiant. Avoid New Products: Stick to familiar skincare and makeup products to prevent allergic reactions before your big day. Communicate Clearly: Discuss your desired look and any specific makeup styles you love with our artist during the consultation. Additional Beauty Services Offered by Ladyfair Alongside bridal makeup, Ladyfair provides a range of beauty services to enhance your overall look: Engagement & Reception Makeup Customized makeup looks for all pre-wedding festivities. Party Makeup Perfect for any celebration, from birthdays to anniversaries, ensuring you shine on any occasion. Everyday Makeup Elevate your everyday beauty routine with our professional makeup services. The Future of Bridal Makeup in Khanpur As Ladyfair continues to revolutionize bridal makeup experiences in Khanpur, we are quickly becoming the preferred choice for brides seeking a blend of convenience, quality, and personalized service. Our commitment to excellence ensures that every bride feels special and looks stunning on her wedding day. Q&A with Ladyfair’s Bridal Makeup Artist in Khanpur Q1: What sets Ladyfair apart for bridal makeup in Khanpur? A1: Ladyfair provides expert at-home bridal makeup services with a personal touch, using high-quality products that ensure you look and feel your best on your wedding day. Q2: What is the price range for bridal makeup in Khanpur? A2: Our bridal makeup services start at ₹10,000 for basic makeup, ₹12,000 for HD, and ₹18,000 for airbrush options. Q3: Can I schedule a trial before the wedding day? A3: Absolutely! We offer trial sessions to ensure you are completely satisfied with your look before your big day. Q4: What styles of makeup are available at Ladyfair? A4: We offer a variety of styles, including traditional, HD, and airbrush bridal makeup to suit different preferences. Q5: What kind of products does Ladyfair use? A5: We use only top-tier professional-grade makeup products that provide a flawless finish suitable for all skin types. Q6: Are other makeup services available in Khanpur? A6: Yes, in addition to bridal makeup, we provide engagement, reception, party, and special occasion makeup services. To learn more or to book your bridal makeup in Khanpur, contact Ladyfair at 7004721239 today! Let us help you create beautiful memories on your wedding day!

Posted By: 21st October 2024
Bridal makeup artist in Morwa
Ladyfair Bridal Makeup Services in Morwa Ladyfair is proud to offer top-notch bridal makeup services in Morwa, bringing expert beauty treatments right to your doorstep. Whether you desire a traditional bridal look, an HD flawless finish, or a smooth airbrush makeup, our experienced makeup artist ensures that you look stunning on your wedding day. Book your bridal makeup appointment today by calling 7004721239. Why Choose Ladyfair for Bridal Makeup in Morwa? Experienced Makeup Artist Our skilled makeup artist in Morwa specializes in bridal makeup, crafting personalized looks that enhance your natural beauty and complement your style. Convenient At-Home Service Enjoy a stress-free makeup experience at home. Ladyfair offers luxury makeup services that come to you, ensuring you can relax while we make you look your best. Premium Makeup Products We use only high-quality, professional-grade makeup products that guarantee a long-lasting, flawless finish to keep you glowing all day. Bridal Makeup Pricing in Morwa Basic Bridal Makeup: ₹10,000 HD Bridal Makeup: ₹12,000 Airbrush Bridal Makeup: ₹18,000 For engagement and reception: Basic Engagement/Reception Makeup: ₹6,000 HD Engagement/Reception Makeup: ₹8,000 Airbrush Engagement/Reception Makeup: ₹12,000 For other special occasions: Basic Party Makeup: ₹2,500 HD Party Makeup: ₹3,500 Popular Bridal Makeup Styles in Morwa Traditional Bridal Makeup A classic look that enhances the bride’s beauty with bold, elegant makeup to match traditional wedding attire. HD Bridal Makeup Perfect for brides who want a flawless, high-definition finish that looks stunning in photos and in person. Airbrush Bridal Makeup Lightweight and long-lasting, this style gives a natural, smooth finish that stays perfect throughout the day. How to Book Your Bridal Makeup with Ladyfair in Morwa Step 1: Initial Contact Call 7004721239 to discuss your bridal makeup needs and schedule your appointment. Step 2: Consultation Meet with our makeup artist to plan your bridal look, considering your wedding attire and personal style. Step 3: Makeup Trial Book a trial session to preview your bridal look and make any necessary adjustments before your big day. Step 4: Wedding Day Makeup Our artist will arrive at your location in Morwa to deliver flawless makeup on your wedding day, ensuring you look radiant and beautiful. Testimonials from Brides in Morwa Neha M., Morwa "Ladyfair made my wedding day so special! The makeup was perfect, and the at-home service made everything so much easier." Shweta P., Morwa "I went for the airbrush makeup, and it was absolutely flawless. I received so many compliments, and the makeup lasted all day." Preparing for Your Bridal Makeup Session Stay Hydrated: Drinking plenty of water will keep your skin glowing and healthy. Stick to Your Skincare Routine: Regular skincare ensures smooth, radiant skin for your big day. Avoid New Products: To prevent allergic reactions, use only products you're familiar with in the days leading up to your wedding. Communicate Your Preferences: Share your desired look and makeup preferences with our artist during the consultation. Additional Beauty Services by Ladyfair In addition to bridal makeup, Ladyfair offers a variety of other services to suit your beauty needs: Engagement & Reception Makeup Custom looks for pre-wedding events, designed to enhance your beauty. Party Makeup Perfect for birthdays, anniversaries, or any special occasion where you want to look your best. Everyday Makeup Get a fresh, professional look for your everyday needs or special outings. The Future of Bridal Makeup in Morwa As Ladyfair continues to provide exceptional at-home bridal makeup services in Morwa, we are fast becoming the preferred choice for brides seeking a stress-free and personalized beauty experience. Our commitment to using high-end products and delivering expert services ensures that every bride shines on her big day. Q&A with Ladyfair’s Bridal Makeup Artist in Morwa Q1: Why is Ladyfair the best choice for bridal makeup in Morwa? A1: Ladyfair offers expert bridal makeup services at home, ensuring you receive a luxurious experience with professional products and a personalized touch. Q2: What is the price for bridal makeup in Morwa? A2: Bridal makeup starts at ₹10,000 for basic, ₹12,000 for HD, and ₹18,000 for airbrush makeup. Q3: Can I book a trial session before the wedding? A3: Yes, we offer trial sessions to perfect your look and ensure you’re completely satisfied before your big day. Q4: What makeup styles does Ladyfair offer? A4: Ladyfair offers traditional, HD, and airbrush bridal makeup to suit a range of preferences and styles. Q5: What kind of products does Ladyfair use? A5: We use only high-quality, professional-grade products to ensure a long-lasting, flawless finish that is safe for all skin types. Q6: Does Ladyfair provide other makeup services in Morwa? A6: Yes, we offer engagement, reception, party, and special occasion makeup in addition to bridal makeup. For more information or to book your bridal makeup in Morwa, call 7004721239 and let Ladyfair make your special day even more memorable!

Posted By: 21st October 2024
Bridal makeup artist in Tajpur
Ladyfair Bridal Makeup Services in Tajpur For brides in Tajpur, Ladyfair is the go-to for expert bridal makeup services. Our at-home makeup services ensure that you feel pampered and look stunning without leaving the comfort of your home. Whether you prefer a traditional bridal look, an HD flawless finish, or the light elegance of airbrush makeup, our skilled makeup artist in Tajpur will make your wedding day unforgettable. Contact us at 7004721239 to book your bridal makeup in Tajpur. Why Choose Ladyfair for Bridal Makeup in Tajpur? Experienced Makeup Artist Our makeup artist has extensive experience in bridal makeup, creating personalized looks that highlight your natural beauty and complement your style. At-Home Service for Convenience Skip the salon trip on your wedding day! We bring top-tier beauty services directly to your home, ensuring a stress-free, luxurious experience. Premium Quality Products We use only the best professional-grade products to ensure a long-lasting, radiant look that stays flawless throughout your celebration. Bridal Makeup Pricing in Tajpur Basic Bridal Makeup: ₹10,000 HD Bridal Makeup: ₹12,000 Airbrush Bridal Makeup: ₹18,000 For engagement and reception: Basic Engagement/Reception Makeup: ₹6,000 HD Engagement/Reception Makeup: ₹8,000 Airbrush Engagement/Reception Makeup: ₹12,000 For other events: Basic Party Makeup: ₹2,500 HD Party Makeup: ₹3,500 Popular Bridal Makeup Styles in Tajpur Traditional Bridal Makeup A classic and bold look that perfectly complements traditional bridal attire, giving you a timeless, elegant appearance. HD Bridal Makeup This high-definition makeup provides a flawless finish, ensuring that you look picture-perfect throughout your wedding day. Airbrush Bridal Makeup With its lightweight feel and full coverage, airbrush makeup creates a natural yet polished look that lasts all day. How to Book Your Bridal Makeup with Ladyfair in Tajpur Step 1: Initial Contact Call us at 7004721239 to discuss your bridal makeup preferences and schedule your appointment. Step 2: Consultation Work with our makeup artist to plan the perfect look for your wedding, considering your dress, preferences, and unique style. Step 3: Makeup Trial Book a makeup trial session to preview your bridal look and make any necessary adjustments to ensure you’re happy with the final result. Step 4: Wedding Day Makeup On your big day, our makeup artist will arrive at your location in Tajpur, delivering a flawless and professional makeup look for your wedding. Testimonials from Brides in Tajpur Ayesha K., Tajpur "Ladyfair's makeup artist did an incredible job for my wedding. The HD makeup looked perfect in the photos, and the convenience of having it done at home made the day stress-free." Priyanka S., Tajpur "I chose airbrush makeup, and I couldn't be happier! It felt light, lasted all day, and I received so many compliments. Highly recommend Ladyfair's services!" Preparing for Your Bridal Makeup Session Stay Hydrated: Drinking plenty of water will keep your skin radiant and healthy. Follow a Skincare Routine: Consistent skincare leading up to your wedding ensures your skin is smooth and glowing. Avoid Trying New Products: Stick to familiar products to avoid any allergic reactions before your big day. Communicate Your Preferences: During your consultation, discuss your ideal look and any specific makeup styles you like with our makeup artist. Additional Beauty Services by Ladyfair Ladyfair offers a range of beauty services beyond bridal makeup: Engagement & Reception Makeup Tailored makeup looks for all your pre-wedding events. Party Makeup Ideal for any special occasion, including birthdays, anniversaries, and more. Special Occasion Makeup Perfect for everyday looks or special occasions when you want to enhance your beauty with professional makeup. The Future of Bridal Makeup in Tajpur As more brides in Tajpur experience the convenience and excellence of Ladyfair’s at-home services, we are quickly becoming the preferred choice for flawless bridal makeup. Our commitment to quality, combined with personalized service, ensures that you will look your absolute best on your wedding day. Q&A with Ladyfair’s Bridal Makeup Artist in Tajpur Q1: Why should I choose Ladyfair for my bridal makeup in Tajpur? A1: Ladyfair offers the convenience of at-home bridal makeup services, ensuring you get a professional, salon-quality look without the stress of traveling. We use only top-quality products and tailor each look to your personal style. Q2: What are the prices for bridal makeup in Tajpur? A2: Bridal makeup starts at ₹10,000 for basic, ₹12,000 for HD, and ₹18,000 for airbrush makeup. Q3: Can I book a trial session before my wedding? A3: Yes, we offer makeup trials to ensure you’re completely satisfied with your look ahead of the big day. Q4: What types of makeup styles does Ladyfair offer? A4: We offer traditional, HD, and airbrush bridal makeup to suit a variety of preferences and styles. Q5: What products does Ladyfair use? A5: We use professional-grade makeup products that ensure a long-lasting, flawless finish suitable for all skin types. Q6: Does Ladyfair provide other makeup services in Tajpur? A6: Yes, Ladyfair offers engagement, reception, party, and special occasion makeup services in addition to bridal makeup. For more details or to book your bridal makeup appointment in Tajpur, call Ladyfair at 7004721239 today!

Posted By: 21st October 2024
Bridal makeup artist in Samastipur
Ladyfair Bridal Makeup Services in Samastipur For brides in Samastipur, Ladyfair offers premium bridal makeup services that bring out the best in you on your wedding day. Whether you're looking for traditional bridal makeup, a flawless HD finish, or the light elegance of airbrush makeup, our skilled makeup artist ensures a stunning transformation from the comfort of your home. Contact us at 7004721239 to book your bridal makeup appointment in Samastipur. Why Ladyfair is the Best Choice for Bridal Makeup in Samastipur Highly Experienced Makeup Artist Our expert makeup artist in Samastipur specializes in bridal looks, ensuring you look radiant and confident on your special day. Convenient At-Home Service Enjoy luxurious salon-quality makeup services without leaving home. Ladyfair ensures a stress-free, personalized beauty experience right at your doorstep. Top-Quality Products We use only the finest professional makeup products to ensure a long-lasting, flawless look that will keep you glowing throughout the celebrations. Bridal Makeup Pricing in Samastipur Our services are designed to meet different preferences and budgets: Basic Bridal Makeup: ₹10,000 HD Bridal Makeup: ₹12,000 Airbrush Bridal Makeup: ₹18,000 For pre-wedding events like engagements and receptions: Basic Engagement/Reception Makeup: ₹6,000 HD Engagement/Reception Makeup: ₹8,000 Airbrush Engagement/Reception Makeup: ₹12,000 For parties and special events: Basic Party Makeup: ₹2,500 HD Party Makeup: ₹3,500 Popular Bridal Makeup Styles in Samastipur Traditional Bridal Makeup Embrace a bold and beautiful look that complements traditional wedding attire for a timeless, elegant appearance. HD Bridal Makeup Achieve a flawless, high-definition finish that ensures you look perfect both in person and in your wedding photos. Airbrush Bridal Makeup With its lightweight, full-coverage finish, airbrush makeup gives you a natural yet refined look that lasts throughout the day. How to Book Your Bridal Makeup with Ladyfair in Samastipur Step 1: Initial Contact Call us at 7004721239 to discuss your bridal makeup needs and book an appointment. Step 2: Consultation Meet our makeup artist to plan your bridal look, considering your attire, preferences, and style. Step 3: Makeup Trial Test out your bridal look with a trial session, making adjustments as needed to ensure your complete satisfaction. Step 4: Wedding Day Makeup On your big day, our makeup artist will arrive at your location in Samastipur to deliver a flawless bridal look that enhances your natural beauty. Testimonials from Brides in Samastipur Ritu S., Samastipur "The airbrush makeup was magical! Ladyfair's service made my wedding day truly unforgettable. I felt like a queen!" Preeti K., Samastipur "I loved the HD makeup. The convenience of getting ready at home with Ladyfair made the entire experience hassle-free and enjoyable." Preparing for Your Bridal Makeup Session Stay Hydrated: Drinking plenty of water keeps your skin healthy and glowing. Follow a Skincare Routine: Stay consistent with your skincare routine to ensure smooth, radiant skin. Avoid New Products: Stick to products you know to prevent any potential allergic reactions before the big day. Communicate Your Preferences: Make sure to discuss your desired look and any specific preferences with our makeup artist during your consultation. Additional Beauty Services by Ladyfair Beyond bridal makeup, Ladyfair also offers a range of services for your other special occasions: Engagement & Reception Makeup Tailored to enhance your look for all pre-wedding events. Party Makeup Ideal for birthdays, anniversaries, and any celebration where you want to look your best. Everyday & Special Occasion Makeup Perfect for casual outings or significant events when you want to elevate your daily look. The Future of Bridal Makeup in Samastipur As more brides discover the ease and luxury of Ladyfair's at-home services, we are proud to become the preferred choice for flawless bridal makeup in Samastipur. Our commitment to using high-quality products and delivering a personalized beauty experience ensures that every bride shines on her big day. Q&A with Ladyfair’s Bridal Makeup Artist in Samastipur Q1: What makes Ladyfair stand out for bridal makeup in Samastipur? A1: Ladyfair’s at-home services ensure brides get professional-quality makeup without the hassle of visiting a salon. We use high-end products and tailor every look to suit the bride’s personality and preferences. Q2: What is the cost of bridal makeup services in Samastipur? A2: Our bridal makeup starts at ₹10,000 for basic, ₹12,000 for HD, and ₹18,000 for airbrush makeup. Q3: Can I book a consultation or trial before my wedding? A3: Yes, we offer consultations and trial sessions so you can finalize the perfect bridal look in advance. Q4: What makeup styles does Ladyfair offer? A4: Ladyfair provides traditional, HD, and airbrush makeup styles to suit every bride’s needs. Q5: What products does Ladyfair use for bridal makeup? A5: We use only professional-grade products to ensure your makeup looks stunning and lasts all day. Q6: Does Ladyfair offer other makeup services in Samastipur? A6: In addition to bridal makeup, we offer makeup services for engagements, receptions, parties, and special occasions. For more information or to book your bridal makeup in Samastipur, call 7004721239. Let Ladyfair help you look your absolute best on your big day!

Posted By: 12th October 2024
Bridal makeup artist in Islamnagar Aliganj
Bridal Makeup Artist in Islamnagar Aliganj Introduction Your wedding day is one of the most significant moments in your life, and looking your best is essential. In Islamnagar Aliganj, Ladyfair is setting new standards in bridal beauty with our premier at-home bridal makeup services. Our team of expert makeup artists comes directly to your location, ensuring you experience a personalized and stress-free beauty journey on your special day. With Ladyfair, you can achieve the perfect bridal look without the hassle of salon visits. This blog will explore the importance of bridal makeup, what distinguishes Ladyfair’s services, and why brides in Islamnagar Aliganj are increasingly choosing us for their wedding day beauty needs. The Importance of Bridal Makeup Bridal makeup is an art that enhances your natural beauty while complementing your wedding attire and accessories. On your wedding day, you deserve to feel radiant and confident. Professional bridal makeup ensures that you look flawless throughout the day and in photographs, capturing the essence of your special moments. At Ladyfair, we understand the unique beauty requirements of brides in Islamnagar Aliganj. We blend traditional and contemporary makeup styles to create a look that reflects your personality and aligns with the cultural significance of your wedding. Why Choose Ladyfair in Islamnagar Aliganj? Convenience of At-Home Services Ladyfair offers the convenience of at-home makeup application. Brides in Islamnagar Aliganj can enjoy a relaxed makeup session in the comfort of their own homes, eliminating the stress of traveling to a salon. Expertise in Bridal Makeup Our skilled makeup artists are renowned for their talent in creating breathtaking bridal looks. They have a deep understanding of various makeup techniques and an eye for detail, ensuring each bride's makeup enhances her natural features and complements her attire. Whether you're looking for a traditional or contemporary style, our artists can create the perfect look for you. High-Quality Products Ladyfair uses only premium makeup products that are safe for all skin types, ensuring a long-lasting and flawless finish. We carefully select products that match your skin tone, providing a beautiful look that lasts throughout your wedding day. Thorough Pre-Wedding Consultations We believe that great bridal makeup starts with a comprehensive consultation. During this pre-wedding session, you can discuss your vision, try out different styles, and receive expert advice to ensure your final look aligns perfectly with your expectations and wedding theme. Bridal Makeup Trends in Islamnagar Aliganj Traditional Bridal Makeup Traditional bridal makeup remains popular in Islamnagar Aliganj. This style often features bold eye makeup, vibrant red lips, and intricate contouring, designed to enhance the bride’s features while complementing ornate wedding attire. Modern Bridal Makeup A growing number of brides in Islamnagar Aliganj prefer modern bridal makeup for a subtle, natural look. This style focuses on enhancing natural beauty with soft tones, minimalistic highlighting, and a dewy finish, ideal for a fresh and contemporary appearance. Fusion Bridal Makeup For brides seeking a blend of traditional and modern styles, fusion bridal makeup offers a personalized option. This approach combines classic elements with modern techniques to create a unique look tailored to each bride's style. The Ladyfair Experience: From Consultation to Final Look Initial Contact: Reach out to us via phone to discuss your requirements and schedule an appointment. Pre-Wedding Consultation: Meet with our makeup artist for a detailed consultation to discuss your desired look and review your wedding attire. Makeup Trial: Experience a trial session to preview your bridal makeup, allowing for adjustments to ensure complete satisfaction. Final Makeup Session: On your wedding day, our makeup artist arrives at your location to provide the full bridal makeup service. Post-Wedding Touch-Ups: We also offer touch-up services throughout the wedding day to keep your makeup looking flawless. Client Testimonials Amina R., Islamnagar Aliganj: "Ladyfair made my wedding day unforgettable. The convenience of at-home service and the amazing makeup artist made me feel beautiful and confident all day long." Nisha P., Islamnagar Aliganj: "I loved the personalized touch Ladyfair offered. The trial session helped me feel comfortable with my look, and I received countless compliments!" Kavita S., Islamnagar Aliganj: "The quality of Ladyfair’s products and the artist's skill exceeded my expectations. My makeup looked fresh and radiant throughout the day. Highly recommend their services!" Preparing for Your Bridal Makeup Session To ensure the best results on your wedding day, consider these tips: Stay Hydrated: Drink plenty of water for glowing skin. Follow a Skincare Routine: Maintain a consistent skincare regimen. Avoid New Products: Stick to familiar skincare to prevent reactions. Communicate Your Vision: Clearly express your desired look during your consultation. Beyond Bridal Makeup: Additional Services Ladyfair offers various beauty services for different occasions: Party Makeup: Ideal for guests attending weddings and events. Everyday Makeup: Perfect for daily activities and casual outings. Special Occasion Makeup: Makeup services for engagements, anniversaries, and more. Looking Ahead: The Future of Bridal Makeup in Islamnagar Aliganj As more brides discover the benefits of Ladyfair’s at-home services, the demand for personalized bridal beauty solutions continues to grow. We are committed to expanding our reach and introducing new techniques and products that cater to evolving bridal trends. Our goal is to set new standards in bridal makeup, ensuring that every bride in Islamnagar Aliganj has access to exceptional beauty services that make their wedding day as beautiful and memorable as possible. FAQ Section Q1: What makes Ladyfair’s bridal makeup services unique in Islamnagar Aliganj? A1: Ladyfair’s at-home bridal makeup services offer unparalleled convenience, allowing brides to receive professional makeup application in the comfort of their homes. We provide personalized services tailored to each bride's preferences for a stress-free experience. Q2: What bridal makeup styles does Ladyfair specialize in? A2: Ladyfair specializes in traditional, modern, and fusion bridal makeup styles, ensuring that every bride finds a look that enhances her natural beauty. Q3: How does the at-home makeup service work? A3: The process begins with a phone consultation to discuss your needs. We then conduct a pre-wedding consultation, offer a makeup trial, and finally, our artist arrives at your location on your wedding day for the full service. Q4: What products does Ladyfair use for bridal makeup? A4: We use high-quality, premium makeup products that are safe for all skin types and provide long-lasting results, ensuring a flawless finish for your wedding day. Q5: How should a bride prepare for her bridal makeup session? A5: Brides should stay hydrated, follow a consistent skincare routine, avoid new products close to the wedding day, and communicate their desired look during the consultation. Q6: Can Ladyfair accommodate cultural or traditional makeup requirements? A6: Yes, we are experienced in creating makeup looks that reflect cultural and traditional values while providing a modern touch. Q7: What do past brides say about their experience with Ladyfair? A7: Past brides have praised the convenience of our at-home services, the quality of makeup, and the expertise of our artists, leading to a memorable wedding experience. Feel free to modify any sections as needed! 4o mini

Posted By: 12th October 2024
Bridal makeup artist in Gidhour
Bridal Makeup Artist in Gidhour Introduction Your wedding day is one of the most significant moments in your life, and looking your best is paramount. In Gidhour, Bihar, Ladyfair is transforming the bridal makeup landscape with exceptional, personalized at-home makeup services. Our skilled team brings professional bridal beauty right to your doorstep, ensuring you have a stress-free and delightful experience on your special day. With Ladyfair, achieving a breathtaking bridal look has never been easier or more convenient. This blog explores the importance of bridal makeup, what sets Ladyfair apart, and why brides in Gidhour increasingly trust us with their wedding day beauty needs. The Role of Bridal Makeup Bridal makeup is not just about applying cosmetics; it's a beautiful art form that enhances a bride’s natural features while complementing her wedding attire and accessories. On your wedding day, feeling confident and radiant is essential. Professional bridal makeup ensures you look flawless in person and in photographs throughout all the day’s events. At Ladyfair, we understand the distinct needs of brides in Gidhour. Our expert artists blend traditional and contemporary styles to create a look that reflects each bride's personality and resonates with the cultural significance of the occasion. Why Ladyfair Stands Out in Gidhour Convenience of At-Home Services One of the key features of Ladyfair’s offerings is the convenience of at-home makeup application. Brides in Gidhour can relax without the stress of traveling to a salon. Our talented makeup artist arrives at your location, allowing you to enjoy the entire process in a comfortable and private environment. Expertise in Bridal Makeup Our makeup artist is known for her skill and creativity in crafting stunning bridal looks. With extensive knowledge of diverse makeup techniques and a keen eye for detail, she ensures that every bride’s makeup enhances her natural beauty and complements her wedding attire. Whether you desire a classic, traditional appearance or a modern, stylish look, Ladyfair can deliver your dream look. High-Quality Products To create a flawless bridal look, we use only premium-quality makeup products that are safe for all skin types and provide long-lasting results. Our carefully selected products match your skin tone and type, ensuring a smooth and durable finish that lasts throughout the long hours of your wedding day. Thorough Pre-Wedding Consultations At Ladyfair, we believe that a well-executed makeup look begins with a comprehensive consultation. During this pre-wedding meeting, brides can discuss their vision, experiment with different styles, and receive expert advice, ensuring the final look aligns perfectly with their expectations and wedding theme. Bridal Makeup Trends in Gidhour Traditional Bridal Makeup Traditional bridal makeup remains a favorite in Gidhour, often characterized by bold eye makeup, vibrant red lips, and intricate contouring. This style is designed to accentuate the bride’s features and complement ornate wedding attire. Modern Bridal Makeup A growing number of brides in Gidhour are opting for modern bridal makeup, which emphasizes a more subtle, natural look. This style focuses on enhancing the bride’s innate beauty with soft tones, minimal highlighting, and a dewy finish, ideal for those who desire a fresh, contemporary appearance while still honoring traditional values. Fusion Bridal Makeup For brides seeking a blend of both traditional and modern styles, fusion bridal makeup offers the perfect solution. This approach combines classic elements with modern techniques to create a unique and personalized look. Ladyfair’s makeup artist is adept at crafting fusion looks tailored to each bride's individual style and preferences. The Ladyfair Experience: From Consultation to Final Look Initial Contact: Reach out to us via phone to discuss your requirements and schedule an appointment. This initial conversation helps us understand your needs. Pre-Wedding Consultation: Meet with our makeup artist for an in-depth consultation. We’ll discuss your desired look, review your wedding attire, and plan the best makeup style for you. Makeup Trial: Experience a trial session where you can preview your bridal makeup. This allows for adjustments to ensure you are completely satisfied with the final look. Final Makeup Session: On your wedding day, our makeup artist arrives at your location to provide a complete bridal makeup service. We guarantee that every detail is perfect so that you look and feel your best. Post-Wedding Touch-Ups: We also offer touch-up services throughout the wedding day to keep your makeup looking flawless. Client Testimonials Sita K., Gidhour: "Ladyfair made my wedding day truly special. The at-home service was incredibly convenient, and the makeup artist did an amazing job. I felt beautiful and confident all day long." Rani J., Gidhour: "I loved the personalized approach Ladyfair offered. The makeup was perfect, and the trial session helped me feel completely comfortable with my look. I received so many compliments!" Mina T., Gidhour: "The quality of Ladyfair’s products and the skill of the makeup artist exceeded my expectations. My makeup looked fresh and radiant throughout the day. Highly recommend their services." Preparing for Your Bridal Makeup Session To ensure the best results on your wedding day, follow these preparation tips: Stay Hydrated: Drink plenty of water to keep your skin glowing. Follow a Skincare Routine: Maintain a consistent skincare regimen with cleansing, toning, and moisturizing. Avoid New Products: Stick to familiar skincare products to prevent potential reactions. Communicate Your Vision: Clearly express your desired look and any concerns during your consultation to ensure everything is tailored to your preferences. Beyond Bridal Makeup: Ladyfair’s Additional Services In addition to bridal makeup, Ladyfair offers a variety of beauty services for different occasions: Party Makeup: Ideal for guests attending weddings, parties, and other events. Everyday Makeup: Perfect for casual outings and daily activities. Special Occasion Makeup: Includes makeup services for engagements, anniversaries, and other significant celebrations. Looking Ahead: The Future of Bridal Makeup in Gidhour As more brides in Gidhour discover the benefits of Ladyfair’s at-home makeup services, the demand for personalized bridal beauty solutions continues to rise. Ladyfair is committed to expanding its reach within the district and introducing innovative techniques and products that cater to evolving bridal trends. Our goal is to set new standards in bridal makeup, ensuring that every bride in Gidhour has access to exceptional beauty services that make their wedding day as memorable and beautiful as possible. FAQs Q1: What makes Ladyfair’s bridal makeup services unique in Gidhour? A1: Ladyfair’s at-home bridal makeup services offer unparalleled convenience, allowing brides to receive professional makeup application in the comfort of their own homes. We provide personalized services tailored to each bride’s preferences, ensuring a seamless and stress-free experience on the wedding day. Q2: What bridal makeup styles does Ladyfair specialize in? A2: Ladyfair specializes in traditional, modern, and fusion bridal makeup styles. Whether you want a classic look with bold features or a contemporary, minimalist appearance, our expert makeup artist can create a stunning look that enhances your natural beauty. Q3: How does the at-home makeup service work? A3: The process starts with an initial phone consultation to discuss your needs and schedule an appointment. We then conduct a pre-wedding consultation, offer a makeup trial, and finally, on your wedding day, our makeup artist arrives at your location to provide the full makeup service. Q4: What products does Ladyfair use for bridal makeup? A4: Ladyfair uses high-quality, premium makeup products that are safe for all skin types and provide long-lasting results. Our product selection is designed to match your skin tone and type, ensuring a flawless finish throughout the day. Q5: How should a bride prepare for her bridal makeup session? A5: Brides should stay hydrated, follow a consistent skincare routine, and avoid trying new skincare products close to the wedding day. Clear communication of your desired look during the consultation will also help ensure the makeup meets your expectations. Q6: Can Ladyfair accommodate cultural or traditional makeup requirements? A6: Yes, Ladyfair is experienced in creating makeup looks that reflect cultural and traditional values. We can incorporate specific elements into the makeup to honor these traditions while providing a modern touch. Q7: What do past brides say about their experience with Ladyfair? A7: Brides appreciate the convenience of our at-home services, the personalized attention, and the high-quality makeup that leaves them looking radiant on their special day. Feel free to customize any part of this blog post as needed!

Posted By: 12th October 2024
Bridal makeup artist in Barhat
Bridal Makeup Artist in Barhat Introduction Your wedding day is a celebration of love and commitment, and looking your best is essential. In Barhat, Bihar, Ladyfair is transforming bridal beauty with top-notch, personalized at-home makeup services. Our expert team brings professional bridal makeup directly to your doorstep, ensuring you have a stress-free and enjoyable experience on your special day. With Ladyfair, you can achieve a stunning bridal look without the hassle of traveling to a salon. This blog explores the importance of bridal makeup, highlights what sets Ladyfair apart, and explains why brides in Barhat increasingly choose us for their wedding day beauty needs. The Role of Bridal Makeup Bridal makeup is not just about applying cosmetics; it's an art form that enhances a bride’s natural beauty while complementing her wedding attire and accessories. On your wedding day, you deserve to feel confident and look radiant. Professional bridal makeup ensures you look flawless both in person and in photographs throughout the day's events. Ladyfair understands the unique preferences of brides in Barhat. We blend traditional and contemporary makeup styles to create a look that reflects each bride’s personality while honoring the cultural significance of the occasion. Why Ladyfair Stands Out in Barhat Convenience of At-Home Services One of the standout features of Ladyfair’s services is the convenience of at-home makeup application. Brides in Barhat can relax without worrying about the stress of traveling to a salon. Our skilled makeup artist comes to your location, allowing you to enjoy your makeup session in a comfortable and private setting. Expertise in Bridal Makeup Ladyfair’s makeup artist is renowned for her skill and experience in creating breathtaking bridal looks. With a deep understanding of various makeup techniques and a keen eye for detail, she ensures each bride's makeup enhances her natural features and complements her wedding attire. Whether you desire a classic, traditional look or a contemporary, stylish appearance, Ladyfair can deliver the perfect look. High-Quality Products To achieve a flawless bridal look, Ladyfair uses only premium-quality makeup products that are safe for all skin types and provide long-lasting results. We select products that match your skin tone and type, ensuring a smooth and enduring finish, perfect for the long hours of your wedding day. Thorough Pre-Wedding Consultations At Ladyfair, we believe that a well-planned makeup look starts with a thorough consultation. During this pre-wedding session, the bride discusses her vision, tries out different styles, and receives expert advice. This ensures that the final look aligns perfectly with the bride’s expectations and wedding theme. Bridal Makeup Trends in Barhat Traditional Bridal Makeup Traditional bridal makeup is highly popular in Barhat. This style often features bold eye makeup with kohl, vibrant red lips, and intricate contouring. Traditional looks are designed to enhance the bride’s features and complement her ornate wedding attire. Modern Bridal Makeup Modern bridal makeup is gaining popularity among brides in Barhat who prefer a more subtle, natural look. This style focuses on enhancing the bride’s natural beauty with soft tones, minimalistic highlighting, and a dewy finish. It’s ideal for brides who want a fresh and contemporary appearance while still honoring traditional values. Fusion Bridal Makeup For those who want a blend of traditional and modern styles, fusion bridal makeup offers the best of both worlds. This approach combines classic elements with modern techniques to create a unique and personalized look. Ladyfair’s makeup artist is skilled in crafting fusion looks that suit each bride’s individual style and preferences. The Ladyfair Experience: From Consultation to Final Look Initial Contact: Reach out to us via phone to discuss your requirements and schedule an appointment. This initial inquiry helps us understand your needs and preferences. Pre-Wedding Consultation: Meet with our makeup artist for a detailed consultation. We’ll discuss your desired look, review your wedding attire, and plan the makeup style that best suits you. Makeup Trial: Experience a trial session where you can preview your bridal makeup. This allows for adjustments to ensure complete satisfaction with the final look. Final Makeup Session: On your wedding day, our makeup artist arrives at your location to provide the full bridal makeup service. We ensure that everything is perfect, so you look and feel your best. Post-Wedding Touch-Ups: If needed, we also offer touch-up services throughout the wedding day to keep your makeup looking flawless. Client Testimonials Sita K., Barhat: "Ladyfair made my wedding day truly special. The at-home service was incredibly convenient, and the makeup artist did an amazing job. I felt beautiful and confident all day long." Rani J., Barhat: "I loved the personalized approach Ladyfair offered. The makeup was perfect, and the trial session helped me feel completely comfortable with my look. I received so many compliments!" Mina T., Barhat: "The quality of Ladyfair’s products and the skill of the makeup artist exceeded my expectations. My makeup looked fresh and radiant throughout the day. Highly recommend their services." Preparing for Your Bridal Makeup Session To ensure the best results on your wedding day, follow these preparation tips: Stay Hydrated: Drink plenty of water to keep your skin hydrated and glowing. Follow a Skincare Routine: Maintain a consistent skincare regimen with cleansing, toning, and moisturizing. Avoid New Products: Stick to familiar skincare products to avoid any potential reactions. Communicate Your Vision: Clearly express your desired look and any concerns during your consultation to ensure everything is tailored to your preferences. Beyond Bridal Makeup: Ladyfair’s Additional Services In addition to bridal makeup, Ladyfair offers a range of beauty services for various occasions: Party Makeup: Ideal for guests attending weddings, parties, and other events. Everyday Makeup: Perfect for everyday activities and casual outings. Special Occasion Makeup: Includes makeup services for engagements, anniversaries, and other significant events. Looking Ahead: The Future of Bridal Makeup in Barhat As more brides in Barhat discover the benefits of Ladyfair’s at-home makeup services, the demand for personalized bridal beauty solutions continues to grow. Ladyfair is committed to expanding its reach within the district and introducing new techniques and products that cater to evolving bridal trends. Our goal is to set new standards in bridal makeup, ensuring that every bride in Barhat has access to exceptional beauty services that make their wedding day as memorable and beautiful as possible. Feel free to modify any sections as needed!

Posted By: 12th October 2024
Bridal makeup artist in Jhajha
Bridal Makeup Artist in Jhajha Introduction Your wedding day is one of the most significant moments of your life, and looking your absolute best is a top priority. In Jhajha, Bihar, Ladyfair is transforming bridal beauty with premium, personalized at-home makeup services. Our professional team brings bridal makeup right to your doorstep, ensuring that you enjoy a relaxed and bespoke experience on your special day. With Ladyfair, achieving a stunning bridal look has never been easier or more convenient. In this blog, we will explore the importance of bridal makeup, the unique offerings of Ladyfair, and why brides in Jhajha are increasingly opting for our expert services. The Role of Bridal Makeup Bridal makeup is more than just a layer of cosmetics; it is an art that enhances a bride’s natural beauty while harmonizing with her wedding attire and accessories. On your special day, you deserve to feel confident and radiant. Professional bridal makeup ensures that you look flawless in person and in photographs throughout all the festivities. Ladyfair understands the unique needs of brides in Jhajha. We skillfully combine traditional and modern makeup styles to create a look that reflects the bride’s personality while honoring the cultural significance of the occasion. Why Ladyfair Stands Out in Jhajha Convenience of At-Home Services One of the most significant advantages of Ladyfair’s services is the convenience of at-home makeup application. Brides in Jhajha no longer have to stress about traveling to a salon. Our expert makeup artist comes to your location, allowing you to enjoy your makeup session in a comfortable and private environment. Expertise in Bridal Makeup Ladyfair’s makeup artist is highly regarded for her skill and experience in crafting breathtaking bridal looks. With a deep understanding of various makeup techniques and a keen eye for detail, she ensures that each bride's makeup enhances her natural features and complements her wedding attire. Whether you desire a classic, traditional look or a contemporary, chic appearance, Ladyfair can deliver the perfect bridal look. High-Quality Products To achieve a flawless bridal look, Ladyfair exclusively uses premium-quality makeup products that are safe for all skin types and offer long-lasting results. We carefully select products that match your skin tone and type, ensuring a smooth and enduring finish, perfect for the long hours of your wedding day. Thorough Pre-Wedding Consultations At Ladyfair, we believe that a well-planned makeup look begins with a comprehensive consultation. During this pre-wedding session, brides can discuss their vision, try out different styles, and receive expert advice. This ensures that the final look aligns perfectly with the bride’s expectations and wedding theme. Bridal Makeup Trends in Jhajha Traditional Bridal Makeup Traditional bridal makeup remains a favorite in Jhajha. This style often features bold eye makeup with kohl, vibrant red lips, and intricate contouring. Traditional bridal looks are designed to enhance the bride’s features and complement her ornate wedding attire. Modern Bridal Makeup Modern bridal makeup is gaining popularity among brides in Jhajha who prefer a more subtle, natural look. This style emphasizes enhancing the bride’s natural beauty with soft tones, minimalistic highlighting, and a dewy finish, making it ideal for brides who want a fresh and contemporary appearance while honoring traditional values. Fusion Bridal Makeup For those who desire a combination of both traditional and modern styles, fusion bridal makeup offers the best of both worlds. This approach blends classic elements with modern techniques to create a unique and personalized look. Ladyfair’s makeup artist is skilled in crafting fusion looks that suit each bride’s individual style and preferences. The Ladyfair Experience: From Consultation to Final Look Initial Contact: Reach out to us via phone to discuss your requirements and schedule an appointment. This initial inquiry helps us understand your needs and preferences. Pre-Wedding Consultation: Meet with our makeup artist for a detailed consultation. We’ll discuss your desired look, review your wedding attire, and plan the makeup style that best suits you. Makeup Trial: Experience a trial session where you can preview your bridal makeup. This allows for adjustments to ensure complete satisfaction with the final look. Final Makeup Session: On your wedding day, our makeup artist arrives at your location to provide the full bridal makeup service. We ensure that everything is perfect, so you look and feel your best. Post-Wedding Touch-Ups: If needed, we also offer touch-up services throughout the wedding day to keep your makeup looking flawless. Client Testimonials Sita K., Jhajha: "Ladyfair made my wedding day unforgettable. The at-home service was incredibly convenient, and the makeup artist did an amazing job. I felt beautiful and confident all day long." Rani J., Jhajha: "I loved the personalized approach Ladyfair offered. The makeup was perfect, and the trial session helped me feel completely comfortable with my look. I received so many compliments!" Mina T., Jhajha: "The quality of Ladyfair’s products and the skill of the makeup artist exceeded my expectations. My makeup looked fresh and radiant throughout the day. Highly recommend their services." Preparing for Your Bridal Makeup Session To ensure the best results on your wedding day, follow these preparation tips: Stay Hydrated: Drink plenty of water to keep your skin hydrated and glowing. Follow a Skincare Routine: Maintain a consistent skincare regimen with cleansing, toning, and moisturizing. Avoid New Products: Stick to familiar skincare products to avoid any potential reactions. Communicate Your Vision: Clearly express your desired look and any concerns during your consultation to ensure everything is tailored to your preferences. Beyond Bridal Makeup: Ladyfair’s Additional Services In addition to bridal makeup, Ladyfair offers a range of beauty services for various occasions: Party Makeup: Ideal for guests attending weddings, parties, and other events. Everyday Makeup: Perfect for everyday activities and casual outings. Special Occasion Makeup: Includes makeup services for engagements, anniversaries, and other significant events. Looking Ahead: The Future of Bridal Makeup in Jhajha As more brides in Jhajha discover the benefits of Ladyfair’s at-home makeup services, the demand for personalized bridal beauty solutions continues to grow. Ladyfair is committed to expanding its reach within the region and introducing new techniques and products that cater to evolving bridal trends. Our goal is to set new standards in bridal makeup, ensuring that every bride in Jhajha has access to exceptional beauty services that make their wedding day as memorable and beautiful as possible. FAQs Q1: What makes Ladyfair’s bridal makeup services unique in Jhajha? A1: Ladyfair’s at-home bridal makeup services offer unparalleled convenience, allowing brides to receive professional makeup application in the comfort of their own homes. We provide personalized services tailored to each bride’s preferences, ensuring a seamless and stress-free experience on the wedding day. Q2: What bridal makeup styles does Ladyfair specialize in? A2: Ladyfair specializes in traditional, modern, and fusion bridal makeup styles. Whether you want a classic look with bold features or a contemporary, minimalist appearance, our expert makeup artist can create a stunning look that enhances your natural beauty. Q3: How does the at-home makeup service work? A3: The process starts with an initial phone consultation to discuss your needs and schedule an appointment. We then conduct a pre-wedding consultation, offer a makeup trial, and finally, on your wedding day, our makeup artist arrives at your location to provide the full makeup service. Q4: What products does Ladyfair use for bridal makeup? A4: Ladyfair uses high-quality, premium makeup products that are safe for all skin types and provide long-lasting results. Our product selection is designed to match your skin tone and type, ensuring a flawless finish throughout the day. Q5: How should a bride prepare for her bridal makeup session? A5: Brides should stay hydrated, follow a consistent skincare routine, and avoid trying new skincare products close to the wedding day. Clear communication of your desired look during the consultation will also help ensure the makeup meets your expectations. Q6: Can Ladyfair accommodate cultural or traditional makeup requirements? A6: Yes, Ladyfair is experienced in creating makeup looks that reflect cultural and traditional values. We can incorporate specific elements into the makeup to honor these traditions while providing a modern touch. Q7: What do past brides say about their experience with Ladyfair? A7: Brides appreciate the convenience of our at-home services, the expertise of our makeup artist, and the quality of our products. Many express how Ladyfair helped them feel confident and beautiful on their special day. Feel free to customize any part of the content to better fit your needs! 4o mini

Posted By: 12th October 2024
Bridal makeup artist in Laxmipur
Bridal Makeup Artist in Laxmipur Introduction Your wedding day is one of the most important days of your life, and looking your best is a top priority. In Laxmipur, Bihar, Ladyfair is transforming the bridal beauty experience with our premier at-home makeup services. Our dedicated team of professional makeup artists brings expertise and personalization right to your doorstep, allowing you to enjoy a seamless and stress-free beauty journey on your special day. With Ladyfair, achieving a stunning bridal look has never been easier. This blog explores the importance of bridal makeup, the unique features of Ladyfair’s services, and why brides in Laxmipur are increasingly choosing us for their wedding beauty needs. The Importance of Bridal Makeup Bridal makeup is not just about applying cosmetics; it’s a form of artistry that enhances a bride’s natural beauty while complementing her wedding attire and accessories. On your wedding day, you deserve to feel radiant and confident. Professional bridal makeup ensures you look flawless, both in person and in photographs, throughout all the events of your special day. At Ladyfair, we understand the unique beauty requirements of brides in Laxmipur. Our artists expertly blend traditional and contemporary makeup styles to create looks that reflect each bride’s personality and resonate with the cultural significance of the occasion. Why Ladyfair Stands Out in Laxmipur Convenience of At-Home Services One of the key advantages of Ladyfair’s offerings is the convenience of at-home makeup application. Brides in Laxmipur can say goodbye to the stress of traveling to a salon. Our expert makeup artist arrives at your location, allowing you to enjoy your makeup session in a comfortable and private environment. Expertise in Bridal Makeup Our makeup artist is highly skilled and renowned for creating breathtaking bridal looks. With a keen eye for detail and a deep understanding of various makeup techniques, she ensures each bride’s makeup enhances her natural features and complements her wedding attire. Whether you desire a classic traditional look or a chic contemporary appearance, Ladyfair’s artist can deliver. High-Quality Products To achieve a flawless bridal look, Ladyfair exclusively uses premium-quality makeup products that are safe for all skin types and provide long-lasting results. Our careful selection of products matches your skin tone and type, ensuring a smooth and enduring finish, perfect for the long hours of your wedding day. Thorough Pre-Wedding Consultations At Ladyfair, we believe that a successful bridal makeup look begins with a detailed consultation. During this pre-wedding meeting, the bride discusses her vision, experiments with different styles, and receives expert advice. This guarantees that the final look aligns perfectly with the bride’s expectations and wedding theme. Bridal Makeup Trends in Laxmipur Traditional Bridal Makeup In Laxmipur, traditional bridal makeup is always in vogue. This style typically features bold eye makeup, kohl, vibrant red lips, and intricate contouring. Traditional bridal looks are designed to enhance the bride’s features while complementing her ornate wedding attire. Modern Bridal Makeup Modern bridal makeup is becoming increasingly popular among brides in Laxmipur who prefer a more subtle, natural look. This style emphasizes enhancing the bride’s inherent beauty with soft tones, minimalistic highlighting, and a dewy finish. It’s perfect for brides who want a fresh and contemporary appearance while still honoring traditional values. Fusion Bridal Makeup For brides who want a combination of both traditional and modern styles, fusion bridal makeup offers a unique approach. This method blends classic elements with modern techniques, resulting in a personalized and distinct look. Ladyfair’s makeup artist excels in creating fusion looks tailored to each bride’s individual style and preferences. The Ladyfair Experience: From Consultation to Final Look Initial Contact: Reach out to us via phone to discuss your requirements and schedule an appointment. This initial conversation helps us understand your needs and preferences. Pre-Wedding Consultation: Meet with our makeup artist for an in-depth consultation. We’ll discuss your desired look, review your wedding attire, and design the makeup style that best suits you. Makeup Trial: Experience a trial session to preview your bridal makeup. This allows for adjustments to ensure complete satisfaction with the final look. Final Makeup Session: On your wedding day, our makeup artist arrives at your location to provide the full bridal makeup service. We ensure that everything is perfect so you can look and feel your best. Post-Wedding Touch-Ups: If necessary, we also offer touch-up services throughout the wedding day to keep your makeup looking flawless. Client Testimonials Sita K., Laxmipur: "Ladyfair made my wedding day unforgettable! The at-home service was incredibly convenient, and the makeup artist did an exceptional job. I felt beautiful and confident all day long." Rani J., Laxmipur: "I loved the personalized approach Ladyfair provided. The makeup was perfect, and the trial session made me feel completely comfortable with my look. I received so many compliments!" Mina T., Laxmipur: "The quality of Ladyfair’s products and the artist’s skills exceeded my expectations. My makeup looked fresh and radiant throughout the day. I highly recommend their services!" Preparing for Your Bridal Makeup Session To ensure the best results on your wedding day, follow these preparation tips: Stay Hydrated: Drink plenty of water to keep your skin glowing. Follow a Skincare Routine: Maintain a consistent skincare regimen with cleansing, toning, and moisturizing. Avoid New Products: Stick to familiar skincare products to prevent any potential reactions. Communicate Your Vision: Clearly express your desired look and any concerns during your consultation to ensure everything is tailored to your preferences. Beyond Bridal Makeup: Ladyfair’s Additional Services In addition to bridal makeup, Ladyfair offers a range of beauty services for various occasions: Party Makeup: Ideal for guests attending weddings, parties, and other events. Everyday Makeup: Perfect for everyday activities and casual outings. Special Occasion Makeup: Includes makeup services for engagements, anniversaries, and other significant events. Looking Ahead: The Future of Bridal Makeup in Laxmipur As more brides in Laxmipur discover the benefits of Ladyfair’s at-home makeup services, the demand for personalized bridal beauty solutions continues to grow. Ladyfair is committed to expanding its reach within the district and introducing new techniques and products that cater to evolving bridal trends. Our goal is to set new standards in bridal makeup, ensuring that every bride in Laxmipur has access to exceptional beauty services that make their wedding day as memorable and beautiful as possible. FAQs About Bridal Makeup Services Q1: What makes Ladyfair’s bridal makeup services unique in Laxmipur? A1: Ladyfair’s at-home bridal makeup services provide unparalleled convenience, allowing brides to receive professional makeup application in the comfort of their homes. We tailor our services to meet each bride’s individual preferences, ensuring a seamless and stress-free experience on their wedding day. Q2: What bridal makeup styles does Ladyfair specialize in? A2: Ladyfair specializes in traditional, modern, and fusion bridal makeup styles. Whether you want a classic look with bold features or a contemporary, minimalist appearance, our expert makeup artist can create a stunning look that enhances your natural beauty. Q3: How does the at-home makeup service work? A3: The process begins with an initial phone consultation to discuss your needs and schedule an appointment. We then conduct a pre-wedding consultation, offer a makeup trial, and finally, on your wedding day, our makeup artist arrives at your location to provide the full makeup service. Q4: What products does Ladyfair use for bridal makeup? A4: Ladyfair uses high-quality, premium makeup products that are safe for all skin types and provide long-lasting results. Our product selection is designed to match your skin tone and type, ensuring a flawless finish throughout the day. Q5: How should a bride prepare for her bridal makeup session? A5: Brides should stay hydrated, follow a consistent skincare routine, and avoid trying new skincare products close to the wedding day. Clear communication of your desired look during the consultation will also help ensure the makeup meets your expectations. Q6: Can Ladyfair accommodate cultural or traditional makeup requirements? A6: Yes, Ladyfair is experienced in creating makeup looks that reflect cultural and traditional values. We can incorporate specific elements into the makeup to honor these traditions while providing a modern touch. Q7: What do past brides say about their experience with Ladyfair? A7: Brides appreciate the convenience of our at-home services, the personalized approach, and the high quality of makeup products used. Many have reported feeling beautiful and receiving compliments on their wedding day. Feel free to modify any sections to better fit your brand voice or specific offerings!

Posted By: 12th October 2024
Bridal makeup artist in Sono
Bridal Makeup Artist in Sono Introduction Your wedding day is one of the most significant moments of your life, and looking your best is essential. In Sono, Bihar, Ladyfair is revolutionizing bridal beauty with exceptional, personalized at-home makeup services. Our expert team brings professional bridal makeup directly to your doorstep, ensuring a relaxed and enjoyable experience on your special day. With Ladyfair, you can achieve a stunning bridal look without the stress of visiting a salon. In this blog, we explore the importance of bridal makeup, what sets Ladyfair apart, and why brides in Sono are increasingly choosing our services for their wedding day beauty needs. The Role of Bridal Makeup Bridal makeup is an art form that enhances a bride’s natural beauty while complementing her wedding attire and accessories. On your wedding day, you deserve to feel confident and look radiant. Professional bridal makeup ensures that you look flawless in person and in photographs throughout the day's events. At Ladyfair, we understand the unique requirements of brides in Sono. We blend traditional and contemporary makeup styles to create a look that reflects the bride’s personality and aligns with the cultural significance of the occasion. Why Ladyfair Stands Out in Sono Convenience of At-Home Services One of the key features of Ladyfair’s services is the convenience of at-home makeup application. Brides in Sono can skip the hassle of traveling to a salon. Our expert makeup artist arrives at your location, allowing you to enjoy your makeup session in a comfortable and private setting. Expertise in Bridal Makeup Ladyfair’s makeup artist is celebrated for her skill and experience in crafting breathtaking bridal looks. With a deep understanding of various makeup techniques and an eye for detail, she ensures that each bride’s makeup enhances her natural features and complements her wedding attire. Whether you desire a classic, traditional look or a contemporary, chic appearance, Ladyfair’s artist can deliver the perfect look. High-Quality Products To achieve a flawless bridal look, Ladyfair uses only premium-quality makeup products that are safe for all skin types and offer long-lasting results. We select products that match your skin tone and type to ensure a smooth and enduring finish, perfect for the long hours of your wedding day. Thorough Pre-Wedding Consultations At Ladyfair, we believe that a well-planned makeup look begins with a comprehensive consultation. During this pre-wedding session, the bride discusses her vision, explores different styles, and receives expert advice. This ensures that the final look aligns perfectly with the bride’s expectations and wedding theme. Bridal Makeup Trends in Sono Traditional Bridal Makeup Traditional bridal makeup remains a popular choice in Sono. This style often features bold eye makeup with kohl, vibrant lips, and intricate contouring. Traditional looks are designed to enhance the bride’s features and complement her ornate wedding attire. Modern Bridal Makeup Modern bridal makeup is gaining popularity among brides in Sono who prefer a more subtle, natural look. This style focuses on enhancing the bride’s natural beauty with soft tones, minimalistic highlighting, and a dewy finish. It’s ideal for brides who want a fresh and contemporary appearance while still honoring traditional values. Fusion Bridal Makeup For those seeking a blend of traditional and modern styles, fusion bridal makeup offers the best of both worlds. This approach combines classic elements with modern techniques to create a unique and personalized look. Ladyfair’s makeup artist excels in crafting fusion looks that suit each bride’s individual style and preferences. The Ladyfair Experience: From Consultation to Final Look Initial Contact: Reach out to us via phone to discuss your requirements and schedule an appointment. This initial inquiry helps us understand your needs and preferences. Pre-Wedding Consultation: Meet with our makeup artist for a detailed consultation. We’ll discuss your desired look, review your wedding attire, and plan the makeup style that best suits you. Makeup Trial: Experience a trial session where you can preview your bridal makeup. This allows for adjustments to ensure complete satisfaction with the final look. Final Makeup Session: On your wedding day, our makeup artist arrives at your location to provide the full bridal makeup service. We ensure that everything is perfect, so you look and feel your best. Post-Wedding Touch-Ups: If needed, we also offer touch-up services throughout the wedding day to keep your makeup looking flawless. Client Testimonials Sita K., Sono: "Ladyfair made my wedding day truly special. The at-home service was incredibly convenient, and the makeup artist did an amazing job. I felt beautiful and confident all day long." Rani J., Sono: "I loved the personalized approach Ladyfair offered. The makeup was perfect, and the trial session helped me feel completely comfortable with my look. I received so many compliments!" Mina T., Sono: "The quality of Ladyfair’s products and the skill of the makeup artist exceeded my expectations. My makeup looked fresh and radiant throughout the day. Highly recommend their services." Preparing for Your Bridal Makeup Session To ensure the best results on your wedding day, follow these preparation tips: Stay Hydrated: Drink plenty of water to keep your skin hydrated and glowing. Follow a Skincare Routine: Maintain a consistent skincare regimen with cleansing, toning, and moisturizing. Avoid New Products: Stick to familiar skincare products to avoid any potential reactions. Communicate Your Vision: Clearly express your desired look and any concerns during your consultation to ensure everything is tailored to your preferences. Beyond Bridal Makeup: Ladyfair’s Additional Services In addition to bridal makeup, Ladyfair offers a range of beauty services for various occasions: Party Makeup: Ideal for guests attending weddings, parties, and other events. Everyday Makeup: Perfect for everyday activities and casual outings. Special Occasion Makeup: Includes makeup services for engagements, anniversaries, and other significant events. Looking Ahead: The Future of Bridal Makeup in Sono As more brides in Sono discover the benefits of Ladyfair’s at-home makeup services, the demand for personalized bridal beauty solutions continues to grow. Ladyfair is committed to expanding its reach within the region and introducing new techniques and products that cater to evolving bridal trends. Our goal is to set new standards in bridal makeup, ensuring that every bride in Sono has access to exceptional beauty services that make their wedding day as memorable and beautiful as possible. FAQs Q1: What makes Ladyfair’s bridal makeup services unique in Sono? A1: Ladyfair’s at-home bridal makeup services offer unparalleled convenience, allowing brides to receive professional makeup application in the comfort of their homes. We provide personalized services tailored to each bride’s preferences, ensuring a seamless and stress-free experience on the wedding day. Q2: What bridal makeup styles does Ladyfair specialize in? A2: Ladyfair specializes in traditional, modern, and fusion bridal makeup styles. Whether you want a classic look with bold features or a contemporary, minimalist appearance, our expert makeup artist can create a stunning look that enhances your natural beauty. Q3: How does the at-home makeup service work? A3: The process starts with an initial phone consultation to discuss your needs and schedule an appointment. We then conduct a pre-wedding consultation, offer a makeup trial, and finally, on your wedding day, our makeup artist arrives at your location to provide the full makeup service. Q4: What products does Ladyfair use for bridal makeup? A4: Ladyfair uses high-quality, premium makeup products that are safe for all skin types and provide long-lasting results. Our product selection is designed to match your skin tone and type, ensuring a flawless finish throughout the day. Q5: How should a bride prepare for her bridal makeup session? A5: Brides should stay hydrated, follow a consistent skincare routine, and avoid trying new skincare products close to the wedding day. Clear communication of your desired look during the consultation will also help ensure the makeup meets your expectations. Q6: Can Ladyfair accommodate cultural or traditional makeup requirements? A6: Yes, Ladyfair is experienced in creating makeup looks that reflect cultural and traditional values. We can incorporate specific elements into the makeup to honor these traditions while providing a modern touch. Q7: What do past brides say about their experience with Ladyfair? A7: Brides appreciate the convenience of our at-home services, the expertise of our makeup artist, and the high-quality products we use, making them feel beautiful and confident on their wedding day. Feel free to modify any section to better fit your style or add any additional details!

Posted By: 12th October 2024
Bridal makeup artist in Chakai
Bridal Makeup Artist in Chakai Introduction Your wedding day is one of the most important days of your life, and looking your best is a top priority. In Chakai, Bihar, Ladyfair is elevating bridal beauty with exceptional at-home makeup services tailored to each bride's unique needs. Our team of experienced makeup artists brings professional bridal makeup directly to your location, ensuring you enjoy a personalized and relaxed experience on your special day. With Ladyfair, you can achieve a breathtaking bridal look without the hassle of traveling to a salon. This blog post explores the significance of bridal makeup, what sets Ladyfair’s services apart, and why brides in Chakai are increasingly choosing us for their wedding day beauty needs. The Role of Bridal Makeup Bridal makeup is more than just applying cosmetics; it is an art that enhances a bride’s natural beauty while complementing her wedding attire and accessories. On your wedding day, you deserve to feel confident and radiant. Professional bridal makeup ensures that you look flawless, both in person and in photographs, throughout the day’s events. Ladyfair understands the unique preferences and cultural requirements of brides in Chakai. We seamlessly blend traditional and contemporary makeup styles to create looks that reflect each bride’s personality and honor the significance of the occasion. Why Ladyfair Stands Out in Chakai Convenience of At-Home Services One of the key features of Ladyfair’s services is the convenience of at-home makeup application. Brides in Chakai can relax and enjoy their makeup session in the comfort of their own homes, eliminating the stress of travel and salon appointments. Expertise in Bridal Makeup Ladyfair’s makeup artist is well-known for her skill and experience in creating stunning bridal looks. With a keen eye for detail and an understanding of various makeup techniques, she ensures that each bride’s makeup enhances her natural features and complements her wedding attire. Whether you prefer a classic, traditional look or a contemporary, stylish appearance, Ladyfair can deliver the perfect makeup look. High-Quality Products To achieve a flawless bridal look, Ladyfair uses only premium-quality makeup products that are safe for all skin types and offer long-lasting results. We select products tailored to your skin tone and type, ensuring a smooth and enduring finish, ideal for the long hours of your wedding day. Thorough Pre-Wedding Consultations At Ladyfair, we believe that a successful makeup look begins with a comprehensive consultation. During this pre-wedding meeting, the bride discusses her vision, experiments with different styles, and receives expert guidance. This ensures that the final look aligns perfectly with the bride’s expectations and wedding theme. Bridal Makeup Trends in Chakai Traditional Bridal Makeup Traditional bridal makeup remains a favorite among brides in Chakai. This style typically features bold eye makeup with kohl, striking red lips, and intricate contouring to enhance the bride’s features and complement ornate wedding attire. Modern Bridal Makeup Many brides in Chakai are embracing modern bridal makeup, which favors a more subtle, natural appearance. This style emphasizes enhancing the bride’s beauty with soft tones, minimalistic highlighting, and a dewy finish, making it perfect for brides who seek a fresh and contemporary look while honoring traditional values. Fusion Bridal Makeup For those wanting a mix of both traditional and modern styles, fusion bridal makeup combines classic elements with modern techniques. Ladyfair’s makeup artist specializes in crafting fusion looks that suit each bride’s individual style and preferences. The Ladyfair Experience: From Consultation to Final Look Initial Contact: Reach out to us via phone to discuss your requirements and schedule an appointment. This initial inquiry helps us understand your needs and preferences. Pre-Wedding Consultation: Meet with our makeup artist for a detailed consultation. We’ll discuss your desired look, review your wedding attire, and plan the makeup style that best suits you. Makeup Trial: Experience a trial session where you can preview your bridal makeup. This allows for adjustments to ensure complete satisfaction with the final look. Final Makeup Session: On your wedding day, our makeup artist arrives at your location to provide the full bridal makeup service. We ensure that everything is perfect, so you look and feel your best. Post-Wedding Touch-Ups: If needed, we also offer touch-up services throughout the wedding day to keep your makeup looking flawless. Client Testimonials Sita K., Chakai: "Ladyfair made my wedding day truly special. The at-home service was incredibly convenient, and the makeup artist did an amazing job. I felt beautiful and confident all day long." Rani J., Chakai: "I loved the personalized approach Ladyfair offered. The makeup was perfect, and the trial session helped me feel completely comfortable with my look. I received so many compliments!" Mina T., Chakai: "The quality of Ladyfair’s products and the skill of the makeup artist exceeded my expectations. My makeup looked fresh and radiant throughout the day. Highly recommend their services." Preparing for Your Bridal Makeup Session To ensure the best results on your wedding day, follow these preparation tips: Stay Hydrated: Drink plenty of water to keep your skin hydrated and glowing. Follow a Skincare Routine: Maintain a consistent skincare regimen with cleansing, toning, and moisturizing. Avoid New Products: Stick to familiar skincare products to avoid any potential reactions. Communicate Your Vision: Clearly express your desired look and any concerns during your consultation to ensure everything is tailored to your preferences. Beyond Bridal Makeup: Ladyfair’s Additional Services In addition to bridal makeup, Ladyfair offers a range of beauty services for various occasions: Party Makeup: Ideal for guests attending weddings, parties, and other events. Everyday Makeup: Perfect for everyday activities and casual outings. Special Occasion Makeup: Includes makeup services for engagements, anniversaries, and other significant events. Looking Ahead: The Future of Bridal Makeup in Chakai As more brides in Chakai discover the benefits of Ladyfair’s at-home makeup services, the demand for personalized bridal beauty solutions continues to grow. Ladyfair is committed to expanding its reach within the district and introducing new techniques and products that cater to evolving bridal trends. Our goal is to set new standards in bridal makeup, ensuring that every bride in Chakai has access to exceptional beauty services that make their wedding day as memorable and beautiful as possible. Frequently Asked Questions Q1: What makes Ladyfair’s bridal makeup services unique in Chakai? A1: Ladyfair’s at-home bridal makeup services offer unparalleled convenience, allowing brides to receive professional makeup application in the comfort of their own homes. We provide personalized services tailored to each bride’s preferences, ensuring a seamless and stress-free experience on the wedding day. Q2: What bridal makeup styles does Ladyfair specialize in? A2: Ladyfair specializes in traditional, modern, and fusion bridal makeup styles. Whether you want a classic look with bold features or a contemporary, minimalist appearance, our expert makeup artist can create a stunning look that enhances your natural beauty. Q3: How does the at-home makeup service work? A3: The process starts with an initial phone consultation to discuss your needs and schedule an appointment. We then conduct a pre-wedding consultation, offer a makeup trial, and finally, on your wedding day, our makeup artist arrives at your location to provide the full makeup service. Q4: What products does Ladyfair use for bridal makeup? A4: Ladyfair uses high-quality, premium makeup products that are safe for all skin types and provide long-lasting results. Our product selection is designed to match your skin tone and type, ensuring a flawless finish throughout the day. Q5: How should a bride prepare for her bridal makeup session? A5: Brides should stay hydrated, follow a consistent skincare routine, and avoid trying new skincare products close to the wedding day. Clear communication of your desired look during the consultation will also help ensure the makeup meets your expectations. Q6: Can Ladyfair accommodate cultural or traditional makeup requirements? A6: Yes, Ladyfair is experienced in creating makeup looks that reflect cultural and traditional values. We can incorporate specific elements into the makeup to honor these traditions while providing a modern touch. Q7: What do past brides say about their experience with Ladyfair? A7: Brides appreciate the convenience of our at-home services, the quality of the products, and the skillful artistry of our makeup artist, making their wedding day even more special. Feel free to adjust any sections to better fit your vision!

Posted By: 12th October 2024
Bridal makup artist in Khaira
Ladyfair: Premier Bridal Makeup Services in Khaira, Bihar Introduction Your wedding day is a once-in-a-lifetime event, and looking your best is paramount. In Khaira, Bihar, Ladyfair is transforming the bridal makeup experience with exceptional, personalized at-home services. Our expert team brings professional bridal makeup directly to your doorstep, ensuring a stress-free and enjoyable experience as you prepare for your special day. With Ladyfair, you can achieve a breathtaking bridal look without the hassle of traveling to a salon. This blog explores the importance of bridal makeup, what sets Ladyfair apart, and why brides in Khaira are choosing our services for their wedding beauty needs. The Importance of Bridal Makeup Bridal makeup goes beyond merely applying cosmetics; it’s an art form that enhances a bride’s natural beauty while complementing her wedding attire and accessories. On your wedding day, you deserve to feel confident and radiant. Professional bridal makeup ensures you look flawless both in person and in photographs, capturing the magic of the day. Ladyfair understands the unique needs of brides in Khaira, blending traditional and contemporary makeup styles to create a look that reflects the bride’s personality while honoring cultural significance. Why Choose Ladyfair in Khaira? Convenience of At-Home Services One of the standout features of Ladyfair is the convenience of at-home makeup application. Brides in Khaira no longer need to worry about the stress of traveling to a salon. Our expert makeup artist comes to your location, allowing you to enjoy your makeup session in the comfort and privacy of your own home. Expertise in Bridal Makeup Ladyfair’s makeup artist is renowned for her skill and experience in creating stunning bridal looks. With a keen eye for detail and a deep understanding of various makeup techniques, she ensures that each bride’s makeup enhances her natural features and complements her wedding attire. Whether you desire a classic, traditional look or a contemporary, chic appearance, Ladyfair’s artist can create the perfect look for you. High-Quality Products To achieve a flawless bridal look, Ladyfair uses only premium-quality makeup products that are safe for all skin types and provide long-lasting results. We select products that match your skin tone and type to ensure a smooth and enduring finish, perfect for the long hours of your wedding day. Thorough Pre-Wedding Consultations At Ladyfair, we believe that a well-planned makeup look starts with a thorough consultation. During this pre-wedding session, the bride discusses her vision, tries out different styles, and receives expert advice. This ensures that the final look aligns perfectly with the bride’s expectations and wedding theme. Bridal Makeup Trends in Khaira Traditional Bridal Makeup Traditional bridal makeup remains a popular choice in Khaira. This style often features bold eye makeup with kohl, vibrant red lips, and intricate contouring. Traditional bridal looks are designed to enhance the bride’s features and complement her ornate wedding attire. Modern Bridal Makeup Many brides in Khaira are opting for a more subtle, natural look. This modern style focuses on enhancing the bride’s natural beauty with soft tones, minimalistic highlighting, and a dewy finish. It’s perfect for brides who want a fresh and contemporary appearance while still honoring traditional values. Fusion Bridal Makeup For those desiring a blend of traditional and modern styles, fusion bridal makeup offers the best of both worlds. This approach combines classic elements with modern techniques to create a unique and personalized look. Ladyfair’s makeup artist excels at crafting fusion looks that suit each bride’s individual style and preferences. The Ladyfair Experience: From Consultation to Final Look Initial Contact: Reach out to us via phone to discuss your requirements and schedule an appointment. This initial inquiry helps us understand your needs and preferences. Pre-Wedding Consultation: Meet with our makeup artist for a detailed consultation. We’ll discuss your desired look, review your wedding attire, and plan the makeup style that best suits you. Makeup Trial: Experience a trial session where you can preview your bridal makeup. This allows for adjustments to ensure complete satisfaction with the final look. Final Makeup Session: On your wedding day, our makeup artist arrives at your location to provide the full bridal makeup service. We ensure that everything is perfect, so you look and feel your best. Post-Wedding Touch-Ups: If needed, we also offer touch-up services throughout the wedding day to keep your makeup looking flawless. Client Testimonials Anjali R., Khaira: "Ladyfair made my wedding day unforgettable. The convenience of at-home service was fantastic, and the makeup artist did a remarkable job. I felt stunning all day long." Priya M., Khaira: "I appreciated the personalized approach Ladyfair provided. The makeup was just perfect, and the trial session helped me feel completely confident in my look. I received so many compliments!" Nisha K., Khaira: "The quality of Ladyfair’s products and the skill of the makeup artist exceeded my expectations. My makeup looked fresh and radiant throughout the day. I highly recommend their services!" Preparing for Your Bridal Makeup Session To ensure the best results on your wedding day, follow these preparation tips: Stay Hydrated: Drink plenty of water to keep your skin hydrated and glowing. Follow a Skincare Routine: Maintain a consistent skincare regimen with cleansing, toning, and moisturizing. Avoid New Products: Stick to familiar skincare products to avoid any potential reactions. Communicate Your Vision: Clearly express your desired look and any concerns during your consultation to ensure everything is tailored to your preferences. Beyond Bridal Makeup: Ladyfair’s Additional Services In addition to bridal makeup, Ladyfair offers a range of beauty services for various occasions: Party Makeup: Ideal for guests attending weddings, parties, and other events. Everyday Makeup: Perfect for daily activities and casual outings. Special Occasion Makeup: Includes makeup services for engagements, anniversaries, and other significant events. Looking Ahead: The Future of Bridal Makeup in Khaira As more brides in Khaira discover the benefits of Ladyfair’s at-home makeup services, the demand for personalized bridal beauty solutions continues to grow. Ladyfair is committed to expanding its reach within the district and introducing new techniques and products that cater to evolving bridal trends. Our goal is to set new standards in bridal makeup, ensuring that every bride in Khaira has access to exceptional beauty services that make their wedding day as memorable and beautiful as possible. Frequently Asked Questions (FAQs) Q1: What makes Ladyfair’s bridal makeup services unique in Khaira? A1: Ladyfair’s at-home bridal makeup services offer unparalleled convenience, allowing brides to receive professional makeup application in the comfort of their homes. We provide personalized services tailored to each bride’s preferences, ensuring a seamless and stress-free experience on the wedding day. Q2: What bridal makeup styles does Ladyfair specialize in? A2: Ladyfair specializes in traditional, modern, and fusion bridal makeup styles. Whether you want a classic look with bold features or a contemporary, minimalist appearance, our expert makeup artist can create a stunning look that enhances your natural beauty. Q3: How does the at-home makeup service work? A3: The process starts with an initial phone consultation to discuss your needs and schedule an appointment. We conduct a pre-wedding consultation, offer a makeup trial, and on your wedding day, our makeup artist arrives at your location to provide the full makeup service. Q4: What products does Ladyfair use for bridal makeup? A4: Ladyfair uses high-quality, premium makeup products that are safe for all skin types and provide long-lasting results. Our product selection is designed to match your skin tone and type, ensuring a flawless finish throughout the day. Q5: How should a bride prepare for her bridal makeup session? A5: Brides should stay hydrated, follow a consistent skincare routine, and avoid trying new skincare products close to the wedding day. Clear communication of your desired look during the consultation will help ensure the makeup meets your expectations. Q6: Can Ladyfair accommodate cultural or traditional makeup requirements? A6: Yes, Ladyfair is experienced in creating makeup looks that reflect cultural and traditional values. We can incorporate specific elements into the makeup to honor these traditions while providing a modern touch. Q7: What do past brides say about their experience with Ladyfair? A7: Brides appreciate the convenience of our at-home services, the quality of products, and the exceptional skill of our makeup artist. Conclusion Ladyfair is dedicated to providing brides in Khaira with the best bridal makeup services. Our personalized approach, expert techniques, and high-quality products ensure that every bride feels beautiful and confident on her wedding day. Contact us today to book your bridal makeup consultation and discover how we can help you create the perfect look for your special day!

Posted By: 12th October 2024
Bridal makeup artist in Sikandra
Ladyfair Bridal Makeup Services in Sikandra Your wedding day is a special moment, and you deserve to look and feel your absolute best. Ladyfair Bridal Makeup Services in Sikandra is here to ensure that your bridal makeup is flawless and unforgettable. Whether you are looking for a traditional bridal look, a perfect HD finish, or an airbrush makeup application, our expert makeup artist will bring your vision to life. With Ladyfair, you can enjoy luxurious at-home makeup services, eliminating the stress of salon visits on your big day. Our goal is to provide every bride in Sikandra with a stunning and personalized look that enhances her natural beauty. Trust Ladyfair to help you shine on your wedding day. Why Choose Ladyfair for Bridal Makeup in Sikandra Expert Makeup Artist Our makeup artist is experienced in bridal makeup and knows how to create personalized looks that complement your skin tone, facial features, and wedding attire. We ensure that every detail is taken care of, so you can relax and enjoy your special day. At-Home Service for Convenience We bring salon-quality beauty services to the comfort of your home in Sikandra. This ensures that you can stay relaxed and stress-free while preparing for your wedding. Our at-home service also saves you time and the hassle of traveling to a salon. Premium Makeup Products At Ladyfair, we use only the best professional-grade makeup products to ensure a flawless, long-lasting finish. Our products are suitable for all skin types and provide radiant, picture-perfect results. Bridal Makeup Pricing in Sikandra We offer a variety of makeup packages to suit different budgets and preferences: Basic Bridal Makeup: ₹10,000 HD Bridal Makeup: ₹12,000 Airbrush Bridal Makeup: ₹18,000 Additionally, we provide makeup services for other important events: Basic Engagement/Reception Makeup: ₹6,000 HD Engagement/Reception Makeup: ₹8,000 Airbrush Engagement/Reception Makeup: ₹12,000 Basic Party Makeup: ₹2,500 HD Party Makeup: ₹3,500 Popular Bridal Makeup Styles in Sikandra Traditional Bridal Makeup For brides who love a classic and bold look, our traditional bridal makeup enhances your natural features while complementing your wedding attire with vibrant colors and a sophisticated finish. HD Bridal Makeup Our HD bridal makeup provides a flawless finish that looks amazing both in person and in photos. This high-definition makeup is ideal for ensuring you look picture-perfect from every angle on your big day. Airbrush Bridal Makeup Airbrush makeup is lightweight, smooth, and provides full coverage. It's the ideal option for brides who want a polished yet natural look that lasts all day. How to Book Ladyfair Bridal Makeup Services in Sikandra Initial Contact: Call us at 7004721239 to discuss your bridal makeup needs and schedule your appointment. Consultation: Meet with our makeup artist to plan your look based on your attire, skin tone, and personal preferences. Makeup Trial: Schedule a trial session to preview your bridal look and make adjustments if needed. Wedding Day Makeup: Our makeup artist will come to your location in Sikandra on the wedding day to ensure you look stunning and feel confident. Testimonials from Brides in Sikandra Anjali R., Sikandra: "I was so impressed with Ladyfair’s at-home makeup service. The makeup artist understood my style and made me feel beautiful on my wedding day. Highly recommended!" Neha S., Sikandra: "The airbrush makeup was perfect! It felt light on my skin and looked flawless throughout the day. Ladyfair’s service was incredibly convenient and stress-free." Preparing for Your Bridal Makeup Session Stay Hydrated: Drinking plenty of water will help keep your skin glowing and healthy for your wedding. Maintain a Skincare Routine: Stick to your regular skincare routine to keep your skin smooth and radiant before the big day. Avoid New Products: Don’t introduce any new skincare products right before your wedding to avoid the risk of allergic reactions. Communicate Your Preferences: Be sure to clearly discuss your makeup preferences during your consultation to ensure you get the look you want. Additional Beauty Services by Ladyfair In addition to bridal makeup, Ladyfair also offers makeup services for various occasions: Engagement and Reception Makeup: Customized makeup looks for all your pre-wedding events. Party Makeup: Look fabulous for any special occasion, such as birthdays, anniversaries, or festive celebrations. Special Occasion Makeup: Perfect for significant events where you want to look your best. Q&A with Ladyfair’s Bridal Makeup Artist in Sikandra Q1: What makes Ladyfair the best choice for bridal makeup in Sikandra? A1: Ladyfair provides personalized, professional at-home bridal makeup services using high-quality products. Our experienced makeup artist ensures you look stunning and feel confident on your big day. Q2: What are the prices for bridal makeup in Sikandra? A2: Bridal makeup prices start at ₹10,000 for basic makeup, ₹12,000 for HD makeup, and ₹18,000 for airbrush makeup. We also offer makeup packages for engagements, receptions, and parties. Q3: How can I book Ladyfair’s bridal makeup services? A3: You can book by calling 7004721239. We also offer consultations and trial sessions to make sure your bridal look is perfect. Q4: What makeup styles does Ladyfair offer? A4: Ladyfair offers traditional, HD, and airbrush makeup styles, allowing you to choose the one that suits your preferences and wedding theme. Q5: Are makeup trials available? A5: Yes, we offer makeup trials so that you can preview your bridal look ahead of your wedding day. Q6: What products does Ladyfair use? A6: We use professional-grade, high-quality makeup products that are safe for all skin types and deliver a flawless finish. Q7: Does Ladyfair offer other makeup services in Sikandra? A7: Yes, Ladyfair offers makeup services for engagements, receptions, parties, and other special occasions. Contact Ladyfair Bridal Makeup Services in Sikandra today! Call 7004721239 to book your appointment and enjoy the luxury of personalized, at-home bridal makeup services. This content provides all the information brides need to know about Ladyfair’s bridal makeup services in Sikandra. It highlights our expert services, pricing, and convenient at-home beauty solutions to make their wedding day stress-free and beautiful.

Posted By: 12th October 2024
Bridal makeup artist in Rangrachowk
Ladyfair Bridal Makeup Services in Rangrachowk Your wedding day is one of the most memorable moments in your life, and looking your absolute best is crucial. For brides in Rangrachowk, Ladyfair Bridal Makeup Services offers expert, at-home makeup services to make your big day even more special. Whether you prefer a traditional, flawless HD look or a sophisticated airbrush finish, Ladyfair’s skilled makeup artist in Rangrachowk is dedicated to giving you the bridal look of your dreams. With the convenience of an at-home service, we ensure that your beauty experience is stress-free, comfortable, and luxurious, so you can focus on enjoying your day. Our makeup artist will create a custom look that enhances your natural beauty and complements your wedding style perfectly. Why Choose Ladyfair for Bridal Makeup in Rangrachowk? Experienced Makeup Artist Our makeup artist in Rangrachowk specializes in bridal makeup and has years of experience in creating personalized looks. Whether you’re going for a traditional style or something more modern, our artist will craft the perfect look for you. Convenient At-Home Service Forget the hassle of traveling to a salon on your big day. Ladyfair offers top-tier, salon-quality makeup services in the comfort of your home. This ensures you are relaxed and pampered, without having to worry about any additional stress. Premium Makeup Products Ladyfair uses only high-end, professional-grade makeup products, ensuring a flawless finish that lasts all day long. These products are safe for all skin types and offer a stunning, long-lasting result that will keep you glowing throughout the day and into the night. Bridal Makeup Pricing in Rangrachowk Ladyfair offers a range of bridal makeup packages to suit your style and budget: Basic Bridal Makeup: ₹10,000 HD Bridal Makeup: ₹12,000 Airbrush Bridal Makeup: ₹18,000 We also provide makeup services for other important events: Basic Engagement/Reception Makeup: ₹6,000 HD Engagement/Reception Makeup: ₹8,000 Airbrush Engagement/Reception Makeup: ₹12,000 Basic Party Makeup: ₹2,500 HD Party Makeup: ₹3,500 Popular Bridal Makeup Styles in Rangrachowk Traditional Bridal Makeup Perfect for brides who want a bold and elegant look, our traditional makeup style beautifully complements traditional attire with vibrant colors and precise makeup application. HD Bridal Makeup For brides looking to appear flawless both in person and in photos, our HD bridal makeup offers a high-definition finish. This style is designed to look perfect from every angle, ensuring you shine throughout the event. Airbrush Bridal Makeup This lightweight, smooth, and full-coverage makeup style is ideal for a natural yet polished look. Airbrush makeup stays fresh and radiant for hours, making it perfect for long wedding celebrations. How to Book Ladyfair Bridal Makeup Services in Rangrachowk Initial Contact: Call us at 7004721239 to discuss your bridal makeup needs and book your appointment. Consultation: Meet with our makeup artist to plan your look. This includes discussing your wedding attire, preferences, and makeup inspirations. Makeup Trial: We offer makeup trials to ensure your desired look is achieved before your wedding day. You can make any necessary adjustments during the trial session. Wedding Day Makeup: Our makeup artist will arrive at your location in Rangrachowk to provide a flawless, stunning look for your big day. Testimonials from Brides in Rangrachowk Megha S., Rangrachowk: "Ladyfair’s at-home bridal makeup service was exactly what I needed! My makeup was stunning, and I loved how professional and kind the makeup artist was." Nisha P., Rangrachowk: "The airbrush makeup was a game changer. It felt so light but gave me the full coverage I wanted. Ladyfair truly made my wedding day stress-free." Preparing for Your Bridal Makeup Session Hydrate Your Skin: Drink plenty of water in the days leading up to your wedding to ensure your skin stays radiant and healthy. Follow a Skincare Routine: Stick to a regular skincare routine to keep your skin smooth and ready for makeup application. Avoid New Products: Refrain from trying new skincare products close to your wedding to prevent any adverse reactions or breakouts. Clear Communication: Make sure to share your preferences and expectations clearly with our makeup artist during the consultation. Additional Makeup Services by Ladyfair in Rangrachowk Along with bridal makeup, Ladyfair provides a variety of other makeup services for special occasions: Engagement and Reception Makeup: Custom looks for your pre-wedding events that match the style and mood of each occasion. Party Makeup: Elegant and glamorous makeup perfect for any party or event, such as birthdays or anniversaries. Special Occasion Makeup: Ideal for festivals, family gatherings, or any important event where you want to look your best. Q&A with Ladyfair’s Bridal Makeup Artist in Rangrachowk Q1: Why is Ladyfair the best choice for bridal makeup in Rangrachowk? A1: Ladyfair offers expert at-home makeup services using top-quality products, ensuring that you look flawless and stunning on your wedding day. Our makeup artist brings years of experience in bridal makeup and provides a luxury experience right at your doorstep. Q2: What are the prices for bridal makeup services in Rangrachowk? A2: Our prices start at ₹10,000 for basic bridal makeup, ₹12,000 for HD makeup, and ₹18,000 for airbrush makeup. Q3: How do I book Ladyfair’s bridal makeup services in Rangrachowk? A3: You can book our services by calling 7004721239. We also offer consultation sessions and makeup trials to make sure your look is perfect ahead of your big day. Q4: What makeup styles does Ladyfair offer in Rangrachowk? A4: We offer traditional, HD, and airbrush makeup styles, depending on the bride’s preferences and wedding theme. Q5: Are makeup trials available? A5: Yes, makeup trials are available. You can preview your bridal look and make any necessary adjustments before your wedding day. Q6: What kind of products does Ladyfair use? A6: Ladyfair uses only high-quality, professional-grade makeup products that are safe for all skin types and provide a long-lasting, flawless finish. Q7: Does Ladyfair offer other makeup services besides bridal makeup? A7: Yes, we offer makeup for engagements, receptions, parties, and other special occasions. Our goal is to ensure you look beautiful for every important event in your life. Contact Ladyfair Bridal Makeup Services in Rangrachowk today! Call 7004721239 to book your appointment and enjoy the luxury of personalized, at-home makeup services. This comprehensive content covers all the essential information to promote Ladyfair's bridal makeup services in Rangrachowk.

Posted By: 12th October 2024
Bridal makeup artist in Naugachhiya
Ladyfair Bridal Makeup Services in Naugachhiya Looking for the perfect bridal makeup service in Naugachhiya to make your special day unforgettable? Look no further than Ladyfair Bridal Makeup Services. We bring expert bridal makeup directly to your doorstep, offering a range of services that ensure you look and feel your best. Whether you want a traditional, HD, or airbrush makeup look, Ladyfair has you covered. Our at-home makeup service means you can relax in the comfort of your own home, while we create a stunning bridal look that enhances your natural beauty and matches your wedding style. From bold traditional looks to flawless HD finishes, Ladyfair ensures every bride is radiant on her big day. Why Ladyfair is the Best Choice for Bridal Makeup in Naugachhiya Experienced Bridal Makeup Artist Our makeup artist in Naugachhiya has years of experience in bridal makeup, specializing in creating custom looks that perfectly complement your features, style, and wedding attire. Convenient At-Home Service No need to travel or stress about time on your wedding day. Ladyfair brings salon-quality makeup services directly to your home, so you can relax and enjoy the luxury of a personalized beauty experience. High-Quality Makeup Products We use only top-grade, professional makeup products that ensure a flawless finish. Our makeup is long-lasting, designed to stay perfect throughout your entire wedding day and night. Bridal Makeup Pricing in Naugachhiya We offer a variety of bridal makeup packages to suit your budget and preferences: Basic Bridal Makeup: ₹10,000 HD Bridal Makeup: ₹12,000 Airbrush Bridal Makeup: ₹18,000 We also provide makeup services for other events like engagements, receptions, and parties: Basic Engagement/Reception Makeup: ₹6,000 HD Engagement/Reception Makeup: ₹8,000 Airbrush Engagement/Reception Makeup: ₹12,000 Basic Party Makeup: ₹2,500 HD Party Makeup: ₹3,500 Popular Bridal Makeup Styles in Naugachhiya Traditional Bridal Makeup For brides who want a vibrant, bold, and classic look, our traditional bridal makeup is perfect. This style complements traditional bridal attire, with carefully applied makeup to highlight your features and enhance your overall look. HD Bridal Makeup For a flawless, high-definition finish, HD makeup is perfect for brides who want to look impeccable both in person and in photographs. This style ensures every detail is captured beautifully. Airbrush Bridal Makeup Lightweight, long-lasting, and offering full coverage, airbrush makeup is ideal for a natural yet polished look. It stays smooth and flawless throughout the day, no matter how long your celebration lasts. How to Book Ladyfair Bridal Makeup Services in Naugachhiya Initial Contact: Call us at 7004721239 to discuss your bridal makeup needs and schedule your appointment. Consultation: Our expert makeup artist will meet with you to plan your look, taking your wedding attire, style, and personal preferences into consideration. Makeup Trial: You can opt for a makeup trial to see how your bridal look will turn out before the big day. Adjustments can be made based on your feedback. Wedding Day Makeup: On your wedding day, our makeup artist will arrive at your location in Naugachhiya to deliver a flawless, stunning look, ensuring you are ready on time. Testimonials from Brides in Naugachhiya Ritika P., Naugachhiya: "Ladyfair made my wedding day so special! The at-home service was incredibly convenient, and my makeup lasted all day without any need for touch-ups." Anjali M., Naugachhiya: "I was so happy with my airbrush makeup – it was lightweight but gave me the coverage I wanted. The artist really understood my vision and delivered it perfectly." Preparing for Your Bridal Makeup Session Hydrate Your Skin: Drinking plenty of water in the days leading up to your wedding will keep your skin healthy and glowing. Stick to a Skincare Routine: Follow a consistent skincare routine to ensure smooth, well-prepped skin for makeup application. Avoid New Products: Don’t introduce new skincare products close to your wedding date to avoid the risk of breakouts or allergic reactions. Communicate Your Preferences: Be clear about your style preferences and share inspiration with your makeup artist during your consultation. Additional Makeup Services by Ladyfair in Naugachhiya In addition to bridal makeup, we also offer a range of other makeup services: Engagement and Reception Makeup: Customized looks to match the tone of your engagement and reception events. Party Makeup: Glamorous and elegant looks for any special occasion, whether it’s a party, birthday, or anniversary. Special Occasion Makeup: Perfect for festivals, family gatherings, or other significant events where you want to look your best. Q&A with Ladyfair’s Bridal Makeup Artist in Naugachhiya Q1: What makes Ladyfair the top choice for bridal makeup in Naugachhiya? A1: Ladyfair offers professional at-home makeup services that ensure brides look stunning on their wedding day. With skilled artists and premium products, we provide a luxury, stress-free experience. Q2: What are the prices for bridal makeup services in Naugachhiya? A2: Prices start at ₹10,000 for basic bridal makeup, ₹12,000 for HD makeup, and ₹18,000 for airbrush makeup. Q3: How do I book Ladyfair’s bridal makeup services? A3: You can book by calling 7004721239. We offer consultations and makeup trials to ensure your look is perfect before the big day. Q4: What makeup styles does Ladyfair offer in Naugachhiya? A4: We offer traditional, HD, and airbrush bridal makeup styles to suit every bride’s preferences and wedding theme. Q5: Are makeup trials available? A5: Yes, makeup trial sessions are available so you can preview your bridal look and make adjustments if needed. Q6: What kind of makeup products does Ladyfair use? A6: We use only high-end, professional-grade makeup products that provide a flawless, long-lasting finish while being safe for all skin types. Q7: Does Ladyfair offer other makeup services apart from bridal makeup? A7: Yes, we provide makeup for engagements, receptions, parties, and special occasions, ensuring you look great for every event. Contact Ladyfair Bridal Makeup Services in Naugachhiya today! Call us at 7004721239 to book your appointment and enjoy the luxury of at-home makeup services. This content covers all essential aspects for promoting Ladyfair’s bridal makeup services in Naugachhiya. 4o

Posted By: 12th October 2024
Bridal makeup artist in Narayanpur
Ladyfair Bridal Makeup Services in Narayanpur Planning your wedding in Narayanpur and looking for the best bridal makeup service? Ladyfair offers professional, at-home bridal makeup that makes your special day even more memorable. Our makeup artist will work closely with you to create a personalized look, whether it’s traditional, modern, or a fusion of both. With Ladyfair, you can choose from a range of styles, including Traditional, HD, and Airbrush makeup, all designed to last throughout your wedding festivities. By bringing the beauty studio directly to your home, we ensure that you feel relaxed and pampered, without the need to step out. Why Ladyfair is the Top Choice for Bridal Makeup in Narayanpur Experienced Makeup Artist Our bridal makeup artist has extensive experience in creating looks that enhance your natural beauty, while perfectly complementing your wedding attire and style. At-Home Convenience We bring everything you need directly to your home, ensuring a stress-free, luxurious experience. This allows you to prepare in the comfort of your own space without any travel hassles. High-Quality Products Ladyfair only uses premium-grade products from top international brands, ensuring a flawless and long-lasting finish that will keep you radiant throughout your big day. Bridal Makeup Packages in Narayanpur We offer bridal makeup services that cater to a range of preferences and budgets: Basic Bridal Makeup: ₹10,000 HD Bridal Makeup: ₹12,000 Airbrush Bridal Makeup: ₹18,000 We also provide makeup for other events like engagement, reception, and parties: Basic Engagement/Reception Makeup: ₹6,000 HD Engagement/Reception Makeup: ₹8,000 Airbrush Engagement/Reception Makeup: ₹12,000 Basic Party Makeup: ₹2,500 HD Party Makeup: ₹3,500 Popular Bridal Makeup Styles in Narayanpur Traditional Bridal Makeup Perfect for brides who want a vibrant and classic look. It is crafted to enhance traditional bridal wear and jewelry, creating a stunning, timeless appearance. HD Bridal Makeup This makeup style offers a high-definition finish, perfect for both in-person and photoshoots, ensuring you look flawless in every picture. Airbrush Bridal Makeup Lightweight, long-lasting, and providing full coverage, airbrush makeup delivers a smooth, natural, and polished look that holds up throughout the day and night. How to Book Ladyfair Bridal Makeup Services in Narayanpur Initial Contact: Call us at 7004721239 to discuss your bridal makeup needs and book an appointment. Consultation: Meet with our makeup artist to discuss your style, outfit, and preferences. Makeup Trial: We offer trial sessions so you can preview your look and make any adjustments. Wedding Day Makeup: Our makeup artist will come to your location in Narayanpur on your big day, ensuring you’re ready on time with flawless makeup. Testimonials from Brides in Narayanpur Sakshi D., Narayanpur: "Ladyfair made my wedding day so special! The at-home service was incredibly convenient, and I loved my airbrush makeup – it lasted all day without touch-ups." Neha S., Narayanpur: "The experience was stress-free, and the makeup artist really understood what I wanted. I highly recommend Ladyfair for bridal makeup." Additional Makeup Services by Ladyfair in Narayanpur Besides bridal makeup, Ladyfair also provides a range of makeup services for various occasions: Engagement and Reception Makeup: Customized looks for all your pre-wedding events. Party Makeup: Glamorous makeup for birthdays, anniversaries, and other special occasions. Special Occasion Makeup: Elegant makeup for any event, from family gatherings to festive celebrations. Preparing for Your Bridal Makeup Session Stay Hydrated: Drink plenty of water leading up to the wedding for glowing skin. Skincare Routine: Follow a consistent skincare routine to keep your skin smooth and ready for makeup application. Avoid New Products: Don’t try any new skincare products just before the wedding to avoid possible reactions. Communicate Clearly: Share your makeup preferences and ideas with the artist during the consultation to ensure your desired look. Q&A with Ladyfair Bridal Makeup Artist in Narayanpur Q1: What makes Ladyfair the best choice for bridal makeup in Narayanpur? A1: Ladyfair provides professional, at-home makeup services using high-quality products to ensure that brides look stunning, relaxed, and ready for their big day. Our personalized approach ensures each bride gets the exact look she envisions. Q2: What are your pricing options for bridal makeup in Narayanpur? A2: Our bridal makeup prices start at ₹10,000 for basic makeup, ₹12,000 for HD makeup, and ₹18,000 for airbrush makeup. We also have options for engagement, reception, and party makeup. Q3: How can I book a bridal makeup appointment with Ladyfair in Narayanpur? A3: You can book our services by calling us at 7004721239. We’ll schedule a consultation and makeup trial to ensure everything is perfect for your big day. Q4: What makeup styles do you offer? A4: Ladyfair offers traditional, HD, and airbrush makeup styles. Each option provides a different level of coverage and finish, allowing brides to choose what suits their needs best. Q5: Do you offer makeup trials before the wedding? A5: Yes, we offer makeup trials where you can preview your look and make any necessary changes before the wedding day. Q6: What kind of makeup products do you use? A6: We only use high-quality, professional-grade makeup products that are long-lasting and safe for all skin types, ensuring a flawless and beautiful finish. Q7: Does Ladyfair provide other makeup services apart from bridal makeup? A7: Yes, in addition to bridal makeup, we offer makeup for engagements, receptions, parties, and special occasions. Contact Ladyfair Bridal Makeup Services in Narayanpur today! Call us at 7004721239 to book your appointment and enjoy the convenience of at-home makeup services.

Posted By: 8th October 2024
Bridal Makeup Artist in Amdabad
Introduction In Amdabad, Ladyfair is the premier choice for brides looking to achieve the perfect wedding day look with our professional at-home bridal makeup services. Whether you desire a traditional bridal look, an HD finish, or the flawless perfection of airbrush makeup, our expert makeup artist in Amdabad ensures that you shine on your special day. Contact us today at 7004721239 to schedule your appointment. Why Choose Ladyfair for Bridal Makeup in Amdabad Experienced Makeup Artist Our makeup artist in Amdabad has years of experience in bridal makeup, creating personalized looks that complement your natural beauty and align with your style and preferences. Convenient At-Home Service Forget the stress of traveling to a salon. Ladyfair brings luxury beauty treatments directly to your doorstep with our at-home bridal makeup services, offering a truly personalized experience. Premium Makeup Products We use only high-quality, professional-grade makeup products to ensure a flawless, long-lasting look that remains perfect throughout your big day. Bridal Makeup Pricing in Amdabad Our bridal makeup services in Amdabad are tailored to fit different styles and budgets: Basic Bridal Makeup: ₹10,000 HD Bridal Makeup: ₹12,000 Airbrush Bridal Makeup: ₹18,000 For engagement and reception makeup: Basic Engagement/Reception Makeup: ₹6,000 HD Engagement/Reception Makeup: ₹8,000 Airbrush Engagement/Reception Makeup: ₹12,000 For parties: Basic Party Makeup: ₹2,500 HD Party Makeup: ₹3,500 Popular Bridal Makeup Styles in Amdabad Traditional Bridal Makeup Our traditional bridal makeup in Amdabad incorporates bold colors and intricate detailing to complement your wedding attire, creating an elegant and timeless look. HD Bridal Makeup For a high-definition finish that looks flawless both in photos and in person, HD bridal makeup is the perfect choice for brides who want a picture-perfect appearance all day. Airbrush Bridal Makeup Our airbrush makeup offers a lightweight, full-coverage finish that lasts all day, giving you a smooth and natural look while ensuring long-lasting perfection. How to Book Your Bridal Makeup with Ladyfair in Amdabad Initial Contact: Call us at 7004721239 to discuss your makeup needs and schedule your appointment. Consultation Session: Meet with our makeup artist to discuss your wedding look, review your attire, and plan the perfect makeup style. Makeup Trial: We offer trial sessions to help you preview your bridal makeup look and make any adjustments. Wedding Day Makeup: On your wedding day, our makeup artist will arrive at your location in Amdabad to provide flawless, hassle-free makeup service. Testimonials from Brides in Amdabad Priya R., Amdabad: "Ladyfair provided amazing service on my wedding day. The airbrush makeup looked flawless and lasted all day." Ritu K., Amdabad: "I loved the HD makeup! It was perfect for my photos, and the at-home service was so convenient." Sneha S., Amdabad: "My traditional bridal makeup was exactly what I wanted, and Ladyfair made the entire process stress-free." Preparing for Your Bridal Makeup Session To get the best results for your bridal makeup: Stay Hydrated: Keep your skin looking fresh by drinking plenty of water. Consistent Skincare: Stick to your regular skincare routine to maintain healthy, glowing skin. Avoid New Products: Use familiar products to prevent any reactions before your wedding day. Clear Communication: Discuss your makeup preferences and any concerns with our artist during the consultation. Additional Beauty Services by Ladyfair Beyond bridal makeup, Ladyfair offers a variety of beauty services in Amdabad: Engagement and Reception Makeup: Customized looks for all pre-wedding events. Party Makeup: Perfect for birthdays, anniversaries, and special occasions. Everyday Makeup: Enhance your daily look with our expert makeup services. Special Occasion Makeup: Professional makeup for parties, celebrations, and formal events. The Future of Bridal Makeup in Amdabad Ladyfair is dedicated to setting new standards in bridal beauty in Amdabad with our innovative at-home services. As we continue to offer exceptional service, more brides are choosing Ladyfair as their preferred makeup provider. Q&A with Ladyfair’s Bridal Makeup Artist in Amdabad Q1: What makes Ladyfair the best choice for bridal makeup in Amdabad? A1: Ladyfair offers expert bridal makeup services at home, using high-quality products to ensure a flawless and long-lasting look. Q2: What are the prices for bridal makeup in Amdabad? A2: Our bridal makeup packages start at ₹10,000 for basic makeup, ₹12,000 for HD makeup, and ₹18,000 for airbrush makeup. Q3: How do I book Ladyfair’s bridal makeup services in Amdabad? A3: You can book our services by calling 7004721239. We also offer consultations and trial sessions to ensure you get the look you want. Q4: What bridal makeup styles does Ladyfair offer in Amdabad? A4: Ladyfair offers traditional, HD, and airbrush bridal makeup to suit different preferences and needs. Q5: Are makeup trials available before my wedding? A5: Yes, we offer trial sessions so you can finalize your bridal look ahead of time. Q6: What products does Ladyfair use for bridal makeup? A6: We use professional-grade, high-quality makeup products that are safe for all skin types and ensure a flawless finish. Q7: What other services does Ladyfair provide in Amdabad? A7: In addition to bridal makeup, we offer makeup for engagements, receptions, parties, and other special occasions. Ladyfair is your ultimate choice for professional, at-home bridal makeup services in Amdabad, ensuring a flawless and stress-free experience on your special day.

Posted By: 8th October 2024
Bridal Makeup Artist in Manihari
Introduction In Manihari, Ladyfair is the premier choice for brides looking to achieve the perfect wedding day look with our professional at-home bridal makeup services. Whether you desire a traditional bridal look, an HD finish, or the flawless perfection of airbrush makeup, our expert makeup artist in Manihari ensures that you shine on your special day. Contact us today at 7004721239 to schedule your appointment. Why Choose Ladyfair for Bridal Makeup in Manihari Experienced Makeup Artist Our makeup artist in Manihari has years of experience in bridal makeup, creating personalized looks that complement your natural beauty and align with your style and preferences. Convenient At-Home Service Forget the stress of traveling to a salon. Ladyfair brings luxury beauty treatments directly to your doorstep with our at-home bridal makeup services, offering a truly personalized experience. Premium Makeup Products We use only high-quality, professional-grade makeup products to ensure a flawless, long-lasting look that remains perfect throughout your big day. Bridal Makeup Pricing in Manihari Our bridal makeup services in Manihari are tailored to fit different styles and budgets: Basic Bridal Makeup: ₹10,000 HD Bridal Makeup: ₹12,000 Airbrush Bridal Makeup: ₹18,000 For engagement and reception makeup: Basic Engagement/Reception Makeup: ₹6,000 HD Engagement/Reception Makeup: ₹8,000 Airbrush Engagement/Reception Makeup: ₹12,000 For parties: Basic Party Makeup: ₹2,500 HD Party Makeup: ₹3,500 Popular Bridal Makeup Styles in Manihari Traditional Bridal Makeup Our traditional bridal makeup in Manihari incorporates bold colors and intricate detailing to complement your wedding attire, creating an elegant and timeless look. HD Bridal Makeup For a high-definition finish that looks flawless both in photos and in person, HD bridal makeup is the perfect choice for brides who want a picture-perfect appearance all day. Airbrush Bridal Makeup Our airbrush makeup offers a lightweight, full-coverage finish that lasts all day, giving you a smooth and natural look while ensuring long-lasting perfection. How to Book Your Bridal Makeup with Ladyfair in Manihari Initial Contact: Call us at 7004721239 to discuss your makeup needs and schedule your appointment. Consultation Session: Meet with our makeup artist to discuss your wedding look, review your attire, and plan the perfect makeup style. Makeup Trial: We offer trial sessions to help you preview your bridal makeup look and make any adjustments. Wedding Day Makeup: On your wedding day, our makeup artist will arrive at your location in Manihari to provide flawless, hassle-free makeup service. Testimonials from Brides in Manihari Priya R., Manihari: "Ladyfair provided amazing service on my wedding day. The airbrush makeup looked flawless and lasted all day." Ritu K., Manihari: "I loved the HD makeup! It was perfect for my photos, and the at-home service was so convenient." Sneha S., Manihari: "My traditional bridal makeup was exactly what I wanted, and Ladyfair made the entire process stress-free." Preparing for Your Bridal Makeup Session To get the best results for your bridal makeup: Stay Hydrated: Keep your skin looking fresh by drinking plenty of water. Consistent Skincare: Stick to your regular skincare routine to maintain healthy, glowing skin. Avoid New Products: Use familiar products to prevent any reactions before your wedding day. Clear Communication: Discuss your makeup preferences and any concerns with our artist during the consultation. Additional Beauty Services by Ladyfair Beyond bridal makeup, Ladyfair offers a variety of beauty services in Manihari: Engagement and Reception Makeup: Customized looks for all pre-wedding events. Party Makeup: Perfect for birthdays, anniversaries, and special occasions. Everyday Makeup: Enhance your daily look with our expert makeup services. Special Occasion Makeup: Professional makeup for parties, celebrations, and formal events. The Future of Bridal Makeup in Manihari Ladyfair is dedicated to setting new standards in bridal beauty in Manihari with our innovative at-home services. As we continue to offer exceptional service, more brides are choosing Ladyfair as their preferred makeup provider. Q&A with Ladyfair’s Bridal Makeup Artist in Manihari Q1: What makes Ladyfair the best choice for bridal makeup in Manihari? A1: Ladyfair offers expert bridal makeup services at home, using high-quality products to ensure a flawless and long-lasting look. Q2: What are the prices for bridal makeup in Manihari? A2: Our bridal makeup packages start at ₹10,000 for basic makeup, ₹12,000 for HD makeup, and ₹18,000 for airbrush makeup. Q3: How do I book Ladyfair’s bridal makeup services in Manihari? A3: You can book our services by calling 7004721239. We also offer consultations and trial sessions to ensure you get the look you want. Q4: What bridal makeup styles does Ladyfair offer in Manihari? A4: Ladyfair offers traditional, HD, and airbrush bridal makeup to suit different preferences and needs. Q5: Are makeup trials available before my wedding? A5: Yes, we offer trial sessions so you can finalize your bridal look ahead of time. Q6: What products does Ladyfair use for bridal makeup? A6: We use professional-grade, high-quality makeup products that are safe for all skin types and ensure a flawless finish. Q7: What other services does Ladyfair provide in Manihari? A7: In addition to bridal makeup, we offer makeup for engagements, receptions, parties, and other special occasions. Ladyfair is your ultimate choice for professional, at-home bridal makeup services in Manihari, ensuring a flawless and stress-free experience on your special day.

Posted By: 8th October 2024
Bridal Makeup Artist in Kadwa
Introduction In Kadwa, Ladyfair is the premier choice for brides looking to achieve the perfect wedding day look with our professional at-home bridal makeup services. Whether you desire a traditional bridal look, an HD finish, or the flawless perfection of airbrush makeup, our expert makeup artist in Kadwa ensures that you shine on your special day. Contact us today at 7004721239 to schedule your appointment. Why Choose Ladyfair for Bridal Makeup in Kadwa Experienced Makeup Artist Our makeup artist in Kadwa has years of experience in bridal makeup, creating personalized looks that complement your natural beauty and align with your style and preferences. Convenient At-Home Service Forget the stress of traveling to a salon. Ladyfair brings luxury beauty treatments directly to your doorstep with our at-home bridal makeup services, offering a truly personalized experience. Premium Makeup Products We use only high-quality, professional-grade makeup products to ensure a flawless, long-lasting look that remains perfect throughout your big day. Bridal Makeup Pricing in Kadwa Our bridal makeup services in Kadwa are tailored to fit different styles and budgets: Basic Bridal Makeup: ₹10,000 HD Bridal Makeup: ₹12,000 Airbrush Bridal Makeup: ₹18,000 For engagement and reception makeup: Basic Engagement/Reception Makeup: ₹6,000 HD Engagement/Reception Makeup: ₹8,000 Airbrush Engagement/Reception Makeup: ₹12,000 For parties: Basic Party Makeup: ₹2,500 HD Party Makeup: ₹3,500 Popular Bridal Makeup Styles in Kadwa Traditional Bridal Makeup Our traditional bridal makeup in Kadwa incorporates bold colors and intricate detailing to complement your wedding attire, creating an elegant and timeless look. HD Bridal Makeup For a high-definition finish that looks flawless both in photos and in person, HD bridal makeup is the perfect choice for brides who want a picture-perfect appearance all day. Airbrush Bridal Makeup Our airbrush makeup offers a lightweight, full-coverage finish that lasts all day, giving you a smooth and natural look while ensuring long-lasting perfection. How to Book Your Bridal Makeup with Ladyfair in Kadwa Initial Contact: Call us at 7004721239 to discuss your makeup needs and schedule your appointment. Consultation Session: Meet with our makeup artist to discuss your wedding look, review your attire, and plan the perfect makeup style. Makeup Trial: We offer trial sessions to help you preview your bridal makeup look and make any adjustments. Wedding Day Makeup: On your wedding day, our makeup artist will arrive at your location in Kadwa to provide flawless, hassle-free makeup service. Testimonials from Brides in Kadwa Priya R., Kadwa: "Ladyfair provided amazing service on my wedding day. The airbrush makeup looked flawless and lasted all day." Ritu K., Kadwa: "I loved the HD makeup! It was perfect for my photos, and the at-home service was so convenient." Sneha S., Kadwa: "My traditional bridal makeup was exactly what I wanted, and Ladyfair made the entire process stress-free." Preparing for Your Bridal Makeup Session To get the best results for your bridal makeup: Stay Hydrated: Keep your skin looking fresh by drinking plenty of water. Consistent Skincare: Stick to your regular skincare routine to maintain healthy, glowing skin. Avoid New Products: Use familiar products to prevent any reactions before your wedding day. Clear Communication: Discuss your makeup preferences and any concerns with our artist during the consultation. Additional Beauty Services by Ladyfair Beyond bridal makeup, Ladyfair offers a variety of beauty services in Kadwa: Engagement and Reception Makeup: Customized looks for all pre-wedding events. Party Makeup: Perfect for birthdays, anniversaries, and special occasions. Everyday Makeup: Enhance your daily look with our expert makeup services. Special Occasion Makeup: Professional makeup for parties, celebrations, and formal events. The Future of Bridal Makeup in Kadwa Ladyfair is dedicated to setting new standards in bridal beauty in Kadwa with our innovative at-home services. As we continue to offer exceptional service, more brides are choosing Ladyfair as their preferred makeup provider. Q&A with Ladyfair’s Bridal Makeup Artist in Kadwa Q1: What makes Ladyfair the best choice for bridal makeup in Kadwa? A1: Ladyfair offers expert bridal makeup services at home, using high-quality products to ensure a flawless and long-lasting look. Q2: What are the prices for bridal makeup in Kadwa? A2: Our bridal makeup packages start at ₹10,000 for basic makeup, ₹12,000 for HD makeup, and ₹18,000 for airbrush makeup. Q3: How do I book Ladyfair’s bridal makeup services in Kadwa? A3: You can book our services by calling 7004721239. We also offer consultations and trial sessions to ensure you get the look you want. Q4: What bridal makeup styles does Ladyfair offer in Kadwa? A4: Ladyfair offers traditional, HD, and airbrush bridal makeup to suit different preferences and needs. Q5: Are makeup trials available before my wedding? A5: Yes, we offer trial sessions so you can finalize your bridal look ahead of time. Q6: What products does Ladyfair use for bridal makeup? A6: We use professional-grade, high-quality makeup products that are safe for all skin types and ensure a flawless finish. Q7: What other services does Ladyfair provide in Kadwa? A7: In addition to bridal makeup, we offer makeup for engagements, receptions, parties, and other special occasions. Ladyfair is your ultimate choice for professional, at-home bridal makeup services in Kadwa, ensuring a flawless and stress-free experience on your special day.

Posted By: 8th October 2024
Bridal Makeup Artist in Azamnagar
Introduction In Azamnagar, Ladyfair is the premier choice for brides looking to achieve the perfect wedding day look with our professional at-home bridal makeup services. Whether you desire a traditional bridal look, an HD finish, or the flawless perfection of airbrush makeup, our expert makeup artist in Azamnagar ensures that you shine on your special day. Contact us today at 7004721239 to schedule your appointment. Why Choose Ladyfair for Bridal Makeup in Azamnagar Experienced Makeup Artist Our makeup artist in Azamnagar has years of experience in bridal makeup, creating personalized looks that complement your natural beauty and align with your style and preferences. Convenient At-Home Service Forget the stress of traveling to a salon. Ladyfair brings luxury beauty treatments directly to your doorstep with our at-home bridal makeup services, offering a truly personalized experience. Premium Makeup Products We use only high-quality, professional-grade makeup products to ensure a flawless, long-lasting look that remains perfect throughout your big day. Bridal Makeup Pricing in Azamnagar Our bridal makeup services in Azamnagar are tailored to fit different styles and budgets: Basic Bridal Makeup: ₹10,000 HD Bridal Makeup: ₹12,000 Airbrush Bridal Makeup: ₹18,000 For engagement and reception makeup: Basic Engagement/Reception Makeup: ₹6,000 HD Engagement/Reception Makeup: ₹8,000 Airbrush Engagement/Reception Makeup: ₹12,000 For parties: Basic Party Makeup: ₹2,500 HD Party Makeup: ₹3,500 Popular Bridal Makeup Styles in Azamnagar Traditional Bridal Makeup Our traditional bridal makeup in Azamnagar incorporates bold colors and intricate detailing to complement your wedding attire, creating an elegant and timeless look. HD Bridal Makeup For a high-definition finish that looks flawless both in photos and in person, HD bridal makeup is the perfect choice for brides who want a picture-perfect appearance all day. Airbrush Bridal Makeup Our airbrush makeup offers a lightweight, full-coverage finish that lasts all day, giving you a smooth and natural look while ensuring long-lasting perfection. How to Book Your Bridal Makeup with Ladyfair in Azamnagar Initial Contact: Call us at 7004721239 to discuss your makeup needs and schedule your appointment. Consultation Session: Meet with our makeup artist to discuss your wedding look, review your attire, and plan the perfect makeup style. Makeup Trial: We offer trial sessions to help you preview your bridal makeup look and make any adjustments. Wedding Day Makeup: On your wedding day, our makeup artist will arrive at your location in Azamnagar to provide flawless, hassle-free makeup service. Testimonials from Brides in Azamnagar Priya R., Azamnagar: "Ladyfair provided amazing service on my wedding day. The airbrush makeup looked flawless and lasted all day." Ritu K., Azamnagar: "I loved the HD makeup! It was perfect for my photos, and the at-home service was so convenient." Sneha S., Azamnagar: "My traditional bridal makeup was exactly what I wanted, and Ladyfair made the entire process stress-free." Preparing for Your Bridal Makeup Session To get the best results for your bridal makeup: Stay Hydrated: Keep your skin looking fresh by drinking plenty of water. Consistent Skincare: Stick to your regular skincare routine to maintain healthy, glowing skin. Avoid New Products: Use familiar products to prevent any reactions before your wedding day. Clear Communication: Discuss your makeup preferences and any concerns with our artist during the consultation. Additional Beauty Services by Ladyfair Beyond bridal makeup, Ladyfair offers a variety of beauty services in Azamnagar: Engagement and Reception Makeup: Customized looks for all pre-wedding events. Party Makeup: Perfect for birthdays, anniversaries, and special occasions. Everyday Makeup: Enhance your daily look with our expert makeup services. Special Occasion Makeup: Professional makeup for parties, celebrations, and formal events. The Future of Bridal Makeup in Azamnagar Ladyfair is dedicated to setting new standards in bridal beauty in Azamnagar with our innovative at-home services. As we continue to offer exceptional service, more brides are choosing Ladyfair as their preferred makeup provider. Q&A with Ladyfair’s Bridal Makeup Artist in Azamnagar Q1: What makes Ladyfair the best choice for bridal makeup in Azamnagar? A1: Ladyfair offers expert bridal makeup services at home, using high-quality products to ensure a flawless and long-lasting look. Q2: What are the prices for bridal makeup in Azamnagar? A2: Our bridal makeup packages start at ₹10,000 for basic makeup, ₹12,000 for HD makeup, and ₹18,000 for airbrush makeup. Q3: How do I book Ladyfair’s bridal makeup services in Azamnagar? A3: You can book our services by calling 7004721239. We also offer consultations and trial sessions to ensure you get the look you want. Q4: What bridal makeup styles does Ladyfair offer in Azamnagar? A4: Ladyfair offers traditional, HD, and airbrush bridal makeup to suit different preferences and needs. Q5: Are makeup trials available before my wedding? A5: Yes, we offer trial sessions so you can finalize your bridal look ahead of time. Q6: What products does Ladyfair use for bridal makeup? A6: We use professional-grade, high-quality makeup products that are safe for all skin types and ensure a flawless finish. Q7: What other services does Ladyfair provide in Azamnagar? A7: In addition to bridal makeup, we offer makeup for engagements, receptions, parties, and other special occasions. Ladyfair is your ultimate choice for professional, at-home bridal makeup services in Azamnagar, ensuring a flawless and stress-free experience on your special day.

Posted By: 7th October 2024
Bridal Makeup Artist in Balrampur
Introduction In Balrampur, Ladyfair is the premier choice for brides looking to achieve the perfect wedding day look with our professional at-home bridal makeup services. Whether you desire a traditional bridal look, an HD finish, or the flawless perfection of airbrush makeup, our expert makeup artist in Balrampur ensures that you shine on your special day. Contact us today at 7004721239 to schedule your appointment. Why Choose Ladyfair for Bridal Makeup in Balrampur Experienced Makeup Artist Our makeup artist in Balrampur has years of experience in bridal makeup, creating personalized looks that complement your natural beauty and align with your style and preferences. Convenient At-Home Service Forget the stress of traveling to a salon. Ladyfair brings luxury beauty treatments directly to your doorstep with our at-home bridal makeup services, offering a truly personalized experience. Premium Makeup Products We use only high-quality, professional-grade makeup products to ensure a flawless, long-lasting look that remains perfect throughout your big day. Bridal Makeup Pricing in Balrampur Our bridal makeup services in Balrampur are tailored to fit different styles and budgets: Basic Bridal Makeup: ₹10,000 HD Bridal Makeup: ₹12,000 Airbrush Bridal Makeup: ₹18,000 For engagement and reception makeup: Basic Engagement/Reception Makeup: ₹6,000 HD Engagement/Reception Makeup: ₹8,000 Airbrush Engagement/Reception Makeup: ₹12,000 For parties: Basic Party Makeup: ₹2,500 HD Party Makeup: ₹3,500 Popular Bridal Makeup Styles in Balrampur Traditional Bridal Makeup Our traditional bridal makeup in Balrampur incorporates bold colors and intricate detailing to complement your wedding attire, creating an elegant and timeless look. HD Bridal Makeup For a high-definition finish that looks flawless both in photos and in person, HD bridal makeup is the perfect choice for brides who want a picture-perfect appearance all day. Airbrush Bridal Makeup Our airbrush makeup offers a lightweight, full-coverage finish that lasts all day, giving you a smooth and natural look while ensuring long-lasting perfection. How to Book Your Bridal Makeup with Ladyfair in Balrampur Initial Contact: Call us at 7004721239 to discuss your makeup needs and schedule your appointment. Consultation Session: Meet with our makeup artist to discuss your wedding look, review your attire, and plan the perfect makeup style. Makeup Trial: We offer trial sessions to help you preview your bridal makeup look and make any adjustments. Wedding Day Makeup: On your wedding day, our makeup artist will arrive at your location in Balrampur to provide flawless, hassle-free makeup service. Testimonials from Brides in Balrampur Priya R., Balrampur: "Ladyfair provided amazing service on my wedding day. The airbrush makeup looked flawless and lasted all day." Ritu K., Balrampur: "I loved the HD makeup! It was perfect for my photos, and the at-home service was so convenient." Sneha S., Balrampur: "My traditional bridal makeup was exactly what I wanted, and Ladyfair made the entire process stress-free." Preparing for Your Bridal Makeup Session To get the best results for your bridal makeup: Stay Hydrated: Keep your skin looking fresh by drinking plenty of water. Consistent Skincare: Stick to your regular skincare routine to maintain healthy, glowing skin. Avoid New Products: Use familiar products to prevent any reactions before your wedding day. Clear Communication: Discuss your makeup preferences and any concerns with our artist during the consultation. Additional Beauty Services by Ladyfair Beyond bridal makeup, Ladyfair offers a variety of beauty services in Balrampur: Engagement and Reception Makeup: Customized looks for all pre-wedding events. Party Makeup: Perfect for birthdays, anniversaries, and special occasions. Everyday Makeup: Enhance your daily look with our expert makeup services. Special Occasion Makeup: Professional makeup for parties, celebrations, and formal events. The Future of Bridal Makeup in Balrampur Ladyfair is dedicated to setting new standards in bridal beauty in Balrampur with our innovative at-home services. As we continue to offer exceptional service, more brides are choosing Ladyfair as their preferred makeup provider. Q&A with Ladyfair’s Bridal Makeup Artist in Balrampur Q1: What makes Ladyfair the best choice for bridal makeup in Balrampur? A1: Ladyfair offers expert bridal makeup services at home, using high-quality products to ensure a flawless and long-lasting look. Q2: What are the prices for bridal makeup in Balrampur? A2: Our bridal makeup packages start at ₹10,000 for basic makeup, ₹12,000 for HD makeup, and ₹18,000 for airbrush makeup. Q3: How do I book Ladyfair’s bridal makeup services in Balrampur? A3: You can book our services by calling 7004721239. We also offer consultations and trial sessions to ensure you get the look you want. Q4: What bridal makeup styles does Ladyfair offer in Balrampur? A4: Ladyfair offers traditional, HD, and airbrush bridal makeup to suit different preferences and needs. Q5: Are makeup trials available before my wedding? A5: Yes, we offer trial sessions so you can finalize your bridal look ahead of time. Q6: What products does Ladyfair use for bridal makeup? A6: We use professional-grade, high-quality makeup products that are safe for all skin types and ensure a flawless finish. Q7: What other services does Ladyfair provide in Balrampur? A7: In addition to bridal makeup, we offer makeup for engagements, receptions, parties, and other special occasions. Ladyfair is your ultimate choice for professional, at-home bridal makeup services in Balrampur, ensuring a flawless and stress-free experience on your special day.

Posted By: 7th October 2024
Bridal Makeup Artist in Barsoi
Introduction In Barsoi, Ladyfair is the premier choice for brides looking to achieve the perfect wedding day look with our professional at-home bridal makeup services. Whether you desire a traditional bridal look, an HD finish, or the flawless perfection of airbrush makeup, our expert makeup artist in Barsoi ensures that you shine on your special day. Contact us today at 7004721239 to schedule your appointment. Why Choose Ladyfair for Bridal Makeup in Barsoi Experienced Makeup Artist Our makeup artist in Barsoi has years of experience in bridal makeup, creating personalized looks that complement your natural beauty and align with your style and preferences. Convenient At-Home Service Forget the stress of traveling to a salon. Ladyfair brings luxury beauty treatments directly to your doorstep with our at-home bridal makeup services, offering a truly personalized experience. Premium Makeup Products We use only high-quality, professional-grade makeup products to ensure a flawless, long-lasting look that remains perfect throughout your big day. Bridal Makeup Pricing in Barsoi Our bridal makeup services in Barsoi are tailored to fit different styles and budgets: Basic Bridal Makeup: ₹10,000 HD Bridal Makeup: ₹12,000 Airbrush Bridal Makeup: ₹18,000 For engagement and reception makeup: Basic Engagement/Reception Makeup: ₹6,000 HD Engagement/Reception Makeup: ₹8,000 Airbrush Engagement/Reception Makeup: ₹12,000 For parties: Basic Party Makeup: ₹2,500 HD Party Makeup: ₹3,500 Popular Bridal Makeup Styles in Barsoi Traditional Bridal Makeup Our traditional bridal makeup in Barsoi incorporates bold colors and intricate detailing to complement your wedding attire, creating an elegant and timeless look. HD Bridal Makeup For a high-definition finish that looks flawless both in photos and in person, HD bridal makeup is the perfect choice for brides who want a picture-perfect appearance all day. Airbrush Bridal Makeup Our airbrush makeup offers a lightweight, full-coverage finish that lasts all day, giving you a smooth and natural look while ensuring long-lasting perfection. How to Book Your Bridal Makeup with Ladyfair in Barsoi Initial Contact: Call us at 7004721239 to discuss your makeup needs and schedule your appointment. Consultation Session: Meet with our makeup artist to discuss your wedding look, review your attire, and plan the perfect makeup style. Makeup Trial: We offer trial sessions to help you preview your bridal makeup look and make any adjustments. Wedding Day Makeup: On your wedding day, our makeup artist will arrive at your location in Barsoi to provide flawless, hassle-free makeup service. Testimonials from Brides in Barsoi Priya R., Barsoi: "Ladyfair provided amazing service on my wedding day. The airbrush makeup looked flawless and lasted all day." Ritu K., Barsoi: "I loved the HD makeup! It was perfect for my photos, and the at-home service was so convenient." Sneha S., Barsoi: "My traditional bridal makeup was exactly what I wanted, and Ladyfair made the entire process stress-free." Preparing for Your Bridal Makeup Session To get the best results for your bridal makeup: Stay Hydrated: Keep your skin looking fresh by drinking plenty of water. Consistent Skincare: Stick to your regular skincare routine to maintain healthy, glowing skin. Avoid New Products: Use familiar products to prevent any reactions before your wedding day. Clear Communication: Discuss your makeup preferences and any concerns with our artist during the consultation. Additional Beauty Services by Ladyfair Beyond bridal makeup, Ladyfair offers a variety of beauty services in Barsoi: Engagement and Reception Makeup: Customized looks for all pre-wedding events. Party Makeup: Perfect for birthdays, anniversaries, and special occasions. Everyday Makeup: Enhance your daily look with our expert makeup services. Special Occasion Makeup: Professional makeup for parties, celebrations, and formal events. The Future of Bridal Makeup in Barsoi Ladyfair is dedicated to setting new standards in bridal beauty in Barsoi with our innovative at-home services. As we continue to offer exceptional service, more brides are choosing Ladyfair as their preferred makeup provider. Q&A with Ladyfair’s Bridal Makeup Artist in Barsoi Q1: What makes Ladyfair the best choice for bridal makeup in Barsoi? A1: Ladyfair offers expert bridal makeup services at home, using high-quality products to ensure a flawless and long-lasting look. Q2: What are the prices for bridal makeup in Barsoi? A2: Our bridal makeup packages start at ₹10,000 for basic makeup, ₹12,000 for HD makeup, and ₹18,000 for airbrush makeup. Q3: How do I book Ladyfair’s bridal makeup services in Barsoi? A3: You can book our services by calling 7004721239. We also offer consultations and trial sessions to ensure you get the look you want. Q4: What bridal makeup styles does Ladyfair offer in Barsoi? A4: Ladyfair offers traditional, HD, and airbrush bridal makeup to suit different preferences and needs. Q5: Are makeup trials available before my wedding? A5: Yes, we offer trial sessions so you can finalize your bridal look ahead of time. Q6: What products does Ladyfair use for bridal makeup? A6: We use professional-grade, high-quality makeup products that are safe for all skin types and ensure a flawless finish. Q7: What other services does Ladyfair provide in Barsoi? A7: In addition to bridal makeup, we offer makeup for engagements, receptions, parties, and other special occasions. Ladyfair is your ultimate choice for professional, at-home bridal makeup services in Barsoi, ensuring a flawless and stress-free experience on your special day.

Posted By: 7th October 2024
Bridal Makeup Artist in Pranpur
Introduction In Pranpur, Ladyfair is the premier choice for brides looking to achieve the perfect wedding day look with our professional at-home bridal makeup services. Whether you desire a traditional bridal look, an HD finish, or the flawless perfection of airbrush makeup, our expert makeup artist in Pranpur ensures that you shine on your special day. Contact us today at 7004721239 to schedule your appointment. Why Choose Ladyfair for Bridal Makeup in Pranpur Experienced Makeup Artist Our makeup artist in Pranpur has years of experience in bridal makeup, creating personalized looks that complement your natural beauty and align with your style and preferences. Convenient At-Home Service Forget the stress of traveling to a salon. Ladyfair brings luxury beauty treatments directly to your doorstep with our at-home bridal makeup services, offering a truly personalized experience. Premium Makeup Products We use only high-quality, professional-grade makeup products to ensure a flawless, long-lasting look that remains perfect throughout your big day. Bridal Makeup Pricing in Pranpur Our bridal makeup services in Pranpur are tailored to fit different styles and budgets: Basic Bridal Makeup: ₹10,000 HD Bridal Makeup: ₹12,000 Airbrush Bridal Makeup: ₹18,000 For engagement and reception makeup: Basic Engagement/Reception Makeup: ₹6,000 HD Engagement/Reception Makeup: ₹8,000 Airbrush Engagement/Reception Makeup: ₹12,000 For parties: Basic Party Makeup: ₹2,500 HD Party Makeup: ₹3,500 Popular Bridal Makeup Styles in Pranpur Traditional Bridal Makeup Our traditional bridal makeup in Pranpur incorporates bold colors and intricate detailing to complement your wedding attire, creating an elegant and timeless look. HD Bridal Makeup For a high-definition finish that looks flawless both in photos and in person, HD bridal makeup is the perfect choice for brides who want a picture-perfect appearance all day. Airbrush Bridal Makeup Our airbrush makeup offers a lightweight, full-coverage finish that lasts all day, giving you a smooth and natural look while ensuring long-lasting perfection. How to Book Your Bridal Makeup with Ladyfair in Pranpur Initial Contact: Call us at 7004721239 to discuss your makeup needs and schedule your appointment. Consultation Session: Meet with our makeup artist to discuss your wedding look, review your attire, and plan the perfect makeup style. Makeup Trial: We offer trial sessions to help you preview your bridal makeup look and make any adjustments. Wedding Day Makeup: On your wedding day, our makeup artist will arrive at your location in Pranpur to provide flawless, hassle-free makeup service. Testimonials from Brides in Pranpur Priya R., Pranpur: "Ladyfair provided amazing service on my wedding day. The airbrush makeup looked flawless and lasted all day." Ritu K., Pranpur: "I loved the HD makeup! It was perfect for my photos, and the at-home service was so convenient." Sneha S., Pranpur: "My traditional bridal makeup was exactly what I wanted, and Ladyfair made the entire process stress-free." Preparing for Your Bridal Makeup Session To get the best results for your bridal makeup: Stay Hydrated: Keep your skin looking fresh by drinking plenty of water. Consistent Skincare: Stick to your regular skincare routine to maintain healthy, glowing skin. Avoid New Products: Use familiar products to prevent any reactions before your wedding day. Clear Communication: Discuss your makeup preferences and any concerns with our artist during the consultation. Additional Beauty Services by Ladyfair Beyond bridal makeup, Ladyfair offers a variety of beauty services in Pranpur: Engagement and Reception Makeup: Customized looks for all pre-wedding events. Party Makeup: Perfect for birthdays, anniversaries, and special occasions. Everyday Makeup: Enhance your daily look with our expert makeup services. Special Occasion Makeup: Professional makeup for parties, celebrations, and formal events. The Future of Bridal Makeup in Pranpur Ladyfair is dedicated to setting new standards in bridal beauty in Pranpur with our innovative at-home services. As we continue to offer exceptional service, more brides are choosing Ladyfair as their preferred makeup provider. Q&A with Ladyfair’s Bridal Makeup Artist in Pranpur Q1: What makes Ladyfair the best choice for bridal makeup in Pranpur? A1: Ladyfair offers expert bridal makeup services at home, using high-quality products to ensure a flawless and long-lasting look. Q2: What are the prices for bridal makeup in Pranpur? A2: Our bridal makeup packages start at ₹10,000 for basic makeup, ₹12,000 for HD makeup, and ₹18,000 for airbrush makeup. Q3: How do I book Ladyfair’s bridal makeup services in Pranpur? A3: You can book our services by calling 7004721239. We also offer consultations and trial sessions to ensure you get the look you want. Q4: What bridal makeup styles does Ladyfair offer in Pranpur? A4: Ladyfair offers traditional, HD, and airbrush bridal makeup to suit different preferences and needs. Q5: Are makeup trials available before my wedding? A5: Yes, we offer trial sessions so you can finalize your bridal look ahead of time. Q6: What products does Ladyfair use for bridal makeup? A6: We use professional-grade, high-quality makeup products that are safe for all skin types and ensure a flawless finish. Q7: What other services does Ladyfair provide in Pranpur? A7: In addition to bridal makeup, we offer makeup for engagements, receptions, parties, and other special occasions. Ladyfair is your ultimate choice for professional, at-home bridal makeup services in Pranpur, ensuring a flawless and stress-free experience on your special day.

Posted By: 7th October 2024
Bridal Makeup Artist in Mansahi
Introduction In Mansahi, Ladyfair is the premier choice for brides looking to achieve the perfect wedding day look with our professional at-home bridal makeup services. Whether you desire a traditional bridal look, an HD finish, or the flawless perfection of airbrush makeup, our expert makeup artist in Mansahi ensures that you shine on your special day. Contact us today at 7004721239 to schedule your appointment. Why Choose Ladyfair for Bridal Makeup in Mansahi Experienced Makeup Artist Our makeup artist in Mansahi has years of experience in bridal makeup, creating personalized looks that complement your natural beauty and align with your style and preferences. Convenient At-Home Service Forget the stress of traveling to a salon. Ladyfair brings luxury beauty treatments directly to your doorstep with our at-home bridal makeup services, offering a truly personalized experience. Premium Makeup Products We use only high-quality, professional-grade makeup products to ensure a flawless, long-lasting look that remains perfect throughout your big day. Bridal Makeup Pricing in Mansahi Our bridal makeup services in Mansahi are tailored to fit different styles and budgets: Basic Bridal Makeup: ₹10,000 HD Bridal Makeup: ₹12,000 Airbrush Bridal Makeup: ₹18,000 For engagement and reception makeup: Basic Engagement/Reception Makeup: ₹6,000 HD Engagement/Reception Makeup: ₹8,000 Airbrush Engagement/Reception Makeup: ₹12,000 For parties: Basic Party Makeup: ₹2,500 HD Party Makeup: ₹3,500 Popular Bridal Makeup Styles in Mansahi Traditional Bridal Makeup Our traditional bridal makeup in Mansahi incorporates bold colors and intricate detailing to complement your wedding attire, creating an elegant and timeless look. HD Bridal Makeup For a high-definition finish that looks flawless both in photos and in person, HD bridal makeup is the perfect choice for brides who want a picture-perfect appearance all day. Airbrush Bridal Makeup Our airbrush makeup offers a lightweight, full-coverage finish that lasts all day, giving you a smooth and natural look while ensuring long-lasting perfection. How to Book Your Bridal Makeup with Ladyfair in Mansahi Initial Contact: Call us at 7004721239 to discuss your makeup needs and schedule your appointment. Consultation Session: Meet with our makeup artist to discuss your wedding look, review your attire, and plan the perfect makeup style. Makeup Trial: We offer trial sessions to help you preview your bridal makeup look and make any adjustments. Wedding Day Makeup: On your wedding day, our makeup artist will arrive at your location in Mansahi to provide flawless, hassle-free makeup service. Testimonials from Brides in Mansahi Priya R., Mansahi: "Ladyfair provided amazing service on my wedding day. The airbrush makeup looked flawless and lasted all day." Ritu K., Mansahi: "I loved the HD makeup! It was perfect for my photos, and the at-home service was so convenient." Sneha S., Mansahi: "My traditional bridal makeup was exactly what I wanted, and Ladyfair made the entire process stress-free." Preparing for Your Bridal Makeup Session To get the best results for your bridal makeup: Stay Hydrated: Keep your skin looking fresh by drinking plenty of water. Consistent Skincare: Stick to your regular skincare routine to maintain healthy, glowing skin. Avoid New Products: Use familiar products to prevent any reactions before your wedding day. Clear Communication: Discuss your makeup preferences and any concerns with our artist during the consultation. Additional Beauty Services by Ladyfair Beyond bridal makeup, Ladyfair offers a variety of beauty services in Mansahi: Engagement and Reception Makeup: Customized looks for all pre-wedding events. Party Makeup: Perfect for birthdays, anniversaries, and special occasions. Everyday Makeup: Enhance your daily look with our expert makeup services. Special Occasion Makeup: Professional makeup for parties, celebrations, and formal events. The Future of Bridal Makeup in Mansahi Ladyfair is dedicated to setting new standards in bridal beauty in Mansahi with our innovative at-home services. As we continue to offer exceptional service, more brides are choosing Ladyfair as their preferred makeup provider. Q&A with Ladyfair’s Bridal Makeup Artist in Mansahi Q1: What makes Ladyfair the best choice for bridal makeup in Mansahi? A1: Ladyfair offers expert bridal makeup services at home, using high-quality products to ensure a flawless and long-lasting look. Q2: What are the prices for bridal makeup in Mansahi? A2: Our bridal makeup packages start at ₹10,000 for basic makeup, ₹12,000 for HD makeup, and ₹18,000 for airbrush makeup. Q3: How do I book Ladyfair’s bridal makeup services in Mansahi? A3: You can book our services by calling 7004721239. We also offer consultations and trial sessions to ensure you get the look you want. Q4: What bridal makeup styles does Ladyfair offer in Mansahi? A4: Ladyfair offers traditional, HD, and airbrush bridal makeup to suit different preferences and needs. Q5: Are makeup trials available before my wedding? A5: Yes, we offer trial sessions so you can finalize your bridal look ahead of time. Q6: What products does Ladyfair use for bridal makeup? A6: We use professional-grade, high-quality makeup products that are safe for all skin types and ensure a flawless finish. Q7: What other services does Ladyfair provide in Mansahi? A7: In addition to bridal makeup, we offer makeup for engagements, receptions, parties, and other special occasions. Ladyfair is your ultimate choice for professional, at-home bridal makeup services in Mansahi, ensuring a flawless and stress-free experience on your special day.

Posted By: 7th October 2024
Bridal Makeup Artist in Barari
Introduction In Barari, Ladyfair is the premier choice for brides looking to achieve the perfect wedding day look with our professional at-home bridal makeup services. Whether you desire a traditional bridal look, an HD finish, or the flawless perfection of airbrush makeup, our expert makeup artist in Barari ensures that you shine on your special day. Contact us today at 7004721239 to schedule your appointment. Why Choose Ladyfair for Bridal Makeup in Barari Experienced Makeup Artist Our makeup artist in Barari has years of experience in bridal makeup, creating personalized looks that complement your natural beauty and align with your style and preferences. Convenient At-Home Service Forget the stress of traveling to a salon. Ladyfair brings luxury beauty treatments directly to your doorstep with our at-home bridal makeup services, offering a truly personalized experience. Premium Makeup Products We use only high-quality, professional-grade makeup products to ensure a flawless, long-lasting look that remains perfect throughout your big day. Bridal Makeup Pricing in Barari Our bridal makeup services in Barari are tailored to fit different styles and budgets: Basic Bridal Makeup: ₹10,000 HD Bridal Makeup: ₹12,000 Airbrush Bridal Makeup: ₹18,000 For engagement and reception makeup: Basic Engagement/Reception Makeup: ₹6,000 HD Engagement/Reception Makeup: ₹8,000 Airbrush Engagement/Reception Makeup: ₹12,000 For parties: Basic Party Makeup: ₹2,500 HD Party Makeup: ₹3,500 Popular Bridal Makeup Styles in Barari Traditional Bridal Makeup Our traditional bridal makeup in Barari incorporates bold colors and intricate detailing to complement your wedding attire, creating an elegant and timeless look. HD Bridal Makeup For a high-definition finish that looks flawless both in photos and in person, HD bridal makeup is the perfect choice for brides who want a picture-perfect appearance all day. Airbrush Bridal Makeup Our airbrush makeup offers a lightweight, full-coverage finish that lasts all day, giving you a smooth and natural look while ensuring long-lasting perfection. How to Book Your Bridal Makeup with Ladyfair in Barari Initial Contact: Call us at 7004721239 to discuss your makeup needs and schedule your appointment. Consultation Session: Meet with our makeup artist to discuss your wedding look, review your attire, and plan the perfect makeup style. Makeup Trial: We offer trial sessions to help you preview your bridal makeup look and make any adjustments. Wedding Day Makeup: On your wedding day, our makeup artist will arrive at your location in Barari to provide flawless, hassle-free makeup service. Testimonials from Brides in Barari Priya R., Barari: "Ladyfair provided amazing service on my wedding day. The airbrush makeup looked flawless and lasted all day." Ritu K., Barari: "I loved the HD makeup! It was perfect for my photos, and the at-home service was so convenient." Sneha S., Barari: "My traditional bridal makeup was exactly what I wanted, and Ladyfair made the entire process stress-free." Preparing for Your Bridal Makeup Session To get the best results for your bridal makeup: Stay Hydrated: Keep your skin looking fresh by drinking plenty of water. Consistent Skincare: Stick to your regular skincare routine to maintain healthy, glowing skin. Avoid New Products: Use familiar products to prevent any reactions before your wedding day. Clear Communication: Discuss your makeup preferences and any concerns with our artist during the consultation. Additional Beauty Services by Ladyfair Beyond bridal makeup, Ladyfair offers a variety of beauty services in Barari: Engagement and Reception Makeup: Customized looks for all pre-wedding events. Party Makeup: Perfect for birthdays, anniversaries, and special occasions. Everyday Makeup: Enhance your daily look with our expert makeup services. Special Occasion Makeup: Professional makeup for parties, celebrations, and formal events. The Future of Bridal Makeup in Barari Ladyfair is dedicated to setting new standards in bridal beauty in Barari with our innovative at-home services. As we continue to offer exceptional service, more brides are choosing Ladyfair as their preferred makeup provider. Q&A with Ladyfair’s Bridal Makeup Artist in Barari Q1: What makes Ladyfair the best choice for bridal makeup in Barari? A1: Ladyfair offers expert bridal makeup services at home, using high-quality products to ensure a flawless and long-lasting look. Q2: What are the prices for bridal makeup in Barari? A2: Our bridal makeup packages start at ₹10,000 for basic makeup, ₹12,000 for HD makeup, and ₹18,000 for airbrush makeup. Q3: How do I book Ladyfair’s bridal makeup services in Barari? A3: You can book our services by calling 7004721239. We also offer consultations and trial sessions to ensure you get the look you want. Q4: What bridal makeup styles does Ladyfair offer in Barari? A4: Ladyfair offers traditional, HD, and airbrush bridal makeup to suit different preferences and needs. Q5: Are makeup trials available before my wedding? A5: Yes, we offer trial sessions so you can finalize your bridal look ahead of time. Q6: What products does Ladyfair use for bridal makeup? A6: We use professional-grade, high-quality makeup products that are safe for all skin types and ensure a flawless finish. Q7: What other services does Ladyfair provide in Barari? A7: In addition to bridal makeup, we offer makeup for engagements, receptions, parties, and other special occasions. Ladyfair is your ultimate choice for professional, at-home bridal makeup services in Barari, ensuring a flawless and stress-free experience on your special day.

Posted By: 6th October 2024
Discover the Best Makeup Artist in Chautham for Flawless Beauty
Bridal makeup Artist in Chautham Introduction In chautham, Ladyfair is renowned for providing expert bridal makeup services directly at your home. Whether you're dreaming of a traditional bridal look, a flawless HD finish, or the perfection of airbrush makeup, our talented makeup artist is here to bring your vision to life. Contact us at 7004721239 to schedule your appointment today and experience the best bridal makeup service in chautham. Why Ladyfair is the Best Choice for Bridal Makeup in chautham Skilled and Experienced Makeup Artist Our makeup artist in Baikunthpur has extensive experience in bridal makeup, ensuring you receive a look that complements your personality, attire, and preferences. Convenient At-Home Makeup Service Ladyfair provides the ultimate convenience by offering at-home makeup services in Baikunthpur, allowing you to prepare for your big day without leaving the comfort of your home. High-Quality Makeup Products We use only premium, professional-grade makeup products to guarantee a long-lasting, flawless look that will keep you radiant throughout your wedding day. Bridal Makeup Pricing in chautham Our pricing is designed to cater to various needs and budgets: Basic Bridal Makeup: ₹10,000 HD Bridal Makeup: ₹12,000 Airbrush Bridal Makeup: ₹18,000 For engagement and reception makeup: Basic Engagement/Reception Makeup: ₹6,000 HD Engagement/Reception Makeup: ₹8,000 Airbrush Engagement/Reception Makeup: ₹12,000 For parties: Basic Party Makeup: ₹2,500 HD Party Makeup: ₹3,500 Popular Bridal Makeup Styles in chautham Traditional Bridal Makeup For those who want a timeless and classic look, our traditional bridal makeup in Baikunthpur features bold and vibrant tones, creating an elegant and traditional style that perfectly complements your wedding attire. HD Bridal Makeup HD bridal makeup ensures you look flawless in both photos and real life, giving you a camera-ready appearance that’s picture-perfect throughout the day. Airbrush Bridal Makeup Airbrush makeup offers a smooth, lightweight, and long-lasting finish. It’s ideal for brides seeking a natural, radiant look that stays fresh all day long. How to Book Your Bridal Makeup with Ladyfair in chautham Initial Contact: Call us at 7004721239 to discuss your needs and book an appointment. Consultation: Our makeup artist will work with you to understand your vision and create a makeup plan that complements your wedding theme. Makeup Trial: We offer trial makeup sessions to ensure that your bridal look is exactly what you desire. Wedding Day Makeup: On your wedding day, our makeup artist will arrive at your home in Baikunthpur, providing a flawless makeup experience without any stress. Testimonials from Brides in chautham Preparing for Your Bridal Makeup Session To ensure your makeup looks perfect on your big day, follow these tips: Stay Hydrated: Drink plenty of water to keep your skin glowing. Maintain Your Skincare Routine: Stick to a consistent skincare routine to keep your skin in optimal condition. Avoid New Skincare Products: Using unfamiliar products before your wedding may lead to breakouts or skin reactions. Communicate Your Preferences: Be clear with our makeup artist about the look you want to achieve during your consultation and trial session. Additional Beauty Services by Ladyfair Ladyfair also offers a range of makeup services for other special occasions in chautham Engagement and Reception Makeup: Tailored looks for all your pre-wedding events. Party Makeup: Perfect for birthdays, anniversaries, and other special celebrations. Everyday Makeup: Enhance your daily look with professional makeup. Special Occasion Makeup: Glamorous makeup for any important life event. The Future of Bridal Makeup in chautham Ladyfair is revolutionizing bridal beauty by offering high-quality, at-home makeup services in Baikunthpur. As more brides experience our exceptional artistry and personalized service, we continue to grow as the premier choice for bridal makeup. Q&A with Ladyfair’s Bridal Makeup Artist in chautham Q1: Why is Ladyfair the top choice for bridal makeup in chautham? A1: Ladyfair offers expert at-home bridal makeup services, ensuring you receive a flawless look in the comfort of your own home. Q2: What are the prices for bridal makeup services in chautham? A2: Our bridal makeup prices start at ₹10,000 for basic makeup, with HD and airbrush options also available. Q3: How do I book Ladyfair’s bridal makeup services in chautham? A3: You can call us at 7004721239 to book our services, and we offer consultations and makeup trials to ensure your desired look is achieved. Q4: What types of bridal makeup does Ladyfair offer in chautham? A4: We offer traditional, HD, and airbrush bridal makeup styles to suit your preferences. Q5: Are makeup trials available before the wedding day? A5: Yes, we provide trial sessions so you can preview your bridal look and make any adjustments before the big day. Q6: What kind of products does Ladyfair use for bridal makeup? A6: We use high-quality, professional-grade makeup products to ensure a flawless and long-lasting finish. Q7: What other makeup services does Ladyfair offer in chautham? A7: Besides bridal makeup, we offer engagement, reception, party, and everyday makeup services for all occasions.

Posted By: 6th October 2024
Bridal Makeup Artist in Kursela
Introduction In Kursela, Ladyfair is the premier choice for brides looking to achieve the perfect wedding day look with our professional at-home bridal makeup services. Whether you desire a traditional bridal look, an HD finish, or the flawless perfection of airbrush makeup, our expert makeup artist in Kursela ensures that you shine on your special day. Contact us today at 7004721239 to schedule your appointment. Why Choose Ladyfair for Bridal Makeup in Kursela Experienced Makeup Artist Our makeup artist in Kursela has years of experience in bridal makeup, creating personalized looks that complement your natural beauty and align with your style and preferences. Convenient At-Home Service Forget the stress of traveling to a salon. Ladyfair brings luxury beauty treatments directly to your doorstep with our at-home bridal makeup services, offering a truly personalized experience. Premium Makeup Products We use only high-quality, professional-grade makeup products to ensure a flawless, long-lasting look that remains perfect throughout your big day. Bridal Makeup Pricing in Kursela Our bridal makeup services in Kursela are tailored to fit different styles and budgets: Basic Bridal Makeup: ₹10,000 HD Bridal Makeup: ₹12,000 Airbrush Bridal Makeup: ₹18,000 For engagement and reception makeup: Basic Engagement/Reception Makeup: ₹6,000 HD Engagement/Reception Makeup: ₹8,000 Airbrush Engagement/Reception Makeup: ₹12,000 For parties: Basic Party Makeup: ₹2,500 HD Party Makeup: ₹3,500 Popular Bridal Makeup Styles in Kursela Traditional Bridal Makeup Our traditional bridal makeup in Kursela incorporates bold colors and intricate detailing to complement your wedding attire, creating an elegant and timeless look. HD Bridal Makeup For a high-definition finish that looks flawless both in photos and in person, HD bridal makeup is the perfect choice for brides who want a picture-perfect appearance all day. Airbrush Bridal Makeup Our airbrush makeup offers a lightweight, full-coverage finish that lasts all day, giving you a smooth and natural look while ensuring long-lasting perfection. How to Book Your Bridal Makeup with Ladyfair in Kursela Initial Contact: Call us at 7004721239 to discuss your makeup needs and schedule your appointment. Consultation Session: Meet with our makeup artist to discuss your wedding look, review your attire, and plan the perfect makeup style. Makeup Trial: We offer trial sessions to help you preview your bridal makeup look and make any adjustments. Wedding Day Makeup: On your wedding day, our makeup artist will arrive at your location in Kursela to provide flawless, hassle-free makeup service. Testimonials from Brides in Kursela Priya R., Kursela: "Ladyfair provided amazing service on my wedding day. The airbrush makeup looked flawless and lasted all day." Ritu K., Kursela: "I loved the HD makeup! It was perfect for my photos, and the at-home service was so convenient." Sneha S., Kursela: "My traditional bridal makeup was exactly what I wanted, and Ladyfair made the entire process stress-free." Preparing for Your Bridal Makeup Session To get the best results for your bridal makeup: Stay Hydrated: Keep your skin looking fresh by drinking plenty of water. Consistent Skincare: Stick to your regular skincare routine to maintain healthy, glowing skin. Avoid New Products: Use familiar products to prevent any reactions before your wedding day. Clear Communication: Discuss your makeup preferences and any concerns with our artist during the consultation. Additional Beauty Services by Ladyfair Beyond bridal makeup, Ladyfair offers a variety of beauty services in Kursela: Engagement and Reception Makeup: Customized looks for all pre-wedding events. Party Makeup: Perfect for birthdays, anniversaries, and special occasions. Everyday Makeup: Enhance your daily look with our expert makeup services. Special Occasion Makeup: Professional makeup for parties, celebrations, and formal events. The Future of Bridal Makeup in Kursela Ladyfair is dedicated to setting new standards in bridal beauty in Kursela with our innovative at-home services. As we continue to offer exceptional service, more brides are choosing Ladyfair as their preferred makeup provider. Q&A with Ladyfair’s Bridal Makeup Artist in Kursela Q1: What makes Ladyfair the best choice for bridal makeup in Kursela? A1: Ladyfair offers expert bridal makeup services at home, using high-quality products to ensure a flawless and long-lasting look. Q2: What are the prices for bridal makeup in Kursela? A2: Our bridal makeup packages start at ₹10,000 for basic makeup, ₹12,000 for HD makeup, and ₹18,000 for airbrush makeup. Q3: How do I book Ladyfair’s bridal makeup services in Kursela? A3: You can book our services by calling 7004721239. We also offer consultations and trial sessions to ensure you get the look you want. Q4: What bridal makeup styles does Ladyfair offer in Kursela? A4: Ladyfair offers traditional, HD, and airbrush bridal makeup to suit different preferences and needs. Q5: Are makeup trials available before my wedding? A5: Yes, we offer trial sessions so you can finalize your bridal look ahead of time. Q6: What products does Ladyfair use for bridal makeup? A6: We use professional-grade, high-quality makeup products that are safe for all skin types and ensure a flawless finish. Q7: What other services does Ladyfair provide in Kursela? A7: In addition to bridal makeup, we offer makeup for engagements, receptions, parties, and other special occasions. Ladyfair is your ultimate choice for professional, at-home bridal makeup services in Kursela, ensuring a flawless and stress-free experience on your special day.

Posted By: 6th October 2024
Bridal Makeup Artist in Falka
Introduction In Falka, Ladyfair is the premier choice for brides looking to achieve the perfect wedding day look with our professional at-home bridal makeup services. Whether you desire a traditional bridal look, an HD finish, or the flawless perfection of airbrush makeup, our expert makeup artist in Falka ensures that you shine on your special day. Contact us today at 7004721239 to schedule your appointment. Why Choose Ladyfair for Bridal Makeup in Falka Experienced Makeup Artist Our makeup artist in Falka has years of experience in bridal makeup, creating personalized looks that complement your natural beauty and align with your style and preferences. Convenient At-Home Service Forget the stress of traveling to a salon. Ladyfair brings luxury beauty treatments directly to your doorstep with our at-home bridal makeup services, offering a truly personalized experience. Premium Makeup Products We use only high-quality, professional-grade makeup products to ensure a flawless, long-lasting look that remains perfect throughout your big day. Bridal Makeup Pricing in Falka Our bridal makeup services in Falka are tailored to fit different styles and budgets: Basic Bridal Makeup: ₹10,000 HD Bridal Makeup: ₹12,000 Airbrush Bridal Makeup: ₹18,000 For engagement and reception makeup: Basic Engagement/Reception Makeup: ₹6,000 HD Engagement/Reception Makeup: ₹8,000 Airbrush Engagement/Reception Makeup: ₹12,000 For parties: Basic Party Makeup: ₹2,500 HD Party Makeup: ₹3,500 Popular Bridal Makeup Styles in Falka Traditional Bridal Makeup Our traditional bridal makeup in Falka incorporates bold colors and intricate detailing to complement your wedding attire, creating an elegant and timeless look. HD Bridal Makeup For a high-definition finish that looks flawless both in photos and in person, HD bridal makeup is the perfect choice for brides who want a picture-perfect appearance all day. Airbrush Bridal Makeup Our airbrush makeup offers a lightweight, full-coverage finish that lasts all day, giving you a smooth and natural look while ensuring long-lasting perfection. How to Book Your Bridal Makeup with Ladyfair in Falka Initial Contact: Call us at 7004721239 to discuss your makeup needs and schedule your appointment. Consultation Session: Meet with our makeup artist to discuss your wedding look, review your attire, and plan the perfect makeup style. Makeup Trial: We offer trial sessions to help you preview your bridal makeup look and make any adjustments. Wedding Day Makeup: On your wedding day, our makeup artist will arrive at your location in Falka to provide flawless, hassle-free makeup service. Testimonials from Brides in Falka Priya R., Falka: "Ladyfair provided amazing service on my wedding day. The airbrush makeup looked flawless and lasted all day." Ritu K., Falka: "I loved the HD makeup! It was perfect for my photos, and the at-home service was so convenient." Sneha S., Falka: "My traditional bridal makeup was exactly what I wanted, and Ladyfair made the entire process stress-free." Preparing for Your Bridal Makeup Session To get the best results for your bridal makeup: Stay Hydrated: Keep your skin looking fresh by drinking plenty of water. Consistent Skincare: Stick to your regular skincare routine to maintain healthy, glowing skin. Avoid New Products: Use familiar products to prevent any reactions before your wedding day. Clear Communication: Discuss your makeup preferences and any concerns with our artist during the consultation. Additional Beauty Services by Ladyfair Beyond bridal makeup, Ladyfair offers a variety of beauty services in Falka: Engagement and Reception Makeup: Customized looks for all pre-wedding events. Party Makeup: Perfect for birthdays, anniversaries, and special occasions. Everyday Makeup: Enhance your daily look with our expert makeup services. Special Occasion Makeup: Professional makeup for parties, celebrations, and formal events. The Future of Bridal Makeup in Falka Ladyfair is dedicated to setting new standards in bridal beauty in Falka with our innovative at-home services. As we continue to offer exceptional service, more brides are choosing Ladyfair as their preferred makeup provider. Q&A with Ladyfair’s Bridal Makeup Artist in Falka Q1: What makes Ladyfair the best choice for bridal makeup in Falka? A1: Ladyfair offers expert bridal makeup services at home, using high-quality products to ensure a flawless and long-lasting look. Q2: What are the prices for bridal makeup in Falka? A2: Our bridal makeup packages start at ₹10,000 for basic makeup, ₹12,000 for HD makeup, and ₹18,000 for airbrush makeup. Q3: How do I book Ladyfair’s bridal makeup services in Falka? A3: You can book our services by calling 7004721239. We also offer consultations and trial sessions to ensure you get the look you want. Q4: What bridal makeup styles does Ladyfair offer in Falka? A4: Ladyfair offers traditional, HD, and airbrush bridal makeup to suit different preferences and needs. Q5: Are makeup trials available before my wedding? A5: Yes, we offer trial sessions so you can finalize your bridal look ahead of time. Q6: What products does Ladyfair use for bridal makeup? A6: We use professional-grade, high-quality makeup products that are safe for all skin types and ensure a flawless finish. Q7: What other services does Ladyfair provide in Falka? A7: In addition to bridal makeup, we offer makeup for engagements, receptions, parties, and other special occasions. Ladyfair is your ultimate choice for professional, at-home bridal makeup services in Falka, ensuring a flawless and stress-free experience on your special day.

Posted By: 6th October 2024
bridal makeup artist in dighalbank
Bridal Makeup Artist in Dighalbank Introduction In Dighalbank, Ladyfair is renowned for providing expert bridal makeup services directly at your home. Whether you're dreaming of a traditional bridal look, a flawless HD finish, or the perfection of airbrush makeup, our talented makeup artist is here to bring your vision to life. Contact us at 7004721239 to schedule your appointment today and experience the best bridal makeup service in Dighalbank. Why Ladyfair is the Best Choice for Bridal Makeup in Dighalbank Skilled and Experienced Makeup Artist Our makeup artist in Dighalbank has extensive experience in bridal makeup, ensuring you receive a look that complements your personality, attire, and preferences. Convenient At-Home Makeup Service Ladyfair provides the ultimate convenience by offering at-home makeup services in Dighalbank, allowing you to prepare for your big day without leaving the comfort of your home. High-Quality Makeup Products We use only premium, professional-grade makeup products to guarantee a long-lasting, flawless look that will keep you radiant throughout your wedding day. Bridal Makeup Pricing in Dighalbank Our pricing is designed to cater to various needs and budgets: Basic Bridal Makeup: ₹10,000 HD Bridal Makeup: ₹12,000 Airbrush Bridal Makeup: ₹18,000 For engagement and reception makeup: Basic Engagement/Reception Makeup: ₹6,000 HD Engagement/Reception Makeup: ₹8,000 Airbrush Engagement/Reception Makeup: ₹12,000 For parties: Basic Party Makeup: ₹2,500 HD Party Makeup: ₹3,500 Popular Bridal Makeup Styles in Dighalbank Traditional Bridal Makeup For those who want a timeless and classic look, our traditional bridal makeup in Dighalbank features bold and vibrant tones, creating an elegant and traditional style that perfectly complements your wedding attire. HD Bridal Makeup HD bridal makeup ensures you look flawless in both photos and real life, giving you a camera-ready appearance that’s picture-perfect throughout the day. Airbrush Bridal Makeup Airbrush makeup offers a smooth, lightweight, and long-lasting finish. It’s ideal for brides seeking a natural, radiant look that stays fresh all day long. How to Book Your Bridal Makeup with Ladyfair in Dighalbank Initial Contact: Call us at 7004721239 to discuss your needs and book an appointment. Consultation: Our makeup artist will work with you to understand your vision and create a makeup plan that complements your wedding theme. Makeup Trial: We offer trial makeup sessions to ensure that your bridal look is exactly what you desire. Wedding Day Makeup: On your wedding day, our makeup artist will arrive at your home in Dighalbank, providing a flawless makeup experience without any stress. Testimonials from Brides in Dighalbank Riya S., Dighalbank: "I loved the convenience of having Ladyfair come to my home. My makeup was perfect, and I got so many compliments on my wedding day." Neha T., Dighalbank: "The HD makeup was exactly what I needed for all the photos. Ladyfair’s service was professional and seamless." Pallavi J., Dighalbank: "The airbrush makeup lasted all day without needing any touch-ups. I couldn’t have been happier with my bridal look!" Preparing for Your Bridal Makeup Session To ensure your makeup looks perfect on your big day, follow these tips: Stay Hydrated: Drink plenty of water to keep your skin glowing. Maintain Your Skincare Routine: Stick to a consistent skincare routine to keep your skin in optimal condition. Avoid New Skincare Products: Using unfamiliar products before your wedding may lead to breakouts or skin reactions. Communicate Your Preferences: Be clear with our makeup artist about the look you want to achieve during your consultation and trial session. Additional Beauty Services by Ladyfair Ladyfair also offers a range of makeup services for other special occasions in Dighalbank: Engagement and Reception Makeup: Tailored looks for all your pre-wedding events. Party Makeup: Perfect for birthdays, anniversaries, and other special celebrations. Everyday Makeup: Enhance your daily look with professional makeup. Special Occasion Makeup: Glamorous makeup for any important life event. The Future of Bridal Makeup in Dighalbank Ladyfair is revolutionizing bridal beauty by offering high-quality, at-home makeup services in Dighalbank. As more brides experience our exceptional artistry and personalized service, we continue to grow as the premier choice for bridal makeup. Q&A with Ladyfair’s Bridal Makeup Artist in Dighalbank Q1: Why is Ladyfair the top choice for bridal makeup in Dighalbank? A1: Ladyfair offers expert at-home bridal makeup services, ensuring you receive a flawless look in the comfort of your own home. Q2: What are the prices for bridal makeup services in Dighalbank? A2: Our bridal makeup prices start at ₹10,000 for basic makeup, with HD and airbrush options also available. Q3: How do I book Ladyfair’s bridal makeup services in Dighalbank? A3: You can call us at 7004721239 to book our services, and we offer consultations and makeup trials to ensure your desired look is achieved. Q4: What types of bridal makeup does Ladyfair offer in Dighalbank? A4: We offer traditional, HD, and airbrush bridal makeup styles to suit your preferences. Q5: Are makeup trials available before the wedding day? A5: Yes, we provide trial sessions so you can preview your bridal look and make any adjustments before the big day. Q6: What kind of products does Ladyfair use for bridal makeup? A6: We use high-quality, professional-grade makeup products to ensure a flawless and long-lasting finish. Q7: What other makeup services does Ladyfair offer in Dighalbank? A7: Besides bridal makeup, we offer engagement, reception, party, and everyday makeup services for all occasions. Ladyfair is your trusted partner for stunning at-home bridal makeup services in Dighalbank, ensuring you look radiant and flawless on your special day.

Posted By: 6th October 2024
Bridal Makeup Artist in Sameli
Introduction In Sameli, Ladyfair is the premier choice for brides looking to achieve the perfect wedding day look with our professional at-home bridal makeup services. Whether you desire a traditional bridal look, an HD finish, or the flawless perfection of airbrush makeup, our expert makeup artist in Sameli ensures that you shine on your special day. Contact us today at 7004721239 to schedule your appointment. Why Choose Ladyfair for Bridal Makeup in Sameli Experienced Makeup Artist Our makeup artist in Sameli has years of experience in bridal makeup, creating personalized looks that complement your natural beauty and align with your style and preferences. Convenient At-Home Service Forget the stress of traveling to a salon. Ladyfair brings luxury beauty treatments directly to your doorstep with our at-home bridal makeup services, offering a truly personalized experience. Premium Makeup Products We use only high-quality, professional-grade makeup products to ensure a flawless, long-lasting look that remains perfect throughout your big day. Bridal Makeup Pricing in Sameli Our bridal makeup services in Sameli are tailored to fit different styles and budgets: Basic Bridal Makeup: ₹10,000 HD Bridal Makeup: ₹12,000 Airbrush Bridal Makeup: ₹18,000 For engagement and reception makeup: Basic Engagement/Reception Makeup: ₹6,000 HD Engagement/Reception Makeup: ₹8,000 Airbrush Engagement/Reception Makeup: ₹12,000 For parties: Basic Party Makeup: ₹2,500 HD Party Makeup: ₹3,500 Popular Bridal Makeup Styles in Sameli Traditional Bridal Makeup Our traditional bridal makeup in Sameli incorporates bold colors and intricate detailing to complement your wedding attire, creating an elegant and timeless look. HD Bridal Makeup For a high-definition finish that looks flawless both in photos and in person, HD bridal makeup is the perfect choice for brides who want a picture-perfect appearance all day. Airbrush Bridal Makeup Our airbrush makeup offers a lightweight, full-coverage finish that lasts all day, giving you a smooth and natural look while ensuring long-lasting perfection. How to Book Your Bridal Makeup with Ladyfair in Sameli Initial Contact: Call us at 7004721239 to discuss your makeup needs and schedule your appointment. Consultation Session: Meet with our makeup artist to discuss your wedding look, review your attire, and plan the perfect makeup style. Makeup Trial: We offer trial sessions to help you preview your bridal makeup look and make any adjustments. Wedding Day Makeup: On your wedding day, our makeup artist will arrive at your location in Sameli to provide flawless, hassle-free makeup service. Testimonials from Brides in Sameli Priya R., Sameli: "Ladyfair provided amazing service on my wedding day. The airbrush makeup looked flawless and lasted all day." Ritu K., Sameli: "I loved the HD makeup! It was perfect for my photos, and the at-home service was so convenient." Sneha S., Sameli: "My traditional bridal makeup was exactly what I wanted, and Ladyfair made the entire process stress-free." Preparing for Your Bridal Makeup Session To get the best results for your bridal makeup: Stay Hydrated: Keep your skin looking fresh by drinking plenty of water. Consistent Skincare: Stick to your regular skincare routine to maintain healthy, glowing skin. Avoid New Products: Use familiar products to prevent any reactions before your wedding day. Clear Communication: Discuss your makeup preferences and any concerns with our artist during the consultation. Additional Beauty Services by Ladyfair Beyond bridal makeup, Ladyfair offers a variety of beauty services in Sameli: Engagement and Reception Makeup: Customized looks for all pre-wedding events. Party Makeup: Perfect for birthdays, anniversaries, and special occasions. Everyday Makeup: Enhance your daily look with our expert makeup services. Special Occasion Makeup: Professional makeup for parties, celebrations, and formal events. The Future of Bridal Makeup in Sameli Ladyfair is dedicated to setting new standards in bridal beauty in Sameli with our innovative at-home services. As we continue to offer exceptional service, more brides are choosing Ladyfair as their preferred makeup provider. Q&A with Ladyfair’s Bridal Makeup Artist in Sameli Q1: What makes Ladyfair the best choice for bridal makeup in Sameli? A1: Ladyfair offers expert bridal makeup services at home, using high-quality products to ensure a flawless and long-lasting look. Q2: What are the prices for bridal makeup in Sameli? A2: Our bridal makeup packages start at ₹10,000 for basic makeup, ₹12,000 for HD makeup, and ₹18,000 for airbrush makeup. Q3: How do I book Ladyfair’s bridal makeup services in Sameli? A3: You can book our services by calling 7004721239. We also offer consultations and trial sessions to ensure you get the look you want. Q4: What bridal makeup styles does Ladyfair offer in Sameli? A4: Ladyfair offers traditional, HD, and airbrush bridal makeup to suit different preferences and needs. Q5: Are makeup trials available before my wedding? A5: Yes, we offer trial sessions so you can finalize your bridal look ahead of time. Q6: What products does Ladyfair use for bridal makeup? A6: We use professional-grade, high-quality makeup products that are safe for all skin types and ensure a flawless finish. Q7: What other services does Ladyfair provide in Sameli? A7: In addition to bridal makeup, we offer makeup for engagements, receptions, parties, and other special occasions. Ladyfair is your ultimate choice for professional, at-home bridal makeup services in Sameli, ensuring a flawless and stress-free experience on your special day.

Posted By: 6th October 2024
bridal makeup artist in bahadurganj
Bridal Makeup Artist in Bahadurganj Introduction In Bahadurganj, Ladyfair is renowned for providing expert bridal makeup services directly at your home. Whether you're dreaming of a traditional bridal look, a flawless HD finish, or the perfection of airbrush makeup, our talented makeup artist is here to bring your vision to life. Contact us at 7004721239 to schedule your appointment today and experience the best bridal makeup service in Bahadurganj. Why Ladyfair is the Best Choice for Bridal Makeup in Bahadurganj Skilled and Experienced Makeup Artist Our makeup artist in Bahadurganj has extensive experience in bridal makeup, ensuring you receive a look that complements your personality, attire, and preferences. Convenient At-Home Makeup Service Ladyfair provides the ultimate convenience by offering at-home makeup services in Bahadurganj, allowing you to prepare for your big day without leaving the comfort of your home. High-Quality Makeup Products We use only premium, professional-grade makeup products to guarantee a long-lasting, flawless look that will keep you radiant throughout your wedding day. Bridal Makeup Pricing in Bahadurganj Our pricing is designed to cater to various needs and budgets: Basic Bridal Makeup: ₹10,000 HD Bridal Makeup: ₹12,000 Airbrush Bridal Makeup: ₹18,000 For engagement and reception makeup: Basic Engagement/Reception Makeup: ₹6,000 HD Engagement/Reception Makeup: ₹8,000 Airbrush Engagement/Reception Makeup: ₹12,000 For parties: Basic Party Makeup: ₹2,500 HD Party Makeup: ₹3,500 Popular Bridal Makeup Styles in Bahadurganj Traditional Bridal Makeup For those who want a timeless and classic look, our traditional bridal makeup in Bahadurganj features bold and vibrant tones, creating an elegant and traditional style that perfectly complements your wedding attire. HD Bridal Makeup HD bridal makeup ensures you look flawless in both photos and real life, giving you a camera-ready appearance that’s picture-perfect throughout the day. Airbrush Bridal Makeup Airbrush makeup offers a smooth, lightweight, and long-lasting finish. It’s ideal for brides seeking a natural, radiant look that stays fresh all day long. How to Book Your Bridal Makeup with Ladyfair in Bahadurganj Initial Contact: Call us at 7004721239 to discuss your needs and book an appointment. Consultation: Our makeup artist will work with you to understand your vision and create a makeup plan that complements your wedding theme. Makeup Trial: We offer trial makeup sessions to ensure that your bridal look is exactly what you desire. Wedding Day Makeup: On your wedding day, our makeup artist will arrive at your home in Bahadurganj, providing a flawless makeup experience without any stress. Testimonials from Brides in Bahadurganj Riya S., Bahadurganj: "I loved the convenience of having Ladyfair come to my home. My makeup was perfect, and I got so many compliments on my wedding day." Neha T., Bahadurganj: "The HD makeup was exactly what I needed for all the photos. Ladyfair’s service was professional and seamless." Pallavi J., Bahadurganj: "The airbrush makeup lasted all day without needing any touch-ups. I couldn’t have been happier with my bridal look!" Preparing for Your Bridal Makeup Session To ensure your makeup looks perfect on your big day, follow these tips: Stay Hydrated: Drink plenty of water to keep your skin glowing. Maintain Your Skincare Routine: Stick to a consistent skincare routine to keep your skin in optimal condition. Avoid New Skincare Products: Using unfamiliar products before your wedding may lead to breakouts or skin reactions. Communicate Your Preferences: Be clear with our makeup artist about the look you want to achieve during your consultation and trial session. Additional Beauty Services by Ladyfair Ladyfair also offers a range of makeup services for other special occasions in Bahadurganj: Engagement and Reception Makeup: Tailored looks for all your pre-wedding events. Party Makeup: Perfect for birthdays, anniversaries, and other special celebrations. Everyday Makeup: Enhance your daily look with professional makeup. Special Occasion Makeup: Glamorous makeup for any important life event. The Future of Bridal Makeup in Bahadurganj Ladyfair is revolutionizing bridal beauty by offering high-quality, at-home makeup services in Bahadurganj. As more brides experience our exceptional artistry and personalized service, we continue to grow as the premier choice for bridal makeup. Q&A with Ladyfair’s Bridal Makeup Artist in Bahadurganj Q1: Why is Ladyfair the top choice for bridal makeup in Bahadurganj? A1: Ladyfair offers expert at-home bridal makeup services, ensuring you receive a flawless look in the comfort of your own home. Q2: What are the prices for bridal makeup services in Bahadurganj? A2: Our bridal makeup prices start at ₹10,000 for basic makeup, with HD and airbrush options also available. Q3: How do I book Ladyfair’s bridal makeup services in Bahadurganj? A3: You can call us at 7004721239 to book our services, and we offer consultations and makeup trials to ensure your desired look is achieved. Q4: What types of bridal makeup does Ladyfair offer in Bahadurganj? A4: We offer traditional, HD, and airbrush bridal makeup styles to suit your preferences. Q5: Are makeup trials available before the wedding day? A5: Yes, we provide trial sessions so you can preview your bridal look and make any adjustments before the big day. Q6: What kind of products does Ladyfair use for bridal makeup? A6: We use high-quality, professional-grade makeup products to ensure a flawless and long-lasting finish. Q7: What other makeup services does Ladyfair offer in Bahadurganj? A7: Besides bridal makeup, we offer engagement, reception, party, and everyday makeup services for all occasions. Ladyfair is your trusted partner for stunning at-home bridal makeup services in Bahadurganj, ensuring you look radiant and flawless on your special day.

Posted By: 6th October 2024
Bridal Makeup Artist in Korha
Introduction In Korha, Ladyfair is the premier choice for brides looking to achieve the perfect wedding day look with our professional at-home bridal makeup services. Whether you desire a traditional bridal look, an HD finish, or the flawless perfection of airbrush makeup, our expert makeup artist in Korha ensures that you shine on your special day. Contact us today at 7004721239 to schedule your appointment. Why Choose Ladyfair for Bridal Makeup in Korha Experienced Makeup Artist Our makeup artist in Korha has years of experience in bridal makeup, creating personalized looks that complement your natural beauty and align with your style and preferences. Convenient At-Home Service Forget the stress of traveling to a salon. Ladyfair brings luxury beauty treatments directly to your doorstep with our at-home bridal makeup services, offering a truly personalized experience. Premium Makeup Products We use only high-quality, professional-grade makeup products to ensure a flawless, long-lasting look that remains perfect throughout your big day. Bridal Makeup Pricing in Korha Our bridal makeup services in Korha are tailored to fit different styles and budgets: Basic Bridal Makeup: ₹10,000 HD Bridal Makeup: ₹12,000 Airbrush Bridal Makeup: ₹18,000 For engagement and reception makeup: Basic Engagement/Reception Makeup: ₹6,000 HD Engagement/Reception Makeup: ₹8,000 Airbrush Engagement/Reception Makeup: ₹12,000 For parties: Basic Party Makeup: ₹2,500 HD Party Makeup: ₹3,500 Popular Bridal Makeup Styles in Korha Traditional Bridal Makeup Our traditional bridal makeup in Korha incorporates bold colors and intricate detailing to complement your wedding attire, creating an elegant and timeless look. HD Bridal Makeup For a high-definition finish that looks flawless both in photos and in person, HD bridal makeup is the perfect choice for brides who want a picture-perfect appearance all day. Airbrush Bridal Makeup Our airbrush makeup offers a lightweight, full-coverage finish that lasts all day, giving you a smooth and natural look while ensuring long-lasting perfection. How to Book Your Bridal Makeup with Ladyfair in Korha Initial Contact: Call us at 7004721239 to discuss your makeup needs and schedule your appointment. Consultation Session: Meet with our makeup artist to discuss your wedding look, review your attire, and plan the perfect makeup style. Makeup Trial: We offer trial sessions to help you preview your bridal makeup look and make any adjustments. Wedding Day Makeup: On your wedding day, our makeup artist will arrive at your location in Korha to provide flawless, hassle-free makeup service. Testimonials from Brides in Korha Priya R., Korha: "Ladyfair provided amazing service on my wedding day. The airbrush makeup looked flawless and lasted all day." Ritu K., Korha: "I loved the HD makeup! It was perfect for my photos, and the at-home service was so convenient." Sneha S., Korha: "My traditional bridal makeup was exactly what I wanted, and Ladyfair made the entire process stress-free." Preparing for Your Bridal Makeup Session To get the best results for your bridal makeup: Stay Hydrated: Keep your skin looking fresh by drinking plenty of water. Consistent Skincare: Stick to your regular skincare routine to maintain healthy, glowing skin. Avoid New Products: Use familiar products to prevent any reactions before your wedding day. Clear Communication: Discuss your makeup preferences and any concerns with our artist during the consultation. Additional Beauty Services by Ladyfair Beyond bridal makeup, Ladyfair offers a variety of beauty services in Korha: Engagement and Reception Makeup: Customized looks for all pre-wedding events. Party Makeup: Perfect for birthdays, anniversaries, and special occasions. Everyday Makeup: Enhance your daily look with our expert makeup services. Special Occasion Makeup: Professional makeup for parties, celebrations, and formal events. The Future of Bridal Makeup in Korha Ladyfair is dedicated to setting new standards in bridal beauty in Korha with our innovative at-home services. As we continue to offer exceptional service, more brides are choosing Ladyfair as their preferred makeup provider. Q&A with Ladyfair’s Bridal Makeup Artist in Korha Q1: What makes Ladyfair the best choice for bridal makeup in Korha? A1: Ladyfair offers expert bridal makeup services at home, using high-quality products to ensure a flawless and long-lasting look. Q2: What are the prices for bridal makeup in Korha? A2: Our bridal makeup packages start at ₹10,000 for basic makeup, ₹12,000 for HD makeup, and ₹18,000 for airbrush makeup. Q3: How do I book Ladyfair’s bridal makeup services in Korha? A3: You can book our services by calling 7004721239. We also offer consultations and trial sessions to ensure you get the look you want. Q4: What bridal makeup styles does Ladyfair offer in Korha? A4: Ladyfair offers traditional, HD, and airbrush bridal makeup to suit different preferences and needs. Q5: Are makeup trials available before my wedding? A5: Yes, we offer trial sessions so you can finalize your bridal look ahead of time. Q6: What products does Ladyfair use for bridal makeup? A6: We use professional-grade, high-quality makeup products that are safe for all skin types and ensure a flawless finish. Q7: What other services does Ladyfair provide in Korha? A7: In addition to bridal makeup, we offer makeup for engagements, receptions, parties, and other special occasions. Ladyfair is your ultimate choice for professional, at-home bridal makeup services in Korha, ensuring a flawless and stress-free experience on your special day.

Posted By: 6th October 2024
Bridal Makeup Artist in Hasanganj
Introduction In Hasanganj, Ladyfair is the premier choice for brides looking to achieve the perfect wedding day look with our professional at-home bridal makeup services. Whether you desire a traditional bridal look, an HD finish, or the flawless perfection of airbrush makeup, our expert makeup artist in Hasanganj ensures that you shine on your special day. Contact us today at 7004721239 to schedule your appointment. Why Choose Ladyfair for Bridal Makeup in Hasanganj Experienced Makeup Artist Our makeup artist in Hasanganj has years of experience in bridal makeup, creating personalized looks that complement your natural beauty and align with your style and preferences. Convenient At-Home Service Forget the stress of traveling to a salon. Ladyfair brings luxury beauty treatments directly to your doorstep with our at-home bridal makeup services, offering a truly personalized experience. Premium Makeup Products We use only high-quality, professional-grade makeup products to ensure a flawless, long-lasting look that remains perfect throughout your big day. Bridal Makeup Pricing in Hasanganj Our bridal makeup services in Hasanganj are tailored to fit different styles and budgets: Basic Bridal Makeup: ₹10,000 HD Bridal Makeup: ₹12,000 Airbrush Bridal Makeup: ₹18,000 For engagement and reception makeup: Basic Engagement/Reception Makeup: ₹6,000 HD Engagement/Reception Makeup: ₹8,000 Airbrush Engagement/Reception Makeup: ₹12,000 For parties: Basic Party Makeup: ₹2,500 HD Party Makeup: ₹3,500 Popular Bridal Makeup Styles in Hasanganj Traditional Bridal Makeup Our traditional bridal makeup in Hasanganj incorporates bold colors and intricate detailing to complement your wedding attire, creating an elegant and timeless look. HD Bridal Makeup For a high-definition finish that looks flawless both in photos and in person, HD bridal makeup is the perfect choice for brides who want a picture-perfect appearance all day. Airbrush Bridal Makeup Our airbrush makeup offers a lightweight, full-coverage finish that lasts all day, giving you a smooth and natural look while ensuring long-lasting perfection. How to Book Your Bridal Makeup with Ladyfair in Hasanganj Initial Contact: Call us at 7004721239 to discuss your makeup needs and schedule your appointment. Consultation Session: Meet with our makeup artist to discuss your wedding look, review your attire, and plan the perfect makeup style. Makeup Trial: We offer trial sessions to help you preview your bridal makeup look and make any adjustments. Wedding Day Makeup: On your wedding day, our makeup artist will arrive at your location in Hasanganj to provide flawless, hassle-free makeup service. Testimonials from Brides in Hasanganj Priya R., Hasanganj: "Ladyfair provided amazing service on my wedding day. The airbrush makeup looked flawless and lasted all day." Ritu K., Hasanganj: "I loved the HD makeup! It was perfect for my photos, and the at-home service was so convenient." Sneha S., Hasanganj: "My traditional bridal makeup was exactly what I wanted, and Ladyfair made the entire process stress-free." Preparing for Your Bridal Makeup Session To get the best results for your bridal makeup: Stay Hydrated: Keep your skin looking fresh by drinking plenty of water. Consistent Skincare: Stick to your regular skincare routine to maintain healthy, glowing skin. Avoid New Products: Use familiar products to prevent any reactions before your wedding day. Clear Communication: Discuss your makeup preferences and any concerns with our artist during the consultation. Additional Beauty Services by Ladyfair Beyond bridal makeup, Ladyfair offers a variety of beauty services in Hasanganj: Engagement and Reception Makeup: Customized looks for all pre-wedding events. Party Makeup: Perfect for birthdays, anniversaries, and special occasions. Everyday Makeup: Enhance your daily look with our expert makeup services. Special Occasion Makeup: Professional makeup for parties, celebrations, and formal events. The Future of Bridal Makeup in Hasanganj Ladyfair is dedicated to setting new standards in bridal beauty in Hasanganj with our innovative at-home services. As we continue to offer exceptional service, more brides are choosing Ladyfair as their preferred makeup provider. Q&A with Ladyfair’s Bridal Makeup Artist in Hasanganj Q1: What makes Ladyfair the best choice for bridal makeup in Hasanganj? A1: Ladyfair offers expert bridal makeup services at home, using high-quality products to ensure a flawless and long-lasting look. Q2: What are the prices for bridal makeup in Hasanganj? A2: Our bridal makeup packages start at ₹10,000 for basic makeup, ₹12,000 for HD makeup, and ₹18,000 for airbrush makeup. Q3: How do I book Ladyfair’s bridal makeup services in Hasanganj? A3: You can book our services by calling 7004721239. We also offer consultations and trial sessions to ensure you get the look you want. Q4: What bridal makeup styles does Ladyfair offer in Hasanganj? A4: Ladyfair offers traditional, HD, and airbrush bridal makeup to suit different preferences and needs. Q5: Are makeup trials available before my wedding? A5: Yes, we offer trial sessions so you can finalize your bridal look ahead of time. Q6: What products does Ladyfair use for bridal makeup? A6: We use professional-grade, high-quality makeup products that are safe for all skin types and ensure a flawless finish. Q7: What other services does Ladyfair provide in Hasanganj? A7: In addition to bridal makeup, we offer makeup for engagements, receptions, parties, and other special occasions. Ladyfair is your ultimate choice for professional, at-home bridal makeup services in Hasanganj, ensuring a flawless and stress-free experience on your special day.

Posted By: 6th October 2024
Bridal Makeup Artist in Dandkhora
Introduction In Dandkhora, Ladyfair is the premier choice for brides looking to achieve the perfect wedding day look with our professional at-home bridal makeup services. Whether you desire a traditional bridal look, an HD finish, or the flawless perfection of airbrush makeup, our expert makeup artist in Dandkhora ensures that you shine on your special day. Contact us today at 7004721239 to schedule your appointment. Why Choose Ladyfair for Bridal Makeup in Dandkhora Experienced Makeup Artist Our makeup artist in Dandkhora has years of experience in bridal makeup, creating personalized looks that complement your natural beauty and align with your style and preferences. Convenient At-Home Service Forget the stress of traveling to a salon. Ladyfair brings luxury beauty treatments directly to your doorstep with our at-home bridal makeup services, offering a truly personalized experience. Premium Makeup Products We use only high-quality, professional-grade makeup products to ensure a flawless, long-lasting look that remains perfect throughout your big day. Bridal Makeup Pricing in Dandkhora Our bridal makeup services in Dandkhora are tailored to fit different styles and budgets: Basic Bridal Makeup: ₹10,000 HD Bridal Makeup: ₹12,000 Airbrush Bridal Makeup: ₹18,000 For engagement and reception makeup: Basic Engagement/Reception Makeup: ₹6,000 HD Engagement/Reception Makeup: ₹8,000 Airbrush Engagement/Reception Makeup: ₹12,000 For parties: Basic Party Makeup: ₹2,500 HD Party Makeup: ₹3,500 Popular Bridal Makeup Styles in Dandkhora Traditional Bridal Makeup Our traditional bridal makeup in Dandkhora incorporates bold colors and intricate detailing to complement your wedding attire, creating an elegant and timeless look. HD Bridal Makeup For a high-definition finish that looks flawless both in photos and in person, HD bridal makeup is the perfect choice for brides who want a picture-perfect appearance all day. Airbrush Bridal Makeup Our airbrush makeup offers a lightweight, full-coverage finish that lasts all day, giving you a smooth and natural look while ensuring long-lasting perfection. How to Book Your Bridal Makeup with Ladyfair in Dandkhora Initial Contact: Call us at 7004721239 to discuss your makeup needs and schedule your appointment. Consultation Session: Meet with our makeup artist to discuss your wedding look, review your attire, and plan the perfect makeup style. Makeup Trial: We offer trial sessions to help you preview your bridal makeup look and make any adjustments. Wedding Day Makeup: On your wedding day, our makeup artist will arrive at your location in Dandkhora to provide flawless, hassle-free makeup service. Testimonials from Brides in Dandkhora Priya R., Dandkhora: "Ladyfair provided amazing service on my wedding day. The airbrush makeup looked flawless and lasted all day." Ritu K., Dandkhora: "I loved the HD makeup! It was perfect for my photos, and the at-home service was so convenient." Sneha S., Dandkhora: "My traditional bridal makeup was exactly what I wanted, and Ladyfair made the entire process stress-free." Preparing for Your Bridal Makeup Session To get the best results for your bridal makeup: Stay Hydrated: Keep your skin looking fresh by drinking plenty of water. Consistent Skincare: Stick to your regular skincare routine to maintain healthy, glowing skin. Avoid New Products: Use familiar products to prevent any reactions before your wedding day. Clear Communication: Discuss your makeup preferences and any concerns with our artist during the consultation. Additional Beauty Services by Ladyfair Beyond bridal makeup, Ladyfair offers a variety of beauty services in Dandkhora: Engagement and Reception Makeup: Customized looks for all pre-wedding events. Party Makeup: Perfect for birthdays, anniversaries, and special occasions. Everyday Makeup: Enhance your daily look with our expert makeup services. Special Occasion Makeup: Professional makeup for parties, celebrations, and formal events. The Future of Bridal Makeup in Dandkhora Ladyfair is dedicated to setting new standards in bridal beauty in Dandkhora with our innovative at-home services. As we continue to offer exceptional service, more brides are choosing Ladyfair as their preferred makeup provider. Q&A with Ladyfair’s Bridal Makeup Artist in Dandkhora Q1: What makes Ladyfair the best choice for bridal makeup in Dandkhora? A1: Ladyfair offers expert bridal makeup services at home, using high-quality products to ensure a flawless and long-lasting look. Q2: What are the prices for bridal makeup in Dandkhora? A2: Our bridal makeup packages start at ₹10,000 for basic makeup, ₹12,000 for HD makeup, and ₹18,000 for airbrush makeup. Q3: How do I book Ladyfair’s bridal makeup services in Dandkhora? A3: You can book our services by calling 7004721239. We also offer consultations and trial sessions to ensure you get the look you want. Q4: What bridal makeup styles does Ladyfair offer in Dandkhora? A4: Ladyfair offers traditional, HD, and airbrush bridal makeup to suit different preferences and needs. Q5: Are makeup trials available before my wedding? A5: Yes, we offer trial sessions so you can finalize your bridal look ahead of time. Q6: What products does Ladyfair use for bridal makeup? A6: We use professional-grade, high-quality makeup products that are safe for all skin types and ensure a flawless finish. Q7: What other services does Ladyfair provide in Dandkhora? A7: In addition to bridal makeup, we offer makeup for engagements, receptions, parties, and other special occasions. Ladyfair is your ultimate choice for professional, at-home bridal makeup services in Dandkhora, ensuring a flawless and stress-free experience on your special day.

Posted By: 6th October 2024
Bridal Makeup Artist in Katihar
Introduction In Katihar, Ladyfair is the premier choice for brides looking to achieve the perfect wedding day look with our professional at-home bridal makeup services. Whether you desire a traditional bridal look, an HD finish, or the flawless perfection of airbrush makeup, our expert makeup artist in Katihar ensures that you shine on your special day. Contact us today at 7004721239 to schedule your appointment. Why Choose Ladyfair for Bridal Makeup in Katihar Experienced Makeup Artist Our makeup artist in Katihar has years of experience in bridal makeup, creating personalized looks that complement your natural beauty and align with your style and preferences. Convenient At-Home Service Forget the stress of traveling to a salon. Ladyfair brings luxury beauty treatments directly to your doorstep with our at-home bridal makeup services, offering a truly personalized experience. Premium Makeup Products We use only high-quality, professional-grade makeup products to ensure a flawless, long-lasting look that remains perfect throughout your big day. Bridal Makeup Pricing in Katihar Our bridal makeup services in Katihar are tailored to fit different styles and budgets: Basic Bridal Makeup: ₹10,000 HD Bridal Makeup: ₹12,000 Airbrush Bridal Makeup: ₹18,000 For engagement and reception makeup: Basic Engagement/Reception Makeup: ₹6,000 HD Engagement/Reception Makeup: ₹8,000 Airbrush Engagement/Reception Makeup: ₹12,000 For parties: Basic Party Makeup: ₹2,500 HD Party Makeup: ₹3,500 Popular Bridal Makeup Styles in Katihar Traditional Bridal Makeup Our traditional bridal makeup in Katihar incorporates bold colors and intricate detailing to complement your wedding attire, creating an elegant and timeless look. HD Bridal Makeup For a high-definition finish that looks flawless both in photos and in person, HD bridal makeup is the perfect choice for brides who want a picture-perfect appearance all day. Airbrush Bridal Makeup Our airbrush makeup offers a lightweight, full-coverage finish that lasts all day, giving you a smooth and natural look while ensuring long-lasting perfection. How to Book Your Bridal Makeup with Ladyfair in Katihar Initial Contact: Call us at 7004721239 to discuss your makeup needs and schedule your appointment. Consultation Session: Meet with our makeup artist to discuss your wedding look, review your attire, and plan the perfect makeup style. Makeup Trial: We offer trial sessions to help you preview your bridal makeup look and make any adjustments. Wedding Day Makeup: On your wedding day, our makeup artist will arrive at your location in Katihar to provide flawless, hassle-free makeup service. Testimonials from Brides in Katihar Priya R., Katihar: "Ladyfair provided amazing service on my wedding day. The airbrush makeup looked flawless and lasted all day." Ritu K., Katihar: "I loved the HD makeup! It was perfect for my photos, and the at-home service was so convenient." Sneha S., Katihar: "My traditional bridal makeup was exactly what I wanted, and Ladyfair made the entire process stress-free." Preparing for Your Bridal Makeup Session To get the best results for your bridal makeup: Stay Hydrated: Keep your skin looking fresh by drinking plenty of water. Consistent Skincare: Stick to your regular skincare routine to maintain healthy, glowing skin. Avoid New Products: Use familiar products to prevent any reactions before your wedding day. Clear Communication: Discuss your makeup preferences and any concerns with our artist during the consultation. Additional Beauty Services by Ladyfair Beyond bridal makeup, Ladyfair offers a variety of beauty services in Katihar: Engagement and Reception Makeup: Customized looks for all pre-wedding events. Party Makeup: Perfect for birthdays, anniversaries, and special occasions. Everyday Makeup: Enhance your daily look with our expert makeup services. Special Occasion Makeup: Professional makeup for parties, celebrations, and formal events. The Future of Bridal Makeup in Katihar Ladyfair is dedicated to setting new standards in bridal beauty in Katihar with our innovative at-home services. As we continue to offer exceptional service, more brides are choosing Ladyfair as their preferred makeup provider. Q&A with Ladyfair’s Bridal Makeup Artist in Katihar Q1: What makes Ladyfair the best choice for bridal makeup in Katihar? A1: Ladyfair offers expert bridal makeup services at home, using high-quality products to ensure a flawless and long-lasting look. Q2: What are the prices for bridal makeup in Katihar? A2: Our bridal makeup packages start at ₹10,000 for basic makeup, ₹12,000 for HD makeup, and ₹18,000 for airbrush makeup. Q3: How do I book Ladyfair’s bridal makeup services in Katihar? A3: You can book our services by calling 7004721239. We also offer consultations and trial sessions to ensure you get the look you want. Q4: What bridal makeup styles does Ladyfair offer in Katihar? A4: Ladyfair offers traditional, HD, and airbrush bridal makeup to suit different preferences and needs. Q5: Are makeup trials available before my wedding? A5: Yes, we offer trial sessions so you can finalize your bridal look ahead of time. Q6: What products does Ladyfair use for bridal makeup? A6: We use professional-grade, high-quality makeup products that are safe for all skin types and ensure a flawless finish. Q7: What other services does Ladyfair provide in Katihar? A7: In addition to bridal makeup, we offer makeup for engagements, receptions, parties, and other special occasions. Ladyfair is your ultimate choice for professional, at-home bridal makeup services in Katihar, ensuring a flawless and stress-free experience on your special day.

Posted By: 6th October 2024
Discover the Best Makeup Artist in Alauli for Unforgettable Beauty
Bridal makeup Artist in Alauli Introduction In Alauli Ladyfair is renowned for providing expert bridal makeup services directly at your home. Whether you're dreaming of a traditional bridal look, a flawless HD finish, or the perfection of airbrush makeup, our talented makeup artist is here to bring your vision to life. Contact us at 7004721239 to schedule your appointment today and experience the best bridal makeup service in Alauli Why Ladyfair is the Best Choice for Bridal Makeup in Alauli Skilled and Experienced Makeup Artist Our makeup artist in Baikunthpur has extensive experience in bridal makeup, ensuring you receive a look that complements your personality, attire, and preferences. Convenient At-Home Makeup Service Ladyfair provides the ultimate convenience by offering at-home makeup services in Baikunthpur, allowing you to prepare for your big day without leaving the comfort of your home. High-Quality Makeup Products We use only premium, professional-grade makeup products to guarantee a long-lasting, flawless look that will keep you radiant throughout your wedding day. Bridal Makeup Pricing in Alauli Our pricing is designed to cater to various needs and budgets: Basic Bridal Makeup: ₹10,000 HD Bridal Makeup: ₹12,000 Airbrush Bridal Makeup: ₹18,000 For engagement and reception makeup: Basic Engagement/Reception Makeup: ₹6,000 HD Engagement/Reception Makeup: ₹8,000 Airbrush Engagement/Reception Makeup: ₹12,000 For parties: Basic Party Makeup: ₹2,500 HD Party Makeup: ₹3,500 Popular Bridal Makeup Styles in Alauli Traditional Bridal Makeup For those who want a timeless and classic look, our traditional bridal makeup in Baikunthpur features bold and vibrant tones, creating an elegant and traditional style that perfectly complements your wedding attire. HD Bridal Makeup HD bridal makeup ensures you look flawless in both photos and real life, giving you a camera-ready appearance that’s picture-perfect throughout the day. Airbrush Bridal Makeup Airbrush makeup offers a smooth, lightweight, and long-lasting finish. It’s ideal for brides seeking a natural, radiant look that stays fresh all day long. How to Book Your Bridal Makeup with Ladyfair in Alauli Initial Contact: Call us at 7004721239 to discuss your needs and book an appointment. Consultation: Our makeup artist will work with you to understand your vision and create a makeup plan that complements your wedding theme. Makeup Trial: We offer trial makeup sessions to ensure that your bridal look is exactly what you desire. Wedding Day Makeup: On your wedding day, our makeup artist will arrive at your home in Baikunthpur, providing a flawless makeup experience without any stress. Testimonials from Brides in Alauli Preparing for Your Bridal Makeup Session To ensure your makeup looks perfect on your big day, follow these tips: Stay Hydrated: Drink plenty of water to keep your skin glowing. Maintain Your Skincare Routine: Stick to a consistent skincare routine to keep your skin in optimal condition. Avoid New Skincare Products: Using unfamiliar products before your wedding may lead to breakouts or skin reactions. Communicate Your Preferences: Be clear with our makeup artist about the look you want to achieve during your consultation and trial session. Additional Beauty Services by Ladyfair Ladyfair also offers a range of makeup services for other special occasions in Alauli Engagement and Reception Makeup: Tailored looks for all your pre-wedding events. Party Makeup: Perfect for birthdays, anniversaries, and other special celebrations. Everyday Makeup: Enhance your daily look with professional makeup. Special Occasion Makeup: Glamorous makeup for any important life event. The Future of Bridal Makeup in Alauli Ladyfair is revolutionizing bridal beauty by offering high-quality, at-home makeup services in Baikunthpur. As more brides experience our exceptional artistry and personalized service, we continue to grow as the premier choice for bridal makeup. Q&A with Ladyfair’s Bridal Makeup Artist in Alauli Q1: Why is Ladyfair the top choice for bridal makeup in Alauli? A1: Ladyfair offers expert at-home bridal makeup services, ensuring you receive a flawless look in the comfort of your own home. Q2: What are the prices for bridal makeup services in Alauli? A2: Our bridal makeup prices start at ₹10,000 for basic makeup, with HD and airbrush options also available. Q3: How do I book Ladyfair’s bridal makeup services in Alauli? A3: You can call us at 7004721239 to book our services, and we offer consultations and makeup trials to ensure your desired look is achieved. Q4: What types of bridal makeup does Ladyfair offer in Alauli? A4: We offer traditional, HD, and airbrush bridal makeup styles to suit your preferences. Q5: Are makeup trials available before the wedding day? A5: Yes, we provide trial sessions so you can preview your bridal look and make any adjustments before the big day. Q6: What kind of products does Ladyfair use for bridal makeup? A6: We use high-quality, professional-grade makeup products to ensure a flawless and long-lasting finish. Q7: What other makeup services does Ladyfair offer in Aauli? A7: Besides bridal makeup, we offer engagement, reception, party, and everyday makeup services for all occasions.

Posted By: 6th October 2024
Discover the Best Makeup Artist in Gogri for Stunning Beauty Transformations
Bridal makeup Artist in Gogri Introduction In Gogri, Ladyfair is renowned for providing expert bridal makeup services directly at your home. Whether you're dreaming of a traditional bridal look, a flawless HD finish, or the perfection of airbrush makeup, our talented makeup artist is here to bring your vision to life. Contact us at 7004721239 to schedule your appointment today and experience the best bridal makeup service in Gogri Why Ladyfair is the Best Choice for Bridal Makeup in Gogri Skilled and Experienced Makeup Artist Our makeup artist in Baikunthpur has extensive experience in bridal makeup, ensuring you receive a look that complements your personality, attire, and preferences. Convenient At-Home Makeup Service Ladyfair provides the ultimate convenience by offering at-home makeup services in Baikunthpur, allowing you to prepare for your big day without leaving the comfort of your home. High-Quality Makeup Products We use only premium, professional-grade makeup products to guarantee a long-lasting, flawless look that will keep you radiant throughout your wedding day. Bridal Makeup Pricing in Gogri Our pricing is designed to cater to various needs and budgets: Basic Bridal Makeup: ₹10,000 HD Bridal Makeup: ₹12,000 Airbrush Bridal Makeup: ₹18,000 For engagement and reception makeup: Basic Engagement/Reception Makeup: ₹6,000 HD Engagement/Reception Makeup: ₹8,000 Airbrush Engagement/Reception Makeup: ₹12,000 For parties: Basic Party Makeup: ₹2,500 HD Party Makeup: ₹3,500 Popular Bridal Makeup Styles in Gogri Traditional Bridal Makeup For those who want a timeless and classic look, our traditional bridal makeup in Baikunthpur features bold and vibrant tones, creating an elegant and traditional style that perfectly complements your wedding attire. HD Bridal Makeup HD bridal makeup ensures you look flawless in both photos and real life, giving you a camera-ready appearance that’s picture-perfect throughout the day. Airbrush Bridal Makeup Airbrush makeup offers a smooth, lightweight, and long-lasting finish. It’s ideal for brides seeking a natural, radiant look that stays fresh all day long. How to Book Your Bridal Makeup with Ladyfair in Gogri Initial Contact: Call us at 7004721239 to discuss your needs and book an appointment. Consultation: Our makeup artist will work with you to understand your vision and create a makeup plan that complements your wedding theme. Makeup Trial: We offer trial makeup sessions to ensure that your bridal look is exactly what you desire. Wedding Day Makeup: On your wedding day, our makeup artist will arrive at your home in Baikunthpur, providing a flawless makeup experience without any stress. Testimonials from Brides in Gogri Riya S., Gogri "I loved the convenience of having Ladyfair come to my home. My makeup was perfect, and I got so many compliments on my wedding day." Neha T., Gogri "The HD makeup was exactly what I needed for all the photos. Ladyfair’s service was professional and seamless." Pallavi J., Gogri "The airbrush makeup lasted all day without needing any touch-ups. I couldn’t have been happier with my bridal look!" Preparing for Your Bridal Makeup Session To ensure your makeup looks perfect on your big day, follow these tips: Stay Hydrated: Drink plenty of water to keep your skin glowing. Maintain Your Skincare Routine: Stick to a consistent skincare routine to keep your skin in optimal condition. Avoid New Skincare Products: Using unfamiliar products before your wedding may lead to breakouts or skin reactions. Communicate Your Preferences: Be clear with our makeup artist about the look you want to achieve during your consultation and trial session. Additional Beauty Services by Ladyfair Ladyfair also offers a range of makeup services for other special occasions in Gogri Engagement and Reception Makeup: Tailored looks for all your pre-wedding events. Party Makeup: Perfect for birthdays, anniversaries, and other special celebrations. Everyday Makeup: Enhance your daily look with professional makeup. Special Occasion Makeup: Glamorous makeup for any important life event. The Future of Bridal Makeup in Gogri Ladyfair is revolutionizing bridal beauty by offering high-quality, at-home makeup services in Baikunthpur. As more brides experience our exceptional artistry and personalized service, we continue to grow as the premier choice for bridal makeup. Q&A with Ladyfair’s Bridal Makeup Artist in Gogri Q1: Why is Ladyfair the top choice for bridal makeup in Gogri? A1: Ladyfair offers expert at-home bridal makeup services, ensuring you receive a flawless look in the comfort of your own home. Q2: What are the prices for bridal makeup services in Gogri? A2: Our bridal makeup prices start at ₹10,000 for basic makeup, with HD and airbrush options also available. Q3: How do I book Ladyfair’s bridal makeup services in Gogri? A3: You can call us at 7004721239 to book our services, and we offer consultations and makeup trials to ensure your desired look is achieved. Q4: What types of bridal makeup does Ladyfair offer in Gogri A4: We offer traditional, HD, and airbrush bridal makeup styles to suit your preferences. Q5: Are makeup trials available before the wedding day? A5: Yes, we provide trial sessions so you can preview your bridal look and make any adjustments before the big day. Q6: What kind of products does Ladyfair use for bridal makeup? A6: We use high-quality, professional-grade makeup products to ensure a flawless and long-lasting finish. Q7: What other makeup services does Ladyfair offer in Gogri? A7: Besides bridal makeup, we offer engagement, reception, party, and everyday makeup services for all occasions.

Posted By: 6th October 2024
the Best Makeup Artist in Parbatta for Your Beauty Needs
Bridal makeup Artist in Parbatta Introduction In Parbatta, Ladyfair is renowned for providing expert bridal makeup services directly at your home. Whether you're dreaming of a traditional bridal look, a flawless HD finish, or the perfection of airbrush makeup, our talented makeup artist is here to bring your vision to life. Contact us at 7004721239 to schedule your appointment today and experience the best bridal makeup service in Parbatta Why Ladyfair is the Best Choice for Bridal Makeup in Parbatta Skilled and Experienced Makeup Artist Our makeup artist in Baikunthpur has extensive experience in bridal makeup, ensuring you receive a look that complements your personality, attire, and preferences. Convenient At-Home Makeup Service Ladyfair provides the ultimate convenience by offering at-home makeup services in Baikunthpur, allowing you to prepare for your big day without leaving the comfort of your home. High-Quality Makeup Products We use only premium, professional-grade makeup products to guarantee a long-lasting, flawless look that will keep you radiant throughout your wedding day. Bridal Makeup Pricing in Parbatta Our pricing is designed to cater to various needs and budgets: Basic Bridal Makeup: ₹10,000 HD Bridal Makeup: ₹12,000 Airbrush Bridal Makeup: ₹18,000 For engagement and reception makeup: Basic Engagement/Reception Makeup: ₹6,000 HD Engagement/Reception Makeup: ₹8,000 Airbrush Engagement/Reception Makeup: ₹12,000 For parties: Basic Party Makeup: ₹2,500 HD Party Makeup: ₹3,500 Popular Bridal Makeup Styles in Parbatta Traditional Bridal Makeup For those who want a timeless and classic look, our traditional bridal makeup in Baikunthpur features bold and vibrant tones, creating an elegant and traditional style that perfectly complements your wedding attire. HD Bridal Makeup HD bridal makeup ensures you look flawless in both photos and real life, giving you a camera-ready appearance that’s picture-perfect throughout the day. Airbrush Bridal Makeup Airbrush makeup offers a smooth, lightweight, and long-lasting finish. It’s ideal for brides seeking a natural, radiant look that stays fresh all day long. How to Book Your Bridal Makeup with Ladyfair in Parbatta Initial Contact: Call us at 7004721239 to discuss your needs and book an appointment. Consultation: Our makeup artist will work with you to understand your vision and create a makeup plan that complements your wedding theme. Makeup Trial: We offer trial makeup sessions to ensure that your bridal look is exactly what you desire. Wedding Day Makeup: On your wedding day, our makeup artist will arrive at your home in Baikunthpur, providing a flawless makeup experience without any stress. Testimonials from Brides in Parbatta Preparing for Your Bridal Makeup Session To ensure your makeup looks perfect on your big day, follow these tips: Stay Hydrated: Drink plenty of water to keep your skin glowing. Maintain Your Skincare Routine: Stick to a consistent skincare routine to keep your skin in optimal condition. Avoid New Skincare Products: Using unfamiliar products before your wedding may lead to breakouts or skin reactions. Communicate Your Preferences: Be clear with our makeup artist about the look you want to achieve during your consultation and trial session. Additional Beauty Services by Ladyfair Ladyfair also offers a range of makeup services for other special occasions in Baikunthpur: Engagement and Reception Makeup: Tailored looks for all your pre-wedding events. Party Makeup: Perfect for birthdays, anniversaries, and other special celebrations. Everyday Makeup: Enhance your daily look with professional makeup. Special Occasion Makeup: Glamorous makeup for any important life event. The Future of Bridal Makeup in Parbatta Ladyfair is revolutionizing bridal beauty by offering high-quality, at-home makeup services in Baikunthpur. As more brides experience our exceptional artistry and personalized service, we continue to grow as the premier choice for bridal makeup. Q&A with Ladyfair’s Bridal Makeup Artist in Parbatta Q1: Why is Ladyfair the top choice for bridal makeup in Parbatta? A1: Ladyfair offers expert at-home bridal makeup services, ensuring you receive a flawless look in the comfort of your own home. Q2: What are the prices for bridal makeup services in parbatta? A2: Our bridal makeup prices start at ₹10,000 for basic makeup, with HD and airbrush options also available. Q3: How do I book Ladyfair’s bridal makeup services in Parbatta? A3: You can call us at 7004721239 to book our services, and we offer consultations and makeup trials to ensure your desired look is achieved. Q4: What types of bridal makeup does Ladyfair offer in Parbatta? A4: We offer traditional, HD, and airbrush bridal makeup styles to suit your preferences. Q5: Are makeup trials available before the wedding day? A5: Yes, we provide trial sessions so you can preview your bridal look and make any adjustments before the big day. Q6: What kind of products does Ladyfair use for bridal makeup? A6: We use high-quality, professional-grade makeup products to ensure a flawless and long-lasting finish. Q7: What other makeup services does Ladyfair offer in Parbatta? A7: Besides bridal makeup, we offer engagement, reception, party, and everyday makeup services for all occasions.

Posted By: 6th October 2024
Discover the Best Makeup Artist in Khagaria for Stunning Transformations
Bridal makeup Artist in Khagaria Introduction In Khagaria, Ladyfair is renowned for providing expert bridal makeup services directly at your home. Whether you're dreaming of a traditional bridal look, a flawless HD finish, or the perfection of airbrush makeup, our talented makeup artist is here to bring your vision to life. Contact us at 7004721239 to schedule your appointment today and experience the best bridal makeup service in Khagaria Why Ladyfair is the Best Choice for Bridal Makeup in Khagaria Skilled and Experienced Makeup Artist Our makeup artist in Baikunthpur has extensive experience in bridal makeup, ensuring you receive a look that complements your personality, attire, and preferences. Convenient At-Home Makeup Service Ladyfair provides the ultimate convenience by offering at-home makeup services in Baikunthpur, allowing you to prepare for your big day without leaving the comfort of your home. High-Quality Makeup Products We use only premium, professional-grade makeup products to guarantee a long-lasting, flawless look that will keep you radiant throughout your wedding day. Bridal Makeup Pricing in Khagaria Our pricing is designed to cater to various needs and budgets: Basic Bridal Makeup: ₹10,000 HD Bridal Makeup: ₹12,000 Airbrush Bridal Makeup: ₹18,000 For engagement and reception makeup: Basic Engagement/Reception Makeup: ₹6,000 HD Engagement/Reception Makeup: ₹8,000 Airbrush Engagement/Reception Makeup: ₹12,000 For parties: Basic Party Makeup: ₹2,500 HD Party Makeup: ₹3,500 Popular Bridal Makeup Styles in Khagaria Traditional Bridal Makeup For those who want a timeless and classic look, our traditional bridal makeup in Baikunthpur features bold and vibrant tones, creating an elegant and traditional style that perfectly complements your wedding attire. HD Bridal Makeup HD bridal makeup ensures you look flawless in both photos and real life, giving you a camera-ready appearance that’s picture-perfect throughout the day. Airbrush Bridal Makeup Airbrush makeup offers a smooth, lightweight, and long-lasting finish. It’s ideal for brides seeking a natural, radiant look that stays fresh all day long. How to Book Your Bridal Makeup with Ladyfair in Khagaria Initial Contact: Call us at 7004721239 to discuss your needs and book an appointment. Consultation: Our makeup artist will work with you to understand your vision and create a makeup plan that complements your wedding theme. Makeup Trial: We offer trial makeup sessions to ensure that your bridal look is exactly what you desire. Wedding Day Makeup: On your wedding day, our makeup artist will arrive at your home in Baikunthpur, providing a flawless makeup experience without any stress. Testimonials from Brides in Khagaria Preparing for Your Bridal Makeup Session To ensure your makeup looks perfect on your big day, follow these tips: Stay Hydrated: Drink plenty of water to keep your skin glowing. Maintain Your Skincare Routine: Stick to a consistent skincare routine to keep your skin in optimal condition. Avoid New Skincare Products: Using unfamiliar products before your wedding may lead to breakouts or skin reactions. Communicate Your Preferences: Be clear with our makeup artist about the look you want to achieve during your consultation and trial session. Additional Beauty Services by Ladyfair Ladyfair also offers a range of makeup services for other special occasions in Baikunthpur: Engagement and Reception Makeup: Tailored looks for all your pre-wedding events. Party Makeup: Perfect for birthdays, anniversaries, and other special celebrations. Everyday Makeup: Enhance your daily look with professional makeup. Special Occasion Makeup: Glamorous makeup for any important life event. The Future of Bridal Makeup in Khagaria Ladyfair is revolutionizing bridal beauty by offering high-quality, at-home makeup services in Baikunthpur. As more brides experience our exceptional artistry and personalized service, we continue to grow as the premier choice for bridal makeup. Q&A with Ladyfair’s Bridal Makeup Artist in Khagaria Q1: Why is Ladyfair the top choice for bridal makeup in khagaria? A1: Ladyfair offers expert at-home bridal makeup services, ensuring you receive a flawless look in the comfort of your own home. Q2: What are the prices for bridal makeup services in khagaria? A2: Our bridal makeup prices start at ₹10,000 for basic makeup, with HD and airbrush options also available. Q3: How do I book Ladyfair’s bridal makeup services in khagaria? A3: You can call us at 7004721239 to book our services, and we offer consultations and makeup trials to ensure your desired look is achieved. Q4: What types of bridal makeup does Ladyfair offer in khagaria? A4: We offer traditional, HD, and airbrush bridal makeup styles to suit your preferences. Q5: Are makeup trials available before the wedding day? A5: Yes, we provide trial sessions so you can preview your bridal look and make any adjustments before the big day. Q6: What kind of products does Ladyfair use for bridal makeup? A6: We use high-quality, professional-grade makeup products to ensure a flawless and long-lasting finish. Q7: What other makeup services does Ladyfair offer in khagaria? A7: Besides bridal makeup, we offer engagement, reception, party, and everyday makeup services for all occasions.

Posted By: 5th October 2024
Discover the Best Makeup Artist in Gaura Bauram for Stunning Looks
Bridal makeup Artist in Gaura Bauram Introduction In Gaura Bauram Ladyfair is renowned for providing expert bridal makeup services directly at your home. Whether you're dreaming of a traditional bridal look, a flawless HD finish, or the perfection of airbrush makeup, our talented makeup artist is here to bring your vision to life. Contact us at 7004721239 to schedule your appointment today and experience the best bridal makeup service in Gaura Bauram Why Ladyfair is the Best Choice for Bridal Makeup in Baikunthpur Skilled and Experienced Makeup Artist Our makeup artist in Baikunthpur has extensive experience in bridal makeup, ensuring you receive a look that complements your personality, attire, and preferences. Convenient At-Home Makeup Service Ladyfair provides the ultimate convenience by offering at-home makeup services in Baikunthpur, allowing you to prepare for your big day without leaving the comfort of your home. High-Quality Makeup Products We use only premium, professional-grade makeup products to guarantee a long-lasting, flawless look that will keep you radiant throughout your wedding day. Bridal Makeup Pricing in Baikunthpur Our pricing is designed to cater to various needs and budgets: Basic Bridal Makeup: ₹10,000 HD Bridal Makeup: ₹12,000 Airbrush Bridal Makeup: ₹18,000 For engagement and reception makeup: Basic Engagement/Reception Makeup: ₹6,000 HD Engagement/Reception Makeup: ₹8,000 Airbrush Engagement/Reception Makeup: ₹12,000 For parties: Basic Party Makeup: ₹2,500 HD Party Makeup: ₹3,500 Popular Bridal Makeup Styles in Gaura Bauram Traditional Bridal Makeup For those who want a timeless and classic look, our traditional bridal makeup in Baikunthpur features bold and vibrant tones, creating an elegant and traditional style that perfectly complements your wedding attire. HD Bridal Makeup HD bridal makeup ensures you look flawless in both photos and real life, giving you a camera-ready appearance that’s picture-perfect throughout the day. Airbrush Bridal Makeup Airbrush makeup offers a smooth, lightweight, and long-lasting finish. It’s ideal for brides seeking a natural, radiant look that stays fresh all day long. How to Book Your Bridal Makeup with Ladyfair in Gaura Bauram Initial Contact: Call us at 7004721239 to discuss your needs and book an appointment. Consultation: Our makeup artist will work with you to understand your vision and create a makeup plan that complements your wedding theme. Makeup Trial: We offer trial makeup sessions to ensure that your bridal look is exactly what you desire. Wedding Day Makeup: On your wedding day, our makeup artist will arrive at your home in Baikunthpur, providing a flawless makeup experience without any stress. Preparing for Your Bridal Makeup Session To ensure your makeup looks perfect on your big day, follow these tips: Stay Hydrated: Drink plenty of water to keep your skin glowing. Maintain Your Skincare Routine: Stick to a consistent skincare routine to keep your skin in optimal condition. Avoid New Skincare Products: Using unfamiliar products before your wedding may lead to breakouts or skin reactions. Communicate Your Preferences: Be clear with our makeup artist about the look you want to achieve during your consultation and trial session. Additional Beauty Services by Ladyfair Ladyfair also offers a range of makeup services for other special occasions in Gaura Bauram Engagement and Reception Makeup: Tailored looks for all your pre-wedding events. Party Makeup: Perfect for birthdays, anniversaries, and other special celebrations. Everyday Makeup: Enhance your daily look with professional makeup. Special Occasion Makeup: Glamorous makeup for any important life event. The Future of Bridal Makeup in Gaura Bauram Ladyfair is revolutionizing bridal beauty by offering high-quality, at-home makeup services in Baikunthpur. As more brides experience our exceptional artistry and personalized service, we continue to grow as the premier choice for bridal makeup. Q&A with Ladyfair’s Bridal Makeup Artist in Baikunthpur Q1: Why is Ladyfair the top choice for bridal makeup in Gaura Bauram? A1: Ladyfair offers expert at-home bridal makeup services, ensuring you receive a flawless look in the comfort of your own home. Q2: What are the prices for bridal makeup services in Gaura Bauram? A2: Our bridal makeup prices start at ₹10,000 for basic makeup, with HD and airbrush options also available. Q3: How do I book Ladyfair’s bridal makeup services in Gaura Bauram? A3: You can call us at 7004721239 to book our services, and we offer consultations and makeup trials to ensure your desired look is achieved. Q4: What types of bridal makeup does Ladyfair offer in Gaura Bauram? A4: We offer traditional, HD, and airbrush bridal makeup styles to suit your preferences. Q5: Are makeup trials available before the wedding day? A5: Yes, we provide trial sessions so you can preview your bridal look and make any adjustments before the big day. Q6: What kind of products does Ladyfair use for bridal makeup? A6: We use high-quality, professional-grade makeup products to ensure a flawless and long-lasting finish. Q7: What other makeup services does Ladyfair offer in Gaura Bauram? A7: Besides bridal makeup, we offer engagement, reception, party, and everyday makeup services for all occasions.

Posted By: 5th October 2024
Discover the Best Makeup Artist in Kiratpur for Stunning Transformations
Bridal makeup Artist in Kiratpur Introduction In kiratpur, Ladyfair is renowned for providing expert bridal makeup services directly at your home. Whether you're dreaming of a traditional bridal look, a flawless HD finish, or the perfection of airbrush makeup, our talented makeup artist is here to bring your vision to life. Contact us at 7004721239 to schedule your appointment today and experience the best bridal makeup service in Kiratpur Why Ladyfair is the Best Choice for Bridal Makeup in Kiratpur Skilled and Experienced Makeup Artist Our makeup artist in Baikunthpur has extensive experience in bridal makeup, ensuring you receive a look that complements your personality, attire, and preferences. Convenient At-Home Makeup Service Ladyfair provides the ultimate convenience by offering at-home makeup services in Baikunthpur, allowing you to prepare for your big day without leaving the comfort of your home. High-Quality Makeup Products We use only premium, professional-grade makeup products to guarantee a long-lasting, flawless look that will keep you radiant throughout your wedding day. Bridal Makeup Pricing in kiratpur Our pricing is designed to cater to various needs and budgets: Basic Bridal Makeup: ₹10,000 HD Bridal Makeup: ₹12,000 Airbrush Bridal Makeup: ₹18,000 For engagement and reception makeup: Basic Engagement/Reception Makeup: ₹6,000 HD Engagement/Reception Makeup: ₹8,000 Airbrush Engagement/Reception Makeup: ₹12,000 For parties: Basic Party Makeup: ₹2,500 HD Party Makeup: ₹3,500 Popular Bridal Makeup Styles in kiratpur Traditional Bridal Makeup For those who want a timeless and classic look, our traditional bridal makeup in Baikunthpur features bold and vibrant tones, creating an elegant and traditional style that perfectly complements your wedding attire. HD Bridal Makeup HD bridal makeup ensures you look flawless in both photos and real life, giving you a camera-ready appearance that’s picture-perfect throughout the day. Airbrush Bridal Makeup Airbrush makeup offers a smooth, lightweight, and long-lasting finish. It’s ideal for brides seeking a natural, radiant look that stays fresh all day long. How to Book Your Bridal Makeup with Ladyfair in kiratpur Initial Contact: Call us at 7004721239 to discuss your needs and book an appointment. Consultation: Our makeup artist will work with you to understand your vision and create a makeup plan that complements your wedding theme. Makeup Trial: We offer trial makeup sessions to ensure that your bridal look is exactly what you desire. Wedding Day Makeup: On your wedding day, our makeup artist will arrive at your home in Baikunthpur, providing a flawless makeup experience without any stress. Testimonials from Brides in kiratpur Preparing for Your Bridal Makeup Session To ensure your makeup looks perfect on your big day, follow these tips: Stay Hydrated: Drink plenty of water to keep your skin glowing. Maintain Your Skincare Routine: Stick to a consistent skincare routine to keep your skin in optimal condition. Avoid New Skincare Products: Using unfamiliar products before your wedding may lead to breakouts or skin reactions. Communicate Your Preferences: Be clear with our makeup artist about the look you want to achieve during your consultation and trial session. Additional Beauty Services by Ladyfair Ladyfair also offers a range of makeup services for other special occasions in kiratpur: Engagement and Reception Makeup: Tailored looks for all your pre-wedding events. Party Makeup: Perfect for birthdays, anniversaries, and other special celebrations. Everyday Makeup: Enhance your daily look with professional makeup. Special Occasion Makeup: Glamorous makeup for any important life event. The Future of Bridal Makeup in kiratpur Ladyfair is revolutionizing bridal beauty by offering high-quality, at-home makeup services in Baikunthpur. As more brides experience our exceptional artistry and personalized service, we continue to grow as the premier choice for bridal makeup. Q&A with Ladyfair’s Bridal Makeup Artist in kiratpur Q1: Why is Ladyfair the top choice for bridal makeup in kiratpur? A1: Ladyfair offers expert at-home bridal makeup services, ensuring you receive a flawless look in the comfort of your own home. Q2: What are the prices for bridal makeup services in kiratpur? A2: Our bridal makeup prices start at ₹10,000 for basic makeup, with HD and airbrush options also available. Q3: How do I book Ladyfair’s bridal makeup services in kiratpur? A3: You can call us at 7004721239 to book our services, and we offer consultations and makeup trials to ensure your desired look is achieved. Q4: What types of bridal makeup does Ladyfair offer in kiratpur? A4: We offer traditional, HD, and airbrush bridal makeup styles to suit your preferences. Q5: Are makeup trials available before the wedding day? A5: Yes, we provide trial sessions so you can preview your bridal look and make any adjustments before the big day. Q6: What kind of products does Ladyfair use for bridal makeup? A6: We use high-quality, professional-grade makeup products to ensure a flawless and long-lasting finish. Q7: What other makeup services does Ladyfair offer in kiratpur? A7: Besides bridal makeup, we offer engagement, reception, party, and everyday makeup services for all occasions.

Posted By: 5th October 2024
he Best Makeup Artist in Kusheshwar Asthan: Elevate Your Beauty
Bridal makeup Artist in Kusheshwar Asthan Introduction In Kusheshwar Asthan, Ladyfair is renowned for providing expert bridal makeup services directly at your home. Whether you're dreaming of a traditional bridal look, a flawless HD finish, or the perfection of airbrush makeup, our talented makeup artist is here to bring your vision to life. Contact us at 7004721239 to schedule your appointment today and experience the best bridal makeup service in Kushehwar Asthan Why Ladyfair is the Best Choice for Bridal Makeup in Kuseshwar Asthan Skilled and Experienced Makeup Artist Our makeup artist in Baikunthpur has extensive experience in bridal makeup, ensuring you receive a look that complements your personality, attire, and preferences. Convenient At-Home Makeup Service Ladyfair provides the ultimate convenience by offering at-home makeup services in Baikunthpur, allowing you to prepare for your big day without leaving the comfort of your home. High-Quality Makeup Products We use only premium, professional-grade makeup products to guarantee a long-lasting, flawless look that will keep you radiant throughout your wedding day. Bridal Makeup Pricing in Kusheshwar Asthan Our pricing is designed to cater to various needs and budgets: Basic Bridal Makeup: ₹10,000 HD Bridal Makeup: ₹12,000 Airbrush Bridal Makeup: ₹18,000 For engagement and reception makeup: Basic Engagement/Reception Makeup: ₹6,000 HD Engagement/Reception Makeup: ₹8,000 Airbrush Engagement/Reception Makeup: ₹12,000 For parties: Basic Party Makeup: ₹2,500 HD Party Makeup: ₹3,500 Popular Bridal Makeup Styles in Kusheshwar Asthan Traditional Bridal Makeup For those who want a timeless and classic look, our traditional bridal makeup in Baikunthpur features bold and vibrant tones, creating an elegant and traditional style that perfectly complements your wedding attire. HD Bridal Makeup HD bridal makeup ensures you look flawless in both photos and real life, giving you a camera-ready appearance that’s picture-perfect throughout the day. Airbrush Bridal Makeup Airbrush makeup offers a smooth, lightweight, and long-lasting finish. It’s ideal for brides seeking a natural, radiant look that stays fresh all day long. How to Book Your Bridal Makeup with Ladyfair in Kusheshwar Asthan Initial Contact: Call us at 7004721239 to discuss your needs and book an appointment. Consultation: Our makeup artist will work with you to understand your vision and create a makeup plan that complements your wedding theme. Makeup Trial: We offer trial makeup sessions to ensure that your bridal look is exactly what you desire. Wedding Day Makeup: On your wedding day, our makeup artist will arrive at your home in Baikunthpur, providing a flawless makeup experience without any stress. To ensure your makeup looks perfect on your big day, follow these tips: Stay Hydrated: Drink plenty of water to keep your skin glowing. Maintain Your Skincare Routine: Stick to a consistent skincare routine to keep your skin in optimal condition. Avoid New Skincare Products: Using unfamiliar products before your wedding may lead to breakouts or skin reactions. Communicate Your Preferences: Be clear with our makeup artist about the look you want to achieve during your consultation and trial session. Additional Beauty Services by Ladyfair Ladyfair also offers a range of makeup services for other special occasions in Baikunthpur: Engagement and Reception Makeup: Tailored looks for all your pre-wedding events. Party Makeup: Perfect for birthdays, anniversaries, and other special celebrations. Everyday Makeup: Enhance your daily look with professional makeup. Special Occasion Makeup: Glamorous makeup for any important life event. The Future of Bridal Makeup in Baikunthpur Ladyfair is revolutionizing bridal beauty by offering high-quality, at-home makeup services in Baikunthpur. As more brides experience our exceptional artistry and personalized service, we continue to grow as the premier choice for bridal makeup. Q&A with Ladyfair’s Bridal Makeup Artist in Kusheshwar Asthan Q1: Why is Ladyfair the top choice for bridal makeup in Kusheshwar Asthan? A1: Ladyfair offers expert at-home bridal makeup services, ensuring you receive a flawless look in the comfort of your own home. Q2: What are the prices for bridal makeup services in Kusheshwar Asthan? A2: Our bridal makeup prices start at ₹10,000 for basic makeup, with HD and airbrush options also available. Q3: How do I book Ladyfair’s bridal makeup services in Kusheshwar Asthan? A3: You can call us at 7004721239 to book our services, and we offer consultations and makeup trials to ensure your desired look is achieved. Q4: What types of bridal makeup does Ladyfair offer in Kusheshwar Asthan? A4: We offer traditional, HD, and airbrush bridal makeup styles to suit your preferences. Q5: Are makeup trials available before the wedding day? A5: Yes, we provide trial sessions so you can preview your bridal look and make any adjustments before the big day. Q6: What kind of products does Ladyfair use for bridal makeup? A6: We use high-quality, professional-grade makeup products to ensure a flawless and long-lasting finish. Q7: What other makeup services does Ladyfair offer in Kusheshwar Asthan? A7: Besides bridal makeup, we offer engagement, reception, party, and everyday makeup services for all occasions.

Posted By: 5th October 2024
Discover the Best Makeup Artist in Ghanshyampur for Stunning Looks
Bridal makeup Artist in Ghanshyampur Introduction In Ghanshyampur, Ladyfair is renowned for providing expert bridal makeup services directly at your home. Whether you're dreaming of a traditional bridal look, a flawless HD finish, or the perfection of airbrush makeup, our talented makeup artist is here to bring your vision to life. Contact us at 7004721239 to schedule your appointment today and experience the best bridal makeup service in Ghanshyampur Why Ladyfair is the Best Choice for Bridal Makeup in Ghanshyampur Skilled and Experienced Makeup Artist Our makeup artist in Baikunthpur has extensive experience in bridal makeup, ensuring you receive a look that complements your personality, attire, and preferences. Convenient At-Home Makeup Service Ladyfair provides the ultimate convenience by offering at-home makeup services in Baikunthpur, allowing you to prepare for your big day without leaving the comfort of your home. High-Quality Makeup Products We use only premium, professional-grade makeup products to guarantee a long-lasting, flawless look that will keep you radiant throughout your wedding day. Bridal Makeup Pricing in Ghanshyampur Our pricing is designed to cater to various needs and budgets: Basic Bridal Makeup: ₹10,000 HD Bridal Makeup: ₹12,000 Airbrush Bridal Makeup: ₹18,000 For engagement and reception makeup: Basic Engagement/Reception Makeup: ₹6,000 HD Engagement/Reception Makeup: ₹8,000 Airbrush Engagement/Reception Makeup: ₹12,000 For parties: Basic Party Makeup: ₹2,500 HD Party Makeup: ₹3,500 Popular Bridal Makeup Styles in Ghamshyampur Traditional Bridal Makeup For those who want a timeless and classic look, our traditional bridal makeup in Baikunthpur features bold and vibrant tones, creating an elegant and traditional style that perfectly complements your wedding attire. HD Bridal Makeup HD bridal makeup ensures you look flawless in both photos and real life, giving you a camera-ready appearance that’s picture-perfect throughout the day. Airbrush Bridal Makeup Airbrush makeup offers a smooth, lightweight, and long-lasting finish. It’s ideal for brides seeking a natural, radiant look that stays fresh all day long. How to Book Your Bridal Makeup with Ladyfair in Ghanshyampur Initial Contact: Call us at 7004721239 to discuss your needs and book an appointment. Consultation: Our makeup artist will work with you to understand your vision and create a makeup plan that complements your wedding theme. Makeup Trial: We offer trial makeup sessions to ensure that your bridal look is exactly what you desire. Wedding Day Makeup: On your wedding day, our makeup artist will arrive at your home in Baikunthpur, providing a flawless makeup experience without any stress. To ensure your makeup looks perfect on your big day, follow these tips: Stay Hydrated: Drink plenty of water to keep your skin glowing. Maintain Your Skincare Routine: Stick to a consistent skincare routine to keep your skin in optimal condition. Avoid New Skincare Products: Using unfamiliar products before your wedding may lead to breakouts or skin reactions. Communicate Your Preferences: Be clear with our makeup artist about the look you want to achieve during your consultation and trial session. Additional Beauty Services by Ladyfair Ladyfair also offers a range of makeup services for other special occasions in Baikunthpur: Engagement and Reception Makeup: Tailored looks for all your pre-wedding events. Party Makeup: Perfect for birthdays, anniversaries, and other special celebrations. Everyday Makeup: Enhance your daily look with professional makeup. Special Occasion Makeup: Glamorous makeup for any important life event. The Future of Bridal Makeup in Ghanshyampur Ladyfair is revolutionizing bridal beauty by offering high-quality, at-home makeup services in Baikunthpur. As more brides experience our exceptional artistry and personalized service, we continue to grow as the premier choice for bridal makeup. Q&A with Ladyfair’s Bridal Makeup Artist in Ghanshyampur Q1: Why is Ladyfair the top choice for bridal makeup in Ghanshyampur? A1: Ladyfair offers expert at-home bridal makeup services, ensuring you receive a flawless look in the comfort of your own home. Q2: What are the prices for bridal makeup services in Ghanshyampur? A2: Our bridal makeup prices start at ₹10,000 for basic makeup, with HD and airbrush options also available. Q3: How do I book Ladyfair’s bridal makeup services in Ghanshyampur? A3: You can call us at 7004721239 to book our services, and we offer consultations and makeup trials to ensure your desired look is achieved. Q4: What types of bridal makeup does Ladyfair offer in Ghanshyampur? A4: We offer traditional, HD, and airbrush bridal makeup styles to suit your preferences. Q5: Are makeup trials available before the wedding day? A5: Yes, we provide trial sessions so you can preview your bridal look and make any adjustments before the big day. Q6: What kind of products does Ladyfair use for bridal makeup? A6: We use high-quality, professional-grade makeup products to ensure a flawless and long-lasting finish. Q7: What other makeup services does Ladyfair offer in Ghanshyampur? A7: Besides bridal makeup, we offer engagement, reception, party, and everyday makeup services for all occasions.

Posted By: 5th October 2024
The Best Makeup Artist in Biraul: Elevate Your Beauty Game
Bridal makeup Artist in Biraul Introduction In Biraul, Ladyfair is renowned for providing expert bridal makeup services directly at your home. Whether you're dreaming of a traditional bridal look, a flawless HD finish, or the perfection of airbrush makeup, our talented makeup artist is here to bring your vision to life. Contact us at 7004721239 to schedule your appointment today and experience the best bridal makeup service in Biraul. Why Ladyfair is the Best Choice for Bridal Makeup in Biraul Skilled and Experienced Makeup Artist Our makeup artist in Baikunthpur has extensive experience in bridal makeup, ensuring you receive a look that complements your personality, attire, and preferences. Convenient At-Home Makeup Service Ladyfair provides the ultimate convenience by offering at-home makeup services in Baikunthpur, allowing you to prepare for your big day without leaving the comfort of your home. High-Quality Makeup Products We use only premium, professional-grade makeup products to guarantee a long-lasting, flawless look that will keep you radiant throughout your wedding day. Bridal Makeup Pricing in Biraul Our pricing is designed to cater to various needs and budgets: Basic Bridal Makeup: ₹10,000 HD Bridal Makeup: ₹12,000 Airbrush Bridal Makeup: ₹18,000 For engagement and reception makeup: Basic Engagement/Reception Makeup: ₹6,000 HD Engagement/Reception Makeup: ₹8,000 Airbrush Engagement/Reception Makeup: ₹12,000 For parties: Basic Party Makeup: ₹2,500 HD Party Makeup: ₹3,500 Popular Bridal Makeup Styles in Biraul Traditional Bridal Makeup For those who want a timeless and classic look, our traditional bridal makeup in Baikunthpur features bold and vibrant tones, creating an elegant and traditional style that perfectly complements your wedding attire. HD Bridal Makeup HD bridal makeup ensures you look flawless in both photos and real life, giving you a camera-ready appearance that’s picture-perfect throughout the day. Airbrush Bridal Makeup Airbrush makeup offers a smooth, lightweight, and long-lasting finish. It’s ideal for brides seeking a natural, radiant look that stays fresh all day long. How to Book Your Bridal Makeup with Ladyfair in Biraul Initial Contact: Call us at 7004721239 to discuss your needs and book an appointment. Consultation: Our makeup artist will work with you to understand your vision and create a makeup plan that complements your wedding theme. Makeup Trial: We offer trial makeup sessions to ensure that your bridal look is exactly what you desire. Wedding Day Makeup: On your wedding day, our makeup artist will arrive at your home in Baikunthpur, providing a flawless makeup experience without any stress. Testimonials from Brides in Biraul Riya S., Biraul "I loved the convenience of having Ladyfair come to my home. My makeup was perfect, and I got so many compliments on my wedding day." Neha T., Biraul "The HD makeup was exactly what I needed for all the photos. Ladyfair’s service was professional and seamless." Pallavi J., Biraul; "The airbrush makeup lasted all day without needing any touch-ups. I couldn’t have been happier with my bridal look!" Preparing for Your Bridal Makeup Session To ensure your makeup looks perfect on your big day, follow these tips: Stay Hydrated: Drink plenty of water to keep your skin glowing. Maintain Your Skincare Routine: Stick to a consistent skincare routine to keep your skin in optimal condition. Avoid New Skincare Products: Using unfamiliar products before your wedding may lead to breakouts or skin reactions. Communicate Your Preferences: Be clear with our makeup artist about the look you want to achieve during your consultation and trial session. Additional Beauty Services by Ladyfair Ladyfair also offers a range of makeup services for other special occasions in Biraul Engagement and Reception Makeup: Tailored looks for all your pre-wedding events. Party Makeup: Perfect for birthdays, anniversaries, and other special celebrations. Everyday Makeup: Enhance your daily look with professional makeup. Special Occasion Makeup: Glamorous makeup for any important life event. The Future of Bridal Makeup in Biraul Ladyfair is revolutionizing bridal beauty by offering high-quality, at-home makeup services in Baikunthpur. As more brides experience our exceptional artistry and personalized service, we continue to grow as the premier choice for bridal makeup. Q&A with Ladyfair’s Bridal Makeup Artist in Biraul Q1: Why is Ladyfair the top choice for bridal makeup in Biraul? A1: Ladyfair offers expert at-home bridal makeup services, ensuring you receive a flawless look in the comfort of your own home. Q2: What are the prices for bridal makeup services in Biraul? A2: Our bridal makeup prices start at ₹10,000 for basic makeup, with HD and airbrush options also available. Q3: How do I book Ladyfair’s bridal makeup services in Biraul? A3: You can call us at 7004721239 to book our services, and we offer consultations and makeup trials to ensure your desired look is achieved. Q4: What types of bridal makeup does Ladyfair offer in Biraul? A4: We offer traditional, HD, and airbrush bridal makeup styles to suit your preferences. Q5: Are makeup trials available before the wedding day? A5: Yes, we provide trial sessions so you can preview your bridal look and make any adjustments before the big day. Q6: What kind of products does Ladyfair use for bridal makeup? A6: We use high-quality, professional-grade makeup products to ensure a flawless and long-lasting finish. Q7: What other makeup services does Ladyfair offer in Biraul? A7: Besides bridal makeup, we offer engagement, reception, party, and everyday makeup services for all occasions.

Posted By: 5th October 2024
the Best Makeup Artist in Alinagar for Flawless Beauty
Bridal makeup Artist in Alinagar Introduction In Alinagar, Ladyfair is renowned for providing expert bridal makeup services directly at your home. Whether you're dreaming of a traditional bridal look, a flawless HD finish, or the perfection of airbrush makeup, our talented makeup artist is here to bring your vision to life. Contact us at 7004721239 to schedule your appointment today and experience the best bridal makeup service in Alinagar. Why Ladyfair is the Best Choice for Bridal Makeup in Alinagar Skilled and Experienced Makeup Artist Our makeup artist in Baikunthpur has extensive experience in bridal makeup, ensuring you receive a look that complements your personality, attire, and preferences. Convenient At-Home Makeup Service Ladyfair provides the ultimate convenience by offering at-home makeup services in Baikunthpur, allowing you to prepare for your big day without leaving the comfort of your home. High-Quality Makeup Products We use only premium, professional-grade makeup products to guarantee a long-lasting, flawless look that will keep you radiant throughout your wedding day. Bridal Makeup Pricing in Alinagar Our pricing is designed to cater to various needs and budgets: Basic Bridal Makeup: ₹10,000 HD Bridal Makeup: ₹12,000 Airbrush Bridal Makeup: ₹18,000 For engagement and reception makeup: Basic Engagement/Reception Makeup: ₹6,000 HD Engagement/Reception Makeup: ₹8,000 Airbrush Engagement/Reception Makeup: ₹12,000 For parties: Basic Party Makeup: ₹2,500 HD Party Makeup: ₹3,500 Popular Bridal Makeup Styles in Alinagar Traditional Bridal Makeup For those who want a timeless and classic look, our traditional bridal makeup in Baikunthpur features bold and vibrant tones, creating an elegant and traditional style that perfectly complements your wedding attire. HD Bridal Makeup HD bridal makeup ensures you look flawless in both photos and real life, giving you a camera-ready appearance that’s picture-perfect throughout the day. Airbrush Bridal Makeup Airbrush makeup offers a smooth, lightweight, and long-lasting finish. It’s ideal for brides seeking a natural, radiant look that stays fresh all day long. How to Book Your Bridal Makeup with Ladyfair in Alinagar Initial Contact: Call us at 7004721239 to discuss your needs and book an appointment. Consultation: Our makeup artist will work with you to understand your vision and create a makeup plan that complements your wedding theme. Makeup Trial: We offer trial makeup sessions to ensure that your bridal look is exactly what you desire. Wedding Day Makeup: On your wedding day, our makeup artist will arrive at your home in Baikunthpur, providing a flawless makeup experience without any stress. Testimonials from Brides in Alinagar Riya S., Alinagar "I loved the convenience of having Ladyfair come to my home. My makeup was perfect, and I got so many compliments on my wedding day." Neha T., Alinagar "The HD makeup was exactly what I needed for all the photos. Ladyfair’s service was professional and seamless." Pallavi J., Alinagar "The airbrush makeup lasted all day without needing any touch-ups. I couldn’t have been happier with my bridal look!" Preparing for Your Bridal Makeup Session To ensure your makeup looks perfect on your big day, follow these tips: Stay Hydrated: Drink plenty of water to keep your skin glowing. Maintain Your Skincare Routine: Stick to a consistent skincare routine to keep your skin in optimal condition. Avoid New Skincare Products: Using unfamiliar products before your wedding may lead to breakouts or skin reactions. Communicate Your Preferences: Be clear with our makeup artist about the look you want to achieve during your consultation and trial session. Additional Beauty Services by Ladyfair Ladyfair also offers a range of makeup services for other special occasions in Alinagar Engagement and Reception Makeup: Tailored looks for all your pre-wedding events. Party Makeup: Perfect for birthdays, anniversaries, and other special celebrations. Everyday Makeup: Enhance your daily look with professional makeup. Special Occasion Makeup: Glamorous makeup for any important life event. The Future of Bridal Makeup in Alinagar Ladyfair is revolutionizing bridal beauty by offering high-quality, at-home makeup services in Baikunthpur. As more brides experience our exceptional artistry and personalized service, we continue to grow as the premier choice for bridal makeup. Q&A with Ladyfair’s Bridal Makeup Artist in Alinagar Q1: Why is Ladyfair the top choice for bridal makeup in Alinagar? A1: Ladyfair offers expert at-home bridal makeup services, ensuring you receive a flawless look in the comfort of your own home. Q2: What are the prices for bridal makeup services in Alinagar A2: Our bridal makeup prices start at ₹10,000 for basic makeup, with HD and airbrush options also available. Q3: How do I book Ladyfair’s bridal makeup services in Alinagar? A3: You can call us at 7004721239 to book our services, and we offer consultations and makeup trials to ensure your desired look is achieved. Q4: What types of bridal makeup does Ladyfair offer in Alinagar? A4: We offer traditional, HD, and airbrush bridal makeup styles to suit your preferences. Q5: Are makeup trials available before the wedding day? A5: Yes, we provide trial sessions so you can preview your bridal look and make any adjustments before the big day. Q6: What kind of products does Ladyfair use for bridal makeup? A6: We use high-quality, professional-grade makeup products to ensure a flawless and long-lasting finish. Q7: What other makeup services does Ladyfair offer in Alinagar? A7: Besides bridal makeup, we offer engagement, reception, party, and everyday makeup services for all occasions.

Posted By: 5th October 2024
Bridal makeup artist in Ismailpur,Kharik
Ladyfair Bridal Makeup Services in Ismailpur & Kharik For brides in Ismailpur and Kharik, Ladyfair offers the ultimate bridal beauty experience with our professional at-home makeup services. Whether you are looking for a traditional bridal look, an HD makeup finish for flawless photos, or the light and long-lasting coverage of airbrush makeup, our experienced makeup artist will bring your bridal vision to life. Skip the hassle of visiting a salon and let us bring top-notch beauty services directly to your doorstep. To book your appointment, contact us at 7004721239. Why Ladyfair is the Best Choice for Bridal Makeup in Ismailpur & Kharik Expert Makeup Artist Our makeup artist has extensive experience working with brides, creating stunning, personalized looks tailored to your style, complexion, and wedding attire. Whether you want a traditional or modern look, we ensure you feel and look your best. Convenient At-Home Service We bring salon-quality makeup services to the comfort of your home in Ismailpur and Kharik, so you can enjoy a relaxed and stress-free makeup session, perfect for your special day. Premium Products We use only high-quality, professional-grade makeup products to ensure a long-lasting, flawless look. From foundation to finishing touches, our products are designed to stay intact throughout your wedding day. Bridal Makeup Pricing in Ismailpur & Kharik We offer a range of packages to suit your budget and preferences: Basic Bridal Makeup: ₹10,000 HD Bridal Makeup: ₹12,000 Airbrush Bridal Makeup: ₹18,000 For engagement and reception makeup: Basic Engagement/Reception Makeup: ₹6,000 HD Engagement/Reception Makeup: ₹8,000 Airbrush Engagement/Reception Makeup: ₹12,000 For parties: Basic Party Makeup: ₹2,500 HD Party Makeup: ₹3,500 Popular Bridal Makeup Styles in Ismailpur & Kharik Traditional Bridal Makeup Ideal for brides wearing traditional wedding attire, this makeup style emphasizes bold, elegant features that complement Indian bridal fashion. HD Bridal Makeup Perfect for high-definition photography, HD makeup ensures your face looks flawless in both real life and photos, giving you a smooth, radiant finish that lasts all day. Airbrush Bridal Makeup Lightweight and long-lasting, airbrush makeup offers full coverage with a natural feel. It’s the perfect choice for brides looking for a polished yet comfortable makeup experience. How to Book Ladyfair Bridal Makeup Services in Ismailpur & Kharik Initial Contact: Call us at 7004721239 to discuss your bridal makeup needs and schedule an appointment. Consultation Session: Meet with our makeup artist to plan your look, based on your attire, theme, and personal preferences. Makeup Trial: Opt for a makeup trial to preview your look and make any necessary adjustments before the big day. Wedding Day Makeup: Our artist will arrive at your home in Ismailpur or Kharik to ensure a flawless makeup application, making you feel beautiful on your special day. Testimonials from Brides in Ismailpur & Kharik Pooja S., Ismailpur "Ladyfair’s at-home makeup service was exactly what I needed. The makeup artist made me look stunning, and I didn’t have to worry about traveling. Highly recommended!" Nidhi R., Kharik "The airbrush makeup was so light and comfortable, and it lasted the entire day without any touch-ups. Ladyfair made my wedding day easy and beautiful!" Preparing for Your Bridal Makeup Session Stay Hydrated: Drinking enough water leading up to your wedding day keeps your skin hydrated and glowing. Skincare Routine: Follow a consistent skincare regimen to ensure your skin is in the best condition for makeup application. Avoid New Products: Avoid trying new skincare or makeup products close to your wedding day to prevent any allergic reactions or breakouts. Discuss Your Preferences: Clearly communicate your makeup preferences, skin type, and concerns with the artist during the consultation. Additional Beauty Services by Ladyfair in Ismailpur & Kharik In addition to bridal makeup, Ladyfair offers a variety of other makeup services: Engagement and Reception Makeup: Customized makeup looks for all your pre-wedding events, ensuring a unique and stunning appearance at each occasion. Party Makeup: Professional makeup services for birthdays, anniversaries, and other special occasions where you want to look your best. Everyday Makeup: Enhance your day-to-day look with a touch of professional makeup. Special Occasion Makeup: Perfect for important life events such as anniversaries or celebrations, making sure you look polished and radiant. The Future of Bridal Makeup in Ismailpur & Kharik Ladyfair is redefining bridal beauty with its at-home makeup services in Ismailpur and Kharik. As more brides experience the ease and quality of our services, we are becoming the preferred choice for flawless bridal makeup in the region. Q&A with Ladyfair’s Bridal Makeup Artist in Ismailpur & Kharik Q1: What makes Ladyfair the best choice for bridal makeup in Ismailpur and Kharik? A1: We offer at-home services with a professional makeup artist using premium products, ensuring a personalized, high-quality experience. Q2: What are the prices for bridal makeup services in Ismailpur and Kharik? A2: Our prices start at ₹10,000 for basic bridal makeup, ₹12,000 for HD makeup, and ₹18,000 for airbrush makeup. Q3: How do I book Ladyfair’s bridal makeup services in Ismailpur and Kharik? A3: You can book your appointment by calling 7004721239. We also offer consultations and trial sessions to ensure your look is perfect for your wedding day. Q4: What makeup styles does Ladyfair offer? A4: We offer traditional bridal makeup, HD makeup for flawless photography, and airbrush makeup for a lightweight, long-lasting finish. Q5: Can I have a trial session before my wedding? A5: Yes, we offer trial sessions to help you finalize your look and make any necessary adjustments before your big day. Q6: What kind of products does Ladyfair use? A6: We use professional-grade, high-quality makeup products that are safe for all skin types and deliver a flawless, long-lasting finish. Q7: Does Ladyfair offer other makeup services besides bridal makeup? A7: Yes, in addition to bridal makeup, we offer makeup services for engagements, receptions, parties, and other special occasions. Ladyfair is dedicated to making you look your best on your special day in Ismailpur and Kharik!

Posted By: 5th October 2024
Bridal makeup artist in Gopalpur
Ladyfair Bridal Makeup Services in Gopalpur In Gopalpur, Ladyfair is the trusted name for brides looking for premium bridal makeup services. We offer convenient at-home bridal makeup, bringing the expertise of a salon directly to your doorstep. Whether you envision a traditional bridal look, a flawless HD finish, or the light elegance of airbrush makeup, our professional makeup artist in Gopalpur is ready to make you look and feel stunning on your big day. To book your appointment, contact us at 7004721239. Why Choose Ladyfair for Bridal Makeup in Gopalpur? Expert Makeup Artist Our makeup artist in Gopalpur is highly experienced and skilled in crafting personalized bridal looks. We focus on enhancing your natural beauty while ensuring your makeup complements your wedding attire and personal style. Convenient At-Home Service Ladyfair brings high-quality beauty treatments directly to your home, allowing you to enjoy a relaxed and stress-free experience. You won’t have to step out of your house for flawless bridal makeup on your special day. Premium Products We use only the best professional-grade makeup products, ensuring your makeup stays intact and flawless throughout the day. From long-lasting foundations to premium eye and lip products, we guarantee a radiant bridal look. Bridal Makeup Pricing in Gopalpur We offer a variety of makeup packages to suit every bride’s preference and budget: Basic Bridal Makeup: ₹10,000 HD Bridal Makeup: ₹12,000 Airbrush Bridal Makeup: ₹18,000 For engagement and reception makeup: Basic Engagement/Reception Makeup: ₹6,000 HD Engagement/Reception Makeup: ₹8,000 Airbrush Engagement/Reception Makeup: ₹12,000 For parties: Basic Party Makeup: ₹2,500 HD Party Makeup: ₹3,500 Popular Bridal Makeup Styles in Gopalpur Traditional Bridal Makeup Ideal for brides who want a bold, vibrant, and traditional look. This style enhances the beauty of traditional wedding attire and provides a classic, timeless appearance. HD Bridal Makeup HD makeup gives you a high-definition finish, ensuring you look perfect in photos and in person. It’s designed to last throughout your special day, with minimal touch-ups needed. Airbrush Bridal Makeup Airbrush makeup is lightweight, smooth, and provides full coverage. It lasts all day and gives you a natural yet polished look, perfect for brides who want flawless skin without the heavy feel. How to Book Ladyfair Bridal Makeup Services in Gopalpur Initial Contact: Call us at 7004721239 to discuss your bridal makeup needs and schedule an appointment. Consultation: Meet with our makeup artist to discuss your wedding look, attire, and personal preferences. Makeup Trial: Opt for a trial session to preview your bridal look, making adjustments to ensure perfection. Wedding Day Makeup: Our makeup artist will arrive at your location in Gopalpur to deliver a flawless makeup application, making sure you look beautiful and radiant on your special day. Testimonials from Brides in Gopalpur Riya M., Gopalpur "Ladyfair provided me with a stunning bridal look. The makeup artist understood exactly what I wanted and made me feel gorgeous on my wedding day. Highly recommend their services!" Ankita P., Gopalpur "I was so happy with the airbrush makeup. It felt light and stayed perfect the entire day. The at-home service made everything so easy and stress-free." Preparing for Your Bridal Makeup Session Stay Hydrated: Drink plenty of water to keep your skin hydrated and glowing in the days leading up to your wedding. Skincare Routine: Follow a consistent skincare routine to keep your skin healthy and ready for makeup application. Avoid New Products: Refrain from using new skincare or makeup products close to the wedding date to avoid allergic reactions. Communicate Your Preferences: Make sure to discuss your desired look, skin type, and makeup preferences with the artist during the consultation. Additional Beauty Services by Ladyfair in Gopalpur In addition to bridal makeup, Ladyfair offers: Engagement and Reception Makeup: Tailored makeup services for your pre-wedding events, ensuring a unique look for each occasion. Party Makeup: Perfect for birthdays, anniversaries, or any special event where you want to look your best. Everyday Makeup: Elevate your everyday look with our professional makeup services. Special Occasion Makeup: Ideal for important life events, giving you a polished and radiant appearance for any celebration. The Future of Bridal Makeup in Gopalpur Ladyfair is committed to revolutionizing the bridal beauty experience in Gopalpur with our high-quality, at-home makeup services. As more brides discover the ease and elegance of our professional makeup services, we continue to be the top choice for flawless bridal makeup. Q&A with Ladyfair’s Bridal Makeup Artist in Gopalpur Q1: What makes Ladyfair the best choice for bridal makeup in Gopalpur? A1: We offer at-home makeup services with a professional, experienced makeup artist, ensuring brides receive personalized, high-quality makeup for their big day. Q2: What is the pricing for bridal makeup in Gopalpur? A2: Prices start at ₹10,000 for basic bridal makeup, ₹12,000 for HD makeup, and ₹18,000 for airbrush makeup. Q3: How can I book Ladyfair’s bridal makeup services in Gopalpur? A3: You can book your appointment by calling 7004721239. We also offer consultation sessions and trial makeup to perfect your look. Q4: What bridal makeup styles does Ladyfair offer? A4: We offer traditional, HD, and airbrush makeup styles to suit different tastes and preferences. Q5: Can I have a makeup trial before my wedding? A5: Yes, makeup trials are available to help you finalize your look ahead of your big day. Q6: What type of products does Ladyfair use? A6: We use only high-quality, professional-grade makeup products that are safe for all skin types and provide a flawless finish. Q7: Does Ladyfair offer makeup for other events in Gopalpur? A7: Yes, in addition to bridal makeup, we provide makeup for engagements, receptions, parties, and other special occasions. Ladyfair is here to ensure you look your best on your wedding day in Gopalpur!

Posted By: 5th October 2024
Bridal makeup artist in Bihpur
Ladyfair Bridal Makeup Services in Bihpur In Bihpur, Ladyfair is the go-to choice for brides seeking professional and luxurious makeup services for their wedding day. With our convenient at-home bridal makeup services, we bring the expertise and elegance of a salon right to your doorstep. Whether you’re dreaming of a traditional bridal look, a flawless HD finish, or the lightweight perfection of airbrush makeup, our experienced makeup artist in Bihpur is ready to make your wedding day memorable. Contact us at 7004721239 to book your appointment today! Why Ladyfair is the Best Bridal Makeup Choice in Bihpur Experienced Makeup Artist Our skilled makeup artist in Bihpur has years of experience in bridal makeup. She crafts personalized looks that enhance your natural beauty and align with your individual style, ensuring you feel confident and stunning. Convenient At-Home Service Enjoy the luxury of having salon-quality beauty treatments brought to your home. Our at-home service allows you to relax and enjoy a stress-free makeup session without having to leave the comfort of your house. High-End Products We use only premium, professional-grade makeup products to ensure a flawless, long-lasting finish. Our products are designed to keep you looking radiant and beautiful throughout your wedding day. Bridal Makeup Pricing in Bihpur We offer competitive pricing that suits various preferences and budgets: Basic Bridal Makeup: ₹10,000 HD Bridal Makeup: ₹12,000 Airbrush Bridal Makeup: ₹18,000 For engagement and reception: Basic Engagement/Reception Makeup: ₹6,000 HD Engagement/Reception Makeup: ₹8,000 Airbrush Engagement/Reception Makeup: ₹12,000 For parties: Basic Party Makeup: ₹2,500 HD Party Makeup: ₹3,500 Popular Bridal Makeup Styles in Bihpur Traditional Bridal Makeup Perfect for brides who want a classic, bold, and vibrant look that complements traditional wedding attire. This style is designed to bring out the elegance of Indian bridal fashion. HD Bridal Makeup Achieve a high-definition, camera-ready look with HD bridal makeup. This style ensures your makeup appears flawless in person and in photographs, lasting all day without touch-ups. Airbrush Bridal Makeup If you’re looking for a lightweight, smooth, and long-lasting finish, airbrush makeup is the ideal choice. This technique provides full coverage while feeling natural and comfortable on your skin. How to Book Ladyfair Bridal Makeup Services in Bihpur Initial Contact: Call us at 7004721239 to discuss your makeup needs and schedule an appointment. Consultation Session: Meet with our makeup artist to discuss your desired look, your attire, and any special preferences you may have. Makeup Trial: Opt for a trial session to preview your bridal look and make any adjustments necessary. Wedding Day Makeup: Our artist will arrive at your location in Bihpur on your wedding day to deliver the perfect makeup look, ensuring you look flawless. Testimonials from Brides in Bihpur Priya S., Bihpur "Ladyfair made my wedding day stress-free and special. The airbrush makeup felt light, and I received so many compliments on my look!" Rashmi K., Bihpur "The at-home makeup service was a blessing. The makeup artist was professional, and the result was beyond my expectations. Highly recommend Ladyfair for bridal makeup!" Preparing for Your Bridal Makeup Session Stay Hydrated: Drink plenty of water leading up to your wedding to keep your skin glowing. Maintain Skincare Routine: Stick to a consistent skincare routine to ensure your skin is healthy and ready for makeup application. Avoid New Products: Don’t experiment with new skincare or makeup products just before the wedding to avoid any potential skin reactions. Communicate Clearly: Discuss your expectations and preferences with our makeup artist during your consultation. Additional Beauty Services by Ladyfair in Bihpur Ladyfair offers more than just bridal makeup. Our range of services includes: Engagement and Reception Makeup: Tailored looks for all your pre-wedding events. Party Makeup: Professional makeup for birthdays, anniversaries, and other special occasions. Everyday Makeup: Enhance your daily look with our expert makeup services. Special Occasion Makeup: Perfect for any major life event where you want to look your best. The Future of Bridal Makeup in Bihpur Ladyfair is revolutionizing the bridal beauty experience in Bihpur with our convenient at-home services. As more brides discover the ease and elegance of our professional makeup services, we are becoming the most trusted name in bridal makeup across the region. Q&A with Ladyfair’s Bridal Makeup Artist in Bihpur Q1: What makes Ladyfair the best choice for bridal makeup in Bihpur? A1: We offer skilled, at-home makeup services that use premium products, ensuring brides look stunning and feel comfortable on their wedding day. Q2: What are the prices for bridal makeup services in Bihpur? A2: Prices start at ₹10,000 for basic bridal makeup, ₹12,000 for HD makeup, and ₹18,000 for airbrush makeup. Q3: How do I book Ladyfair’s bridal makeup services? A3: Call 7004721239 to schedule an appointment and book your trial session. Q4: Are makeup trials available before the wedding day? A4: Yes, we offer trial sessions to help you preview and perfect your bridal look. Q5: What kind of products does Ladyfair use for bridal makeup? A5: We use high-quality, professional-grade products that are safe for all skin types and provide a long-lasting, flawless finish. Q6: Does Ladyfair offer other makeup services in Bihpur? A6: Yes, we provide makeup for engagement, reception, parties, and other special occasions in addition to bridal makeup. Ladyfair is here to make your wedding day beauty dreams come true in Bihpur!

Posted By: 29th September 2024
Bridal Makeup Artist in Barachatti
Introduction In Barachatti, Ladyfair is the premier choice for brides looking to achieve the perfect wedding day look with our professional at-home bridal makeup services. Whether you desire a traditional bridal look, an HD finish, or the flawless perfection of airbrush makeup, our expert makeup artist in Barachatti ensures that you shine on your special day. Contact us today at 7004721239 to schedule your appointment. Why Choose Ladyfair for Bridal Makeup in Barachatti Experienced Makeup Artist Our makeup artist in Barachatti has years of experience in bridal makeup, creating personalized looks that complement your natural beauty and align with your style and preferences. Convenient At-Home Service Forget the stress of traveling to a salon. Ladyfair brings luxury beauty treatments directly to your doorstep with our at-home bridal makeup services, offering a truly personalized experience. Premium Makeup Products We use only high-quality, professional-grade makeup products to ensure a flawless, long-lasting look that remains perfect throughout your big day. Bridal Makeup Pricing in Barachatti Our bridal makeup services in Barachatti are tailored to fit different styles and budgets: Basic Bridal Makeup: ₹10,000 HD Bridal Makeup: ₹12,000 Airbrush Bridal Makeup: ₹18,000 For engagement and reception makeup: Basic Engagement/Reception Makeup: ₹6,000 HD Engagement/Reception Makeup: ₹8,000 Airbrush Engagement/Reception Makeup: ₹12,000 For parties: Basic Party Makeup: ₹2,500 HD Party Makeup: ₹3,500 Popular Bridal Makeup Styles in Barachatti Traditional Bridal Makeup Our traditional bridal makeup in Barachatti incorporates bold colors and intricate detailing to complement your wedding attire, creating an elegant and timeless look. HD Bridal Makeup For a high-definition finish that looks flawless both in photos and in person, HD bridal makeup is the perfect choice for brides who want a picture-perfect appearance all day. Airbrush Bridal Makeup Our airbrush makeup offers a lightweight, full-coverage finish that lasts all day, giving you a smooth and natural look while ensuring long-lasting perfection. How to Book Your Bridal Makeup with Ladyfair in Barachatti Initial Contact: Call us at 7004721239 to discuss your makeup needs and schedule your appointment. Consultation Session: Meet with our makeup artist to discuss your wedding look, review your attire, and plan the perfect makeup style. Makeup Trial: We offer trial sessions to help you preview your bridal makeup look and make any adjustments. Wedding Day Makeup: On your wedding day, our makeup artist will arrive at your location in Barachatti to provide flawless, hassle-free makeup service. Testimonials from Brides in Barachatti Priya R., Barachatti: "Ladyfair provided amazing service on my wedding day. The airbrush makeup looked flawless and lasted all day." Ritu K., Barachatti: "I loved the HD makeup! It was perfect for my photos, and the at-home service was so convenient." Sneha S., Barachatti: "My traditional bridal makeup was exactly what I wanted, and Ladyfair made the entire process stress-free." Preparing for Your Bridal Makeup Session To get the best results for your bridal makeup: Stay Hydrated: Keep your skin looking fresh by drinking plenty of water. Consistent Skincare: Stick to your regular skincare routine to maintain healthy, glowing skin. Avoid New Products: Use familiar products to prevent any reactions before your wedding day. Clear Communication: Discuss your makeup preferences and any concerns with our artist during the consultation. Additional Beauty Services by Ladyfair Beyond bridal makeup, Ladyfair offers a variety of beauty services in Barachatti: Engagement and Reception Makeup: Customized looks for all pre-wedding events. Party Makeup: Perfect for birthdays, anniversaries, and special occasions. Everyday Makeup: Enhance your daily look with our expert makeup services. Special Occasion Makeup: Professional makeup for parties, celebrations, and formal events. The Future of Bridal Makeup in Barachatti Ladyfair is dedicated to setting new standards in bridal beauty in Barachatti with our innovative at-home services. As we continue to offer exceptional service, more brides are choosing Ladyfair as their preferred makeup provider. Q&A with Ladyfair’s Bridal Makeup Artist in Barachatti Q1: What makes Ladyfair the best choice for bridal makeup in Barachatti? A1: Ladyfair offers expert bridal makeup services at home, using high-quality products to ensure a flawless and long-lasting look. Q2: What are the prices for bridal makeup in Barachatti? A2: Our bridal makeup packages start at ₹10,000 for basic makeup, ₹12,000 for HD makeup, and ₹18,000 for airbrush makeup. Q3: How do I book Ladyfair’s bridal makeup services in Barachatti? A3: You can book our services by calling 7004721239. We also offer consultations and trial sessions to ensure you get the look you want. Q4: What bridal makeup styles does Ladyfair offer in Barachatti? A4: Ladyfair offers traditional, HD, and airbrush bridal makeup to suit different preferences and needs. Q5: Are makeup trials available before my wedding? A5: Yes, we offer trial sessions so you can finalize your bridal look ahead of time. Q6: What products does Ladyfair use for bridal makeup? A6: We use professional-grade, high-quality makeup products that are safe for all skin types and ensure a flawless finish. Q7: What other services does Ladyfair provide in Barachatti? A7: In addition to bridal makeup, we offer makeup for engagements, receptions, parties, and other special occasions. Ladyfair is your ultimate choice for professional, at-home bridal makeup services in Barachatti, ensuring a flawless and stress-free experience on your special day.

Posted By: 29th September 2024
Bridal Makeup Artist in Mohanpur
Introduction In Mohanpur, Ladyfair is the premier choice for brides looking to achieve the perfect wedding day look with our professional at-home bridal makeup services. Whether you desire a traditional bridal look, an HD finish, or the flawless perfection of airbrush makeup, our expert makeup artist in Mohanpur ensures that you shine on your special day. Contact us today at 7004721239 to schedule your appointment. Why Choose Ladyfair for Bridal Makeup in Mohanpur Experienced Makeup Artist Our makeup artist in Mohanpur has years of experience in bridal makeup, creating personalized looks that complement your natural beauty and align with your style and preferences. Convenient At-Home Service Forget the stress of traveling to a salon. Ladyfair brings luxury beauty treatments directly to your doorstep with our at-home bridal makeup services, offering a truly personalized experience. Premium Makeup Products We use only high-quality, professional-grade makeup products to ensure a flawless, long-lasting look that remains perfect throughout your big day. Bridal Makeup Pricing in Mohanpur Our bridal makeup services in Mohanpur are tailored to fit different styles and budgets: Basic Bridal Makeup: ₹10,000 HD Bridal Makeup: ₹12,000 Airbrush Bridal Makeup: ₹18,000 For engagement and reception makeup: Basic Engagement/Reception Makeup: ₹6,000 HD Engagement/Reception Makeup: ₹8,000 Airbrush Engagement/Reception Makeup: ₹12,000 For parties: Basic Party Makeup: ₹2,500 HD Party Makeup: ₹3,500 Popular Bridal Makeup Styles in Mohanpur Traditional Bridal Makeup Our traditional bridal makeup in Mohanpur incorporates bold colors and intricate detailing to complement your wedding attire, creating an elegant and timeless look. HD Bridal Makeup For a high-definition finish that looks flawless both in photos and in person, HD bridal makeup is the perfect choice for brides who want a picture-perfect appearance all day. Airbrush Bridal Makeup Our airbrush makeup offers a lightweight, full-coverage finish that lasts all day, giving you a smooth and natural look while ensuring long-lasting perfection. How to Book Your Bridal Makeup with Ladyfair in Mohanpur Initial Contact: Call us at 7004721239 to discuss your makeup needs and schedule your appointment. Consultation Session: Meet with our makeup artist to discuss your wedding look, review your attire, and plan the perfect makeup style. Makeup Trial: We offer trial sessions to help you preview your bridal makeup look and make any adjustments. Wedding Day Makeup: On your wedding day, our makeup artist will arrive at your location in Mohanpur to provide flawless, hassle-free makeup service. Testimonials from Brides in Mohanpur Priya R., Mohanpur: "Ladyfair provided amazing service on my wedding day. The airbrush makeup looked flawless and lasted all day." Ritu K., Mohanpur: "I loved the HD makeup! It was perfect for my photos, and the at-home service was so convenient." Sneha S., Mohanpur: "My traditional bridal makeup was exactly what I wanted, and Ladyfair made the entire process stress-free." Preparing for Your Bridal Makeup Session To get the best results for your bridal makeup: Stay Hydrated: Keep your skin looking fresh by drinking plenty of water. Consistent Skincare: Stick to your regular skincare routine to maintain healthy, glowing skin. Avoid New Products: Use familiar products to prevent any reactions before your wedding day. Clear Communication: Discuss your makeup preferences and any concerns with our artist during the consultation. Additional Beauty Services by Ladyfair Beyond bridal makeup, Ladyfair offers a variety of beauty services in Mohanpur: Engagement and Reception Makeup: Customized looks for all pre-wedding events. Party Makeup: Perfect for birthdays, anniversaries, and special occasions. Everyday Makeup: Enhance your daily look with our expert makeup services. Special Occasion Makeup: Professional makeup for parties, celebrations, and formal events. The Future of Bridal Makeup in Mohanpur Ladyfair is dedicated to setting new standards in bridal beauty in Mohanpur with our innovative at-home services. As we continue to offer exceptional service, more brides are choosing Ladyfair as their preferred makeup provider. Q&A with Ladyfair’s Bridal Makeup Artist in Mohanpur Q1: What makes Ladyfair the best choice for bridal makeup in Mohanpur? A1: Ladyfair offers expert bridal makeup services at home, using high-quality products to ensure a flawless and long-lasting look. Q2: What are the prices for bridal makeup in Mohanpur? A2: Our bridal makeup packages start at ₹10,000 for basic makeup, ₹12,000 for HD makeup, and ₹18,000 for airbrush makeup. Q3: How do I book Ladyfair’s bridal makeup services in Mohanpur? A3: You can book our services by calling 7004721239. We also offer consultations and trial sessions to ensure you get the look you want. Q4: What bridal makeup styles does Ladyfair offer in Mohanpur? A4: Ladyfair offers traditional, HD, and airbrush bridal makeup to suit different preferences and needs. Q5: Are makeup trials available before my wedding? A5: Yes, we offer trial sessions so you can finalize your bridal look ahead of time. Q6: What products does Ladyfair use for bridal makeup? A6: We use professional-grade, high-quality makeup products that are safe for all skin types and ensure a flawless finish. Q7: What other services does Ladyfair provide in Mohanpur? A7: In addition to bridal makeup, we offer makeup for engagements, receptions, parties, and other special occasions. Ladyfair is your ultimate choice for professional, at-home bridal makeup services in Mohanpur, ensuring a flawless and stress-free experience on your special day.

Posted By: 29th September 2024
Bridal Makeup Artist in Dobhi
Introduction In Dobhi, Ladyfair is the premier choice for brides looking to achieve the perfect wedding day look with our professional at-home bridal makeup services. Whether you desire a traditional bridal look, an HD finish, or the flawless perfection of airbrush makeup, our expert makeup artist in Dobhi ensures that you shine on your special day. Contact us today at 7004721239 to schedule your appointment. Why Choose Ladyfair for Bridal Makeup in Dobhi Experienced Makeup Artist Our makeup artist in Dobhi has years of experience in bridal makeup, creating personalized looks that complement your natural beauty and align with your style and preferences. Convenient At-Home Service Forget the stress of traveling to a salon. Ladyfair brings luxury beauty treatments directly to your doorstep with our at-home bridal makeup services, offering a truly personalized experience. Premium Makeup Products We use only high-quality, professional-grade makeup products to ensure a flawless, long-lasting look that remains perfect throughout your big day. Bridal Makeup Pricing in Dobhi Our bridal makeup services in Dobhi are tailored to fit different styles and budgets: Basic Bridal Makeup: ₹10,000 HD Bridal Makeup: ₹12,000 Airbrush Bridal Makeup: ₹18,000 For engagement and reception makeup: Basic Engagement/Reception Makeup: ₹6,000 HD Engagement/Reception Makeup: ₹8,000 Airbrush Engagement/Reception Makeup: ₹12,000 For parties: Basic Party Makeup: ₹2,500 HD Party Makeup: ₹3,500 Popular Bridal Makeup Styles in Dobhi Traditional Bridal Makeup Our traditional bridal makeup in Dobhi incorporates bold colors and intricate detailing to complement your wedding attire, creating an elegant and timeless look. HD Bridal Makeup For a high-definition finish that looks flawless both in photos and in person, HD bridal makeup is the perfect choice for brides who want a picture-perfect appearance all day. Airbrush Bridal Makeup Our airbrush makeup offers a lightweight, full-coverage finish that lasts all day, giving you a smooth and natural look while ensuring long-lasting perfection. How to Book Your Bridal Makeup with Ladyfair in Dobhi Initial Contact: Call us at 7004721239 to discuss your makeup needs and schedule your appointment. Consultation Session: Meet with our makeup artist to discuss your wedding look, review your attire, and plan the perfect makeup style. Makeup Trial: We offer trial sessions to help you preview your bridal makeup look and make any adjustments. Wedding Day Makeup: On your wedding day, our makeup artist will arrive at your location in Dobhi to provide flawless, hassle-free makeup service. Testimonials from Brides in Dobhi Priya R., Dobhi: "Ladyfair provided amazing service on my wedding day. The airbrush makeup looked flawless and lasted all day." Ritu K., Dobhi: "I loved the HD makeup! It was perfect for my photos, and the at-home service was so convenient." Sneha S., Dobhi: "My traditional bridal makeup was exactly what I wanted, and Ladyfair made the entire process stress-free." Preparing for Your Bridal Makeup Session To get the best results for your bridal makeup: Stay Hydrated: Keep your skin looking fresh by drinking plenty of water. Consistent Skincare: Stick to your regular skincare routine to maintain healthy, glowing skin. Avoid New Products: Use familiar products to prevent any reactions before your wedding day. Clear Communication: Discuss your makeup preferences and any concerns with our artist during the consultation. Additional Beauty Services by Ladyfair Beyond bridal makeup, Ladyfair offers a variety of beauty services in Dobhi: Engagement and Reception Makeup: Customized looks for all pre-wedding events. Party Makeup: Perfect for birthdays, anniversaries, and special occasions. Everyday Makeup: Enhance your daily look with our expert makeup services. Special Occasion Makeup: Professional makeup for parties, celebrations, and formal events. The Future of Bridal Makeup in Dobhi Ladyfair is dedicated to setting new standards in bridal beauty in Dobhi with our innovative at-home services. As we continue to offer exceptional service, more brides are choosing Ladyfair as their preferred makeup provider. Q&A with Ladyfair’s Bridal Makeup Artist in Dobhi Q1: What makes Ladyfair the best choice for bridal makeup in Dobhi? A1: Ladyfair offers expert bridal makeup services at home, using high-quality products to ensure a flawless and long-lasting look. Q2: What are the prices for bridal makeup in Dobhi? A2: Our bridal makeup packages start at ₹10,000 for basic makeup, ₹12,000 for HD makeup, and ₹18,000 for airbrush makeup. Q3: How do I book Ladyfair’s bridal makeup services in Dobhi? A3: You can book our services by calling 7004721239. We also offer consultations and trial sessions to ensure you get the look you want. Q4: What bridal makeup styles does Ladyfair offer in Dobhi? A4: Ladyfair offers traditional, HD, and airbrush bridal makeup to suit different preferences and needs. Q5: Are makeup trials available before my wedding? A5: Yes, we offer trial sessions so you can finalize your bridal look ahead of time. Q6: What products does Ladyfair use for bridal makeup? A6: We use professional-grade, high-quality makeup products that are safe for all skin types and ensure a flawless finish. Q7: What other services does Ladyfair provide in Dobhi? A7: In addition to bridal makeup, we offer makeup for engagements, receptions, parties, and other special occasions. Ladyfair is your ultimate choice for professional, at-home bridal makeup services in Dobhi, ensuring a flawless and stress-free experience on your special day.

Posted By: 29th September 2024
Bridal Makeup Artist in Sherghati
Introduction In Sherghati, Ladyfair is the premier choice for brides looking to achieve the perfect wedding day look with our professional at-home bridal makeup services. Whether you desire a traditional bridal look, an HD finish, or the flawless perfection of airbrush makeup, our expert makeup artist in Sherghati ensures that you shine on your special day. Contact us today at 7004721239 to schedule your appointment. Why Choose Ladyfair for Bridal Makeup in Sherghati Experienced Makeup Artist Our makeup artist in Sherghati has years of experience in bridal makeup, creating personalized looks that complement your natural beauty and align with your style and preferences. Convenient At-Home Service Forget the stress of traveling to a salon. Ladyfair brings luxury beauty treatments directly to your doorstep with our at-home bridal makeup services, offering a truly personalized experience. Premium Makeup Products We use only high-quality, professional-grade makeup products to ensure a flawless, long-lasting look that remains perfect throughout your big day. Bridal Makeup Pricing in Sherghati Our bridal makeup services in Sherghati are tailored to fit different styles and budgets: Basic Bridal Makeup: ₹10,000 HD Bridal Makeup: ₹12,000 Airbrush Bridal Makeup: ₹18,000 For engagement and reception makeup: Basic Engagement/Reception Makeup: ₹6,000 HD Engagement/Reception Makeup: ₹8,000 Airbrush Engagement/Reception Makeup: ₹12,000 For parties: Basic Party Makeup: ₹2,500 HD Party Makeup: ₹3,500 Popular Bridal Makeup Styles in Sherghati Traditional Bridal Makeup Our traditional bridal makeup in Sherghati incorporates bold colors and intricate detailing to complement your wedding attire, creating an elegant and timeless look. HD Bridal Makeup For a high-definition finish that looks flawless both in photos and in person, HD bridal makeup is the perfect choice for brides who want a picture-perfect appearance all day. Airbrush Bridal Makeup Our airbrush makeup offers a lightweight, full-coverage finish that lasts all day, giving you a smooth and natural look while ensuring long-lasting perfection. How to Book Your Bridal Makeup with Ladyfair in Sherghati Initial Contact: Call us at 7004721239 to discuss your makeup needs and schedule your appointment. Consultation Session: Meet with our makeup artist to discuss your wedding look, review your attire, and plan the perfect makeup style. Makeup Trial: We offer trial sessions to help you preview your bridal makeup look and make any adjustments. Wedding Day Makeup: On your wedding day, our makeup artist will arrive at your location in Sherghati to provide flawless, hassle-free makeup service. Testimonials from Brides in Sherghati Priya R., Sherghati: "Ladyfair provided amazing service on my wedding day. The airbrush makeup looked flawless and lasted all day." Ritu K., Sherghati: "I loved the HD makeup! It was perfect for my photos, and the at-home service was so convenient." Sneha S., Sherghati: "My traditional bridal makeup was exactly what I wanted, and Ladyfair made the entire process stress-free." Preparing for Your Bridal Makeup Session To get the best results for your bridal makeup: Stay Hydrated: Keep your skin looking fresh by drinking plenty of water. Consistent Skincare: Stick to your regular skincare routine to maintain healthy, glowing skin. Avoid New Products: Use familiar products to prevent any reactions before your wedding day. Clear Communication: Discuss your makeup preferences and any concerns with our artist during the consultation. Additional Beauty Services by Ladyfair Beyond bridal makeup, Ladyfair offers a variety of beauty services in Sherghati: Engagement and Reception Makeup: Customized looks for all pre-wedding events. Party Makeup: Perfect for birthdays, anniversaries, and special occasions. Everyday Makeup: Enhance your daily look with our expert makeup services. Special Occasion Makeup: Professional makeup for parties, celebrations, and formal events. The Future of Bridal Makeup in Sherghati Ladyfair is dedicated to setting new standards in bridal beauty in Sherghati with our innovative at-home services. As we continue to offer exceptional service, more brides are choosing Ladyfair as their preferred makeup provider. Q&A with Ladyfair’s Bridal Makeup Artist in Sherghati Q1: What makes Ladyfair the best choice for bridal makeup in Sherghati? A1: Ladyfair offers expert bridal makeup services at home, using high-quality products to ensure a flawless and long-lasting look. Q2: What are the prices for bridal makeup in Sherghati? A2: Our bridal makeup packages start at ₹10,000 for basic makeup, ₹12,000 for HD makeup, and ₹18,000 for airbrush makeup. Q3: How do I book Ladyfair’s bridal makeup services in Sherghati? A3: You can book our services by calling 7004721239. We also offer consultations and trial sessions to ensure you get the look you want. Q4: What bridal makeup styles does Ladyfair offer in Sherghati? A4: Ladyfair offers traditional, HD, and airbrush bridal makeup to suit different preferences and needs. Q5: Are makeup trials available before my wedding? A5: Yes, we offer trial sessions so you can finalize your bridal look ahead of time. Q6: What products does Ladyfair use for bridal makeup? A6: We use professional-grade, high-quality makeup products that are safe for all skin types and ensure a flawless finish. Q7: What other services does Ladyfair provide in Sherghati? A7: In addition to bridal makeup, we offer makeup for engagements, receptions, parties, and other special occasions. Ladyfair is your ultimate choice for professional, at-home bridal makeup services in Sherghati, ensuring a flawless and stress-free experience on your special day.

Posted By: 29th September 2024
Bridal Makeup Artist in Dumariya
Introduction In Dumariya, Ladyfair is the premier choice for brides looking to achieve the perfect wedding day look with our professional at-home bridal makeup services. Whether you desire a traditional bridal look, an HD finish, or the flawless perfection of airbrush makeup, our expert makeup artist in Dumariya ensures that you shine on your special day. Contact us today at 7004721239 to schedule your appointment. Why Choose Ladyfair for Bridal Makeup in Dumariya Experienced Makeup Artist Our makeup artist in Dumariya has years of experience in bridal makeup, creating personalized looks that complement your natural beauty and align with your style and preferences. Convenient At-Home Service Forget the stress of traveling to a salon. Ladyfair brings luxury beauty treatments directly to your doorstep with our at-home bridal makeup services, offering a truly personalized experience. Premium Makeup Products We use only high-quality, professional-grade makeup products to ensure a flawless, long-lasting look that remains perfect throughout your big day. Bridal Makeup Pricing in Dumariya Our bridal makeup services in Dumariya are tailored to fit different styles and budgets: Basic Bridal Makeup: ₹10,000 HD Bridal Makeup: ₹12,000 Airbrush Bridal Makeup: ₹18,000 For engagement and reception makeup: Basic Engagement/Reception Makeup: ₹6,000 HD Engagement/Reception Makeup: ₹8,000 Airbrush Engagement/Reception Makeup: ₹12,000 For parties: Basic Party Makeup: ₹2,500 HD Party Makeup: ₹3,500 Popular Bridal Makeup Styles in Dumariya Traditional Bridal Makeup Our traditional bridal makeup in Dumariya incorporates bold colors and intricate detailing to complement your wedding attire, creating an elegant and timeless look. HD Bridal Makeup For a high-definition finish that looks flawless both in photos and in person, HD bridal makeup is the perfect choice for brides who want a picture-perfect appearance all day. Airbrush Bridal Makeup Our airbrush makeup offers a lightweight, full-coverage finish that lasts all day, giving you a smooth and natural look while ensuring long-lasting perfection. How to Book Your Bridal Makeup with Ladyfair in Dumariya Initial Contact: Call us at 7004721239 to discuss your makeup needs and schedule your appointment. Consultation Session: Meet with our makeup artist to discuss your wedding look, review your attire, and plan the perfect makeup style. Makeup Trial: We offer trial sessions to help you preview your bridal makeup look and make any adjustments. Wedding Day Makeup: On your wedding day, our makeup artist will arrive at your location in Dumariya to provide flawless, hassle-free makeup service. Testimonials from Brides in Dumariya Priya R., Dumariya: "Ladyfair provided amazing service on my wedding day. The airbrush makeup looked flawless and lasted all day." Ritu K., Dumariya: "I loved the HD makeup! It was perfect for my photos, and the at-home service was so convenient." Sneha S., Dumariya: "My traditional bridal makeup was exactly what I wanted, and Ladyfair made the entire process stress-free." Preparing for Your Bridal Makeup Session To get the best results for your bridal makeup: Stay Hydrated: Keep your skin looking fresh by drinking plenty of water. Consistent Skincare: Stick to your regular skincare routine to maintain healthy, glowing skin. Avoid New Products: Use familiar products to prevent any reactions before your wedding day. Clear Communication: Discuss your makeup preferences and any concerns with our artist during the consultation. Additional Beauty Services by Ladyfair Beyond bridal makeup, Ladyfair offers a variety of beauty services in Dumariya: Engagement and Reception Makeup: Customized looks for all pre-wedding events. Party Makeup: Perfect for birthdays, anniversaries, and special occasions. Everyday Makeup: Enhance your daily look with our expert makeup services. Special Occasion Makeup: Professional makeup for parties, celebrations, and formal events. The Future of Bridal Makeup in Dumariya Ladyfair is dedicated to setting new standards in bridal beauty in Dumariya with our innovative at-home services. As we continue to offer exceptional service, more brides are choosing Ladyfair as their preferred makeup provider. Q&A with Ladyfair’s Bridal Makeup Artist in Dumariya Q1: What makes Ladyfair the best choice for bridal makeup in Dumariya? A1: Ladyfair offers expert bridal makeup services at home, using high-quality products to ensure a flawless and long-lasting look. Q2: What are the prices for bridal makeup in Dumariya? A2: Our bridal makeup packages start at ₹10,000 for basic makeup, ₹12,000 for HD makeup, and ₹18,000 for airbrush makeup. Q3: How do I book Ladyfair’s bridal makeup services in Dumariya? A3: You can book our services by calling 7004721239. We also offer consultations and trial sessions to ensure you get the look you want. Q4: What bridal makeup styles does Ladyfair offer in Dumariya? A4: Ladyfair offers traditional, HD, and airbrush bridal makeup to suit different preferences and needs. Q5: Are makeup trials available before my wedding? A5: Yes, we offer trial sessions so you can finalize your bridal look ahead of time. Q6: What products does Ladyfair use for bridal makeup? A6: We use professional-grade, high-quality makeup products that are safe for all skin types and ensure a flawless finish. Q7: What other services does Ladyfair provide in Dumariya? A7: In addition to bridal makeup, we offer makeup for engagements, receptions, parties, and other special occasions. Ladyfair is your ultimate choice for professional, at-home bridal makeup services in Dumariya, ensuring a flawless and stress-free experience on your special day.

Posted By: 29th September 2024
Bridal Makeup Artist in Imamganj
Introduction In Imamganj, Ladyfair is the premier choice for brides looking to achieve the perfect wedding day look with our professional at-home bridal makeup services. Whether you desire a traditional bridal look, an HD finish, or the flawless perfection of airbrush makeup, our expert makeup artist in Imamganj ensures that you shine on your special day. Contact us today at 7004721239 to schedule your appointment. Why Choose Ladyfair for Bridal Makeup in Imamganj Experienced Makeup Artist Our makeup artist in Imamganj has years of experience in bridal makeup, creating personalized looks that complement your natural beauty and align with your style and preferences. Convenient At-Home Service Forget the stress of traveling to a salon. Ladyfair brings luxury beauty treatments directly to your doorstep with our at-home bridal makeup services, offering a truly personalized experience. Premium Makeup Products We use only high-quality, professional-grade makeup products to ensure a flawless, long-lasting look that remains perfect throughout your big day. Bridal Makeup Pricing in Imamganj Our bridal makeup services in Imamganj are tailored to fit different styles and budgets: Basic Bridal Makeup: ₹10,000 HD Bridal Makeup: ₹12,000 Airbrush Bridal Makeup: ₹18,000 For engagement and reception makeup: Basic Engagement/Reception Makeup: ₹6,000 HD Engagement/Reception Makeup: ₹8,000 Airbrush Engagement/Reception Makeup: ₹12,000 For parties: Basic Party Makeup: ₹2,500 HD Party Makeup: ₹3,500 Popular Bridal Makeup Styles in Imamganj Traditional Bridal Makeup Our traditional bridal makeup in Imamganj incorporates bold colors and intricate detailing to complement your wedding attire, creating an elegant and timeless look. HD Bridal Makeup For a high-definition finish that looks flawless both in photos and in person, HD bridal makeup is the perfect choice for brides who want a picture-perfect appearance all day. Airbrush Bridal Makeup Our airbrush makeup offers a lightweight, full-coverage finish that lasts all day, giving you a smooth and natural look while ensuring long-lasting perfection. How to Book Your Bridal Makeup with Ladyfair in Imamganj Initial Contact: Call us at 7004721239 to discuss your makeup needs and schedule your appointment. Consultation Session: Meet with our makeup artist to discuss your wedding look, review your attire, and plan the perfect makeup style. Makeup Trial: We offer trial sessions to help you preview your bridal makeup look and make any adjustments. Wedding Day Makeup: On your wedding day, our makeup artist will arrive at your location in Imamganj to provide flawless, hassle-free makeup service. Testimonials from Brides in Imamganj Priya R., Imamganj: "Ladyfair provided amazing service on my wedding day. The airbrush makeup looked flawless and lasted all day." Ritu K., Imamganj: "I loved the HD makeup! It was perfect for my photos, and the at-home service was so convenient." Sneha S., Imamganj: "My traditional bridal makeup was exactly what I wanted, and Ladyfair made the entire process stress-free." Preparing for Your Bridal Makeup Session To get the best results for your bridal makeup: Stay Hydrated: Keep your skin looking fresh by drinking plenty of water. Consistent Skincare: Stick to your regular skincare routine to maintain healthy, glowing skin. Avoid New Products: Use familiar products to prevent any reactions before your wedding day. Clear Communication: Discuss your makeup preferences and any concerns with our artist during the consultation. Additional Beauty Services by Ladyfair Beyond bridal makeup, Ladyfair offers a variety of beauty services in Imamganj: Engagement and Reception Makeup: Customized looks for all pre-wedding events. Party Makeup: Perfect for birthdays, anniversaries, and special occasions. Everyday Makeup: Enhance your daily look with our expert makeup services. Special Occasion Makeup: Professional makeup for parties, celebrations, and formal events. The Future of Bridal Makeup in Imamganj Ladyfair is dedicated to setting new standards in bridal beauty in Imamganj with our innovative at-home services. As we continue to offer exceptional service, more brides are choosing Ladyfair as their preferred makeup provider. Q&A with Ladyfair’s Bridal Makeup Artist in Imamganj Q1: What makes Ladyfair the best choice for bridal makeup in Imamganj? A1: Ladyfair offers expert bridal makeup services at home, using high-quality products to ensure a flawless and long-lasting look. Q2: What are the prices for bridal makeup in Imamganj? A2: Our bridal makeup packages start at ₹10,000 for basic makeup, ₹12,000 for HD makeup, and ₹18,000 for airbrush makeup. Q3: How do I book Ladyfair’s bridal makeup services in Imamganj? A3: You can book our services by calling 7004721239. We also offer consultations and trial sessions to ensure you get the look you want. Q4: What bridal makeup styles does Ladyfair offer in Imamganj? A4: Ladyfair offers traditional, HD, and airbrush bridal makeup to suit different preferences and needs. Q5: Are makeup trials available before my wedding? A5: Yes, we offer trial sessions so you can finalize your bridal look ahead of time. Q6: What products does Ladyfair use for bridal makeup? A6: We use professional-grade, high-quality makeup products that are safe for all skin types and ensure a flawless finish. Q7: What other services does Ladyfair provide in Imamganj? A7: In addition to bridal makeup, we offer makeup for engagements, receptions, parties, and other special occasions. Ladyfair is your ultimate choice for professional, at-home bridal makeup services in Imamganj, ensuring a flawless and stress-free experience on your special day.

Posted By: 29th September 2024
Bridal Makeup Artist in Banke Bazar
Introduction In Banke Bazar, Ladyfair is the premier choice for brides looking to achieve the perfect wedding day look with our professional at-home bridal makeup services. Whether you desire a traditional bridal look, an HD finish, or the flawless perfection of airbrush makeup, our expert makeup artist in Banke Bazar ensures that you shine on your special day. Contact us today at 7004721239 to schedule your appointment. Why Choose Ladyfair for Bridal Makeup in Banke Bazar Experienced Makeup Artist Our makeup artist in Banke Bazar has years of experience in bridal makeup, creating personalized looks that complement your natural beauty and align with your style and preferences. Convenient At-Home Service Forget the stress of traveling to a salon. Ladyfair brings luxury beauty treatments directly to your doorstep with our at-home bridal makeup services, offering a truly personalized experience. Premium Makeup Products We use only high-quality, professional-grade makeup products to ensure a flawless, long-lasting look that remains perfect throughout your big day. Bridal Makeup Pricing in Banke Bazar Our bridal makeup services in Banke Bazar are tailored to fit different styles and budgets: Basic Bridal Makeup: ₹10,000 HD Bridal Makeup: ₹12,000 Airbrush Bridal Makeup: ₹18,000 For engagement and reception makeup: Basic Engagement/Reception Makeup: ₹6,000 HD Engagement/Reception Makeup: ₹8,000 Airbrush Engagement/Reception Makeup: ₹12,000 For parties: Basic Party Makeup: ₹2,500 HD Party Makeup: ₹3,500 Popular Bridal Makeup Styles in Banke Bazar Traditional Bridal Makeup Our traditional bridal makeup in Banke Bazar incorporates bold colors and intricate detailing to complement your wedding attire, creating an elegant and timeless look. HD Bridal Makeup For a high-definition finish that looks flawless both in photos and in person, HD bridal makeup is the perfect choice for brides who want a picture-perfect appearance all day. Airbrush Bridal Makeup Our airbrush makeup offers a lightweight, full-coverage finish that lasts all day, giving you a smooth and natural look while ensuring long-lasting perfection. How to Book Your Bridal Makeup with Ladyfair in Banke Bazar Initial Contact: Call us at 7004721239 to discuss your makeup needs and schedule your appointment. Consultation Session: Meet with our makeup artist to discuss your wedding look, review your attire, and plan the perfect makeup style. Makeup Trial: We offer trial sessions to help you preview your bridal makeup look and make any adjustments. Wedding Day Makeup: On your wedding day, our makeup artist will arrive at your location in Banke Bazar to provide flawless, hassle-free makeup service. Testimonials from Brides in Banke Bazar Priya R., Banke Bazar: "Ladyfair provided amazing service on my wedding day. The airbrush makeup looked flawless and lasted all day." Ritu K., Banke Bazar: "I loved the HD makeup! It was perfect for my photos, and the at-home service was so convenient." Sneha S., Banke Bazar: "My traditional bridal makeup was exactly what I wanted, and Ladyfair made the entire process stress-free." Preparing for Your Bridal Makeup Session To get the best results for your bridal makeup: Stay Hydrated: Keep your skin looking fresh by drinking plenty of water. Consistent Skincare: Stick to your regular skincare routine to maintain healthy, glowing skin. Avoid New Products: Use familiar products to prevent any reactions before your wedding day. Clear Communication: Discuss your makeup preferences and any concerns with our artist during the consultation. Additional Beauty Services by Ladyfair Beyond bridal makeup, Ladyfair offers a variety of beauty services in Banke Bazar: Engagement and Reception Makeup: Customized looks for all pre-wedding events. Party Makeup: Perfect for birthdays, anniversaries, and special occasions. Everyday Makeup: Enhance your daily look with our expert makeup services. Special Occasion Makeup: Professional makeup for parties, celebrations, and formal events. The Future of Bridal Makeup in Banke Bazar Ladyfair is dedicated to setting new standards in bridal beauty in Banke Bazar with our innovative at-home services. As we continue to offer exceptional service, more brides are choosing Ladyfair as their preferred makeup provider. Q&A with Ladyfair’s Bridal Makeup Artist in Banke Bazar Q1: What makes Ladyfair the best choice for bridal makeup in Banke Bazar? A1: Ladyfair offers expert bridal makeup services at home, using high-quality products to ensure a flawless and long-lasting look. Q2: What are the prices for bridal makeup in Banke Bazar? A2: Our bridal makeup packages start at ₹10,000 for basic makeup, ₹12,000 for HD makeup, and ₹18,000 for airbrush makeup. Q3: How do I book Ladyfair’s bridal makeup services in Banke Bazar? A3: You can book our services by calling 7004721239. We also offer consultations and trial sessions to ensure you get the look you want. Q4: What bridal makeup styles does Ladyfair offer in Banke Bazar? A4: Ladyfair offers traditional, HD, and airbrush bridal makeup to suit different preferences and needs. Q5: Are makeup trials available before my wedding? A5: Yes, we offer trial sessions so you can finalize your bridal look ahead of time. Q6: What products does Ladyfair use for bridal makeup? A6: We use professional-grade, high-quality makeup products that are safe for all skin types and ensure a flawless finish. Q7: What other services does Ladyfair provide in Banke Bazar? A7: In addition to bridal makeup, we offer makeup for engagements, receptions, parties, and other special occasions. Ladyfair is your ultimate choice for professional, at-home bridal makeup services in Banke Bazar, ensuring a flawless and stress-free experience on your special day.

Posted By: 29th September 2024
Bridal Makeup Artist in Amas
Introduction In Amas, Ladyfair is the premier choice for brides looking to achieve the perfect wedding day look with our professional at-home bridal makeup services. Whether you desire a traditional bridal look, an HD finish, or the flawless perfection of airbrush makeup, our expert makeup artist in Amas ensures that you shine on your special day. Contact us today at 7004721239 to schedule your appointment. Why Choose Ladyfair for Bridal Makeup in Amas Experienced Makeup Artist Our makeup artist in Amas has years of experience in bridal makeup, creating personalized looks that complement your natural beauty and align with your style and preferences. Convenient At-Home Service Forget the stress of traveling to a salon. Ladyfair brings luxury beauty treatments directly to your doorstep with our at-home bridal makeup services, offering a truly personalized experience. Premium Makeup Products We use only high-quality, professional-grade makeup products to ensure a flawless, long-lasting look that remains perfect throughout your big day. Bridal Makeup Pricing in Amas Our bridal makeup services in Amas are tailored to fit different styles and budgets: Basic Bridal Makeup: ₹10,000 HD Bridal Makeup: ₹12,000 Airbrush Bridal Makeup: ₹18,000 For engagement and reception makeup: Basic Engagement/Reception Makeup: ₹6,000 HD Engagement/Reception Makeup: ₹8,000 Airbrush Engagement/Reception Makeup: ₹12,000 For parties: Basic Party Makeup: ₹2,500 HD Party Makeup: ₹3,500 Popular Bridal Makeup Styles in Amas Traditional Bridal Makeup Our traditional bridal makeup in Amas incorporates bold colors and intricate detailing to complement your wedding attire, creating an elegant and timeless look. HD Bridal Makeup For a high-definition finish that looks flawless both in photos and in person, HD bridal makeup is the perfect choice for brides who want a picture-perfect appearance all day. Airbrush Bridal Makeup Our airbrush makeup offers a lightweight, full-coverage finish that lasts all day, giving you a smooth and natural look while ensuring long-lasting perfection. How to Book Your Bridal Makeup with Ladyfair in Amas Initial Contact: Call us at 7004721239 to discuss your makeup needs and schedule your appointment. Consultation Session: Meet with our makeup artist to discuss your wedding look, review your attire, and plan the perfect makeup style. Makeup Trial: We offer trial sessions to help you preview your bridal makeup look and make any adjustments. Wedding Day Makeup: On your wedding day, our makeup artist will arrive at your location in Amas to provide flawless, hassle-free makeup service. Testimonials from Brides in Amas Priya R., Amas: "Ladyfair provided amazing service on my wedding day. The airbrush makeup looked flawless and lasted all day." Ritu K., Amas: "I loved the HD makeup! It was perfect for my photos, and the at-home service was so convenient." Sneha S., Amas: "My traditional bridal makeup was exactly what I wanted, and Ladyfair made the entire process stress-free." Preparing for Your Bridal Makeup Session To get the best results for your bridal makeup: Stay Hydrated: Keep your skin looking fresh by drinking plenty of water. Consistent Skincare: Stick to your regular skincare routine to maintain healthy, glowing skin. Avoid New Products: Use familiar products to prevent any reactions before your wedding day. Clear Communication: Discuss your makeup preferences and any concerns with our artist during the consultation. Additional Beauty Services by Ladyfair Beyond bridal makeup, Ladyfair offers a variety of beauty services in Amas: Engagement and Reception Makeup: Customized looks for all pre-wedding events. Party Makeup: Perfect for birthdays, anniversaries, and special occasions. Everyday Makeup: Enhance your daily look with our expert makeup services. Special Occasion Makeup: Professional makeup for parties, celebrations, and formal events. The Future of Bridal Makeup in Amas Ladyfair is dedicated to setting new standards in bridal beauty in Amas with our innovative at-home services. As we continue to offer exceptional service, more brides are choosing Ladyfair as their preferred makeup provider. Q&A with Ladyfair’s Bridal Makeup Artist in Amas Q1: What makes Ladyfair the best choice for bridal makeup in Amas? A1: Ladyfair offers expert bridal makeup services at home, using high-quality products to ensure a flawless and long-lasting look. Q2: What are the prices for bridal makeup in Amas? A2: Our bridal makeup packages start at ₹10,000 for basic makeup, ₹12,000 for HD makeup, and ₹18,000 for airbrush makeup. Q3: How do I book Ladyfair’s bridal makeup services in Amas? A3: You can book our services by calling 7004721239. We also offer consultations and trial sessions to ensure you get the look you want. Q4: What bridal makeup styles does Ladyfair offer in Amas? A4: Ladyfair offers traditional, HD, and airbrush bridal makeup to suit different preferences and needs. Q5: Are makeup trials available before my wedding? A5: Yes, we offer trial sessions so you can finalize your bridal look ahead of time. Q6: What products does Ladyfair use for bridal makeup? A6: We use professional-grade, high-quality makeup products that are safe for all skin types and ensure a flawless finish. Q7: What other services does Ladyfair provide in Amas? A7: In addition to bridal makeup, we offer makeup for engagements, receptions, parties, and other special occasions. Ladyfair is your ultimate choice for professional, at-home bridal makeup services in Amas, ensuring a flawless and stress-free experience on your special day.

Posted By: 29th September 2024
Bridal Makeup Artist in Gurua
Introduction In Gurua, Ladyfair is the premier choice for brides looking to achieve the perfect wedding day look with our professional at-home bridal makeup services. Whether you desire a traditional bridal look, an HD finish, or the flawless perfection of airbrush makeup, our expert makeup artist in Gurua ensures that you shine on your special day. Contact us today at 7004721239 to schedule your appointment. Why Choose Ladyfair for Bridal Makeup in Gurua Experienced Makeup Artist Our makeup artist in Gurua has years of experience in bridal makeup, creating personalized looks that complement your natural beauty and align with your style and preferences. Convenient At-Home Service Forget the stress of traveling to a salon. Ladyfair brings luxury beauty treatments directly to your doorstep with our at-home bridal makeup services, offering a truly personalized experience. Premium Makeup Products We use only high-quality, professional-grade makeup products to ensure a flawless, long-lasting look that remains perfect throughout your big day. Bridal Makeup Pricing in Gurua Our bridal makeup services in Gurua are tailored to fit different styles and budgets: Basic Bridal Makeup: ₹10,000 HD Bridal Makeup: ₹12,000 Airbrush Bridal Makeup: ₹18,000 For engagement and reception makeup: Basic Engagement/Reception Makeup: ₹6,000 HD Engagement/Reception Makeup: ₹8,000 Airbrush Engagement/Reception Makeup: ₹12,000 For parties: Basic Party Makeup: ₹2,500 HD Party Makeup: ₹3,500 Popular Bridal Makeup Styles in Gurua Traditional Bridal Makeup Our traditional bridal makeup in Gurua incorporates bold colors and intricate detailing to complement your wedding attire, creating an elegant and timeless look. HD Bridal Makeup For a high-definition finish that looks flawless both in photos and in person, HD bridal makeup is the perfect choice for brides who want a picture-perfect appearance all day. Airbrush Bridal Makeup Our airbrush makeup offers a lightweight, full-coverage finish that lasts all day, giving you a smooth and natural look while ensuring long-lasting perfection. How to Book Your Bridal Makeup with Ladyfair in Gurua Initial Contact: Call us at 7004721239 to discuss your makeup needs and schedule your appointment. Consultation Session: Meet with our makeup artist to discuss your wedding look, review your attire, and plan the perfect makeup style. Makeup Trial: We offer trial sessions to help you preview your bridal makeup look and make any adjustments. Wedding Day Makeup: On your wedding day, our makeup artist will arrive at your location in Gurua to provide flawless, hassle-free makeup service. Testimonials from Brides in Gurua Priya R., Gurua: "Ladyfair provided amazing service on my wedding day. The airbrush makeup looked flawless and lasted all day." Ritu K., Gurua: "I loved the HD makeup! It was perfect for my photos, and the at-home service was so convenient." Sneha S., Gurua: "My traditional bridal makeup was exactly what I wanted, and Ladyfair made the entire process stress-free." Preparing for Your Bridal Makeup Session To get the best results for your bridal makeup: Stay Hydrated: Keep your skin looking fresh by drinking plenty of water. Consistent Skincare: Stick to your regular skincare routine to maintain healthy, glowing skin. Avoid New Products: Use familiar products to prevent any reactions before your wedding day. Clear Communication: Discuss your makeup preferences and any concerns with our artist during the consultation. Additional Beauty Services by Ladyfair Beyond bridal makeup, Ladyfair offers a variety of beauty services in Gurua: Engagement and Reception Makeup: Customized looks for all pre-wedding events. Party Makeup: Perfect for birthdays, anniversaries, and special occasions. Everyday Makeup: Enhance your daily look with our expert makeup services. Special Occasion Makeup: Professional makeup for parties, celebrations, and formal events. The Future of Bridal Makeup in Gurua Ladyfair is dedicated to setting new standards in bridal beauty in Gurua with our innovative at-home services. As we continue to offer exceptional service, more brides are choosing Ladyfair as their preferred makeup provider. Q&A with Ladyfair’s Bridal Makeup Artist in Gurua Q1: What makes Ladyfair the best choice for bridal makeup in Gurua? A1: Ladyfair offers expert bridal makeup services at home, using high-quality products to ensure a flawless and long-lasting look. Q2: What are the prices for bridal makeup in Gurua? A2: Our bridal makeup packages start at ₹10,000 for basic makeup, ₹12,000 for HD makeup, and ₹18,000 for airbrush makeup. Q3: How do I book Ladyfair’s bridal makeup services in Gurua? A3: You can book our services by calling 7004721239. We also offer consultations and trial sessions to ensure you get the look you want. Q4: What bridal makeup styles does Ladyfair offer in Gurua? A4: Ladyfair offers traditional, HD, and airbrush bridal makeup to suit different preferences and needs. Q5: Are makeup trials available before my wedding? A5: Yes, we offer trial sessions so you can finalize your bridal look ahead of time. Q6: What products does Ladyfair use for bridal makeup? A6: We use professional-grade, high-quality makeup products that are safe for all skin types and ensure a flawless finish. Q7: What other services does Ladyfair provide in Gurua? A7: In addition to bridal makeup, we offer makeup for engagements, receptions, parties, and other special occasions. Ladyfair is your ultimate choice for professional, at-home bridal makeup services in Gurua, ensuring a flawless and stress-free experience on your special day.

Posted By: 29th September 2024
Bridal Makeup Artist in Mohra
Introduction In Mohra, Ladyfair is the premier choice for brides looking to achieve the perfect wedding day look with our professional at-home bridal makeup services. Whether you desire a traditional bridal look, an HD finish, or the flawless perfection of airbrush makeup, our expert makeup artist in Mohra ensures that you shine on your special day. Contact us today at 7004721239 to schedule your appointment. Why Choose Ladyfair for Bridal Makeup in Mohra Experienced Makeup Artist Our makeup artist in Mohra has years of experience in bridal makeup, creating personalized looks that complement your natural beauty and align with your style and preferences. Convenient At-Home Service Forget the stress of traveling to a salon. Ladyfair brings luxury beauty treatments directly to your doorstep with our at-home bridal makeup services, offering a truly personalized experience. Premium Makeup Products We use only high-quality, professional-grade makeup products to ensure a flawless, long-lasting look that remains perfect throughout your big day. Bridal Makeup Pricing in Mohra Our bridal makeup services in Mohra are tailored to fit different styles and budgets: Basic Bridal Makeup: ₹10,000 HD Bridal Makeup: ₹12,000 Airbrush Bridal Makeup: ₹18,000 For engagement and reception makeup: Basic Engagement/Reception Makeup: ₹6,000 HD Engagement/Reception Makeup: ₹8,000 Airbrush Engagement/Reception Makeup: ₹12,000 For parties: Basic Party Makeup: ₹2,500 HD Party Makeup: ₹3,500 Popular Bridal Makeup Styles in Mohra Traditional Bridal Makeup Our traditional bridal makeup in Mohra incorporates bold colors and intricate detailing to complement your wedding attire, creating an elegant and timeless look. HD Bridal Makeup For a high-definition finish that looks flawless both in photos and in person, HD bridal makeup is the perfect choice for brides who want a picture-perfect appearance all day. Airbrush Bridal Makeup Our airbrush makeup offers a lightweight, full-coverage finish that lasts all day, giving you a smooth and natural look while ensuring long-lasting perfection. How to Book Your Bridal Makeup with Ladyfair in Mohra Initial Contact: Call us at 7004721239 to discuss your makeup needs and schedule your appointment. Consultation Session: Meet with our makeup artist to discuss your wedding look, review your attire, and plan the perfect makeup style. Makeup Trial: We offer trial sessions to help you preview your bridal makeup look and make any adjustments. Wedding Day Makeup: On your wedding day, our makeup artist will arrive at your location in Mohra to provide flawless, hassle-free makeup service. Testimonials from Brides in Mohra Priya R., Mohra: "Ladyfair provided amazing service on my wedding day. The airbrush makeup looked flawless and lasted all day." Ritu K., Mohra: "I loved the HD makeup! It was perfect for my photos, and the at-home service was so convenient." Sneha S., Mohra: "My traditional bridal makeup was exactly what I wanted, and Ladyfair made the entire process stress-free." Preparing for Your Bridal Makeup Session To get the best results for your bridal makeup: Stay Hydrated: Keep your skin looking fresh by drinking plenty of water. Consistent Skincare: Stick to your regular skincare routine to maintain healthy, glowing skin. Avoid New Products: Use familiar products to prevent any reactions before your wedding day. Clear Communication: Discuss your makeup preferences and any concerns with our artist during the consultation. Additional Beauty Services by Ladyfair Beyond bridal makeup, Ladyfair offers a variety of beauty services in Mohra: Engagement and Reception Makeup: Customized looks for all pre-wedding events. Party Makeup: Perfect for birthdays, anniversaries, and special occasions. Everyday Makeup: Enhance your daily look with our expert makeup services. Special Occasion Makeup: Professional makeup for parties, celebrations, and formal events. The Future of Bridal Makeup in Mohra Ladyfair is dedicated to setting new standards in bridal beauty in Mohra with our innovative at-home services. As we continue to offer exceptional service, more brides are choosing Ladyfair as their preferred makeup provider. Q&A with Ladyfair’s Bridal Makeup Artist in Mohra Q1: What makes Ladyfair the best choice for bridal makeup in Mohra? A1: Ladyfair offers expert bridal makeup services at home, using high-quality products to ensure a flawless and long-lasting look. Q2: What are the prices for bridal makeup in Mohra? A2: Our bridal makeup packages start at ₹10,000 for basic makeup, ₹12,000 for HD makeup, and ₹18,000 for airbrush makeup. Q3: How do I book Ladyfair’s bridal makeup services in Mohra? A3: You can book our services by calling 7004721239. We also offer consultations and trial sessions to ensure you get the look you want. Q4: What bridal makeup styles does Ladyfair offer in Mohra? A4: Ladyfair offers traditional, HD, and airbrush bridal makeup to suit different preferences and needs. Q5: Are makeup trials available before my wedding? A5: Yes, we offer trial sessions so you can finalize your bridal look ahead of time. Q6: What products does Ladyfair use for bridal makeup? A6: We use professional-grade, high-quality makeup products that are safe for all skin types and ensure a flawless finish. Q7: What other services does Ladyfair provide in Mohra? A7: In addition to bridal makeup, we offer makeup for engagements, receptions, parties, and other special occasions. Ladyfair is your ultimate choice for professional, at-home bridal makeup services in Mohra, ensuring a flawless and stress-free experience on your special day.

Posted By: 28th September 2024
Bridal Makeup Artist in Bathani
Introduction In Bathani, Ladyfair is the premier choice for brides looking to achieve the perfect wedding day look with our professional at-home bridal makeup services. Whether you desire a traditional bridal look, an HD finish, or the flawless perfection of airbrush makeup, our expert makeup artist in Bathani ensures that you shine on your special day. Contact us today at 7004721239 to schedule your appointment. Why Choose Ladyfair for Bridal Makeup in Bathani Experienced Makeup Artist Our makeup artist in Bathani has years of experience in bridal makeup, creating personalized looks that complement your natural beauty and align with your style and preferences. Convenient At-Home Service Forget the stress of traveling to a salon. Ladyfair brings luxury beauty treatments directly to your doorstep with our at-home bridal makeup services, offering a truly personalized experience. Premium Makeup Products We use only high-quality, professional-grade makeup products to ensure a flawless, long-lasting look that remains perfect throughout your big day. Bridal Makeup Pricing in Bathani Our bridal makeup services in Bathani are tailored to fit different styles and budgets: Basic Bridal Makeup: ₹10,000 HD Bridal Makeup: ₹12,000 Airbrush Bridal Makeup: ₹18,000 For engagement and reception makeup: Basic Engagement/Reception Makeup: ₹6,000 HD Engagement/Reception Makeup: ₹8,000 Airbrush Engagement/Reception Makeup: ₹12,000 For parties: Basic Party Makeup: ₹2,500 HD Party Makeup: ₹3,500 Popular Bridal Makeup Styles in Bathani Traditional Bridal Makeup Our traditional bridal makeup in Bathani incorporates bold colors and intricate detailing to complement your wedding attire, creating an elegant and timeless look. HD Bridal Makeup For a high-definition finish that looks flawless both in photos and in person, HD bridal makeup is the perfect choice for brides who want a picture-perfect appearance all day. Airbrush Bridal Makeup Our airbrush makeup offers a lightweight, full-coverage finish that lasts all day, giving you a smooth and natural look while ensuring long-lasting perfection. How to Book Your Bridal Makeup with Ladyfair in Bathani Initial Contact: Call us at 7004721239 to discuss your makeup needs and schedule your appointment. Consultation Session: Meet with our makeup artist to discuss your wedding look, review your attire, and plan the perfect makeup style. Makeup Trial: We offer trial sessions to help you preview your bridal makeup look and make any adjustments. Wedding Day Makeup: On your wedding day, our makeup artist will arrive at your location in Bathani to provide flawless, hassle-free makeup service. Testimonials from Brides in Bathani Priya R., Bathani: "Ladyfair provided amazing service on my wedding day. The airbrush makeup looked flawless and lasted all day." Ritu K., Bathani: "I loved the HD makeup! It was perfect for my photos, and the at-home service was so convenient." Sneha S., Bathani: "My traditional bridal makeup was exactly what I wanted, and Ladyfair made the entire process stress-free." Preparing for Your Bridal Makeup Session To get the best results for your bridal makeup: Stay Hydrated: Keep your skin looking fresh by drinking plenty of water. Consistent Skincare: Stick to your regular skincare routine to maintain healthy, glowing skin. Avoid New Products: Use familiar products to prevent any reactions before your wedding day. Clear Communication: Discuss your makeup preferences and any concerns with our artist during the consultation. Additional Beauty Services by Ladyfair Beyond bridal makeup, Ladyfair offers a variety of beauty services in Bathani: Engagement and Reception Makeup: Customized looks for all pre-wedding events. Party Makeup: Perfect for birthdays, anniversaries, and special occasions. Everyday Makeup: Enhance your daily look with our expert makeup services. Special Occasion Makeup: Professional makeup for parties, celebrations, and formal events. The Future of Bridal Makeup in Bathani Ladyfair is dedicated to setting new standards in bridal beauty in Bathani with our innovative at-home services. As we continue to offer exceptional service, more brides are choosing Ladyfair as their preferred makeup provider. Q&A with Ladyfair’s Bridal Makeup Artist in Bathani Q1: What makes Ladyfair the best choice for bridal makeup in Bathani? A1: Ladyfair offers expert bridal makeup services at home, using high-quality products to ensure a flawless and long-lasting look. Q2: What are the prices for bridal makeup in Bathani? A2: Our bridal makeup packages start at ₹10,000 for basic makeup, ₹12,000 for HD makeup, and ₹18,000 for airbrush makeup. Q3: How do I book Ladyfair’s bridal makeup services in Bathani? A3: You can book our services by calling 7004721239. We also offer consultations and trial sessions to ensure you get the look you want. Q4: What bridal makeup styles does Ladyfair offer in Bathani? A4: Ladyfair offers traditional, HD, and airbrush bridal makeup to suit different preferences and needs. Q5: Are makeup trials available before my wedding? A5: Yes, we offer trial sessions so you can finalize your bridal look ahead of time. Q6: What products does Ladyfair use for bridal makeup? A6: We use professional-grade, high-quality makeup products that are safe for all skin types and ensure a flawless finish. Q7: What other services does Ladyfair provide in Bathani? A7: In addition to bridal makeup, we offer makeup for engagements, receptions, parties, and other special occasions. Ladyfair is your ultimate choice for professional, at-home bridal makeup services in Bathani, ensuring a flawless and stress-free experience on your special day.

Posted By: 28th September 2024
Bridal Makeup Artist in Atri
Introduction In Atri, Ladyfair is the premier choice for brides looking to achieve the perfect wedding day look with our professional at-home bridal makeup services. Whether you desire a traditional bridal look, an HD finish, or the flawless perfection of airbrush makeup, our expert makeup artist in Atri ensures that you shine on your special day. Contact us today at 7004721239 to schedule your appointment. Why Choose Ladyfair for Bridal Makeup in Atri Experienced Makeup Artist Our makeup artist in Atri has years of experience in bridal makeup, creating personalized looks that complement your natural beauty and align with your style and preferences. Convenient At-Home Service Forget the stress of traveling to a salon. Ladyfair brings luxury beauty treatments directly to your doorstep with our at-home bridal makeup services, offering a truly personalized experience. Premium Makeup Products We use only high-quality, professional-grade makeup products to ensure a flawless, long-lasting look that remains perfect throughout your big day. Bridal Makeup Pricing in Atri Our bridal makeup services in Atri are tailored to fit different styles and budgets: Basic Bridal Makeup: ₹10,000 HD Bridal Makeup: ₹12,000 Airbrush Bridal Makeup: ₹18,000 For engagement and reception makeup: Basic Engagement/Reception Makeup: ₹6,000 HD Engagement/Reception Makeup: ₹8,000 Airbrush Engagement/Reception Makeup: ₹12,000 For parties: Basic Party Makeup: ₹2,500 HD Party Makeup: ₹3,500 Popular Bridal Makeup Styles in Atri Traditional Bridal Makeup Our traditional bridal makeup in Atri incorporates bold colors and intricate detailing to complement your wedding attire, creating an elegant and timeless look. HD Bridal Makeup For a high-definition finish that looks flawless both in photos and in person, HD bridal makeup is the perfect choice for brides who want a picture-perfect appearance all day. Airbrush Bridal Makeup Our airbrush makeup offers a lightweight, full-coverage finish that lasts all day, giving you a smooth and natural look while ensuring long-lasting perfection. How to Book Your Bridal Makeup with Ladyfair in Atri Initial Contact: Call us at 7004721239 to discuss your makeup needs and schedule your appointment. Consultation Session: Meet with our makeup artist to discuss your wedding look, review your attire, and plan the perfect makeup style. Makeup Trial: We offer trial sessions to help you preview your bridal makeup look and make any adjustments. Wedding Day Makeup: On your wedding day, our makeup artist will arrive at your location in Atri to provide flawless, hassle-free makeup service. Testimonials from Brides in Atri Priya R., Atri: "Ladyfair provided amazing service on my wedding day. The airbrush makeup looked flawless and lasted all day." Ritu K., Atri: "I loved the HD makeup! It was perfect for my photos, and the at-home service was so convenient." Sneha S., Atri: "My traditional bridal makeup was exactly what I wanted, and Ladyfair made the entire process stress-free." Preparing for Your Bridal Makeup Session To get the best results for your bridal makeup: Stay Hydrated: Keep your skin looking fresh by drinking plenty of water. Consistent Skincare: Stick to your regular skincare routine to maintain healthy, glowing skin. Avoid New Products: Use familiar products to prevent any reactions before your wedding day. Clear Communication: Discuss your makeup preferences and any concerns with our artist during the consultation. Additional Beauty Services by Ladyfair Beyond bridal makeup, Ladyfair offers a variety of beauty services in Atri: Engagement and Reception Makeup: Customized looks for all pre-wedding events. Party Makeup: Perfect for birthdays, anniversaries, and special occasions. Everyday Makeup: Enhance your daily look with our expert makeup services. Special Occasion Makeup: Professional makeup for parties, celebrations, and formal events. The Future of Bridal Makeup in Atri Ladyfair is dedicated to setting new standards in bridal beauty in Atri with our innovative at-home services. As we continue to offer exceptional service, more brides are choosing Ladyfair as their preferred makeup provider. Q&A with Ladyfair’s Bridal Makeup Artist in Atri Q1: What makes Ladyfair the best choice for bridal makeup in Atri? A1: Ladyfair offers expert bridal makeup services at home, using high-quality products to ensure a flawless and long-lasting look. Q2: What are the prices for bridal makeup in Atri? A2: Our bridal makeup packages start at ₹10,000 for basic makeup, ₹12,000 for HD makeup, and ₹18,000 for airbrush makeup. Q3: How do I book Ladyfair’s bridal makeup services in Atri? A3: You can book our services by calling 7004721239. We also offer consultations and trial sessions to ensure you get the look you want. Q4: What bridal makeup styles does Ladyfair offer in Atri? A4: Ladyfair offers traditional, HD, and airbrush bridal makeup to suit different preferences and needs. Q5: Are makeup trials available before my wedding? A5: Yes, we offer trial sessions so you can finalize your bridal look ahead of time. Q6: What products does Ladyfair use for bridal makeup? A6: We use professional-grade, high-quality makeup products that are safe for all skin types and ensure a flawless finish. Q7: What other services does Ladyfair provide in Atri? A7: In addition to bridal makeup, we offer makeup for engagements, receptions, parties, and other special occasions. Ladyfair is your ultimate choice for professional, at-home bridal makeup services in Atri, ensuring a flawless and stress-free experience on your special day.

Posted By: 28th September 2024
Bridal Makeup Artist in Khizarsarai
Introduction In Khizarsarai, Ladyfair is the premier choice for brides looking to achieve the perfect wedding day look with our professional at-home bridal makeup services. Whether you desire a traditional bridal look, an HD finish, or the flawless perfection of airbrush makeup, our expert makeup artist in Khizarsarai ensures that you shine on your special day. Contact us today at 7004721239 to schedule your appointment. Why Choose Ladyfair for Bridal Makeup in Khizarsarai Experienced Makeup Artist Our makeup artist in Khizarsarai has years of experience in bridal makeup, creating personalized looks that complement your natural beauty and align with your style and preferences. Convenient At-Home Service Forget the stress of traveling to a salon. Ladyfair brings luxury beauty treatments directly to your doorstep with our at-home bridal makeup services, offering a truly personalized experience. Premium Makeup Products We use only high-quality, professional-grade makeup products to ensure a flawless, long-lasting look that remains perfect throughout your big day. Bridal Makeup Pricing in Khizarsarai Our bridal makeup services in Khizarsarai are tailored to fit different styles and budgets: Basic Bridal Makeup: ₹10,000 HD Bridal Makeup: ₹12,000 Airbrush Bridal Makeup: ₹18,000 For engagement and reception makeup: Basic Engagement/Reception Makeup: ₹6,000 HD Engagement/Reception Makeup: ₹8,000 Airbrush Engagement/Reception Makeup: ₹12,000 For parties: Basic Party Makeup: ₹2,500 HD Party Makeup: ₹3,500 Popular Bridal Makeup Styles in Khizarsarai Traditional Bridal Makeup Our traditional bridal makeup in Khizarsarai incorporates bold colors and intricate detailing to complement your wedding attire, creating an elegant and timeless look. HD Bridal Makeup For a high-definition finish that looks flawless both in photos and in person, HD bridal makeup is the perfect choice for brides who want a picture-perfect appearance all day. Airbrush Bridal Makeup Our airbrush makeup offers a lightweight, full-coverage finish that lasts all day, giving you a smooth and natural look while ensuring long-lasting perfection. How to Book Your Bridal Makeup with Ladyfair in Khizarsarai Initial Contact: Call us at 7004721239 to discuss your makeup needs and schedule your appointment. Consultation Session: Meet with our makeup artist to discuss your wedding look, review your attire, and plan the perfect makeup style. Makeup Trial: We offer trial sessions to help you preview your bridal makeup look and make any adjustments. Wedding Day Makeup: On your wedding day, our makeup artist will arrive at your location in Khizarsarai to provide flawless, hassle-free makeup service. Testimonials from Brides in Khizarsarai Priya R., Khizarsarai: "Ladyfair provided amazing service on my wedding day. The airbrush makeup looked flawless and lasted all day." Ritu K., Khizarsarai: "I loved the HD makeup! It was perfect for my photos, and the at-home service was so convenient." Sneha S., Khizarsarai: "My traditional bridal makeup was exactly what I wanted, and Ladyfair made the entire process stress-free." Preparing for Your Bridal Makeup Session To get the best results for your bridal makeup: Stay Hydrated: Keep your skin looking fresh by drinking plenty of water. Consistent Skincare: Stick to your regular skincare routine to maintain healthy, glowing skin. Avoid New Products: Use familiar products to prevent any reactions before your wedding day. Clear Communication: Discuss your makeup preferences and any concerns with our artist during the consultation. Additional Beauty Services by Ladyfair Beyond bridal makeup, Ladyfair offers a variety of beauty services in Khizarsarai: Engagement and Reception Makeup: Customized looks for all pre-wedding events. Party Makeup: Perfect for birthdays, anniversaries, and special occasions. Everyday Makeup: Enhance your daily look with our expert makeup services. Special Occasion Makeup: Professional makeup for parties, celebrations, and formal events. The Future of Bridal Makeup in Khizarsarai Ladyfair is dedicated to setting new standards in bridal beauty in Khizarsarai with our innovative at-home services. As we continue to offer exceptional service, more brides are choosing Ladyfair as their preferred makeup provider. Q&A with Ladyfair’s Bridal Makeup Artist in Khizarsarai Q1: What makes Ladyfair the best choice for bridal makeup in Khizarsarai? A1: Ladyfair offers expert bridal makeup services at home, using high-quality products to ensure a flawless and long-lasting look. Q2: What are the prices for bridal makeup in Khizarsarai? A2: Our bridal makeup packages start at ₹10,000 for basic makeup, ₹12,000 for HD makeup, and ₹18,000 for airbrush makeup. Q3: How do I book Ladyfair’s bridal makeup services in Khizarsarai? A3: You can book our services by calling 7004721239. We also offer consultations and trial sessions to ensure you get the look you want. Q4: What bridal makeup styles does Ladyfair offer in Khizarsarai? A4: Ladyfair offers traditional, HD, and airbrush bridal makeup to suit different preferences and needs. Q5: Are makeup trials available before my wedding? A5: Yes, we offer trial sessions so you can finalize your bridal look ahead of time. Q6: What products does Ladyfair use for bridal makeup? A6: We use professional-grade, high-quality makeup products that are safe for all skin types and ensure a flawless finish. Q7: What other services does Ladyfair provide in Khizarsarai? A7: In addition to bridal makeup, we offer makeup for engagements, receptions, parties, and other special occasions. Ladyfair is your ultimate choice for professional, at-home bridal makeup services in Khizarsarai, ensuring a flawless and stress-free experience on your special day.

Posted By: 28th September 2024
Bridal Makeup Artist in Paraiya
Introduction In Paraiya, Ladyfair is the premier choice for brides looking to achieve the perfect wedding day look with our professional at-home bridal makeup services. Whether you desire a traditional bridal look, an HD finish, or the flawless perfection of airbrush makeup, our expert makeup artist in Paraiya ensures that you shine on your special day. Contact us today at 7004721239 to schedule your appointment. Why Choose Ladyfair for Bridal Makeup in Paraiya Experienced Makeup Artist Our makeup artist in Paraiya has years of experience in bridal makeup, creating personalized looks that complement your natural beauty and align with your style and preferences. Convenient At-Home Service Forget the stress of traveling to a salon. Ladyfair brings luxury beauty treatments directly to your doorstep with our at-home bridal makeup services, offering a truly personalized experience. Premium Makeup Products We use only high-quality, professional-grade makeup products to ensure a flawless, long-lasting look that remains perfect throughout your big day. Bridal Makeup Pricing in Paraiya Our bridal makeup services in Paraiya are tailored to fit different styles and budgets: Basic Bridal Makeup: ₹10,000 HD Bridal Makeup: ₹12,000 Airbrush Bridal Makeup: ₹18,000 For engagement and reception makeup: Basic Engagement/Reception Makeup: ₹6,000 HD Engagement/Reception Makeup: ₹8,000 Airbrush Engagement/Reception Makeup: ₹12,000 For parties: Basic Party Makeup: ₹2,500 HD Party Makeup: ₹3,500 Popular Bridal Makeup Styles in Paraiya Traditional Bridal Makeup Our traditional bridal makeup in Paraiya incorporates bold colors and intricate detailing to complement your wedding attire, creating an elegant and timeless look. HD Bridal Makeup For a high-definition finish that looks flawless both in photos and in person, HD bridal makeup is the perfect choice for brides who want a picture-perfect appearance all day. Airbrush Bridal Makeup Our airbrush makeup offers a lightweight, full-coverage finish that lasts all day, giving you a smooth and natural look while ensuring long-lasting perfection. How to Book Your Bridal Makeup with Ladyfair in Paraiya Initial Contact: Call us at 7004721239 to discuss your makeup needs and schedule your appointment. Consultation Session: Meet with our makeup artist to discuss your wedding look, review your attire, and plan the perfect makeup style. Makeup Trial: We offer trial sessions to help you preview your bridal makeup look and make any adjustments. Wedding Day Makeup: On your wedding day, our makeup artist will arrive at your location in Paraiya to provide flawless, hassle-free makeup service. Testimonials from Brides in Paraiya Priya R., Paraiya: "Ladyfair provided amazing service on my wedding day. The airbrush makeup looked flawless and lasted all day." Ritu K., Paraiya: "I loved the HD makeup! It was perfect for my photos, and the at-home service was so convenient." Sneha S., Paraiya: "My traditional bridal makeup was exactly what I wanted, and Ladyfair made the entire process stress-free." Preparing for Your Bridal Makeup Session To get the best results for your bridal makeup: Stay Hydrated: Keep your skin looking fresh by drinking plenty of water. Consistent Skincare: Stick to your regular skincare routine to maintain healthy, glowing skin. Avoid New Products: Use familiar products to prevent any reactions before your wedding day. Clear Communication: Discuss your makeup preferences and any concerns with our artist during the consultation. Additional Beauty Services by Ladyfair Beyond bridal makeup, Ladyfair offers a variety of beauty services in Paraiya: Engagement and Reception Makeup: Customized looks for all pre-wedding events. Party Makeup: Perfect for birthdays, anniversaries, and special occasions. Everyday Makeup: Enhance your daily look with our expert makeup services. Special Occasion Makeup: Professional makeup for parties, celebrations, and formal events. The Future of Bridal Makeup in Paraiya Ladyfair is dedicated to setting new standards in bridal beauty in Paraiya with our innovative at-home services. As we continue to offer exceptional service, more brides are choosing Ladyfair as their preferred makeup provider. Q&A with Ladyfair’s Bridal Makeup Artist in Paraiya Q1: What makes Ladyfair the best choice for bridal makeup in Paraiya? A1: Ladyfair offers expert bridal makeup services at home, using high-quality products to ensure a flawless and long-lasting look. Q2: What are the prices for bridal makeup in Paraiya? A2: Our bridal makeup packages start at ₹10,000 for basic makeup, ₹12,000 for HD makeup, and ₹18,000 for airbrush makeup. Q3: How do I book Ladyfair’s bridal makeup services in Paraiya? A3: You can book our services by calling 7004721239. We also offer consultations and trial sessions to ensure you get the look you want. Q4: What bridal makeup styles does Ladyfair offer in Paraiya? A4: Ladyfair offers traditional, HD, and airbrush bridal makeup to suit different preferences and needs. Q5: Are makeup trials available before my wedding? A5: Yes, we offer trial sessions so you can finalize your bridal look ahead of time. Q6: What products does Ladyfair use for bridal makeup? A6: We use professional-grade, high-quality makeup products that are safe for all skin types and ensure a flawless finish. Q7: What other services does Ladyfair provide in Paraiya? A7: In addition to bridal makeup, we offer makeup for engagements, receptions, parties, and other special occasions. Ladyfair is your ultimate choice for professional, at-home bridal makeup services in Paraiya, ensuring a flawless and stress-free experience on your special day.

Posted By: 28th September 2024
Bridal Makeup Artist in Guraru
Introduction In Guraru, Ladyfair is the premier choice for brides looking to achieve the perfect wedding day look with our professional at-home bridal makeup services. Whether you desire a traditional bridal look, an HD finish, or the flawless perfection of airbrush makeup, our expert makeup artist in Guraru ensures that you shine on your special day. Contact us today at 7004721239 to schedule your appointment. Why Choose Ladyfair for Bridal Makeup in Guraru Experienced Makeup Artist Our makeup artist in Guraru has years of experience in bridal makeup, creating personalized looks that complement your natural beauty and align with your style and preferences. Convenient At-Home Service Forget the stress of traveling to a salon. Ladyfair brings luxury beauty treatments directly to your doorstep with our at-home bridal makeup services, offering a truly personalized experience. Premium Makeup Products We use only high-quality, professional-grade makeup products to ensure a flawless, long-lasting look that remains perfect throughout your big day. Bridal Makeup Pricing in Guraru Our bridal makeup services in Guraru are tailored to fit different styles and budgets: Basic Bridal Makeup: ₹10,000 HD Bridal Makeup: ₹12,000 Airbrush Bridal Makeup: ₹18,000 For engagement and reception makeup: Basic Engagement/Reception Makeup: ₹6,000 HD Engagement/Reception Makeup: ₹8,000 Airbrush Engagement/Reception Makeup: ₹12,000 For parties: Basic Party Makeup: ₹2,500 HD Party Makeup: ₹3,500 Popular Bridal Makeup Styles in Guraru Traditional Bridal Makeup Our traditional bridal makeup in Guraru incorporates bold colors and intricate detailing to complement your wedding attire, creating an elegant and timeless look. HD Bridal Makeup For a high-definition finish that looks flawless both in photos and in person, HD bridal makeup is the perfect choice for brides who want a picture-perfect appearance all day. Airbrush Bridal Makeup Our airbrush makeup offers a lightweight, full-coverage finish that lasts all day, giving you a smooth and natural look while ensuring long-lasting perfection. How to Book Your Bridal Makeup with Ladyfair in Guraru Initial Contact: Call us at 7004721239 to discuss your makeup needs and schedule your appointment. Consultation Session: Meet with our makeup artist to discuss your wedding look, review your attire, and plan the perfect makeup style. Makeup Trial: We offer trial sessions to help you preview your bridal makeup look and make any adjustments. Wedding Day Makeup: On your wedding day, our makeup artist will arrive at your location in Guraru to provide flawless, hassle-free makeup service. Testimonials from Brides in Guraru Priya R., Guraru: "Ladyfair provided amazing service on my wedding day. The airbrush makeup looked flawless and lasted all day." Ritu K., Guraru: "I loved the HD makeup! It was perfect for my photos, and the at-home service was so convenient." Sneha S., Guraru: "My traditional bridal makeup was exactly what I wanted, and Ladyfair made the entire process stress-free." Preparing for Your Bridal Makeup Session To get the best results for your bridal makeup: Stay Hydrated: Keep your skin looking fresh by drinking plenty of water. Consistent Skincare: Stick to your regular skincare routine to maintain healthy, glowing skin. Avoid New Products: Use familiar products to prevent any reactions before your wedding day. Clear Communication: Discuss your makeup preferences and any concerns with our artist during the consultation. Additional Beauty Services by Ladyfair Beyond bridal makeup, Ladyfair offers a variety of beauty services in Guraru: Engagement and Reception Makeup: Customized looks for all pre-wedding events. Party Makeup: Perfect for birthdays, anniversaries, and special occasions. Everyday Makeup: Enhance your daily look with our expert makeup services. Special Occasion Makeup: Professional makeup for parties, celebrations, and formal events. The Future of Bridal Makeup in Guraru Ladyfair is dedicated to setting new standards in bridal beauty in Guraru with our innovative at-home services. As we continue to offer exceptional service, more brides are choosing Ladyfair as their preferred makeup provider. Q&A with Ladyfair’s Bridal Makeup Artist in Guraru Q1: What makes Ladyfair the best choice for bridal makeup in Guraru? A1: Ladyfair offers expert bridal makeup services at home, using high-quality products to ensure a flawless and long-lasting look. Q2: What are the prices for bridal makeup in Guraru? A2: Our bridal makeup packages start at ₹10,000 for basic makeup, ₹12,000 for HD makeup, and ₹18,000 for airbrush makeup. Q3: How do I book Ladyfair’s bridal makeup services in Guraru? A3: You can book our services by calling 7004721239. We also offer consultations and trial sessions to ensure you get the look you want. Q4: What bridal makeup styles does Ladyfair offer in Guraru? A4: Ladyfair offers traditional, HD, and airbrush bridal makeup to suit different preferences and needs. Q5: Are makeup trials available before my wedding? A5: Yes, we offer trial sessions so you can finalize your bridal look ahead of time. Q6: What products does Ladyfair use for bridal makeup? A6: We use professional-grade, high-quality makeup products that are safe for all skin types and ensure a flawless finish. Q7: What other services does Ladyfair provide in Guraru? A7: In addition to bridal makeup, we offer makeup for engagements, receptions, parties, and other special occasions. Ladyfair is your ultimate choice for professional, at-home bridal makeup services in Guraru, ensuring a flawless and stress-free experience on your special day.

Posted By: 28th September 2024
Bridal Makeup Artist in Tekari
Introduction In Tekari, Ladyfair is the premier choice for brides looking to achieve the perfect wedding day look with our professional at-home bridal makeup services. Whether you desire a traditional bridal look, an HD finish, or the flawless perfection of airbrush makeup, our expert makeup artist in Tekari ensures that you shine on your special day. Contact us today at 7004721239 to schedule your appointment. Why Choose Ladyfair for Bridal Makeup in Tekari Experienced Makeup Artist Our makeup artist in Tekari has years of experience in bridal makeup, creating personalized looks that complement your natural beauty and align with your style and preferences. Convenient At-Home Service Forget the stress of traveling to a salon. Ladyfair brings luxury beauty treatments directly to your doorstep with our at-home bridal makeup services, offering a truly personalized experience. Premium Makeup Products We use only high-quality, professional-grade makeup products to ensure a flawless, long-lasting look that remains perfect throughout your big day. Bridal Makeup Pricing in Tekari Our bridal makeup services in Tekari are tailored to fit different styles and budgets: Basic Bridal Makeup: ₹10,000 HD Bridal Makeup: ₹12,000 Airbrush Bridal Makeup: ₹18,000 For engagement and reception makeup: Basic Engagement/Reception Makeup: ₹6,000 HD Engagement/Reception Makeup: ₹8,000 Airbrush Engagement/Reception Makeup: ₹12,000 For parties: Basic Party Makeup: ₹2,500 HD Party Makeup: ₹3,500 Popular Bridal Makeup Styles in Tekari Traditional Bridal Makeup Our traditional bridal makeup in Tekari incorporates bold colors and intricate detailing to complement your wedding attire, creating an elegant and timeless look. HD Bridal Makeup For a high-definition finish that looks flawless both in photos and in person, HD bridal makeup is the perfect choice for brides who want a picture-perfect appearance all day. Airbrush Bridal Makeup Our airbrush makeup offers a lightweight, full-coverage finish that lasts all day, giving you a smooth and natural look while ensuring long-lasting perfection. How to Book Your Bridal Makeup with Ladyfair in Tekari Initial Contact: Call us at 7004721239 to discuss your makeup needs and schedule your appointment. Consultation Session: Meet with our makeup artist to discuss your wedding look, review your attire, and plan the perfect makeup style. Makeup Trial: We offer trial sessions to help you preview your bridal makeup look and make any adjustments. Wedding Day Makeup: On your wedding day, our makeup artist will arrive at your location in Tekari to provide flawless, hassle-free makeup service. Testimonials from Brides in Tekari Priya R., Tekari: "Ladyfair provided amazing service on my wedding day. The airbrush makeup looked flawless and lasted all day." Ritu K., Tekari: "I loved the HD makeup! It was perfect for my photos, and the at-home service was so convenient." Sneha S., Tekari: "My traditional bridal makeup was exactly what I wanted, and Ladyfair made the entire process stress-free." Preparing for Your Bridal Makeup Session To get the best results for your bridal makeup: Stay Hydrated: Keep your skin looking fresh by drinking plenty of water. Consistent Skincare: Stick to your regular skincare routine to maintain healthy, glowing skin. Avoid New Products: Use familiar products to prevent any reactions before your wedding day. Clear Communication: Discuss your makeup preferences and any concerns with our artist during the consultation. Additional Beauty Services by Ladyfair Beyond bridal makeup, Ladyfair offers a variety of beauty services in Tekari: Engagement and Reception Makeup: Customized looks for all pre-wedding events. Party Makeup: Perfect for birthdays, anniversaries, and special occasions. Everyday Makeup: Enhance your daily look with our expert makeup services. Special Occasion Makeup: Professional makeup for parties, celebrations, and formal events. The Future of Bridal Makeup in Tekari Ladyfair is dedicated to setting new standards in bridal beauty in Tekari with our innovative at-home services. As we continue to offer exceptional service, more brides are choosing Ladyfair as their preferred makeup provider. Q&A with Ladyfair’s Bridal Makeup Artist in Tekari Q1: What makes Ladyfair the best choice for bridal makeup in Tekari? A1: Ladyfair offers expert bridal makeup services at home, using high-quality products to ensure a flawless and long-lasting look. Q2: What are the prices for bridal makeup in Tekari? A2: Our bridal makeup packages start at ₹10,000 for basic makeup, ₹12,000 for HD makeup, and ₹18,000 for airbrush makeup. Q3: How do I book Ladyfair’s bridal makeup services in Tekari? A3: You can book our services by calling 7004721239. We also offer consultations and trial sessions to ensure you get the look you want. Q4: What bridal makeup styles does Ladyfair offer in Tekari? A4: Ladyfair offers traditional, HD, and airbrush bridal makeup to suit different preferences and needs. Q5: Are makeup trials available before my wedding? A5: Yes, we offer trial sessions so you can finalize your bridal look ahead of time. Q6: What products does Ladyfair use for bridal makeup? A6: We use professional-grade, high-quality makeup products that are safe for all skin types and ensure a flawless finish. Q7: What other services does Ladyfair provide in Tekari? A7: In addition to bridal makeup, we offer makeup for engagements, receptions, parties, and other special occasions. Ladyfair is your ultimate choice for professional, at-home bridal makeup services in Tekari, ensuring a flawless and stress-free experience on your special day.

Posted By: 28th September 2024
Bridal Makeup Artist in Konch
Introduction In Konch, Ladyfair is the premier choice for brides looking to achieve the perfect wedding day look with our professional at-home bridal makeup services. Whether you desire a traditional bridal look, an HD finish, or the flawless perfection of airbrush makeup, our expert makeup artist in Konch ensures that you shine on your special day. Contact us today at 7004721239 to schedule your appointment. Why Choose Ladyfair for Bridal Makeup in Konch Experienced Makeup Artist Our makeup artist in Konch has years of experience in bridal makeup, creating personalized looks that complement your natural beauty and align with your style and preferences. Convenient At-Home Service Forget the stress of traveling to a salon. Ladyfair brings luxury beauty treatments directly to your doorstep with our at-home bridal makeup services, offering a truly personalized experience. Premium Makeup Products We use only high-quality, professional-grade makeup products to ensure a flawless, long-lasting look that remains perfect throughout your big day. Bridal Makeup Pricing in Konch Our bridal makeup services in Konch are tailored to fit different styles and budgets: Basic Bridal Makeup: ₹10,000 HD Bridal Makeup: ₹12,000 Airbrush Bridal Makeup: ₹18,000 For engagement and reception makeup: Basic Engagement/Reception Makeup: ₹6,000 HD Engagement/Reception Makeup: ₹8,000 Airbrush Engagement/Reception Makeup: ₹12,000 For parties: Basic Party Makeup: ₹2,500 HD Party Makeup: ₹3,500 Popular Bridal Makeup Styles in Konch Traditional Bridal Makeup Our traditional bridal makeup in Konch incorporates bold colors and intricate detailing to complement your wedding attire, creating an elegant and timeless look. HD Bridal Makeup For a high-definition finish that looks flawless both in photos and in person, HD bridal makeup is the perfect choice for brides who want a picture-perfect appearance all day. Airbrush Bridal Makeup Our airbrush makeup offers a lightweight, full-coverage finish that lasts all day, giving you a smooth and natural look while ensuring long-lasting perfection. How to Book Your Bridal Makeup with Ladyfair in Konch Initial Contact: Call us at 7004721239 to discuss your makeup needs and schedule your appointment. Consultation Session: Meet with our makeup artist to discuss your wedding look, review your attire, and plan the perfect makeup style. Makeup Trial: We offer trial sessions to help you preview your bridal makeup look and make any adjustments. Wedding Day Makeup: On your wedding day, our makeup artist will arrive at your location in Konch to provide flawless, hassle-free makeup service. Testimonials from Brides in Konch Priya R., Konch: "Ladyfair provided amazing service on my wedding day. The airbrush makeup looked flawless and lasted all day." Ritu K., Konch: "I loved the HD makeup! It was perfect for my photos, and the at-home service was so convenient." Sneha S., Konch: "My traditional bridal makeup was exactly what I wanted, and Ladyfair made the entire process stress-free." Preparing for Your Bridal Makeup Session To get the best results for your bridal makeup: Stay Hydrated: Keep your skin looking fresh by drinking plenty of water. Consistent Skincare: Stick to your regular skincare routine to maintain healthy, glowing skin. Avoid New Products: Use familiar products to prevent any reactions before your wedding day. Clear Communication: Discuss your makeup preferences and any concerns with our artist during the consultation. Additional Beauty Services by Ladyfair Beyond bridal makeup, Ladyfair offers a variety of beauty services in Konch: Engagement and Reception Makeup: Customized looks for all pre-wedding events. Party Makeup: Perfect for birthdays, anniversaries, and special occasions. Everyday Makeup: Enhance your daily look with our expert makeup services. Special Occasion Makeup: Professional makeup for parties, celebrations, and formal events. The Future of Bridal Makeup in Konch Ladyfair is dedicated to setting new standards in bridal beauty in Konch with our innovative at-home services. As we continue to offer exceptional service, more brides are choosing Ladyfair as their preferred makeup provider. Q&A with Ladyfair’s Bridal Makeup Artist in Konch Q1: What makes Ladyfair the best choice for bridal makeup in Konch? A1: Ladyfair offers expert bridal makeup services at home, using high-quality products to ensure a flawless and long-lasting look. Q2: What are the prices for bridal makeup in Konch? A2: Our bridal makeup packages start at ₹10,000 for basic makeup, ₹12,000 for HD makeup, and ₹18,000 for airbrush makeup. Q3: How do I book Ladyfair’s bridal makeup services in Konch? A3: You can book our services by calling 7004721239. We also offer consultations and trial sessions to ensure you get the look you want. Q4: What bridal makeup styles does Ladyfair offer in Konch? A4: Ladyfair offers traditional, HD, and airbrush bridal makeup to suit different preferences and needs. Q5: Are makeup trials available before my wedding? A5: Yes, we offer trial sessions so you can finalize your bridal look ahead of time. Q6: What products does Ladyfair use for bridal makeup? A6: We use professional-grade, high-quality makeup products that are safe for all skin types and ensure a flawless finish. Q7: What other services does Ladyfair provide in Konch? A7: In addition to bridal makeup, we offer makeup for engagements, receptions, parties, and other special occasions. Ladyfair is your ultimate choice for professional, at-home bridal makeup services in Konch, ensuring a flawless and stress-free experience on your special day.

Posted By: 28th September 2024
bridal makeup artist in manjha
Bridal Makeup Artist in Manjha Introduction In Manjha, Ladyfair is known for providing expert bridal makeup services directly at your home. Whether you're envisioning a traditional bridal look, an HD flawless finish, or airbrush makeup perfection, our skilled makeup artist will bring your dream look to life. Contact us at 7004721239 today to schedule your appointment and experience the best bridal makeup service in Manjha. Why Ladyfair is the Best Choice for Bridal Makeup in Manjha Skilled and Experienced Makeup Artist Our makeup artist in Manjha has years of experience in bridal makeup, ensuring you receive a look that enhances your personality, attire, and individual style. Convenient At-Home Makeup Service Ladyfair offers the ultimate convenience by providing at-home makeup services in Manjha, allowing you to prepare for your big day in the comfort of your own home. High-Quality Makeup Products We use only premium, professional-grade makeup products to ensure a long-lasting, flawless look that keeps you radiant throughout your wedding day. Bridal Makeup Pricing in Manjha We offer competitive pricing to suit different needs and budgets: Basic Bridal Makeup: ₹10,000 HD Bridal Makeup: ₹12,000 Airbrush Bridal Makeup: ₹18,000 For engagement and reception makeup: Basic Engagement/Reception Makeup: ₹6,000 HD Engagement/Reception Makeup: ₹8,000 Airbrush Engagement/Reception Makeup: ₹12,000 For parties: Basic Party Makeup: ₹2,500 HD Party Makeup: ₹3,500 Popular Bridal Makeup Styles in Manjha Traditional Bridal Makeup Our traditional bridal makeup in Manjha offers a classic, elegant style that perfectly complements your wedding attire, featuring bold and vibrant tones. HD Bridal Makeup HD bridal makeup ensures you look flawless both in person and in photos, giving you a camera-ready appearance that lasts all day. Airbrush Bridal Makeup Airbrush makeup provides a smooth, lightweight finish that’s long-lasting. This is perfect for brides looking for a natural, radiant glow throughout the day. How to Book Your Bridal Makeup with Ladyfair in Manjha Initial Contact: Call us at 7004721239 to discuss your bridal makeup needs and book an appointment. Consultation: Our makeup artist will work with you to design a makeup plan that aligns with your wedding theme. Makeup Trial: We offer trial makeup sessions to ensure your bridal look meets your expectations. Wedding Day Makeup: On your wedding day, our makeup artist will come to your home in Manjha, ensuring a stress-free and flawless makeup experience. Testimonials from Brides in Manjha Priya G., Manjha "I couldn't be happier with Ladyfair’s service. Having my makeup done at home was so convenient, and I looked exactly how I imagined on my wedding day." Sneha P., Manjha "The HD makeup made me look perfect for the camera. Ladyfair exceeded my expectations!" Ritu S., Manjha "The airbrush makeup was stunning and lasted all day. I felt beautiful throughout the entire wedding!" Preparing for Your Bridal Makeup Session To make sure your makeup looks perfect on your big day, follow these tips: Stay Hydrated: Keep your skin glowing by drinking plenty of water. Stick to Your Skincare Routine: Keep your skin in top shape by following your regular skincare routine. Avoid New Products: Don’t experiment with new skincare products right before your wedding to avoid unwanted reactions. Communicate Your Preferences: Make sure to express your desired bridal look clearly during your consultation and trial session. Additional Beauty Services by Ladyfair Ladyfair offers a range of makeup services for various occasions in Manjha, including: Engagement and Reception Makeup: Custom looks for all pre-wedding events. Party Makeup: Perfect for birthdays, anniversaries, and special events. Everyday Makeup: Enhance your daily look with professional touch-ups. Special Occasion Makeup: Glamorous makeup for any important event. The Future of Bridal Makeup in Manjha Ladyfair is transforming bridal beauty by offering premium at-home makeup services in Manjha. As more brides experience our exceptional artistry and personalized service, Ladyfair continues to be the top choice for bridal makeup. Q&A with Ladyfair’s Bridal Makeup Artist in Manjha Q1: Why is Ladyfair the top choice for bridal makeup in Manjha? A1: Ladyfair provides professional, at-home bridal makeup services, allowing brides to look perfect on their big day without leaving home. Q2: What are the prices for bridal makeup services in Manjha? A2: Prices start at ₹10,000 for basic bridal makeup, with HD and airbrush options also available. Q3: How do I book Ladyfair’s bridal makeup services in Manjha? A3: Call 7004721239 to book your bridal makeup appointment. Consultations and trial sessions are also available. Q4: What types of bridal makeup does Ladyfair offer in Manjha? A4: Ladyfair offers traditional, HD, and airbrush bridal makeup styles to suit all preferences. Q5: Are makeup trials available before the wedding day? A5: Yes, trial sessions are available to help you find your perfect bridal look. Q6: What kind of products does Ladyfair use for bridal makeup? A6: We use only top-quality, professional-grade makeup products to ensure a flawless and long-lasting finish. Q7: What other makeup services does Ladyfair offer in Manjha? A7: In addition to bridal makeup, we provide makeup services for engagement, reception, party, and everyday occasions. Ladyfair is your trusted partner for stunning at-home bridal makeup services in Manjha, ensuring you look radiant and flawless on your special day.

Posted By: 28th September 2024
bridal-makeup-artist-in-Kuchaikote
Bridal Makeup Artist in Kuchaikote Introduction In Kuchaikote, Ladyfair is renowned for providing expert bridal makeup services directly at your home. Whether you're dreaming of a traditional bridal look, a flawless HD finish, or the perfection of airbrush makeup, our talented makeup artist is here to bring your vision to life. Contact us at 7004721239 to schedule your appointment today and experience the best bridal makeup service in Kuchaikote. Why Ladyfair is the Best Choice for Bridal Makeup in Kuchaikote Skilled and Experienced Makeup Artist Our makeup artist in Kuchaikote has extensive experience in bridal makeup, ensuring you receive a look that complements your personality, attire, and preferences. Convenient At-Home Makeup Service Ladyfair provides the ultimate convenience by offering at-home makeup services in Kuchaikote, allowing you to prepare for your big day without leaving the comfort of your home. High-Quality Makeup Products We use only premium, professional-grade makeup products to guarantee a long-lasting, flawless look that will keep you radiant throughout your wedding day. Bridal Makeup Pricing in Kuchaikote Our pricing is designed to cater to various needs and budgets: Basic Bridal Makeup: ₹10,000 HD Bridal Makeup: ₹12,000 Airbrush Bridal Makeup: ₹18,000 For engagement and reception makeup: Basic Engagement/Reception Makeup: ₹6,000 HD Engagement/Reception Makeup: ₹8,000 Airbrush Engagement/Reception Makeup: ₹12,000 For parties: Basic Party Makeup: ₹2,500 HD Party Makeup: ₹3,500 Popular Bridal Makeup Styles in Kuchaikote Traditional Bridal Makeup For those who want a timeless and classic look, our traditional bridal makeup in Kuchaikote features bold and vibrant tones, creating an elegant and traditional style that perfectly complements your wedding attire. HD Bridal Makeup HD bridal makeup ensures you look flawless in both photos and real life, giving you a camera-ready appearance that’s picture-perfect throughout the day. Airbrush Bridal Makeup Airbrush makeup offers a smooth, lightweight, and long-lasting finish. It’s ideal for brides seeking a natural, radiant look that stays fresh all day long. How to Book Your Bridal Makeup with Ladyfair in Kuchaikote Initial Contact: Call us at 7004721239 to discuss your needs and book an appointment. Consultation: Our makeup artist will work with you to understand your vision and create a makeup plan that complements your wedding theme. Makeup Trial: We offer trial makeup sessions to ensure that your bridal look is exactly what you desire. Wedding Day Makeup: On your wedding day, our makeup artist will arrive at your home in Kuchaikote, providing a flawless makeup experience without any stress. Testimonials from Brides in Kuchaikote Riya S., Kuchaikote: "I loved the convenience of having Ladyfair come to my home. My makeup was perfect, and I got so many compliments on my wedding day." Neha T., Kuchaikote: "The HD makeup was exactly what I needed for all the photos. Ladyfair’s service was professional and seamless." Pallavi J., Kuchaikote: "The airbrush makeup lasted all day without needing any touch-ups. I couldn’t have been happier with my bridal look!" Preparing for Your Bridal Makeup Session To ensure your makeup looks perfect on your big day, follow these tips: Stay Hydrated: Drink plenty of water to keep your skin glowing. Maintain Your Skincare Routine: Stick to a consistent skincare routine to keep your skin in optimal condition. Avoid New Skincare Products: Using unfamiliar products before your wedding may lead to breakouts or skin reactions. Communicate Your Preferences: Be clear with our makeup artist about the look you want to achieve during your consultation and trial session. Additional Beauty Services by Ladyfair Ladyfair also offers a range of makeup services for other special occasions in Kuchaikote: Engagement and Reception Makeup: Tailored looks for all your pre-wedding events. Party Makeup: Perfect for birthdays, anniversaries, and other special celebrations. Everyday Makeup: Enhance your daily look with professional makeup. Special Occasion Makeup: Glamorous makeup for any important life event. The Future of Bridal Makeup in Kuchaikote Ladyfair is revolutionizing bridal beauty by offering high-quality, at-home makeup services in Kuchaikote. As more brides experience our exceptional artistry and personalized service, we continue to grow as the premier choice for bridal makeup. Q&A with Ladyfair’s Bridal Makeup Artist in Kuchaikote Q1: Why is Ladyfair the top choice for bridal makeup in Kuchaikote? A1: Ladyfair offers expert at-home bridal makeup services, ensuring you receive a flawless look in the comfort of your own home. Q2: What are the prices for bridal makeup services in Kuchaikote? A2: Our bridal makeup prices start at ₹10,000 for basic makeup, with HD and airbrush options also available. Q3: How do I book Ladyfair’s bridal makeup services in Kuchaikote? A3: You can call us at 7004721239 to book our services, and we offer consultations and makeup trials to ensure your desired look is achieved. Q4: What types of bridal makeup does Ladyfair offer in Kuchaikote? A4: We offer traditional, HD, and airbrush bridal makeup styles to suit your preferences. Q5: Are makeup trials available before the wedding day? A5: Yes, we provide trial sessions so you can preview your bridal look and make any adjustments before the big day. Q6: What kind of products does Ladyfair use for bridal makeup? A6: We use high-quality, professional-grade makeup products to ensure a flawless and long-lasting finish. Q7: What other makeup services does Ladyfair offer in Kuchaikote? A7: Besides bridal makeup, we offer engagement, reception, party, and everyday makeup services for all occasions. Ladyfair is your trusted partner for stunning at-home bridal makeup services in Kuchaikote, ensuring you look radiant and flawless on your special day.

Posted By: 27th September 2024
Bridal Makeup Artist in Fatehpur
Introduction In Fatehpur, Ladyfair is the premier choice for brides looking to achieve the perfect wedding day look with our professional at-home bridal makeup services. Whether you desire a traditional bridal look, an HD finish, or the flawless perfection of airbrush makeup, our expert makeup artist in Fatehpur ensures that you shine on your special day. Contact us today at 7004721239 to schedule your appointment. Why Choose Ladyfair for Bridal Makeup in Fatehpur Experienced Makeup Artist Our makeup artist in Fatehpur has years of experience in bridal makeup, creating personalized looks that complement your natural beauty and align with your style and preferences. Convenient At-Home Service Forget the stress of traveling to a salon. Ladyfair brings luxury beauty treatments directly to your doorstep with our at-home bridal makeup services, offering a truly personalized experience. Premium Makeup Products We use only high-quality, professional-grade makeup products to ensure a flawless, long-lasting look that remains perfect throughout your big day. Bridal Makeup Pricing in Fatehpur Our bridal makeup services in Fatehpur are tailored to fit different styles and budgets: Basic Bridal Makeup: ₹10,000 HD Bridal Makeup: ₹12,000 Airbrush Bridal Makeup: ₹18,000 For engagement and reception makeup: Basic Engagement/Reception Makeup: ₹6,000 HD Engagement/Reception Makeup: ₹8,000 Airbrush Engagement/Reception Makeup: ₹12,000 For parties: Basic Party Makeup: ₹2,500 HD Party Makeup: ₹3,500 Popular Bridal Makeup Styles in Fatehpur Traditional Bridal Makeup Our traditional bridal makeup in Fatehpur incorporates bold colors and intricate detailing to complement your wedding attire, creating an elegant and timeless look. HD Bridal Makeup For a high-definition finish that looks flawless both in photos and in person, HD bridal makeup is the perfect choice for brides who want a picture-perfect appearance all day. Airbrush Bridal Makeup Our airbrush makeup offers a lightweight, full-coverage finish that lasts all day, giving you a smooth and natural look while ensuring long-lasting perfection. How to Book Your Bridal Makeup with Ladyfair in Fatehpur Initial Contact: Call us at 7004721239 to discuss your makeup needs and schedule your appointment. Consultation Session: Meet with our makeup artist to discuss your wedding look, review your attire, and plan the perfect makeup style. Makeup Trial: We offer trial sessions to help you preview your bridal makeup look and make any adjustments. Wedding Day Makeup: On your wedding day, our makeup artist will arrive at your location in Fatehpur to provide flawless, hassle-free makeup service. Testimonials from Brides in Fatehpur Priya R., Fatehpur: "Ladyfair provided amazing service on my wedding day. The airbrush makeup looked flawless and lasted all day." Ritu K., Fatehpur: "I loved the HD makeup! It was perfect for my photos, and the at-home service was so convenient." Sneha S., Fatehpur: "My traditional bridal makeup was exactly what I wanted, and Ladyfair made the entire process stress-free." Preparing for Your Bridal Makeup Session To get the best results for your bridal makeup: Stay Hydrated: Keep your skin looking fresh by drinking plenty of water. Consistent Skincare: Stick to your regular skincare routine to maintain healthy, glowing skin. Avoid New Products: Use familiar products to prevent any reactions before your wedding day. Clear Communication: Discuss your makeup preferences and any concerns with our artist during the consultation. Additional Beauty Services by Ladyfair Beyond bridal makeup, Ladyfair offers a variety of beauty services in Fatehpur: Engagement and Reception Makeup: Customized looks for all pre-wedding events. Party Makeup: Perfect for birthdays, anniversaries, and special occasions. Everyday Makeup: Enhance your daily look with our expert makeup services. Special Occasion Makeup: Professional makeup for parties, celebrations, and formal events. The Future of Bridal Makeup in Fatehpur Ladyfair is dedicated to setting new standards in bridal beauty in Fatehpur with our innovative at-home services. As we continue to offer exceptional service, more brides are choosing Ladyfair as their preferred makeup provider. Q&A with Ladyfair’s Bridal Makeup Artist in Fatehpur Q1: What makes Ladyfair the best choice for bridal makeup in Fatehpur? A1: Ladyfair offers expert bridal makeup services at home, using high-quality products to ensure a flawless and long-lasting look. Q2: What are the prices for bridal makeup in Fatehpur? A2: Our bridal makeup packages start at ₹10,000 for basic makeup, ₹12,000 for HD makeup, and ₹18,000 for airbrush makeup. Q3: How do I book Ladyfair’s bridal makeup services in Fatehpur? A3: You can book our services by calling 7004721239. We also offer consultations and trial sessions to ensure you get the look you want. Q4: What bridal makeup styles does Ladyfair offer in Fatehpur? A4: Ladyfair offers traditional, HD, and airbrush bridal makeup to suit different preferences and needs. Q5: Are makeup trials available before my wedding? A5: Yes, we offer trial sessions so you can finalize your bridal look ahead of time. Q6: What products does Ladyfair use for bridal makeup? A6: We use professional-grade, high-quality makeup products that are safe for all skin types and ensure a flawless finish. Q7: What other services does Ladyfair provide in Fatehpur? A7: In addition to bridal makeup, we offer makeup for engagements, receptions, parties, and other special occasions. Ladyfair is your ultimate choice for professional, at-home bridal makeup services in Fatehpur, ensuring a flawless and stress-free experience on your special day.

Posted By: 27th September 2024
Bridal Makeup Artist in Tankuppa
Introduction In Tankuppa, Ladyfair is the premier choice for brides looking to achieve the perfect wedding day look with our professional at-home bridal makeup services. Whether you desire a traditional bridal look, an HD finish, or the flawless perfection of airbrush makeup, our expert makeup artist in Tankuppa ensures that you shine on your special day. Contact us today at 7004721239 to schedule your appointment. Why Choose Ladyfair for Bridal Makeup in Tankuppa Experienced Makeup Artist Our makeup artist in Tankuppa has years of experience in bridal makeup, creating personalized looks that complement your natural beauty and align with your style and preferences. Convenient At-Home Service Forget the stress of traveling to a salon. Ladyfair brings luxury beauty treatments directly to your doorstep with our at-home bridal makeup services, offering a truly personalized experience. Premium Makeup Products We use only high-quality, professional-grade makeup products to ensure a flawless, long-lasting look that remains perfect throughout your big day. Bridal Makeup Pricing in Tankuppa Our bridal makeup services in Tankuppa are tailored to fit different styles and budgets: Basic Bridal Makeup: ₹10,000 HD Bridal Makeup: ₹12,000 Airbrush Bridal Makeup: ₹18,000 For engagement and reception makeup: Basic Engagement/Reception Makeup: ₹6,000 HD Engagement/Reception Makeup: ₹8,000 Airbrush Engagement/Reception Makeup: ₹12,000 For parties: Basic Party Makeup: ₹2,500 HD Party Makeup: ₹3,500 Popular Bridal Makeup Styles in Tankuppa Traditional Bridal Makeup Our traditional bridal makeup in Tankuppa incorporates bold colors and intricate detailing to complement your wedding attire, creating an elegant and timeless look. HD Bridal Makeup For a high-definition finish that looks flawless both in photos and in person, HD bridal makeup is the perfect choice for brides who want a picture-perfect appearance all day. Airbrush Bridal Makeup Our airbrush makeup offers a lightweight, full-coverage finish that lasts all day, giving you a smooth and natural look while ensuring long-lasting perfection. How to Book Your Bridal Makeup with Ladyfair in Tankuppa Initial Contact: Call us at 7004721239 to discuss your makeup needs and schedule your appointment. Consultation Session: Meet with our makeup artist to discuss your wedding look, review your attire, and plan the perfect makeup style. Makeup Trial: We offer trial sessions to help you preview your bridal makeup look and make any adjustments. Wedding Day Makeup: On your wedding day, our makeup artist will arrive at your location in Tankuppa to provide flawless, hassle-free makeup service. Testimonials from Brides in Tankuppa Priya R., Tankuppa: "Ladyfair provided amazing service on my wedding day. The airbrush makeup looked flawless and lasted all day." Ritu K., Tankuppa: "I loved the HD makeup! It was perfect for my photos, and the at-home service was so convenient." Sneha S., Tankuppa: "My traditional bridal makeup was exactly what I wanted, and Ladyfair made the entire process stress-free." Preparing for Your Bridal Makeup Session To get the best results for your bridal makeup: Stay Hydrated: Keep your skin looking fresh by drinking plenty of water. Consistent Skincare: Stick to your regular skincare routine to maintain healthy, glowing skin. Avoid New Products: Use familiar products to prevent any reactions before your wedding day. Clear Communication: Discuss your makeup preferences and any concerns with our artist during the consultation. Additional Beauty Services by Ladyfair Beyond bridal makeup, Ladyfair offers a variety of beauty services in Tankuppa: Engagement and Reception Makeup: Customized looks for all pre-wedding events. Party Makeup: Perfect for birthdays, anniversaries, and special occasions. Everyday Makeup: Enhance your daily look with our expert makeup services. Special Occasion Makeup: Professional makeup for parties, celebrations, and formal events. The Future of Bridal Makeup in Tankuppa Ladyfair is dedicated to setting new standards in bridal beauty in Tankuppa with our innovative at-home services. As we continue to offer exceptional service, more brides are choosing Ladyfair as their preferred makeup provider. Q&A with Ladyfair’s Bridal Makeup Artist in Tankuppa Q1: What makes Ladyfair the best choice for bridal makeup in Tankuppa? A1: Ladyfair offers expert bridal makeup services at home, using high-quality products to ensure a flawless and long-lasting look. Q2: What are the prices for bridal makeup in Tankuppa? A2: Our bridal makeup packages start at ₹10,000 for basic makeup, ₹12,000 for HD makeup, and ₹18,000 for airbrush makeup. Q3: How do I book Ladyfair’s bridal makeup services in Tankuppa? A3: You can book our services by calling 7004721239. We also offer consultations and trial sessions to ensure you get the look you want. Q4: What bridal makeup styles does Ladyfair offer in Tankuppa? A4: Ladyfair offers traditional, HD, and airbrush bridal makeup to suit different preferences and needs. Q5: Are makeup trials available before my wedding? A5: Yes, we offer trial sessions so you can finalize your bridal look ahead of time. Q6: What products does Ladyfair use for bridal makeup? A6: We use professional-grade, high-quality makeup products that are safe for all skin types and ensure a flawless finish. Q7: What other services does Ladyfair provide in Tankuppa? A7: In addition to bridal makeup, we offer makeup for engagements, receptions, parties, and other special occasions. Ladyfair is your ultimate choice for professional, at-home bridal makeup services in Tankuppa, ensuring a flawless and stress-free experience on your special day.

Posted By: 27th September 2024
Bridal Makeup Artist in Bodhgaya
Introduction In Bodhgaya, Ladyfair is the premier choice for brides looking to achieve the perfect wedding day look with our professional at-home bridal makeup services. Whether you desire a traditional bridal look, an HD finish, or the flawless perfection of airbrush makeup, our expert makeup artist in Bodhgaya ensures that you shine on your special day. Contact us today at 7004721239 to schedule your appointment. Why Choose Ladyfair for Bridal Makeup in Bodhgaya Experienced Makeup Artist Our makeup artist in Bodhgaya has years of experience in bridal makeup, creating personalized looks that complement your natural beauty and align with your style and preferences. Convenient At-Home Service Forget the stress of traveling to a salon. Ladyfair brings luxury beauty treatments directly to your doorstep with our at-home bridal makeup services, offering a truly personalized experience. Premium Makeup Products We use only high-quality, professional-grade makeup products to ensure a flawless, long-lasting look that remains perfect throughout your big day. Bridal Makeup Pricing in Bodhgaya Our bridal makeup services in Bodhgaya are tailored to fit different styles and budgets: Basic Bridal Makeup: ₹10,000 HD Bridal Makeup: ₹12,000 Airbrush Bridal Makeup: ₹18,000 For engagement and reception makeup: Basic Engagement/Reception Makeup: ₹6,000 HD Engagement/Reception Makeup: ₹8,000 Airbrush Engagement/Reception Makeup: ₹12,000 For parties: Basic Party Makeup: ₹2,500 HD Party Makeup: ₹3,500 Popular Bridal Makeup Styles in Bodhgaya Traditional Bridal Makeup Our traditional bridal makeup in Bodhgaya incorporates bold colors and intricate detailing to complement your wedding attire, creating an elegant and timeless look. HD Bridal Makeup For a high-definition finish that looks flawless both in photos and in person, HD bridal makeup is the perfect choice for brides who want a picture-perfect appearance all day. Airbrush Bridal Makeup Our airbrush makeup offers a lightweight, full-coverage finish that lasts all day, giving you a smooth and natural look while ensuring long-lasting perfection. How to Book Your Bridal Makeup with Ladyfair in Bodhgaya Initial Contact: Call us at 7004721239 to discuss your makeup needs and schedule your appointment. Consultation Session: Meet with our makeup artist to discuss your wedding look, review your attire, and plan the perfect makeup style. Makeup Trial: We offer trial sessions to help you preview your bridal makeup look and make any adjustments. Wedding Day Makeup: On your wedding day, our makeup artist will arrive at your location in Bodhgaya to provide flawless, hassle-free makeup service. Testimonials from Brides in Bodhgaya Priya R., Bodhgaya: "Ladyfair provided amazing service on my wedding day. The airbrush makeup looked flawless and lasted all day." Ritu K., Bodhgaya: "I loved the HD makeup! It was perfect for my photos, and the at-home service was so convenient." Sneha S., Bodhgaya: "My traditional bridal makeup was exactly what I wanted, and Ladyfair made the entire process stress-free." Preparing for Your Bridal Makeup Session To get the best results for your bridal makeup: Stay Hydrated: Keep your skin looking fresh by drinking plenty of water. Consistent Skincare: Stick to your regular skincare routine to maintain healthy, glowing skin. Avoid New Products: Use familiar products to prevent any reactions before your wedding day. Clear Communication: Discuss your makeup preferences and any concerns with our artist during the consultation. Additional Beauty Services by Ladyfair Beyond bridal makeup, Ladyfair offers a variety of beauty services in Bodhgaya: Engagement and Reception Makeup: Customized looks for all pre-wedding events. Party Makeup: Perfect for birthdays, anniversaries, and special occasions. Everyday Makeup: Enhance your daily look with our expert makeup services. Special Occasion Makeup: Professional makeup for parties, celebrations, and formal events. The Future of Bridal Makeup in Bodhgaya Ladyfair is dedicated to setting new standards in bridal beauty in Bodhgaya with our innovative at-home services. As we continue to offer exceptional service, more brides are choosing Ladyfair as their preferred makeup provider. Q&A with Ladyfair’s Bridal Makeup Artist in Bodhgaya Q1: What makes Ladyfair the best choice for bridal makeup in Bodhgaya? A1: Ladyfair offers expert bridal makeup services at home, using high-quality products to ensure a flawless and long-lasting look. Q2: What are the prices for bridal makeup in Bodhgaya? A2: Our bridal makeup packages start at ₹10,000 for basic makeup, ₹12,000 for HD makeup, and ₹18,000 for airbrush makeup. Q3: How do I book Ladyfair’s bridal makeup services in Bodhgaya? A3: You can book our services by calling 7004721239. We also offer consultations and trial sessions to ensure you get the look you want. Q4: What bridal makeup styles does Ladyfair offer in Bodhgaya? A4: Ladyfair offers traditional, HD, and airbrush bridal makeup to suit different preferences and needs. Q5: Are makeup trials available before my wedding? A5: Yes, we offer trial sessions so you can finalize your bridal look ahead of time. Q6: What products does Ladyfair use for bridal makeup? A6: We use professional-grade, high-quality makeup products that are safe for all skin types and ensure a flawless finish. Q7: What other services does Ladyfair provide in Bodhgaya? A7: In addition to bridal makeup, we offer makeup for engagements, receptions, parties, and other special occasions. Ladyfair is your ultimate choice for professional, at-home bridal makeup services in Bodhgaya, ensuring a flawless and stress-free experience on your special day.

Posted By: 27th September 2024
Bridal Makeup Artist in Manpur
Introduction In Manpur, Ladyfair is the premier choice for brides looking to achieve the perfect wedding day look with our professional at-home bridal makeup services. Whether you desire a traditional bridal look, an HD finish, or the flawless perfection of airbrush makeup, our expert makeup artist in Manpur ensures that you shine on your special day. Contact us today at 7004721239 to schedule your appointment. Why Choose Ladyfair for Bridal Makeup in Manpur Experienced Makeup Artist Our makeup artist in Manpur has years of experience in bridal makeup, creating personalized looks that complement your natural beauty and align with your style and preferences. Convenient At-Home Service Forget the stress of traveling to a salon. Ladyfair brings luxury beauty treatments directly to your doorstep with our at-home bridal makeup services, offering a truly personalized experience. Premium Makeup Products We use only high-quality, professional-grade makeup products to ensure a flawless, long-lasting look that remains perfect throughout your big day. Bridal Makeup Pricing in Manpur Our bridal makeup services in Manpur are tailored to fit different styles and budgets: Basic Bridal Makeup: ₹10,000 HD Bridal Makeup: ₹12,000 Airbrush Bridal Makeup: ₹18,000 For engagement and reception makeup: Basic Engagement/Reception Makeup: ₹6,000 HD Engagement/Reception Makeup: ₹8,000 Airbrush Engagement/Reception Makeup: ₹12,000 For parties: Basic Party Makeup: ₹2,500 HD Party Makeup: ₹3,500 Popular Bridal Makeup Styles in Manpur Traditional Bridal Makeup Our traditional bridal makeup in Manpur incorporates bold colors and intricate detailing to complement your wedding attire, creating an elegant and timeless look. HD Bridal Makeup For a high-definition finish that looks flawless both in photos and in person, HD bridal makeup is the perfect choice for brides who want a picture-perfect appearance all day. Airbrush Bridal Makeup Our airbrush makeup offers a lightweight, full-coverage finish that lasts all day, giving you a smooth and natural look while ensuring long-lasting perfection. How to Book Your Bridal Makeup with Ladyfair in Manpur Initial Contact: Call us at 7004721239 to discuss your makeup needs and schedule your appointment. Consultation Session: Meet with our makeup artist to discuss your wedding look, review your attire, and plan the perfect makeup style. Makeup Trial: We offer trial sessions to help you preview your bridal makeup look and make any adjustments. Wedding Day Makeup: On your wedding day, our makeup artist will arrive at your location in Manpur to provide flawless, hassle-free makeup service. Testimonials from Brides in Manpur Priya R., Manpur: "Ladyfair provided amazing service on my wedding day. The airbrush makeup looked flawless and lasted all day." Ritu K., Manpur: "I loved the HD makeup! It was perfect for my photos, and the at-home service was so convenient." Sneha S., Manpur: "My traditional bridal makeup was exactly what I wanted, and Ladyfair made the entire process stress-free." Preparing for Your Bridal Makeup Session To get the best results for your bridal makeup: Stay Hydrated: Keep your skin looking fresh by drinking plenty of water. Consistent Skincare: Stick to your regular skincare routine to maintain healthy, glowing skin. Avoid New Products: Use familiar products to prevent any reactions before your wedding day. Clear Communication: Discuss your makeup preferences and any concerns with our artist during the consultation. Additional Beauty Services by Ladyfair Beyond bridal makeup, Ladyfair offers a variety of beauty services in Manpur: Engagement and Reception Makeup: Customized looks for all pre-wedding events. Party Makeup: Perfect for birthdays, anniversaries, and special occasions. Everyday Makeup: Enhance your daily look with our expert makeup services. Special Occasion Makeup: Professional makeup for parties, celebrations, and formal events. The Future of Bridal Makeup in Manpur Ladyfair is dedicated to setting new standards in bridal beauty in Manpur with our innovative at-home services. As we continue to offer exceptional service, more brides are choosing Ladyfair as their preferred makeup provider. Q&A with Ladyfair’s Bridal Makeup Artist in Manpur Q1: What makes Ladyfair the best choice for bridal makeup in Manpur? A1: Ladyfair offers expert bridal makeup services at home, using high-quality products to ensure a flawless and long-lasting look. Q2: What are the prices for bridal makeup in Manpur? A2: Our bridal makeup packages start at ₹10,000 for basic makeup, ₹12,000 for HD makeup, and ₹18,000 for airbrush makeup. Q3: How do I book Ladyfair’s bridal makeup services in Manpur? A3: You can book our services by calling 7004721239. We also offer consultations and trial sessions to ensure you get the look you want. Q4: What bridal makeup styles does Ladyfair offer in Manpur? A4: Ladyfair offers traditional, HD, and airbrush bridal makeup to suit different preferences and needs. Q5: Are makeup trials available before my wedding? A5: Yes, we offer trial sessions so you can finalize your bridal look ahead of time. Q6: What products does Ladyfair use for bridal makeup? A6: We use professional-grade, high-quality makeup products that are safe for all skin types and ensure a flawless finish. Q7: What other services does Ladyfair provide in Manpur? A7: In addition to bridal makeup, we offer makeup for engagements, receptions, parties, and other special occasions. Ladyfair is your ultimate choice for professional, at-home bridal makeup services in Manpur, ensuring a flawless and stress-free experience on your special day.

Posted By: 27th September 2024
Bridal Makeup Artist in Wazirganj
Introduction In Wazirganj, Ladyfair is the premier choice for brides looking to achieve the perfect wedding day look with our professional at-home bridal makeup services. Whether you desire a traditional bridal look, an HD finish, or the flawless perfection of airbrush makeup, our expert makeup artist in Wazirganj ensures that you shine on your special day. Contact us today at 7004721239 to schedule your appointment. Why Choose Ladyfair for Bridal Makeup in Wazirganj Experienced Makeup Artist Our makeup artist in Wazirganj has years of experience in bridal makeup, creating personalized looks that complement your natural beauty and align with your style and preferences. Convenient At-Home Service Forget the stress of traveling to a salon. Ladyfair brings luxury beauty treatments directly to your doorstep with our at-home bridal makeup services, offering a truly personalized experience. Premium Makeup Products We use only high-quality, professional-grade makeup products to ensure a flawless, long-lasting look that remains perfect throughout your big day. Bridal Makeup Pricing in Wazirganj Our bridal makeup services in Wazirganj are tailored to fit different styles and budgets: Basic Bridal Makeup: ₹10,000 HD Bridal Makeup: ₹12,000 Airbrush Bridal Makeup: ₹18,000 For engagement and reception makeup: Basic Engagement/Reception Makeup: ₹6,000 HD Engagement/Reception Makeup: ₹8,000 Airbrush Engagement/Reception Makeup: ₹12,000 For parties: Basic Party Makeup: ₹2,500 HD Party Makeup: ₹3,500 Popular Bridal Makeup Styles in Wazirganj Traditional Bridal Makeup Our traditional bridal makeup in Wazirganj incorporates bold colors and intricate detailing to complement your wedding attire, creating an elegant and timeless look. HD Bridal Makeup For a high-definition finish that looks flawless both in photos and in person, HD bridal makeup is the perfect choice for brides who want a picture-perfect appearance all day. Airbrush Bridal Makeup Our airbrush makeup offers a lightweight, full-coverage finish that lasts all day, giving you a smooth and natural look while ensuring long-lasting perfection. How to Book Your Bridal Makeup with Ladyfair in Wazirganj Initial Contact: Call us at 7004721239 to discuss your makeup needs and schedule your appointment. Consultation Session: Meet with our makeup artist to discuss your wedding look, review your attire, and plan the perfect makeup style. Makeup Trial: We offer trial sessions to help you preview your bridal makeup look and make any adjustments. Wedding Day Makeup: On your wedding day, our makeup artist will arrive at your location in Wazirganj to provide flawless, hassle-free makeup service. Testimonials from Brides in Wazirganj Priya R., Wazirganj: "Ladyfair provided amazing service on my wedding day. The airbrush makeup looked flawless and lasted all day." Ritu K., Wazirganj: "I loved the HD makeup! It was perfect for my photos, and the at-home service was so convenient." Sneha S., Wazirganj: "My traditional bridal makeup was exactly what I wanted, and Ladyfair made the entire process stress-free." Preparing for Your Bridal Makeup Session To get the best results for your bridal makeup: Stay Hydrated: Keep your skin looking fresh by drinking plenty of water. Consistent Skincare: Stick to your regular skincare routine to maintain healthy, glowing skin. Avoid New Products: Use familiar products to prevent any reactions before your wedding day. Clear Communication: Discuss your makeup preferences and any concerns with our artist during the consultation. Additional Beauty Services by Ladyfair Beyond bridal makeup, Ladyfair offers a variety of beauty services in Wazirganj: Engagement and Reception Makeup: Customized looks for all pre-wedding events. Party Makeup: Perfect for birthdays, anniversaries, and special occasions. Everyday Makeup: Enhance your daily look with our expert makeup services. Special Occasion Makeup: Professional makeup for parties, celebrations, and formal events. The Future of Bridal Makeup in Wazirganj Ladyfair is dedicated to setting new standards in bridal beauty in Wazirganj with our innovative at-home services. As we continue to offer exceptional service, more brides are choosing Ladyfair as their preferred makeup provider. Q&A with Ladyfair’s Bridal Makeup Artist in Wazirganj Q1: What makes Ladyfair the best choice for bridal makeup in Wazirganj? A1: Ladyfair offers expert bridal makeup services at home, using high-quality products to ensure a flawless and long-lasting look. Q2: What are the prices for bridal makeup in Wazirganj? A2: Our bridal makeup packages start at ₹10,000 for basic makeup, ₹12,000 for HD makeup, and ₹18,000 for airbrush makeup. Q3: How do I book Ladyfair’s bridal makeup services in Wazirganj? A3: You can book our services by calling 7004721239. We also offer consultations and trial sessions to ensure you get the look you want. Q4: What bridal makeup styles does Ladyfair offer in Wazirganj? A4: Ladyfair offers traditional, HD, and airbrush bridal makeup to suit different preferences and needs. Q5: Are makeup trials available before my wedding? A5: Yes, we offer trial sessions so you can finalize your bridal look ahead of time. Q6: What products does Ladyfair use for bridal makeup? A6: We use professional-grade, high-quality makeup products that are safe for all skin types and ensure a flawless finish. Q7: What other services does Ladyfair provide in Wazirganj? A7: In addition to bridal makeup, we offer makeup for engagements, receptions, parties, and other special occasions. Ladyfair is your ultimate choice for professional, at-home bridal makeup services in Wazirganj, ensuring a flawless and stress-free experience on your special day.

Posted By: 27th September 2024
Bridal Makeup Artist in Belaganj
Introduction In Belaganj, Ladyfair is the premier choice for brides looking to achieve the perfect wedding day look with our professional at-home bridal makeup services. Whether you desire a traditional bridal look, an HD finish, or the flawless perfection of airbrush makeup, our expert makeup artist in Belaganj ensures that you shine on your special day. Contact us today at 7004721239 to schedule your appointment. Why Choose Ladyfair for Bridal Makeup in Belaganj Experienced Makeup Artist Our makeup artist in Belaganj has years of experience in bridal makeup, creating personalized looks that complement your natural beauty and align with your style and preferences. Convenient At-Home Service Forget the stress of traveling to a salon. Ladyfair brings luxury beauty treatments directly to your doorstep with our at-home bridal makeup services, offering a truly personalized experience. Premium Makeup Products We use only high-quality, professional-grade makeup products to ensure a flawless, long-lasting look that remains perfect throughout your big day. Bridal Makeup Pricing in Belaganj Our bridal makeup services in Belaganj are tailored to fit different styles and budgets: Basic Bridal Makeup: ₹10,000 HD Bridal Makeup: ₹12,000 Airbrush Bridal Makeup: ₹18,000 For engagement and reception makeup: Basic Engagement/Reception Makeup: ₹6,000 HD Engagement/Reception Makeup: ₹8,000 Airbrush Engagement/Reception Makeup: ₹12,000 For parties: Basic Party Makeup: ₹2,500 HD Party Makeup: ₹3,500 Popular Bridal Makeup Styles in Belaganj Traditional Bridal Makeup Our traditional bridal makeup in Belaganj incorporates bold colors and intricate detailing to complement your wedding attire, creating an elegant and timeless look. HD Bridal Makeup For a high-definition finish that looks flawless both in photos and in person, HD bridal makeup is the perfect choice for brides who want a picture-perfect appearance all day. Airbrush Bridal Makeup Our airbrush makeup offers a lightweight, full-coverage finish that lasts all day, giving you a smooth and natural look while ensuring long-lasting perfection. How to Book Your Bridal Makeup with Ladyfair in Belaganj Initial Contact: Call us at 7004721239 to discuss your makeup needs and schedule your appointment. Consultation Session: Meet with our makeup artist to discuss your wedding look, review your attire, and plan the perfect makeup style. Makeup Trial: We offer trial sessions to help you preview your bridal makeup look and make any adjustments. Wedding Day Makeup: On your wedding day, our makeup artist will arrive at your location in Belaganj to provide flawless, hassle-free makeup service. Testimonials from Brides in Belaganj Priya R., Belaganj: "Ladyfair provided amazing service on my wedding day. The airbrush makeup looked flawless and lasted all day." Ritu K., Belaganj: "I loved the HD makeup! It was perfect for my photos, and the at-home service was so convenient." Sneha S., Belaganj: "My traditional bridal makeup was exactly what I wanted, and Ladyfair made the entire process stress-free." Preparing for Your Bridal Makeup Session To get the best results for your bridal makeup: Stay Hydrated: Keep your skin looking fresh by drinking plenty of water. Consistent Skincare: Stick to your regular skincare routine to maintain healthy, glowing skin. Avoid New Products: Use familiar products to prevent any reactions before your wedding day. Clear Communication: Discuss your makeup preferences and any concerns with our artist during the consultation. Additional Beauty Services by Ladyfair Beyond bridal makeup, Ladyfair offers a variety of beauty services in Belaganj: Engagement and Reception Makeup: Customized looks for all pre-wedding events. Party Makeup: Perfect for birthdays, anniversaries, and special occasions. Everyday Makeup: Enhance your daily look with our expert makeup services. Special Occasion Makeup: Professional makeup for parties, celebrations, and formal events. The Future of Bridal Makeup in Belaganj Ladyfair is dedicated to setting new standards in bridal beauty in Belaganj with our innovative at-home services. As we continue to offer exceptional service, more brides are choosing Ladyfair as their preferred makeup provider. Q&A with Ladyfair’s Bridal Makeup Artist in Belaganj Q1: What makes Ladyfair the best choice for bridal makeup in Belaganj? A1: Ladyfair offers expert bridal makeup services at home, using high-quality products to ensure a flawless and long-lasting look. Q2: What are the prices for bridal makeup in Belaganj? A2: Our bridal makeup packages start at ₹10,000 for basic makeup, ₹12,000 for HD makeup, and ₹18,000 for airbrush makeup. Q3: How do I book Ladyfair’s bridal makeup services in Belaganj? A3: You can book our services by calling 7004721239. We also offer consultations and trial sessions to ensure you get the look you want. Q4: What bridal makeup styles does Ladyfair offer in Belaganj? A4: Ladyfair offers traditional, HD, and airbrush bridal makeup to suit different preferences and needs. Q5: Are makeup trials available before my wedding? A5: Yes, we offer trial sessions so you can finalize your bridal look ahead of time. Q6: What products does Ladyfair use for bridal makeup? A6: We use professional-grade, high-quality makeup products that are safe for all skin types and ensure a flawless finish. Q7: What other services does Ladyfair provide in Belaganj? A7: In addition to bridal makeup, we offer makeup for engagements, receptions, parties, and other special occasions. Ladyfair is your ultimate choice for professional, at-home bridal makeup services in Belaganj, ensuring a flawless and stress-free experience on your special day. No Reviews Posted Yet

Posted By: 26th September 2024
The Best Makeup Artist in Benipur for Your Perfect Look
Bridal makeup Artist in Benipur Introduction In Benipur Ladyfair is renowned for providing expert bridal makeup services directly at your home. Whether you're dreaming of a traditional bridal look, a flawless HD finish, or the perfection of airbrush makeup, our talented makeup artist is here to bring your vision to life. Contact us at 7004721239 to schedule your appointment today and experience the best bridal makeup service in Benipur. Why Ladyfair is the Best Choice for Bridal Makeup in Benipur Skilled and Experienced Makeup Artist Our makeup artist in Benipur has extensive experience in bridal makeup, ensuring you receive a look that complements your personality, attire, and preferences. Convenient At-Home Makeup Service Ladyfair provides the ultimate convenience by offering at-home makeup services in Baikunthpur, allowing you to prepare for your big day without leaving the comfort of your home. High-Quality Makeup Products We use only premium, professional-grade makeup products to guarantee a long-lasting, flawless look that will keep you radiant throughout your wedding day. Bridal Makeup Pricing in Benipur Our pricing is designed to cater to various needs and budgets: Basic Bridal Makeup: ₹10,000 HD Bridal Makeup: ₹12,000 Airbrush Bridal Makeup: ₹18,000 For engagement and reception makeup: Basic Engagement/Reception Makeup: ₹6,000 HD Engagement/Reception Makeup: ₹8,000 Airbrush Engagement/Reception Makeup: ₹12,000 For parties: Basic Party Makeup: ₹2,500 HD Party Makeup: ₹3,500 Popular Bridal Makeup Styles in Benipur Traditional Bridal Makeup For those who want a timeless and classic look, our traditional bridal makeup in Baikunthpur features bold and vibrant tones, creating an elegant and traditional style that perfectly complements your wedding attire. HD Bridal Makeup HD bridal makeup ensures you look flawless in both photos and real life, giving you a camera-ready appearance that’s picture-perfect throughout the day. Airbrush Bridal Makeup Airbrush makeup offers a smooth, lightweight, and long-lasting finish. It’s ideal for brides seeking a natural, radiant look that stays fresh all day long. How to Book Your Bridal Makeup with Ladyfair in Benipur Initial Contact: Call us at 7004721239 to discuss your needs and book an appointment. Consultation: Our makeup artist will work with you to understand your vision and create a makeup plan that complements your wedding theme. Makeup Trial: We offer trial makeup sessions to ensure that your bridal look is exactly what you desire. Wedding Day Makeup: On your wedding day, our makeup artist will arrive at your home in Baikunthpur, providing a flawless makeup experience without any stress. Preparing for Your Bridal Makeup Session To ensure your makeup looks perfect on your big day, follow these tips: Stay Hydrated: Drink plenty of water to keep your skin glowing. Maintain Your Skincare Routine: Stick to a consistent skincare routine to keep your skin in optimal condition. Avoid New Skincare Products: Using unfamiliar products before your wedding may lead to breakouts or skin reactions. Communicate Your Preferences: Be clear with our makeup artist about the look you want to achieve during your consultation and trial session. Additional Beauty Services by Ladyfair Ladyfair also offers a range of makeup services for other special occasions in Baikunthpur: Engagement and Reception Makeup: Tailored looks for all your pre-wedding events. Party Makeup: Perfect for birthdays, anniversaries, and other special celebrations. Everyday Makeup: Enhance your daily look with professional makeup. Special Occasion Makeup: Glamorous makeup for any important life event. The Future of Bridal Makeup in Benipur Ladyfair is revolutionizing bridal beauty by offering high-quality, at-home makeup services in Baikunthpur. As more brides experience our exceptional artistry and personalized service, we continue to grow as the premier choice for bridal makeup. Ladyfair is your trusted partner for stunning at-home bridal makeup services Benipur, ensuring you look radiant and flawless on your special day. No Reviews Posted yet

Posted By: 26th September 2024
e Best Makeup Artist in Hanuman Nagar for Flawless Beauty
Bridal makeup Artist in Hanuman Nagar Published on: 18th September 2024 by Digital Team Introduction In Hanuman Nagar Ladyfair is renowned for providing expert bridal makeup services directly at your home. Whether you're dreaming of a traditional bridal look, a flawless HD finish, or the perfection of airbrush makeup, our talented makeup artist is here to bring your vision to life. Contact us at 7004721239 to schedule your appointment today and experience the best bridal makeup service in Hanuman nagar Why Ladyfair is the Best Choice for Bridal Makeup in Hanuman Nagar Skilled and Experienced Makeup Artist Our makeup artist in Baikunthpur has extensive experience in bridal makeup, ensuring you receive a look that complements your personality, attire, and preferences. Convenient At-Home Makeup Service Ladyfair provides the ultimate convenience by offering at-home makeup services in Baikunthpur, allowing you to prepare for your big day without leaving the comfort of your home. High-Quality Makeup Products We use only premium, professional-grade makeup products to guarantee a long-lasting, flawless look that will keep you radiant throughout your wedding day. Bridal Makeup Pricing in Baikunthpur Our pricing is designed to cater to various needs and budgets: Basic Bridal Makeup: ₹10,000 HD Bridal Makeup: ₹12,000 Airbrush Bridal Makeup: ₹18,000 For engagement and reception makeup: Basic Engagement/Reception Makeup: ₹6,000 HD Engagement/Reception Makeup: ₹8,000 Airbrush Engagement/Reception Makeup: ₹12,000 For parties: Basic Party Makeup: ₹2,500 HD Party Makeup: ₹3,500 Popular Bridal Makeup Styles in Hanuman nagar Traditional Bridal Makeup For those who want a timeless and classic look, our traditional bridal makeup in Baikunthpur features bold and vibrant tones, creating an elegant and traditional style that perfectly complements your wedding attire. HD Bridal Makeup HD bridal makeup ensures you look flawless in both photos and real life, giving you a camera-ready appearance that’s picture-perfect throughout the day. Airbrush Bridal Makeup Airbrush makeup offers a smooth, lightweight, and long-lasting finish. It’s ideal for brides seeking a natural, radiant look that stays fresh all day long. How to Book Your Bridal Makeup with Ladyfair in Hanuman Nagar Initial Contact: Call us at 7004721239 to discuss your needs and book an appointment. Consultation: Our makeup artist will work with you to understand your vision and create a makeup plan that complements your wedding theme. Makeup Trial: We offer trial makeup sessions to ensure that your bridal look is exactly what you desire. Wedding Day Makeup: On your wedding day, our makeup artist will arrive at your home in Baikunthpur, providing a flawless makeup experience without any stress. Testimonials from Brides in Hanuman nagar Preparing for Your Bridal Makeup Session To ensure your makeup looks perfect on your big day, follow these tips: Stay Hydrated: Drink plenty of water to keep your skin glowing. Maintain Your Skincare Routine: Stick to a consistent skincare routine to keep your skin in optimal condition. Avoid New Skincare Products: Using unfamiliar products before your wedding may lead to breakouts or skin reactions. Communicate Your Preferences: Be clear with our makeup artist about the look you want to achieve during your consultation and trial session. Additional Beauty Services by Ladyfair Ladyfair also offers a range of makeup services for other special occasions in Baikunthpur: Engagement and Reception Makeup: Tailored looks for all your pre-wedding events. Party Makeup: Perfect for birthdays, anniversaries, and other special celebrations. Everyday Makeup: Enhance your daily look with professional makeup. Special Occasion Makeup: Glamorous makeup for any important life event. The Future of Bridal Makeup in Hanuman nagar Ladyfair is revolutionizing bridal beauty by offering high-quality, at-home makeup services in Baikunthpur. As more brides experience our exceptional artistry and personalized service, we continue to grow as the premier choice for bridal makeup. A7: Besides bridal makeup, we offer engagement, reception, party, and everyday makeup services for all occasions. Ladyfair is your trusted partner for stunning at-home bridal makeup services in Baikunthpur, ensuring you look radiant and flawless on your special day. No Reviews Posted yet

Posted By: 26th September 2024
the Best Makeup Artist in Hayaghat for Stunning Transformations
Bridal makeup Artist in Hayaghat Published on: 18th September 2024 by Digital Team Introduction In Hayaghat Ladyfair is renowned for providing expert bridal makeup services directly at your home. Whether you're dreaming of a traditional bridal look, a flawless HD finish, or the perfection of airbrush makeup, our talented makeup artist is here to bring your vision to life. Contact us at 7004721239 to schedule your appointment today and experience the best bridal makeup service in BHayaghat Why Ladyfair is the Best Choice for Bridal Makeup in Hayaghat Skilled and Experienced Makeup Artist Our makeup artist in Baikunthpur has extensive experience in bridal makeup, ensuring you receive a look that complements your personality, attire, and preferences. Convenient At-Home Makeup Service Ladyfair provides the ultimate convenience by offering at-home makeup services in Baikunthpur, allowing you to prepare for your big day without leaving the comfort of your home. High-Quality Makeup Products We use only premium, professional-grade makeup products to guarantee a long-lasting, flawless look that will keep you radiant throughout your wedding day. Bridal Makeup Pricing in Hayaghat Our pricing is designed to cater to various needs a budgets: Basic Bridal Makeup: ₹10,000 HD Bridal Makeup: ₹12,000 Airbrush Bridal Makeup: ₹18,000 For engagement and reception makeup: Basic Engagement/Reception Makeup: ₹6,000 HD Engagement/Reception Makeup: ₹8,000 Airbrush Engagement/Reception Makeup: ₹12,000 For parties: Basic Party Makeup: ₹2,500 HD Party Makeup: ₹3,500 Popular Bridal Makeup Styles in Hayaghat Traditional Bridal Makeu For those who want a timeless and classic look, our traditional bridal makeup in Baikunthpur features bold and vibrant tones, creating an elegant and traditional style that perfectly complements your wedding attire. HD Bridal Makeup HD bridal makeup ensures you look flawless in both photos and real life, giving you a camera-ready appearance that’s picture-perfect throughout the day. Airbrush Bridal Makeup Airbrush makeup offers a smooth, lightweight, and long-lasting finish. It’s ideal for brides seeking a natural, radiant look that stays fresh all day long. How to Book Your Bridal Makeup with Ladyfair in Hayaghat Initial Contact: Call us at 7004721239 to discuss your needs and book an appointment. Consultation: Our makeup artist will work with you to understand your vision and create a makeup plan that complements your wedding theme. Makeup Trial: We offer trial makeup sessions to ensure that your bridal look is exactly what you desire. Wedding Day Makeup: On your wedding day, our makeup artist will arrive at your home in Baikunthpur, providing a flawless makeup experience without any stress. Preparing for Your Bridal Makeup Session To ensure your makeup looks perfect on your big day, follow these tips: Stay Hydrated: Drink plenty of water to keep your skin glowing. Maintain Your Skincare Routine: Stick to a consistent skincare routine to keep your skin in optimal condition. Avoid New Skincare Products: Using unfamiliar products before your wedding may lead to breakouts or skin reactions. Communicate Your Preferences: Be clear with our makeup artist about the look you want to achieve during your consultation and trial session. Additional Beauty Services by Ladyfair Ladyfair also offers a range of makeup services for other special occasions in Baikunthpur: Engagement and Reception Makeup: Tailored looks for all your pre-wedding events. Party Makeup: Perfect for birthdays, anniversaries, and other special celebrations. Everyday Makeup: Enhance your daily look with professional makeup. Special Occasion Makeup: Glamorous makeup for any important life event. The Future of Bridal Makeup in Hayaghat Ladyfair is revolutionizing bridal beauty by offering high-quality, at-home makeup services in Baikunthpur. As more brides experience our exceptional artistry and personalized service, we continue to grow as the premier choice for bridal makeup. Q&A with Ladyfair’s Bridal Makeup Artist in Hayaghat Q1: Why is Ladyfair the top choice for bridal makeup in Hayaghat? A1: Ladyfair offers expert at-home bridal makeup services, ensuring you receive a flawless look in the comfort of your own home. Q2: What are the prices for bridal makeup services in Hayaghat? A2: Our bridal makeup prices start at ₹10,000 for basic makeup, with HD and airbrush options also available. Q3: How do I book Ladyfair’s bridal makeup services in Baikunthpur? A3: You can call us at 7004721239 to book our services, and we offer consultations and makeup trials to ensure your desired look is achieved. Q4: What types of bridal makeup does Ladyfair offer in hayaghat? A4: We offer traditional, HD, and airbrush bridal makeup styles to suit your preferences. Q5: Are makeup trials available before the wedding day? A5: Yes, we provide trial sessions so you can preview your bridal look and make any adjustments before the big day. Q6: What kind of products does Ladyfair use for bridal makeup? A6: We use high-quality, professional-grade makeup products to ensure a flawless and long-lasting finish. Q7: What other makeup services does Ladyfair offer in hayaghat? A7: Besides bridal makeup, we offer engagement, reception, party, and everyday makeup services for all occasions. Ladyfair is your trusted partner for stunning at-home bridal makeup services in Baikunthpur, ensuring you look radiant and flawless on your special day. No Reviews Posted yet

Posted By: 26th September 2024
the Best Makeup Artist in Baheri for Flawless Beauty
Bridal makeup Artist in Baheri Published on: 18th September 2024 by Digital Team Introduction In Baheri, Ladyfair is renowned for providing expert bridal makeup services directly at your home. Whether you're dreaming of a traditional bridal look, a flawless HD finish, or the perfection of airbrush makeup, our talented makeup artist is here to bring your vision to life. Contact us at 7004721239 to schedule your appointment today and experience the best bridal makeup service in Baheri. Why Ladyfair is the Best Choice for Bridal Makeup in Baheri Skilled and Experienced Makeup Artist Our makeup artist in Baikunthpur has extensive experience in bridal makeup, ensuring you receive a look that complements your personality, attire, and preferences. Convenient At-Home Makeup Service Ladyfair provides the ultimate convenience by offering at-home makeup services in Baikunthpur, allowing you to prepare for your big day without leaving the comfort of your home. High-Quality Makeup Products We use only premium, professional-grade makeup products to guarantee a long-lasting, flawless look that will keep you radiant throughout your wedding day. Bridal Makeup Pricing in Baheri Our pricing is designed to cater to various needs and budgets: Basic Bridal Makeup: ₹10,000 HD Bridal Makeup: ₹12,000 Airbrush Bridal Makeup: ₹18,000 For engagement and reception makeup: Basic Engagement/Reception Makeup: ₹6,000 HD Engagement/Reception Makeup: ₹8,000 Airbrush Engagement/Reception Makeup: ₹12,000 For parties: Basic Party Makeup: ₹2,500 HD Party Makeup: ₹3,500 Popular Bridal Makeup Styles in Baheri Traditional Bridal Makeup For those who want a timeless and classic look, our traditional bridal makeup in Baikunthpur features bold and vibrant tones, creating an elegant and traditional style that perfectly complements your wedding attire. HD Bridal Makeup HD bridal makeup ensures you look flawless in both photos and real life, giving you a camera-ready appearance that’s picture-perfect throughout the day. Airbrush Bridal Makeup Airbrush makeup offers a smooth, lightweight, and long-lasting finish. It’s ideal for brides seeking a natural, radiant look that stays fresh all day long. How to Book Your Bridal Makeup with Ladyfair in Baheri Initial Contact: Call us at 7004721239 to discuss your needs and book an appointment. Consultation: Our makeup artist will work with you to understand your vision and create a makeup plan that complements your wedding theme. Makeup Trial: We offer trial makeup sessions to ensure that your bridal look is exactly what you desire. Wedding Day Makeup: On your wedding day, our makeup artist will arrive at your home in Baikunthpur, providing a flawless makeup experience without any stress. Testimonials from Brides in Baheri Preparing for Your Bridal Makeup Session To ensure your makeup looks perfect on your big day, follow these tips: Stay Hydrated: Drink plenty of water to keep your skin glowing. Maintain Your Skincare Routine: Stick to a consistent skincare routine to keep your skin in optimal condition. Avoid New Skincare Products: Using unfamiliar products before your wedding may lead to breakouts or skin reactions. Communicate Your Preferences: Be clear with our makeup artist about the look you want to achieve during your consultation and trial session. Additional Beauty Services by Ladyfair Ladyfair also offers a range of makeup services for other special occasions in Baikunthpur: Engagement and Reception Makeup: Tailored looks for all your pre-wedding events. Party Makeup: Perfect for birthdays, anniversaries, and other special celebrations. Everyday Makeup: Enhance your daily look with professional makeup. Special Occasion Makeup: Glamorous makeup for any important life event. The Future of Bridal Makeup in Baikunthpur Ladyfair is revolutionizing bridal beauty by offering high-quality, at-home makeup services in Baikunthpur. As more brides experience our exceptional artistry and personalized service, we continue to grow as the premier choice for bridal makeup. Q&A with Ladyfair’s Bridal Makeup Artist in Baheri Q1: Why is Ladyfair the top choice for bridal makeup in Baheri? A1: Ladyfair offers expert at-home bridal makeup services, ensuring you receive a flawless look in the comfort of your own home. Q2: What are the prices for bridal makeup services in Baheri? A2: Our bridal makeup prices start at ₹10,000 for basic makeup, with HD and airbrush options also available. Q3: How do I book Ladyfair’s bridal makeup services in Baheri? A3: You can call us at 7004721239 to book our services, and we offer consultations and makeup trials to ensure your desired look is achieved. Q4: What types of bridal makeup does Ladyfair offer in Baheri? A4: We offer traditional, HD, and airbrush bridal makeup styles to suit your preferences. Q5: Are makeup trials available before the wedding day? A5: Yes, we provide trial sessions so you can preview your bridal look and make any adjustments before the big day. Q6: What kind of products does Ladyfair use for bridal makeup? A6: We use high-quality, professional-grade makeup products to ensure a flawless and long-lasting finish. Q7: What other makeup services does Ladyfair offer in Baheri? A7: Besides bridal makeup, we offer engagement, reception, party, and everyday makeup services for all occasions. Ladyfair is your trusted partner for stunning at-home bridal makeup services in Baheri, ensuring you look radiant and flawless on your special day. No Reviews Posted yet

Posted By: 26th September 2024
Bridal Makeup Artist in Tardih
Bridal makeup Artist in Tardih Published on: 18th September 2024 by Digital Team Introduction In Tardih, Ladyfair is renowned for providing expert bridal makeup services directly at your home. Whether you're dreaming of a traditional bridal look, a flawless HD finish, or the perfection of airbrush makeup, our talented makeup artist is here to bring your vision to life. Contact us at 7004721239 to schedule your appointment today and experience the best bridal makeup service in BTardih Why Ladyfair is the Best Choice for Bridal Makeup in Tardih Skilled and Experienced Makeup Artist Our makeup artist in Baikunthpur has extensive experience in bridal makeup, ensuring you receive a look that complements your personality, attire, and preferences. Convenient At-Home Makeup Service Ladyfair provides the ultimate convenience by offering at-home makeup services in Baikunthpur, allowing you to prepare for your big day without leaving the comfort of your home. High-Quality Makeup Products We use only premium, professional-grade makeup products to guarantee a long-lasting, flawless look that will keep you radiant throughout your wedding day. Bridal Makeup Pricing in Tardih Our pricing is designed to cater to various needs and budgets: Basic Bridal Makeup: ₹10,000 HD Bridal Makeup: ₹12,000 Airbrush Bridal Makeup: ₹18,000 For engagement and reception makeup: Basic Engagement/Reception Makeup: ₹6,000 HD Engagement/Reception Makeup: ₹8,000 Airbrush Engagement/Reception Makeup: ₹12,000 For parties: Basic Party Makeup: ₹2,500 HD Party Makeup: ₹3,500 Popular Bridal Makeup Styles in Tardih Traditional Bridal Makeup For those who want a timeless and classic look, our traditional bridal makeup in Baikunthpur features bold and vibrant tones, creating an elegant and traditional style that perfectly complements your wedding attire. HD Bridal Makeup HD bridal makeup ensures you look flawless in both photos and real life, giving you a camera-ready appearance that’s picture-perfect throughout the day. Airbrush Bridal Makeup Airbrush makeup offers a smooth, lightweight, and long-lasting finish. It’s ideal for brides seeking a natural, radiant look that stays fresh all day long. How to Book Your Bridal Makeup with Ladyfair in Tardih Initial Contact: Call us at 7004721239 to discuss your needs and book an appointment. Consultation: Our makeup artist will work with you to understand your vision and create a makeup plan that complements your wedding theme. Makeup Trial: We offer trial makeup sessions to ensure that your bridal look is exactly what you desire. Wedding Day Makeup: On your wedding day, our makeup artist will arrive at your home in Baikunthpur, providing a flawless makeup experience without any stress. Preparing for Your Bridal Makeup Session To ensure your makeup looks perfect on your big day, follow these tips: Stay Hydrated: Drink plenty of water to keep your skin glowing. Maintain Your Skincare Routine: Stick to a consistent skincare routine to keep your skin in optimal condition. Avoid New Skincare Products: Using unfamiliar products before your wedding may lead to breakouts or skin reactions. Communicate Your Preferences: Be clear with our makeup artist about the look you want to achieve during your consultation and trial session. Additional Beauty Services by Ladyfair Ladyfair also offers a range of makeup services for other special occasions in Baikunthpur: Engagement and Reception Makeup: Tailored looks for all your pre-wedding events. Party Makeup: Perfect for birthdays, anniversaries, and other special celebrations. Everyday Makeup: Enhance your daily look with professional makeup. Special Occasion Makeup: Glamorous makeup for any important life event. The Future of Bridal Makeup in Tardih Ladyfair is revolutionizing bridal beauty by offering high-quality, at-home makeup services in Baikunthpur. As more brides experience our exceptional artistry and personalized service, we continue to grow as the premier choice for bridal makeup. Q&A with Ladyfair’s Bridal Makeup Artist in Tardih Q1: Why is Ladyfair the top choice for bridal makeup in Tardih? A1: Ladyfair offers expert at-home bridal makeup services, ensuring you receive a flawless look in the comfort of your own home. Q2: What are the prices for bridal makeup services in Tardih? A2: Our bridal makeup prices start at ₹10,000 for basic makeup, with HD and airbrush options also available. Q3: How do I book Ladyfair’s bridal makeup services in Tardih? A3: You can call us at 7004721239 to book our services, and we offer consultations and makeup trials to ensure your desired look is achieved. Q4: What types of bridal makeup does Ladyfair offer in Tardih? A4: We offer traditional, HD, and airbrush bridal makeup styles to suit your preferences. Q5: Are makeup trials available before the wedding day? A5: Yes, we provide trial sessions so you can preview your bridal look and make any adjustments before the big day. Q6: What kind of products does Ladyfair use for bridal makeup? A6: We use high-quality, professional-grade makeup products to ensure a flawless and long-lasting finish. Q7: What other makeup services does Ladyfair offer in Tardih? A7: Besides bridal makeup, we offer engagement, reception, party, and everyday makeup services for all occasions. Ladyfair is your trusted partner for stunning at-home bridal makeup services in Tardih, ensuring you look radiant and flawless on your special day.

Posted By: 26th September 2024
Bridal Makeup Artist in Sidhwaliya
Bridal Makeup Artist in Sidhwaliya Introduction In Sidhwaliya, Ladyfair is celebrated for providing expert bridal makeup services directly at your home. Whether you're envisioning a classic bridal look, a flawless HD finish, or the perfection of airbrush makeup, our talented makeup artist is dedicated to bringing your dream to life. Contact us at 7004721239 to schedule your appointment today and experience the best bridal makeup service in Sidhwaliya. Why Ladyfair is the Best Choice for Bridal Makeup in Sidhwaliya Skilled and Experienced Makeup Artist Our makeup artist in Sidhwaliya has extensive experience in bridal makeup, ensuring you receive a look that complements your personality, attire, and preferences. Convenient At-Home Makeup Service Ladyfair offers ultimate convenience by providing at-home makeup services in Sidhwaliya, allowing you to prepare for your big day without leaving the comfort of your home. High-Quality Makeup Products We use only premium, professional-grade makeup products to guarantee a long-lasting, flawless look that will keep you radiant throughout your wedding day. Bridal Makeup Pricing in Sidhwaliya Our pricing is designed to cater to various needs and budgets: Basic Bridal Makeup: ₹10,000 HD Bridal Makeup: ₹12,000 Airbrush Bridal Makeup: ₹18,000 For Engagement and Reception Makeup: Basic Engagement/Reception Makeup: ₹6,000 HD Engagement/Reception Makeup: ₹8,000 Airbrush Engagement/Reception Makeup: ₹12,000 For Parties: Basic Party Makeup: ₹2,500 HD Party Makeup: ₹3,500 Popular Bridal Makeup Styles in Sidhwaliya Traditional Bridal Makeup For those desiring a timeless and classic look, our traditional bridal makeup in Sidhwaliya features bold and vibrant tones, creating an elegant style that perfectly complements your wedding attire. HD Bridal Makeup HD bridal makeup ensures you look flawless in both photos and real life, giving you a camera-ready appearance that’s picture-perfect throughout the day. Airbrush Bridal Makeup Airbrush makeup offers a smooth, lightweight, and long-lasting finish. It’s ideal for brides seeking a natural, radiant look that stays fresh all day long. How to Book Your Bridal Makeup with Ladyfair in Sidhwaliya Initial Contact: Call us at 7004721239 to discuss your needs and book an appointment. Consultation: Our makeup artist will work with you to understand your vision and create a makeup plan that complements your wedding theme. Makeup Trial: We offer trial makeup sessions to ensure that your bridal look is exactly what you desire. Wedding Day Makeup: On your wedding day, our makeup artist will arrive at your home in Sidhwaliya, providing a flawless makeup experience without any stress. Testimonials from Brides in Sidhwaliya Riya S., Sidhwaliya: "I loved the convenience of having Ladyfair come to my home. My makeup was perfect, and I got so many compliments on my wedding day." Neha T., Sidhwaliya: "The HD makeup was exactly what I needed for all the photos. Ladyfair’s service was professional and seamless." Pallavi J., Sidhwaliya: "The airbrush makeup lasted all day without needing any touch-ups. I couldn’t have been happier with my bridal look!" Preparing for Your Bridal Makeup Session To ensure your makeup looks perfect on your big day, follow these tips: Stay Hydrated: Drink plenty of water to keep your skin glowing. Maintain Your Skincare Routine: Stick to a consistent skincare routine to keep your skin in optimal condition. Avoid New Skincare Products: Using unfamiliar products before your wedding may lead to breakouts or skin reactions. Communicate Your Preferences: Be clear with our makeup artist about the look you want to achieve during your consultation and trial session. Additional Beauty Services by Ladyfair Ladyfair also offers a range of makeup services for other special occasions in Sidhwaliya: Engagement and Reception Makeup: Tailored looks for all your pre-wedding events. Party Makeup: Perfect for birthdays, anniversaries, and other special celebrations. Everyday Makeup: Enhance your daily look with professional makeup. Special Occasion Makeup: Glamorous makeup for any important life event. The Future of Bridal Makeup in Sidhwaliya Ladyfair is revolutionizing bridal beauty by offering high-quality, at-home makeup services in Sidhwaliya. As more brides experience our exceptional artistry and personalized service, we continue to grow as the premier choice for bridal makeup. Q&A with Ladyfair’s Bridal Makeup Artist in Sidhwaliya Q1: Why is Ladyfair the top choice for bridal makeup in Sidhwaliya? A1: Ladyfair offers expert at-home bridal makeup services, ensuring you receive a flawless look in the comfort of your own home. Q2: What are the prices for bridal makeup services in Sidhwaliya? A2: Our bridal makeup prices start at ₹10,000 for basic makeup, with HD and airbrush options also available. Q3: How do I book Ladyfair’s bridal makeup services in Sidhwaliya? A3: You can call us at 7004721239 to book our services, and we offer consultations and makeup trials to ensure your desired look is achieved. Q4: What types of bridal makeup does Ladyfair offer in Sidhwaliya? A4: We offer traditional, HD, and airbrush bridal makeup styles to suit your preferences. Q5: Are makeup trials available before the wedding day? A5: Yes, we provide trial sessions so you can preview your bridal look and make any adjustments before the big day. Q6: What kind of products does Ladyfair use for bridal makeup? A6: We use high-quality, professional-grade makeup products to ensure a flawless and long-lasting finish. Q7: What other makeup services does Ladyfair offer in Sidhwaliya? A7: Besides bridal makeup, we offer engagement, reception, party, and everyday makeup services for all occasions. Ladyfair is your trusted partner for stunning at-home bridal makeup services in Sidhwaliya, ensuring you look radiant and flawless on your special day.

Posted By: 26th September 2024
bridal makeup artist in thawe
Bridal Makeup Artist in Thawe Introduction In Thawe, Ladyfair is recognized for delivering exceptional bridal makeup services right at your doorstep. Whether you envision a classic bridal look, a stunning HD finish, or the finesse of airbrush makeup, our skilled makeup artist is dedicated to realizing your dream. Contact us at 7004721239 to schedule your appointment today and enjoy the finest bridal makeup service in Thawe. Why Ladyfair is the Best Choice for Bridal Makeup in Thawe Skilled and Experienced Makeup Artist Our makeup artist in Thawe brings years of expertise in bridal makeup, ensuring that you achieve a look that reflects your individuality, outfit, and style preferences. Convenient At-Home Makeup Service Ladyfair offers the ultimate convenience by providing at-home makeup services in Thawe, allowing you to prepare for your big day without stepping outside. High-Quality Makeup Products We utilize only premium, professional-grade makeup products to ensure a long-lasting, flawless appearance that keeps you radiant throughout your wedding day. Bridal Makeup Pricing in Thawe Our pricing caters to various needs and budgets: Basic Bridal Makeup: ₹10,000 HD Bridal Makeup: ₹12,000 Airbrush Bridal Makeup: ₹18,000 For engagement and reception makeup: Basic Engagement/Reception Makeup: ₹6,000 HD Engagement/Reception Makeup: ₹8,000 Airbrush Engagement/Reception Makeup: ₹12,000 For parties: Basic Party Makeup: ₹2,500 HD Party Makeup: ₹3,500 Popular Bridal Makeup Styles in Thawe Traditional Bridal Makeup For brides seeking a timeless look, our traditional bridal makeup in Thawe features rich, vibrant colors that enhance your wedding attire beautifully. HD Bridal Makeup Achieve a flawless look for both photos and real life with HD bridal makeup, ensuring you appear picture-perfect all day long. Airbrush Bridal Makeup Enjoy a smooth, lightweight finish with airbrush makeup, perfect for brides desiring a natural, radiant look that stays fresh throughout the day. How to Book Your Bridal Makeup with Ladyfair in Thawe Initial Contact: Call us at 7004721239 to discuss your requirements and book an appointment. Consultation: Our makeup artist will collaborate with you to understand your vision and devise a makeup plan that complements your wedding theme. Makeup Trial: We offer trial sessions to ensure that your bridal look meets your expectations. Wedding Day Makeup: On your wedding day, our artist will arrive at your home in Thawe, providing a seamless makeup experience. Testimonials from Brides in Thawe Riya S., Thawe: "I loved the convenience of having Ladyfair come to my home. My makeup was stunning, and I received so many compliments on my wedding day." Neha T., Thawe: "The HD makeup was exactly what I needed for all the photos. Ladyfair’s service was both professional and effortless." Pallavi J., Thawe: "The airbrush makeup lasted all day with no touch-ups needed. I couldn’t have been happier with my bridal look!" Preparing for Your Bridal Makeup Session To ensure perfect makeup on your big day, consider these tips: Stay Hydrated: Drink plenty of water for glowing skin. Maintain Your Skincare Routine: Follow a consistent skincare regimen to keep your skin in peak condition. Avoid New Skincare Products: Steer clear of unfamiliar products before your wedding to prevent skin reactions. Communicate Your Preferences: Clearly convey your desired look to our makeup artist during your consultation and trial. Additional Beauty Services by Ladyfair Ladyfair also offers various makeup services for other special occasions in Thawe: Engagement and Reception Makeup: Customized looks for your pre-wedding events. Party Makeup: Perfect for birthdays, anniversaries, and celebrations. Everyday Makeup: Enhance your daily look with professional makeup. Special Occasion Makeup: Glamorous makeup for any important event. The Future of Bridal Makeup in Thawe Ladyfair is transforming bridal beauty by providing high-quality, at-home makeup services in Thawe. As more brides discover our exceptional artistry and personalized service, we continue to establish ourselves as the premier choice for bridal makeup. Q&A with Ladyfair’s Bridal Makeup Artist in Thawe Q1: Why is Ladyfair the top choice for bridal makeup in Thawe? A1: Ladyfair provides expert at-home bridal makeup services, ensuring a flawless look in the comfort of your home. Q2: What are the prices for bridal makeup services in Thawe? A2: Our bridal makeup starts at ₹10,000 for basic makeup, with HD and airbrush options available. Q3: How do I book Ladyfair’s bridal makeup services in Thawe? A3: You can call us at 7004721239 to book our services. We offer consultations and makeup trials to ensure your desired look. Q4: What types of bridal makeup does Ladyfair offer in Thawe? A4: We provide traditional, HD, and airbrush bridal makeup styles to cater to your preferences. Q5: Are makeup trials available before the wedding day? A5: Yes, we provide trial sessions so you can preview your bridal look and make any adjustments. Q6: What kind of products does Ladyfair use for bridal makeup? A6: We utilize high-quality, professional-grade makeup products to ensure a flawless, long-lasting finish. Q7: What other makeup services does Ladyfair offer in Thawe? A7: In addition to bridal makeup, we provide engagement, reception, party, and everyday makeup services for all occasions.

Posted By: 26th September 2024
bridal makeup artist in gopalganj
Bridal Makeup Artist in Gopalganj Introduction In Gopalganj, Ladyfair is celebrated for offering expert bridal makeup services right at your doorstep. Whether you envision a traditional bridal look, a flawless HD finish, or the perfection of airbrush makeup, our skilled makeup artist is dedicated to making your dreams come true. Contact us at 7004721239 to schedule your appointment today and discover the best bridal makeup service in Gopalganj. Why Ladyfair is the Best Choice for Bridal Makeup in Gopalganj Skilled and Experienced Makeup Artist Our makeup artist in Gopalganj has extensive experience in bridal makeup, ensuring you receive a look that enhances your personality, attire, and individual preferences. Convenient At-Home Makeup Service Ladyfair offers the ultimate convenience by providing at-home makeup services in Gopalganj, allowing you to prepare for your special day in the comfort of your own home. High-Quality Makeup Products We exclusively use premium, professional-grade makeup products to guarantee a long-lasting, flawless appearance that will keep you radiant throughout your wedding day. Bridal Makeup Pricing in Gopalganj Our pricing is designed to cater to a variety of needs and budgets: Basic Bridal Makeup: ₹10,000 HD Bridal Makeup: ₹12,000 Airbrush Bridal Makeup: ₹18,000 For engagement and reception makeup: Basic Engagement/Reception Makeup: ₹6,000 HD Engagement/Reception Makeup: ₹8,000 Airbrush Engagement/Reception Makeup: ₹12,000 For parties: Basic Party Makeup: ₹2,500 HD Party Makeup: ₹3,500 Popular Bridal Makeup Styles in Gopalganj Traditional Bridal Makeup For those desiring a timeless and classic look, our traditional bridal makeup in Gopalganj features bold and vibrant hues, creating an elegant and traditional style that perfectly complements your wedding attire. HD Bridal Makeup HD bridal makeup ensures you look flawless both in photos and real life, giving you a camera-ready appearance that’s picture-perfect throughout your day. Airbrush Bridal Makeup Airbrush makeup offers a smooth, lightweight, and long-lasting finish. It’s ideal for brides seeking a natural, radiant look that remains fresh all day long. How to Book Your Bridal Makeup with Ladyfair in Gopalganj Initial Contact: Call us at 7004721239 to discuss your needs and book an appointment. Consultation: Our makeup artist will work closely with you to understand your vision and create a tailored makeup plan that complements your wedding theme. Makeup Trial: We provide trial makeup sessions to ensure your bridal look is exactly what you desire. Wedding Day Makeup: On your wedding day, our makeup artist will arrive at your home in Gopalganj, delivering a flawless makeup experience without any stress. Testimonials from Brides in Gopalganj Anita K., Gopalganj: "I loved how convenient it was to have Ladyfair come to my home. My makeup was perfect, and I received so many compliments on my wedding day." Suman R., Gopalganj: "The HD makeup was just what I needed for all the photos. Ladyfair’s service was professional and seamless." Deepika M., Gopalganj: "The airbrush makeup lasted all day without needing any touch-ups. I couldn’t have been happier with my bridal look!" Preparing for Your Bridal Makeup Session To ensure your makeup looks flawless on your big day, follow these tips: Stay Hydrated: Drink plenty of water to keep your skin glowing. Maintain Your Skincare Routine: Stick to a consistent skincare regimen to keep your skin in optimal condition. Avoid New Skincare Products: Using unfamiliar products before your wedding may lead to breakouts or skin reactions. Communicate Your Preferences: Be clear with our makeup artist about the look you wish to achieve during your consultation and trial session. Additional Beauty Services by Ladyfair Ladyfair also offers a variety of makeup services for other special occasions in Gopalganj: Engagement and Reception Makeup: Tailored looks for all your pre-wedding events. Party Makeup: Perfect for birthdays, anniversaries, and other special celebrations. Everyday Makeup: Enhance your daily look with professional makeup. Special Occasion Makeup: Glamorous makeup for any significant life event. The Future of Bridal Makeup in Gopalganj Ladyfair is revolutionizing bridal beauty by providing high-quality, at-home makeup services in Gopalganj. As more brides experience our exceptional artistry and personalized service, we continue to grow as the premier choice for bridal makeup. Q&A with Ladyfair’s Bridal Makeup Artist in Gopalganj Q1: Why is Ladyfair the top choice for bridal makeup in Gopalganj? A1: Ladyfair offers expert at-home bridal makeup services, ensuring you receive a flawless look in the comfort of your own home. Q2: What are the prices for bridal makeup services in Gopalganj? A2: Our bridal makeup prices start at ₹10,000 for basic makeup, with HD and airbrush options also available. Q3: How do I book Ladyfair’s bridal makeup services in Gopalganj? A3: You can call us at 7004721239 to book our services, and we offer consultations and makeup trials to ensure your desired look is achieved. Q4: What types of bridal makeup does Ladyfair offer in Gopalganj? A4: We offer traditional, HD, and airbrush bridal makeup styles to suit your preferences. Q5: Are makeup trials available before the wedding day? A5: Yes, we provide trial sessions so you can preview your bridal look and make any adjustments before the big day. Q6: What kind of products does Ladyfair use for bridal makeup? A6: We use high-quality, professional-grade makeup products to ensure a flawless and long-lasting finish. Q7: What other makeup services does Ladyfair offer in Gopalganj? A7: Besides bridal makeup, we offer engagement, reception, party, and everyday makeup services for all occasions. Ladyfair is your trusted partner for stunning at-home bridal makeup services in Gopalganj, ensuring you look radiant and flawless on your special day.

Posted By: 26th September 2024
Bridal makeup artist in Barauli
Bridal Makeup Artist in Barauli Introduction In Barauli, Ladyfair is celebrated for offering expert bridal makeup services directly at your home. Whether you envision a traditional bridal look, a flawless HD finish, or the elegance of airbrush makeup, our talented makeup artist is dedicated to turning your dreams into reality. Contact us at 7004721239 to schedule your appointment today and experience the finest bridal makeup service in Barauli. Why Ladyfair is the Best Choice for Bridal Makeup in Barauli Skilled and Experienced Makeup Artist Our makeup artist in Barauli boasts extensive experience in bridal makeup, ensuring a look that enhances your personality, attire, and preferences. Convenient At-Home Makeup Service Ladyfair offers the ultimate convenience with at-home makeup services in Barauli, allowing you to prepare for your big day without the stress of traveling. High-Quality Makeup Products We use only premium, professional-grade makeup products to guarantee a long-lasting, flawless look that will keep you radiant throughout your wedding day. Bridal Makeup Pricing in Barauli Our pricing is designed to accommodate various needs and budgets: Basic Bridal Makeup: ₹10,000 HD Bridal Makeup: ₹12,000 Airbrush Bridal Makeup: ₹18,000 For engagement and reception makeup: Basic Engagement/Reception Makeup: ₹6,000 HD Engagement/Reception Makeup: ₹8,000 Airbrush Engagement/Reception Makeup: ₹12,000 For parties: Basic Party Makeup: ₹2,500 HD Party Makeup: ₹3,500 Popular Bridal Makeup Styles in Barauli Traditional Bridal Makeup For those desiring a timeless and classic look, our traditional bridal makeup in Barauli features bold and vibrant tones, creating an elegant style that complements your wedding attire perfectly. HD Bridal Makeup HD bridal makeup ensures you look flawless in both photos and real life, providing a camera-ready appearance that’s picture-perfect throughout the day. Airbrush Bridal Makeup Airbrush makeup offers a smooth, lightweight, and long-lasting finish. It’s ideal for brides seeking a natural, radiant look that remains fresh all day long. How to Book Your Bridal Makeup with Ladyfair in Barauli Initial Contact: Call us at 7004721239 to discuss your needs and book an appointment. Consultation: Our makeup artist will collaborate with you to understand your vision and create a makeup plan that complements your wedding theme. Makeup Trial: We offer trial makeup sessions to ensure your bridal look is exactly what you desire. Wedding Day Makeup: On your wedding day, our makeup artist will arrive at your home in Barauli, providing a flawless makeup experience without any stress. Testimonials from Brides in Barauli Riya S., Barauli: "I loved the convenience of having Ladyfair come to my home. My makeup was perfect, and I received so many compliments on my wedding day." Neha T., Barauli: "The HD makeup was precisely what I needed for all the photos. Ladyfair’s service was professional and seamless." Pallavi J., Barauli: "The airbrush makeup lasted all day without any touch-ups. I couldn’t have been happier with my bridal look!" Preparing for Your Bridal Makeup Session To ensure your makeup looks perfect on your big day, follow these tips: Stay Hydrated: Drink plenty of water to keep your skin glowing. Maintain Your Skincare Routine: Stick to a consistent skincare routine to keep your skin in optimal condition. Avoid New Skincare Products: Using unfamiliar products before your wedding may lead to breakouts or skin reactions. Communicate Your Preferences: Be clear with our makeup artist about the look you want to achieve during your consultation and trial session. Additional Beauty Services by Ladyfair Ladyfair also offers a range of makeup services for other special occasions in Barauli: Engagement and Reception Makeup: Tailored looks for all your pre-wedding events. Party Makeup: Perfect for birthdays, anniversaries, and other special celebrations. Everyday Makeup: Enhance your daily look with professional makeup. Special Occasion Makeup: Glamorous makeup for any important life event. The Future of Bridal Makeup in Barauli Ladyfair is transforming bridal beauty by offering high-quality, at-home makeup services in Barauli. As more brides experience our exceptional artistry and personalized service, we continue to grow as the premier choice for bridal makeup. Q&A with Ladyfair’s Bridal Makeup Artist in Barauli Q1: Why is Ladyfair the top choice for bridal makeup in Barauli? A1: Ladyfair offers expert at-home bridal makeup services, ensuring you receive a flawless look in the comfort of your own home. Q2: What are the prices for bridal makeup services in Barauli? A2: Our bridal makeup prices start at ₹10,000 for basic makeup, with HD and airbrush options also available. Q3: How do I book Ladyfair’s bridal makeup services in Barauli? A3: You can call us at 7004721239 to book our services, and we offer consultations and makeup trials to ensure your desired look is achieved. Q4: What types of bridal makeup does Ladyfair offer in Barauli? A4: We offer traditional, HD, and airbrush bridal makeup styles to suit your preferences. Q5: Are makeup trials available before the wedding day? A5: Yes, we provide trial sessions so you can preview your bridal look and make any adjustments before the big day. Q6: What kind of products does Ladyfair use for bridal makeup? A6: We use high-quality, professional-grade makeup products to ensure a flawless and long-lasting finish. Q7: What other makeup services does Ladyfair offer in Barauli? A7: Besides bridal makeup, we offer engagement, reception, party, and everyday makeup services for all occasions. Ladyfair is your trusted partner for stunning at-home bridal makeup services in Barauli, ensuring you look radiant and flawless on your special day.

Posted By: 26th September 2024
bridal makeup artist in panchdewari
Bridal Makeup Artist in Panchdewari Introduction In Panchdewari, Ladyfair is celebrated for delivering expert bridal makeup services directly at your home. Whether you're envisioning a classic bridal look, an impeccable HD finish, or the flawless elegance of airbrush makeup, our skilled makeup artist is dedicated to making your dreams come true. Contact us at 7004721239 to schedule your appointment today and discover the finest bridal makeup service in Panchdewari. Why Ladyfair is the Best Choice for Bridal Makeup in Panchdewari Skilled and Experienced Makeup Artist Our makeup artist in Panchdewari boasts extensive expertise in bridal makeup, ensuring a look that harmonizes with your personality, attire, and individual preferences. Convenient At-Home Makeup Service Ladyfair provides unmatched convenience with at-home makeup services in Panchdewari, enabling you to prepare for your special day without stepping out of your home. High-Quality Makeup Products We utilize only premium, professional-grade makeup products to ensure a long-lasting, flawless look that keeps you glowing throughout your wedding celebrations. Bridal Makeup Pricing in Panchdewari Our pricing is designed to cater to a variety of needs and budgets: Basic Bridal Makeup: ₹10,000 HD Bridal Makeup: ₹12,000 Airbrush Bridal Makeup: ₹18,000 For engagement and reception makeup: Basic Engagement/Reception Makeup: ₹6,000 HD Engagement/Reception Makeup: ₹8,000 Airbrush Engagement/Reception Makeup: ₹12,000 For parties: Basic Party Makeup: ₹2,500 HD Party Makeup: ₹3,500 Popular Bridal Makeup Styles in Panchdewari Traditional Bridal Makeup For those desiring a timeless and classic appearance, our traditional bridal makeup in Panchdewari features bold, vibrant tones, creating an elegant look that beautifully complements your wedding attire. HD Bridal Makeup HD bridal makeup ensures you look impeccable in both photographs and in real life, giving you a camera-ready look that remains picture-perfect throughout the day. Airbrush Bridal Makeup Airbrush makeup provides a smooth, lightweight, and long-lasting finish, making it perfect for brides seeking a natural, radiant look that stays fresh all day long. How to Book Your Bridal Makeup with Ladyfair in Panchdewari Initial Contact: Call us at 7004721239 to discuss your requirements and book an appointment. Consultation: Our makeup artist will collaborate with you to understand your vision and develop a makeup plan that aligns with your wedding theme. Makeup Trial: We offer trial makeup sessions to guarantee your bridal look is exactly as you envisioned. Wedding Day Makeup: On your wedding day, our makeup artist will arrive at your home in Panchdewari, ensuring a flawless makeup experience without stress. Testimonials from Brides in Panchdewari Riya S., Panchdewari: "I loved the convenience of having Ladyfair come to my home. My makeup was perfect, and I received so many compliments on my wedding day." Neha T., Panchdewari: "The HD makeup was exactly what I needed for all the photos. Ladyfair’s service was professional and seamless." Pallavi J., Panchdewari: "The airbrush makeup lasted all day without any touch-ups. I couldn’t have been happier with my bridal look!" Preparing for Your Bridal Makeup Session To ensure your makeup looks flawless on your special day, consider these tips: Stay Hydrated: Drink plenty of water to keep your skin radiant. Maintain Your Skincare Routine: Adhere to a consistent skincare routine to keep your skin in optimal condition. Avoid New Skincare Products: Using unfamiliar products before your wedding may result in breakouts or skin reactions. Communicate Your Preferences: Clearly express your desired look to our makeup artist during your consultation and trial session. Additional Beauty Services by Ladyfair Ladyfair also offers a range of makeup services for other special occasions in Panchdewari: Engagement and Reception Makeup: Tailored looks for all your pre-wedding events. Party Makeup: Ideal for birthdays, anniversaries, and other special celebrations. Everyday Makeup: Enhance your daily appearance with professional makeup. Special Occasion Makeup: Glamorous makeup for any important life event. The Future of Bridal Makeup in Panchdewari Ladyfair is revolutionizing bridal beauty by providing high-quality, at-home makeup services in Panchdewari. As more brides experience our exceptional artistry and personalized service, we continue to establish ourselves as the premier choice for bridal makeup. Q&A with Ladyfair’s Bridal Makeup Artist in Panchdewari Q1: Why is Ladyfair the top choice for bridal makeup in Panchdewari? A1: Ladyfair offers expert at-home bridal makeup services, ensuring you receive a flawless look in the comfort of your own home. Q2: What are the prices for bridal makeup services in Panchdewari? A2: Our bridal makeup prices start at ₹10,000 for basic makeup, with HD and airbrush options available. Q3: How do I book Ladyfair’s bridal makeup services in Panchdewari? A3: You can call us at 7004721239 to book our services, and we provide consultations and makeup trials to ensure your desired look is achieved. Q4: What types of bridal makeup does Ladyfair offer in Panchdewari? A4: We offer traditional, HD, and airbrush bridal makeup styles to suit your preferences. Q5: Are makeup trials available before the wedding day? A5: Yes, we provide trial sessions so you can preview your bridal look and make any adjustments before the big day. Q6: What kind of products does Ladyfair use for bridal makeup? A6: We use high-quality, professional-grade makeup products to ensure a flawless and long-lasting finish. Q7: What other makeup services does Ladyfair offer in Panchdewari? A7: Besides bridal makeup, we offer engagement, reception, party, and everyday makeup services for all occasions. Ladyfair is your trusted partner for stunning at-home bridal makeup services in Panchdewari, ensuring you look radiant and flawless on your special day.

Posted By: 26th September 2024
bridal makeup artist in Kateya
Bridal Makeup Artist in Kateya Introduction In Kateya, Ladyfair is renowned for providing expert bridal makeup services directly at your home. Whether you're dreaming of a traditional bridal look, a flawless HD finish, or the perfection of airbrush makeup, our talented makeup artist is here to bring your vision to life. Contact us at 7004721239 to schedule your appointment today and experience the best bridal makeup service in Kateya. Why Ladyfair is the Best Choice for Bridal Makeup in Kateya Skilled and Experienced Makeup Artist Our makeup artist in Kateya has extensive experience in bridal makeup, ensuring you receive a look that complements your personality, attire, and preferences. Convenient At-Home Makeup Service Ladyfair provides the ultimate convenience by offering at-home makeup services in Kateya, allowing you to prepare for your big day without leaving the comfort of your home. High-Quality Makeup Products We use only premium, professional-grade makeup products to guarantee a long-lasting, flawless look that will keep you radiant throughout your wedding day. Bridal Makeup Pricing in Kateya Our pricing is designed to cater to various needs and budgets: Basic Bridal Makeup: ₹10,000 HD Bridal Makeup: ₹12,000 Airbrush Bridal Makeup: ₹18,000 For engagement and reception makeup: Basic Engagement/Reception Makeup: ₹6,000 HD Engagement/Reception Makeup: ₹8,000 Airbrush Engagement/Reception Makeup: ₹12,000 For parties: Basic Party Makeup: ₹2,500 HD Party Makeup: ₹3,500 Popular Bridal Makeup Styles in Kateya Traditional Bridal Makeup For those who want a timeless and classic look, our traditional bridal makeup in Kateya features bold and vibrant tones, creating an elegant and traditional style that perfectly complements your wedding attire. HD Bridal Makeup HD bridal makeup ensures you look flawless in both photos and real life, giving you a camera-ready appearance that’s picture-perfect throughout the day. Airbrush Bridal Makeup Airbrush makeup offers a smooth, lightweight, and long-lasting finish. It’s ideal for brides seeking a natural, radiant look that stays fresh all day long. How to Book Your Bridal Makeup with Ladyfair in Kateya Initial Contact: Call us at 7004721239 to discuss your needs and book an appointment. Consultation: Our makeup artist will work with you to understand your vision and create a makeup plan that complements your wedding theme. Makeup Trial: We offer trial makeup sessions to ensure that your bridal look is exactly what you desire. Wedding Day Makeup: On your wedding day, our makeup artist will arrive at your home in Kateya, providing a flawless makeup experience without any stress. Testimonials from Brides in Kateya Riya S., Kateya: "I loved the convenience of having Ladyfair come to my home. My makeup was perfect, and I got so many compliments on my wedding day." Neha T., Kateya: "The HD makeup was exactly what I needed for all the photos. Ladyfair’s service was professional and seamless." Pallavi J., Kateya: "The airbrush makeup lasted all day without needing any touch-ups. I couldn’t have been happier with my bridal look!" Preparing for Your Bridal Makeup Session To ensure your makeup looks perfect on your big day, follow these tips: Stay Hydrated: Drink plenty of water to keep your skin glowing. Maintain Your Skincare Routine: Stick to a consistent skincare routine to keep your skin in optimal condition. Avoid New Skincare Products: Using unfamiliar products before your wedding may lead to breakouts or skin reactions. Communicate Your Preferences: Be clear with our makeup artist about the look you want to achieve during your consultation and trial session. Additional Beauty Services by Ladyfair Ladyfair also offers a range of makeup services for other special occasions in Kateya: Engagement and Reception Makeup: Tailored looks for all your pre-wedding events. Party Makeup: Perfect for birthdays, anniversaries, and other special celebrations. Everyday Makeup: Enhance your daily look with professional makeup. Special Occasion Makeup: Glamorous makeup for any important life event. The Future of Bridal Makeup in Kateya Ladyfair is revolutionizing bridal beauty by offering high-quality, at-home makeup services in Kateya. As more brides experience our exceptional artistry and personalized service, we continue to grow as the premier choice for bridal makeup. Q&A with Ladyfair’s Bridal Makeup Artist in Kateya Q1: Why is Ladyfair the top choice for bridal makeup in Kateya? A1: Ladyfair offers expert at-home bridal makeup services, ensuring you receive a flawless look in the comfort of your own home. Q2: What are the prices for bridal makeup services in Kateya? A2: Our bridal makeup prices start at ₹10,000 for basic makeup, with HD and airbrush options also available. Q3: How do I book Ladyfair’s bridal makeup services in Kateya? A3: You can call us at 7004721239 to book our services, and we offer consultations and makeup trials to ensure your desired look is achieved. Q4: What types of bridal makeup does Ladyfair offer in Kateya? A4: We offer traditional, HD, and airbrush bridal makeup styles to suit your preferences. Q5: Are makeup trials available before the wedding day? A5: Yes, we provide trial sessions so you can preview your bridal look and make any adjustments before the big day. Q6: What kind of products does Ladyfair use for bridal makeup? A6: We use high-quality, professional-grade makeup products to ensure a flawless and long-lasting finish. Q7: What other makeup services does Ladyfair offer in Kateya? A7: Besides bridal makeup, we offer engagement, reception, party, and everyday makeup services for all occasions.

Posted By: 26th September 2024
bridal makeup artist in hathua
Bridal Makeup Artist in Hathua Introduction In Hathua, Ladyfair is renowned for providing expert bridal makeup services directly at your home. Whether you're dreaming of a traditional bridal look, a flawless HD finish, or the perfection of airbrush makeup, our talented makeup artist is here to bring your vision to life. Contact us at 7004721239 to schedule your appointment today and experience the best bridal makeup service in Hathua. Why Ladyfair is the Best Choice for Bridal Makeup in Hathua Skilled and Experienced Makeup Artist Our makeup artist in Hathua has extensive experience in bridal makeup, ensuring you receive a look that complements your personality, attire, and preferences. Convenient At-Home Makeup Service Ladyfair provides the ultimate convenience by offering at-home makeup services in Hathua, allowing you to prepare for your big day without leaving the comfort of your home. High-Quality Makeup Products We use only premium, professional-grade makeup products to guarantee a long-lasting, flawless look that will keep you radiant throughout your wedding day. Bridal Makeup Pricing in Hathua Our pricing is designed to cater to various needs and budgets: Basic Bridal Makeup: ₹10,000 HD Bridal Makeup: ₹12,000 Airbrush Bridal Makeup: ₹18,000 For engagement and reception makeup: Basic Engagement/Reception Makeup: ₹6,000 HD Engagement/Reception Makeup: ₹8,000 Airbrush Engagement/Reception Makeup: ₹12,000 For parties: Basic Party Makeup: ₹2,500 HD Party Makeup: ₹3,500 Popular Bridal Makeup Styles in Hathua Traditional Bridal Makeup For those who want a timeless and classic look, our traditional bridal makeup in Hathua features bold and vibrant tones, creating an elegant and traditional style that perfectly complements your wedding attire. HD Bridal Makeup HD bridal makeup ensures you look flawless in both photos and real life, giving you a camera-ready appearance that’s picture-perfect throughout the day. Airbrush Bridal Makeup Airbrush makeup offers a smooth, lightweight, and long-lasting finish. It’s ideal for brides seeking a natural, radiant look that stays fresh all day long. How to Book Your Bridal Makeup with Ladyfair in Hathua Initial Contact: Call us at 7004721239 to discuss your needs and book an appointment. Consultation: Our makeup artist will work with you to understand your vision and create a makeup plan that complements your wedding theme. Makeup Trial: We offer trial makeup sessions to ensure that your bridal look is exactly what you desire. Wedding Day Makeup: On your wedding day, our makeup artist will arrive at your home in Hathua, providing a flawless makeup experience without any stress. Testimonials from Brides in Hathua Riya S., Hathua: "I loved the convenience of having Ladyfair come to my home. My makeup was perfect, and I got so many compliments on my wedding day." Neha T., Hathua: "The HD makeup was exactly what I needed for all the photos. Ladyfair’s service was professional and seamless." Pallavi J., Hathua: "The airbrush makeup lasted all day without needing any touch-ups. I couldn’t have been happier with my bridal look!" Preparing for Your Bridal Makeup Session To ensure your makeup looks perfect on your big day, follow these tips: Stay Hydrated: Drink plenty of water to keep your skin glowing. Maintain Your Skincare Routine: Stick to a consistent skincare routine to keep your skin in optimal condition. Avoid New Skincare Products: Using unfamiliar products before your wedding may lead to breakouts or skin reactions. Communicate Your Preferences: Be clear with our makeup artist about the look you want to achieve during your consultation and trial session. Additional Beauty Services by Ladyfair Ladyfair also offers a range of makeup services for other special occasions in Hathua: Engagement and Reception Makeup: Tailored looks for all your pre-wedding events. Party Makeup: Perfect for birthdays, anniversaries, and other special celebrations. Everyday Makeup: Enhance your daily look with professional makeup. Special Occasion Makeup: Glamorous makeup for any important life event. The Future of Bridal Makeup in Hathua Ladyfair is revolutionizing bridal beauty by offering high-quality, at-home makeup services in Hathua. As more brides experience our exceptional artistry and personalized service, we continue to grow as the premier choice for bridal makeup. Q&A with Ladyfair’s Bridal Makeup Artist in Hathua Q1: Why is Ladyfair the top choice for bridal makeup in Hathua? A1: Ladyfair offers expert at-home bridal makeup services, ensuring you receive a flawless look in the comfort of your own home. Q2: What are the prices for bridal makeup services in Hathua? A2: Our bridal makeup prices start at ₹10,000 for basic makeup, with HD and airbrush options also available. Q3: How do I book Ladyfair’s bridal makeup services in Hathua? A3: You can call us at 7004721239 to book our services, and we offer consultations and makeup trials to ensure your desired look is achieved. Q4: What types of bridal makeup does Ladyfair offer in Hathua? A4: We offer traditional, HD, and airbrush bridal makeup styles to suit your preferences. Q5: Are makeup trials available before the wedding day? A5: Yes, we provide trial sessions so you can preview your bridal look and make any adjustments before the big day. Q6: What kind of products does Ladyfair use for bridal makeup? A6: We use high-quality, professional-grade makeup products to ensure a flawless and long-lasting finish. Q7: What other makeup services does Ladyfair offer in Hathua? A7: Besides bridal makeup, we offer engagement, reception, party, and everyday makeup services for all occasions.

Posted By: 26th September 2024
bridal makeup artist in bhorey
Bridal Makeup Artist in Bhorey Introduction In Bhorey, Ladyfair is the go-to choice for delivering professional bridal makeup services right at your doorstep. Whether you envision a traditional bridal style, the seamless finish of HD makeup, or the elegance of airbrush makeup, our expert makeup artist is here to make your wedding day look perfect. Book your appointment now by contacting us at 7004721239 to experience the finest bridal makeup service in Bhorey. Why Ladyfair is the Best Choice for Bridal Makeup in Bhorey Skilled and Experienced Makeup Artist Our makeup artist in Bhorey is highly experienced in creating stunning bridal looks that complement your attire, personality, and preferences. At-Home Makeup Convenience Ladyfair offers unparalleled convenience by providing bridal makeup services at your home in Bhorey, ensuring a stress-free preparation for your big day. Premium Makeup Products We use top-of-the-line, professional-grade makeup products that guarantee a flawless, long-lasting look throughout your wedding celebrations. Bridal Makeup Pricing in Bhorey We offer packages to suit a range of budgets: Basic Bridal Makeup: ₹10,000 HD Bridal Makeup: ₹12,000 Airbrush Bridal Makeup: ₹18,000 For engagement and reception makeup: Basic Engagement/Reception Makeup: ₹6,000 HD Engagement/Reception Makeup: ₹8,000 Airbrush Engagement/Reception Makeup: ₹12,000 For parties: Basic Party Makeup: ₹2,500 HD Party Makeup: ₹3,500 Popular Bridal Makeup Styles in Bhorey Traditional Bridal Makeup A timeless and elegant look with bold tones that complement traditional wedding attire. HD Bridal Makeup Ensures a picture-perfect, camera-ready finish that looks stunning both in photos and real life. Airbrush Bridal Makeup Lightweight, smooth, and long-lasting, ideal for brides who want a natural and radiant look all day long. How to Book Your Bridal Makeup with Ladyfair in Bhorey Initial Contact: Call us at 7004721239 to discuss your makeup needs and book your appointment. Consultation: Our makeup artist will consult with you to create a personalized makeup plan. Makeup Trial: We offer makeup trial sessions to ensure your bridal look is exactly what you want. Wedding Day Makeup: On your wedding day, our makeup artist will arrive at your home in Bhorey to provide flawless service. Testimonials from Brides in Bhorey Sakshi G., Bhorey: "Ladyfair made my day by providing a flawless bridal look right at my home. Highly recommend!" Shweta K., Bhorey: "The HD makeup was perfect for my photos, and the service was extremely professional and convenient." Meenal P., Bhorey: "The airbrush makeup stayed perfect the whole day. I couldn't have asked for a better experience!" Preparing for Your Bridal Makeup Session Stay Hydrated: Drinking plenty of water will keep your skin radiant. Skincare Routine: Stick to your usual routine to keep your skin in top shape. Avoid New Products: Prevent breakouts by avoiding new skincare products right before your wedding. Communicate Preferences: Be clear about your desired look during your consultation and trial session. Additional Beauty Services by Ladyfair Ladyfair offers other makeup services for various occasions in Bhorey: Engagement and Reception Makeup Party Makeup Everyday Makeup Special Occasion Makeup The Future of Bridal Makeup in Bhorey Ladyfair continues to lead the bridal makeup industry in Bhorey by offering convenient, high-quality at-home services, making us the preferred choice for brides looking for expert artistry and stress-free preparations. Q&A with Ladyfair’s Bridal Makeup Artist in Bhorey Q1: Why choose Ladyfair for bridal makeup in Bhorey? A1: Ladyfair provides professional at-home bridal makeup services, ensuring a flawless and convenient experience. Q2: What are the prices for bridal makeup services? A2: Bridal makeup prices start at ₹10,000 for basic services, with HD and airbrush options available. Q3: How do I book Ladyfair’s services? A3: Call 7004721239 to book an appointment and schedule a consultation or makeup trial. Q4: What types of bridal makeup do you offer? A4: We offer traditional, HD, and airbrush bridal makeup to suit different preferences. Q5: Are makeup trials available? A5: Yes, trial sessions are offered to ensure your bridal look is exactly what you want. Q6: What kind of products are used? A6: We use only high-quality, professional makeup products to deliver long-lasting, flawless results. Q7: What other makeup services do you offer? A7: We also offer engagement, reception, party, and everyday makeup services.

Posted By: 26th September 2024
bridal makeup artist in Phulwariya
Bridal Makeup Artist in Phulwariya Introduction In Phulwariya, Ladyfair is recognized for delivering expert bridal makeup services right at your doorstep. Whether you envision a traditional bridal look, a flawless HD finish, or the perfection of airbrush makeup, our professional makeup artist is here to bring your vision to reality. Contact us at 7004721239 to book your appointment today and experience the best bridal makeup service in Phulwariya. Why Ladyfair is the Best Choice for Bridal Makeup in Phulwariya Skilled and Experienced Makeup Artist Our makeup artist in Phulwariya is highly experienced in bridal makeup, ensuring that your look complements your personality, wedding attire, and individual preferences. Convenient At-Home Makeup Service Ladyfair provides a hassle-free, at-home makeup service in Phulwariya, so you can comfortably prepare for your special day without needing to travel. High-Quality Makeup Products We use only premium, professional-grade makeup products to ensure a flawless and long-lasting look that will keep you radiant throughout your wedding day. Bridal Makeup Pricing in Phulwariya Basic Bridal Makeup: ₹10,000 HD Bridal Makeup: ₹12,000 Airbrush Bridal Makeup: ₹18,000 For engagement and reception makeup: Basic Engagement/Reception Makeup: ₹6,000 HD Engagement/Reception Makeup: ₹8,000 Airbrush Engagement/Reception Makeup: ₹12,000 For parties: Basic Party Makeup: ₹2,500 HD Party Makeup: ₹3,500 Popular Bridal Makeup Styles in Phulwariya Traditional Bridal Makeup For those seeking a timeless, classic look, our traditional bridal makeup in Phulwariya features bold tones that elegantly complement your wedding attire. HD Bridal Makeup HD bridal makeup ensures a flawless appearance both in photos and in person, giving you a camera-ready look that lasts throughout the day. Airbrush Bridal Makeup Airbrush makeup provides a lightweight, smooth, and long-lasting finish, ideal for brides who desire a natural, radiant look that stays fresh all day long. How to Book Your Bridal Makeup with Ladyfair in Phulwariya Initial Contact: Call us at 7004721239 to discuss your requirements and book an appointment. Consultation: Our makeup artist will collaborate with you to understand your vision and create a personalized makeup plan for your wedding. Makeup Trial: We offer trial makeup sessions to ensure your bridal look is exactly as you desire. Wedding Day Makeup: Our makeup artist will arrive at your home in Phulwariya on your wedding day, ensuring a flawless makeup application with zero stress. Testimonials from Brides in Phulwariya Riya S., Phulwariya: "The convenience of having Ladyfair come to my home was fantastic. My makeup was perfect, and everyone loved my bridal look!" Neha T., Phulwariya: "I chose HD makeup for my wedding, and it looked flawless in all the pictures. Ladyfair's service was smooth and professional." Pallavi J., Phulwariya: "The airbrush makeup lasted all day without any need for touch-ups. My bridal look was exactly what I dreamed of!" Preparing for Your Bridal Makeup Session Stay Hydrated: Drink plenty of water to keep your skin looking fresh and radiant. Maintain Your Skincare Routine: Stick to your regular skincare routine to ensure your skin is in optimal condition. Avoid New Skincare Products: Don’t experiment with new products close to your wedding date to prevent any skin reactions. Communicate Your Preferences: Be open about your desired look during your consultation and makeup trial. Additional Beauty Services by Ladyfair Ladyfair also offers a variety of makeup services for special occasions in Phulwariya: Engagement and Reception Makeup: Custom looks for pre-wedding events. Party Makeup: Perfect for birthdays, anniversaries, and other special occasions. Everyday Makeup: Elevate your daily look with professional makeup. Special Occasion Makeup: Glamorous looks for any important event. The Future of Bridal Makeup in Phulwariya Ladyfair is transforming bridal beauty by offering high-quality, at-home makeup services in Phulwariya. As more brides experience our personalized artistry and exceptional service, we are becoming the top choice for bridal makeup. Q&A with Ladyfair’s Bridal Makeup Artist in Phulwariya Q1: Why is Ladyfair the best choice for bridal makeup in Phulwariya? A1: Ladyfair offers expert at-home bridal makeup services, ensuring a flawless look in the comfort of your home. Q2: What are the prices for bridal makeup services in Phulwariya? A2: Bridal makeup prices start at ₹10,000 for basic makeup, with HD and airbrush options also available. Q3: How do I book Ladyfair’s bridal makeup services in Phulwariya? A3: Simply call us at 7004721239 to book our services. We offer consultations and makeup trials to guarantee your desired look. Q4: What types of bridal makeup does Ladyfair offer in Phulwariya? A4: We offer traditional, HD, and airbrush bridal makeup styles, tailored to your preferences. Q5: Are makeup trials available before the wedding day? A5: Yes, we provide trial sessions so you can preview your bridal look before the big day. Q6: What kind of products does Ladyfair use for bridal makeup? A6: We use high-quality, professional-grade makeup products for a flawless, long-lasting finish. Q7: What other makeup services does Ladyfair offer in Phulwariya? A7: In addition to bridal makeup, we offer makeup services for engagements, receptions, parties, and everyday occasions.

Posted By: 26th September 2024
bridal makeup artist in Uchkagaon
Bridal Makeup Artist in Uchkagaon Introduction In Uchkagaon, Ladyfair is renowned for providing expert bridal makeup services directly at your home. Whether you're dreaming of a traditional bridal look, a flawless HD finish, or the perfection of airbrush makeup, our talented makeup artist is here to bring your vision to life. Contact us at 7004721239 to schedule your appointment today and experience the best bridal makeup service in Uchkagaon. Why Ladyfair is the Best Choice for Bridal Makeup in Uchkagaon Skilled and Experienced Makeup Artist Our makeup artist in Uchkagaon has extensive experience in bridal makeup, ensuring you receive a look that complements your personality, attire, and preferences. Convenient At-Home Makeup Service Ladyfair provides the ultimate convenience by offering at-home makeup services in Uchkagaon, allowing you to prepare for your big day without leaving the comfort of your home. High-Quality Makeup Products We use only premium, professional-grade makeup products to guarantee a long-lasting, flawless look that will keep you radiant throughout your wedding day. Bridal Makeup Pricing in Uchkagaon Our pricing is designed to cater to various needs and budgets: Basic Bridal Makeup: ₹10,000 HD Bridal Makeup: ₹12,000 Airbrush Bridal Makeup: ₹18,000 For engagement and reception makeup: Basic Engagement/Reception Makeup: ₹6,000 HD Engagement/Reception Makeup: ₹8,000 Airbrush Engagement/Reception Makeup: ₹12,000 For parties: Basic Party Makeup: ₹2,500 HD Party Makeup: ₹3,500 Popular Bridal Makeup Styles in Uchkagaon Traditional Bridal Makeup For those who want a timeless and classic look, our traditional bridal makeup in Uchkagaon features bold and vibrant tones, creating an elegant and traditional style that perfectly complements your wedding attire. HD Bridal Makeup HD bridal makeup ensures you look flawless in both photos and real life, giving you a camera-ready appearance that’s picture-perfect throughout the day. Airbrush Bridal Makeup Airbrush makeup offers a smooth, lightweight, and long-lasting finish. It’s ideal for brides seeking a natural, radiant look that stays fresh all day long. How to Book Your Bridal Makeup with Ladyfair in Uchkagaon Initial Contact: Call us at 7004721239 to discuss your needs and book an appointment. Consultation: Our makeup artist will work with you to understand your vision and create a makeup plan that complements your wedding theme. Makeup Trial: We offer trial makeup sessions to ensure that your bridal look is exactly what you desire. Wedding Day Makeup: On your wedding day, our makeup artist will arrive at your home in Uchkagaon, providing a flawless makeup experience without any stress. Testimonials from Brides in Uchkagaon Riya S., Uchkagaon: "I loved the convenience of having Ladyfair come to my home. My makeup was perfect, and I got so many compliments on my wedding day." Neha T., Uchkagaon: "The HD makeup was exactly what I needed for all the photos. Ladyfair’s service was professional and seamless." Pallavi J., Uchkagaon: "The airbrush makeup lasted all day without needing any touch-ups. I couldn’t have been happier with my bridal look!" Preparing for Your Bridal Makeup Session To ensure your makeup looks perfect on your big day, follow these tips: Stay Hydrated: Drink plenty of water to keep your skin glowing. Maintain Your Skincare Routine: Stick to a consistent skincare routine to keep your skin in optimal condition. Avoid New Skincare Products: Using unfamiliar products before your wedding may lead to breakouts or skin reactions. Communicate Your Preferences: Be clear with our makeup artist about the look you want to achieve during your consultation and trial session. Additional Beauty Services by Ladyfair Ladyfair also offers a range of makeup services for other special occasions in Uchkagaon: Engagement and Reception Makeup: Tailored looks for all your pre-wedding events. Party Makeup: Perfect for birthdays, anniversaries, and other special celebrations. Everyday Makeup: Enhance your daily look with professional makeup. Special Occasion Makeup: Glamorous makeup for any important life event. The Future of Bridal Makeup in Uchkagaon Ladyfair is revolutionizing bridal beauty by offering high-quality, at-home makeup services in Uchkagaon. As more brides experience our exceptional artistry and personalized service, we continue to grow as the premier choice for bridal makeup. Q&A with Ladyfair’s Bridal Makeup Artist in Uchkagaon Q1: Why is Ladyfair the top choice for bridal makeup in Uchkagaon? A1: Ladyfair offers expert at-home bridal makeup services, ensuring you receive a flawless look in the comfort of your own home. Q2: What are the prices for bridal makeup services in Uchkagaon? A2: Our bridal makeup prices start at ₹10,000 for basic makeup, with HD and airbrush options also available. Q3: How do I book Ladyfair’s bridal makeup services in Uchkagaon? A3: You can call us at 7004721239 to book our services, and we offer consultations and makeup trials to ensure your desired look is achieved. Q4: What types of bridal makeup does Ladyfair offer in Uchkagaon? A4: We offer traditional, HD, and airbrush bridal makeup styles to suit your preferences. Q5: Are makeup trials available before the wedding day? A5: Yes, we provide trial sessions so you can preview your bridal look and make any adjustments before the big day. Q6: What kind of products does Ladyfair use for bridal makeup? A6: We use high-quality, professional-grade makeup products to ensure a flawless and long-lasting finish. Q7: What other makeup services does Ladyfair offer in Uchkagaon? A7: Besides bridal makeup, we offer engagement, reception, party, and everyday makeup services for all occasions.

Posted By: 26th September 2024
BRIDAL MAKEUP ATRIST IN VIJAYIPUR
Bridal Makeup Artist in Vijayipur Introduction In Vijayipur, Ladyfair is renowned for providing expert bridal makeup services directly at your home. Whether you're dreaming of a traditional bridal look, a flawless HD finish, or the perfection of airbrush makeup, our talented makeup artist is here to bring your vision to life. Contact us at 7004721239 to schedule your appointment today and experience the best bridal makeup service in Vijayipur. Why Ladyfair is the Best Choice for Bridal Makeup in Vijayipur Skilled and Experienced Makeup Artist Our makeup artist in Vijayipur has extensive experience in bridal makeup, ensuring you receive a look that complements your personality, attire, and preferences. Convenient At-Home Makeup Service Ladyfair provides the ultimate convenience by offering at-home makeup services in Vijayipur, allowing you to prepare for your big day without leaving the comfort of your home. High-Quality Makeup Products We use only premium, professional-grade makeup products to guarantee a long-lasting, flawless look that will keep you radiant throughout your wedding day. Bridal Makeup Pricing in Vijayipur Our pricing is designed to cater to various needs and budgets: Basic Bridal Makeup: ₹10,000 HD Bridal Makeup: ₹12,000 Airbrush Bridal Makeup: ₹18,000 For engagement and reception makeup: Basic Engagement/Reception Makeup: ₹6,000 HD Engagement/Reception Makeup: ₹8,000 Airbrush Engagement/Reception Makeup: ₹12,000 For parties: Basic Party Makeup: ₹2,500 HD Party Makeup: ₹3,500 Popular Bridal Makeup Styles in Vijayipur Traditional Bridal Makeup For those who want a timeless and classic look, our traditional bridal makeup in Vijayipur features bold and vibrant tones, creating an elegant and traditional style that perfectly complements your wedding attire. HD Bridal Makeup HD bridal makeup ensures you look flawless in both photos and real life, giving you a camera-ready appearance that’s picture-perfect throughout the day. Airbrush Bridal Makeup Airbrush makeup offers a smooth, lightweight, and long-lasting finish. It’s ideal for brides seeking a natural, radiant look that stays fresh all day long. How to Book Your Bridal Makeup with Ladyfair in Vijayipur Initial Contact: Call us at 7004721239 to discuss your needs and book an appointment. Consultation: Our makeup artist will work with you to understand your vision and create a makeup plan that complements your wedding theme. Makeup Trial: We offer trial makeup sessions to ensure that your bridal look is exactly what you desire. Wedding Day Makeup: On your wedding day, our makeup artist will arrive at your home in Vijayipur, providing a flawless makeup experience without any stress. Testimonials from Brides in Vijayipur Riya S., Vijayipur: "I loved the convenience of having Ladyfair come to my home. My makeup was perfect, and I got so many compliments on my wedding day." Neha T., Vijayipur: "The HD makeup was exactly what I needed for all the photos. Ladyfair’s service was professional and seamless." Pallavi J., Vijayipur: "The airbrush makeup lasted all day without needing any touch-ups. I couldn’t have been happier with my bridal look!" Preparing for Your Bridal Makeup Session To ensure your makeup looks perfect on your big day, follow these tips: Stay Hydrated: Drink plenty of water to keep your skin glowing. Maintain Your Skincare Routine: Stick to a consistent skincare routine to keep your skin in optimal condition. Avoid New Skincare Products: Using unfamiliar products before your wedding may lead to breakouts or skin reactions. Communicate Your Preferences: Be clear with our makeup artist about the look you want to achieve during your consultation and trial session. Additional Beauty Services by Ladyfair in Vijayipur Ladyfair also offers a range of makeup services for other special occasions in Vijayipur: Engagement and Reception Makeup: Tailored looks for all your pre-wedding events. Party Makeup: Perfect for birthdays, anniversaries, and other special celebrations. Everyday Makeup: Enhance your daily look with professional makeup. Special Occasion Makeup: Glamorous makeup for any important life event. The Future of Bridal Makeup in Vijayipur Ladyfair is revolutionizing bridal beauty by offering high-quality, at-home makeup services in Vijayipur. As more brides experience our exceptional artistry and personalized service, we continue to grow as the premier choice for bridal makeup. Q&A with Ladyfair’s Bridal Makeup Artist in Vijayipur Q1: Why is Ladyfair the top choice for bridal makeup in Vijayipur? A1: Ladyfair offers expert at-home bridal makeup services, ensuring you receive a flawless look in the comfort of your own home. Q2: What are the prices for bridal makeup services in Vijayipur? A2: Our bridal makeup prices start at ₹10,000 for basic makeup, with HD and airbrush options also available. Q3: How do I book Ladyfair’s bridal makeup services in Vijayipur? A3: You can call us at 7004721239 to book our services, and we offer consultations and makeup trials to ensure your desired look is achieved. Q4: What types of bridal makeup does Ladyfair offer in Vijayipur? A4: We offer traditional, HD, and airbrush bridal makeup styles to suit your preferences. Q5: Are makeup trials available before the wedding day? A5: Yes, we provide trial sessions so you can preview your bridal look and make any adjustments before the big day. Q6: What kind of products does Ladyfair use for bridal makeup? A6: We use high-quality, professional-grade makeup products to ensure a flawless and long-lasting finish. Q7: What other makeup services does Ladyfair offer in Vijayipur? A7: Besides bridal makeup, we offer engagement, reception, party, and everyday makeup services for all occasions. Ladyfair is your trusted partner for stunning at-home bridal makeup services in Vijayipur, ensuring you look radiant and flawless on your special day.

Posted By: 23rd September 2024
bridal makeup artist in udwantnagar
Bridal Makeup Artist in Udwantnagar Introduction In Udwantnagar, Ladyfair is renowned for offering exceptional bridal makeup services right at your doorstep. Whether you are seeking a traditional bridal look, the flawless finish of HD makeup, or the sophistication of airbrush makeup, our experienced makeup artist will bring your bridal vision to life. To book your appointment and enjoy the best bridal makeup service in Udwantnagar, contact us at 7004721239 today. Why Ladyfair is the Best Choice for Bridal Makeup in Udwantnagar Skilled and Experienced Makeup Artist Our makeup artist in Udwantnagar brings years of experience in bridal makeup, ensuring a look that enhances your natural beauty and aligns with your wedding attire and preferences. Convenient At-Home Makeup Service Ladyfair provides the luxury of at-home bridal makeup services in Udwantnagar, allowing you to relax and prepare for your big day without the stress of traveling to a salon. High-Quality Makeup Products We use premium, professional-grade products to ensure your makeup is flawless, long-lasting, and keeps you glowing throughout your wedding. Bridal Makeup Pricing in Udwantnagar We offer various bridal makeup packages to fit different needs and budgets: Basic Bridal Makeup: ₹10,000 HD Bridal Makeup: ₹12,000 Airbrush Bridal Makeup: ₹18,000 For engagement and reception makeup: Basic Engagement/Reception Makeup: ₹6,000 HD Engagement/Reception Makeup: ₹8,000 Airbrush Engagement/Reception Makeup: ₹12,000 For parties: Basic Party Makeup: ₹2,500 HD Party Makeup: ₹3,500 Popular Bridal Makeup Styles in Udwantnagar Traditional Bridal Makeup For a timeless bridal look, our traditional makeup focuses on bold and rich shades to perfectly complement your wedding attire. HD Bridal Makeup HD makeup ensures a flawless, camera-ready finish that looks great both in person and in photos. Airbrush Bridal Makeup Airbrush makeup offers a lightweight, smooth finish that’s perfect for a natural and radiant bridal glow, lasting throughout your wedding day. How to Book Your Bridal Makeup with Ladyfair in Udwantnagar Initial Contact: Call us at 7004721239 to discuss your bridal makeup needs and book your appointment. Consultation: Our makeup artist will work closely with you to design a look that fits your personal style and wedding theme. Makeup Trial: We offer trial makeup sessions to ensure your bridal look is exactly how you envision it. Wedding Day Makeup: On your wedding day, our artist will arrive at your home in Udwantnagar to provide a flawless, stress-free makeup experience. Testimonials from Brides in Udwantnagar Priya S., Udwantnagar: "Ladyfair’s at-home service made my day so easy. The makeup was perfect, and I received compliments all day long." Anjali T., Udwantnagar: "The HD makeup was stunning for the photos, and Ladyfair’s service was seamless and professional." Kavita J., Udwantnagar: "The airbrush makeup lasted all day, and I couldn’t have been happier with the results!" Preparing for Your Bridal Makeup Session To make sure your makeup looks flawless on your wedding day, follow these tips: Stay Hydrated: Drink plenty of water to keep your skin fresh and glowing. Maintain Your Skincare Routine: A consistent skincare regimen will help your skin look its best. Avoid New Products: Don’t introduce new skincare products right before your wedding to avoid any adverse reactions. Communicate Preferences: During your consultation and trial, communicate your preferences clearly to achieve the perfect bridal look. Additional Beauty Services by Ladyfair In addition to bridal makeup, Ladyfair offers a range of makeup services for other special occasions in Udwantnagar: Engagement and Reception Makeup: Customized looks tailored for your pre-wedding events. Party Makeup: Ideal for birthdays, anniversaries, or any special celebration. Everyday Makeup: Enhance your everyday look with professional makeup for any occasion. Special Occasion Makeup: Glamorous makeup for any important event in your life. The Future of Bridal Makeup in Udwantnagar Ladyfair is revolutionizing bridal makeup services in Udwantnagar with personalized, at-home services. As more brides choose our professional artistry, we continue to lead as the top choice for bridal makeup in the area. Q&A with Ladyfair’s Bridal Makeup Artist in Udwantnagar Q1: Why is Ladyfair the best choice for bridal makeup in Udwantnagar? A1: Ladyfair offers expert at-home makeup services, providing a flawless and stress-free experience on your big day. Q2: What are the prices for bridal makeup services in Udwantnagar? A2: Bridal makeup prices start from ₹10,000, with options for HD and airbrush makeup available. Q3: How do I book Ladyfair’s bridal makeup services in Udwantnagar? A3: You can book our services by calling 7004721239. We also provide consultations and makeup trials to ensure your desired look is achieved. Q4: What types of bridal makeup does Ladyfair offer? A4: We offer traditional, HD, and airbrush makeup styles to match every bride’s preferences. Q5: Are makeup trials available before the wedding day? A5: Yes, we provide makeup trials to ensure your bridal look is perfect in advance of the big day. Q6: What makeup products does Ladyfair use? A6: We use high-quality, professional-grade products to guarantee a flawless, long-lasting finish. Q7: What other makeup services does Ladyfair provide in Udwantnagar? A7: In addition to bridal makeup, we offer engagement, reception, party, and everyday makeup services. Ladyfair is your trusted partner for stunning bridal makeup services in Udwantnagar, ensuring you look radiant and beautiful on your special day.

Posted By: 23rd September 2024
bridal makeup artist in sandesh
Bridal Makeup Artist in Sandesh Introduction In Sandesh, Ladyfair is the go-to choice for providing exceptional bridal makeup services right at your doorstep. Whether you desire a traditional bridal look, the flawless finish of HD makeup, or the elegance of airbrush makeup, our skilled makeup artist will bring your vision to life. To schedule your appointment and experience the best bridal makeup service in Sandesh, call us at 7004721239 today. Why Ladyfair is the Best Choice for Bridal Makeup in Sandesh Skilled and Experienced Makeup Artist Our makeup artist in Sandesh has years of experience, ensuring your bridal makeup enhances your natural beauty and aligns with your wedding style and personal preferences. Convenient At-Home Makeup Service Ladyfair brings luxury to your home by providing at-home bridal makeup services in Sandesh, eliminating the need to visit a salon. This allows you to relax and prepare for your big day in the comfort of your own space. High-Quality Makeup Products We use top-quality, professional-grade makeup products to guarantee a flawless, long-lasting look that will keep you glowing throughout your wedding day. Bridal Makeup Pricing in Sandesh We offer bridal makeup packages tailored to different budgets and requirements: Basic Bridal Makeup: ₹10,000 HD Bridal Makeup: ₹12,000 Airbrush Bridal Makeup: ₹18,000 For engagement and reception makeup: Basic Engagement/Reception Makeup: ₹6,000 HD Engagement/Reception Makeup: ₹8,000 Airbrush Engagement/Reception Makeup: ₹12,000 For parties: Basic Party Makeup: ₹2,500 HD Party Makeup: ₹3,500 Popular Bridal Makeup Styles in Sandesh Traditional Bridal Makeup For a classic and timeless bridal look, traditional makeup incorporates vibrant colors that perfectly complement your attire. HD Bridal Makeup Our HD makeup technique ensures a flawless, camera-ready finish, making sure you look stunning both in person and in photos. Airbrush Bridal Makeup Airbrush makeup offers a smooth, lightweight finish that stays fresh and radiant throughout your special day. How to Book Your Bridal Makeup with Ladyfair in Sandesh Initial Contact: Call us at 7004721239 to discuss your requirements and schedule an appointment. Consultation: Our makeup artist will collaborate with you to understand your vision and create a makeup plan that suits your wedding theme. Makeup Trial: We provide trial makeup sessions to ensure you are fully satisfied with your bridal look before the big day. Wedding Day Makeup: On your wedding day, our artist will arrive at your home in Sandesh, providing a flawless makeup experience without any hassle. Testimonials from Brides in Sandesh Priya S., Sandesh: "Ladyfair made my wedding day stress-free by coming to my house. The makeup was flawless, and I received countless compliments." Anjali T., Sandesh: "The HD makeup was ideal for all my wedding photos. Ladyfair was professional and attentive." Kavita J., Sandesh: "The airbrush makeup lasted all day without a single touch-up, and I loved the final result!" Preparing for Your Bridal Makeup Session To ensure your makeup looks its best, follow these tips: Stay Hydrated: Keep your skin glowing by drinking plenty of water. Maintain Your Skincare Routine: Consistency will ensure your skin is in the best condition. Avoid New Products: Don’t introduce new products right before your wedding to avoid any potential irritation or breakouts. Communicate Preferences: During your consultation and trial, be clear about your preferences to achieve the perfect look. Additional Beauty Services by Ladyfair Ladyfair also offers various makeup services for special occasions in Sandesh: Engagement and Reception Makeup: Tailored looks for all your pre-wedding events. Party Makeup: Perfect for birthdays, anniversaries, and special celebrations. Everyday Makeup: Elevate your everyday look with professional makeup for any occasion. Special Occasion Makeup: Glamorous looks for any important event in your life. The Future of Bridal Makeup in Sandesh Ladyfair is revolutionizing bridal makeup in Sandesh by providing premium, personalized at-home makeup services. As more brides in Sandesh choose our professional artistry, we continue to solidify our reputation as the top choice for bridal makeup. Q&A with Ladyfair’s Bridal Makeup Artist in Sandesh Q1: Why is Ladyfair the top choice for bridal makeup in Sandesh? A1: Ladyfair offers expert at-home makeup services, making the entire process stress-free and tailored to your needs. Q2: What are the prices for bridal makeup in Sandesh? A2: Bridal makeup prices start from ₹10,000, with options for HD and airbrush makeup. Q3: How can I book Ladyfair’s services in Sandesh? A3: Call 7004721239 to book an appointment. We also offer consultations and trial sessions to ensure your desired look. Q4: What makeup styles does Ladyfair offer? A4: We offer traditional, HD, and airbrush makeup to suit every bride's style. Q5: Are makeup trials available before the wedding? A5: Yes, we offer trial sessions to ensure the look meets your expectations. Q6: What products does Ladyfair use? A6: We use high-quality, professional-grade products for a long-lasting, flawless finish. Q7: What other services does Ladyfair provide in Sandesh? A7: Apart from bridal makeup, we offer makeup services for engagements, receptions, parties, and everyday wear. Ladyfair ensures you shine and look radiant on your big day with stunning bridal makeup services in Sandesh.

Posted By: 23rd September 2024
bridal makeup artist in garhani
Bridal Makeup Artist in Garhani Introduction In Garhani, Ladyfair is well-known for offering top-notch bridal makeup services right at your doorstep. Whether you're seeking a traditional bridal look, the smooth perfection of HD makeup, or the elegance of airbrush makeup, our experienced makeup artist is here to make your vision a reality. To schedule your appointment and experience the best bridal makeup service in Garhani, contact us at 7004721239 today. Why Ladyfair is the Best Choice for Bridal Makeup in Garhani Skilled and Experienced Makeup Artist Our makeup artist in Garhani brings years of experience in bridal makeup, ensuring your look is tailored to enhance your natural beauty while complementing your wedding attire and personal preferences. Convenient At-Home Makeup Service Ladyfair provides the luxury of at-home bridal makeup services in Garhani, eliminating the stress of visiting a salon on your special day. You can relax and get ready in the comfort of your own home. High-Quality Makeup Products We use premium, professional-grade makeup products to guarantee a flawless, long-lasting look that will leave you glowing throughout your wedding day. Bridal Makeup Pricing in Garhani We offer a range of bridal makeup packages to fit different needs and budgets: Basic Bridal Makeup: ₹10,000 HD Bridal Makeup: ₹12,000 Airbrush Bridal Makeup: ₹18,000 For engagement and reception makeup: Basic Engagement/Reception Makeup: ₹6,000 HD Engagement/Reception Makeup: ₹8,000 Airbrush Engagement/Reception Makeup: ₹12,000 For parties: Basic Party Makeup: ₹2,500 HD Party Makeup: ₹3,500 Popular Bridal Makeup Styles in Garhani Traditional Bridal Makeup For a classic and timeless look, our traditional bridal makeup uses bold and vibrant shades to create an elegant style that perfectly complements your wedding attire. HD Bridal Makeup HD makeup ensures you look flawless in photos and in person, giving you a picture-perfect look that lasts all day. Airbrush Bridal Makeup Airbrush makeup provides a smooth, lightweight finish that’s perfect for brides seeking a natural, radiant glow that stays fresh throughout the day. How to Book Your Bridal Makeup with Ladyfair in Garhani Initial Contact: Call us at 7004721239 to discuss your needs and schedule an appointment. Consultation: Our makeup artist will work with you to understand your desired look and create a makeup plan that suits your wedding theme. Makeup Trial: We offer trial makeup sessions to ensure your bridal look is exactly what you want. Wedding Day Makeup: On your wedding day, our makeup artist will arrive at your home in Garhani to provide a flawless makeup experience without the hassle. Testimonials from Brides in Garhani Priya S., Garhani: "Ladyfair made my wedding day so much easier by coming to my home. The makeup was stunning, and I received so many compliments throughout the day." Anjali T., Garhani: "The HD makeup was perfect for all my wedding photos. Ladyfair provided a seamless and professional service." Kavita J., Garhani: "The airbrush makeup lasted the entire day without touch-ups, and I couldn’t have been happier with how it turned out!" Preparing for Your Bridal Makeup Session To ensure your makeup looks flawless on your wedding day, follow these tips: Stay Hydrated: Drinking water keeps your skin looking fresh and glowing. Maintain Your Skincare Routine: A consistent skincare regimen will ensure your skin is in its best condition. Avoid New Products: Don’t try new skincare products right before your wedding, as they may cause breakouts or irritation. Communicate Your Preferences: Let our makeup artist know exactly what you want during your consultation and trial to achieve your dream look. Additional Beauty Services by Ladyfair In addition to bridal makeup, Ladyfair offers various makeup services for other special occasions in Garhani: Engagement and Reception Makeup: Custom looks tailored for all your pre-wedding events. Party Makeup: Ideal for birthdays, anniversaries, and other special celebrations. Everyday Makeup: Enhance your daily look with professional makeup for any occasion. Special Occasion Makeup: Glamorous makeup for any important event in your life. The Future of Bridal Makeup in Garhani Ladyfair is redefining bridal beauty in Garhani by offering premium, at-home makeup services. With more brides choosing our personalized, professional artistry, we continue to grow as the top choice for bridal makeup in the area. Q&A with Ladyfair’s Bridal Makeup Artist in Garhani Q1: Why is Ladyfair the top choice for bridal makeup in Garhani? A1: Ladyfair offers expert at-home bridal makeup services, ensuring a flawless and stress-free experience. Q2: What are the prices for bridal makeup services in Garhani? A2: Bridal makeup prices start at ₹10,000 for basic makeup, with HD and airbrush options available. Q3: How do I book Ladyfair’s bridal makeup services in Garhani? A3: Call us at 7004721239 to book our services. We also offer consultations and makeup trials to ensure your desired look is achieved. Q4: What types of bridal makeup does Ladyfair offer in Garhani? A4: We offer traditional, HD, and airbrush makeup styles to suit your preferences. Q5: Are makeup trials available before the wedding day? A5: Yes, we offer trial sessions to preview and adjust your bridal look ahead of time. Q6: What makeup products does Ladyfair use? A6: We use high-quality, professional-grade products to ensure a long-lasting and flawless finish. Q7: What other makeup services does Ladyfair provide in Garhani? A7: In addition to bridal makeup, we offer engagement, reception, party, and everyday makeup services. Ladyfair is your go-to partner for stunning bridal makeup services in Garhani, ensuring you look flawless and radiant on your big day.

Posted By: 23rd September 2024
bridal makeup artist in sahar
Bridal Makeup Artist in Sahar Introduction In Sahar, Ladyfair stands out as the go-to provider for expert bridal makeup services, bringing top-tier beauty expertise directly to your doorstep. Whether you're looking for a traditional bridal look, a high-definition (HD) finish, or the flawless perfection of airbrush makeup, our talented makeup artist is ready to make your dream look a reality. Contact us at 7004721239 to book your appointment today and experience the best bridal makeup service in Sahar. Why Ladyfair is the Best Choice for Bridal Makeup in Sahar Skilled and Experienced Makeup Artist Our professional makeup artist in Sahar has years of experience in bridal makeup, ensuring that your look is tailored to complement your personality, wedding attire, and preferences. At-Home Makeup Service for Your Convenience Ladyfair offers the convenience of at-home bridal makeup services in Sahar, allowing you to get ready for your special day in the comfort of your own home, stress-free. High-Quality Makeup Products We use only premium, long-lasting, and professional-grade makeup products to ensure a radiant and flawless look that lasts throughout your wedding day. Bridal Makeup Pricing in Sahar We offer a range of bridal makeup packages to fit every need and budget: Basic Bridal Makeup: ₹10,000 HD Bridal Makeup: ₹12,000 Airbrush Bridal Makeup: ₹18,000 For engagement and reception makeup: Basic Engagement/Reception Makeup: ₹6,000 HD Engagement/Reception Makeup: ₹8,000 Airbrush Engagement/Reception Makeup: ₹12,000 For parties: Basic Party Makeup: ₹2,500 HD Party Makeup: ₹3,500 Popular Bridal Makeup Styles in Sahar Traditional Bridal Makeup Our traditional bridal makeup emphasizes bold and vibrant tones for a timeless, classic look that pairs perfectly with your wedding attire. HD Bridal Makeup HD makeup ensures you look flawless in photos and real life, offering a camera-ready finish that keeps you looking stunning all day. Airbrush Bridal Makeup Airbrush makeup delivers a smooth, lightweight, and long-lasting finish, giving you a natural, radiant glow that stays fresh throughout your wedding festivities. How to Book Your Bridal Makeup with Ladyfair in Sahar Initial Contact: Call us at 7004721239 to discuss your requirements and book an appointment. Consultation: Our makeup artist will work closely with you to create a makeup plan that complements your wedding theme and vision. Makeup Trial: We offer trial makeup sessions to ensure that your desired bridal look is achieved to perfection. Wedding Day Makeup: On your wedding day, our makeup artist will arrive at your home in Sahar to provide a flawless makeup experience, stress-free. Testimonials from Brides in Sahar Priya M., Sahar: "Ladyfair made my wedding day so much easier by offering at-home makeup. The makeup was flawless, and I received endless compliments!" Anjali K., Sahar: "I opted for HD makeup, and it looked incredible in both real life and photos. The team was professional and super helpful throughout the process." Meera D., Sahar: "The airbrush makeup was everything I hoped for! It stayed perfect all day without needing a single touch-up." Preparing for Your Bridal Makeup Session To ensure your bridal makeup looks its best on your big day, follow these tips: Stay Hydrated: Drink plenty of water to keep your skin glowing. Follow a Skincare Routine: Stick to a consistent routine to keep your skin in optimal condition. Avoid New Skincare Products: Avoid trying new products before your wedding to prevent potential breakouts or reactions. Communicate Clearly: During your consultation, be clear about your preferences so our artist can bring your vision to life. Additional Beauty Services by Ladyfair Ladyfair provides a wide range of makeup services for other special occasions in Sahar, including: Engagement and Reception Makeup Party Makeup Everyday Makeup Special Occasion Makeup The Future of Bridal Makeup in Sahar Ladyfair is transforming the bridal makeup experience in Sahar by offering professional, high-quality at-home services. As more brides choose Ladyfair for their big day, we continue to establish ourselves as the leading bridal makeup provider in Sahar. Q&A with Ladyfair’s Bridal Makeup Artist in Sahar Q1: Why is Ladyfair the top choice for bridal makeup in Sahar? A1: Ladyfair provides expert, at-home bridal makeup services, ensuring a flawless look in the comfort of your own home. Q2: What are the prices for bridal makeup services in Sahar? A2: Bridal makeup packages start at ₹10,000, with HD and airbrush options available for a premium look. Q3: How do I book Ladyfair’s bridal makeup services in Sahar? A3: Call us at 7004721239 to schedule your appointment and consultation. We also offer trial sessions to ensure your look is perfect. Q4: What types of bridal makeup does Ladyfair offer in Sahar? A4: Ladyfair offers traditional, HD, and airbrush bridal makeup styles. Q5: Are makeup trials available before the wedding day? A5: Yes, we offer trial sessions to finalize your bridal look. Q6: What kind of products does Ladyfair use for bridal makeup? A6: We use high-quality, professional-grade products to ensure a flawless, long-lasting finish. Q7: Does Ladyfair offer other makeup services in Sahar? A7: Yes, we provide makeup services for engagements, receptions, parties, and everyday occasions. Ladyfair is your trusted partner for at-home bridal makeup services in Sahar, ensuring you look flawless and radiant on your special day.

Posted By: 22nd September 2024
Bridal makeup artist in Sanhaula
Ladyfair Bridal Makeup Services in Sanhaula Looking for a skilled bridal makeup artist in Sanhaula? Look no further than Ladyfair, your go-to choice for premium at-home bridal makeup services. Whether you’re dreaming of a traditional bridal look, a flawless HD finish, or the elegance of airbrush makeup, Ladyfair’s expert artist is here to make your special day unforgettable. Our team ensures a stress-free, luxurious experience from the comfort of your home. Contact us at 7004721239 to book your appointment and elevate your bridal beauty experience in Sanhaula. Why Choose Ladyfair for Bridal Makeup in Sanhaula? Experienced Makeup Artist Ladyfair’s makeup artist in Sanhaula is highly experienced, with expertise in creating personalized bridal looks that highlight your natural beauty while enhancing your individual style. Convenient At-Home Service No need to travel or visit a salon—Ladyfair brings professional bridal makeup services directly to your home. We focus on delivering salon-quality results with the convenience of on-site service, ensuring a relaxing experience. Premium Quality Products We use only high-end, professional-grade makeup products that offer long-lasting, flawless finishes, ensuring that you look radiant throughout your wedding day and beyond. Bridal Makeup Pricing in Sanhaula We offer a range of pricing options to meet your needs and budget: Basic Bridal Makeup: ₹10,000 HD Bridal Makeup: ₹12,000 Airbrush Bridal Makeup: ₹18,000 Engagement & Reception Makeup: Basic: ₹6,000 HD: ₹8,000 Airbrush: ₹12,000 Party Makeup: Basic: ₹2,500 HD: ₹3,500 Popular Bridal Makeup Styles in Sanhaula Traditional Bridal Makeup Perfect for a timeless look, our traditional bridal makeup complements Indian wedding attire, featuring bold and vibrant colors with meticulous application. HD Bridal Makeup Ensuring a high-definition, photo-perfect finish, HD bridal makeup makes you look flawless both in person and in photographs, lasting all day without smudging or fading. Airbrush Bridal Makeup For brides seeking a lightweight, smooth, and long-lasting makeup finish, our airbrush makeup provides full coverage while maintaining a natural look that lasts all day. How to Book Your Bridal Makeup with Ladyfair in Sanhaula Initial Contact: Call us at 7004721239 to discuss your bridal makeup preferences and schedule your appointment. Consultation Session: Meet with our makeup artist to plan your bridal look based on your attire and style choices. Makeup Trial: Experience a trial makeup session to preview your bridal look and make any necessary adjustments. Wedding Day Makeup: Our artist will arrive at your location in Sanhaula to deliver a flawless bridal makeup look on your big day. Testimonials from Brides in Sanhaula Ritika S., Sanhaula "Ladyfair’s at-home bridal makeup service made my wedding day stress-free. The airbrush makeup looked amazing and lasted all day!" Neha K., Sanhaula "I was so impressed with Ladyfair’s professional service. The makeup artist gave me exactly the look I wanted, and I felt so beautiful!" Preparing for Your Bridal Makeup Session Stay Hydrated: Keep your skin glowing by drinking plenty of water leading up to your wedding. Follow a Skincare Routine: Stick to a consistent skincare regimen for optimal results. Avoid New Products: Stick with familiar skincare products to avoid potential allergic reactions. Communicate Your Preferences: Share your bridal look inspirations and preferences during your consultation. Additional Beauty Services by Ladyfair in Sanhaula Engagement and Reception Makeup: Tailored looks for pre-wedding events to match your outfit and style. Party Makeup: Professional makeup for any special occasion, from birthdays to anniversary celebrations. Special Occasion Makeup: Enhance your beauty for all important moments with our expert services. The Future of Bridal Makeup in Sanhaula Ladyfair continues to elevate bridal beauty with its expert at-home services in Sanhaula. As we grow and serve more brides, we are proud to be the leading choice for flawless bridal makeup that matches every bride’s unique style and preferences. For a stress-free, luxurious bridal makeup experience in Sanhaula, trust Ladyfair—where beauty meets convenience. Book your session today by calling 7004721239.

Posted By: 21st September 2024
Bridal makeup artist in Pirpainty
Ladyfair Bridal Makeup Services in Pirpainty Ladyfair is now offering its premium bridal makeup services in Pirpainty, ensuring that brides in this area can look stunning and feel confident on their special day. Whether you're dreaming of a traditional, HD, or airbrush makeup look, our experienced makeup artist in Pirpainty will bring salon-quality beauty services to the comfort of your home. Call 7004721239 today to schedule your appointment and experience a flawless, stress-free bridal makeup session with Ladyfair! Why Choose Ladyfair for Bridal Makeup in Pirpainty? 1. Professional Makeup Artist Our bridal makeup artist in Pirpainty has extensive experience in creating customized, long-lasting bridal looks that enhance your natural beauty while matching your personal style. 2. Convenient At-Home Service Skip the hassle of traveling to a salon! Ladyfair brings high-end bridal makeup services right to your doorstep, so you can focus on enjoying your wedding day. 3. High-Quality Makeup Products We use only top-quality, long-lasting products that provide flawless coverage throughout the entire day, ensuring you look radiant from the ceremony to the reception. Bridal Makeup Pricing in Pirpainty We offer various packages to suit your needs and budget: Basic Bridal Makeup: ₹10,000 HD Bridal Makeup: ₹12,000 Airbrush Bridal Makeup: ₹18,000 For Engagement and Reception Makeup: Basic: ₹6,000 HD: ₹8,000 Airbrush: ₹12,000 For Party Makeup: Basic: ₹2,500 HD: ₹3,500 Popular Bridal Makeup Styles in Pirpainty Traditional Bridal Makeup: A timeless, bold look that beautifully complements traditional bridal attire, ensuring you exude elegance on your special day. HD Bridal Makeup: Perfect for high-definition photography, HD makeup gives a flawless, camera-ready appearance, ideal for wedding photos that last a lifetime. Airbrush Bridal Makeup: This lightweight, long-lasting makeup option offers full coverage and a smooth, natural finish that holds up beautifully throughout the day. How to Book Ladyfair Bridal Makeup in Pirpainty Contact Us: Call 7004721239 to discuss your bridal makeup needs and schedule an appointment. Consultation: Meet with our makeup artist to plan your personalized look, based on your wedding attire and style preferences. Makeup Trial: Book a trial session to finalize your bridal look and make adjustments before the big day. Wedding Day Makeup: On your wedding day, our artist will arrive at your home to create the perfect, customized look for you. Testimonials from Brides in Pirpainty Aarohi K., Pirpainty "I couldn’t have asked for a better bridal makeup experience. Ladyfair made me feel so special, and the makeup lasted all day without a flaw!" Nisha R., Pirpainty "Ladyfair’s airbrush makeup gave me such a natural, glowing look. I loved that they came to my home – it made my wedding day preparation stress-free." Preparing for Your Bridal Makeup Session Hydrate your skin for a natural glow. Stick to your regular skincare routine to avoid last-minute breakouts. Avoid new beauty products close to your wedding to prevent any reactions. Discuss your desired look during the consultation to ensure your makeup aligns with your vision. Additional Services by Ladyfair in Pirpainty Ladyfair offers more than just bridal makeup! We also provide: Engagement & Reception Makeup: Customized looks for pre-wedding events. Party Makeup: Glam up for any celebration or special occasion. Everyday Makeup: Achieve a polished, professional look for daily wear. Special Occasion Makeup: Perfect for birthdays, anniversaries, or other memorable events. Ladyfair: Redefining Bridal Makeup in Pirpainty Ladyfair is transforming bridal beauty in Pirpainty with our personalized, at-home makeup services. Our commitment to using high-quality products and delivering professional results has made us the top choice for brides in the region. Let us help you look and feel your best on your big day. Book your bridal makeup appointment with Ladyfair in Pirpainty today by calling 7004721239! Make your wedding day unforgettable with our expert services.

Posted By: 21st September 2024
Bridal makeup artist in Kahalgaon
Ladyfair Bridal Makeup Services in Kahalgaon Ladyfair has become the top choice for brides in Kahalgaon who want to look stunning on their wedding day. We offer premium, at-home bridal makeup services that bring salon-level expertise directly to you. Whether you envision a traditional, HD, or airbrush makeup look, our skilled makeup artist in Kahalgaon will ensure you feel confident and beautiful as you walk down the aisle. Call 7004721239 today to book an appointment and enjoy a luxurious, stress-free makeup experience. Why Choose Ladyfair for Bridal Makeup in Kahalgaon? Experienced Makeup Artist Our bridal makeup artist in Kahalgaon has extensive experience in creating customized looks for brides, enhancing their natural beauty while matching their personal style. Convenient At-Home Service We bring our expert services right to your doorstep. Skip the hassle of traveling to a salon and focus on your special day while we handle your makeup needs in the comfort of your home. High-Quality Products Ladyfair uses only premium-grade makeup products that offer long-lasting, flawless coverage, ensuring you look radiant throughout your wedding day. Bridal Makeup Pricing in Kahalgaon Our packages cater to different budgets and preferences: Basic Bridal Makeup: ₹10,000 HD Bridal Makeup: ₹12,000 Airbrush Bridal Makeup: ₹18,000 For Engagement and Reception Makeup: Basic: ₹6,000 HD: ₹8,000 Airbrush: ₹12,000 For Party Makeup: Basic: ₹2,500 HD: ₹3,500 Popular Bridal Makeup Styles in Kahalgaon Traditional Bridal Makeup This timeless, bold look perfectly complements traditional bridal attire, ensuring you exude elegance. HD Bridal Makeup Ideal for high-definition photography, HD makeup gives you a flawless, camera-ready appearance that’s perfect for wedding photos. Airbrush Bridal Makeup Lightweight and long-lasting, airbrush makeup provides full coverage with a natural, smooth finish that holds up all day. How to Book Your Bridal Makeup with Ladyfair in Kahalgaon Contact Us: Call 7004721239 to discuss your bridal makeup needs and schedule an appointment. Consultation: Meet with our makeup artist to plan your look based on your wedding attire and personal preferences. Makeup Trial: Enjoy a trial session to finalize your bridal makeup and make any adjustments ahead of your big day. Wedding Day Makeup: On your wedding day, our artist will arrive at your home to create the perfect look for you. Testimonials from Brides in Kahalgaon Priya S., Kahalgaon "I felt like a princess on my wedding day! Ladyfair’s artist created the perfect bridal look for me, and I couldn’t have been happier." Richa T., Kahalgaon "The airbrush makeup was flawless and lasted all day. Ladyfair’s service was so convenient, and the makeup trial gave me peace of mind before the wedding." Preparing for Your Bridal Makeup Session Keep your skin hydrated for a natural glow. Stick to your regular skincare routine to avoid last-minute breakouts. Avoid new beauty products close to your wedding date to prevent reactions. Share your desired look during the consultation to ensure the makeup matches your vision. Additional Beauty Services by Ladyfair in Kahalgaon In addition to bridal makeup, we also offer: Engagement & Reception Makeup: Customized looks for all your pre-wedding events. Party Makeup: Glam up for any special occasion with a stunning makeup look. Everyday Makeup: A polished, professional appearance for your daily routine. Special Occasion Makeup: Perfect for birthdays, anniversaries, or any memorable event. The Future of Bridal Makeup in Kahalgaon Ladyfair is redefining bridal beauty in Kahalgaon with our premium at-home services. Our expert, personalized approach ensures that every bride looks and feels her best. As more brides choose Ladyfair, we are becoming the most trusted name for bridal makeup in the region. Make your wedding day unforgettable with Ladyfair’s bridal makeup services in Kahalgaon. Call 7004721239 to book your appointment today!

Posted By: 20th September 2024
Bridal makeup artist in Sultanganj
Ladyfair Bridal Makeup Services in Sultanganj In Sultanganj, Ladyfair has emerged as the top choice for brides who want to look their best on their big day. Our at-home bridal makeup service ensures you receive expert beauty treatments without having to leave the comfort of your home. Whether you're dreaming of a traditional bridal look, a picture-perfect HD finish, or the flawless elegance of airbrush makeup, our skilled makeup artist in Sultanganj will make sure you look radiant. Call 7004721239 to schedule your appointment and enjoy a luxurious, stress-free experience on your wedding day. Why Choose Ladyfair for Bridal Makeup in Sultanganj? Experienced Makeup Artist Our makeup artist in Sultanganj is highly experienced in bridal makeup, offering customized looks that enhance your natural beauty and match your unique style. Convenient At-Home Service Ladyfair brings top-quality, salon-level makeup services right to your home, so you can relax and focus on your special day while we take care of your makeup needs. Premium Quality Products We use only high-end, professional-grade products to create a long-lasting and flawless finish that will keep you looking stunning throughout your wedding events. Bridal Makeup Pricing in Sultanganj Our pricing is tailored to accommodate various budgets and preferences: Basic Bridal Makeup: ₹10,000 HD Bridal Makeup: ₹12,000 Airbrush Bridal Makeup: ₹18,000 For Engagement and Reception Makeup: Basic: ₹6,000 HD: ₹8,000 Airbrush: ₹12,000 For Party Makeup: Basic: ₹2,500 HD: ₹3,500 Popular Bridal Makeup Styles in Sultanganj Traditional Bridal Makeup A bold and vibrant look that perfectly complements traditional wedding attire, giving you a timeless, classic appearance. HD Bridal Makeup Perfect for high-definition photography, this makeup style ensures you look flawless both in person and in wedding photos. Airbrush Bridal Makeup Lightweight yet long-lasting, airbrush makeup provides full coverage with a smooth and natural finish that lasts all day. How to Book Your Bridal Makeup with Ladyfair in Sultanganj Initial Contact: Call 7004721239 to discuss your bridal makeup needs and schedule an appointment. Consultation: Meet with our makeup artist to plan your bridal look, taking your attire and style preferences into account. Makeup Trial: Experience a trial session to finalize your bridal makeup and make any adjustments ahead of your big day. Wedding Day Makeup: On your wedding day, our makeup artist will arrive at your location to create the perfect look for you. Testimonials from Brides in Sultanganj Sonal M., Sultanganj "Ladyfair's bridal makeup service was fantastic! The artist listened to what I wanted and made me look exactly as I had imagined for my wedding." Neha R., Sultanganj "The HD makeup was absolutely perfect for the wedding photos, and the airbrush technique made me feel like a queen. Ladyfair’s service was flawless from start to finish." Preparing for Your Bridal Makeup Session Stay hydrated to keep your skin glowing and fresh. Follow a consistent skincare routine leading up to your wedding day. Avoid using any new products close to your wedding to prevent unexpected skin reactions. Clearly communicate your preferences with the makeup artist during the consultation to ensure your desired look is achieved. Additional Beauty Services by Ladyfair in Sultanganj In addition to bridal makeup, Ladyfair offers: Engagement & Reception Makeup: Beautiful, customized looks for all your pre-wedding events. Party Makeup: Enhance your look for any special occasion. Everyday Makeup: Subtle and professional makeup for a polished daily look. Special Occasion Makeup: Perfect for birthdays, anniversaries, or other significant celebrations. The Future of Bridal Makeup in Sultanganj Ladyfair is redefining bridal beauty in Sultanganj with our premium at-home services. As more brides experience our high-quality, personalized makeup services, we are quickly becoming the most sought-after choice for bridal makeup in the area. Q&A with Ladyfair’s Bridal Makeup Artist in Sultanganj Q1: What makes Ladyfair the best bridal makeup artist in Sultanganj? A1: Ladyfair provides expert makeup services using premium-quality products, all delivered to the convenience of your home, ensuring a stress-free and luxurious bridal experience. Q2: What are the prices for bridal makeup services in Sultanganj? A2: Bridal makeup packages start at ₹10,000 for basic makeup, ₹12,000 for HD makeup, and ₹18,000 for airbrush makeup. Q3: How can I book Ladyfair’s services in Sultanganj? A3: You can book by calling 7004721239. We also offer consultations and makeup trials to ensure your bridal look is perfect. Q4: What makeup styles are available? A4: We offer traditional, HD, and airbrush bridal makeup to suit your preferences and wedding style. Q5: Are makeup trials available before the wedding day? A5: Yes, trial sessions are available so you can finalize your look and make any adjustments before the big day. Q6: What type of products does Ladyfair use for bridal makeup? A6: We use only professional-grade, safe, and high-quality makeup products to provide a flawless, long-lasting finish. Q7: Does Ladyfair offer services beyond bridal makeup? A7: Yes, in addition to bridal makeup, we offer makeup services for engagements, receptions, parties, and other special occasions. Make your wedding day in Sultanganj unforgettable with Ladyfair’s expert bridal makeup services. Call us today to book your appointment!

Posted By: 20th September 2024
Bridal makeup artist in Shahkund
Ladyfair Bridal Makeup Services in Shahkund In Shahkund, Ladyfair has become the top choice for brides who want flawless makeup for their big day. Offering at-home bridal makeup services, we ensure that you get professional beauty treatments without ever leaving the comfort of your home. Whether you desire a traditional bridal look, a smooth HD finish, or the lightweight elegance of airbrush makeup, our skilled makeup artist in Shahkund will make sure you look stunning on your wedding day. Call us at 7004721239 to schedule your appointment and enjoy a stress-free beauty experience. Why Choose Ladyfair for Bridal Makeup in Shahkund? Experienced Makeup Artist Our makeup artist in Shahkund is highly experienced in bridal makeup, providing personalized looks that highlight your natural beauty and match your style. Convenient At-Home Service Ladyfair offers salon-quality makeup services right at your doorstep, ensuring that you feel relaxed and pampered on your special day. High-Quality Products We use only top-tier, professional-grade makeup products that guarantee a long-lasting, radiant look throughout your wedding events. Bridal Makeup Pricing in Shahkund Our pricing options cater to various preferences and budgets: Basic Bridal Makeup: ₹10,000 HD Bridal Makeup: ₹12,000 Airbrush Bridal Makeup: ₹18,000 For Engagement and Reception Makeup: Basic: ₹6,000 HD: ₹8,000 Airbrush: ₹12,000 For Party Makeup: Basic: ₹2,500 HD: ₹3,500 Popular Bridal Makeup Styles in Shahkund Traditional Bridal Makeup This style features bold, vibrant colors, perfectly complementing traditional bridal attire for a timeless and elegant look. HD Bridal Makeup Designed to give a high-definition, flawless finish, this style ensures you look radiant in both photos and in person throughout the day. Airbrush Bridal Makeup Lightweight yet full coverage, this makeup style provides a smooth, natural look that lasts all day without needing touch-ups. How to Book Your Bridal Makeup with Ladyfair in Shahkund Initial Contact: Call 7004721239 to discuss your bridal makeup requirements and schedule an appointment. Consultation: Meet with our makeup artist to customize your look based on your wedding attire and style preferences. Makeup Trial: Experience a trial session to finalize your bridal look and make any adjustments needed. Wedding Day Makeup: Our artist will arrive at your location on your big day to deliver flawless makeup that enhances your beauty. Testimonials from Brides in Shahkund Ritika K., Shahkund "Ladyfair’s at-home makeup service made my wedding day stress-free. The artist created a beautiful, traditional look that I absolutely loved!" Sneha P., Shahkund "The airbrush makeup was perfect for my big day—it was so lightweight yet gave amazing coverage. I highly recommend Ladyfair for bridal makeup!" Preparing for Your Bridal Makeup Session Stay hydrated to keep your skin looking fresh and healthy. Follow a regular skincare routine in the weeks leading up to the wedding. Avoid trying new products close to your wedding day to prevent allergic reactions. Be clear about your preferences with the makeup artist during your consultation to achieve the desired look. Additional Beauty Services by Ladyfair in Shahkund Besides bridal makeup, Ladyfair also offers: Engagement & Reception Makeup: Customized makeup looks for all your pre-wedding events. Party Makeup: Glam up for any special occasion with our professional makeup services. Everyday Makeup: Enhance your daily look with subtle, professional makeup. Special Occasion Makeup: Perfect for birthdays, anniversaries, and other celebrations. The Future of Bridal Makeup in Shahkund Ladyfair is raising the standards for bridal makeup in Shahkund, offering premium at-home services that make your wedding day as stress-free as possible. With more brides choosing our professional and personalized services, Ladyfair is becoming the leading name in bridal beauty. Q&A with Ladyfair’s Bridal Makeup Artist in Shahkund Q1: What makes Ladyfair the best bridal makeup artist in Shahkund? A1: Ladyfair offers expert makeup services using high-quality products, providing brides with a stress-free, at-home beauty experience. Q2: What is the cost of bridal makeup services in Shahkund? A2: Bridal makeup packages start at ₹10,000 for basic makeup, ₹12,000 for HD makeup, and ₹18,000 for airbrush makeup. Q3: How can I book Ladyfair’s bridal makeup services in Shahkund? A3: Simply call 7004721239. We also offer consultation and makeup trials to ensure your look is perfect for your wedding day. Q4: What makeup styles does Ladyfair offer? A4: We offer traditional, HD, and airbrush bridal makeup styles to suit each bride’s preferences. Q5: Does Ladyfair offer trial sessions before the wedding? A5: Yes, trial sessions are available to perfect your bridal look ahead of your big day. Q6: What kind of products does Ladyfair use? A6: We use only professional-grade, high-quality makeup products that ensure a flawless finish for all skin types. Q7: Does Ladyfair provide makeup services other than bridal makeup? A7: Yes, in addition to bridal makeup, we offer makeup services for engagement, reception, party, and other special occasions. Let Ladyfair make your wedding day in Shahkund unforgettable with our expert bridal makeup services. Call us today to book your appointment!

Posted By: 20th September 2024
Bridal makeup artist in Sabour
Ladyfair Bridal Makeup Services in Sabour In Sabour, Ladyfair has become the go-to choice for brides seeking exceptional makeup services for their big day. Our at-home bridal makeup service ensures that you can experience professional beauty treatments without stepping out of your home. Whether you dream of a traditional bridal look, a flawless HD finish, or the seamless elegance of airbrush makeup, our experienced makeup artist in Sabour is dedicated to making your wedding day unforgettable. Contact us at 7004721239 to book your appointment and enjoy a stress-free beauty experience. Why Ladyfair is the Best Choice for Bridal Makeup in Sabour Experienced Makeup Artist Our makeup artist in Sabour specializes in bridal makeup, delivering personalized looks that enhance your natural beauty and suit your style. At-Home Convenience Ladyfair brings top-tier salon-quality makeup services directly to your home, ensuring you feel relaxed and beautiful on your special day. Premium Products We use only high-end, professional-grade products to give you a long-lasting, radiant finish that will keep you glowing throughout your wedding festivities. Bridal Makeup Pricing in Sabour Our prices are structured to meet different budgets and preferences: Basic Bridal Makeup: ₹10,000 HD Bridal Makeup: ₹12,000 Airbrush Bridal Makeup: ₹18,000 For Engagement and Reception Makeup: Basic: ₹6,000 HD: ₹8,000 Airbrush: ₹12,000 For Party Makeup: Basic: ₹2,500 HD: ₹3,500 Popular Bridal Makeup Styles in Sabour Traditional Bridal Makeup This style includes bold, vibrant colors that perfectly complement traditional wedding attire for a timeless, elegant look. HD Bridal Makeup Designed to give a high-definition finish, ensuring you look flawless both in person and in photos throughout the day. Airbrush Bridal Makeup Lightweight and long-lasting, this style provides full coverage with a smooth, natural look that lasts all day. How to Book Your Bridal Makeup with Ladyfair in Sabour Initial Contact: Call 7004721239 to discuss your bridal makeup requirements and schedule an appointment. Consultation: Meet with our makeup artist to customize your bridal look based on your attire and style. Makeup Trial: Experience a trial session to finalize your look and make any necessary adjustments. Wedding Day Makeup: On your big day, our makeup artist will arrive at your location to provide flawless bridal makeup. Testimonials from Brides in Sabour Priya S., Sabour "Ladyfair made my wedding day so special. The artist arrived on time and created the exact look I wanted—just perfect!" Anjali R., Sabour "The HD makeup was incredible! Ladyfair's service was seamless and made my wedding day stress-free." Preparing for Your Bridal Makeup Session Stay hydrated to keep your skin looking fresh. Follow a consistent skincare routine leading up to the wedding. Avoid experimenting with new products close to your wedding day to prevent any skin issues. Be clear about your preferences with the makeup artist during the consultation to achieve the perfect look. Additional Beauty Services by Ladyfair in Sabour Besides bridal makeup, Ladyfair also offers: Engagement & Reception Makeup: Tailored looks for all your pre-wedding events. Party Makeup: Glam up for any special occasion. Everyday Makeup: Enhance your daily look with our professional touch. Special Occasion Makeup: Ideal for birthdays, anniversaries, or other significant celebrations. The Future of Bridal Makeup in Sabour Ladyfair continues to raise the bar for bridal makeup services in Sabour, offering at-home convenience and premium quality. With more brides choosing our top-tier services, we are fast becoming the preferred choice for flawless bridal beauty in Sabour. Q&A with Ladyfair’s Bridal Makeup Artist in Sabour Q1: What sets Ladyfair apart in Sabour? A1: Ladyfair offers experienced makeup services with high-quality products, bringing the convenience of professional makeup right to your doorstep. Q2: What is the cost of bridal makeup in Sabour? A2: Our bridal makeup packages start at ₹10,000 for basic makeup, ₹12,000 for HD, and ₹18,000 for airbrush makeup. Q3: How do I book Ladyfair’s services in Sabour? A3: Simply call 7004721239. We offer consultations and trials to ensure your bridal look is perfect. Q4: What makeup styles are available? A4: We offer traditional, HD, and airbrush makeup styles to suit your preferences. Q5: Are trial sessions available? A5: Yes, we provide trial sessions so you can finalize your look before the big day. Q6: What products does Ladyfair use? A6: We use only professional-grade, safe, and high-quality makeup products to ensure a flawless finish. Q7: Does Ladyfair offer services beyond bridal makeup? A7: Yes, we offer engagement, reception, party, and special occasion makeup services in Sabour. Let Ladyfair make your wedding day in Sabour an unforgettable experience with our expert bridal makeup services. Call us today!

Posted By: 19th September 2024
Tardih's Best Makeup Artist
ridal Makeup Artist in Tardih Introduction In Tardih, Ladyfair is the leading choice for brides who want to look their absolute best on their wedding day. Our at-home bridal makeup service brings expert beauty treatments to the comfort of your own home. Whether you're looking for a traditional bridal look, a flawless HD finish, or the elegance of airbrush makeup, our skilled makeup artist in Deo is here to make your wedding day as perfect as you've imagined. Contact us today at 7004721239 to book your appointment. Why Ladyfair is the Top Choice for Bridal Makeup in Tardih? Experienced Makeup Artist Our makeup artist in Tardih has years of experience in bridal makeup, specializing in creating looks that highlight your natural beauty and complement your individual style. Convenient At-Home Service Ladyfair eliminates the hassle of traveling to a salon by offering luxurious at-home bridal makeup services, allowing you to enjoy a personalized beauty experience right at your doorstep in Deo. Premium Quality Products We use only high-quality, professional-grade makeup products to ensure a flawless, long-lasting look that will keep you glowing throughout your special day. Bridal Makeup Pricing in Tardih Our bridal makeup services in Tardih are tailored to fit a range of preferences and budgets: Basic Bridal Makeup: ₹10,000 HD Bridal Makeup: ₹12,000 Airbrush Bridal Makeup: ₹18,000 For engagement and reception: Basic Engagement/Reception Makeup: ₹6,000 HD Engagement/Reception Makeup: ₹8,000 Airbrush Engagement/Reception Makeup: ₹12,000 For parties: Basic Party Makeup: ₹2,500 HD Party Makeup: ₹3,500 Popular Bridal Makeup Styles in Tardih. Traditional Bridal Makeup Our traditional bridal makeup in Deo features bold, vibrant colors and meticulous application, perfectly complementing traditional wedding attire to create an elegant and timeless look. HD Bridal Makeup HD bridal makeup provides a high-definition finish that ensures you look flawless in both photographs and in person, making you picture-perfect all day long. Airbrush Bridal Makeup Airbrush makeup delivers a lightweight, smooth finish with full coverage that lasts all day, ideal for brides seeking a natural yet polished look. How to Book Your Bridal Makeup with Ladyfair in Tardih Initial Contact: Call us at 7004721239 to discuss your bridal makeup needs and schedule an appointment. Consultation Session: Meet with our makeup artist to discuss your desired look, review your wedding attire, and plan the perfect makeup style. Makeup Trial: We offer trial sessions so you can preview your bridal makeup and make any necessary adjustments before the wedding day. Wedding Day Makeup: On your wedding day, our makeup artist will arrive at your location in Deo to provide a flawless and stress-free makeup service. Testimonials from Brides in Tardih Sneha P., : "Ladyfair’s at-home makeup service was exactly what I needed. The makeup artist was incredibly skilled, and my bridal look was beyond perfect." Meera R., : "The airbrush makeup was flawless and lasted all day long. Ladyfair’s service made my wedding day stress-free and special." Ritika S., : "The HD makeup was stunning, and my photos turned out beautifully. Ladyfair’s service exceeded all my expectations." Preparing for Your Bridal Makeup Session To ensure the best results, follow these tips: Stay Hydrated: Drink plenty of water to keep your skin fresh and glowing. Consistent Skincare: Maintain a regular skincare routine leading up to your wedding. Avoid New Products: Stick to familiar skincare products to avoid any reactions. Communicate Clearly: Discuss your makeup preferences and concerns with our artist during your consultation. Additional Beauty Services by Ladyfair In addition to bridal makeup, Ladyfair offers: Engagement and Reception Makeup: Customized looks for all your pre-wedding events. Party Makeup: Perfect for special occasions and celebrations. Everyday Makeup: Enhance your daily look with our expert services. Special Occasion Makeup: Makeup for birthdays, anniversaries, and other significant events. The Future of Bridal Makeup in Tardih Ladyfair is committed to setting new standards in bridal beauty with our innovative at-home services in Deo. As more brides experience our exceptional service, Ladyfair continues to grow as the preferred choice for bridal makeup. Q&A with Ladyfair’s Bridal Makeup Artist in Tardih Q1: What makes Ladyfair the best choice for bridal makeup in Tardih? A1: Ladyfair offers expert at-home bridal makeup services, combining skilled artistry with high-quality products for a flawless wedding look. Q2: What are the prices for bridal makeup services in Tardih? A2: Our bridal makeup services start at ₹10,000 for basic makeup, ₹12,000 for HD makeup, and ₹18,000 for airbrush makeup. Q3: How do I book Ladyfair’s bridal makeup services in Tardih? A3: You can book our services by calling 7004721239. We also offer consultations and trial sessions to help you achieve your desired look. Q4: What types of bridal makeup does Ladyfair offer in Tardih? A4: We offer traditional, HD, and airbrush bridal makeup styles to suit your preferences. Q5: Are makeup trials available before the wedding day? A5: Yes, we provide trial sessions to finalize your bridal look and make any necessary adjustments. Q6: What kind of products does Ladyfair use for bridal makeup? A6: We use professional-grade, high-quality products that are safe for all skin types and ensure a flawless finish. Q7: What other makeup services does Ladyfair offer in Tardih? A7: Besides bridal makeup, we offer engagement, reception, party, and special occasion makeup services. No Reviews Posted yet
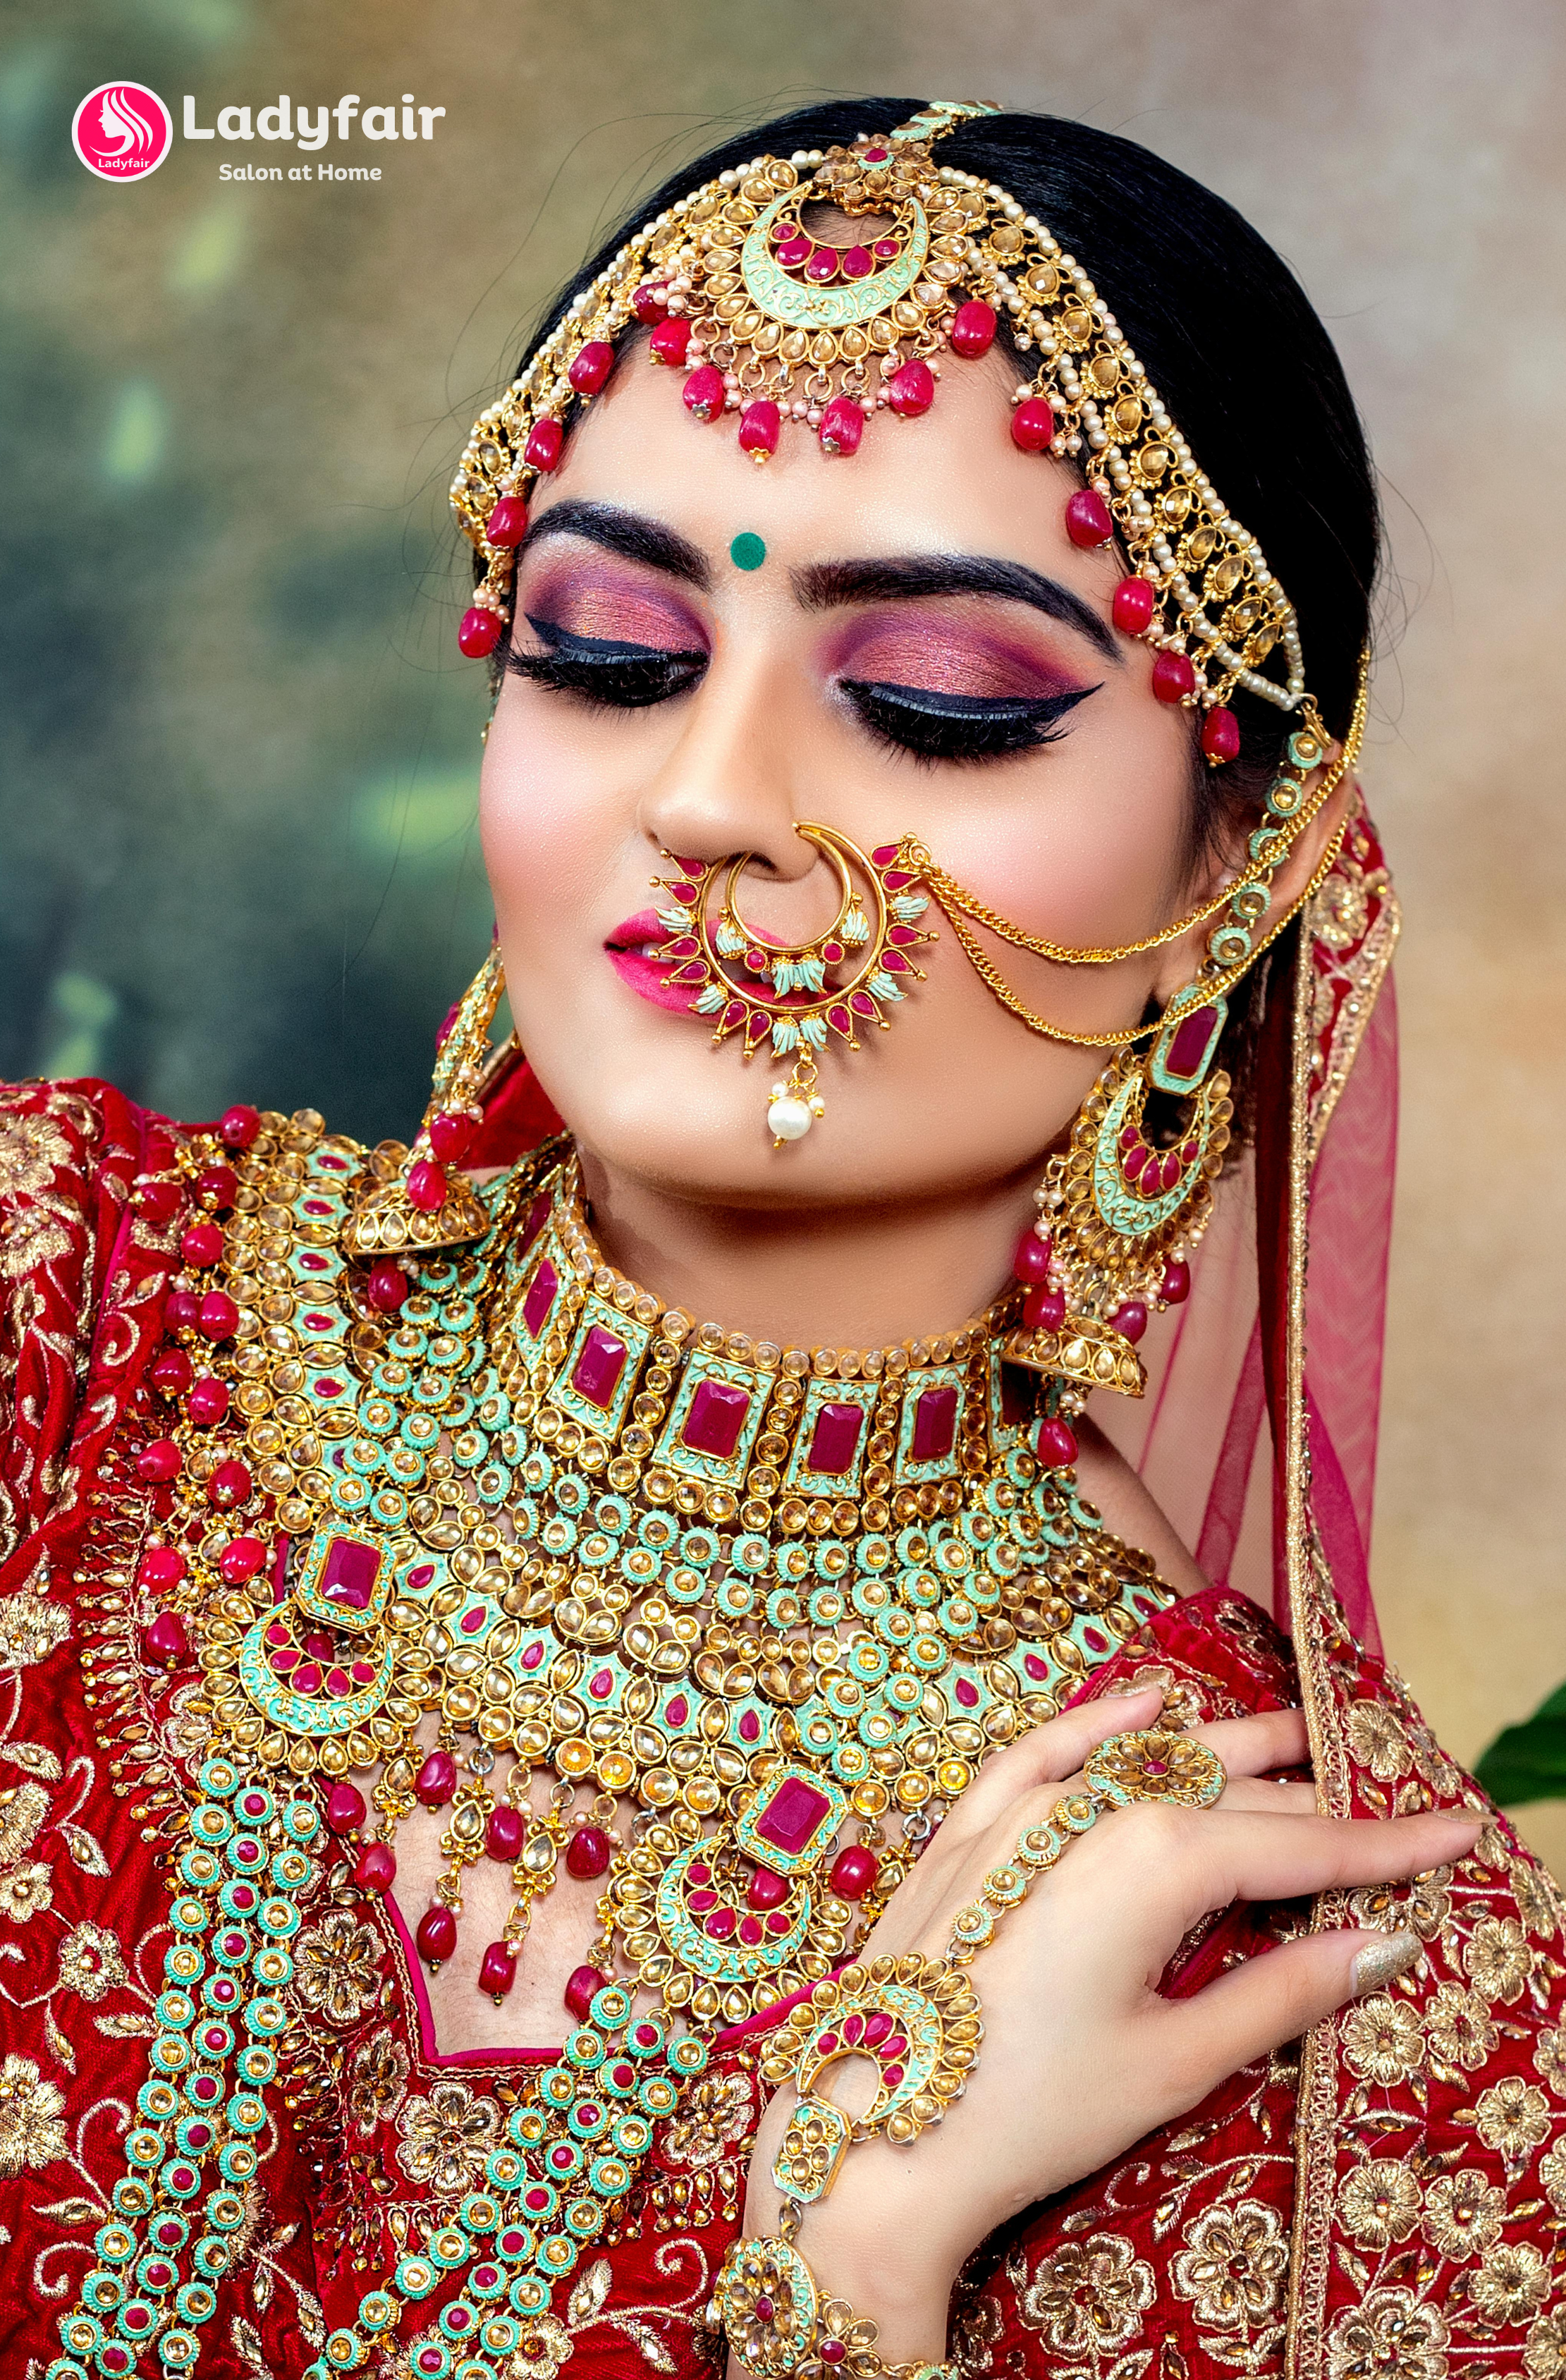
Posted By: 19th September 2024
Best Makeup Artist in Manigachhi
Bridal Makeup Artist in manigacchi Introduction In Manigachhi, Ladyfair is the leading choice for brides who want to look their absolute best on their wedding day. Our at-home bridal makeup service brings expert beauty treatments to the comfort of your own home. Whether you're looking for a traditional bridal look, a flawless HD finish, or the elegance of airbrush makeup, our skilled makeup artist in Manigachhi is here to make your wedding day as perfect as you've imagined. Contact us today at 7004721239 to book your appointment. Why Ladyfair is the Top Choice for Bridal Makeup in Manigachhi? Experienced Makeup Artist Our makeup artist in Manigachhi has years of experience in bridal makeup, specializing in creating looks that highlight your natural beauty and complement your individual style. Convenient At-Home Service Ladyfair eliminates the hassle of traveling to a salon by offering luxurious at-home bridal makeup services, allowing you to enjoy a personalized beauty experience right at your doorstep in Deo. Premium Quality Products We use only high-quality, professional-grade makeup products to ensure a flawless, long-lasting look that will keep you glowing throughout your special day. Bridal Makeup Pricing in Manigachhi Our bridal makeup services in Manigachhi are tailored to fit a range of preferences and budgets: Basic Bridal Makeup: ₹10,000 HD Bridal Makeup: ₹12,000 Airbrush Bridal Makeup: ₹18,000 For engagement and reception: Basic Engagement/Reception Makeup: ₹6,000 HD Engagement/Reception Makeup: ₹8,000 Airbrush Engagement/Reception Makeup: ₹12,000 For parties: Basic Party Makeup: ₹2,500 HD Party Makeup: ₹3,500 Popular Bridal Makeup Styles in Manigachhi. Traditional Bridal Makeup Our traditional bridal makeup in Manigachhi features bold, vibrant colors and meticulous application, perfectly complementing traditional wedding attire to create an elegant and timeless look. HD Bridal Makeup HD bridal makeup provides a high-definition finish that ensures you look flawless in both photographs and in person, making you picture-perfect all day long. Airbrush Bridal Makeup Airbrush makeup delivers a lightweight, smooth finish with full coverage that lasts all day, ideal for brides seeking a natural yet polished look. How to Book Your Bridal Makeup with Ladyfair in Manigachhi Initial Contact: Call us at 7004721239 to discuss your bridal makeup needs and schedule an appointment. Consultation Session: Meet with our makeup artist to discuss your desired look, review your wedding attire, and plan the perfect makeup style. Makeup Trial: We offer trial sessions so you can preview your bridal makeup and make any necessary adjustments before the wedding day. Wedding Day Makeup: On your wedding day, our makeup artist will arrive at your location in Deo to provide a flawless and stress-free makeup service. Testimonials from Brides in Manigachhi Sneha P., Manigachhi: "Ladyfair’s at-home makeup service was exactly what I needed. The makeup artist was incredibly skilled, and my bridal look was beyond perfect." Meera R., : "The airbrush makeup was flawless and lasted all day long. Ladyfair’s service made my wedding day stress-free and special." Ritika S., : "The HD makeup was stunning, and my photos turned out beautifully. Ladyfair’s service exceeded all my expectations." Preparing for Your Bridal Makeup Session To ensure the best results, follow these tips: Stay Hydrated: Drink plenty of water to keep your skin fresh and glowing. Consistent Skincare: Maintain a regular skincare routine leading up to your wedding. Avoid New Products: Stick to familiar skincare products to avoid any reactions. Communicate Clearly: Discuss your makeup preferences and concerns with our artist during your consultation. Additional Beauty Services by Ladyfair In addition to bridal makeup, Ladyfair offers: Engagement and Reception Makeup: Customized looks for all your pre-wedding events. Party Makeup: Perfect for special occasions and celebrations. Everyday Makeup: Enhance your daily look with our expert services. Special Occasion Makeup: Makeup for birthdays, anniversaries, and other significant events. The Future of Bridal Makeup in Manigachhi Ladyfair is committed to setting new standards in bridal beauty with our innovative at-home services in Deo. As more brides experience our exceptional service, Ladyfair continues to grow as the preferred choice for bridal makeup. Q&A with Ladyfair’s Bridal Makeup Artist in Mnigachhi Q1: What makes Ladyfair the best choice for bridal makeup in Manigachhi? A1: Ladyfair offers expert at-home bridal makeup services, combining skilled artistry with high-quality products for a flawless wedding look. Q2: What are the prices for bridal makeup services in Manigachhi? A2: Our bridal makeup services start at ₹10,000 for basic makeup, ₹12,000 for HD makeup, and ₹18,000 for airbrush makeup. Q3: How do I book Ladyfair’s bridal makeup services in Manigachhi? A3: You can book our services by calling 7004721239. We also offer consultations and trial sessions to help you achieve your desired look. Q4: What types of bridal makeup does Ladyfair offer in Manigachhi? A4: We offer traditional, HD, and airbrush bridal makeup styles to suit your preferences. Q5: Are makeup trials available before the wedding day? A5: Yes, we provide trial sessions to finalize your bridal look and make any necessary adjustments. Q6: What kind of products does Ladyfair use for bridal makeup? A6: We use professional-grade, high-quality products that are safe for all skin types and ensure a flawless finish. Q7: What other makeup services does Ladyfair offer in Manigachhi? A7: Besides bridal makeup, we offer engagement, reception, party, and special occasion makeup services.

Posted By: 19th September 2024
Bridal makeup artist in Nathnagar
Ladyfair: Transforming Bridal Beauty in Nathnagar Introduction In Nathnagar, Ladyfair is revolutionizing bridal beauty with its exceptional at-home makeup services. We understand the importance of looking perfect on your wedding day, which is why we bring professional-grade makeup artistry directly to your doorstep. From traditional to modern and airbrush techniques, Ladyfair ensures that your bridal makeup is flawless and stress-free. Call us at 7004721239 to schedule your appointment and let us help you shine on your big day. The Importance of Professional Bridal Makeup Your wedding day is one of the most important moments of your life, and your makeup plays a crucial role in making sure you look radiant and picture-perfect. Professional bridal makeup is about more than just applying cosmetics—it’s about enhancing your natural beauty and ensuring your makeup lasts through hours of celebrations. Ladyfair’s expert makeup artist in Nathnagar creates stunning looks that highlight your best features and align with your personal style and wedding theme. Why Ladyfair Stands Out in Nathnagar At-Home Bridal Makeup Services Ladyfair’s at-home service means no more stressful salon visits. We bring the full beauty experience directly to your location, allowing you to relax while our makeup artist works her magic, ensuring a flawless finish. Personalized Bridal Styles Whether you're looking for a traditional, modern, or fusion bridal look, Ladyfair’s makeup artist specializes in creating styles that reflect your unique personality and the theme of your wedding. We work closely with you to ensure that your makeup is everything you envisioned. High-Quality Makeup Products Ladyfair uses premium, professional-grade products that are gentle on the skin and deliver long-lasting, camera-ready results. We carefully select each product to ensure it enhances your look and stays fresh throughout your special day. Consultation and Makeup Trials We offer in-depth consultations and makeup trials, allowing you to preview your bridal look before the big day. Our makeup artist works with you to finalize every detail so that you feel confident and beautiful. Popular Bridal Makeup Trends in Nathnagar Traditional Bridal Makeup For brides who wish to embrace tradition, Ladyfair offers bold, glamorous makeup that enhances the beauty of traditional wedding attire. This classic style typically features rich colors and defined eyes, perfect for brides looking to make a statement. Modern Bridal Makeup Modern brides often opt for soft, natural tones and minimalistic makeup that enhances their natural beauty. Ladyfair excels in creating glowing, dewy looks with subtle accents, perfect for those who prefer a more understated elegance. Fusion Bridal Makeup For brides looking to combine the best of both worlds, fusion makeup blends traditional elements with modern trends. This approach allows you to honor cultural traditions while maintaining a contemporary feel. How to Book Ladyfair’s Bridal Makeup Services in Nathnagar Contact Us: Call 7004721239 to discuss your bridal makeup needs and book an appointment. Consultation: Our makeup artist will meet with you to review your wedding attire and discuss your desired bridal look. Makeup Trial: We offer trial sessions to test and refine your bridal makeup, ensuring it’s perfect for your big day. Wedding Day Service: On your wedding day, our makeup artist will arrive at your location in Nathnagar to deliver a stress-free, flawless makeup application. Client Testimonials “Ladyfair’s at-home makeup service made my wedding day so much easier. The makeup was stunning, and I received compliments all day long.” – Shalini P., Nathnagar “I was so happy with my makeup—it was exactly what I wanted. Ladyfair’s service was professional and convenient!” – Priya M., Nathnagar Preparing for Your Bridal Makeup Session To ensure you get the best results, here are a few tips for preparing for your bridal makeup session: Hydration: Drink plenty of water to keep your skin glowing and healthy. Skincare Routine: Stick to a regular skincare routine in the weeks leading up to your wedding. Avoid New Products: Don’t experiment with new skincare products right before the wedding to avoid any reactions. Share Your Preferences: Clearly communicate your preferences and desired look with our makeup artist during your consultation. Beyond Bridal Makeup: Ladyfair’s Additional Services Ladyfair also offers a variety of other beauty services, including: Party Makeup: Perfect for guests, parties, and special events. Engagement and Reception Makeup: Tailored looks for all your pre- and post-wedding celebrations. Everyday Glam Makeup: Elevate your everyday style with a touch of glamour. The Future of Bridal Makeup in Nathnagar Ladyfair is committed to redefining bridal beauty services in Nathnagar by offering personalized, professional, and high-quality makeup experiences. Our at-home service allows you to enjoy a luxurious and convenient makeup experience, ensuring you look flawless on your special day. Book Your Appointment Today! Ready to look your best on your wedding day? Contact Ladyfair at 7004721239 to book your consultation and makeup trial. Let us help you create the perfect bridal look that will leave everyone in awe.

Posted By: 19th September 2024
Bridal Makeup Artist in Bounsi
Ladyfair Bridal Makeup Services in Bounsi In Bounsi, Ladyfair is the trusted choice for brides seeking expert makeup services for their big day. Our at-home bridal makeup service ensures a luxurious beauty experience from the comfort of your home. Whether you desire a traditional bridal look, a flawless HD finish, or the elegance of airbrush makeup, our skilled makeup artist in Bounsi is ready to make your wedding day unforgettable. Contact us at 7004721239 to book your appointment. Why Ladyfair is the Best Choice for Bridal Makeup in Bounsi 1. Experienced Makeup Artist Our makeup artist in Bounsi is experienced in bridal makeup, crafting personalized looks that highlight your natural beauty and match your style. 2. Convenient At-Home Service Ladyfair brings salon-quality beauty treatments directly to your home, ensuring you receive a stress-free, luxurious experience without leaving your doorstep. 3. Premium Quality Products We only use high-end, professional-grade makeup products to ensure a long-lasting, flawless finish that will keep you radiant throughout your wedding day. Bridal Makeup Pricing in Bounsi Our pricing structure is designed to accommodate various preferences and budgets: Basic Bridal Makeup: ₹10,000 HD Bridal Makeup: ₹12,000 Airbrush Bridal Makeup: ₹18,000 For engagement and reception: Basic Engagement/Reception Makeup: ₹6,000 HD Engagement/Reception Makeup: ₹8,000 Airbrush Engagement/Reception Makeup: ₹12,000 For parties: Basic Party Makeup: ₹2,500 HD Party Makeup: ₹3,500 Popular Bridal Makeup Styles in Bounsi 1. Traditional Bridal Makeup Bold, vibrant, and meticulously applied to complement traditional wedding attire for an elegant, classic look. 2. HD Bridal Makeup Provides a high-definition finish, ensuring you look flawless in photos and in person all day long. 3. Airbrush Bridal Makeup Lightweight, smooth, and full coverage, this style lasts all day for a natural yet polished look. How to Book Your Bridal Makeup with Ladyfair in Bounsi Initial Contact: Call us at 7004721239 to discuss your bridal makeup needs and schedule an appointment. Consultation Session: Meet with our makeup artist to plan your look, considering your attire and style preferences. Makeup Trial: Preview your bridal look with a trial session and make adjustments if necessary. Wedding Day Makeup: Our artist will arrive at your location in Bounsi to deliver flawless makeup for your big day. Testimonials from Brides in Bounsi Sneha T., Bounsi "Ladyfair’s at-home makeup service was a dream come true. The makeup artist made me look and feel beautiful on my special day." Pooja R., Bounsi "The airbrush makeup was stunning, and the service made my wedding day stress-free. I highly recommend Ladyfair!" Preparing for Your Bridal Makeup Session Stay Hydrated: Drinking water keeps your skin glowing and healthy. Consistent Skincare: Follow a regular skincare routine leading up to your wedding. Avoid New Products: Stick with products you know to avoid allergic reactions. Communicate Clearly: Discuss your preferences with our makeup artist during your consultation. Additional Beauty Services by Ladyfair In addition to bridal makeup, Ladyfair also offers: Engagement and Reception Makeup: Customized for all pre-wedding events. Party Makeup: Perfect for any special occasion. Everyday Makeup: Enhance your daily look with our professional services. Special Occasion Makeup: Ideal for birthdays, anniversaries, or other significant events. The Future of Bridal Makeup in Bounsi Ladyfair continues to redefine the bridal beauty experience with its at-home services in Bounsi. As more brides experience our top-notch service, we are becoming the preferred choice for flawless bridal makeup. Q&A with Ladyfair’s Bridal Makeup Artist in Bounsi Q1: What makes Ladyfair the best choice for bridal makeup in Bounsi? A1: Ladyfair provides skilled at-home makeup services using top-quality products, ensuring brides look stunning on their wedding day. Q2: What are the prices for bridal makeup services in Bounsi? A2: Prices start at ₹10,000 for basic bridal makeup, ₹12,000 for HD, and ₹18,000 for airbrush makeup. Q3: How do I book Ladyfair’s bridal makeup services in Bounsi? A3: You can book by calling 7004721239. We also offer consultations and makeup trials to ensure a perfect look. Q4: What makeup styles does Ladyfair offer in Bounsi? A4: We offer traditional, HD, and airbrush makeup styles to suit every bride’s preferences. Q5: Are makeup trials available before the wedding day? A5: Yes, trial sessions are available to perfect your look ahead of your big day. Q6: What kind of products does Ladyfair use for bridal makeup? A6: We use professional-grade, high-quality makeup products that are safe for all skin types and provide a flawless finish. Q7: Does Ladyfair offer other makeup services in Bounsi? A7: Yes, in addition to bridal makeup, we provide engagement, reception, party, and special occasion makeup services.

Posted By: 19th September 2024
Bridal makeup in Jagdishpur
Introduction When it comes to bridal makeup in Jagdishpur, Ladyfair stands as the top choice for brides seeking perfection. Whether you desire a traditional look, flawless HD makeup, or the latest in airbrush techniques, Ladyfair provides luxurious, at-home bridal makeup services. Our expert makeup artist ensures that your beauty shines on your special day, delivering professional results right at your doorstep. Contact us at 7004721239 to book your appointment and make your wedding day extraordinary. Why Choose Ladyfair for Bridal Makeup in Jagdishpur? Expert Makeup Artist Ladyfair’s makeup artist has years of experience in the bridal beauty industry, creating personalized looks that bring out your natural beauty. Whether you want a traditional or modern look, she will craft a flawless style suited to your preferences. Convenient At-Home Service Forget the hassle of visiting salons—Ladyfair brings the makeup studio to you. Enjoy a personalized, luxurious experience from the comfort of your home, where our makeup artist will create your dream bridal look. High-Quality Products Ladyfair uses only top-tier, professional-grade makeup products to guarantee a long-lasting and stunning look throughout your big day. Whether it’s an elegant traditional look or a glamorous HD finish, our products ensure perfection. Bridal Makeup Pricing in Jagdishpur Ladyfair offers flexible pricing to meet different needs and budgets: Basic Bridal Makeup: ₹10,000 HD Bridal Makeup: ₹12,000 Airbrush Bridal Makeup: ₹18,000 We also offer makeup services for engagements, receptions, and other events: Basic Engagement/Reception Makeup: ₹6,000 HD Engagement/Reception Makeup: ₹8,000 Airbrush Engagement/Reception Makeup: ₹12,000 For parties and special occasions: Basic Party Makeup: ₹2,500 HD Party Makeup: ₹3,500 Popular Bridal Makeup Styles in Jagdishpur Traditional Bridal Makeup Bold colors, defined eyes, and flawless application to complement your traditional attire and jewelry for a classic and timeless look. HD Bridal Makeup With HD makeup, you’ll achieve a smooth, high-definition finish that looks perfect both in photographs and in person. This makeup style ensures a flawless appearance all day long. Airbrush Bridal Makeup For brides who prefer a natural and lightweight finish, airbrush makeup is ideal. This technique provides full coverage while maintaining a soft, radiant glow that lasts through your wedding. How to Book Your Bridal Makeup with Ladyfair in Jagdishpur Contact Us: Call 7004721239 to discuss your bridal makeup needs. Consultation Session: Meet with our makeup artist to plan your look, based on your attire and personal preferences. Makeup Trial: We offer trial sessions so you can preview and adjust your bridal look before your wedding day. Wedding Day Makeup: On the day of your wedding, our artist will arrive at your location to ensure you have a stress-free, flawless makeup experience. Bridal Testimonials “Ladyfair made my wedding day so special. The at-home service was convenient and the makeup was exactly what I envisioned. Highly recommend!” – Pooja S., Jagdishpur “I chose airbrush makeup and it stayed perfect throughout the day. I received so many compliments!” – Priya M., Jagdishpur Preparing for Your Bridal Makeup Session To get the best results from your bridal makeup, follow these tips: Stay Hydrated: Drink plenty of water to keep your skin glowing. Stick to a Skincare Routine: A consistent routine ensures your skin is smooth and ready for makeup application. Avoid New Products: Stick to familiar skincare products before the big day to avoid allergic reactions. Communicate Clearly: Share your preferences and ideas with our makeup artist during your consultation. Additional Makeup Services by Ladyfair Engagement and Reception Makeup Party and Special Occasion Makeup Everyday Glamour Makeup The Future of Bridal Makeup in Jagdishpur Ladyfair is setting new standards in bridal beauty services, offering the convenience of at-home makeup combined with high-quality artistry. As we continue to expand in Jagdishpur, we remain the top choice for brides looking for flawless beauty on their wedding day. Book Your Appointment with Ladyfair Today! Let Ladyfair create the perfect bridal look for your special day. Call 7004721239 to schedule your consultation or makeup trial today!

Posted By: 19th September 2024
Best Makeup Artist in Jale
Bridal Makeup Artist in jale Introduction In jale, Ladyfair is the leading choice for brides who want to look their absolute best on their wedding day. Our at-home bridal makeup service brings expert beauty treatments to the comfort of your own home. Whether you're looking for a traditional bridal look, a flawless HD finish, or the elegance of airbrush makeup, our skilled makeup artist in Deo is here to make your wedding day as perfect as you've imagined. Contact us today at 7004721239 to book your appointment. Why Ladyfair is the Top Choice for Bridal Makeup in jale? Experienced Makeup Artist Our makeup artist in jale has years of experience in bridal makeup, specializing in creating looks that highlight your natural beauty and complement your individual style. Convenient At-Home Service Ladyfair eliminates the hassle of traveling to a salon by offering luxurious at-home bridal makeup services, allowing you to enjoy a personalized beauty experience right at your doorstep in jale. Premium Quality Products We use only high-quality, professional-grade makeup products to ensure a flawless, long-lasting look that will keep you glowing throughout your special day. Bridal Makeup Pricing in jale Our bridal makeup services in jale are tailored to fit a range of preferences and budgets: Basic Bridal Makeup: ₹10,000 HD Bridal Makeup: ₹12,000 Airbrush Bridal Makeup: ₹18,000 For engagement and reception: Basic Engagement/Reception Makeup: ₹6,000 HD Engagement/Reception Makeup: ₹8,000 Airbrush Engagement/Reception Makeup: ₹12,000 For parties: Basic Party Makeup: ₹2,500 HD Party Makeup: ₹3,500 Popular Bridal Makeup Styles in jale. Traditional Bridal Makeup Our traditional bridal makeup in jale features bold, vibrant colors and meticulous application, perfectly complementing traditional wedding attire to create an elegant and timeless look. HD Bridal Makeup HD bridal makeup provides a high-definition finish that ensures you look flawless in both photographs and in person, making you picture-perfect all day long. Airbrush Bridal Makeup Airbrush makeup delivers a lightweight, smooth finish with full coverage that lasts all day, ideal for brides seeking a natural yet polished look. How to Book Your Bridal Makeup with Ladyfair in jale Initial Contact: Call us at 7004721239 to discuss your bridal makeup needs and schedule an appointment. Consultation Session: Meet with our makeup artist to discuss your desired look, review your wedding attire, and plan the perfect makeup style. Makeup Trial: We offer trial sessions so you can preview your bridal makeup and make any necessary adjustments before the wedding day. Wedding Day Makeup: On your wedding day, our makeup artist will arrive at your location in Deo to provide a flawless and stress-free makeup service. Testimonials from Brides in jale Sneha P., jale: "Ladyfair’s at-home makeup service was exactly what I needed. The makeup artist was incredibly skilled, and my bridal look was beyond perfect." Meera R., jale "The airbrush makeup was flawless and lasted all day long. Ladyfair’s service made my wedding day stress-free and special." Ritika S., jale: "The HD makeup was stunning, and my photos turned out beautifully. Ladyfair’s service exceeded all my expectations." Preparing for Your Bridal Makeup Session To ensure the best results, follow these tips: Stay Hydrated: Drink plenty of water to keep your skin fresh and glowing. Consistent Skincare: Maintain a regular skincare routine leading up to your wedding. Avoid New Products: Stick to familiar skincare products to avoid any reactions. Communicate Clearly: Discuss your makeup preferences and concerns with our artist during your consultation. Additional Beauty Services by Ladyfair In addition to bridal makeup, Ladyfair offers: Engagement and Reception Makeup: Customized looks for all your pre-wedding events. Party Makeup: Perfect for special occasions and celebrations. Everyday Makeup: Enhance your daily look with our expert services. Special Occasion Makeup: Makeup for birthdays, anniversaries, and other significant events. The Future of Bridal Makeup in jale Ladyfair is committed to setting new standards in bridal beauty with our innovative at-home services in jale. As more brides experience our exceptional service, Ladyfair continues to grow as the preferred choice for bridal makeup. Q&A with Ladyfair’s Bridal Makeup Artist in jale Q1: What makes Ladyfair the best choice for bridal makeup in jale? A1: Ladyfair offers expert at-home bridal makeup services, combining skilled artistry with high-quality products for a flawless wedding look. Q2: What are the prices for bridal makeup services in jale? A2: Our bridal makeup services start at ₹10,000 for basic makeup, ₹12,000 for HD makeup, and ₹18,000 for airbrush makeup. Q3: How do I book Ladyfair’s bridal makeup services in jale? A3: You can book our services by calling 7004721239. We also offer consultations and trial sessions to help you achieve your desired look. Q4: What types of bridal makeup does Ladyfair offer in jale? A4: We offer traditional, HD, and airbrush bridal makeup styles to suit your preferences. Q5: Are makeup trials available before the wedding day? A5: Yes, we provide trial sessions to finalize your bridal look and make any necessary adjustments. Q6: What kind of products does Ladyfair use for bridal makeup? A6: We use professional-grade, high-quality products that are safe for all skin types and ensure a flawless finish. Q7: What other makeup services does Ladyfair offer in jale? A7: Besides bridal makeup, we offer engagement, reception, party, and special occasion makeup service.

Posted By: 19th September 2024
best makeup artist in singhwara
Bridal Makeup Artist in Singhwara Introduction In sinhwara, Ladyfair is the leading choice for brides who want to look their absolute best on their wedding day. Our at-home bridal makeup service brings expert beauty treatments to the comfort of your own home. Whether you're looking for a traditional bridal look, a flawless HD finish, or the elegance of airbrush makeup, our skilled makeup artist in singhwara is here to make your wedding day as perfect as you've imagined. Contact us today at 7004721239 to book your appointment. Why Ladyfair is the Top Choice for Bridal Makeup in singhwara? Experienced Makeup Artist Our makeup artist in singhwara has years of experience in bridal makeup, specializing in creating looks that highlight your natural beauty and complement your individual style. Convenient At-Home Service Ladyfair eliminates the hassle of traveling to a salon by offering luxurious at-home bridal makeup services, allowing you to enjoy a personalized beauty experience right at your doorstep in singhwara. Premium Quality Products We use only high-quality, professional-grade makeup products to ensure a flawless, long-lasting look that will keep you glowing throughout your special day. Bridal Makeup Pricing in singhwara Our bridal makeup services in singhwara are tailored to fit a range of preferences and budgets: Basic Bridal Makeup: ₹10,000 HD Bridal Makeup: ₹12,000 Airbrush Bridal Makeup: ₹18,000 For engagement and reception: Basic Engagement/Reception Makeup: ₹6,000 HD Engagement/Reception Makeup: ₹8,000 Airbrush Engagement/Reception Makeup: ₹12,000 For parties: Basic Party Makeup: ₹2,500 HD Party Makeup: ₹3,500 Popular Bridal Makeup Styles in singhwara Traditional Bridal Makeup Our traditional bridal makeup in singhwara features bold, vibrant colors and meticulous application, perfectly complementing traditional wedding attire to create an elegant and timeless look. HD Bridal Makeup HD bridal makeup provides a high-definition finish that ensures you look flawless in both photographs and in person, making you picture-perfect all day long. Airbrush Bridal Makeup Airbrush makeup delivers a lightweight, smooth finish with full coverage that lasts all day, ideal for brides seeking a natural yet polished look. How to Book Your Bridal Makeup with Ladyfair in singhwara Initial Contact: Call us at 7004721239 to discuss your bridal makeup needs and schedule an appointment. Consultation Session: Meet with our makeup artist to discuss your desired look, review your wedding attire, and plan the perfect makeup style. Makeup Trial: We offer trial sessions so you can preview your bridal makeup and make any necessary adjustments before the wedding day. Wedding Day Makeup: On your wedding day, our makeup artist will arrive at your location in singhwara to provide a flawless and stress-free makeup service. Testimonials from Brides in singhwara Sneha P.,singhwara: "Ladyfair’s at-home makeup service was exactly what I needed. The makeup artist was incredibly skilled, and my bridal look was beyond perfect." Meera R., sighwara: "The airbrush makeup was flawless and lasted all day long. Ladyfair’s service made my wedding day stress-free and special." Ritika S., singhwara: "The HD makeup was stunning, and my photos turned out beautifully. Ladyfair’s service exceeded all my expectations." Preparing for Your Bridal Makeup Session To ensure the best results, follow these tips: Stay Hydrated: Drink plenty of water to keep your skin fresh and glowing. Consistent Skincare: Maintain a regular skincare routine leading up to your wedding. Avoid New Products: Stick to familiar skincare products to avoid any reactions. Communicate Clearly: Discuss your makeup preferences and concerns with our artist during your consultation. Additional Beauty Services by Ladyfair In addition to bridal makeup, Ladyfair offers: Engagement and Reception Makeup: Customized looks for all your pre-wedding events. Party Makeup: Perfect for special occasions and celebrations. Everyday Makeup: Enhance your daily look with our expert services. Special Occasion Makeup: Makeup for birthdays, anniversaries, and other significant events. The Future of Bridal Makeup in singhwara Ladyfair is committed to setting new standards in bridal beauty with our innovative at-home services in singhwara. As more brides experience our exceptional service, Ladyfair continues to grow as the preferred choice for bridal makeup. Q&A with Ladyfair’s Bridal Makeup Artist in sinhwara Q1: What makes Ladyfair the best choice for bridal makeup in singhwara? A1: Ladyfair offers expert at-home bridal makeup services, combining skilled artistry with high-quality products for a flawless wedding look. Q2: What are the prices for bridal makeup services in singhwara? A2: Our bridal makeup services start at ₹10,000 for basic makeup, ₹12,000 for HD makeup, and ₹18,000 for airbrush makeup. Q3: How do I book Ladyfair’s bridal makeup services in singhwara? A3: You can book our services by calling 7004721239. We also offer consultations and trial sessions to help you achieve your desired look. Q4: What types of bridal makeup does Ladyfair offer in singhwara? A4: We offer traditional, HD, and airbrush bridal makeup styles to suit your preferences. Q5: Are makeup trials available before the wedding day? A5: Yes, we provide trial sessions to finalize your bridal look and make any necessary adjustments. Q6: What kind of products does Ladyfair use for bridal makeup? A6: We use professional-grade, high-quality products that are safe for all skin types and ensure a flawless finish. Q7: What other makeup services does Ladyfair offer in singhwara? A7: Besides bridal makeup, we offer engagement, reception, party, and special occasion makeup services.

Posted By: 18th September 2024
Bridal Makeup Artist in Belhar
Introduction In Belhar, Ladyfair is the leading provider of expert bridal makeup services delivered directly to your home. Whether you're looking for a classic, traditional bridal look, or a flawless HD or airbrush finish, our makeup artist in Belhar is here to make sure you look perfect on your big day. Call us at 7004721239 to book your bridal makeup appointment today. Why Ladyfair is the Best Choice for Bridal Makeup in Belhar Experienced Makeup Artist Our professional makeup artist in Belhar has years of experience in bridal makeup, specializing in creating personalized looks that enhance your natural beauty. Convenient At-Home Service Enjoy the ultimate convenience with our at-home bridal makeup services in Belhar, allowing you to get ready in the comfort of your own space without the stress of traveling to a salon. Premium Quality Products We use only high-quality, professional-grade makeup products to ensure your bridal makeup is long-lasting and flawless. Bridal Makeup Pricing in Belhar We offer a variety of bridal makeup packages to suit every budget and style: Basic Bridal Makeup: ₹10,000 HD Bridal Makeup: ₹12,000 Airbrush Bridal Makeup: ₹18,000 For engagement and reception makeup: Basic Engagement/Reception Makeup: ₹6,000 HD Engagement/Reception Makeup: ₹8,000 Airbrush Engagement/Reception Makeup: ₹12,000 For parties: Basic Party Makeup: ₹2,500 HD Party Makeup: ₹3,500 Popular Bridal Makeup Styles in Belhar Traditional Bridal Makeup For brides who prefer a timeless, traditional look, our makeup artist in Belhar creates elegant, classic styles that complement traditional wedding attire. HD Bridal Makeup HD bridal makeup ensures that you look flawless in both real life and in photographs, giving you a picture-perfect appearance throughout your wedding day. Airbrush Bridal Makeup Airbrush makeup provides a lightweight, full-coverage finish that lasts all day, giving brides a natural, polished look for their special day. How to Book Your Bridal Makeup with Ladyfair in Belhar Initial Contact: Call us at 7004721239 to discuss your needs and schedule an appointment. Consultation: Meet with our makeup artist to plan your look, ensuring it aligns with your style and wedding theme. Makeup Trial: We offer trial sessions so you can preview your bridal look before the big day. Wedding Day Makeup: Our makeup artist will arrive at your home in Belhar to deliver a stress-free, flawless makeup application. Testimonials from Brides in Belhar Priya S., Belhar: "I couldn’t have been happier with Ladyfair’s makeup service. My bridal look was exactly what I wanted, and the at-home service made everything so convenient." Muskan R., Belhar: "The HD makeup was perfect for my wedding photos, and the makeup artist was so professional and friendly." Rishika M., Belhar: "Ladyfair made my special day even better. The airbrush makeup was flawless and lasted all day. Highly recommended!" Preparing for Your Bridal Makeup Session To ensure your makeup looks perfect, follow these tips before your appointment: Hydrate: Drink plenty of water in the days leading up to your wedding for healthy, glowing skin. Follow a Consistent Skincare Routine: Stick to a regular skincare routine to keep your skin clear and prepared for makeup. Avoid New Products: Use products your skin is familiar with to avoid any reactions. Communicate Clearly: Discuss your makeup preferences and desired style with our makeup artist during your consultation. Additional Beauty Services by Ladyfair In addition to bridal makeup, Ladyfair offers a variety of beauty services in Belhar, including: Engagement and Reception Makeup: Custom looks for all your pre-wedding events. Party Makeup: Perfect for special celebrations. Everyday Makeup: Enhance your daily look with professional makeup services. Special Occasion Makeup: Makeup for birthdays, anniversaries, and other important events. The Future of Bridal Makeup in Belhar Ladyfair is dedicated to providing high-quality, at-home bridal makeup services in Belhar, setting new standards in bridal beauty. Our commitment to exceptional service and customer satisfaction continues to make Ladyfair the preferred choice for brides. Q&A with Ladyfair’s Bridal Makeup Artist in Belhar Q1: What makes Ladyfair the top choice for bridal makeup in Belhar? A1: Ladyfair offers expert at-home bridal makeup services with professional products and personalized artistry, ensuring brides look their best. Q2: What are the prices for bridal makeup services in Belhar? A2: Our bridal makeup packages range from ₹10,000 for basic makeup to ₹18,000 for airbrush makeup. Q3: How can I book Ladyfair’s bridal makeup services in Belhar? A3: Call 7004721239 to book our services. We also offer consultations and makeup trials. Q4: What bridal makeup styles does Ladyfair offer in Belhar? A4: We offer traditional, HD, and airbrush makeup, tailored to meet your preferences. Q5: Are makeup trials available? A5: Yes, we provide makeup trials to help you finalize your look before the wedding day. Q6: What products does Ladyfair use for bridal makeup? A6: We use high-quality, professional-grade products to ensure a flawless finish. Q7: What other services does Ladyfair offer in Belhar? A7: We offer engagement, reception, party, and everyday makeup services, in addition to bridal makeup. Ladyfair is your trusted partner for stunning, at-home bridal makeup services in Belhar, ensuring you look your best on your special day.

Posted By: 18th September 2024
Bridal makeup Artist in Baikunthpur
Introduction In Baikunthpur, Ladyfair is renowned for providing expert bridal makeup services directly at your home. Whether you're dreaming of a traditional bridal look, a flawless HD finish, or the perfection of airbrush makeup, our talented makeup artist is here to bring your vision to life. Contact us at 7004721239 to schedule your appointment today and experience the best bridal makeup service in Baikunthpur. Why Ladyfair is the Best Choice for Bridal Makeup in Baikunthpur Skilled and Experienced Makeup Artist Our makeup artist in Baikunthpur has extensive experience in bridal makeup, ensuring you receive a look that complements your personality, attire, and preferences. Convenient At-Home Makeup Service Ladyfair provides the ultimate convenience by offering at-home makeup services in Baikunthpur, allowing you to prepare for your big day without leaving the comfort of your home. High-Quality Makeup Products We use only premium, professional-grade makeup products to guarantee a long-lasting, flawless look that will keep you radiant throughout your wedding day. Bridal Makeup Pricing in Baikunthpur Our pricing is designed to cater to various needs and budgets: Basic Bridal Makeup: ₹10,000 HD Bridal Makeup: ₹12,000 Airbrush Bridal Makeup: ₹18,000 For engagement and reception makeup: Basic Engagement/Reception Makeup: ₹6,000 HD Engagement/Reception Makeup: ₹8,000 Airbrush Engagement/Reception Makeup: ₹12,000 For parties: Basic Party Makeup: ₹2,500 HD Party Makeup: ₹3,500 Popular Bridal Makeup Styles in Baikunthpur Traditional Bridal Makeup For those who want a timeless and classic look, our traditional bridal makeup in Baikunthpur features bold and vibrant tones, creating an elegant and traditional style that perfectly complements your wedding attire. HD Bridal Makeup HD bridal makeup ensures you look flawless in both photos and real life, giving you a camera-ready appearance that’s picture-perfect throughout the day. Airbrush Bridal Makeup Airbrush makeup offers a smooth, lightweight, and long-lasting finish. It’s ideal for brides seeking a natural, radiant look that stays fresh all day long. How to Book Your Bridal Makeup with Ladyfair in Baikunthpur Initial Contact: Call us at 7004721239 to discuss your needs and book an appointment. Consultation: Our makeup artist will work with you to understand your vision and create a makeup plan that complements your wedding theme. Makeup Trial: We offer trial makeup sessions to ensure that your bridal look is exactly what you desire. Wedding Day Makeup: On your wedding day, our makeup artist will arrive at your home in Baikunthpur, providing a flawless makeup experience without any stress. Testimonials from Brides in Baikunthpur Riya S., Baikunthpur: "I loved the convenience of having Ladyfair come to my home. My makeup was perfect, and I got so many compliments on my wedding day." Neha T., Baikunthpur: "The HD makeup was exactly what I needed for all the photos. Ladyfair’s service was professional and seamless." Pallavi J., Baikunthpur: "The airbrush makeup lasted all day without needing any touch-ups. I couldn’t have been happier with my bridal look!" Preparing for Your Bridal Makeup Session To ensure your makeup looks perfect on your big day, follow these tips: Stay Hydrated: Drink plenty of water to keep your skin glowing. Maintain Your Skincare Routine: Stick to a consistent skincare routine to keep your skin in optimal condition. Avoid New Skincare Products: Using unfamiliar products before your wedding may lead to breakouts or skin reactions. Communicate Your Preferences: Be clear with our makeup artist about the look you want to achieve during your consultation and trial session. Additional Beauty Services by Ladyfair Ladyfair also offers a range of makeup services for other special occasions in Baikunthpur: Engagement and Reception Makeup: Tailored looks for all your pre-wedding events. Party Makeup: Perfect for birthdays, anniversaries, and other special celebrations. Everyday Makeup: Enhance your daily look with professional makeup. Special Occasion Makeup: Glamorous makeup for any important life event. The Future of Bridal Makeup in Baikunthpur Ladyfair is revolutionizing bridal beauty by offering high-quality, at-home makeup services in Baikunthpur. As more brides experience our exceptional artistry and personalized service, we continue to grow as the premier choice for bridal makeup. Q&A with Ladyfair’s Bridal Makeup Artist in Baikunthpur Q1: Why is Ladyfair the top choice for bridal makeup in Baikunthpur? A1: Ladyfair offers expert at-home bridal makeup services, ensuring you receive a flawless look in the comfort of your own home. Q2: What are the prices for bridal makeup services in Baikunthpur? A2: Our bridal makeup prices start at ₹10,000 for basic makeup, with HD and airbrush options also available. Q3: How do I book Ladyfair’s bridal makeup services in Baikunthpur? A3: You can call us at 7004721239 to book our services, and we offer consultations and makeup trials to ensure your desired look is achieved. Q4: What types of bridal makeup does Ladyfair offer in Baikunthpur? A4: We offer traditional, HD, and airbrush bridal makeup styles to suit your preferences. Q5: Are makeup trials available before the wedding day? A5: Yes, we provide trial sessions so you can preview your bridal look and make any adjustments before the big day. Q6: What kind of products does Ladyfair use for bridal makeup? A6: We use high-quality, professional-grade makeup products to ensure a flawless and long-lasting finish. Q7: What other makeup services does Ladyfair offer in Baikunthpur? A7: Besides bridal makeup, we offer engagement, reception, party, and everyday makeup services for all occasions. Ladyfair is your trusted partner for stunning at-home bridal makeup services in Baikunthpur, ensuring you look radiant and flawless on your special day.

Posted By: 18th September 2024
Bridal Makeup Artist in Gaya Sadar
Introduction In Gaya Sadar, Ladyfair is the premier choice for brides looking to achieve the perfect wedding day look with our professional at-home bridal makeup services. Whether you desire a traditional bridal look, an HD finish, or the flawless perfection of airbrush makeup, our expert makeup artist in Gaya Sadar ensures that you shine on your special day. Contact us today at 7004721239 to schedule your appointment. Why Choose Ladyfair for Bridal Makeup in Gaya Sadar Experienced Makeup Artist Our makeup artist in Gaya Sadar has years of experience in bridal makeup, creating personalized looks that complement your natural beauty and align with your style and preferences. Convenient At-Home Service Forget the stress of traveling to a salon. Ladyfair brings luxury beauty treatments directly to your doorstep with our at-home bridal makeup services, offering a truly personalized experience. Premium Makeup Products We use only high-quality, professional-grade makeup products to ensure a flawless, long-lasting look that remains perfect throughout your big day. Bridal Makeup Pricing in Gaya Sadar Our bridal makeup services in Gaya Sadar are tailored to fit different styles and budgets: Basic Bridal Makeup: ₹10,000 HD Bridal Makeup: ₹12,000 Airbrush Bridal Makeup: ₹18,000 For engagement and reception makeup: Basic Engagement/Reception Makeup: ₹6,000 HD Engagement/Reception Makeup: ₹8,000 Airbrush Engagement/Reception Makeup: ₹12,000 For parties: Basic Party Makeup: ₹2,500 HD Party Makeup: ₹3,500 Popular Bridal Makeup Styles in Gaya Sadar Traditional Bridal Makeup Our traditional bridal makeup in Gaya Sadar incorporates bold colors and intricate detailing to complement your wedding attire, creating an elegant and timeless look. HD Bridal Makeup For a high-definition finish that looks flawless both in photos and in person, HD bridal makeup is the perfect choice for brides who want a picture-perfect appearance all day. Airbrush Bridal Makeup Our airbrush makeup offers a lightweight, full-coverage finish that lasts all day, giving you a smooth and natural look while ensuring long-lasting perfection. How to Book Your Bridal Makeup with Ladyfair in Gaya Sadar Initial Contact: Call us at 7004721239 to discuss your makeup needs and schedule your appointment. Consultation Session: Meet with our makeup artist to discuss your wedding look, review your attire, and plan the perfect makeup style. Makeup Trial: We offer trial sessions to help you preview your bridal makeup look and make any adjustments. Wedding Day Makeup: On your wedding day, our makeup artist will arrive at your location in Gaya Sadar to provide flawless, hassle-free makeup service. Testimonials from Brides in Gaya Sadar Priya R., Gaya Sadar: "Ladyfair provided amazing service on my wedding day. The airbrush makeup looked flawless and lasted all day." Ritu K., Gaya Sadar: "I loved the HD makeup! It was perfect for my photos, and the at-home service was so convenient." Sneha S., Gaya Sadar: "My traditional bridal makeup was exactly what I wanted, and Ladyfair made the entire process stress-free." Preparing for Your Bridal Makeup Session To get the best results for your bridal makeup: Stay Hydrated: Keep your skin looking fresh by drinking plenty of water. Consistent Skincare: Stick to your regular skincare routine to maintain healthy, glowing skin. Avoid New Products: Use familiar products to prevent any reactions before your wedding day. Clear Communication: Discuss your makeup preferences and any concerns with our artist during the consultation. Additional Beauty Services by Ladyfair Beyond bridal makeup, Ladyfair offers a variety of beauty services in Gaya Sadar: Engagement and Reception Makeup: Customized looks for all pre-wedding events. Party Makeup: Perfect for birthdays, anniversaries, and special occasions. Everyday Makeup: Enhance your daily look with our expert makeup services. Special Occasion Makeup: Professional makeup for parties, celebrations, and formal events. The Future of Bridal Makeup in Gaya Sadar Ladyfair is dedicated to setting new standards in bridal beauty in Gaya Sadar with our innovative at-home services. As we continue to offer exceptional service, more brides are choosing Ladyfair as their preferred makeup provider. Q&A with Ladyfair’s Bridal Makeup Artist in Gaya Sadar Q1: What makes Ladyfair the best choice for bridal makeup in Gaya Sadar? A1: Ladyfair offers expert bridal makeup services at home, using high-quality products to ensure a flawless and long-lasting look. Q2: What are the prices for bridal makeup in Gaya Sadar? A2: Our bridal makeup packages start at ₹10,000 for basic makeup, ₹12,000 for HD makeup, and ₹18,000 for airbrush makeup. Q3: How do I book Ladyfair’s bridal makeup services in Gaya Sadar? A3: You can book our services by calling 7004721239. We also offer consultations and trial sessions to ensure you get the look you want. Q4: What bridal makeup styles does Ladyfair offer in Gaya Sadar? A4: Ladyfair offers traditional, HD, and airbrush bridal makeup to suit different preferences and needs. Q5: Are makeup trials available before my wedding? A5: Yes, we offer trial sessions so you can finalize your bridal look ahead of time. Q6: What products does Ladyfair use for bridal makeup? A6: We use professional-grade, high-quality makeup products that are safe for all skin types and ensure a flawless finish. Q7: What other services does Ladyfair provide in Gaya Sadar? A7: In addition to bridal makeup, we offer makeup for engagements, receptions, parties, and other special occasions. Ladyfair is your ultimate choice for professional, at-home bridal makeup services in Gaya Sadar, ensuring a flawless and stress-free experience on your special day.

Posted By: 17th September 2024
Bridal Makeup Artist in Khudabandpur
Introduction In Khudabandpur, Ladyfair is the leading choice for brides who want to look their absolute best on their wedding day. Our at-home bridal makeup service brings expert beauty treatments to the comfort of your own home. Whether you're looking for a traditional bridal look, a flawless HD finish, or the elegance of airbrush makeup, our skilled makeup artist in Khudabandpur is here to make your wedding day as perfect as you've imagined. Contact us today at 7004721239 to book your appointment. Why Ladyfair is the Top Choice for Bridal Makeup in Khudabandpur? Experienced Makeup Artist Our makeup artist in Khudabandpur has years of experience in bridal makeup, specializing in creating looks that highlight your natural beauty and complement your individual style. Convenient At-Home Service Ladyfair eliminates the hassle of traveling to a salon by offering luxurious at-home bridal makeup services, allowing you to enjoy a personalized beauty experience right at your doorstep in Khudabandpur. Premium Quality Products We use only high-quality, professional-grade makeup products to ensure a flawless, long-lasting look that will keep you glowing throughout your special day. Bridal Makeup Pricing in Khudabandpur Our bridal makeup services in Khudabandpur are tailored to fit a range of preferences and budgets: Basic Bridal Makeup: ₹10,000 HD Bridal Makeup: ₹12,000 Airbrush Bridal Makeup: ₹18,000 For engagement and reception: Basic Engagement/Reception Makeup: ₹6,000 HD Engagement/Reception Makeup: ₹8,000 Airbrush Engagement/Reception Makeup: ₹12,000 For parties: Basic Party Makeup: ₹2,500 HD Party Makeup: ₹3,500 Popular Bridal Makeup Styles in Khudabandpur Traditional Bridal Makeup Our traditional bridal makeup in Khudabandpur features bold, vibrant colors and meticulous application, perfectly complementing traditional wedding attire to create an elegant and timeless look. HD Bridal Makeup HD bridal makeup provides a high-definition finish that ensures you look flawless in both photographs and in person, making you picture-perfect all day long. Airbrush Bridal Makeup Airbrush makeup delivers a lightweight, smooth finish with full coverage that lasts all day, ideal for brides seeking a natural yet polished look. How to Book Your Bridal Makeup with Ladyfair in Khudabandpur Initial Contact: Call us at 7004721239 to discuss your bridal makeup needs and schedule an appointment. Consultation Session: Meet with our makeup artist to discuss your desired look, review your wedding attire, and plan the perfect makeup style. Makeup Trial: We offer trial sessions so you can preview your bridal makeup and make any necessary adjustments before the wedding day. Wedding Day Makeup: On your wedding day, our makeup artist will arrive at your location in Khudabandpur to provide a flawless and stress-free makeup service. Testimonials from Brides in Khudabandpur Sneha P., Khudabandpur: "Ladyfair’s at-home makeup service was exactly what I needed. The makeup artist was incredibly skilled, and my bridal look was beyond perfect." Meera R., Khudabandpur: "The airbrush makeup was flawless and lasted all day long. Ladyfair’s service made my wedding day stress-free and special." Ritika S., Khudabandpur: "The HD makeup was stunning, and my photos turned out beautifully. Ladyfair’s service exceeded all my expectations." Preparing for Your Bridal Makeup Session To ensure the best results, follow these tips: Stay Hydrated: Drink plenty of water to keep your skin fresh and glowing. Consistent Skincare: Maintain a regular skincare routine leading up to your wedding. Avoid New Products: Stick to familiar skincare products to avoid any reactions. Communicate Clearly: Discuss your makeup preferences and concerns with our artist during your consultation. Additional Beauty Services by Ladyfair In addition to bridal makeup, Ladyfair offers: Engagement and Reception Makeup: Customized looks for all your pre-wedding events. Party Makeup: Perfect for special occasions and celebrations. Everyday Makeup: Enhance your daily look with our expert services. Special Occasion Makeup: Makeup for birthdays, anniversaries, and other significant events. The Future of Bridal Makeup in Khudabandpur Ladyfair is committed to setting new standards in bridal beauty with our innovative at-home services in Khudabandpur. As more brides experience our exceptional service, Ladyfair continues to grow as the preferred choice for bridal makeup. Q&A with Ladyfair’s Bridal Makeup Artist in Khudabandpur Q1: What makes Ladyfair the best choice for bridal makeup in Khudabandpur? A1: Ladyfair offers expert at-home bridal makeup services, combining skilled artistry with high-quality products for a flawless wedding look. Q2: What are the prices for bridal makeup services in Khudabandpur? A2: Our bridal makeup services start at ₹10,000 for basic makeup, ₹12,000 for HD makeup, and ₹18,000 for airbrush makeup. Q3: How do I book Ladyfair’s bridal makeup services in Khudabandpur? A3: You can book our services by calling 7004721239. We also offer consultations and trial sessions to help you achieve your desired look. Q4: What types of bridal makeup does Ladyfair offer in Khudabandpur? A4: We offer traditional, HD, and airbrush bridal makeup styles to suit your preferences. Q5: Are makeup trials available before the wedding day? A5: Yes, we provide trial sessions to finalize your bridal look and make any necessary adjustments. Q6: What kind of products does Ladyfair use for bridal makeup? A6: We use professional-grade, high-quality products that are safe for all skin types and ensure a flawless finish. Q7: What other makeup services does Ladyfair offer in Khudabandpur? A7: Besides bridal makeup, we offer engagement, reception, party, and special occasion makeup services.

Posted By: 17th September 2024
Bridal Makeup Artist in Nawkothi
Introduction In Nawkothi, Ladyfair is the leading choice for brides who want to look their absolute best on their wedding day. Our at-home bridal makeup service brings expert beauty treatments to the comfort of your own home. Whether you're looking for a traditional bridal look, a flawless HD finish, or the elegance of airbrush makeup, our skilled makeup artist in Nawkothi is here to make your wedding day as perfect as you've imagined. Contact us today at 7004721239 to book your appointment. Why Ladyfair is the Top Choice for Bridal Makeup in Nawkothi? Experienced Makeup Artist Our makeup artist in Nawkothi has years of experience in bridal makeup, specializing in creating looks that highlight your natural beauty and complement your individual style. Convenient At-Home Service Ladyfair eliminates the hassle of traveling to a salon by offering luxurious at-home bridal makeup services, allowing you to enjoy a personalized beauty experience right at your doorstep in Nawkothi. Premium Quality Products We use only high-quality, professional-grade makeup products to ensure a flawless, long-lasting look that will keep you glowing throughout your special day. Bridal Makeup Pricing in Nawkothi Our bridal makeup services in Nawkothi are tailored to fit a range of preferences and budgets: Basic Bridal Makeup: ₹10,000 HD Bridal Makeup: ₹12,000 Airbrush Bridal Makeup: ₹18,000 For engagement and reception: Basic Engagement/Reception Makeup: ₹6,000 HD Engagement/Reception Makeup: ₹8,000 Airbrush Engagement/Reception Makeup: ₹12,000 For parties: Basic Party Makeup: ₹2,500 HD Party Makeup: ₹3,500 Popular Bridal Makeup Styles in Nawkothi Traditional Bridal Makeup Our traditional bridal makeup in Nawkothi features bold, vibrant colors and meticulous application, perfectly complementing traditional wedding attire to create an elegant and timeless look. HD Bridal Makeup HD bridal makeup provides a high-definition finish that ensures you look flawless in both photographs and in person, making you picture-perfect all day long. Airbrush Bridal Makeup Airbrush makeup delivers a lightweight, smooth finish with full coverage that lasts all day, ideal for brides seeking a natural yet polished look. How to Book Your Bridal Makeup with Ladyfair in Nawkothi Initial Contact: Call us at 7004721239 to discuss your bridal makeup needs and schedule an appointment. Consultation Session: Meet with our makeup artist to discuss your desired look, review your wedding attire, and plan the perfect makeup style. Makeup Trial: We offer trial sessions so you can preview your bridal makeup and make any necessary adjustments before the wedding day. Wedding Day Makeup: On your wedding day, our makeup artist will arrive at your location in Nawkothi to provide a flawless and stress-free makeup service. Testimonials from Brides in Nawkothi Sneha P., Nawkothi: "Ladyfair’s at-home makeup service was exactly what I needed. The makeup artist was incredibly skilled, and my bridal look was beyond perfect." Meera R., Nawkothi: "The airbrush makeup was flawless and lasted all day long. Ladyfair’s service made my wedding day stress-free and special." Ritika S., Nawkothi: "The HD makeup was stunning, and my photos turned out beautifully. Ladyfair’s service exceeded all my expectations." Preparing for Your Bridal Makeup Session To ensure the best results, follow these tips: Stay Hydrated: Drink plenty of water to keep your skin fresh and glowing. Consistent Skincare: Maintain a regular skincare routine leading up to your wedding. Avoid New Products: Stick to familiar skincare products to avoid any reactions. Communicate Clearly: Discuss your makeup preferences and concerns with our artist during your consultation. Additional Beauty Services by Ladyfair In addition to bridal makeup, Ladyfair offers: Engagement and Reception Makeup: Customized looks for all your pre-wedding events. Party Makeup: Perfect for special occasions and celebrations. Everyday Makeup: Enhance your daily look with our expert services. Special Occasion Makeup: Makeup for birthdays, anniversaries, and other significant events. The Future of Bridal Makeup in Nawkothi Ladyfair is committed to setting new standards in bridal beauty with our innovative at-home services in Nawkothi. As more brides experience our exceptional service, Ladyfair continues to grow as the preferred choice for bridal makeup. Q&A with Ladyfair’s Bridal Makeup Artist in Nawkothi Q1: What makes Ladyfair the best choice for bridal makeup in Nawkothi? A1: Ladyfair offers expert at-home bridal makeup services, combining skilled artistry with high-quality products for a flawless wedding look. Q2: What are the prices for bridal makeup services in Nawkothi? A2: Our bridal makeup services start at ₹10,000 for basic makeup, ₹12,000 for HD makeup, and ₹18,000 for airbrush makeup. Q3: How do I book Ladyfair’s bridal makeup services in Nawkothi? A3: You can book our services by calling 7004721239. We also offer consultations and trial sessions to help you achieve your desired look. Q4: What types of bridal makeup does Ladyfair offer in Nawkothi? A4: We offer traditional, HD, and airbrush bridal makeup styles to suit your preferences. Q5: Are makeup trials available before the wedding day? A5: Yes, we provide trial sessions to finalize your bridal look and make any necessary adjustments. Q6: What kind of products does Ladyfair use for bridal makeup? A6: We use professional-grade, high-quality products that are safe for all skin types and ensure a flawless finish. Q7: What other makeup services does Ladyfair offer in Nawkothi? A7: Besides bridal makeup, we offer engagement, reception, party, and special occasion makeup services.

Posted By: 17th September 2024
Bridal Makeup Artist in Garhpura
Introduction In Garhpura, Ladyfair is the leading choice for brides who want to look their absolute best on their wedding day. Our at-home bridal makeup service brings expert beauty treatments to the comfort of your own home. Whether you're looking for a traditional bridal look, a flawless HD finish, or the elegance of airbrush makeup, our skilled makeup artist in Garhpura is here to make your wedding day as perfect as you've imagined. Contact us today at 7004721239 to book your appointment. Why Ladyfair is the Top Choice for Bridal Makeup in Garhpura? Experienced Makeup Artist Our makeup artist in Garhpura has years of experience in bridal makeup, specializing in creating looks that highlight your natural beauty and complement your individual style. Convenient At-Home Service Ladyfair eliminates the hassle of traveling to a salon by offering luxurious at-home bridal makeup services, allowing you to enjoy a personalized beauty experience right at your doorstep in Garhpura. Premium Quality Products We use only high-quality, professional-grade makeup products to ensure a flawless, long-lasting look that will keep you glowing throughout your special day. Bridal Makeup Pricing in Garhpura Our bridal makeup services in Garhpura are tailored to fit a range of preferences and budgets: Basic Bridal Makeup: ₹10,000 HD Bridal Makeup: ₹12,000 Airbrush Bridal Makeup: ₹18,000 For engagement and reception: Basic Engagement/Reception Makeup: ₹6,000 HD Engagement/Reception Makeup: ₹8,000 Airbrush Engagement/Reception Makeup: ₹12,000 For parties: Basic Party Makeup: ₹2,500 HD Party Makeup: ₹3,500 Popular Bridal Makeup Styles in Garhpura Traditional Bridal Makeup Our traditional bridal makeup in Garhpura features bold, vibrant colors and meticulous application, perfectly complementing traditional wedding attire to create an elegant and timeless look. HD Bridal Makeup HD bridal makeup provides a high-definition finish that ensures you look flawless in both photographs and in person, making you picture-perfect all day long. Airbrush Bridal Makeup Airbrush makeup delivers a lightweight, smooth finish with full coverage that lasts all day, ideal for brides seeking a natural yet polished look. How to Book Your Bridal Makeup with Ladyfair in Garhpura Initial Contact: Call us at 7004721239 to discuss your bridal makeup needs and schedule an appointment. Consultation Session: Meet with our makeup artist to discuss your desired look, review your wedding attire, and plan the perfect makeup style. Makeup Trial: We offer trial sessions so you can preview your bridal makeup and make any necessary adjustments before the wedding day. Wedding Day Makeup: On your wedding day, our makeup artist will arrive at your location in Garhpura to provide a flawless and stress-free makeup service. Testimonials from Brides in Garhpura Sneha P., Garhpura: "Ladyfair’s at-home makeup service was exactly what I needed. The makeup artist was incredibly skilled, and my bridal look was beyond perfect." Meera R., Garhpura: "The airbrush makeup was flawless and lasted all day long. Ladyfair’s service made my wedding day stress-free and special." Ritika S., Garhpura: "The HD makeup was stunning, and my photos turned out beautifully. Ladyfair’s service exceeded all my expectations." Preparing for Your Bridal Makeup Session To ensure the best results, follow these tips: Stay Hydrated: Drink plenty of water to keep your skin fresh and glowing. Consistent Skincare: Maintain a regular skincare routine leading up to your wedding. Avoid New Products: Stick to familiar skincare products to avoid any reactions. Communicate Clearly: Discuss your makeup preferences and concerns with our artist during your consultation. Additional Beauty Services by Ladyfair In addition to bridal makeup, Ladyfair offers: Engagement and Reception Makeup: Customized looks for all your pre-wedding events. Party Makeup: Perfect for special occasions and celebrations. Everyday Makeup: Enhance your daily look with our expert services. Special Occasion Makeup: Makeup for birthdays, anniversaries, and other significant events. The Future of Bridal Makeup in Garhpura Ladyfair is committed to setting new standards in bridal beauty with our innovative at-home services in Garhpura. As more brides experience our exceptional service, Ladyfair continues to grow as the preferred choice for bridal makeup. Q&A with Ladyfair’s Bridal Makeup Artist in Garhpura Q1: What makes Ladyfair the best choice for bridal makeup in Garhpura? A1: Ladyfair offers expert at-home bridal makeup services, combining skilled artistry with high-quality products for a flawless wedding look. Q2: What are the prices for bridal makeup services in Garhpura? A2: Our bridal makeup services start at ₹10,000 for basic makeup, ₹12,000 for HD makeup, and ₹18,000 for airbrush makeup. Q3: How do I book Ladyfair’s bridal makeup services in Garhpura? A3: You can book our services by calling 7004721239. We also offer consultations and trial sessions to help you achieve your desired look. Q4: What types of bridal makeup does Ladyfair offer in Garhpura? A4: We offer traditional, HD, and airbrush bridal makeup styles to suit your preferences. Q5: Are makeup trials available before the wedding day? A5: Yes, we provide trial sessions to finalize your bridal look and make any necessary adjustments. Q6: What kind of products does Ladyfair use for bridal makeup? A6: We use professional-grade, high-quality products that are safe for all skin types and ensure a flawless finish. Q7: What other makeup services does Ladyfair offer in Garhpura? A7: Besides bridal makeup, we offer engagement, reception, party, and special occasion makeup services.

Posted By: 17th September 2024
Bridal Makeup Artist in Bakhari
Introduction In Bakhari, Ladyfair is the leading choice for brides who want to look their absolute best on their wedding day. Our at-home bridal makeup service brings expert beauty treatments to the comfort of your own home. Whether you're looking for a traditional bridal look, a flawless HD finish, or the elegance of airbrush makeup, our skilled makeup artist in Bakhari is here to make your wedding day as perfect as you've imagined. Contact us today at 7004721239 to book your appointment. Why Ladyfair is the Top Choice for Bridal Makeup in Bakhari? Experienced Makeup Artist Our makeup artist in Bakhari has years of experience in bridal makeup, specializing in creating looks that highlight your natural beauty and complement your individual style. Convenient At-Home Service Ladyfair eliminates the hassle of traveling to a salon by offering luxurious at-home bridal makeup services, allowing you to enjoy a personalized beauty experience right at your doorstep in Bakhari. Premium Quality Products We use only high-quality, professional-grade makeup products to ensure a flawless, long-lasting look that will keep you glowing throughout your special day. Bridal Makeup Pricing in Bakhari Our bridal makeup services in Bakhari are tailored to fit a range of preferences and budgets: Basic Bridal Makeup: ₹10,000 HD Bridal Makeup: ₹12,000 Airbrush Bridal Makeup: ₹18,000 For engagement and reception: Basic Engagement/Reception Makeup: ₹6,000 HD Engagement/Reception Makeup: ₹8,000 Airbrush Engagement/Reception Makeup: ₹12,000 For parties: Basic Party Makeup: ₹2,500 HD Party Makeup: ₹3,500 Popular Bridal Makeup Styles in Bakhari Traditional Bridal Makeup Our traditional bridal makeup in Bakhari features bold, vibrant colors and meticulous application, perfectly complementing traditional wedding attire to create an elegant and timeless look. HD Bridal Makeup HD bridal makeup provides a high-definition finish that ensures you look flawless in both photographs and in person, making you picture-perfect all day long. Airbrush Bridal Makeup Airbrush makeup delivers a lightweight, smooth finish with full coverage that lasts all day, ideal for brides seeking a natural yet polished look. How to Book Your Bridal Makeup with Ladyfair in Bakhari Initial Contact: Call us at 7004721239 to discuss your bridal makeup needs and schedule an appointment. Consultation Session: Meet with our makeup artist to discuss your desired look, review your wedding attire, and plan the perfect makeup style. Makeup Trial: We offer trial sessions so you can preview your bridal makeup and make any necessary adjustments before the wedding day. Wedding Day Makeup: On your wedding day, our makeup artist will arrive at your location in Bakhari to provide a flawless and stress-free makeup service. Testimonials from Brides in Bakhari Sneha P., Bakhari: "Ladyfair’s at-home makeup service was exactly what I needed. The makeup artist was incredibly skilled, and my bridal look was beyond perfect." Meera R., Bakhari: "The airbrush makeup was flawless and lasted all day long. Ladyfair’s service made my wedding day stress-free and special." Ritika S., Bakhari: "The HD makeup was stunning, and my photos turned out beautifully. Ladyfair’s service exceeded all my expectations." Preparing for Your Bridal Makeup Session To ensure the best results, follow these tips: Stay Hydrated: Drink plenty of water to keep your skin fresh and glowing. Consistent Skincare: Maintain a regular skincare routine leading up to your wedding. Avoid New Products: Stick to familiar skincare products to avoid any reactions. Communicate Clearly: Discuss your makeup preferences and concerns with our artist during your consultation. Additional Beauty Services by Ladyfair In addition to bridal makeup, Ladyfair offers: Engagement and Reception Makeup: Customized looks for all your pre-wedding events. Party Makeup: Perfect for special occasions and celebrations. Everyday Makeup: Enhance your daily look with our expert services. Special Occasion Makeup: Makeup for birthdays, anniversaries, and other significant events. The Future of Bridal Makeup in Bakhari Ladyfair is committed to setting new standards in bridal beauty with our innovative at-home services in Bakhari. As more brides experience our exceptional service, Ladyfair continues to grow as the preferred choice for bridal makeup. Q&A with Ladyfair’s Bridal Makeup Artist in Bakhari Q1: What makes Ladyfair the best choice for bridal makeup in Bakhari? A1: Ladyfair offers expert at-home bridal makeup services, combining skilled artistry with high-quality products for a flawless wedding look. Q2: What are the prices for bridal makeup services in Bakhari? A2: Our bridal makeup services start at ₹10,000 for basic makeup, ₹12,000 for HD makeup, and ₹18,000 for airbrush makeup. Q3: How do I book Ladyfair’s bridal makeup services in Bakhari? A3: You can book our services by calling 7004721239. We also offer consultations and trial sessions to help you achieve your desired look. Q4: What types of bridal makeup does Ladyfair offer in Bakhari? A4: We offer traditional, HD, and airbrush bridal makeup styles to suit your preferences. Q5: Are makeup trials available before the wedding day? A5: Yes, we provide trial sessions to finalize your bridal look and make any necessary adjustments. Q6: What kind of products does Ladyfair use for bridal makeup? A6: We use professional-grade, high-quality products that are safe for all skin types and ensure a flawless finish. Q7: What other makeup services does Ladyfair offer in Bakhari? A7: Besides bridal makeup, we offer engagement, reception, party, and special occasion makeup services.

Posted By: 17th September 2024
Bridal Makeup Artist in Chhorahi
Introduction In Chhorahi, Ladyfair is the leading choice for brides who want to look their absolute best on their wedding day. Our at-home bridal makeup service brings expert beauty treatments to the comfort of your own home. Whether you're looking for a traditional bridal look, a flawless HD finish, or the elegance of airbrush makeup, our skilled makeup artist in Chhorahi is here to make your wedding day as perfect as you've imagined. Contact us today at 7004721239 to book your appointment. Why Ladyfair is the Top Choice for Bridal Makeup in Chhorahi? Experienced Makeup Artist Our makeup artist in Chhorahi has years of experience in bridal makeup, specializing in creating looks that highlight your natural beauty and complement your individual style. Convenient At-Home Service Ladyfair eliminates the hassle of traveling to a salon by offering luxurious at-home bridal makeup services, allowing you to enjoy a personalized beauty experience right at your doorstep in Chhorahi. Premium Quality Products We use only high-quality, professional-grade makeup products to ensure a flawless, long-lasting look that will keep you glowing throughout your special day. Bridal Makeup Pricing in Chhorahi Our bridal makeup services in Chhorahi are tailored to fit a range of preferences and budgets: Basic Bridal Makeup: ₹10,000 HD Bridal Makeup: ₹12,000 Airbrush Bridal Makeup: ₹18,000 For engagement and reception: Basic Engagement/Reception Makeup: ₹6,000 HD Engagement/Reception Makeup: ₹8,000 Airbrush Engagement/Reception Makeup: ₹12,000 For parties: Basic Party Makeup: ₹2,500 HD Party Makeup: ₹3,500 Popular Bridal Makeup Styles in Chhorahi Traditional Bridal Makeup Our traditional bridal makeup in Chhorahi features bold, vibrant colors and meticulous application, perfectly complementing traditional wedding attire to create an elegant and timeless look. HD Bridal Makeup HD bridal makeup provides a high-definition finish that ensures you look flawless in both photographs and in person, making you picture-perfect all day long. Airbrush Bridal Makeup Airbrush makeup delivers a lightweight, smooth finish with full coverage that lasts all day, ideal for brides seeking a natural yet polished look. How to Book Your Bridal Makeup with Ladyfair in Chhorahi Initial Contact: Call us at 7004721239 to discuss your bridal makeup needs and schedule an appointment. Consultation Session: Meet with our makeup artist to discuss your desired look, review your wedding attire, and plan the perfect makeup style. Makeup Trial: We offer trial sessions so you can preview your bridal makeup and make any necessary adjustments before the wedding day. Wedding Day Makeup: On your wedding day, our makeup artist will arrive at your location in Chhorahi to provide a flawless and stress-free makeup service. Testimonials from Brides in Chhorahi Sneha P., Chhorahi: "Ladyfair’s at-home makeup service was exactly what I needed. The makeup artist was incredibly skilled, and my bridal look was beyond perfect." Meera R., Chhorahi: "The airbrush makeup was flawless and lasted all day long. Ladyfair’s service made my wedding day stress-free and special." Ritika S., Chhorahi: "The HD makeup was stunning, and my photos turned out beautifully. Ladyfair’s service exceeded all my expectations." Preparing for Your Bridal Makeup Session To ensure the best results, follow these tips: Stay Hydrated: Drink plenty of water to keep your skin fresh and glowing. Consistent Skincare: Maintain a regular skincare routine leading up to your wedding. Avoid New Products: Stick to familiar skincare products to avoid any reactions. Communicate Clearly: Discuss your makeup preferences and concerns with our artist during your consultation. Additional Beauty Services by Ladyfair In addition to bridal makeup, Ladyfair offers: Engagement and Reception Makeup: Customized looks for all your pre-wedding events. Party Makeup: Perfect for special occasions and celebrations. Everyday Makeup: Enhance your daily look with our expert services. Special Occasion Makeup: Makeup for birthdays, anniversaries, and other significant events. The Future of Bridal Makeup in Chhorahi Ladyfair is committed to setting new standards in bridal beauty with our innovative at-home services in Chhorahi. As more brides experience our exceptional service, Ladyfair continues to grow as the preferred choice for bridal makeup. Q&A with Ladyfair’s Bridal Makeup Artist in Chhorahi Q1: What makes Ladyfair the best choice for bridal makeup in Chhorahi? A1: Ladyfair offers expert at-home bridal makeup services, combining skilled artistry with high-quality products for a flawless wedding look. Q2: What are the prices for bridal makeup services in Chhorahi? A2: Our bridal makeup services start at ₹10,000 for basic makeup, ₹12,000 for HD makeup, and ₹18,000 for airbrush makeup. Q3: How do I book Ladyfair’s bridal makeup services in Chhorahi? A3: You can book our services by calling 7004721239. We also offer consultations and trial sessions to help you achieve your desired look. Q4: What types of bridal makeup does Ladyfair offer in Chhorahi? A4: We offer traditional, HD, and airbrush bridal makeup styles to suit your preferences. Q5: Are makeup trials available before the wedding day? A5: Yes, we provide trial sessions to finalize your bridal look and make any necessary adjustments. Q6: What kind of products does Ladyfair use for bridal makeup? A6: We use professional-grade, high-quality products that are safe for all skin types and ensure a flawless finish. Q7: What other makeup services does Ladyfair offer in Chhorahi? A7: Besides bridal makeup, we offer engagement, reception, party, and special occasion makeup services.

Posted By: 17th September 2024
Bridal Makeup Artist in Cheriya Bariyarpur
Introduction In Cheriya Bariyarpur, Ladyfair is the leading choice for brides who want to look their absolute best on their wedding day. Our at-home bridal makeup service brings expert beauty treatments to the comfort of your own home. Whether you're looking for a traditional bridal look, a flawless HD finish, or the elegance of airbrush makeup, our skilled makeup artist in Cheriya Bariyarpur is here to make your wedding day as perfect as you've imagined. Contact us today at 7004721239 to book your appointment. Why Ladyfair is the Top Choice for Bridal Makeup in Cheriya Bariyarpur? Experienced Makeup Artist Our makeup artist in Cheriya Bariyarpur has years of experience in bridal makeup, specializing in creating looks that highlight your natural beauty and complement your individual style. Convenient At-Home Service Ladyfair eliminates the hassle of traveling to a salon by offering luxurious at-home bridal makeup services, allowing you to enjoy a personalized beauty experience right at your doorstep in Cheriya Bariyarpur. Premium Quality Products We use only high-quality, professional-grade makeup products to ensure a flawless, long-lasting look that will keep you glowing throughout your special day. Bridal Makeup Pricing in Cheriya Bariyarpur Our bridal makeup services in Cheriya Bariyarpur are tailored to fit a range of preferences and budgets: Basic Bridal Makeup: ₹10,000 HD Bridal Makeup: ₹12,000 Airbrush Bridal Makeup: ₹18,000 For engagement and reception: Basic Engagement/Reception Makeup: ₹6,000 HD Engagement/Reception Makeup: ₹8,000 Airbrush Engagement/Reception Makeup: ₹12,000 For parties: Basic Party Makeup: ₹2,500 HD Party Makeup: ₹3,500 Popular Bridal Makeup Styles in Cheriya Bariyarpur Traditional Bridal Makeup Our traditional bridal makeup in Cheriya Bariyarpur features bold, vibrant colors and meticulous application, perfectly complementing traditional wedding attire to create an elegant and timeless look. HD Bridal Makeup HD bridal makeup provides a high-definition finish that ensures you look flawless in both photographs and in person, making you picture-perfect all day long. Airbrush Bridal Makeup Airbrush makeup delivers a lightweight, smooth finish with full coverage that lasts all day, ideal for brides seeking a natural yet polished look. How to Book Your Bridal Makeup with Ladyfair in Cheriya Bariyarpur Initial Contact: Call us at 7004721239 to discuss your bridal makeup needs and schedule an appointment. Consultation Session: Meet with our makeup artist to discuss your desired look, review your wedding attire, and plan the perfect makeup style. Makeup Trial: We offer trial sessions so you can preview your bridal makeup and make any necessary adjustments before the wedding day. Wedding Day Makeup: On your wedding day, our makeup artist will arrive at your location in Cheriya Bariyarpur to provide a flawless and stress-free makeup service. Testimonials from Brides in Cheriya Bariyarpur Sneha P., Cheriya Bariyarpur: "Ladyfair’s at-home makeup service was exactly what I needed. The makeup artist was incredibly skilled, and my bridal look was beyond perfect." Meera R., Cheriya Bariyarpur: "The airbrush makeup was flawless and lasted all day long. Ladyfair’s service made my wedding day stress-free and special." Ritika S., Cheriya Bariyarpur: "The HD makeup was stunning, and my photos turned out beautifully. Ladyfair’s service exceeded all my expectations." Preparing for Your Bridal Makeup Session To ensure the best results, follow these tips: Stay Hydrated: Drink plenty of water to keep your skin fresh and glowing. Consistent Skincare: Maintain a regular skincare routine leading up to your wedding. Avoid New Products: Stick to familiar skincare products to avoid any reactions. Communicate Clearly: Discuss your makeup preferences and concerns with our artist during your consultation. Additional Beauty Services by Ladyfair In addition to bridal makeup, Ladyfair offers: Engagement and Reception Makeup: Customized looks for all your pre-wedding events. Party Makeup: Perfect for special occasions and celebrations. Everyday Makeup: Enhance your daily look with our expert services. Special Occasion Makeup: Makeup for birthdays, anniversaries, and other significant events. The Future of Bridal Makeup in Cheriya Bariyarpur Ladyfair is committed to setting new standards in bridal beauty with our innovative at-home services in Cheriya Bariyarpur. As more brides experience our exceptional service, Ladyfair continues to grow as the preferred choice for bridal makeup. Q&A with Ladyfair’s Bridal Makeup Artist in Cheriya Bariyarpur Q1: What makes Ladyfair the best choice for bridal makeup in Cheriya Bariyarpur? A1: Ladyfair offers expert at-home bridal makeup services, combining skilled artistry with high-quality products for a flawless wedding look. Q2: What are the prices for bridal makeup services in Cheriya Bariyarpur? A2: Our bridal makeup services start at ₹10,000 for basic makeup, ₹12,000 for HD makeup, and ₹18,000 for airbrush makeup. Q3: How do I book Ladyfair’s bridal makeup services in Cheriya Bariyarpur? A3: You can book our services by calling 7004721239. We also offer consultations and trial sessions to help you achieve your desired look. Q4: What types of bridal makeup does Ladyfair offer in Cheriya Bariyarpur? A4: We offer traditional, HD, and airbrush bridal makeup styles to suit your preferences. Q5: Are makeup trials available before the wedding day? A5: Yes, we provide trial sessions to finalize your bridal look and make any necessary adjustments. Q6: What kind of products does Ladyfair use for bridal makeup? A6: We use professional-grade, high-quality products that are safe for all skin types and ensure a flawless finish. Q7: What other makeup services does Ladyfair offer in Cheriya Bariyarpur? A7: Besides bridal makeup, we offer engagement, reception, party, and special occasion makeup services.

Posted By: 17th September 2024
Bridal Makeup Artist in Barahat
Introduction In Barahat, Ladyfair is the go-to choice for brides who want to shine on their wedding day. Our at-home bridal makeup service brings professional beauty treatments right to your door. Whether you're aiming for a traditional bridal look, a flawless HD finish, or an airbrush look that lasts all day, our skilled makeup artist in Barahat is here to make your dream wedding look a reality. Contact us today at 7004721239 to book your appointment. Why Ladyfair is the Top Choice for Bridal Makeup in Barahat Experienced Makeup Artist Our makeup artist in Barahat has extensive experience in bridal makeup, creating customized looks that enhance your natural beauty while complementing your style. Convenient At-Home Service No need to travel to a salon! Ladyfair offers the ultimate convenience by providing luxurious at-home makeup services, ensuring a stress-free experience right at your doorstep in Barahat. Premium Quality Products We use only the best professional-grade makeup products, guaranteeing a long-lasting and flawless look that will keep you glowing on your special day. Bridal Makeup Pricing in Barahat Our pricing is tailored to suit different preferences and budgets: Basic Bridal Makeup: ₹10,000 HD Bridal Makeup: ₹12,000 Airbrush Bridal Makeup: ₹18,000 For engagement and reception: Basic Engagement/Reception Makeup: ₹6,000 HD Engagement/Reception Makeup: ₹8,000 Airbrush Engagement/Reception Makeup: ₹12,000 For parties: Basic Party Makeup: ₹2,500 HD Party Makeup: ₹3,500 Popular Bridal Makeup Styles in Barahat Traditional Bridal Makeup Vibrant colors and expert application for a classic and elegant look that pairs perfectly with traditional wedding attire. HD Bridal Makeup High-definition makeup for a flawless, picture-perfect appearance in photos and in person throughout the day. Airbrush Bridal Makeup A lightweight, smooth finish that offers full coverage, ideal for brides seeking a natural yet polished look. How to Book Your Bridal Makeup with Ladyfair in Barahat Initial Contact: Call us at 7004721239 to discuss your bridal makeup needs and schedule your appointment. Consultation Session: Meet with our makeup artist to plan your look, discuss your wedding attire, and review your style preferences. Makeup Trial: We offer trial sessions so you can preview your bridal look and make any necessary adjustments ahead of your big day. Wedding Day Makeup: Our makeup artist will arrive at your location in Barahat on your wedding day for a flawless, stress-free service. Testimonials from Brides in Barahat Ritika S., Barahat: "Ladyfair’s at-home service made my wedding day so much easier! The makeup artist was professional and understood exactly what I wanted." Sneha P., Barahat: "I went for airbrush makeup and it stayed flawless all day long. Ladyfair’s service made everything stress-free." Meera R., Barahat: "The HD makeup looked amazing in photos, and the at-home service was perfect for my hectic schedule. I highly recommend Ladyfair." Preparing for Your Bridal Makeup Session Stay Hydrated: Drink plenty of water to keep your skin fresh and glowing. Consistent Skincare: Stick to a regular skincare routine leading up to your wedding. Avoid New Products: Avoid introducing new skincare products to prevent unexpected reactions. Communicate Clearly: Discuss your preferences and concerns with our makeup artist during the consultation. Additional Beauty Services by Ladyfair In addition to bridal makeup, Ladyfair offers a wide range of beauty services: Engagement and Reception Makeup: Tailored looks for pre-wedding events. Party Makeup: Perfect for all your special occasions and celebrations. Everyday Makeup: Get a refined, everyday look with our professional services. Special Occasion Makeup: Make birthdays, anniversaries, and other events even more special with Ladyfair. The Future of Bridal Makeup in Barahat Ladyfair is dedicated to setting new standards in bridal beauty with our at-home services in Barahat. As more brides choose Ladyfair for their special day, we continue to grow as the top choice for bridal makeup services in the area. Q&A with Ladyfair’s Bridal Makeup Artist in Barahat Q1: What makes Ladyfair the best choice for bridal makeup in Barahat? A1: Ladyfair combines expert at-home bridal makeup services with high-quality products to deliver a flawless look. Q2: What are the prices for bridal makeup services in Barahat? A2: Our prices start at ₹10,000 for basic makeup, ₹12,000 for HD makeup, and ₹18,000 for airbrush makeup. Q3: How do I book Ladyfair’s bridal makeup services in Barahat? A3: Call us at 7004721239 to schedule your consultation and trial session. Q4: What bridal makeup styles does Ladyfair offer? A4: We offer traditional, HD, and airbrush bridal makeup styles to suit your preferences. Q5: Can I schedule a makeup trial before my wedding day? A5: Yes, we offer trial sessions so you can finalize your look before your wedding. Q6: What products does Ladyfair use for bridal makeup? A6: We use professional-grade, high-quality products that are safe for all skin types. Q7: What other services does Ladyfair offer in Barahat? A7: We offer engagement, reception, party, and special occasion makeup services, in addition to bridal makeup.

Posted By: 16th September 2024
Bridal Makeup Artist in Mansoorchak
Introduction In Mansoorchak, Ladyfair is the leading choice for brides who want to look their absolute best on their wedding day. Our at-home bridal makeup service brings expert beauty treatments to the comfort of your own home. Whether you're looking for a traditional bridal look, a flawless HD finish, or the elegance of airbrush makeup, our skilled makeup artist in Mansoorchak is here to make your wedding day as perfect as you've imagined. Contact us today at 7004721239 to book your appointment. Why Ladyfair is the Top Choice for Bridal Makeup in Mansoorchak? Experienced Makeup Artist Our makeup artist in Mansoorchak has years of experience in bridal makeup, specializing in creating looks that highlight your natural beauty and complement your individual style. Convenient At-Home Service Ladyfair eliminates the hassle of traveling to a salon by offering luxurious at-home bridal makeup services, allowing you to enjoy a personalized beauty experience right at your doorstep in Mansoorchak. Premium Quality Products We use only high-quality, professional-grade makeup products to ensure a flawless, long-lasting look that will keep you glowing throughout your special day. Bridal Makeup Pricing in Mansoorchak Our bridal makeup services in Mansoorchak are tailored to fit a range of preferences and budgets: Basic Bridal Makeup: ₹10,000 HD Bridal Makeup: ₹12,000 Airbrush Bridal Makeup: ₹18,000 For engagement and reception: Basic Engagement/Reception Makeup: ₹6,000 HD Engagement/Reception Makeup: ₹8,000 Airbrush Engagement/Reception Makeup: ₹12,000 For parties: Basic Party Makeup: ₹2,500 HD Party Makeup: ₹3,500 Popular Bridal Makeup Styles in Mansoorchak Traditional Bridal Makeup Our traditional bridal makeup in Mansoorchak features bold, vibrant colors and meticulous application, perfectly complementing traditional wedding attire to create an elegant and timeless look. HD Bridal Makeup HD bridal makeup provides a high-definition finish that ensures you look flawless in both photographs and in person, making you picture-perfect all day long. Airbrush Bridal Makeup Airbrush makeup delivers a lightweight, smooth finish with full coverage that lasts all day, ideal for brides seeking a natural yet polished look. How to Book Your Bridal Makeup with Ladyfair in Mansoorchak Initial Contact: Call us at 7004721239 to discuss your bridal makeup needs and schedule an appointment. Consultation Session: Meet with our makeup artist to discuss your desired look, review your wedding attire, and plan the perfect makeup style. Makeup Trial: We offer trial sessions so you can preview your bridal makeup and make any necessary adjustments before the wedding day. Wedding Day Makeup: On your wedding day, our makeup artist will arrive at your location in Mansoorchak to provide a flawless and stress-free makeup service. Testimonials from Brides in Mansoorchak Sneha P., Mansoorchak: "Ladyfair’s at-home makeup service was exactly what I needed. The makeup artist was incredibly skilled, and my bridal look was beyond perfect." Meera R., Mansoorchak: "The airbrush makeup was flawless and lasted all day long. Ladyfair’s service made my wedding day stress-free and special." Ritika S., Mansoorchak: "The HD makeup was stunning, and my photos turned out beautifully. Ladyfair’s service exceeded all my expectations." Preparing for Your Bridal Makeup Session To ensure the best results, follow these tips: Stay Hydrated: Drink plenty of water to keep your skin fresh and glowing. Consistent Skincare: Maintain a regular skincare routine leading up to your wedding. Avoid New Products: Stick to familiar skincare products to avoid any reactions. Communicate Clearly: Discuss your makeup preferences and concerns with our artist during your consultation. Additional Beauty Services by Ladyfair In addition to bridal makeup, Ladyfair offers: Engagement and Reception Makeup: Customized looks for all your pre-wedding events. Party Makeup: Perfect for special occasions and celebrations. Everyday Makeup: Enhance your daily look with our expert services. Special Occasion Makeup: Makeup for birthdays, anniversaries, and other significant events. The Future of Bridal Makeup in Mansoorchak Ladyfair is committed to setting new standards in bridal beauty with our innovative at-home services in Mansoorchak. As more brides experience our exceptional service, Ladyfair continues to grow as the preferred choice for bridal makeup. Q&A with Ladyfair’s Bridal Makeup Artist in Mansoorchak Q1: What makes Ladyfair the best choice for bridal makeup in Mansoorchak? A1: Ladyfair offers expert at-home bridal makeup services, combining skilled artistry with high-quality products for a flawless wedding look. Q2: What are the prices for bridal makeup services in Mansoorchak? A2: Our bridal makeup services start at ₹10,000 for basic makeup, ₹12,000 for HD makeup, and ₹18,000 for airbrush makeup. Q3: How do I book Ladyfair’s bridal makeup services in Mansoorchak? A3: You can book our services by calling 7004721239. We also offer consultations and trial sessions to help you achieve your desired look. Q4: What types of bridal makeup does Ladyfair offer in Mansoorchak? A4: We offer traditional, HD, and airbrush bridal makeup styles to suit your preferences. Q5: Are makeup trials available before the wedding day? A5: Yes, we provide trial sessions to finalize your bridal look and make any necessary adjustments. Q6: What kind of products does Ladyfair use for bridal makeup? A6: We use professional-grade, high-quality products that are safe for all skin types and ensure a flawless finish. Q7: What other makeup services does Ladyfair offer in Mansoorchak? A7: Besides bridal makeup, we offer engagement, reception, party, and special occasion makeup services.

Posted By: 16th September 2024
Bridal Makeup Artist in Bhagwanpur bhagwanpur
Introduction In Bhagwanpur, Ladyfair is the leading choice for brides who want to look their absolute best on their wedding day. Our at-home bridal makeup service brings expert beauty treatments to the comfort of your own home. Whether you're looking for a traditional bridal look, a flawless HD finish, or the elegance of airbrush makeup, our skilled makeup artist in Bhagwanpur is here to make your wedding day as perfect as you've imagined. Contact us today at 7004721239 to book your appointment. Why Ladyfair is the Top Choice for Bridal Makeup in Bhagwanpur? Experienced Makeup Artist Our makeup artist in Bhagwanpur has years of experience in bridal makeup, specializing in creating looks that highlight your natural beauty and complement your individual style. Convenient At-Home Service Ladyfair eliminates the hassle of traveling to a salon by offering luxurious at-home bridal makeup services, allowing you to enjoy a personalized beauty experience right at your doorstep in Bhagwanpur. Premium Quality Products We use only high-quality, professional-grade makeup products to ensure a flawless, long-lasting look that will keep you glowing throughout your special day. Bridal Makeup Pricing in Bhagwanpur Our bridal makeup services in Bhagwanpur are tailored to fit a range of preferences and budgets: Basic Bridal Makeup: ₹10,000 HD Bridal Makeup: ₹12,000 Airbrush Bridal Makeup: ₹18,000 For engagement and reception: Basic Engagement/Reception Makeup: ₹6,000 HD Engagement/Reception Makeup: ₹8,000 Airbrush Engagement/Reception Makeup: ₹12,000 For parties: Basic Party Makeup: ₹2,500 HD Party Makeup: ₹3,500 Popular Bridal Makeup Styles in Bhagwanpur Traditional Bridal Makeup Our traditional bridal makeup in Bhagwanpur features bold, vibrant colors and meticulous application, perfectly complementing traditional wedding attire to create an elegant and timeless look. HD Bridal Makeup HD bridal makeup provides a high-definition finish that ensures you look flawless in both photographs and in person, making you picture-perfect all day long. Airbrush Bridal Makeup Airbrush makeup delivers a lightweight, smooth finish with full coverage that lasts all day, ideal for brides seeking a natural yet polished look. How to Book Your Bridal Makeup with Ladyfair in Bhagwanpur Initial Contact: Call us at 7004721239 to discuss your bridal makeup needs and schedule an appointment. Consultation Session: Meet with our makeup artist to discuss your desired look, review your wedding attire, and plan the perfect makeup style. Makeup Trial: We offer trial sessions so you can preview your bridal makeup and make any necessary adjustments before the wedding day. Wedding Day Makeup: On your wedding day, our makeup artist will arrive at your location in Bhagwanpur to provide a flawless and stress-free makeup service. Testimonials from Brides in Bhagwanpur Sneha P., Bhagwanpur: "Ladyfair’s at-home makeup service was exactly what I needed. The makeup artist was incredibly skilled, and my bridal look was beyond perfect." Meera R., Bhagwanpur: "The airbrush makeup was flawless and lasted all day long. Ladyfair’s service made my wedding day stress-free and special." Ritika S., Bhagwanpur: "The HD makeup was stunning, and my photos turned out beautifully. Ladyfair’s service exceeded all my expectations." Preparing for Your Bridal Makeup Session To ensure the best results, follow these tips: Stay Hydrated: Drink plenty of water to keep your skin fresh and glowing. Consistent Skincare: Maintain a regular skincare routine leading up to your wedding. Avoid New Products: Stick to familiar skincare products to avoid any reactions. Communicate Clearly: Discuss your makeup preferences and concerns with our artist during your consultation. Additional Beauty Services by Ladyfair In addition to bridal makeup, Ladyfair offers: Engagement and Reception Makeup: Customized looks for all your pre-wedding events. Party Makeup: Perfect for special occasions and celebrations. Everyday Makeup: Enhance your daily look with our expert services. Special Occasion Makeup: Makeup for birthdays, anniversaries, and other significant events. The Future of Bridal Makeup in Bhagwanpur Ladyfair is committed to setting new standards in bridal beauty with our innovative at-home services in Bhagwanpur. As more brides experience our exceptional service, Ladyfair continues to grow as the preferred choice for bridal makeup. Q&A with Ladyfair’s Bridal Makeup Artist in Bhagwanpur Q1: What makes Ladyfair the best choice for bridal makeup in Bhagwanpur? A1: Ladyfair offers expert at-home bridal makeup services, combining skilled artistry with high-quality products for a flawless wedding look. Q2: What are the prices for bridal makeup services in Bhagwanpur? A2: Our bridal makeup services start at ₹10,000 for basic makeup, ₹12,000 for HD makeup, and ₹18,000 for airbrush makeup. Q3: How do I book Ladyfair’s bridal makeup services in Bhagwanpur? A3: You can book our services by calling 7004721239. We also offer consultations and trial sessions to help you achieve your desired look. Q4: What types of bridal makeup does Ladyfair offer in Bhagwanpur? A4: We offer traditional, HD, and airbrush bridal makeup styles to suit your preferences. Q5: Are makeup trials available before the wedding day? A5: Yes, we provide trial sessions to finalize your bridal look and make any necessary adjustments. Q6: What kind of products does Ladyfair use for bridal makeup? A6: We use professional-grade, high-quality products that are safe for all skin types and ensure a flawless finish. Q7: What other makeup services does Ladyfair offer in Bhagwanpur? A7: Besides bridal makeup, we offer engagement, reception, party, and special occasion makeup services.

Posted By: 16th September 2024
Bridal Makeup Artist in Bachhwara
Introduction In Bachhwara, Ladyfair is the leading choice for brides who want to look their absolute best on their wedding day. Our at-home bridal makeup service brings expert beauty treatments to the comfort of your own home. Whether you're looking for a traditional bridal look, a flawless HD finish, or the elegance of airbrush makeup, our skilled makeup artist in Bachhwara is here to make your wedding day as perfect as you've imagined. Contact us today at 7004721239 to book your appointment. Why Ladyfair is the Top Choice for Bridal Makeup in Bachhwara? Experienced Makeup Artist Our makeup artist in Bachhwara has years of experience in bridal makeup, specializing in creating looks that highlight your natural beauty and complement your individual style. Convenient At-Home Service Ladyfair eliminates the hassle of traveling to a salon by offering luxurious at-home bridal makeup services, allowing you to enjoy a personalized beauty experience right at your doorstep in Bachhwara. Premium Quality Products We use only high-quality, professional-grade makeup products to ensure a flawless, long-lasting look that will keep you glowing throughout your special day. Bridal Makeup Pricing in Bachhwara Our bridal makeup services in Bachhwara are tailored to fit a range of preferences and budgets: Basic Bridal Makeup: ₹10,000 HD Bridal Makeup: ₹12,000 Airbrush Bridal Makeup: ₹18,000 For engagement and reception: Basic Engagement/Reception Makeup: ₹6,000 HD Engagement/Reception Makeup: ₹8,000 Airbrush Engagement/Reception Makeup: ₹12,000 For parties: Basic Party Makeup: ₹2,500 HD Party Makeup: ₹3,500 Popular Bridal Makeup Styles in Bachhwara Traditional Bridal Makeup Our traditional bridal makeup in Bachhwara features bold, vibrant colors and meticulous application, perfectly complementing traditional wedding attire to create an elegant and timeless look. HD Bridal Makeup HD bridal makeup provides a high-definition finish that ensures you look flawless in both photographs and in person, making you picture-perfect all day long. Airbrush Bridal Makeup Airbrush makeup delivers a lightweight, smooth finish with full coverage that lasts all day, ideal for brides seeking a natural yet polished look. How to Book Your Bridal Makeup with Ladyfair in Bachhwara Initial Contact: Call us at 7004721239 to discuss your bridal makeup needs and schedule an appointment. Consultation Session: Meet with our makeup artist to discuss your desired look, review your wedding attire, and plan the perfect makeup style. Makeup Trial: We offer trial sessions so you can preview your bridal makeup and make any necessary adjustments before the wedding day. Wedding Day Makeup: On your wedding day, our makeup artist will arrive at your location in Bachhwara to provide a flawless and stress-free makeup service. Testimonials from Brides in Bachhwara Sneha P., Bachhwara: "Ladyfair’s at-home makeup service was exactly what I needed. The makeup artist was incredibly skilled, and my bridal look was beyond perfect." Meera R., Bachhwara: "The airbrush makeup was flawless and lasted all day long. Ladyfair’s service made my wedding day stress-free and special." Ritika S., Bachhwara: "The HD makeup was stunning, and my photos turned out beautifully. Ladyfair’s service exceeded all my expectations." Preparing for Your Bridal Makeup Session To ensure the best results, follow these tips: Stay Hydrated: Drink plenty of water to keep your skin fresh and glowing. Consistent Skincare: Maintain a regular skincare routine leading up to your wedding. Avoid New Products: Stick to familiar skincare products to avoid any reactions. Communicate Clearly: Discuss your makeup preferences and concerns with our artist during your consultation. Additional Beauty Services by Ladyfair In addition to bridal makeup, Ladyfair offers: Engagement and Reception Makeup: Customized looks for all your pre-wedding events. Party Makeup: Perfect for special occasions and celebrations. Everyday Makeup: Enhance your daily look with our expert services. Special Occasion Makeup: Makeup for birthdays, anniversaries, and other significant events. The Future of Bridal Makeup in Bachhwara Ladyfair is committed to setting new standards in bridal beauty with our innovative at-home services in Bachhwara. As more brides experience our exceptional service, Ladyfair continues to grow as the preferred choice for bridal makeup. Q&A with Ladyfair’s Bridal Makeup Artist in Bachhwara Q1: What makes Ladyfair the best choice for bridal makeup in Bachhwara? A1: Ladyfair offers expert at-home bridal makeup services, combining skilled artistry with high-quality products for a flawless wedding look. Q2: What are the prices for bridal makeup services in Bachhwara? A2: Our bridal makeup services start at ₹10,000 for basic makeup, ₹12,000 for HD makeup, and ₹18,000 for airbrush makeup. Q3: How do I book Ladyfair’s bridal makeup services in Bachhwara? A3: You can book our services by calling 7004721239. We also offer consultations and trial sessions to help you achieve your desired look. Q4: What types of bridal makeup does Ladyfair offer in Bachhwara? A4: We offer traditional, HD, and airbrush bridal makeup styles to suit your preferences. Q5: Are makeup trials available before the wedding day? A5: Yes, we provide trial sessions to finalize your bridal look and make any necessary adjustments. Q6: What kind of products does Ladyfair use for bridal makeup? A6: We use professional-grade, high-quality products that are safe for all skin types and ensure a flawless finish. Q7: What other makeup services does Ladyfair offer in Bachhwara? A7: Besides bridal makeup, we offer engagement, reception, party, and special occasion makeup services.

Posted By: 16th September 2024
Bridal Makeup Artist in Teghra
Introduction In Teghra, Ladyfair is the leading choice for brides who want to look their absolute best on their wedding day. Our at-home bridal makeup service brings expert beauty treatments to the comfort of your own home. Whether you're looking for a traditional bridal look, a flawless HD finish, or the elegance of airbrush makeup, our skilled makeup artist in Teghra is here to make your wedding day as perfect as you've imagined. Contact us today at 7004721239 to book your appointment. Why Ladyfair is the Top Choice for Bridal Makeup in Teghra? Experienced Makeup Artist Our makeup artist in Teghra has years of experience in bridal makeup, specializing in creating looks that highlight your natural beauty and complement your individual style. Convenient At-Home Service Ladyfair eliminates the hassle of traveling to a salon by offering luxurious at-home bridal makeup services, allowing you to enjoy a personalized beauty experience right at your doorstep in Teghra. Premium Quality Products We use only high-quality, professional-grade makeup products to ensure a flawless, long-lasting look that will keep you glowing throughout your special day. Bridal Makeup Pricing in Teghra Our bridal makeup services in Teghra are tailored to fit a range of preferences and budgets: Basic Bridal Makeup: ₹10,000 HD Bridal Makeup: ₹12,000 Airbrush Bridal Makeup: ₹18,000 For engagement and reception: Basic Engagement/Reception Makeup: ₹6,000 HD Engagement/Reception Makeup: ₹8,000 Airbrush Engagement/Reception Makeup: ₹12,000 For parties: Basic Party Makeup: ₹2,500 HD Party Makeup: ₹3,500 Popular Bridal Makeup Styles in Teghra Traditional Bridal Makeup Our traditional bridal makeup in Teghra features bold, vibrant colors and meticulous application, perfectly complementing traditional wedding attire to create an elegant and timeless look. HD Bridal Makeup HD bridal makeup provides a high-definition finish that ensures you look flawless in both photographs and in person, making you picture-perfect all day long. Airbrush Bridal Makeup Airbrush makeup delivers a lightweight, smooth finish with full coverage that lasts all day, ideal for brides seeking a natural yet polished look. How to Book Your Bridal Makeup with Ladyfair in Teghra Initial Contact: Call us at 7004721239 to discuss your bridal makeup needs and schedule an appointment. Consultation Session: Meet with our makeup artist to discuss your desired look, review your wedding attire, and plan the perfect makeup style. Makeup Trial: We offer trial sessions so you can preview your bridal makeup and make any necessary adjustments before the wedding day. Wedding Day Makeup: On your wedding day, our makeup artist will arrive at your location in Teghra to provide a flawless and stress-free makeup service. Testimonials from Brides in Teghra Sneha P., Teghra: "Ladyfair’s at-home makeup service was exactly what I needed. The makeup artist was incredibly skilled, and my bridal look was beyond perfect." Meera R., Teghra: "The airbrush makeup was flawless and lasted all day long. Ladyfair’s service made my wedding day stress-free and special." Ritika S., Teghra: "The HD makeup was stunning, and my photos turned out beautifully. Ladyfair’s service exceeded all my expectations." Preparing for Your Bridal Makeup Session To ensure the best results, follow these tips: Stay Hydrated: Drink plenty of water to keep your skin fresh and glowing. Consistent Skincare: Maintain a regular skincare routine leading up to your wedding. Avoid New Products: Stick to familiar skincare products to avoid any reactions. Communicate Clearly: Discuss your makeup preferences and concerns with our artist during your consultation. Additional Beauty Services by Ladyfair In addition to bridal makeup, Ladyfair offers: Engagement and Reception Makeup: Customized looks for all your pre-wedding events. Party Makeup: Perfect for special occasions and celebrations. Everyday Makeup: Enhance your daily look with our expert services. Special Occasion Makeup: Makeup for birthdays, anniversaries, and other significant events. The Future of Bridal Makeup in Teghra Ladyfair is committed to setting new standards in bridal beauty with our innovative at-home services in Teghra. As more brides experience our exceptional service, Ladyfair continues to grow as the preferred choice for bridal makeup. Q&A with Ladyfair’s Bridal Makeup Artist in Teghra Q1: What makes Ladyfair the best choice for bridal makeup in Teghra? A1: Ladyfair offers expert at-home bridal makeup services, combining skilled artistry with high-quality products for a flawless wedding look. Q2: What are the prices for bridal makeup services in Teghra? A2: Our bridal makeup services start at ₹10,000 for basic makeup, ₹12,000 for HD makeup, and ₹18,000 for airbrush makeup. Q3: How do I book Ladyfair’s bridal makeup services in Teghra? A3: You can book our services by calling 7004721239. We also offer consultations and trial sessions to help you achieve your desired look. Q4: What types of bridal makeup does Ladyfair offer in Teghra? A4: We offer traditional, HD, and airbrush bridal makeup styles to suit your preferences. Q5: Are makeup trials available before the wedding day? A5: Yes, we provide trial sessions to finalize your bridal look and make any necessary adjustments. Q6: What kind of products does Ladyfair use for bridal makeup? A6: We use professional-grade, high-quality products that are safe for all skin types and ensure a flawless finish. Q7: What other makeup services does Ladyfair offer in Teghra? A7: Besides bridal makeup, we offer engagement, reception, party, and special occasion makeup services.
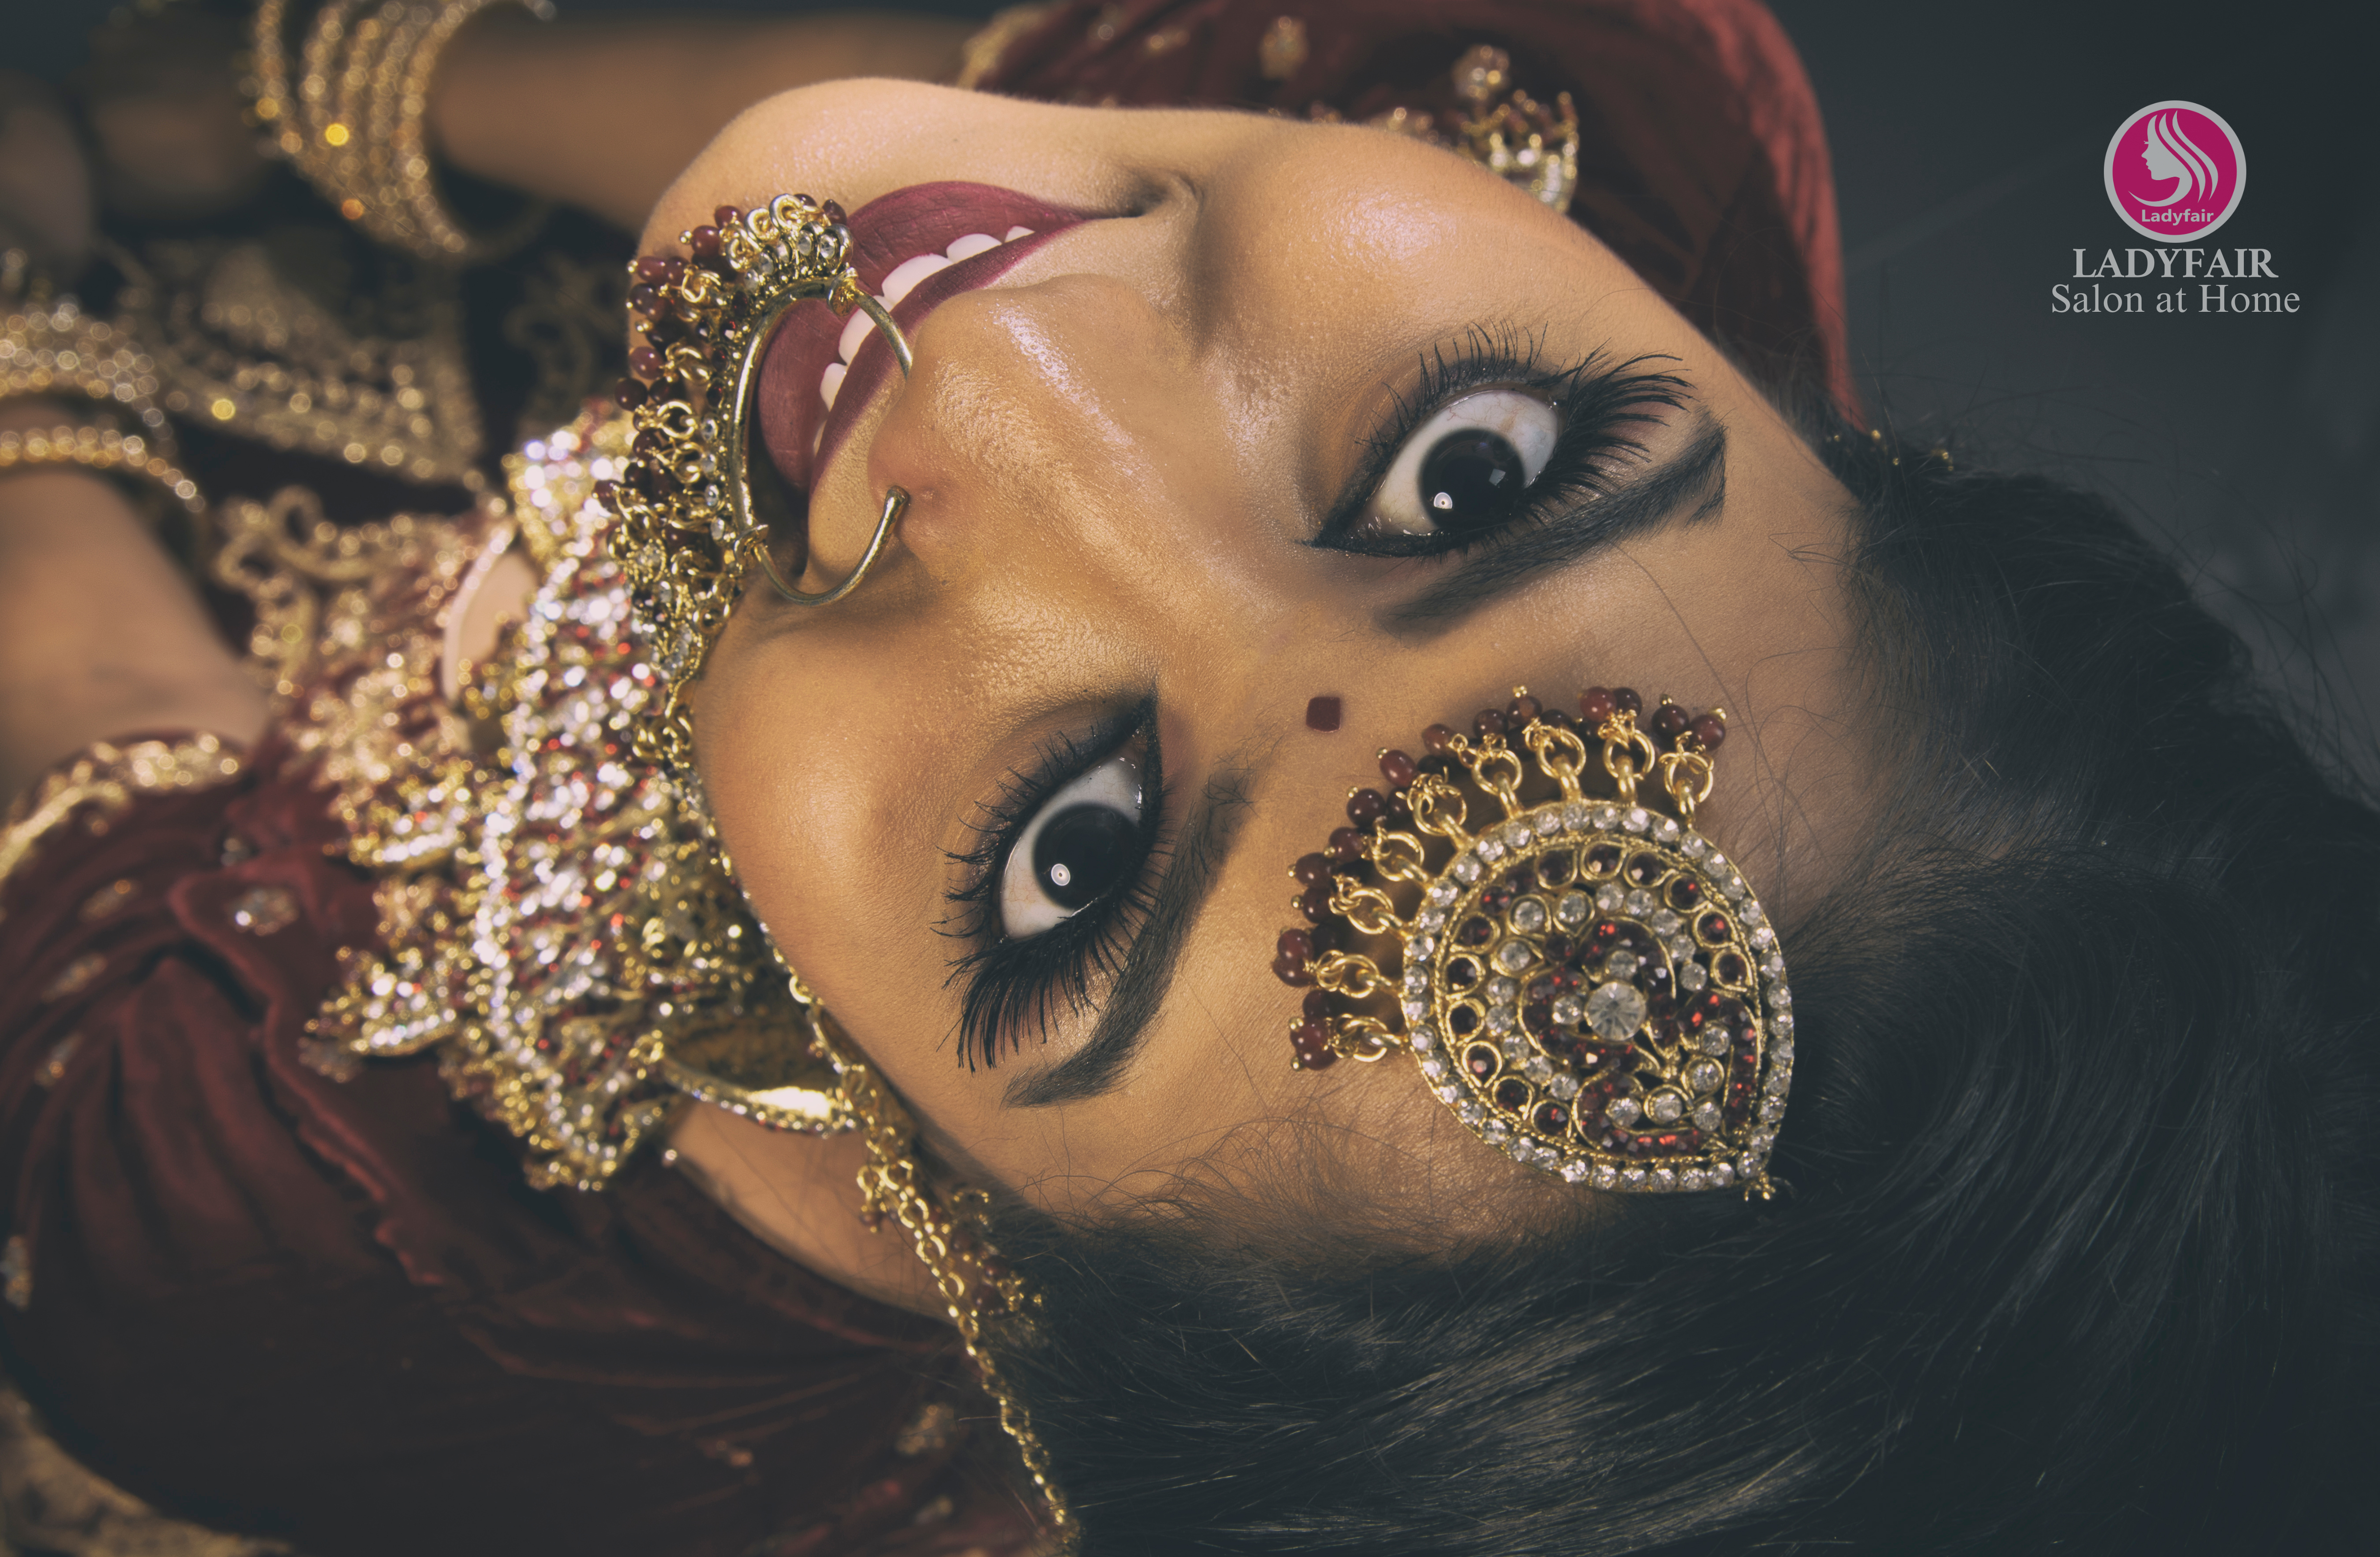
Posted By: 16th September 2024
Bridal Makeup Artist in Begusarai begusarai
Introduction In Begusarai, Ladyfair is the leading choice for brides who want to look their absolute best on their wedding day. Our at-home bridal makeup service brings expert beauty treatments to the comfort of your own home. Whether you're looking for a traditional bridal look, a flawless HD finish, or the elegance of airbrush makeup, our skilled makeup artist in Begusarai is here to make your wedding day as perfect as you've imagined. Contact us today at 7004721239 to book your appointment. Why Ladyfair is the Top Choice for Bridal Makeup in Begusarai? Experienced Makeup Artist Our makeup artist in Begusarai has years of experience in bridal makeup, specializing in creating looks that highlight your natural beauty and complement your individual style. Convenient At-Home Service Ladyfair eliminates the hassle of traveling to a salon by offering luxurious at-home bridal makeup services, allowing you to enjoy a personalized beauty experience right at your doorstep in Begusarai. Premium Quality Products We use only high-quality, professional-grade makeup products to ensure a flawless, long-lasting look that will keep you glowing throughout your special day. Bridal Makeup Pricing in Begusarai Our bridal makeup services in Begusarai are tailored to fit a range of preferences and budgets: Basic Bridal Makeup: ₹10,000 HD Bridal Makeup: ₹12,000 Airbrush Bridal Makeup: ₹18,000 For engagement and reception: Basic Engagement/Reception Makeup: ₹6,000 HD Engagement/Reception Makeup: ₹8,000 Airbrush Engagement/Reception Makeup: ₹12,000 For parties: Basic Party Makeup: ₹2,500 HD Party Makeup: ₹3,500 Popular Bridal Makeup Styles in Begusarai Traditional Bridal Makeup Our traditional bridal makeup in Begusarai features bold, vibrant colors and meticulous application, perfectly complementing traditional wedding attire to create an elegant and timeless look. HD Bridal Makeup HD bridal makeup provides a high-definition finish that ensures you look flawless in both photographs and in person, making you picture-perfect all day long. Airbrush Bridal Makeup Airbrush makeup delivers a lightweight, smooth finish with full coverage that lasts all day, ideal for brides seeking a natural yet polished look. How to Book Your Bridal Makeup with Ladyfair in Begusarai Initial Contact: Call us at 7004721239 to discuss your bridal makeup needs and schedule an appointment. Consultation Session: Meet with our makeup artist to discuss your desired look, review your wedding attire, and plan the perfect makeup style. Makeup Trial: We offer trial sessions so you can preview your bridal makeup and make any necessary adjustments before the wedding day. Wedding Day Makeup: On your wedding day, our makeup artist will arrive at your location in Begusarai to provide a flawless and stress-free makeup service. Testimonials from Brides in Begusarai Sneha P., Begusarai: "Ladyfair’s at-home makeup service was exactly what I needed. The makeup artist was incredibly skilled, and my bridal look was beyond perfect." Meera R., Begusarai: "The airbrush makeup was flawless and lasted all day long. Ladyfair’s service made my wedding day stress-free and special." Ritika S., Begusarai: "The HD makeup was stunning, and my photos turned out beautifully. Ladyfair’s service exceeded all my expectations." Preparing for Your Bridal Makeup Session To ensure the best results, follow these tips: Stay Hydrated: Drink plenty of water to keep your skin fresh and glowing. Consistent Skincare: Maintain a regular skincare routine leading up to your wedding. Avoid New Products: Stick to familiar skincare products to avoid any reactions. Communicate Clearly: Discuss your makeup preferences and concerns with our artist during your consultation. Additional Beauty Services by Ladyfair In addition to bridal makeup, Ladyfair offers: Engagement and Reception Makeup: Customized looks for all your pre-wedding events. Party Makeup: Perfect for special occasions and celebrations. Everyday Makeup: Enhance your daily look with our expert services. Special Occasion Makeup: Makeup for birthdays, anniversaries, and other significant events. The Future of Bridal Makeup in Begusarai Ladyfair is committed to setting new standards in bridal beauty with our innovative at-home services in Begusarai. As more brides experience our exceptional service, Ladyfair continues to grow as the preferred choice for bridal makeup. Q&A with Ladyfair’s Bridal Makeup Artist in Begusarai Q1: What makes Ladyfair the best choice for bridal makeup in Begusarai? A1: Ladyfair offers expert at-home bridal makeup services, combining skilled artistry with high-quality products for a flawless wedding look. Q2: What are the prices for bridal makeup services in Begusarai? A2: Our bridal makeup services start at ₹10,000 for basic makeup, ₹12,000 for HD makeup, and ₹18,000 for airbrush makeup. Q3: How do I book Ladyfair’s bridal makeup services in Begusarai? A3: You can book our services by calling 7004721239. We also offer consultations and trial sessions to help you achieve your desired look. Q4: What types of bridal makeup does Ladyfair offer in Begusarai? A4: We offer traditional, HD, and airbrush bridal makeup styles to suit your preferences. Q5: Are makeup trials available before the wedding day? A5: Yes, we provide trial sessions to finalize your bridal look and make any necessary adjustments. Q6: What kind of products does Ladyfair use for bridal makeup? A6: We use professional-grade, high-quality products that are safe for all skin types and ensure a flawless finish. Q7: What other makeup services does Ladyfair offer in Begusarai? A7: Besides bridal makeup, we offer engagement, reception, party, and special occasion makeup services.

Posted By: 16th September 2024
Bridal Makeup Artist in Sahebpur Kamal
Introduction In Sahebpur Kamal, Ladyfair is the leading choice for brides who want to look their absolute best on their wedding day. Our at-home bridal makeup service brings expert beauty treatments to the comfort of your own home. Whether you're looking for a traditional bridal look, a flawless HD finish, or the elegance of airbrush makeup, our skilled makeup artist in Sahebpur Kamal is here to make your wedding day as perfect as you've imagined. Contact us today at 7004721239 to book your appointment. Why Ladyfair is the Top Choice for Bridal Makeup in Sahebpur Kamal? Experienced Makeup Artist Our makeup artist in Sahebpur Kamal has years of experience in bridal makeup, specializing in creating looks that highlight your natural beauty and complement your individual style. Convenient At-Home Service Ladyfair eliminates the hassle of traveling to a salon by offering luxurious at-home bridal makeup services, allowing you to enjoy a personalized beauty experience right at your doorstep in Sahebpur Kamal. Premium Quality Products We use only high-quality, professional-grade makeup products to ensure a flawless, long-lasting look that will keep you glowing throughout your special day. Bridal Makeup Pricing in Sahebpur Kamal Our bridal makeup services in Sahebpur Kamal are tailored to fit a range of preferences and budgets: Basic Bridal Makeup: ₹10,000 HD Bridal Makeup: ₹12,000 Airbrush Bridal Makeup: ₹18,000 For engagement and reception: Basic Engagement/Reception Makeup: ₹6,000 HD Engagement/Reception Makeup: ₹8,000 Airbrush Engagement/Reception Makeup: ₹12,000 For parties: Basic Party Makeup: ₹2,500 HD Party Makeup: ₹3,500 Popular Bridal Makeup Styles in Sahebpur Kamal Traditional Bridal Makeup Our traditional bridal makeup in Sahebpur Kamal features bold, vibrant colors and meticulous application, perfectly complementing traditional wedding attire to create an elegant and timeless look. HD Bridal Makeup HD bridal makeup provides a high-definition finish that ensures you look flawless in both photographs and in person, making you picture-perfect all day long. Airbrush Bridal Makeup Airbrush makeup delivers a lightweight, smooth finish with full coverage that lasts all day, ideal for brides seeking a natural yet polished look. How to Book Your Bridal Makeup with Ladyfair in Sahebpur Kamal Initial Contact: Call us at 7004721239 to discuss your bridal makeup needs and schedule an appointment. Consultation Session: Meet with our makeup artist to discuss your desired look, review your wedding attire, and plan the perfect makeup style. Makeup Trial: We offer trial sessions so you can preview your bridal makeup and make any necessary adjustments before the wedding day. Wedding Day Makeup: On your wedding day, our makeup artist will arrive at your location in Sahebpur Kamal to provide a flawless and stress-free makeup service. Testimonials from Brides in Sahebpur Kamal Sneha P., Sahebpur Kamal: "Ladyfair’s at-home makeup service was exactly what I needed. The makeup artist was incredibly skilled, and my bridal look was beyond perfect." Meera R., Sahebpur Kamal: "The airbrush makeup was flawless and lasted all day long. Ladyfair’s service made my wedding day stress-free and special." Ritika S., Sahebpur Kamal: "The HD makeup was stunning, and my photos turned out beautifully. Ladyfair’s service exceeded all my expectations." Preparing for Your Bridal Makeup Session To ensure the best results, follow these tips: Stay Hydrated: Drink plenty of water to keep your skin fresh and glowing. Consistent Skincare: Maintain a regular skincare routine leading up to your wedding. Avoid New Products: Stick to familiar skincare products to avoid any reactions. Communicate Clearly: Discuss your makeup preferences and concerns with our artist during your consultation. Additional Beauty Services by Ladyfair In addition to bridal makeup, Ladyfair offers: Engagement and Reception Makeup: Customized looks for all your pre-wedding events. Party Makeup: Perfect for special occasions and celebrations. Everyday Makeup: Enhance your daily look with our expert services. Special Occasion Makeup: Makeup for birthdays, anniversaries, and other significant events. The Future of Bridal Makeup in Sahebpur Kamal Ladyfair is committed to setting new standards in bridal beauty with our innovative at-home services in Sahebpur Kamal. As more brides experience our exceptional service, Ladyfair continues to grow as the preferred choice for bridal makeup. Q&A with Ladyfair’s Bridal Makeup Artist in Sahebpur Kamal Q1: What makes Ladyfair the best choice for bridal makeup in Sahebpur Kamal? A1: Ladyfair offers expert at-home bridal makeup services, combining skilled artistry with high-quality products for a flawless wedding look. Q2: What are the prices for bridal makeup services in Sahebpur Kamal? A2: Our bridal makeup services start at ₹10,000 for basic makeup, ₹12,000 for HD makeup, and ₹18,000 for airbrush makeup. Q3: How do I book Ladyfair’s bridal makeup services in Sahebpur Kamal? A3: You can book our services by calling 7004721239. We also offer consultations and trial sessions to help you achieve your desired look. Q4: What types of bridal makeup does Ladyfair offer in Sahebpur Kamal? A4: We offer traditional, HD, and airbrush bridal makeup styles to suit your preferences. Q5: Are makeup trials available before the wedding day? A5: Yes, we provide trial sessions to finalize your bridal look and make any necessary adjustments. Q6: What kind of products does Ladyfair use for bridal makeup? A6: We use professional-grade, high-quality products that are safe for all skin types and ensure a flawless finish. Q7: What other makeup services does Ladyfair offer in Sahebpur Kamal? A7: Besides bridal makeup, we offer engagement, reception, party, and special occasion makeup services.

Posted By: 16th September 2024
Bridal Makeup Artist in Dandari
Introduction In Dandari, Ladyfair is the leading choice for brides who want to look their absolute best on their wedding day. Our at-home bridal makeup service brings expert beauty treatments to the comfort of your own home. Whether you're looking for a traditional bridal look, a flawless HD finish, or the elegance of airbrush makeup, our skilled makeup artist in Dandari is here to make your wedding day as perfect as you've imagined. Contact us today at 7004721239 to book your appointment. Why Ladyfair is the Top Choice for Bridal Makeup in Dandari? Experienced Makeup Artist Our makeup artist in Dandari has years of experience in bridal makeup, specializing in creating looks that highlight your natural beauty and complement your individual style. Convenient At-Home Service Ladyfair eliminates the hassle of traveling to a salon by offering luxurious at-home bridal makeup services, allowing you to enjoy a personalized beauty experience right at your doorstep in Dandari. Premium Quality Products We use only high-quality, professional-grade makeup products to ensure a flawless, long-lasting look that will keep you glowing throughout your special day. Bridal Makeup Pricing in Dandari Our bridal makeup services in Dandari are tailored to fit a range of preferences and budgets: Basic Bridal Makeup: ₹10,000 HD Bridal Makeup: ₹12,000 Airbrush Bridal Makeup: ₹18,000 For engagement and reception: Basic Engagement/Reception Makeup: ₹6,000 HD Engagement/Reception Makeup: ₹8,000 Airbrush Engagement/Reception Makeup: ₹12,000 For parties: Basic Party Makeup: ₹2,500 HD Party Makeup: ₹3,500 Popular Bridal Makeup Styles in Dandari Traditional Bridal Makeup Our traditional bridal makeup in Dandari features bold, vibrant colors and meticulous application, perfectly complementing traditional wedding attire to create an elegant and timeless look. HD Bridal Makeup HD bridal makeup provides a high-definition finish that ensures you look flawless in both photographs and in person, making you picture-perfect all day long. Airbrush Bridal Makeup Airbrush makeup delivers a lightweight, smooth finish with full coverage that lasts all day, ideal for brides seeking a natural yet polished look. How to Book Your Bridal Makeup with Ladyfair in Dandari Initial Contact: Call us at 7004721239 to discuss your bridal makeup needs and schedule an appointment. Consultation Session: Meet with our makeup artist to discuss your desired look, review your wedding attire, and plan the perfect makeup style. Makeup Trial: We offer trial sessions so you can preview your bridal makeup and make any necessary adjustments before the wedding day. Wedding Day Makeup: On your wedding day, our makeup artist will arrive at your location in Dandari to provide a flawless and stress-free makeup service. Testimonials from Brides in Dandari Sneha P., Dandari: "Ladyfair’s at-home makeup service was exactly what I needed. The makeup artist was incredibly skilled, and my bridal look was beyond perfect." Meera R., Dandari: "The airbrush makeup was flawless and lasted all day long. Ladyfair’s service made my wedding day stress-free and special." Ritika S., Dandari: "The HD makeup was stunning, and my photos turned out beautifully. Ladyfair’s service exceeded all my expectations." Preparing for Your Bridal Makeup Session To ensure the best results, follow these tips: Stay Hydrated: Drink plenty of water to keep your skin fresh and glowing. Consistent Skincare: Maintain a regular skincare routine leading up to your wedding. Avoid New Products: Stick to familiar skincare products to avoid any reactions. Communicate Clearly: Discuss your makeup preferences and concerns with our artist during your consultation. Additional Beauty Services by Ladyfair In addition to bridal makeup, Ladyfair offers: Engagement and Reception Makeup: Customized looks for all your pre-wedding events. Party Makeup: Perfect for special occasions and celebrations. Everyday Makeup: Enhance your daily look with our expert services. Special Occasion Makeup: Makeup for birthdays, anniversaries, and other significant events. The Future of Bridal Makeup in Dandari Ladyfair is committed to setting new standards in bridal beauty with our innovative at-home services in Dandari. As more brides experience our exceptional service, Ladyfair continues to grow as the preferred choice for bridal makeup. Q&A with Ladyfair’s Bridal Makeup Artist in Dandari Q1: What makes Ladyfair the best choice for bridal makeup in Dandari? A1: Ladyfair offers expert at-home bridal makeup services, combining skilled artistry with high-quality products for a flawless wedding look. Q2: What are the prices for bridal makeup services in Dandari? A2: Our bridal makeup services start at ₹10,000 for basic makeup, ₹12,000 for HD makeup, and ₹18,000 for airbrush makeup. Q3: How do I book Ladyfair’s bridal makeup services in Dandari? A3: You can book our services by calling 7004721239. We also offer consultations and trial sessions to help you achieve your desired look. Q4: What types of bridal makeup does Ladyfair offer in Dandari? A4: We offer traditional, HD, and airbrush bridal makeup styles to suit your preferences. Q5: Are makeup trials available before the wedding day? A5: Yes, we provide trial sessions to finalize your bridal look and make any necessary adjustments. Q6: What kind of products does Ladyfair use for bridal makeup? A6: We use professional-grade, high-quality products that are safe for all skin types and ensure a flawless finish. Q7: What other makeup services does Ladyfair offer in Dandari? A7: Besides bridal makeup, we offer engagement, reception, party, and special occasion makeup services.

Posted By: 16th September 2024
Bridal Makeup Artist in Balia
Introduction In Balia, Ladyfair is the leading choice for brides who want to look their absolute best on their wedding day. Our at-home bridal makeup service brings expert beauty treatments to the comfort of your own home. Whether you're looking for a traditional bridal look, a flawless HD finish, or the elegance of airbrush makeup, our skilled makeup artist in Balia is here to make your wedding day as perfect as you've imagined. Contact us today at 7004721239 to book your appointment. Why Ladyfair is the Top Choice for Bridal Makeup in Balia? Experienced Makeup Artist Our makeup artist in Balia has years of experience in bridal makeup, specializing in creating looks that highlight your natural beauty and complement your individual style. Convenient At-Home Service Ladyfair eliminates the hassle of traveling to a salon by offering luxurious at-home bridal makeup services, allowing you to enjoy a personalized beauty experience right at your doorstep in Balia. Premium Quality Products We use only high-quality, professional-grade makeup products to ensure a flawless, long-lasting look that will keep you glowing throughout your special day. Bridal Makeup Pricing in Balia Our bridal makeup services in Balia are tailored to fit a range of preferences and budgets: Basic Bridal Makeup: ₹10,000 HD Bridal Makeup: ₹12,000 Airbrush Bridal Makeup: ₹18,000 For engagement and reception: Basic Engagement/Reception Makeup: ₹6,000 HD Engagement/Reception Makeup: ₹8,000 Airbrush Engagement/Reception Makeup: ₹12,000 For parties: Basic Party Makeup: ₹2,500 HD Party Makeup: ₹3,500 Popular Bridal Makeup Styles in Balia Traditional Bridal Makeup Our traditional bridal makeup in Balia features bold, vibrant colors and meticulous application, perfectly complementing traditional wedding attire to create an elegant and timeless look. HD Bridal Makeup HD bridal makeup provides a high-definition finish that ensures you look flawless in both photographs and in person, making you picture-perfect all day long. Airbrush Bridal Makeup Airbrush makeup delivers a lightweight, smooth finish with full coverage that lasts all day, ideal for brides seeking a natural yet polished look. How to Book Your Bridal Makeup with Ladyfair in Balia Initial Contact: Call us at 7004721239 to discuss your bridal makeup needs and schedule an appointment. Consultation Session: Meet with our makeup artist to discuss your desired look, review your wedding attire, and plan the perfect makeup style. Makeup Trial: We offer trial sessions so you can preview your bridal makeup and make any necessary adjustments before the wedding day. Wedding Day Makeup: On your wedding day, our makeup artist will arrive at your location in Balia to provide a flawless and stress-free makeup service. Testimonials from Brides in Balia Sneha P., Balia: "Ladyfair’s at-home makeup service was exactly what I needed. The makeup artist was incredibly skilled, and my bridal look was beyond perfect." Meera R., Balia: "The airbrush makeup was flawless and lasted all day long. Ladyfair’s service made my wedding day stress-free and special." Ritika S., Balia: "The HD makeup was stunning, and my photos turned out beautifully. Ladyfair’s service exceeded all my expectations." Preparing for Your Bridal Makeup Session To ensure the best results, follow these tips: Stay Hydrated: Drink plenty of water to keep your skin fresh and glowing. Consistent Skincare: Maintain a regular skincare routine leading up to your wedding. Avoid New Products: Stick to familiar skincare products to avoid any reactions. Communicate Clearly: Discuss your makeup preferences and concerns with our artist during your consultation. Additional Beauty Services by Ladyfair In addition to bridal makeup, Ladyfair offers: Engagement and Reception Makeup: Customized looks for all your pre-wedding events. Party Makeup: Perfect for special occasions and celebrations. Everyday Makeup: Enhance your daily look with our expert services. Special Occasion Makeup: Makeup for birthdays, anniversaries, and other significant events. The Future of Bridal Makeup in Balia Ladyfair is committed to setting new standards in bridal beauty with our innovative at-home services in Balia. As more brides experience our exceptional service, Ladyfair continues to grow as the preferred choice for bridal makeup. Q&A with Ladyfair’s Bridal Makeup Artist in Balia Q1: What makes Ladyfair the best choice for bridal makeup in Balia? A1: Ladyfair offers expert at-home bridal makeup services, combining skilled artistry with high-quality products for a flawless wedding look. Q2: What are the prices for bridal makeup services in Balia? A2: Our bridal makeup services start at ₹10,000 for basic makeup, ₹12,000 for HD makeup, and ₹18,000 for airbrush makeup. Q3: How do I book Ladyfair’s bridal makeup services in Balia? A3: You can book our services by calling 7004721239. We also offer consultations and trial sessions to help you achieve your desired look. Q4: What types of bridal makeup does Ladyfair offer in Balia? A4: We offer traditional, HD, and airbrush bridal makeup styles to suit your preferences. Q5: Are makeup trials available before the wedding day? A5: Yes, we provide trial sessions to finalize your bridal look and make any necessary adjustments. Q6: What kind of products does Ladyfair use for bridal makeup? A6: We use professional-grade, high-quality products that are safe for all skin types and ensure a flawless finish. Q7: What other makeup services does Ladyfair offer in Balia? A7: Besides bridal makeup, we offer engagement, reception, party, and special occasion makeup services.

Posted By: 16th September 2024
Bridal Makeup Artist in Samho Akha Kurha
Introduction In Samho Akha Kurha, Ladyfair is the leading choice for brides who want to look their absolute best on their wedding day. Our at-home bridal makeup service brings expert beauty treatments to the comfort of your own home. Whether you're looking for a traditional bridal look, a flawless HD finish, or the elegance of airbrush makeup, our skilled makeup artist in Samho Akha Kurha is here to make your wedding day as perfect as you've imagined. Contact us today at 7004721239 to book your appointment. Why Ladyfair is the Top Choice for Bridal Makeup in Samho Akha Kurha? Experienced Makeup Artist Our makeup artist in Samho Akha Kurha has years of experience in bridal makeup, specializing in creating looks that highlight your natural beauty and complement your individual style. Convenient At-Home Service Ladyfair eliminates the hassle of traveling to a salon by offering luxurious at-home bridal makeup services, allowing you to enjoy a personalized beauty experience right at your doorstep in Samho Akha Kurha. Premium Quality Products We use only high-quality, professional-grade makeup products to ensure a flawless, long-lasting look that will keep you glowing throughout your special day. Bridal Makeup Pricing in Samho Akha Kurha Our bridal makeup services in Samho Akha Kurha are tailored to fit a range of preferences and budgets: Basic Bridal Makeup: ₹10,000 HD Bridal Makeup: ₹12,000 Airbrush Bridal Makeup: ₹18,000 For engagement and reception: Basic Engagement/Reception Makeup: ₹6,000 HD Engagement/Reception Makeup: ₹8,000 Airbrush Engagement/Reception Makeup: ₹12,000 For parties: Basic Party Makeup: ₹2,500 HD Party Makeup: ₹3,500 Popular Bridal Makeup Styles in Samho Akha Kurha Traditional Bridal Makeup Our traditional bridal makeup in Samho Akha Kurha features bold, vibrant colors and meticulous application, perfectly complementing traditional wedding attire to create an elegant and timeless look. HD Bridal Makeup HD bridal makeup provides a high-definition finish that ensures you look flawless in both photographs and in person, making you picture-perfect all day long. Airbrush Bridal Makeup Airbrush makeup delivers a lightweight, smooth finish with full coverage that lasts all day, ideal for brides seeking a natural yet polished look. How to Book Your Bridal Makeup with Ladyfair in Samho Akha Kurha Initial Contact: Call us at 7004721239 to discuss your bridal makeup needs and schedule an appointment. Consultation Session: Meet with our makeup artist to discuss your desired look, review your wedding attire, and plan the perfect makeup style. Makeup Trial: We offer trial sessions so you can preview your bridal makeup and make any necessary adjustments before the wedding day. Wedding Day Makeup: On your wedding day, our makeup artist will arrive at your location in Samho Akha Kurha to provide a flawless and stress-free makeup service. Testimonials from Brides in Samho Akha Kurha Sneha P., Samho Akha Kurha: "Ladyfair’s at-home makeup service was exactly what I needed. The makeup artist was incredibly skilled, and my bridal look was beyond perfect." Meera R., Samho Akha Kurha: "The airbrush makeup was flawless and lasted all day long. Ladyfair’s service made my wedding day stress-free and special." Ritika S., Samho Akha Kurha: "The HD makeup was stunning, and my photos turned out beautifully. Ladyfair’s service exceeded all my expectations." Preparing for Your Bridal Makeup Session To ensure the best results, follow these tips: Stay Hydrated: Drink plenty of water to keep your skin fresh and glowing. Consistent Skincare: Maintain a regular skincare routine leading up to your wedding. Avoid New Products: Stick to familiar skincare products to avoid any reactions. Communicate Clearly: Discuss your makeup preferences and concerns with our artist during your consultation. Additional Beauty Services by Ladyfair In addition to bridal makeup, Ladyfair offers: Engagement and Reception Makeup: Customized looks for all your pre-wedding events. Party Makeup: Perfect for special occasions and celebrations. Everyday Makeup: Enhance your daily look with our expert services. Special Occasion Makeup: Makeup for birthdays, anniversaries, and other significant events. The Future of Bridal Makeup in Samho Akha Kurha Ladyfair is committed to setting new standards in bridal beauty with our innovative at-home services in Samho Akha Kurha. As more brides experience our exceptional service, Ladyfair continues to grow as the preferred choice for bridal makeup. Q&A with Ladyfair’s Bridal Makeup Artist in Samho Akha Kurha Q1: What makes Ladyfair the best choice for bridal makeup in Samho Akha Kurha? A1: Ladyfair offers expert at-home bridal makeup services, combining skilled artistry with high-quality products for a flawless wedding look. Q2: What are the prices for bridal makeup services in Samho Akha Kurha? A2: Our bridal makeup services start at ₹10,000 for basic makeup, ₹12,000 for HD makeup, and ₹18,000 for airbrush makeup. Q3: How do I book Ladyfair’s bridal makeup services in Samho Akha Kurha? A3: You can book our services by calling 7004721239. We also offer consultations and trial sessions to help you achieve your desired look. Q4: What types of bridal makeup does Ladyfair offer in Samho Akha Kurha? A4: We offer traditional, HD, and airbrush bridal makeup styles to suit your preferences. Q5: Are makeup trials available before the wedding day? A5: Yes, we provide trial sessions to finalize your bridal look and make any necessary adjustments. Q6: What kind of products does Ladyfair use for bridal makeup? A6: We use professional-grade, high-quality products that are safe for all skin types and ensure a flawless finish. Q7: What other makeup services does Ladyfair offer in Samho Akha Kurha? A7: Besides bridal makeup, we offer engagement, reception, party, and special occasion makeup services.

Posted By: 16th September 2024
Bridal Makeup Artist in Birpur
Introduction In Birpur, Ladyfair is the leading choice for brides who want to look their absolute best on their wedding day. Our at-home bridal makeup service brings expert beauty treatments to the comfort of your own home. Whether you're looking for a traditional bridal look, a flawless HD finish, or the elegance of airbrush makeup, our skilled makeup artist in Birpur is here to make your wedding day as perfect as you've imagined. Contact us today at 7004721239 to book your appointment. Why Ladyfair is the Top Choice for Bridal Makeup in Birpur? Experienced Makeup Artist Our makeup artist in Birpur has years of experience in bridal makeup, specializing in creating looks that highlight your natural beauty and complement your individual style. Convenient At-Home Service Ladyfair eliminates the hassle of traveling to a salon by offering luxurious at-home bridal makeup services, allowing you to enjoy a personalized beauty experience right at your doorstep in Birpur. Premium Quality Products We use only high-quality, professional-grade makeup products to ensure a flawless, long-lasting look that will keep you glowing throughout your special day. Bridal Makeup Pricing in Birpur Our bridal makeup services in Birpur are tailored to fit a range of preferences and budgets: Basic Bridal Makeup: ₹10,000 HD Bridal Makeup: ₹12,000 Airbrush Bridal Makeup: ₹18,000 For engagement and reception: Basic Engagement/Reception Makeup: ₹6,000 HD Engagement/Reception Makeup: ₹8,000 Airbrush Engagement/Reception Makeup: ₹12,000 For parties: Basic Party Makeup: ₹2,500 HD Party Makeup: ₹3,500 Popular Bridal Makeup Styles in Birpur Traditional Bridal Makeup Our traditional bridal makeup in Birpur features bold, vibrant colors and meticulous application, perfectly complementing traditional wedding attire to create an elegant and timeless look. HD Bridal Makeup HD bridal makeup provides a high-definition finish that ensures you look flawless in both photographs and in person, making you picture-perfect all day long. Airbrush Bridal Makeup Airbrush makeup delivers a lightweight, smooth finish with full coverage that lasts all day, ideal for brides seeking a natural yet polished look. How to Book Your Bridal Makeup with Ladyfair in Birpur Initial Contact: Call us at 7004721239 to discuss your bridal makeup needs and schedule an appointment. Consultation Session: Meet with our makeup artist to discuss your desired look, review your wedding attire, and plan the perfect makeup style. Makeup Trial: We offer trial sessions so you can preview your bridal makeup and make any necessary adjustments before the wedding day. Wedding Day Makeup: On your wedding day, our makeup artist will arrive at your location in Birpur to provide a flawless and stress-free makeup service. Testimonials from Brides in Birpur Sneha P., Birpur: "Ladyfair’s at-home makeup service was exactly what I needed. The makeup artist was incredibly skilled, and my bridal look was beyond perfect." Meera R., Birpur: "The airbrush makeup was flawless and lasted all day long. Ladyfair’s service made my wedding day stress-free and special." Ritika S., Birpur: "The HD makeup was stunning, and my photos turned out beautifully. Ladyfair’s service exceeded all my expectations." Preparing for Your Bridal Makeup Session To ensure the best results, follow these tips: Stay Hydrated: Drink plenty of water to keep your skin fresh and glowing. Consistent Skincare: Maintain a regular skincare routine leading up to your wedding. Avoid New Products: Stick to familiar skincare products to avoid any reactions. Communicate Clearly: Discuss your makeup preferences and concerns with our artist during your consultation. Additional Beauty Services by Ladyfair In addition to bridal makeup, Ladyfair offers: Engagement and Reception Makeup: Customized looks for all your pre-wedding events. Party Makeup: Perfect for special occasions and celebrations. Everyday Makeup: Enhance your daily look with our expert services. Special Occasion Makeup: Makeup for birthdays, anniversaries, and other significant events. The Future of Bridal Makeup in Birpur Ladyfair is committed to setting new standards in bridal beauty with our innovative at-home services in Birpur. As more brides experience our exceptional service, Ladyfair continues to grow as the preferred choice for bridal makeup. Q&A with Ladyfair’s Bridal Makeup Artist in Birpur Q1: What makes Ladyfair the best choice for bridal makeup in Birpur? A1: Ladyfair offers expert at-home bridal makeup services, combining skilled artistry with high-quality products for a flawless wedding look. Q2: What are the prices for bridal makeup services in Birpur? A2: Our bridal makeup services start at ₹10,000 for basic makeup, ₹12,000 for HD makeup, and ₹18,000 for airbrush makeup. Q3: How do I book Ladyfair’s bridal makeup services in Birpur? A3: You can book our services by calling 7004721239. We also offer consultations and trial sessions to help you achieve your desired look. Q4: What types of bridal makeup does Ladyfair offer in Birpur? A4: We offer traditional, HD, and airbrush bridal makeup styles to suit your preferences. Q5: Are makeup trials available before the wedding day? A5: Yes, we provide trial sessions to finalize your bridal look and make any necessary adjustments. Q6: What kind of products does Ladyfair use for bridal makeup? A6: We use professional-grade, high-quality products that are safe for all skin types and ensure a flawless finish. Q7: What other makeup services does Ladyfair offer in Birpur? A7: Besides bridal makeup, we offer engagement, reception, party, and special occasion makeup services.

Posted By: 16th September 2024
Bridal Makeup Artist in Matihani
Introduction In Matihani, Ladyfair is the leading choice for brides who want to look their absolute best on their wedding day. Our at-home bridal makeup service brings expert beauty treatments to the comfort of your own home. Whether you're looking for a traditional bridal look, a flawless HD finish, or the elegance of airbrush makeup, our skilled makeup artist in Matihani is here to make your wedding day as perfect as you've imagined. Contact us today at 7004721239 to book your appointment. Why Ladyfair is the Top Choice for Bridal Makeup in Matihani? Experienced Makeup Artist Our makeup artist in Matihani has years of experience in bridal makeup, specializing in creating looks that highlight your natural beauty and complement your individual style. Convenient At-Home Service Ladyfair eliminates the hassle of traveling to a salon by offering luxurious at-home bridal makeup services, allowing you to enjoy a personalized beauty experience right at your doorstep in Matihani. Premium Quality Products We use only high-quality, professional-grade makeup products to ensure a flawless, long-lasting look that will keep you glowing throughout your special day. Bridal Makeup Pricing in Matihani Our bridal makeup services in Matihani are tailored to fit a range of preferences and budgets: Basic Bridal Makeup: ₹10,000 HD Bridal Makeup: ₹12,000 Airbrush Bridal Makeup: ₹18,000 For engagement and reception: Basic Engagement/Reception Makeup: ₹6,000 HD Engagement/Reception Makeup: ₹8,000 Airbrush Engagement/Reception Makeup: ₹12,000 For parties: Basic Party Makeup: ₹2,500 HD Party Makeup: ₹3,500 Popular Bridal Makeup Styles in Matihani Traditional Bridal Makeup Our traditional bridal makeup in Matihani features bold, vibrant colors and meticulous application, perfectly complementing traditional wedding attire to create an elegant and timeless look. HD Bridal Makeup HD bridal makeup provides a high-definition finish that ensures you look flawless in both photographs and in person, making you picture-perfect all day long. Airbrush Bridal Makeup Airbrush makeup delivers a lightweight, smooth finish with full coverage that lasts all day, ideal for brides seeking a natural yet polished look. How to Book Your Bridal Makeup with Ladyfair in Matihani Initial Contact: Call us at 7004721239 to discuss your bridal makeup needs and schedule an appointment. Consultation Session: Meet with our makeup artist to discuss your desired look, review your wedding attire, and plan the perfect makeup style. Makeup Trial: We offer trial sessions so you can preview your bridal makeup and make any necessary adjustments before the wedding day. Wedding Day Makeup: On your wedding day, our makeup artist will arrive at your location in Matihani to provide a flawless and stress-free makeup service. Testimonials from Brides in Matihani Sneha P., Matihani: "Ladyfair’s at-home makeup service was exactly what I needed. The makeup artist was incredibly skilled, and my bridal look was beyond perfect." Meera R., Matihani: "The airbrush makeup was flawless and lasted all day long. Ladyfair’s service made my wedding day stress-free and special." Ritika S., Matihani: "The HD makeup was stunning, and my photos turned out beautifully. Ladyfair’s service exceeded all my expectations." Preparing for Your Bridal Makeup Session To ensure the best results, follow these tips: Stay Hydrated: Drink plenty of water to keep your skin fresh and glowing. Consistent Skincare: Maintain a regular skincare routine leading up to your wedding. Avoid New Products: Stick to familiar skincare products to avoid any reactions. Communicate Clearly: Discuss your makeup preferences and concerns with our artist during your consultation. Additional Beauty Services by Ladyfair In addition to bridal makeup, Ladyfair offers: Engagement and Reception Makeup: Customized looks for all your pre-wedding events. Party Makeup: Perfect for special occasions and celebrations. Everyday Makeup: Enhance your daily look with our expert services. Special Occasion Makeup: Makeup for birthdays, anniversaries, and other significant events. The Future of Bridal Makeup in Matihani Ladyfair is committed to setting new standards in bridal beauty with our innovative at-home services in Matihani. As more brides experience our exceptional service, Ladyfair continues to grow as the preferred choice for bridal makeup. Q&A with Ladyfair’s Bridal Makeup Artist in Matihani Q1: What makes Ladyfair the best choice for bridal makeup in Matihani? A1: Ladyfair offers expert at-home bridal makeup services, combining skilled artistry with high-quality products for a flawless wedding look. Q2: What are the prices for bridal makeup services in Matihani? A2: Our bridal makeup services start at ₹10,000 for basic makeup, ₹12,000 for HD makeup, and ₹18,000 for airbrush makeup. Q3: How do I book Ladyfair’s bridal makeup services in Matihani? A3: You can book our services by calling 7004721239. We also offer consultations and trial sessions to help you achieve your desired look. Q4: What types of bridal makeup does Ladyfair offer in Matihani? A4: We offer traditional, HD, and airbrush bridal makeup styles to suit your preferences. Q5: Are makeup trials available before the wedding day? A5: Yes, we provide trial sessions to finalize your bridal look and make any necessary adjustments. Q6: What kind of products does Ladyfair use for bridal makeup? A6: We use professional-grade, high-quality products that are safe for all skin types and ensure a flawless finish. Q7: What other makeup services does Ladyfair offer in Matihani? A7: Besides bridal makeup, we offer engagement, reception, party, and special occasion makeup services.
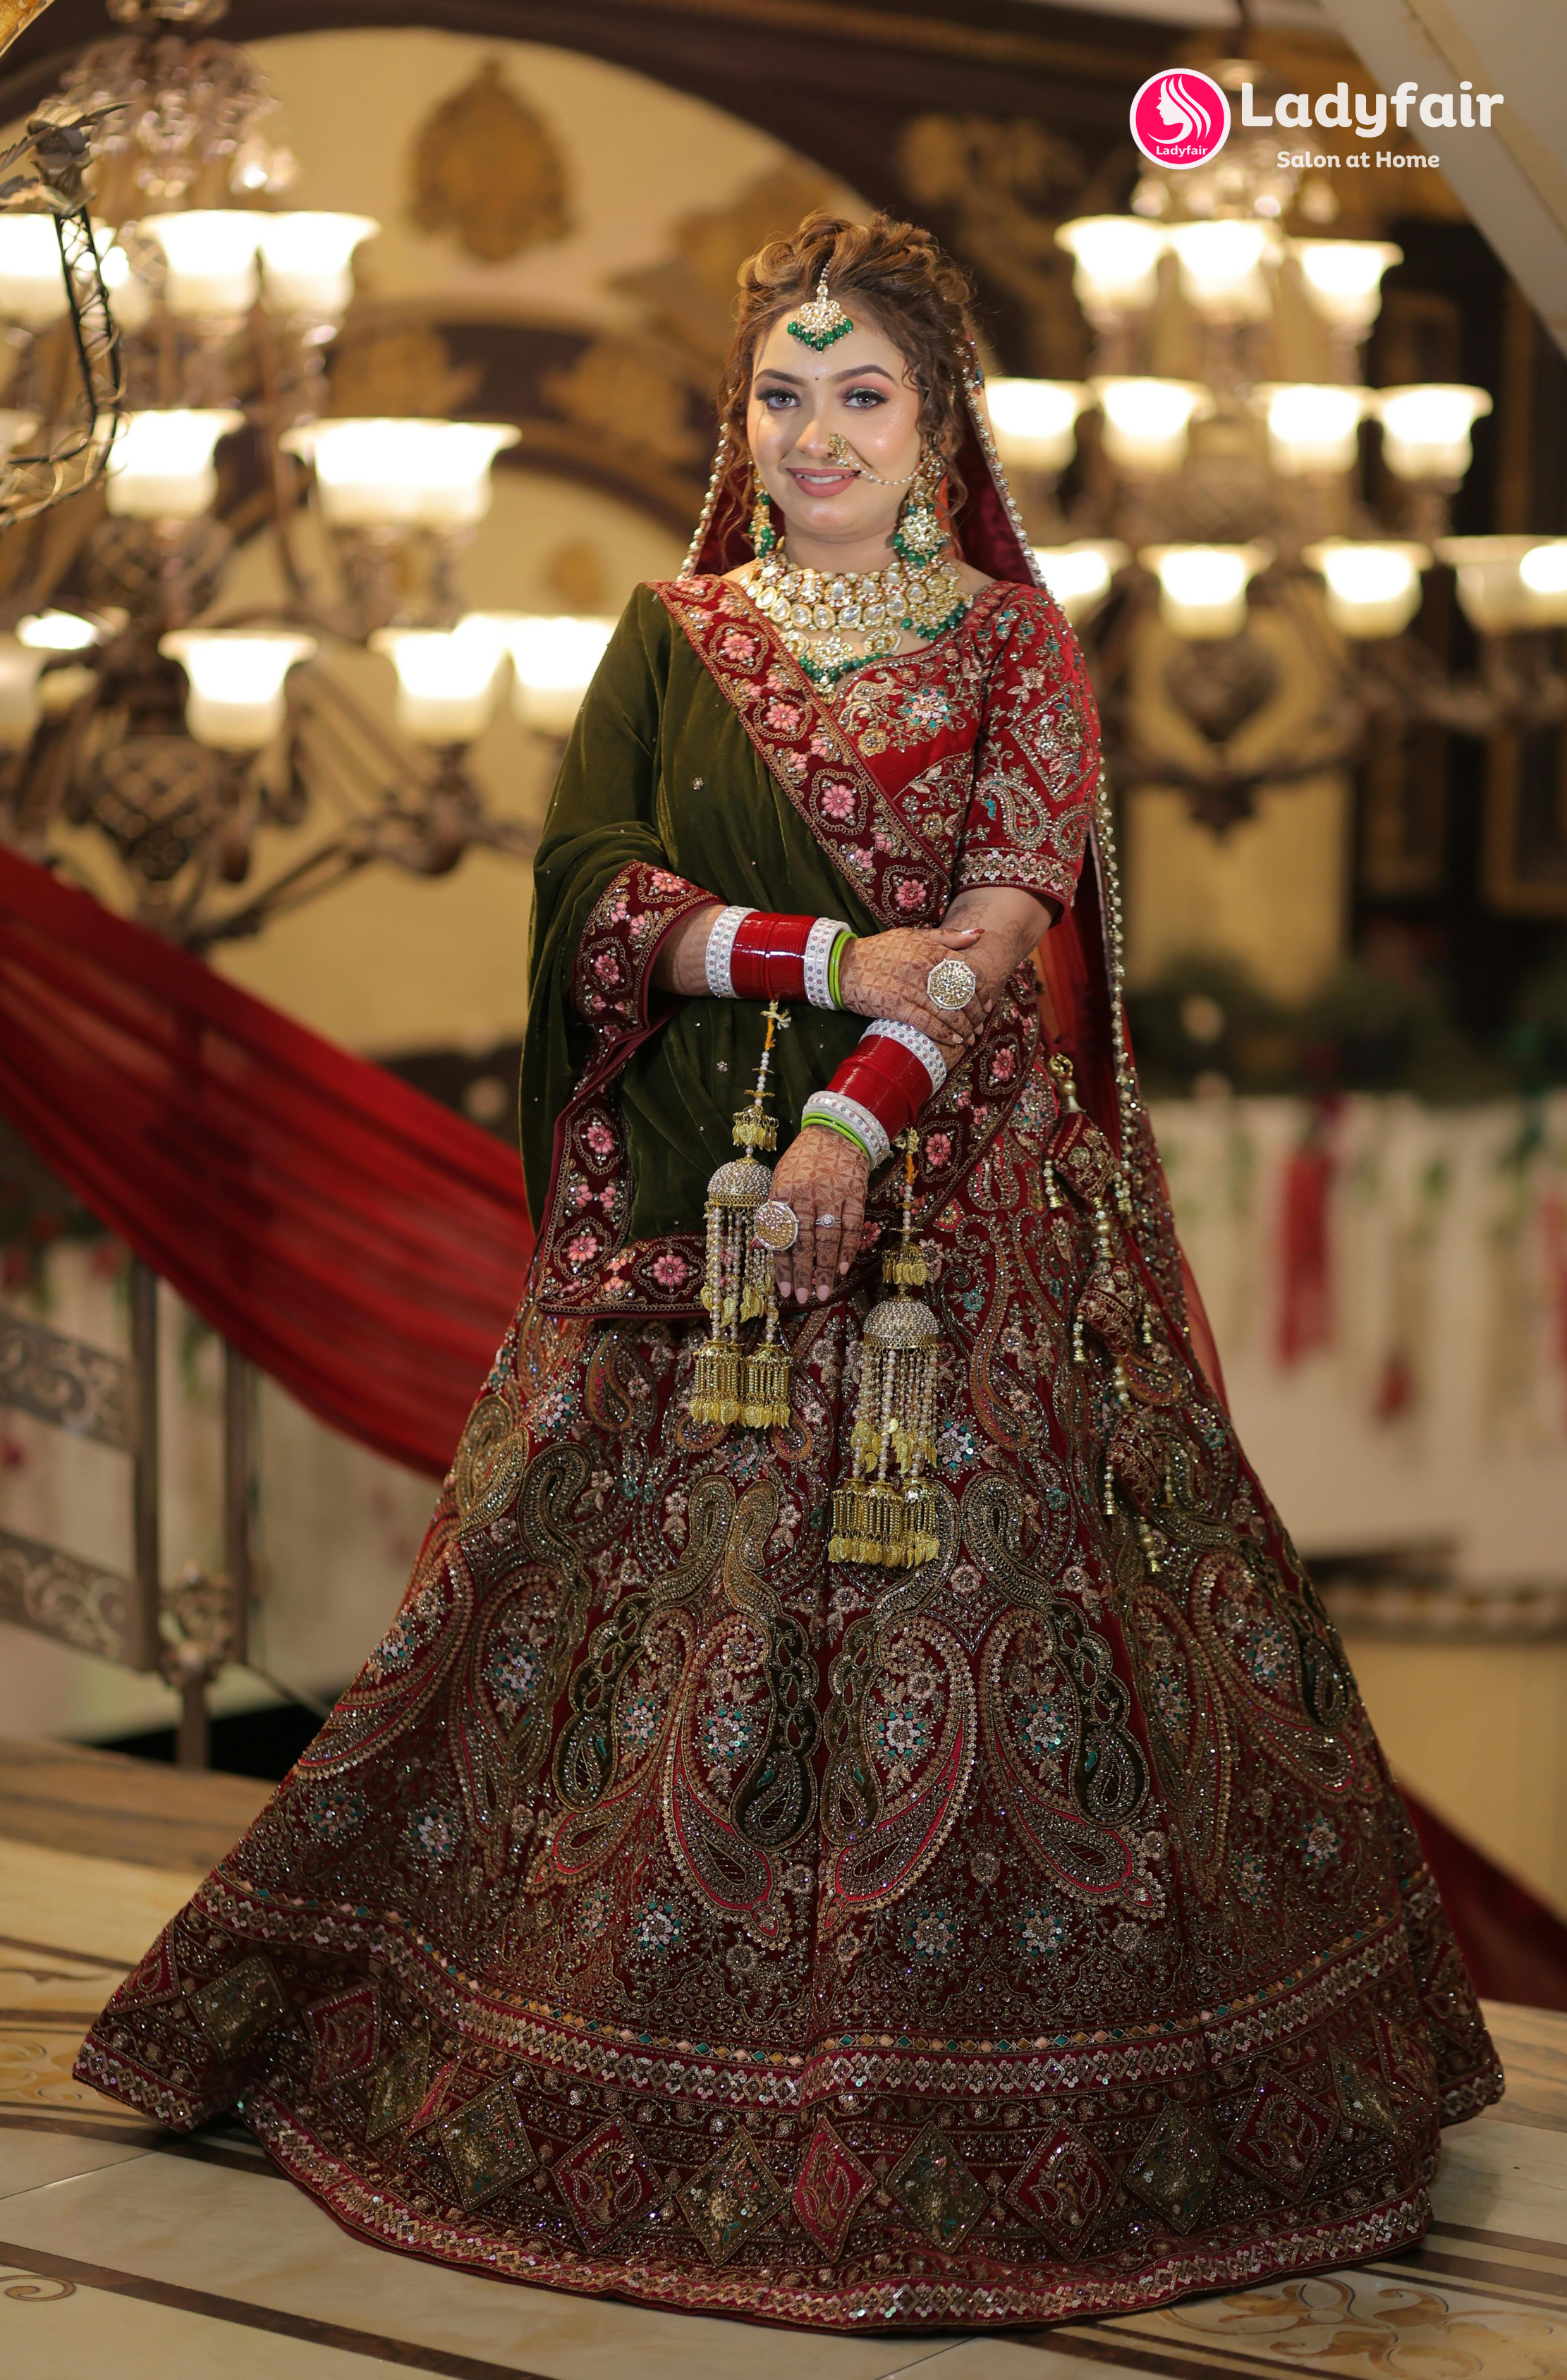
Posted By: 16th September 2024
Bridal Makeup Artist in barauni
Introduction In Barauni, Ladyfair is the leading choice for brides who want to look their absolute best on their wedding day. Our at-home bridal makeup service brings expert beauty treatments to the comfort of your own home. Whether you're looking for a traditional bridal look, a flawless HD finish, or the elegance of airbrush makeup, our skilled makeup artist in Barauni is here to make your wedding day as perfect as you've imagined. Contact us today at 7004721239 to book your appointment. Why Ladyfair is the Top Choice for Bridal Makeup in Barauni? Experienced Makeup Artist Our makeup artist in Barauni has years of experience in bridal makeup, specializing in creating looks that highlight your natural beauty and complement your individual style. Convenient At-Home Service Ladyfair eliminates the hassle of traveling to a salon by offering luxurious at-home bridal makeup services, allowing you to enjoy a personalized beauty experience right at your doorstep in Barauni. Premium Quality Products We use only high-quality, professional-grade makeup products to ensure a flawless, long-lasting look that will keep you glowing throughout your special day. Bridal Makeup Pricing in Barauni Our bridal makeup services in Barauni are tailored to fit a range of preferences and budgets: Basic Bridal Makeup: ₹10,000 HD Bridal Makeup: ₹12,000 Airbrush Bridal Makeup: ₹18,000 For engagement and reception: Basic Engagement/Reception Makeup: ₹6,000 HD Engagement/Reception Makeup: ₹8,000 Airbrush Engagement/Reception Makeup: ₹12,000 For parties: Basic Party Makeup: ₹2,500 HD Party Makeup: ₹3,500 Popular Bridal Makeup Styles in Barauni Traditional Bridal Makeup Our traditional bridal makeup in Barauni features bold, vibrant colors and meticulous application, perfectly complementing traditional wedding attire to create an elegant and timeless look. HD Bridal Makeup HD bridal makeup provides a high-definition finish that ensures you look flawless in both photographs and in person, making you picture-perfect all day long. Airbrush Bridal Makeup Airbrush makeup delivers a lightweight, smooth finish with full coverage that lasts all day, ideal for brides seeking a natural yet polished look. How to Book Your Bridal Makeup with Ladyfair in Barauni Initial Contact: Call us at 7004721239 to discuss your bridal makeup needs and schedule an appointment. Consultation Session: Meet with our makeup artist to discuss your desired look, review your wedding attire, and plan the perfect makeup style. Makeup Trial: We offer trial sessions so you can preview your bridal makeup and make any necessary adjustments before the wedding day. Wedding Day Makeup: On your wedding day, our makeup artist will arrive at your location in Barauni to provide a flawless and stress-free makeup service. Testimonials from Brides in Barauni Sneha P., Barauni: "Ladyfair’s at-home makeup service was exactly what I needed. The makeup artist was incredibly skilled, and my bridal look was beyond perfect." Meera R., Barauni: "The airbrush makeup was flawless and lasted all day long. Ladyfair’s service made my wedding day stress-free and special." Ritika S., Barauni: "The HD makeup was stunning, and my photos turned out beautifully. Ladyfair’s service exceeded all my expectations." Preparing for Your Bridal Makeup Session To ensure the best results, follow these tips: Stay Hydrated: Drink plenty of water to keep your skin fresh and glowing. Consistent Skincare: Maintain a regular skincare routine leading up to your wedding. Avoid New Products: Stick to familiar skincare products to avoid any reactions. Communicate Clearly: Discuss your makeup preferences and concerns with our artist during your consultation. Additional Beauty Services by Ladyfair In addition to bridal makeup, Ladyfair offers: Engagement and Reception Makeup: Customized looks for all your pre-wedding events. Party Makeup: Perfect for special occasions and celebrations. Everyday Makeup: Enhance your daily look with our expert services. Special Occasion Makeup: Makeup for birthdays, anniversaries, and other significant events. The Future of Bridal Makeup in Barauni Ladyfair is committed to setting new standards in bridal beauty with our innovative at-home services in Barauni. As more brides experience our exceptional service, Ladyfair continues to grow as the preferred choice for bridal makeup. Q&A with Ladyfair’s Bridal Makeup Artist in Barauni Q1: What makes Ladyfair the best choice for bridal makeup in Barauni? A1: Ladyfair offers expert at-home bridal makeup services, combining skilled artistry with high-quality products for a flawless wedding look. Q2: What are the prices for bridal makeup services in Barauni? A2: Our bridal makeup services start at ₹10,000 for basic makeup, ₹12,000 for HD makeup, and ₹18,000 for airbrush makeup. Q3: How do I book Ladyfair’s bridal makeup services in Barauni? A3: You can book our services by calling 7004721239. We also offer consultations and trial sessions to help you achieve your desired look. Q4: What types of bridal makeup does Ladyfair offer in Barauni? A4: We offer traditional, HD, and airbrush bridal makeup styles to suit your preferences. Q5: Are makeup trials available before the wedding day? A5: Yes, we provide trial sessions to finalize your bridal look and make any necessary adjustments. Q6: What kind of products does Ladyfair use for bridal makeup? A6: We use professional-grade, high-quality products that are safe for all skin types and ensure a flawless finish. Q7: What other makeup services does Ladyfair offer in Barauni? A7: Besides bridal makeup, we offer engagement, reception, party, and special occasion makeup services.

Posted By: 16th September 2024
Bridal makeup artist in Goradih
Introduction Your wedding day is a momentous occasion where every detail counts, and your bridal makeup is no exception. At Ladyfair, we’re dedicated to enhancing your natural beauty and making your special day unforgettable with our premium bridal makeup services in Goradih. We offer the unique convenience of at-home appointments, bringing top-quality beauty treatments right to your doorstep. To schedule your personalized bridal makeup session, call us at 7004721239. The Importance of Bridal Makeup Bridal makeup is not just about applying cosmetics; it’s about showcasing your natural beauty and ensuring you look radiant throughout your wedding day. A professional makeup artist brings expertise in creating a look that complements your features, attire, and overall wedding theme. At Ladyfair, we strive to provide exceptional makeup services that enhance your beauty and boost your confidence, making sure you feel and look stunning on your big day. Why Ladyfair Stands Out in Goradih Convenience of At-Home Services Ladyfair offers the unparalleled convenience of at-home bridal makeup services. This means you can enjoy a stress-free preparation in the comfort of your own space, without the need to travel to a salon on your wedding day. Our makeup artist comes to you, ensuring a relaxing and personalized experience. Expert Makeup Artist Our top makeup artist in Goradih is renowned for her exceptional skill and extensive experience in bridal makeup. She is adept at various techniques and styles, ensuring your bridal look is perfectly tailored to your personal preferences and wedding theme. High-Quality Products We use only premium, high-quality makeup products that are suitable for all skin types and designed to deliver long-lasting results. This selection ensures that your makeup remains flawless and fresh throughout your wedding day. Comprehensive Pre-Wedding Consultations Ladyfair provides detailed pre-wedding consultations to plan your ideal bridal look. During this session, you can discuss your vision, try different styles, and receive expert advice to ensure that your final look aligns perfectly with your expectations. Bridal Makeup Trends in Goradih Traditional Bridal Makeup Traditional bridal makeup remains a popular choice in Goradih. This style often features bold eyes, vibrant lips, and intricate contouring, reflecting cultural heritage and complementing traditional wedding attire. Modern Bridal Makeup For a contemporary appearance, modern bridal makeup focuses on a more natural and understated look. It highlights your natural features with soft tones and subtle accents, creating an elegant and timeless style. Fusion Bridal Makeup Fusion bridal makeup combines elements of both traditional and modern styles. This approach allows for a unique, personalized look that blends classic beauty with contemporary trends, resulting in a memorable and distinctive appearance. The Ladyfair Experience: From Consultation to Final Makeup Initial Inquiry: Reach out to us at 7004721239 to discuss your bridal makeup needs and schedule an appointment. Pre-Wedding Consultation: Meet with our makeup artist for a thorough consultation to discuss your desired look, review your wedding attire, and plan the perfect makeup style. Makeup Trial: Experience a trial session to preview your bridal makeup. This step ensures you are completely satisfied with the look before your wedding day. Final Makeup Session: On your wedding day, our makeup artist arrives at your location to provide the full bridal makeup service, ensuring you look flawless and feel confident. Post-Wedding Touch-Ups: If needed, we offer touch-up services throughout the wedding day to keep your makeup looking perfect. Client Testimonials Aarti S., Goradih: "Ladyfair made my wedding day extraordinary with their exceptional makeup services. The convenience of having the makeup artist come to my home was fantastic, and I felt absolutely beautiful all day long." Rina K., Goradih: "I was thrilled with the makeup trial and the final look on my wedding day. Ladyfair’s makeup artist was professional, skilled, and truly understood my vision. I received countless compliments!" Sunita P., Goradih: "The quality of Ladyfair’s products and the artist’s expertise were impressive. My makeup looked flawless and lasted throughout the day. I couldn’t have asked for a better bridal makeup experience." Preparing for Your Bridal Makeup Session For the best results, follow these preparation tips: Stay Hydrated: Drink plenty of water to keep your skin healthy and radiant. Follow a Skincare Routine: Maintain a consistent skincare routine with cleansing, toning, and moisturizing. Avoid New Products: Stick to your regular skincare products to prevent potential reactions. Communicate Clearly: Share your vision and any specific concerns with the makeup artist during your consultation to ensure the best outcome. Beyond Bridal Makeup: Ladyfair’s Additional Services In addition to bridal makeup, Ladyfair offers a range of beauty services: Party Makeup: Perfect for special events, including weddings, parties, and gatherings. Everyday Makeup: Ideal for daily wear and casual outings. Special Occasion Makeup: Includes services for engagements, anniversaries, and other important events. Looking Ahead: The Future of Bridal Makeup in Goradih As Ladyfair’s reputation for premium, at-home bridal makeup services continues to grow, we are dedicated to expanding our reach in Goradih. Our mission is to set new standards in bridal beauty, offering innovative techniques and products that cater to evolving trends and individual preferences. Our goal is to ensure that every bride in Goradih experiences exceptional beauty services that make her wedding day truly memorable. Q&A with Ladyfair’s Top Bridal Makeup Artist in Goradih Q1: What sets Ladyfair’s bridal makeup services apart in Goradih? A1: Ladyfair’s at-home makeup services offer convenience and personalization by bringing professional beauty treatments directly to the bride’s location. Our skilled makeup artist ensures that each bride’s look is customized to her preferences and wedding theme. Q2: What types of bridal makeup does Ladyfair offer? A2: Ladyfair specializes in traditional, modern, and fusion bridal makeup styles. We can create a classic, bold look or a soft, contemporary appearance based on the bride’s preferences. Q3: How does the at-home makeup service process work? A3: The process begins with an initial phone consultation to discuss your needs. We then conduct a pre-wedding consultation and makeup trial. On your wedding day, our makeup artist arrives at your location to provide the full makeup service. Q4: What makeup products does Ladyfair use? A4: Ladyfair uses high-quality, premium makeup products that are safe for all skin types and provide long-lasting results. Our products are selected to ensure a flawless finish and beautiful look throughout the day. Q5: How should a bride prepare for her bridal makeup session? A5: Brides should stay hydrated, maintain a consistent skincare routine, avoid trying new products close to the wedding day, and communicate their vision clearly during the consultation for the best results. Q6: Can Ladyfair accommodate traditional or cultural makeup requirements? A6: Yes, Ladyfair is skilled in creating makeup looks that reflect cultural and traditional values. We can incorporate specific elements into the makeup to honor these traditions while providing a modern touch. Q7: What do previous clients say about their experience with Ladyfair? A7: Brides appreciate the convenience of our at-home services, the professionalism of our makeup artist, and the high quality of the makeup. Many have noted how beautiful and confident they felt on their wedding day. Q8: How can a bride book Ladyfair’s bridal makeup services in Goradih? A8: Booking is easy! Call us at 7004721239 to discuss your bridal makeup needs and schedule an appointment. We’ll guide you through the process from the initial inquiry to the final makeup session. Q9: Does Ladyfair offer other beauty services apart from bridal makeup? A9: Yes, Ladyfair provides a variety of beauty services, including party makeup, everyday makeup, and special occasion makeup.

Posted By: 16th September 2024
Bridal Makeup Artist in Koilwar
Bridal Makeup Artist in Koilwar Experience the Best Bridal Makeup Services in Koilwar with Ladyfair In Koilwar, Ladyfair is the go-to provider for luxurious at-home bridal makeup services. Whether you’re seeking a traditional look, HD makeup, or the perfect airbrush finish, our expert makeup artist ensures you look stunning and radiant on your wedding day—all from the comfort of your home. Why Ladyfair is the Premier Choice for Bridal Makeup in Koilwar Expertise of Our Makeup Artist Our professional makeup artist in Koilwar specializes in creating breathtaking bridal looks tailored to your personal style. We focus on bringing out your natural beauty to make sure you shine on your special day. Convenient At-Home Service Forget the stress of salon visits. With Ladyfair, we bring the luxury of bridal makeup right to your home, ensuring a comfortable and seamless experience on your wedding day. Use of Premium Products We use only top-quality, professional-grade products to give you a flawless, long-lasting look that will keep you glowing throughout your wedding ceremony and beyond. Bridal Makeup Pricing in Koilwar We offer competitive pricing on our bridal makeup services, making sure there’s a package for every bride: Basic Bridal Makeup: ₹10,000 HD Bridal Makeup: ₹12,000 Airbrush Bridal Makeup: ₹18,000 For engagement and reception: Basic Makeup: ₹6,000 HD Makeup: ₹8,000 Airbrush Makeup: ₹12,000 For parties: Basic Party Makeup: ₹2,500 HD Party Makeup: ₹3,500 Popular Bridal Makeup Styles in Koilwar Traditional Bridal Makeup Designed to complement vibrant wedding attire, this timeless style offers an elegant and regal look that’s perfect for traditional ceremonies. HD Bridal Makeup Ideal for photos and live events, HD makeup ensures a flawless finish that will last all day, leaving you picture-perfect throughout your wedding. Airbrush Bridal Makeup For brides looking for a lightweight yet long-lasting look, airbrush makeup provides smooth, full coverage with a natural glow. How to Book Your Bridal Makeup with Ladyfair in Koilwar Initial Contact: Call us at 7004721239 to discuss your bridal makeup needs. Consultation Session: Collaborate with our expert makeup artist to design a look that complements your style and wedding attire. Makeup Trial: Opt for a trial session to finalize and perfect your bridal makeup ahead of the wedding. Wedding Day Makeup: On the big day, our artist will arrive at your location in Koilwar, ensuring a flawless, stress-free experience. Testimonials from Brides in Koilwar Pooja R.: “Ladyfair’s at-home service was a game changer. I felt so relaxed on my wedding day, and my makeup looked absolutely gorgeous!” Rina S.: “The airbrush makeup stayed perfect throughout the day and night. I received so many compliments!” Anita P.: “I opted for HD makeup, and it made a huge difference in my photos. Ladyfair’s service was fantastic!” Preparing for Your Bridal Makeup Session Stay Hydrated: Drink plenty of water to maintain fresh and glowing skin. Follow a Skincare Routine: Stick to your skincare regimen leading up to the wedding for optimal results. Avoid New Products: Avoid introducing new skincare products close to the wedding to prevent any unwanted reactions. Clear Communication: During the consultation, be sure to share your preferences and ideas with our makeup artist to ensure your perfect bridal look. Additional Beauty Services by Ladyfair Ladyfair offers a variety of beauty services, including: Engagement and Reception Makeup Party Makeup Everyday Makeup Special Occasion Makeup for birthdays, anniversaries, and more.

Posted By: 16th September 2024
Bridal Makeup Artist in Tarari
Bridal Makeup Artist in Tarari Experience the Best Bridal Makeup Services in Tarari with Ladyfair In Tarari, Ladyfair is the leading provider of luxurious at-home bridal makeup services. Whether you’re looking for a traditional, HD, or airbrush bridal makeup, our expert makeup artist ensures that you look flawless and radiant on your wedding day, all from the comfort of your home. Why Ladyfair is the Premier Choice for Bridal Makeup in Tarari Expertise of Our Makeup Artist Our makeup artist in Tarari is highly skilled in creating stunning, personalized bridal looks. We focus on enhancing your natural beauty, ensuring you feel beautiful and confident on your special day. Convenient At-Home Service Forget about the hassle of visiting a salon! With Ladyfair, our professional makeup artist will come to your home, providing you with a luxurious, stress-free bridal makeup experience right at your doorstep. Use of Premium Products We use only high-quality, professional makeup products to give you a long-lasting, flawless look that will keep you glowing throughout your wedding day. Bridal Makeup Pricing in Tarari We offer a variety of competitively priced bridal makeup packages to suit every bride’s needs: Basic Bridal Makeup: ₹10,000 HD Bridal Makeup: ₹12,000 Airbrush Bridal Makeup: ₹18,000 For engagement and reception: Basic Makeup: ₹6,000 HD Makeup: ₹8,000 Airbrush Makeup: ₹12,000 For parties: Basic Party Makeup: ₹2,500 HD Party Makeup: ₹3,500 Popular Bridal Makeup Styles in Tarari Traditional Bridal Makeup This look is designed to complement traditional wedding attire with vibrant colors, offering a timeless and elegant appearance. HD Bridal Makeup Ideal for both photography and real-life moments, HD bridal makeup ensures a flawless finish that will last throughout the day. Airbrush Bridal Makeup Airbrush makeup provides lightweight, full coverage for brides seeking a natural yet polished look with long-lasting wear. How to Book Your Bridal Makeup with Ladyfair in Tarari Initial Contact: Call us at 7004721239 to discuss your bridal makeup requirements. Consultation Session: Collaborate with our expert makeup artist to plan a bridal look that suits your style and wedding attire. Makeup Trial: Schedule a trial session to perfect your look ahead of the wedding day. Wedding Day Makeup: On your wedding day, our artist will arrive at your location in Tarari, ensuring you receive a flawless, stress-free makeup application. Testimonials from Brides in Tarari Neha S.: “Ladyfair made me look and feel absolutely stunning on my wedding day! The at-home service was so convenient.” Priyanka K.: “I opted for airbrush makeup, and it was perfect. It stayed fresh all day, and I received so many compliments.” Swati T.: “The HD makeup was incredible. My photos turned out beautifully, and my bridal look was flawless.” Preparing for Your Bridal Makeup Session Stay Hydrated: Drink plenty of water to keep your skin fresh and glowing. Follow a Skincare Routine: Stick to your usual skincare routine in the days leading up to your wedding for the best results. Avoid New Products: Do not experiment with new skincare products close to the wedding to avoid skin reactions. Clear Communication: During the consultation, communicate your preferences and expectations with our makeup artist to ensure your dream look. Additional Beauty Services by Ladyfair In addition to bridal makeup, Ladyfair also offers a range of beauty services, including: Engagement and Reception Makeup Party Makeup Everyday Makeup Special Occasion Makeup for events like birthdays, anniversaries, and more.

Posted By: 16th September 2024
Bridal Makeup Artist in Charpokhari
Bridal Makeup Artist in Charpokhari Published on: 14th September 2024 by Digital Team Experience the Best Bridal Makeup Services in Charpokhari with Ladyfair In Charpokhari, Ladyfair is known for providing luxurious at-home bridal makeup services that make every bride look radiant on her big day. Whether you desire a traditional bridal look, an HD finish, or airbrush makeup, our expert makeup artist ensures that you look stunning from the comfort of your own home. Why Ladyfair is the Premier Choice for Bridal Makeup in Charpokhari Expertise of Our Makeup Artist Ladyfair’s makeup artist in Charpokhari is experienced in creating flawless bridal looks that highlight your natural beauty. We work closely with you to ensure your wedding day makeup reflects your personal style. Convenient At-Home Service Skip the stress of traveling to a salon and enjoy our at-home bridal makeup services. We bring the artistry and luxury of professional makeup directly to your doorstep, ensuring a smooth and relaxed experience. Use of Premium Products We only use top-quality, professional makeup products to guarantee a flawless and long-lasting look that will keep you glowing throughout your wedding celebrations. Bridal Makeup Pricing in Charpokhari Our competitive pricing options ensure that every bride in Charpokhari can find a package that meets her needs: Basic Bridal Makeup: ₹10,000 HD Bridal Makeup: ₹12,000 Airbrush Bridal Makeup: ₹18,000 For engagement and reception: Basic Makeup: ₹6,000 HD Makeup: ₹8,000 Airbrush Makeup: ₹12,000 For parties: Basic Party Makeup: ₹2,500 HD Party Makeup: ₹3,500 Popular Bridal Makeup Styles in Charpokhari Traditional Bridal Makeup A classic bridal style that uses rich colors to complement traditional wedding attire, resulting in an elegant and timeless look. HD Bridal Makeup HD makeup provides a high-definition finish, ideal for photographs and real-life moments, ensuring that your look remains flawless throughout your wedding day. Airbrush Bridal Makeup Airbrush makeup offers lightweight, full coverage, giving brides a natural glow with a smooth, long-lasting finish that feels comfortable all day. How to Book Your Bridal Makeup with Ladyfair in Charpokhari Initial Contact: Call us at 7004721239 to discuss your bridal makeup needs. Consultation Session: Work with our expert makeup artist to plan your desired bridal look, tailored to your style and wedding outfit. Makeup Trial: Schedule a trial session to preview and perfect your bridal look before the big day. Wedding Day Makeup: Our artist will arrive at your location in Charpokhari to provide a stress-free and flawless makeup experience. Testimonials from Brides in Charpokhari Shweta R.: “Ladyfair’s at-home makeup service made everything so convenient. I loved my bridal look, and the makeup lasted all day!” Poonam D.: “The airbrush makeup was perfect for my wedding. I felt so confident, and it stayed flawless throughout the celebrations.” Kajal P.: “The HD makeup was stunning! My photos turned out amazing, and I felt like a true bride.” Preparing for Your Bridal Makeup Session Stay Hydrated: Drink plenty of water to keep your skin glowing. Follow a Skincare Routine: Stick to a consistent skincare routine in the days leading up to your wedding. Avoid New Products: Avoid trying new products close to your wedding day to prevent any possible skin reactions. Clear Communication: During your consultation, clearly communicate your preferences to our makeup artist for the best results. Additional Beauty Services by Ladyfair Ladyfair offers more than just bridal makeup. Our range of beauty services includes: Engagement and Reception Makeup Party Makeup Everyday Makeup Special Occasion Makeup for birthdays, anniversaries, and other celebrations.
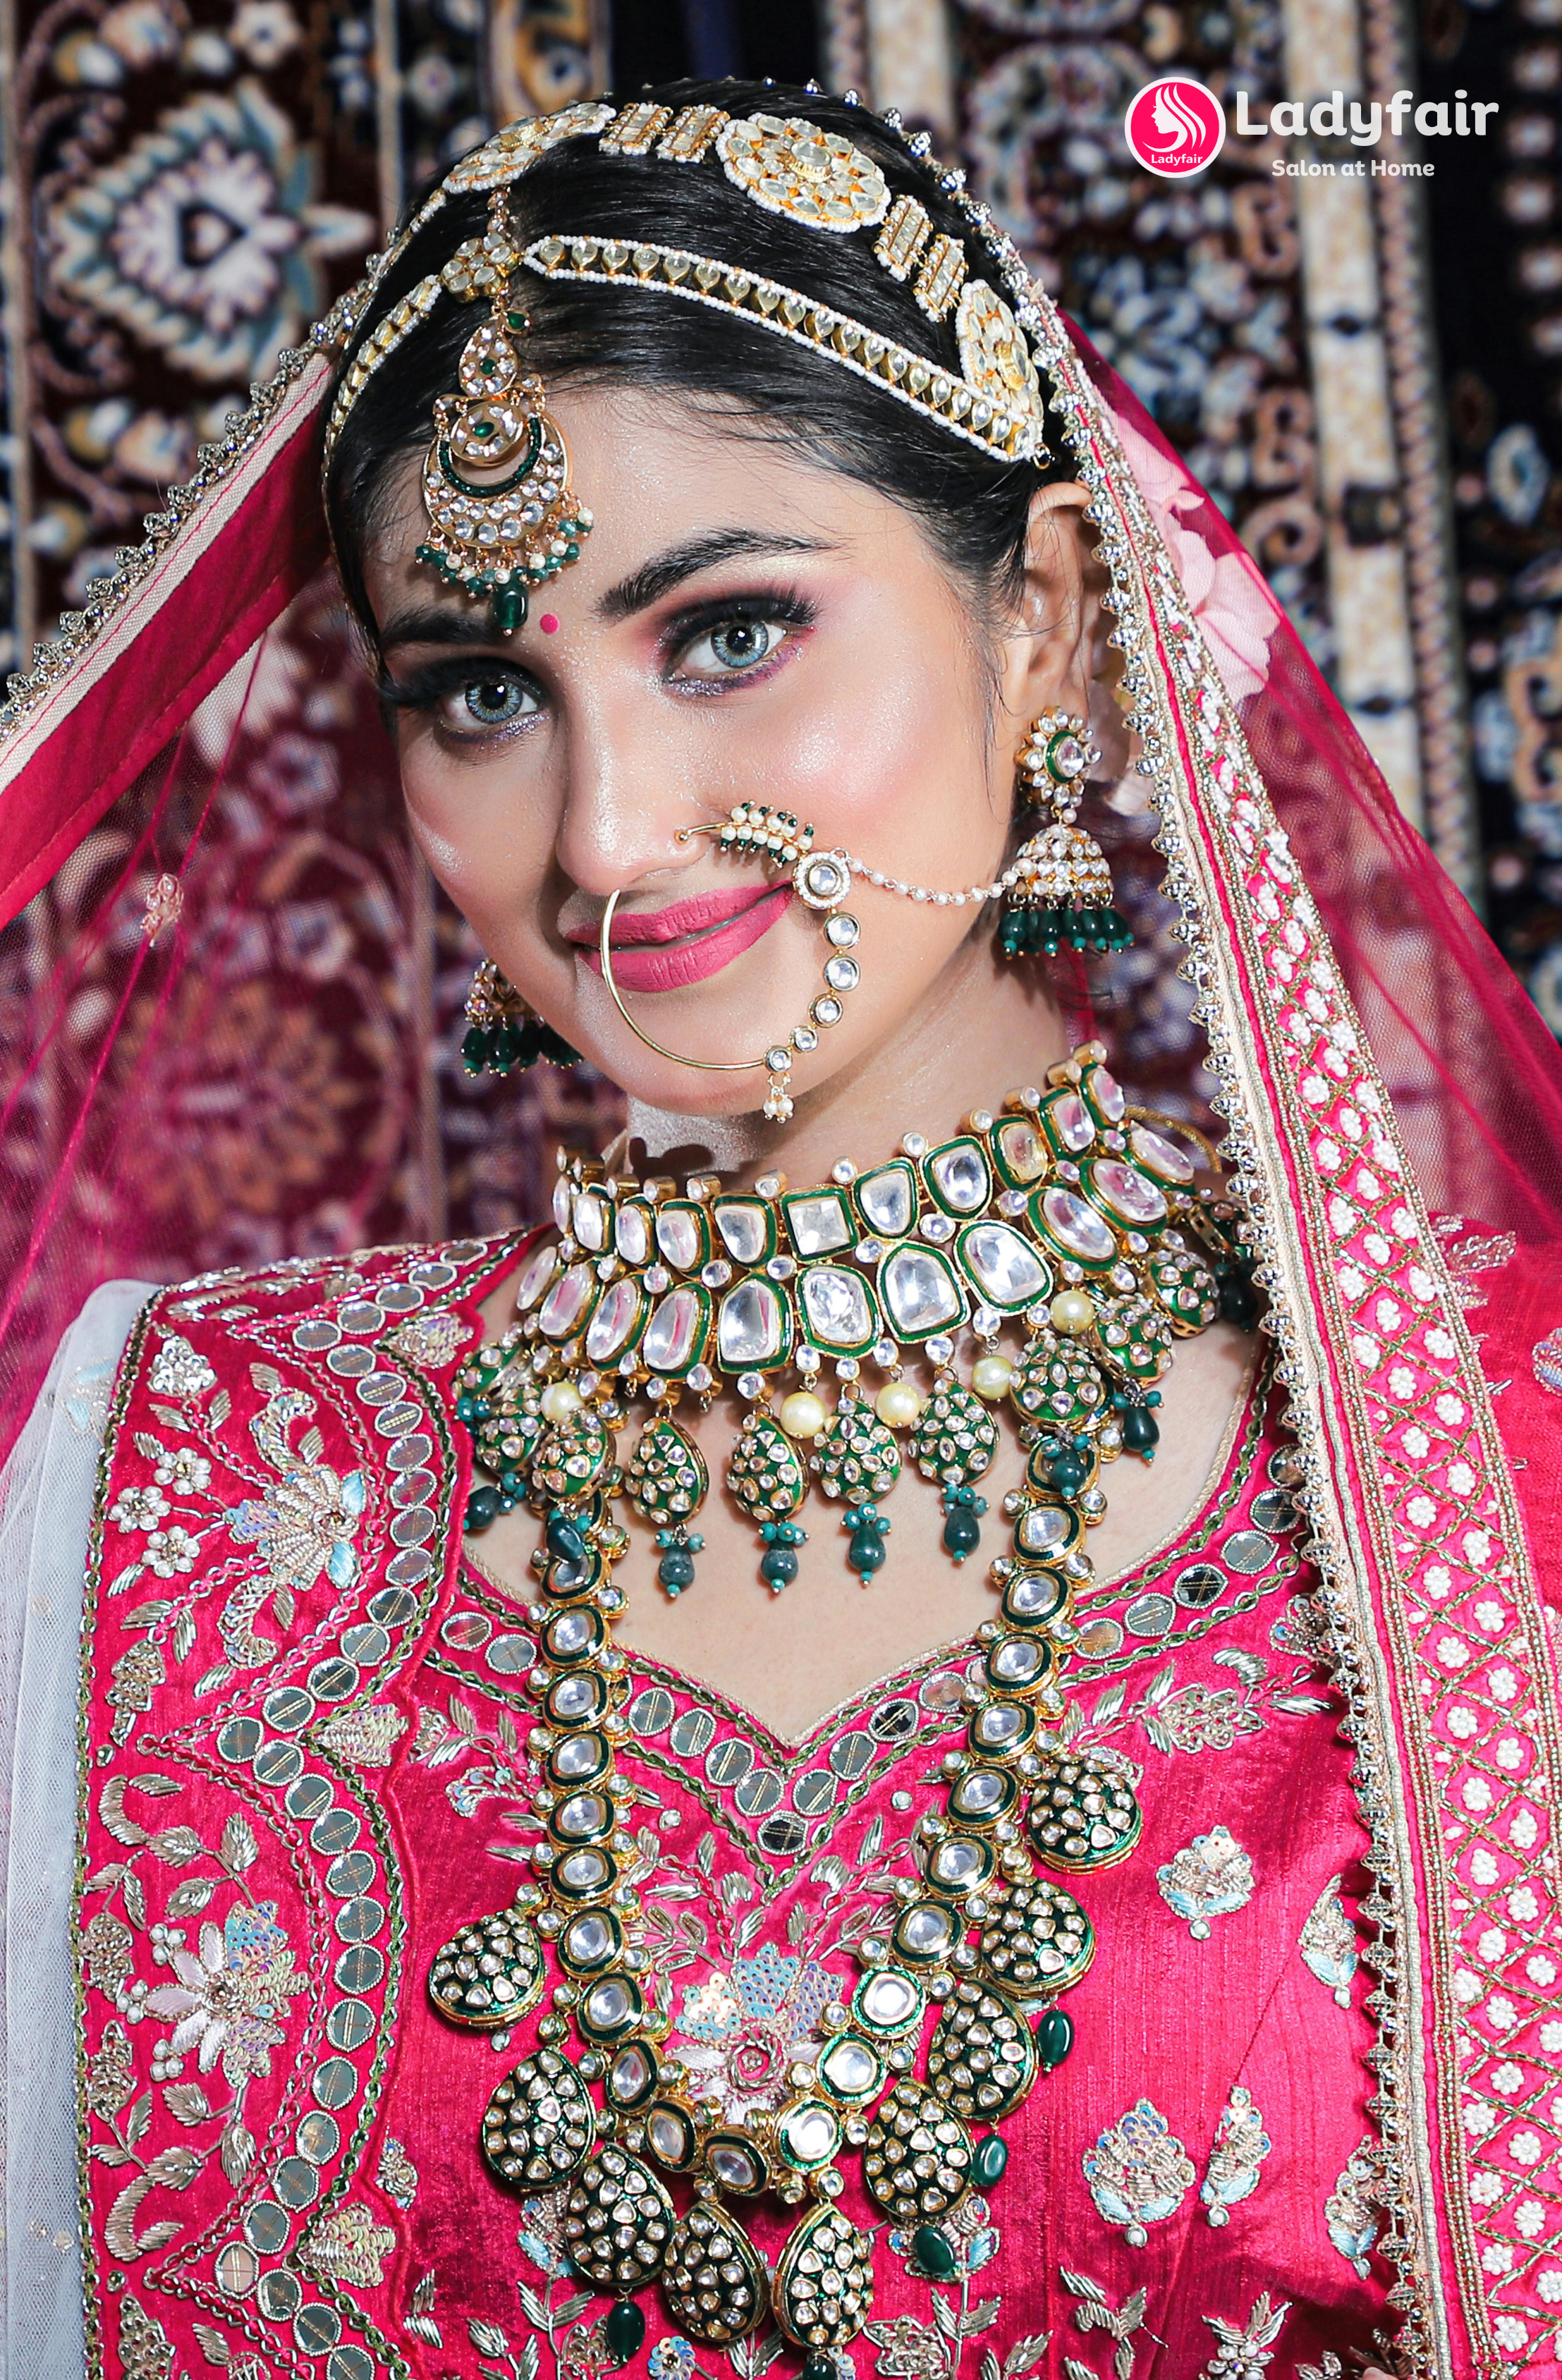
Posted By: 16th September 2024
Bridal Makeup Artist in Piro
Bridal Makeup Artist in Piro Experience the Best Bridal Makeup Services in Piro with Ladyfair Ladyfair offers the best in luxurious, at-home bridal makeup services in Piro, ensuring every bride looks radiant on her special day. Whether you desire a traditional look, an HD finish, or a flawless airbrush style, our expert makeup artist will provide a stunning transformation right in the comfort of your home. Why Ladyfair is the Premier Choice for Bridal Makeup in Piro Expertise of Our Makeup Artist Ladyfair’s makeup artist in Piro is highly skilled in creating personalized bridal looks that enhance your natural beauty. With an eye for detail, our artist will make sure you feel confident and beautiful on your big day. Convenient At-Home Service Skip the hassle of salon appointments and enjoy our luxurious at-home bridal makeup services. We bring professional artistry to your doorstep, providing you with a stress-free experience. Use of Premium Products We use only the best professional makeup products to ensure a flawless, long-lasting look that keeps you glowing throughout your wedding celebrations. Bridal Makeup Pricing in Piro Our pricing is competitive, offering packages tailored to fit every bride’s needs in Piro: Basic Bridal Makeup: ₹10,000 HD Bridal Makeup: ₹12,000 Airbrush Bridal Makeup: ₹18,000 For engagement and reception: Basic Makeup: ₹6,000 HD Makeup: ₹8,000 Airbrush Makeup: ₹12,000 For parties: Basic Party Makeup: ₹2,500 HD Party Makeup: ₹3,500 Popular Bridal Makeup Styles in Piro Traditional Bridal Makeup This timeless look uses bold, vibrant colors to complement traditional wedding attire, ensuring a regal and elegant appearance. HD Bridal Makeup Perfect for capturing the best photos and real-life moments, HD makeup provides a high-definition finish that lasts all day. Airbrush Bridal Makeup Airbrush makeup gives brides a lightweight, full-coverage glow, ensuring a smooth, natural finish that lasts throughout the wedding festivities. How to Book Your Bridal Makeup with Ladyfair in Piro Initial Contact: Call us at 7004721239 to discuss your bridal makeup needs. Consultation Session: Collaborate with our expert makeup artist to plan your bridal look, tailored to your personal style and wedding attire. Makeup Trial: Schedule a trial session to ensure your bridal look is perfect ahead of your big day. Wedding Day Makeup: Our makeup artist will arrive at your location in Piro to provide a flawless and stress-free bridal makeup experience. Testimonials from Brides in Piro Riya K.: “Ladyfair’s at-home service was so convenient! I felt relaxed, and my makeup turned out beautifully.” Sonal P.: “The airbrush makeup was perfect! It lasted all day and made me feel radiant.” Meera S.: “I loved the HD makeup. It looked stunning in my wedding photos, and I felt like a princess!” Preparing for Your Bridal Makeup Session Stay Hydrated: Keep your skin healthy and glowing by drinking plenty of water. Follow a Skincare Routine: Stick to a consistent skincare routine leading up to your wedding. Avoid New Products: Avoid trying new skincare products close to your wedding day to prevent any skin reactions. Clear Communication: During your consultation, share your preferences with our makeup artist to ensure your desired bridal look is achieved. Additional Beauty Services by Ladyfair Ladyfair offers a variety of beauty services beyond bridal makeup, including: Engagement and Reception Makeup Party Makeup Everyday Makeup Special Occasion Makeup for birthdays, anniversaries, and other celebrations.

Posted By: 16th September 2024
Bridal Makeup Artist in Shahpur
Bridal Makeup Artist in Shahpur Experience the Best Bridal Makeup Services in Shahpur with Ladyfair Ladyfair offers luxurious, at-home bridal makeup services in Shahpur, making us the preferred choice for brides. Whether you’re looking for a traditional look, HD finish, or flawless airbrush makeup, our expert makeup artist will ensure you look radiant on your wedding day from the comfort of your home. Why Ladyfair is the Premier Choice for Bridal Makeup in Shahpur Expertise of Our Makeup Artist Ladyfair’s makeup artist in Shahpur is experienced in creating personalized bridal looks that reflect your style. We focus on enhancing your natural beauty, so you feel confident and beautiful on your special day. Convenient At-Home Service Avoid the stress of salon visits with our convenient at-home bridal makeup services. We bring the luxury of professional makeup directly to your home, ensuring a smooth and hassle-free experience. Use of Premium Products We use high-end, professional makeup products to deliver a flawless and long-lasting look, keeping you glowing throughout your wedding day. Bridal Makeup Pricing in Shahpur Our competitive pricing ensures every bride in Shahpur can find a package suited to her needs: Basic Bridal Makeup: ₹10,000 HD Bridal Makeup: ₹12,000 Airbrush Bridal Makeup: ₹18,000 For engagement and reception: Basic Makeup: ₹6,000 HD Makeup: ₹8,000 Airbrush Makeup: ₹12,000 For parties: Basic Party Makeup: ₹2,500 HD Party Makeup: ₹3,500 Popular Bridal Makeup Styles in Shahpur Traditional Bridal Makeup This classic style incorporates vibrant colors to complement traditional wedding attire, creating a timeless and regal look. HD Bridal Makeup Perfect for photos and real-life moments, HD makeup offers a high-definition finish that keeps you looking flawless all day long. Airbrush Bridal Makeup Airbrush makeup offers full coverage with a lightweight feel, giving brides a natural glow and a smooth, long-lasting finish. How to Book Your Bridal Makeup with Ladyfair in Shahpur Initial Contact: Call us at 7004721239 to discuss your bridal makeup requirements. Consultation Session: Plan your dream bridal look with our expert makeup artist, tailored to your style and wedding outfit. Makeup Trial: Schedule a trial session to preview and perfect your bridal look. Wedding Day Makeup: Our makeup artist will arrive at your location in Shahpur to deliver a flawless and stress-free bridal makeup experience. Testimonials from Brides in Shahpur Neha R.: “Ladyfair’s at-home bridal makeup was amazing! The whole experience was stress-free, and I loved how my makeup turned out.” Ritika T.: “The airbrush makeup was stunning! It stayed flawless the entire day, and I felt beautiful in every moment.” Anu B.: “The HD makeup was perfect for my photos. Ladyfair truly made me feel special on my wedding day.” Preparing for Your Bridal Makeup Session Stay Hydrated: Keep your skin glowing by drinking plenty of water. Follow a Skincare Routine: Stick to a consistent skincare routine leading up to your wedding. Avoid New Products: Avoid trying new products close to your wedding day to prevent any skin reactions. Clear Communication: During your consultation, clearly communicate your preferences to achieve your desired bridal look. Additional Beauty Services by Ladyfair Ladyfair provides more than just bridal makeup. Our range of beauty services includes: Engagement and Reception Makeup Party Makeup Everyday Makeup Special Occasion Makeup for birthdays, anniversaries, and more. The Future of Bridal Makeup in Shahpur Ladyfair is committed to raising bridal beauty standards with our at-home bridal makeup services in Shahpur. Our dedication to providing brides with exceptional care and expertise makes us the top choice for wedding makeup. Contact us at 7004721239 to book your bridal makeup session today!
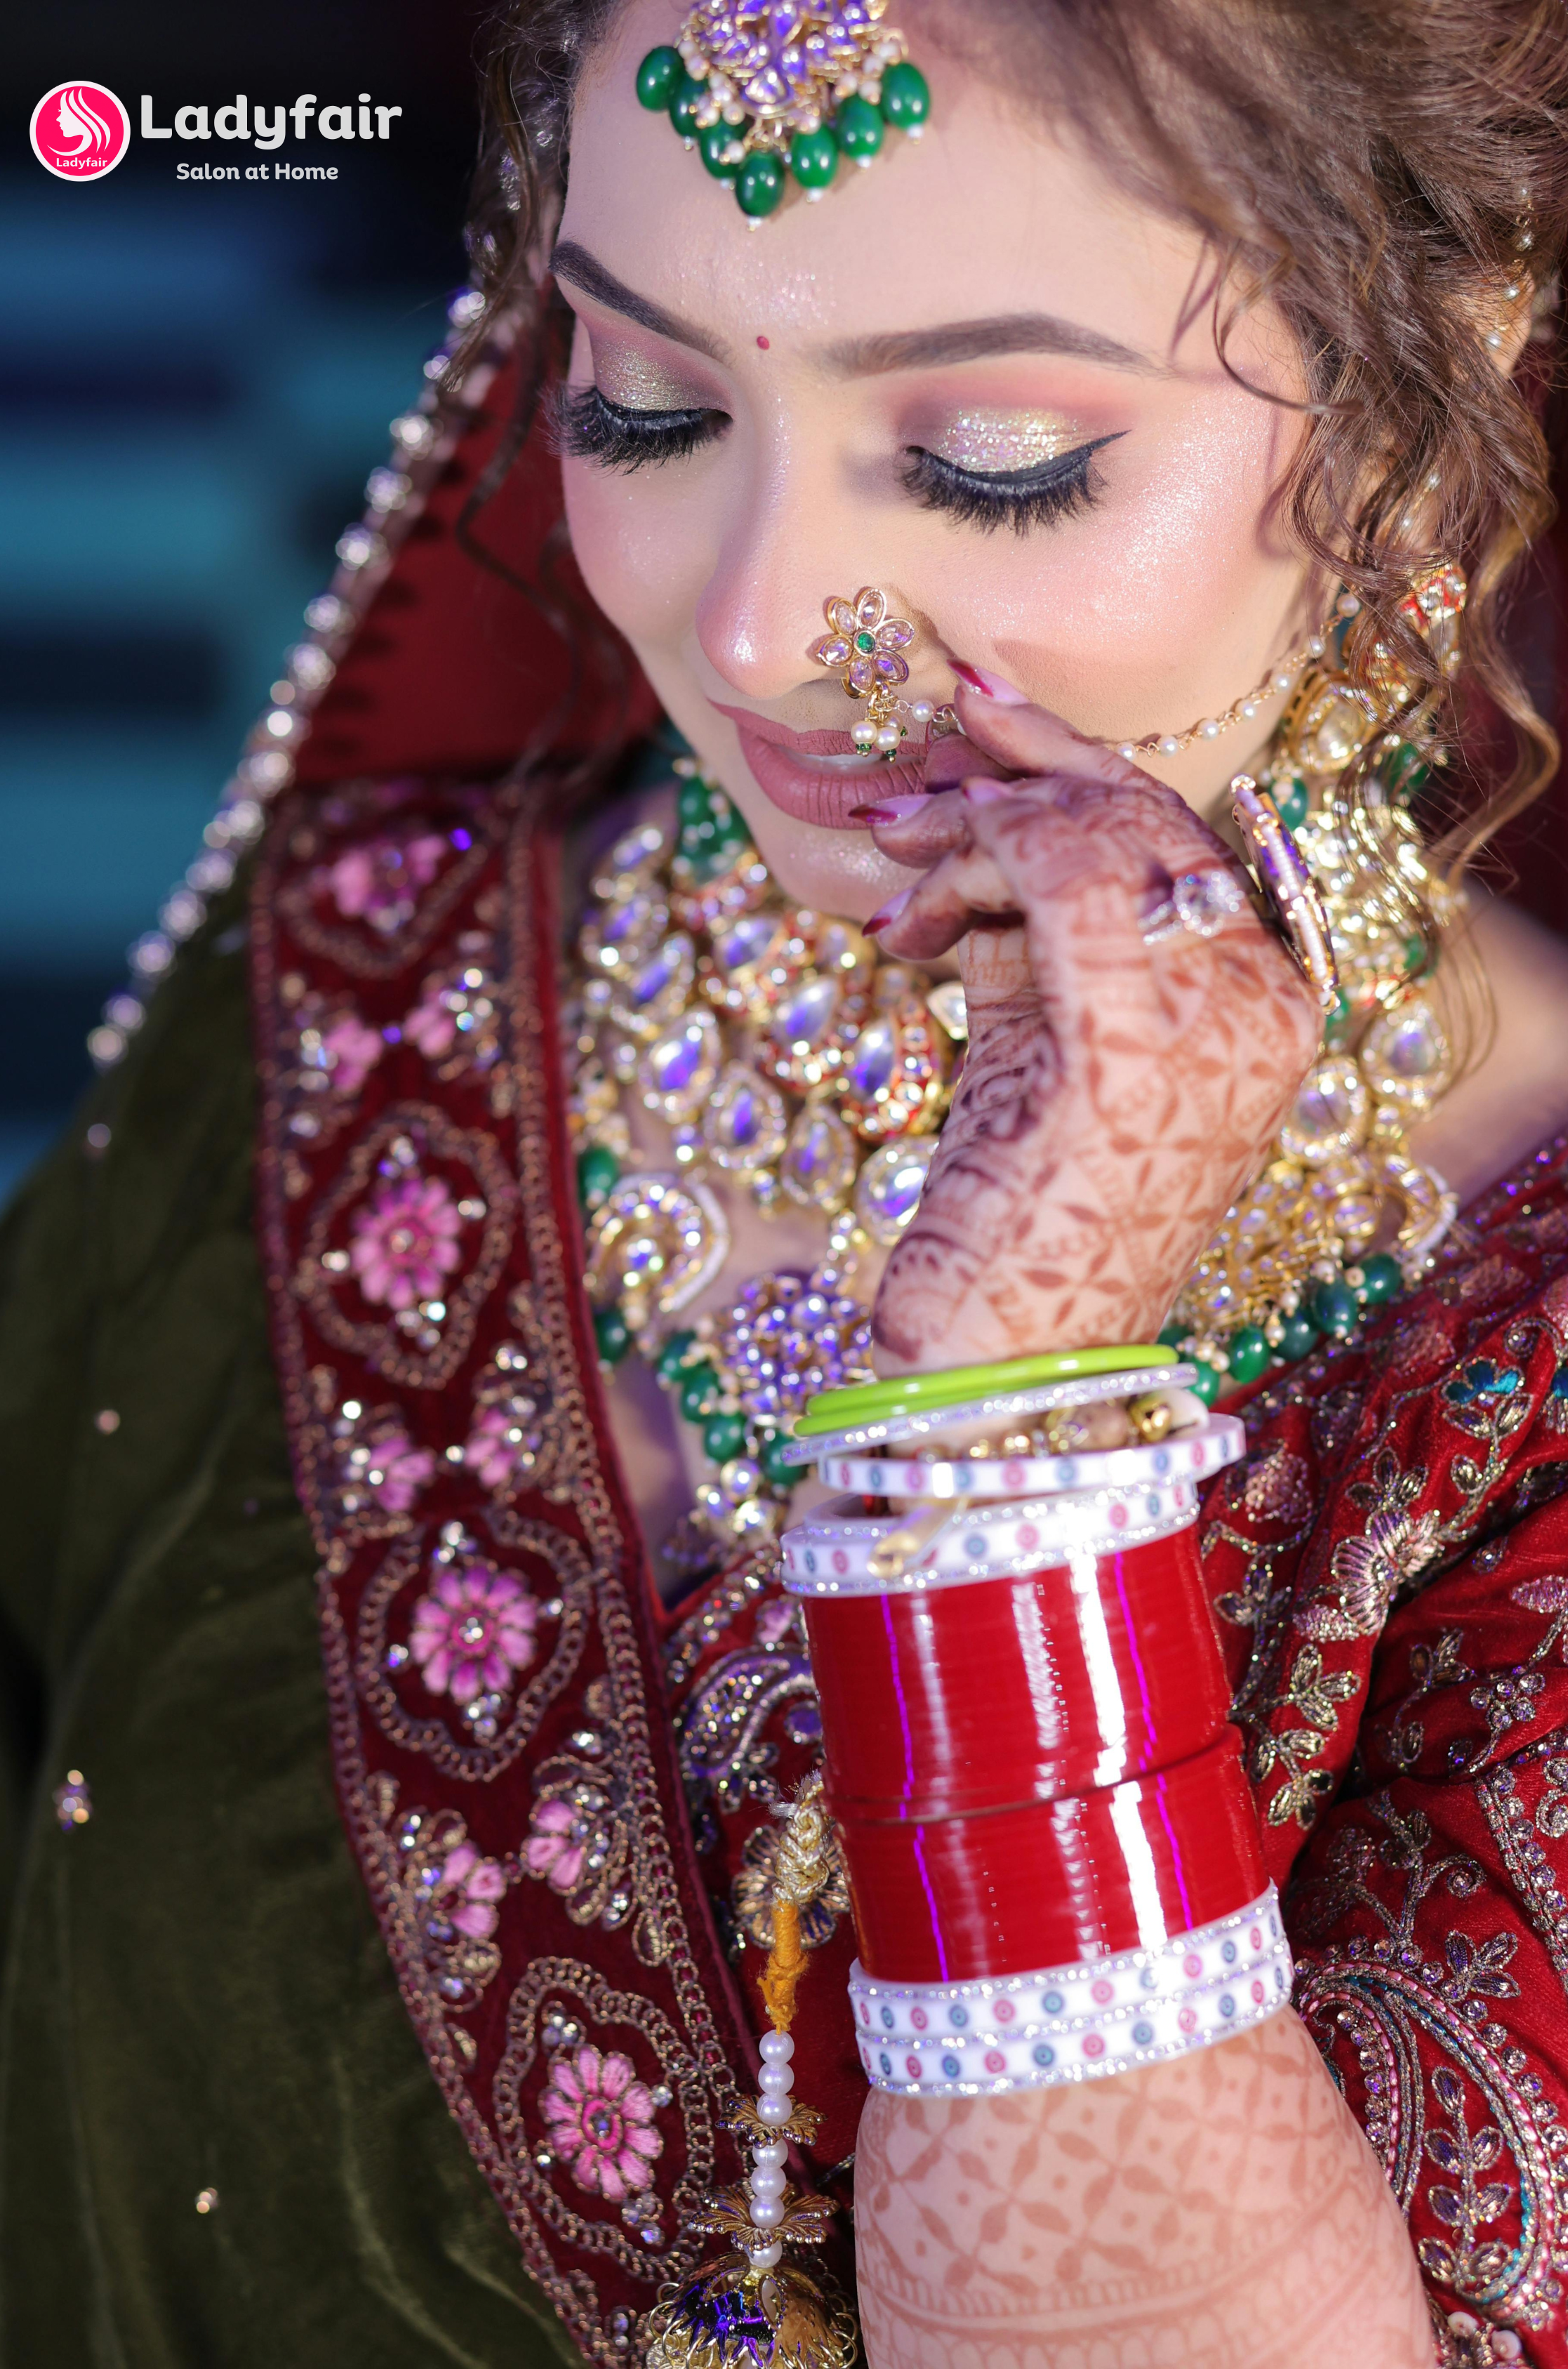
Posted By: 16th September 2024
Bridal Makeup Artist in Bihiya
Bridal Makeup Artist in Bihiya Experience the Best Bridal Makeup Services in Bihiya with Ladyfair In Bihiya, Ladyfair offers luxurious at-home bridal makeup services, making us the top choice for brides. Whether you prefer a traditional look, an HD finish, or flawless airbrush makeup, our expert makeup artist will ensure you look radiant on your big day, all from the comfort of your own home. Why Ladyfair is the Premier Choice for Bridal Makeup in Bihiya Expertise of Our Makeup Artist Ladyfair’s makeup artist in Bihiya is highly experienced in creating stunning bridal looks that are personalized to your style. We focus on enhancing your natural beauty, ensuring you feel confident and radiant on your special day. Convenient At-Home Service Forget the hassle of salon visits with our convenient at-home bridal makeup services. We bring professional luxury makeup directly to your home, offering a seamless, stress-free experience. Use of Premium Products We use high-end, professional makeup products to create a long-lasting and flawless look that will keep you glowing throughout your wedding day. Bridal Makeup Pricing in Bihiya Our competitive bridal makeup pricing in Bihiya offers packages to suit every bride’s needs: Basic Bridal Makeup: ₹10,000 HD Bridal Makeup: ₹12,000 Airbrush Bridal Makeup: ₹18,000 For engagement and reception: Basic Makeup: ₹6,000 HD Makeup: ₹8,000 Airbrush Makeup: ₹12,000 For parties: Basic Party Makeup: ₹2,500 HD Party Makeup: ₹3,500 Popular Bridal Makeup Styles in Bihiya Traditional Bridal Makeup A classic look that uses vibrant colors to complement your traditional wedding attire, creating a regal and elegant appearance. HD Bridal Makeup With a high-definition finish, HD makeup ensures you look flawless in both photos and in real life, lasting all day. Airbrush Bridal Makeup Airbrush makeup provides lightweight yet full coverage, giving you a natural, glowing finish that lasts throughout your wedding. How to Book Your Bridal Makeup with Ladyfair in Bihiya Initial Contact: Call us at 7004721239 to discuss your bridal makeup needs. Consultation Session: Collaborate with our expert makeup artist to design your ideal bridal look, tailored to your wedding attire and personal style. Makeup Trial: Book a trial session to perfect your bridal look before the big day. Wedding Day Makeup: Our makeup artist will arrive at your location in Bihiya to provide a flawless, stress-free bridal makeup experience. Testimonials from Brides in Bihiya Pooja S.: “Ladyfair made the at-home bridal makeup experience so convenient and stress-free. I was absolutely in love with my bridal look!” Kajal K.: “The airbrush makeup was beyond perfect! It lasted all day, and I felt beautiful every moment.” Divya M.: “The HD makeup looked amazing in my photos. Ladyfair made me feel special and confident on my big day.” Preparing for Your Bridal Makeup Session Stay Hydrated: Drink plenty of water to keep your skin healthy and glowing. Follow a Skincare Routine: Stick to a consistent skincare regimen leading up to your wedding. Avoid New Products: Avoid trying new skincare products close to the wedding day to prevent any skin reactions. Clear Communication: During your consultation, make sure to communicate your preferences and concerns to ensure the perfect bridal look. Additional Beauty Services by Ladyfair Ladyfair offers more than just bridal makeup. Our range of services includes: Engagement and Reception Makeup Party Makeup Everyday Makeup Special Occasion Makeup for birthdays, anniversaries, and other events. The Future of Bridal Makeup in Bihiya Ladyfair is committed to setting new standards in bridal beauty with our exceptional at-home bridal makeup services in Bihiya. As we continue to provide unmatched care and expertise to brides, Ladyfair remains the preferred choice for bridal makeup in Bihiya. Contact us today at 7004721239 to book your bridal makeup session!

Posted By: 16th September 2024
Bridal Makeup Artist in Jagdishpur
Bridal Makeup Artist in Jagdishpur Experience the Best Bridal Makeup Services in Jagdishpur with Ladyfair In Jagdishpur, Ladyfair is the leading choice for luxurious at-home bridal makeup services. Whether you’re going for a traditional look, an HD finish, or airbrush perfection, our expert makeup artist will make sure you look stunning and radiant on your special day, right from the comfort of your own home. Why Ladyfair is the Premier Choice for Bridal Makeup in Jagdishpur Expertise of Our Makeup Artist Ladyfair’s makeup artist in Jagdishpur is highly skilled in creating breathtaking bridal looks tailored to your style and personality. We focus on enhancing your natural beauty, ensuring you feel confident and beautiful on your wedding day. Convenient At-Home Service Say goodbye to stressful salon visits with our at-home bridal makeup services. We bring the luxury of professional makeup to your home for a seamless, personalized experience. Use of Premium Products We only use high-end, professional makeup products to create a flawless and long-lasting look, keeping you radiant throughout your wedding day. Bridal Makeup Pricing in Jagdishpur Our competitive bridal makeup packages in Jagdishpur are designed to fit your needs and budget: Basic Bridal Makeup: ₹10,000 HD Bridal Makeup: ₹12,000 Airbrush Bridal Makeup: ₹18,000 For engagement and reception: Basic Makeup: ₹6,000 HD Makeup: ₹8,000 Airbrush Makeup: ₹12,000 For parties: Basic Party Makeup: ₹2,500 HD Party Makeup: ₹3,500 Popular Bridal Makeup Styles in Jagdishpur Traditional Bridal Makeup This timeless look enhances your traditional wedding attire with vibrant colors, creating a regal and elegant appearance. HD Bridal Makeup HD makeup delivers a high-definition, flawless finish, making sure you look stunning in both photographs and real life. Airbrush Bridal Makeup Lightweight yet full-coverage, airbrush makeup provides a natural glow with a smooth, long-lasting finish, perfect for your big day. How to Book Your Bridal Makeup with Ladyfair in Jagdishpur Initial Contact: Call us at 7004721239 to discuss your bridal makeup requirements. Consultation Session: Plan your desired look with our expert makeup artist, tailored to your style and wedding attire. Makeup Trial: Book a trial session to preview and perfect your bridal look. Wedding Day Makeup: Our artist will arrive at your location in Jagdishpur to ensure a flawless, stress-free makeup experience on your big day. Testimonials from Brides in Jagdishpur Rashmi D.: “Ladyfair’s at-home service was exceptional! The experience was stress-free, and my bridal makeup was perfect.” Sonal K.: “The airbrush makeup was absolutely flawless and stayed perfect all day. I felt beautiful every moment.” Neha M.: “The HD makeup was stunning, and my wedding photos turned out beautifully. Ladyfair truly made me feel like a queen.” Preparing for Your Bridal Makeup Session Stay Hydrated: Drink plenty of water to keep your skin glowing. Follow a Skincare Routine: Stick to a consistent skincare routine in the days leading up to your wedding. Avoid New Products: Refrain from trying new products close to the wedding day to avoid skin reactions. Clear Communication: During your consultation, communicate your preferences and concerns to ensure your dream look is achieved. Additional Beauty Services by Ladyfair In addition to bridal makeup, Ladyfair offers a wide range of beauty services: Engagement and Reception Makeup Party Makeup Everyday Makeup Special Occasion Makeup for birthdays, anniversaries, and other celebrations. The Future of Bridal Makeup in Jagdishpur Ladyfair is committed to raising the standard of bridal beauty with our exceptional at-home makeup services in Jagdishpur. As we continue to provide brides with unmatched care and professionalism, Ladyfair remains the top choice for wedding makeup in Jagdishpur. Contact us today at 7004721239 to book your bridal makeup session!

Posted By: 16th September 2024
Bridal Makeup Artist in Barhara
Experience the Best Bridal Makeup Services in Barhara with Ladyfair In Barhara, Ladyfair is your ultimate choice for luxurious at-home bridal makeup services. Whether you’re opting for a traditional look, an HD finish, or airbrush perfection, our expert makeup artist will ensure that you look flawless and radiant on your big day, all from the comfort of your home. Why Ladyfair is the Premier Choice for Bridal Makeup in Barhara Expertise of Our Makeup Artist Ladyfair’s makeup artist in Barhara is highly skilled in creating stunning bridal looks tailored to your unique style. We aim to enhance your natural beauty, making you feel confident and beautiful on your special day. Convenient At-Home Service Avoid the hassle of salon visits with our convenient at-home bridal makeup services. We bring the luxury of professional makeup to your doorstep for a stress-free and personalized experience. Use of Premium Products We use only high-end, professional makeup products to ensure a flawless, long-lasting look that keeps you glowing throughout your wedding celebrations. Bridal Makeup Pricing in Barhara Our competitive bridal makeup pricing in Barhara ensures that every bride can find a package that fits her needs and budget: Basic Bridal Makeup: ₹10,000 HD Bridal Makeup: ₹12,000 Airbrush Bridal Makeup: ₹18,000 For engagement and reception: Basic Makeup: ₹6,000 HD Makeup: ₹8,000 Airbrush Makeup: ₹12,000 For parties: Basic Party Makeup: ₹2,500 HD Party Makeup: ₹3,500 Popular Bridal Makeup Styles in Barhara Traditional Bridal Makeup This timeless style features vibrant colors that complement traditional wedding attire, providing a regal and elegant appearance. HD Bridal Makeup Perfect for both photography and real life, HD makeup offers a flawless, high-definition finish that lasts all day. Airbrush Bridal Makeup Lightweight yet full-coverage, airbrush makeup is ideal for brides who want a natural, glowing look with a smooth, long-lasting finish. How to Book Your Bridal Makeup with Ladyfair in Barhara Initial Contact: Call us at 7004721239 to discuss your bridal makeup needs. Consultation Session: Plan your ideal look with our expert makeup artist, customized to your style and wedding attire. Makeup Trial: Opt for a trial session to preview and perfect your bridal look. Wedding Day Makeup: Our artist will arrive at your location in Barhara to ensure a flawless and stress-free makeup application on your big day. Testimonials from Brides in Barhara Ritika R.: “The at-home service was fantastic! Ladyfair made the entire experience stress-free, and my bridal look was perfect.” Muskan K.: “The airbrush makeup was incredible! It stayed perfect all day, and I felt beautiful every moment.” Mansi S.: “The HD makeup was flawless, and my wedding photos came out amazing. Ladyfair knows how to make a bride shine.” Preparing for Your Bridal Makeup Session Stay Hydrated: Keep your skin glowing by drinking plenty of water. Follow a Skincare Routine: Stick to a consistent skincare regimen leading up to your wedding. Avoid New Products: Refrain from trying new skincare products close to the big day to avoid any skin reactions. Clear Communication: During your consultation, share your preferences and any concerns with our makeup artist to achieve your dream look. Additional Beauty Services by Ladyfair Ladyfair provides more than just bridal makeup. We also offer: Engagement and Reception Makeup Party Makeup Everyday Makeup Special Occasion Makeup for birthdays, anniversaries, and other celebrations. The Future of Bridal Makeup in Barhara Ladyfair is committed to setting new standards for bridal beauty with our unique at-home makeup services in Barhara. As we continue to serve brides with unmatched care and professionalism, Ladyfair remains the preferred choice for bridal makeup in Barhara. Contact us today at 7004721239 to book your bridal makeup session!

Posted By: 16th September 2024
Best Makeup Artist in Bahadurpur
LadyFair: Your Ultimate Destination for the Best Makeup Artist in Bahadurpur In the vibrant locale of Bahadurpur, LadyFair stands out as the premier choice for those seeking the best makeup artist. Whether you’re preparing for a wedding, attending a special event, or simply want to refresh your look, LadyFair offers unparalleled expertise and personalized beauty services. This guide will delve into what makes LadyFair the best makeup artist in Bahadurpur and how our services can elevate your beauty experience. Why Choose LadyFair? When it comes to finding the best makeup artist in Bahadurpur, LadyFair distinguishes itself through a commitment to excellence and personalized service. Here’s why choosing LadyFair is the best decision for your beauty needs: Tailored Beauty Solutions: At LadyFair, we understand that every client is unique. Our makeup artists tailor their services to match your individual features, preferences, and the specific nature of your event. High-Quality Products: We use only premium makeup products that ensure long-lasting results, superior coverage, and a flawless finish. Our products are chosen for their quality and suitability for various skin types. Expert Techniques: Our team is skilled in advanced makeup techniques, from creating a stunning bridal look to delivering a chic everyday style. LadyFair's Services LadyFair offers a comprehensive range of makeup services to cater to all your needs. Whether you’re preparing for a grand event or a casual outing, our expert team ensures you look and feel your best. 1. Bridal Makeup Your wedding day is one of the most memorable events of your life, and at LadyFair, we are dedicated to making you look radiant. Our bridal makeup services are designed to enhance your natural beauty and complement your wedding attire. Services Include: Complete bridal makeup and hairstyling Pre-bridal consultations and trials Customizable packages for different ceremonies and events 2. Party and Event Makeup From festive celebrations to formal gatherings, LadyFair provides makeup services that make you stand out. Our artists create looks that range from glamorous and bold to elegant and understated, ensuring you are perfectly styled for any occasion. Services Include: Makeup for parties, corporate events, and other special occasions Trendy and chic looks tailored to your style On-location services for added convenience 3. Photoshoot Makeup For those important photoshoots, LadyFair’s makeup artists ensure you look impeccable on camera. We specialize in techniques that enhance your features and provide a flawless appearance under various lighting conditions. Services Include: Editorial and fashion makeup Makeup for promotional and professional photoshoots Professional advice on makeup for different photography styles 4. Everyday and Office Makeup If you need a polished, professional look for everyday wear or office settings, LadyFair has you covered. Our makeup artists create looks that are both elegant and practical, perfect for a busy day at work or a casual outing. Services Include: Natural and fresh everyday looks Makeup that transitions seamlessly from day to night Quick and efficient makeup applications Bridal Makeup Pricing in Bahadurpur Our bridal makeup services in Bahadurpur are tailored to fit a range of preferences and budgets: Basic Bridal Makeup: ₹10,000 HD Bridal Makeup: ₹12,000 Airbrush Bridal Makeup: ₹18,000 For engagement and reception: Basic Engagement/Reception Makeup: ₹6,000 HD Engagement/Reception Makeup: ₹8,000 Airbrush Engagement/Reception Makeup: ₹12,000 For parties: Basic Party Makeup: ₹2,500 HD Party Makeup: ₹3,500 What Sets LadyFair Apart? Choosing LadyFair means opting for a blend of professionalism, creativity, and a client-focused approach. Here’s what sets us apart: Personalized Consultations: We offer detailed consultations to understand your specific needs and preferences. This ensures that the final look aligns perfectly with your vision. High Standards of Service: From hygiene practices to product quality, we adhere to the highest standards to deliver exceptional results. Commitment to Client Satisfaction: Our goal is to ensure every client leaves feeling beautiful and satisfied. Positive reviews and repeat clients reflect our dedication to excellence. Tips for a Successful Makeup Experience To make the most of your makeup appointment with LadyFair, consider the following tips: Schedule a Trial: For significant events like weddings, a trial session allows you to visualize the makeup and make any necessary adjustments before the actual event. Communicate Clearly: Share your preferences and desired look with our makeup artists. Providing images or examples can help in achieving the perfect style. Know Your Skin Type: Inform us about your skin type and any specific concerns so we can use the best products suited for you. Book in Advance: To secure your preferred date and time, especially during peak seasons, it’s advisable to book your appointment early. The Advantages of Professional Makeup Services Investing in professional makeup services offers numerous benefits: Enhanced Confidence: A well-executed makeup look can boost your self-esteem and make you feel confident in any setting. Long-Lasting Results: Professional makeup is designed to last, ensuring you look flawless from morning until night. Expert Recommendations: Our makeup artists provide valuable advice on skincare and makeup products tailored to your needs. How to Book Your Bridal Makeup with Ladyfair in Bahadupur Initial Contact: Call us at 7004721239 to discuss your bridal makeup needs and schedule an appointment. Consultation Session: Meet with our makeup artist to discuss your desired look, review your wedding attire, and plan the perfect makeup style. Makeup Trial: We offer trial sessions so you can preview your bridal makeup and make any necessary adjustments before the wedding day. Wedding Day Makeup: On your wedding day, our makeup artist will arrive at your location in Bahadurpur to provide a flawless and stress-free makeup service. Q1: What makes LadyFair the best makeup artist in Bahadurpur? A1: LadyFair stands out as the best makeup artist in Bahadurpur due to our commitment to excellence, personalized service, and use of high-quality products. Our team of experienced artists tailors each makeup look to suit individual features and preferences, ensuring that every client receives a unique and flattering result. We pride ourselves on our professionalism, attention to detail, and dedication to making every client look and feel their best. Q2: What services does LadyFair offer? A2: LadyFair offers a wide range of makeup services designed to meet various needs: Bridal Makeup: Comprehensive bridal makeup and hairstyling services, including pre-bridal consultations and trials, customized packages for different ceremonies, and on-location services. Party and Event Makeup: Makeup services for parties, corporate events, and other special occasions, with options for trendy and chic looks tailored to your style. Photoshoot Makeup: Professional makeup for editorial, fashion, and promotional photoshoots, with techniques that ensure a flawless appearance on camera. Everyday and Office Makeup: Elegant and practical makeup solutions for daily wear or office settings, with looks that transition seamlessly from day to night. Q3: How does LadyFair ensure a personalized makeup experience? A3: At LadyFair, we prioritize personalized consultations to understand each client’s specific needs and preferences. During the consultation, we discuss your desired look, skin type, and any special requirements. This detailed approach allows us to create a customized makeup plan that aligns perfectly with your vision and ensures a satisfying and tailored experience. Q4: What are the benefits of choosing LadyFair for bridal makeup? A4: LadyFair’s bridal makeup services offer several key benefits: Tailored Bridal Packages: We provide customized bridal packages designed to meet your specific needs and preferences. Expert Techniques: Our team uses advanced techniques to enhance your natural beauty and complement your wedding attire. High-Quality Products: We use premium products that ensure a long-lasting, flawless finish, perfect for capturing every special moment on your wedding day. Personalized Trials: Pre-bridal trials allow you to preview and adjust your makeup look before the big day, ensuring you are completely satisfied with the final result. Q5: How can I book an appointment with LadyFair? A5: Booking an appointment with LadyFair is simple. You can contact us via our website, phone, or social media channels to schedule a consultation or book a service. For special occasions and peak seasons, we recommend booking in advance to secure your preferred date and time. Q6: What should I expect during a makeup appointment at LadyFair? A6: During your appointment at LadyFair, you can expect: Professional Consultation: We start with a detailed consultation to discuss your makeup preferences, skin type, and the specific requirements of your event. Customized Makeup Application: Our skilled artists will apply makeup using high-quality products and advanced techniques to achieve your desired look. Personalized Attention: We focus on providing a comfortable and enjoyable experience, with attention to detail and a commitment to making you look and feel fabulous. Aftercare Tips: We offer advice on maintaining your makeup and skincare tips to ensure you continue to look your best after your appointment. Q7: What sets LadyFair apart from other makeup artists in Bahadurpur? A7: LadyFair distinguishes itself through: Expertise and Experience: Our team of makeup artists brings a wealth of experience and skill, specializing in a range of makeup styles and techniques. High Standards: We maintain high standards of hygiene, product quality, and service to deliver exceptional results. Client-Centric Approach: Our focus on personalized service ensures that every client receives a makeup look tailored to their individual needs and preferences. Commitment to Satisfaction: We are dedicated to ensuring that each client leaves feeling confident and satisfied, which is reflected in our positive reviews and repeat clients. Q8: Are there any special offers or packages available at LadyFair? A8: LadyFair occasionally offers special promotions and packages, especially for bridal services and group bookings. To learn about our current offers or to inquire about customized packages, please contact us directly or visit our website for the latest updates. Q9: How does LadyFair handle different skin types and concerns? A9: At LadyFair, we take into account each client’s skin type and specific concerns. Our makeup artists use products that are suitable for various skin types, including sensitive or dry skin. We also offer personalized recommendations and solutions to address any particular skin issues, ensuring a flawless and comfortable makeup application. Q10: Can LadyFair provide makeup services for events outside Bahadurpur? A10: While our primary focus is on Bahadurpur, LadyFair may offer services for events outside the area on a case-by-case basis. If you have a special event in another location, please contact us to discuss your needs and availability. We aim to accommodate clients and provide exceptional service wherever possible.

Posted By: 16th September 2024
Bridal makeup artist in arrah
Introduction In Arrah, Ladyfair stands out as the premier choice for brides seeking impeccable makeup services on their special day. Our at-home bridal makeup service brings professional beauty treatments right to your doorstep, ensuring a luxurious and stress-free experience. Whether you envision a classic bridal look, a flawless HD finish, or the smooth elegance of airbrush makeup, our expert makeup artist in Arrah is dedicated to making your wedding day as extraordinary as you’ve always dreamed. Contact us today at 7004721239 to schedule your appointment. Why Ladyfair is the Top Choice for Bridal Makeup in Arrah Experienced Makeup Artist Our makeup artist in Arrah brings years of expertise in bridal makeup, specializing in crafting looks that enhance your natural beauty and suit your unique style. Convenient At-Home Service Say goodbye to the hassle of traveling to a salon. Ladyfair offers luxurious at-home bridal makeup services, letting you enjoy a personalized beauty experience in the comfort of your home in Arrah. Premium Quality Products We use only top-tier, professional-grade makeup products to ensure a flawless, long-lasting finish that will keep you radiant throughout your special day. Bridal Makeup Pricing in Arrah Our bridal makeup services in Arrah are designed to accommodate a variety of preferences and budgets: Basic Bridal Makeup: ₹10,000 HD Bridal Makeup: ₹12,000 Airbrush Bridal Makeup: ₹18,000 For engagement and reception: Basic Engagement/Reception Makeup: ₹6,000 HD Engagement/Reception Makeup: ₹8,000 Airbrush Engagement/Reception Makeup: ₹12,000 For parties: Basic Party Makeup: ₹2,500 HD Party Makeup: ₹3,500 Popular Bridal Makeup Styles in Arrah Traditional Bridal Makeup Our traditional bridal makeup in Arrah features bold, vibrant colors and meticulous application to perfectly complement traditional wedding attire, creating a look that’s both elegant and timeless. HD Bridal Makeup HD bridal makeup offers a high-definition finish that ensures you look flawless in both photographs and in person, making you picture-perfect for your entire wedding day. Airbrush Bridal Makeup Airbrush makeup provides a lightweight, smooth finish with full coverage, ideal for brides seeking a natural yet polished look that lasts all day. How to Book Your Bridal Makeup with Ladyfair in Arrah Initial Contact: Call us at 7004721239 to discuss your bridal makeup needs and schedule an appointment. Consultation Session: Meet with our makeup artist to discuss your desired look, review your wedding attire, and plan the perfect makeup style. Makeup Trial: We offer trial sessions so you can preview your bridal makeup and make any necessary adjustments before the wedding day. Wedding Day Makeup: On your wedding day, our makeup artist will arrive at your location in Arrah to provide a flawless and stress-free makeup service. Testimonials from Brides in Arrah Sneha P., Arrah: "Ladyfair’s at-home makeup service was exactly what I needed. The makeup artist was incredibly skilled, and my bridal look was beyond perfect." Meera R., Arrah: "The airbrush makeup was flawless and lasted all day long. Ladyfair’s service made my wedding day stress-free and special." Ritika S., Arrah: "The HD makeup was stunning, and my photos turned out beautifully. Ladyfair’s service exceeded all my expectations." Preparing for Your Bridal Makeup Session To ensure the best results, follow these tips: Stay Hydrated: Drink plenty of water to keep your skin fresh and glowing. Consistent Skincare: Maintain a regular skincare routine leading up to your wedding. Avoid New Products: Stick to familiar skincare products to avoid any reactions. Communicate Clearly: Discuss your makeup preferences and concerns with our artist during your consultation. Additional Beauty Services by Ladyfair In addition to bridal makeup, Ladyfair offers: Engagement and Reception Makeup: Customized looks for all your pre-wedding events. Party Makeup: Perfect for special occasions and celebrations. Everyday Makeup: Enhance your daily look with our expert services. Special Occasion Makeup: Makeup for birthdays, anniversaries, and other significant events. The Future of Bridal Makeup in Arrah Ladyfair is committed to redefining bridal beauty with our innovative at-home services in Arrah. As more brides experience our exceptional service, Ladyfair continues to grow as the preferred choice for bridal makeup. Q&A with Ladyfair’s Bridal Makeup Artist in Arrah Q1: What makes Ladyfair the best choice for bridal makeup in Arrah? A1: Ladyfair combines skilled artistry with high-quality products, offering expert at-home bridal makeup services for a flawless wedding look. Q2: What are the prices for bridal makeup services in Arrah? A2: Our bridal makeup services start at ₹10,000 for basic makeup, ₹12,000 for HD makeup, and ₹18,000 for airbrush makeup. Q3: How do I book Ladyfair’s bridal makeup services in Arrah? A3: You can book our services by calling 7004721239. We also offer consultations and trial sessions to help you achieve your desired look. Q4: What types of bridal makeup does Ladyfair offer in Arrah? A4: We offer traditional, HD, and airbrush bridal makeup styles to suit your preferences. Q5: Are makeup trials available before the wedding day? A5: Yes, we provide trial sessions to finalize your bridal look and make any necessary adjustments. Q6: What kind of products does Ladyfair use for bridal makeup? A: We use professional-grade, high-quality products that are safe for all skin types and ensure a flawless finish.

Posted By: 15th September 2024
Bridal Makeup Artist in Agiaon
Introduction In Agiaon, Ladyfair is the trusted provider for brides seeking professional bridal makeup services at home. Our expert makeup artist ensures that you look your absolute best, whether you're aiming for a traditional bridal style, HD perfection, or the flawless finish of airbrush makeup. We bring our luxurious services directly to your doorstep. To schedule your bridal makeup appointment, call us today at 7004721239. Why Choose Ladyfair for Bridal Makeup in Agiaon? Experienced Makeup Artist Our makeup artist in Agiaon is highly skilled and experienced in creating personalized bridal looks that perfectly complement your features and wedding style. Convenient At-Home Service Ladyfair brings professional makeup services directly to your home in Agiaon, offering brides a stress-free and personalized beauty experience. Premium Makeup Products We use only top-tier, professional-grade products to ensure a flawless, long-lasting finish that stays perfect throughout your wedding day. Bridal Makeup Pricing in Agiaon We offer a range of bridal makeup options to meet various budgets and preferences: Basic Bridal Makeup: ₹10,000 HD Bridal Makeup: ₹12,000 Airbrush Bridal Makeup: ₹18,000 For engagement and reception makeup: Basic Engagement/Reception Makeup: ₹6,000 HD Engagement/Reception Makeup: ₹8,000 Airbrush Engagement/Reception Makeup: ₹12,000 For parties: Basic Party Makeup: ₹2,500 HD Party Makeup: ₹3,500 Popular Bridal Makeup Styles in Agiaon Traditional Bridal Makeup Our traditional bridal makeup in Agiaon features rich colors and meticulous detailing to complement traditional attire, offering a timeless, elegant look. HD Bridal Makeup For brides who want a picture-perfect look both in person and in photographs, HD bridal makeup provides a high-definition finish that lasts all day. Airbrush Bridal Makeup Airbrush makeup delivers a smooth, lightweight, full-coverage finish that is perfect for brides seeking a natural, polished appearance that lasts throughout the event. How to Book Your Bridal Makeup with Ladyfair in Agiaon Initial Contact: Call 7004721239 to discuss your needs and set up an appointment. Consultation Session: Meet with our makeup artist to plan your look, ensuring it complements your dress and overall wedding style. Makeup Trial: We offer makeup trials so you can see how your look will appear on your big day. Wedding Day Makeup: Our artist will come to your home in Agiaon to provide a flawless makeup service on your wedding day. Testimonials from Brides in Agiaon Neha K., Agiaon: "Ladyfair made my wedding day so special. The airbrush makeup looked flawless and lasted all day long." Anita P., Agiaon: "The HD makeup was stunning, and the at-home service made everything so convenient. Ladyfair did an amazing job." Kriti S., Agiaon: "I loved my traditional bridal look. Ladyfair’s makeup artist was professional and made the process so easy and stress-free." Preparing for Your Bridal Makeup Session To ensure your makeup looks perfect, follow these tips before your appointment: Stay Hydrated: Drink plenty of water for healthy, glowing skin. Follow a Skincare Routine: Keep your skin clear by sticking to a consistent skincare routine leading up to your wedding. Avoid New Products: Stick to products your skin is familiar with to avoid reactions. Communicate Clearly: Discuss your makeup preferences and concerns with our artist during your consultation. Additional Beauty Services by Ladyfair Ladyfair also offers the following services in Agiaon: Engagement and Reception Makeup: Create custom looks for your pre-wedding events. Party Makeup: Whether it's a party or celebration, we offer expert makeup services. Everyday Makeup: Enhance your daily look with our professional touch. Special Occasion Makeup: Makeup services for birthdays, anniversaries, and other significant events. The Future of Bridal Makeup in Agiaon Ladyfair is dedicated to offering innovative, high-quality at-home bridal makeup services in Agiaon. As we continue to provide exceptional beauty services, more brides are choosing Ladyfair for their wedding day needs. Q&A with Ladyfair’s Bridal Makeup Artist in Agiaon Q1: What makes Ladyfair the best choice for bridal makeup in Agiaon? A1: Ladyfair offers expert at-home bridal makeup services, ensuring a stress-free, personalized experience with high-quality products. Q2: What are the prices for bridal makeup services in Agiaon? A2: Our bridal makeup packages start at ₹10,000 for basic makeup, ₹12,000 for HD makeup, and ₹18,000 for airbrush makeup. Q3: How can I book Ladyfair’s bridal makeup services in Agiaon? A3: You can book our services by calling 7004721239. We also offer consultations and trial sessions to ensure you get the perfect look. Q4: What bridal makeup styles does Ladyfair offer in Agiaon? A4: We offer traditional, HD, and airbrush makeup styles tailored to meet your preferences. Q5: Are makeup trials available before my wedding? A5: Yes, we provide trial sessions so you can finalize your desired look before your wedding day. Q6: What products does Ladyfair use for bridal makeup? A6: We use only professional-grade, high-quality products that are safe for all skin types and ensure a flawless finish. Q7: What other makeup services does Ladyfair provide in Agiaon? A7: In addition to bridal makeup, we offer engagement, reception, party, and other special occasion makeup services.

Posted By: 15th September 2024
Bridal Makeup Artist in Ara
Introduction Every bride dreams of looking her absolute best on her wedding day. Achieving that flawless bridal look requires the expertise of skilled makeup artists, high-quality products, and a personalized approach that captures the bride’s vision. In the historic city of Ara, Bihar, Ladyfair is setting a new standard in bridal beauty by offering top-tier at-home makeup services. No longer do brides need to visit a salon—our expert artists come to you, ensuring a stress-free, luxurious experience in the comfort of your home. For brides in Ara, Ladyfair is the go-to choice for a seamless bridal transformation. To book your session, call 7004721239. The Importance of Professional Bridal Makeup Bridal makeup is more than just enhancing beauty—it’s about creating a look that reflects the bride’s personality, complements her attire, and withstands the emotional and physical demands of the day. Ladyfair’s expert makeup artists specialize in understanding different skin types, facial features, and individual styles, ensuring that every bride in Ara looks stunning and feels confident on her big day. Why At-Home Bridal Makeup Services? In Ara, wedding celebrations are often deeply rooted in family traditions, and the convenience of at-home services cannot be overstated. Visiting a salon can be time-consuming and stressful, particularly on the wedding day. With Ladyfair’s at-home makeup services, brides can enjoy their special day without worrying about salon appointments or travel logistics. Key Benefits of At-Home Services: Comfort and Convenience: Luxuriate in a makeup session at your home, where you feel most at ease. Time-Saving: Eliminate travel time and avoid the stress of last-minute delays. Personalized Attention: Our makeup artists devote their time solely to you, customizing every detail to your preferences. Ladyfair’s Bridal Makeup Services in Ara Ladyfair offers a wide array of bridal makeup services tailored to the diverse preferences of brides in Ara. Whether you're envisioning a traditional bridal look or a modern, trendy style, our makeup artists have the expertise to bring your dream look to life. Services Offered: Custom Bridal Makeup: Our makeup artists create looks that complement your outfit, jewelry, and overall wedding theme. Pre-Wedding Consultations: Discuss your vision with our experts and get tailored advice for your special day. Makeup Trials: Experience a trial session to ensure satisfaction with your look before your wedding day. High-Quality Products: We use premium, skin-safe products that deliver lasting, photo-ready results. Meet the Top Makeup Artists in Ara Ladyfair takes pride in its team of skilled bridal makeup artists. Our artists are not only experts in makeup but also in understanding and enhancing bridal beauty. Their years of experience ensure they are well-versed in the latest makeup techniques and trends. Why Choose Our Artists? Experience: Our makeup artists have extensive experience in bridal makeup, ensuring flawless execution on your big day. Attention to Detail: Every element of your makeup is meticulously planned and applied. Client Satisfaction: We are dedicated to making sure you are completely satisfied with your bridal look. Book Your Bridal Makeup Today: To book your bridal makeup session with Ladyfair in Ara, call 7004721239. Our team is ready to make you look your absolute best on your special day. Popular Bridal Makeup Trends in Ara Bridal makeup in Ara often reflects a blend of tradition and modernity. Here are some popular styles Ladyfair specializes in: Traditional Bridal Looks: Rich, bold colors, intricate eye makeup, and deep red lips, often paired with ornate jewelry and attire. Natural and Subtle Makeup: A more understated look focusing on enhancing natural features with soft eye makeup, nude lips, and a dewy finish. Contemporary Bridal Styles: Modern brides opt for trendy looks like smokey eyes, highlighted cheekbones, and ombre lips, adding a contemporary touch to their bridal look. Why Choose Ladyfair for Your Bridal Makeup? Your wedding day is one of the most important days of your life, and at Ladyfair, we are committed to providing a service that matches its significance. Our combination of expertise, convenience, and personalized care sets us apart from other bridal makeup services in Ara. Top Reasons to Choose Ladyfair: Expertise: Our makeup artists are highly skilled, ensuring top-quality service for every bride. Convenience: We come to your location, offering a comfortable and stress-free makeup experience. Personalized Service: Every bride is unique, and we ensure your makeup complements your personal style. High-Quality Products: We use premium products for long-lasting, flawless results. Real Brides, Real Stories: Testimonials from Ara Brides Our brides’ satisfaction speaks for itself. Here are some testimonials from happy Ladyfair brides in Ara: "I was beyond impressed with how my makeup turned out. The artist perfectly captured the look I wanted, and it lasted the entire day without any touch-ups!" – Neha "Choosing Ladyfair was the best decision. The makeup artist was professional, punctual, and made me feel at ease throughout the entire process." – Sakshi "I loved the natural makeup look they created for me. I felt like the best version of myself on my wedding day, thanks to Ladyfair!" – Meera Preparing for Your Bridal Makeup Session in Ara To ensure the best results for your bridal makeup, here are a few tips to help you prepare for your Ladyfair session: Start a Skincare Routine Early: Focus on a consistent routine of cleansing, exfoliating, and moisturizing well in advance of your wedding day. Hydrate: Keep your skin looking fresh by drinking plenty of water in the weeks leading up to your wedding. Avoid New Products: Stick with skincare products you’re familiar with to avoid any adverse reactions before your big day. Communicate Clearly: Share your vision with your makeup artist and provide any reference photos to ensure your look is exactly as you imagined. Beyond Bridal: Ladyfair’s Full Range of Beauty Services in Ara Ladyfair offers a variety of beauty services for occasions beyond weddings. Whether you need makeup for an engagement party, family event, or other special occasions, our team is ready to help. Additional Services Offered: Party Makeup: Ideal for weddings, parties, and events where you want to shine. Everyday Makeup: Subtle, professional makeup for everyday wear. Special Occasion Services: Makeup for engagements, anniversaries, and more.
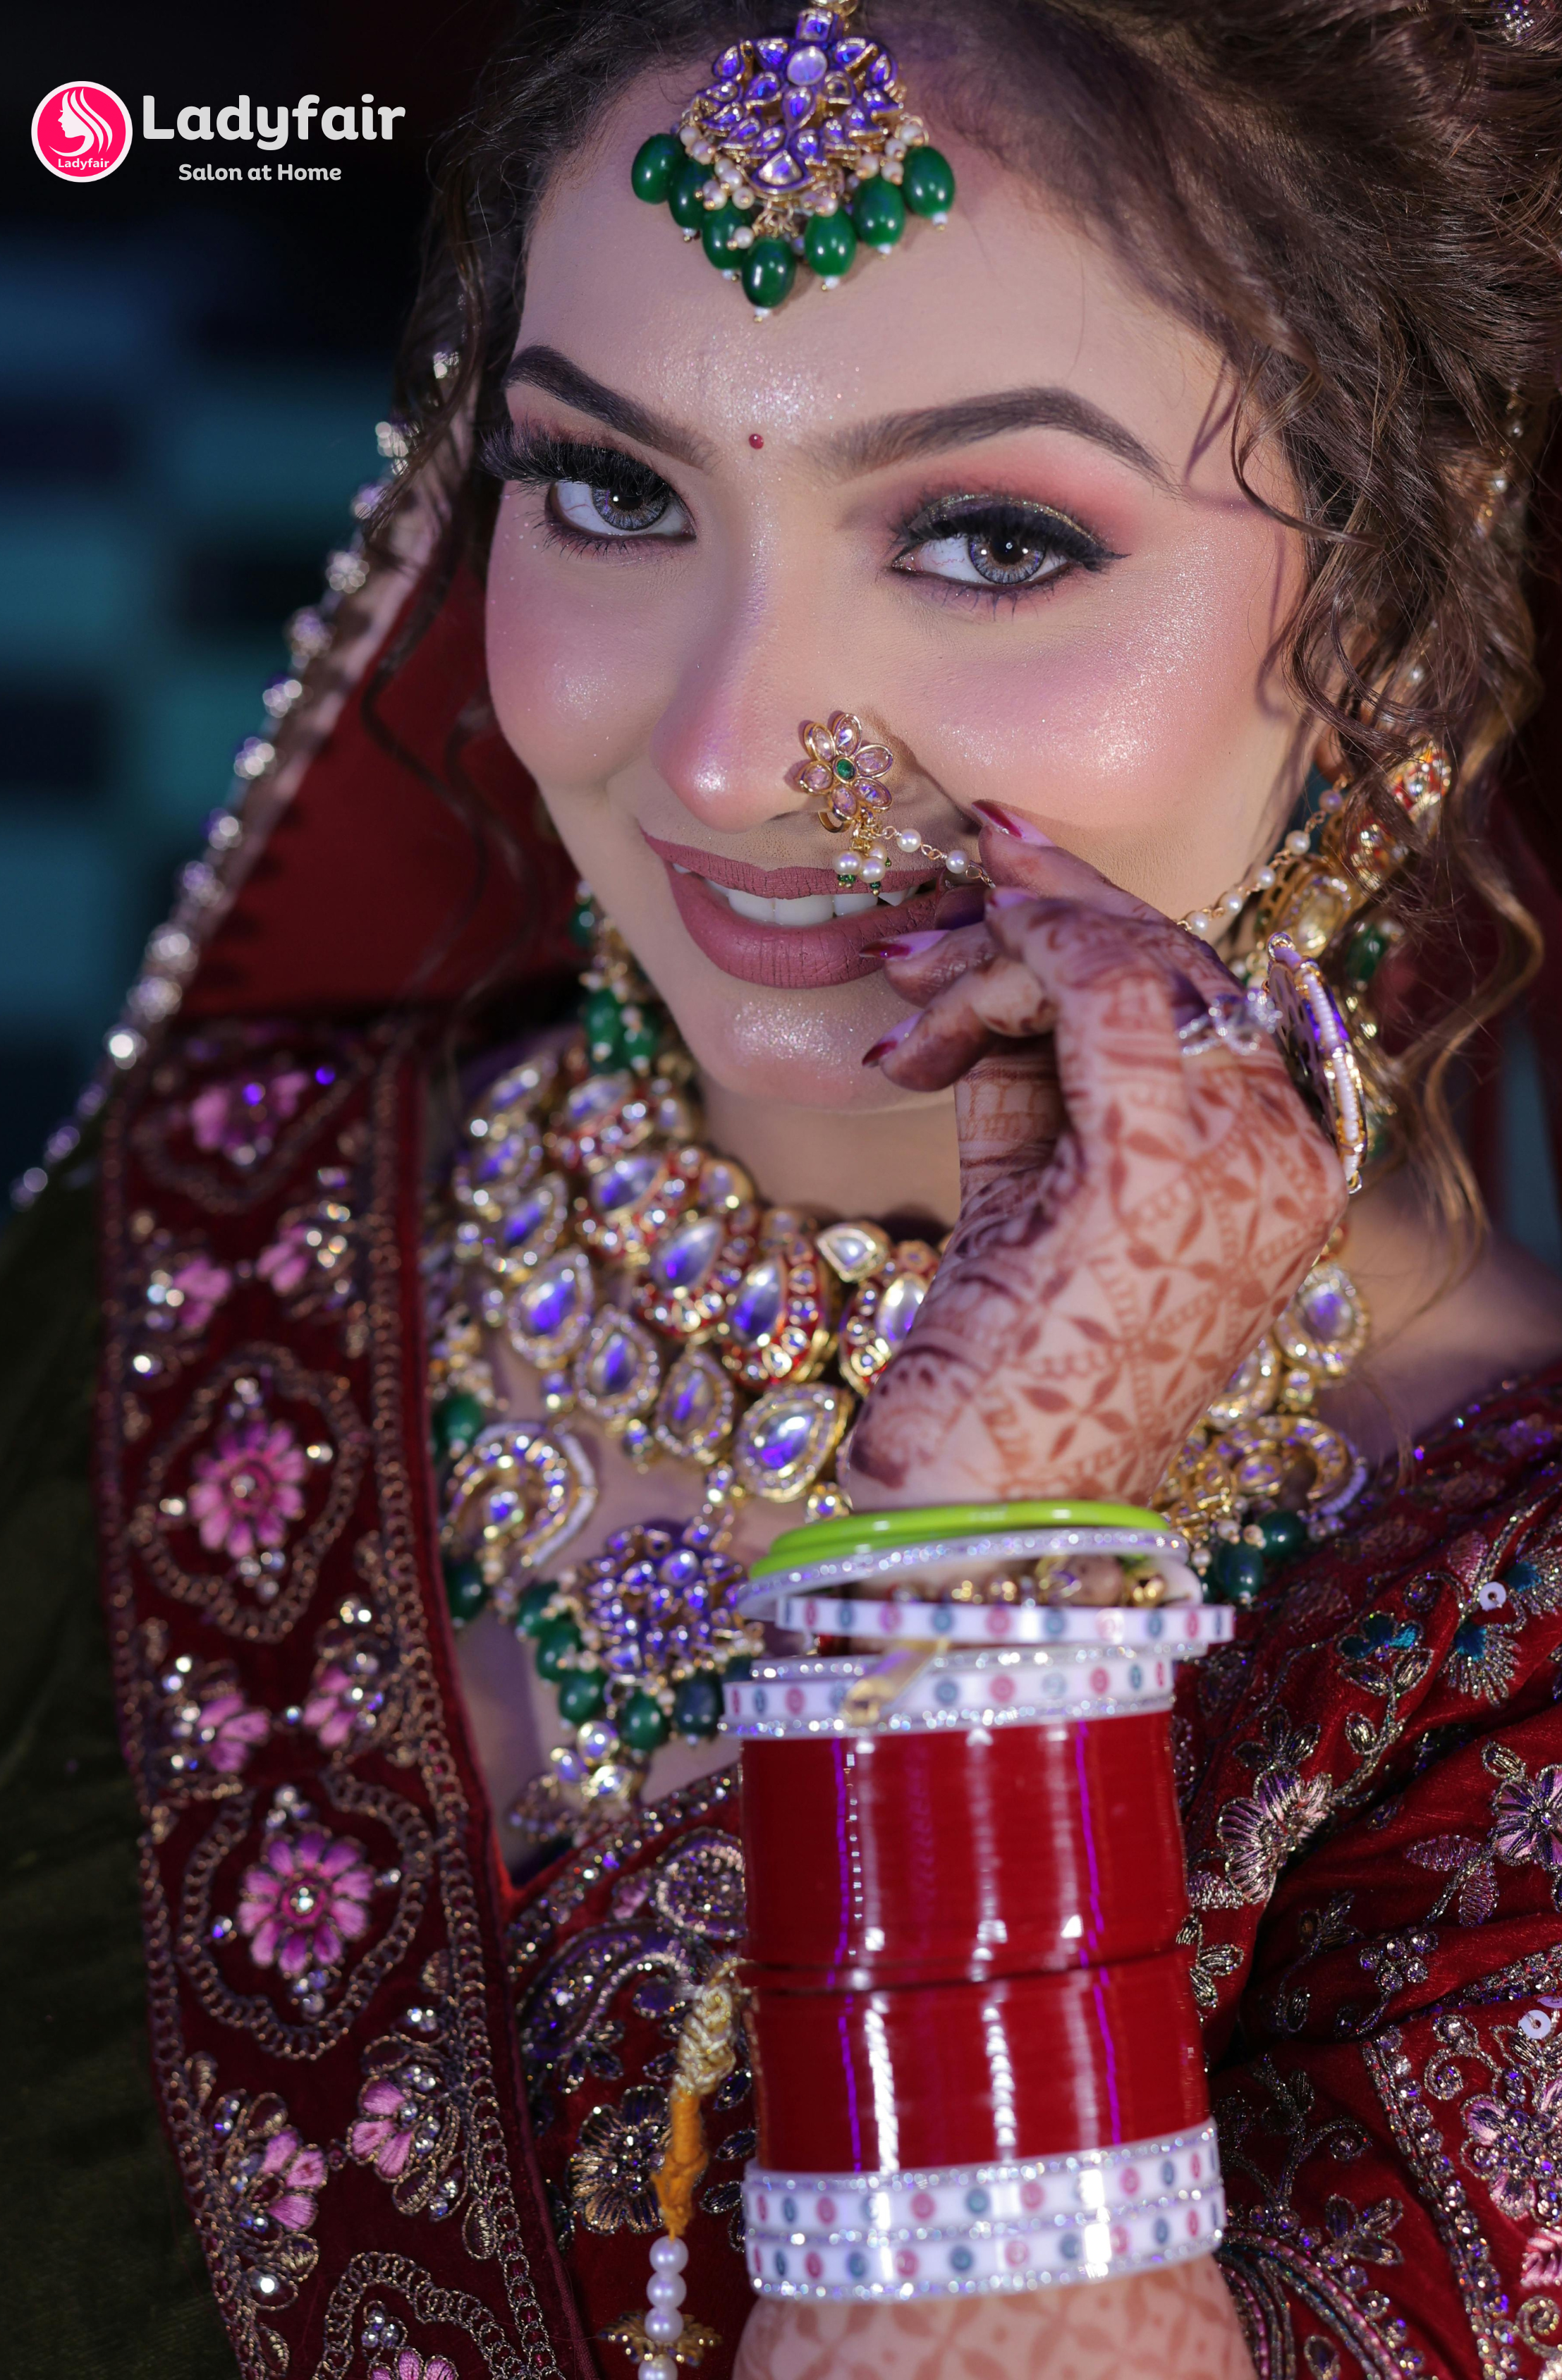
Posted By: 15th September 2024
Bridal makeup artist in Tirupathi
Why Ladyfair is the Top Choice for Bridal Makeup in Tirupathi? Experienced Makeup Artist Our makeup artist in Tirupathi has years of experience in bridal makeup, creating looks that highlight natural beauty and individual style. Convenient At-Home Service Ladyfair offers luxurious at-home bridal makeup services, eliminating the need to travel to a salon. Premium Quality Products We use only high-quality, professional-grade products to ensure a flawless, long-lasting look on your special day. Bridal Makeup Pricing in Tirupathi Basic Bridal Makeup: ₹10,000 HD Bridal Makeup: ₹12,000 Airbrush Bridal Makeup: ₹18,000 For engagement and reception: Basic Engagement/Reception Makeup: ₹6,000 HD Engagement/Reception Makeup: ₹8,000 Airbrush Engagement/Reception Makeup: ₹12,000 For parties: Basic Party Makeup: ₹2,500 HD Party Makeup: ₹3,500 Popular Bridal Makeup Styles in Tirupathi Traditional Bridal Makeup Bold colors and meticulous application, perfectly complementing traditional wedding attire. HD Bridal Makeup A high-definition finish ensures you look flawless in both photographs and in person. Airbrush Bridal Makeup Lightweight, smooth coverage that lasts all day, ideal for a polished, natural look. How to Book Your Bridal Makeup with Ladyfair in Tirupathi Initial Contact: Call us at 7004721239 to schedule an appointment. Consultation Session: Discuss your desired look and plan your makeup style. Makeup Trial: Preview your bridal makeup with a trial session. Wedding Day Makeup: On the wedding day, our artist will provide flawless, stress-free service at your home. Testimonials from Brides in Tirupathi Sneha P., Tirupathi: "Ladyfair’s at-home makeup service was perfect. My bridal look was beyond what I imagined." Meera R., Tirupathi: "The airbrush makeup lasted all day and made my wedding stress-free." Ritika S., Tirupathi: "The HD makeup was stunning, and my photos turned out beautifully." Preparing for Your Bridal Makeup Session Stay hydrated for glowing skin. Maintain a consistent skincare routine. Avoid trying new products before the wedding. Clearly communicate your preferences during the consultation. Additional Beauty Services by Ladyfair Engagement and Reception Makeup Party Makeup Everyday Makeup Special Occasion Makeup The Future of Bridal Makeup in Tirupathi Ladyfair is committed to raising the standards of bridal beauty with its innovative at-home services, continuing to grow as the top choice for brides in Tirupathi.

Posted By: 14th September 2024
Bridal Makeup Artist in Puri
Experience the Best Bridal Makeup Services in Puri with Ladyfair In Puri, Ladyfair stands out as the go-to choice for luxurious at-home bridal makeup services. Whether you’re looking for a traditional look, an HD finish, or airbrush perfection, our expert makeup artist will ensure that you look flawless and radiant on your big day, right from the comfort of your home. Why Ladyfair is the Premier Choice for Bridal Makeup in Puri Expertise of Our Makeup Artist Ladyfair’s makeup artist in Puri is experienced in creating stunning bridal looks tailored to your personal style. We focus on enhancing your natural beauty, ensuring you feel confident on your special day. Convenient At-Home Service Skip the salon visits and enjoy the convenience of our at-home bridal makeup services. We bring the luxury of professional makeup to your doorstep for a hassle-free experience. Use of Premium Products We use high-end, professional makeup products to create a flawless, long-lasting look that will keep you radiant throughout your wedding. Bridal Makeup Pricing in Puri Our competitive pricing for bridal makeup services in Puri ensures that every bride can find a package suited to her needs: Basic Bridal Makeup: ₹10,000 HD Bridal Makeup: ₹12,000 Airbrush Bridal Makeup: ₹18,000 For engagement and reception: Basic Makeup: ₹6,000 HD Makeup: ₹8,000 Airbrush Makeup: ₹12,000 For parties: Basic Party Makeup: ₹2,500 HD Party Makeup: ₹3,500 Popular Bridal Makeup Styles in Puri Traditional Bridal Makeup A timeless look featuring vibrant colors that complements traditional wedding attire, ensuring an elegant and regal appearance. HD Bridal Makeup HD makeup delivers a high-definition finish, ideal for both photographs and real-life moments, ensuring a flawless look all day long. Airbrush Bridal Makeup Lightweight yet full-coverage, airbrush makeup is perfect for brides who want a natural glow with a smooth, long-lasting finish. How to Book Your Bridal Makeup with Ladyfair in Puri Initial Contact: Call us at 7004721239 to discuss your bridal makeup requirements. Consultation Session: Plan your desired look with our expert makeup artist, tailored to your style and wedding attire. Makeup Trial: Opt for a trial session to preview and perfect your bridal look. Wedding Day Makeup: On your big day, our artist will arrive at your location in Puri to provide a stress-free, flawless makeup experience. Testimonials from Brides in Puri Anjali M.: “Ladyfair’s makeup service was incredible! The at-home experience made my day stress-free, and I absolutely loved my bridal look.” Priya S.: “The airbrush makeup was beyond perfect! It stayed flawless all day, and I felt beautiful every moment.” Ritika P.: “The HD makeup was stunning, and my wedding photos turned out amazing. Ladyfair really knows how to make a bride feel special.” Preparing for Your Bridal Makeup Session Stay Hydrated: Keep your skin glowing by drinking plenty of water. Follow a Skincare Routine: Stick to a consistent skincare routine in the lead-up to your wedding. Avoid New Products: Don’t try new products close to the big day to avoid skin reactions. Clear Communication: During your consultation, share your preferences and concerns with our makeup artist to achieve your dream look. Additional Beauty Services by Ladyfair Ladyfair not only offers bridal makeup but also provides a range of beauty services, including: Engagement and Reception Makeup Party Makeup Everyday Makeup Special Occasion Makeup for birthdays, anniversaries, and more. The Future of Bridal Makeup in Puri Ladyfair is dedicated to elevating bridal beauty standards with our unique at-home bridal makeup services in Puri. As we continue to serve brides with top-notch care and expertise, Ladyfair remains the preferred choice for wedding makeup in Puri. Contact us today at 7004721239 to book your bridal makeup session!

Posted By: 13th September 2024
Best Makeup Artist in Kanpur
Best Makeup Artist in Kanpur: Ladyfair's Expertise for Every Occasion At Ladyfair, we believe every woman deserves to look her best on her special day. Whether it’s your wedding, an engagement, or a fun-filled party, our team of professional makeup artists in Kanpur will ensure you radiate confidence and beauty. Known for delivering premium salon-at-home services, Ladyfair has become the top choice for women seeking the best makeup artist in Kanpur for bridal, party, and special occasion makeup. Why Choose Ladyfair's Professional Makeup Services in Kanpur? Ladyfair offers salon-quality makeup services in the comfort of your home, bringing Kanpur’s top makeup artists to your doorstep. Our skilled artists are trained to provide personalized looks that complement your natural beauty, leaving you with a flawless finish for any occasion. Reasons to choose Ladyfair: Experienced Makeup Artists: Our artists are experts in bridal, party, and event makeup, ensuring long-lasting results with personalized touch. Premium Products: We only use high-quality products from top brands like MAC, Huda Beauty, Lakmé, and Maybelline to ensure your makeup looks stunning and stays perfect for hours. Convenience at Home: No need to visit a salon! With Ladyfair, our makeup artists come to your home, saving you time and effort. Ladyfair’s Top Makeup Services in Kanpur At Ladyfair, we understand the importance of creating a makeup look that suits your style, skin tone, and the occasion. Our services are customized to fit your needs, ensuring you look and feel your best, no matter the event. Bridal Makeup Every bride dreams of looking perfect on her wedding day, and our expert bridal makeup artists specialize in making that dream a reality. Whether you prefer a classic bridal look or something more contemporary, Ladyfair provides the best bridal makeup services in Kanpur. Our artists are skilled in airbrush and HD makeup techniques to give you a flawless, long-lasting finish. Party Makeup Whether it’s a cocktail party, engagement, or festive celebration, Ladyfair offers party makeup services that help you stand out. Our makeup artists create looks that range from soft and elegant to bold and glamorous, ensuring you are ready to make a statement. Airbrush Makeup For those who want a lightweight yet full-coverage finish, Ladyfair offers airbrush makeup, perfect for humid climates and long events. This technique provides a natural, glowing complexion that stays fresh all day. Pre-Wedding and Engagement Makeup Ladyfair’s makeup artists excel at creating beautiful, natural looks for your pre-wedding and engagement ceremonies. These occasions demand a look that balances elegance with subtle glam, and we ensure you look picture-perfect from every angle. Makeup for Photoshoots Preparing for a pre-wedding or fashion photoshoot? Ladyfair’s professional makeup artists in Kanpur will ensure you look flawless in front of the camera. From soft, romantic looks to bold, editorial styles, we have you covered. Why Ladyfair is Kanpur's Preferred Choice When it comes to finding the best makeup artist in Kanpur, Ladyfair is trusted for offering top-notch services that combine skill, convenience, and value. With a focus on quality and client satisfaction, we ensure that every woman feels beautiful and confident after our makeup sessions. Personalized Services: We believe that every woman is unique, which is why our makeup artists take the time to understand your preferences and tailor the makeup to suit your face shape, skin tone, and event. Professionalism: At Ladyfair, our team is known for its professionalism, punctuality, and dedication to providing a great experience. Whether it's your wedding day or a special event, we ensure your makeup is done to perfection. Affordable Packages: Ladyfair offers a range of customizable packages for bridal, party, and airbrush makeup services that suit every budget. Our Professional Makeup Artists Ladyfair brings together a team of talented makeup artists who have extensive experience in bridal, party, and fashion makeup. Here are a few of our top-rated professionals: Priya Gupta Priya is known for her delicate yet impactful bridal looks. Her ability to highlight a bride’s natural features while ensuring long-lasting makeup makes her a favorite for brides in Kanpur. Specialty: Bridal makeup, airbrush makeup Signature Look: Soft bridal glow with flawless skin Products Used: MAC, Lakmé, Huda Beauty Anjali Verma Anjali excels in creating bold, glamorous looks for parties and high-profile events. Her smokey eye makeup and precision contouring are perfect for partygoers who want to make a bold statement. Specialty: Party makeup, fashion makeup Signature Look: Dramatic eyes and bold lips Products Used: Maybelline, Bobbi Brown, NYX Meena Singh Meena is an expert in airbrush makeup and is known for her ability to create flawless, natural looks that last all day. Her expertise makes her a great choice for brides and partygoers who prefer a light, natural feel. Specialty: Airbrush makeup, engagement makeup Signature Look: Dewy complexion with soft contouring Products Used: Faces Canada, MAC, Colorbar How to Book Ladyfair's Makeup Services Booking your makeup session with Ladyfair is simple and convenient. Here’s how you can get started: Step 1: Download the Ladyfair App Download the Ladyfair mobile app and browse our makeup services. You can select the type of service you need, such as bridal makeup, party makeup, or airbrush makeup. Step 2: Choose Your Artist Select your preferred makeup artist based on their profile, reviews, and expertise. All our artists are certified professionals with extensive experience in delivering premium makeup services. Step 3: Schedule Your Appointment Choose a convenient date and time for your makeup session. Our artists will arrive at your home fully prepared to transform your look. Step 4: Enjoy the Experience Sit back, relax, and let Ladyfair pamper you with top-notch salon services, ensuring you look and feel your best. Q1: What makes Ladyfair the best choice for makeup services in Kanpur? A: Ladyfair offers professional, high-quality makeup services from the comfort of your home. We have a team of experienced makeup artists who specialize in bridal, party, and event makeup. Our artists use premium products and customize each look to suit your unique style and preferences. Q2: Which makeup products do Ladyfair artists use? A: Ladyfair’s makeup artists use high-quality, professional makeup brands like MAC, Lakmé, Maybelline, Huda Beauty, Bobbi Brown, Colorbar, and Faces Canada. We ensure that the products used are suitable for your skin type and provide long-lasting, flawless results. Q3: What types of makeup services does Ladyfair provide in Kanpur? A: Ladyfair offers a wide range of makeup services, including: Bridal Makeup Party Makeup Airbrush Makeup Pre-Wedding and Engagement Makeup Fashion and Photoshoot Makeup Q6: Does Ladyfair offer airbrush makeup in Kanpur? A: Yes, Ladyfair offers airbrush makeup, which is ideal for brides and partygoers looking for a lightweight yet flawless finish. It provides a natural look with long-lasting coverage, perfect for long events and humid climates. Q7: Can I get a makeup trial before my wedding? A: Absolutely! Ladyfair offers makeup trial sessions for brides to ensure you’re satisfied with the look before your big day. During the trial, you can discuss your preferences with our artist, who will work with you to create your ideal bridal look. We also provide hairstyling and skincare services to complement your makeup look. Q4: Can I book a specific makeup artist from Ladyfair in Kanpur? A: Yes! Through the Ladyfair mobile app, you can browse profiles of our makeup artists, view their work, read reviews, and select the one you feel is the best fit for your needs. Q5: How do I book a makeup appointment with Ladyfair? A: Booking with Ladyfair is easy! Simply download the Ladyfair app, choose your desired makeup service, select your preferred artist, and schedule your appointment. Our artist will arrive at your location on the chosen date and time.

Posted By: 12th September 2024
Shraddha Sharma – Empowering Voices through YourStory
Shraddha Sharma – Empowering Voices through YourStory In the world of startups and entrepreneurship, where visibility and storytelling often shape the success of ventures, Shraddha Sharma has emerged as a pioneering figure. As the founder and CEO of YourStory, India’s largest media platform dedicated to startups and entrepreneurs, she has created a space where emerging businesses can share their stories, find support, and build networks. Sharma’s journey from her humble beginnings in Patna, Bihar, to being one of the most recognized entrepreneurs in India is not just inspiring but a testament to the power of persistence, vision, and storytelling. Early Life and Education Born in Patna, Bihar, Shraddha Sharma’s early life was rooted in a family that valued education and hard work. Her ambition led her to New Delhi in 1997, where she pursued a Bachelor's and Master’s degree in History from the prestigious St. Stephen’s College, Delhi. Known for its academic rigor, St. Stephen’s laid the foundation for her analytical thinking and leadership skills. But Shraddha’s thirst for knowledge didn’t stop there. She further honed her communication and media skills by completing a Master’s degree from the Mudra Institute of Communications, Ahmedabad (MICA), one of India’s top institutes for marketing and communications. Building a Career in Media Shraddha Sharma’s career began in media, an industry where she quickly made a name for herself. She started as a brand advisor at The Times of India, one of India’s leading newspapers. This role gave her insight into branding, audience engagement, and media strategies, laying the groundwork for her future endeavors. Sharma’s journey in media took another leap when she became Assistant Vice President at CNBC TV18, a leading business news channel in India. Her position at CNBC TV18 not only sharpened her understanding of business and finance but also gave her a front-row seat to the struggles and triumphs of entrepreneurs across India. It was during this time that she noticed the lack of platforms exclusively dedicated to telling the stories of startups and entrepreneurs. This gap would eventually inspire her to create a platform that brought visibility to aspiring entrepreneurs, many of whom lacked media attention despite their groundbreaking ideas. The Birth of YourStory In 2008, Shraddha Sharma made the bold decision to step out of the traditional media landscape and start her own venture—YourStory. At the time, India’s startup ecosystem was still in its infancy, and few platforms focused on telling the stories of entrepreneurs, especially those outside the metro cities. Shraddha’s vision was to create a platform that democratized storytelling for entrepreneurs, irrespective of their geographical location, industry, or funding stage. YourStory quickly gained traction as it began sharing the stories of startups, often highlighting underdog entrepreneurs who were making an impact. The platform became a space where entrepreneurs could showcase their work, get recognition, and inspire others. Under Sharma’s leadership, YourStory evolved into India’s most prominent media platform for startups, covering over 100,000 stories of entrepreneurs and growing businesses. Championing Women Entrepreneurs One of Shraddha Sharma’s significant contributions through YourStory has been her focus on women entrepreneurs. In a business environment where women often struggle to gain visibility and support, Sharma has been a vocal advocate for highlighting their stories. Through initiatives such as HerStory, a sub-platform under YourStory, she has championed the stories of women entrepreneurs, leaders, and changemakers. This not only provides visibility to women but also inspires countless others to step into the world of entrepreneurship with confidence. The Impact of YourStory Today, YourStory is more than just a media platform—it is a community for entrepreneurs, innovators, and changemakers. It provides them with the visibility they need, connects them with investors, and empowers them through storytelling. The platform covers a wide range of topics, from startup success stories and funding updates to thought leadership articles and startup resources. Sharma’s relentless pursuit of storytelling has turned YourStory into a critical player in India’s startup ecosystem. YourStory has also expanded beyond India, covering entrepreneurs and startups in Southeast Asia and other parts of the world. It has become a global platform that not only informs but also inspires a new generation of business leaders. Challenges and Success Shraddha Sharma’s journey hasn’t been without challenges. Like many entrepreneurs, she faced the uncertainty of starting a business from scratch, navigating financial constraints, and proving her value in a competitive media landscape. However, her deep belief in the power of stories kept her going. Today, YourStory has not only survived but thrived in an ever-changing digital media world, with millions of readers and a dedicated team that shares her vision. Legacy and Influence Shraddha Sharma’s work has made her a role model for aspiring entrepreneurs, especially women, who look up to her for inspiration. Her dedication to giving entrepreneurs a voice has had a transformative impact on India’s startup ecosystem. As a woman leading one of the most influential platforms in the country, she continues to break barriers and inspire others to follow their passion. Through YourStory, Sharma has successfully created a bridge between entrepreneurs and the world, allowing their stories to inspire, educate, and motivate. Her work is not only about business success; it’s about creating a ripple effect of positive change through the power of storytelling.

Posted By: 12th September 2024
Empowering Women Through Ladyfair's "Women Story" Initiative
Empowering Women Through Ladyfair's "Women Story" Initiative In a world where women continue to break boundaries and redefine success, Ladyfair's initiative, Women Story, stands as a platform of inspiration. Women Story is dedicated to sharing the real-life journeys of women who have achieved remarkable success, despite the challenges they faced. Whether in business, arts, social service, education, or any other field, these stories offer motivation for all women aspiring to achieve their dreams. The Vision Behind Women Story Ladyfair, a brand known for its focus on women empowerment, launched Women Story with the goal of bringing the narratives of successful women to the forefront. The aim is simple—celebrate the accomplishments of women, showcase their resilience, and provide inspiration for those who are on a similar journey. These stories are about overcoming obstacles, persistence, and breaking stereotypes. Each woman featured on Women Story represents strength and determination. By highlighting their personal and professional achievements, Ladyfair offers role models for women everywhere who seek to create an impact in their respective fields. The Format of Women Story Women Story isn’t limited to a single format; instead, it embraces multiple media forms to ensure a wider reach. Stories are shared through: Written articles: In-depth narratives detailing the journey of each woman, from their early struggles to their triumphant successes. Video interviews: Capturing the voices and emotions of these remarkable women as they share their experiences firsthand. Podcasts: For those who prefer listening to stories of inspiration on the go, Ladyfair offers insightful audio content featuring discussions with these women. Inspiring Women, Real Journeys Some of the women featured on Women Story come from humble beginnings, while others have faced societal, financial, or personal hurdles. These stories showcase not only success but also the grit and determination that led to it. From entrepreneurs leading successful businesses to social activists creating change, the platform celebrates women who have made a difference. For example, Ladyfair featured the journey of a young entrepreneur who, coming from a rural background, built a business empire from scratch, empowering other women along the way. Another story highlighted a teacher who transformed the education system in her community through innovative practices. Why Women Story Matters The stories shared through this initiative are more than just narratives—they serve as roadmaps for women who wish to follow their dreams but need that extra push of inspiration. Each story reflects resilience, innovation, and a passion to make a difference, aligning with Ladyfair's mission to empower women across all walks of life. Through Women Story, Ladyfair is encouraging women to believe that no goal is out of reach, no matter the circumstances. By featuring a wide range of women from different backgrounds, industries, and experiences, the platform ensures that every woman finds a relatable role model. Join the Movement Ladyfair invites all women to be a part of Women Story, either by contributing their stories or by drawing inspiration from the experiences shared on the platform. If you know a woman whose story needs to be told, you can nominate her to be featured, ensuring her journey inspires others. With this initiative, Ladyfair continues its commitment to empowering women by fostering a community of support, encouragement, and celebration of success. Q1: What is Women Story by Ladyfair? A1: Women Story is an initiative by Ladyfair that focuses on sharing the inspiring and successful journeys of women from different fields. It showcases their challenges, accomplishments, and the impact they've made, offering motivation to other women. Q2: What type of stories are featured on Women Story? A2: The platform features stories of women from various industries, including business, education, social work, arts, and more. The focus is on their success, the obstacles they’ve overcome, and how they serve as role models for others. Q3: How are the stories shared on Women Story? A3: Stories are shared in multiple formats, such as written articles, video interviews, and podcasts. This ensures that audiences can engage with the stories in their preferred medium, whether by reading, watching, or listening. Q4: Who can be featured on Women Story? A4: Any woman who has made a significant impact in her field or community and has an inspiring story of success can be featured. Ladyfair encourages nominations and submissions of women whose stories deserve to be told. Q5: Why was Women Story created? A5: Women Story was created to inspire and motivate women by sharing real-life examples of others who have overcome challenges to achieve success. The goal is to provide role models and encourage other women to pursue their dreams, regardless of their circumstances. Q6: How does Women Story align with Ladyfair’s mission? A6: Ladyfair is focused on empowering women, and Women Story is an extension of that mission. By featuring successful women, Ladyfair aims to inspire others to break barriers, take leadership roles, and make meaningful contributions to society. Q7: Can I nominate someone for Women Story? A7: Yes, you can nominate women who have inspiring stories to be featured on the platform. Ladyfair encourages people to bring forward women who have made significant contributions or achieved success against all odds. Q8: Is Women Story limited to a specific industry? A8: No, Women Story is not limited to any particular industry. It features women from all walks of life, whether they are entrepreneurs, educators, artists, social workers, or in any other field that contributes positively to society. Q9: How does Women Story inspire others? A9: By sharing the personal and professional journeys of women who have overcome adversity to succeed, Women Story offers real-life examples that other women can relate to. These stories provide encouragement, hope, and the belief that success is possible for anyone. Q10: How can I access Women Story? A10: Women Story is accessible through Ladyfair’s platform, where you can read articles, watch videos, or listen to podcasts featuring these inspiring women. Keep an eye on Ladyfair’s website and social media channels for new stories. Q11: Can I share my own story on Women Story? A11: Yes, if you have a story of success and want to inspire other women, you can reach out to Ladyfair to share your journey. Ladyfair is always looking to feature new stories that empower women.
Posted By: 7th September 2024
White Hair Solution at Home
White Hair Solution at Home: Natural Remedies for Greying Hair Grey or white hair is often associated with aging, but it can also appear in younger individuals due to genetics, stress, lifestyle, and environmental factors. Many people seek natural solutions for managing white hair, as these remedies are generally safer and more accessible than chemical treatments. In this guide, we will explore various home remedies that can help prevent and reverse white hair, emphasizing natural ingredients and simple practices. Understanding the Causes of White Hair Before diving into solutions, it’s essential to understand the causes of white or grey hair. Melanin, the pigment responsible for the color of your hair, diminishes as you age, leading to the loss of color in your hair strands. Several factors contribute to premature greying, including: Genetics: If your parents or grandparents experienced early greying, there’s a higher chance you will too. Vitamin Deficiencies: Lack of certain vitamins, particularly B12, D, E, and biotin, can accelerate greying. Stress: Chronic stress can cause hormonal imbalances, leading to premature greying. Chemical Exposure: Harsh chemicals found in shampoos, dyes, and environmental pollutants can weaken hair and lead to greying. Poor Diet: A diet low in essential nutrients can cause premature white hair. Smoking: Smoking has been linked to early greying due to oxidative stress on hair follicles. Now that we know the causes, let's explore some natural white hair solutions you can implement at home. 1. Coconut Oil and Lemon Juice One of the most popular remedies for white hair is the combination of coconut oil and lemon juice. Coconut oil nourishes the scalp and hair, while lemon juice is rich in antioxidants and vitamins that help preserve hair color. How to Use: Mix 2-3 tablespoons of coconut oil with 1 tablespoon of lemon juice. Apply the mixture to your scalp and hair. Massage for 10 minutes and leave it on for at least 30 minutes before washing it off with a mild shampoo. Repeat this process 2-3 times a week for the best results. 2. Amla (Indian Gooseberry) Amla is an age-old remedy used in Ayurvedic medicine to treat hair problems, including premature greying. It is rich in vitamin C and antioxidants, which promote melanin production and improve hair health. How to Use: Amla Oil: Massage your scalp with amla oil before bedtime and leave it overnight. Wash your hair in the morning with a mild shampoo. Do this 2-3 times a week. Amla Juice: Drink amla juice daily for added benefits to your hair and overall health. Amla Hair Mask: Make a paste using amla powder and water. Apply the paste to your scalp and hair, leave it for 30 minutes, and then rinse with lukewarm water. 3. Black Tea Rinse Black tea is packed with antioxidants and tannins that can darken grey or white hair and give it a more youthful appearance. This remedy is ideal for those who want to maintain the natural color of their hair without using chemical dyes. How to Use: Boil 2 tablespoons of black tea in water and let it steep until it cools down. Strain the tea and use the liquid to rinse your hair. Massage your scalp gently, leave it on for 20-30 minutes, and then rinse with water (no need to shampoo afterward). Repeat this treatment 2-3 times a week. 4. Onion Juice Onion juice is known for its ability to boost catalase levels, an enzyme that helps reduce hydrogen peroxide buildup in the hair follicles, which is responsible for greying. This home remedy is especially useful for preventing further greying. How to Use: Extract juice from one large onion using a blender or grater. Apply the onion juice directly to your scalp and massage it in. Leave it on for 30 minutes to an hour before rinsing with a mild shampoo to remove the smell. Use this treatment 2-3 times a week for effective results. 5. Henna Henna is a natural dye used for centuries to color hair. While it won’t completely reverse white hair, it can give your hair a natural brown or red hue, depending on your hair's natural color. Henna also strengthens hair and improves its texture. How to Use: Mix henna powder with water, amla powder, and a bit of coffee to form a paste. Let the mixture sit for a couple of hours. Apply the paste to your hair and leave it for 1-2 hours before rinsing with water. You can use this remedy once a month. 6. Bhringraj Oil Bhringraj is another Ayurvedic remedy known for promoting hair growth and preventing greying. Regular use of Bhringraj oil can help maintain your hair’s natural color and strengthen the roots. How to Use: Warm a small amount of Bhringraj oil and massage it into your scalp. Leave it on for at least 30 minutes or overnight for best results. Wash your hair with a mild shampoo afterward. Repeat 2-3 times a week. 7. Curry Leaves Curry leaves are packed with vitamins and minerals that improve hair health. These leaves help restore the natural melanin pigment in the hair, preventing premature greying. How to Use: Boil a handful of curry leaves in coconut oil until they turn black. Strain the oil and let it cool. Massage this oil into your scalp and hair 2-3 times a week. Leave it for 30 minutes before washing with a mild shampoo. 8. Fenugreek Seeds (Methi) Fenugreek seeds are rich in lecithin and amino acids, which strengthen hair and prevent greying. Regular use of fenugreek can help maintain your hair’s health and natural color. How to Use: Soak a tablespoon of fenugreek seeds overnight. In the morning, grind them into a paste and mix with coconut oil. Apply the mixture to your scalp and hair, and leave it for 30-45 minutes before rinsing with water. Use this remedy 2-3 times a week. 9. Sesame Oil and Carrot Juice Sesame oil is rich in vitamins and minerals that nourish the scalp, while carrot juice is loaded with antioxidants and nutrients that can help slow down the greying process. How to Use: Mix sesame oil and carrot juice in equal parts. Apply the mixture to your scalp and massage it in. Leave it for 30 minutes before rinsing with a mild shampoo. Use this remedy 2-3 times a week. 10. Balanced Diet for White Hair Prevention Your diet plays a critical role in the health and appearance of your hair. Eating foods rich in vitamins and minerals can help prevent premature greying. Some essential nutrients to include are: Vitamin B12: Found in eggs, dairy, fish, and fortified cereals. Biotin: Found in nuts, seeds, and whole grains. Iron: Found in leafy green vegetables, red meat, and lentils. Zinc: Found in pumpkin seeds, chickpeas, and nuts. Antioxidants: Found in berries, spinach, and nuts. 11. Avoid Smoking and Reduce Stress Lifestyle changes can significantly impact the health of your hair. Smoking accelerates the aging process and contributes to premature greying. Reducing stress through yoga, meditation, or exercise can help maintain your hair's natural color and prevent further greying. Final Thoughts While there is no magical solution to completely reverse grey or white hair, the above natural remedies can help slow down the process and improve the overall health of your hair. Consistency is key when using these treatments, and patience is necessary, as natural remedies often take time to show visible results. Additionally, adopting a healthy lifestyle, managing stress, and eating a nutrient-rich diet will contribute to healthier, more vibrant hair over time. By incorporating these remedies and lifestyle changes into your routine, you can naturally manage white hair from the comfort of your home. Salon At Home Kolkata

Posted By: 3rd September 2024
Bridal Makeup Artist in Desri
Top Bridal Makeup Artist in Desri - Ladyfair Your wedding day is a momentous occasion, and looking your absolute best is crucial. At Ladyfair, we are proud to be the leading bridal makeup artist in Desri, offering exceptional at-home bridal makeup services tailored to make you look stunning on your special day. Our expert makeup artist specializes in delivering personalized, flawless looks that enhance your natural beauty while complementing your wedding theme and attire. Whether you envision a classic, elegant style or a contemporary, glamorous appearance, Ladyfair is dedicated to bringing your bridal makeup dreams to life. Why Choose Ladyfair for Bridal Makeup in Desri? 1. Expert Makeup Artist Ladyfair’s makeup artist in Desri has extensive experience and expertise in bridal makeup. Our artist is adept at various makeup techniques, ensuring that your look is tailored to highlight your unique features and match your wedding attire, all while reflecting your personal style. 2. Convenient At-Home Service To make your wedding day as stress-free as possible, Ladyfair provides luxurious at-home bridal makeup services in Desri. Our makeup artist arrives at your home fully equipped, allowing you to relax and enjoy a seamless beauty experience without the need for salon visits. 3. Premium Quality Products For a flawless and long-lasting bridal look, we use only top-quality products from renowned brands such as Maybelline New York, Lakmé, MAC Cosmetics, Nykaa, Colorbar, Bobbi Brown, Faces Canada, and Huda Beauty. These high-end products ensure that your makeup looks perfect and stays fresh throughout your wedding day. 4. Customized Bridal Makeup Packages Recognizing that each bride has unique needs, Ladyfair offers a range of customized bridal makeup packages in Desri. From subtle elegance to dramatic glamour, our packages are designed to fit your style and budget. Bridal Makeup Packages in Desri 1. Basic Bridal Makeup: ₹10,000 Our Basic Bridal Makeup package offers a simple yet elegant look that enhances your natural beauty and complements your bridal attire. 2. HD Bridal Makeup: ₹12,000 The HD Bridal Makeup package provides a high-definition finish, ensuring that your makeup looks impeccable both in person and in photos, making it perfect for a long day of celebrations. 3. Airbrush Bridal Makeup: ₹18,000 For a lightweight, full-coverage look, our Airbrush Bridal Makeup package is ideal. This technique offers a smooth, natural finish that lasts all day, making it perfect for extended wedding events. Makeup for Engagements and Receptions In addition to bridal makeup, Ladyfair provides professional makeup services for engagement ceremonies and receptions in Desri. Our specialized packages ensure you look beautiful and confident for all your pre-wedding events. Basic Engagement/Reception Makeup: ₹6,000 HD Engagement/Reception Makeup: ₹8,000 Airbrush Engagement/Reception Makeup: ₹12,000 Party Makeup Services in Desri Ladyfair also offers makeup services for other special occasions such as parties, birthdays, and anniversaries. Our party makeup packages are designed to make you look fabulous for any event. Basic Party Makeup: ₹2,500 HD Party Makeup: ₹3,500 Popular Bridal Makeup Styles in Desri 1. Traditional Bridal Makeup Our Traditional Bridal Makeup style features rich colors and intricate application techniques that perfectly complement traditional wedding attire. This classic look is ideal for brides who wish to embrace their cultural heritage on their special day. 2. HD Bridal Makeup The HD Bridal Makeup style ensures a flawless appearance that looks great both in person and in photographs. This style is perfect for brides who want their makeup to remain impeccable throughout their wedding day. 3. Airbrush Bridal Makeup For a natural yet polished look, our Airbrush Bridal Makeup offers a lightweight, smooth finish with full coverage. This style is ideal for brides who want a long-lasting and natural look. Booking Your Bridal Makeup with Ladyfair in Desri 1. Initial Contact Call us at 7004721239 to discuss your bridal makeup needs and schedule an appointment. Our team will help you choose the right package and set up a consultation. 2. Consultation Session Meet with our makeup artist to discuss your desired look, review your wedding attire, and plan the perfect makeup style. This session helps ensure that your bridal makeup aligns with your vision. 3. Makeup Trial We offer trial sessions to preview your bridal makeup and make any necessary adjustments before your wedding day. This ensures you are fully satisfied with your final look. 4. Wedding Day Makeup On your wedding day, our makeup artist will arrive at your location in Desri to provide a flawless and stress-free makeup service. We take care of all the details so you can focus on enjoying your special day. Testimonials from Brides in Desri Our brides in Desri have shared their positive experiences with Ladyfair’s bridal makeup services: Anita P., Desri: "Ladyfair’s makeup artist did an amazing job. The at-home service was so convenient, and my bridal look was absolutely perfect!" Meera L., Desri: "The HD makeup looked fantastic in all my wedding photos. I felt beautiful and confident throughout the day." Divya K., Desri: "The airbrush makeup was lightweight and long-lasting. Ladyfair made my wedding day truly special with their excellent service." Preparing for Your Bridal Makeup Session To achieve the best results for your bridal makeup, follow these preparation tips: Stay Hydrated: Drink plenty of water to keep your skin glowing. Consistent Skincare: Maintain a regular skincare routine leading up to your wedding. Avoid New Products: Stick to familiar skincare products to avoid any adverse reactions. Communicate Clearly: Discuss your makeup preferences and any concerns with our artist during your consultation. Additional Beauty Services by Ladyfair in Desri Ladyfair also offers a variety of beauty services to complement your bridal makeup: Engagement and Reception Makeup Party Makeup Special Occasion Makeup Everyday Makeup Contact Us Ready to book your bridal makeup appointment with Ladyfair in Desri? Call us today at 7004721239 to schedule your consultation and start your journey to a stunning bridal look.

Posted By: 3rd September 2024
Bridal Makeup Artist in Patedhi Belsar
Top Bridal Makeup Artist in Patedhi Belsar - Ladyfair Your wedding day is a once-in-a-lifetime event, and at Ladyfair, we understand the importance of looking your best. As the premier bridal makeup artist in Patedhi Belsar, we offer exceptional at-home bridal makeup services designed to make you look and feel stunning on your special day. Our expert makeup artist specializes in creating personalized, flawless looks that enhance your natural beauty while matching your wedding theme and attire. Whether you envision a classic, elegant appearance or a modern, glamorous style, Ladyfair is here to fulfill your bridal makeup dreams. Why Choose Ladyfair for Bridal Makeup in Patedhi Belsar? 1. Expert Makeup Artist Ladyfair’s makeup artist in Patedhi Belsar brings extensive experience and expertise to your bridal preparation. Our artist is skilled in various makeup techniques, ensuring your look is tailored to complement your features and wedding attire, while also aligning with your personal style. 2. Convenient At-Home Service We understand that your wedding day can be stressful, which is why we offer the luxury of at-home bridal makeup services in Patedhi Belsar. Our makeup artist arrives at your home fully equipped, allowing you to relax and enjoy a seamless beauty experience without the need to travel. 3. Premium Quality Products For a flawless bridal look, we use only the highest quality products from renowned brands such as Maybelline New York, Lakmé, MAC Cosmetics, Nykaa, Colorbar, Bobbi Brown, Faces Canada, and Huda Beauty. These top-notch products ensure long-lasting wear and a perfect finish, so you can confidently celebrate your wedding day without worrying about touch-ups. 4. Customized Bridal Makeup Packages Every bride is unique, and so are her makeup needs. Ladyfair offers a range of customized bridal makeup packages in Patedhi Belsar, catering to different preferences and budgets. From understated elegance to full-on glamour, we have a package that will perfectly suit your vision. Bridal Makeup Packages in Patedhi Belsar 1. Basic Bridal Makeup: ₹10,000 Our Basic Bridal Makeup package provides a refined yet natural look that enhances your beauty and complements your wedding attire. 2. HD Bridal Makeup: ₹12,000 The HD Bridal Makeup package is designed for a flawless, high-definition finish that looks perfect both in person and in photographs, ensuring you look stunning throughout your wedding day. 3. Airbrush Bridal Makeup: ₹18,000 For a lightweight, full-coverage look, our Airbrush Bridal Makeup package is the ideal choice. This technique offers a smooth, natural finish that lasts all day, making it perfect for long wedding celebrations. Makeup for Engagements and Receptions In addition to bridal makeup, Ladyfair provides professional makeup services for engagement ceremonies and receptions in Patedhi Belsar. Our specialized packages ensure you look beautiful and confident for all your pre-wedding events. Basic Engagement/Reception Makeup: ₹6,000 HD Engagement/Reception Makeup: ₹8,000 Airbrush Engagement/Reception Makeup: ₹12,000 Party Makeup Services in Patedhi Belsar Ladyfair also offers makeup services for other special occasions such as parties, birthdays, and anniversaries. Our party makeup packages are designed to make you look fabulous for any event. Basic Party Makeup: ₹2,500 HD Party Makeup: ₹3,500 Popular Bridal Makeup Styles in Patedhi Belsar 1. Traditional Bridal Makeup Our Traditional Bridal Makeup style features rich, vibrant colors and detailed application techniques that perfectly complement traditional wedding attire. This classic look is ideal for brides who want to embrace their cultural heritage on their special day. 2. HD Bridal Makeup The HD Bridal Makeup style ensures a flawless, photogenic appearance, making it perfect for brides who want their makeup to look impeccable in both photographs and in person. 3. Airbrush Bridal Makeup For a natural, polished appearance, our Airbrush Bridal Makeup offers a lightweight, smooth finish with full coverage. This style is ideal for brides who want long-lasting results and a natural look throughout their wedding day. Booking Your Bridal Makeup with Ladyfair in Patedhi Belsar 1. Initial Contact Call us at 7004721239 to discuss your bridal makeup needs and schedule an appointment. Our team will assist you in selecting the right package and setting up a consultation. 2. Consultation Session Meet with our makeup artist to discuss your desired look, review your wedding attire, and plan the perfect makeup style. This session helps ensure that your bridal makeup aligns with your vision. 3. Makeup Trial We offer makeup trial sessions to preview your bridal look and make any necessary adjustments before your wedding day. This trial ensures that you are completely satisfied with your final look. 4. Wedding Day Makeup On your wedding day, our makeup artist will arrive at your location in Patedhi Belsar to provide a flawless and stress-free makeup service. We handle all the details so you can focus on enjoying your special day. Testimonials from Brides in Patedhi Belsar Our brides in Patedhi Belsar have shared their positive experiences with Ladyfair’s bridal makeup services: Sonia R., Patedhi Belsar: "Ladyfair made my wedding day extra special with their exceptional at-home service and skilled makeup artist. My look was perfect!" Riya K., Patedhi Belsar: "The HD makeup was flawless, and I felt beautiful throughout my wedding. I received many compliments, and Ladyfair truly delivered." Aarti J., Patedhi Belsar: "The airbrush makeup was fantastic! It felt light and lasted all day without needing touch-ups. Ladyfair made my day unforgettable." Preparing for Your Bridal Makeup Session To ensure the best results for your bridal makeup, follow these preparation tips: Stay Hydrated: Drink plenty of water to keep your skin fresh and glowing. Consistent Skincare: Maintain a skincare routine leading up to your wedding to ensure your skin is in optimal condition. Avoid New Products: Stick to your usual skincare products to avoid any unexpected reactions or breakouts. Communicate Your Vision: Discuss your makeup preferences and any concerns with our artist during your consultation to achieve your desired look. Additional Beauty Services by Ladyfair in Patedhi Belsar In addition to bridal makeup, Ladyfair offers various beauty services to complement your look: Engagement and Reception Makeup Party Makeup Special Occasion Makeup Everyday Makeup Contact Us Ready to book your bridal makeup appointment with Ladyfair in Patedhi Belsar? Call us today at 7004721239 to schedule your consultation and start your journey to a stunning bridal look.

Posted By: 3rd September 2024
Bridal Makeup Artist in Bhagwanpur
Top Bridal Makeup Artist in Bhagwanpur - Ladyfair Your wedding day is one of the most important days of your life, and Ladyfair is here to ensure you look and feel absolutely stunning. As the leading bridal makeup artist in Bhagwanpur, we offer professional, at-home bridal makeup services tailored to make you the star of your special day. Our expert makeup artist specializes in creating flawless, personalized looks that enhance your natural beauty while reflecting your unique style. Whether you prefer a classic, traditional look or a modern, glamorous finish, Ladyfair is committed to making your bridal dreams come true. Why Choose Ladyfair for Bridal Makeup in Bhagwanpur? 1. Expert Makeup Artist Ladyfair’s makeup artist in Bhagwanpur brings years of experience and expertise in bridal makeup. Our artist understands the intricacies of different makeup techniques and knows how to create a look that complements your facial features, wedding attire, and overall theme. We are dedicated to making you look your absolute best on your big day. 2. Convenient At-Home Service We understand the stress of wedding preparations, which is why we offer the convenience of at-home bridal makeup services in Bhagwanpur. Our makeup artist arrives at your doorstep fully equipped, allowing you to relax and enjoy a stress-free experience as you get ready for your wedding. 3. Premium Quality Products At Ladyfair, we believe that using high-quality products is essential for achieving a flawless bridal look. We exclusively use premium makeup products from renowned brands such as Maybelline New York, Lakmé, MAC Cosmetics, Nykaa, Colorbar, Bobbi Brown, Faces Canada, and Huda Beauty. These products ensure long-lasting wear and a perfect finish that will keep you looking stunning throughout your wedding day. 4. Customized Bridal Makeup Packages Every bride is unique, and so are her makeup needs. Ladyfair offers a range of customized bridal makeup packages in Bhagwanpur to suit different preferences and budgets. Whether you want a simple, elegant look or a full-glam bridal style, we have a package that’s perfect for you. Bridal Makeup Packages in Bhagwanpur 1. Basic Bridal Makeup: ₹10,000 Our Basic Bridal Makeup package is designed to give you a natural, sophisticated look that enhances your beauty while complementing your wedding dress and accessories. 2. HD Bridal Makeup: ₹12,000 For a flawless, camera-ready appearance, our HD Bridal Makeup package offers a high-definition finish that looks perfect both in person and in photographs. 3. Airbrush Bridal Makeup: ₹18,000 Our Airbrush Bridal Makeup package is ideal for brides who want a lightweight, long-lasting look with full coverage. This technique provides a smooth and natural finish, perfect for all-day wear. Makeup for Engagements and Receptions In addition to bridal makeup, Ladyfair also offers professional makeup services for engagement ceremonies and reception events in Bhagwanpur. Our specialized packages ensure you look your best for every pre-wedding celebration. Basic Engagement/Reception Makeup: ₹6,000 HD Engagement/Reception Makeup: ₹8,000 Airbrush Engagement/Reception Makeup: ₹12,000 Party Makeup Services in Bhagwanpur Ladyfair provides expert makeup services for various occasions, including parties, birthdays, anniversaries, and other special events. Our party makeup packages are designed to make you look fabulous for any occasion. Basic Party Makeup: ₹2,500 HD Party Makeup: ₹3,500 Popular Bridal Makeup Styles in Bhagwanpur 1. Traditional Bridal Makeup Our Traditional Bridal Makeup style uses rich, vibrant colors and intricate techniques that beautifully complement traditional wedding attire, making it perfect for brides who wish to embrace their cultural heritage. 2. HD Bridal Makeup Ideal for brides who want a flawless, photogenic look, our HD Bridal Makeup style ensures your makeup looks impeccable in every photograph and throughout your wedding day. 3. Airbrush Bridal Makeup For a natural, polished appearance, our Airbrush Bridal Makeup provides lightweight, even coverage that lasts all day, making it ideal for long wedding ceremonies and receptions. Booking Your Bridal Makeup with Ladyfair in Bhagwanpur 1. Initial Contact Call us at 7004721239 to discuss your bridal makeup requirements and schedule your appointment. Our team will guide you through our packages and help you choose the one that best fits your needs. 2. Consultation Session During your consultation, you'll meet with our makeup artist to discuss your desired look, review your wedding attire, and plan the perfect makeup style. This ensures we align our services with your vision. 3. Makeup Trial We offer trial sessions to preview your bridal makeup and make any necessary adjustments before your wedding day. This trial helps ensure that you are completely satisfied with your chosen look. 4. Wedding Day Makeup On your wedding day, our makeup artist will arrive at your location in Bhagwanpur to provide a flawless, stress-free makeup service. We handle all the details so you can focus on enjoying your special day. Testimonials from Brides in Bhagwanpur Our brides in Bhagwanpur have shared their positive experiences with Ladyfair’s bridal makeup services: Ritu S., Bhagwanpur: "Ladyfair's service exceeded my expectations. The convenience of at-home service and the expertise of the makeup artist made my wedding day truly memorable." Priya K., Bhagwanpur: "The HD makeup was stunning, and I received so many compliments. Ladyfair made me feel like the most beautiful bride." Neha J., Bhagwanpur: "I chose the airbrush makeup for my wedding, and it was perfect. It felt light and lasted all day without needing any touch-ups." Preparing for Your Bridal Makeup Session To ensure the best results for your bridal makeup session, consider these preparation tips: Stay Hydrated: Drink plenty of water leading up to your wedding day to keep your skin glowing and fresh. Follow a Skincare Routine: Consistent skincare in the months before your wedding will help achieve a flawless makeup application. Avoid Trying New Products: Stick to your usual skincare products to avoid unexpected reactions or breakouts. Communicate Your Vision: Share your makeup preferences and any specific concerns with our artist during your consultation to ensure your desired look. Additional Beauty Services by Ladyfair in Bhagwanpur Ladyfair also offers a range of beauty services to complement your bridal makeup: Engagement and Reception Makeup Party Makeup Special Occasion Makeup Everyday Makeup Contact Us Ready to book your bridal makeup appointment with Ladyfair in Bhagwanpur? Call us today at 7004721239 to schedule your consultation and start your journey to achieving the perfect bridal look.

Posted By: 3rd September 2024
Top Makeup Artist in Vaishali
Exquisite Bridal Makeup Services in Vaishali by Ladyfair Every bride dreams of looking radiant and beautiful on her wedding day, and Ladyfair is here to make that dream come true in Vaishali. As the leading bridal makeup artist in the area, we specialize in providing exceptional at-home bridal makeup services that ensure you shine with confidence on your special day. Our expert makeup artist tailors each look to enhance your natural beauty, creating a perfect blend of tradition and modernity that suits your style and personality. Whether you desire a subtle, elegant look or a glamorous, high-definition finish, Ladyfair is dedicated to bringing your bridal vision to life. Why Ladyfair is the Best Choice for Bridal Makeup in Vaishali 1. Skilled and Experienced Makeup Artist Ladyfair's makeup artist in Vaishali is a seasoned professional with extensive experience in bridal makeup. With a deep understanding of various makeup techniques, our artist customizes each look to complement your facial features, wedding attire, and overall theme. We ensure that you walk down the aisle looking flawless and feeling your best. 2. Convenient At-Home Service On your wedding day, convenience is key. Ladyfair offers the luxury of at-home bridal makeup services in Vaishali, allowing you to prepare for your big day in the comfort of your own home. Our makeup artist arrives fully equipped, ensuring a stress-free and enjoyable experience while you relax and get ready. 3. Premium Quality Products We believe that quality makeup products are essential for achieving a flawless bridal look. Ladyfair exclusively uses top-tier, professional-grade makeup products from renowned brands such as Maybelline New York, Lakmé, MAC Cosmetics, Nykaa, Colorbar, Bobbi Brown, Faces Canada, and Huda Beauty. These high-quality products guarantee a perfect finish and long-lasting wear throughout your wedding day. 4. Custom Bridal Makeup Packages Understanding that every bride is unique, Ladyfair offers a range of bridal makeup packages in Vaishali to suit different needs and budgets. Whether you're looking for a simple, elegant look or a full-on glamorous style, we have a package designed just for you. Bridal Makeup Packages in Vaishali 1. Basic Bridal Makeup: ₹10,000 Our Basic Bridal Makeup package provides a natural and elegant look that enhances your beauty while complementing your wedding dress and accessories. 2. HD Bridal Makeup: ₹12,000 For brides who want a flawless, camera-ready appearance, our HD Bridal Makeup package offers a high-definition finish that looks stunning both in person and in photographs. 3. Airbrush Bridal Makeup: ₹18,000 Our Airbrush Bridal Makeup package is perfect for brides seeking a lightweight, long-lasting look with full coverage. This technique delivers a smooth and natural finish, ideal for all-day wear. Makeup for Engagements and Receptions In addition to bridal makeup, Ladyfair provides professional makeup services for engagement ceremonies and reception events. Our specialized packages ensure you look your best for all your pre-wedding celebrations. Basic Engagement/Reception Makeup: ₹6,000 HD Engagement/Reception Makeup: ₹8,000 Airbrush Engagement/Reception Makeup: ₹12,000 Party Makeup Services in Vaishali Ladyfair also offers expert makeup services for various occasions, including parties, birthdays, anniversaries, and other special events. Our party makeup packages are designed to make you look fabulous for any event. Basic Party Makeup: ₹2,500 HD Party Makeup: ₹3,500 Popular Bridal Makeup Styles in Vaishali 1. Traditional Bridal Makeup For brides who wish to embrace cultural traditions, our Traditional Bridal Makeup style uses rich, vibrant colors and intricate techniques that beautifully complement traditional wedding attire. 2. HD Bridal Makeup Perfect for brides seeking a flawless, photogenic look, our HD Bridal Makeup style ensures your makeup looks impeccable in every photograph and throughout your wedding day. 3. Airbrush Bridal Makeup For a natural, polished appearance, our Airbrush Bridal Makeup provides lightweight, even coverage that lasts all day, making it ideal for long wedding ceremonies and receptions. Booking Your Bridal Makeup with Ladyfair in Vaishali 1. Initial Contact Call us at 7004721239 to discuss your bridal makeup requirements and schedule your appointment. Our team will guide you through our packages and help you choose the one that best fits your needs. 2. Consultation Session During your consultation, you'll meet with our makeup artist to discuss your desired look, review your wedding attire, and plan the perfect makeup style. This ensures we align our services with your vision. 3. Makeup Trial We offer trial sessions to preview your bridal makeup and make any necessary adjustments before your wedding day. This trial helps ensure that you are completely satisfied with your chosen look. 4. Wedding Day Makeup On your wedding day, our makeup artist will arrive at your location in Vaishali to provide a flawless, stress-free makeup service. We handle all the details so you can focus on enjoying your special day. Testimonials from Brides in Vaishali Our brides in Vaishali have shared their positive experiences with Ladyfair’s bridal makeup services: Pooja R., Vaishali: "Ladyfair's service was top-notch. The convenience of at-home service and the expertise of the makeup artist made my wedding day even more special." Sneha B., Vaishali: "The HD makeup was flawless, and I received countless compliments throughout the day. Ladyfair truly made me feel like a princess." Anjali K., Vaishali: "The airbrush makeup was perfect for my long wedding day. It felt light, stayed put, and looked amazing in all my photos." Preparing for Your Bridal Makeup Session To ensure the best results for your bridal makeup session, consider these preparation tips: Stay Hydrated: Drink plenty of water leading up to your wedding day to keep your skin glowing and fresh. Follow a Skincare Routine: Consistent skincare in the months before your wedding will help achieve a flawless makeup application. Avoid Trying New Products: Stick to your usual skincare products to avoid unexpected reactions or breakouts. Communicate Your Vision: Share your makeup preferences and any specific concerns with our artist during your consultation to ensure your desired look. Additional Beauty Services by Ladyfair in Vaishali Ladyfair also offers a range of beauty services to complement your bridal makeup: Engagement and Reception Makeup Party Makeup Special Occasion Makeup Everyday Makeup Contact Us Ready to book your bridal makeup appointment with Ladyfair in Vaishali? Call us today at 7004721239 to schedule your consultation and start your journey to achieving the perfect bridal look.

Posted By: 3rd September 2024
Bridal Makeup Artist in Lalganj
Flawless Bridal Makeup Services in Lalganj by Ladyfair Your wedding day is a momentous occasion, and every bride deserves to look and feel her absolute best. Ladyfair is proud to be the premier bridal makeup artist in Lalganj, offering specialized at-home bridal makeup services designed to make your special day even more memorable. With a focus on perfection, our experienced makeup artist tailors each look to match your unique style, ensuring you shine brightly on your wedding day. Whether you envision a classic, traditional look or a modern, high-definition finish, Ladyfair is dedicated to bringing your bridal beauty dreams to life. Why Choose Ladyfair for Bridal Makeup in Lalganj? 1. Expert Makeup Artist with Extensive Experience Ladyfair's makeup artist in Lalganj brings years of professional experience, specializing in bridal makeup that enhances your natural beauty while complementing your wedding theme and attire. With a deep understanding of various makeup techniques and styles, our artist ensures you achieve a flawless look that lasts all day. 2. Convenient At-Home Service On your wedding day, the last thing you want is the stress of traveling to a salon. Ladyfair offers the luxury of at-home bridal makeup services in Lalganj, allowing you to prepare in the comfort of your home. Our makeup artist arrives fully equipped to create a stunning look tailored to your preferences, making the entire experience stress-free and enjoyable. 3. Use of Premium Products At Ladyfair, we believe that quality is key to achieving a perfect bridal look. We exclusively use top-tier, professional-grade makeup products from leading brands such as Maybelline New York, Lakmé, MAC Cosmetics, Nykaa, Colorbar, Bobbi Brown, Faces Canada, and Huda Beauty. These high-quality products ensure a flawless application and a long-lasting finish, so you can confidently enjoy your day without worrying about touch-ups. 4. Custom Bridal Makeup Packages Every bride is unique, and so are her beauty needs. Ladyfair offers a variety of bridal makeup packages in Lalganj to suit different budgets and styles. From subtle elegance to full glamour, we have a package designed to meet your specific desires. Bridal Makeup Packages in Lalganj 1. Basic Bridal Makeup: ₹10,000 Our Basic Bridal Makeup package offers a simple yet elegant look that enhances your natural beauty and harmonizes with your bridal attire. 2. HD Bridal Makeup: ₹12,000 Designed for brides who want a picture-perfect finish, our HD Bridal Makeup package ensures that your makeup looks impeccable both in person and in photographs. 3. Airbrush Bridal Makeup: ₹18,000 For a lightweight, long-lasting look with full coverage, our Airbrush Bridal Makeup package is the ideal choice. This package is perfect for brides who prefer a natural yet flawless finish. Makeup for Engagements and Receptions In addition to bridal makeup, Ladyfair offers expert makeup services for your engagement and reception events. Our specialized packages ensure you look stunning for all your pre-wedding celebrations. Basic Engagement/Reception Makeup: ₹6,000 HD Engagement/Reception Makeup: ₹8,000 Airbrush Engagement/Reception Makeup: ₹12,000 Party Makeup Services in Lalganj Ladyfair also provides professional makeup services for parties, birthdays, anniversaries, and other special occasions. Our party makeup packages are designed to help you look your best, no matter the event. Basic Party Makeup: ₹2,500 HD Party Makeup: ₹3,500 Popular Bridal Makeup Styles in Lalganj 1. Traditional Bridal Makeup For brides who want to embrace cultural beauty, our Traditional Bridal Makeup style uses rich colors and intricate techniques to perfectly complement traditional wedding attire. 2. HD Bridal Makeup Ideal for brides who want a flawless, camera-ready finish, our HD Bridal Makeup style ensures you look impeccable in every photograph and in person. 3. Airbrush Bridal Makeup For a natural yet polished look, our Airbrush Bridal Makeup offers lightweight, smooth coverage that lasts all day, perfect for long wedding celebrations. Booking Your Bridal Makeup with Ladyfair in Lalganj 1. Initial Contact Call us at 7004721239 to discuss your bridal makeup needs and schedule your appointment. Our team will guide you through the available packages and help you choose the best one for your wedding. 2. Consultation Session Meet with our makeup artist to discuss your desired look, review your wedding attire, and plan the perfect makeup style. This session allows us to align our services with your vision. 3. Makeup Trial We offer trial sessions to preview your bridal makeup and make any necessary adjustments before your wedding day. This ensures that you are completely satisfied with your chosen look. 4. Wedding Day Makeup On your wedding day, our makeup artist will arrive at your location in Lalganj to provide a flawless and stress-free makeup service. We handle all the details so you can focus on enjoying your special day. Testimonials from Brides in Lalganj Our brides in Lalganj have had wonderful experiences with Ladyfair’s bridal makeup services. Here’s what some of them have to say: Nidhi P., Lalganj: "Ladyfair's service was impeccable. The convenience of at-home service and the professional skill of the makeup artist made my wedding day stress-free and magical." Ritika S., Lalganj: "The HD makeup was flawless in every photo, and I received so many compliments on my look. Ladyfair made my bridal dreams come true." Ankita K., Lalganj: "The airbrush makeup felt light and natural, yet provided full coverage that lasted all day. Ladyfair exceeded my expectations." Preparing for Your Bridal Makeup Session To ensure the best results for your bridal makeup session, follow these preparation tips: Stay Hydrated: Drink plenty of water in the days leading up to your wedding to keep your skin fresh and glowing. Consistent Skincare: Maintain a regular skincare routine in the months before your wedding for the best skin condition. Avoid New Products: Stick to familiar skincare products to avoid potential reactions or breakouts. Communicate Clearly: Discuss your makeup preferences and any concerns during your consultation to achieve your desired look. Additional Beauty Services by Ladyfair in Lalganj Ladyfair also offers a variety of beauty services to complement your bridal makeup: Engagement and Reception Makeup Party Makeup Everyday Makeup Special Occasion Makeup Contact Us Ready to book your bridal makeup appointment with Ladyfair in Lalganj? Call us today at 7004721239 to schedule your consultation and start your journey to achieving your dream wedding look.

Posted By: 3rd September 2024
Best Bridal Makeup Artist in Bidupur
Ladyfair: Best Bridal Makeup Artist in Bidupur Your wedding day is one of the most memorable days of your life, and looking your absolute best is a top priority. In Bidupur, Ladyfair is the premier bridal makeup artist, providing exceptional at-home bridal makeup services that cater to your individual style and needs. Whether you're dreaming of a classic bridal look, a flawless high-definition (HD) finish, or the sophisticated elegance of airbrush makeup, Ladyfair is dedicated to making your special day as beautiful as you've always imagined. Why Choose Ladyfair for Bridal Makeup in Bidupur? 1. Expertise and Professionalism Ladyfair’s makeup artist in Bidupur has years of experience and a deep understanding of various makeup techniques. This expertise ensures that your bridal makeup will not only enhance your natural beauty but also perfectly match your wedding theme and attire. Our artist is committed to creating a look that is uniquely yours, making sure you feel confident and stunning on your big day. 2. Convenient At-Home Service Ladyfair offers the luxury of at-home bridal makeup services in Bidupur, eliminating the need for stressful salon visits on your wedding day. Our makeup artist will come to your location, fully equipped to create a flawless look in the comfort of your home. This convenience allows you to relax and enjoy the preparation process without any added stress. 3. Premium Products for Flawless Results At Ladyfair, we understand that quality is key to achieving a flawless finish. That's why we use only top-tier, professional-grade makeup products from renowned brands such as Maybelline New York, Lakmé, MAC Cosmetics, Nykaa, Colorbar, Bobbi Brown, Faces Canada, and Huda Beauty. These high-quality products ensure that your makeup not only looks stunning but also lasts throughout the entire event, keeping you picture-perfect from start to finish. 4. Customizable Bridal Makeup Packages Every bride has her own vision for her wedding day, which is why Ladyfair offers a range of bridal makeup packages in Bidupur. From understated elegance to full-on glam, our packages are designed to cater to different styles and budgets, ensuring you get the exact look you want for your special day. Bridal Makeup Packages Available in Bidupur 1. Basic Bridal Makeup Package: ₹10,000 This package offers a simple yet elegant makeup look that enhances your natural beauty. It's perfect for brides who prefer a more understated, classic style. 2. HD Bridal Makeup Package: ₹12,000 For brides who want a flawless, camera-ready look, our HD bridal makeup package is the ideal choice. This package ensures that your makeup looks perfect both in person and in photographs. 3. Airbrush Bridal Makeup Package: ₹18,000 Our airbrush bridal makeup package provides a lightweight, smooth finish with full coverage. This package is perfect for brides who want a natural, long-lasting look that stays fresh throughout the day. Engagement and Reception Makeup Services in Bidupur Ladyfair also offers specialized makeup services for your engagement and reception events, ensuring that you look stunning for all your pre-wedding celebrations. Our packages are designed to enhance your beauty for every special occasion leading up to your wedding day. 1. Basic Engagement/Reception Makeup: ₹6,000 This package includes a simple yet polished look that highlights your natural features, making you look radiant during your engagement or reception. 2. HD Engagement/Reception Makeup: ₹8,000 For a flawless, high-definition finish that looks great in photos, our HD makeup package is the perfect choice for your engagement or reception. 3. Airbrush Engagement/Reception Makeup: ₹12,000 Our airbrush makeup package offers a lightweight, full-coverage look that lasts all night, ensuring you look your best for your engagement or reception. Party Makeup Services in Bidupur In addition to bridal and engagement makeup, Ladyfair provides professional makeup services for other special occasions, such as parties, birthdays, and anniversaries. Our party makeup packages are designed to help you look your best, no matter the event. 1. Basic Party Makeup: ₹2,500 A quick and simple makeup application that enhances your natural features, perfect for any party or special occasion. 2. HD Party Makeup: ₹3,500 For a high-definition makeup look that ensures you are picture-perfect throughout the event, our HD party makeup package is an excellent choice. Popular Bridal Makeup Styles Offered by Ladyfair in Bidupur Ladyfair’s makeup artist in Bidupur is skilled in a variety of bridal makeup styles, allowing you to choose the look that best suits your personality and wedding theme. Here are some of the most popular styles we offer: 1. Traditional Bridal Makeup Our traditional bridal makeup style features rich, vibrant colors and intricate techniques that perfectly complement traditional wedding attire. This classic look is ideal for brides who want to embrace the cultural beauty of their wedding day. 2. HD Bridal Makeup The HD bridal makeup style is designed to give you a flawless, camera-ready finish. This style is perfect for brides who want to look impeccable in every photograph, ensuring that your makeup looks as good in pictures as it does in person. 3. Airbrush Bridal Makeup For brides who prefer a natural yet polished look, our airbrush bridal makeup offers a lightweight, smooth finish with full coverage. This style is ideal for long-lasting wear, ensuring your makeup stays fresh throughout your wedding day. How to Book Your Bridal Makeup with Ladyfair in Bidupur Booking your bridal makeup with Ladyfair is easy and convenient. We strive to make the process as smooth and stress-free as possible, so you can focus on enjoying your wedding day. 1. Initial Contact Call us at 7004721239 to discuss your bridal makeup needs and schedule your appointment. Our friendly team will guide you through the available packages and help you choose the one that best suits your preferences. 2. Consultation Session Meet with our makeup artist to discuss your desired look, review your wedding attire, and plan the perfect makeup style. This session ensures that we understand your vision and can deliver a look that aligns with your expectations. 3. Makeup Trial We offer trial sessions to preview your bridal makeup and make any necessary adjustments before your wedding day. This trial ensures that you are completely satisfied with your chosen look. 4. Wedding Day Makeup On your wedding day, our makeup artist will arrive at your location in Bidupur to provide a flawless and stress-free makeup service. We take care of all the details so you can focus on enjoying your special day. Why Brides in Bidupur Trust Ladyfair Ladyfair is trusted by brides in Bidupur for our commitment to quality, convenience, and customer satisfaction. Our makeup artist’s expertise and use of premium products have made us the preferred choice for bridal makeup in the area.

Posted By: 3rd September 2024
Best Bridal Makeup Artist in Raghopur
Best Bridal Makeup Artist in Raghopur: Ladyfair Your wedding day is a momentous occasion, and every bride dreams of looking her best as she embarks on this new chapter of life. In Raghopur, Ladyfair is recognized as the best bridal makeup artist, providing expert at-home bridal makeup services that ensure you shine on your special day. Whether you desire a traditional bridal look, a flawless high-definition finish, or the perfect airbrush makeup, Ladyfair’s professional makeup artist is dedicated to making your wedding day look absolutely perfect. Why Choose Ladyfair as Your Bridal Makeup Artist in Raghopur? 1. Expertise and Professionalism Ladyfair’s makeup artist in Raghopur brings years of experience and a deep understanding of various bridal makeup techniques. This expertise ensures that each bride receives a tailored makeup look that enhances her natural beauty while complementing her wedding attire. Whether you prefer a subtle, elegant style or something more glamorous and bold, Ladyfair can bring your bridal vision to life. 2. Convenient At-Home Service On your wedding day, comfort and convenience are essential. Ladyfair offers premium at-home bridal makeup services in Raghopur, allowing you to relax and enjoy the preparation process in the comfort of your own home. Our makeup artist arrives fully equipped, ensuring a seamless and stress-free experience without the hassle of visiting a salon. 3. Use of High-Quality Products Quality is a cornerstone of Ladyfair’s services. We use top-tier makeup products from renowned brands such as Maybelline New York, Lakmé, MAC Cosmetics, Nykaa, Colorbar, Bobbi Brown, Faces Canada, and Huda Beauty. These products are selected for their durability, excellent finish, and ability to maintain a flawless look throughout your wedding day. 4. Customized Bridal Makeup Packages Understanding that every bride has unique preferences, Ladyfair offers a range of bridal makeup packages in Raghopur. From the classic bridal look to high-definition and airbrush makeup styles, there is a package to suit every bride’s needs and budget. Bridal Makeup Packages Available in Raghopur Basic Bridal Makeup: ₹10,000 This package provides a simple yet elegant makeup look that enhances your natural beauty and perfectly complements your bridal ensemble. HD Bridal Makeup: ₹12,000 For brides who want to look flawless both in person and in photographs, our HD bridal makeup package offers a high-definition finish that lasts throughout the day. Airbrush Bridal Makeup: ₹18,000 Ideal for a natural yet polished appearance, our airbrush bridal makeup provides lightweight, full coverage that lasts all day, making it perfect for long wedding celebrations. Engagement and Reception Makeup Ladyfair also offers specialized makeup services for your engagement and reception events, ensuring you look stunning for all your pre-wedding celebrations. Basic Engagement/Reception Makeup: ₹6,000 A refined, natural look that highlights your best features for these special occasions. HD Engagement/Reception Makeup: ₹8,000 A high-definition finish that ensures you look picture-perfect throughout the event. Airbrush Engagement/Reception Makeup: ₹12,000 A lightweight, flawless finish with full coverage to keep you looking radiant all day. Party Makeup Services in Raghopur Ladyfair also provides professional makeup services for other special occasions, such as parties and anniversaries, to help you look your best no matter the event. Basic Party Makeup: ₹2,500 A simple makeup application that enhances your natural beauty for any event. HD Party Makeup: ₹3,500 A high-definition makeup look that keeps you camera-ready throughout the occasion. Popular Bridal Makeup Styles Offered by Ladyfair in Raghopur Ladyfair offers a range of bridal makeup styles to cater to every bride’s taste and preference: Traditional Bridal Makeup Embrace the cultural beauty of your wedding day with our traditional bridal makeup, featuring vibrant colors and intricate techniques that perfectly complement your traditional attire. HD Bridal Makeup For brides who want to ensure a flawless, camera-ready appearance, our HD bridal makeup offers a high-definition finish that looks impeccable both in person and in photographs. Airbrush Bridal Makeup For a natural yet polished look, our airbrush bridal makeup provides a lightweight, smooth finish with full coverage, perfect for long-lasting wear throughout your wedding day. Booking Your Bridal Makeup with Ladyfair Booking your bridal makeup with Ladyfair is easy and hassle-free: 1. Initial Contact Call us at 7004721239 to discuss your bridal makeup needs and schedule an appointment. Our team will assist you in choosing the perfect package for your preferences. 2. Consultation Session During your consultation, you’ll meet with our makeup artist to discuss your desired look, review your wedding attire, and plan your makeup style. This session ensures that we fully understand your vision and can deliver the look you want. 3. Makeup Trial We offer makeup trials to preview your bridal look and make any necessary adjustments before your wedding day. This helps ensure you are completely satisfied with your chosen style. 4. Wedding Day Makeup On your wedding day, our makeup artist will arrive at your location in Raghopur to provide a flawless, stress-free makeup service, allowing you to focus on enjoying your special day. Testimonials from Brides in Raghopur Brides in Raghopur have shared their wonderful experiences with Ladyfair’s bridal makeup services. Here are some of their testimonials: Rani T., Raghopur "Ladyfair made me feel so beautiful on my wedding day. The makeup was exactly how I wanted it, and the convenience of at-home service made everything so much easier. I would recommend them to any bride!" Meena S., Raghopur "I opted for the HD bridal makeup, and it was perfect. My makeup stayed flawless all day, and I received so many compliments. Ladyfair is truly the best in Raghopur." Neelam P., Raghopur "The airbrush makeup was amazing. It felt light and natural but provided excellent coverage. Ladyfair’s artist was professional, and I was thrilled with the result." Preparing for Your Bridal Makeup Session To ensure the best results for your bridal makeup session, follow these tips: Stay Hydrated Drink plenty of water in the weeks leading up to your wedding to keep your skin glowing and fresh. Consistent Skincare Maintain a regular skincare routine to ensure your skin is in top condition for your big day. Avoid New Products Stick to familiar skincare products to prevent any unexpected reactions or breakouts. Communicate Clearly During your consultation, clearly communicate your makeup preferences and any concerns with our artist to achieve your desired look. Additional Beauty Services by Ladyfair in Raghopur Ladyfair also offers a variety of beauty services to complement your bridal makeup: Engagement and Reception Makeup Customized looks for all your pre-wedding events. Party Makeup Professional makeup services for parties and special occasions. Everyday Makeup Enhance your daily look with our expert makeup services. Special Occasion Makeup Ensure you look and feel your best for important events. The Future of Bridal Makeup in Raghopur Ladyfair is committed to setting new standards in bridal beauty as the best bridal makeup artist in Raghopur. Our dedication to quality, convenience, and customer satisfaction has made us the top choice for brides in the area. We look forward to helping more brides achieve their dream wedding look with our exceptional at-home makeup services. Q&A with Ladyfair’s Bridal Makeup Artist in Raghopur Why should I choose Ladyfair as my bridal makeup artist in Raghopur? Ladyfair offers expert at-home bridal makeup services with premium products and tailored packages, ensuring you look stunning on your wedding day. What makeup products do you use? We use high-quality products from top brands like Maybelline, Lakmé, MAC Cosmetics, Nykaa, Colorbar, Bobbi Brown, Faces Canada, and Huda Beauty for a flawless finish. Can I book a trial before my wedding? Yes, we provide trial sessions to preview and adjust your bridal look before the big day. How do I book an appointment? Call us at 7004721239 to book your consultation and trial. Do you offer makeup services for other events? Yes, Ladyfair provides makeup services for engagements, receptions, parties, and other special occasions. Contact Us Ready to book with the best bridal makeup artist in Raghopur? Call us today at 7004721239 to schedule your consultation and start your journey to a breathtaking bridal look. Ladyfair - The Best Bridal Makeup Artist in Raghopur

Posted By: 3rd September 2024
Best Bridal Makeup Artist in Hajipur
Best Bridal Makeup Artist in Hajipur: Ladyfair Your wedding day is one of the most memorable days of your life, and looking your absolute best is a top priority. In Hajipur, Ladyfair stands out as the best bridal makeup artist, offering expert at-home bridal makeup services that ensure you look stunning from the first photo to the last dance. Whether you’re aiming for a traditional bridal look, a high-definition finish, or an airbrush makeup style, Ladyfair’s professional makeup artist is here to make your bridal dreams come true. Why Ladyfair is the Best Bridal Makeup Artist in Hajipur 1. Expertise and Professionalism Ladyfair’s makeup artist in Hajipur has years of experience and a deep understanding of bridal makeup techniques. This expertise ensures that every bride receives a personalized look that enhances her natural beauty and aligns with her wedding theme. From subtle and elegant to glamorous and bold, Ladyfair can create the perfect bridal look for you. 2. Convenient At-Home Service On your wedding day, convenience is key. Ladyfair offers luxurious at-home bridal makeup services in Hajipur, allowing you to relax and enjoy the preparation process in the comfort of your own space. Our makeup artist arrives fully equipped, ensuring you receive a flawless makeup application without the need to travel to a salon. 3. Use of Premium Products Quality is a priority at Ladyfair. We use top-of-the-line makeup products from renowned brands such as Maybelline New York, Lakmé, MAC Cosmetics, Nykaa, Colorbar, Bobbi Brown, Faces Canada, and Huda Beauty. These products are chosen for their durability, finish, and ability to withstand the long hours of your wedding day, ensuring you look perfect throughout. 4. Tailored Bridal Makeup Packages Understanding that every bride has unique preferences and needs, Ladyfair offers a variety of bridal makeup packages in Hajipur. From the classic bridal look to high-definition and airbrush styles, there is a package to suit every style and budget. Bridal Makeup Packages in Hajipur Basic Bridal Makeup: ₹10,000 This package offers a simple yet sophisticated makeup look that highlights your natural beauty and complements your bridal attire. HD Bridal Makeup: ₹12,000 Our HD bridal makeup package is perfect for brides who want to look flawless both in person and in photographs. The high-definition finish ensures your makeup remains perfect throughout your wedding day. Airbrush Bridal Makeup: ₹18,000 For a lightweight, full-coverage look that lasts all day, our airbrush bridal makeup is ideal. This package provides a natural finish with long-lasting results. Engagement and Reception Makeup Ladyfair also offers specialized makeup services for your engagement and reception events, ensuring you look stunning for all your pre-wedding celebrations. Basic Engagement/Reception Makeup: ₹6,000 A polished yet natural look that enhances your features beautifully. HD Engagement/Reception Makeup: ₹8,000 A high-definition finish that ensures you look impeccable in all your photos. Airbrush Engagement/Reception Makeup: ₹12,000 A lightweight, smooth finish with full coverage for a perfect appearance throughout your events. Party Makeup Services in Hajipur Ladyfair provides professional makeup services for various special occasions, such as parties and anniversaries, helping you look your best no matter the event. Basic Party Makeup: ₹2,500 A simple makeup application that enhances your natural beauty. HD Party Makeup: ₹3,500 A high-definition makeup look to keep you picture-perfect throughout the event. Popular Bridal Makeup Styles Offered by Ladyfair in Hajipur Ladyfair offers a range of bridal makeup styles to cater to every bride’s taste and preference: Traditional Bridal Makeup Our traditional bridal makeup features vibrant colors and intricate techniques that complement traditional wedding attire, embracing the cultural beauty of your special day. HD Bridal Makeup The HD bridal makeup style provides a flawless, camera-ready finish, perfect for ensuring your makeup looks impeccable both in-person and in photographs. Airbrush Bridal Makeup For a natural yet polished look, our airbrush bridal makeup offers a lightweight, smooth finish with full coverage, ideal for long-lasting wear throughout your wedding day. Booking Your Bridal Makeup with Ladyfair Booking your bridal makeup with Ladyfair is a simple and stress-free process: 1. Initial Contact Call us at 7004721239 to discuss your bridal makeup needs and schedule your appointment. Our team will help you choose the right package for your preferences. 2. Consultation Session Meet with our makeup artist to discuss your desired look, review your wedding attire, and plan the perfect makeup style. This session helps us understand your vision and ensures that we deliver a look that meets your expectations. 3. Makeup Trial We offer trial sessions to preview your bridal makeup and make any necessary adjustments before your wedding day. This ensures you are fully satisfied with your chosen look. 4. Wedding Day Makeup On your wedding day, our makeup artist will arrive at your location in Hajipur to provide a flawless and stress-free makeup service. We handle all the details so you can focus on enjoying your special day. Testimonials from Brides in Hajipur Our brides in Hajipur have shared wonderful experiences with Ladyfair’s bridal makeup services. Here are some testimonials: Pooja R., Hajipur "Ladyfair made my wedding day so special. The makeup was exactly how I envisioned it, and the convenience of at-home service was unbeatable. I felt like a queen." Anjali S., Hajipur "I went for the HD bridal makeup, and it was perfect. My makeup lasted all day, and I received so many compliments. I highly recommend Ladyfair to any bride." Kavita M., Hajipur "The airbrush makeup was incredible. It felt light but gave amazing coverage. Ladyfair’s artist was so professional, and I couldn’t have been happier with the result." Preparing for Your Bridal Makeup Session To ensure the best results for your bridal makeup session, follow these tips: Stay Hydrated Drink plenty of water leading up to your wedding to keep your skin fresh and glowing. Consistent Skincare Follow a regular skincare routine in the months before your wedding to ensure your skin is in optimal condition. Avoid New Products Stick to familiar skincare products to prevent any potential reactions or breakouts. Communicate Clearly Discuss your makeup preferences and any concerns with our artist during your consultation. Clear communication is key to achieving your desired look. Additional Beauty Services by Ladyfair in Hajipur In addition to bridal makeup, Ladyfair offers a range of beauty services to complement your look: Engagement and Reception Makeup Customized looks for all your pre-wedding events. Party Makeup Professional makeup services for parties and special occasions. Everyday Makeup Enhance your daily look with our expert makeup services. Special Occasion Makeup Make sure you look and feel your best for those important life events. The Future of Bridal Makeup in Hajipur As the best bridal makeup artist in Hajipur, Ladyfair is committed to setting new standards in bridal beauty. Our dedication to quality, convenience, and customer satisfaction has made us the preferred choice for brides in the area. We look forward to helping more brides achieve their dream wedding look with our exceptional at-home makeup services. Q&A with Ladyfair’s Bridal Makeup Artist in Hajipur Why should I choose Ladyfair as my bridal makeup artist in Hajipur? Ladyfair offers expert at-home bridal makeup services with premium products and tailored packages. Our experienced artist ensures you look stunning on your wedding day. What makeup products do you use? We use high-quality products from top brands like Maybelline, Lakmé, MAC Cosmetics, Nykaa, Colorbar, Bobbi Brown, Faces Canada, and Huda Beauty for a flawless finish. Can I book a trial before my wedding? Yes, we provide trial sessions to preview and adjust your bridal look before the big day. How do I book an appointment? Call us at 7004721239 to book your consultation and trial. Do you offer makeup services for other events? Yes, Ladyfair provides makeup services for engagements, receptions, parties, and other special occasions. Contact Us Ready to book with the best bridal makeup artist in Hajipur? Call us today at 7004721239 to schedule your consultation and start your journey to a breathtaking bridal look. Ladyfair - The Best Bridal Makeup Artist in Hajipur

Posted By: 2nd September 2024
Bridal Makeup Artist in Dhaka
Discover the Best Bridal Makeup Artist in Dhaka with Ladyfair Your wedding day is a milestone event that deserves a flawless look. Ladyfair is proud to be recognized as the best bridal makeup artist in Dhaka, offering top-notch at-home bridal makeup services that cater to your every need. With our focus on delivering impeccable and long-lasting beauty, our expert makeup artist ensures you shine on your special day. Whether you desire a classic bridal look, a high-definition finish, or the elegance of airbrush makeup, Ladyfair is dedicated to making your wedding day dreams come true. Why Ladyfair is the Best Bridal Makeup Artist in Dhaka 1. Professional Expertise and Experience Ladyfair’s makeup artist in Dhaka brings extensive experience and professional expertise to your bridal preparation. Our artist is skilled in various makeup styles and techniques, ensuring that your makeup not only enhances your natural beauty but also complements your wedding theme and attire perfectly. 2. Convenient At-Home Service Avoid the stress of traveling to a salon on your wedding day. Ladyfair offers luxurious at-home bridal makeup services in Dhaka, allowing you to relax and enjoy the preparation process in the comfort of your own home. Our makeup artist arrives fully equipped to create a stunning look that will last throughout your wedding day. 3. Use of Premium Makeup Products At Ladyfair, we prioritize quality. We use only the finest professional-grade makeup products from renowned brands such as Maybelline New York, Lakmé, MAC Cosmetics, Nykaa, Colorbar, Bobbi Brown, Faces Canada, and Huda Beauty. Our selection ensures a flawless application and long-lasting finish, so you can enjoy every moment of your special day without frequent touch-ups. 4. Tailored Bridal Makeup Packages We understand that every bride has unique preferences. Ladyfair offers a range of bridal makeup packages in Dhaka to suit various styles and budgets. From classic elegance to full glam, we have a package to meet your needs. Bridal Makeup Packages in Dhaka Basic Bridal Makeup: ₹10,000 This package includes a simple yet elegant makeup look that enhances your natural features and complements your bridal attire. HD Bridal Makeup: ₹12,000 Our HD bridal makeup package is perfect for brides who want to look flawless both in person and in photographs. The high-definition finish ensures your makeup remains perfect throughout your wedding day. Airbrush Bridal Makeup: ₹18,000 For a lightweight, full-coverage look that lasts all day, our airbrush bridal makeup is ideal. This package provides a natural finish with long-lasting results. Engagement and Reception Makeup Ladyfair also offers specialized makeup services for your engagement and reception events, ensuring you look stunning for all your pre-wedding celebrations. Basic Engagement/Reception Makeup: ₹6,000 A polished yet natural look that enhances your features beautifully. HD Engagement/Reception Makeup: ₹8,000 A high-definition finish that ensures you look impeccable in all your photos. Airbrush Engagement/Reception Makeup: ₹12,000 A lightweight, smooth finish with full coverage for a perfect appearance throughout your events. Party Makeup Services in Dhaka Ladyfair provides professional makeup services for various special occasions, such as parties and anniversaries, helping you look your best no matter the event. Basic Party Makeup: ₹2,500 A simple makeup application that enhances your natural beauty. HD Party Makeup: ₹3,500 A high-definition makeup look to keep you picture-perfect throughout the event. Popular Bridal Makeup Styles Offered by Ladyfair in Dhaka Ladyfair offers a range of bridal makeup styles to cater to every bride’s taste and preference: Traditional Bridal Makeup Our traditional bridal makeup features vibrant colors and intricate techniques that complement traditional wedding attire, embracing the cultural beauty of your special day. HD Bridal Makeup The HD bridal makeup style provides a flawless, camera-ready finish, perfect for ensuring your makeup looks impeccable both in-person and in photographs. Airbrush Bridal Makeup For a natural yet polished look, our airbrush bridal makeup offers a lightweight, smooth finish with full coverage, ideal for long-lasting wear throughout your wedding day. Booking Your Makeup with Ladyfair Booking your bridal makeup with Ladyfair is a straightforward process: 1. Initial Contact Call us at 7004721239 to discuss your bridal makeup needs and schedule your appointment. Our team will help you choose the right package for your preferences. 2. Consultation Session Meet with our makeup artist to discuss your desired look, review your wedding attire, and plan the perfect makeup style. This session helps us understand your vision and ensures that we deliver a look that meets your expectations. 3. Makeup Trial We offer trial sessions to preview your bridal makeup and make any necessary adjustments before your wedding day. This ensures you are fully satisfied with your chosen look. 4. Wedding Day Makeup On your wedding day, our makeup artist will arrive at your location in Dhaka to provide a flawless and stress-free makeup service. We handle all the details so you can focus on enjoying your special day. Testimonials from Brides in Dhaka Our brides in Dhaka have shared wonderful experiences with Ladyfair’s bridal makeup services. Here are some testimonials: Naina A., Dhaka "Ladyfair provided exceptional service. The convenience of at-home makeup was fantastic, and the artist was highly professional. My bridal look was exactly what I envisioned." Riya M., Dhaka "I chose the HD makeup package for my wedding, and it was perfect. My makeup looked flawless in every photo, and I received numerous compliments throughout the day." Simran B., Dhaka "The airbrush makeup was incredible. It felt so light on my skin but gave excellent coverage that lasted all day. Ladyfair truly made my wedding day unforgettable." Preparing for Your Bridal Makeup Session To achieve the best results for your bridal makeup session, follow these tips: Stay Hydrated Drink plenty of water leading up to your wedding to keep your skin fresh and glowing. Consistent Skincare Follow a regular skincare routine in the months before your wedding to ensure your skin is in optimal condition. Avoid New Products Stick to familiar skincare products to prevent any potential reactions or breakouts. Communicate Clearly Discuss your makeup preferences and any concerns with our artist during your consultation. Clear communication is key to achieving your desired look. Additional Beauty Services by Ladyfair in Dhaka In addition to bridal makeup, Ladyfair offers a range of beauty services to complement your look: Engagement and Reception Makeup Customized looks for all your pre-wedding events. Party Makeup Professional makeup services for parties and special occasions. Everyday Makeup Enhance your daily look with our expert makeup services. Special Occasion Makeup Make sure you look and feel your best for those important life events. The Future of Bridal Makeup in Dhaka As the best bridal makeup artist in Dhaka, Ladyfair is committed to setting new standards in bridal beauty. Our dedication to quality, convenience, and customer satisfaction has made us the preferred choice for brides in the area. We look forward to helping more brides achieve their dream wedding look with our exceptional at-home makeup services. Q&A with Ladyfair’s Bridal Makeup Artist in Dhaka Why should I choose Ladyfair as my bridal makeup artist in Dhaka? Ladyfair offers expert at-home bridal makeup services with premium products and tailored packages. Our experienced artist ensures you look stunning on your wedding day. What makeup products do you use? We use high-quality products from top brands like Maybelline, Lakmé, MAC Cosmetics, Nykaa, Colorbar, Bobbi Brown, Faces Canada, and Huda Beauty for a flawless finish. Can I book a trial before my wedding? Yes, we provide trial sessions to preview and adjust your bridal look before the big day. How do I book an appointment? Call us at 7004721239 to book your consultation and trial. Do you offer makeup services for other events? Yes, Ladyfair provides makeup services for engagements, receptions, parties, and other special occasions. Contact Us Ready to book with the best bridal makeup artist in Dhaka? Call us today at 7004721239 to schedule your consultation and start your journey to a breathtaking bridal look. Ladyfair - The Best Bridal Makeup Artist in Dhaka

Posted By: 2nd September 2024
Bridal Makeup Artist in Ghorasahan
Discover the Best Bridal Makeup Artist in Ghorasahan with Ladyfair Your wedding day is a once-in-a-lifetime event, and looking absolutely stunning is essential. Ladyfair is honored to be recognized as the best bridal makeup artist in Ghorasahan, offering specialized at-home bridal makeup services that cater to your every need. Our expert makeup artist focuses on delivering flawless, long-lasting beauty so you can shine on your special day. Whether you envision a traditional bridal look, an HD finish, or the elegance of airbrush makeup, Ladyfair is here to make your wedding day dreams come true. Why Ladyfair is the Best Bridal Makeup Artist in Ghorasahan 1. Extensive Expertise and Experience Ladyfair’s makeup artist in Ghorasahan brings years of experience and professional expertise to your bridal preparation. Our artist is adept in various makeup styles and techniques, ensuring your makeup enhances your natural beauty and perfectly aligns with your wedding theme and attire. 2. Convenient At-Home Service Skip the inconvenience of salon visits on your wedding day. Ladyfair offers luxurious at-home bridal makeup services in Ghorasahan, allowing you to relax and enjoy the preparation process in the comfort of your home. Our artist arrives fully equipped to create a stunning look that will last throughout your wedding day. 3. Premium Makeup Products Quality is our priority. At Ladyfair, we use only the finest professional-grade makeup products from renowned brands such as Maybelline New York, Lakmé, MAC Cosmetics, Nykaa, Colorbar, Bobbi Brown, Faces Canada, and Huda Beauty. Our selection ensures flawless application and a long-lasting finish, allowing you to revel in your special day without needing frequent touch-ups. 4. Customized Bridal Makeup Packages We recognize that each bride has unique preferences. Ladyfair offers a range of bridal makeup packages in Ghorasahan to cater to different styles and budgets. Whether you’re looking for classic elegance, a high-definition finish, or the sophistication of airbrush makeup, we have a package to meet your needs. Bridal Makeup Packages in Ghorasahan Basic Bridal Makeup: ₹10,000 This package offers a simple yet elegant look that enhances your natural features and complements your bridal attire. HD Bridal Makeup: ₹12,000 Our HD bridal makeup package is designed for brides who want to look flawless both in person and in photographs. The high-definition finish ensures your makeup remains perfect throughout your wedding day. Airbrush Bridal Makeup: ₹18,000 For a lightweight, full-coverage look that lasts all day, our airbrush bridal makeup is ideal. This package provides a natural finish with long-lasting results. Engagement and Reception Makeup In addition to bridal makeup, Ladyfair offers specialized makeup services for your engagement and reception events, ensuring you look stunning for all your pre-wedding celebrations. Basic Engagement/Reception Makeup: ₹6,000 A polished, natural look that highlights your features beautifully. HD Engagement/Reception Makeup: ₹8,000 A high-definition finish for impeccable looks in all your photos. Airbrush Engagement/Reception Makeup: ₹12,000 A lightweight, smooth finish with full coverage for a perfect appearance throughout your events. Party Makeup Services in Ghorasahan Ladyfair also offers professional makeup services for other special occasions, such as parties and anniversaries, helping you look your best no matter the event. Basic Party Makeup: ₹2,500 A simple yet effective makeup application to enhance your natural beauty. HD Party Makeup: ₹3,500 A high-definition makeup look to keep you picture-perfect throughout the event. Popular Bridal Makeup Styles Offered by Ladyfair in Ghorasahan Ladyfair provides a variety of bridal makeup styles to suit every bride’s taste and preference: Traditional Bridal Makeup Featuring vibrant colors and intricate application techniques, our traditional bridal makeup style complements traditional wedding attire and enhances cultural beauty. HD Bridal Makeup Achieve a flawless, camera-ready finish with our HD bridal makeup style, perfect for looking impeccable both in-person and in photographs. Airbrush Bridal Makeup For a natural, smooth finish with full coverage, our airbrush makeup is perfect for long-lasting wear, ensuring your makeup stays fresh throughout your wedding day. Booking Your Makeup with Ladyfair Booking your bridal makeup with Ladyfair is a simple and seamless process: 1. Initial Contact Call us at 7004721239 to discuss your bridal makeup needs and schedule your appointment. Our team will assist you in choosing the right package for your preferences. 2. Consultation Session Meet with our makeup artist to discuss your desired look, review your wedding attire, and plan the perfect makeup style. This session helps us understand your vision and ensures we deliver a look that aligns with your expectations. 3. Makeup Trial We offer trial sessions to preview your bridal makeup and make any necessary adjustments before your wedding day. This ensures you are fully satisfied with your chosen look. 4. Wedding Day Makeup On your wedding day, our makeup artist will arrive at your location in Ghorasahan to provide a flawless and stress-free makeup service. We handle all the details so you can focus on enjoying your special day. Testimonials from Brides in Ghorasahan Our brides in Ghorasahan have had wonderful experiences with Ladyfair’s bridal makeup services. Here are some testimonials: Meera S., Ghorasahan "Ladyfair’s service was fantastic. The at-home makeup application was so convenient, and the makeup artist was incredibly skilled. My bridal look was just perfect." Roshni D., Ghorasahan "I opted for the HD makeup package, and it was worth every bit. My makeup looked flawless in all my photos, and I received numerous compliments." Kriti P., Ghorasahan "The airbrush makeup was amazing. It felt light on my skin but provided excellent coverage that lasted all day. Ladyfair made my wedding day truly special." Preparing for Your Bridal Makeup Session To ensure the best possible results: Stay Hydrated Drink plenty of water leading up to your wedding to keep your skin fresh and glowing. Consistent Skincare Follow a regular skincare routine in the months before your wedding to ensure your skin is in the best condition. Avoid New Products Stick to familiar skincare products to prevent any potential reactions or breakouts. Communicate Clearly Discuss your makeup preferences and any concerns with our artist during your consultation. Clear communication is key to achieving your desired look. Additional Beauty Services by Ladyfair in Ghorasahan Ladyfair also offers a range of additional beauty services to complement your bridal makeup: Engagement and Reception Makeup Customized looks for all your pre-wedding events. Party Makeup Professional makeup services for parties and special occasions. Everyday Makeup Enhance your daily look with our expert makeup services. Special Occasion Makeup Ensure you look and feel your best for those important life events. The Future of Bridal Makeup in Ghorasahan As the best bridal makeup artist in Ghorasahan, Ladyfair is dedicated to setting new standards in bridal beauty. Our commitment to quality, convenience, and customer satisfaction has made us the preferred choice for brides in the area. We look forward to helping more brides achieve their dream wedding look with our exceptional at-home makeup services. Q&A with Ladyfair’s Bridal Makeup Artist in Ghorasahan Why should I choose Ladyfair as my bridal makeup artist in Ghorasahan? Ladyfair provides expert at-home bridal makeup services with premium products and customized packages. Our experienced artist ensures you look flawless on your wedding day. What makeup products do you use? We use high-quality products from leading brands like Maybelline, Lakmé, MAC Cosmetics, Nykaa, Colorbar, Bobbi Brown, Faces Canada, and Huda Beauty, offering long-lasting coverage and a perfect finish. Can I book a trial before my wedding? Yes, we offer trial sessions to preview and adjust your bridal look before your wedding day. How do I book an appointment? Call us at 7004721239 to book your consultation and trial. Do you offer makeup services for other events? Yes, Ladyfair provides makeup services for engagements, receptions, parties, and other special occasions. Contact Us Ready to book with the best bridal makeup artist in Ghorasahan? Call us today at 7004721239 to schedule your consultation and start your journey to a stunning bridal look. Ladyfair - The Best Bridal Makeup Artist in Ghorasahan

Posted By: 2nd September 2024
Bridal Makeup Artist in Chiraiya
Discover the Best Bridal Makeup Artist in Chiraiya with Ladyfair Your wedding day is one of the most significant moments of your life, and looking your best is essential. Ladyfair proudly stands as the best bridal makeup artist in Chiraiya, offering exceptional at-home bridal makeup services tailored to meet your every need. Our commitment to delivering flawless, long-lasting beauty ensures you look radiant and feel confident throughout your special day. Why Ladyfair is the Best Bridal Makeup Artist in Chiraiya 1. Professional Expertise As the leading bridal makeup artist in Chiraiya, Ladyfair brings extensive experience and expertise to your wedding preparations. Our makeup artist specializes in various styles and techniques, ensuring your makeup enhances your natural beauty while perfectly complementing your wedding theme and attire. 2. Convenient At-Home Service Say goodbye to the hassle of traveling to a salon on your wedding day. Ladyfair offers the luxury of at-home bridal makeup services in Chiraiya, allowing you to enjoy the preparation process in the comfort of your home. Our expert arrives fully equipped to create a stunning look that will last throughout your wedding day. 3. Use of Premium Makeup Products At Ladyfair, we prioritize quality. That’s why we use only top-of-the-line makeup products from renowned brands such as Maybelline New York, Lakmé, MAC Cosmetics, Nykaa, Colorbar, Bobbi Brown, Faces Canada, and Huda Beauty. Our selection of high-end cosmetics ensures a flawless application and long-lasting finish, so you can enjoy every moment of your special day without worrying about touch-ups. 4. Customized Bridal Makeup Packages Every bride has unique preferences, which is why Ladyfair offers a variety of bridal makeup packages in Chiraiya to suit different styles and budgets. Whether you desire a classic look, an HD finish, or the elegance of airbrush makeup, we have a package that will meet your needs. Bridal Makeup Packages in Chiraiya Basic Bridal Makeup: ₹10,000 This package offers a simple yet elegant look that enhances your natural features and complements your bridal attire. HD Bridal Makeup: ₹12,000 Our HD bridal makeup package ensures a flawless look both in person and in photographs. The high-definition finish guarantees your makeup remains perfect throughout your wedding day. Airbrush Bridal Makeup: ₹18,000 For a lightweight, full-coverage look that lasts all day, our airbrush bridal makeup is the ideal choice. This package provides a natural finish with long-lasting results. Engagement and Reception Makeup Ladyfair also offers specialized makeup services for your engagement and reception events, ensuring you look stunning for all your pre-wedding celebrations. Basic Engagement/Reception Makeup: ₹6,000 A simple yet polished look that highlights your natural beauty. HD Engagement/Reception Makeup: ₹8,000 Includes a high-definition finish to ensure you look impeccable in all your photos. Airbrush Engagement/Reception Makeup: ₹12,000 A lightweight, smooth finish that provides full coverage and lasting results. Party Makeup Services in Chiraiya In addition to bridal makeup, Ladyfair provides professional makeup services for other special occasions, such as parties and anniversaries. Basic Party Makeup: ₹2,500 A quick and simple makeup application that enhances your natural features. HD Party Makeup: ₹3,500 A high-definition makeup look that ensures you are picture-perfect throughout the event. Popular Bridal Makeup Styles by the Best Bridal Makeup Artist in Chiraiya Ladyfair offers a variety of bridal makeup styles to suit every bride’s taste and preference: Traditional Bridal Makeup Featuring rich colors and intricate application techniques, our traditional bridal makeup style perfectly complements traditional wedding attire and enhances cultural beauty. HD Bridal Makeup Achieve a flawless, camera-ready finish with our HD bridal makeup style, ideal for both in-person and photographic perfection. Airbrush Bridal Makeup For a natural, smooth finish, our airbrush makeup offers full coverage and long-lasting wear, ensuring your makeup remains fresh throughout your wedding day. Booking Your Makeup with Ladyfair Booking your bridal makeup with Ladyfair is easy and convenient: 1. Initial Contact Call us at 7004721239 to discuss your bridal makeup needs and schedule your appointment. Our team will guide you through the available packages and help you choose the one that best suits your preferences. 2. Consultation Session Meet with our makeup artist to discuss your desired look, review your wedding attire, and plan the perfect makeup style. This session helps us understand your vision and ensures we deliver a look that aligns with your expectations. 3. Makeup Trial We offer trial sessions to preview your bridal makeup and make any necessary adjustments before your wedding day. This trial ensures that you are completely satisfied with your chosen look. 4. Wedding Day Makeup On your wedding day, our makeup artist will arrive at your location in Chiraiya to provide a flawless and stress-free makeup service. We take care of all the details so you can focus on enjoying your special day. Testimonials from Brides in Chiraiya Our brides in Chiraiya have had wonderful experiences with Ladyfair’s bridal makeup services. Here are a few testimonials: Anita P., Chiraiya "Ladyfair exceeded my expectations. The at-home service was so convenient, and the makeup artist was incredibly skilled. My bridal look was perfect." Seema J., Chiraiya "I opted for the HD makeup package, and it was worth every penny. My makeup looked flawless in all my photos, and I received countless compliments." Riya M., Chiraiya "The airbrush makeup was amazing. It felt light on my skin but provided full coverage that lasted all day. Ladyfair truly made my wedding day special." Preparing for Your Bridal Makeup Session To ensure the best possible results: Stay Hydrated Drink plenty of water in the days leading up to your wedding to keep your skin fresh and glowing. Consistent Skincare Maintain a regular skincare routine in the months before your wedding to ensure your skin is in optimal condition. Avoid New Products Stick to familiar skincare products to avoid any potential reactions or breakouts. Communicate Clearly Discuss your makeup preferences and any concerns with our artist during your consultation. Clear communication is key to achieving your desired look. Additional Beauty Services by Ladyfair in Chiraiya Ladyfair also offers a range of additional beauty services: Engagement and Reception Makeup Customized looks for all your pre-wedding events. Party Makeup Professional makeup services for parties and other special occasions. Everyday Makeup Enhance your daily look with our expert makeup services. Special Occasion Makeup For those important life events, Ladyfair offers special occasion makeup services that ensure you look and feel your best. The Future of Bridal Makeup in Chiraiya As the best bridal makeup artist in Chiraiya, Ladyfair is dedicated to setting new standards in bridal beauty. Our commitment to quality, convenience, and customer satisfaction makes us the preferred choice for brides in the area. We look forward to helping more brides achieve their dream wedding look with our exceptional at-home makeup services. Q&A with Ladyfair’s Bridal Makeup Artist in Chiraiya Why should I choose Ladyfair as my bridal makeup artist in Chiraiya? Ladyfair offers expert at-home bridal makeup services with premium products and customized packages. Our experienced artist ensures you look flawless on your wedding day. What makeup products do you use? We use high-quality products from top brands like Maybelline, Lakmé, MAC Cosmetics, Nykaa, Colorbar, Bobbi Brown, Faces Canada, and Huda Beauty, providing a long-lasting, perfect finish. Can I book a trial before my wedding? Yes, we offer trial sessions to preview and adjust your bridal look before your wedding day. How do I book an appointment? Call us at 7004721239 to book your consultation and trial. Do you offer makeup services for other events? Yes, Ladyfair provides makeup services for engagements, receptions, parties, and other special occasions. Contact Us Ready to book with the best bridal makeup artist in Chiraiya? Call us today at 7004721239 to schedule your consultation and start your journey to a stunning bridal look. Ladyfair - The Best Bridal Makeup Artist in Chiraiya
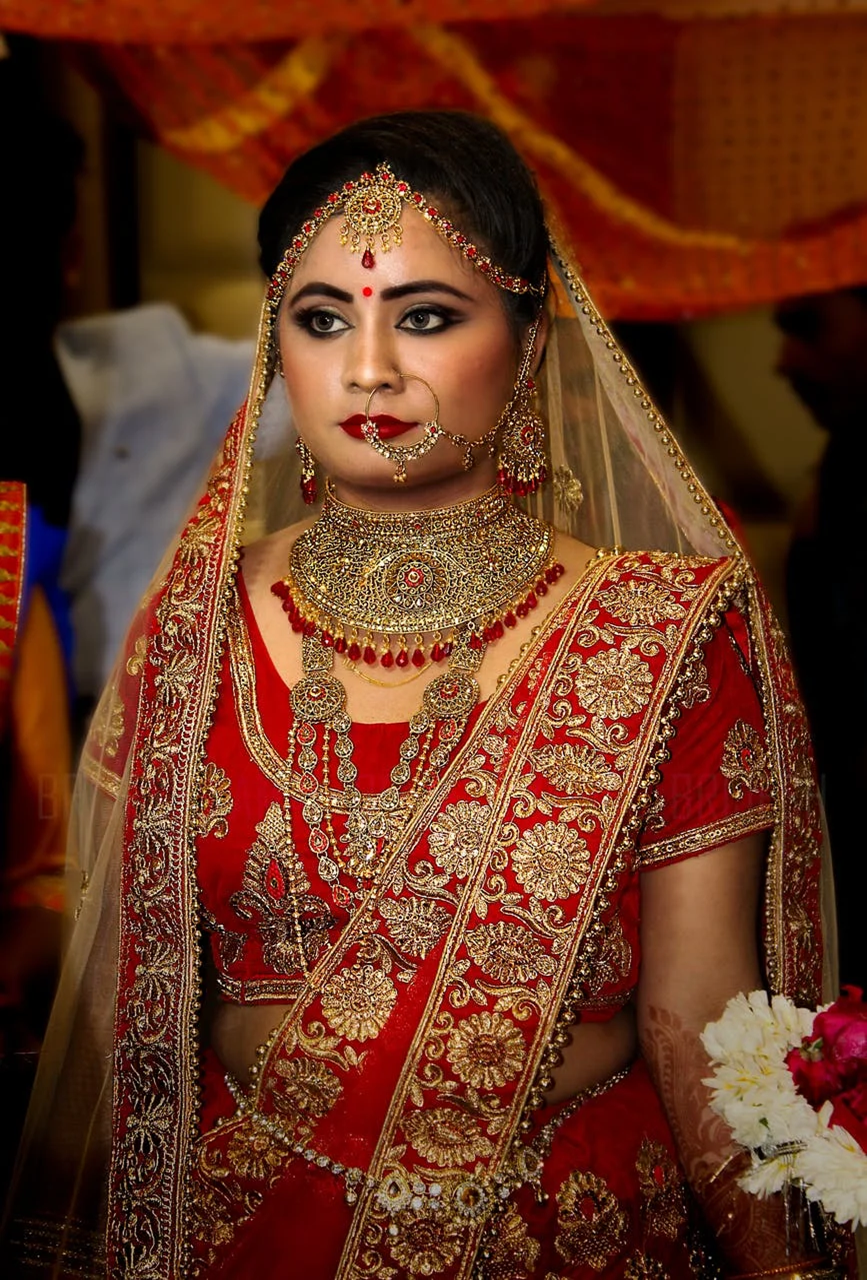
Posted By: 2nd September 2024
Bridal Makeup Artist in Bankatwa
Discover the Best Bridal Makeup Artist in Bankatwa with Ladyfair Your wedding day is a once-in-a-lifetime event, and looking your best is essential. Ladyfair proudly stands as the best bridal makeup artist in Bankatwa, offering exceptional at-home bridal makeup services designed to enhance your natural beauty and ensure you look radiant throughout your special day. With a commitment to personalized service and premium products, we make sure your bridal look is flawless and unforgettable. Why Ladyfair is the Best Bridal Makeup Artist in Bankatwa 1. Professional Expertise As the leading bridal makeup artist in Bankatwa, Ladyfair brings a wealth of experience and expertise to your wedding preparations. Our makeup artist specializes in a variety of styles and techniques, ensuring your makeup enhances your natural beauty and aligns with your wedding theme and attire. We work diligently to create a look that is uniquely yours. 2. Convenient At-Home Service Forget the stress of salon visits on your big day. Ladyfair offers the convenience of at-home bridal makeup services in Bankatwa, allowing you to enjoy the preparation process in the comfort of your own home. Our expert arrives fully equipped to provide a stunning look that will last throughout your wedding. 3. Use of Premium Makeup Products At Ladyfair, we understand that quality is key. That’s why we use only top-tier makeup products from renowned brands such as Maybelline New York, Lakmé, MAC Cosmetics, Nykaa, Colorbar, Bobbi Brown, Faces Canada, and Huda Beauty. These high-end products ensure a flawless application and long-lasting finish, so you can enjoy your wedding day without worrying about touch-ups. 4. Customized Bridal Makeup Packages Every bride has unique preferences, and Ladyfair offers a range of bridal makeup packages in Bankatwa to suit different styles and budgets. Whether you desire a classic look, an HD finish, or the elegance of airbrush makeup, we have a package that will meet your needs. Bridal Makeup Packages in Bankatwa Basic Bridal Makeup: ₹10,000 This package provides a simple yet elegant look that enhances your natural features and complements your bridal attire. HD Bridal Makeup: ₹12,000 Our HD bridal makeup package is designed for brides who want a flawless look both in person and in photographs. The high-definition finish ensures your makeup remains perfect throughout the day. Airbrush Bridal Makeup: ₹18,000 For a lightweight, full-coverage look with a natural finish, our airbrush bridal makeup is ideal. This package ensures your makeup stays fresh and flawless throughout your wedding day. Engagement and Reception Makeup Ladyfair also offers specialized makeup services for engagements and receptions, ensuring you look stunning for all your pre-wedding events. Basic Engagement/Reception Makeup: ₹6,000 A simple yet polished look that highlights your natural beauty. HD Engagement/Reception Makeup: ₹8,000 Includes a high-definition finish that ensures you look impeccable in all your photos. Airbrush Engagement/Reception Makeup: ₹12,000 A lightweight, smooth finish that offers full coverage and lasting results. Party Makeup Services in Bankatwa In addition to bridal makeup, Ladyfair provides professional makeup services for other special occasions, including parties and anniversaries. Basic Party Makeup: ₹2,500 A quick and simple makeup application that enhances your natural features. HD Party Makeup: ₹3,500 A high-definition makeup look that ensures you are picture-perfect throughout the event. Popular Bridal Makeup Styles by the Best Bridal Makeup Artist in Bankatwa Ladyfair offers a variety of bridal makeup styles to suit every bride’s taste and preference: Traditional Bridal Makeup Our traditional bridal makeup style features rich colors and intricate application techniques, perfectly complementing traditional wedding attire and enhancing cultural beauty. HD Bridal Makeup Achieve a flawless, camera-ready finish with our HD bridal makeup style, ideal for both in-person and photographic perfection. Airbrush Bridal Makeup For a natural, smooth finish, our airbrush makeup offers full coverage and long-lasting wear, ensuring your makeup remains fresh throughout your wedding day. Booking Your Makeup with Ladyfair Booking your bridal makeup with Ladyfair is straightforward and convenient: 1. Initial Contact Call us at 7004721239 to discuss your bridal makeup needs and schedule your appointment. Our team will assist you in choosing the right package. 2. Consultation Session Meet with our makeup artist to plan your look, review your attire, and ensure your makeup aligns with your vision. 3. Makeup Trial We offer trial sessions to preview your bridal makeup and make any necessary adjustments before your wedding day. 4. Wedding Day Makeup On your wedding day, our makeup artist will arrive at your location in Bankatwa to provide a flawless, stress-free makeup service. Testimonials from Brides in Bankatwa Our brides in Bankatwa have had wonderful experiences with Ladyfair’s bridal makeup services: Sanya K., Bankatwa "Ladyfair is truly the best bridal makeup artist in Bankatwa. The at-home service was incredibly convenient, and the makeup artist was professional and skilled. My bridal look was perfect." Nidhi R., Bankatwa "I chose the HD makeup package for my wedding, and I’m so glad I did. It looked flawless in every photograph, and I received many compliments throughout the day." Ritu M., Bankatwa "The airbrush makeup was fantastic. It felt so light on my skin yet provided full coverage that lasted all day. Ladyfair made my wedding day even more special." Preparing for Your Bridal Makeup Session To ensure the best results: Stay Hydrated Drink plenty of water leading up to your wedding to keep your skin fresh and glowing. Consistent Skincare Follow a regular skincare routine to ensure your skin is in optimal condition. Avoid New Products Stick to familiar skincare products to avoid any potential reactions or breakouts. Communicate Clearly Discuss your makeup preferences and any concerns with our artist during your consultation to achieve your desired look. Additional Beauty Services by Ladyfair in Bankatwa Ladyfair also provides: Engagement and Reception Makeup Customized looks for all your pre-wedding events. Party Makeup Expert services for parties and other special occasions. Everyday Makeup Enhance your daily look with our professional makeup services. Special Occasion Makeup For important life events, Ladyfair offers special occasion makeup services to ensure you look and feel your best. The Future of Bridal Makeup in Bankatwa As the best bridal makeup artist in Bankatwa, Ladyfair is committed to setting new standards in bridal beauty. Our dedication to quality, convenience, and customer satisfaction makes us the preferred choice for brides in the area. We look forward to helping more brides achieve their dream wedding look with our exceptional at-home makeup services. Q&A with Ladyfair’s Bridal Makeup Artist in Bankatwa Why choose Ladyfair as my bridal makeup artist in Bankatwa? Ladyfair offers expert at-home services, premium products, and customized packages. Our experienced artist ensures you look flawless on your wedding day. What products do you use? We use high-quality products from top brands like Maybelline, Lakmé, MAC Cosmetics, Nykaa, Colorbar, Bobbi Brown, Faces Canada, and Huda Beauty for a long-lasting, perfect finish. Can I book a trial before my wedding? Yes, we offer trial sessions to help you preview and adjust your bridal look before your wedding day. How do I book an appointment? Call us at 7004721239 to book your consultation and trial. Do you offer makeup for other events? Yes, Ladyfair provides makeup services for engagements, receptions, parties, and other special occasions. Contact Us Ready to book with the best bridal makeup artist in Bankatwa? Call us at 7004721239 to schedule your consultation and start your journey to a stunning bridal look. Ladyfair - The Best Bridal Makeup Artist in Bankatwa

Posted By: 2nd September 2024
Bridal Makeup Artist in Chauradano
Discover the Best Bridal Makeup Artist in Chauradano with Ladyfair Your wedding day is a celebration of love and beauty, and Ladyfair is honored to be recognized as the best bridal makeup artist in Chauradano. Our dedicated team offers exceptional at-home bridal makeup services designed to enhance your natural beauty and ensure you look stunning throughout your special day. With a focus on personalized service and premium products, we make sure that your bridal look is nothing short of perfect. Why Ladyfair is the Best Bridal Makeup Artist in Chauradano 1. Professional Expertise As the best bridal makeup artist in Chauradano, Ladyfair brings a wealth of experience and expertise to your wedding preparations. Our makeup artist specializes in a range of styles and techniques, ensuring that your look is tailored to your unique preferences and wedding theme. We work meticulously to enhance your features and deliver a flawless finish. 2. Convenient At-Home Service Avoid the stress of salon visits on your big day. Ladyfair offers the convenience of at-home bridal makeup services in Chauradano, allowing you to relax and enjoy the preparations in the comfort of your home. Our expert arrives fully equipped to create a stunning look that will stay perfect throughout your wedding. 3. Premium Makeup Products At Ladyfair, we use only the highest quality products from top brands to ensure a flawless application. Our selection includes Maybelline New York, Lakmé, MAC Cosmetics, Nykaa, Colorbar, Bobbi Brown, Faces Canada, and Huda Beauty. These premium products provide a long-lasting and perfect finish, so you can enjoy your day without worrying about touch-ups. 4. Customized Bridal Makeup Packages Understanding that every bride is unique, Ladyfair offers a variety of bridal makeup packages in Chauradano. Whether you prefer a classic look, an HD finish, or the elegance of airbrush makeup, we have a package to match your style and budget. Bridal Makeup Packages in Chauradano Basic Bridal Makeup: ₹10,000 This package includes a simple, elegant look that enhances your natural beauty and complements your bridal attire. HD Bridal Makeup: ₹12,000 Our HD bridal makeup package ensures you look flawless in both person and photographs, providing a high-definition finish that lasts all day. Airbrush Bridal Makeup: ₹18,000 For a lightweight, full-coverage look with a natural finish, our airbrush bridal makeup is ideal. This package ensures your makeup stays perfect throughout your wedding day. Engagement and Reception Makeup Ladyfair also offers makeup services for engagements and receptions, ensuring you look radiant for all pre-wedding celebrations. Basic Engagement/Reception Makeup: ₹6,000 A simple yet refined look that highlights your natural beauty. HD Engagement/Reception Makeup: ₹8,000 This package includes a high-definition finish that ensures you look impeccable in all your photos. Airbrush Engagement/Reception Makeup: ₹12,000 A lightweight, smooth finish that offers full coverage and lasting results. Party Makeup Services in Chauradano In addition to bridal services, Ladyfair offers professional makeup for other special occasions, such as parties and anniversaries. Basic Party Makeup: ₹2,500 A quick and simple makeup application that enhances your natural features. HD Party Makeup: ₹3,500 A high-definition look that ensures you are picture-perfect throughout your event. Popular Bridal Makeup Styles by the Best Bridal Makeup Artist in Chauradano Ladyfair offers various bridal makeup styles to suit every bride’s taste and preference: Traditional Bridal Makeup Featuring rich colors and intricate techniques, this style complements traditional wedding attire and enhances cultural beauty. HD Bridal Makeup Achieve a flawless, camera-ready finish with our HD makeup style, ideal for both in-person and photographic perfection. Airbrush Bridal Makeup For a natural, smooth finish, our airbrush makeup provides full coverage and long-lasting wear, ensuring your makeup remains fresh throughout your wedding. Booking Your Makeup with Ladyfair Booking your bridal makeup with Ladyfair is simple and convenient: 1. Initial Contact Call us at 7004721239 to discuss your bridal makeup needs and schedule your appointment. Our team will assist you in choosing the right package. 2. Consultation Session Meet with our makeup artist to plan your look, review your attire, and ensure your makeup aligns with your vision. 3. Makeup Trial We offer trial sessions to preview your bridal look and make adjustments before your wedding day. 4. Wedding Day Makeup Our artist will arrive at your location in Chauradano to provide a flawless, stress-free makeup service. Testimonials from Brides in Chauradano Our clients have shared wonderful feedback about Ladyfair’s services: Priya M., Chauradano "Ladyfair truly is the best bridal makeup artist in Chauradano. The at-home service was convenient, and the makeup was impeccable. I felt stunning on my wedding day." Aarti R., Chauradano "I opted for HD makeup, and it was perfect. My look was flawless in every photograph, and I received so many compliments from my guests." Neha S., Chauradano "The airbrush makeup was incredible. It felt so light on my skin yet provided full coverage. Ladyfair made my wedding day even more special." Preparing for Your Bridal Makeup Session To ensure the best results: Stay Hydrated Drink plenty of water leading up to your wedding to keep your skin glowing. Consistent Skincare Follow a regular skincare routine to ensure your skin is in top condition. Avoid New Products Stick to familiar skincare products to avoid potential reactions. Communicate Clearly Discuss your preferences and any concerns with our artist during your consultation to achieve your desired look. Additional Beauty Services by Ladyfair in Chauradano Ladyfair also provides: Engagement and Reception Makeup Customized looks for all pre-wedding events. Party Makeup Expert services for parties and special occasions. Everyday Makeup Enhance your daily look with our expert makeup services. Special Occasion Makeup Make important events even more special with our professional services. The Future of Bridal Makeup in Chauradano As the best bridal makeup artist in Chauradano, Ladyfair is committed to setting new standards in beauty. Our dedication to quality, convenience, and customer satisfaction makes us the preferred choice for brides in the area. We look forward to making your wedding day beautiful with our exceptional services. Q&A with Ladyfair’s Bridal Makeup Artist in Chauradano Why choose Ladyfair as my bridal makeup artist in Chauradano? Ladyfair offers expert at-home services, premium products, and tailored packages. Our experienced artist ensures you look flawless on your wedding day. What products do you use? We use top brands like Maybelline, Lakmé, MAC Cosmetics, Nykaa, Colorbar, Bobbi Brown, Faces Canada, and Huda Beauty for a long-lasting, perfect finish. Can I book a trial before my wedding? Yes, we offer trials to help you preview and adjust your bridal look. How do I book an appointment? Call us at 7004721239 to book your consultation and trial. Do you offer makeup for other events? Yes, we provide services for engagements, receptions, parties, and other special occasions. Contact Us Ready to book with the best bridal makeup artist in Chauradano? Call us at 7004721239 to schedule your consultation and start your journey to a stunning bridal look. Ladyfair - The Best Bridal Makeup Artist in Chauradano

Posted By: 2nd September 2024
Bridal Makeup Artist in Adapur
Experience Unmatched Bridal Makeup Services in Adapur with Ladyfair Your wedding day is a celebration of love and joy, and every detail needs to reflect the significance of this special occasion. Ladyfair is delighted to offer top-notch at-home bridal makeup services in Adapur, ensuring you look and feel your absolute best. With our expert makeup artist and premium products, we are committed to delivering a flawless and long-lasting bridal look that perfectly complements your unique style and wedding theme. Why Choose Ladyfair for Your Bridal Makeup in Adapur? 1. Expertise and Skill At Ladyfair, our makeup artist in Adapur brings extensive experience and expertise to every bridal makeup session. We specialize in a variety of makeup styles and techniques, ensuring that your bridal look enhances your natural beauty while aligning perfectly with your wedding theme and attire. 2. Convenient At-Home Service Enjoy the luxury and convenience of at-home bridal makeup services in Adapur. Ladyfair eliminates the stress of traveling to a salon, allowing you to prepare for your wedding in the comfort of your home. Our professional makeup artist arrives fully equipped to create a stunning look that will last throughout your special day. 3. Use of Premium Makeup Products We believe in using only the highest quality products for your bridal makeup. Ladyfair exclusively uses renowned brands such as Maybelline New York, Lakmé, MAC Cosmetics, Nykaa, Colorbar, Bobbi Brown, Faces Canada, and Huda Beauty. These products ensure a flawless application and a long-lasting finish, so you can enjoy your wedding day without the need for constant touch-ups. 4. Tailored Bridal Makeup Packages Understanding that each bride has unique preferences, Ladyfair offers a range of bridal makeup packages in Adapur designed to cater to different styles and budgets. From understated elegance to full glam, our packages are crafted to meet your specific needs. Bridal Makeup Packages in Adapur Ladyfair provides various bridal makeup options to ensure that every bride finds her perfect look. Our transparent pricing offers excellent value without compromising on quality. Basic Bridal Makeup: ₹10,000 This package includes a classic yet sophisticated makeup look that enhances your natural beauty and complements your bridal attire. HD Bridal Makeup: ₹12,000 Designed for brides who want a flawless finish both in person and in photographs, the HD Bridal Makeup package ensures your makeup looks impeccable all day. Airbrush Bridal Makeup: ₹18,000 For a lightweight, smooth finish with full coverage, our Airbrush Bridal Makeup package is ideal. This option provides a natural look that lasts throughout your wedding day. Engagement and Reception Makeup Ladyfair also offers specialized makeup services for your engagement and reception events: Basic Engagement/Reception Makeup: ₹6,000 A polished yet simple look that highlights your natural features. HD Engagement/Reception Makeup: ₹8,000 Includes a high-definition finish for flawless photos and a stunning appearance. Airbrush Engagement/Reception Makeup: ₹12,000 Provides a lightweight, smooth finish with full coverage for all-day wear. Party Makeup Services in Adapur In addition to bridal makeup, Ladyfair offers professional makeup services for other special occasions: Basic Party Makeup: ₹2,500 Enhances your natural features with a quick and simple application. HD Party Makeup: ₹3,500 Ensures a picture-perfect look with high-definition makeup. Popular Bridal Makeup Styles by Ladyfair in Adapur Ladyfair offers a variety of bridal makeup styles to match every bride’s taste: Traditional Bridal Makeup Features vibrant colors and intricate techniques that complement traditional wedding attire. Perfect for brides seeking a classic look. HD Bridal Makeup Achieves a flawless, camera-ready finish ideal for photos and in-person appearances. Airbrush Bridal Makeup Offers a lightweight, natural look with full coverage, ideal for long-lasting wear. Booking Your Bridal Makeup with Ladyfair in Adapur Booking your bridal makeup with Ladyfair is a simple and enjoyable process: 1. Initial Contact Call us at 7004721239 to discuss your bridal makeup needs and schedule an appointment. Our team will help you choose the right package for your wedding day. 2. Consultation Session Meet with our makeup artist to discuss your desired look, review your wedding attire, and plan your makeup style. This consultation ensures we understand your vision and can deliver the perfect look. 3. Makeup Trial We offer trial sessions to preview your bridal makeup and make any necessary adjustments before your wedding day, ensuring you are fully satisfied with your chosen style. 4. Wedding Day Makeup On your wedding day, our makeup artist will arrive at your location in Adapur to provide a flawless and stress-free makeup service. We handle all the details so you can focus on celebrating. Testimonials from Brides in Adapur Our clients in Adapur have shared their wonderful experiences with Ladyfair: Suman J., Adapur "Ladyfair made my wedding day perfect. The at-home service was so convenient, and the makeup artist was incredibly skilled. My bridal look was exactly what I had envisioned." Kavita M., Adapur "I opted for HD makeup, and it was stunning. The look was flawless in all my photos, and I received endless compliments throughout the day." Neelam R., Adapur "The airbrush makeup was fantastic—light and long-lasting. Ladyfair truly made me feel beautiful and special on my wedding day." Preparing for Your Bridal Makeup Session To achieve the best results for your bridal makeup session, consider the following tips: Stay Hydrated Drink plenty of water leading up to your wedding to keep your skin fresh and glowing. Consistent Skincare Follow a regular skincare routine to ensure your skin is in top condition. Avoid New Products Stick to familiar skincare products to prevent any reactions or breakouts. Communicate Clearly Discuss your makeup preferences and any concerns with our artist during your consultation to ensure we meet your expectations. Additional Beauty Services by Ladyfair in Adapur In addition to bridal makeup, Ladyfair offers a range of beauty services: Engagement and Reception Makeup Customized looks for all your pre-wedding events. Party Makeup Perfect for birthdays, anniversaries, and other special occasions. Everyday Makeup Enhances your daily look for work or casual outings. Special Occasion Makeup For important life events, ensuring you look and feel your best. The Future of Bridal Makeup in Adapur Ladyfair is dedicated to leading the way in bridal beauty in Adapur. Our commitment to quality, convenience, and client satisfaction has made us the top choice for brides in the area. We look forward to helping more brides achieve their dream wedding look with our exceptional at-home makeup services. Q&A with Ladyfair’s Bridal Makeup Artist in Adapur Why should I choose Ladyfair for my bridal makeup in Adapur? Ladyfair offers expert at-home bridal makeup services using premium products and tailored packages to meet your specific needs. Our experienced artist ensures you look flawless with a focus on quality and convenience. What makeup products do you use? We use high-quality products from brands like Maybelline, Lakmé, MAC Cosmetics, Nykaa, Colorbar, Bobbi Brown, Faces Canada, and Huda Beauty. These products provide a flawless finish and long-lasting coverage. Can I book a makeup trial before my wedding? Yes, we offer trial sessions to preview your bridal look and make adjustments before your wedding day. How do I book an appointment? Call us at 7004721239 to book your appointment. Our team will assist you in selecting the right package and scheduling your consultation and trial. Do you offer makeup services for other events? Yes, we provide makeup services for engagements, receptions, parties, and special occasions, catering to all your beauty needs. Contact Us Ready to book your bridal makeup appointment with Ladyfair in Adapur? Call us today at 7004721239 to schedule your consultation and start your journey to the perfect wedding look. Ladyfair - Making Brides Beautiful in Adapur

Posted By: 2nd September 2024
Bridal Makeup Artist in Ramgarhwa
Ladyfair’s Premier Bridal Makeup Services in Ramgarhwa Your wedding day is one of the most important events of your life, and looking your best is paramount. Ladyfair is proud to be the leading bridal makeup artist in Ramgarhwa, offering specialized at-home bridal makeup services that cater to your every need. With a focus on delivering flawless, long-lasting beauty, our expert makeup artist ensures you shine on your special day. Whether you desire a traditional bridal look, a high-definition (HD) finish, or the elegance of airbrush makeup, Ladyfair is here to make your wedding day dreams come true. Why Choose Ladyfair for Bridal Makeup in Ramgarhwa? 1. Expertise and Experience Ladyfair’s makeup artist in Ramgarhwa brings years of experience and expertise to your bridal preparation. Our artist is well-versed in various makeup styles and techniques, ensuring that your makeup enhances your natural beauty while perfectly matching your wedding theme and attire. 2. Convenient At-Home Service Forget the hassle of traveling to a salon on your wedding day. Ladyfair provides the luxury of at-home bridal makeup services in Ramgarhwa, allowing you to relax and enjoy the preparation process in the comfort of your home. Our makeup artist comes fully equipped to create a stunning look that will last throughout your wedding day. 3. Use of Premium Products At Ladyfair, we understand the importance of quality. That’s why we use only top-of-the-line, professional-grade makeup products from renowned brands such as Maybelline New York, Lakmé, MAC Cosmetics, Nykaa, Colorbar, Bobbi Brown, Faces Canada, and Huda Beauty. Our selection of high-end cosmetics ensures a flawless application and a long-lasting finish, so you can confidently enjoy every moment of your special day without worrying about touch-ups. 4. Tailored Bridal Makeup Packages We know that every bride has unique preferences and requirements, which is why Ladyfair offers a variety of bridal makeup packages in Ramgarhwa to suit different budgets and styles. From simple elegance to full glam, we have a package that will meet your needs. Bridal Makeup Packages in Ramgarhwa Ladyfair offers a range of bridal makeup options to ensure that every bride finds the perfect look for her big day. Our pricing is transparent and designed to offer value for money without compromising on quality. Basic Bridal Makeup: ₹10,000 This package includes a simple yet elegant makeup look that enhances your natural features and complements your bridal attire. HD Bridal Makeup: ₹12,000 Our HD bridal makeup package is designed for brides who want to look flawless both in person and in photographs. The high-definition finish ensures your makeup is camera-ready all day long. Airbrush Bridal Makeup: ₹18,000 For a lightweight, full-coverage look that lasts all day, our airbrush bridal makeup is the ideal choice. This package is perfect for brides who want a natural finish with long-lasting results. Makeup for Engagements and Receptions In addition to bridal makeup, Ladyfair offers specialized makeup services for your engagement and reception events. These packages are designed to make you look stunning for all your pre-wedding celebrations. Basic Engagement/Reception Makeup: ₹6,000 A simple yet polished look that highlights your natural beauty. HD Engagement/Reception Makeup: ₹8,000 This package includes a high-definition finish that ensures you look flawless in all your photos. Airbrush Engagement/Reception Makeup: ₹12,000 A lightweight, smooth finish that offers full coverage and lasting results. Party Makeup Services in Ramgarhwa Ladyfair also provides professional makeup services for other special occasions, such as parties, birthdays, and anniversaries. Our party makeup packages are designed to help you look your best, no matter the event. Basic Party Makeup: ₹2,500 A quick and simple makeup application that enhances your natural features. HD Party Makeup: ₹3,500 A high-definition makeup look that ensures you are picture-perfect throughout the event. Popular Bridal Makeup Styles Offered by Ladyfair in Ramgarhwa Ladyfair offers a variety of bridal makeup styles to suit every bride’s taste and preference. Our makeup artist in Ramgarhwa will work with you to create a look that is uniquely yours. Traditional Bridal Makeup Our traditional bridal makeup style features rich, vibrant colors and intricate application techniques that perfectly complement traditional wedding attire. This classic look is ideal for brides who want to embrace the cultural beauty of their wedding day. HD Bridal Makeup The HD bridal makeup style is all about achieving a flawless, camera-ready finish. This makeup style is perfect for brides who want to ensure their makeup looks impeccable in photographs and in person. Airbrush Bridal Makeup For brides who prefer a natural yet polished look, our airbrush bridal makeup offers a lightweight, smooth finish with full coverage. This style is ideal for long-lasting wear, ensuring your makeup stays fresh throughout your wedding day. Booking Your Bridal Makeup with Ladyfair in Ramgarhwa Booking your bridal makeup with Ladyfair is a straightforward process. We strive to make your experience as seamless and stress-free as possible, from the initial consultation to the final application on your wedding day. 1. Initial Contact Call us at 7004721239 to discuss your bridal makeup needs and schedule your appointment. Our friendly team will guide you through the available packages and help you choose the one that best suits your preferences. 2. Consultation Session Meet with our makeup artist to discuss your desired look, review your wedding attire, and plan the perfect makeup style. This session allows us to understand your vision and ensures that we deliver a look that aligns with your expectations. 3. Makeup Trial We offer trial sessions to preview your bridal makeup and make any necessary adjustments before your wedding day. This trial ensures that you are completely satisfied with your chosen look. 4. Wedding Day Makeup On your wedding day, our makeup artist will arrive at your location in Ramgarhwa to provide a flawless and stress-free makeup service. We take care of all the details so you can focus on enjoying your special day. Testimonials from Brides in Ramgarhwa Our brides in Ramgarhwa have had wonderful experiences with Ladyfair’s bridal makeup services. Here are a few testimonials from happy clients: Sonal R., Ramgarhwa: "Ladyfair exceeded my expectations. The at-home service was incredibly convenient, and the makeup artist was professional and skilled. My bridal look was exactly what I wanted." Priya S., Ramgarhwa: "I chose HD makeup for my wedding, and I’m so glad I did. It looked flawless in all my photos, and I received countless compliments throughout the day." Anjali K., Ramgarhwa: "The airbrush makeup was fantastic. It felt so light on my skin, yet provided full coverage that lasted all day. Ladyfair truly made my wedding day special." Preparing for Your Bridal Makeup Session To ensure the best possible results for your bridal makeup session, it’s important to prepare your skin in advance. Here are some tips to help you get ready: Stay Hydrated: Drinking plenty of water in the days leading up to your wedding will help keep your skin fresh and glowing. Consistent Skincare: Maintain a regular skincare routine in the months before your wedding to ensure your skin is in its best condition. Avoid New Products: Stick to familiar skincare products to avoid any potential reactions or breakouts. Communicate Clearly: Be sure to discuss your makeup preferences and any concerns with our artist during your consultation. Clear communication is key to achieving your desired look. Additional Beauty Services by Ladyfair in Ramgarhwa Ladyfair also offers a variety of additional beauty services to complement your bridal makeup: Engagement and Reception Makeup: Customized looks for all your pre-wedding events, ensuring you look stunning from start to finish. Party Makeup: Whether it’s a birthday, anniversary, or other special occasion, Ladyfair’s party makeup services are designed to make you look your best. Everyday Makeup: Enhance your daily look with our expert makeup services, perfect for work, casual outings, or any time you want to look your best. Special Occasion Makeup: For those important life events, Ladyfair offers special occasion makeup services that ensure you look and feel your best. The Future of Bridal Makeup in Ramgarhwa As the leading bridal makeup artist in Ramgarhwa, Ladyfair is dedicated to setting new standards in bridal beauty. Our commitment to quality, convenience, and customer satisfaction has made us the preferred choice for brides in the area. We look forward to helping more brides achieve their dream wedding look with our exceptional at-home makeup services. Q&A with Ladyfair’s Bridal Makeup Artist in Ramgarhwa Why should I choose Ladyfair as my bridal makeup artist in Ramgarhwa? Ladyfair offers expert at-home bridal makeup services, using premium products and tailored packages to meet your specific needs. Our experienced makeup artist ensures that you look flawless on your wedding day, with a focus on quality, convenience, and customer satisfaction. What makeup products do you use? We use high-quality products from top brands like Maybelline, Lakmé, MAC Cosmetics, Nykaa, Colorbar, Bobbi Brown, Faces Canada, and Huda Beauty. These products provide long-lasting coverage and a flawless finish, ensuring that your makeup looks perfect all day long. Can I book a makeup trial before my wedding? Yes, we offer makeup trial sessions to help you preview your bridal look and make any necessary adjustments before your wedding day. This ensures that you are completely satisfied with your chosen style. How do I book an appointment? You can book an appointment by calling us at 7004721239. Our team will assist you in selecting the right package and scheduling your consultation and makeup trial. Do you offer makeup services for other events besides weddings? Yes, Ladyfair offers makeup services for engagements, receptions, parties, and other special occasions. Our packages are designed to cater to all your beauty needs, ensuring you look your best for every event. Contact Us Ready to book your bridal makeup appointment with Ladyfair in Ramgarhwa? Call us today at 7004721239 to schedule your consultation and take the first step toward achieving your dream wedding look. Ladyfair - Making Brides Beautiful in Ramgarhwa

Posted By: 31st August 2024
Bridal Makeup Artist in Goh
Introduction In Goh, Ladyfair is the ultimate choice for brides seeking top-notch makeup services for their wedding day. Our at-home bridal makeup service allows you to enjoy expert beauty treatments in the comfort of your home. Whether you’re aiming for a classic traditional look, a flawless HD finish, or elegant airbrush makeup, our skilled makeup artist in Goh is dedicated to making you look radiant on your special day. Contact us today at 7004721239 to schedule your appointment. Why Ladyfair is the Top Choice for Bridal Makeup in Goh? Experienced Makeup Artist Our experienced makeup artist in Goh specializes in bridal makeup and brings years of expertise to create personalized looks that enhance your natural beauty and complement your wedding style. Convenient At-Home Service Ladyfair provides the convenience of at-home bridal makeup services, so you can enjoy a luxurious experience without the hassle of traveling to a salon. Premium Quality Products We use only high-quality, professional-grade makeup products to ensure a flawless, long-lasting look that will keep you looking stunning throughout your wedding day. Bridal Makeup Pricing in Goh Our bridal makeup services in Goh are priced to accommodate various preferences and budgets: Basic Bridal Makeup: ₹10,000 HD Bridal Makeup: ₹12,000 Airbrush Bridal Makeup: ₹18,000 For engagement and reception: Basic Engagement/Reception Makeup: ₹6,000 HD Engagement/Reception Makeup: ₹8,000 Airbrush Engagement/Reception Makeup: ₹12,000 For parties: Basic Party Makeup: ₹2,500 HD Party Makeup: ₹3,500 Popular Bridal Makeup Styles in Goh Traditional Bridal Makeup Our traditional bridal makeup in Goh features vibrant colors and detailed application to match traditional wedding attire, creating a classic and elegant look. HD Bridal Makeup HD bridal makeup provides a high-definition finish that looks flawless in both photographs and real life, ensuring you appear stunning throughout your special day. Airbrush Bridal Makeup Airbrush makeup offers a lightweight, smooth finish with full coverage, ideal for brides who desire a natural yet polished look that lasts all day. How to Book Your Bridal Makeup with Ladyfair in Goh Initial Contact: Call us at 7004721239 to discuss your bridal makeup needs and schedule an appointment. Consultation Session: Meet with our makeup artist to discuss your desired look, review your wedding attire, and plan the perfect makeup style. Makeup Trial: We offer trial sessions so you can preview your bridal makeup and make any necessary adjustments before the wedding day. Wedding Day Makeup: On your wedding day, our makeup artist will arrive at your location in Goh to deliver a flawless and stress-free makeup service. Testimonials from Brides in Goh Neha R., Goh: "Ladyfair’s at-home makeup service was fantastic. The makeup artist was professional, and my bridal look was exactly what I had hoped for." Sonia M., Goh: "The airbrush makeup was perfect for my wedding. It stayed fresh all day, and I received many compliments. Ladyfair’s service was exceptional." Aarti S., Goh: "The HD makeup looked stunning in all my wedding photos. Ladyfair’s team made the entire experience smooth and enjoyable." Preparing for Your Bridal Makeup Session To achieve the best results, follow these tips: Stay Hydrated: Drink plenty of water to keep your skin fresh and glowing. Consistent Skincare: Maintain a regular skincare routine leading up to your wedding. Avoid New Products: Stick to familiar skincare products to avoid any reactions. Communicate Clearly: Discuss your makeup preferences and concerns with our artist during your consultation. Additional Beauty Services by Ladyfair In addition to bridal makeup, Ladyfair offers: Engagement and Reception Makeup: Customized looks for all your pre-wedding events. Party Makeup: Ideal for special occasions and celebrations. Everyday Makeup: Enhance your daily look with our expert services. Special Occasion Makeup: Makeup for birthdays, anniversaries, and other significant events. The Future of Bridal Makeup in Goh Ladyfair is committed to setting new standards in bridal beauty with our innovative at-home services in Goh. As more brides experience our exceptional service, Ladyfair continues to be the preferred choice for bridal makeup. Q&A with Ladyfair’s Bridal Makeup Artist in Goh Q1: What makes Ladyfair the best choice for bridal makeup in Goh? A1: Ladyfair provides expert at-home bridal makeup services, combining skilled artistry with high-quality products for a flawless wedding look. Q2: What are the prices for bridal makeup services in Goh? A2: Our bridal makeup services start at ₹10,000 for basic makeup, ₹12,000 for HD makeup, and ₹18,000 for airbrush makeup. Q3: How do I book Ladyfair’s bridal makeup services in Goh? A3: You can book our services by calling 7004721239. We also offer consultations and trial sessions to help you achieve your desired look. Q4: What types of bridal makeup does Ladyfair offer in Goh? A4: We offer traditional, HD, and airbrush bridal makeup styles to suit your preferences. Q5: Are makeup trials available before the wedding day? A5: Yes, we provide trial sessions to finalize your bridal look and make any necessary adjustments. Q6: What kind of products does Ladyfair use for bridal makeup? A6: We use professional-grade, high-quality products that are safe for all skin types and ensure a flawless finish. Q7: What other makeup services does Ladyfair offer in Goh? A7: Besides bridal makeup, we offer engagement, reception, party, and special occasion makeup services.

Posted By: 31st August 2024
Bridal Makeup Artist in Daudnagar
Introduction In Daudnagar, Ladyfair is the ultimate choice for brides seeking exceptional bridal makeup services. Our at-home bridal makeup service offers professional beauty treatments in the comfort of your home. Whether you desire a traditional look, an impeccable HD finish, or elegant airbrush makeup, our skilled makeup artist in Daudnagar is dedicated to making your wedding day truly special. Contact us today at 7004721239 to schedule your appointment. Why Ladyfair is the Top Choice for Bridal Makeup in Daudnagar? Experienced Makeup Artist Our expert makeup artist in Daudnagar brings years of experience in bridal makeup. She excels at creating personalized looks that enhance your natural beauty and complement your individual style. Convenient At-Home Service Ladyfair provides the convenience of at-home bridal makeup services, allowing you to enjoy a luxurious experience without having to travel to a salon. Premium Quality Products We use only high-quality, professional-grade makeup products to ensure a flawless, long-lasting look that will keep you radiant throughout your wedding day. Bridal Makeup Pricing in Daudnagar Our pricing for bridal makeup services in Daudnagar is designed to fit a range of preferences and budgets: Basic Bridal Makeup: ₹10,000 HD Bridal Makeup: ₹12,000 Airbrush Bridal Makeup: ₹18,000 For engagement and reception: Basic Engagement/Reception Makeup: ₹6,000 HD Engagement/Reception Makeup: ₹8,000 Airbrush Engagement/Reception Makeup: ₹12,000 For parties: Basic Party Makeup: ₹2,500 HD Party Makeup: ₹3,500 Popular Bridal Makeup Styles in Daudnagar Traditional Bridal Makeup Our traditional bridal makeup in Daudnagar features vibrant colors and meticulous application, perfectly complementing traditional wedding attire for a classic and elegant look. HD Bridal Makeup HD bridal makeup offers a high-definition finish that looks flawless both in photos and in person, ensuring you look stunning throughout your wedding day. Airbrush Bridal Makeup Airbrush makeup provides a lightweight, smooth finish with full coverage, ideal for brides seeking a natural yet polished appearance that lasts all day. How to Book Your Bridal Makeup with Ladyfair in Daudnagar Initial Contact: Call us at 7004721239 to discuss your bridal makeup needs and schedule an appointment. Consultation Session: Meet with our makeup artist to discuss your desired look, review your wedding attire, and plan the perfect makeup style. Makeup Trial: We offer trial sessions so you can preview your bridal makeup and make any necessary adjustments before the wedding day. Wedding Day Makeup: On your wedding day, our makeup artist will arrive at your location in Daudnagar to provide a flawless and stress-free makeup experience. Testimonials from Brides in Daudnagar Anita K., Daudnagar: "Ladyfair’s at-home service made my wedding day perfect. The makeup artist was professional and my bridal look was just as I imagined." Renu S., Daudnagar: "The airbrush makeup was flawless and lasted all day. I was thrilled with Ladyfair’s exceptional service and convenience." Sangeeta P., Daudnagar: "The HD makeup looked stunning in all my photos. Ladyfair’s service made the entire process smooth and enjoyable." Preparing for Your Bridal Makeup Session To ensure the best results, consider these tips: Stay Hydrated: Drink plenty of water to keep your skin fresh and glowing. Consistent Skincare: Follow a regular skincare routine leading up to your wedding. Avoid New Products: Stick to familiar skincare products to prevent any reactions. Communicate Clearly: Discuss your makeup preferences and concerns with our artist during your consultation. Additional Beauty Services by Ladyfair In addition to bridal makeup, Ladyfair offers: Engagement and Reception Makeup: Customized looks for all your pre-wedding events. Party Makeup: Perfect for special occasions and celebrations. Everyday Makeup: Enhance your daily look with our expert services. Special Occasion Makeup: Makeup for birthdays, anniversaries, and other significant events. The Future of Bridal Makeup in Daudnagar Ladyfair is dedicated to setting new standards in bridal beauty with our innovative at-home services in Daudnagar. As more brides experience our exceptional service, Ladyfair continues to be the preferred choice for bridal makeup. Q&A with Ladyfair’s Bridal Makeup Artist in Daudnagar Q1: What makes Ladyfair the best choice for bridal makeup in Daudnagar? A1: Ladyfair provides expert at-home bridal makeup services, combining skilled artistry with high-quality products for a flawless wedding look. Q2: What are the prices for bridal makeup services in Daudnagar? A2: Our bridal makeup services start at ₹10,000 for basic makeup, ₹12,000 for HD makeup, and ₹18,000 for airbrush makeup. Q3: How do I book Ladyfair’s bridal makeup services in Daudnagar? A3: You can book our services by calling 7004721239. We also offer consultations and trial sessions to help you achieve your desired look. Q4: What types of bridal makeup does Ladyfair offer in Daudnagar? A4: We offer traditional, HD, and airbrush bridal makeup styles to suit your preferences. Q5: Are makeup trials available before the wedding day? A5: Yes, we provide trial sessions to finalize your bridal look and make any necessary adjustments. Q6: What kind of products does Ladyfair use for bridal makeup? A6: We use professional-grade, high-quality products that are safe for all skin types and ensure a flawless finish. Q7: What other makeup services does Ladyfair offer in Daudnagar? A7: Besides bridal makeup, we offer engagement, reception, party, and special occasion makeup services.

Posted By: 31st August 2024
Bridal Makeup Artist in Raxaul
Ladyfair: Premier Bridal Makeup Artist in Raxaul Introduction Your wedding day is a celebration of love and beauty, and at Ladyfair, we’re dedicated to making sure you look and feel your best. As the top bridal makeup artist in Raxaul, we offer exceptional at-home bridal makeup services tailored to your personal style and preferences. Whether you desire a traditional bridal look, a sophisticated high-definition finish, or a flawless airbrush makeup, our expert team is here to ensure you shine on your special day. Contact us today at 7004721239 to book your appointment and experience the best in bridal beauty services. Why Ladyfair is the Top Choice for Bridal Makeup in Raxaul Experienced Makeup Artist Our makeup artist in Raxaul is a seasoned professional with extensive experience in bridal makeup. We specialize in creating personalized looks that enhance your natural beauty and complement your wedding theme. With a keen eye for detail and a commitment to excellence, we ensure your makeup is perfect for your special day. Convenient At-Home Service Ladyfair provides the convenience of at-home bridal makeup services, so you don’t have to travel to a salon. Our team will come to your location fully equipped with all the necessary tools and products to deliver a stunning makeup look in the comfort of your home. This approach ensures a relaxed and enjoyable experience, allowing you to focus on celebrating your wedding. Premium Quality Products We use only high-quality, professional-grade makeup products to ensure a flawless, long-lasting finish. Our selection of products is designed to provide a perfect look that endures throughout the day and shines in every photograph. Bridal Makeup Pricing in Raxaul with Ladyfair Ladyfair offers a range of bridal makeup options in Raxaul to suit different styles and budgets: Basic Bridal Makeup: ₹10,000 This package includes essential makeup services for a classic and natural bridal look, ensuring you look elegant and radiant on your wedding day. HD Bridal Makeup: ₹12,000 Provides a high-definition finish that looks flawless both in photographs and in real life. Ideal for brides who want a picture-perfect appearance throughout their wedding day. Airbrush Bridal Makeup: ₹18,000 Offers a lightweight, smooth finish with full coverage that lasts all day. Perfect for brides seeking a natural yet polished look. For engagement and reception: Basic Engagement/Reception Makeup: ₹6,000 This package provides a sophisticated look for engagement parties and receptions, ensuring you look stunning at all your pre-wedding events. HD Engagement/Reception Makeup: ₹8,000 Achieve a high-definition finish for your engagement or reception with this package, perfect for a flawless appearance at your special occasions. Airbrush Engagement/Reception Makeup: ₹12,000 Ensures a flawless look for your engagement and reception with airbrush makeup, offering a smooth and long-lasting finish. For parties: Basic Party Makeup: ₹2,500 Ideal for special events and celebrations, this package enhances your look for parties and gatherings. HD Party Makeup: ₹3,500 Enjoy a high-definition finish for any party or celebration with this package, ensuring you look radiant and polished. Popular Bridal Makeup Styles Offered by Ladyfair in Raxaul Ladyfair provides a range of bridal makeup styles to suit your vision and wedding theme: Traditional Bridal Makeup Our traditional bridal makeup in Raxaul features bold, vibrant colors and intricate detailing to complement traditional wedding attire. This style creates an elegant and timeless look, celebrating classic beauty and cultural significance. HD Bridal Makeup High-definition (HD) bridal makeup offers a flawless finish that looks perfect in both photographs and real life. This style uses specialized products and techniques to ensure your makeup remains impeccable throughout the day. Airbrush Bridal Makeup Airbrush makeup provides a lightweight, smooth finish with full coverage. This technique uses airbrush technology to apply makeup evenly and seamlessly, making it an excellent choice for brides who prefer a natural yet polished look. Booking Your Bridal Makeup with Ladyfair in Raxaul To ensure a smooth booking process, please note the following: Advance Payment: A 20% advance payment is required to confirm your booking with Ladyfair. This advance is adjustable for one year but is non-refundable. Adjustable Booking Amount: The booking amount is valid for one year from the date of payment, allowing flexibility in rescheduling if needed. Non-Refundable: The advance payment is non-refundable but will be applied towards the total cost of the service. How to Book Your Bridal Makeup Initial Contact: Call us at 7004721239 to discuss your bridal makeup needs and schedule an appointment. Our team will assist you with the booking process and address any questions you may have. Consultation Session: Arrange a consultation with our makeup artist to discuss your desired look, review your wedding attire, and plan the perfect makeup style. This session ensures we understand your preferences and create a look that matches your vision. Makeup Trial: We offer trial sessions so you can preview your bridal makeup and make any necessary adjustments before the wedding day. This trial helps ensure that you are satisfied with the final look and allows us to make any tweaks as needed. Wedding Day Makeup: On your wedding day, our makeup artist will arrive at your location in Raxaul to provide a flawless and stress-free makeup service. We come fully prepared to create your perfect look and ensure you feel confident and beautiful throughout the day. Testimonials from Brides in Raxaul Here’s what some of our satisfied brides have to say about their experience with Ladyfair: Aarti S., Raxaul: "Ladyfair’s at-home makeup service was fantastic. The artist was professional, and the bridal look was exactly what I wanted. I felt beautiful and confident on my wedding day." Ritika M., Raxaul: "I chose the airbrush makeup, and it was perfect. It lasted all day and looked amazing in photos. Ladyfair’s team ensured everything was perfect, and I couldn’t be happier." Kiran J., Raxaul: "The HD makeup was exceptional and looked great throughout the day. Ladyfair’s artist made sure I looked stunning and felt confident. Highly recommend their services." Preparing for Your Bridal Makeup Session To achieve the best results, consider these tips: Stay Hydrated: Drinking plenty of water helps keep your skin fresh and glowing, providing a better base for makeup application. Consistent Skincare: Maintain a regular skincare routine leading up to your wedding day to keep your skin in optimal condition. Avoid New Products: Stick to familiar skincare products to avoid any adverse reactions or breakouts before your big day. Communicate Clearly: Discuss your makeup preferences and any concerns with our artist during your consultation to ensure we deliver the look you desire. Additional Beauty Services by Ladyfair in Raxaul In addition to bridal makeup, Ladyfair offers a range of beauty services to cater to all your needs: Engagement and Reception Makeup: Customized looks for all your pre-wedding events, ensuring you look stunning at every occasion. Party Makeup: Perfect for special occasions and celebrations, providing a polished look for any event. Everyday Makeup: Enhance your daily appearance with our expert makeup services, designed to make you look and feel your best. Special Occasion Makeup: Makeup services for birthdays, anniversaries, and other significant events, ensuring you look radiant for any special occasion. The Future of Bridal Makeup in Raxaul Ladyfair is committed to setting new standards in bridal beauty in Raxaul. Our dedication to providing exceptional at-home services ensures that we remain the preferred choice for brides. As more brides experience our personalized and professional makeup services, we continue to innovate and grow in the field of bridal beauty. Q&A with Ladyfair’s Bridal Makeup Artist in Raxaul Why should I choose Ladyfair as my bridal makeup artist in Raxaul? Ladyfair offers expert at-home bridal makeup services with skilled artistry and high-quality products, ensuring you look stunning on your wedding day. What are the prices for bridal makeup services in Raxaul? Our bridal makeup services start at ₹10,000 for basic makeup, ₹12,000 for HD makeup, and ₹18,000 for airbrush makeup. How do I book Ladyfair’s bridal makeup services in Raxaul? You can book our services by calling 7004721239. We also offer consultations and trial sessions to help you achieve your desired look. What types of bridal makeup does Ladyfair offer in Raxaul? We offer traditional, HD, and airbrush bridal makeup styles to suit your preferences and wedding theme. Are makeup trials available before the wedding day? Yes, we provide trial sessions to finalize your bridal look and make any necessary adjustments before your wedding day. What kind of products does Ladyfair use for bridal makeup? We use professional-grade, high-quality products that ensure a flawless finish and are safe for all skin types. What other makeup services does Ladyfair offer in Raxaul? Besides bridal makeup, we offer engagement, reception, party, and special occasion makeup services to cater to all your beauty needs.

Posted By: 31st August 2024
Bridal Makeup Artist in Obra
Introduction In Obra, Ladyfair is the premier choice for brides seeking exceptional makeup services for their special day. Our at-home bridal makeup service ensures you receive professional beauty treatments in the comfort of your home. Whether you prefer a classic look, a flawless HD finish, or the elegance of airbrush makeup, our expert makeup artist in Obra is here to make your wedding day unforgettable. Contact us today at 7004721239 to book your appointment. Why Ladyfair is the Top Choice for Bridal Makeup in Obra? Experienced Makeup Artist Our talented makeup artist in Obra is highly skilled with extensive experience in bridal makeup. She specializes in creating personalized looks that enhance your natural beauty and match your unique style. Convenient At-Home Service Ladyfair offers the ultimate convenience with our at-home bridal makeup services. Enjoy a luxurious and personalized experience without the need to travel to a salon. Premium Quality Products We use only high-quality, professional-grade makeup products to ensure a flawless, long-lasting look that will keep you looking stunning throughout your wedding day. Bridal Makeup Pricing in Obra Our pricing for bridal makeup services in Obra is designed to suit various preferences and budgets: Basic Bridal Makeup: ₹10,000 HD Bridal Makeup: ₹12,000 Airbrush Bridal Makeup: ₹18,000 For engagement and reception: Basic Engagement/Reception Makeup: ₹6,000 HD Engagement/Reception Makeup: ₹8,000 Airbrush Engagement/Reception Makeup: ₹12,000 For parties: Basic Party Makeup: ₹2,500 HD Party Makeup: ₹3,500 Popular Bridal Makeup Styles in Obra Traditional Bridal Makeup Our traditional bridal makeup in Obra features vibrant colors and meticulous application to complement traditional wedding attire, creating an elegant and timeless look. HD Bridal Makeup HD bridal makeup provides a high-definition finish that looks flawless both in photographs and in person, ensuring you look perfect throughout your special day. Airbrush Bridal Makeup Airbrush makeup offers a lightweight, smooth finish with full coverage that lasts all day, ideal for brides seeking a natural yet polished appearance. How to Book Your Bridal Makeup with Ladyfair in Obra Initial Contact: Call us at 7004721239 to discuss your bridal makeup needs and schedule an appointment. Consultation Session: Meet with our makeup artist to discuss your desired look, review your wedding attire, and plan the perfect makeup style. Makeup Trial: We provide trial sessions so you can preview your bridal makeup and make any necessary adjustments before the wedding day. Wedding Day Makeup: On your wedding day, our makeup artist will arrive at your location in Obra to deliver a flawless and stress-free makeup service. Testimonials from Brides in Obra Neha B., Obra: "Ladyfair’s at-home makeup service made my wedding day so special. The makeup artist was incredibly professional, and my bridal look was exactly as I envisioned." Rina S., Obra: "The airbrush makeup was perfect and stayed fresh throughout the day. Ladyfair’s service was convenient and exceeded my expectations." Sunita P., Obra: "The HD makeup looked fantastic in all my wedding photos. Ladyfair made the entire experience stress-free and enjoyable." Preparing for Your Bridal Makeup Session To achieve the best results, follow these tips: Stay Hydrated: Drink plenty of water to keep your skin fresh and glowing. Consistent Skincare: Follow a regular skincare routine leading up to your wedding. Avoid New Products: Stick to familiar skincare products to prevent any adverse reactions. Communicate Clearly: Discuss your makeup preferences and concerns with our artist during your consultation. Additional Beauty Services by Ladyfair In addition to bridal makeup, Ladyfair offers: Engagement and Reception Makeup: Customized looks for all your pre-wedding events. Party Makeup: Perfect for special occasions and celebrations. Everyday Makeup: Enhance your daily look with our professional services. Special Occasion Makeup: Makeup for birthdays, anniversaries, and other significant events. The Future of Bridal Makeup in Obra Ladyfair is committed to setting new standards in bridal beauty with our innovative at-home services in Obra. As more brides experience our exceptional service, Ladyfair continues to grow as the preferred choice for bridal makeup. Q&A with Ladyfair’s Bridal Makeup Artist in Obra Q1: What makes Ladyfair the best choice for bridal makeup in Obra? A1: Ladyfair offers expert at-home bridal makeup services, combining skilled artistry with high-quality products to ensure a flawless wedding look. Q2: What are the prices for bridal makeup services in Obra? A2: Our bridal makeup services start at ₹10,000 for basic makeup, ₹12,000 for HD makeup, and ₹18,000 for airbrush makeup. Q3: How do I book Ladyfair’s bridal makeup services in Obra? A3: You can book our services by calling 7004721239. We also offer consultations and trial sessions to help you achieve your desired look. Q4: What types of bridal makeup does Ladyfair offer in Obra? A4: We offer traditional, HD, and airbrush bridal makeup styles to suit your preferences. Q5: Are makeup trials available before the wedding day? A5: Yes, we provide trial sessions to finalize your bridal look and make any necessary adjustments. Q6: What kind of products does Ladyfair use for bridal makeup? A6: We use professional-grade, high-quality products that are safe for all skin types and ensure a flawless finish. Q7: What other makeup services does Ladyfair offer in Obra? A7: Besides bridal makeup, we offer engagement, reception, party, and special occasion makeup services.

Posted By: 31st August 2024
Bridal Makeup Artist in Pakaridayal
Ladyfair: Premier Bridal Makeup Artist in Pakaridayal Introduction Your wedding day is a celebration of love and commitment, and at Ladyfair, we understand the importance of looking and feeling your absolute best. As the leading bridal makeup artist in Pakaridayal, we offer exceptional at-home bridal makeup services tailored to suit your unique style and preferences. Whether you desire a classic traditional look, a sophisticated high-definition finish, or flawless airbrush makeup, our expert makeup artist in Pakaridayal is here to ensure you shine on your special day. Contact us today at 7004721239 to book your appointment and experience unparalleled bridal beauty services. Why Ladyfair is the Top Choice for Bridal Makeup in Pakaridayal Experienced Makeup Artist Our makeup artist in Pakaridayal is a highly skilled professional with years of experience in bridal makeup. We excel in creating personalized looks that enhance your natural beauty and complement your wedding theme. With meticulous attention to detail and a commitment to excellence, we ensure your makeup is flawlessly executed, making you look radiant on your special day. Convenient At-Home Service Ladyfair offers the convenience of at-home bridal makeup services, eliminating the need for you to travel to a salon. Our team arrives at your location fully equipped with all the necessary tools and products to deliver a stunning makeup look right in the comfort of your home. This approach ensures a relaxed and enjoyable experience, allowing you to focus on celebrating your wedding day. Premium Quality Products We use only high-quality, professional-grade makeup products to guarantee a flawless and long-lasting finish. Our products are selected for their superior performance, ensuring your makeup looks impeccable throughout the day and in every photograph. Bridal Makeup Pricing in Pakaridayal with Ladyfair Ladyfair offers a variety of bridal makeup options in Pakaridayal, with pricing designed to accommodate different styles and budgets: Basic Bridal Makeup: ₹10,000 Includes essential makeup services for a classic, natural bridal look, ensuring you look elegant and beautiful on your special day. HD Bridal Makeup: ₹12,000 Provides a high-definition finish that looks perfect both in photographs and in real life. Ideal for brides seeking a flawless and picture-perfect appearance throughout their wedding day. Airbrush Bridal Makeup: ₹18,000 Offers a lightweight, smooth finish with full coverage that lasts all day. Perfect for brides who want a natural yet polished look that endures through every moment. For engagement and reception: Basic Engagement/Reception Makeup: ₹6,000 Provides a sophisticated look for engagement parties and receptions, ensuring you look stunning at all your pre-wedding events. HD Engagement/Reception Makeup: ₹8,000 Achieve a high-definition finish for your engagement or reception with this package, perfect for a flawless appearance at your special occasions. Airbrush Engagement/Reception Makeup: ₹12,000 Ensures a flawless look for your engagement and reception with airbrush makeup, offering a smooth and long-lasting finish. For parties: Basic Party Makeup: ₹2,500 Perfect for any special event or celebration, this package offers essential makeup services to enhance your look for parties and gatherings. HD Party Makeup: ₹3,500 Enjoy a high-definition finish for any party or celebration with this package, ensuring you look radiant and polished. Popular Bridal Makeup Styles Offered by Ladyfair in Pakaridayal Ladyfair provides a range of bridal makeup styles to match your vision and wedding theme: Traditional Bridal Makeup Our traditional bridal makeup in Pakaridayal features bold, vibrant colors and intricate detailing to complement traditional wedding attire. This style creates an elegant and timeless look, embracing classic beauty and cultural significance. HD Bridal Makeup High-definition (HD) bridal makeup offers a flawless finish that looks perfect in both photographs and in real life. This style uses specialized products and techniques to ensure your makeup remains impeccable throughout the day, making it ideal for brides who want a picture-perfect appearance. Airbrush Bridal Makeup Airbrush makeup provides a lightweight, smooth finish with full coverage. This technique uses airbrush technology to apply makeup evenly and seamlessly, making it an excellent choice for brides who prefer a natural yet polished look that lasts all day. Booking Your Bridal Makeup with Ladyfair in Pakaridayal To ensure a smooth booking process, please consider the following details: Advance Payment: A 20% advance payment is required to confirm your booking with Ladyfair. This advance is adjustable for one year but is non-refundable. Adjustable Booking Amount: The booking amount is valid for one year from the date of payment, allowing flexibility in rescheduling if necessary. Non-Refundable: The advance payment is non-refundable but will be applied towards the total cost of the service. How to Book Your Bridal Makeup Initial Contact: Call us at 7004721239 to discuss your bridal makeup needs and schedule an appointment. Our team will assist you with the booking process and answer any questions you may have. Consultation Session: Schedule a consultation with our makeup artist to discuss your desired look, review your wedding attire, and plan the perfect makeup style. This session helps us understand your preferences and ensures we create a look that aligns with your vision. Makeup Trial: We offer trial sessions so you can preview your bridal makeup and make any necessary adjustments before the wedding day. This trial ensures you are satisfied with the final look and allows us to make any tweaks to achieve your desired appearance. Wedding Day Makeup: On your wedding day, our makeup artist will arrive at your location in Pakaridayal to provide a flawless and stress-free makeup service. We come fully prepared to create your perfect look and ensure you feel confident and beautiful throughout the day. Testimonials from Brides in Pakaridayal Here’s what some of our satisfied brides have to say about their experience with Ladyfair: Rani P., Pakaridayal: "Ladyfair’s at-home makeup service was outstanding. The artist was professional and created a bridal look that was exactly what I wanted. I felt beautiful and confident on my wedding day." Neha T., Pakaridayal: "I opted for the airbrush makeup, and it was perfect. It lasted all day and looked amazing in photos. Ladyfair’s team ensured everything was perfect, and I couldn’t be happier." Sunita R., Pakaridayal: "The HD makeup was exceptional and looked great throughout the day. Ladyfair’s artist made sure I looked stunning and felt confident. Highly recommend their services." Preparing for Your Bridal Makeup Session To achieve the best results, consider these tips: Stay Hydrated: Drinking plenty of water helps keep your skin fresh and glowing, providing a better base for makeup application. Consistent Skincare: Maintain a regular skincare routine leading up to your wedding day to keep your skin in optimal condition. Avoid New Products: Stick to familiar skincare products to avoid any adverse reactions or breakouts before your big day. Communicate Clearly: Discuss your makeup preferences and any concerns with our artist during your consultation to ensure that we understand your vision and deliver the desired results. Additional Beauty Services by Ladyfair in Pakaridayal In addition to bridal makeup, Ladyfair offers a range of beauty services to cater to all your needs: Engagement and Reception Makeup: Customized looks for all your pre-wedding events, ensuring you look stunning at every occasion. Party Makeup: Perfect for special occasions and celebrations, providing a polished look for any event. Everyday Makeup: Enhance your daily appearance with our expert makeup services, designed to make you look and feel your best. Special Occasion Makeup: Makeup services for birthdays, anniversaries, and other significant events, ensuring you look radiant for any special occasion. The Future of Bridal Makeup in Pakaridayal Ladyfair is dedicated to setting new standards in bridal beauty in Pakaridayal. Our commitment to providing exceptional at-home services ensures that we remain the preferred choice for brides. As more brides experience our personalized and professional makeup services, we continue to innovate and grow in the field of bridal beauty. Q&A with Ladyfair’s Bridal Makeup Artist in Pakaridayal Why should I choose Ladyfair as my bridal makeup artist in Pakaridayal? Ladyfair offers expert at-home bridal makeup services with skilled artistry and high-quality products, ensuring you look stunning on your wedding day. What are the prices for bridal makeup services in Pakaridayal? Our bridal makeup services start at ₹10,000 for basic makeup, ₹12,000 for HD makeup, and ₹18,000 for airbrush makeup. How do I book Ladyfair’s bridal makeup services in Pakaridayal? You can book our services by calling 7004721239. We also offer consultations and trial sessions to help you achieve your desired look. What types of bridal makeup does Ladyfair offer in Pakaridayal? We offer traditional, HD, and airbrush bridal makeup styles to suit your preferences and wedding theme. Are makeup trials available before the wedding day? Yes, we provide trial sessions to finalize your bridal look and make any necessary adjustments before your wedding day. What kind of products does Ladyfair use for bridal makeup? We use professional-grade, high-quality products that ensure a flawless finish and are safe for all skin types. What other makeup services does Ladyfair offer in Pakaridayal? Besides bridal makeup, we offer engagement, reception, party, and special occasion makeup services to cater to all your beauty needs.
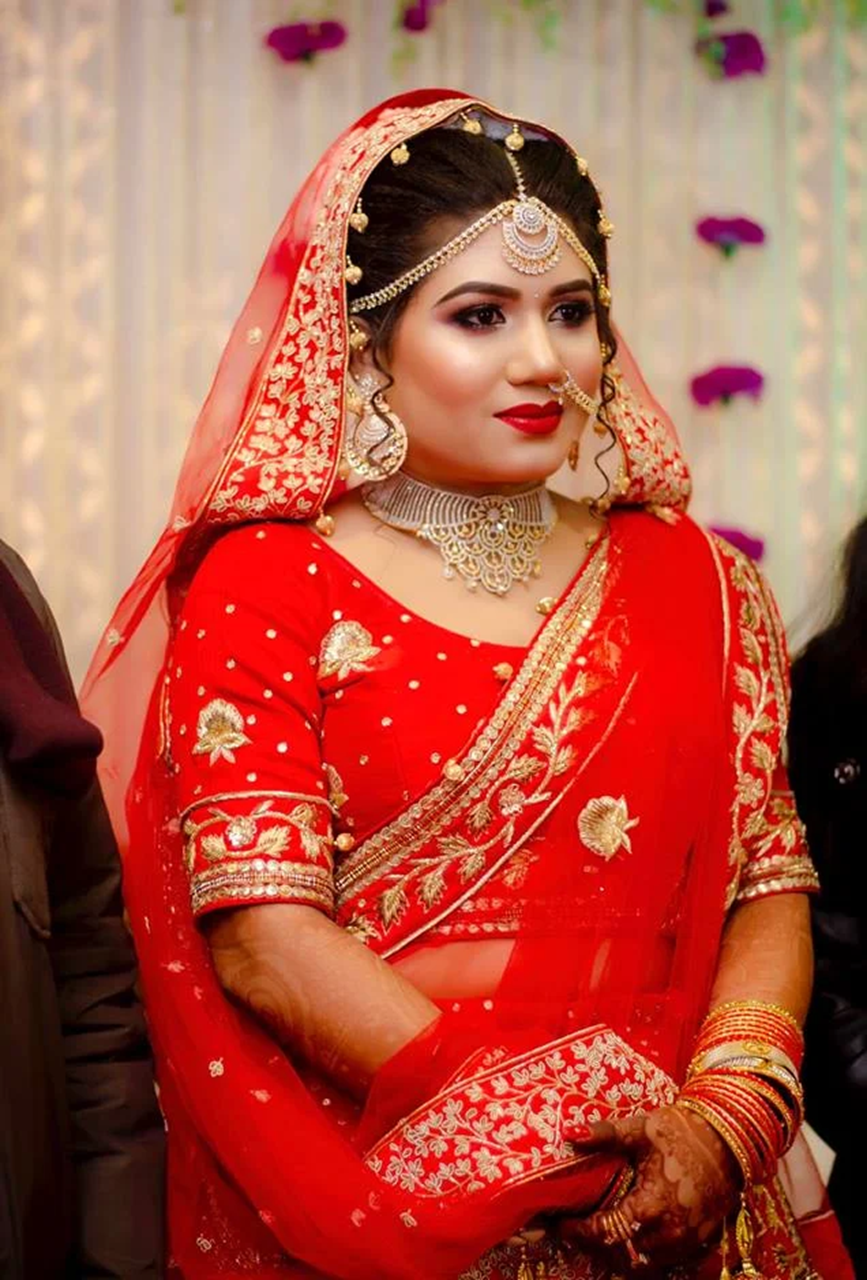
Posted By: 31st August 2024
Bridal Makeup Artist in Phenhara
Ladyfair: Premier Bridal Makeup Artist in Phenhara Introduction Your wedding day is one of the most important moments of your life, and every detail matters. At Ladyfair, we specialize in making you look and feel your best on this special occasion. As the leading bridal makeup artist in Phenhara, we offer exceptional at-home bridal makeup services tailored to meet your unique needs and preferences. Whether you're looking for a traditional bridal look, a high-definition finish, or flawless airbrush makeup, our expert makeup artist in Phenhara is here to ensure you shine. Contact us today at 7004721239 to book your appointment and experience the finest in bridal beauty services. Why Ladyfair is the Top Choice for Bridal Makeup in Phenhara Experienced Makeup Artist Our makeup artist in Phenhara is a seasoned professional with extensive experience in bridal makeup. We are adept at creating personalized looks that enhance your natural beauty and complement your wedding theme. With a keen eye for detail and a commitment to excellence, we ensure that your makeup is perfectly suited to your style and the ambiance of your special day. Convenient At-Home Service Ladyfair offers the convenience of at-home bridal makeup services, allowing you to enjoy a luxurious experience without the need to travel to a salon. Our team arrives fully prepared with all the necessary tools and products to deliver a flawless look right in the comfort of your home. This approach ensures a stress-free experience and allows you to focus on enjoying your wedding day. Premium Quality Products We use only high-quality, professional-grade makeup products to guarantee a flawless, long-lasting finish. Our products are selected for their superior performance, ensuring that your makeup looks impeccable throughout your wedding day and in every photograph. Bridal Makeup Pricing in Phenhara with Ladyfair At Ladyfair, we offer a range of bridal makeup options in Phenhara to suit different styles and budgets. Our pricing is designed to provide flexibility while maintaining the highest standard of service: Basic Bridal Makeup: ₹10,000 This package includes essential makeup services for a classic, natural bridal look, ensuring you look beautiful and elegant on your special day. HD Bridal Makeup: ₹12,000 Provides a high-definition finish that looks perfect both in photographs and in person. Ideal for brides who want a flawless, picture-perfect appearance throughout the day. Airbrush Bridal Makeup: ₹18,000 Offers a lightweight, smooth finish with full coverage that lasts all day. Perfect for brides seeking a natural yet polished look that endures through every moment of the day. For engagement and reception: Basic Engagement/Reception Makeup: ₹6,000 Provides a simple yet sophisticated look for engagement parties and receptions, ensuring you look stunning at all your pre-wedding events. HD Engagement/Reception Makeup: ₹8,000 Achieve a high-definition finish for your engagement or reception with this package, ideal for a flawless appearance at your special occasions. Airbrush Engagement/Reception Makeup: ₹12,000 Ensures a flawless look for your engagement and reception with airbrush makeup, providing a smooth and long-lasting finish. For parties: Basic Party Makeup: ₹2,500 Perfect for any special event or celebration, this package offers essential makeup services to enhance your look for parties and gatherings. HD Party Makeup: ₹3,500 Enjoy a high-definition finish for any party or celebration with this package, ensuring you look radiant and polished. Popular Bridal Makeup Styles Offered by Ladyfair in Phenhara Ladyfair provides a variety of bridal makeup styles to match your vision and wedding theme: Traditional Bridal Makeup Our traditional bridal makeup in Phenhara features bold, vibrant colors and intricate detailing to complement traditional wedding attire. This style creates an elegant and timeless look, embracing classic beauty and cultural significance. HD Bridal Makeup High-definition (HD) bridal makeup offers a flawless finish that looks perfect both in photographs and in real life. This style uses specialized products and techniques to ensure your makeup remains impeccable throughout the day, making it ideal for brides who want a picture-perfect appearance. Airbrush Bridal Makeup Airbrush makeup provides a lightweight, smooth finish with full coverage. This technique uses airbrush technology to apply makeup evenly and seamlessly, making it an excellent choice for brides who prefer a natural yet polished look that lasts all day. Booking Your Bridal Makeup with Ladyfair in Phenhara To ensure a smooth booking process, please consider the following details: Advance Payment: A 20% advance payment is required to confirm your booking with Ladyfair. This advance is adjustable for one year but is non-refundable. Adjustable Booking Amount: The booking amount is valid for one year from the date of payment, allowing flexibility in rescheduling if necessary. Non-Refundable: The advance payment is non-refundable but will be applied towards the total cost of the service. How to Book Your Bridal Makeup Initial Contact: Call us at 7004721239 to discuss your bridal makeup needs and schedule an appointment. Our team will assist you with the booking process and answer any questions you may have. Consultation Session: Schedule a consultation with our makeup artist to discuss your desired look, review your wedding attire, and plan the perfect makeup style. This session helps us understand your preferences and ensures we create a look that aligns with your vision. Makeup Trial: We offer trial sessions so you can preview your bridal makeup and make any necessary adjustments before the wedding day. This trial ensures you are satisfied with the final look and allows us to make any tweaks to achieve your desired appearance. Wedding Day Makeup: On your wedding day, our makeup artist will arrive at your location in Phenhara to provide a flawless and stress-free makeup service. We come fully prepared to create your perfect look and ensure you feel confident and beautiful throughout the day. Testimonials from Brides in Phenhara Here’s what some of our satisfied brides have to say about their experience with Ladyfair: Rita K., Phenhara: "Ladyfair’s at-home makeup service was fantastic. The artist was professional and created a bridal look that was exactly what I wanted. I felt beautiful and confident on my wedding day." Meenal S., Phenhara: "I chose the airbrush makeup, and it was perfect. It lasted all day and looked amazing in photos. Ladyfair’s team made sure everything was perfect, and I couldn’t be happier." Sunita R., Phenhara: "The HD makeup was exceptional and looked great throughout the day. Ladyfair’s artist made sure I looked stunning and felt confident. Highly recommend their services." Preparing for Your Bridal Makeup Session To achieve the best results, consider these tips: Stay Hydrated: Drinking plenty of water helps keep your skin fresh and glowing, providing a better base for makeup application. Consistent Skincare: Maintain a regular skincare routine leading up to your wedding day to keep your skin in optimal condition. Avoid New Products: Stick to familiar skincare products to avoid any adverse reactions or breakouts before your big day. Communicate Clearly: Discuss your makeup preferences and any concerns with our artist during your consultation to ensure that we understand your vision and deliver the desired results. Additional Beauty Services by Ladyfair in Phenhara In addition to bridal makeup, Ladyfair offers a range of beauty services to cater to all your needs: Engagement and Reception Makeup: Customized looks for all your pre-wedding events, ensuring you look stunning at every occasion. Party Makeup: Perfect for special occasions and celebrations, providing a polished look for any event. Everyday Makeup: Enhance your daily appearance with our expert makeup services, designed to make you look and feel your best. Special Occasion Makeup: Makeup services for birthdays, anniversaries, and other significant events, ensuring you look radiant for any special occasion. The Future of Bridal Makeup in Phenhara Ladyfair is dedicated to setting new standards in bridal beauty in Phenhara. Our commitment to providing exceptional at-home services ensures that we remain the preferred choice for brides. As more brides experience our personalized and professional makeup services, we continue to innovate and grow in the field of bridal beauty. Q&A with Ladyfair’s Bridal Makeup Artist in Phenhara Why should I choose Ladyfair as my bridal makeup artist in Phenhara? Ladyfair offers expert at-home bridal makeup services with skilled artistry and high-quality products, ensuring you look stunning on your wedding day. What are the prices for bridal makeup services in Phenhara? Our bridal makeup services start at ₹10,000 for basic makeup, ₹12,000 for HD makeup, and ₹18,000 for airbrush makeup. How do I book Ladyfair’s bridal makeup services in Phenhara? You can book our services by calling 7004721239. We also offer consultations and trial sessions to help you achieve your desired look. What types of bridal makeup does Ladyfair offer in Phenhara? We offer traditional, HD, and airbrush bridal makeup styles to suit your preferences and wedding theme. Are makeup trials available before the wedding day? Yes, we provide trial sessions to finalize your bridal look and make any necessary adjustments before your wedding day. What kind of products does Ladyfair use for bridal makeup? We use professional-grade, high-quality products that ensure a flawless finish and are safe for all skin types. What other makeup services does Ladyfair offer in Phenhara? Besides bridal makeup, we offer engagement, reception, party, and special occasion makeup services to cater to all your beauty needs.

Posted By: 31st August 2024
Bridal Makeup Artist in Rafiganj
Introduction In Rafiganj, Ladyfair is the premier choice for brides seeking exceptional makeup services for their special day. Our at-home bridal makeup service brings the expertise of a professional makeup artist right to your doorstep. Whether you prefer a traditional look, an HD finish, or the elegance of airbrush makeup, we ensure you achieve the perfect look for your wedding. Contact us today at 7004721239 to book your appointment. Why Ladyfair is the Top Choice for Bridal Makeup in Rafiganj Experienced Makeup Artist Our skilled makeup artist in Rafiganj brings years of experience in bridal makeup, specializing in creating personalized looks that enhance your natural beauty and align with your style. Convenient At-Home Service Ladyfair offers the ultimate convenience with our at-home bridal makeup services, so you can enjoy a luxurious and stress-free beauty experience without having to travel. Premium Quality Products We use only the highest quality, professional-grade makeup products to ensure a flawless, long-lasting finish that will keep you looking radiant throughout your wedding day. Bridal Makeup Pricing in Rafiganj Our pricing for bridal makeup services in Rafiganj is designed to accommodate various preferences and budgets: Basic Bridal Makeup: ₹10,000 HD Bridal Makeup: ₹12,000 Airbrush Bridal Makeup: ₹18,000 For engagement and reception: Basic Engagement/Reception Makeup: ₹6,000 HD Engagement/Reception Makeup: ₹8,000 Airbrush Engagement/Reception Makeup: ₹12,000 For parties: Basic Party Makeup: ₹2,500 HD Party Makeup: ₹3,500 Popular Bridal Makeup Styles in Rafiganj Traditional Bridal Makeup Our traditional bridal makeup in Rafiganj features rich, vibrant colors and detailed application to complement traditional wedding attire, creating an elegant and timeless look. HD Bridal Makeup HD bridal makeup provides a high-definition finish that ensures you look flawless both in photographs and in person, maintaining a perfect appearance throughout the day. Airbrush Bridal Makeup Airbrush makeup delivers a lightweight, smooth finish with full coverage that lasts all day, ideal for brides seeking a natural yet polished look. How to Book Your Bridal Makeup with Ladyfair in Rafiganj Initial Contact: Call us at 7004721239 to discuss your bridal makeup needs and schedule an appointment. Consultation Session: Meet with our makeup artist to discuss your desired look, review your wedding attire, and plan the perfect makeup style. Makeup Trial: We offer trial sessions so you can preview your bridal makeup and make any necessary adjustments before the wedding day. Wedding Day Makeup: On your wedding day, our makeup artist will arrive at your location in Rafiganj to provide a flawless and stress-free makeup service. Testimonials from Brides in Rafiganj Aisha K., Rafiganj: "Ladyfair made my wedding day truly special. The makeup artist was incredibly professional, and my bridal look was exactly what I had hoped for." Sana J., Rafiganj: "The airbrush makeup was perfect for my wedding. It stayed fresh all day, and Ladyfair’s at-home service was so convenient." Nazia M., Rafiganj: "The HD makeup looked stunning in all my photos. Ladyfair’s service was exceptional, and they made sure I felt confident and beautiful." Preparing for Your Bridal Makeup Session To ensure the best results, keep these tips in mind: Stay Hydrated: Drink plenty of water to keep your skin fresh and glowing. Consistent Skincare: Follow a regular skincare routine leading up to your wedding. Avoid New Products: Stick to familiar skincare products to prevent any reactions. Communicate Clearly: Discuss your makeup preferences and concerns with our artist during your consultation. Additional Beauty Services by Ladyfair In addition to bridal makeup, Ladyfair offers: Engagement and Reception Makeup: Customized looks for all your pre-wedding events. Party Makeup: Perfect for special occasions and celebrations. Everyday Makeup: Enhance your daily look with our professional services. Special Occasion Makeup: Makeup for birthdays, anniversaries, and other significant events. The Future of Bridal Makeup in Rafiganj Ladyfair is committed to setting new standards in bridal beauty with our innovative at-home services in Rafiganj. As more brides experience our exceptional service, Ladyfair continues to grow as the preferred choice for bridal makeup. Q&A with Ladyfair’s Bridal Makeup Artist in Rafiganj Q1: What makes Ladyfair the best choice for bridal makeup in Rafiganj? A1: Ladyfair offers expert at-home bridal makeup services, combining skilled artistry with high-quality products for a flawless wedding look. Q2: What are the prices for bridal makeup services in Rafiganj? A2: Our bridal makeup services start at ₹10,000 for basic makeup, ₹12,000 for HD makeup, and ₹18,000 for airbrush makeup. Q3: How do I book Ladyfair’s bridal makeup services in Rafiganj? A3: You can book our services by calling 7004721239. We also offer consultations and trial sessions to help you achieve your desired look. Q4: What types of bridal makeup does Ladyfair offer in Rafiganj? A4: We offer traditional, HD, and airbrush bridal makeup styles to suit your preferences. Q5: Are makeup trials available before the wedding day? A5: Yes, we provide trial sessions to finalize your bridal look and make any necessary adjustments. Q6: What kind of products does Ladyfair use for bridal makeup? A6: We use professional-grade, high-quality products that are safe for all skin types and ensure a flawless finish. Q7: What other makeup services does Ladyfair offer in Rafiganj? A7: Besides bridal makeup, we offer engagement, reception, party, and special occasion makeup services.

Posted By: 31st August 2024
Bridal Makeup Artist in Patahi
Ladyfair: Premier Bridal Makeup Artist in Patahi Introduction When it comes to your wedding day, every detail is crucial, and your makeup is no exception. At Ladyfair, we understand the importance of looking and feeling your best on this significant occasion. As the leading bridal makeup artist in Patahi, we are committed to offering exceptional at-home bridal makeup services tailored to your unique needs and preferences. Whether you’re seeking a classic traditional look, a high-definition finish, or flawless airbrush makeup, our expert makeup artist in Patahi is here to help you shine. Contact us today at 7004721239 to book your appointment and experience the unparalleled beauty services offered by Ladyfair. Why Ladyfair is the Top Choice for Bridal Makeup in Patahi Experienced Makeup Artist Our makeup artist in Patahi brings years of experience and skill to the table, specializing in bridal makeup. We excel in crafting personalized looks that enhance your natural beauty while aligning with your style and wedding theme. Our expertise ensures that your makeup will be perfectly suited to your preferences and the ambiance of your special day. Convenient At-Home Service Ladyfair offers the convenience of at-home bridal makeup services, so you can enjoy a luxurious experience without the hassle of traveling to a salon. Our team arrives fully equipped with all the necessary tools and products to deliver a flawless look in the comfort of your home. This approach ensures a stress-free experience, allowing you to focus on enjoying your special day. Premium Quality Products We use only high-quality, professional-grade makeup products to ensure a flawless and long-lasting finish. Our products are selected for their superior performance, ensuring that your makeup looks impeccable throughout your wedding day and in every photograph. Bridal Makeup Pricing in Patahi with Ladyfair Ladyfair offers a range of bridal makeup options in Patahi to accommodate various styles and budgets. Our pricing is designed to provide flexibility while maintaining the highest standard of service: Basic Bridal Makeup: ₹10,000 Includes essential makeup services for a natural and classic bridal look, ensuring you look beautiful on your special day. HD Bridal Makeup: ₹12,000 Provides a high-definition finish that is perfect for both photographs and real life. Ideal for brides who want a flawless appearance throughout the day. Airbrush Bridal Makeup: ₹18,000 Offers a lightweight, smooth finish with full coverage that lasts all day. Perfect for brides seeking a natural yet polished look. For engagement and reception: Basic Engagement/Reception Makeup: ₹6,000 Provides a simple yet elegant look for engagement parties and receptions, ensuring you look stunning at every pre-wedding event. HD Engagement/Reception Makeup: ₹8,000 Achieve a high-definition finish for your engagement or reception with this package, ideal for a flawless appearance at your special events. Airbrush Engagement/Reception Makeup: ₹12,000 Ensures a flawless look for your engagement and reception with airbrush makeup, offering a smooth and long-lasting finish. For parties: Basic Party Makeup: ₹2,500 Perfect for any special occasion, this package offers essential makeup services to enhance your look for parties and celebrations. HD Party Makeup: ₹3,500 Enjoy a high-definition finish for any party or celebration with this package, ensuring you look radiant and polished. Popular Bridal Makeup Styles Offered by Ladyfair in Patahi Ladyfair provides a variety of bridal makeup styles to match your vision and wedding theme: Traditional Bridal Makeup Our traditional bridal makeup in Patahi features bold, vibrant colors and intricate detailing that complement traditional wedding attire. This style embraces classic beauty and cultural significance, creating an elegant and timeless look. HD Bridal Makeup High-definition (HD) bridal makeup offers a flawless finish that looks perfect both in photographs and in person. This style uses specialized products and techniques to ensure your makeup remains impeccable throughout the day, ideal for brides who want a picture-perfect appearance. Airbrush Bridal Makeup Airbrush makeup provides a lightweight, smooth finish with full coverage. This technique uses airbrush technology to apply makeup evenly and seamlessly, making it an excellent choice for brides who prefer a natural yet polished look that lasts all day. Booking Your Bridal Makeup with Ladyfair in Patahi To ensure a smooth booking process, please consider the following details: Advance Payment: A 20% advance payment is required to confirm your booking with Ladyfair. This advance is adjustable for one year but is non-refundable. Adjustable Booking Amount: The booking amount is valid for one year from the date of payment, allowing flexibility in rescheduling if necessary. Non-Refundable: The advance payment is non-refundable but will be applied towards the total cost of the service. How to Book Your Bridal Makeup Initial Contact: Call us at 7004721239 to discuss your bridal makeup needs and schedule an appointment. Our team will assist you with the booking process and address any questions you may have. Consultation Session: Schedule a consultation with our makeup artist to discuss your desired look, review your wedding attire, and plan the perfect makeup style. This session helps us understand your preferences and ensures we create a look that aligns with your vision. Makeup Trial: We offer trial sessions so you can preview your bridal makeup and make any necessary adjustments before the wedding day. This trial ensures you are satisfied with the final look and allows us to make any tweaks to achieve your desired appearance. Wedding Day Makeup: On your wedding day, our makeup artist will arrive at your location in Patahi to provide a flawless and stress-free makeup service. We come fully prepared to create your perfect look and ensure you feel confident and beautiful throughout the day. Testimonials from Brides in Patahi Here’s what some of our satisfied brides have to say about their experience with Ladyfair: Rita K., Patahi: "Ladyfair’s at-home makeup service was exceptional. The artist was professional and created a bridal look that was exactly what I wanted. I felt stunning on my wedding day." Meenal S., Patahi: "I opted for airbrush makeup, and it was perfect. It lasted all day and looked amazing in photos. Ladyfair’s team ensured everything was perfect, and I couldn’t be happier." Sunita R., Patahi: "The HD makeup was fantastic and looked great throughout the day. Ladyfair’s artist made sure I looked beautiful and felt confident. Highly recommend their services." Preparing for Your Bridal Makeup Session To achieve the best results, consider these tips: Stay Hydrated: Drinking plenty of water helps keep your skin fresh and glowing, providing a better base for makeup application. Consistent Skincare: Maintain a regular skincare routine leading up to your wedding day to keep your skin in optimal condition. Avoid New Products: Stick to familiar skincare products to avoid any adverse reactions or breakouts before your big day. Communicate Clearly: Discuss your makeup preferences and any concerns with our artist during your consultation to ensure that we understand your vision and deliver the desired results. Additional Beauty Services by Ladyfair in Patahi In addition to bridal makeup, Ladyfair offers a range of beauty services to cater to all your needs: Engagement and Reception Makeup: Customized looks for all your pre-wedding events, ensuring you look stunning at every occasion. Party Makeup: Perfect for special occasions and celebrations, providing a polished look for any event. Everyday Makeup: Enhance your daily appearance with our expert makeup services, designed to make you look and feel your best. Special Occasion Makeup: Makeup services for birthdays, anniversaries, and other significant events, ensuring you look radiant for any special occasion. The Future of Bridal Makeup in Patahi Ladyfair is dedicated to setting new standards in bridal beauty in Patahi. Our commitment to providing exceptional at-home services ensures that we remain the preferred choice for brides. As more brides experience our personalized and professional makeup services, we continue to innovate and grow in the field of bridal beauty. Q&A with Ladyfair’s Bridal Makeup Artist in Patahi Why should I choose Ladyfair as my bridal makeup artist in Patahi? Ladyfair offers expert at-home bridal makeup services with skilled artistry and high-quality products, ensuring you look stunning on your wedding day. What are the prices for bridal makeup services in Patahi? Our bridal makeup services start at ₹10,000 for basic makeup, ₹12,000 for HD makeup, and ₹18,000 for airbrush makeup. How do I book Ladyfair’s bridal makeup services in Patahi? You can book our services by calling 7004721239. We also offer consultations and trial sessions to help you achieve your desired look. What types of bridal makeup does Ladyfair offer in Patahi? We offer traditional, HD, and airbrush bridal makeup styles to suit your preferences and wedding theme. Are makeup trials available before the wedding day? Yes, we provide trial sessions to finalize your bridal look and make any necessary adjustments before your wedding day. What kind of products does Ladyfair use for bridal makeup? We use professional-grade, high-quality products that ensure a flawless finish and are safe for all skin types. What other makeup services does Ladyfair offer in Patahi? Besides bridal makeup, we offer engagement, reception, party, and special occasion makeup services.

Posted By: 31st August 2024
Bridal Makeup Artist in Deo
Introduction In Deo, Ladyfair is the leading choice for brides who want to look their absolute best on their wedding day. Our at-home bridal makeup service brings expert beauty treatments to the comfort of your own home. Whether you're looking for a traditional bridal look, a flawless HD finish, or the elegance of airbrush makeup, our skilled makeup artist in Deo is here to make your wedding day as perfect as you've imagined. Contact us today at 7004721239 to book your appointment. Why Ladyfair is the Top Choice for Bridal Makeup in Deo? Experienced Makeup Artist Our makeup artist in Deo has years of experience in bridal makeup, specializing in creating looks that highlight your natural beauty and complement your individual style. Convenient At-Home Service Ladyfair eliminates the hassle of traveling to a salon by offering luxurious at-home bridal makeup services, allowing you to enjoy a personalized beauty experience right at your doorstep in Deo. Premium Quality Products We use only high-quality, professional-grade makeup products to ensure a flawless, long-lasting look that will keep you glowing throughout your special day. Bridal Makeup Pricing in Deo Our bridal makeup services in Deo are tailored to fit a range of preferences and budgets: Basic Bridal Makeup: ₹10,000 HD Bridal Makeup: ₹12,000 Airbrush Bridal Makeup: ₹18,000 For engagement and reception: Basic Engagement/Reception Makeup: ₹6,000 HD Engagement/Reception Makeup: ₹8,000 Airbrush Engagement/Reception Makeup: ₹12,000 For parties: Basic Party Makeup: ₹2,500 HD Party Makeup: ₹3,500 Popular Bridal Makeup Styles in Deo. Traditional Bridal Makeup Our traditional bridal makeup in Deo features bold, vibrant colors and meticulous application, perfectly complementing traditional wedding attire to create an elegant and timeless look. HD Bridal Makeup HD bridal makeup provides a high-definition finish that ensures you look flawless in both photographs and in person, making you picture-perfect all day long. Airbrush Bridal Makeup Airbrush makeup delivers a lightweight, smooth finish with full coverage that lasts all day, ideal for brides seeking a natural yet polished look. How to Book Your Bridal Makeup with Ladyfair in Deo Initial Contact: Call us at 7004721239 to discuss your bridal makeup needs and schedule an appointment. Consultation Session: Meet with our makeup artist to discuss your desired look, review your wedding attire, and plan the perfect makeup style. Makeup Trial: We offer trial sessions so you can preview your bridal makeup and make any necessary adjustments before the wedding day. Wedding Day Makeup: On your wedding day, our makeup artist will arrive at your location in Deo to provide a flawless and stress-free makeup service. Testimonials from Brides in Deo Sneha P., Deo: "Ladyfair’s at-home makeup service was exactly what I needed. The makeup artist was incredibly skilled, and my bridal look was beyond perfect." Meera R., Deo: "The airbrush makeup was flawless and lasted all day long. Ladyfair’s service made my wedding day stress-free and special." Ritika S., Deo: "The HD makeup was stunning, and my photos turned out beautifully. Ladyfair’s service exceeded all my expectations." Preparing for Your Bridal Makeup Session To ensure the best results, follow these tips: Stay Hydrated: Drink plenty of water to keep your skin fresh and glowing. Consistent Skincare: Maintain a regular skincare routine leading up to your wedding. Avoid New Products: Stick to familiar skincare products to avoid any reactions. Communicate Clearly: Discuss your makeup preferences and concerns with our artist during your consultation. Additional Beauty Services by Ladyfair In addition to bridal makeup, Ladyfair offers: Engagement and Reception Makeup: Customized looks for all your pre-wedding events. Party Makeup: Perfect for special occasions and celebrations. Everyday Makeup: Enhance your daily look with our expert services. Special Occasion Makeup: Makeup for birthdays, anniversaries, and other significant events. The Future of Bridal Makeup in Deo Ladyfair is committed to setting new standards in bridal beauty with our innovative at-home services in Deo. As more brides experience our exceptional service, Ladyfair continues to grow as the preferred choice for bridal makeup. Q&A with Ladyfair’s Bridal Makeup Artist in Deo Q1: What makes Ladyfair the best choice for bridal makeup in Deo? A1: Ladyfair offers expert at-home bridal makeup services, combining skilled artistry with high-quality products for a flawless wedding look. Q2: What are the prices for bridal makeup services in Deo? A2: Our bridal makeup services start at ₹10,000 for basic makeup, ₹12,000 for HD makeup, and ₹18,000 for airbrush makeup. Q3: How do I book Ladyfair’s bridal makeup services in Deo? A3: You can book our services by calling 7004721239. We also offer consultations and trial sessions to help you achieve your desired look. Q4: What types of bridal makeup does Ladyfair offer in Deo? A4: We offer traditional, HD, and airbrush bridal makeup styles to suit your preferences. Q5: Are makeup trials available before the wedding day? A5: Yes, we provide trial sessions to finalize your bridal look and make any necessary adjustments. Q6: What kind of products does Ladyfair use for bridal makeup? A6: We use professional-grade, high-quality products that are safe for all skin types and ensure a flawless finish. Q7: What other makeup services does Ladyfair offer in Deo? A7: Besides bridal makeup, we offer engagement, reception, party, and special occasion makeup services.

Posted By: 31st August 2024
Bridal Makeup Artist in Madanpur
Introduction In Madanpur, Ladyfair is the go-to choice for brides who want to look flawless on their wedding day. Our at-home bridal makeup service offers the luxury of expert beauty treatments right in the comfort of your own home. Whether you’re dreaming of a traditional bridal look, a flawless HD finish, or the elegance of airbrush makeup, our skilled makeup artist in Madanpur is here to make your vision a reality. Contact us today at 7004721239 to book your appointment. Why Ladyfair is the Top Choice for Bridal Makeup in Madanpur Experienced Makeup Artist Our makeup artist in Madanpur has years of experience in bridal makeup and specializes in creating personalized looks that enhance your natural beauty and complement your unique style. Convenient At-Home Service Ladyfair brings the salon to you, eliminating the need to travel. Enjoy a luxurious, personalized bridal makeup experience right at your doorstep in Madanpur. Premium Quality Products We use only high-quality, professional-grade makeup products to ensure a flawless, long-lasting look that will keep you glowing throughout your wedding day. Bridal Makeup Pricing in Madanpur Our bridal makeup services in Madanpur are designed to fit various preferences and budgets: Basic Bridal Makeup: ₹10,000 HD Bridal Makeup: ₹12,000 Airbrush Bridal Makeup: ₹18,000 For engagement and reception: Basic Engagement/Reception Makeup: ₹6,000 HD Engagement/Reception Makeup: ₹8,000 Airbrush Engagement/Reception Makeup: ₹12,000 For parties: Basic Party Makeup: ₹2,500 HD Party Makeup: ₹3,500 Popular Bridal Makeup Styles in Madanpur Traditional Bridal Makeup Our traditional bridal makeup in Madanpur focuses on bold, vibrant colors and meticulous application, perfectly complementing traditional wedding attire to create an elegant and timeless look. HD Bridal Makeup HD bridal makeup provides a high-definition finish that ensures you look flawless in both photographs and in person, making you picture-perfect all day long. Airbrush Bridal Makeup Airbrush makeup delivers a lightweight, smooth finish with full coverage that lasts all day, ideal for brides seeking a natural yet polished look. How to Book Your Bridal Makeup with Ladyfair in Madanpur Initial Contact: Call us at 7004721239 to discuss your bridal makeup needs and schedule an appointment. Consultation Session: Meet with our makeup artist to discuss your desired look, review your wedding attire, and plan the perfect makeup style. Makeup Trial: We offer trial sessions so you can preview your bridal makeup and make any necessary adjustments before the wedding day. Wedding Day Makeup: On your wedding day, our makeup artist will arrive at your location in Madanpur to provide a flawless and stress-free makeup service. Testimonials from Brides in Madanpur Priya K., Madanpur: "Ladyfair’s at-home service was exactly what I needed. The makeup artist understood my vision perfectly and made me feel beautiful on my special day." Anjali S., Madanpur: "The airbrush makeup was perfect for my wedding. It stayed fresh all day, and the convenience of having the service at home was a game-changer." Neha R., Madanpur: "The HD makeup looked stunning in all my wedding photos. Ladyfair’s service was impeccable, and I couldn’t have been happier with the results." Preparing for Your Bridal Makeup Session To achieve the best results, follow these tips: Stay Hydrated: Drink plenty of water to keep your skin fresh and glowing. Consistent Skincare: Maintain a regular skincare routine leading up to your wedding. Avoid New Products: Stick to familiar skincare products to avoid any reactions. Communicate Clearly: Discuss your makeup preferences and concerns with our artist during your consultation. Additional Beauty Services by Ladyfair In addition to bridal makeup, Ladyfair offers: Engagement and Reception Makeup: Customized looks for all your pre-wedding events. Party Makeup: Perfect for special occasions and celebrations. Everyday Makeup: Enhance your daily look with our expert services. Special Occasion Makeup: Makeup for birthdays, anniversaries, and other significant events. The Future of Bridal Makeup in Madanpur Ladyfair is dedicated to setting new standards in bridal beauty with our innovative at-home services in Madanpur. As more brides experience our exceptional service, Ladyfair continues to grow as the preferred choice for bridal makeup. Q&A with Ladyfair’s Bridal Makeup Artist in Madanpur Q1: What makes Ladyfair the best choice for bridal makeup in Madanpur? A1: Ladyfair offers expert at-home bridal makeup services, combining skilled artistry with high-quality products for a flawless wedding look. Q2: What are the prices for bridal makeup services in Madanpur? A2: Our bridal makeup services start at ₹10,000 for basic makeup, ₹12,000 for HD makeup, and ₹18,000 for airbrush makeup. Q3: How do I book Ladyfair’s bridal makeup services in Madanpur? A3: You can book our services by calling 7004721239. We also offer consultations and trial sessions to help you achieve your desired look. Q4: What types of bridal makeup does Ladyfair offer in Madanpur? A4: We offer traditional, HD, and airbrush bridal makeup styles to suit your preferences. Q5: Are makeup trials available before the wedding day? A5: Yes, we provide trial sessions to finalize your bridal look and make any necessary adjustments. Q6: What kind of products does Ladyfair use for bridal makeup? A6: We use professional-grade, high-quality products that are safe for all skin types and ensure a flawless finish. Q7: What other makeup services does Ladyfair offer in Madanpur? A7: Besides bridal makeup, we offer engagement, reception, party, and special occasion makeup services.

Posted By: 31st August 2024
Bridal Makeup Artist in Kutumba
Introduction In Kutumba, Ladyfair is the premier choice for brides seeking flawless makeup services on their wedding day. Our at-home bridal makeup service provides the luxury of professional beauty treatments in the comfort of your own home. Whether you’re dreaming of a traditional bridal look, a perfect HD finish, or the seamless elegance of airbrush makeup, our skilled makeup artist in Kutumba is here to bring your vision to life. Contact us today at 7004721239 to book your appointment. Why Ladyfair is the Top Choice for Bridal Makeup in Kutumba Experienced Makeup Artist Our makeup artist in Kutumba has extensive experience in bridal makeup, specializing in creating personalized looks that enhance your natural beauty and match your unique style. Convenient At-Home Service Ladyfair eliminates the stress of traveling to a salon by bringing our professional bridal makeup services directly to your home. Enjoy a personalized and luxurious experience without leaving your doorstep. Premium Quality Products We use only high-quality, professional-grade makeup products to ensure a flawless, long-lasting look that is perfect for your wedding day. Bridal Makeup Pricing in Kutumba Our bridal makeup services in Kutumba are designed to cater to different preferences and budgets: Basic Bridal Makeup: ₹10,000 HD Bridal Makeup: ₹12,000 Airbrush Bridal Makeup: ₹18,000 For engagement and reception: Basic Engagement/Reception Makeup: ₹6,000 HD Engagement/Reception Makeup: ₹8,000 Airbrush Engagement/Reception Makeup: ₹12,000 For parties: Basic Party Makeup: ₹2,500 HD Party Makeup: ₹3,500 Popular Bridal Makeup Styles in Kutumba Traditional Bridal Makeup Our traditional bridal makeup in Kutumba is designed with bold, vibrant colors and meticulous application to perfectly complement traditional wedding attire, creating an elegant and timeless look. HD Bridal Makeup HD bridal makeup offers a high-definition finish that ensures you look stunning in both photographs and real life, keeping you flawless throughout your special day. Airbrush Bridal Makeup Airbrush makeup provides a lightweight, smooth finish with full coverage that lasts all day, ideal for brides seeking a natural yet polished look. How to Book Your Bridal Makeup with Ladyfair in Kutumba Initial Contact: Call us at 7004721239 to discuss your bridal makeup needs and schedule an appointment. Consultation Session: Meet with our makeup artist to discuss your desired look, review your wedding attire, and plan the perfect makeup style. Makeup Trial: We offer trial sessions so you can preview your bridal makeup and make any necessary adjustments before the wedding day. Wedding Day Makeup: On your wedding day, our makeup artist will arrive at your location in Kutumba to provide a flawless and stress-free makeup service. Testimonials from Brides in Kutumba Rita P., Kutumba: "Ladyfair’s service was exceptional. The makeup artist understood exactly what I wanted and made me feel beautiful on my wedding day." Anita S., Kutumba: "I chose the airbrush makeup, and it was perfect. It lasted all day, and I received so many compliments. The convenience of having the service at home was a huge plus." Suman R., Kutumba: "The HD makeup looked amazing in all my photos. Ladyfair made the entire experience stress-free, and the results were beyond my expectations." Preparing for Your Bridal Makeup Session To achieve the best results, follow these tips: Stay Hydrated: Drink plenty of water to keep your skin fresh and glowing. Consistent Skincare: Maintain a regular skincare routine leading up to your wedding. Avoid New Products: Stick to familiar skincare products to avoid any reactions. Communicate Clearly: Discuss your makeup preferences and concerns with our artist during your consultation. Additional Beauty Services by Ladyfair In addition to bridal makeup, Ladyfair offers: Engagement and Reception Makeup: Customized looks for all your pre-wedding events. Party Makeup: Perfect for special occasions and celebrations. Everyday Makeup: Enhance your daily look with our expert services. Special Occasion Makeup: Makeup for birthdays, anniversaries, and other significant events. The Future of Bridal Makeup in Kutumba Ladyfair is dedicated to setting new standards in bridal beauty with our innovative at-home services in Kutumba. As more brides experience our exceptional service, Ladyfair continues to grow as the preferred choice for bridal makeup. Q&A with Ladyfair’s Bridal Makeup Artist in Kutumba Q1: What makes Ladyfair the best choice for bridal makeup in Kutumba? A1: Ladyfair offers expert at-home bridal makeup services, combining skilled artistry with high-quality products for a flawless wedding look. Q2: What are the prices for bridal makeup services in Kutumba? A2: Our bridal makeup services start at ₹10,000 for basic makeup, ₹12,000 for HD makeup, and ₹18,000 for airbrush makeup. Q3: How do I book Ladyfair’s bridal makeup services in Kutumba? A3: You can book our services by calling 7004721239. We also offer consultations and trial sessions to help you achieve your desired look. Q4: What types of bridal makeup does Ladyfair offer in Kutumba? A4: We offer traditional, HD, and airbrush bridal makeup styles to suit your preferences. Q5: Are makeup trials available before the wedding day? A5: Yes, we provide trial sessions to finalize your bridal look and make any necessary adjustments. Q6: What kind of products does Ladyfair use for bridal makeup? A6: We use professional-grade, high-quality products that are safe for all skin types and ensure a flawless finish. Q7: What other makeup services does Ladyfair offer in Kutumba? A7: Besides bridal makeup, we offer engagement, reception, party, and special occasion makeup services.

Posted By: 31st August 2024
Bridal Makeup Artist in Navinagar
Introduction In Navinagar, Ladyfair is the go-to choice for brides who want impeccable makeup services for their special day. Our at-home bridal makeup service brings the salon to your doorstep, ensuring you look your best without leaving the comfort of your home. Whether you desire a traditional bridal look, a flawless HD finish, or the smooth perfection of airbrush makeup, our skilled makeup artist in Navinagar is here to make your dream look a reality. Contact us today at 7004721239 to book your appointment. Why Ladyfair is the Top Choice for Bridal Makeup in Navinagar? Experienced Makeup Artist Our makeup artist in Navinagar is highly experienced in bridal makeup, with a deep understanding of how to enhance your natural beauty and tailor the look to suit your style. Convenient At-Home Service Ladyfair offers the ultimate convenience with our at-home bridal makeup services in Navinagar. No need to travel to a salon—enjoy a luxurious, personalized experience in your own space. Premium Quality Products We use only high-quality, professional-grade makeup products to ensure your look is flawless, long-lasting, and perfect for your wedding day. Bridal Makeup Pricing in Navinagar Our pricing for bridal makeup services in Navinagar is structured to fit different preferences and budgets: Basic Bridal Makeup: ₹10,000 HD Bridal Makeup: ₹12,000 Airbrush Bridal Makeup: ₹18,000 For engagement and reception: Basic Engagement/Reception Makeup: ₹6,000 HD Engagement/Reception Makeup: ₹8,000 Airbrush Engagement/Reception Makeup: ₹12,000 For parties: Basic Party Makeup: ₹2,500 HD Party Makeup: ₹3,500 Popular Bridal Makeup Styles in Navinagar Traditional Bridal Makeup Our traditional bridal makeup in Navinagar incorporates bold, vibrant colors and meticulous application to complement traditional wedding attire, creating an elegant and timeless look. HD Bridal Makeup HD bridal makeup ensures a high-definition finish that looks perfect both in person and in photographs, keeping you flawless throughout your wedding day. Airbrush Bridal Makeup Airbrush makeup offers a lightweight, smooth finish with full coverage that lasts all day, ideal for brides seeking a natural yet polished appearance. How to Book Your Bridal Makeup with Ladyfair in Navinagar Initial Contact: Call us at 7004721239 to discuss your bridal makeup needs and schedule an appointment. Consultation Session: Meet with our makeup artist to discuss your desired look, review your wedding attire, and plan the perfect makeup style. Makeup Trial: We offer trial sessions so you can preview your bridal makeup and make any necessary adjustments before the wedding day. Wedding Day Makeup: On your wedding day, our makeup artist will arrive at your location in Navinagar to provide a flawless and stress-free makeup service. Testimonials from Brides in Navinagar Priya S., Navinagar: "Ladyfair’s service made my wedding day even more special. The makeup artist was professional and delivered exactly the look I wanted." Anjali R., Navinagar: "The airbrush makeup was perfect and stayed intact throughout the day. I highly recommend Ladyfair for their at-home services." Sneha K., Navinagar: "The HD makeup looked amazing in all my wedding photos. The convenience of having the service at home made the entire process stress-free." Preparing for Your Bridal Makeup Session To achieve the best results, follow these tips: Stay Hydrated: Drink plenty of water to keep your skin fresh and glowing. Consistent Skincare: Maintain a regular skincare routine leading up to your wedding. Avoid New Products: Stick to familiar skincare products to avoid any reactions. Communicate Clearly: Discuss your makeup preferences and concerns with our artist during your consultation. Additional Beauty Services by Ladyfair In addition to bridal makeup, Ladyfair offers: Engagement and Reception Makeup: Customized looks for all your pre-wedding events. Party Makeup: Perfect for special occasions and celebrations. Everyday Makeup: Enhance your daily look with our expert services. Special Occasion Makeup: Makeup for birthdays, anniversaries, and other significant events. The Future of Bridal Makeup in Navinagar Ladyfair is committed to setting new standards in bridal beauty with our innovative at-home services in Navinagar. As more brides experience our exceptional service, Ladyfair continues to grow as the preferred choice for bridal makeup. Q&A with Ladyfair’s Bridal Makeup Artist in Navinagar Q1: What makes Ladyfair the best choice for bridal makeup in Navinagar? A1: Ladyfair offers expert at-home bridal makeup services, combining skilled artistry with high-quality products for a flawless wedding look. Q2: What are the prices for bridal makeup services in Navinagar? A2: Our bridal makeup services start at ₹10,000 for basic makeup, ₹12,000 for HD makeup, and ₹18,000 for airbrush makeup. Q3: How do I book Ladyfair’s bridal makeup services in Navinagar? A3: You can book our services by calling 7004721239. We also offer consultations and trial sessions to help you achieve your desired look. Q4: What types of bridal makeup does Ladyfair offer in Navinagar? A4: We offer traditional, HD, and airbrush bridal makeup styles to suit your preferences. Q5: Are makeup trials available before the wedding day? A5: Yes, we provide trial sessions to finalize your bridal look and make any necessary adjustments. Q6: What kind of products does Ladyfair use for bridal makeup? A6: We use professional-grade, high-quality products that are safe for all skin types and ensure a flawless finish. Q7: What other makeup services does Ladyfair offer in Navinagar? A7: Besides bridal makeup, we offer engagement, reception, party, and special occasion makeup services.
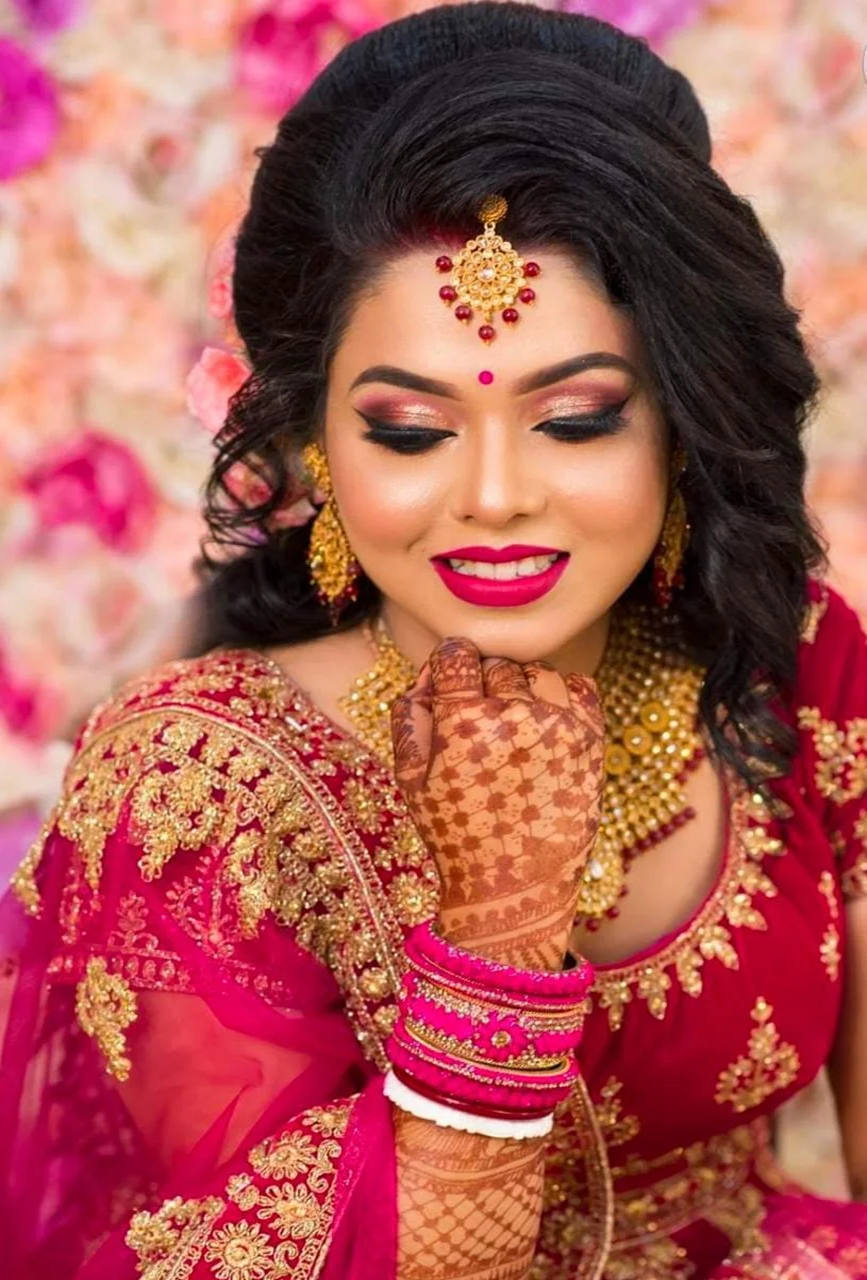
Posted By: 31st August 2024
Bridal Makeup Artist in Tetaria
Ladyfair: Premier Bridal Makeup Artist in Tetaria Introduction Your wedding day is one of the most important and memorable days of your life. Every detail matters, from your venue and attire to your makeup. At Ladyfair, we understand the significance of looking and feeling your best on your special day. As the leading bridal makeup artist in Tetaria, we are dedicated to providing exceptional at-home bridal makeup services tailored to your unique needs and preferences. Whether you envision a traditional, high-definition, or airbrush look, our expert makeup artist in Tetaria will ensure you achieve a flawless and radiant appearance. Contact us today at 7004721239 to book your appointment and experience the difference with Ladyfair. Why Ladyfair is the Top Choice for Bridal Makeup in Tetaria Experienced Makeup Artist At Ladyfair, our makeup artist in Tetaria is not only highly skilled but also brings years of experience in bridal makeup. This experience is crucial in understanding the nuances of different skin types, preferences, and the overall wedding theme. Our artist excels in creating personalized looks that highlight your natural beauty while complementing your bridal attire. From intricate detailing to a perfect finish, you can trust that you will receive a professional touch that makes you look and feel stunning. Convenient At-Home Service One of the key advantages of choosing Ladyfair for your bridal makeup is our at-home service. We bring the salon experience to the comfort of your home, saving you the hassle of traveling and allowing you to relax in a familiar environment. Our team arrives fully equipped with everything needed to create a flawless look, providing you with a luxurious and personalized experience without the stress of a salon visit. Premium Quality Products We believe that high-quality products are essential for achieving a flawless bridal look. Ladyfair uses only premium, professional-grade makeup products that are safe for all skin types and designed to provide long-lasting results. Our products ensure that your makeup looks impeccable throughout your wedding day, whether you are posing for photos, dancing the night away, or exchanging vows. Bridal Makeup Pricing in Tetaria with Ladyfair Ladyfair offers a range of bridal makeup options in Tetaria to suit various styles and budgets. Our pricing is structured to provide flexibility while maintaining the highest quality of service: Basic Bridal Makeup: ₹10,000 This package includes a classic bridal look with essential makeup services that ensure a beautiful and natural appearance. HD Bridal Makeup: ₹12,000 Our HD bridal makeup provides a high-definition finish that looks flawless both in photographs and in person. It’s perfect for brides who want a picture-perfect look. Airbrush Bridal Makeup: ₹18,000 Airbrush makeup offers a lightweight, smooth finish with full coverage that lasts all day. This style is ideal for brides who prefer a natural yet polished look. For engagement and reception: Basic Engagement/Reception Makeup: ₹6,000 This package includes a simple yet elegant look suitable for engagement parties and receptions. HD Engagement/Reception Makeup: ₹8,000 Achieve a high-definition finish for your engagement or reception event with this package. Airbrush Engagement/Reception Makeup: ₹12,000 Ensure a flawless look for your special events with our airbrush makeup service. For parties: Basic Party Makeup: ₹2,500 Perfect for any special occasion, this package includes essential makeup services for a polished appearance. HD Party Makeup: ₹3,500 Enjoy a high-definition finish for any celebration or party. Popular Bridal Makeup Styles Offered by Ladyfair in Tetaria At Ladyfair, we offer a variety of bridal makeup styles to match your vision and wedding theme: Traditional Bridal Makeup Our traditional bridal makeup in Tetaria features bold, vibrant colors and intricate detailing to complement traditional wedding attire. This style is perfect for brides who wish to embrace classic bridal beauty and cultural significance. We use rich hues and expert techniques to create a timeless and elegant look that enhances your natural beauty. HD Bridal Makeup High-definition (HD) bridal makeup is designed to provide a flawless finish that looks perfect both in photos and in person. This style uses specialized products and techniques to ensure that your makeup remains impeccable throughout the day, capturing every moment with clarity and precision. HD makeup is ideal for brides who want a picture-perfect look that stands out in photographs. Airbrush Bridal Makeup Airbrush makeup offers a lightweight, smooth finish with full coverage, making it an excellent choice for brides who prefer a natural yet polished look. This style uses airbrush technology to apply makeup evenly and seamlessly, providing long-lasting coverage that feels comfortable and looks radiant. Airbrush makeup is perfect for brides who want a flawless appearance without the heaviness of traditional makeup. Booking Your Bridal Makeup with Ladyfair in Tetaria To ensure a smooth and stress-free booking process, please keep the following details in mind: Advance Payment: To confirm your booking with Ladyfair, a 20% advance payment is required. This advance is adjustable for one year but is non-refundable. Adjustable Booking Amount: The booking amount is valid for one year from the date of payment, allowing you flexibility in rescheduling if needed. Non-Refundable: Please note that the advance payment is non-refundable but will be applied towards the total cost of the service. How to Book Your Bridal Makeup Initial Contact: Call us at 7004721239 to discuss your bridal makeup needs and schedule an appointment. Our team will guide you through the booking process and answer any questions you may have. Consultation Session: Schedule a consultation session with our makeup artist to discuss your desired look, review your wedding attire, and plan the perfect makeup style. This session allows us to understand your preferences and ensure that we create a look that suits your vision. Makeup Trial: We offer trial sessions so you can preview your bridal makeup and make any necessary adjustments before the wedding day. This trial ensures that you are satisfied with the final look and helps us make any tweaks to achieve your desired appearance. Wedding Day Makeup: On your wedding day, our makeup artist will arrive at your location in Tetaria to provide a flawless and stress-free makeup service. We arrive fully prepared to create your perfect look and ensure you feel confident and beautiful throughout the day. Testimonials from Brides in Tetaria Hear from some of our satisfied brides who experienced Ladyfair’s exceptional service: Sunita B., Tetaria: "Ladyfair’s at-home makeup service was fantastic. The artist was professional and made sure my bridal look was exactly what I envisioned. I felt beautiful and confident on my special day." Rekha S., Tetaria: "I chose airbrush makeup for my wedding, and it was perfect. It stayed fresh all day, and I received so many compliments from friends and family. Ladyfair’s team made the whole experience enjoyable." Meena J., Tetaria: "The HD makeup was amazing and looked great in all my wedding photos. Ladyfair’s artist ensured that I looked beautiful and felt confident. I highly recommend their services." Preparing for Your Bridal Makeup Session To achieve the best results, consider the following tips: Stay Hydrated: Drinking plenty of water will keep your skin fresh and glowing, providing a better base for makeup application. Consistent Skincare: Maintain a regular skincare routine leading up to your wedding day to ensure your skin is in optimal condition. Avoid New Products: Stick to familiar skincare products to avoid any adverse reactions or breakouts before your big day. Communicate Clearly: Discuss your makeup preferences and any concerns with our artist during your consultation. Clear communication ensures that we understand your vision and can deliver the desired results. Additional Beauty Services by Ladyfair in Tetaria In addition to bridal makeup, Ladyfair offers a variety of beauty services to meet all your needs: Engagement and Reception Makeup: Customized looks for all your pre-wedding events, ensuring you look stunning at every occasion. Party Makeup: Perfect for special occasions and celebrations, providing a polished look for any event. Everyday Makeup: Enhance your daily appearance with our expert makeup services, designed to make you look and feel your best. Special Occasion Makeup: Makeup services for birthdays, anniversaries, and other significant events, ensuring you look radiant on any special occasion. The Future of Bridal Makeup in Tetaria Ladyfair is dedicated to setting new standards in bridal beauty in Tetaria. Our commitment to providing exceptional at-home services ensures that we remain the preferred choice for brides. As more brides experience our personalized and professional makeup services, we continue to grow and innovate in the field of bridal beauty. Q&A with Ladyfair’s Bridal Makeup Artist in Tetaria Why should I choose Ladyfair as my bridal makeup artist in Tetaria? Ladyfair offers expert at-home bridal makeup services with skilled artistry and high-quality products to ensure you look stunning on your wedding day. What are the prices for bridal makeup services in Tetaria? Our bridal makeup services start at ₹10,000 for basic makeup, ₹12,000 for HD makeup, and ₹18,000 for airbrush makeup. How do I book Ladyfair’s bridal makeup services in Tetaria? You can book our services by calling 7004721239. We also offer consultations and trial sessions to help you achieve your desired look. What types of bridal makeup does Ladyfair offer in Tetaria? We offer traditional, HD, and airbrush bridal makeup styles to suit your preferences and wedding theme. Are makeup trials available before the wedding day? Yes, we provide trial sessions to finalize your bridal look and make any necessary adjustments before your wedding day. What kind of products does Ladyfair use for bridal makeup? We use professional-grade, high-quality products that ensure a flawless finish and are safe for all skin types. What other makeup services does Ladyfair offer in Tetaria? Besides bridal makeup, we offer engagement, reception, party, and special occasion makeup services.

Posted By: 31st August 2024
Bridal Makeup Artist in Barun
Introduction In Barun, Ladyfair stands out as the premier choice for brides seeking exceptional makeup services on their wedding day. Our at-home bridal makeup service ensures that you receive top-quality beauty treatments without having to leave your home. Whether you're looking for a traditional bridal look, a flawless HD finish, or the perfection of airbrush makeup, our experienced makeup artist in Barun is here to make you shine. Contact us today at 7004721239 to book your appointment. Why Ladyfair is the Top Choice for Bridal Makeup in Barun? Experienced Makeup Artist Our makeup artist in Barun brings years of experience in bridal makeup, specializing in creating personalized looks that enhance your natural beauty and align with your style. Convenient At-Home Service Ladyfair offers the convenience of at-home bridal makeup services in Barun, allowing you to enjoy a luxurious, personalized experience without the need to travel to a salon. Premium Quality Products We use only high-quality, professional-grade makeup products to ensure a flawless, long-lasting look that is perfect for your wedding day. Bridal Makeup Pricing in Barun Our pricing for bridal makeup services in Barun is designed to accommodate various preferences and budgets: Basic Bridal Makeup: ₹10,000 HD Bridal Makeup: ₹12,000 Airbrush Bridal Makeup: ₹18,000 For engagement and reception: Basic Engagement/Reception Makeup: ₹6,000 HD Engagement/Reception Makeup: ₹8,000 Airbrush Engagement/Reception Makeup: ₹12,000 For parties: Basic Party Makeup: ₹2,500 HD Party Makeup: ₹3,500 Popular Bridal Makeup Styles in Barun Traditional Bridal Makeup Our traditional bridal makeup in Barun features bold, vibrant colors and meticulous application techniques to complement traditional wedding attire, creating a timeless and elegant look. HD Bridal Makeup HD bridal makeup provides a high-definition finish that looks perfect in both photographs and real life. This style ensures you maintain a flawless appearance throughout your special day. Airbrush Bridal Makeup Airbrush makeup offers a lightweight, smooth finish with full coverage that lasts all day, ideal for brides seeking a natural yet polished look. How to Book Your Bridal Makeup with Ladyfair in Barun Initial Contact: Call us at 7004721239 to discuss your bridal makeup needs and schedule an appointment. Consultation Session: Meet with our makeup artist to discuss your desired look, review your wedding attire, and plan the perfect makeup style. Makeup Trial: We offer trial sessions so you can preview your bridal makeup and make any necessary adjustments before the wedding day. Wedding Day Makeup: On your wedding day, our makeup artist will arrive at your location in Barun to provide a flawless and stress-free makeup service. Testimonials from Brides in Barun Pooja S., Barun: "Ladyfair made my wedding day truly special. The makeup artist was incredibly skilled, and my bridal look was exactly what I envisioned." Neha R., Barun: "The airbrush makeup was flawless and lasted all day. Ladyfair’s service exceeded my expectations." Sneha K., Barun: "The HD makeup looked stunning in all my photos. The at-home service made everything so convenient and stress-free." Preparing for Your Bridal Makeup Session To achieve the best results, follow these tips: Stay Hydrated: Drink plenty of water to keep your skin fresh and glowing. Consistent Skincare: Maintain a regular skincare routine leading up to your wedding. Avoid New Products: Stick to familiar skincare products to avoid any adverse reactions. Communicate Clearly: Discuss your makeup preferences and concerns with our artist during your consultation. Additional Beauty Services by Ladyfair In addition to bridal makeup, Ladyfair offers: Engagement and Reception Makeup: Customized looks for all your pre-wedding events. Party Makeup: Perfect for special occasions and celebrations. Everyday Makeup: Enhance your daily look with our expert services. Special Occasion Makeup: Makeup for birthdays, anniversaries, and other significant events. The Future of Bridal Makeup in Barun Ladyfair is committed to setting new standards in bridal beauty with our innovative at-home services in Barun. As more brides experience our exceptional service, Ladyfair continues to grow as the preferred choice for bridal makeup. Q&A with Ladyfair’s Bridal Makeup Artist in Barun Q1: What makes Ladyfair the best choice for bridal makeup in Barun? A1: Ladyfair offers expert at-home bridal makeup services, combining skilled artistry with high-quality products for a flawless wedding look. Q2: What are the prices for bridal makeup services in Barun? A2: Our bridal makeup services start at ₹10,000 for basic makeup, ₹12,000 for HD makeup, and ₹18,000 for airbrush makeup. Q3: How do I book Ladyfair’s bridal makeup services in Barun? A3: You can book our services by calling 7004721239. We also offer consultations and trial sessions to help you achieve your desired look. Q4: What types of bridal makeup does Ladyfair offer in Barun? A4: We offer traditional, HD, and airbrush bridal makeup styles to suit your preferences. Q5: Are makeup trials available before the wedding day? A5: Yes, we provide trial sessions to finalize your bridal look and make any necessary adjustments. Q6: What kind of products does Ladyfair use for bridal makeup? A6: We use professional-grade, high-quality products that are safe for all skin types and ensure a flawless finish. Q7: What other makeup services does Ladyfair offer in Barun? A7: Besides bridal makeup, we offer engagement, reception, party, and special occasion makeup services.

Posted By: 31st August 2024
Bridal Makeup Artist in Madhuban
Ladyfair: Premier Bridal Makeup Artist in Madhuban Introduction On your wedding day, every detail is crucial, and your makeup is a key part of your look. Ladyfair is the leading bridal makeup artist in Madhuban, offering exceptional at-home bridal makeup services to ensure you look stunning. Whether you’re aiming for a traditional, high-definition, or airbrush look, our expert makeup artist in Madhuban will tailor the perfect style for your special day. Contact us today at 7004721239 to book your appointment. Why Ladyfair is the Top Choice for Bridal Makeup in Madhuban Experienced Makeup Artist Our makeup artist in Madhuban boasts extensive experience in bridal makeup, creating personalized looks that highlight your natural beauty and align with your wedding theme. Convenient At-Home Service Ladyfair offers the convenience of at-home bridal makeup services in Madhuban, allowing you to enjoy a professional makeup experience without leaving your home. Premium Quality Products We use only high-quality, professional-grade makeup products to ensure a flawless, long-lasting finish. With Ladyfair, you can be confident that your makeup will look perfect throughout your wedding day. Bridal Makeup Pricing in Madhuban with Ladyfair Ladyfair offers a range of bridal makeup options in Madhuban to fit various styles and budgets: Basic Bridal Makeup: ₹10,000 HD Bridal Makeup: ₹12,000 Airbrush Bridal Makeup: ₹18,000 For engagement and reception: Basic Engagement/Reception Makeup: ₹6,000 HD Engagement/Reception Makeup: ₹8,000 Airbrush Engagement/Reception Makeup: ₹12,000 For parties: Basic Party Makeup: ₹2,500 HD Party Makeup: ₹3,500 Popular Bridal Makeup Styles Offered by Ladyfair in Madhuban Traditional Bridal Makeup Our traditional bridal makeup in Madhuban features bold, vibrant colors and detailed application techniques that perfectly complement traditional wedding attire for an elegant and classic look. HD Bridal Makeup HD bridal makeup provides a high-definition finish that looks flawless in photographs and real life. This style ensures a perfect appearance throughout your wedding day. Airbrush Bridal Makeup Airbrush makeup offers a lightweight, smooth finish with full coverage that lasts all day, making it ideal for brides who prefer a natural yet polished look. Booking Your Bridal Makeup with Ladyfair in Madhuban To secure your bridal makeup service with Ladyfair, please note the following: Advance Payment: A 20% advance payment is required to confirm your booking. Adjustable Booking Amount: The booking amount is adjustable for one year. Non-Refundable: The advance payment is non-refundable but will be applied to the total service cost. How to Book Your Bridal Makeup Initial Contact: Call us at 7004721239 to discuss your bridal makeup needs and schedule your appointment. Consultation Session: Meet with our makeup artist to discuss your desired look, review your wedding attire, and plan the perfect makeup style. Makeup Trial: We offer trial sessions to preview your bridal makeup and make any necessary adjustments before your wedding day. Wedding Day Makeup: On your wedding day, our makeup artist will arrive at your location in Madhuban to provide a flawless and stress-free makeup service. Testimonials from Brides in Madhuban Sonia R., Madhuban: "Ladyfair’s at-home makeup service was incredible. The artist was professional, and my bridal look was exactly what I envisioned." Nisha K., Madhuban: "I opted for airbrush makeup for my wedding, and it was perfect. It stayed fresh throughout the day, and I received numerous compliments." Meenal S., Madhuban: "The HD makeup was fantastic and looked amazing in all my wedding photos. Ladyfair’s team made sure I felt beautiful and confident." Preparing for Your Bridal Makeup Session To ensure the best results, follow these tips: Stay Hydrated: Drink plenty of water to keep your skin fresh and glowing. Consistent Skincare: Maintain a regular skincare routine leading up to your wedding day. Avoid New Products: Stick to familiar skincare products to avoid any reactions. Communicate Clearly: Discuss your makeup preferences and any concerns with our artist during your consultation. Additional Beauty Services by Ladyfair in Madhuban Ladyfair also offers: Engagement and Reception Makeup: Customized looks for all your pre-wedding events. Party Makeup: Ideal for special occasions and celebrations. Everyday Makeup: Enhance your daily look with our expert services. Special Occasion Makeup: Makeup for birthdays, anniversaries, and other significant events. The Future of Bridal Makeup in Madhuban Ladyfair is committed to setting new standards in bridal beauty in Madhuban. As more brides experience our exceptional at-home services, we continue to be the preferred choice for bridal makeup. Q&A with Ladyfair’s Bridal Makeup Artist in Madhuban Why should I choose Ladyfair as my bridal makeup artist in Madhuban? Ladyfair offers expert at-home bridal makeup services, ensuring you look stunning on your wedding day. What are the prices for bridal makeup services in Madhuban? Our bridal makeup services start at ₹10,000 for basic makeup, ₹12,000 for HD makeup, and ₹18,000 for airbrush makeup. How do I book Ladyfair’s bridal makeup services in Madhuban? You can book our services by calling 7004721239. We also offer consultations and trial sessions to help you achieve your desired look. What types of bridal makeup does Ladyfair offer in Madhuban? We offer traditional, HD, and airbrush bridal makeup styles to suit your preferences. Are makeup trials available before the wedding day? Yes, we provide trial sessions to finalize your bridal look and make any necessary adjustments. What kind of products does Ladyfair use for bridal makeup? We use professional-grade, high-quality products that are safe for all skin types and ensure a flawless finish. What other makeup services does Ladyfair offer in Madhuban? Besides bridal makeup, we offer engagement, reception, party, and special occasion makeup services.

Posted By: 31st August 2024
Bridal Makeup Artist in Suryapur Banshi
Introduction In Suryapur Banshi, Ladyfair is the leading choice for brides seeking exceptional makeup services for their wedding day. Our at-home bridal makeup service ensures that you receive top-quality beauty treatments in the comfort of your own home. Whether you’re after a traditional bridal look, a flawless HD finish, or the perfection of airbrush makeup, our experienced makeup artist in Suryapur Banshi is here to help you shine. Contact us at 7004721239 to book your appointment today. Why Ladyfair is the Top Choice for Bridal Makeup in Suryapur Banshi Experienced Makeup Artist Our makeup artist in Suryapur Banshi is highly skilled, with years of experience in bridal makeup. She specializes in creating personalized looks that enhance your natural beauty and align with your style. Convenient At-Home Service Ladyfair offers the ultimate convenience by providing at-home bridal makeup services in Suryapur Banshi. You can enjoy a luxurious, personalized experience without needing to travel to a salon. Premium Quality Products We use only high-quality, professional-grade makeup products to ensure a flawless, long-lasting look that’s perfect for your wedding day. Bridal Makeup Pricing in Suryapur Banshi Our pricing for bridal makeup services in Suryapur Banshi is designed to suit various preferences and budgets: Basic Bridal Makeup: ₹10,000 HD Bridal Makeup: ₹12,000 Airbrush Bridal Makeup: ₹18,000 For engagement and reception: Basic Engagement/Reception Makeup: ₹6,000 HD Engagement/Reception Makeup: ₹8,000 Airbrush Engagement/Reception Makeup: ₹12,000 For parties: Basic Party Makeup: ₹2,500 HD Party Makeup: ₹3,500 Popular Bridal Makeup Styles in Suryapur Banshi Traditional Bridal Makeup Our traditional bridal makeup in Suryapur Banshi features bold, vibrant colors and meticulous application techniques to complement your traditional wedding attire, resulting in a timeless and elegant look. HD Bridal Makeup HD bridal makeup offers a high-definition finish that looks flawless in both photographs and in person. This style ensures you maintain a perfect appearance throughout your special day. Airbrush Bridal Makeup Airbrush makeup provides a lightweight, smooth finish with full coverage that lasts all day, ideal for brides who want a natural yet polished look. How to Book Your Bridal Makeup with Ladyfair in Suryapur Banshi Initial Contact: Call us at 7004721239 to discuss your bridal makeup needs and schedule an appointment. Consultation Session: Meet with our makeup artist to discuss your desired look, review your wedding attire, and plan the perfect makeup style. Makeup Trial: We offer trial sessions so you can preview your bridal makeup and make any necessary adjustments before the wedding day. Wedding Day Makeup: On your wedding day, our makeup artist will arrive at your location in Suryapur Banshi to provide a flawless and stress-free makeup service. Testimonials from Brides in Suryapur Banshi Ritika J., Suryapur Banshi: "Ladyfair exceeded my expectations. The makeup artist was so talented, and my bridal look was exactly what I had dreamed of." Megha K., Suryapur Banshi: "The airbrush makeup was perfect! It stayed fresh throughout my wedding day, and I received so many compliments." Anjali D., Suryapur Banshi: "The HD makeup looked stunning in all my photos. Ladyfair’s at-home service made the entire experience stress-free and enjoyable." Preparing for Your Bridal Makeup Session To achieve the best results, follow these tips: Stay Hydrated: Drink plenty of water to keep your skin fresh and glowing. Consistent Skincare: Maintain a regular skincare routine leading up to your wedding. Avoid New Products: Stick to familiar skincare products to avoid any adverse reactions. Communicate Clearly: Discuss your makeup preferences and concerns with our artist during your consultation. Additional Beauty Services by Ladyfair In addition to bridal makeup, Ladyfair offers: Engagement and Reception Makeup: Customized looks for all your pre-wedding events. Party Makeup: Perfect for special occasions and celebrations. Everyday Makeup: Enhance your daily look with our expert services. Special Occasion Makeup: Makeup for birthdays, anniversaries, and other significant events. The Future of Bridal Makeup in Suryapur Banshi Ladyfair is committed to setting new standards in bridal beauty with our innovative at-home services in Suryapur Banshi. As more brides experience our exceptional service, Ladyfair continues to grow as the preferred choice for bridal makeup. Q&A with Ladyfair’s Bridal Makeup Artist in Suryapur Banshi Q1: What makes Ladyfair the best choice for bridal makeup in Suryapur Banshi? A1: Ladyfair offers expert at-home bridal makeup services, combining skilled artistry with high-quality products for a flawless wedding look. Q2: What are the prices for bridal makeup services in Suryapur Banshi? A2: Our bridal makeup services start at ₹10,000 for basic makeup, ₹12,000 for HD makeup, and ₹18,000 for airbrush makeup. Q3: How do I book Ladyfair’s bridal makeup services in Suryapur Banshi? A3: You can book our services by calling 7004721239. We also offer consultations and trial sessions to help you achieve your desired look. Q4: What types of bridal makeup does Ladyfair offer in Suryapur Banshi? A4: We offer traditional, HD, and airbrush bridal makeup styles to suit your preferences. Q5: Are makeup trials available before the wedding day? A5: Yes, we provide trial sessions to finalize your bridal look and make any necessary adjustments. Q6: What kind of products does Ladyfair use for bridal makeup? A6: We use professional-grade, high-quality products that are safe for all skin types and ensure a flawless finish. Q7: What other makeup services does Ladyfair offer in Suryapur Banshi? A7: Besides bridal makeup, we offer engagement, reception, party, and special occasion makeup services.

Posted By: 31st August 2024
Bridal Makeup Artist in Turkaulia
Ladyfair: Premier Bridal Makeup Artist in Turkaulia Introduction When it comes to your wedding day, every detail counts, and your makeup is no exception. Ladyfair is the leading bridal makeup artist in Turkaulia, specializing in providing exceptional at-home bridal makeup services that ensure you look and feel stunning. Whether you’re aiming for a classic traditional look, a high-definition finish, or airbrush perfection, our expert makeup artist in Turkaulia will tailor the perfect look for your special day. Contact us today at 7004721239 to book your appointment. Why Ladyfair is the Top Choice for Bridal Makeup in Turkaulia Experienced Makeup Artist Our makeup artist in Turkaulia is highly experienced in bridal makeup, offering personalized services that enhance your natural beauty and complement your wedding theme. Convenient At-Home Service Ladyfair provides the luxury of at-home bridal makeup services in Turkaulia, eliminating the need for salon visits and allowing you to enjoy a professional makeup experience in the comfort of your home. Premium Quality Products We use only top-notch, professional-grade makeup products to ensure a flawless, long-lasting finish. With Ladyfair, you can be confident that your makeup will look impeccable throughout your wedding day. Bridal Makeup Pricing in Turkaulia with Ladyfair Ladyfair offers a range of bridal makeup options in Turkaulia to suit various preferences and budgets: Basic Bridal Makeup: ₹10,000 HD Bridal Makeup: ₹12,000 Airbrush Bridal Makeup: ₹18,000 For engagement and reception: Basic Engagement/Reception Makeup: ₹6,000 HD Engagement/Reception Makeup: ₹8,000 Airbrush Engagement/Reception Makeup: ₹12,000 For parties: Basic Party Makeup: ₹2,500 HD Party Makeup: ₹3,500 Popular Bridal Makeup Styles Offered by Ladyfair in Turkaulia Traditional Bridal Makeup Our traditional bridal makeup in Turkaulia features rich, vibrant colors and intricate application techniques that perfectly complement traditional wedding attire for an elegant and classic look. HD Bridal Makeup HD bridal makeup delivers a high-definition finish that looks flawless in photographs and real life. This style ensures a perfect appearance throughout your wedding day. Airbrush Bridal Makeup Airbrush makeup offers a lightweight, smooth finish with full coverage that lasts all day, making it ideal for brides who prefer a natural yet polished look. Booking Your Bridal Makeup with Ladyfair in Turkaulia To secure your bridal makeup service with Ladyfair, please note the following: Advance Payment: A 20% advance payment is required to confirm your booking. Adjustable Booking Amount: The booking amount is adjustable for one year. Non-Refundable: The advance payment is non-refundable but will be applied to the total service cost. How to Book Your Bridal Makeup Initial Contact: Call us at 7004721239 to discuss your bridal makeup needs and schedule your appointment. Consultation Session: Meet with our makeup artist to discuss your desired look, review your wedding attire, and plan the perfect makeup style. Makeup Trial: We offer trial sessions to preview your bridal makeup and make any necessary adjustments before your wedding day. Wedding Day Makeup: On your wedding day, our makeup artist will arrive at your location in Turkaulia to provide a flawless and stress-free makeup service. Testimonials from Brides in Turkaulia Priti S., Turkaulia: "Ladyfair’s at-home makeup service was exceptional. The artist was professional, and my bridal look was exactly as I envisioned." Aarti R., Turkaulia: "I chose airbrush makeup for my wedding, and it was perfect. It stayed fresh all day, and I received many compliments." Meena K., Turkaulia: "The HD makeup was fantastic and looked amazing in all my wedding photos. Ladyfair’s team made sure I felt beautiful and confident." Preparing for Your Bridal Makeup Session For the best results, keep these tips in mind before your session: Stay Hydrated: Drink plenty of water to keep your skin fresh and glowing. Consistent Skincare: Maintain a regular skincare routine leading up to your wedding day. Avoid New Products: Stick to familiar skincare products to avoid any reactions. Communicate Clearly: Discuss your makeup preferences and concerns with our artist during your consultation. Additional Beauty Services by Ladyfair in Turkaulia Ladyfair also offers: Engagement and Reception Makeup: Customized looks for all your pre-wedding events. Party Makeup: Ideal for special occasions and celebrations. Everyday Makeup: Enhance your daily look with our expert services. Special Occasion Makeup: Makeup for birthdays, anniversaries, and other significant events. The Future of Bridal Makeup in Turkaulia Ladyfair is committed to setting new standards in bridal beauty in Turkaulia. As more brides experience our exceptional at-home services, we continue to be the preferred choice for bridal makeup. Q&A with Ladyfair’s Bridal Makeup Artist in Turkaulia Why should I choose Ladyfair as my bridal makeup artist in Turkaulia? Ladyfair offers expert at-home bridal makeup services, ensuring you look stunning on your wedding day. What are the prices for bridal makeup services in Turkaulia? Our bridal makeup services start at ₹10,000 for basic makeup, ₹12,000 for HD makeup, and ₹18,000 for airbrush makeup. How do I book Ladyfair’s bridal makeup services in Turkaulia? You can book our services by calling 7004721239. We also offer consultations and trial sessions to help you achieve your desired look. What types of bridal makeup does Ladyfair offer in Turkaulia? We offer traditional, HD, and airbrush bridal makeup styles to suit your preferences. Are makeup trials available before the wedding day? Yes, we provide trial sessions to finalize your bridal look and make any necessary adjustments. What kind of products does Ladyfair use for bridal makeup? We use professional-grade, high-quality products that are safe for all skin types and ensure a flawless finish. What other makeup services does Ladyfair offer in Turkaulia? Besides bridal makeup, we offer engagement, reception, party, and special occasion makeup services.

Posted By: 31st August 2024
Bridal Makeup Artist in Sugauli
Ladyfair: Premier Bridal Makeup Artist in Sugauli Introduction Your wedding day is a celebration of love and beauty, and Ladyfair is dedicated to ensuring you look flawless. As the top bridal makeup artist in Sugauli, we specialize in providing exceptional at-home bridal makeup services tailored to your individual style and preferences. Whether you’re aiming for a classic traditional look, a high-definition finish, or airbrush perfection, our expert makeup artist in Sugauli will help you shine on your special day. Contact us today at 7004721239 to book your appointment. Why Ladyfair is the Best Choice for Bridal Makeup in Sugauli Experienced Makeup Artist Our makeup artist in Sugauli has years of experience in bridal makeup, creating personalized looks that enhance your natural beauty and align with your wedding theme. Convenient At-Home Service Ladyfair offers the convenience of at-home bridal makeup services in Sugauli. Enjoy a luxurious and professional makeup experience without the need to travel to a salon. High-Quality Products We use only premium, professional-grade makeup products to ensure a flawless, long-lasting finish. With Ladyfair, you can trust that your makeup will look perfect throughout your wedding day. Bridal Makeup Pricing in Sugauli with Ladyfair Ladyfair offers a variety of bridal makeup options in Sugauli to fit different styles and budgets: Basic Bridal Makeup: ₹10,000 HD Bridal Makeup: ₹12,000 Airbrush Bridal Makeup: ₹18,000 For engagement and reception: Basic Engagement/Reception Makeup: ₹6,000 HD Engagement/Reception Makeup: ₹8,000 Airbrush Engagement/Reception Makeup: ₹12,000 For parties: Basic Party Makeup: ₹2,500 HD Party Makeup: ₹3,500 Popular Bridal Makeup Styles Offered by Ladyfair in Sugauli Traditional Bridal Makeup Our traditional bridal makeup in Sugauli features vibrant colors and detailed application, perfectly complementing traditional wedding attire for an elegant and classic look. HD Bridal Makeup HD bridal makeup provides a high-definition finish that looks flawless in both photographs and real life. This style ensures a perfect appearance throughout your wedding day. Airbrush Bridal Makeup Airbrush makeup offers a lightweight, smooth finish with full coverage that lasts all day, ideal for brides who prefer a natural yet polished look. Booking Your Bridal Makeup with Ladyfair in Sugauli To book your bridal makeup service with Ladyfair, please note the following: Advance Payment: A 20% advance payment is required to secure your booking. Adjustable Booking Amount: The booking amount is adjustable for one year. Non-Refundable: The advance payment is non-refundable but will be adjusted against the total service cost. How to Book Your Bridal Makeup Initial Contact: Call us at 7004721239 to discuss your bridal makeup needs and schedule your appointment. Consultation Session: Meet with our makeup artist to discuss your desired look, review your wedding attire, and plan the perfect makeup style. Makeup Trial: We offer trial sessions so you can preview your bridal makeup and make any necessary adjustments before your wedding day. Wedding Day Makeup: On your wedding day, our makeup artist will arrive at your location in Sugauli to provide a flawless and stress-free makeup service. Testimonials from Brides in Sugauli Meena K., Sugauli: "Ladyfair’s at-home makeup service was outstanding. The artist was professional, and my bridal look was exactly what I hoped for." Sunita R., Sugauli: "I chose airbrush makeup for my wedding, and it was perfect. It stayed fresh all day, and I received many compliments." Rani M., Sugauli: "The HD makeup was amazing and looked great in all my wedding photos. Ladyfair’s team made sure I felt beautiful and confident." Preparing for Your Bridal Makeup Session To achieve the best results, follow these tips: Stay Hydrated: Drink plenty of water to keep your skin fresh and glowing. Consistent Skincare: Maintain a regular skincare routine leading up to your wedding day. Avoid New Products: Stick to familiar skincare products to avoid any reactions. Communicate Clearly: Discuss your makeup preferences and any concerns with our artist during your consultation. Additional Beauty Services by Ladyfair in Sugauli Ladyfair also offers: Engagement and Reception Makeup: Customized looks for all your pre-wedding events. Party Makeup: Perfect for special occasions and celebrations. Everyday Makeup: Enhance your daily look with our expert services. Special Occasion Makeup: Makeup for birthdays, anniversaries, and other significant events. The Future of Bridal Makeup in Sugauli Ladyfair is committed to elevating bridal beauty standards in Sugauli. As more brides experience our exceptional at-home services, we continue to grow as the preferred choice for bridal makeup. Q&A with Ladyfair’s Bridal Makeup Artist in Sugauli Why should I choose Ladyfair as my bridal makeup artist in Sugauli? Ladyfair offers expert at-home bridal makeup services, ensuring you look stunning on your wedding day. What are the prices for bridal makeup services in Sugauli? Our bridal makeup services start at ₹10,000 for basic makeup, ₹12,000 for HD makeup, and ₹18,000 for airbrush makeup. How do I book Ladyfair’s bridal makeup services in Sugauli? You can book our services by calling 7004721239. We also offer consultations and trial sessions to help you achieve your desired look. What types of bridal makeup does Ladyfair offer in Sugauli? We offer traditional, HD, and airbrush bridal makeup styles to suit your preferences. Are makeup trials available before the wedding day? Yes, we provide trial sessions to finalize your bridal look and make any necessary adjustments. What kind of products does Ladyfair use for bridal makeup? We use professional-grade, high-quality products that are safe for all skin types and ensure a flawless finish. What other makeup services does Ladyfair offer in Sugauli? Besides bridal makeup, we offer engagement, reception, party, and special occasion makeup services.

Posted By: 31st August 2024
Bridal Makeup Artist in Kurtha
Bridal Makeup Artist in Kurtha: Ladyfair’s At-Home Professional Services Introduction In Kurtha, Ladyfair is the go-to choice for brides who want exceptional makeup services for their wedding day. Our at-home bridal makeup service brings top-tier beauty treatments directly to your doorstep, ensuring that you receive expert care in the comfort of your own home. Whether you're seeking a traditional bridal look, a flawless HD finish, or the perfection of airbrush makeup, our skilled makeup artist in Kurtha is here to make you shine. Contact us at 7004721239 to book your appointment today. Why Ladyfair is the Top Choice for Bridal Makeup in Kurtha? Experienced Makeup Artist Our makeup artist in Kurtha is a highly experienced professional with years of expertise in bridal makeup. She specializes in crafting personalized looks that enhance your natural beauty while reflecting your unique style. Convenient At-Home Service Ladyfair offers the ultimate convenience by providing at-home bridal makeup services in Kurtha. You can enjoy a luxurious, personalized beauty experience without the need to travel to a salon. Premium Quality Products We use only the finest professional-grade makeup products to ensure a flawless, long-lasting look that’s perfect for your wedding day. Bridal Makeup Pricing in Kurtha Our pricing for bridal makeup services in Kurtha is designed to accommodate various preferences and budgets: Basic Bridal Makeup: ₹10,000 HD Bridal Makeup: ₹12,000 Airbrush Bridal Makeup: ₹18,000 For engagement and reception: Basic Engagement/Reception Makeup: ₹6,000 HD Engagement/Reception Makeup: ₹8,000 Airbrush Engagement/Reception Makeup: ₹12,000 For parties: Basic Party Makeup: ₹2,500 HD Party Makeup: ₹3,500 Popular Bridal Makeup Styles in Kurtha Traditional Bridal Makeup Our traditional bridal makeup in Kurtha features bold, vibrant colors and meticulous application techniques to complement your traditional wedding attire, resulting in a timeless and elegant look. HD Bridal Makeup HD bridal makeup offers a high-definition finish that looks flawless in both photographs and in person. This style ensures you maintain a perfect appearance throughout your special day. Airbrush Bridal Makeup Airbrush makeup provides a lightweight, smooth finish with full coverage that lasts all day, ideal for brides who want a natural yet polished look. How to Book Your Bridal Makeup with Ladyfair in Kurtha Initial Contact: Call us at 7004721239 to discuss your bridal makeup needs and schedule an appointment. Consultation Session: Meet with our makeup artist to discuss your desired look, review your wedding attire, and plan the perfect makeup style. Makeup Trial: We offer trial sessions so you can preview your bridal makeup and make any necessary adjustments before the wedding day. Wedding Day Makeup: On your wedding day, our makeup artist will arrive at your location in Kurtha to provide a flawless and stress-free makeup service. Testimonials from Brides in Kurtha Sneha P., Kurtha: "Ladyfair made my wedding day even more special with their exceptional service. The makeup artist was so talented, and my bridal look was exactly what I had imagined." Ankita R., Kurtha: "I chose airbrush makeup for my wedding, and it was perfect! It stayed fresh all day, and I received so many compliments." Pallavi S., Kurtha: "The HD makeup looked stunning in all my photos, and Ladyfair’s at-home service made the whole experience stress-free and enjoyable." Preparing for Your Bridal Makeup Session To achieve the best results, follow these tips: Stay Hydrated: Drink plenty of water to keep your skin fresh and glowing. Consistent Skincare: Maintain a regular skincare routine leading up to your wedding. Avoid New Products: Stick to familiar skincare products to avoid any adverse reactions. Communicate Clearly: Discuss your makeup preferences and concerns with our artist during your consultation. Additional Beauty Services by Ladyfair In addition to bridal makeup, Ladyfair offers: Engagement and Reception Makeup: Customized looks for all your pre-wedding events. Party Makeup: Perfect for special occasions and celebrations. Everyday Makeup: Enhance your daily look with our expert services. Special Occasion Makeup: Makeup for birthdays, anniversaries, and other significant events. The Future of Bridal Makeup in Kurtha Ladyfair is committed to setting new standards in bridal beauty with our innovative at-home services in Kurtha. As more brides experience our exceptional service, Ladyfair continues to grow as the preferred choice for bridal makeup. Q&A with Ladyfair’s Bridal Makeup Artist in Kurtha Q1: What makes Ladyfair the best choice for bridal makeup in Kurtha? A1: Ladyfair offers expert at-home bridal makeup services, combining skilled artistry with high-quality products for a flawless wedding look. Q2: What are the prices for bridal makeup services in Kurtha? A2: Our bridal makeup services start at ₹10,000 for basic makeup, ₹12,000 for HD makeup, and ₹18,000 for airbrush makeup. Q3: How do I book Ladyfair’s bridal makeup services in Kurtha? A3: You can book our services by calling 7004721239. We also offer consultations and trial sessions to help you achieve your desired look. Q4: What types of bridal makeup does Ladyfair offer in Kurtha? A4: We offer traditional, HD, and airbrush bridal makeup styles to suit your preferences. Q5: Are makeup trials available before the wedding day? A5: Yes, we provide trial sessions to finalize your bridal look and make any necessary adjustments. Q6: What kind of products does Ladyfair use for bridal makeup? A6: We use professional-grade, high-quality products that are safe for all skin types and ensure a flawless finish. Q7: What other makeup services does Ladyfair offer in Kurtha? A7: Besides bridal makeup, we offer engagement, reception, party, and special occasion makeup services.

Posted By: 31st August 2024
Bridal Makeup Artist in Karpi
Introduction In Karpi, Ladyfair is the premier choice for brides who want exceptional makeup services for their wedding day. Our at-home bridal makeup service brings top-tier beauty treatments directly to your door. Whether you're seeking a classic traditional look, a flawless HD finish, or airbrush perfection, our skilled makeup artist in Karpi will ensure you look your absolute best. Contact us at 7004721239 to book your appointment today. Why Ladyfair is the Top Choice for Bridal Makeup in Karpi Experienced Makeup Artist Our makeup artist in Karpi is highly experienced, with years of expertise in bridal makeup. She excels in crafting personalized looks that enhance your natural beauty and match your individual style. Convenient At-Home Service Ladyfair offers the luxury of at-home bridal makeup services in Karpi, eliminating the need to visit a salon. Experience a personalized, stress-free beauty service in the comfort of your own home. Premium Quality Products We use only high-quality, professional-grade makeup products, ensuring a long-lasting and flawless look that is perfect for your wedding day. Bridal Makeup Pricing in Karpi Our pricing for bridal makeup services in Karpi caters to various preferences and budgets: Basic Bridal Makeup: ₹10,000 HD Bridal Makeup: ₹12,000 Airbrush Bridal Makeup: ₹18,000 For engagement and reception: Basic Engagement/Reception Makeup: ₹6,000 HD Engagement/Reception Makeup: ₹8,000 Airbrush Engagement/Reception Makeup: ₹12,000 For parties: Basic Party Makeup: ₹2,500 HD Party Makeup: ₹3,500 Popular Bridal Makeup Styles in Karpi Traditional Bridal Makeup Our traditional bridal makeup in Karpi features bold, vibrant colors and precise application, creating a timeless look that beautifully complements traditional wedding attire. HD Bridal Makeup HD bridal makeup offers a high-definition finish, ensuring you look flawless in photographs and in person throughout your wedding day. Airbrush Bridal Makeup Airbrush makeup provides a lightweight, smooth finish with full coverage that lasts all day, perfect for brides who want a natural yet polished look. How to Book Your Bridal Makeup with Ladyfair in Karpi Initial Contact: Call us at 7004721239 to discuss your bridal makeup needs and schedule an appointment. Consultation Session: Meet with our makeup artist to discuss your desired look, review your wedding attire, and plan the perfect makeup style. Makeup Trial: We offer trial sessions so you can preview your bridal makeup and make any necessary adjustments before the wedding day. Wedding Day Makeup: On your wedding day, our makeup artist will arrive at your location in Karpi to deliver a flawless and stress-free makeup service. Testimonials from Brides in Karpi Ritu S., Karpi: "Ladyfair provided an amazing service on my wedding day. The makeup artist was skilled and made sure I looked exactly how I wanted." Pooja K., Karpi: "The airbrush makeup was perfect for my wedding. It stayed fresh all day, and I got so many compliments." Neha M., Karpi: "The HD makeup was stunning and looked amazing in all my wedding photos. Ladyfair’s at-home service made the whole experience so much easier." Preparing for Your Bridal Makeup Session To ensure the best results, follow these tips: Stay Hydrated: Drink plenty of water to keep your skin fresh and glowing. Consistent Skincare: Maintain a regular skincare routine leading up to your wedding. Avoid New Products: Stick to familiar skincare products to avoid any adverse reactions. Communicate Clearly: Discuss your makeup preferences and concerns with our artist during your consultation. Additional Beauty Services by Ladyfair In addition to bridal makeup, Ladyfair offers: Engagement and Reception Makeup: Tailored looks for all your pre-wedding events. Party Makeup: Perfect for special occasions and celebrations. Everyday Makeup: Enhance your daily look with our expert services. Special Occasion Makeup: Makeup for birthdays, anniversaries, and other significant events. The Future of Bridal Makeup in Karpi Ladyfair is dedicated to setting new standards in bridal beauty with our innovative at-home services in Karpi. As more brides experience our exceptional service, Ladyfair continues to grow as the preferred choice for bridal makeup. Q&A with Ladyfair’s Bridal Makeup Artist in Karpi Q1: What makes Ladyfair the best choice for bridal makeup in Karpi? A1: Ladyfair offers expert at-home bridal makeup services, combining skilled artistry with high-quality products for a flawless wedding look. Q2: What are the prices for bridal makeup services in Karpi? A2: Our bridal makeup services start at ₹10,000 for basic makeup, ₹12,000 for HD makeup, and ₹18,000 for airbrush makeup. Q3: How do I book Ladyfair’s bridal makeup services in Karpi? A3: You can book our services by calling 7004721239. We also offer consultations and trial sessions to help you achieve your desired look. Q4: What types of bridal makeup does Ladyfair offer in Karpi? A4: We offer traditional, HD, and airbrush bridal makeup styles to suit your preferences. Q5: Are makeup trials available before the wedding day? A5: Yes, we provide trial sessions to finalize your bridal look and make any necessary adjustments. Q6: What kind of products does Ladyfair use for bridal makeup? A6: We use professional-grade, high-quality products that are safe for all skin types and ensure a flawless finish. Q7: What other makeup services does Ladyfair offer in Karpi? A7: Besides bridal makeup, we offer engagement, reception, party, and special occasion makeup services.

Posted By: 31st August 2024
Bridal Makeup Artist in Kotowa
Ladyfair: Premier Bridal Makeup Artist in Kotowa Introduction Your wedding day deserves a touch of elegance and perfection, and Ladyfair is dedicated to providing just that. As the top bridal makeup artist in Kotowa, we specialize in offering exceptional at-home bridal makeup services that cater to your unique style and preferences. Whether you're looking for a traditional look, high-definition finish, or airbrush perfection, our expert makeup artist in Kotowa is here to ensure you look stunning on your special day. Contact us today at 7004721239 to book your appointment. Why Ladyfair is the Best Choice for Bridal Makeup in Kotowa Experienced Makeup Artist Our makeup artist in Kotowa boasts years of experience in bridal makeup, creating personalized looks that enhance your natural beauty and align with your wedding theme. Convenient At-Home Service Ladyfair provides the convenience of at-home bridal makeup services in Kotowa. Enjoy a luxurious and professional makeup experience without the hassle of traveling to a salon. High-Quality Products We use only premium, professional-grade makeup products to ensure a flawless, long-lasting finish. With Ladyfair, you can trust that your makeup will look impeccable throughout your wedding day. Bridal Makeup Pricing in Kotowa with Ladyfair Ladyfair offers a variety of bridal makeup options in Kotowa to fit different styles and budgets: Basic Bridal Makeup: ₹10,000 HD Bridal Makeup: ₹12,000 Airbrush Bridal Makeup: ₹18,000 For engagement and reception: Basic Engagement/Reception Makeup: ₹6,000 HD Engagement/Reception Makeup: ₹8,000 Airbrush Engagement/Reception Makeup: ₹12,000 For parties: Basic Party Makeup: ₹2,500 HD Party Makeup: ₹3,500 Popular Bridal Makeup Styles Offered by Ladyfair in Kotowa Traditional Bridal Makeup Our traditional bridal makeup in Kotowa features vibrant colors and detailed application, perfectly complementing traditional wedding attire for an elegant and timeless look. HD Bridal Makeup HD bridal makeup provides a high-definition finish that looks flawless in both photographs and real life. This style ensures a perfect appearance throughout your wedding day. Airbrush Bridal Makeup Airbrush makeup offers a lightweight, smooth finish with full coverage that lasts all day, making it ideal for brides who prefer a natural yet polished look. Booking Your Bridal Makeup with Ladyfair in Kotowa To book your bridal makeup service with Ladyfair, please note the following: Advance Payment: A 20% advance payment is required to secure your booking. Adjustable Booking Amount: The booking amount is adjustable for one year. Non-Refundable: The advance payment is non-refundable but will be adjusted against the total service cost. How to Book Your Bridal Makeup Initial Contact: Call us at 7004721239 to discuss your bridal makeup needs and schedule your appointment. Consultation Session: Meet with our makeup artist to discuss your desired look, review your wedding attire, and plan the perfect makeup style. Makeup Trial: We offer trial sessions so you can preview your bridal makeup and make any necessary adjustments before your wedding day. Wedding Day Makeup: On your wedding day, our makeup artist will arrive at your location in Kotowa to provide a flawless and stress-free makeup service. Testimonials from Brides in Kotowa Poonam S., Kotowa: "Ladyfair’s at-home makeup service was exceptional. The artist was professional, and my bridal look was exactly what I envisioned." Nisha R., Kotowa: "I opted for airbrush makeup for my wedding, and it was perfect. It stayed fresh all day, and I received numerous compliments." Rani K., Kotowa: "The HD makeup was fantastic and looked great in all my wedding photos. Ladyfair’s team ensured I felt beautiful and confident." Preparing for Your Bridal Makeup Session To achieve the best results, keep these tips in mind before your session: Stay Hydrated: Drink plenty of water to keep your skin fresh and glowing. Consistent Skincare: Maintain a regular skincare routine leading up to your wedding day. Avoid New Products: Stick to familiar skincare products to avoid any reactions. Communicate Clearly: Discuss your makeup preferences and any concerns with our artist during your consultation. Additional Beauty Services by Ladyfair in Kotowa Ladyfair also offers: Engagement and Reception Makeup: Customized looks for all your pre-wedding events. Party Makeup: Ideal for special occasions and celebrations. Everyday Makeup: Enhance your daily look with our expert services. Special Occasion Makeup: Makeup for birthdays, anniversaries, and other significant events. The Future of Bridal Makeup in Kotowa Ladyfair is committed to raising the bar in bridal beauty in Kotowa. As more brides experience our outstanding at-home services, we continue to be the preferred choice for bridal makeup. Q&A with Ladyfair’s Bridal Makeup Artist in Kotowa Why should I choose Ladyfair as my bridal makeup artist in Kotowa? Ladyfair offers expert at-home bridal makeup services, ensuring you look stunning on your wedding day. What are the prices for bridal makeup services in Kotowa? Our bridal makeup services start at ₹10,000 for basic makeup, ₹12,000 for HD makeup, and ₹18,000 for airbrush makeup. How do I book Ladyfair’s bridal makeup services in Kotowa? You can book our services by calling 7004721239. We also offer consultations and trial sessions to help you achieve your desired look. What types of bridal makeup does Ladyfair offer in Kotowa? We offer traditional, HD, and airbrush bridal makeup styles to suit your preferences. Are makeup trials available before the wedding day? Yes, we provide trial sessions to finalize your bridal look and make any necessary adjustments. What kind of products does Ladyfair use for bridal makeup? We use professional-grade, high-quality products that are safe for all skin types and ensure a flawless finish. What other makeup services does Ladyfair offer in Kotowa? Besides bridal makeup, we offer engagement, reception, party, and special occasion makeup services.
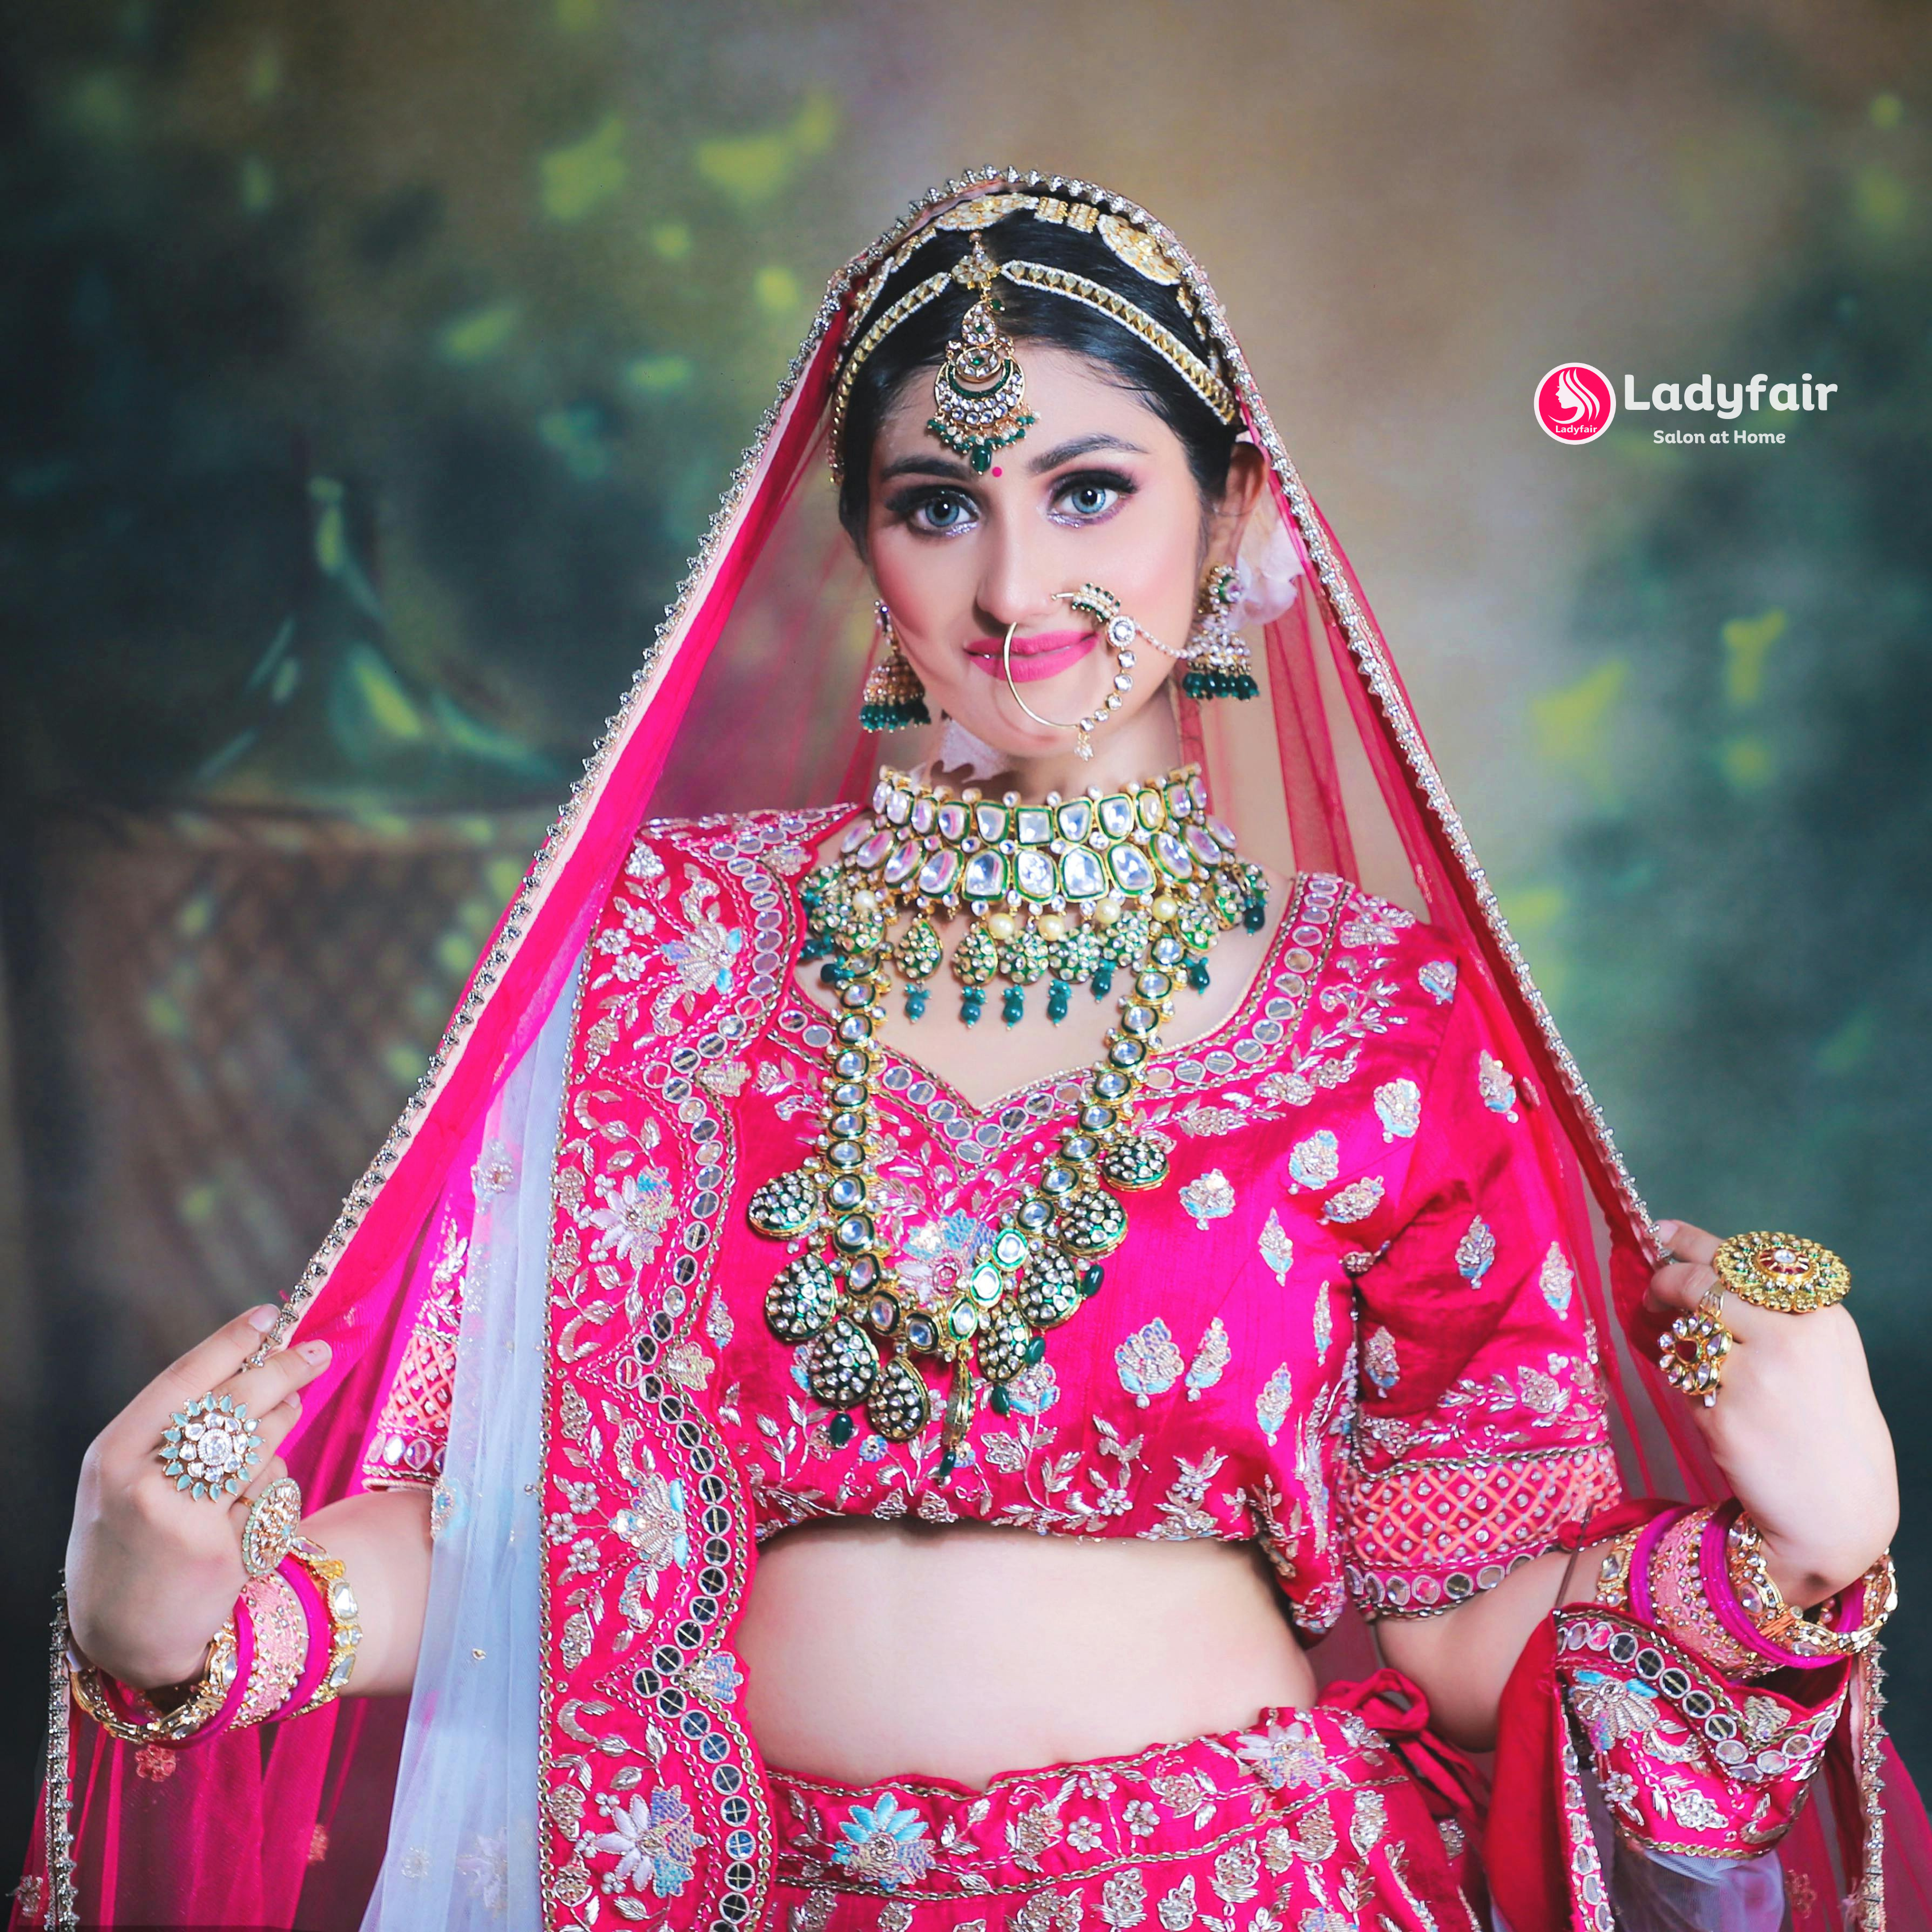
Posted By: 31st August 2024
Bridal Makeup Artist in Kaler
Introduction For brides in Kaler who are seeking top-notch makeup artistry, Ladyfair stands out as the ultimate choice. Our at-home bridal makeup service ensures that you receive expert beauty treatments right in the comfort of your home. Whether you desire a traditional look, a flawless HD finish, or airbrush perfection, our skilled makeup artist in Kaler will ensure you look stunning on your special day. Contact us today at 7004721239 to schedule your appointment. Why Ladyfair is the Top Choice for Bridal Makeup in Kaler? Experienced Makeup Artist Our makeup artist in Kaler has years of experience and specializes in creating personalized bridal looks that highlight your natural beauty while complementing your style. Convenient At-Home Service Ladyfair offers the convenience of at-home bridal makeup services in Kaler, providing a luxurious, personalized experience without the need to visit a salon. Enjoy professional-grade makeup services right at your doorstep. Premium Quality Products We use only the best, professional-grade makeup products to ensure a flawless, long-lasting look that is perfect for your wedding day. Bridal Makeup Pricing in Kaler Our bridal makeup services in Kaler are priced to accommodate various budgets and preferences: Basic Bridal Makeup: ₹10,000 HD Bridal Makeup: ₹12,000 Airbrush Bridal Makeup: ₹18,000 For engagement and reception: Basic Engagement/Reception Makeup: ₹6,000 HD Engagement/Reception Makeup: ₹8,000 Airbrush Engagement/Reception Makeup: ₹12,000 For parties: Basic Party Makeup: ₹2,500 HD Party Makeup: ₹3,500 Popular Bridal Makeup Styles in Kaler Traditional Bridal Makeup Our traditional bridal makeup in Kaler features bold, vibrant colors, and meticulous application, creating a timeless look that perfectly complements traditional wedding attire. HD Bridal Makeup HD bridal makeup offers a high-definition finish, ensuring that you look flawless both in photographs and in real life throughout your wedding day. Airbrush Bridal Makeup Airbrush makeup provides a lightweight, smooth finish with full coverage that lasts all day, ideal for brides who prefer a natural yet polished look. How to Book Your Bridal Makeup with Ladyfair in Kaler Initial Contact: Call us at 7004721239 to discuss your bridal makeup needs and schedule an appointment. Consultation Session: Meet with our makeup artist to discuss your desired look, review your wedding attire, and plan the perfect makeup style. Makeup Trial: We offer trial sessions so you can preview your bridal makeup and make any necessary adjustments before the wedding day. Wedding Day Makeup: On your wedding day, our makeup artist will arrive at your location in Kaler to deliver a flawless and stress-free makeup service. Testimonials from Brides in Kaler Anjali S., Kaler: "Ladyfair’s at-home makeup service was exactly what I needed. The makeup artist was skilled, and I felt beautiful on my wedding day." Nisha K., Kaler: "I chose the airbrush makeup for my wedding, and it was perfect. The makeup stayed fresh all day, and I received many compliments." Sonia P., Kaler: "The HD makeup was incredible and looked great in all my wedding photos. Ladyfair’s service was professional and made my day stress-free." Preparing for Your Bridal Makeup Session To achieve the best results, follow these tips: Stay Hydrated: Drink plenty of water to keep your skin fresh and glowing. Consistent Skincare: Maintain a regular skincare routine leading up to your wedding. Avoid New Products: Stick to familiar skincare products to avoid any adverse reactions. Communicate Clearly: Discuss your makeup preferences and concerns with our artist during your consultation. Additional Beauty Services by Ladyfair In addition to bridal makeup, Ladyfair offers: Engagement and Reception Makeup: Customized looks for all your pre-wedding events. Party Makeup: Ideal for special occasions and celebrations. Everyday Makeup: Enhance your daily look with our expert services. Special Occasion Makeup: Makeup for birthdays, anniversaries, and other significant events. The Future of Bridal Makeup in Kaler Ladyfair is committed to setting new standards in bridal beauty with our innovative at-home services in Kaler. As more brides experience our exceptional service, Ladyfair continues to grow as the preferred choice for bridal makeup. Q&A with Ladyfair’s Bridal Makeup Artist in Kaler Q1: What makes Ladyfair the best choice for bridal makeup in Kaler? A1: Ladyfair offers expert at-home bridal makeup services, combining skilled artistry with high-quality products for a flawless wedding look. Q2: What are the prices for bridal makeup services in Kaler? A2: Our bridal makeup services start at ₹10,000 for basic makeup, ₹12,000 for HD makeup, and ₹18,000 for airbrush makeup. Q3: How do I book Ladyfair’s bridal makeup services in Kaler? A3: You can book our services by calling 7004721239. We also offer consultations and trial sessions to help you achieve your desired look. Q4: What types of bridal makeup does Ladyfair offer in Kaler? A4: We offer traditional, HD, and airbrush bridal makeup styles to suit your preferences. Q5: Are makeup trials available before the wedding day? A5: Yes, we provide trial sessions to finalize your bridal look and make any necessary adjustments. Q6: What kind of products does Ladyfair use for bridal makeup? A6: We use professional-grade, high-quality products that are safe for all skin types and ensure a flawless finish. Q7: What other makeup services does Ladyfair offer in Kaler? A7: Besides bridal makeup, we offer engagement, reception, party, and special occasion makeup services.

Posted By: 31st August 2024
Bridal Makeup Artist in Piprakothi
Ladyfair: The Top Bridal Makeup Artist in Piprakothi Introduction Your wedding day is a celebration of love and beauty, and Ladyfair is here to ensure you look absolutely stunning. As the premier bridal makeup artist in Piprakothi, we offer exceptional at-home bridal makeup services tailored to your individual style and preferences. Whether you're aiming for a traditional look, a high-definition finish, or a flawless airbrush application, our expert makeup artist in Piprakothi will make you shine on your special day. Contact us today at 7004721239 to book your appointment. Why Ladyfair is the Best Choice for Bridal Makeup in Piprakothi Experienced Makeup Artist Our makeup artist in Piprakothi is highly skilled with years of experience in bridal makeup. She specializes in creating personalized looks that enhance your natural beauty and align with your wedding theme. Convenient At-Home Service Ladyfair offers the convenience of at-home bridal makeup services in Piprakothi. Enjoy a luxurious and stress-free makeup experience right at your doorstep, allowing you to relax and focus on your special day. High-Quality Products We use only premium, professional-grade makeup products to ensure a flawless, long-lasting finish. With Ladyfair, you can trust that your makeup will look perfect throughout your wedding day. Bridal Makeup Pricing in Piprakothi with Ladyfair Ladyfair provides a range of bridal makeup options in Piprakothi to suit different preferences and budgets: Basic Bridal Makeup: ₹10,000 HD Bridal Makeup: ₹12,000 Airbrush Bridal Makeup: ₹18,000 For engagement and reception: Basic Engagement/Reception Makeup: ₹6,000 HD Engagement/Reception Makeup: ₹8,000 Airbrush Engagement/Reception Makeup: ₹12,000 For parties: Basic Party Makeup: ₹2,500 HD Party Makeup: ₹3,500 Popular Bridal Makeup Styles Offered by Ladyfair in Piprakothi Traditional Bridal Makeup Our traditional bridal makeup in Piprakothi features rich colors and detailed application, perfectly complementing traditional wedding attire for an elegant and classic appearance. HD Bridal Makeup HD bridal makeup provides a high-definition finish that looks flawless in both photos and real life. This style ensures a perfect look throughout your wedding day. Airbrush Bridal Makeup Airbrush makeup offers a lightweight, smooth finish with full coverage that lasts all day, making it ideal for brides who prefer a natural yet polished look. Booking Your Bridal Makeup with Ladyfair in Piprakothi To book your bridal makeup service with Ladyfair, please keep in mind the following: Advance Payment: A 20% advance payment is required to secure your booking. Adjustable Booking Amount: The booking amount is adjustable for one year. Non-Refundable: The advance payment is non-refundable but will be adjusted against the total service cost. How to Book Your Bridal Makeup Initial Contact: Call us at 7004721239 to discuss your bridal makeup needs and schedule your appointment. Consultation Session: Meet with our makeup artist to discuss your desired look, review your wedding attire, and plan the perfect makeup style. Makeup Trial: We offer trial sessions so you can preview your bridal makeup and make any necessary adjustments before your wedding day. Wedding Day Makeup: On your wedding day, our makeup artist will arrive at your location in Piprakothi to provide a flawless and stress-free makeup service. Testimonials from Brides in Piprakothi Sita M., Piprakothi: "Ladyfair’s at-home makeup service was exceptional. The artist was professional, and my bridal look was perfect." Aarti R., Piprakothi: "I chose airbrush makeup for my wedding, and it was flawless. It stayed fresh throughout the day, and I received many compliments." Rina K., Piprakothi: "The HD makeup was fantastic and looked great in all my wedding photos. Ladyfair’s team made sure I felt beautiful and confident." Preparing for Your Bridal Makeup Session For the best results, follow these tips before your session: Stay Hydrated: Drink plenty of water to keep your skin fresh and glowing. Consistent Skincare: Maintain a regular skincare routine leading up to your wedding day. Avoid New Products: Stick to familiar skincare products to avoid any reactions. Communicate Clearly: Discuss your makeup preferences and any concerns with our artist during your consultation. Additional Beauty Services by Ladyfair in Piprakothi Ladyfair also offers: Engagement and Reception Makeup: Customized looks for all your pre-wedding events. Party Makeup: Ideal for special occasions and celebrations. Everyday Makeup: Enhance your daily look with our expert services. Special Occasion Makeup: Makeup for birthdays, anniversaries, and other significant events. The Future of Bridal Makeup in Piprakothi Ladyfair is committed to setting new standards in bridal beauty in Piprakothi. As more brides experience our exceptional at-home services, we continue to grow as the preferred choice for bridal makeup. Q&A with Ladyfair’s Bridal Makeup Artist in Piprakothi Why should I choose Ladyfair as my bridal makeup artist in Piprakothi? Ladyfair offers expert at-home bridal makeup services, ensuring you look stunning on your wedding day. What are the prices for bridal makeup services in Piprakothi? Our bridal makeup services start at ₹10,000 for basic makeup, ₹12,000 for HD makeup, and ₹18,000 for airbrush makeup. How do I book Ladyfair’s bridal makeup services in Piprakothi? You can book our services by calling 7004721239. We also offer consultations and trial sessions to help you achieve your desired look. What types of bridal makeup does Ladyfair offer in Piprakothi? We offer traditional, HD, and airbrush bridal makeup styles to suit your preferences. Are makeup trials available before the wedding day? Yes, we provide trial sessions to finalize your bridal look and make any necessary adjustments. What kind of products does Ladyfair use for bridal makeup? We use professional-grade, high-quality products that are safe for all skin types and ensure a flawless finish. What other makeup services does Ladyfair offer in Piprakothi? Besides bridal makeup, we offer engagement, reception, party, and special occasion makeup services.

Posted By: 31st August 2024
Bridal Makeup Artist in Motihari
Ladyfair: The Leading Bridal Makeup Artist in Motihari Introduction Your wedding day is a momentous occasion, and Ladyfair is here to ensure you look and feel your best. As the premier bridal makeup artist in Motihari, we offer top-notch at-home bridal makeup services tailored to your unique style and preferences. Whether you desire a traditional look, high-definition finish, or a flawless airbrush application, our expert makeup artist in Motihari is dedicated to making you look stunning. Contact us today at 7004721239 to book your appointment. Why Ladyfair is the Best Choice for Bridal Makeup in Motihari Experienced Makeup Artist Our makeup artist in Motihari is highly skilled with years of experience in bridal makeup. She excels in creating personalized looks that highlight your natural beauty and match your wedding style. Convenient At-Home Service Ladyfair provides the convenience of at-home bridal makeup services in Motihari. Enjoy a luxurious and professional makeup experience right at your doorstep, allowing you to relax and focus on your special day. High-Quality Products We use only premium, professional-grade makeup products to ensure a flawless, long-lasting finish. With Ladyfair, you can be confident that your makeup will look perfect throughout your wedding day. Bridal Makeup Pricing in Motihari with Ladyfair Ladyfair offers a range of bridal makeup options in Motihari to suit various tastes and budgets: Basic Bridal Makeup: ₹10,000 HD Bridal Makeup: ₹12,000 Airbrush Bridal Makeup: ₹18,000 For engagement and reception: Basic Engagement/Reception Makeup: ₹6,000 HD Engagement/Reception Makeup: ₹8,000 Airbrush Engagement/Reception Makeup: ₹12,000 For parties: Basic Party Makeup: ₹2,500 HD Party Makeup: ₹3,500 Popular Bridal Makeup Styles Offered by Ladyfair in Motihari Traditional Bridal Makeup Our traditional bridal makeup in Motihari features vibrant colors and intricate application, perfectly complementing traditional wedding attire for an elegant and classic look. HD Bridal Makeup HD bridal makeup offers a high-definition finish that looks flawless in both photographs and real life. This style ensures a perfect appearance throughout your special day. Airbrush Bridal Makeup Airbrush makeup provides a lightweight, smooth finish with full coverage that lasts all day, ideal for brides seeking a natural yet polished look. Booking Your Bridal Makeup with Ladyfair in Motihari To book your bridal makeup service with Ladyfair, please note the following: Advance Payment: A 20% advance payment is required to secure your booking. Adjustable Booking Amount: The booking amount is adjustable for one year. Non-Refundable: The advance payment is non-refundable but will be adjusted against the total service cost. How to Book Your Bridal Makeup Initial Contact: Call us at 7004721239 to discuss your bridal makeup needs and schedule your appointment. Consultation Session: Meet with our makeup artist to discuss your desired look, review your wedding attire, and plan the perfect makeup style. Makeup Trial: We offer trial sessions so you can preview your bridal makeup and make any necessary adjustments before your wedding day. Wedding Day Makeup: On your wedding day, our makeup artist will come to your location in Motihari to provide a flawless and stress-free makeup service. Testimonials from Brides in Motihari Ravi S., Motihari: "Ladyfair’s at-home makeup service was fantastic. The artist was professional, and my bridal look was exactly what I had envisioned." Neeta P., Motihari: "I chose airbrush makeup for my wedding, and it was perfect. It stayed fresh all day, and I received many compliments." Rita K., Motihari: "The HD makeup was incredible and looked great in all my wedding photos. Ladyfair’s team ensured I felt beautiful and confident." Preparing for Your Bridal Makeup Session To achieve the best results, keep these tips in mind before your session: Stay Hydrated: Drink plenty of water to keep your skin fresh and glowing. Consistent Skincare: Maintain a regular skincare routine leading up to your wedding day. Avoid New Products: Stick to familiar skincare products to prevent potential reactions. Communicate Clearly: Discuss your makeup preferences and any concerns with our artist during your consultation. Additional Beauty Services by Ladyfair in Motihari Ladyfair also offers: Engagement and Reception Makeup: Customized looks for all your pre-wedding events. Party Makeup: Ideal for special occasions and celebrations. Everyday Makeup: Enhance your daily look with our expert services. Special Occasion Makeup: Makeup for birthdays, anniversaries, and other significant events. The Future of Bridal Makeup in Motihari Ladyfair is dedicated to setting new standards in bridal beauty in Motihari. As more brides experience our exceptional at-home services, we continue to grow as the preferred choice for bridal makeup. Q&A with Ladyfair’s Bridal Makeup Artist in Motihari Why should I choose Ladyfair as my bridal makeup artist in Motihari? Ladyfair offers expert at-home bridal makeup services, ensuring you look stunning on your wedding day. What are the prices for bridal makeup services in Motihari? Our bridal makeup services start at ₹10,000 for basic makeup, ₹12,000 for HD makeup, and ₹18,000 for airbrush makeup. How do I book Ladyfair’s bridal makeup services in Motihari? You can book our services by calling 7004721239. We also offer consultations and trial sessions to help you achieve your desired look. What types of bridal makeup does Ladyfair offer in Motihari? We offer traditional, HD, and airbrush bridal makeup styles to suit your preferences. Are makeup trials available before the wedding day? Yes, we provide trial sessions to finalize your bridal look and make any necessary adjustments. What kind of products does Ladyfair use for bridal makeup? We use professional-grade, high-quality products that are safe for all skin types and ensure a flawless finish. What other makeup services does Ladyfair offer in Motihari? Besides bridal makeup, we offer engagement, reception, party, and special occasion makeup services.
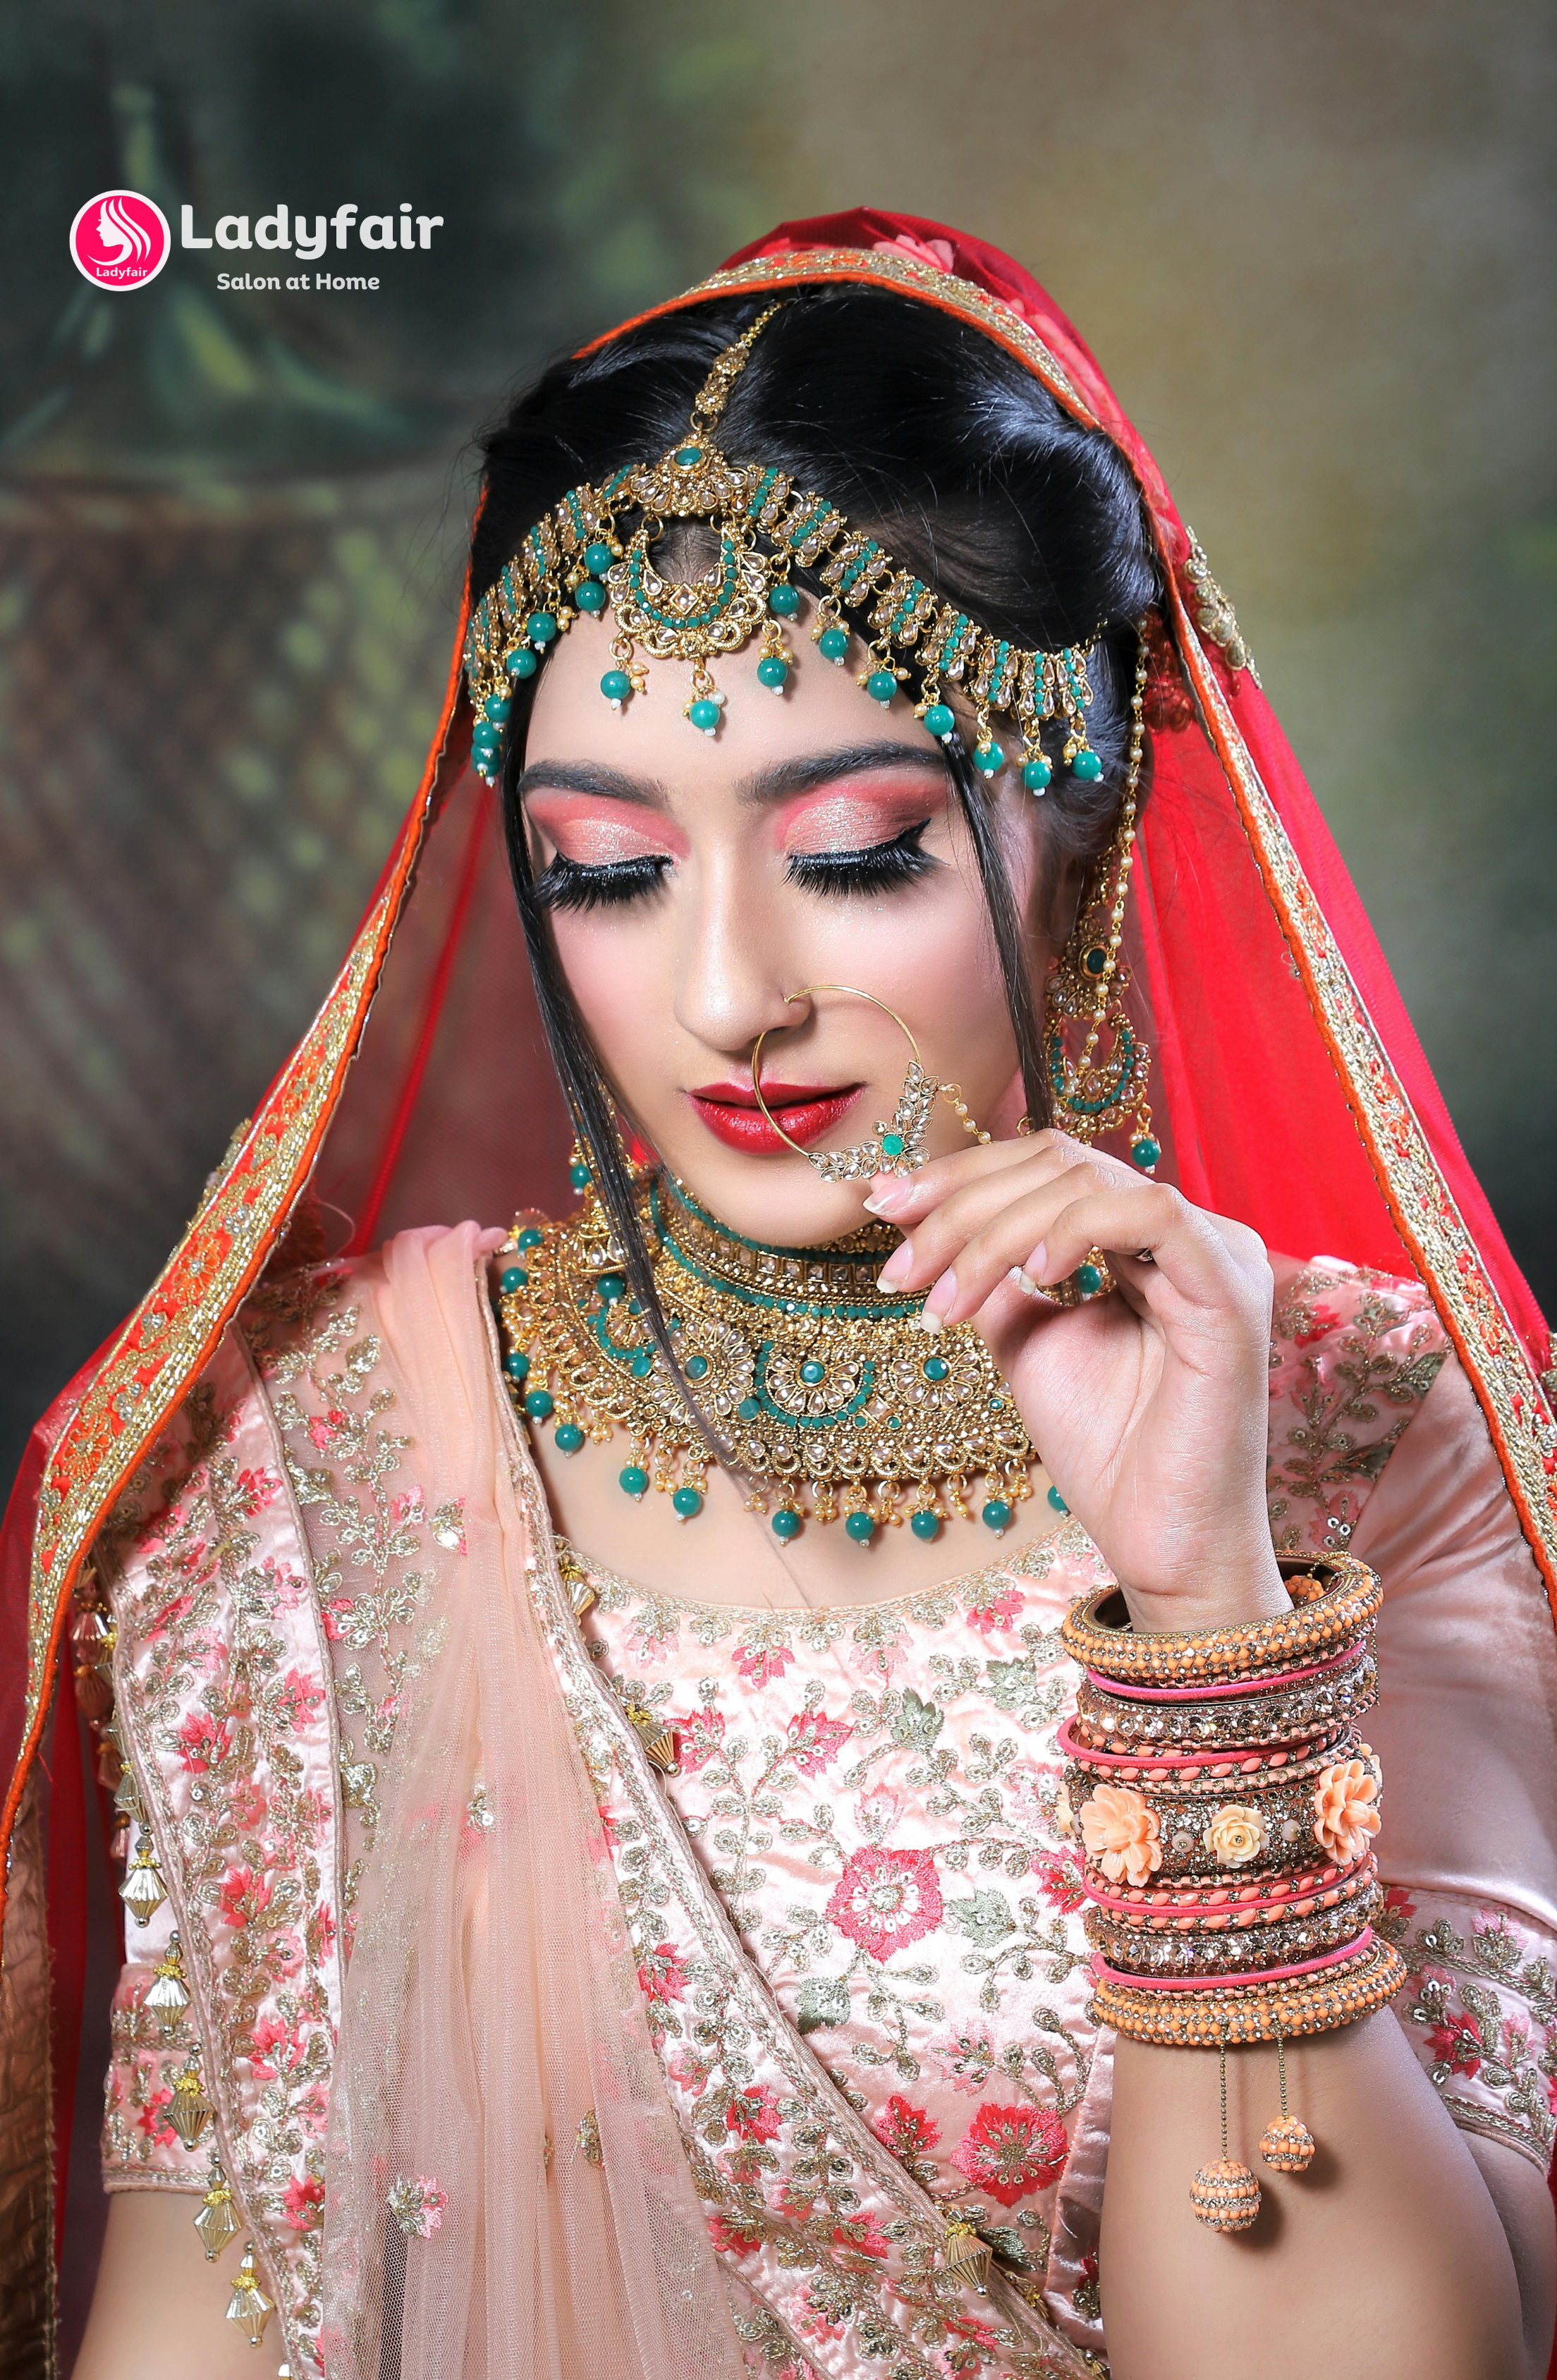
Posted By: 31st August 2024
Bridal Makeup Artist in Bhargama
Introduction For brides in Bhargama seeking the best in makeup artistry, Ladyfair is the ultimate choice. Our at-home bridal makeup service ensures that you receive expert beauty treatments in the comfort of your own home. Whether you want a traditional look, a flawless HD finish, or airbrush perfection, our skilled makeup artist in Bhargama will make sure you shine on your special day. Contact us today at 7004721239 to schedule your appointment. Why Ladyfair is the Top Choice for Bridal Makeup in Bhargama? Experienced Makeup Artist Our makeup artist in Bhargama is highly experienced and specializes in creating personalized bridal looks that enhance your natural beauty while reflecting your unique style. Convenient At-Home Service Ladyfair’s at-home bridal makeup service in Bhargama offers the convenience of a luxurious, personalized experience without needing to visit a salon. Enjoy professional makeup services right at your doorstep. Premium Quality Products We use only the finest, professional-grade makeup products to ensure a flawless, long-lasting look that is perfect for your wedding day. Bridal Makeup Pricing in Bhargama Our bridal makeup services in Bhargama are priced to accommodate various budgets and preferences: Basic Bridal Makeup: ₹10,000 HD Bridal Makeup: ₹12,000 Airbrush Bridal Makeup: ₹18,000 For engagement and reception: Basic Engagement/Reception Makeup: ₹6,000 HD Engagement/Reception Makeup: ₹8,000 Airbrush Engagement/Reception Makeup: ₹12,000 For parties: Basic Party Makeup: ₹2,500 HD Party Makeup: ₹3,500 Popular Bridal Makeup Styles in Bhargama Traditional Bridal Makeup Our traditional bridal makeup in Bhargama features bold and vibrant colors, creating a timeless look that perfectly complements traditional wedding attire. HD Bridal Makeup HD bridal makeup provides a high-definition finish, ensuring that you look flawless in both photos and real life throughout your wedding day. Airbrush Bridal Makeup Airbrush makeup offers a lightweight, smooth finish with full coverage that lasts all day, ideal for brides who want a natural yet polished look. How to Book Your Bridal Makeup with Ladyfair in Bhargama Initial Contact: Call us at 7004721239 to discuss your bridal makeup needs and schedule an appointment. Consultation Session: Meet with our makeup artist to discuss your desired look, review your wedding attire, and plan the perfect makeup style. Makeup Trial: We offer trial sessions so you can preview your bridal makeup and make any necessary adjustments before the wedding day. Wedding Day Makeup: On your wedding day, our makeup artist will arrive at your location in Bhargama to provide a flawless and stress-free makeup service. Testimonials from Brides in Bhargama Priyanka S., Bhargama: "Ladyfair's at-home makeup service made my wedding day so special. The makeup artist was professional, and I looked exactly how I had imagined." Ritika K., Bhargama: "The airbrush makeup was light and stayed perfect throughout the day. I highly recommend Ladyfair for bridal makeup." Sakshi M., Bhargama: "The HD makeup looked stunning in all my wedding photos. Ladyfair’s service was top-notch, making the entire experience stress-free." Preparing for Your Bridal Makeup Session To achieve the best results, follow these tips: Stay Hydrated: Drink plenty of water to keep your skin fresh and glowing. Consistent Skincare: Maintain a regular skincare routine leading up to your wedding. Avoid New Products: Stick to familiar skincare products to avoid any adverse reactions. Communicate Clearly: Discuss your makeup preferences and concerns with our artist during your consultation. Additional Beauty Services by Ladyfair Beyond bridal makeup, Ladyfair offers: Engagement and Reception Makeup: Customized looks for all your pre-wedding events. Party Makeup: Ideal for special occasions and celebrations. Everyday Makeup: Enhance your daily look with our expert services. Special Occasion Makeup: Makeup for birthdays, anniversaries, and other significant events. The Future of Bridal Makeup in Bhargama Ladyfair is committed to setting new standards in bridal beauty with our innovative at-home services in Bhargama. As more brides experience our exceptional service, Ladyfair continues to grow as the preferred choice for bridal makeup. Q&A with Ladyfair’s Bridal Makeup Artist in Bhargama Q1: What makes Ladyfair the best choice for bridal makeup in Bhargama? A1: Ladyfair offers expert at-home bridal makeup services, combining skilled artistry with high-quality products for a flawless wedding look. Q2: What are the prices for bridal makeup services in Bhargama? A2: Our bridal makeup services start at ₹10,000 for basic makeup, ₹12,000 for HD makeup, and ₹18,000 for airbrush makeup. Q3: How do I book Ladyfair’s bridal makeup services in Bhargama? A3: You can book our services by calling 7004721239. We also offer consultations and trial sessions to help you achieve your desired look. Q4: What types of bridal makeup does Ladyfair offer in Bhargama? A4: We offer traditional, HD, and airbrush bridal makeup styles to suit your preferences. Q5: Are makeup trials available before the wedding day? A5: Yes, we provide trial sessions to finalize your bridal look and make any necessary adjustments. Q6: What kind of products does Ladyfair use for bridal makeup? A6: We use professional-grade, high-quality products that are safe for all skin types and ensure a flawless finish. Q7: What other makeup services does Ladyfair offer in Bhargama? A7: Besides bridal makeup, we offer engagement, reception, party, and special occasion makeup services.

Posted By: 31st August 2024
Bridal Makeup Artist in Banjaria
Ladyfair: The Premier Bridal Makeup Artist in Banjaria Introduction On your wedding day, looking perfect is crucial, and Ladyfair is here to ensure you do just that. As the top bridal makeup artist in Banjaria, we provide exceptional at-home bridal makeup services to make you look radiant and feel confident. Whether you desire a traditional look, high-definition finish, or flawless airbrush application, our expert makeup artist in Banjaria will deliver a stunning bridal look. Contact us today at 7004721239 to book your appointment. Why Ladyfair is the Best Choice for Bridal Makeup in Banjaria Experienced Makeup Artist Our makeup artist in Banjaria has extensive experience in bridal makeup, providing a look that enhances your natural beauty and aligns with your wedding style. She is skilled in various techniques and stays updated with the latest trends. Convenient At-Home Service Ladyfair offers the convenience of at-home bridal makeup services in Banjaria. Enjoy a personalized and professional makeup experience right at your doorstep, making your special day as relaxed as possible. High-Quality Products We use only premium, professional-grade makeup products to deliver a flawless, long-lasting finish. With Ladyfair, you can be confident that your makeup will look perfect throughout your wedding day. Bridal Makeup Pricing in Banjaria with Ladyfair Ladyfair provides a range of bridal makeup options in Banjaria to suit different preferences and budgets: Basic Bridal Makeup: ₹10,000 HD Bridal Makeup: ₹12,000 Airbrush Bridal Makeup: ₹18,000 For engagement and reception: Basic Engagement/Reception Makeup: ₹6,000 HD Engagement/Reception Makeup: ₹8,000 Airbrush Engagement/Reception Makeup: ₹12,000 For parties: Basic Party Makeup: ₹2,500 HD Party Makeup: ₹3,500 Popular Bridal Makeup Styles Offered by Ladyfair in Banjaria Traditional Bridal Makeup Our traditional bridal makeup in Banjaria features vibrant colors and detailed application, perfectly complementing traditional wedding attire for an elegant, classic look. HD Bridal Makeup HD bridal makeup provides a high-definition finish that looks flawless both in photos and in person. This style ensures a perfect appearance throughout your special day. Airbrush Bridal Makeup Airbrush makeup offers a lightweight, smooth finish with full coverage that lasts all day, ideal for brides seeking a natural yet polished look. Booking Your Bridal Makeup with Ladyfair in Banjaria To book your bridal makeup service with Ladyfair, please note the following: Advance Payment: We require a 20% advance payment to secure your booking. Adjustable Booking Amount: The booking amount is adjustable for one year. Non-Refundable: The advance payment is non-refundable but will be adjusted against the total service cost. How to Book Your Bridal Makeup Initial Contact: Call us at 7004721239 to discuss your bridal makeup needs and schedule your appointment. Consultation Session: Meet with our makeup artist to discuss your desired look, review your wedding attire, and plan the perfect makeup style. Makeup Trial: We offer trial sessions to help you preview your bridal makeup and make any adjustments before your wedding day. Wedding Day Makeup: On your wedding day, our makeup artist will come to your location in Banjaria to provide a flawless and stress-free makeup service. Testimonials from Brides in Banjaria Anita K., Banjaria: "Ladyfair’s at-home service was outstanding. The makeup artist was professional, and my bridal look was exactly as I envisioned." Sunita R., Banjaria: "I opted for airbrush makeup for my wedding, and it was perfect. It stayed fresh all day, and I received numerous compliments." Neelam P., Banjaria: "The HD makeup was fantastic and looked great in all my wedding photos. Ladyfair’s team ensured I felt beautiful and confident." Preparing for Your Bridal Makeup Session For optimal results, consider these tips before your session: Stay Hydrated: Drink plenty of water to keep your skin fresh and glowing. Consistent Skincare: Follow your regular skincare routine leading up to your wedding day. Avoid New Products: Stick to familiar skincare products to avoid potential reactions. Communicate Clearly: Discuss your makeup preferences and any concerns with our artist during your consultation. Additional Beauty Services by Ladyfair in Banjaria Ladyfair also offers: Engagement and Reception Makeup: Customized looks for all your pre-wedding events. Party Makeup: Perfect for special occasions and celebrations. Everyday Makeup: Enhance your daily look with our expert services. Special Occasion Makeup: Makeup for birthdays, anniversaries, and other significant events. The Future of Bridal Makeup in Banjaria Ladyfair is dedicated to setting new standards in bridal beauty in Banjaria. As more brides experience our exceptional at-home services, we continue to grow as the preferred choice for bridal makeup. Q&A with Ladyfair’s Bridal Makeup Artist in Banjaria Why choose Ladyfair as my bridal makeup artist in Banjaria? Ladyfair offers expert at-home bridal makeup services, ensuring you look stunning on your wedding day. What are the prices for bridal makeup services in Banjaria? Our bridal makeup services start at ₹10,000 for basic makeup, ₹12,000 for HD makeup, and ₹18,000 for airbrush makeup. How do I book Ladyfair’s bridal makeup services in Banjaria? You can book our services by calling 7004721239. We also offer consultations and trial sessions to help you achieve your desired look. What types of bridal makeup does Ladyfair offer in Banjaria? We offer traditional, HD, and airbrush bridal makeup styles to suit your preferences. Are makeup trials available before the wedding day? Yes, we provide trial sessions to finalize your bridal look and make any necessary adjustments. What kind of products does Ladyfair use for bridal makeup? We use professional-grade, high-quality products that are safe for all skin types and ensure a flawless finish. What other makeup services does Ladyfair offer in Banjaria? Besides bridal makeup, we offer engagement, reception, party, and special occasion makeup services.

Posted By: 31st August 2024
Bridal Makeup Artist in Kalyanpur
Ladyfair: The Premier Bridal Makeup Artist in Kalyanpur Introduction On your wedding day, every detail counts, and your makeup is no exception. Ladyfair, the leading bridal makeup artist in Kalyanpur, offers exceptional at-home bridal makeup services designed to make you look and feel radiant. Whether you want a traditional look, high-definition finish, or a flawless airbrush application, our expert makeup artist in Kalyanpur is here to make your dream bridal look a reality. Book your appointment today by calling 7004721239. Why Ladyfair is the Top Choice for Bridal Makeup in Kalyanpur Experienced Makeup Artist Our makeup artist in Kalyanpur boasts years of experience in bridal makeup, providing you with a look that highlights your natural beauty and complements your wedding style. She is skilled in various makeup techniques and stays updated with the latest trends. Convenient At-Home Service Ladyfair offers the luxury of at-home bridal makeup services in Kalyanpur. Enjoy a personalized, high-quality experience without having to travel. Our professional makeup services come directly to you, ensuring a stress-free experience. High-Quality Products We use only premium, professional-grade makeup products to ensure a flawless, long-lasting finish. With Ladyfair, you can trust that your makeup will look perfect from the ceremony through to the reception. Bridal Makeup Pricing in Kalyanpur with Ladyfair Ladyfair offers a variety of bridal makeup options in Kalyanpur to fit different tastes and budgets: Basic Bridal Makeup: ₹10,000 HD Bridal Makeup: ₹12,000 Airbrush Bridal Makeup: ₹18,000 For engagement and reception: Basic Engagement/Reception Makeup: ₹6,000 HD Engagement/Reception Makeup: ₹8,000 Airbrush Engagement/Reception Makeup: ₹12,000 For parties: Basic Party Makeup: ₹2,500 HD Party Makeup: ₹3,500 Popular Bridal Makeup Styles Offered by Ladyfair in Kalyanpur Traditional Bridal Makeup Our traditional bridal makeup in Kalyanpur features vibrant colors and detailed application, perfectly complementing traditional wedding attire and creating an elegant, classic look. HD Bridal Makeup HD bridal makeup offers a high-definition finish that looks perfect both in photos and in person. This style ensures a flawless appearance throughout your special day. Airbrush Bridal Makeup Airbrush makeup provides a lightweight, smooth finish with full coverage that lasts all day, making it ideal for brides seeking a natural yet polished look. How to Book Your Bridal Makeup with Ladyfair in Kalyanpur Initial Contact: Call us at 7004721239 to discuss your bridal makeup needs and schedule your appointment. Consultation Session: Meet with our makeup artist to discuss your desired look, review your wedding attire, and plan the perfect makeup style. Makeup Trial: We offer trial sessions to help you preview your bridal makeup and make any adjustments before your wedding day. Wedding Day Makeup: On your wedding day, our makeup artist will come to your location in Kalyanpur to provide a flawless and stress-free makeup service. Testimonials from Brides in Kalyanpur Sunita J., Kalyanpur: "Ladyfair’s at-home service was amazing. The makeup artist was professional and made my bridal look perfect, just as I envisioned." Neelam G., Kalyanpur: "I chose the airbrush makeup for my wedding, and it was fantastic. The makeup stayed fresh all day, and I received so many compliments." Rita D., Kalyanpur: "The HD makeup was stunning and looked great in all my wedding photos. Ladyfair’s team ensured I felt beautiful and confident." Preparing for Your Bridal Makeup Session For the best results, consider these tips before your bridal makeup session: Stay Hydrated: Drink plenty of water to keep your skin fresh and glowing. Consistent Skincare: Follow your regular skincare routine leading up to your wedding day. Avoid New Products: Stick to familiar skincare products to avoid any potential reactions. Communicate Clearly: Discuss your makeup preferences and any concerns with our artist during your consultation. Additional Beauty Services by Ladyfair in Kalyanpur Ladyfair also offers: Engagement and Reception Makeup: Customized looks for all your pre-wedding events. Party Makeup: Perfect for special occasions and celebrations. Everyday Makeup: Enhance your daily look with our expert services. Special Occasion Makeup: Makeup for birthdays, anniversaries, and other significant events. The Future of Bridal Makeup in Kalyanpur Ladyfair is dedicated to setting new standards in bridal beauty in Kalyanpur. As more brides experience our exceptional at-home services, we continue to grow as the preferred choice for bridal makeup. Q&A with Ladyfair’s Bridal Makeup Artist in Kalyanpur Why choose Ladyfair as my bridal makeup artist in Kalyanpur? Ladyfair offers expert at-home bridal makeup services, ensuring you look your best on your wedding day. What are the prices for bridal makeup services in Kalyanpur? Our bridal makeup services start at ₹10,000 for basic makeup, ₹12,000 for HD makeup, and ₹18,000 for airbrush makeup. How do I book Ladyfair’s bridal makeup services in Kalyanpur? You can book our services by calling 7004721239. We also offer consultations and trial sessions to help you achieve your desired look. What types of bridal makeup does Ladyfair offer in Kalyanpur? We offer traditional, HD, and airbrush bridal makeup styles to suit your preferences. Are makeup trials available before the wedding day? Yes, we provide trial sessions to finalize your bridal look and make any necessary adjustments. What kind of products does Ladyfair use for bridal makeup? We use professional-grade, high-quality products that are safe for all skin types and ensure a flawless finish. What other makeup services does Ladyfair offer in Kalyanpur? Besides bridal makeup, we offer engagement, reception, party, and special occasion makeup services.

Posted By: 31st August 2024
Bridal Makeup Artist in Kesaria
Ladyfair: The Leading Bridal Makeup Artist in Kesaria Introduction For your special day, looking perfect is essential. Ladyfair, the premier bridal makeup artist in Kesaria, provides exceptional at-home bridal makeup services to ensure you look stunning and feel confident. Whether you prefer a traditional, HD, or airbrush finish, our expert makeup artist in Kesaria will cater to your needs. Contact us today at 7004721239 to book your appointment and make your wedding day unforgettable. Why Ladyfair is the Top Choice for Bridal Makeup in Kesaria Experienced Makeup Artist Our makeup artist in Kesaria has extensive experience in bridal makeup, guaranteeing a look that enhances your natural beauty and suits your personal style. She is skilled in various techniques and stays updated with the latest trends to offer you the best. Convenient At-Home Service Ladyfair offers the convenience of at-home bridal makeup services in Kesaria. Enjoy a luxurious and personalized experience without the need to travel. We bring professional makeup services directly to you, making your day as stress-free as possible. High-Quality Products We use only premium, professional-grade makeup products to ensure a flawless, long-lasting finish. With Ladyfair, you can trust that your makeup will look perfect from the ceremony to the reception. Bridal Makeup Pricing in Kesaria with Ladyfair Ladyfair provides a range of bridal makeup options in Kesaria to suit various preferences and budgets: Basic Bridal Makeup: ₹10,000 HD Bridal Makeup: ₹12,000 Airbrush Bridal Makeup: ₹18,000 For engagement and reception: Basic Engagement/Reception Makeup: ₹6,000 HD Engagement/Reception Makeup: ₹8,000 Airbrush Engagement/Reception Makeup: ₹12,000 For parties: Basic Party Makeup: ₹2,500 HD Party Makeup: ₹3,500 Popular Bridal Makeup Styles Offered by Ladyfair in Kesaria Traditional Bridal Makeup Our traditional bridal makeup in Kesaria features rich, vibrant colors and detailed application, enhancing traditional wedding attire for an elegant and classic look. HD Bridal Makeup HD bridal makeup provides a high-definition finish that looks flawless both in photos and in person. This style ensures a perfect appearance throughout your special day. Airbrush Bridal Makeup Airbrush makeup offers a lightweight, smooth finish with full coverage that lasts all day, ideal for brides seeking a natural yet polished look. How to Book Your Bridal Makeup with Ladyfair in Kesaria Initial Contact: Call us at 7004721239 to discuss your bridal makeup needs and schedule an appointment. Consultation Session: Meet with our makeup artist to discuss your desired look, review your wedding attire, and plan the perfect makeup style. Makeup Trial: We offer trial sessions to help you preview your bridal makeup and make any adjustments before your wedding day. Wedding Day Makeup: On your wedding day, our makeup artist will come to your location in Kesaria to provide a flawless and stress-free makeup service. Testimonials from Brides in Kesaria Kavita M., Kesaria: "Ladyfair’s at-home service was a game-changer for me. The makeup artist was professional, and the bridal look was exactly as I hoped." Meena P., Kesaria: "I opted for the airbrush makeup for my wedding, and it was fantastic. It stayed perfect throughout the day, and I got numerous compliments." Neeta S., Kesaria: "The HD makeup was incredible and looked amazing in all my wedding photos. Ladyfair’s team ensured I felt beautiful and confident." Preparing for Your Bridal Makeup Session To achieve the best results, consider these tips before your bridal makeup session: Stay Hydrated: Drink plenty of water to keep your skin fresh and glowing. Consistent Skincare: Follow your regular skincare routine leading up to your wedding day. Avoid New Products: Stick to familiar skincare products to avoid any potential reactions. Communicate Clearly: Discuss your makeup preferences and any concerns with our artist during your consultation. Additional Beauty Services by Ladyfair in Kesaria In addition to bridal makeup, Ladyfair offers: Engagement and Reception Makeup: Customized looks for all your pre-wedding events. Party Makeup: Ideal for special occasions and celebrations. Everyday Makeup: Enhance your daily look with our expert services. Special Occasion Makeup: Makeup for birthdays, anniversaries, and other significant events. The Future of Bridal Makeup in Kesaria Ladyfair is committed to becoming the leading choice for bridal makeup in Kesaria. As more brides experience our exceptional at-home services, we continue to set new standards in bridal beauty. Q&A with Ladyfair’s Bridal Makeup Artist in Kesaria Why choose Ladyfair as my bridal makeup artist in Kesaria? Ladyfair offers expert at-home bridal makeup services, ensuring you look your best on your wedding day. What are the prices for bridal makeup services in Kesaria? Our bridal makeup services start at ₹10,000 for basic makeup, ₹12,000 for HD makeup, and ₹18,000 for airbrush makeup. How do I book Ladyfair’s bridal makeup services in Kesaria? You can book our services by calling 7004721239. We also offer consultations and trial sessions to help you achieve your desired look. What types of bridal makeup does Ladyfair offer in Kesaria? We offer traditional, HD, and airbrush bridal makeup styles to suit your preferences. Are makeup trials available before the wedding day? Yes, we provide trial sessions to finalize your bridal look and make any necessary adjustments. What kind of products does Ladyfair use for bridal makeup? We use professional-grade, high-quality products that are safe for all skin types and ensure a flawless finish. What other makeup services does Ladyfair offer in Kesaria? Besides bridal makeup, we offer engagement, reception, party, and special occasion makeup services.

Posted By: 31st August 2024
Bridal Makeup Artist in Mehsi
Ladyfair: Premier Bridal Makeup Artist in Mehsi Introduction Your wedding day is a time for celebration, and looking your best is key. Ladyfair, the top bridal makeup artist in Mehsi, offers outstanding at-home bridal makeup services tailored to make you feel and look beautiful on your special day. Whether you desire a classic traditional look, a high-definition finish, or flawless airbrush makeup, our expert makeup artist in Mehsi is here to fulfill your bridal beauty dreams. Book your appointment today by calling 7004721239. Why Ladyfair is the Top Choice for Bridal Makeup in Mehsi Experienced Makeup Artist Our makeup artist in Mehsi brings years of experience in bridal makeup, ensuring that you receive a look that enhances your natural beauty and complements your personal style. She is adept at various makeup techniques and keeps up with the latest trends. Convenient At-Home Service Ladyfair offers the luxury of at-home bridal makeup services in Mehsi. This means you can enjoy a personalized, high-quality experience without having to leave your home. Our professional service is designed to make your day as stress-free as possible. Premium Quality Products We use only the best professional-grade makeup products to ensure a flawless, long-lasting finish. With Ladyfair, you can trust that your makeup will look perfect from the ceremony to the last dance. Bridal Makeup Pricing in Mehsi with Ladyfair Ladyfair provides a range of bridal makeup options in Mehsi to suit different tastes and budgets: Basic Bridal Makeup: ₹10,000 HD Bridal Makeup: ₹12,000 Airbrush Bridal Makeup: ₹18,000 For engagement and reception: Basic Engagement/Reception Makeup: ₹6,000 HD Engagement/Reception Makeup: ₹8,000 Airbrush Engagement/Reception Makeup: ₹12,000 For parties: Basic Party Makeup: ₹2,500 HD Party Makeup: ₹3,500 Popular Bridal Makeup Styles Offered by Ladyfair in Mehsi Traditional Bridal Makeup Our traditional bridal makeup in Mehsi highlights vibrant colors and intricate application to enhance traditional wedding attire, creating a timeless and elegant look. HD Bridal Makeup HD bridal makeup offers a high-definition finish, ensuring you look flawless both in photos and in person. This style is perfect for brides who want a perfect, camera-ready look that lasts all day. Airbrush Bridal Makeup Airbrush makeup provides a lightweight, smooth finish with full coverage that lasts all day. It’s ideal for brides seeking a natural yet polished look. How to Book Your Bridal Makeup with Ladyfair in Mehsi Initial Contact: Call us at 7004721239 to discuss your bridal makeup needs and schedule your appointment. Consultation Session: Meet with our makeup artist to discuss your desired look, review your wedding attire, and plan the perfect makeup style. Makeup Trial: We offer trial sessions to allow you to preview your bridal makeup and make any adjustments before your wedding day. Wedding Day Makeup: On your wedding day, our makeup artist will come to your location in Mehsi to provide a flawless and stress-free makeup service. Testimonials from Brides in Mehsi Ritika P., Mehsi: "Ladyfair’s at-home makeup service was so convenient. The makeup artist was skilled and made me look exactly how I envisioned for my wedding." Aarti S., Mehsi: "I chose the airbrush makeup for my big day, and it was amazing. The makeup stayed perfect all day, and I received many compliments." Suman R., Mehsi: "The HD makeup was incredible and looked fantastic in all my wedding photos. Ladyfair’s team ensured I felt beautiful and confident." Preparing for Your Bridal Makeup Session For the best results, consider these tips before your bridal makeup session: Stay Hydrated: Drink plenty of water to keep your skin fresh and glowing. Consistent Skincare: Stick to your regular skincare routine leading up to your wedding day. Avoid New Products: Use familiar skincare products to avoid any potential reactions. Communicate Clearly: Discuss your makeup preferences and any concerns with our artist during your consultation. Additional Beauty Services by Ladyfair in Mehsi Ladyfair offers more than just bridal makeup in Mehsi: Engagement and Reception Makeup: Customized looks for all your pre-wedding events. Party Makeup: Perfect for special occasions and celebrations. Everyday Makeup: Enhance your daily look with our expert services. Special Occasion Makeup: Makeup for birthdays, anniversaries, and other significant events. The Future of Bridal Makeup in Mehsi Ladyfair is dedicated to becoming the leading choice for bridal makeup in Mehsi. As more brides experience our exceptional at-home services, we continue to raise the bar in bridal beauty. Q&A with Ladyfair’s Bridal Makeup Artist in Mehsi Why choose Ladyfair as my bridal makeup artist in Mehsi? Ladyfair offers expert at-home bridal makeup services, ensuring you look your best on your wedding day. What are the prices for bridal makeup services in Mehsi? Our bridal makeup services start at ₹10,000 for basic makeup, ₹12,000 for HD makeup, and ₹18,000 for airbrush makeup. How do I book Ladyfair’s bridal makeup services in Mehsi? You can book our services by calling 7004721239. We also offer consultations and trial sessions to help you achieve your desired look. What types of bridal makeup does Ladyfair offer in Mehsi? We offer traditional, HD, and airbrush bridal makeup styles to suit your preferences. Are makeup trials available before the wedding day? Yes, we provide trial sessions to finalize your bridal look and make any necessary adjustments. What kind of products does Ladyfair use for bridal makeup? We use professional-grade, high-quality products that are safe for all skin types and ensure a flawless finish. What other makeup services does Ladyfair offer in Mehsi? Besides bridal makeup, we offer engagement, reception, party, and special occasion makeup services.

Posted By: 31st August 2024
Bridal Makeup Artist in Chakia
Ladyfair: Your Go-To Bridal Makeup Artist in Chakia Introduction Your wedding day is one of the most significant moments of your life, and looking your best is paramount. Ladyfair, the leading bridal makeup artist in Chakia, offers professional at-home bridal makeup services designed to make you look stunning on your special day. Whether you're looking for a traditional, HD, or airbrush finish, our experienced makeup artist in Chakia is here to bring your bridal vision to life. To schedule your appointment, contact us today at 7004721239. Why Choose Ladyfair for Bridal Makeup in Chakia? Expert Makeup Artist Our makeup artist in Chakia has years of experience in bridal makeup, ensuring that you receive a look that perfectly complements your natural beauty and personal style. She is skilled in a variety of makeup techniques and stays updated with the latest trends. Convenient At-Home Service With Ladyfair's at-home bridal makeup services in Chakia, you don't have to worry about traveling to a salon. We bring the luxury and expertise directly to you, allowing you to relax and enjoy a stress-free experience in the comfort of your own home. High-Quality Products Ladyfair uses only top-tier, professional-grade makeup products to ensure a flawless, long-lasting finish. Our commitment to quality means that you can trust us to deliver a look that lasts throughout your wedding day. Bridal Makeup Pricing in Chakia with Ladyfair Our bridal makeup services in Chakia are designed to suit different preferences and budgets: Basic Bridal Makeup: ₹10,000 HD Bridal Makeup: ₹12,000 Airbrush Bridal Makeup: ₹18,000 For engagement and reception: Basic Engagement/Reception Makeup: ₹6,000 HD Engagement/Reception Makeup: ₹8,000 Airbrush Engagement/Reception Makeup: ₹12,000 For parties: Basic Party Makeup: ₹2,500 HD Party Makeup: ₹3,500 Popular Bridal Makeup Styles Offered by Ladyfair in Chakia Traditional Bridal Makeup Our traditional bridal makeup in Chakia features bold, vibrant colors and intricate application to complement traditional wedding attire, creating a timeless and elegant look. HD Bridal Makeup HD bridal makeup offers a high-definition finish that looks flawless both in photographs and in person. This style is ideal for brides who want a perfect, camera-ready look that lasts all day. Airbrush Bridal Makeup Airbrush makeup provides a lightweight, smooth finish with full coverage that lasts all day, perfect for brides who prefer a natural yet polished look. How to Book Your Bridal Makeup with Ladyfair in Chakia Initial Contact: Call us at 7004721239 to discuss your bridal makeup needs and schedule an appointment. Consultation Session: Meet with our makeup artist to discuss your desired look, review your wedding attire, and plan the perfect makeup style. Makeup Trial: We offer trial sessions so you can preview your bridal makeup and make any necessary adjustments before your wedding day. Wedding Day Makeup: On your wedding day, our makeup artist will arrive at your location in Chakia to deliver a flawless and stress-free makeup service. Testimonials from Brides in Chakia Pooja R., Chakia: "Ladyfair’s at-home service was incredibly convenient. The makeup artist was professional, and the bridal makeup was exactly how I envisioned it." Anjali S., Chakia: "I opted for the HD makeup, and it was perfect for my wedding. It stayed fresh all day, and I received so many compliments." Rekha K., Chakia: "The airbrush makeup was amazing, and Ladyfair’s team made sure I looked flawless throughout my wedding day." Preparing for Your Bridal Makeup Session To ensure the best results, follow these tips before your bridal makeup session: Stay Hydrated: Drink plenty of water to keep your skin fresh and glowing. Consistent Skincare: Maintain your regular skincare routine leading up to your wedding day. Avoid New Products: Stick to familiar skincare products to avoid any potential reactions. Communicate Clearly: Discuss your makeup preferences and any concerns with our artist during your consultation. Additional Beauty Services by Ladyfair in Chakia In addition to bridal makeup, Ladyfair offers a variety of beauty services in Chakia: Engagement and Reception Makeup: Customized looks for all your pre-wedding events. Party Makeup: Perfect for special occasions and celebrations. Everyday Makeup: Enhance your daily look with our expert services. Special Occasion Makeup: Makeup for birthdays, anniversaries, and other significant events. The Future of Bridal Makeup in Chakia Ladyfair is dedicated to becoming the top choice for bridal makeup in Chakia. As more brides experience our exceptional at-home services, we continue to set new standards in bridal beauty. Q&A with Ladyfair’s Bridal Makeup Artist in Chakia Why choose Ladyfair as my bridal makeup artist in Chakia? Ladyfair offers expert at-home bridal makeup services, ensuring you look your best on your wedding day. What are the prices for bridal makeup services in Chakia? Our bridal makeup services start at ₹10,000 for basic makeup, ₹12,000 for HD makeup, and ₹18,000 for airbrush makeup. How do I book Ladyfair’s bridal makeup services in Chakia? You can book our services by calling 7004721239. We also offer consultations and trial sessions to help you achieve your desired look. What types of bridal makeup does Ladyfair offer in Chakia? We offer traditional, HD, and airbrush bridal makeup styles to suit your preferences. Are makeup trials available before the wedding day? Yes, we provide trial sessions to finalize your bridal look and make any necessary adjustments. What kind of products does Ladyfair use for bridal makeup? We use professional-grade, high-quality products that are safe for all skin types and ensure a flawless finish. What other makeup services does Ladyfair offer in Chakia? Besides bridal makeup, we offer engagement, reception, party, and special occasion makeup services.

Posted By: 31st August 2024
Bridal Makeup Artist in Paharpur
Ladyfair: The Ultimate Bridal Makeup Artist in Paharpur Introduction Your wedding day is a momentous occasion, and looking your best is essential. Ladyfair, the leading bridal makeup artist in Paharpur, offers exceptional at-home bridal makeup services that combine convenience with beauty. Whether you’re aiming for a traditional look, HD finish, or airbrush perfection, our skilled makeup artist in Paharpur is dedicated to making you shine on your special day. To book your appointment, contact us today at 7004721239. Why Ladyfair is the Best Choice for Bridal Makeup in Paharpur Expert Makeup Artist Our makeup artist in Paharpur has extensive experience in bridal makeup and excels in creating looks that enhance your natural beauty. She stays up-to-date with the latest trends and techniques to ensure that you look stunning on your wedding day. Convenient At-Home Service Ladyfair brings luxury and professionalism to your doorstep with our at-home bridal makeup services in Paharpur. This personalized service allows you to relax and enjoy a stress-free makeup experience in the comfort of your own home. High-Quality Products We use only premium, professional-grade makeup products to ensure a flawless and long-lasting finish. Our commitment to quality means you can trust us to deliver a look that is both beautiful and enduring. Bridal Makeup Pricing with Ladyfair in Paharpur Ladyfair offers a range of bridal makeup services in Paharpur to suit different budgets and preferences: Basic Bridal Makeup: ₹10,000 HD Bridal Makeup: ₹12,000 Airbrush Bridal Makeup: ₹18,000 For engagement and reception: Basic Engagement/Reception Makeup: ₹6,000 HD Engagement/Reception Makeup: ₹8,000 Airbrush Engagement/Reception Makeup: ₹12,000 For parties: Basic Party Makeup: ₹2,500 HD Party Makeup: ₹3,500 Popular Bridal Makeup Styles by Ladyfair in Paharpur Traditional Bridal Makeup Our traditional bridal makeup in Paharpur emphasizes vibrant colors and detailed application that complement traditional wedding attire, creating an elegant and timeless look. HD Bridal Makeup HD bridal makeup offers a high-definition finish that looks flawless in photographs and real life. This style is perfect for brides who want a perfect appearance throughout their wedding day. Airbrush Bridal Makeup Airbrush makeup provides a lightweight, smooth finish with full coverage that lasts all day. This technique is ideal for brides seeking a natural yet polished look. How to Book Your Bridal Makeup with Ladyfair in Paharpur Initial Contact: Call us at 7004721239 to discuss your bridal makeup needs and schedule an appointment. Consultation Session: Meet with our makeup artist to discuss your desired look, review your wedding attire, and plan the perfect makeup style. Makeup Trial: We offer trial sessions so you can preview your bridal makeup and make any necessary adjustments before your wedding day. Wedding Day Makeup: On your wedding day, our makeup artist will arrive at your location in Paharpur to deliver a flawless and stress-free makeup service. Testimonials from Brides in Paharpur Kavita S., Paharpur: "Ladyfair’s at-home service was so convenient. The makeup artist was professional and made me look exactly how I wanted on my big day." Neha R., Paharpur: "I opted for airbrush makeup, and it was fantastic. The makeup lasted all day and looked flawless in all the pictures." Sunita M., Paharpur: "The HD makeup was perfect, and Ladyfair’s team ensured that I looked stunning throughout my wedding." Preparing for Your Bridal Makeup Session To achieve the best results, consider these tips before your bridal makeup session: Stay Hydrated: Keep your skin fresh and glowing by drinking plenty of water. Consistent Skincare: Stick to your regular skincare routine leading up to your wedding day. Avoid New Products: Use familiar skincare products to avoid any potential reactions. Communicate Clearly: Discuss your makeup preferences and concerns with our artist during your consultation. Additional Beauty Services by Ladyfair in Paharpur In addition to bridal makeup, Ladyfair offers a variety of beauty services in Paharpur: Engagement and Reception Makeup: Customized looks for all your pre-wedding events. Party Makeup: Perfect for special occasions and celebrations. Everyday Makeup: Enhance your daily look with our expert services. Special Occasion Makeup: Makeup for birthdays, anniversaries, and other significant events. The Future of Bridal Makeup in Paharpur Ladyfair is committed to becoming the leading bridal makeup artist in Paharpur. As more brides experience our exceptional at-home services, we continue to set new standards in bridal beauty. Q&A with Ladyfair’s Bridal Makeup Artist in Paharpur Why choose Ladyfair as my bridal makeup artist in Paharpur? Ladyfair offers expert at-home bridal makeup services, ensuring you look your best on your wedding day. What are the prices for bridal makeup services in Paharpur? Our bridal makeup services start at ₹10,000 for basic makeup, ₹12,000 for HD makeup, and ₹18,000 for airbrush makeup. How do I book Ladyfair’s bridal makeup services in Paharpur? You can book our services by calling 7004721239. We offer consultations and trial sessions to help you achieve your desired look. What types of bridal makeup does Ladyfair offer in Paharpur? We offer traditional, HD, and airbrush bridal makeup styles to suit your preferences. Are makeup trials available before the wedding day? Yes, we provide trial sessions to finalize your bridal look and make any necessary adjustments. What kind of products does Ladyfair use for bridal makeup? We use professional-grade, high-quality products that are safe for all skin types and ensure a flawless finish. What other makeup services does Ladyfair offer in Paharpur? Besides bridal makeup, we offer engagement, reception, party, and special occasion makeup services.

Posted By: 31st August 2024
Bridal Makeup Artist in Areraj
Ladyfair: Your Go-To Bridal Makeup Artist in Areraj Introduction Your wedding day is one of the most important days of your life, and every bride deserves to look and feel her best. Ladyfair, the premier bridal makeup artist in Areraj, offers top-notch at-home bridal makeup services that bring beauty and convenience to your doorstep. Whether you're looking for a traditional, HD, or airbrush makeup style, our skilled makeup artist in Areraj is here to create the perfect look for your special day. Contact us today at 7004721239 to schedule your appointment. Why Choose Ladyfair for Bridal Makeup in Areraj Experienced Makeup Artist Our makeup artist in Areraj is highly experienced in bridal makeup, with a talent for creating personalized looks that enhance your natural beauty. She stays up-to-date with the latest makeup trends and techniques, ensuring that you look stunning on your wedding day. At-Home Convenience Ladyfair brings the luxury of professional bridal makeup services right to your home in Areraj. Our at-home service means you can relax and enjoy a stress-free experience while our makeup artist transforms you into a beautiful bride. High-Quality Products We use only the best professional-grade makeup products to ensure a flawless and long-lasting finish. Our commitment to quality means you can trust us to deliver a look that is both beautiful and enduring. Bridal Makeup Pricing with Ladyfair in Areraj Ladyfair offers bridal makeup services in Areraj to suit various budgets and preferences: Basic Bridal Makeup: ₹10,000 HD Bridal Makeup: ₹12,000 Airbrush Bridal Makeup: ₹18,000 For engagement and reception: Basic Engagement/Reception Makeup: ₹6,000 HD Engagement/Reception Makeup: ₹8,000 Airbrush Engagement/Reception Makeup: ₹12,000 For parties: Basic Party Makeup: ₹2,500 HD Party Makeup: ₹3,500 Popular Bridal Makeup Styles by Ladyfair in Areraj Traditional Bridal Makeup Our traditional bridal makeup in Areraj features vibrant colors and meticulous application that complements traditional wedding attire, creating a timeless and elegant look. HD Bridal Makeup HD bridal makeup provides a high-definition finish that looks flawless in both photographs and real life. This style is ideal for brides who want a perfect appearance throughout their special day. Airbrush Bridal Makeup Airbrush makeup offers a smooth, lightweight finish with full coverage that lasts all day. This technique is perfect for brides who desire a natural yet polished look. How to Book Your Bridal Makeup with Ladyfair in Areraj Initial Contact: Call us at 7004721239 to discuss your bridal makeup needs and schedule an appointment. Consultation Session: Meet with our makeup artist to discuss your desired look, review your wedding attire, and plan the perfect makeup style. Makeup Trial: We offer trial sessions so you can preview your bridal makeup and make any necessary adjustments before your wedding day. Wedding Day Makeup: On your wedding day, our makeup artist will arrive at your location in Areraj to deliver a flawless and stress-free makeup service. Testimonials from Brides in Areraj Priya M., Areraj: "Ladyfair’s at-home makeup service made my wedding day so much easier. The makeup artist was professional, and I looked exactly how I imagined." Rina K., Areraj: "I chose the airbrush makeup, and it was perfect. It lasted all day and looked amazing in all the photos." Sita R., Areraj: "The HD makeup was stunning. Ladyfair’s team made me feel beautiful and confident on my special day." Preparing for Your Bridal Makeup Session To ensure the best results from your bridal makeup session, follow these tips: Stay Hydrated: Keep your skin fresh and glowing by drinking plenty of water. Maintain Your Skincare Routine: Stick to your regular skincare regimen leading up to your wedding. Avoid New Products: Use familiar skincare products to avoid any potential reactions. Communicate with Your Makeup Artist: Discuss your makeup preferences and any concerns during your consultation. Additional Beauty Services by Ladyfair in Areraj In addition to bridal makeup, Ladyfair offers a range of beauty services in Areraj: Engagement and Reception Makeup: Customized looks for all your pre-wedding events. Party Makeup: Perfect for special occasions and celebrations. Everyday Makeup: Enhance your daily look with our expert services. Special Occasion Makeup: Makeup for birthdays, anniversaries, and other significant events. The Future of Bridal Makeup in Areraj Ladyfair is dedicated to being the leading bridal makeup artist in Areraj. As more brides experience our exceptional at-home services, we continue to set new standards in bridal beauty. Q&A with Ladyfair’s Bridal Makeup Artist in Areraj Why choose Ladyfair as my bridal makeup artist in Areraj? Ladyfair offers expert at-home bridal makeup services, ensuring you look your best on your wedding day. What are the prices for bridal makeup services in Areraj? Our bridal makeup services start at ₹10,000 for basic makeup, ₹12,000 for HD makeup, and ₹18,000 for airbrush makeup. How do I book Ladyfair’s bridal makeup services in Areraj? You can book our services by calling 7004721239. We offer consultations and trial sessions to help you achieve your desired look. What types of bridal makeup does Ladyfair offer in Areraj? We offer traditional, HD, and airbrush bridal makeup styles to suit your preferences. Are makeup trials available before the wedding day? Yes, we provide trial sessions to finalize your bridal look and make any necessary adjustments. What kind of products does Ladyfair use for bridal makeup? We use professional-grade, high-quality products that are safe for all skin types and ensure a flawless finish. What other makeup services does Ladyfair offer in Areraj? Besides bridal makeup, we offer engagement, reception, party, and special occasion makeup services.

Posted By: 31st August 2024
Bridal Makeup Artist in Harsidh
Ladyfair: Your Premier Bridal Makeup Artist in Harsidhi Introduction When it comes to your wedding day, every detail matters, especially your bridal makeup. Ladyfair, the leading bridal makeup artist in Harsidhi, offers exceptional at-home makeup services to ensure you look your best on your special day. Whether you dream of a traditional look, a flawless HD finish, or the elegance of airbrush makeup, our expert makeup artist in Harsidhi is here to bring your vision to life. Contact us today at 7004721239 to book your appointment. Why Choose Ladyfair as Your Bridal Makeup Artist in Harsidhi Professional Expertise Our makeup artist in Harsidhi is highly experienced in bridal makeup, specializing in creating personalized looks that enhance your natural beauty. With a deep understanding of the latest makeup trends and techniques, she ensures that you shine on your big day. Convenient At-Home Service Ladyfair offers the convenience of at-home bridal makeup services in Harsidhi, allowing you to relax and enjoy a stress-free experience. Our makeup artist will come to your location, providing a luxurious and personalized service right at your doorstep. Top-Quality Products We use only the finest, professional-grade makeup products to ensure a flawless and long-lasting finish. Our commitment to quality means you can trust us to deliver a look that is both beautiful and enduring. Bridal Makeup Pricing with Ladyfair in Harsidhi Our bridal makeup services in Harsidhi are tailored to fit various budgets and preferences: Basic Bridal Makeup: ₹10,000 HD Bridal Makeup: ₹12,000 Airbrush Bridal Makeup: ₹18,000 For engagement and reception: Basic Engagement/Reception Makeup: ₹6,000 HD Engagement/Reception Makeup: ₹8,000 Airbrush Engagement/Reception Makeup: ₹12,000 For parties: Basic Party Makeup: ₹2,500 HD Party Makeup: ₹3,500 Popular Bridal Makeup Styles by Ladyfair in Harsidhi Traditional Bridal Makeup Our traditional bridal makeup in Harsidhi features vibrant colors and detailed application that complement traditional wedding attire, creating a timeless and elegant look. HD Bridal Makeup HD bridal makeup offers a high-definition finish that looks perfect in both photographs and real life. This style is ideal for brides who want a flawless appearance throughout their special day. Airbrush Bridal Makeup Airbrush makeup provides a smooth, lightweight finish with full coverage that lasts all day. This technique is perfect for brides who desire a natural yet polished look. Booking Your Bridal Makeup Artist in Harsidhi with Ladyfair Initial Contact: Call us at 7004721239 to discuss your bridal makeup needs and schedule an appointment. Consultation Session: Meet with our makeup artist to discuss your desired look, review your wedding attire, and plan the perfect makeup style. Makeup Trial: We offer trial sessions so you can preview your bridal makeup and make any necessary adjustments before your wedding day. Wedding Day Makeup: On your wedding day, our makeup artist will arrive at your location in Harsidhi to deliver a flawless and stress-free makeup service. Testimonials from Brides in Harsidhi Aarti K., Harsidhi: "Ladyfair made my wedding day unforgettable. The makeup artist was professional and created the exact look I wanted. I felt beautiful and confident." Meera S., Harsidhi: "I opted for the HD makeup, and it was perfect. The makeup lasted all day, and I received so many compliments on my look." Jyoti P., Harsidhi: "The airbrush makeup was fantastic. It felt light and looked amazing in all the photos. Ladyfair exceeded my expectations!" Preparing for Your Bridal Makeup Session To achieve the best results from your bridal makeup session, follow these tips: Stay Hydrated: Keep your skin fresh and glowing by drinking plenty of water. Maintain Your Skincare Routine: Stick to your regular skincare regimen leading up to your wedding. Avoid New Products: Use familiar skincare products to avoid any potential reactions. Communicate with Your Makeup Artist: Discuss your makeup preferences and any concerns during your consultation. Additional Beauty Services by Ladyfair in Harsidhi Ladyfair offers a wide range of beauty services in Harsidhi to meet all your makeup needs: Engagement and Reception Makeup: Customized looks for all your pre-wedding events. Party Makeup: Perfect for special occasions and celebrations. Everyday Makeup: Enhance your daily look with our expert services. Special Occasion Makeup: Makeup for birthdays, anniversaries, and other significant events. The Future of Bridal Makeup in Harsidhi Ladyfair is dedicated to being the leading bridal makeup artist in Harsidhi. As more brides experience our exceptional at-home services, we continue to raise the standard for bridal beauty in the region. Q&A with Ladyfair’s Bridal Makeup Artist in Harsidhi Why should I choose Ladyfair as my bridal makeup artist in Harsidhi? Ladyfair combines professional expertise with the convenience of at-home services, ensuring that you look your best on your wedding day. What are the prices for bridal makeup services in Harsidhi? Our bridal makeup services start at ₹10,000 for basic makeup, ₹12,000 for HD makeup, and ₹18,000 for airbrush makeup. How do I book Ladyfair’s bridal makeup services in Harsidhi? You can book our services by calling 7004721239. We offer consultations and trial sessions to help you achieve your desired look. What types of bridal makeup does Ladyfair offer in Harsidhi? We offer traditional, HD, and airbrush bridal makeup styles to suit your preferences. Are makeup trials available before the wedding day? Yes, we provide trial sessions to finalize your bridal look and make any necessary adjustments. What kind of products does Ladyfair use for bridal makeup? We use professional-grade, high-quality products that are safe for all skin types and ensure a flawless finish. What other makeup services does Ladyfair offer in Harsidhi? Besides bridal makeup, we offer engagement, reception, party, and special occasion makeup services.

Posted By: 31st August 2024
Bridal Makeup Artist in Sangrampur
Ladyfair: Your Trusted Bridal Makeup Artist in Sangrampur Introduction Finding the perfect bridal makeup artist in Sangrampur can make all the difference on your special day. At Ladyfair, we provide professional at-home bridal makeup services, ensuring that you look and feel your best as you prepare to walk down the aisle. Whether you're interested in a traditional look, a flawless HD finish, or the elegance of airbrush makeup, our expert bridal makeup artist in Sangrampur is here to bring your vision to life. Contact us today at 7004721239 to book your appointment. Why Choose Ladyfair as Your Bridal Makeup Artist in Sangrampur Expertise and Experience Our bridal makeup artist in Sangrampur has extensive experience in creating stunning bridal looks. With a deep understanding of makeup techniques and trends, she ensures that each bride receives a personalized look that enhances her natural beauty and complements her wedding attire. Convenient At-Home Service Ladyfair offers the convenience of at-home makeup services, so you don't have to worry about traveling to a salon. Our makeup artist will come to your location in Sangrampur, providing a luxurious, stress-free experience right at your doorstep. High-Quality Products We use only premium, professional-grade makeup products to ensure a flawless finish that lasts throughout your wedding day. Our commitment to quality means you can trust us to deliver a look that is both beautiful and long-lasting. Bridal Makeup Pricing with Ladyfair in Sangrampur We offer a range of bridal makeup services in Sangrampur to suit different budgets and preferences: Basic Bridal Makeup: ₹10,000 HD Bridal Makeup: ₹12,000 Airbrush Bridal Makeup: ₹18,000 For engagement and reception: Basic Engagement/Reception Makeup: ₹6,000 HD Engagement/Reception Makeup: ₹8,000 Airbrush Engagement/Reception Makeup: ₹12,000 For parties: Basic Party Makeup: ₹2,500 HD Party Makeup: ₹3,500 Popular Bridal Makeup Styles by Ladyfair in Sangrampur Traditional Bridal Makeup Our traditional bridal makeup is designed to complement the rich colors and intricate details of traditional wedding attire. This style is perfect for brides who want a timeless, elegant look on their big day. HD Bridal Makeup HD bridal makeup is ideal for brides who want to look flawless both in person and in photographs. This high-definition finish ensures that your makeup looks perfect under all lighting conditions, making it a popular choice for modern brides. Airbrush Bridal Makeup Airbrush makeup provides a smooth, lightweight finish that offers full coverage without feeling heavy. This technique is perfect for brides who want a natural, radiant look that lasts all day. Booking Your Bridal Makeup Artist in Sangrampur with Ladyfair Initial Contact: Call us at 7004721239 to discuss your bridal makeup needs and schedule an appointment. Consultation Session: Meet with our makeup artist to discuss your desired look, review your wedding attire, and plan the perfect makeup style. Makeup Trial: We offer trial sessions so you can preview your bridal makeup and make any necessary adjustments before your wedding day. Wedding Day Makeup: On your wedding day, our makeup artist will arrive at your location in Sangrampur to provide a seamless and stress-free makeup experience. Testimonials from Brides in Sangrampur Pooja M., Sangrampur: "Ladyfair made my wedding day perfect. The makeup artist was professional and understood exactly what I wanted. My bridal look was flawless!" Anamika S., Sangrampur: "I chose the HD makeup, and it was perfect for the photos. I felt confident and beautiful throughout the day." Rekha J., Sangrampur: "The airbrush makeup was a great choice. It felt light on my skin and lasted all day without any touch-ups. Highly recommend Ladyfair!" Preparing for Your Bridal Makeup Session To get the best results from your bridal makeup session, keep these tips in mind: Stay Hydrated: Drinking plenty of water helps keep your skin hydrated and glowing. Maintain a Skincare Routine: Stick to your regular skincare routine leading up to the wedding. Avoid New Products: Use familiar skincare products to prevent any adverse reactions. Communicate with Your Makeup Artist: Discuss your makeup preferences and any concerns during your consultation. Additional Beauty Services by Ladyfair in Sangrampur Ladyfair offers a variety of beauty services in Sangrampur to cater to all your makeup needs: Engagement and Reception Makeup: Customized looks for your pre-wedding events. Party Makeup: Perfect for any special occasion or celebration. Everyday Makeup: Enhance your daily look with our expert services. Special Occasion Makeup: Makeup for birthdays, anniversaries, and other significant events. The Future of Bridal Makeup in Sangrampur Ladyfair is committed to being the top bridal makeup artist in Sangrampur. As more brides experience our expert at-home services, we continue to set the standard for bridal beauty in the region. Q&A with Ladyfair’s Bridal Makeup Artist in Sangrampur Why should I choose Ladyfair as my bridal makeup artist in Sangrampur? Ladyfair combines professional expertise with the convenience of at-home services, ensuring that you look your best on your wedding day. What are the prices for bridal makeup services in Sangrampur? Our bridal makeup services start at ₹10,000 for basic makeup, ₹12,000 for HD makeup, and ₹18,000 for airbrush makeup. How do I book Ladyfair’s bridal makeup services in Sangrampur? You can book our services by calling 7004721239. We offer consultations and trial sessions to help you achieve your desired look. What types of bridal makeup does Ladyfair offer in Sangrampur? We offer traditional, HD, and airbrush bridal makeup styles to suit your preferences. Are makeup trials available before the wedding day? Yes, we provide trial sessions to finalize your bridal look and make any necessary adjustments. What kind of products does Ladyfair use for bridal makeup? We use professional-grade, high-quality products that are safe for all skin types and ensure a flawless finish. What other makeup services does Ladyfair offer in Sangrampur? Besides bridal makeup, we offer engagement, reception, party, and special occasion makeup services.

Posted By: 30th August 2024
Bridal Makeup Artist in Narpatganj
Introduction In Narpatganj, Ladyfair is the go-to choice for brides seeking impeccable makeup services for their special day. Our at-home bridal makeup service ensures you receive expert beauty treatments in the comfort of your own home. Whether you're aiming for a traditional look, a flawless HD finish, or airbrush perfection, our skilled makeup artist in Narpatganj is here to make you shine on your wedding day. Contact us today at 7004721239 to book your appointment. Why Ladyfair is the Top Choice for Bridal Makeup in Narpatganj Experienced Makeup Artist Our makeup artist in Narpatganj is highly skilled, with years of experience in bridal makeup. She specializes in creating personalized looks that enhance your natural beauty and reflect your unique style. Convenient At-Home Service Ladyfair offers the ultimate convenience with our at-home bridal makeup services, removing the need for you to travel to a salon. Enjoy a luxurious, personalized experience right at your doorstep. Premium Quality Products We use only high-quality, professional-grade makeup products to ensure a flawless, long-lasting look that is perfect for your wedding day. Bridal Makeup Pricing in Narpatganj Our pricing for bridal makeup services in Narpatganj is structured to fit various preferences and budgets: Basic Bridal Makeup: ₹10,000 HD Bridal Makeup: ₹12,000 Airbrush Bridal Makeup: ₹18,000 For engagement and reception: Basic Engagement/Reception Makeup: ₹6,000 HD Engagement/Reception Makeup: ₹8,000 Airbrush Engagement/Reception Makeup: ₹12,000 For parties: Basic Party Makeup: ₹2,500 HD Party Makeup: ₹3,500 Popular Bridal Makeup Styles in Narpatganj Traditional Bridal Makeup Our traditional bridal makeup in Narpatganj features bold, vibrant colors and meticulous application to complement traditional wedding attire, creating an elegant and classic look. HD Bridal Makeup HD bridal makeup provides a high-definition finish, ensuring you look picture-perfect in both photographs and real life throughout your special day. Airbrush Bridal Makeup Airbrush makeup offers a lightweight, smooth finish with full coverage that lasts all day, ideal for brides seeking a natural yet polished look. How to Book Your Bridal Makeup with Ladyfair in Narpatganj Initial Contact: Call us at 7004721239 to discuss your bridal makeup needs and schedule an appointment. Consultation Session: Meet with our makeup artist to discuss your desired look, review your wedding attire, and plan the perfect makeup style. Makeup Trial: We offer trial sessions so you can preview your bridal makeup and make any necessary adjustments before the big day. Wedding Day Makeup: On your wedding day, our makeup artist will arrive at your location in Narpatganj to provide a flawless and stress-free makeup service. Testimonials from Brides in Narpatganj Nisha R., Narpatganj: "Ladyfair made my wedding day perfect. The makeup artist was incredibly talented, and my bridal look exceeded all expectations." Pooja K., Narpatganj: "The airbrush makeup was light and comfortable, yet lasted all day. I couldn’t have asked for a better experience with Ladyfair." Swati M., Narpatganj: "The HD makeup looked stunning in my wedding photos. Ladyfair’s at-home service made everything so easy and stress-free." Preparing for Your Bridal Makeup Session To achieve the best results, follow these tips: Stay Hydrated: Drink plenty of water to keep your skin fresh and glowing. Consistent Skincare: Maintain a regular skincare routine leading up to your wedding. Avoid New Products: Stick to familiar skincare products to avoid any reactions. Communicate Clearly: Discuss your makeup preferences and concerns with our artist during your consultation. Additional Beauty Services by Ladyfair In addition to bridal makeup, Ladyfair offers: Engagement and Reception Makeup: Customized looks for all your pre-wedding events. Party Makeup: Perfect for special occasions and celebrations. Everyday Makeup: Enhance your daily look with our expert services. Special Occasion Makeup: Makeup for birthdays, anniversaries, and other significant events. The Future of Bridal Makeup in Narpatganj Ladyfair is committed to setting new standards in bridal beauty with our innovative at-home services in Narpatganj. As more brides experience our exceptional service, Ladyfair continues to grow as the preferred choice for bridal makeup. Q&A with Ladyfair’s Bridal Makeup Artist in Narpatganj Q1: What makes Ladyfair the best choice for bridal makeup in Narpatganj? A1: Ladyfair offers expert at-home bridal makeup services, combining skilled artistry with high-quality products for a flawless wedding look. Q2: What are the prices for bridal makeup services in Narpatganj? A2: Our bridal makeup services start at ₹10,000 for basic makeup, ₹12,000 for HD makeup, and ₹18,000 for airbrush makeup. Q3: How do I book Ladyfair’s bridal makeup services in Narpatganj? A3: You can book our services by calling 7004721239. We also offer consultations and trial sessions to help you achieve your desired look. Q4: What types of bridal makeup does Ladyfair offer in Narpatganj? A4: We offer traditional, HD, and airbrush bridal makeup styles to suit your preferences. Q5: Are makeup trials available before the wedding day? A5: Yes, we provide trial sessions to finalize your bridal look and make any necessary adjustments. Q6: What kind of products does Ladyfair use for bridal makeup? A6: We use professional-grade, high-quality products that are safe for all skin types and ensure a flawless finish. Q7: What other makeup services does Ladyfair offer in Narpatganj? A7: Besides bridal makeup, we offer engagement, reception, party, and special occasion makeup services.
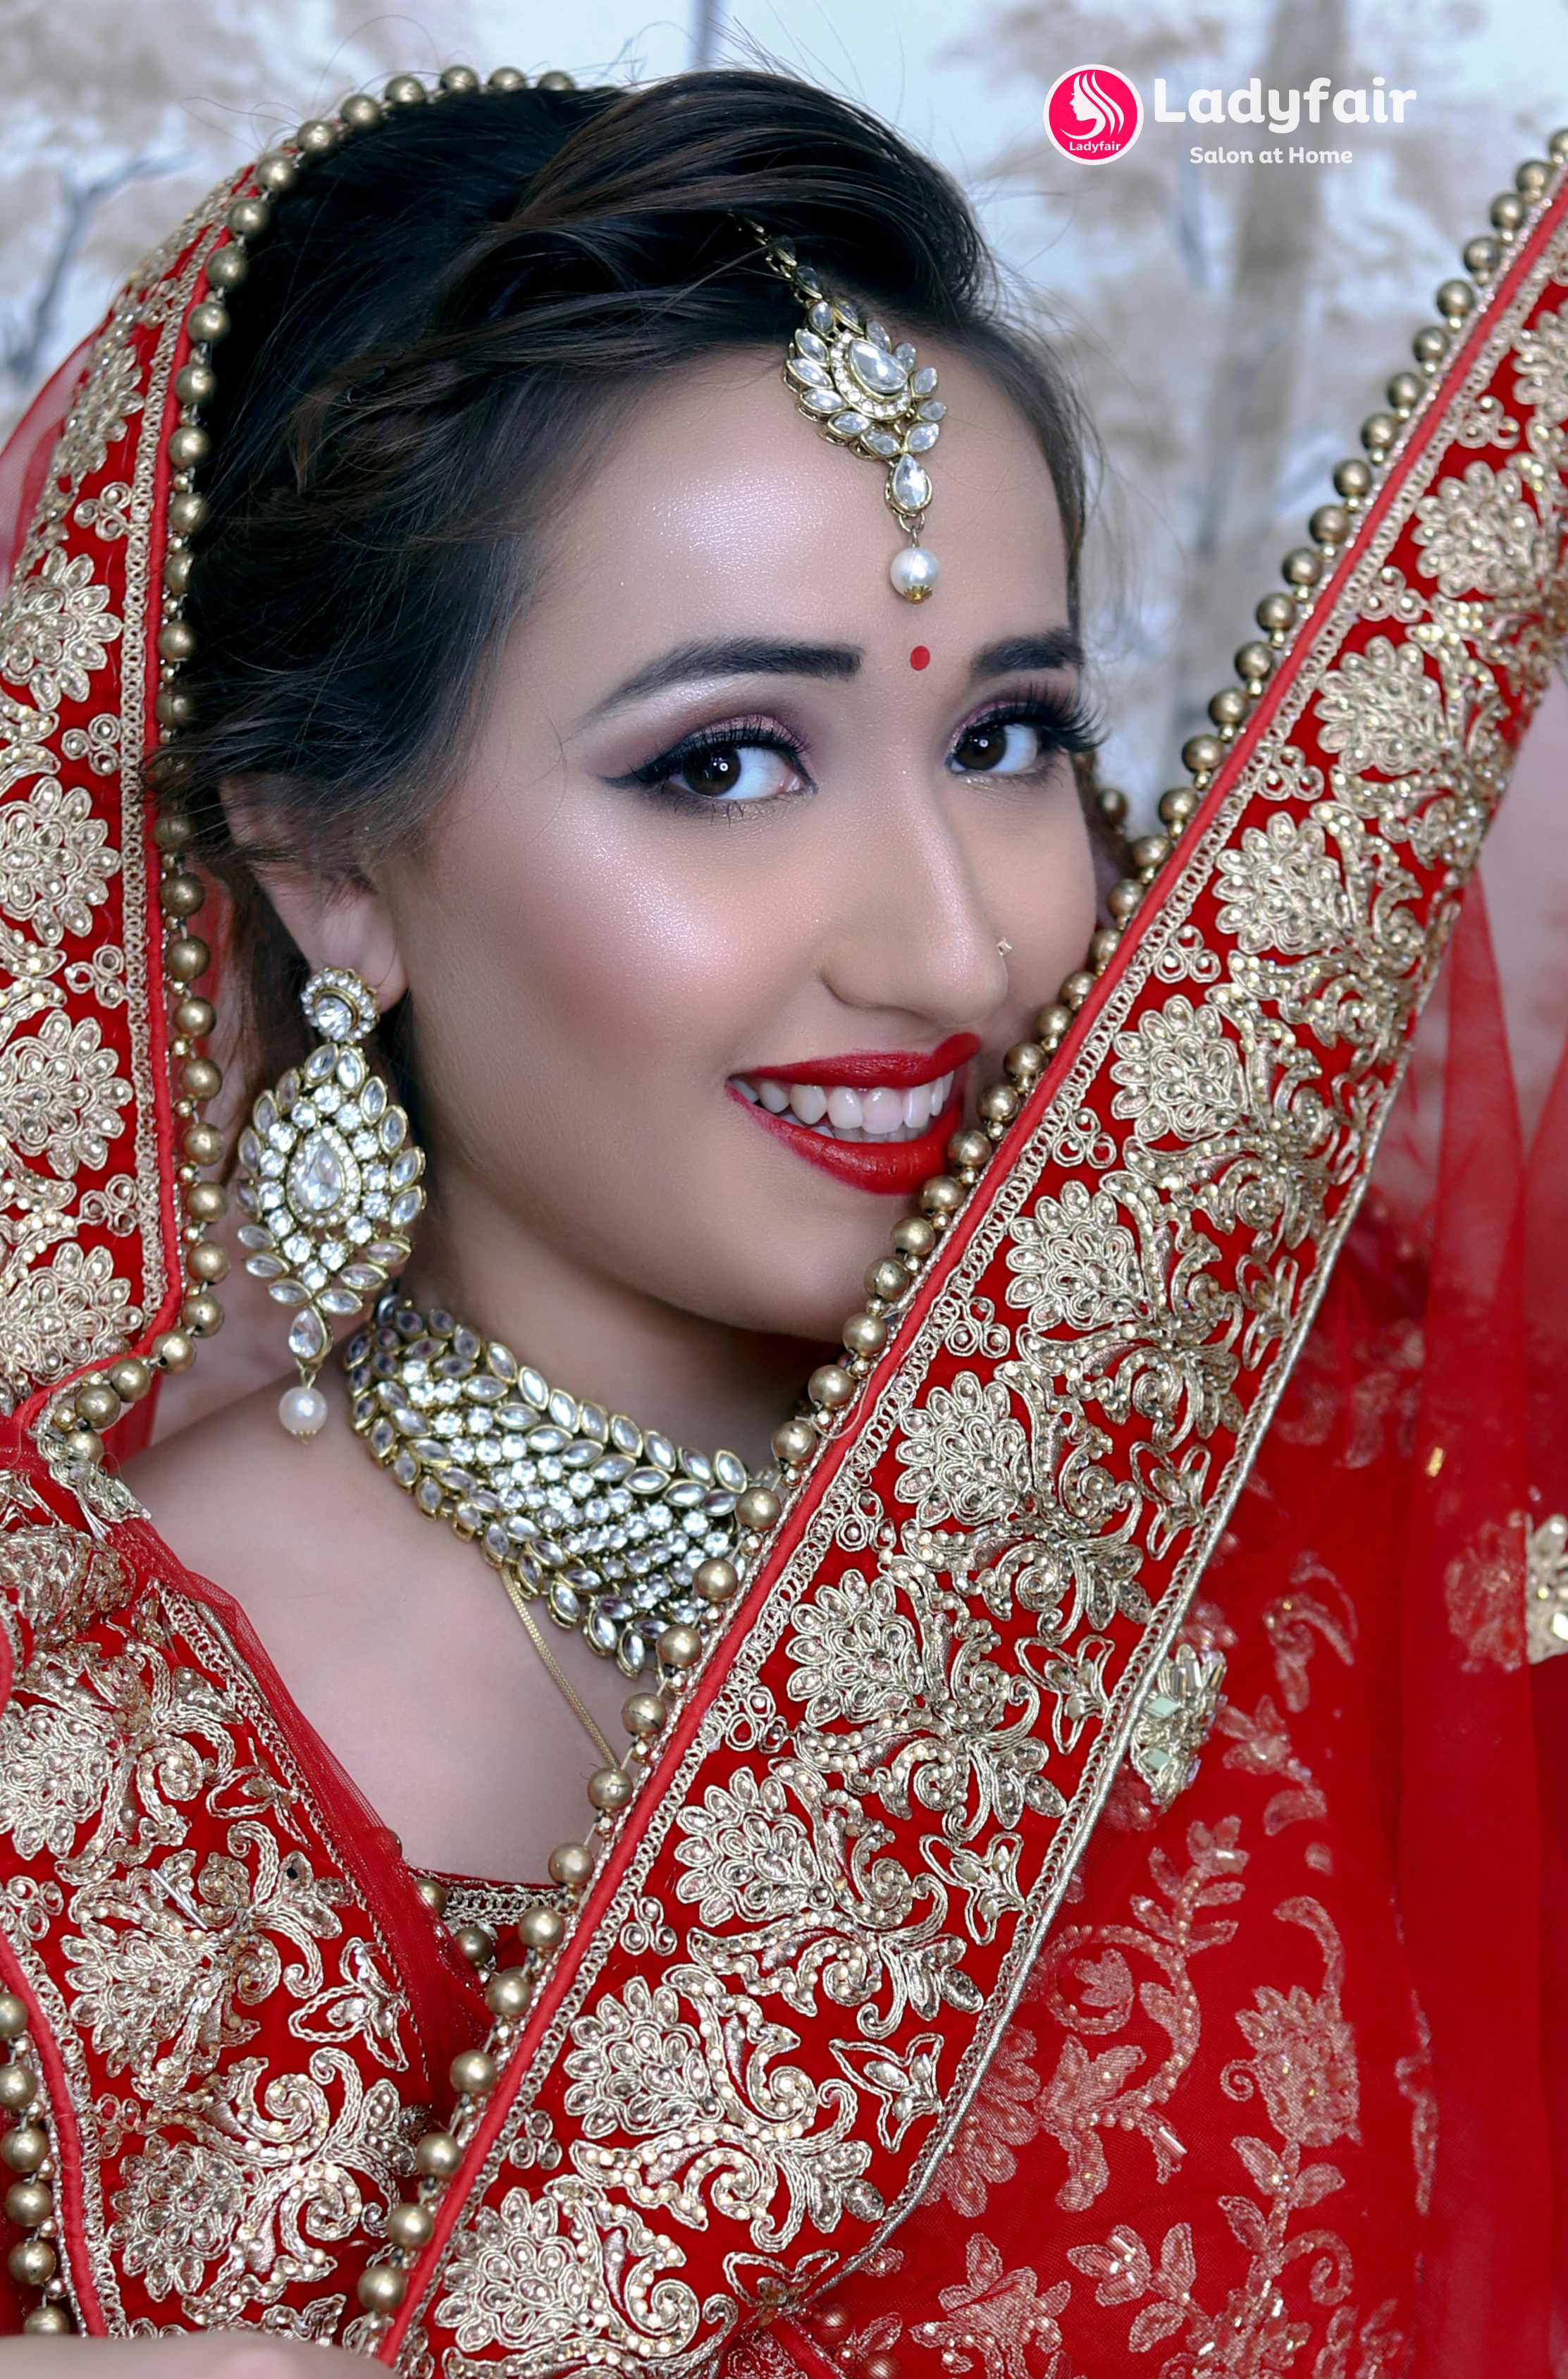
Posted By: 30th August 2024
Bridal Makeup Artist in Forbesganj
Introduction In Forbesganj, Ladyfair is the leading choice for brides seeking impeccable makeup services for their special day. Our at-home bridal makeup service ensures you receive expert beauty treatments in the comfort of your own home. Whether you're looking for a traditional look, a flawless HD finish, or airbrush perfection, our skilled makeup artist in Forbesganj is here to help you shine on your wedding day. Contact us today at 7004721239 to book your appointment. Why Ladyfair is the Top Choice for Bridal Makeup in Forbesganj Experienced Makeup Artist Our makeup artist in Forbesganj is highly skilled, with years of experience in bridal makeup. She specializes in creating personalized looks that enhance your natural beauty and align with your unique style. Convenient At-Home Service Ladyfair offers the ultimate convenience with our at-home bridal makeup services, eliminating the need to travel to a salon. Enjoy a luxurious, personalized experience right at your doorstep. Premium Quality Products We use only high-quality, professional-grade makeup products to ensure a flawless, long-lasting look that is perfect for your wedding day. Bridal Makeup Pricing in Forbesganj Our pricing for bridal makeup services in Forbesganj is structured to fit various preferences and budgets: Basic Bridal Makeup: ₹10,000 HD Bridal Makeup: ₹12,000 Airbrush Bridal Makeup: ₹18,000 For engagement and reception: Basic Engagement/Reception Makeup: ₹6,000 HD Engagement/Reception Makeup: ₹8,000 Airbrush Engagement/Reception Makeup: ₹12,000 For parties: Basic Party Makeup: ₹2,500 HD Party Makeup: ₹3,500 Popular Bridal Makeup Styles in Forbesganj Traditional Bridal Makeup Our traditional bridal makeup in Forbesganj features bold, vibrant colors and meticulous application to complement traditional wedding attire, creating an elegant and classic look. HD Bridal Makeup HD bridal makeup provides a high-definition finish, ensuring you look picture-perfect in both photographs and real life throughout your special day. Airbrush Bridal Makeup Airbrush makeup offers a lightweight, smooth finish with full coverage that lasts all day, ideal for brides seeking a natural yet polished look. How to Book Your Bridal Makeup with Ladyfair in Forbesganj Initial Contact: Call us at 7004721239 to discuss your bridal makeup needs and schedule an appointment. Consultation Session: Meet with our makeup artist to discuss your desired look, review your wedding attire, and plan the perfect makeup style. Makeup Trial: We offer trial sessions so you can preview your bridal makeup and make any necessary adjustments before the big day. Wedding Day Makeup: On your wedding day, our makeup artist will arrive at your location in Forbesganj to provide a flawless and stress-free makeup service. Testimonials from Brides in Forbesganj Rashmi D., Forbesganj: "Ladyfair made my wedding day unforgettable. The makeup artist was professional, and my bridal look was just as I imagined." Shalini P., Forbesganj: "The airbrush makeup was flawless and lasted all day. I couldn't have asked for better service from Ladyfair." Ankita K., Forbesganj: "The HD makeup looked incredible in all my photos. Ladyfair’s at-home service made the whole experience stress-free and enjoyable." Preparing for Your Bridal Makeup Session To achieve the best results, follow these tips: Stay Hydrated: Drink plenty of water to keep your skin fresh and glowing. Consistent Skincare: Maintain a regular skincare routine leading up to your wedding. Avoid New Products: Stick to familiar skincare products to avoid any reactions. Communicate Clearly: Discuss your makeup preferences and concerns with our artist during your consultation. Additional Beauty Services by Ladyfair In addition to bridal makeup, Ladyfair offers: Engagement and Reception Makeup: Customized looks for all your pre-wedding events. Party Makeup: Perfect for special occasions and celebrations. Everyday Makeup: Enhance your daily look with our expert services. Special Occasion Makeup: Makeup for birthdays, anniversaries, and other significant events. The Future of Bridal Makeup in Forbesganj Ladyfair is committed to setting new standards in bridal beauty with our innovative at-home services in Forbesganj. As more brides experience our exceptional service, Ladyfair continues to grow as the preferred choice for bridal makeup. Q&A with Ladyfair’s Bridal Makeup Artist in Forbesganj Q1: What makes Ladyfair the best choice for bridal makeup in Forbesganj? A1: Ladyfair offers expert at-home bridal makeup services, combining skilled artistry with high-quality products for a flawless wedding look. Q2: What are the prices for bridal makeup services in Forbesganj? A2: Our bridal makeup services start at ₹10,000 for basic makeup, ₹12,000 for HD makeup, and ₹18,000 for airbrush makeup. Q3: How do I book Ladyfair’s bridal makeup services in Forbesganj? A3: You can book our services by calling 7004721239. We also offer consultations and trial sessions to help you achieve your desired look. Q4: What types of bridal makeup does Ladyfair offer in Forbesganj? A4: We offer traditional, HD, and airbrush bridal makeup styles to suit your preferences. Q5: Are makeup trials available before the wedding day? A5: Yes, we provide trial sessions to finalize your bridal look and make any necessary adjustments. Q6: What kind of products does Ladyfair use for bridal makeup? A6: We use professional-grade, high-quality products that are safe for all skin types and ensure a flawless finish. Q7: What other makeup services does Ladyfair offer in Forbesganj? A7: Besides bridal makeup, we offer engagement, reception, party, and special occasion makeup services.

Posted By: 30th August 2024
Bridal Makeup Artist in Palasi
Introduction In Palasi, Ladyfair is the leading choice for brides seeking impeccable makeup services for their special day. Our at-home bridal makeup service ensures you receive expert beauty treatments in the comfort of your own home. Whether you're looking for a traditional look, a flawless HD finish, or airbrush perfection, our skilled makeup artist in Palasi is here to help you shine on your wedding day. Contact us today at 7004721239 to book your appointment. Why Ladyfair is the Top Choice for Bridal Makeup in Palasi Experienced Makeup Artist Our makeup artist in Palasi is highly skilled, with years of experience in bridal makeup. She specializes in creating personalized looks that enhance your natural beauty and align with your unique style. Convenient At-Home Service Ladyfair offers the ultimate convenience with our at-home bridal makeup services, eliminating the need to travel to a salon. Enjoy a luxurious, personalized experience right at your doorstep. Premium Quality Products We use only high-quality, professional-grade makeup products to ensure a flawless, long-lasting look that is perfect for your wedding day. Bridal Makeup Pricing in Palasi Our pricing for bridal makeup services in Palasi is structured to fit various preferences and budgets: Basic Bridal Makeup: ₹10,000 HD Bridal Makeup: ₹12,000 Airbrush Bridal Makeup: ₹18,000 For engagement and reception: Basic Engagement/Reception Makeup: ₹6,000 HD Engagement/Reception Makeup: ₹8,000 Airbrush Engagement/Reception Makeup: ₹12,000 For parties: Basic Party Makeup: ₹2,500 HD Party Makeup: ₹3,500 Popular Bridal Makeup Styles in Palasi Traditional Bridal Makeup Our traditional bridal makeup in Palasi features bold, vibrant colors and meticulous application to complement traditional wedding attire, creating an elegant and classic look. HD Bridal Makeup HD bridal makeup provides a high-definition finish, ensuring you look picture-perfect in both photographs and real life throughout your special day. Airbrush Bridal Makeup Airbrush makeup offers a lightweight, smooth finish with full coverage that lasts all day, ideal for brides seeking a natural yet polished look. How to Book Your Bridal Makeup with Ladyfair in Palasi Initial Contact: Call us at 7004721239 to discuss your bridal makeup needs and schedule an appointment. Consultation Session: Meet with our makeup artist to discuss your desired look, review your wedding attire, and plan the perfect makeup style. Makeup Trial: We offer trial sessions so you can preview your bridal makeup and make any necessary adjustments before the big day. Wedding Day Makeup: On your wedding day, our makeup artist will arrive at your location in Palasi to provide a flawless and stress-free makeup service. Testimonials from Brides in Palasi Rina B., Palasi: "Ladyfair made my wedding day unforgettable. The makeup artist was professional, and my bridal look was just as I dreamed." Suman K., Palasi: "The airbrush makeup was flawless and lasted all day. I couldn't have asked for better service from Ladyfair." Pooja D., Palasi: "The HD makeup looked incredible in all my photos. Ladyfair’s at-home service made the whole experience stress-free and enjoyable." Preparing for Your Bridal Makeup Session To achieve the best results, follow these tips: Stay Hydrated: Drink plenty of water to keep your skin fresh and glowing. Consistent Skincare: Maintain a regular skincare routine leading up to your wedding. Avoid New Products: Stick to familiar skincare products to avoid any reactions. Communicate Clearly: Discuss your makeup preferences and concerns with our artist during your consultation. Additional Beauty Services by Ladyfair In addition to bridal makeup, Ladyfair offers: Engagement and Reception Makeup: Customized looks for all your pre-wedding events. Party Makeup: Perfect for special occasions and celebrations. Everyday Makeup: Enhance your daily look with our expert services. Special Occasion Makeup: Makeup for birthdays, anniversaries, and other significant events. The Future of Bridal Makeup in Palasi Ladyfair is committed to setting new standards in bridal beauty with our innovative at-home services in Palasi. As more brides experience our exceptional service, Ladyfair continues to grow as the preferred choice for bridal makeup. Q&A with Ladyfair’s Bridal Makeup Artist in Palasi Q1: What makes Ladyfair the best choice for bridal makeup in Palasi? A1: Ladyfair offers expert at-home bridal makeup services, combining skilled artistry with high-quality products for a flawless wedding look. Q2: What are the prices for bridal makeup services in Palasi? A2: Our bridal makeup services start at ₹10,000 for basic makeup, ₹12,000 for HD makeup, and ₹18,000 for airbrush makeup. Q3: How do I book Ladyfair’s bridal makeup services in Palasi? A3: You can book our services by calling 7004721239. We also offer consultations and trial sessions to help you achieve your desired look. Q4: What types of bridal makeup does Ladyfair offer in Palasi? A4: We offer traditional, HD, and airbrush bridal makeup styles to suit your preferences. Q5: Are makeup trials available before the wedding day? A5: Yes, we provide trial sessions to finalize your bridal look and make any necessary adjustments. Q6: What kind of products does Ladyfair use for bridal makeup? A6: We use professional-grade, high-quality products that are safe for all skin types and ensure a flawless finish. Q7: What other makeup services does Ladyfair offer in Palasi? A7: Besides bridal makeup, we offer engagement, reception, party, and special occasion makeup services.

Posted By: 30th August 2024
Bridal Makeup Artist in Sikti
Introduction In Sikti, Ladyfair is the top choice for brides seeking impeccable makeup services for their special day. Our at-home bridal makeup service ensures you receive expert beauty treatments in the comfort of your own home. Whether you're looking for a traditional look, a flawless HD finish, or airbrush perfection, our skilled makeup artist in Sikti is here to help you shine on your wedding day. Contact us today at 7004721239 to book your appointment. Why Ladyfair is the Top Choice for Bridal Makeup in Sikti Experienced Makeup Artist Our makeup artist in Sikti is highly skilled, with years of experience in bridal makeup. She specializes in creating personalized looks that enhance your natural beauty and align with your unique style. Convenient At-Home Service Ladyfair offers the ultimate convenience with our at-home bridal makeup services, eliminating the need to travel to a salon. Enjoy a luxurious, personalized experience right at your doorstep. Premium Quality Products We use only high-quality, professional-grade makeup products to ensure a flawless, long-lasting look that is perfect for your wedding day. Bridal Makeup Pricing in Sikti Our pricing for bridal makeup services in Sikti is structured to fit various preferences and budgets: Basic Bridal Makeup: ₹10,000 HD Bridal Makeup: ₹12,000 Airbrush Bridal Makeup: ₹18,000 For engagement and reception: Basic Engagement/Reception Makeup: ₹6,000 HD Engagement/Reception Makeup: ₹8,000 Airbrush Engagement/Reception Makeup: ₹12,000 For parties: Basic Party Makeup: ₹2,500 HD Party Makeup: ₹3,500 Popular Bridal Makeup Styles in Sikti Traditional Bridal Makeup Our traditional bridal makeup in Sikti features bold, vibrant colors and meticulous application to complement traditional wedding attire, creating an elegant and classic look. HD Bridal Makeup HD bridal makeup provides a high-definition finish, ensuring you look picture-perfect in both photographs and real life throughout your special day. Airbrush Bridal Makeup Airbrush makeup offers a lightweight, smooth finish with full coverage that lasts all day, ideal for brides seeking a natural yet polished look. How to Book Your Bridal Makeup with Ladyfair in Sikti Initial Contact: Call us at 7004721239 to discuss your bridal makeup needs and schedule an appointment. Consultation Session: Meet with our makeup artist to discuss your desired look, review your wedding attire, and plan the perfect makeup style. Makeup Trial: We offer trial sessions so you can preview your bridal makeup and make any necessary adjustments before the big day. Wedding Day Makeup: On your wedding day, our makeup artist will arrive at your location in Sikti to provide a flawless and stress-free makeup service. Testimonials from Brides in Sikti Meena K., Sikti: "Ladyfair made my wedding day so special. The makeup artist was professional, and my bridal look was exactly what I envisioned." Rashmi J., Sikti: "The airbrush makeup was flawless and lasted all day. I couldn’t have asked for better service from Ladyfair." Anita S., Sikti: "The HD makeup looked stunning in all my photos. Ladyfair’s at-home service made the whole experience stress-free and enjoyable." Preparing for Your Bridal Makeup Session To achieve the best results, follow these tips: Stay Hydrated: Drink plenty of water to keep your skin fresh and glowing. Consistent Skincare: Maintain a regular skincare routine leading up to your wedding. Avoid New Products: Stick to familiar skincare products to avoid any reactions. Communicate Clearly: Discuss your makeup preferences and concerns with our artist during your consultation. Additional Beauty Services by Ladyfair In addition to bridal makeup, Ladyfair offers: Engagement and Reception Makeup: Customized looks for all your pre-wedding events. Party Makeup: Perfect for special occasions and celebrations. Everyday Makeup: Enhance your daily look with our expert services. Special Occasion Makeup: Makeup for birthdays, anniversaries, and other significant events. The Future of Bridal Makeup in Sikti Ladyfair is committed to setting new standards in bridal beauty with our innovative at-home services in Sikti. As more brides experience our exceptional service, Ladyfair continues to grow as the preferred choice for bridal makeup. Q&A with Ladyfair’s Bridal Makeup Artist in Sikti Q1: What makes Ladyfair the best choice for bridal makeup in Sikti? A1: Ladyfair offers expert at-home bridal makeup services, combining skilled artistry with high-quality products for a flawless wedding look. Q2: What are the prices for bridal makeup services in Sikti? A2: Our bridal makeup services start at ₹10,000 for basic makeup, ₹12,000 for HD makeup, and ₹18,000 for airbrush makeup. Q3: How do I book Ladyfair’s bridal makeup services in Sikti? A3: You can book our services by calling 7004721239. We also offer consultations and trial sessions to help you achieve your desired look. Q4: What types of bridal makeup does Ladyfair offer in Sikti? A4: We offer traditional, HD, and airbrush bridal makeup styles to suit your preferences. Q5: Are makeup trials available before the wedding day? A5: Yes, we provide trial sessions to finalize your bridal look and make any necessary adjustments. Q6: What kind of products does Ladyfair use for bridal makeup? A6: We use professional-grade, high-quality products that are safe for all skin types and ensure a flawless finish. Q7: What other makeup services does Ladyfair offer in Sikti? A7: Besides bridal makeup, we offer engagement, reception, party, and special occasion makeup services.
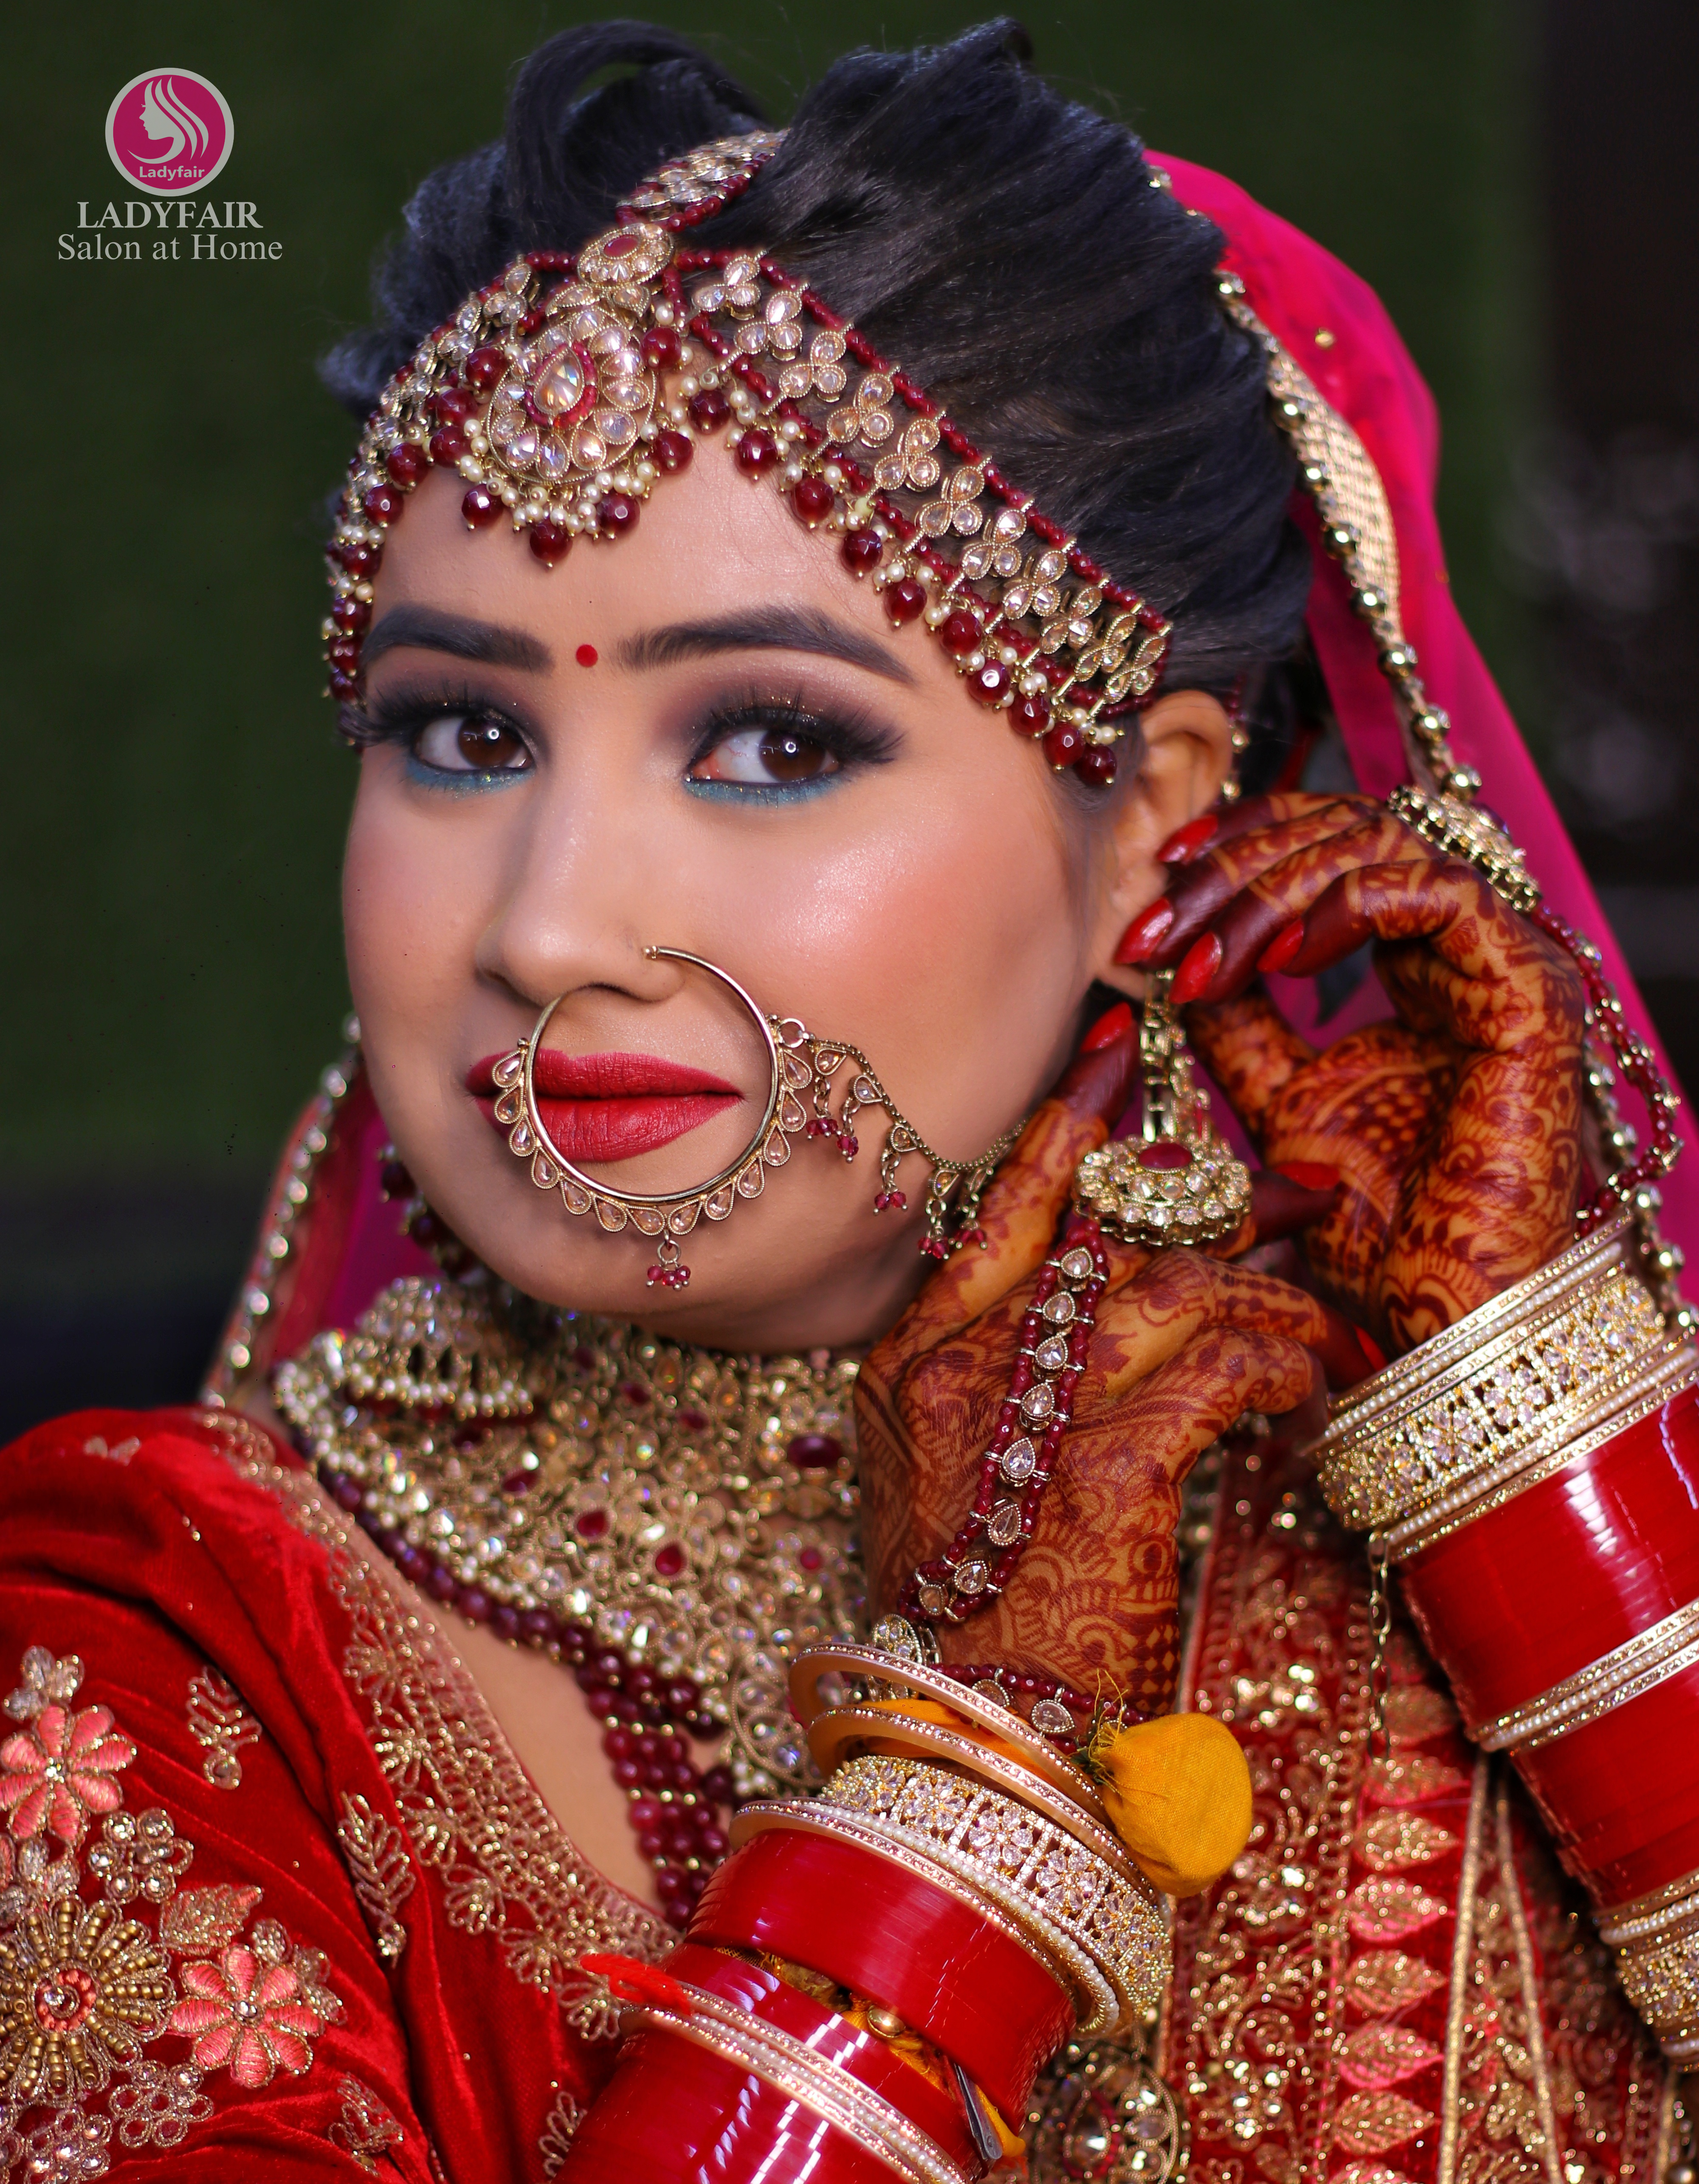
Posted By: 29th August 2024
Bridal Makeup Artist in Raniganj
Introduction In Raniganj, Ladyfair is the go-to choice for brides seeking impeccable makeup services for their big day. Our at-home bridal makeup service guarantees expert beauty treatments in the comfort of your own home. Whether you're looking for a traditional look, a flawless HD finish, or airbrush perfection, our skilled makeup artist in Raniganj is here to ensure you shine on your special day. Contact us today at 7004721239 to book your appointment. Why Ladyfair is the Top Choice for Bridal Makeup in Raniganj Experienced Makeup Artist Our makeup artist in Raniganj is highly skilled, with years of experience in bridal makeup. She specializes in creating personalized looks that enhance your natural beauty and align with your unique style. Convenient At-Home Service Ladyfair offers the ultimate convenience with our at-home bridal makeup services, eliminating the need to travel to a salon. Enjoy a luxurious, personalized experience right at your doorstep. Premium Quality Products We use only high-quality, professional-grade makeup products to ensure a flawless, long-lasting look that is perfect for your wedding day. Bridal Makeup Pricing in Raniganj Our pricing for bridal makeup services in Raniganj is structured to fit various preferences and budgets: Basic Bridal Makeup: ₹10,000 HD Bridal Makeup: ₹12,000 Airbrush Bridal Makeup: ₹18,000 For engagement and reception: Basic Engagement/Reception Makeup: ₹6,000 HD Engagement/Reception Makeup: ₹8,000 Airbrush Engagement/Reception Makeup: ₹12,000 For parties: Basic Party Makeup: ₹2,500 HD Party Makeup: ₹3,500 Popular Bridal Makeup Styles in Raniganj Traditional Bridal Makeup Our traditional bridal makeup in Raniganj features bold, vibrant colors and meticulous application to complement traditional wedding attire, creating an elegant and classic look. HD Bridal Makeup HD bridal makeup provides a high-definition finish, ensuring you look picture-perfect in both photographs and real life throughout your special day. Airbrush Bridal Makeup Airbrush makeup offers a lightweight, smooth finish with full coverage that lasts all day, ideal for brides seeking a natural yet polished look. How to Book Your Bridal Makeup with Ladyfair in Raniganj Initial Contact: Call us at 7004721239 to discuss your bridal makeup needs and schedule an appointment. Consultation Session: Meet with our makeup artist to discuss your desired look, review your wedding attire, and plan the perfect makeup style. Makeup Trial: We offer trial sessions so you can preview your bridal makeup and make any necessary adjustments before the big day. Wedding Day Makeup: On your wedding day, our makeup artist will arrive at your location in Raniganj to provide a flawless and stress-free makeup service. Testimonials from Brides in Raniganj Sneha D., Raniganj: "Ladyfair made my wedding day so special. The makeup artist was professional, and my bridal look was exactly what I envisioned." Pooja R., Raniganj: "The airbrush makeup was flawless and lasted all day. I couldn’t have asked for better service from Ladyfair." Shivani K., Raniganj: "The HD makeup looked stunning in all my photos. Ladyfair’s at-home service made the whole experience stress-free and enjoyable." Preparing for Your Bridal Makeup Session To achieve the best results, follow these tips: Stay Hydrated: Drink plenty of water to keep your skin fresh and glowing. Consistent Skincare: Maintain a regular skincare routine leading up to your wedding. Avoid New Products: Stick to familiar skincare products to avoid any reactions. Communicate Clearly: Discuss your makeup preferences and concerns with our artist during your consultation. Additional Beauty Services by Ladyfair In addition to bridal makeup, Ladyfair offers: Engagement and Reception Makeup: Customized looks for all your pre-wedding events. Party Makeup: Perfect for special occasions and celebrations. Everyday Makeup: Enhance your daily look with our expert services. Special Occasion Makeup: Makeup for birthdays, anniversaries, and other significant events. The Future of Bridal Makeup in Raniganj Ladyfair is committed to setting new standards in bridal beauty with our innovative at-home services in Raniganj. As more brides experience our exceptional service, Ladyfair continues to grow as the preferred choice for bridal makeup. Q&A with Ladyfair’s Bridal Makeup Artist in Raniganj Q1: What makes Ladyfair the best choice for bridal makeup in Raniganj? A1: Ladyfair offers expert at-home bridal makeup services, combining skilled artistry with high-quality products for a flawless wedding look. Q2: What are the prices for bridal makeup services in Raniganj? A2: Our bridal makeup services start at ₹10,000 for basic makeup, ₹12,000 for HD makeup, and ₹18,000 for airbrush makeup. Q3: How do I book Ladyfair’s bridal makeup services in Raniganj? A3: You can book our services by calling 7004721239. We also offer consultations and trial sessions to help you achieve your desired look. Q4: What types of bridal makeup does Ladyfair offer in Raniganj? A4: We offer traditional, HD, and airbrush bridal makeup styles to suit your preferences. Q5: Are makeup trials available before the wedding day? A5: Yes, we provide trial sessions to finalize your bridal look and make any necessary adjustments. Q6: What kind of products does Ladyfair use for bridal makeup? A6: We use professional-grade, high-quality products that are safe for all skin types and ensure a flawless finish. Q7: What other makeup services does Ladyfair offer in Raniganj? A7: Besides bridal makeup, we offer engagement, reception, party, and special occasion makeup services.

Posted By: 29th August 2024
Bridal Makeup Artist in Kursakanta
Introduction In Kursakanta, Ladyfair is the top choice for brides seeking impeccable makeup services for their big day. Our at-home bridal makeup service ensures you receive expert beauty treatments in the comfort of your own home. Whether you're looking for a traditional look, a flawless HD finish, or airbrush perfection, our skilled makeup artist in Kursakanta is here to make you shine on your special day. Contact us today at 7004721239 to book your appointment. Why Ladyfair is the Top Choice for Bridal Makeup in Kursakanta Experienced Makeup Artist Our makeup artist in Kursakanta is highly skilled with years of experience in bridal makeup. She specializes in creating personalized looks that enhance your natural beauty and align with your style. Convenient At-Home Service Ladyfair offers the ultimate convenience with our at-home bridal makeup services, removing the need for you to travel to a salon. Enjoy a luxurious, personalized experience right at your doorstep. Premium Quality Products We use only high-quality, professional-grade makeup products to ensure a flawless, long-lasting look that is perfect for your wedding day. Bridal Makeup Pricing in Kursakanta Our pricing for bridal makeup services in Kursakanta is designed to fit various preferences and budgets: Basic Bridal Makeup: ₹10,000 HD Bridal Makeup: ₹12,000 Airbrush Bridal Makeup: ₹18,000 For engagement and reception: Basic Engagement/Reception Makeup: ₹6,000 HD Engagement/Reception Makeup: ₹8,000 Airbrush Engagement/Reception Makeup: ₹12,000 For parties: Basic Party Makeup: ₹2,500 HD Party Makeup: ₹3,500 Popular Bridal Makeup Styles in Kursakanta Traditional Bridal Makeup Our traditional bridal makeup in Kursakanta features bold, vibrant colors and meticulous application to complement traditional wedding attire, creating an elegant and classic look. HD Bridal Makeup HD bridal makeup provides a high-definition finish that looks perfect in both photographs and real life. This style ensures a flawless appearance throughout your special day. Airbrush Bridal Makeup Airbrush makeup offers a lightweight, smooth finish with full coverage that lasts all day, ideal for brides seeking a natural yet polished look. How to Book Your Bridal Makeup with Ladyfair in Kursakanta Initial Contact: Call us at 7004721239 to discuss your bridal makeup needs and schedule an appointment. Consultation Session: Meet with our makeup artist to discuss your desired look, review your wedding attire, and plan the perfect makeup style. Makeup Trial: We provide trial sessions so you can preview your bridal makeup and make any necessary adjustments before the wedding day. Wedding Day Makeup: On your wedding day, our makeup artist will arrive at your location in Kursakanta to deliver a flawless and stress-free makeup service. Testimonials from Brides in Kursakanta Priya T., Kursakanta: "Ladyfair made my wedding day so special. The makeup artist was fantastic, and my bridal look was exactly what I had envisioned." Anjali S., Kursakanta: "The airbrush makeup was flawless and lasted throughout the day. I couldn't have asked for better service from Ladyfair." Kavita M., Kursakanta: "The HD makeup looked stunning in all my photos. Ladyfair’s at-home service made the whole experience stress-free and enjoyable." Preparing for Your Bridal Makeup Session To achieve the best results, follow these tips: Stay Hydrated: Drink plenty of water to keep your skin fresh and glowing. Consistent Skincare: Maintain a regular skincare routine leading up to your wedding. Avoid New Products: Stick to familiar skincare products to avoid any reactions. Communicate Clearly: Discuss your makeup preferences and concerns with our artist during your consultation. Additional Beauty Services by Ladyfair In addition to bridal makeup, Ladyfair offers: Engagement and Reception Makeup: Customized looks for all your pre-wedding events. Party Makeup: Perfect for special occasions and celebrations. Everyday Makeup: Enhance your daily look with our expert services. Special Occasion Makeup: Makeup for birthdays, anniversaries, and other significant events. The Future of Bridal Makeup in Kursakanta Ladyfair is committed to setting new standards in bridal beauty with our innovative at-home services in Kursakanta. As more brides experience our exceptional service, Ladyfair continues to grow as the preferred choice for bridal makeup. Q&A with Ladyfair’s Bridal Makeup Artist in Kursakanta Q1: What makes Ladyfair the best choice for bridal makeup in Kursakanta? Ladyfair offers expert at-home bridal makeup services, combining skilled artistry with high-quality products for a flawless wedding look. Q2: What are the prices for bridal makeup services in Kursakanta? Our bridal makeup services start at ₹10,000 for basic makeup, ₹12,000 for HD makeup, and ₹18,000 for airbrush makeup. Q3: How do I book Ladyfair’s bridal makeup services in Kursakanta? You can book our services by calling 7004721239. We also offer consultations and trial sessions to help you achieve your desired look. Q4: What types of bridal makeup does Ladyfair offer in Kursakanta? We offer traditional, HD, and airbrush bridal makeup styles to suit your preferences. Q5: Are makeup trials available before the wedding day? Yes, we provide trial sessions to finalize your bridal look and make any necessary adjustments. Q6: What kind of products does Ladyfair use for bridal makeup? We use professional-grade, high-quality products that are safe for all skin types and ensure a flawless finish. Q7: What other makeup services does Ladyfair offer in Kursakanta? Besides bridal makeup, we offer engagement, reception, party, and special occasion makeup services.

Posted By: 29th August 2024
Bridal Makeup Artist in Jokihat
Introduction A bride’s wedding day is one of the most memorable moments of her life, and Ladyfair is dedicated to ensuring that every bride in Jokihat, Bihar, looks her absolute best. Specializing in at-home bridal makeup services, Ladyfair brings professional beauty expertise directly to your doorstep, providing a stress-free and personalized experience. To book your session, contact us at 7004721239. This blog will walk you through the unique bridal makeup services Ladyfair offers in Jokihat, our expert approach to various bridal styles, and how to make your wedding day beauty routine seamless and enjoyable. Why Professional Bridal Makeup is Essential Bridal makeup is about more than just applying cosmetics—it's about enhancing your natural beauty and ensuring your makeup lasts all day. A professional makeup artist knows how to highlight your best features and create a look that complements your wedding attire. Ladyfair’s expert makeup artist in Jokihat is skilled in creating flawless, long-lasting bridal looks that will make you feel confident and beautiful on your special day. Why Choose Ladyfair in Jokihat? Convenient At-Home Bridal Makeup Services Ladyfair offers unmatched convenience with our at-home services, allowing you to prepare for your big day in the comfort of your own home. Our makeup artist will travel to your location, so you can focus on enjoying your wedding day without the hassle of visiting a salon. Expertise in Diverse Bridal Styles Whether you're dreaming of a traditional bridal look or a modern, trendy style, Ladyfair’s makeup artist in Jokihat can craft the perfect look for you. We work closely with each bride to ensure their makeup reflects their unique personality and wedding theme. Use of Premium Products Ladyfair is committed to using only high-quality makeup products, ensuring your bridal look is safe for your skin and lasts throughout your wedding day. Our products are chosen for their long-lasting and flawless finish. Personalized Consultations and Makeup Trials We offer personalized consultations to discuss your desired look, review your wedding attire, and plan the perfect makeup style. Additionally, we provide makeup trials so you can see your bridal makeup before the big day and make any necessary adjustments. Bridal Makeup Trends in Jokihat Traditional Bridal Makeup In Jokihat, traditional bridal makeup often features bold eyes, bright lip colors, and well-defined features. This style is ideal for brides who want to honor their cultural heritage while making a striking impression. Modern Bridal Makeup For brides who prefer a contemporary look, modern bridal makeup trends focus on subtlety and elegance. With soft, natural tones and a dewy finish, this style is perfect for brides who want to enhance their features without overwhelming them. Fusion Bridal Makeup Fusion makeup blends traditional and modern elements, creating a unique look that respects cultural traditions while embracing current trends. This style is perfect for brides who want a personalized and trendy look on their special day. The Ladyfair Bridal Makeup Experience: Step-by-Step Initial Inquiry: Start by contacting us at 7004721239 to discuss your bridal makeup needs and schedule a consultation. Pre-Wedding Consultation: Meet with our makeup artist to discuss your vision, review your wedding attire, and plan the makeup style that best suits you. Makeup Trial: Experience a trial session where you can preview your bridal makeup. This allows you to make any adjustments before the big day to ensure complete satisfaction. Final Makeup Session: On your wedding day, our makeup artist will arrive at your location to provide the full bridal makeup service, ensuring you look flawless and feel confident. Optional Touch-Ups: We also offer post-wedding touch-up services to keep your makeup looking fresh throughout the event. Client Testimonials Anita K., Jokihat: "Ladyfair made my wedding day so special. The at-home service was incredibly convenient, and the makeup artist captured exactly the look I wanted. My bridal makeup was stunning and lasted all day." Rita S., Jokihat: "The makeup artist from Ladyfair was fantastic! She understood my vision perfectly and created a look that was elegant and timeless. The at-home service made everything stress-free." Meena T., Jokihat: "I was thrilled with my bridal makeup by Ladyfair. The artist was professional, punctual, and incredibly talented. My makeup looked amazing in photos, and I would highly recommend Ladyfair to any bride in Jokihat." Preparing for Your Bridal Makeup Session To achieve the best results from your bridal makeup session, follow these tips: Stay Hydrated: Drinking plenty of water in the weeks leading up to your wedding helps keep your skin hydrated and glowing. Maintain a Skincare Routine: Stick to a consistent skincare routine, including cleansing, toning, and moisturizing, to keep your skin healthy. Avoid Trying New Products: To prevent any adverse reactions, avoid introducing new skincare products close to your wedding day. Communicate Your Vision: During your consultation, clearly communicate your desired look and any specific concerns to the makeup artist to ensure the best results. Beyond Bridal Makeup: Ladyfair’s Comprehensive Beauty Services While bridal makeup is our specialty, Ladyfair also offers a variety of other beauty services: Party Makeup: Perfect for wedding guests, parties, or special events. Everyday Makeup: Ideal for enhancing your natural beauty for daily activities. Special Occasion Services: Includes makeup for engagements, anniversaries, and other significant events. The Future of Bridal Makeup in Jokihat Ladyfair is committed to continuing our tradition of excellence in Jokihat by offering brides the highest quality makeup services for their special day. As we grow, we remain dedicated to staying ahead of beauty trends and techniques, ensuring that every bride feels beautiful and confident on her wedding day. Q&A with Ladyfair’s Bridal Makeup Artist in Jokihat, Bihar Q1: What makes Ladyfair’s bridal makeup services unique in Jokihat? Ladyfair offers at-home bridal makeup services, providing a personalized experience where the makeup artist comes to you. This convenience, combined with our expertise in various bridal styles, sets us apart in Jokihat. Q2: What bridal makeup styles does Ladyfair specialize in? Ladyfair specializes in traditional, modern, and fusion bridal makeup styles. Our makeup artist works with each bride to create a look that reflects her personal style and wedding theme. Q3: How do Ladyfair’s at-home makeup services work? The process is simple. Start by contacting us at 7004721239 to discuss your needs. We’ll schedule a consultation and makeup trial, and on your wedding day, our makeup artist will come to your location to complete your bridal look. Q4: What kind of products does Ladyfair use for bridal makeup? Ladyfair uses premium, long-lasting makeup products that are safe for all skin types. Our products ensure a flawless finish that lasts throughout your wedding day. Q5: How should a bride prepare for her bridal makeup session? Brides should maintain a good skincare routine, stay hydrated, avoid trying new products close to the wedding, and communicate their desired look clearly during the consultation. Q6: Can Ladyfair accommodate specific cultural or traditional makeup requests? Yes, Ladyfair is experienced in creating makeup looks that respect cultural traditions while incorporating modern trends. We work closely with brides to ensure their makeup reflects their heritage and personal style. Q7: What feedback have clients given about Ladyfair’s services in Jokihat? Clients appreciate the convenience of our at-home services, the professionalism of our makeup artist, and the quality of the products we use. Many brides have praised the stunning results and how comfortable they felt throughout the process. Q8: How can a bride book Ladyfair’s bridal makeup services in Jokihat? To book our services, simply call us at 7004721239. We’ll guide you through the entire process, from the initial inquiry to the final makeup session. Q9: Does Ladyfair offer other beauty services in addition to bridal makeup? Yes, Ladyfair provides a range of beauty services, including party makeup, everyday makeup, and special occasion makeup.

Posted By: 29th August 2024
Top Bridal Makeup Artist in Katihar
Introduction In the vibrant district of Katihar, Ladyfair is recognized as the leading choice for brides who desire impeccable makeup services. Our at-home bridal makeup service ensures that you receive the highest quality beauty treatments in the comfort of your own home. Whether you’re dreaming of a traditional look, a flawless HD finish, or the elegance of airbrush makeup, our expert makeup artist in Katihar is dedicated to making you shine on your special day. Contact us today at 7004721239 to book your appointment. Why Ladyfair is the Top Choice for Bridal Makeup in Katihar 1. Experienced Makeup Artist Our makeup artist in Katihar brings years of expertise in bridal makeup, specializing in creating personalized looks that highlight your natural beauty and match your individual style. 2. Convenient At-Home Service Ladyfair offers the unparalleled convenience of at-home bridal makeup services, allowing you to enjoy a luxurious and personalized beauty experience right at your doorstep, without the stress of traveling to a salon. 3. Premium Quality Products We only use high-quality, professional-grade makeup products to ensure a flawless, long-lasting look that will keep you radiant throughout your wedding day. Bridal Makeup Pricing in Katihar Our pricing for bridal makeup services in Katihar is designed to fit various preferences and budgets: Basic Bridal Makeup: ₹10,000 HD Bridal Makeup: ₹12,000 Airbrush Bridal Makeup: ₹18,000 For engagement and reception makeup: Basic Engagement/Reception Makeup: ₹6,000 HD Engagement/Reception Makeup: ₹8,000 Airbrush Engagement/Reception Makeup: ₹12,000 For party makeup: Basic Party Makeup: ₹2,500 HD Party Makeup: ₹3,500 Popular Bridal Makeup Styles in Katihar Traditional Bridal Makeup Our traditional bridal makeup in Katihar emphasizes bold, vibrant colors and intricate details to complement traditional wedding attire, ensuring an elegant and timeless look. HD Bridal Makeup HD bridal makeup offers a high-definition finish that is flawless both in photographs and in person, making it an ideal choice for your special day. Airbrush Bridal Makeup Airbrush makeup provides a lightweight, smooth finish with full coverage that lasts all day, perfect for brides seeking a natural yet polished appearance. How to Book Your Bridal Makeup with Ladyfair in Katihar 1. Initial Contact: Call us at 7004721239 to discuss your bridal makeup needs and schedule an appointment. 2. Consultation Session: Meet with our makeup artist to discuss your desired look, review your wedding attire, and plan the perfect makeup style. 3. Makeup Trial: We offer trial sessions so you can preview your bridal makeup and make any necessary adjustments before the big day. 4. Wedding Day Makeup: On your wedding day, our makeup artist will arrive at your location in Katihar to deliver a flawless and stress-free makeup service. Testimonials from Brides in Katihar Priya K., Katihar: "Ladyfair’s at-home makeup service was fantastic. The makeup artist was incredibly skilled, and my bridal look was exactly what I envisioned!" Anjali T., Katihar: "I chose the airbrush makeup for my wedding, and it was stunning. The makeup lasted all day, and I received so many compliments. Highly recommended!" Megha S., Katihar: "The HD makeup was perfect for my wedding photos. Ladyfair's team made sure I looked and felt beautiful on my special day." Preparing for Your Bridal Makeup Session To ensure the best results, follow these preparation tips: Stay Hydrated: Drink plenty of water to keep your skin fresh and glowing. Consistent Skincare: Maintain a regular skincare routine leading up to your wedding. Avoid New Products: Stick to familiar skincare products to avoid any adverse reactions. Communicate Clearly: Discuss your makeup preferences and any concerns with our artist during your consultation. Additional Beauty Services by Ladyfair In addition to bridal makeup, Ladyfair offers: Engagement and Reception Makeup: Customized looks for all your pre-wedding events. Party Makeup: Perfect for special occasions and celebrations. Everyday Makeup: Enhance your daily look with our expert services. Special Occasion Makeup: Makeup for birthdays, anniversaries, and other significant events. The Future of Bridal Makeup in Katihar Ladyfair is dedicated to setting new standards in bridal beauty with our innovative at-home services in Katihar. As more brides experience our exceptional service, Ladyfair continues to grow as the preferred choice for bridal makeup in the region. Q&A with Ladyfair’s Bridal Makeup Artist in Katihar Q1: What makes Ladyfair the best choice for bridal makeup in Katihar? A1: Ladyfair offers expert at-home bridal makeup services, combining skilled artistry with high-quality products for a flawless wedding look. Q2: What are the prices for bridal makeup services in Katihar? A2: Our bridal makeup services start at ₹10,000 for basic makeup, ₹12,000 for HD makeup, and ₹18,000 for airbrush makeup. **Q3: How do I book Ladyfair’s bridal makeup services in Katihar?** A3: You can book our services by calling 7004721239. We offer consultations and trial sessions to ensure you achieve your desired bridal look. Q4: What types of bridal makeup does Ladyfair offer in Katihar? A4: We offer traditional, HD, and airbrush bridal makeup styles to suit your preferences. Q5: Are makeup trials available before the wedding day? A5: Yes, we provide trial sessions to finalize your bridal look and make any necessary adjustments before the big day. Q6: What kind of products does Ladyfair use for bridal makeup? A6: We use professional-grade, high-quality products that are safe for all skin types and ensure a flawless finish. Q7: What other makeup services does Ladyfair offer in Katihar? A7: Besides bridal makeup, we offer engagement, reception, party, and special occasion makeup services.

Posted By: 28th August 2024
Best Makeup Artist in bhagwanpur
Ladyfair Bridal Makeup Services in Bhagwanpur In Bhagwanpur, Ladyfair is recognized as the premier choice for brides who want flawless, at-home makeup services. Our at-home bridal makeup service ensures you receive top-tier beauty treatments right in the comfort of your own space. Whether you're aiming for a traditional look, an HD finish, or airbrush perfection, our expert makeup artist in Bhagwanpur is here to make you shine on your special day. Contact us today at 7004721239 to book your appointment. Why Ladyfair is the Top Choice for Bridal Makeup in Bhagwanpur Experienced Makeup Artist Our Bhagwanpur-based makeup artist has extensive experience in bridal makeup, excelling in creating looks that enhance your natural beauty and reflect your personal style. Convenient At-Home Service Ladyfair brings the salon to you, offering the convenience of at-home bridal makeup. Enjoy a luxurious, personalized experience without the need to travel. Premium Quality Products We use only the best professional-grade makeup products to ensure your look is flawless and long-lasting on your big day. Bridal Makeup Pricing in Bhagwanpur Our pricing is designed to accommodate various preferences and budgets: Basic Bridal Makeup: ₹10,000 HD Bridal Makeup: ₹12,000 Airbrush Bridal Makeup: ₹18,000 For engagement and reception: Basic Engagement/Reception Makeup: ₹6,000 HD Engagement/Reception Makeup: ₹8,000 Airbrush Engagement/Reception Makeup: ₹12,000 For parties: Basic Party Makeup: ₹2,500 HD Party Makeup: ₹3,500 Popular Bridal Makeup Styles in Bhagwanpur Traditional Bridal Makeup Featuring bold, vibrant colors and detailed application, our traditional bridal makeup complements your wedding attire, creating an elegant, classic look. HD Bridal Makeup HD makeup offers a high-definition finish that looks flawless in both photographs and in person, ensuring you look perfect all day. Airbrush Bridal Makeup Airbrush makeup provides a lightweight, smooth finish with full coverage that lasts all day, ideal for brides seeking a natural yet polished look. How to Book Your Bridal Makeup with Ladyfair in Bhagwanpur Initial Contact: Call us at 7004721239 to discuss your bridal makeup needs and schedule an appointment. Consultation Session: Meet with our makeup artist to discuss your desired look, review your wedding attire, and plan the perfect makeup style. Makeup Trial: We offer trial sessions to preview your bridal makeup and make any necessary adjustments before the wedding day. Wedding Day Makeup: On your wedding day, our makeup artist will arrive at your location in Bhagwanpur to deliver a flawless and stress-free makeup service. Testimonials from Brides in Bhagwanpur Priya M., Bhagwanpur: "Ladyfair’s at-home makeup service was exactly what I needed. The makeup artist was amazing, and my bridal look was perfect!" Anjali S., Bhagwanpur: "I opted for airbrush makeup, and it was fantastic. It stayed fresh all day, and I received so many compliments." Sonal R., Bhagwanpur: "The HD makeup looked incredible in my photos. Ladyfair made sure I looked stunning on my wedding day." Preparing for Your Bridal Makeup Session To ensure the best results, follow these tips: Stay Hydrated: Keep your skin fresh and glowing by drinking plenty of water. Consistent Skincare: Maintain a regular skincare routine leading up to your wedding. Avoid New Products: Stick to familiar skincare products to avoid reactions. Communicate Clearly: Discuss your makeup preferences and any concerns with our artist during your consultation. Additional Beauty Services by Ladyfair In addition to bridal makeup, Ladyfair offers: Engagement and Reception Makeup: Customized looks for all your pre-wedding events. Party Makeup: Perfect for special occasions and celebrations. Everyday Makeup: Enhance your daily look with our expert services. Special Occasion Makeup: Makeup for birthdays, anniversaries, and other significant events. The Future of Bridal Makeup in Bhagwanpur Ladyfair is dedicated to setting new standards in bridal beauty with our innovative at-home services in Bhagwanpur. As more brides experience our exceptional service, Ladyfair continues to grow as the preferred choice for bridal makeup. Q&A with Ladyfair’s Bridal Makeup Artist in Bhagwanpur Q1: What makes Ladyfair the best choice for bridal makeup in Bhagwanpur? Ladyfair combines skilled artistry with high-quality products, offering expert at-home bridal makeup services for a flawless wedding look. Q2: What are the prices for bridal makeup services in Bhagwanpur? Our services start at ₹10,000 for basic bridal makeup, ₹12,000 for HD makeup, and ₹18,000 for airbrush makeup. Q3: How do I book Ladyfair’s bridal makeup services in Bhagwanpur? You can book our services by calling 7004721239. We also offer consultations and trial sessions to help you achieve your desired look. Q4: What types of bridal makeup does Ladyfair offer in Bhagwanpur? We offer traditional, HD, and airbrush bridal makeup styles to suit your preferences. Q5: Are makeup trials available before the wedding day? Yes, we provide trial sessions to finalize your bridal look and make any necessary adjustments. Q6: What kind of products does Ladyfair use for bridal makeup? We use professional-grade, high-quality products that are safe for all skin types and ensure a flawless finish. Q7: What other makeup services does Ladyfair offer in Bhagwanpur? Besides bridal makeup, we offer engagement, reception, party, and special occasion makeup services. Ladyfair is here to make your bridal experience in Bhagwanpur truly exceptional. Book your appointment today and let us help you shine on your special day.

Posted By: 26th August 2024
Top Bridal Makeup Artist in West Champaran
Ladyfair: Premier Bridal Makeup Services in West Champaran Introduction For brides in West Champaran looking for a flawless bridal look, Ladyfair offers outstanding at-home makeup services tailored to your individual style. Our skilled makeup artist brings professional quality directly to your doorstep, ensuring a personalized and stress-free experience. Whether you prefer a classic traditional look, a high-definition finish, or the elegance of airbrush makeup, Ladyfair is here to make your wedding day truly special. Contact us at 7004721239 to schedule your appointment today. Why Choose Ladyfair for Bridal Makeup in West Champaran? 1. Expert Makeup Artist Ladyfair’s makeup artist in West Champaran is known for her expertise and attention to detail. She specializes in creating beautiful, customized bridal looks that enhance your natural beauty and complement your wedding attire. 2. Convenient At-Home Service Enjoy the convenience of professional makeup application in the comfort of your own home. Ladyfair’s at-home service ensures you can relax and enjoy your special day without any hassle. 3. High-Quality Products We use premium-quality makeup products to ensure a flawless finish that lasts all day, allowing you to look and feel your best throughout your wedding celebrations. Bridal Makeup Pricing in West Champaran Ladyfair offers a range of bridal makeup services in West Champaran to suit different preferences and budgets: Basic Bridal Makeup: ₹10,000 HD Bridal Makeup: ₹12,000 Airbrush Bridal Makeup: ₹18,000 For engagement and reception: Basic Engagement/Reception Makeup: ₹6,000 HD Engagement/Reception Makeup: ₹8,000 Airbrush Engagement/Reception Makeup: ₹12,000 For parties: Basic Party Makeup: ₹2,500 HD Party Makeup: ₹3,500 Popular Bridal Makeup Styles in West Champaran Traditional Bridal Makeup Traditional bridal makeup in West Champaran features rich, vibrant colors and intricate details, creating a classic and elegant look that complements traditional bridal outfits. HD Bridal Makeup HD bridal makeup offers a high-definition finish, ensuring you look flawless both in photographs and in person. It’s perfect for achieving a polished look that lasts throughout your wedding day. Airbrush Bridal Makeup Airbrush makeup provides a lightweight, smooth finish with full coverage, making it ideal for brides who want a flawless, natural appearance that lasts all day. How to Book Your Bridal Makeup with Ladyfair in West Champaran 1. Initial Contact: Call 7004721239 to discuss your bridal makeup needs and schedule an appointment. 2. Consultation Session: Meet with our makeup artist to discuss your desired look, review your wedding attire, and plan the ideal makeup style for your special day. 3. Makeup Trial: We offer trial sessions so you can preview your bridal makeup and make any necessary adjustments before the wedding. 4. Wedding Day Makeup: On your wedding day, our makeup artist will arrive at your location in West Champaran to provide a flawless and hassle-free makeup service. Testimonials from Brides in West Champaran Sonia S., West Champaran: "Ladyfair’s at-home service was a game-changer for me. My bridal look was perfect, and the convenience was unmatched." Rita M., West Champaran: "I opted for airbrush makeup, and it was worth every penny. The makeup looked fantastic and stayed flawless all day long." Deepika R., West Champaran: "The HD makeup was incredible. Ladyfair’s team was professional, and I felt beautiful throughout my wedding day." Preparing for Your Bridal Makeup Session To achieve the best results, follow these tips: Stay Hydrated: Drink plenty of water to keep your skin healthy and glowing. Maintain a Skincare Routine: Follow a consistent skincare regimen leading up to your wedding day. Avoid New Products: Stick to familiar products to avoid potential reactions. Communicate Your Preferences: Clearly discuss your makeup preferences and any concerns with our artist during your consultation. Additional Beauty Services by Ladyfair In addition to bridal makeup, Ladyfair offers: Engagement and Reception Makeup: Customized looks for your pre-wedding events. Party Makeup: Ideal for special occasions and celebrations. Everyday Makeup: Enhance your daily look with our professional services. Special Occasion Makeup: Makeup for birthdays, anniversaries, and other important events. The Future of Bridal Makeup in West Champaran Ladyfair is committed to enhancing bridal beauty with our innovative at-home services in West Champaran. As more brides experience our exceptional service, Ladyfair remains a top choice for bridal makeup in the region. Q&A with Ladyfair’s Bridal Makeup Artist in West Champaran Q1: What sets Ladyfair apart for bridal makeup in West Champaran? A1: Ladyfair provides expert at-home bridal makeup services with high-quality products and professional artistry to ensure a stunning and stress-free experience. Q2: What are the prices for bridal makeup services in West Champaran? A2: Our bridal makeup services start at ₹10,000 for basic makeup, ₹12,000 for HD makeup, and ₹18,000 for airbrush makeup. Q3: How can I book Ladyfair’s bridal makeup services in West Champaran? A3: Book our services by calling 7004721239. We also offer consultations and trial sessions to help you achieve your desired look. Q4: What types of bridal makeup does Ladyfair offer in West Champaran? A4: We offer traditional, HD, and airbrush bridal makeup styles to suit your preferences. Q5: Are makeup trials available before the wedding day? A5: Yes, we provide trial sessions to preview and perfect your bridal makeup before your wedding day. Q6: What kind of products does Ladyfair use for bridal makeup? A6: We use professional-grade, high-quality products to ensure a flawless finish suitable for all skin types. Q7: What other makeup services does Ladyfair offer in West Champaran? A7: Besides bridal makeup, we offer engagement, reception, party, and special occasion makeup services.

Posted By: 26th August 2024
Top Bridal Makeup Artist in Vaishali
Ladyfair: Premier Bridal Makeup Services in Vaishali Introduction For brides in Vaishali seeking a flawless bridal look, Ladyfair offers exceptional at-home makeup services tailored to your needs. Our experienced makeup artist delivers professional artistry directly to your doorstep, ensuring a convenient and personalized experience. Whether you desire a classic traditional look, a high-definition finish, or the sophisticated elegance of airbrush makeup, Ladyfair is dedicated to making your special day extraordinary. Contact us at 7004721239 to book your appointment today. Why Choose Ladyfair for Bridal Makeup in Vaishali? 1. Expert Makeup Artist Ladyfair’s makeup artist in Vaishali is highly skilled and experienced in bridal makeup. She specializes in crafting beautiful, customized looks that enhance your natural beauty and complement your wedding attire. 2. Convenient At-Home Service Experience the luxury of professional makeup application without leaving your home. Ladyfair’s at-home service offers a stress-free and comfortable experience, allowing you to relax and enjoy your wedding day. 3. High-Quality Products We use premium makeup products to ensure a flawless finish that lasts all day, so you look and feel your best from the start to the end of your wedding celebrations. Bridal Makeup Pricing in Vaishali Ladyfair provides a range of bridal makeup services in Vaishali, designed to fit different preferences and budgets: Basic Bridal Makeup: ₹10,000 HD Bridal Makeup: ₹12,000 Airbrush Bridal Makeup: ₹18,000 For engagement and reception: Basic Engagement/Reception Makeup: ₹6,000 HD Engagement/Reception Makeup: ₹8,000 Airbrush Engagement/Reception Makeup: ₹12,000 For parties: Basic Party Makeup: ₹2,500 HD Party Makeup: ₹3,500 Popular Bridal Makeup Styles in Vaishali Traditional Bridal Makeup Traditional bridal makeup in Vaishali emphasizes rich colors and intricate application, perfectly complementing classic bridal outfits for an elegant and timeless look. HD Bridal Makeup HD bridal makeup provides a high-definition finish that looks impeccable in photos and in person, ensuring you look stunning throughout your wedding day. Airbrush Bridal Makeup Airbrush makeup offers a smooth, lightweight finish with full coverage that stays flawless all day, ideal for brides who want a polished yet natural appearance. How to Book Your Bridal Makeup with Ladyfair in Vaishali 1. Initial Contact: Call 7004721239 to discuss your bridal makeup requirements and schedule an appointment. 2. Consultation Session: Meet with our makeup artist to discuss your desired look, review your wedding attire, and plan the perfect makeup style for your special day. 3. Makeup Trial: We offer trial sessions so you can preview your bridal makeup and make any necessary adjustments before your wedding. 4. Wedding Day Makeup: On your wedding day, our makeup artist will arrive at your location in Vaishali to provide a flawless and hassle-free makeup service. Testimonials from Brides in Vaishali Anita R., Vaishali: "Ladyfair made my wedding day perfect. The at-home service was so convenient, and my bridal look was exactly what I wanted!" Sunita P., Vaishali: "The airbrush makeup was fantastic! It lasted all day and looked incredible in my wedding photos." Poonam K., Vaishali: "I loved the HD makeup. Ladyfair’s team was professional and made sure I felt beautiful and confident throughout the day." Preparing for Your Bridal Makeup Session For the best results, keep these tips in mind: Stay Hydrated: Drink plenty of water to keep your skin healthy and glowing. Follow a Skincare Routine: Maintain a consistent skincare regimen leading up to your wedding day. Avoid New Products: Stick to products you know to avoid potential reactions. Communicate Your Preferences: Clearly discuss your makeup preferences and any concerns with our artist during your consultation. Additional Beauty Services by Ladyfair Ladyfair also offers: Engagement and Reception Makeup: Customized looks for your pre-wedding events. Party Makeup: Ideal for special occasions and celebrations. Everyday Makeup: Enhance your daily look with our professional services. Special Occasion Makeup: Makeup for birthdays, anniversaries, and other important events. The Future of Bridal Makeup in Vaishali Ladyfair is committed to elevating bridal beauty standards with our innovative at-home services in Vaishali. As more brides experience our exceptional service, Ladyfair continues to be the top choice for bridal makeup in the region. Q&A with Ladyfair’s Bridal Makeup Artist in Vaishali Q1: What makes Ladyfair the best choice for bridal makeup in Vaishali? A1: Ladyfair offers expert at-home bridal makeup services with professional artistry and high-quality products to ensure a stunning look on your wedding day. Q2: What are the prices for bridal makeup services in Vaishali? A2: Our bridal makeup services start at ₹10,000 for basic makeup, ₹12,000 for HD makeup, and ₹18,000 for airbrush makeup. Q3: How can I book Ladyfair’s bridal makeup services in Vaishali? A3: You can book our services by calling 7004721239. We also offer consultations and trial sessions to help you achieve your ideal look. Q4: What types of bridal makeup does Ladyfair offer in Vaishali? A4: We offer traditional, HD, and airbrush bridal makeup styles to suit your preferences. Q5: Are makeup trials available before the wedding day? A5: Yes, we provide trial sessions so you can preview and perfect your bridal look before your wedding day. Q6: What kind of products does Ladyfair use for bridal makeup? A6: We use professional-grade, high-quality products to ensure a flawless finish that is suitable for all skin types. Q7: What other makeup services does Ladyfair offer in Vaishali? A7: In addition to bridal makeup, we offer engagement, reception, party, and special occasion makeup services.
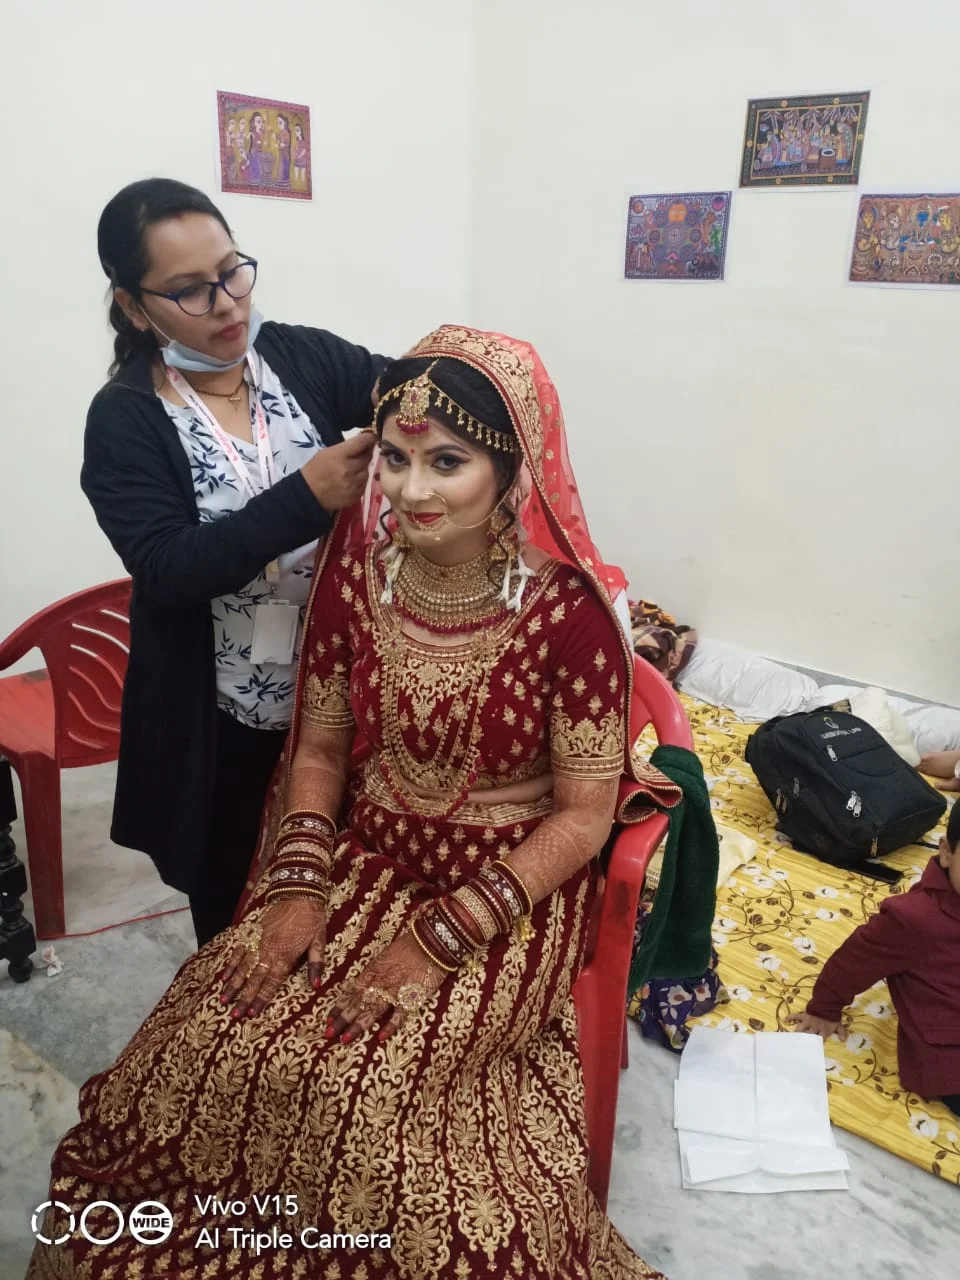
Posted By: 26th August 2024
Top Bridal Makeup Artist in Siwan
Ladyfair: Premier Bridal Makeup Services in Siwan Introduction For brides in Siwan seeking impeccable bridal makeup, Ladyfair offers exceptional at-home services tailored to your unique style. Our professional makeup artist brings expertise and elegance directly to your doorstep, ensuring a seamless and personalized experience. Whether you envision a classic traditional look, a high-definition finish, or the sophistication of airbrush makeup, Ladyfair is here to make your wedding day truly special. Contact us at 7004721239 to book your appointment today. Why Choose Ladyfair for Bridal Makeup in Siwan 1. Skilled Makeup Artist Ladyfair’s expert makeup artist in Siwan has years of experience in creating stunning bridal looks. Her artistry ensures a flawless finish that enhances your natural beauty and complements your wedding attire. 2. Convenient At-Home Service Our at-home bridal makeup service provides the convenience of professional application in the comfort of your home. Relax and enjoy the experience as our artist works to create your perfect look. 3. High-Quality Products We use only premium makeup products to deliver a flawless finish that lasts all day. Our products are chosen for their quality and suitability for all skin types. Bridal Makeup Pricing in Siwan Ladyfair’s bridal makeup services in Siwan are designed to meet various preferences and budgets: Basic Bridal Makeup: ₹10,000 HD Bridal Makeup: ₹12,000 Airbrush Bridal Makeup: ₹18,000 For engagement and reception: Basic Engagement/Reception Makeup: ₹6,000 HD Engagement/Reception Makeup: ₹8,000 Airbrush Engagement/Reception Makeup: ₹12,000 For parties: Basic Party Makeup: ₹2,500 HD Party Makeup: ₹3,500 Popular Bridal Makeup Styles in Siwan Traditional Bridal Makeup Traditional bridal makeup in Siwan highlights rich colors and detailed application, perfectly suited to complement classic bridal outfits and create an elegant, timeless look. HD Bridal Makeup HD bridal makeup provides a high-definition finish that looks impeccable in photographs and in person, making it an excellent choice for brides who want a flawless look. Airbrush Bridal Makeup Airbrush makeup offers a smooth, lightweight finish with full coverage that lasts throughout the day, ideal for brides seeking a polished and natural appearance. How to Book Your Bridal Makeup with Ladyfair in Siwan 1. Initial Contact: Call 7004721239 to discuss your bridal makeup needs and schedule an appointment. 2. Consultation Session: Meet with our makeup artist to discuss your desired look, review your wedding attire, and plan the perfect makeup style for your special day. 3. Makeup Trial: We offer trial sessions so you can preview your bridal makeup and make any adjustments before your wedding day. 4. Wedding Day Makeup: On your wedding day, our makeup artist will arrive at your location in Siwan to provide a flawless and stress-free makeup service. Testimonials from Brides in Siwan Nisha S., Siwan: "Ladyfair’s at-home service was incredible. The artist was professional and my bridal look was exactly what I imagined!" Rita K., Siwan: "I opted for airbrush makeup, and it was perfect. It stayed fresh all day, and I received numerous compliments on my look." Sanjana M., Siwan: "The HD makeup was fantastic in my wedding photos. Ladyfair ensured I felt beautiful and confident throughout the day." Preparing for Your Bridal Makeup Session To ensure optimal results, consider these tips: Stay Hydrated: Drink plenty of water to keep your skin healthy and glowing. Maintain a Skincare Routine: Follow a consistent skincare regimen leading up to your wedding day. Avoid New Products: Use only familiar products to prevent any adverse skin reactions. Communicate Preferences: Clearly discuss your makeup preferences and concerns with our artist during the consultation. Additional Beauty Services by Ladyfair Ladyfair also provides: Engagement and Reception Makeup: Custom looks for pre-wedding events. Party Makeup: Ideal for special occasions and celebrations. Everyday Makeup: Enhance your daily look with our professional services. Special Occasion Makeup: Makeup for birthdays, anniversaries, and other significant events. The Future of Bridal Makeup in Siwan Ladyfair is dedicated to setting new standards in bridal beauty with our innovative at-home services in Siwan. As more brides experience our exceptional service, Ladyfair remains the top choice for bridal makeup in the region. Q&A with Ladyfair’s Bridal Makeup Artist in Siwan Q1: What makes Ladyfair the best option for bridal makeup in Siwan? A1: Ladyfair offers expert at-home bridal makeup services with professional artistry and high-quality products to ensure a stunning look on your wedding day. Q2: What are the prices for bridal makeup services in Siwan? A2: Our bridal makeup services start at ₹10,000 for basic makeup, ₹12,000 for HD makeup, and ₹18,000 for airbrush makeup. Q3: How can I book Ladyfair’s bridal makeup services in Siwan? A3: You can book our services by calling 7004721239. We also offer consultations and trial sessions to help you achieve your ideal look. Q4: What types of bridal makeup does Ladyfair offer in Siwan? A4: We offer traditional, HD, and airbrush bridal makeup styles to match your preferences. Q5: Are makeup trials available before the wedding day? A5: Yes, we provide trial sessions so you can preview and perfect your bridal look before your wedding day. Q6: What kind of products does Ladyfair use for bridal makeup? A6: We use professional-grade, high-quality products to ensure a flawless finish that suits all skin types. Q7: What other makeup services does Ladyfair offer in Siwan? A7: In addition to bridal makeup, we offer engagement, reception, party, and special occasion makeup services.

Posted By: 26th August 2024
Top Bridal Makeup Artist in Supaul
Ladyfair: Premier Bridal Makeup Services in Supaul Introduction For brides in Supaul looking to achieve a stunning bridal look, Ladyfair provides exceptional at-home makeup services tailored to your needs. Our professional makeup artist brings expertise and artistry directly to your home, ensuring a stress-free and personalized experience. Whether you prefer a classic traditional look, a high-definition finish, or the sophistication of airbrush makeup, Ladyfair is here to make your special day unforgettable. Call us at 7004721239 to schedule your appointment today. Why Ladyfair is the Best Choice for Bridal Makeup in Supaul 1. Expert Makeup Artist Our skilled makeup artist in Supaul has extensive experience in bridal makeup. She excels in creating beautiful, customized looks that enhance your natural features and complement your wedding attire. 2. Convenient At-Home Service Enjoy the luxury of professional makeup application without leaving your home. Ladyfair’s at-home service provides convenience and comfort, allowing you to focus on your special day. 3. Use of High-Quality Products We use top-quality makeup products that ensure a flawless finish and longevity throughout your wedding day, so you look and feel your best. Bridal Makeup Pricing in Supaul Ladyfair’s bridal makeup services in Supaul are competitively priced to suit different needs and preferences: Basic Bridal Makeup: ₹10,000 HD Bridal Makeup: ₹12,000 Airbrush Bridal Makeup: ₹18,000 For engagement and reception: Basic Engagement/Reception Makeup: ₹6,000 HD Engagement/Reception Makeup: ₹8,000 Airbrush Engagement/Reception Makeup: ₹12,000 For parties: Basic Party Makeup: ₹2,500 HD Party Makeup: ₹3,500 Popular Bridal Makeup Styles in Supaul Traditional Bridal Makeup Traditional bridal makeup in Supaul features rich colors and detailed application, perfectly complementing classic bridal attire for an elegant and timeless appearance. HD Bridal Makeup HD bridal makeup offers a high-definition finish that looks impeccable in photos and in person, ensuring a flawless look for your wedding day. Airbrush Bridal Makeup Airbrush makeup provides a smooth, lightweight finish with full coverage that lasts all day, ideal for brides who want a polished yet natural look. How to Book Your Bridal Makeup with Ladyfair in Supaul 1. Initial Contact: Call 7004721239 to discuss your bridal makeup needs and set up an appointment. 2. Consultation Session: Meet with our makeup artist to discuss your desired look, review your wedding attire, and plan the best makeup style for your special day. 3. Makeup Trial: We offer trial sessions so you can preview your bridal makeup and make any necessary adjustments before the wedding. 4. Wedding Day Makeup: On your wedding day, our makeup artist will arrive at your location in Supaul to provide a flawless and stress-free makeup service. Testimonials from Brides in Supaul Kavita M., Supaul: "Ladyfair’s at-home service was fantastic. The makeup artist was professional, and my bridal look was exactly what I envisioned!" Rani P., Supaul: "I chose the airbrush makeup for my wedding, and it was perfect. It stayed fresh all day, and I received so many compliments." Suman D., Supaul: "The HD makeup looked amazing in my wedding photos. Ladyfair made sure I felt beautiful and confident throughout the day." Preparing for Your Bridal Makeup Session To ensure the best results, follow these tips: Stay Hydrated: Drink plenty of water to keep your skin glowing and healthy. Follow a Skincare Routine: Maintain a consistent skincare regimen leading up to your wedding. Avoid New Products: Stick to products you know to avoid any potential skin reactions. Communicate Your Preferences: Clearly discuss your makeup preferences and concerns with our artist during your consultation. Additional Beauty Services by Ladyfair Ladyfair also offers: Engagement and Reception Makeup: Customized looks for your pre-wedding events. Party Makeup: Ideal for special occasions and celebrations. Everyday Makeup: Enhance your daily look with our professional services. Special Occasion Makeup: Makeup for birthdays, anniversaries, and other important events. The Future of Bridal Makeup in Supaul Ladyfair is committed to setting new standards in bridal beauty with our innovative at-home services in Supaul. As more brides discover our exceptional service, Ladyfair continues to be the top choice for bridal makeup in the region. Q&A with Ladyfair’s Bridal Makeup Artist in Supaul Q1: What makes Ladyfair the best choice for bridal makeup in Supaul? A1: Ladyfair offers expert at-home bridal makeup services with skilled artistry and high-quality products to ensure a stunning look on your wedding day. Q2: What are the prices for bridal makeup services in Supaul? A2: Our bridal makeup services start at ₹10,000 for basic makeup, ₹12,000 for HD makeup, and ₹18,000 for airbrush makeup. Q3: How can I book Ladyfair’s bridal makeup services in Supaul? A3: You can book our services by calling 7004721239. We also offer consultations and trial sessions to help you achieve your ideal look. Q4: What types of bridal makeup does Ladyfair offer in Supaul? A4: We offer traditional, HD, and airbrush bridal makeup styles to suit your preferences. Q5: Are makeup trials available before the wedding day? A5: Yes, we provide trial sessions so you can preview and perfect your bridal look before your wedding day. Q6: What kind of products does Ladyfair use for bridal makeup? A6: We use professional-grade, high-quality products to ensure a flawless finish that is suitable for all skin types. Q7: What other makeup services does Ladyfair offer in Supaul? A7: In addition to bridal makeup, we offer engagement, reception, party, and special occasion makeup services.

Posted By: 26th August 2024
Top Bridal Makeup Artist in Saran
Ladyfair: Premier Bridal Makeup Services in Saran Introduction For brides in Saran seeking impeccable bridal makeup, Ladyfair offers unparalleled at-home makeup services. Our dedicated team brings expert artistry directly to your doorstep, ensuring you enjoy a flawless look in the comfort of your home. Whether you prefer a classic traditional look, a high-definition finish, or the elegance of airbrush makeup, our skilled makeup artist in Saran is here to make your special day unforgettable. Contact us at 7004721239 to book your appointment today. Why Ladyfair is the Best Choice for Bridal Makeup in Saran 1. Expert Makeup Artist Ladyfair’s makeup artist in Saran brings years of experience and artistry to every bridal makeup session. She specializes in creating personalized looks that enhance your natural beauty and suit your individual style. 2. Convenient At-Home Service Our at-home bridal makeup service offers the luxury of professional makeup application in your own space, making the experience relaxing and customized to your needs. 3. High-Quality Products We use only premium makeup products to ensure a flawless finish that lasts throughout your wedding day, providing both beauty and durability. Bridal Makeup Pricing in Saran Our pricing for bridal makeup services in Saran is designed to cater to various preferences and budgets: Basic Bridal Makeup: ₹10,000 HD Bridal Makeup: ₹12,000 Airbrush Bridal Makeup: ₹18,000 For engagement and reception: Basic Engagement/Reception Makeup: ₹6,000 HD Engagement/Reception Makeup: ₹8,000 Airbrush Engagement/Reception Makeup: ₹12,000 For parties: Basic Party Makeup: ₹2,500 HD Party Makeup: ₹3,500 Popular Bridal Makeup Styles in Saran Traditional Bridal Makeup Traditional bridal makeup in Saran features rich colors and detailed application that complement classic wedding attire, creating an elegant and timeless look. HD Bridal Makeup HD bridal makeup provides a high-definition finish, ensuring your appearance is flawless both in photographs and in person, perfect for making you shine on your big day. Airbrush Bridal Makeup Airbrush makeup offers a smooth, lightweight finish with full coverage that lasts all day, ideal for brides who want a polished and natural look. How to Book Your Bridal Makeup with Ladyfair in Saran 1. Initial Contact: Call 7004721239 to discuss your bridal makeup needs and schedule an appointment. 2. Consultation Session: Meet with our makeup artist to discuss your desired look, review your wedding attire, and plan the ideal makeup style for your special day. 3. Makeup Trial: We provide trial sessions so you can preview your bridal makeup and make any adjustments before the wedding. 4. Wedding Day Makeup: On your wedding day, our makeup artist will arrive at your location in Saran to provide a flawless and stress-free makeup service. Testimonials from Brides in Saran Anju S., Saran: "Ladyfair’s at-home makeup service was outstanding. The artist was professional and created a beautiful bridal look that I loved." Meena K., Saran: "I opted for airbrush makeup, and it was perfect for my wedding. It stayed fresh throughout the day and I received many compliments." Sita R., Saran: "The HD makeup looked fantastic in all my wedding photos. Ladyfair’s team made sure I felt beautiful and confident." Preparing for Your Bridal Makeup Session For the best results, consider these tips: Stay Hydrated: Drink plenty of water to maintain glowing, healthy skin. Follow a Skincare Routine: Maintain a consistent skincare regimen leading up to your wedding. Avoid New Products: Stick to familiar products to avoid any potential reactions. Communicate Your Preferences: Clearly discuss your makeup preferences and any concerns with our artist during your consultation. Additional Beauty Services by Ladyfair Ladyfair also provides: Engagement and Reception Makeup: Tailored looks for your pre-wedding events. Party Makeup: Ideal for special occasions and celebrations. Everyday Makeup: Enhance your daily look with our professional services. Special Occasion Makeup: Makeup for birthdays, anniversaries, and other important events. The Future of Bridal Makeup in Saran Ladyfair is committed to enhancing bridal beauty with our innovative at-home services in Saran. As more brides experience our exceptional service, Ladyfair continues to be the preferred choice for bridal makeup in the region. Q&A with Ladyfair’s Bridal Makeup Artist in Saran Q1: What makes Ladyfair the best option for bridal makeup in Saran? A1: Ladyfair offers expert at-home bridal makeup services with skilled artistry and high-quality products, ensuring you look stunning on your wedding day. Q2: What are the prices for bridal makeup services in Saran? A2: Our bridal makeup services start at ₹10,000 for basic makeup, ₹12,000 for HD makeup, and ₹18,000 for airbrush makeup. Q3: How can I book Ladyfair’s bridal makeup services in Saran? A3: You can book our services by calling 7004721239. We also offer consultations and trial sessions to help you achieve your ideal look. Q4: What types of bridal makeup does Ladyfair offer in Saran? A4: We offer traditional, HD, and airbrush bridal makeup styles to match your preferences. Q5: Are makeup trials available before the wedding day? A5: Yes, we provide trial sessions to preview and perfect your bridal look before the big day. Q6: What kind of products does Ladyfair use for bridal makeup? A6: We use premium, professional-grade products to ensure a flawless finish that suits all skin types. Q7: What other makeup services does Ladyfair offer in Saran? A7: In addition to bridal makeup, we offer engagement, reception, party, and special occasion makeup services.

Posted By: 26th August 2024
Best Bridal Makeup Artist in Sheikhpura
Ladyfair: Premier Bridal Makeup Services in Sheikhpura Introduction In Sheikhpura, Ladyfair is your go-to destination for exceptional bridal makeup services. We specialize in providing at-home makeup services that bring professional beauty treatments right to your doorstep. Whether you’re looking for a traditional look, HD finish, or airbrush perfection, our expert makeup artist in Sheikhpura is dedicated to helping you look stunning on your special day. Contact us today at 7004721239 to book your appointment. Why Choose Ladyfair for Your Bridal Makeup in Sheikhpura? 1. Expertise of Our Makeup Artist Our makeup artist in Sheikhpura is highly skilled and experienced in bridal makeup. She brings expertise and creativity to create a look that enhances your natural beauty and complements your style. 2. Convenient At-Home Service Ladyfair’s at-home bridal makeup service offers you the convenience of professional makeup in the comfort of your own home, ensuring a relaxed and personalized experience. 3. Use of High-Quality Products We use premium, professional-grade makeup products to ensure a flawless finish that lasts throughout your wedding day. Bridal Makeup Pricing in Sheikhpura Our pricing for bridal makeup services in Sheikhpura is designed to cater to different preferences and budgets: Basic Bridal Makeup: ₹10,000 HD Bridal Makeup: ₹12,000 Airbrush Bridal Makeup: ₹18,000 For engagement and reception: Basic Engagement/Reception Makeup: ₹6,000 HD Engagement/Reception Makeup: ₹8,000 Airbrush Engagement/Reception Makeup: ₹12,000 For parties: Basic Party Makeup: ₹2,500 HD Party Makeup: ₹3,500 Popular Bridal Makeup Styles in Sheikhpura Traditional Bridal Makeup Traditional bridal makeup in Sheikhpura features vibrant colors and detailed application that complement traditional wedding attire, creating a classic and elegant look. HD Bridal Makeup HD bridal makeup offers a high-definition finish that looks impeccable in both photographs and real life, ensuring you look flawless throughout your wedding day. Airbrush Bridal Makeup Airbrush makeup provides a lightweight and smooth finish with full coverage that lasts all day, perfect for brides who want a natural yet polished appearance. How to Book Your Bridal Makeup with Ladyfair in Sheikhpura 1. Initial Contact: Call us at 7004721239 to discuss your bridal makeup needs and schedule an appointment. 2. Consultation Session: Meet with our makeup artist to discuss your desired look, review your wedding attire, and plan the perfect makeup style. 3. Makeup Trial: We offer trial sessions so you can preview your bridal makeup and make any adjustments before the wedding day. 4. Wedding Day Makeup: On your wedding day, our makeup artist will arrive at your location in Sheikhpura to provide a flawless and stress-free makeup service. Testimonials from Brides in Sheikhpura Poonam T., Sheikhpura: "Ladyfair’s at-home service was exceptional. The makeup artist was professional, and my bridal look was exactly what I wanted!" Rita K., Sheikhpura: "I opted for the airbrush makeup, and it was perfect for my wedding. It stayed fresh all day and received many compliments." Sonia J., Sheikhpura: "The HD makeup was amazing and looked great in all my wedding photos. Ladyfair’s team ensured I looked beautiful and felt confident." Preparing for Your Bridal Makeup Session To achieve the best results, consider these tips: Stay Hydrated: Drink plenty of water to keep your skin glowing and healthy. Follow a Skincare Routine: Maintain a consistent skincare regimen leading up to your wedding day. Avoid New Products: Stick to products you are familiar with to avoid any adverse reactions. Communicate Your Preferences: Clearly discuss your makeup preferences and concerns with our artist during your consultation. Additional Beauty Services by Ladyfair Ladyfair also offers: Engagement and Reception Makeup: Customized looks for all your pre-wedding events. Party Makeup: Ideal for special occasions and celebrations. Everyday Makeup: Enhance your daily look with our expert services. Special Occasion Makeup: Makeup for birthdays, anniversaries, and other significant events. The Future of Bridal Makeup in Sheikhpura Ladyfair is committed to elevating bridal beauty standards with our innovative at-home services in Sheikhpura. As more brides experience our exceptional service, Ladyfair continues to be the preferred choice for bridal makeup. Q&A with Ladyfair’s Bridal Makeup Artist in Sheikhpura Q1: What makes Ladyfair the best choice for bridal makeup in Sheikhpura? A1: Ladyfair offers expert at-home bridal makeup services, combining skilled artistry with high-quality products to ensure you look stunning on your wedding day. Q2: What are the prices for bridal makeup services in Sheikhpura? A2: Our bridal makeup services start at ₹10,000 for basic makeup, ₹12,000 for HD makeup, and ₹18,000 for airbrush makeup. Q3: How do I book Ladyfair’s bridal makeup services in Sheikhpura? A3: You can book our services by calling 7004721239. We also offer consultations and trial sessions to help you achieve your desired look. Q4: What types of bridal makeup does Ladyfair offer in Sheikhpura? A4: We offer traditional, HD, and airbrush bridal makeup styles to suit your preferences. Q5: Are makeup trials available before the wedding day? A5: Yes, we provide trial sessions to finalize your bridal look and make any necessary adjustments. Q6: What kind of products does Ladyfair use for bridal makeup? A6: We use professional-grade, high-quality products that ensure a flawless finish and are suitable for all skin types. Q7: What other makeup services does Ladyfair offer in Sheikhpura? A7: In addition to bridal makeup, we offer engagement, reception, party, and special occasion makeup services.

Posted By: 26th August 2024
Top Bridal Makeup Artist in Sheohar
Ladyfair: Exceptional Bridal Makeup Services in Sheohar Introduction In Sheohar, Ladyfair is renowned for providing top-notch bridal makeup services that come to your doorstep. Our at-home bridal makeup service is designed to offer you a luxurious experience right in the comfort of your own home. Whether you prefer a traditional look, HD finish, or airbrush perfection, our expert makeup artist in Sheohar ensures you look stunning on your special day. Contact us at 7004721239 to schedule your appointment. Why Ladyfair is the Premier Choice for Bridal Makeup in Sheohar 1. Expertise of Our Makeup Artist Ladyfair’s makeup artist in Sheohar is highly skilled and experienced in bridal makeup. She excels in creating customized looks that highlight your natural beauty and complement your personal style. 2. Convenient At-Home Service Enjoy the convenience of at-home bridal makeup services with Ladyfair. We bring our professional makeup services directly to you, ensuring a stress-free and personalized experience. 3. Use of Premium Products We use only high-quality, professional-grade makeup products to ensure a flawless look that lasts throughout your wedding day. Bridal Makeup Pricing in Sheohar Our pricing for bridal makeup services in Sheohar is designed to suit various preferences and budgets: Basic Bridal Makeup: ₹10,000 HD Bridal Makeup: ₹12,000 Airbrush Bridal Makeup: ₹18,000 For engagement and reception: Basic Engagement/Reception Makeup: ₹6,000 HD Engagement/Reception Makeup: ₹8,000 Airbrush Engagement/Reception Makeup: ₹12,000 For parties: Basic Party Makeup: ₹2,500 HD Party Makeup: ₹3,500 Popular Bridal Makeup Styles in Sheohar Traditional Bridal Makeup Traditional bridal makeup in Sheohar features vibrant colors and detailed application that complement traditional wedding attire, creating a classic and elegant look. HD Bridal Makeup HD bridal makeup provides a high-definition finish that looks perfect in photos and real life. It ensures a flawless appearance throughout your special day. Airbrush Bridal Makeup Airbrush makeup offers a lightweight and smooth finish with full coverage that lasts all day, ideal for brides seeking a natural yet polished look. How to Book Your Bridal Makeup with Ladyfair in Sheohar 1. Initial Contact: Call us at 7004721239 to discuss your bridal makeup needs and schedule an appointment. 2. Consultation Session: Meet with our makeup artist to discuss your desired look, review your wedding attire, and plan the perfect makeup style. 3. Makeup Trial: We offer trial sessions so you can preview your bridal makeup and make any adjustments before the big day. 4. Wedding Day Makeup: On your wedding day, our makeup artist will arrive at your location in Sheohar to deliver a flawless and stress-free makeup service. Testimonials from Brides in Sheohar Anita K., Sheohar: "Ladyfair’s at-home service was fantastic. The makeup artist was professional, and my bridal look was exactly what I envisioned!" Suman P., Sheohar: "I chose the airbrush makeup for my wedding, and it was perfect. It stayed fresh and beautiful throughout the day." Geeta R., Sheohar: "The HD makeup was amazing for my wedding photos. Ladyfair’s team ensured I looked beautiful and felt confident all day long." Preparing for Your Bridal Makeup Session To achieve the best results, follow these tips: Stay Hydrated: Drink plenty of water to keep your skin glowing. Maintain a Skincare Routine: Follow a consistent skincare regimen leading up to your wedding. Avoid New Products: Stick to products you know to avoid any potential reactions. Communicate Clearly: Discuss your makeup preferences and concerns with our artist during your consultation. Additional Beauty Services by Ladyfair Beyond bridal makeup, Ladyfair offers: Engagement and Reception Makeup: Tailored looks for pre-wedding events. Party Makeup: Ideal for special occasions and celebrations. Everyday Makeup: Enhance your daily look with our expert services. Special Occasion Makeup: Makeup for birthdays, anniversaries, and other significant events. The Future of Bridal Makeup in Sheohar Ladyfair is committed to raising the standards of bridal beauty with our innovative at-home services in Sheohar. As more brides experience our exceptional service, Ladyfair continues to establish itself as the preferred choice for bridal makeup. Q&A with Ladyfair’s Bridal Makeup Artist in Sheohar Q1: What sets Ladyfair apart as the best bridal makeup artist in Sheohar? A1: Ladyfair provides expert at-home bridal makeup services, combining skilled artistry with high-quality products to ensure you look stunning on your wedding day. Q2: What are the prices for bridal makeup services in Sheohar? A2: Our bridal makeup services start at ₹10,000 for basic makeup, ₹12,000 for HD makeup, and ₹18,000 for airbrush makeup. Q3: How can I book Ladyfair’s bridal makeup services in Sheohar? A3: You can book our services by calling 7004721239. We also offer consultations and trial sessions to help you achieve your desired look. Q4: What types of bridal makeup does Ladyfair offer in Sheohar? A4: We offer traditional, HD, and airbrush bridal makeup styles to suit your preferences. Q5: Are makeup trials available before the wedding day? A5: Yes, we provide trial sessions to help you finalize your bridal look and make any necessary adjustments. Q6: What kind of products does Ladyfair use for bridal makeup? A6: We use professional-grade, high-quality products that ensure a flawless finish and are suitable for all skin types. Q7: What other makeup services does Ladyfair offer in Sheohar? A7: In addition to bridal makeup, we offer engagement, reception, party, and special occasion makeup services.

Posted By: 26th August 2024
Top Bridal Makeup Artist in Samastipur
Ladyfair: Exceptional Bridal Makeup Services in Samastipur Introduction In Samastipur, Ladyfair stands out as the premier choice for brides seeking impeccable makeup services. Our at-home bridal makeup service ensures that you receive top-notch beauty treatments in the comfort of your own home. Whether you prefer a traditional look, HD finish, or airbrush perfection, our expert makeup artist in Samastipur is here to help you shine on your special day. Contact us today at 7004721239 to book your appointment. Why Ladyfair is the Top Choice for Bridal Makeup in Samastipur 1. Experienced Makeup Artist Our makeup artist in Samastipur is highly skilled with years of experience in bridal makeup. She excels in creating personalized looks that highlight your natural beauty and match your style. 2. Convenient At-Home Service Ladyfair offers the convenience of at-home bridal makeup services, eliminating the need for you to travel to a salon. Enjoy a luxurious, personalized experience right at your doorstep. 3. Premium Quality Products We use only high-quality, professional-grade makeup products to ensure a flawless, long-lasting look that is perfect for your wedding day. Bridal Makeup Pricing in Samastipur Our pricing for bridal makeup services in Samastipur is structured to fit various preferences and budgets: Basic Bridal Makeup: ₹10,000 HD Bridal Makeup: ₹12,000 Airbrush Bridal Makeup: ₹18,000 For engagement and reception: Basic Engagement/Reception Makeup: ₹6,000 HD Engagement/Reception Makeup: ₹8,000 Airbrush Engagement/Reception Makeup: ₹12,000 For parties: Basic Party Makeup: ₹2,500 HD Party Makeup: ₹3,500 Popular Bridal Makeup Styles in Samastipur Traditional Bridal Makeup Our traditional bridal makeup in Samastipur features bold, vibrant colors and detailed application to complement traditional wedding attire, creating an elegant and classic look. HD Bridal Makeup HD bridal makeup provides a high-definition finish that looks perfect in both photographs and real life. This style ensures a flawless appearance throughout your special day. Airbrush Bridal Makeup Airbrush makeup offers a lightweight, smooth finish with full coverage that lasts all day, ideal for brides seeking a natural yet polished look. How to Book Your Bridal Makeup with Ladyfair in Samastipur 1. Initial Contact: Call us at 7004721239 to discuss your bridal makeup needs and schedule an appointment. 2. Consultation Session: Meet with our makeup artist to discuss your desired look, review your wedding attire, and plan the perfect makeup style. 3. Makeup Trial: We provide trial sessions so you can preview your bridal makeup and make any necessary adjustments before the wedding day. 4. Wedding Day Makeup: On your wedding day, our makeup artist will arrive at your location in Samastipur to deliver a flawless and stress-free makeup service. Testimonials from Brides in Samastipur Sunita R., Samastipur: "Ladyfair’s at-home makeup service was a game-changer. The makeup artist was professional and my bridal look was exactly what I wanted!" Neelam P., Samastipur: "I chose the airbrush makeup and it was perfect for my wedding. It stayed fresh all day and I received numerous compliments." Rita S., Samastipur: "The HD makeup was amazing and looked great in all my wedding photos. Ladyfair’s team made sure I looked beautiful and felt confident." Preparing for Your Bridal Makeup Session To achieve the best results, follow these tips: Stay Hydrated: Drink plenty of water to keep your skin fresh and glowing. Consistent Skincare: Maintain a regular skincare routine leading up to your wedding. Avoid New Products: Stick to familiar skincare products to avoid any reactions. Communicate Clearly: Discuss your makeup preferences and concerns with our artist during your consultation. Additional Beauty Services by Ladyfair In addition to bridal makeup, Ladyfair offers: Engagement and Reception Makeup: Customized looks for all your pre-wedding events. Party Makeup: Perfect for special occasions and celebrations. Everyday Makeup: Enhance your daily look with our expert services. Special Occasion Makeup: Makeup for birthdays, anniversaries, and other significant events. The Future of Bridal Makeup in Samastipur Ladyfair is committed to setting new standards in bridal beauty with our innovative at-home services in Samastipur. As more brides experience our exceptional service, Ladyfair continues to grow as the preferred choice for bridal makeup. Q&A with Ladyfair’s Bridal Makeup Artist in Samastipur Q1: What makes Ladyfair the best choice for bridal makeup in Samastipur? A1: Ladyfair offers expert at-home bridal makeup services, combining skilled artistry with high-quality products for a flawless wedding look. Q2: What are the prices for bridal makeup services in Samastipur? A2: Our bridal makeup services start at ₹10,000 for basic makeup, ₹12,000 for HD makeup, and ₹18,000 for airbrush makeup. Q3: How do I book Ladyfair’s bridal makeup services in Samastipur? A3: You can book our services by calling 7004721239. We also offer consultations and trial sessions to help you achieve your desired look. Q4: What types of bridal makeup does Ladyfair offer in Samastipur? A4: We offer traditional, HD, and airbrush bridal makeup styles to suit your preferences. Q5: Are makeup trials available before the wedding day? A5: Yes, we provide trial sessions to finalize your bridal look and make any necessary adjustments. Q6: What kind of products does Ladyfair use for bridal makeup? A6: We use professional-grade, high-quality products that are safe for all skin types and ensure a flawless finish. Q7: What other makeup services does Ladyfair offer in Samastipur? A7: Besides bridal makeup, we offer engagement, reception, party, and special occasion makeup services.

Posted By: 26th August 2024
Top Bridal Makeup Artist in Saharsa
Ladyfair: Premier Bridal Makeup Services in Saharsa Introduction In Saharsa, Ladyfair is the ultimate choice for brides looking for exceptional bridal makeup services. Our at-home makeup service ensures that you enjoy a luxurious beauty experience in the comfort of your home. Whether you prefer a traditional look, HD finish, or airbrush perfection, our expert makeup artist in Saharsa will make sure you look stunning on your special day. Contact us at 7004721239 to book your appointment. Why Ladyfair is the Best Choice for Bridal Makeup in Saharsa 1. Skilled Makeup Artist Ladyfair’s makeup artist in Saharsa has extensive experience in bridal makeup, specializing in creating looks that enhance your natural beauty and suit your personal style. 2. Convenient At-Home Service Our at-home bridal makeup service means you can avoid the hassle of salon visits. Enjoy a personalized experience as our makeup artist comes directly to your location in Saharsa. 3. High-Quality Products We use only top-quality, professional makeup products that ensure a flawless look and long-lasting results, perfect for your wedding day. Pricing for Bridal Makeup in Saharsa Our bridal makeup packages in Saharsa are designed to cater to various preferences and budgets: Basic Bridal Makeup: ₹10,000 HD Bridal Makeup: ₹12,000 Airbrush Bridal Makeup: ₹18,000 For engagement and reception: Basic Engagement/Reception Makeup: ₹6,000 HD Engagement/Reception Makeup: ₹8,000 Airbrush Engagement/Reception Makeup: ₹12,000 For parties: Basic Party Makeup: ₹2,500 HD Party Makeup: ₹3,500 Popular Bridal Makeup Styles in Saharsa Traditional Bridal Makeup Traditional bridal makeup in Saharsa features bold colors and detailed application that complements your wedding attire, creating a classic and elegant look. HD Bridal Makeup HD bridal makeup provides a high-definition finish that looks perfect in both photos and real life. This style ensures a flawless appearance throughout your wedding day. Airbrush Bridal Makeup Airbrush makeup offers a lightweight and smooth finish, providing full coverage that lasts all day. Ideal for brides seeking a natural yet polished look. How to Book Your Bridal Makeup with Ladyfair in Saharsa 1. Initial Contact: Call us at 7004721239 to discuss your bridal makeup needs and schedule an appointment. 2. Consultation Session: Meet with our makeup artist to discuss your desired look, review your wedding attire, and plan the perfect makeup style. 3. Makeup Trial: We provide trial sessions so you can preview and adjust your bridal makeup before the big day. 4. Wedding Day Makeup: On your wedding day, our makeup artist will arrive at your location in Saharsa to provide a flawless and stress-free makeup service. What Brides in Saharsa Are Saying About Ladyfair Sonia M., Saharsa: "Ladyfair’s at-home service was incredible. The makeup artist was punctual and professional, and my bridal look was perfect!" Anju R., Saharsa: "I opted for the airbrush makeup, and it was exactly what I wanted. The makeup lasted throughout my wedding day, and I felt beautiful all day long." Priyanka S., Saharsa: "The HD makeup was amazing for my photos. Ladyfair’s team made sure I looked stunning and felt confident." Preparing for Your Bridal Makeup Session For the best results, consider these tips: Stay Hydrated: Drink plenty of water to keep your skin fresh and glowing. Maintain a Skincare Routine: Follow a consistent skincare regimen leading up to your wedding. Avoid New Products: Stick to familiar skincare products to avoid reactions. Communicate Clearly: Share your makeup preferences and concerns with our artist during your consultation. Additional Beauty Services by Ladyfair Ladyfair offers a full range of beauty services beyond bridal makeup: Engagement and Reception Makeup: Customized looks for all your pre-wedding events. Party Makeup: Perfect for special occasions and celebrations. Everyday Makeup: Enhance your daily look with our expert services. Special Occasion Makeup: Makeup for birthdays, anniversaries, and other important events. The Future of Bridal Makeup in Saharsa Ladyfair is setting new benchmarks in bridal beauty with our innovative at-home services in Saharsa. As more brides experience our exceptional service, Ladyfair continues to grow as the preferred choice for bridal makeup. Q&A with Ladyfair’s Bridal Makeup Artist in Saharsa Q1: What distinguishes Ladyfair as the best bridal makeup artist in Saharsa? A1: Ladyfair provides at-home bridal makeup services that combine expert artistry, convenience, and high-quality products to ensure you look stunning on your wedding day. Q2: What are the prices for Ladyfair’s bridal makeup services in Saharsa? A2: Our bridal makeup services start at ₹10,000 for basic makeup, ₹12,000 for HD makeup, and ₹18,000 for airbrush makeup. Q3: How can I book Ladyfair’s bridal makeup services in Saharsa? A3: You can book our services by calling 7004721239. We also offer consultations and trial sessions to help you achieve your desired look. Q4: What types of bridal makeup does Ladyfair offer in Saharsa? A4: We offer traditional, HD, and airbrush bridal makeup styles to suit your preferences. Q5: Are makeup trials available before the wedding day? A5: Yes, we offer trial sessions to help you finalize your bridal look and make any necessary adjustments. Q6: What kind of products does Ladyfair use for bridal makeup? A6: We use professional-grade, high-quality products that are safe for all skin types and provide a flawless finish. Q7: What other makeup services does Ladyfair offer in Saharsa? A7: In addition to bridal makeup, we offer engagement, reception, party, and special occasion makeup services.

Posted By: 26th August 2024
Top Bridal Makeup Artist in Rohtas
Ladyfair: Premium Bridal Makeup Services in Rohtas Introduction In Rohtas, Ladyfair is the go-to name for brides seeking flawless makeup for their special day. Offering at-home bridal makeup services, we ensure that you receive the best beauty treatment in the comfort of your home. Whether you desire a traditional look or something more contemporary, our expert makeup artist in Rohtas will bring your bridal vision to life. Book now by calling 7004721239. Why Choose Ladyfair for Bridal Makeup in Rohtas? 1. Expert Makeup Artists Our makeup artist in Rohtas brings years of experience in bridal beauty, specializing in creating looks that enhance your natural features and ensure you look stunning on your wedding day. 2. Convenient At-Home Service Ladyfair’s at-home bridal makeup service in Rohtas means you can avoid the hassle of traveling to a salon. Enjoy a stress-free experience as our expert comes to you. 3. High-Quality Products We use only top-tier, professional-grade makeup products that ensure a flawless, long-lasting look, perfect for all-day wear. Bridal Makeup Pricing in Rohtas Ladyfair offers competitive pricing for our bridal makeup services in Rohtas: Basic Bridal Makeup: ₹10,000 HD Bridal Makeup: ₹12,000 Airbrush Bridal Makeup: ₹18,000 For engagement and reception: Basic Engagement/Reception Makeup: ₹6,000 HD Engagement/Reception Makeup: ₹8,000 Airbrush Engagement/Reception Makeup: ₹12,000 For parties: Basic Party Makeup: ₹2,500 HD Party Makeup: ₹3,500 Bridal Makeup Styles in Rohtas Traditional Bridal Makeup Our traditional bridal makeup in Rohtas emphasizes bold, defined features, with intricate detailing that complements traditional bridal attire. HD Bridal Makeup Perfect for brides who want a flawless, high-definition finish that looks impeccable both in person and in photographs. Our HD makeup is designed for all-day durability. Airbrush Bridal Makeup Airbrush makeup offers a lightweight, smooth finish, providing full coverage that lasts throughout the wedding day. It's ideal for brides looking for a natural, yet polished appearance. How to Book Your Bridal Makeup with Ladyfair in Rohtas 1. Initial Contact: Call us at 7004721239 to discuss your bridal makeup needs and schedule an appointment. 2. Consultation: Meet with our makeup artist for a detailed consultation to plan your desired look and review your wedding attire. 3. Makeup Trial: We offer trial sessions so you can preview your bridal makeup and make any adjustments before the wedding day. 4. Wedding Day Makeup: On your big day, our makeup artist will arrive at your location in Rohtas to deliver a flawless, stress-free makeup service. Testimonials from Brides in Rohtas Anjali K., Rohtas: "Ladyfair made my wedding day so much easier with their at-home service. The makeup was exactly how I imagined, and it lasted all day!" Priya S., Rohtas: "I loved the HD bridal makeup! It looked amazing in all my wedding photos, and the makeup artist was so professional and talented." Neetu R., Rohtas: "The airbrush makeup was perfect for my outdoor wedding. It stayed fresh all day, and I received so many compliments on my look." Preparing for Your Bridal Makeup Session To ensure the best results, here are a few tips: Hydrate: Keep your skin hydrated by drinking plenty of water. Skincare Routine: Stick to a consistent skincare routine leading up to your wedding. Avoid New Products: Avoid trying new skincare products close to your wedding day to prevent potential reactions. Clear Communication: Be clear about your desired look during your consultation. Additional Services by Ladyfair Ladyfair offers a variety of beauty services beyond bridal makeup: Engagement and Reception Makeup: Tailored looks for all your pre-wedding events. Party Makeup: Perfect for guests attending weddings or other celebrations. Everyday Makeup: Enhance your daily appearance with our expert services. Special Occasion Makeup: Includes makeup for anniversaries, birthdays, and other significant events. The Future of Bridal Makeup in Rohtas Ladyfair is committed to setting new standards in bridal beauty with our innovative at-home makeup services in Rohtas. As more brides experience the convenience and quality we offer, Ladyfair is quickly becoming the top choice for bridal makeup in the region. Q&A with Ladyfair’s Bridal Makeup Artist in Rohtas Q1: What sets Ladyfair apart as the top bridal makeup artist in Rohtas? A1: Ladyfair offers at-home bridal makeup services that combine expert artistry, convenience, and the use of high-quality products to ensure you look perfect on your big day. Q2: How much does Ladyfair’s bridal makeup service cost in Rohtas? A2: Our bridal makeup services start at ₹10,000 for basic bridal makeup, ₹12,000 for HD bridal makeup, and ₹18,000 for airbrush bridal makeup. Q3: How do I book Ladyfair’s bridal makeup services in Rohtas? A3: You can book our services by calling 7004721239. We also offer consultations and trial sessions to ensure your makeup is exactly what you envision. Q4: What types of bridal makeup does Ladyfair offer in Rohtas? A4: We offer traditional, HD, and airbrush bridal makeup styles to suit every bride's preference. Q5: Does Ladyfair provide makeup trials before the wedding day? A5: Yes, we offer makeup trial sessions to help you finalize your bridal look and make any necessary adjustments. Q6: What products does Ladyfair use for bridal makeup? A6: We use high-quality, professional-grade products that are safe for all skin types and provide a flawless, long-lasting finish. Q7: What other makeup services does Ladyfair offer in Rohtas? A7: Besides bridal makeup, Ladyfair offers engagement, reception, party, and special occasion makeup services.

Posted By: 26th August 2024
Top Bridal Makeup Artist in Purnia
Ladyfair: The Ultimate Bridal Makeup Experience in Purnia Introduction In the vibrant town of Purnia, Ladyfair is redefining bridal beauty with our exclusive at-home makeup services. We understand the importance of looking your best on your wedding day, which is why we bring the salon experience to the comfort of your home. Whether you want a traditional, HD, or airbrush makeup look, Ladyfair’s expert makeup artist will make sure you shine on your special day. Book your session by calling 7004721239. Why Choose Ladyfair for Your Bridal Makeup in Purnia? 1. Unmatched Expertise Ladyfair’s makeup artist in Purnia has years of experience in creating exquisite bridal looks. We specialize in enhancing your natural beauty, ensuring that you look flawless from every angle. 2. Convenient At-Home Service No need to worry about salon visits on your big day. Our at-home makeup service in Purnia is designed to offer maximum convenience, allowing you to relax and enjoy the makeup process in your own space. 3. Premium Products We use only high-quality, professional-grade makeup products to ensure that your look lasts throughout your wedding day. Our products are safe for all skin types and provide a flawless finish. Ladyfair Bridal Makeup Pricing in Purnia Our bridal makeup packages in Purnia are designed to meet every bride's needs: Basic Bridal Makeup: ₹10,000 HD Bridal Makeup: ₹12,000 Airbrush Bridal Makeup: ₹18,000 For engagement and reception: Basic Engagement/Reception Makeup: ₹6,000 HD Engagement/Reception Makeup: ₹8,000 Airbrush Engagement/Reception Makeup: ₹12,000 For parties: Basic Party Makeup: ₹2,500 HD Party Makeup: ₹3,500 Popular Bridal Makeup Styles in Purnia Traditional Bridal Makeup For brides who prefer a classic look, traditional bridal makeup features bold colors, intricate detailing, and a flawless finish that complements your traditional wedding attire. HD Bridal Makeup HD makeup is ideal for brides who want a high-definition finish that looks perfect in both real life and photographs. This style ensures your makeup is camera-ready and lasts all day. Airbrush Bridal Makeup Airbrush makeup offers a lightweight, yet full-coverage finish that is perfect for brides looking for a flawless, long-lasting look. It’s particularly popular for its smooth, even application and durability. Booking Your Bridal Makeup with Ladyfair in Purnia 1. Initial Consultation: Reach out to us at 7004721239 to discuss your bridal makeup needs and book your appointment. 2. Consultation Session: Meet with our makeup artist to discuss your desired look and review the options that best suit your skin tone and wedding theme. 3. Makeup Trial: We offer trial sessions to help you choose the perfect look and make any necessary adjustments before the big day. 4. Final Makeup Session: On your wedding day, our makeup artist will arrive at your location in Purnia to deliver a flawless bridal makeup service. Testimonials from Brides in Purnia Sneha R., Purnia: "Ladyfair’s at-home service was a game-changer for my wedding. The makeup artist was professional, and the results were stunning. I received so many compliments!" Aarti J., Purnia: "I opted for the HD bridal makeup, and it was perfect for both my wedding photos and real life. The service was top-notch, and I felt beautiful all day long." Neha S., Purnia: "The airbrush makeup was amazing. It gave me a flawless finish that lasted all day, even through all the ceremonies. Ladyfair made my wedding day stress-free." Preparing for Your Bridal Makeup Session To ensure the best results on your wedding day, follow these tips: Stay Hydrated: Drink plenty of water to keep your skin hydrated and healthy. Follow a Skincare Routine: Maintain a consistent skincare routine leading up to your wedding day. Avoid New Products: Don’t introduce new skincare products close to your wedding to avoid potential skin reactions. Clear Communication: Discuss your desired look and any skin concerns during your consultation. Additional Services by Ladyfair Ladyfair offers a range of beauty services beyond bridal makeup: Engagement and Reception Makeup: Tailored looks for all your pre-wedding events. Party Makeup: Perfect for guests and special occasions. Everyday Makeup: Enhance your daily appearance with our expert services. Special Occasion Makeup: Makeup for anniversaries, birthdays, and other significant events. The Future of Bridal Makeup in Purnia Ladyfair is setting new standards in bridal beauty with our innovative at-home makeup services in Purnia. As more brides discover the convenience and quality we offer, Ladyfair continues to grow as the preferred choice for bridal makeup. Q&A with Ladyfair’s Bridal Makeup Artist in Purnia Q1: What makes Ladyfair the best bridal makeup artist in Purnia? A1: Ladyfair offers at-home bridal makeup services that combine expertise, convenience, and the use of premium products to ensure you look your best on your wedding day. Q2: What are the prices for Ladyfair’s bridal makeup services in Purnia? A2: Our bridal makeup prices start at ₹10,000 for basic bridal makeup, ₹12,000 for HD bridal makeup, and ₹18,000 for airbrush bridal makeup. Q3: How can I book Ladyfair’s bridal makeup services in Purnia? A3: You can book our services by calling 7004721239. We offer consultations and trial sessions to ensure your makeup is exactly what you envision. Q4: What types of bridal makeup styles does Ladyfair offer in Purnia? A4: Ladyfair offers traditional, HD, and airbrush bridal makeup styles to suit every bride's preference. Q5: Does Ladyfair provide makeup trials before the wedding day? A5: Yes, we offer makeup trial sessions to help you finalize your bridal look and make any adjustments. Q6: What products does Ladyfair use for bridal makeup? A6: We use high-quality, professional-grade products that are safe for all skin types and provide a flawless, long-lasting finish. Q7: What other makeup services does Ladyfair offer in Purnia? A7: In addition to bridal makeup, Ladyfair offers engagement, reception, party, and special occasion makeup services.

Posted By: 26th August 2024
Bridal Makeup Artist in Patna
Ladyfair: Your Go-To Bridal Makeup Artist in Patna Introduction Every bride dreams of looking her best on her wedding day, and in Patna, Ladyfair is the bridal makeup artist you can trust to make that dream come true. Offering at-home bridal makeup services, Ladyfair ensures you look stunning without the stress of visiting a salon. With a range of makeup styles, including traditional, HD, and airbrush, our services cater to every bride's unique preferences. To book your session, call us at 7004721239. Why Choose Ladyfair for Bridal Makeup in Patna? 1. Expertise in Bridal Makeup Ladyfair’s makeup artist in Patna specializes in creating stunning bridal looks that enhance your natural beauty while complementing your attire and jewelry. With years of experience, we understand the importance of looking perfect on your special day. 2. Convenient At-Home Services Our at-home bridal makeup services allow you to enjoy a stress-free experience. Our expert makeup artist will come to your location in Patna, making the process seamless and comfortable. 3. High-Quality Products We use only premium makeup products that are safe for all skin types. These products ensure a flawless finish that lasts throughout your wedding day. Ladyfair Bridal Makeup Pricing in Patna Our bridal makeup services in Patna are competitively priced: Basic Bridal Makeup: ₹10,000 HD Bridal Makeup: ₹12,000 Airbrush Bridal Makeup: ₹18,000 For engagement and reception: Basic Engagement/Reception Makeup: ₹6,000 HD Engagement/Reception Makeup: ₹8,000 Airbrush Engagement/Reception Makeup: ₹12,000 For parties: Basic Party Makeup: ₹2,500 HD Party Makeup: ₹3,500 Popular Bridal Makeup Styles in Patna Traditional Bridal Makeup Many brides in Patna prefer a traditional look that includes bold eyes, rich lips, and intricate details that match their cultural attire. Modern Bridal Makeup For those who lean towards contemporary styles, modern bridal makeup focuses on a natural, radiant look that emphasizes your best features without overpowering them. Airbrush Bridal Makeup Airbrush makeup is perfect for brides who want a flawless, long-lasting finish. It’s lightweight and provides excellent coverage, ensuring your makeup looks fresh all day. Booking Your Bridal Makeup with Ladyfair in Patna 1. Initial Inquiry: Call 7004721239 to discuss your needs and schedule an appointment. 2. Consultation: Meet with our makeup artist to review your wedding look, and discuss the best makeup style for you. 3. Makeup Trial: Try out your bridal look in a trial session to ensure everything is perfect before the big day. 4. Final Makeup Session: On your wedding day, our makeup artist will arrive at your location in Patna to deliver the full bridal makeup service. Testimonials from Brides in Patna Anjali S., Patna: "Ladyfair’s makeup artist made my wedding day so special. The airbrush makeup was flawless and lasted all day. I couldn't be happier with the results." Ritu K., Patna: "The convenience of having my makeup done at home was a game-changer. The artist was professional and attentive to all my needs. Highly recommend!" Sonal P., Patna: "I loved the HD bridal makeup! The trial session really helped me decide on the perfect look. Thank you, Ladyfair!" Preparing for Your Bridal Makeup Session To ensure your bridal makeup is perfect, follow these tips: Hydrate: Keep your skin hydrated by drinking plenty of water. Skincare Routine: Stick to your regular skincare routine to maintain healthy skin. Avoid New Products: Don’t introduce new skincare products close to your wedding day to prevent reactions. Clear Communication: Share your makeup preferences and concerns with the artist during your consultation. Additional Services by Ladyfair Ladyfair offers more than just bridal makeup. Our other services include: Engagement and Reception Makeup: Tailored looks for all your pre-wedding events. Party Makeup: Ideal for guests and special occasions. Everyday Makeup: Perfect for enhancing your daily appearance. Special Occasion Makeup: Makeup for anniversaries, birthdays, and other significant events. The Future of Bridal Makeup in Patna As more brides in Patna discover the benefits of Ladyfair’s at-home bridal makeup services, our brand continues to grow in popularity. We’re committed to providing exceptional service that makes every bride feel beautiful on her wedding day. Q&A with Ladyfair’s Bridal Makeup Artist in Patna Q1: What sets Ladyfair apart as the best bridal makeup artist in Patna? A1: Ladyfair provides top-tier at-home bridal makeup services, ensuring a stress-free experience with high-quality products and expert techniques that enhance your natural beauty. Q2: How much does bridal makeup cost with Ladyfair in Patna? A2: Our bridal makeup prices start at ₹10,000 for basic makeup, ₹12,000 for HD makeup, and ₹18,000 for airbrush makeup. Q3: How do I book Ladyfair’s bridal makeup services in Patna? A3: Simply call 7004721239 to schedule your consultation and book your bridal makeup session. Q4: What types of bridal makeup does Ladyfair offer in Patna? A4: We offer traditional, modern, and airbrush bridal makeup styles, tailored to each bride's preferences. Q5: Can I have a trial session before my wedding day? A5: Yes, we provide trial sessions to ensure you’re completely satisfied with your bridal look before the big day. Q6: What products do you use for bridal makeup? A6: Ladyfair uses only premium, long-lasting products that are safe for all skin types and provide a flawless finish. Q7: What other services does Ladyfair offer in Patna? A7: In addition to bridal makeup, we offer engagement, reception, party, and special occasion makeup services.
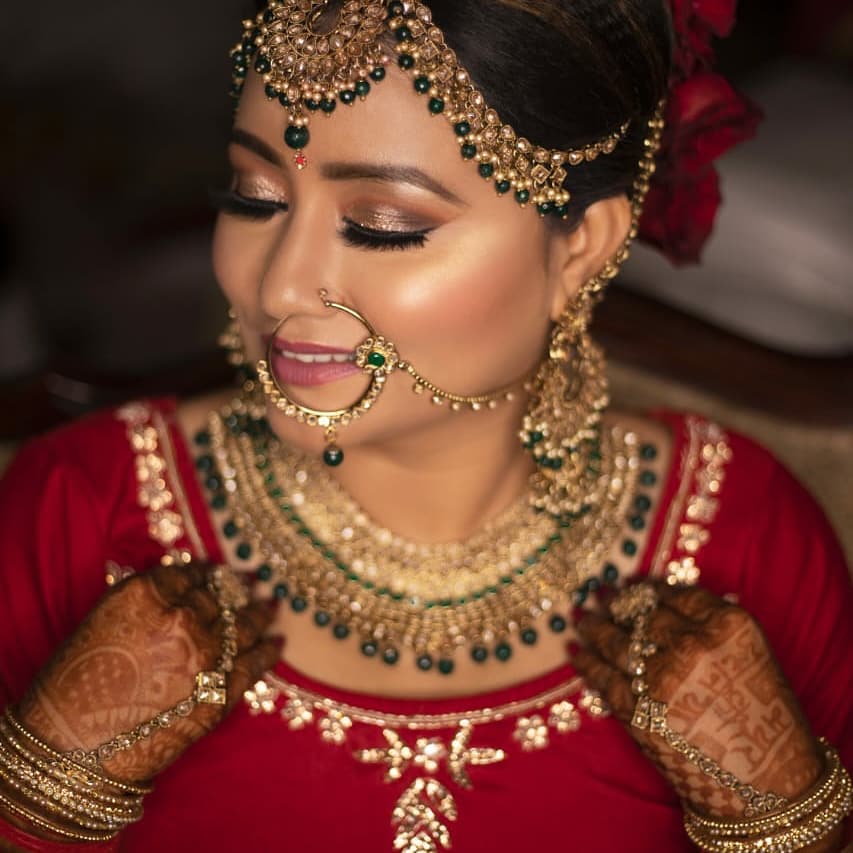
Posted By: 26th August 2024
Bridal Makeup Artist in Nawada
Ladyfair: Premium At-Home Bridal Makeup Services in Nawada, Bihar Introduction In Nawada, Bihar, Ladyfair is the go-to brand for brides seeking flawless makeup services right in the comfort of their homes. Our at-home bridal makeup services ensure that you look stunning on your wedding day without the hassle of visiting a salon. Ladyfair offers a range of bridal makeup styles tailored to your preferences, from traditional to modern, all at competitive prices. To book your bridal makeup session, contact us at 7004721239. Why Choose Professional Bridal Makeup? Professional bridal makeup is essential for ensuring that your wedding day look is both beautiful and long-lasting. Bridal makeup requires precision, an understanding of your skin type, and a style that complements your attire and personal preferences. Ladyfair’s expert makeup artist specializes in creating bridal looks that enhance your natural beauty while ensuring that you feel confident throughout your special day. Ladyfair Bridal Makeup Pricing in Nawada We offer a variety of bridal makeup services designed to meet different needs and budgets: Basic Bridal Makeup: ₹10,000 HD Bridal Makeup: ₹12,000 Airbrush Bridal Makeup: ₹18,000 For engagement and reception: Basic Engagement/Reception Makeup: ₹6,000 HD Engagement/Reception Makeup: ₹8,000 Airbrush Engagement/Reception Makeup: ₹12,000 For parties: Basic Party Makeup: ₹2,500 HD Party Makeup: ₹3,500 Why Ladyfair is the Best Choice for Bridal Makeup in Nawada 1. Convenient At-Home Services Our makeup artist comes to your location in Nawada, providing a stress-free experience where you can relax in your own space. No need to travel to a salon on your wedding day. 2. Expertise in Various Bridal Styles Whether you prefer a traditional bridal look with bold, rich colors, or a modern, subtle style, our makeup artist has the expertise to deliver exactly what you envision. 3. Use of High-Quality Products Ladyfair uses premium makeup products that are not only safe for your skin but also ensure long-lasting, flawless results throughout your wedding day. 4. Personalized Consultations and Trials We offer personalized consultations and makeup trials to help you choose the perfect look for your big day. This allows you to see and approve your makeup style before the wedding. Bridal Makeup Styles Popular in Nawada Traditional Bridal Makeup In Nawada, traditional bridal makeup often includes bold eyes, red lips, and a look that pairs beautifully with traditional jewelry and attire. Modern Bridal Makeup Modern bridal makeup focuses on enhancing natural beauty with soft tones and a radiant glow, perfect for brides who prefer a minimalist approach. Fusion Bridal Makeup A blend of traditional and modern styles, fusion makeup is ideal for brides who want to combine cultural elements with contemporary trends. Booking Your Bridal Makeup with Ladyfair 1. Initial Inquiry: Call 7004721239 to discuss your bridal makeup requirements and schedule an appointment. 2. Consultation: Our makeup artist will meet with you to review your desired look, wedding attire, and discuss the makeup style that suits you best. 3. Makeup Trial: A trial session allows you to preview your bridal makeup and make any necessary adjustments before the wedding day. 4. Final Makeup Session: On your wedding day, our makeup artist will arrive at your location in Nawada to provide the complete bridal makeup service, ensuring you look flawless. Testimonials from Brides in Nawada Priya S., Nawada: "Ladyfair made my wedding day stress-free with their at-home service. The makeup was exactly how I imagined, and it lasted all day. Highly recommend!" Neha T., Nawada: "The HD bridal makeup was perfect for my wedding. The artist was professional, and the results were stunning. Thank you, Ladyfair!" Shivani R., Nawada: "I was worried about finding a good makeup artist in Nawada, but Ladyfair exceeded my expectations. The trial session was so helpful, and the final look was flawless." Preparing for Your Bridal Makeup Session To ensure the best results, follow these skincare tips leading up to your wedding: Hydrate: Drink plenty of water to keep your skin hydrated and glowing. Follow a Skincare Routine: Cleanse, tone, and moisturize regularly to prepare your skin. Avoid New Products: Avoid trying new skincare products close to your wedding day to prevent any adverse reactions. Communicate Clearly: Discuss your desired look and any concerns with the makeup artist during your consultation. Additional Services by Ladyfair In addition to bridal makeup, Ladyfair offers a variety of beauty services: Engagement and Reception Makeup: Perfect for pre-wedding events. Party Makeup: Ideal for guests and other special occasions. Everyday Makeup: Enhance your daily look with our expert services. Special Occasion Makeup: Makeup for anniversaries, celebrations, and more. The Future of Bridal Makeup in Nawada As Ladyfair continues to expand its at-home bridal makeup services in Nawada, more brides are discovering the convenience and quality we offer. Our commitment to excellence ensures that every bride looks her best on her wedding day. Q&A with Ladyfair’s Bridal Makeup Artist in Nawada Q1: What makes Ladyfair’s bridal makeup services unique in Nawada? A1: Ladyfair offers at-home bridal makeup services, allowing brides to enjoy a personalized and stress-free experience. We provide a range of makeup styles, from traditional to modern, tailored to each bride's preferences. Q2: What are the prices for Ladyfair’s bridal makeup services in Nawada? A2: Our prices start at ₹10,000 for basic bridal makeup, ₹12,000 for HD bridal makeup, and ₹18,000 for airbrush bridal makeup. We also offer engagement and party makeup services starting at ₹2,500. Q3: How do I book Ladyfair’s bridal makeup services in Nawada? A3: To book our services, simply call 7004721239. We’ll arrange a consultation and makeup trial, followed by the final makeup application on your wedding day. Q4: What products does Ladyfair use for bridal makeup? A4: We use premium, long-lasting makeup products that are safe for all skin types, ensuring a flawless finish that lasts all day. Q5: How can I prepare for my bridal makeup session with Ladyfair? A5: Maintain a good skincare routine, stay hydrated, avoid new skincare products close to your wedding, and communicate your desired look clearly during your consultation. Q6: Does Ladyfair offer other makeup services besides bridal makeup? A6: Yes, we offer a range of makeup services including engagement, reception, party, and special occasion makeup. Q7: Can I make changes to my bridal look after the trial session? A7: Yes, the trial session is designed to ensure you are happy with your look. Our makeup artist will work with you to make any adjustments you desire.
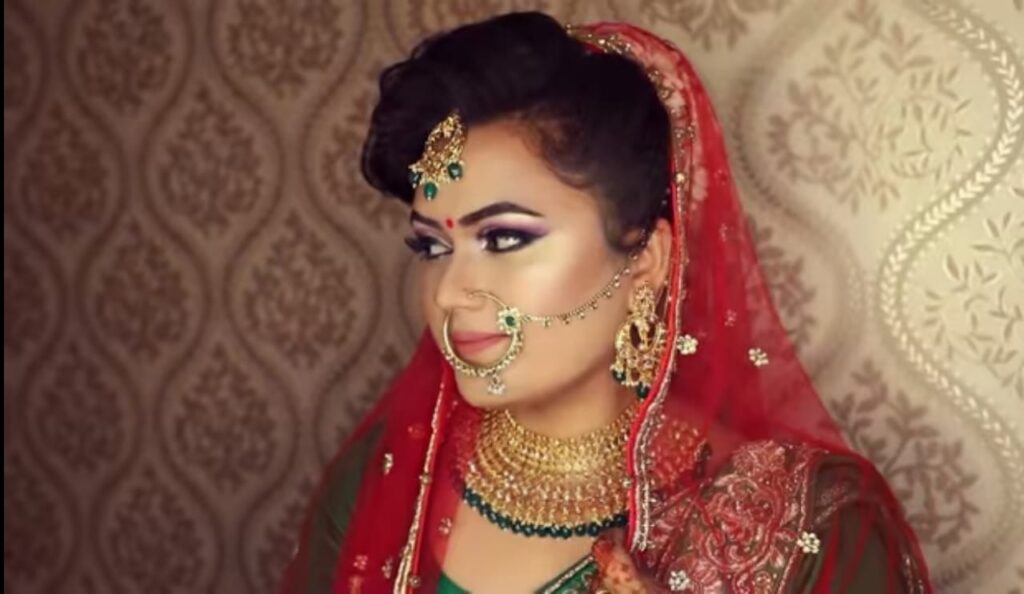
Posted By: 26th August 2024
Bridal Makeup Artist in Nalanda
Ladyfair: Exceptional Bridal Makeup Services in Nalanda, Bihar Introduction In the culturally rich district of Nalanda, Bihar, Ladyfair is bringing top-tier bridal makeup services right to your doorstep. We understand the importance of looking and feeling your best on your wedding day, and our at-home services are designed to offer both convenience and quality. Whether you're looking for a traditional bridal look or a modern twist, Ladyfair is here to make your dream look a reality. Book your appointment today by calling 7004721239. Why Bridal Makeup is Essential Bridal makeup is about more than just enhancing your appearance; it’s about creating a look that complements your wedding attire, suits your personal style, and makes you feel confident. Professional bridal makeup ensures that every detail, from your eyeshadow to your lipstick, is perfect. Ladyfair is committed to offering the best bridal makeup services in Nalanda, ensuring that every bride shines on her special day. Ladyfair Bridal Makeup Pricing in Nalanda We offer a range of bridal and special occasion makeup services tailored to suit different styles and budgets: Basic Bridal Makeup: ₹10,000 HD Bridal Makeup: ₹12,000 Airbrush Bridal Makeup: ₹18,000 For engagements and receptions: Basic Engagement/Reception Makeup: ₹6,000 HD Engagement/Reception Makeup: ₹8,000 Airbrush Engagement/Reception Makeup: ₹12,000 For parties: Basic Party Makeup: ₹2,500 HD Party Makeup: ₹3,500 Why Choose Ladyfair in Nalanda District? 1. Convenience of At-Home Services On your wedding day, the last thing you want is to travel to a salon. Ladyfair brings the salon experience to your home, allowing you to relax and enjoy the process in a comfortable setting. 2. Expertise in Bridal Styles Ladyfair’s makeup artist is experienced in a variety of bridal styles, from traditional to modern, ensuring that every bride’s makeup is perfectly tailored to her vision. 3. Premium Products for a Flawless Finish We use only the best makeup products to ensure your makeup looks flawless and lasts throughout your wedding day. Our products are chosen for their quality, safety, and long-lasting effects. 4. Personalized Consultations and Makeup Trials We offer personalized consultations and makeup trials to help you finalize your look before the big day, ensuring that you are completely satisfied with the results. Popular Bridal Makeup Styles in Nalanda Traditional Bridal Makeup In Nalanda, traditional bridal makeup is a popular choice, often featuring bold eyes, vibrant lip colors, and a look that complements intricate jewelry and attire. Modern Bridal Makeup Modern bridal makeup focuses on enhancing natural beauty with subtle tones and a radiant finish, perfect for brides who prefer a minimalist yet elegant look. Fusion Bridal Makeup Fusion makeup combines elements of both traditional and modern styles, offering a unique and personalized bridal look that reflects both heritage and contemporary trends. The Ladyfair Bridal Makeup Process 1. Initial Inquiry: Call 7004721239 to discuss your bridal makeup needs and schedule your appointment. 2. Consultation: Meet with our makeup artist to discuss your desired look, review your wedding attire, and plan the makeup style that best suits you. 3. Makeup Trial: Experience a trial session to see your bridal makeup come to life, allowing for any adjustments before your wedding day. 4. Final Makeup Session: On your wedding day, our makeup artist will arrive at your location to provide the full bridal makeup service, ensuring you look flawless and feel confident. Testimonials from Nalanda Brides Ritika S., Nalanda: "I was so pleased with Ladyfair’s services. The makeup artist was professional, and the convenience of at-home service made the whole experience stress-free. My bridal look was exactly what I wanted." Ankita R., Nalanda: "I opted for the HD bridal makeup, and it was worth every penny. The makeup lasted all day, and I received so many compliments. Highly recommend Ladyfair!" Shweta J., Nalanda: "The trial session was incredibly helpful, and on my wedding day, the makeup artist executed the look perfectly. I felt beautiful and confident, thanks to Ladyfair." Preparing for Your Bridal Makeup Session To ensure the best results on your wedding day, follow these preparation tips: Stay Hydrated: Keep your skin glowing by drinking plenty of water. Follow a Skincare Routine: Cleanse, tone, and moisturize regularly to prepare your skin. Avoid New Products: Avoid introducing new skincare products close to your wedding day to prevent potential reactions. Communicate Clearly: Ensure you clearly communicate your desired look and any specific concerns during your consultation. Additional Services by Ladyfair Beyond bridal makeup, Ladyfair offers a range of other beauty services: Engagement and Reception Makeup: From basic to airbrush, tailored to suit your style. Party Makeup: For guests and attendees of weddings or special events. Everyday Makeup: Ideal for enhancing your appearance for daily activities. Special Occasion Makeup: Includes makeup for engagements, anniversaries, and other important events. The Future of Bridal Makeup in Nalanda District Ladyfair is committed to bringing the highest quality bridal makeup services to Nalanda. As more brides discover the convenience and quality of our at-home services, we continue to refine our offerings to ensure that every bride looks and feels her best on her wedding day. Q&A with Ladyfair’s Bridal Makeup Artist in Nalanda District, Bihar Q1: What sets Ladyfair’s bridal makeup services apart in Nalanda? A1: Ladyfair offers at-home bridal makeup services, providing a comfortable and personalized experience. We also offer a range of makeup styles from traditional to modern, all tailored to your preferences. Q2: What are the prices for Ladyfair’s bridal makeup services in Nalanda? A2: Our prices start at ₹10,000 for basic bridal makeup, ₹12,000 for HD bridal makeup, and ₹18,000 for airbrush bridal makeup. We also offer engagement and party makeup services starting at ₹2,500. Q3: How do I book Ladyfair’s services for my wedding in Nalanda? A3: You can book our services by calling 7004721239. We’ll arrange a consultation and trial session, followed by the final makeup application on your wedding day. Q4: What types of products does Ladyfair use? A4: We use high-quality, long-lasting makeup products that are safe for all skin types, ensuring a flawless finish that lasts throughout your wedding day. Q5: How should I prepare for my bridal makeup session? A5: Maintain a good skincare routine, stay hydrated, avoid trying new products close to your wedding day, and communicate your desired look clearly during your consultation. Q6: Does Ladyfair offer other makeup services besides bridal makeup? A6: Yes, Ladyfair also provides makeup services for engagements, receptions, parties, and other special occasions. Q7: What if I want to change my bridal look after the trial session? A7: The trial session is designed to ensure you are completely happy with your look. If you want to make any adjustments, our makeup artist will work with you to achieve the desired result.

Posted By: 26th August 2024
Bridal Makeup Artist in Muzaffarpur
Ladyfair: Elevating Bridal Beauty in Muzaffarpur, Bihar Introduction Ladyfair is proud to offer exceptional bridal makeup services right at your doorstep in Muzaffarpur, Bihar. Understanding the significance of your wedding day, our goal is to provide a luxurious, stress-free beauty experience that makes you look and feel extraordinary. With Ladyfair’s at-home services, your dream bridal look is just a call away at 7004721239. Why Bridal Makeup Matters Bridal makeup is more than just enhancing your appearance; it’s about creating a look that complements your wedding attire and highlights your natural beauty. A professional makeup artist ensures that every detail, from your foundation to your lipstick, is perfectly tailored to your style and the occasion. Ladyfair is dedicated to offering the best bridal makeup services in Muzaffarpur, ensuring that every bride shines on her special day. Why Choose Ladyfair in Muzaffarpur District? 1. Convenience of At-Home Services No need to travel to a salon on your wedding day. Ladyfair brings the expertise of a professional makeup artist directly to your home, allowing you to relax and enjoy the process in a familiar setting. 2. Expertise in Diverse Bridal Styles Ladyfair’s makeup artist is skilled in a variety of bridal looks, from traditional, culturally rich styles to contemporary, minimalist designs. Whatever your vision, we can create the perfect look for you. 3. Use of Premium Products To ensure a flawless finish that lasts all day, we use only the highest quality makeup products. These products are carefully selected to be gentle on your skin while providing long-lasting coverage. 4. Personalized Consultations and Trials We offer detailed consultations to understand your style and preferences. A makeup trial allows you to see your look before the big day, ensuring complete satisfaction and peace of mind. Bridal Makeup Styles Popular in Muzaffarpur Traditional Bridal Makeup In Muzaffarpur, many brides opt for traditional makeup that highlights their cultural heritage. This style often includes bold eyes, dramatic lashes, and vibrant lip colors, paired with intricate jewelry and bridal attire. Modern Bridal Makeup For a more contemporary look, modern bridal makeup focuses on creating a natural, radiant appearance with soft, subtle tones. This style is perfect for brides who prefer a minimalist yet elegant look. Fusion Bridal Makeup Fusion makeup blends traditional elements with modern trends, offering a unique and personalized bridal look. This style is ideal for brides who want the best of both worlds. The Ladyfair Bridal Makeup Process 1. Initial Inquiry: Contact us at 7004721239 to discuss your bridal makeup needs and schedule your appointment. 2. Consultation: Meet with our makeup artist to discuss your desired look, review your wedding attire, and plan the makeup style that best suits you. 3. Makeup Trial: Experience a trial session to see your bridal makeup come to life, allowing for any adjustments before your wedding day. 4. Final Makeup Session: On your wedding day, our makeup artist will arrive at your location to provide the full bridal makeup service, ensuring you look flawless and feel confident. Testimonials from Muzaffarpur Brides Priya S., Muzaffarpur: "Ladyfair’s at-home service was incredibly convenient, and the makeup artist understood exactly what I wanted. I felt beautiful and relaxed on my wedding day, thanks to their professional touch." Anjali R., Muzaffarpur: "I chose a traditional bridal look, and Ladyfair nailed it! The makeup was stunning and lasted all day. I couldn’t have asked for a better experience." Neha J., Muzaffarpur: "The trial session was so helpful in deciding my final look. On my wedding day, everything was perfect, and I received so many compliments. Thank you, Ladyfair!" Preparing for Your Bridal Makeup Session To achieve the best results on your wedding day, follow these preparation tips: Stay Hydrated: Drink plenty of water to keep your skin glowing. Follow a Skincare Routine: Cleanse, tone, and moisturize regularly to prepare your skin. Avoid New Products: Don’t introduce new skincare products close to your wedding day to avoid potential reactions. Communicate Clearly: Be sure to communicate your desired look and any specific concerns during your consultation. Additional Services by Ladyfair Beyond bridal makeup, Ladyfair offers a range of beauty services: Party Makeup: Perfect for guests and attendees of special events. Everyday Makeup: Ideal for enhancing your daily appearance. Special Occasion Makeup: Services for engagements, anniversaries, and other important events. The Future of Bridal Makeup in Muzaffarpur District Ladyfair is dedicated to bringing the best bridal beauty services to Muzaffarpur. As more brides discover the convenience and quality of our at-home services, we continue to refine our offerings to ensure every bride looks and feels her best on her wedding day. Q&A with Ladyfair’s Bridal Makeup Artist in Muzaffarpur District, Bihar Q1: What makes Ladyfair’s bridal makeup services unique in Muzaffarpur? A1: Ladyfair offers at-home bridal makeup services, providing a comfortable and personalized experience. Our expertise in both traditional and modern styles ensures that each bride looks her best. Q2: What bridal makeup styles are most popular in Muzaffarpur? A2: Traditional bridal makeup with bold eyes and vibrant lips is popular, as well as modern styles that focus on a natural, radiant look. Fusion makeup, combining elements of both, is also trending. Q3: How do I book Ladyfair’s services for my wedding in Muzaffarpur? A3: Simply call 7004721239 to book your appointment. We’ll arrange a consultation and trial session, followed by the final makeup application on your wedding day. Q4: What types of products does Ladyfair use? A4: We use high-quality, long-lasting makeup products that are safe for all skin types, ensuring a flawless finish that lasts throughout your wedding day. Q5: How should I prepare for my bridal makeup session? A5: Maintain a good skincare routine, stay hydrated, avoid trying new products close to your wedding day, and communicate your desired look clearly during your consultation. Q6: Does Ladyfair offer other makeup services besides bridal makeup? A6: Yes, Ladyfair also provides makeup services for parties, everyday wear, and special occasions like engagements and anniversaries. Q7: What if I want to change my bridal look after the trial session? A7: The trial session is designed to ensure you are completely happy with your look. If you want to make any adjustments, our makeup artist will work with you to achieve the desired result.
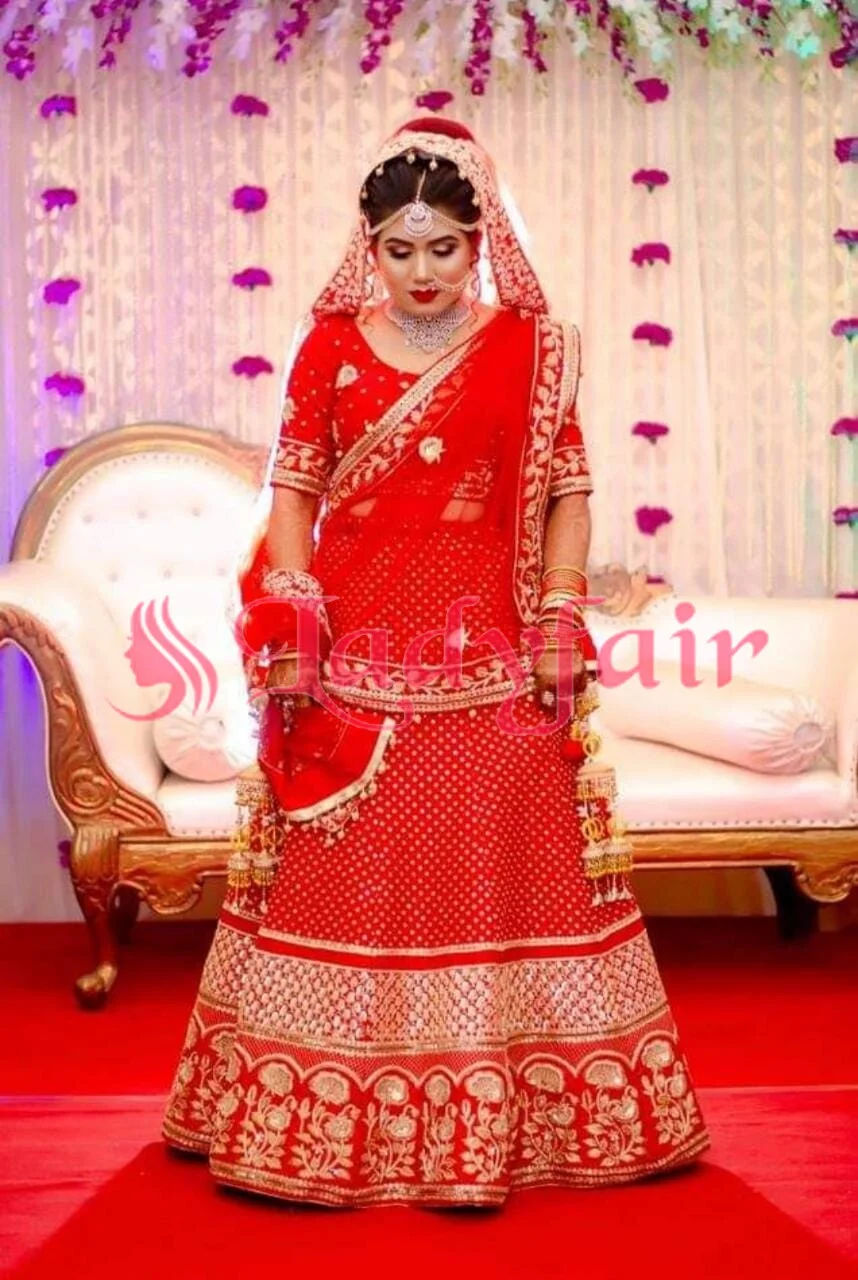
Posted By: 26th August 2024
Bridal Makeup Artist in Madhepura
Ladyfair: Transforming Bridal Beauty in Madhepura District, Bihar Introduction In the vibrant district of Madhepura, Bihar, Ladyfair is redefining bridal beauty with our specialized at-home makeup services. We know how important your wedding day is, and our goal is to provide you with a flawless and relaxing beauty experience. With personalized makeup services delivered right to your doorstep, Ladyfair ensures that you look your absolute best on your special day. Book your appointment by calling 7004721239. The Importance of Professional Bridal Makeup Bridal makeup is a crucial part of any wedding, as it highlights the bride's natural beauty and enhances her overall appearance. A professional makeup artist understands how to accentuate your best features while ensuring your makeup lasts throughout the day. Ladyfair is committed to offering top-notch bridal makeup services in Madhepura, tailored to your individual style and preferences. Why Choose Ladyfair in Madhepura District? 1. Convenient At-Home Services Ladyfair’s at-home bridal makeup services provide the ultimate convenience, allowing you to enjoy a personalized beauty session without the need to visit a salon. This service is designed to make your wedding day preparation as comfortable and hassle-free as possible. 2. Expertise in Diverse Bridal Styles Our makeup artist is proficient in a wide range of bridal looks, from traditional and culturally rich styles to contemporary and modern trends. Whether you desire a classic, elegant look or something more trendy and chic, Ladyfair can deliver the perfect bridal makeup. 3. Premium Products for Long-Lasting Results We use only the highest quality makeup products to ensure a flawless finish that lasts all day. Our products are selected for their excellence and suitability for all skin types, ensuring you look stunning from the ceremony to the reception. 4. Comprehensive Consultations and Trials Ladyfair offers detailed consultations to understand your vision and provide professional advice. We also offer makeup trials so you can preview your bridal makeup before the big day, ensuring complete satisfaction. Popular Bridal Makeup Styles in Madhepura District Traditional Bridal Makeup Many brides in Madhepura prefer a traditional look that reflects the rich cultural heritage of the region. This style often includes bold eyes, vibrant lips, and intricate detailing, perfectly complementing traditional bridal attire. Modern Bridal Makeup For those who prefer a more contemporary look, modern bridal makeup focuses on creating a natural, glowing appearance with subtle, sophisticated tones. This style is ideal for brides who want a timeless and elegant look. Fusion Bridal Makeup Fusion makeup combines traditional and modern elements, offering a unique and personalized bridal look. This style is perfect for brides who want to blend cultural traditions with current trends. The Ladyfair Bridal Makeup Process 1. Initial Inquiry: Contact us at 7004721239 to discuss your bridal makeup needs and book your appointment. 2. Pre-Wedding Consultation: Meet with our makeup artist for a detailed consultation where we discuss your desired look, review your wedding attire, and plan the makeup style that best suits you. 3. Makeup Trial: Experience a trial session to preview your bridal makeup. This allows for any adjustments before the big day, ensuring you are completely happy with your look. 4. Final Makeup Session: On your wedding day, our makeup artist will arrive at your location to complete your bridal makeup, ensuring you look radiant and feel confident throughout the day. Testimonials from Madhepura Brides Rani S., Madhepura: "Ladyfair made my wedding day so special. The at-home service was incredibly convenient, and the makeup artist created a look that was exactly what I wanted. I felt beautiful and confident all day!" Pooja T., Madhepura: "I loved the traditional bridal makeup Ladyfair did for me. It perfectly complemented my wedding attire and lasted all day. The service was professional, and the results were stunning!" Kavita J., Madhepura: "Ladyfair’s makeup artist was amazing. The trial session was so helpful, and the final result was beyond my expectations. I received so many compliments on my wedding day. Thank you!" Preparing for Your Bridal Makeup Session To ensure the best results, follow these preparation tips: Hydrate: Keep your skin hydrated by drinking plenty of water. Skincare Routine: Follow a consistent skincare routine, including cleansing, toning, and moisturizing. Avoid New Products: Don’t try new skincare products close to your wedding day to avoid potential reactions. Clear Communication: Clearly communicate your desired look and any specific concerns during your consultation to ensure the best outcome. Additional Services by Ladyfair In addition to bridal makeup, Ladyfair offers a range of other beauty services: Party Makeup: Ideal for wedding guests and attendees of special events. Everyday Makeup: Perfect for enhancing your daily look. Special Occasion Makeup: Services for engagements, anniversaries, and other important events. The Future of Bridal Makeup in Madhepura District As more brides in Madhepura discover the convenience and quality of Ladyfair’s at-home services, we are excited to continue providing exceptional bridal makeup solutions. Our commitment to excellence ensures that every bride receives the highest level of service and care. Q&A with Ladyfair’s Bridal Makeup Artist in Madhepura District, Bihar Q1: What sets Ladyfair’s bridal makeup services apart in Madhepura? A1: Ladyfair offers convenient at-home bridal makeup services, providing a stress-free and personalized beauty experience. Our expertise in both traditional and modern styles ensures that every bride looks her best. Q2: What types of bridal makeup styles are popular in Madhepura? A2: Traditional bridal makeup with bold eyes and vibrant lips is popular in Madhepura, as is modern makeup that focuses on a natural, glowing look. Fusion styles, blending traditional and modern elements, are also well-loved. Q3: How do I book Ladyfair’s at-home makeup service? A3: You can book our services by calling 7004721239. We’ll arrange a consultation and trial session, followed by the final makeup application on your wedding day. Q4: What products does Ladyfair use for bridal makeup? A4: We use premium, long-lasting makeup products that are safe for all skin types, ensuring a flawless finish that lasts throughout your wedding day. Q5: What should I do to prepare for my bridal makeup session? A5: Maintain a good skincare routine, stay hydrated, avoid trying new products close to your wedding day, and clearly communicate your desired look during the consultation. Q6: Does Ladyfair offer makeup services for other occasions? A6: Yes, Ladyfair provides makeup services for parties, everyday wear, and special occasions like engagements and anniversaries. Q7: How can I ensure that my bridal makeup is exactly what I want? A7: We offer makeup trials before the big day, allowing you to preview your look and make any necessary adjustments. This ensures complete satisfaction with your bridal makeup.

Posted By: 26th August 2024
Bridal Makeup Artist in Munger
Ladyfair: Elevating Bridal Beauty in Munger District, Bihar Introduction In the scenic district of Munger, Bihar, Ladyfair is transforming bridal beauty with our exclusive at-home makeup services. We understand how important your wedding day is, and our mission is to provide you with a flawless and stress-free beauty experience. With personalized makeup services delivered right to your door, Ladyfair ensures that you look your absolute best on your special day. Book your appointment by calling 7004721239. The Importance of Professional Bridal Makeup Bridal makeup is a crucial aspect of any wedding, as it enhances the bride's natural beauty and complements her overall look. A professional makeup artist understands how to highlight your best features while ensuring your makeup lasts throughout the day. Ladyfair is dedicated to offering top-quality bridal makeup services in Munger, tailored to your individual style and preferences. Why Choose Ladyfair in Munger District? 1. Convenient At-Home Services Ladyfair’s at-home bridal makeup services offer the ultimate convenience, allowing you to enjoy a personalized beauty session without the need to visit a salon. This service is designed to make your wedding day preparation as comfortable and hassle-free as possible. 2. Expertise in Diverse Bridal Styles Our makeup artist is skilled in a variety of bridal looks, from traditional and culturally inspired styles to contemporary and modern trends. Whether you desire a classic, elegant look or something more trendy and chic, Ladyfair can deliver the perfect bridal makeup. 3. Premium Products for Long-Lasting Results We use only the best makeup products to ensure a flawless finish that lasts all day. Our products are chosen for their quality and suitability for all skin types, ensuring you look stunning from the ceremony to the reception. 4. Comprehensive Consultations and Trials Ladyfair offers detailed consultations to understand your vision and offer professional advice. We also provide makeup trials so you can see how your makeup will look before the big day, ensuring complete satisfaction. Popular Bridal Makeup Styles in Munger District Traditional Bridal Makeup Many brides in Munger prefer a traditional look that reflects the rich cultural heritage of the region. This style often includes bold eyes, vibrant lips, and intricate detailing, perfectly complementing traditional bridal attire. Modern Bridal Makeup For those who prefer a more contemporary look, modern bridal makeup focuses on creating a natural, glowing appearance with subtle, sophisticated tones. This style is ideal for brides who want a timeless and elegant look. Fusion Bridal Makeup Fusion makeup combines traditional and modern elements, offering a unique and personalized bridal look. This style is perfect for brides who want to blend cultural traditions with current trends. The Ladyfair Bridal Makeup Process 1. Initial Inquiry: Contact us at 7004721239 to discuss your bridal makeup needs and book your appointment. 2. Pre-Wedding Consultation: Meet with our makeup artist for a comprehensive consultation where we discuss your desired look, review your wedding attire, and plan the makeup style that best suits you. 3. Makeup Trial: Experience a trial session to preview your bridal makeup. This allows for any adjustments before the big day, ensuring you are completely happy with your look. 4. Final Makeup Session: On your wedding day, our makeup artist will arrive at your location to complete your bridal makeup, ensuring you look radiant and feel confident throughout the day. Testimonials from Munger Brides Anjali R., Munger: "Ladyfair made my wedding day so special. The at-home service was incredibly convenient, and the makeup artist created a look that was exactly what I wanted. I felt beautiful and confident all day!" Sunita P., Munger: "I loved the traditional bridal makeup Ladyfair did for me. It perfectly complemented my wedding attire and lasted all day. The service was professional, and the results were stunning!" Ritika S., Munger: "Ladyfair’s makeup artist was amazing. The trial session was so helpful, and the final result was beyond my expectations. I received so many compliments on my wedding day. Thank you!" Preparing for Your Bridal Makeup Session To ensure the best results, follow these preparation tips: Hydrate: Keep your skin hydrated by drinking plenty of water. Skincare Routine: Follow a consistent skincare routine, including cleansing, toning, and moisturizing. Avoid New Products: Don’t try new skincare products close to your wedding day to avoid potential reactions. Clear Communication: Clearly communicate your desired look and any specific concerns during your consultation to ensure the best outcome. Additional Services by Ladyfair In addition to bridal makeup, Ladyfair offers a range of other beauty services: Party Makeup: Ideal for wedding guests and attendees of special events. Everyday Makeup: Perfect for enhancing your daily look. Special Occasion Makeup: Services for engagements, anniversaries, and other important events. The Future of Bridal Makeup in Munger District As more brides in Munger discover the convenience and quality of Ladyfair’s at-home services, we are excited to continue providing exceptional bridal makeup solutions. Our commitment to excellence ensures that every bride receives the highest level of service and care. Q&A with Ladyfair’s Bridal Makeup Artist in Munger District, Bihar Q1: What sets Ladyfair’s bridal makeup services apart in Munger? A1: Ladyfair offers convenient at-home bridal makeup services, providing a stress-free and personalized beauty experience. Our expertise in both traditional and modern styles ensures that every bride looks her best. Q2: What types of bridal makeup styles are popular in Munger? A2: Traditional bridal makeup with bold eyes and vibrant lips is popular in Munger, as is modern makeup that focuses on a natural, glowing look. Fusion styles, blending traditional and modern elements, are also well-loved. Q3: How do I book Ladyfair’s at-home makeup service? A3: You can book our services by calling 7004721239. We’ll arrange a consultation and trial session, followed by the final makeup application on your wedding day. Q4: What products does Ladyfair use for bridal makeup? A4: We use premium, long-lasting makeup products that are safe for all skin types, ensuring a flawless finish that lasts throughout your wedding day. Q5: What should I do to prepare for my bridal makeup session? A5: Maintain a good skincare routine, stay hydrated, avoid trying new products close to your wedding day, and clearly communicate your desired look during the consultation. Q6: Does Ladyfair offer makeup services for other occasions? A6: Yes, Ladyfair provides makeup services for parties, everyday wear, and special occasions like engagements and anniversaries. Q7: How can I ensure that my bridal makeup is exactly what I want? A7: We offer makeup trials before the big day, allowing you to preview your look and make any necessary adjustments. This ensures complete satisfaction with your bridal makeup.
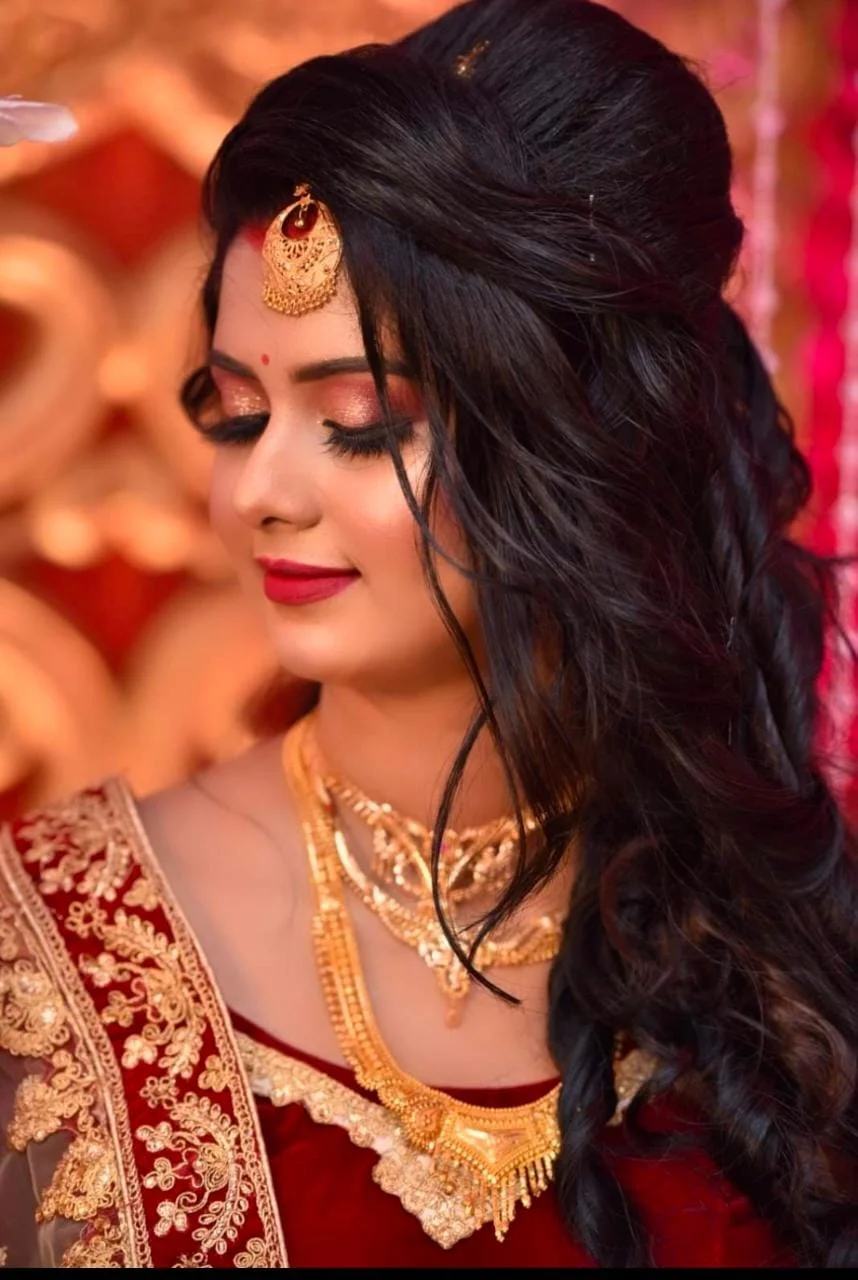
Posted By: 26th August 2024
Bridal Makeup Artist in Madhubani
Ladyfair: Perfecting Bridal Beauty in Madhubani District, Bihar Introduction In the culturally rich district of Madhubani, Bihar, Ladyfair is elevating bridal beauty with our specialized at-home makeup services. Understanding the significance of your wedding day, we provide personalized and stress-free beauty solutions that cater to your unique style and preferences. Our experienced makeup artist brings the luxury of salon-quality service directly to your doorstep, ensuring you look stunning on your special day. Book your appointment by calling 7004721239. The Importance of Bridal Makeup Bridal makeup is more than just a cosmetic application; it's an art form that enhances your natural beauty while aligning with the theme and traditions of your wedding. Professional bridal makeup ensures that you not only look beautiful but also feel confident and radiant throughout your wedding day. Ladyfair is dedicated to providing the highest quality bridal makeup services in Madhubani, tailored to each bride's individual needs and desires. Why Choose Ladyfair in Madhubani District? 1. Convenient At-Home Services Ladyfair offers the unparalleled convenience of at-home bridal makeup services, allowing you to enjoy a personalized beauty experience without the hassle of travel. This service is designed to make your bridal preparation as smooth and comfortable as possible. 2. Expertise in Traditional and Modern Styles Our expert makeup artist is proficient in a wide range of bridal styles, from traditional and culturally significant looks to contemporary trends. Whether you envision a classic bridal appearance or a modern, elegant style, Ladyfair can bring your vision to life. 3. Premium Makeup Products We use only the finest makeup products that ensure a flawless finish and long-lasting results. Our products are selected to be safe for all skin types, ensuring that your makeup looks perfect throughout your wedding festivities. 4. Comprehensive Consultations and Makeup Trials Ladyfair provides in-depth consultations to understand your desired look and offer expert advice. We also conduct makeup trials to ensure that your bridal makeup exceeds your expectations before the big day. Popular Bridal Makeup Trends in Madhubani District Traditional Bridal Makeup Madhubani brides often prefer traditional makeup that highlights their cultural heritage. Bold eyes, vibrant lips, and intricate detailing are key features of this style, which complements traditional bridal attire beautifully. Modern Bridal Makeup For brides who prefer a more contemporary look, modern bridal makeup offers a subtle, natural appearance with dewy skin and soft tones. This style is perfect for those who want an elegant yet understated look. Fusion Bridal Makeup Fusion makeup combines elements from both traditional and modern styles, offering a unique and personalized bridal look. This approach is ideal for brides who wish to incorporate cultural elements while embracing contemporary trends. The Ladyfair Bridal Makeup Process 1. Initial Inquiry: Contact us at 7004721239 to discuss your bridal makeup needs and schedule an appointment. 2. Pre-Wedding Consultation: Meet with our makeup artist for a detailed consultation where we’ll discuss your vision, review your wedding attire, and plan a makeup style that complements your look perfectly. 3. Makeup Trial: Experience a trial session to preview your bridal makeup and make any adjustments necessary. This ensures you are completely satisfied with your look before the wedding day. 4. Final Makeup Session: On your wedding day, our makeup artist will arrive at your location to provide the complete bridal makeup service, ensuring you look radiant and feel confident throughout the day. Testimonials from Madhubani Brides Poonam S., Madhubani: "Ladyfair’s at-home bridal makeup service was a dream come true. The makeup artist was skilled and professional, and my makeup looked stunning all day. I felt so beautiful!" Rekha T., Madhubani: "Having my makeup done at home made my wedding day so much easier. Ladyfair’s artist was amazing, and my bridal look was exactly what I had imagined. Highly recommended!" Jyoti K., Madhubani: "Ladyfair made me feel like a queen on my wedding day. The makeup artist used top-quality products and created a look that was perfect for me. Thank you for making my day so special!" Preparing for Your Bridal Makeup Session For the best results, follow these preparation tips: Hydrate: Drink plenty of water to keep your skin healthy and glowing. Skincare Routine: Stick to a consistent skincare routine that includes cleansing, toning, and moisturizing. Avoid New Products: Refrain from trying new skincare products close to your wedding day to avoid any adverse reactions. Communicate Clearly: Clearly communicate your desired look and any specific concerns during your consultation to ensure the best outcome. Additional Services by Ladyfair In addition to bridal makeup, Ladyfair offers a variety of other beauty services: Party Makeup: Ideal for guests and attendees of weddings and special events. Everyday Makeup: Perfect for enhancing your daily appearance. Special Occasion Makeup: Services for engagements, anniversaries, and other important events. The Future of Bridal Makeup in Madhubani District Ladyfair is committed to continuing to provide exceptional bridal makeup services in Madhubani District. As more brides discover the convenience and quality of our at-home services, we look forward to helping even more women achieve their dream bridal look. Q&A with Ladyfair’s Bridal Makeup Artist in Madhubani District, Bihar Q1: What makes Ladyfair’s bridal makeup services unique in Madhubani? A1: Ladyfair offers the convenience of at-home bridal makeup services, providing a personalized experience where our artist comes directly to you. Our expertise in both traditional and modern styles sets us apart in Madhubani. Q2: What bridal makeup styles are popular in Madhubani? A2: In Madhubani, traditional bridal makeup with bold eyes and vibrant lips is popular, as is modern makeup with a more natural and subtle look. Fusion styles, which combine elements of both, are also favored by many brides. Q3: How does the at-home makeup service work? A3: To book our services, you can call us at 7004721239. We’ll arrange a consultation and trial session, and on your wedding day, our makeup artist will come to your location to complete your bridal look. Q4: What products does Ladyfair use for bridal makeup? A4: We use high-quality, long-lasting makeup products that are safe for all skin types. Our products ensure that your makeup remains flawless throughout your wedding day. Q5: How should a bride prepare for her bridal makeup session? A5: Brides should maintain a good skincare routine, stay hydrated, avoid trying new products close to the wedding day, and clearly communicate their desired look during the consultation. Q6: Does Ladyfair offer other beauty services besides bridal makeup? A6: Yes, Ladyfair provides party makeup, everyday makeup, and special occasion services. Q7: How can I book Ladyfair’s bridal makeup services in Madhubani? A7: You can book our services by calling 7004721239. We’ll guide you through the process from the initial inquiry to the final makeup session.

Posted By: 26th August 2024
Bridal Makeup Artist in Lakhisarai
Ladyfair: Elevating Bridal Beauty in Lakhisarai District, Bihar Introduction In Lakhisarai District, Bihar, Ladyfair is transforming bridal beauty with our exceptional at-home makeup services. We recognize that your wedding day is one of the most significant events of your life, and our mission is to ensure you look and feel absolutely radiant. Our expert makeup artist brings a personalized experience directly to your home, making your bridal preparation both luxurious and stress-free. To book your appointment, call us at 7004721239. The Art of Bridal Makeup Bridal makeup is not just about applying cosmetics; it’s about creating a look that enhances your natural beauty and ensures you look flawless throughout your wedding celebrations. A professional makeup artist provides the expertise needed to achieve this, offering precision, creativity, and long-lasting results. At Ladyfair, we are committed to delivering the highest quality bridal makeup services in Lakhisarai District, tailored to your specific preferences and wedding theme. Why Ladyfair Stands Out in Lakhisarai District 1. Convenient At-Home Services Ladyfair offers the luxury of at-home bridal makeup services, allowing you to enjoy a high-quality salon experience in the comfort of your own space. This eliminates the need for travel and lets you focus on enjoying your special day. 2. Expertise in Diverse Makeup Styles Our talented makeup artist excels in creating a wide range of bridal looks, from traditional and culturally inspired to modern and trendy. We work closely with each bride to design a look that perfectly matches her vision and enhances her wedding attire. 3. Premium Quality Products We use only the best makeup products that are gentle on your skin and provide long-lasting results. Our choice of high-quality products ensures that your bridal makeup remains flawless from the ceremony through to the reception. 4. Personalized Consultations and Makeup Trials Ladyfair offers comprehensive consultations to understand your makeup preferences and provide expert advice. We also conduct makeup trials to ensure that you are completely satisfied with your bridal look before the big day. Popular Bridal Makeup Trends in Lakhisarai District Traditional Bridal Makeup In Lakhisarai, traditional bridal makeup often features bold eyes, vibrant lips, and intricate detailing. This classic style is perfect for brides who wish to honor cultural traditions and make a grand impression on their wedding day. Modern Bridal Makeup Modern trends emphasize a natural and subtle look, with dewy skin, soft colors, and a light touch. This style is ideal for brides who prefer an elegant and contemporary appearance. Fusion Bridal Makeup Fusion makeup combines elements from both traditional and modern styles, creating a unique and personalized look. This approach is perfect for brides who want to blend cultural heritage with contemporary beauty trends. The Ladyfair Bridal Makeup Experience: Step-by-Step 1. Initial Inquiry: Contact us at 7004721239 to discuss your bridal makeup needs and schedule an appointment. 2. Pre-Wedding Consultation: Meet with our makeup artist for a detailed consultation. We’ll discuss your desired look, review your wedding attire, and plan a makeup style that complements you perfectly. 3. Makeup Trial: Experience a trial session to preview your bridal makeup and make any necessary adjustments. This ensures that you’re completely satisfied with your look before your wedding day. 4. Final Makeup Session: On your wedding day, our makeup artist will come to your location to provide the complete bridal makeup service, ensuring you look radiant and feel confident throughout the celebrations. 5. Optional Touch-Ups: We offer touch-up services to keep your makeup looking flawless throughout the day. Client Testimonials Neeta R., Lakhisarai: "Ladyfair’s at-home bridal makeup service was incredible. The artist was skilled and professional, and my makeup looked stunning all day long. I couldn’t have been happier!" Sonia K., Lakhisarai: "The convenience of having my makeup done at home was a game-changer. Ladyfair’s artist was attentive and talented, and my bridal look was perfect. Thank you for making my day special!" Anjali M., Lakhisarai: "I was thrilled with my bridal makeup from Ladyfair. The artist used top-quality products and made me look and feel beautiful. I received so many compliments!" Preparing for Your Bridal Makeup Session For the best results, follow these preparation tips: Stay Hydrated: Drink plenty of water to keep your skin healthy and glowing. Maintain a Skincare Routine: Consistently follow a skincare routine that includes cleansing, toning, and moisturizing. Avoid New Products: Refrain from trying new skincare products close to your wedding day to avoid any adverse reactions. Communicate Clearly: Share your desired look and any specific concerns during your consultation to ensure the best outcome. Additional Beauty Services by Ladyfair In addition to bridal makeup, Ladyfair offers a range of beauty services: Party Makeup: Perfect for guests, parties, and special events. Everyday Makeup: Ideal for enhancing your daily look. Special Occasion Services: Includes makeup for engagements, anniversaries, and other significant events. The Future of Bridal Makeup Services in Lakhisarai District Ladyfair is committed to enhancing bridal beauty in Lakhisarai District with our premium at-home services. As we continue to grow, we remain dedicated to providing exceptional makeup experiences that make every bride’s wedding day truly memorable. Q&A with Ladyfair’s Bridal Makeup Artist in Lakhisarai District, Bihar Q1: What sets Ladyfair’s bridal makeup services apart in Lakhisarai? A1: Ladyfair offers at-home bridal makeup services, providing a personalized experience where our artist comes to you. This convenience, combined with our expertise in various bridal styles, distinguishes us in Lakhisarai. Q2: What bridal makeup styles can Ladyfair create? A2: We specialize in traditional, modern, and fusion bridal makeup styles. Our artist works closely with each bride to create a look that matches her personal style and wedding theme. Q3: How does the at-home makeup service work? A3: Contact us at 7004721239 to discuss your needs and schedule an appointment. We’ll arrange a consultation and trial session, and on your wedding day, our makeup artist will come to your location to complete your bridal look. Q4: What kind of makeup products does Ladyfair use? A4: We use high-quality, long-lasting makeup products that are gentle on your skin. Our products are selected to ensure a flawless finish that lasts throughout your wedding day. Q5: How should a bride prepare for her bridal makeup session? A5: Maintain a good skincare routine, stay hydrated, avoid trying new products close to the wedding day, and clearly communicate your desired look during the consultation. Q6: Can Ladyfair accommodate traditional or cultural makeup requests? A6: Yes, we are skilled in creating makeup looks that honor cultural traditions while incorporating modern trends. We work with brides to ensure their makeup reflects their heritage and personal style. Q7: What feedback have clients given about Ladyfair’s services in Lakhisarai? A7: Clients appreciate the convenience of our at-home services, the professionalism of our makeup artist, and the quality of the products used. Many brides have praised the stunning results and the comfortable experience. Q8: How can a bride book Ladyfair’s bridal makeup services in Lakhisarai? A8: To book our services, call us at 7004721239. We’ll guide you through the process from the initial inquiry to the final makeup session. Q9: Does Ladyfair offer other beauty services besides bridal makeup? A9: Yes, we offer party makeup, everyday makeup, and special occasion services.

Posted By: 26th August 2024
Bridal Makeup Artist in Kaimur
Ladyfair: Elevating Bridal Beauty in Kaimur District, Bihar Introduction In Kaimur District, Bihar, Ladyfair is revolutionizing bridal beauty with our exceptional at-home makeup services. We understand that your wedding day is one of the most important moments in your life, and our goal is to make you look and feel absolutely stunning. Our top makeup artist delivers a personalized experience right at your doorstep, ensuring a relaxed and flawless bridal look. To book your appointment, call us at 7004721239. The Essence of Professional Bridal Makeup Bridal makeup is more than just a beauty routine; it’s about enhancing your natural features and ensuring you look impeccable throughout your wedding celebrations. A professional makeup artist brings expertise and precision, creating a look that highlights your best attributes while ensuring longevity and photo-readiness. At Ladyfair, we are dedicated to providing the highest quality bridal makeup services in Kaimur District, tailored to your unique style and wedding theme. Why Choose Ladyfair in Kaimur District? 1. Convenient At-Home Services Ladyfair offers the convenience of at-home bridal makeup services, bringing the salon experience to your location. This eliminates the need for travel and allows you to enjoy a personalized session in the comfort of your home. 2. Expertise in Diverse Bridal Styles Our skilled makeup artist is adept in creating a variety of bridal looks, from traditional and cultural styles to modern and trendy appearances. We work closely with you to craft a look that perfectly matches your vision and complements your wedding attire. 3. Use of Premium Quality Products We use only the finest makeup products that are gentle on your skin and designed for long-lasting results. Our commitment to quality ensures that your bridal makeup remains flawless throughout your wedding day. 4. Personalized Consultations and Makeup Trials Ladyfair provides detailed consultations to understand your preferences and offer expert advice. We also conduct makeup trials to help you preview your bridal look and make any necessary adjustments before your big day. Bridal Makeup Trends in Kaimur District Traditional Bridal Makeup Traditional bridal makeup in Kaimur often features bold eyes, vibrant lips, and intricate contouring. This timeless style is ideal for brides who wish to embrace cultural traditions and make a grand impression. Modern Bridal Makeup Modern trends favor a more natural and understated look, with dewy skin, subtle colors, and a light touch. This style is perfect for brides who prefer a contemporary and elegant appearance. Fusion Bridal Makeup Fusion makeup combines elements of traditional and modern styles to create a unique and personalized look. This approach is ideal for brides who want to blend cultural heritage with current beauty trends. The Ladyfair Bridal Makeup Experience: What to Expect 1. Initial Inquiry: Contact us at 7004721239 to discuss your bridal makeup needs and schedule an appointment. 2. Pre-Wedding Consultation: Meet with our makeup artist for a detailed consultation. We’ll discuss your desired look, review your wedding attire, and plan a makeup style that suits you perfectly. 3. Makeup Trial: Experience a trial session to see how your bridal makeup will look. This allows for any adjustments to ensure you’re completely satisfied before your wedding day. 4. Final Makeup Session: On your wedding day, our makeup artist will arrive at your location to provide the full bridal makeup service, ensuring you look radiant and feel confident. 5. Optional Touch-Ups: We offer touch-up services to maintain your makeup’s flawless appearance throughout your wedding celebrations. Client Testimonials Priya S., Kaimur: "Ladyfair’s at-home bridal makeup service was fantastic. The artist was professional and my makeup looked perfect all day. I was thrilled with the results!" Aarti M., Kaimur: "The convenience of having my makeup done at home was amazing. Ladyfair’s artist was skilled and attentive, and my bridal look was exactly what I envisioned." Rina K., Kaimur: "I was extremely happy with my bridal makeup from Ladyfair. The quality of the products and the artist’s expertise made me feel beautiful and confident on my wedding day." Preparing for Your Bridal Makeup Session To ensure the best results for your bridal makeup, follow these tips: Hydrate: Drink plenty of water to keep your skin healthy and glowing. Skincare Routine: Maintain a consistent skincare routine, including cleansing, toning, and moisturizing. Avoid New Products: Avoid trying new skincare products close to your wedding day to prevent any adverse reactions. Communicate Preferences: Clearly communicate your desired look and any specific concerns during your consultation. Additional Beauty Services Offered by Ladyfair Besides bridal makeup, Ladyfair also provides a range of beauty services: Party Makeup: Ideal for guests, parties, or special events. Everyday Makeup: Perfect for enhancing your daily look. Special Occasion Services: Includes makeup for engagements, anniversaries, and other important events. Looking Ahead: The Future of Bridal Makeup in Kaimur District Ladyfair is committed to enhancing bridal beauty in Kaimur District with our top-notch, personalized services. As we continue to grow, we remain dedicated to delivering exceptional makeup experiences that make every bride’s wedding day unforgettable. Q&A with Ladyfair’s Bridal Makeup Artist in Kaimur District, Bihar Q1: What makes Ladyfair’s bridal makeup services unique in Kaimur? A1: Ladyfair offers at-home bridal makeup services, providing a personalized experience where our artist comes to you. This convenience, combined with our expertise in various bridal styles, sets us apart in Kaimur. Q2: What types of bridal makeup styles can Ladyfair create? A2: We specialize in traditional, modern, and fusion bridal makeup styles. Our artist works closely with each bride to create a look that matches her personal style and wedding theme. Q3: How do Ladyfair’s at-home makeup services work? A3: Contact us at 7004721239 to discuss your needs and schedule an appointment. We’ll arrange a consultation and trial session, and on your wedding day, our makeup artist will come to your location to complete your bridal look. Q4: What makeup products does Ladyfair use? A4: We use high-quality, long-lasting makeup products that are gentle on your skin. Our products are chosen to ensure a flawless finish that lasts throughout your wedding day. Q5: How should a bride prepare for her bridal makeup session? A5: Maintain a good skincare routine, stay hydrated, avoid trying new products close to the wedding day, and clearly communicate your desired look during the consultation. Q6: Can Ladyfair accommodate traditional or cultural makeup requests? A6: Yes, we are skilled in creating makeup looks that respect cultural traditions while incorporating modern trends. We work with brides to ensure their makeup reflects their heritage and personal style. Q7: What feedback have clients provided about Ladyfair’s services in Kaimur? A7: Clients appreciate the convenience of our at-home services, the professionalism of our makeup artist, and the quality of the products used. Many brides have praised the stunning results and the comfortable experience. Q8: How can a bride book Ladyfair’s bridal makeup services in Kaimur? A8: To book our services, call us at 7004721239. We’ll guide you through the process from the initial inquiry to the final makeup session. Q9: Does Ladyfair offer other beauty services besides bridal makeup? A9: Yes, we offer party makeup, everyday makeup, and special occasion services.
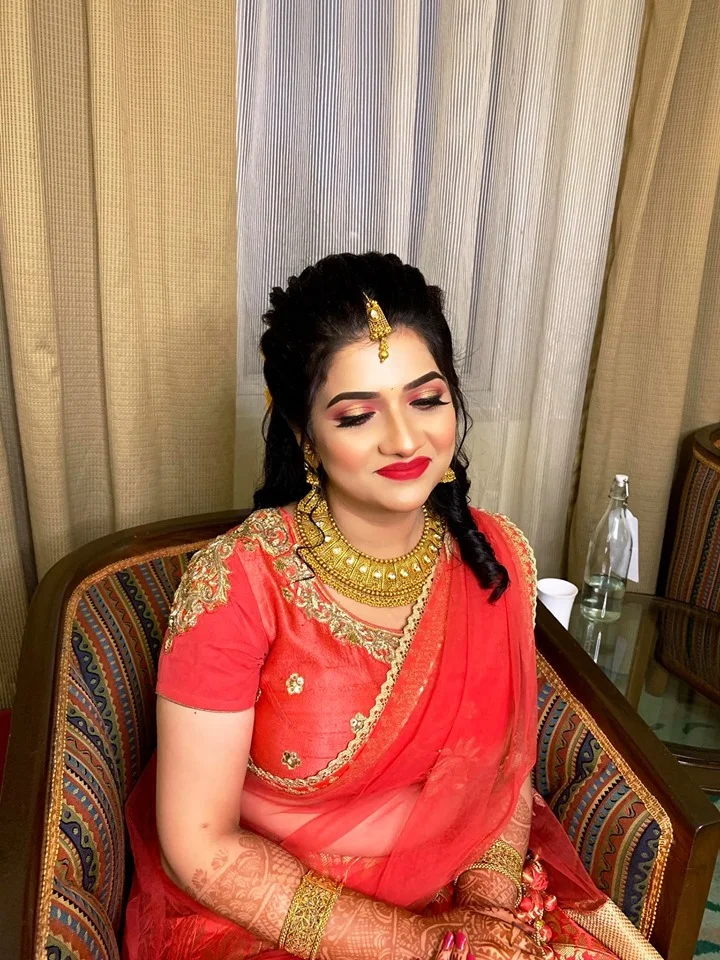
Posted By: 26th August 2024
Bridal Makeup Artist in Kishanganj
Ladyfair: Transforming Bridal Beauty in Kishanganj District, Bihar Introduction In Kishanganj District, Bihar, Ladyfair is setting new standards in bridal beauty with our exclusive at-home makeup services. We understand the significance of your wedding day and are dedicated to ensuring you look and feel your best. Our expert makeup artist provides a personalized experience right at your doorstep, making your special day stress-free and beautiful. To schedule your appointment, call us at 7004721239. In this blog, we will explore Ladyfair’s bridal makeup services in Kishanganj, discuss the importance of professional makeup, and guide you on how to prepare for your bridal beauty session. The Importance of Professional Bridal Makeup Bridal makeup is not just about applying cosmetics; it’s about enhancing your natural beauty and ensuring you look flawless throughout your wedding day. A professional makeup artist has the skills and experience to create a look that highlights your best features while ensuring longevity and camera readiness. Ladyfair’s expert makeup artist in Kishanganj is skilled in delivering stunning results tailored to your unique style and wedding theme. Why Ladyfair Stands Out in Kishanganj District 1. Convenient At-Home Bridal Makeup Services Ladyfair’s at-home services bring the salon experience to your location, allowing you to enjoy a relaxed and personalized session. No need to travel or deal with the stress of salon appointments—our makeup artist will come to you. 2. Expertise in Various Bridal Styles From traditional to modern and fusion looks, Ladyfair’s makeup artist has the expertise to create the perfect bridal style for you. We work closely with you to design a look that matches your vision and complements your wedding attire. 3. Use of Premium Makeup Products We use only the highest quality makeup products to ensure your bridal look is flawless and long-lasting. Our products are carefully selected to provide the best results while being gentle on your skin. 4. Personalized Consultations and Makeup Trials Ladyfair offers detailed consultations to understand your preferences and provide expert advice. We also conduct makeup trials so you can preview your bridal look and make any adjustments before your wedding day. Bridal Makeup Trends in Kishanganj District Traditional Bridal Makeup In Kishanganj, traditional bridal makeup often includes bold eyes, vibrant lips, and intricate contouring. This classic style is perfect for brides who want to honor their cultural heritage and make a striking impression. Modern Bridal Makeup Modern trends focus on a more natural and understated look. Soft, dewy skin, subtle colors, and a light touch are key elements, making this style ideal for brides who prefer a more contemporary and elegant appearance. Fusion Bridal Makeup Fusion makeup combines elements of both traditional and modern styles to create a unique and personalized look. This approach is great for brides who want to blend cultural traditions with modern beauty trends. The Ladyfair Bridal Makeup Experience: Step-by-Step 1. Initial Inquiry: Contact us at 7004721239 to discuss your bridal makeup needs and schedule an appointment. 2. Pre-Wedding Consultation: Meet with our makeup artist to discuss your desired look, review your wedding attire, and plan the best makeup style for your big day. 3. Makeup Trial: Experience a trial session to see your bridal makeup in action. This allows you to make any necessary changes before your wedding day. 4. Final Makeup Session: On your wedding day, our makeup artist will arrive at your location to provide the full bridal makeup service, ensuring you look stunning and feel confident. 5. Optional Touch-Ups: We offer touch-up services to keep your makeup looking fresh throughout your wedding celebrations. Client Testimonials Poonam R., Kishanganj: "Ladyfair’s at-home bridal makeup service was exceptional. The artist was professional, and my makeup looked perfect all day. I couldn’t have asked for a better experience." Neelam K., Kishanganj: "The convenience of having my makeup done at home was amazing. The Ladyfair artist was skilled and friendly, and my bridal look was exactly what I wanted." Sonia J., Kishanganj: "I was thrilled with my bridal makeup from Ladyfair. The artist’s attention to detail and the quality of the products used made me feel beautiful and confident." Preparing for Your Bridal Makeup Session For the best results on your wedding day, consider the following tips: Hydrate: Drink plenty of water to keep your skin looking radiant. Skincare Routine: Follow a regular skincare routine, including cleansing, toning, and moisturizing. Avoid New Products: Refrain from trying new skincare products close to your wedding day to avoid any adverse reactions. Communicate Your Preferences: Clearly share your desired look and any specific concerns during your consultation. Beyond Bridal Makeup: Ladyfair’s Additional Beauty Services In addition to bridal makeup, Ladyfair offers a variety of beauty services: Party Makeup: Ideal for guests, parties, or special events. Everyday Makeup: Perfect for enhancing your daily look. Special Occasion Services: Includes makeup for engagements, anniversaries, and other important events. The Future of Bridal Makeup Services in Kishanganj District Ladyfair is committed to enhancing bridal beauty in Kishanganj District with our top-quality, personalized services. As we continue to grow, we remain dedicated to providing exceptional makeup experiences that make every bride’s wedding day unforgettable. Q&A with Ladyfair’s Bridal Makeup Artist in Kishanganj District, Bihar Q1: What sets Ladyfair’s bridal makeup services apart in Kishanganj? A1: Ladyfair provides at-home bridal makeup services, offering a personalized experience where our artist comes to you. This convenience, combined with our expertise in various bridal styles, distinguishes us in Kishanganj. Q2: What bridal makeup styles can Ladyfair create? A2: We specialize in traditional, modern, and fusion bridal makeup styles. Our artist works with each bride to design a look that suits her personal style and wedding theme. Q3: How do Ladyfair’s at-home makeup services work? A3: Simply call us at 7004721239 to discuss your needs. We’ll schedule a consultation and trial session, and on your wedding day, our makeup artist will arrive at your location to complete your bridal look. Q4: What products does Ladyfair use for bridal makeup? A4: We use high-quality, long-lasting makeup products that are safe for all skin types. Our products are selected to ensure a flawless finish that lasts throughout your wedding day. Q5: How should a bride prepare for her bridal makeup session? A5: Maintain a good skincare routine, stay hydrated, avoid trying new products close to the wedding, and communicate your desired look during the consultation. Q6: Can Ladyfair accommodate cultural or traditional makeup requests? A6: Yes, we are experienced in creating makeup looks that respect cultural traditions while incorporating modern trends. We work closely with brides to ensure their makeup reflects their heritage and personal style. Q7: What feedback have clients given about Ladyfair’s services in Kishanganj? A7: Clients appreciate the convenience of our at-home services, the professionalism of our makeup artist, and the quality of the products. Many brides have praised the stunning results and the comfortable experience. Q8: How can a bride book Ladyfair’s bridal makeup services in Kishanganj? A8: To book our services, call us at 7004721239. We’ll guide you through the process from the initial inquiry to the final makeup session. Q9: Does Ladyfair offer other beauty services in addition to bridal makeup? A9: Yes, we offer party makeup, everyday makeup, and special occasion services.

Posted By: 26th August 2024
Bridal Makeup Artist in Khagaria
Ladyfair: Elevating Bridal Beauty in Khagaria District, Bihar Introduction Every bride dreams of looking her best on her wedding day, and Ladyfair is here to make that dream come true for brides in Khagaria District, Bihar. Offering at-home bridal makeup services, Ladyfair brings the salon to your doorstep, ensuring a stress-free and personalized experience. To book your session, call us at 7004721239. In this blog, we’ll explore Ladyfair’s exclusive bridal makeup services in Khagaria, discuss the importance of professional makeup, and walk you through the process of preparing for your big day. Why Professional Bridal Makeup Matters Bridal makeup is a critical aspect of a bride’s wedding day look. A professional makeup artist knows how to highlight your best features while ensuring your makeup is long-lasting and camera-ready. Ladyfair’s expert makeup artist in Khagaria is skilled in creating bridal looks that are not only beautiful but also perfectly suited to your skin type and wedding attire. Why Choose Ladyfair in Khagaria District? 1. Convenient At-Home Bridal Makeup Services Ladyfair’s at-home services allow you to relax and enjoy your wedding day preparation without the stress of traveling to a salon. Our makeup artist will come to your location, providing you with the ultimate convenience. 2. Expertise in a Variety of Bridal Styles Whether you envision a traditional bridal look or something more modern, Ladyfair’s makeup artist can bring your vision to life. We tailor our services to reflect your unique style and the theme of your wedding. 3. High-Quality Makeup Products We use only the best makeup products to ensure your bridal look is flawless and long-lasting. Our products are selected for their quality, safety, and ability to withstand the demands of a wedding day. 4. Personalized Consultations and Makeup Trials Ladyfair offers in-depth consultations to understand your preferences and style. We also provide makeup trials so you can see your bridal look before the wedding day and make any necessary adjustments. Bridal Makeup Trends in Khagaria District Traditional Bridal Makeup In Khagaria, traditional bridal makeup often features bold, dramatic eyes, vibrant lips, and intricate contouring. This style is perfect for brides who want to embrace their cultural heritage while making a strong statement. Modern Bridal Makeup Modern bridal makeup trends focus on a more natural, subtle look. Soft colors, dewy skin, and a light touch are key elements, making this style ideal for brides who prefer understated elegance. Fusion Bridal Makeup Fusion makeup blends traditional and contemporary elements, creating a unique and personalized look. This style is perfect for brides who want to honor their roots while embracing modern trends. The Ladyfair Bridal Makeup Experience: Step-by-Step 1. Initial Inquiry: Contact us at 7004721239 to discuss your bridal makeup needs and schedule a consultation. 2. Pre-Wedding Consultation: Meet with our makeup artist to discuss your desired look, review your wedding attire, and plan the makeup style that best suits you. 3. Makeup Trial: Experience a trial session where you can preview your bridal makeup. This allows you to make any adjustments before the big day. 4. Final Makeup Session: On your wedding day, our makeup artist will arrive at your location to provide the full bridal makeup service, ensuring you look flawless and feel confident. 5. Optional Touch-Ups: We offer post-wedding touch-up services to keep your makeup looking fresh throughout the event. Client Testimonials Anjali M., Khagaria: "Ladyfair’s at-home service was exactly what I needed. The makeup artist was professional and understood my vision perfectly. I felt beautiful and confident all day." Rina K., Khagaria: "The convenience of having my makeup done at home was a game-changer. The makeup artist was punctual, skilled, and made me look stunning. I highly recommend Ladyfair." Sita P., Khagaria: "My bridal makeup was flawless, thanks to Ladyfair. The artist listened to my preferences and created a look that was perfect for me. I received so many compliments!" Preparing for Your Bridal Makeup Session To ensure the best results on your wedding day, here are some tips to prepare for your bridal makeup session: Hydrate: Drink plenty of water to keep your skin glowing. Follow a Skincare Routine: Maintain a consistent skincare routine, including cleansing, toning, and moisturizing. Avoid New Products: To prevent any reactions, avoid trying new skincare products close to your wedding day. Communicate Your Vision: Be clear about your desired look during the consultation to achieve the best results. Beyond Bridal Makeup: Ladyfair’s Additional Beauty Services In addition to bridal makeup, Ladyfair offers a range of beauty services to meet your needs: Party Makeup: Ideal for guests attending weddings, parties, or special events. Everyday Makeup: Perfect for enhancing your natural beauty for daily activities. Special Occasion Services: Includes makeup for engagements, anniversaries, and other important events. The Future of Bridal Makeup Services in Khagaria District Ladyfair is dedicated to providing the best bridal makeup services in Khagaria District. As we continue to grow, we remain committed to offering high-quality, personalized makeup services that meet the unique needs of every bride. Q&A with Ladyfair’s Bridal Makeup Artist in Khagaria District, Bihar Q1: What makes Ladyfair’s bridal makeup services unique in Khagaria? A1: Ladyfair offers at-home bridal makeup services, providing a personalized experience where the makeup artist comes to you. This convenience, combined with our expertise in various bridal styles, sets us apart in Khagaria. Q2: What bridal makeup styles does Ladyfair specialize in? A2: Ladyfair specializes in traditional, modern, and fusion bridal makeup styles. Our makeup artist works with each bride to create a look that reflects her personal style and wedding theme. Q3: How do Ladyfair’s at-home makeup services work? A3: The process is simple. Start by contacting us at 7004721239 to discuss your needs. We’ll schedule a consultation and makeup trial, and on your wedding day, our makeup artist will come to your location to complete your bridal look. Q4: What kind of products does Ladyfair use for bridal makeup? A4: Ladyfair uses premium, long-lasting makeup products that are safe for all skin types. Our products ensure a flawless finish that lasts throughout your wedding day. Q5: How should a bride prepare for her bridal makeup session? A5: Brides should maintain a good skincare routine, stay hydrated, avoid trying new products close to the wedding, and communicate their desired look clearly during the consultation. Q6: Can Ladyfair accommodate specific cultural or traditional makeup requests? A6: Yes, Ladyfair is experienced in creating makeup looks that respect cultural traditions while incorporating modern trends. We work closely with brides to ensure their makeup reflects their heritage and personal style. Q7: What feedback have clients given about Ladyfair’s services in Khagaria? A7: Clients appreciate the convenience of our at-home services, the professionalism of our makeup artist, and the quality of the products we use. Many brides have praised the stunning results and how comfortable they felt throughout the process. Q8: How can a bride book Ladyfair’s bridal makeup services in Khagaria? A8: To book our services, simply call us at 7004721239. We’ll guide you through the entire process, from the initial inquiry to the final makeup session. Q9: Does Ladyfair offer other beauty services in addition to bridal makeup? A9: Yes, Ladyfair provides a range of beauty services, including party makeup, everyday makeup, and special occasion makeup.

Posted By: 26th August 2024
Bridal Makeup Artist in Jehanabad
Ladyfair: Perfecting Bridal Beauty in Jehanabad District, Bihar Introduction A bride's wedding day is one of the most cherished moments of her life, and Ladyfair is committed to making sure every bride in Jehanabad District, Bihar, looks her absolute best. Specializing in at-home bridal makeup services, Ladyfair brings professional beauty directly to your doorstep, ensuring a stress-free and personalized experience. To book your session, contact us at 7004721239. This blog will guide you through the unique bridal makeup services Ladyfair offers in Jehanabad, our expert approach to various bridal styles, and the steps to make your wedding day beauty routine seamless and enjoyable. Why Professional Bridal Makeup is Essential Bridal makeup is more than just applying cosmetics; it's about crafting a look that enhances your natural beauty and complements your wedding attire. A professional makeup artist understands how to highlight your best features while ensuring your makeup lasts all day. Ladyfair’s expert makeup artist in Jehanabad is skilled in creating flawless, long-lasting bridal looks that make you feel confident and beautiful on your special day. Why Choose Ladyfair in Jehanabad District? 1. Convenient At-Home Bridal Makeup Services Ladyfair offers the ultimate convenience with our at-home services, allowing you to prepare for your big day in the comfort of your own home. Our makeup artist will travel to your location, so you can focus on enjoying your wedding day without the hassle of visiting a salon. 2. Expertise in Diverse Bridal Styles Whether you're envisioning a traditional bridal look or a modern, trendy style, Ladyfair’s makeup artist in Jehanabad can create the perfect look for you. We work closely with each bride to ensure their makeup reflects their unique personality and wedding theme. 3. Use of Premium Products Ladyfair is committed to using only the highest quality makeup products, ensuring your bridal look is safe for your skin and lasts throughout your wedding day. Our products are chosen for their long-lasting and flawless finish. 4. Personalized Consultations and Makeup Trials We offer personalized consultations to discuss your desired look, review your wedding attire, and plan the perfect makeup style. Additionally, we provide makeup trials so you can see your bridal makeup before the big day and make any necessary adjustments. Bridal Makeup Trends in Jehanabad District Traditional Bridal Makeup In Jehanabad, traditional bridal makeup often includes bold eyes, bright lip colors, and well-defined features. This style is ideal for brides who want to honor their cultural heritage while making a striking impression. Modern Bridal Makeup For brides who prefer a contemporary look, modern bridal makeup trends focus on subtlety and elegance. With soft, natural tones and a dewy finish, this style is perfect for brides who want to enhance their features without overwhelming them. Fusion Bridal Makeup Fusion makeup blends traditional and modern elements, creating a unique look that respects cultural traditions while embracing current trends. This style is perfect for brides who want a personalized and trendy look on their special day. The Ladyfair Bridal Makeup Experience: Step-by-Step 1. Initial Inquiry: Start by contacting us at 7004721239 to discuss your bridal makeup needs and schedule a consultation. 2. Pre-Wedding Consultation: Meet with our makeup artist to discuss your vision, review your wedding attire, and plan the makeup style that best suits you. 3. Makeup Trial: Experience a trial session where you can preview your bridal makeup. This allows you to make any adjustments before the big day to ensure complete satisfaction. 4. Final Makeup Session: On your wedding day, our makeup artist will arrive at your location to provide the full bridal makeup service, ensuring you look flawless and feel confident. 5. Optional Touch-Ups: We also offer post-wedding touch-up services to keep your makeup looking fresh throughout the event. Client Testimonials Priya S., Jehanabad: *"Ladyfair made my wedding day so much easier. The at-home service was a blessing, and the makeup artist understood exactly what I wanted . My bridal makeup was perfect, and I received so many compliments."* Megha R., Jehanabad: "The makeup artist from Ladyfair was amazing! She listened to my preferences and created a look that was exactly what I envisioned. The convenience of at-home service made the experience stress-free." Kavita T., Jehanabad: "I was so happy with my bridal makeup by Ladyfair. The artist was punctual, professional, and talented. My makeup lasted all day and looked fantastic in photos. I would highly recommend Ladyfair to any bride in Jehanabad." Preparing for Your Bridal Makeup Session To get the best results from your bridal makeup session, follow these tips: Stay Hydrated: Drinking plenty of water in the weeks leading up to your wedding helps keep your skin hydrated and glowing. Maintain a Skincare Routine: Stick to a consistent skincare routine, including cleansing, toning, and moisturizing, to keep your skin healthy. Avoid Trying New Products: To prevent any adverse reactions, avoid introducing new skincare products close to your wedding day. Communicate Your Vision: During your consultation, clearly communicate your desired look and any specific concerns to the makeup artist to ensure the best results. Beyond Bridal Makeup: Ladyfair’s Comprehensive Beauty Services While bridal makeup is our specialty, Ladyfair also offers a variety of other beauty services: Party Makeup: Perfect for wedding guests, parties, or special events. Everyday Makeup: Ideal for enhancing your natural beauty for daily activities. Special Occasion Services: Includes makeup for engagements, anniversaries, and other significant events. The Future of Bridal Makeup in Jehanabad District Ladyfair is committed to continuing our tradition of excellence in Jehanabad District by offering brides the highest quality makeup services for their special day. As we grow, we remain dedicated to staying ahead of beauty trends and techniques, ensuring that every bride feels beautiful and confident on her wedding day. Q&A with Ladyfair’s Bridal Makeup Artist in Jehanabad District, Bihar Q1: What makes Ladyfair’s bridal makeup services unique in Jehanabad? A1: Ladyfair offers at-home bridal makeup services, providing a personalized experience where the makeup artist comes to you. This convenience, combined with our expertise in various bridal styles, sets us apart in Jehanabad. Q2: What bridal makeup styles does Ladyfair specialize in? A2: Ladyfair specializes in traditional, modern, and fusion bridal makeup styles. Our makeup artist works with each bride to create a look that reflects her personal style and wedding theme. Q3: How do Ladyfair’s at-home makeup services work? A3: The process is simple. Start by contacting us at 7004721239 to discuss your needs. We’ll schedule a consultation and makeup trial, and on your wedding day, our makeup artist will come to your location to complete your bridal look. Q4: What kind of products does Ladyfair use for bridal makeup? A4: Ladyfair uses premium, long-lasting makeup products that are safe for all skin types. Our products ensure a flawless finish that lasts throughout your wedding day. Q5: How should a bride prepare for her bridal makeup session? A5: Brides should maintain a good skincare routine, stay hydrated, avoid trying new products close to the wedding, and communicate their desired look clearly during the consultation. Q6: Can Ladyfair accommodate specific cultural or traditional makeup requests? A6: Yes, Ladyfair is experienced in creating makeup looks that respect cultural traditions while incorporating modern trends. We work closely with brides to ensure their makeup reflects their heritage and personal style. Q7: What feedback have clients given about Ladyfair’s services in Jehanabad? A7: Clients appreciate the convenience of our at-home services, the professionalism of our makeup artist, and the quality of the products we use. Many brides have praised the stunning results and how comfortable they felt throughout the process. Q8: How can a bride book Ladyfair’s bridal makeup services in Jehanabad? A8: To book our services, simply call us at 7004721239. We’ll guide you through the entire process, from the initial inquiry to the final makeup session. Q9: Does Ladyfair offer other beauty services in addition to bridal makeup? A9: Yes, Ladyfair provides a range of beauty services, including party makeup, everyday makeup, and special occasion makeup.

Posted By: 26th August 2024
Bridal Makeup Artist in Jamui
Ladyfair: Elevating Bridal Beauty in Jamui District, Bihar Introduction Your wedding day is one of the most important moments of your life, and Ladyfair is here to ensure you look stunning on your special day in Jamui District, Bihar. Specializing in at-home bridal makeup services, Ladyfair brings professional beauty solutions directly to your doorstep, offering a stress-free and personalized experience. To book your appointment, call us at 7004721239. In this blog, we’ll explore why Ladyfair is the best choice for bridal makeup in Jamui, how our services cater to different bridal styles, and what you can expect from the Ladyfair experience. The Importance of Professional Bridal Makeup Bridal makeup is essential for enhancing your natural beauty and ensuring you look radiant in person and in photographs. A professional makeup artist knows how to create a look that complements your facial features, wedding attire, and overall theme of your special day. Ladyfair’s expert makeup artist in Jamui is dedicated to delivering a flawless, long-lasting look that will keep you feeling confident and beautiful throughout your wedding celebrations. Why Choose Ladyfair in Jamui District? 1. At-Home Bridal Makeup Services Ladyfair’s at-home services offer the ultimate convenience, allowing you to prepare for your wedding day in the comfort of your own home. Our makeup artist travels to your location, eliminating the stress of salon visits and ensuring a relaxing experience. 2. Expertise in Diverse Bridal Styles Whether you’re looking for a traditional bridal look or something more modern and trendy, Ladyfair’s makeup artist in Jamui is skilled in a wide range of styles. We tailor each look to reflect the bride’s personality and preferences. 3. Use of Premium Products Ladyfair uses only high-quality, safe, and long-lasting makeup products to ensure your bridal look stays fresh and flawless all day. Our commitment to quality ensures you look your best from the first photo to the last dance. 4. Personalized Consultations and Trials We offer personalized consultations to discuss your desired look, review your wedding attire, and plan the perfect makeup style. Additionally, we provide makeup trials to ensure you are completely satisfied with the final result before your big day. Bridal Makeup Trends in Jamui District Traditional Bridal Makeup Traditional bridal makeup in Jamui often features bold and dramatic looks, including kohl-lined eyes, vibrant lip colors, and intricate contouring. This style is perfect for brides who want to embrace cultural heritage and make a statement. Modern Bridal Makeup Modern bridal makeup trends in Jamui focus on subtlety and elegance, with a natural, dewy finish that highlights the bride’s features without overpowering them. This style is ideal for brides who prefer a soft, understated look. Fusion Bridal Makeup Fusion makeup combines traditional and modern elements, creating a unique and personalized look that blends cultural significance with contemporary trends. This is perfect for brides who want a look that is both timeless and trendy. The Ladyfair Bridal Makeup Experience: Step-by-Step 1. Initial Inquiry: Contact us at 7004721239 to discuss your bridal makeup needs and schedule a consultation. 2. Pre-Wedding Consultation: Meet with our makeup artist to discuss your vision, review your wedding attire, and plan the makeup style that best suits you. 3. Makeup Trial: Experience a trial session where you can see your bridal makeup come to life. This allows you to make any adjustments before the big day. 4. Final Makeup Session: On your wedding day, our makeup artist will arrive at your location to provide the full bridal makeup service, ensuring you look flawless and feel confident. 5. Optional Touch-Ups: We offer post-wedding touch-up services to keep your makeup looking fresh throughout the event. Client Testimonials Anjali R., Jamui: "Ladyfair’s at-home makeup service was exactly what I needed. The artist was professional and knew exactly how to create the look I wanted. My makeup stayed perfect all day." Pooja M., Jamui: "I was so happy with my bridal makeup by Ladyfair. The artist was on time, professional, and made me feel beautiful. The convenience of having her come to my home made the whole process stress-free." Shweta S., Jamui: "Ladyfair did an amazing job with my bridal makeup. The artist understood my vision and created a look that was better than I had imagined. I received so many compliments throughout the day." Preparing for Your Bridal Makeup Session To ensure your bridal makeup looks its best, here are some tips for preparing: Stay Hydrated: Drink plenty of water in the weeks leading up to your wedding to keep your skin hydrated and glowing. Consistent Skincare Routine: Maintain a regular skincare routine, including cleansing, toning, and moisturizing, to keep your skin healthy. Avoid New Products: Avoid trying new skincare products close to your wedding day to prevent any adverse reactions. Communicate Clearly: During your consultation, clearly communicate your desired look and any specific concerns to the makeup artist for the best results. Beyond Bridal Makeup: Ladyfair’s Full Range of Beauty Services While bridal makeup is our specialty, Ladyfair also offers a variety of other beauty services: Party Makeup: Perfect for guests attending weddings, parties, or special events. Everyday Makeup: Ideal for women who want to look their best for daily activities. Special Occasion Services: Includes makeup for engagements, anniversaries, and other important events. The Future of Bridal Makeup in Jamui District Ladyfair is committed to continuing its tradition of excellence in Jamui District, offering brides the highest quality makeup services for their special day. As we grow, we remain dedicated to staying at the forefront of beauty trends and techniques, ensuring that every bride feels beautiful and confident on her wedding day. Q&A with Ladyfair’s Bridal Makeup Artist in Jamui District, Bihar Q1: What makes Ladyfair’s bridal makeup services unique in Jamui? A1: Ladyfair offers at-home bridal makeup services, providing a personalized experience where the makeup artist comes to you. This convenience, combined with our expertise in various bridal styles, sets us apart in Jamui. Q2: What bridal makeup styles does Ladyfair specialize in? A2: Ladyfair specializes in traditional, modern, and fusion bridal makeup styles. Our makeup artist works with each bride to create a look that reflects her personal style and wedding theme. Q3: How do Ladyfair’s at-home makeup services work? A3: The process is simple. Start by contacting us at 7004721239 to discuss your needs. We’ll schedule a consultation and makeup trial, and on your wedding day, our makeup artist will come to your location to complete your bridal look. Q4: What kind of products does Ladyfair use for bridal makeup? A4: Ladyfair uses premium, long-lasting makeup products that are safe for all skin types. Our products ensure a flawless finish that lasts throughout your wedding day. Q5: How should a bride prepare for her bridal makeup session? A5: Brides should maintain a good skincare routine, stay hydrated, avoid trying new products close to the wedding, and communicate their desired look clearly during the consultation. Q6: Can Ladyfair accommodate specific cultural or traditional makeup requests? A6: Yes, Ladyfair is experienced in creating makeup looks that respect cultural traditions while incorporating modern trends. We work closely with brides to ensure their makeup reflects their heritage and personal style. Q7: What feedback have clients given about Ladyfair’s services in Jamui? A7: Clients appreciate the convenience of our at-home services, the professionalism of our makeup artist, and the quality of the products we use. Many brides have praised the stunning results and how comfortable they felt throughout the process. Q8: How can a bride book Ladyfair’s bridal makeup services in Jamui? A8: To book our services, simply call us at 7004721239. We’ll guide you through the entire process, from the initial inquiry to the final makeup session. Q9: Does Ladyfair offer other beauty services in addition to bridal makeup? A9: Yes, Ladyfair provides a range of beauty services, including party makeup, everyday makeup, and special occasion makeup.
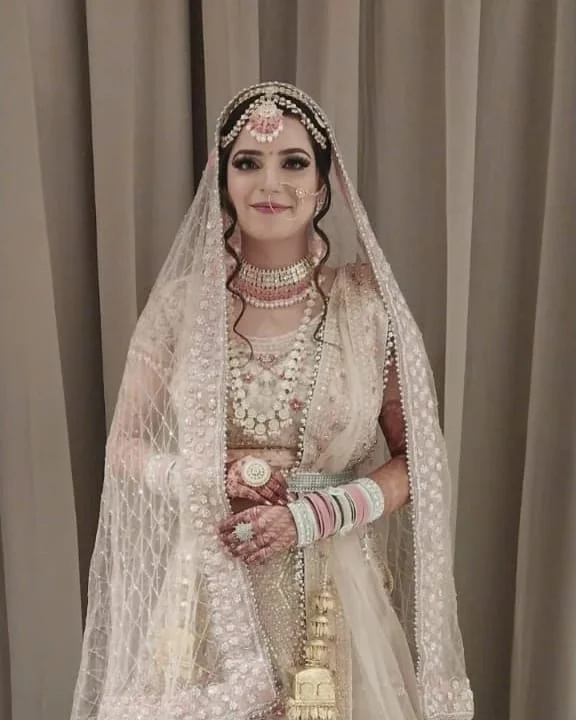
Posted By: 26th August 2024
Bridal Makeup Artist in Gopalganj
Ladyfair: Redefining Bridal Beauty in Gopalganj District, Bihar Introduction Every bride wants to look her best on her wedding day, and in Gopalganj District, Ladyfair is making that possible with our exceptional at-home bridal makeup services. We understand that your wedding day is one of the most important days of your life, and we are dedicated to ensuring you look stunning with a makeup look that reflects your unique style. Ladyfair brings professional bridal makeup services directly to your doorstep, offering a convenient and stress-free experience. To book your appointment, call us at 7004721239. In this blog, we’ll explore why professional bridal makeup is essential, what makes Ladyfair the top choice in Gopalganj, and how our services can help you achieve the perfect wedding day look. The Importance of Professional Bridal Makeup Bridal makeup is a crucial part of your wedding day preparation. It’s not just about looking good in person but also about ensuring that your makeup photographs beautifully and lasts throughout the day. A professional makeup artist understands how to highlight your best features and complement your wedding attire. Ladyfair’s makeup artist in Gopalganj is skilled in creating bridal looks that enhance your natural beauty and give you the confidence to shine on your special day. Why Choose Ladyfair in Gopalganj District? 1. At-Home Bridal Makeup Services Ladyfair’s at-home makeup services provide the ultimate convenience for brides in Gopalganj. No need to stress about traveling to a salon; our makeup artist comes to your location, allowing you to relax and enjoy the experience. 2. Expertise in Bridal Makeup Our makeup artist in Gopalganj is experienced in a variety of bridal makeup styles, from traditional to modern. Whether you want a classic look or something more contemporary, Ladyfair can create the perfect look for you. 3. High-Quality Makeup Products Ladyfair uses only premium, long-lasting makeup products that are safe for your skin. Our commitment to quality ensures that your makeup will stay flawless throughout your wedding day. 4. Personalized Consultations We offer personalized bridal consultations to discuss your preferences, try out different looks, and ensure that the final makeup style is exactly what you envision for your wedding day. Bridal Makeup Trends in Gopalganj District Traditional Bridal Makeup Traditional bridal makeup is a popular choice in Gopalganj, featuring bold eyes, rich lip colors, and intricate contouring that pairs beautifully with traditional wedding attire. Modern Bridal Makeup For brides who prefer a more contemporary look, modern bridal makeup focuses on natural beauty with subtle tones and minimalist techniques, perfect for a fresh and elegant appearance. Fusion Bridal Makeup Fusion bridal makeup combines elements of both traditional and modern styles, creating a unique look that reflects both cultural heritage and modern trends. This style is ideal for brides who want a distinctive, personalized look. The Ladyfair Bridal Makeup Experience: Step-by-Step 1. Initial Inquiry: Contact us at 7004721239 to discuss your bridal makeup needs and schedule a consultation. 2. Pre-Wedding Consultation: Meet with our makeup artist to discuss your vision, review your wedding attire, and plan the makeup style that best suits you. 3. Makeup Trial: Experience a trial session to preview your bridal makeup. This ensures that you are completely satisfied with your look before the wedding day. 4. Final Makeup Session: On your wedding day, our makeup artist will arrive at your location to provide the full bridal makeup service, ensuring you look flawless and feel confident. 5. Optional Touch-Ups: We offer post-wedding touch-up services to keep your makeup looking fresh throughout the event. Client Testimonials Meera P., Gopalganj: "Ladyfair provided an incredible at-home makeup service for my wedding. The artist was professional, and I felt so beautiful. The convenience of having her come to my location made the day so much easier." Rani J., Gopalganj: "I was thrilled with my bridal makeup by Ladyfair. The artist listened to my ideas and created a look that was even better than I imagined. My makeup lasted all day without a hitch." Sunita K., Gopalganj: "Ladyfair’s makeup artist was amazing! She knew exactly how to highlight my features and make me feel confident. I received so many compliments on my wedding day." Preparing for Your Bridal Makeup Session To ensure your bridal makeup looks its best, here are some tips for preparing: Stay Hydrated: Drink plenty of water in the weeks leading up to your wedding to keep your skin hydrated and glowing. Consistent Skincare Routine: Maintain a regular skincare routine, including cleansing, toning, and moisturizing, to keep your skin healthy. Avoid New Products: Avoid trying new skincare products close to your wedding day to prevent any adverse reactions. Communicate Clearly: During your consultation, clearly communicate your desired look and any specific concerns to the makeup artist for the best results. Beyond Bridal Makeup: Ladyfair’s Full Range of Beauty Services While bridal makeup is our specialty, Ladyfair also offers a variety of other beauty services: Party Makeup: Perfect for guests attending weddings, parties, or special events. Everyday Makeup: Ideal for women who want to look their best for daily activities. Special Occasion Services: Includes makeup for engagements, anniversaries, and other important events. The Future of Bridal Makeup in Gopalganj District Ladyfair is committed to continuing its tradition of excellence in Gopalganj District, offering brides the highest quality makeup services for their special day. As we grow, we remain dedicated to staying at the forefront of beauty trends and techniques, ensuring that every bride feels beautiful and confident on her wedding day. Q&A with Ladyfair’s Bridal Makeup Artist in Gopalganj District, Bihar Q1: What sets Ladyfair’s bridal makeup services apart in Gopalganj? A1: Ladyfair offers convenient at-home bridal makeup services, providing a personalized experience. Our makeup artist tailors the look to match the bride’s style, ensuring she feels beautiful and confident on her special day. Q2: What types of bridal makeup does Ladyfair offer? A2: Ladyfair specializes in traditional, modern, and fusion bridal makeup styles. We create looks that reflect the bride’s personality, wedding theme, and cultural preferences. Q3: How does the at-home makeup service process work? A3: The process begins with an initial phone call to discuss your needs. This is followed by a pre-wedding consultation and makeup trial. On the wedding day, our makeup artist arrives at your location to complete the final look. Q4: What products does Ladyfair use for bridal makeup? A4: Ladyfair uses high-quality, premium makeup products that are safe for all skin types. Our products ensure a long-lasting and flawless finish, keeping you looking radiant throughout your wedding day. Q5: How should a bride prepare for her bridal makeup session? A5: Brides should maintain a consistent skincare routine, stay hydrated, avoid new products close to the wedding day, and clearly communicate their desired look during the consultation for optimal results. Q6: Can Ladyfair accommodate specific cultural or traditional makeup requests? A6: Absolutely! Ladyfair is skilled in creating makeup looks that honor cultural traditions while incorporating modern elements. We work closely with the bride to ensure her makeup reflects her heritage and personal style. Q7: What feedback have clients given about Ladyfair’s services in Gopalganj? A7: Brides love the convenience of our at-home services, the professionalism of our makeup artist, and the high-quality products we use. Many clients have praised how beautiful and confident they felt on their wedding day. Q8: How can a bride book Ladyfair’s bridal makeup services in Gopalganj? A8: To book our services, simply call us at 7004721239. We’ll guide you through the process from the initial inquiry to the final makeup session. Q9: Does Ladyfair offer other beauty services in addition to bridal makeup? A9: Yes, Ladyfair provides a range of beauty services, including party makeup, everyday makeup, and special occasion makeup.

Posted By: 26th August 2024
Bridal Makeup Artist in Gaya
Ladyfair: Elevating Bridal Beauty in Gaya District, Bihar Introduction Your wedding day is one of the most important days of your life, and Ladyfair is committed to making you look and feel your absolute best. Serving Gaya District, Bihar, we specialize in providing exceptional bridal makeup services right at your doorstep. Our at-home beauty services offer a personalized, stress-free experience, ensuring that you can enjoy every moment leading up to your big day. To book your appointment, call us at 7004721239. In this blog, we’ll explore the significance of professional bridal makeup, discuss what makes Ladyfair the top choice in Gaya, and explain how our services can help you achieve the perfect wedding day look. The Importance of Professional Bridal Makeup Bridal makeup is more than just enhancing your appearance; it’s about creating a look that reflects your personality and complements your wedding attire. A professional makeup artist brings expertise, creativity, and precision, ensuring that you look stunning from every angle. At Ladyfair, we understand the importance of your wedding day and are dedicated to providing the highest quality makeup services that highlight your natural beauty. Why Choose Ladyfair in Gaya District? 1. At-Home Makeup Services for Ultimate Convenience Ladyfair brings the salon to you, offering at-home bridal makeup services that eliminate the need to travel. Our makeup artist will come to your location, allowing you to relax and focus on your special day. 2. Expertise and Experience Our makeup artist in Gaya District is renowned for her skill and experience in bridal makeup. Whether you prefer a traditional, modern, or fusion look, she can tailor the makeup to suit your style and enhance your natural features. 3. Use of Premium Products We use only high-quality, safe, and long-lasting makeup products to ensure that your bridal look remains flawless throughout the day. Our commitment to quality ensures that your skin is well cared for and your makeup looks impeccable. 4. Personalized Bridal Consultations Ladyfair offers personalized pre-wedding consultations to understand your vision and create a look that aligns with your preferences. Our consultations include discussing your desired style, trying out different looks, and finalizing the perfect bridal makeup. Bridal Makeup Trends in Gaya District Traditional Bridal Makeup In Gaya, traditional bridal makeup continues to be a popular choice. This style often features bold, defined eyes, rich lips, and elaborate contouring, which pair beautifully with traditional wedding attire. Modern Bridal Makeup For brides seeking a contemporary look, modern bridal makeup focuses on enhancing natural beauty with softer tones and minimalist techniques. This approach is perfect for those who prefer a more subtle yet elegant appearance. Fusion Bridal Makeup Fusion makeup combines traditional and modern elements, creating a unique look that reflects both cultural heritage and current trends. This style allows brides to enjoy the best of both worlds, resulting in a distinctive and memorable appearance. The Ladyfair Bridal Makeup Experience: A Step-by-Step Guide 1. Initial Contact: Reach out to us at 7004721239 to discuss your bridal makeup needs and schedule a consultation. 2. Pre-Wedding Consultation: During this session, you’ll meet with our makeup artist to discuss your vision, review your wedding attire, and plan the makeup style that best suits you. 3. Makeup Trial: Experience a trial makeup session where you can preview your bridal look. This allows you to make any adjustments and ensure complete satisfaction before the wedding day. 4. Final Makeup Session: On the day of your wedding, our makeup artist will arrive at your location to provide the full bridal makeup service, ensuring you look flawless and feel confident. 5. Optional Touch-Ups: We offer post-wedding touch-up services to keep your makeup looking fresh throughout the event. Client Testimonials Priya S., Gaya: "Ladyfair made my wedding day perfect with their amazing at-home makeup service. I felt so comfortable and beautiful, and the convenience of having the artist come to me was priceless." Rina K., Gaya: "The makeup artist from Ladyfair understood exactly what I wanted. My makeup looked incredible, and I received so many compliments. The whole process was smooth and stress-free." Kavita T., Gaya: "I was so happy with the results of my bridal makeup. Ladyfair’s use of high-quality products really made a difference, and the makeup lasted all day without any issues." Preparing for Your Bridal Makeup Session To ensure your bridal makeup looks flawless, follow these preparation tips: Hydrate: Drink plenty of water in the weeks leading up to your wedding to keep your skin hydrated and glowing. Consistent Skincare Routine: Stick to a regular skincare routine, including cleansing, toning, and moisturizing, to maintain healthy skin. Avoid New Products: Refrain from trying new skincare products close to your wedding day to avoid any adverse reactions. Clear Communication: During your consultation, clearly communicate your preferences and any specific concerns to the makeup artist for the best results. Beyond Bridal Makeup: Ladyfair’s Full Range of Beauty Services While bridal makeup is our specialty, Ladyfair also offers a variety of other beauty services: Party Makeup: Ideal for guests attending weddings, parties, or special events. Everyday Makeup: Perfect for women who want to look their best for daily activities. Special Occasion Services: Includes makeup for engagements, anniversaries, and other important events. The Future of Bridal Makeup in Gaya District As Ladyfair continues to grow its reputation in Gaya District, we remain dedicated to offering the best bridal makeup services in the region. Our commitment to excellence, innovation, and customer satisfaction drives us to stay at the forefront of beauty trends and techniques. We aim to make every bride in Gaya District feel beautiful and confident on her special day. Q&A with Ladyfair’s Bridal Makeup Artist in Gaya District, Bihar Q1: What makes Ladyfair’s bridal makeup services stand out in Gaya District? A1: Ladyfair offers at-home bridal makeup services, providing convenience and a personalized experience. Our makeup artist tailors the look to suit the bride’s style, ensuring she feels beautiful and confident on her special day. Q2: What types of bridal makeup can Ladyfair provide? A2: Ladyfair specializes in traditional, modern, and fusion bridal makeup styles. We create looks that reflect the bride’s personality, wedding theme, and cultural preferences. Q3: How does the at-home makeup service process work? A3: The process begins with an initial phone call to discuss your needs. This is followed by a pre-wedding consultation and makeup trial. On the wedding day, our makeup artist arrives at your location to complete the final look. Q4: What products does Ladyfair use for bridal makeup? A4: Ladyfair uses high-quality, premium makeup products that are safe for all skin types. Our products ensure a long-lasting and flawless finish, keeping you looking radiant throughout your wedding day. Q5: How should a bride prepare for her bridal makeup session? A5: Brides should maintain a consistent skincare routine, stay hydrated, avoid new products close to the wedding day, and clearly communicate their desired look during the consultation for optimal results. Q6: Can Ladyfair accommodate specific cultural or traditional makeup requests? A6: Absolutely! Ladyfair is skilled in creating makeup looks that honor cultural traditions while incorporating modern elements. We work closely with the bride to ensure her makeup reflects her heritage and personal style. Q7: What feedback have clients given about Ladyfair’s services in Gaya? A7: Brides love the convenience of our at-home services, the professionalism of our makeup artist, and the high-quality products we use. Many clients have praised how beautiful and confident they felt on their wedding day. Q8: How can a bride book Ladyfair’s bridal makeup services in Gaya? A8: To book our services, simply call us at 7004721239. We’ll guide you through the process from the initial inquiry to the final makeup session. Q9: Does Ladyfair offer other beauty services in addition to bridal makeup? A9: Yes, Ladyfair provides a range of beauty services, including party makeup, everyday makeup, and special occasion makeup.

Posted By: 26th August 2024
Bridal Makeup Artist in East Champaran
Ladyfair: Leading Bridal Makeup Services in East Champaran District, Bihar Introduction Your wedding day is a momentous occasion that deserves the perfect look, and Ladyfair is here to make that happen. Serving East Champaran District, Bihar, we specialize in delivering exceptional bridal makeup services right to your doorstep. Our at-home beauty services provide a personalized experience, allowing you to enjoy your special day in the comfort of your own home. To book your appointment, call us at 7004721239. In this blog, we will delve into the importance of professional bridal makeup, showcase what sets Ladyfair apart in East Champaran, and explain why our services are the ideal choice for brides seeking outstanding beauty treatments. The Importance of Professional Bridal Makeup Professional bridal makeup is more than just applying cosmetics; it’s about enhancing the bride’s natural beauty and ensuring she looks radiant throughout her wedding day. A skilled makeup artist can create a look that complements the bride’s features, attire, and wedding theme. At Ladyfair, we are dedicated to providing high-quality makeup services that make every bride look stunning and feel confident on her special day. Why Ladyfair is the Top Choice in East Champaran District 1. Convenience of At-Home Services Ladyfair offers the unique advantage of at-home bridal makeup services. Our expert makeup artist will come to your location, allowing you to enjoy a relaxed and stress-free experience without the need to travel to a salon. 2. Expert Makeup Artist Our top makeup artist in East Champaran District is renowned for her exceptional skills and extensive experience in bridal makeup. She understands various makeup techniques and styles, ensuring that each bride’s look is tailored to her preferences and wedding theme. 3. High-Quality Products We use only premium, high-quality makeup products that are safe for all skin types and provide long-lasting results. Our selection of products ensures that your makeup remains flawless and fresh throughout your wedding day. 4. Comprehensive Pre-Wedding Consultations Ladyfair offers thorough pre-wedding consultations to help you plan your ideal bridal look. During this consultation, you can discuss your vision with our makeup artist, try different styles, and receive expert advice to ensure that your final look is just as you imagined. Bridal Makeup Trends in East Champaran District Traditional Bridal Makeup Traditional bridal makeup is a popular choice in East Champaran District. This style typically features bold eyes, vibrant lips, and intricate contouring, reflecting the region’s rich cultural heritage and complementing traditional wedding attire. Modern Bridal Makeup Modern bridal makeup emphasizes a more natural and understated look. It highlights the bride’s natural features with soft tones and subtle accents, creating an elegant and timeless appearance. Fusion Bridal Makeup Fusion bridal makeup combines elements of both traditional and modern styles. This approach allows brides to enjoy a unique and personalized look that merges classic beauty with contemporary trends, resulting in a distinctive and memorable appearance. The Ladyfair Experience: From Consultation to Final Makeup 1. Initial Inquiry: Contact us at 7004721239 to discuss your bridal makeup needs and schedule an appointment. 2. Pre-Wedding Consultation: Meet with our makeup artist for a detailed consultation. Discuss your desired look, review your wedding attire, and plan the makeup style that suits you best. 3. Makeup Trial: Experience a trial session to preview your bridal makeup. This helps ensure that you’re completely satisfied with the look before your wedding day. 4. Final Makeup Session: On your wedding day, our makeup artist arrives at your location to provide the full bridal makeup service, ensuring you look flawless and feel confident. 5. Post-Wedding Touch-Ups: If needed, we offer touch-up services throughout the wedding day to keep your makeup looking perfect. Client Testimonials Anita R., East Champaran: "Ladyfair made my wedding day unforgettable with their exceptional makeup services. The convenience of having the artist come to my home was fantastic, and I felt absolutely beautiful throughout the day." Rita M., East Champaran: "The makeup trial was amazing, and the final result on my wedding day was exactly what I had envisioned. Ladyfair’s makeup artist was professional and skilled, and I received countless compliments!" Seema L., East Champaran: "Ladyfair’s expertise and high-quality products were impressive. My makeup looked flawless and lasted all day. I couldn’t have asked for a better bridal makeup experience." Preparing for Your Bridal Makeup Session To ensure the best results, follow these preparation tips: Stay Hydrated: Drink plenty of water to keep your skin healthy and radiant. Follow a Skincare Routine: Maintain a consistent skincare routine with cleansing, toning, and moisturizing. Avoid New Products: Stick to your regular skincare products to avoid any potential reactions. Communicate Clearly: Share your vision and any specific concerns with the makeup artist during the consultation to achieve the best outcome. Beyond Bridal Makeup: Ladyfair’s Additional Services In addition to bridal makeup, Ladyfair provides a range of beauty services: Party Makeup: Ideal for special events, including weddings, parties, and gatherings. Everyday Makeup: Perfect for daily wear and casual outings. Special Occasion Makeup: Includes services for engagements, anniversaries, and other important events. The Future of Bridal Makeup in East Champaran District As Ladyfair’s reputation for premium, at-home bridal makeup services grows, we are committed to expanding our reach in East Champaran District. Our mission is to set new standards in bridal beauty, offering innovative techniques and products that cater to evolving trends and individual preferences. Our goal is to ensure that every bride in East Champaran District experiences exceptional beauty services that make her wedding day truly memorable. Q&A with Ladyfair’s Top Bridal Makeup Artist in East Champaran District, Bihar Q1: What makes Ladyfair’s bridal makeup services unique in East Champaran District? A1: Ladyfair offers the convenience of at-home makeup services, bringing professional beauty treatments directly to the bride’s location. Our skilled makeup artist ensures that each bride’s look is customized to her preferences and wedding theme. Q2: What types of bridal makeup styles does Ladyfair offer? A2: Ladyfair specializes in traditional, modern, and fusion bridal makeup styles. We can create a classic, bold look or a soft, contemporary appearance based on the bride’s preferences. Q3: How does the at-home makeup service process work? A3: The process begins with an initial phone consultation to discuss your needs. We then conduct a pre-wedding consultation and makeup trial. On your wedding day, our makeup artist arrives at your location to provide the full makeup service. Q4: What makeup products does Ladyfair use? A4: Ladyfair uses high-quality, premium makeup products that are safe for all skin types and provide long-lasting results. Our products are selected to ensure a flawless finish and beautiful look throughout the day. Q5: How should a bride prepare for her bridal makeup session? A5: Brides should stay hydrated, maintain a consistent skincare routine, avoid trying new products close to the wedding day, and communicate their vision clearly during the consultation for the best results. Q6: Can Ladyfair accommodate traditional or cultural makeup requirements? A6: Yes, Ladyfair is skilled in creating makeup looks that reflect cultural and traditional values. We can incorporate specific elements into the makeup to honor these traditions while providing a modern touch. Q7: What do previous clients say about their experience with Ladyfair? A7: Brides appreciate the convenience of our at-home services, the professionalism of our makeup artist, and the high quality of the makeup. Many have noted how beautiful and confident they felt on their wedding day. Q8: How can a bride book Ladyfair’s bridal makeup services in East Champaran? A8: Booking is simple! Call us at 7004721239 to discuss your bridal makeup needs and schedule an appointment. We’ll guide you through the process from the initial inquiry to the final makeup session. Q9: Does Ladyfair offer other beauty services apart from bridal makeup? A9: Yes, Ladyfair provides a variety of beauty services, including party makeup, everyday makeup, and special occasion makeup.

Posted By: 26th August 2024
Bridal Makeup Artist in Buxar
Ladyfair: Premier Bridal Makeup Services in Buxar District, Bihar Introduction Your wedding day is a momentous occasion, and Ladyfair is dedicated to making it extraordinary. Serving Buxar District, Bihar, we offer top-tier bridal makeup services right at your doorstep. With our at-home beauty services, you can enjoy personalized care and comfort without the hassle of traveling. To book your appointment, call us at 7004721239. In this blog, we explore the importance of professional bridal makeup, highlight what distinguishes Ladyfair in Buxar District, and explain why our services are the ideal choice for brides looking for exceptional beauty treatments. The Significance of Professional Bridal Makeup Bridal makeup is not merely about applying cosmetics; it’s an integral part of wedding preparations. It’s about enhancing the bride’s natural beauty and ensuring she looks radiant throughout her special day. A professional makeup artist possesses the expertise to create a look that complements the bride’s features, attire, and the overall theme of her wedding. At Ladyfair, we are committed to providing high-quality makeup services that enhance your beauty and boost your confidence on your wedding day. Why Ladyfair is the Top Choice in Buxar District 1. Convenience of At-Home Services Ladyfair offers the distinct advantage of at-home makeup services, eliminating the need for brides to travel to a salon. Our expert makeup artist comes to your location, allowing you to relax and enjoy the process in the comfort of your own home. 2. Expert Makeup Artist Our leading makeup artist in Buxar District is renowned for her exceptional skills and extensive experience in bridal makeup. She understands various makeup techniques and styles, ensuring that each bride’s look is tailored to her preferences and the wedding theme. 3. High-Quality Products We use only premium, high-quality makeup products that are safe for all skin types and provide long-lasting results. Our selection ensures that your makeup looks flawless and remains fresh throughout your wedding day. 4. Comprehensive Pre-Wedding Consultations Ladyfair offers thorough pre-wedding consultations to help you plan your ideal bridal look. During this consultation, you can discuss your vision with our makeup artist, try different styles, and receive expert advice to ensure that your final look is just as you envisioned. Bridal Makeup Trends in Buxar District Traditional Bridal Makeup Traditional bridal makeup is highly popular in Buxar District. This style often features bold eyes, vibrant lips, and intricate contouring, reflecting the region’s rich cultural heritage and complementing traditional wedding attire. Modern Bridal Makeup Modern bridal makeup focuses on a more natural and understated look. It enhances the bride’s natural features with soft tones and subtle accents, creating a contemporary appearance that is both elegant and timeless. Fusion Bridal Makeup Fusion bridal makeup combines elements of both traditional and modern styles. This approach allows brides to enjoy a unique and personalized look that merges classic beauty with contemporary trends, resulting in a distinctive and memorable appearance. The Ladyfair Experience: From Consultation to Final Makeup 1. Initial Inquiry: Contact us at 7004721239 to discuss your bridal makeup needs and schedule an appointment. 2. Pre-Wedding Consultation: Meet with our makeup artist for a detailed consultation. Discuss your desired look, review your wedding attire, and plan the makeup style that suits you best. 3. Makeup Trial: Experience a trial session to preview your bridal makeup. This helps ensure that you’re completely satisfied with the look before your wedding day. 4. Final Makeup Session: On your wedding day, our makeup artist arrives at your location to provide the full bridal makeup service, ensuring you look flawless and feel confident. 5. Post-Wedding Touch-Ups: If needed, we offer touch-up services throughout the wedding day to keep your makeup looking perfect. Client Testimonials Poonam S., Buxar: "Ladyfair made my wedding day truly special with their exceptional makeup services. The convenience of having the artist come to my home was fantastic, and I felt absolutely beautiful throughout the day." Suman K., Buxar: "I was thrilled with the makeup trial and the final result on my wedding day. Ladyfair’s makeup artist was professional, skilled, and understood my vision perfectly. I received countless compliments!" Neetu P., Buxar: "The quality of Ladyfair’s products and the artist’s expertise were impressive. My makeup looked flawless and lasted all day. I couldn’t have asked for a better bridal makeup experience." Preparing for Your Bridal Makeup Session To ensure the best results, follow these preparation tips: Stay Hydrated: Drink plenty of water to keep your skin healthy and radiant. Follow a Skincare Routine: Maintain a consistent skincare routine with cleansing, toning, and moisturizing. Avoid New Products: Stick to your regular skincare products to avoid any potential reactions. Communicate Clearly: Share your vision and any specific concerns with the makeup artist during your consultation to achieve the best outcome. Beyond Bridal Makeup: Ladyfair’s Additional Services In addition to bridal makeup, Ladyfair provides a range of beauty services: Party Makeup: Ideal for special events, including weddings, parties, and gatherings. Everyday Makeup: Perfect for daily wear and casual outings. Special Occasion Makeup: Includes services for engagements, anniversaries, and other important events. The Future of Bridal Makeup in Buxar District As Ladyfair’s reputation for premium, at-home bridal makeup services grows, we are committed to expanding our reach in Buxar District. Our mission is to set new standards in bridal beauty, offering innovative techniques and products that cater to evolving trends and individual preferences. Our goal is to ensure that every bride in Buxar District experiences exceptional beauty services that make her wedding day truly memorable. Q1: What makes Ladyfair’s bridal makeup services unique in Buxar District? A1: Ladyfair offers the convenience of at-home makeup services, bringing professional beauty treatments directly to the bride’s location. Our skilled makeup artist ensures that each bride’s look is customized to her preferences and wedding theme. Q2: What types of bridal makeup styles does Ladyfair offer? A2: Ladyfair specializes in traditional, modern, and fusion bridal makeup styles. We can create a classic, bold look or a soft, contemporary appearance based on the bride’s preferences. Q3: How does the at-home makeup service process work? A3: The process begins with an initial phone consultation to discuss your needs. We then conduct a pre-wedding consultation and makeup trial. On your wedding day, our makeup artist arrives at your location to provide the full makeup service. Q4: What makeup products does Ladyfair use? A4: Ladyfair uses high-quality, premium makeup products that are safe for all skin types and provide long-lasting results. Our products are selected to ensure a flawless finish and beautiful look throughout the day. Q5: How should a bride prepare for her bridal makeup session? A5: Brides should stay hydrated, maintain a consistent skincare routine, avoid trying new products close to the wedding day, and communicate their vision clearly during the consultation for the best results. Q6: Can Ladyfair accommodate traditional or cultural makeup requirements? A6: Yes, Ladyfair is skilled in creating makeup looks that reflect cultural and traditional values. We can incorporate specific elements into the makeup to honor these traditions while providing a modern touch. Q7: What do previous clients say about their experience with Ladyfair? A7: Brides appreciate the convenience of our at-home services, the professionalism of our makeup artist, and the high quality of the makeup. Many have noted how beautiful and confident they felt on their wedding day. Q8: How can a bride book Ladyfair’s bridal makeup services in Buxar? A8: Booking is simple! Call us at 7004721239 to discuss your bridal makeup needs and schedule an appointment. We’ll guide you through the process from the initial inquiry to the final makeup session. Q9: Does Ladyfair offer other beauty services apart from bridal makeup? A9: Yes, Ladyfair provides a variety of beauty services, including party makeup, everyday makeup, and special occasion makeup.

Posted By: 26th August 2024
Bridal Makeup Artist in Bhojpur
Ladyfair: Premier Bridal Makeup Services in Bhojpur District, Bihar Introduction Your wedding day is one of the most important moments of your life, and Ladyfair is here to ensure you look and feel extraordinary. Serving Bhojpur District, Bihar, our team provides exceptional bridal makeup services right at your doorstep. With our at-home beauty services, you can experience personalized care in the comfort of your home. To book your appointment, call us at 7004721239. In this blog, we delve into the significance of professional bridal makeup, highlight what sets Ladyfair apart in Bhojpur District, and explain why our services are the perfect choice for brides seeking top-notch beauty treatments. The Importance of Professional Bridal Makeup Bridal makeup is more than just applying cosmetics; it’s an essential part of the wedding preparation process. It’s about enhancing the bride’s natural beauty and ensuring she looks radiant throughout the day. A professional makeup artist has the expertise to create a look that complements the bride’s features, attire, and overall wedding theme. At Ladyfair, we are dedicated to delivering high-quality makeup services that not only enhance your beauty but also make you feel confident and beautiful on your special day. What Makes Ladyfair Stand Out in Bhojpur District 1. Convenience of At-Home Services Ladyfair offers the unique advantage of at-home makeup services, eliminating the need for brides to travel to a salon. Our expert makeup artist comes to your location, allowing you to relax and enjoy the process in your own space, free from the stress of travel. 2. Expert Makeup Artist Our top makeup artist in Bhojpur District is renowned for her exceptional skills and extensive experience in bridal makeup. She has a deep understanding of various makeup techniques and styles, ensuring that each bride’s look is customized to her preferences and wedding theme. 3. High-Quality Products We use only premium, high-quality makeup products that are safe for all skin types and provide long-lasting results. Our products are chosen to ensure that your makeup looks flawless and stays fresh throughout your wedding day. 4. Comprehensive Pre-Wedding Consultations Ladyfair provides detailed pre-wedding consultations to help you plan your ideal bridal look. During this consultation, you can discuss your vision with our makeup artist, try different styles, and receive expert advice to ensure that your final look aligns perfectly with your expectations. Bridal Makeup Trends in Bhojpur District Traditional Bridal Makeup In Bhojpur District, traditional bridal makeup is highly favored. This style often includes bold eyes, vibrant lips, and intricate contouring, reflecting the region’s rich cultural heritage and complementing traditional wedding attire. Modern Bridal Makeup Modern bridal makeup focuses on a more natural and understated look. It highlights the bride’s natural features with soft tones and subtle accents, creating a contemporary appearance that is elegant and timeless. Fusion Bridal Makeup Fusion bridal makeup combines elements of both traditional and modern styles. This approach allows brides to enjoy a unique and personalized look that blends classic beauty with contemporary trends, resulting in a distinctive and memorable appearance. The Ladyfair Experience: From Consultation to Final Makeup 1. Initial Inquiry: Contact us at 7004721239 to discuss your bridal makeup needs and schedule an appointment. 2. Pre-Wedding Consultation: Meet with our makeup artist for a detailed consultation. Discuss your desired look, review your wedding attire, and plan the makeup style that suits you best. 3. Makeup Trial: Experience a trial session to preview your bridal makeup. This helps ensure that you’re completely satisfied with the look before your wedding day. 4. Final Makeup Session: On your wedding day, our makeup artist arrives at your location to provide the full bridal makeup service, ensuring you look flawless and feel confident. 5. Post-Wedding Touch-Ups: If needed, we offer touch-up services throughout the wedding day to keep your makeup looking perfect. Client Testimonials Meera S., Bhojpur: "Ladyfair made my wedding day unforgettable with their exceptional makeup services. The convenience of having the makeup artist come to my home was fantastic, and I felt beautiful throughout the day." Ritu K., Bhojpur: "I was thrilled with the makeup trial and the final result on my wedding day. Ladyfair’s makeup artist was professional, skilled, and truly understood my vision. I received so many compliments!" Neha P., Bhojpur: "The quality of Ladyfair’s products and the artist’s expertise were impressive. My makeup looked flawless and lasted all day. I couldn’t have asked for a better bridal makeup experience." Preparing for Your Bridal Makeup Session To achieve the best results, consider these preparation tips: Stay Hydrated: Drink plenty of water to keep your skin healthy and glowing. Follow a Skincare Routine: Maintain a consistent skincare routine with cleansing, toning, and moisturizing. Avoid New Products: Stick to your regular skincare products to avoid any potential reactions. Communicate Clearly: Share your vision and any specific concerns with the makeup artist during your consultation to ensure the best outcome. Beyond Bridal Makeup: Ladyfair’s Additional Services In addition to bridal makeup, Ladyfair offers a range of beauty services: Party Makeup: Perfect for special events, including weddings, parties, and gatherings. Everyday Makeup: Ideal for daily wear and casual outings. Special Occasion Makeup: Includes services for engagements, anniversaries, and other important events. The Future of Bridal Makeup in Bhojpur District As Ladyfair’s reputation for top-quality, at-home bridal makeup services grows, we are committed to expanding our reach in Bhojpur District. Our goal is to set new standards in bridal beauty, offering innovative techniques and products that cater to evolving trends and individual preferences. Our mission is to ensure that every bride in Bhojpur District experiences exceptional beauty services that make her wedding day truly memorable. Q&A with Ladyfair’s Top Bridal Makeup Artist in Bhojpur District, Bihar Q1: What makes Ladyfair’s bridal makeup services unique in Bhojpur District? A1: Ladyfair offers at-home makeup services, providing convenience and personalization by bringing professional beauty treatments directly to the bride’s location. Our skilled makeup artist ensures that each bride’s look is customized to her preferences and wedding theme. Q2: What types of bridal makeup styles does Ladyfair offer? A2: Ladyfair specializes in traditional, modern, and fusion bridal makeup styles. We can create a classic, bold look or a soft, contemporary appearance based on the bride’s preferences. Q3: How does the at-home makeup service process work? A3: The process begins with an initial phone consultation to discuss your needs. We then conduct a pre-wedding consultation and makeup trial. On your wedding day, our makeup artist arrives at your location to provide the full makeup service. Q4: What makeup products does Ladyfair use? A4: Ladyfair uses high-quality, premium makeup products that are safe for all skin types and provide long-lasting results. Our products are selected to ensure a flawless finish and beautiful look throughout the day. Q5: How should a bride prepare for her bridal makeup session? A5: Brides should stay hydrated, maintain a consistent skincare routine, avoid trying new products close to the wedding day, and communicate their vision clearly during the consultation for the best results. Q6: Can Ladyfair accommodate traditional or cultural makeup requirements? A6: Yes, Ladyfair is skilled in creating makeup looks that reflect cultural and traditional values. We can incorporate specific elements into the makeup to honor these traditions while providing a modern touch. Q7: What do previous clients say about their experience with Ladyfair? A7: Brides appreciate the convenience of our at-home services, the professionalism of our makeup artist, and the high quality of the makeup. Many have noted how beautiful and confident they felt on their wedding day. Q8: How can a bride book Ladyfair’s bridal makeup services in Bhojpur? A8: Booking is easy! Call us at 7004721239 to discuss your bridal makeup needs and schedule an appointment. We’ll guide you through the process from the initial inquiry to the final makeup session. Q9: Does Ladyfair offer other beauty services apart from bridal makeup? A9: Yes, Ladyfair provides a variety of beauty services, including party makeup, everyday makeup, and special occasion makeup.

Posted By: 26th August 2024
Bridal Makeup Artist in Bhagalpur
Ladyfair: Premium Bridal Makeup Services in Bhagalpur District, Bihar Introduction Your wedding day is a celebration of your beauty and style, and Ladyfair is committed to making it unforgettable. In Bhagalpur District, Bihar, we offer exceptional bridal makeup services with the convenience of at-home appointments. Our skilled makeup artist provides top-quality beauty treatments right at your doorstep, ensuring a seamless and enjoyable experience. To book your appointment, call us at 7004721239. This blog explores the significance of professional bridal makeup, showcases what sets Ladyfair apart in Bhagalpur District, and explains why our services are the perfect choice for brides seeking excellence and convenience. The Importance of Bridal Makeup Bridal makeup is a crucial aspect of wedding preparations. It involves more than just applying cosmetics; it’s about enhancing the bride’s natural beauty and ensuring she looks radiant throughout the day. Professional makeup artists possess the skills to create a look that complements the bride’s features, attire, and the overall wedding theme. Ladyfair’s goal is to provide high-quality makeup services that enhance your beauty and make you feel confident and stunning on your special day. Why Ladyfair Stands Out in Bhagalpur District 1. Convenience of At-Home Services Ladyfair offers the convenience of at-home makeup services, eliminating the need for brides to travel to a salon on their wedding day. Our makeup artist comes to your location, allowing you to relax and enjoy the process in a familiar and comfortable setting. 2. Expert Makeup Artist Our top makeup artist in Bhagalpur is known for her exceptional skills and extensive experience in bridal makeup. She has a deep understanding of various makeup techniques and styles, ensuring that each bride’s look is tailored to her personal preferences and the theme of her wedding. 3. High-Quality Products We use only premium, high-quality makeup products that are safe for all skin types and provide long-lasting results. Our selection ensures that your makeup looks flawless and stays fresh throughout your wedding day. 4. Comprehensive Pre-Wedding Consultations Ladyfair offers detailed pre-wedding consultations to plan your ideal bridal look. During this consultation, you can discuss your vision with our makeup artist, try different styles, and receive expert advice to ensure that your final look aligns perfectly with your expectations. Bridal Makeup Trends in Bhagalpur District Traditional Bridal Makeup Traditional bridal makeup is highly favored in Bhagalpur District. This style often features bold eyes, vibrant lips, and intricate contouring, reflecting the rich cultural heritage and complementing traditional wedding attire. Modern Bridal Makeup Modern bridal makeup focuses on a more natural and understated look. It highlights the bride’s natural features with soft tones and subtle accents, creating a contemporary appearance that is both elegant and timeless. Fusion Bridal Makeup Fusion bridal makeup combines elements of both traditional and modern styles. This approach allows brides to enjoy a unique and personalized look that blends classic beauty with contemporary trends, resulting in a distinctive and memorable appearance. The Ladyfair Experience: From Consultation to Final Makeup 1. Initial Inquiry: Contact us at 7004721239 to discuss your bridal makeup needs and schedule an appointment. 2. Pre-Wedding Consultation: Meet with our makeup artist for a detailed consultation. Discuss your desired look, review your wedding attire, and plan the makeup style that suits you best. 3. Makeup Trial: Experience a trial session to preview your bridal makeup. This helps ensure that you’re completely satisfied with the look before your wedding day. 4. Final Makeup Session: On your wedding day, our makeup artist arrives at your location to provide the full bridal makeup service, ensuring you look flawless and feel confident. 5. Post-Wedding Touch-Ups: If needed, we offer touch-up services throughout the wedding day to keep your makeup looking perfect. Client Testimonials Aarti S., Bhagalpur: "Ladyfair made my wedding day so special with their exceptional makeup services. The convenience of having the makeup artist come to my home was fantastic, and I felt absolutely beautiful throughout the day." Rina K., Bhagalpur: "I was thrilled with the makeup trial and the final result on my wedding day. Ladyfair’s makeup artist was professional, skilled, and truly understood my vision. I received countless compliments!" Sunita P., Bhagalpur: "The quality of Ladyfair’s products and the artist’s expertise were impressive. My makeup looked flawless and lasted all day. I couldn’t have asked for a better bridal makeup experience." Preparing for Your Bridal Makeup Session To achieve the best results, consider these preparation tips: Stay Hydrated: Drink plenty of water to keep your skin healthy and radiant. Follow a Skincare Routine: Maintain a consistent skincare routine with cleansing, toning, and moisturizing. Avoid New Products: Stick to your regular skincare products to avoid any potential reactions. Communicate Clearly: Share your vision and any specific concerns with the makeup artist during your consultation to ensure the best outcome. Beyond Bridal Makeup: Ladyfair’s Additional Services In addition to bridal makeup, Ladyfair offers a range of beauty services: Party Makeup: Perfect for special events, including weddings, parties, and gatherings. Everyday Makeup: Ideal for daily wear and casual outings. Special Occasion Makeup: Includes services for engagements, anniversaries, and other important events. Looking Ahead: The Future of Bridal Makeup in Bhagalpur District As Ladyfair’s reputation for top-quality, at-home bridal makeup services continues to grow, we are committed to expanding our reach in Bhagalpur District. Our aim is to set new standards in bridal beauty, offering innovative techniques and products that cater to evolving trends and individual preferences. Our mission is to ensure that every bride in Bhagalpur District experiences exceptional beauty services that make her wedding day truly memorable. Q&A with Ladyfair’s Top Bridal Makeup Artist in Bhagalpur District, Bihar Q1: What sets Ladyfair’s bridal makeup services apart in Bhagalpur District? A1: Ladyfair’s at-home makeup services provide convenience and personalization by bringing professional beauty treatments directly to the bride’s location. Our skilled makeup artist ensures that each bride’s look is customized to her preferences and wedding theme. Q2: What types of bridal makeup does Ladyfair offer? A2: Ladyfair specializes in traditional, modern, and fusion bridal makeup styles. We can create a classic, bold look or a soft, contemporary appearance based on the bride’s preferences. Q3: How does the at-home makeup service process work? A3: The process begins with an initial phone consultation to discuss your needs. We then conduct a pre-wedding consultation and makeup trial. On your wedding day, our makeup artist arrives at your location to provide the full makeup service. Q4: What makeup products does Ladyfair use? A4: Ladyfair uses high-quality, premium makeup products that are safe for all skin types and provide long-lasting results. Our products are selected to ensure a flawless finish and beautiful look throughout the day. Q5: How should a bride prepare for her bridal makeup session? A5: Brides should stay hydrated, maintain a consistent skincare routine, avoid trying new products close to the wedding day, and communicate their vision clearly during the consultation for the best results. Q6: Can Ladyfair accommodate traditional or cultural makeup requirements? A6: Yes, Ladyfair is skilled in creating makeup looks that reflect cultural and traditional values. We can incorporate specific elements into the makeup to honor these traditions while providing a modern touch. Q7: What do previous clients say about their experience with Ladyfair? A7: Brides appreciate the convenience of our at-home services, the professionalism of our makeup artist, and the high quality of the makeup. Many have noted how beautiful and confident they felt on their wedding day. Q8: How can a bride book Ladyfair’s bridal makeup services in Bhagalpur? A8: Booking is easy! Call us at 7004721239 to discuss your bridal makeup needs and schedule an appointment. We’ll guide you through the process from the initial inquiry to the final makeup session. Q9: Does Ladyfair offer other beauty services apart from bridal makeup? A9: Yes, Ladyfair provides a variety of beauty services, including party makeup, everyday makeup, and special occasion makeup.

Posted By: 26th August 2024
Bridal Makeup Artist in Begusarai
Ladyfair: Exceptional Bridal Makeup Services in Begusarai District, Bihar Introduction Your wedding day is a reflection of your unique beauty and style, and Ladyfair is here to make sure you look and feel absolutely stunning. In Begusarai District, Bihar, Ladyfair offers unparalleled bridal makeup services with the convenience of at-home appointments. Our expert makeup artist brings top-quality beauty services directly to your doorstep, ensuring a flawless and stress-free experience on your special day. To book your appointment, call us at 7004721239. This blog delves into the importance of professional bridal makeup, highlights the unique aspects of Ladyfair’s services in Begusarai District, and explains why more brides are choosing Ladyfair for their wedding day beauty needs. The Importance of Bridal Makeup Bridal makeup is an art form that goes beyond basic cosmetics. It’s about enhancing a bride’s natural beauty and ensuring she looks radiant both in person and in photographs. A professional makeup artist understands the nuances of bridal makeup, from selecting the right shades to applying techniques that highlight the bride’s best features. Ladyfair is dedicated to providing high-quality bridal makeup services that cater to your unique preferences and the theme of your wedding. Why Ladyfair is the Preferred Choice in Begusarai District 1. Convenience of At-Home Services Ladyfair’s at-home makeup services bring professional beauty treatments directly to your location. This eliminates the need to travel to a salon on your wedding day, allowing you to relax and enjoy the process in the comfort of your own space. Our makeup artist ensures that everything is tailored to your preferences and that you look perfect without any stress. 2. Expert Makeup Artist Our top makeup artist in Begusarai is known for her exceptional skills and experience in bridal makeup. She has a keen eye for detail and a deep understanding of various makeup techniques, ensuring that each bride’s look is both stunning and personalized. Whether you’re interested in a traditional style or a contemporary look, Ladyfair’s artist has the expertise to deliver a flawless result. 3. High-Quality Products At Ladyfair, we use only premium makeup products that are safe for all skin types and provide long-lasting results. Our selection of high-quality products ensures that your makeup looks fresh and beautiful throughout your wedding day. 4. Detailed Pre-Wedding Consultations We offer comprehensive pre-wedding consultations to plan your ideal bridal look. During this session, you can discuss your vision with our makeup artist, try different styles, and receive expert advice. This process ensures that your final look aligns with your expectations and complements your wedding attire. Bridal Makeup Trends in Begusarai District Traditional Bridal Makeup Traditional bridal makeup remains popular in Begusarai, often featuring bold eyes, vibrant lips, and intricate contouring. These classic looks are designed to enhance the bride’s features and harmonize with her traditional wedding attire. Modern Bridal Makeup For brides who prefer a more understated approach, modern bridal makeup offers a fresh and natural look. This style focuses on enhancing the bride’s natural beauty with soft tones and subtle highlighting, creating a contemporary appearance that’s both elegant and timeless. Fusion Bridal Makeup Fusion bridal makeup combines elements of both traditional and modern styles, providing a unique and personalized look. Ladyfair’s makeup artist is skilled in creating fusion looks that blend classic features with contemporary techniques, ensuring a standout appearance that reflects each bride’s individual style. The Ladyfair Experience: From Consultation to Final Makeup 1. Initial Inquiry: Call us at 7004721239 to discuss your bridal makeup needs and schedule an appointment. 2. Pre-Wedding Consultation: Meet with our makeup artist to discuss your desired look, review your wedding attire, and plan the makeup style that best suits you. 3. Makeup Trial: Experience a trial session to preview your bridal makeup. This allows you to make any adjustments before your wedding day. 4. Final Makeup Session: On your wedding day, our makeup artist arrives at your location to provide the full bridal makeup service, ensuring you look flawless and feel confident. 5. Post-Wedding Touch-Ups: If needed, we offer touch-up services throughout the wedding day to keep your makeup looking fresh. Client Testimonials Sita M., Begusarai: "Ladyfair’s at-home service was incredibly convenient, and the makeup artist was both professional and talented. My makeup looked stunning, and I felt confident and beautiful throughout my wedding day." Nisha R., Begusarai: "I loved the personalized service from Ladyfair. The makeup artist took the time to understand my preferences and delivered exactly what I wanted. I received so many compliments on my bridal look!" Rekha P., Begusarai: "The quality of Ladyfair’s makeup products and the expertise of the artist were outstanding. My makeup stayed perfect all day, and I couldn’t have asked for a better experience." Preparing for Your Bridal Makeup Session To ensure the best results, follow these preparation tips: Stay Hydrated: Drink plenty of water to keep your skin healthy and radiant. Follow a Skincare Routine: Maintain a consistent routine with cleansing, toning, and moisturizing. Avoid New Products: Stick to familiar skincare products to prevent any adverse reactions. Communicate Clearly: Share your vision and any specific concerns with the makeup artist during your consultation. Beyond Bridal Makeup: Ladyfair’s Additional Services Ladyfair also offers a range of beauty services beyond bridal makeup: Party Makeup: Ideal for special events, including weddings, parties, and gatherings. Everyday Makeup: Perfect for daily wear and casual outings. Special Occasion Makeup: Includes services for engagements, anniversaries, and other significant events. Looking Ahead: The Future of Bridal Makeup in Begusarai District As Ladyfair’s reputation for high-quality at-home makeup services continues to grow, we are committed to expanding our reach in Begusarai District. We aim to set new standards in bridal beauty, offering innovative techniques and products that cater to evolving trends and individual preferences. Our mission is to ensure that every bride in Begusarai District experiences exceptional beauty services that make her wedding day truly memorable. Q&A with Ladyfair’s Top Bridal Makeup Artist in Begusarai District, Bihar Q1: What makes Ladyfair’s bridal makeup services unique in Begusarai District? A1: Ladyfair’s at-home makeup services bring professional beauty treatments directly to the bride’s location, offering a personalized and convenient experience. Our expert makeup artist ensures that each bride’s look is tailored to her preferences and wedding theme. Q2: What bridal makeup styles does Ladyfair specialize in? A2: Ladyfair specializes in traditional, modern, and fusion bridal makeup styles. Whether you want a classic, bold look or a soft, contemporary appearance, our makeup artist can create a beautiful and personalized result. Q3: How does the at-home makeup service work? A3: The process begins with an initial phone consultation to discuss your needs. We then conduct a pre-wedding consultation and makeup trial, and on your wedding day, our makeup artist arrives at your location to provide the full makeup service. Q4: What products does Ladyfair use for bridal makeup? A4: Ladyfair uses high-quality, premium makeup products that are safe for all skin types and provide long-lasting results. Our products are selected to ensure a flawless finish and a beautiful look throughout the day. Q5: How should a bride prepare for her bridal makeup session? A5: Brides should stay hydrated, maintain a consistent skincare routine, avoid trying new skincare products close to the wedding day, and communicate their vision clearly during the consultation to ensure the best results. Q6: Can Ladyfair accommodate cultural or traditional makeup requirements? A6: Yes, Ladyfair is skilled in creating makeup looks that reflect cultural and traditional values. We can incorporate specific elements into the makeup to honor these traditions while providing a modern touch. Q7: What do past brides say about their experience with Ladyfair? A7: Brides appreciate the convenience of our at-home services, the professionalism of our makeup artist, and the quality of the makeup. Many have noted how comfortable and beautiful they felt on their wedding day. Q8: How can a bride book Ladyfair’s bridal makeup services in Begusarai? A8: Booking is simple! Call us at 7004721239 to discuss your bridal makeup needs and schedule an appointment. We’ll guide you through the process from the initial inquiry to the final makeup session on your wedding day. Q9: Does Ladyfair offer other beauty services apart from bridal makeup? A9: Yes, Ladyfair offers a variety of beauty services, including party

Posted By: 26th August 2024
Bridal Makeup Artist in Banka
Ladyfair: Premier Bridal Makeup Services in Banka District, Bihar Introduction Your wedding day is a celebration of love and beauty, and every bride deserves to look and feel her best. In Banka District, Bihar, Ladyfair is transforming the bridal makeup experience with our exclusive at-home services. Our expert team provides top-notch bridal makeup right at your doorstep, ensuring a stress-free and personalized experience on your special day. To book your appointment, call us at 7004721239. This blog highlights the importance of professional bridal makeup, what sets Ladyfair apart in Banka District, and why more brides are choosing Ladyfair for their wedding day beauty needs. The Importance of Bridal Makeup Bridal makeup is more than just applying cosmetics; it’s an art that enhances a bride’s natural features while complementing her wedding attire and accessories. On your wedding day, professional makeup ensures that you look flawless in person and in photographs, providing a confidence boost and a radiant appearance throughout the celebrations. Ladyfair understands the significance of this special occasion and offers bridal makeup services that blend traditional and modern styles to reflect each bride’s unique preferences. Why Ladyfair Stands Out in Banka District 1. Convenience of At-Home Services One of the standout features of Ladyfair’s services is the convenience of at-home makeup application. Brides in Banka District can enjoy professional makeup services without the need to travel to a salon. Our makeup artist comes to your location, allowing you to relax and enjoy the experience in the comfort of your own home. 2. Expertise in Bridal Makeup Ladyfair’s makeup artist is renowned for her skill and experience in creating stunning bridal looks. With a deep understanding of various makeup techniques and an eye for detail, she ensures that each bride’s makeup enhances her natural beauty and complements her wedding attire. Whether you prefer a classic, traditional look or a modern, stylish appearance, Ladyfair’s artist can deliver the perfect look. 3. High-Quality Products To achieve a flawless bridal look, Ladyfair uses only high-quality, premium makeup products. These products are safe for all skin types and provide long-lasting results, ensuring that your makeup remains perfect throughout your wedding day. 4. Thorough Pre-Wedding Consultations Ladyfair offers detailed pre-wedding consultations to plan your perfect bridal look. During this session, you can discuss your vision, try out different styles, and receive expert advice. This ensures that your final look aligns with your expectations and complements your wedding theme. Bridal Makeup Trends in Banka District Traditional Bridal Makeup Traditional bridal makeup remains a favorite in Banka, often featuring bold eye makeup, rich red lips, and intricate contouring. These looks are designed to enhance the bride’s features and complement her traditional wedding attire. Modern Bridal Makeup Modern bridal makeup is gaining popularity among brides in Banka who prefer a more subtle, natural look. This style focuses on enhancing the bride’s natural beauty with soft tones and minimalistic highlighting, providing a fresh and contemporary appearance. Fusion Bridal Makeup For brides who want a blend of traditional and modern styles, fusion bridal makeup offers a unique solution. This approach combines classic elements with modern techniques to create a personalized and striking look. Ladyfair’s makeup artist excels in crafting fusion looks that suit each bride’s individual style and preferences. The Ladyfair Experience: From Consultation to Final Look 1. Initial Contact: Call us at 7004721239 to discuss your bridal makeup needs and schedule an appointment. 2. Pre-Wedding Consultation: Meet with our makeup artist to discuss your desired look, review your wedding attire, and plan the makeup style that best suits you. 3. Makeup Trial: Experience a trial session to preview your bridal makeup. This allows you to make any adjustments before your wedding day. 4. Final Makeup Session: On your wedding day, our makeup artist arrives at your location to provide the full bridal makeup service, ensuring you look flawless and feel confident. 5. Post-Wedding Touch-Ups: If needed, we offer touch-up services throughout the wedding day to keep your makeup looking fresh. Client Testimonials Rita P., Banka: "Ladyfair made my wedding day truly special. The at-home service was incredibly convenient, and the makeup artist did an amazing job. I felt beautiful and confident all day long." Aarti S., Banka: "I loved the personalized approach Ladyfair offered. The makeup was perfect, and the trial session helped me feel completely comfortable with my look. I received so many compliments!" Sunita R., Banka: "The quality of Ladyfair’s products and the skill of the makeup artist exceeded my expectations. My makeup looked fresh and radiant throughout the day. Highly recommend their services." Preparing for Your Bridal Makeup Session To ensure the best results on your wedding day, follow these preparation tips: Stay Hydrated: Drink plenty of water to keep your skin hydrated and glowing. Follow a Skincare Routine: Maintain a consistent skincare regimen with cleansing, toning, and moisturizing. Avoid New Products: Stick to familiar skincare products to avoid any potential reactions. Communicate Your Vision: Clearly express your desired look and any concerns during your consultation to ensure everything is tailored to your preferences. Beyond Bridal Makeup: Ladyfair’s Additional Services In addition to bridal makeup, Ladyfair offers a variety of beauty services for different occasions: Party Makeup: Ideal for guests attending weddings, parties, and other events. Everyday Makeup: Perfect for everyday activities and casual outings. Special Occasion Makeup: Includes makeup services for engagements, anniversaries, and other significant events. Looking Ahead: The Future of Bridal Makeup in Banka District As more brides in Banka discover the benefits of Ladyfair’s at-home makeup services, the demand for personalized bridal beauty solutions continues to grow. Ladyfair is committed to expanding its reach within the district and introducing new techniques and products that cater to evolving bridal trends. Our goal is to set new standards in bridal makeup, ensuring that every bride in Banka District has access to exceptional beauty services that make their wedding day as memorable and beautiful as possible. Q1: What makes Ladyfair’s bridal makeup services unique in Banka District? A1: Ladyfair offers at-home bridal makeup services that bring professional makeup application directly to the bride’s location, providing a convenient and personalized experience. Our services are tailored to each bride’s preferences, ensuring a seamless and stress-free process on the wedding day. Q2: What bridal makeup styles does Ladyfair specialize in? A2: Ladyfair specializes in traditional, modern, and fusion bridal makeup styles. Whether you want a classic look with bold features or a contemporary, minimalist appearance, our expert makeup artist can create a stunning look that enhances your natural beauty. Q3: How does the at-home makeup service work? A3: The process starts with an initial phone consultation to discuss your needs and schedule an appointment. We then conduct a pre-wedding consultation, offer a makeup trial, and on your wedding day, our makeup artist arrives at your location to provide the full makeup service. Q4: What products does Ladyfair use for bridal makeup? A4: Ladyfair uses high-quality, premium makeup products that are safe for all skin types and offer long-lasting results. Our product selection is designed to match your skin tone and type, ensuring a flawless finish throughout the day. Q5: How should a bride prepare for her bridal makeup session? A5: Brides should stay hydrated, follow a consistent skincare routine, and avoid trying new skincare products close to the wedding day. Clear communication of your desired look during the consultation will also help ensure the makeup meets your expectations. Q6: Can Ladyfair accommodate cultural or traditional makeup requirements? A6: Yes, Ladyfair is experienced in creating makeup looks that reflect cultural and traditional values. We can incorporate specific elements into the makeup to honor these traditions while providing a modern touch. Q7: What do past brides say about their experience with Ladyfair? A7: Brides appreciate the convenience of our at-home services, the professionalism of our makeup artist, and the quality of the makeup itself. Many have expressed how comfortable and beautiful they felt on their wedding day. Q8: How can a bride book Ladyfair’s bridal makeup services in Banka? A8: Booking is easy! Simply call us at 7004721239 to discuss your bridal makeup needs and schedule an appointment. We’ll guide you through the process, from the initial inquiry to the final makeup session on your wedding day.

Posted By: 26th August 2024
Bridal Makeup Artist in Aurangabad
Ladyfair: Premier Bridal Makeup Services in Aurangabad District, Bihar Introduction Your wedding day is a momentous occasion, and looking your absolute best is essential. In Aurangabad District, Bihar, Ladyfair is redefining bridal beauty with top-notch, personalized at-home makeup services. Our expert team brings professional bridal makeup directly to your doorstep, ensuring you enjoy a relaxed and personalized experience on your special day. With Ladyfair, you can achieve a stunning bridal look without the hassle of visiting a salon. This blog delves into the significance of bridal makeup, what makes Ladyfair’s services stand out, and why brides in Aurangabad are increasingly choosing Ladyfair for their wedding day beauty needs. The Role of Bridal Makeup Bridal makeup is more than just applying cosmetics; it's an art that enhances a bride’s natural beauty while complementing her wedding attire and accessories. On your wedding day, you deserve to feel confident and look radiant. Professional bridal makeup ensures that you look flawless in person and in photographs throughout the day’s events. Ladyfair understands the unique requirements of brides in Aurangabad District. We blend traditional and contemporary makeup styles to create a look that reflects the bride’s personality and fits the cultural significance of the occasion. Why Ladyfair Stands Out in Aurangabad District 1. Convenience of At-Home Services One of the standout features of Ladyfair’s services is the convenience of at-home makeup application. Brides in Aurangabad no longer need to worry about the time and stress of traveling to a salon. Our expert makeup artist comes to your location, allowing you to enjoy your makeup session in a comfortable and private setting. 2. Expertise in Bridal Makeup Ladyfair’s makeup artist is renowned for her skill and experience in creating breathtaking bridal looks. With a deep understanding of various makeup techniques and an eye for detail, she ensures that each bride’s makeup enhances her natural features and complements her wedding attire. Whether you desire a classic, traditional look or a contemporary, stylish appearance, Ladyfair’s artist can deliver the perfect look. 3. High-Quality Products To achieve a flawless bridal look, Ladyfair uses only premium-quality makeup products that are safe for all skin types and offer long-lasting results. We choose products that match your skin tone and type to ensure a smooth and enduring finish, perfect for the long hours of your wedding day. 4. Thorough Pre-Wedding Consultations At Ladyfair, we believe that a well-planned makeup look starts with a thorough consultation. During this pre-wedding session, the bride discusses her vision, tries out different styles, and receives expert advice. This ensures that the final look aligns perfectly with the bride’s expectations and wedding theme. Bridal Makeup Trends in Aurangabad District Traditional Bridal Makeup In Aurangabad, traditional bridal makeup remains highly popular. This style often features bold eye makeup with kohl, vibrant red lips, and intricate contouring. Traditional bridal looks are designed to enhance the bride’s features and complement her ornate wedding attire. Modern Bridal Makeup Modern bridal makeup is gaining traction among brides in Aurangabad who prefer a more subtle, natural look. This style focuses on enhancing the bride’s natural beauty with soft tones, minimalistic highlighting, and a dewy finish. It’s perfect for brides who want a fresh and contemporary appearance while still honoring traditional values. Fusion Bridal Makeup For those who want a blend of both traditional and modern styles, fusion bridal makeup offers the best of both worlds. This approach combines classic elements with modern techniques to create a unique and personalized look. Ladyfair’s makeup artist is skilled in crafting fusion looks that suit each bride’s individual style and preferences. The Ladyfair Experience: From Consultation to Final Look 1. Initial Contact: Reach out to us via phone to discuss your requirements and schedule an appointment. This initial inquiry helps us understand your needs and preferences. 2. Pre-Wedding Consultation: Meet with our makeup artist for a detailed consultation. We’ll discuss your desired look, review your wedding attire, and plan the makeup style that best suits you. 3. Makeup Trial: Experience a trial session where you can preview your bridal makeup. This allows for adjustments to ensure complete satisfaction with the final look. 4. Final Makeup Session: On your wedding day, our makeup artist arrives at your location to provide the full bridal makeup service. We ensure that everything is perfect, so you look and feel your best. 5. Post-Wedding Touch-Ups: If needed, we also offer touch-up services throughout the wedding day to keep your makeup looking flawless. Client Testimonials Sita K., Aurangabad: "Ladyfair made my wedding day truly special. The at-home service was incredibly convenient, and the makeup artist did an amazing job. I felt beautiful and confident all day long." Rani J., Aurangabad: "I loved the personalized approach Ladyfair offered. The makeup was perfect, and the trial session helped me feel completely comfortable with my look. I received so many compliments!" Mina T., Aurangabad: "The quality of Ladyfair’s products and the skill of the makeup artist exceeded my expectations. My makeup looked fresh and radiant throughout the day. Highly recommend their services." Preparing for Your Bridal Makeup Session To ensure the best results on your wedding day, follow these preparation tips: Stay Hydrated: Drink plenty of water to keep your skin hydrated and glowing. Follow a Skincare Routine: Maintain a consistent skincare regimen with cleansing, toning, and moisturizing. Avoid New Products: Stick to familiar skincare products to avoid any potential reactions. Communicate Your Vision: Clearly express your desired look and any concerns during your consultation to ensure everything is tailored to your preferences. Beyond Bridal Makeup: Ladyfair’s Additional Services In addition to bridal makeup, Ladyfair offers a range of beauty services for various occasions: Party Makeup: Ideal for guests attending weddings, parties, and other events. Everyday Makeup: Perfect for everyday activities and casual outings. Special Occasion Makeup: Includes makeup services for engagements, anniversaries, and other significant events. Looking Ahead: The Future of Bridal Makeup in Aurangabad District As more brides in Aurangabad discover the benefits of Ladyfair’s at-home makeup services, the demand for personalized bridal beauty solutions continues to grow. Ladyfair is committed to expanding its reach within the district and introducing new techniques and products that cater to evolving bridal trends. Our goal is to set new standards in bridal makeup, ensuring that every bride in Aurangabad has access to exceptional beauty services that make their wedding day as memorable and beautiful as possible. Q1: What makes Ladyfair’s bridal makeup services unique in Aurangabad District? A1: Ladyfair’s at-home bridal makeup services offer unparalleled convenience, allowing brides to receive professional makeup application in the comfort of their own homes. We provide personalized services that are tailored to each bride’s preferences and ensure a seamless and stress-free experience on the wedding day. Q2: What bridal makeup styles does Ladyfair specialize in? A2: Ladyfair specializes in traditional, modern, and fusion bridal makeup styles. Whether you want a classic look with bold features or a contemporary, minimalist appearance, our expert makeup artist can create a stunning look that enhances your natural beauty. Q3: How does the at-home makeup service work? A3: The process starts with an initial phone consultation to discuss your needs and schedule an appointment. We then conduct a pre-wedding consultation, offer a makeup trial, and finally, on your wedding day, our makeup artist arrives at your location to provide the full makeup service. Q4: What products does Ladyfair use for bridal makeup? A4: Ladyfair uses high-quality, premium makeup products that are safe for all skin types and provide long-lasting results. Our product selection is designed to match your skin tone and type, ensuring a flawless finish throughout the day. Q5: How should a bride prepare for her bridal makeup session? A5: Brides should stay hydrated, follow a consistent skincare routine, and avoid trying new skincare products close to the wedding day. Clear communication of your desired look during the consultation will also help ensure the makeup meets your expectations. Q6: Can Ladyfair accommodate cultural or traditional makeup requirements? A6: Yes, Ladyfair is experienced in creating makeup looks that reflect cultural and traditional values. We can incorporate specific elements into the makeup to honor these traditions while providing a modern touch. Q7: What do past brides say about their experience with Ladyfair? A7: Brides appreciate the convenience of our at-home services, the

Posted By: 26th August 2024
Best Bridal Makeup in Arwal
Ladyfair: Elevating Bridal Beauty in Arwal District, Bihar Introduction Weddings are one of the most significant milestones in a person’s life, and for the bride, looking and feeling her best is paramount. In the culturally rich district of Arwal, Bihar, Ladyfair is setting a new standard in bridal beauty by offering top-tier, personalized at-home makeup services. With a deep understanding of both traditional and contemporary bridal makeup styles, Ladyfair ensures that every bride in Arwal can achieve her dream look without the stress of visiting a salon. This blog explores the essential role of bridal makeup, the expertise Ladyfair brings to the table, and why brides in Arwal are choosing Ladyfair for their big day. The Importance of Bridal Makeup Bridal makeup is not just about applying makeup products; it’s an art that highlights a bride’s best features while complementing her attire and jewelry. A bride’s makeup needs to last through the day’s events, from the early morning rituals to the late-night celebrations, all while looking flawless in photos and in person. In a region like Arwal, where traditions are deeply valued, the makeup must align with the cultural aesthetics while also incorporating the bride’s personal style. Ladyfair understands these unique needs and brings a blend of tradition and modernity to every bridal look, ensuring that the bride looks radiant, confident, and beautiful. Why Choose Ladyfair in Arwal? 1. Personalized At-Home Services One of the biggest advantages Ladyfair offers is the convenience of at-home services. Brides no longer have to travel to a salon on their wedding day, which can be both time-consuming and stressful. Instead, Ladyfair’s expert makeup artist arrives at the bride’s home, fully equipped to provide a serene, personalized makeup experience. This at-home service allows brides to relax and enjoy the process in the comfort of their own space. 2. Expertise in Bridal Makeup Ladyfair’s makeup artist is not only skilled in applying makeup but also in understanding the specific needs of bridal clients. With years of experience and a keen eye for detail, the makeup artist can tailor the makeup to suit the bride’s skin type, facial features, and the overall theme of the wedding. Whether the bride wants a traditional look with bold eyes and deep reds or a modern, minimalist style, Ladyfair can deliver with precision and creativity. 3. Use of High-Quality Products Quality is paramount when it comes to bridal makeup. Ladyfair uses only the best products that are safe for the skin, long-lasting, and capable of withstanding the demands of a wedding day. The products used are carefully selected to match the bride’s skin tone and type, ensuring a flawless finish that lasts throughout the day. 4. Comprehensive Pre-Wedding Consultations Ladyfair understands that every bride has a unique vision for her wedding day. To ensure this vision is realized, Ladyfair offers comprehensive pre-wedding consultations. During these sessions, the bride can discuss her preferences, try out different looks, and receive expert advice on what will work best for her. This consultation ensures that there are no surprises on the wedding day and that the bride feels confident in her makeup choice. Bridal Makeup Trends in Arwal District Traditional Bridal Makeup In Arwal, traditional bridal makeup remains a popular choice, reflecting the district’s rich cultural heritage. Traditional makeup often features bold, defined eyes with kohl, vibrant lip colors, and intricate contouring that highlights the bride’s facial features. Gold and red hues are commonly used to complement the traditional bridal attire, creating a timeless and elegant look. Modern Bridal Makeup While traditional looks are favored, there is a growing trend among brides in Arwal towards more modern, understated makeup styles. Modern bridal makeup tends to focus on enhancing the bride’s natural beauty with softer tones, subtle highlighting, and a dewy finish. This style is particularly popular among younger brides who want a fresh, contemporary look that still respects traditional values. Fusion Bridal Makeup For brides who want the best of both worlds, fusion bridal makeup combines elements of traditional and modern styles. This approach allows for creative expression, blending bold colors with minimalist techniques to create a look that is both unique and culturally significant. Ladyfair’s makeup artist excels in creating fusion looks that are tailored to each bride’s individual preferences. The Ladyfair Experience: Step-by-Step 1. Initial Inquiry: The journey begins with a simple phone call to Ladyfair. Brides can discuss their needs, schedule an appointment, and ask any initial questions about the services offered. 2. Pre-Wedding Consultation: Ladyfair’s makeup artist meets with the bride to discuss her vision for the wedding day. This consultation includes a review of the wedding attire, an assessment of the bride’s skin type, and a discussion of different makeup styles that could complement the overall wedding theme. 3. Makeup Trial: To ensure the bride is completely satisfied with her makeup on the wedding day, Ladyfair offers a makeup trial. During this session, the makeup artist applies the chosen look, allowing the bride to see how it will appear on the big day. Any adjustments can be made at this stage to ensure perfection. 4. Final Session: On the wedding day, the makeup artist arrives at the bride’s location well-prepared to execute the final look. The process is seamless, allowing the bride to enjoy her day without worrying about her makeup. 5. Post-Wedding Services: Ladyfair also offers touch-up services if needed throughout the wedding day, ensuring the bride’s makeup remains flawless from start to finish. Testimonials: What Brides in Arwal Are Saying Priya S., Arwal: "I was so nervous about my bridal makeup, but Ladyfair’s artist put me at ease right from the consultation. The trial session was incredibly helpful, and on my wedding day, the makeup was perfect—it lasted all day, and I felt beautiful!" Anita R., Arwal: "The convenience of at-home services was a game-changer for me. I didn’t have to worry about traveling to a salon on my wedding day, and the makeup artist was so professional and talented. I highly recommend Ladyfair to any bride in Arwal." Kavita M., Arwal: "Ladyfair really understood what I wanted for my wedding day. The makeup was a perfect blend of traditional and modern elements, and I received so many compliments. I couldn’t have asked for a better experience." Preparing for Your Bridal Makeup Session To ensure the best results on your wedding day, it’s important to prepare your skin in the weeks leading up to your bridal makeup session. Here are some tips from Ladyfair: Hydrate: Drinking plenty of water helps keep your skin hydrated and glowing. Skincare Routine: Stick to a consistent skincare routine that includes cleansing, toning, and moisturizing. This helps create a smooth canvas for makeup application. Avoid New Products: Don’t introduce new skincare products close to your wedding day to avoid potential reactions. Communicate: Clearly communicate your desired look and any specific concerns to the makeup artist during your consultation. Why Ladyfair is the Best Choice for Brides in Arwal Convenience and Comfort Ladyfair’s at-home services offer unparalleled convenience, allowing brides to prepare for their big day in the comfort of their own homes. This eliminates the stress of traveling to a salon and provides a more personalized experience. Tailored Services Every bride is unique, and Ladyfair takes pride in offering tailored services that reflect the individual preferences and needs of each client. Whether it’s a traditional look, a modern style, or a fusion of both, Ladyfair ensures that the makeup is a perfect match for the bride’s vision. Quality and Expertise With a commitment to using high-quality products and employing expert techniques, Ladyfair guarantees a flawless finish that lasts throughout the wedding day. The makeup artist’s expertise ensures that the bride looks radiant in person and in photographs, capturing the beauty of the moment. Beyond Bridal Makeup: Ladyfair’s Full Range of Beauty Services While bridal makeup is Ladyfair’s specialty, the brand also offers a variety of other beauty services that cater to different needs: Party Makeup: Ideal for wedding guests, engagement parties, and other special occasions. Everyday Makeup: Perfect for women who want to look their best for everyday activities. Special Occasion Services: Includes makeup for anniversaries, engagements, and other important events. The Future of Bridal Makeup in Arwal District As more brides in Arwal discover the convenience and quality of Ladyfair’s at-home bridal makeup services, the demand continues to grow. Ladyfair is committed to expanding its reach within the district, ensuring that more brides can experience the exceptional service that has made it a trusted name in bridal beauty. With a focus on innovation, Ladyfair plans to introduce new makeup techniques and products that cater to the evolving tastes of modern brides while respecting traditional values. The goal is to continue setting new standards in bridal makeup, making Ladyfair the go-to choice for brides in Arwal District and beyond. Q1: What makes Ladyfair’s bridal makeup services unique in Arwal District? A1: Ladyfair offers personalized at-home bridal makeup services, which means brides don’t have to worry about traveling to a salon on their wedding day. Our makeup artist brings everything needed right to the bride’s doorstep, ensuring a stress-free and comfortable experience. We focus on creating looks that are tailored to each bride’s preferences, blending traditional and modern styles to achieve the perfect look. Q2: What kind of bridal makeup styles does Ladyfair specialize in? A2: Ladyfair specializes in a range of bridal makeup styles, including traditional, modern, and fusion looks. Whether you want a classic look with bold eyes and rich reds or a more contemporary, minimalist style, we can create a look that enhances your natural beauty and complements your wedding attire. Q3: How does the at-home makeup service work? A3: The process is simple and convenient. First, you schedule an appointment by calling us. Then, we have a pre-wedding consultation to discuss your vision for the big day. We also offer a makeup trial session, so you can see exactly how you’ll look on your wedding day. On the day itself, our makeup artist arrives at your location to provide the full makeup service, ensuring everything is perfect. Q4: What kind of products does Ladyfair use for bridal makeup? A4: We use only high-quality, premium products that are safe for all skin types and provide long-lasting results. Our product selection is tailored to match your skin tone and type, ensuring a flawless finish that will last throughout your wedding day. Q5: How can a bride prepare for her bridal makeup session? A5: We recommend starting with good skincare habits a few weeks before the wedding. Keep your skin hydrated, follow a consistent skincare routine, and avoid trying new products close to the big day to prevent any adverse reactions. During your consultation, we’ll discuss your desired look and any specific concerns to ensure everything goes smoothly on your wedding day. Q6: Can Ladyfair accommodate specific cultural or traditional makeup requirements? A6: Absolutely. We understand that cultural and traditional elements are important to many brides in Arwal, and we are well-versed in creating looks that honor these traditions. Whether you want a traditional bridal look or something that blends cultural elements with modern trends, we can tailor our services to meet your needs. Q7: What do past brides say about their experience with Ladyfair? A7: Our brides often comment on the convenience of our at-home services, the professionalism of our makeup artist, and the quality of the makeup itself. Many have expressed how comfortable and beautiful they felt on their wedding day, thanks to the personalized attention and expert techniques we provide. Q8: How can a bride book Ladyfair’s bridal makeup services in Arwal? A8: Booking is easy! Simply call us at the provided phone number to discuss your needs and schedule a consultation. We’ll guide you through the process, from the initial inquiry to the final makeup session on your wedding day. Q9: Does Ladyfair offer other beauty services apart from bridal makeup? A9: Yes, Ladyfair offers a variety of beauty services, including makeup for parties, special occasions, and everyday looks. Whether you’re attending a wedding as a guest, celebrating an engagement, or just want to look your best for a special event, we have services that cater to all your beauty needs.

Posted By: 26th August 2024
Bridal Makeup in Araria
Ladyfair : Bringing the Best Bridal Makeup to Your Doorstep in Araria Introduction Every bride wants to look her absolute best on her wedding day, and in Araria, Ladyfair is making that dream a reality. Specializing in at-home bridal makeup services, Ladyfair is transforming the beauty industry by offering top-tier, personalized makeup experiences in the comfort of your own home. No more stressful trips to the salon on your big day—Ladyfair’s expert makeup artist comes to you, ensuring a flawless, stress-free bridal look that will leave you glowing from the first photo to the last dance. Why Bridal Makeup Matters Bridal makeup is more than just applying a few products; it’s an art form that requires skill, creativity, and a deep understanding of the bride's unique features. On her wedding day, a bride deserves to feel confident, beautiful, and truly special. Professional bridal makeup enhances natural beauty, complements the wedding attire, and ensures the bride looks stunning in person and in photos. Ladyfair understands the importance of this occasion and is dedicated to providing exceptional makeup services that are tailored to each bride’s vision. Ladyfair’s At-Home Bridal Makeup Services in Araria Ladyfair offers a comprehensive range of bridal makeup services, all delivered directly to your home. Whether you’re seeking a traditional look that celebrates the rich cultural heritage of Araria or a more contemporary style, Ladyfair’s services are designed to meet your every need. Here’s what you can expect: Custom Bridal Makeup: Personalized to match your style, ensuring you look exactly how you envisioned on your wedding day. Pre-Wedding Consultations: Discuss your desired look with Ladyfair’s expert makeup artist, who will provide advice and suggestions to achieve the perfect result. Makeup Trials: Experience a trial session to see your bridal makeup come to life before the big day, ensuring complete satisfaction. High-Quality Products: We use only premium makeup products that are safe for your skin and provide long-lasting results, perfect for all-day wear. Meet Araria’s Top Makeup Artist The success of Ladyfair in Araria is driven by our top makeup artist, known for her exceptional skills in creating stunning bridal looks. With years of experience and a deep understanding of various skin types and makeup techniques, she crafts personalized looks that enhance each bride’s natural beauty. Her expertise allows her to deliver both traditional and modern styles, ensuring that every bride feels confident and radiant on her wedding day. Booking Your Bridal Makeup with Ladyfair Booking your bridal makeup with Ladyfair is simple and convenient: Initial Inquiry: Contact us via phone at 7004721239 to discuss your needs and schedule an appointment. Consultation: Meet with our makeup artist for a detailed consultation to discuss your desired look, review your wedding attire, and plan the makeup style that best suits you. Makeup Trial: Experience a trial session where you can see your bridal makeup come to life, allowing you to make any adjustments before the big day. Final Session: On your wedding day, our makeup artist will arrive at your location to provide the full bridal makeup service, ensuring you look flawless and feel confident. Popular Bridal Makeup Trends in Araria In Araria, traditional bridal looks with bold, defined eyes, rich lips, and intricate contouring remain popular. However, modern trends are also gaining traction, with many brides opting for softer, more natural makeup that highlights their features without overpowering them. Ladyfair’s makeup artist is skilled in both traditional and contemporary styles, ensuring that every bride’s makeup aligns with her personal taste and the theme of her wedding. Why Choose Ladyfair for Your Bridal Makeup? Ladyfair’s at-home bridal makeup services offer numerous benefits that set us apart from the competition: Convenience: No need to travel to a salon on your wedding day. Our makeup artist comes to you, allowing you to relax and enjoy the experience in your own space. Personalization: Every bride is unique, and so is her makeup. We tailor our services to match your skin tone, facial features, and personal style. Quality Assurance: We use premium products and tools to ensure your makeup looks flawless and lasts all day. Customer Satisfaction: Our commitment to excellence has earned us a reputation for delivering beautiful results and exceptional customer service. Q&A with Ladyfair’s Top Makeup Artist in Araria Q1: What inspired you to become a bridal makeup artist? A1: I've always been passionate about beauty and artistry, and helping brides feel their best on such an important day is incredibly fulfilling. Seeing a bride’s reaction when she sees herself for the first time on her wedding day is what drives me to continually improve my craft. Q2: How do you create a personalized look for each bride? A2: I start by having a detailed consultation with each bride, where we discuss her vision, style preferences, and any specific concerns. I also consider her skin tone, facial features, and wedding attire to create a look that enhances her natural beauty and fits her unique style. Q3: What are some of the most popular bridal makeup trends in Araria? A3: Traditional bridal makeup, with bold eyes and vibrant lips, is always in demand. However, more brides are now opting for natural, understated looks that highlight their best features without being too dramatic. Both styles are popular, and I’m adept at creating both, depending on what the bride wants. Q4: How do you handle the stress of wedding day time constraints? A4: Preparation is crucial. I make sure to do a thorough consultation and trial beforehand, so there are no surprises on the wedding day. I arrive early and work efficiently, creating a calm, stress-free environment for the bride. Q5: What kind of makeup products do you use? A5: I use only high-quality, professional-grade products that are safe for all skin types and offer long-lasting results. This includes products known for their durability, pigmentation, and compatibility with different skin tones, ensuring the bride’s makeup stays perfect throughout the day. Q6: How do you stay updated with the latest makeup trends and techniques? A6: I regularly attend workshops, follow top makeup artists, and constantly practice new techniques. I also experiment with different products and tools to find what works best for various skin types and styles, ensuring my brides always receive the best possible service. Q7: Can you accommodate specific requests, like sensitive skin or allergies? A7: Yes, during the consultation, I discuss any skin sensitivities, allergies, or specific concerns the bride may have. I select products that are hypoallergenic and suitable for her skin type, and I offer customized skincare advice leading up to the wedding. Q8: What do you enjoy most about working with brides in Araria? A8: I love the rich cultural traditions of Araria, and I enjoy the diversity in bridal styles, from traditional to modern. The connections I build with my brides and knowing that I’ve contributed to making their day special are what I find most rewarding. Q9: How do you ensure the bride’s makeup lasts all day? A9: I use a combination of long-wear, waterproof products and techniques like layering and setting with high-quality powders and sprays. This ensures the makeup remains fresh and vibrant throughout the day, no matter what activities or weather conditions are involved. Q10: What advice would you give brides preparing for their makeup session? A10: Start with a consistent skincare routine a few weeks before the wedding. Stay hydrated, avoid trying new products close to the big day, and communicate your desired look clearly during your consultation. On the day of, just relax and trust the process—we’re here to make sure you look and feel your best. Testimonials from Brides in Araria "I couldn’t have been happier with my bridal makeup from Ladyfair. The makeup artist listened to my ideas and made me look exactly how I had imagined. The at-home service made everything so much easier on the day of the wedding." – Anjali "Ladyfair made my wedding day so special. The makeup artist was professional, talented, and the convenience of the at-home service was unbeatable. My makeup lasted all day, and I received so many compliments." – Roshni

Posted By: 25th August 2024
Bridal Makeup Artist in Darbhanga
Ladyfair: Transforming Bridal Beauty with At-Home Makeup Services in Darbhanga Introduction Every bride dreams of looking her absolute best on her wedding day. The journey to that perfect bridal look is a combination of expert artistry, high-quality products, and a deep understanding of the bride's vision. In the vibrant city of Darbhanga, Ladyfair is setting new standards in bridal beauty by offering premium at-home makeup services that cater to the unique needs of each bride. With Ladyfair, you don’t have to worry about the hassle of traveling to a salon on your big day. Instead, our top makeup artists come to you, ensuring a personalized, stress-free experience in the comfort of your own home. For brides in Darbhanga, Ladyfair is the go-to choice for flawless bridal makeup. To book your session, simply call 7004721239. The Importance of Professional Bridal Makeup Bridal makeup is not just about enhancing beauty; it's about creating a look that reflects the bride's personality, complements her outfit, and stands up to the emotional and physical demands of the day. A professional bridal makeup artist understands these nuances and knows how to bring out the best in each bride. Ladyfair’s makeup artists are skilled in working with different skin tones, textures, and facial features, ensuring that every bride in Darbhanga looks and feels her best on her wedding day. Why At-Home Bridal Makeup Services? In a city as lively as Darbhanga, where wedding preparations are often a family affair, the convenience of at-home services cannot be overstated. Traveling to a salon can be time-consuming and stressful, especially on the morning of your wedding. With Ladyfair’s at-home services, brides can relax and enjoy their special day without the added worry of salon appointments and transportation logistics. Key Benefits of At-Home Services: Comfort and Convenience: Enjoy a luxurious makeup session in the comfort of your own home. Time-Saving: Eliminate travel time and avoid the stress of running late. Personalized Attention: Our makeup artists focus solely on you, tailoring every detail to your preferences. Ladyfair’s Bridal Makeup Services in Darbhanga Ladyfair offers a range of bridal makeup services designed to cater to the diverse needs of brides in Darbhanga. Whether you’re envisioning a traditional look steeped in cultural heritage or a modern, trendy style, our makeup artists have the expertise to bring your vision to life. Services Offered: Custom Bridal Makeup: Tailored to your style, our artists create a look that complements your outfit, jewelry, and overall wedding theme. Pre-Wedding Consultations: Discuss your desired look with our experts and receive personalized advice on achieving the perfect result. Makeup Trials: Experience a trial session to ensure complete satisfaction before your wedding day. High-Quality Products: We use only top-tier products that are safe for your skin and provide long-lasting, photo-ready results. Meet the Top Makeup Artists in Darbhanga Ladyfair prides itself on having some of the best makeup artists in the industry. Our professionals are not just makeup artists; they are bridal beauty experts with years of experience in creating stunning, personalized looks for brides. They are well-versed in the latest makeup techniques and trends, ensuring that every bride they work with feels confident and beautiful. Why Choose Our Artists? Experience: Our makeup artists have extensive experience in bridal makeup, ensuring flawless execution on your big day. Attention to Detail: Every aspect of your makeup is carefully planned and executed to perfection. Client Satisfaction: Our artists are committed to making sure you are completely satisfied with your look. Book Your Bridal Makeup Today: To book your bridal makeup session with Ladyfair in Darbhanga, call 7004721239. Our team is ready to help you look your best on the most important day of your life. Popular Bridal Makeup Trends in Darbhanga Bridal makeup trends in Darbhanga reflect a blend of traditional elegance and contemporary flair. Here are some of the popular styles that our makeup artists specialize in: Traditional Bridal Looks: Bold eyes, rich red lips, and intricate contouring are the hallmarks of a traditional bridal look in Darbhanga. These looks are often paired with heavy jewelry and richly adorned outfits. Natural and Subtle Makeup: For brides who prefer a more understated look, natural makeup that highlights their features without being overpowering is a popular choice. This trend focuses on a fresh, dewy complexion, soft eye makeup, and nude lips. Contemporary Bridal Styles: Modern brides in Darbhanga are increasingly opting for makeup styles that incorporate the latest trends. Think soft smokey eyes, metallic highlights, and ombre lips. Why Choose Ladyfair for Your Bridal Makeup? When it comes to your wedding day, you deserve nothing but the best. Ladyfair offers a unique combination of convenience, quality, and personalized service that sets us apart from other makeup providers in Darbhanga. Top Reasons to Choose Ladyfair: Expertise: Our makeup artists are highly skilled and experienced, ensuring you receive the best service possible. Convenience: We come to you, providing a stress-free, comfortable experience on your wedding day. Personalized Service: Every bride is unique, and so is our approach. We tailor our services to match your individual style and preferences. High-Quality Products: We use only premium makeup products that deliver long-lasting, beautiful results. Real Brides, Real Stories: Testimonials from Darbhanga Brides At Ladyfair, we take pride in the satisfaction of our brides. Here are some testimonials from brides in Darbhanga who trusted Ladyfair for their bridal makeup: "I was thrilled with how my bridal makeup turned out. The artist was professional and really listened to what I wanted. My makeup stayed perfect throughout the entire day, and I received so many compliments." – Pooja "Booking Ladyfair for my bridal makeup was the best decision. The artist arrived on time, was incredibly skilled, and made me look and feel beautiful on my wedding day." – Kriti sriwasta "I wanted a natural look for my wedding, and Ladyfair’s makeup artist nailed it. The whole process was smooth and stress-free. I couldn’t have asked for more." – Pragati Preparing for Your Bridal Makeup Session in Darbhanga To ensure the best results on your wedding day, it’s important to prepare in advance. Here are some tips to help you get ready for your bridal makeup session with Ladyfair: Start a Skincare Routine Early: Begin a consistent skincare routine several months before your wedding. Focus on cleansing, exfoliating, moisturizing, and protecting your skin with SPF. Hydrate: Drink plenty of water in the weeks leading up to your wedding to keep your skin hydrated and glowing. Avoid New Products: Stick to products you know work well with your skin. Avoid trying new skincare or makeup products close to your wedding to prevent potential reactions. Communicate Your Preferences: During your consultation, clearly communicate your desired look to the makeup artist. Bring photos for reference and discuss any specific concerns you may have. Beyond Bridal: Ladyfair’s Full Range of Beauty Services in Darbhanga In addition to bridal makeup, Ladyfair offers a variety of beauty services to cater to different occasions. Whether you’re attending a wedding as a guest, celebrating an engagement, or just want to look your best for a special event, Ladyfair has you covered. Additional Services Offered: Party Makeup: Perfect for weddings, parties, or any special occasion where you want to look your best. Everyday Makeup: Enhance your natural beauty with our professional everyday makeup services. Special Occasion Services: Makeup for engagements, anniversaries, and other important events. The Future of Bridal Makeup Services in Darbhanga The demand for at-home beauty services is growing rapidly in Darbhanga, and Ladyfair is at the forefront of this trend. We are committed to expanding our services, continuously improving our offerings, and setting new standards in bridal beauty. As more brides in Darbhanga discover the convenience and quality of Ladyfair’s at-home services, we expect to see even greater demand and growth in the coming years.
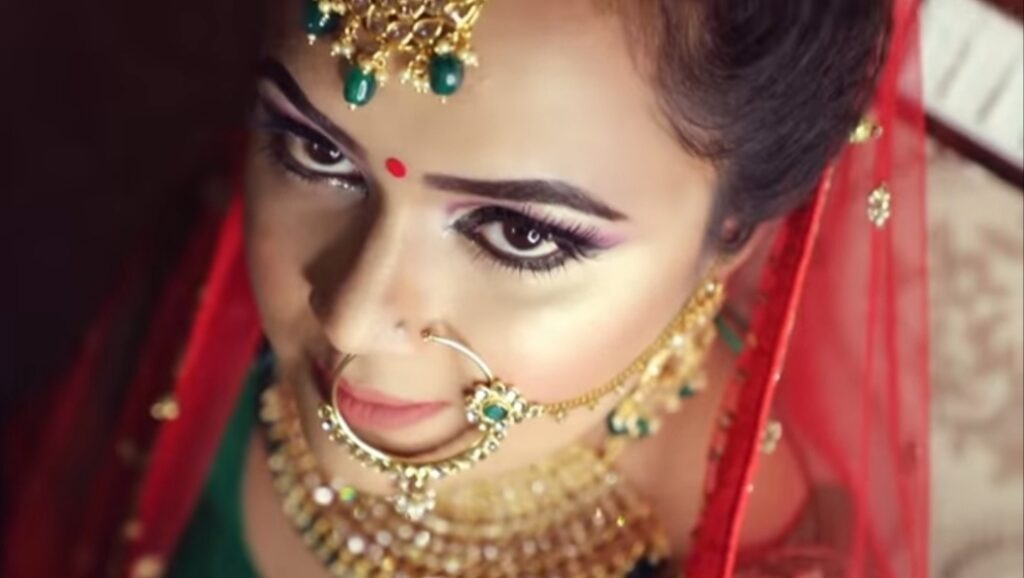
Posted By: 25th August 2024
Makeup Artist in Sitamarhi
Ladyfair: Transforming Bridal Beauty in Sitamarhi with At-Home Makeup Services Introduction Every bride dreams of looking flawless on her wedding day, and in Sitamarhi, Ladyfair is making that dream a reality. Specializing in bridal makeup services delivered right to your doorstep, Ladyfair is revolutionizing the way brides prepare for their big day. With the convenience of at-home services, brides can now enjoy a stress-free, personalized experience in the comfort of their own homes. Ladyfair’s top makeup artist is available to help you achieve your perfect bridal look, and you can book your appointment today by calling 7004721239. The Significance of Bridal Makeup Bridal makeup is more than just a few swipes of lipstick and blush; it’s an art that requires precision, creativity, and an understanding of the bride's unique features. On her wedding day, a bride deserves to look and feel her best, and professional bridal makeup plays a crucial role in achieving that. Ladyfair understands the significance of this special occasion and is dedicated to providing the highest quality makeup services that enhance the bride’s natural beauty while complementing her attire and jewelry. Ladyfair’s Bridal Makeup Services Ladyfair offers a comprehensive range of bridal makeup services designed to meet the diverse needs of brides in Sitamarhi. Whether you're looking for a traditional look that reflects the rich cultural heritage of the region or a modern style that incorporates the latest trends, Ladyfair has you covered. The services include: Custom Bridal Makeup: Tailored to your individual style and preferences, ensuring you look exactly how you envisioned on your wedding day. Pre-Wedding Consultations: Discuss your desired look with our expert makeup artist, who will offer advice and suggestions to achieve the perfect result. Makeup Trials: Get a preview of your bridal makeup to ensure complete satisfaction before the big day. High-Quality Products: We use only the best makeup products that are safe for your skin and provide long-lasting results, perfect for all-day wear. Meet the Makeup Artist: Sitamarhi’s Best At the heart of Ladyfair’s success in Sitamarhi is our top makeup artist, known for her exceptional skills in bridal makeup. With years of experience in the beauty industry, she has mastered the art of creating stunning bridal looks that make every bride shine. Her expertise includes a deep understanding of different skin types, facial features, and makeup techniques, allowing her to craft personalized looks that enhance the bride’s natural beauty. Contact Information: To book your bridal makeup session with Ladyfair’s top makeup artist, call 7004721239 today. The Process: Booking Your Bridal Makeup with Ladyfair Booking your bridal makeup with Ladyfair is a simple and straightforward process designed to make your experience as stress-free as possible: Initial Inquiry: Contact us via phone at 7004721239 to discuss your needs and schedule an appointment. Consultation: Meet with our makeup artist for a detailed consultation to discuss your desired look, review your wedding attire, and plan the makeup style that best suits you. Makeup Trial: Experience a trial session where you can see your bridal makeup come to life. This allows you to make any adjustments before the big day. Final Session: On your wedding day, our makeup artist will arrive at your location to provide the full bridal makeup service, ensuring you look flawless and feel confident. Popular Bridal Makeup Trends in Sitamarhi Sitamarhi is a town rich in tradition, and this is often reflected in the bridal makeup choices of local brides. Traditional bridal looks that incorporate bold, defined eyes, rich red lips, and intricate contouring are perennial favorites. However, modern trends are also making their mark, with many brides opting for more subtle, natural makeup that highlights their features without overpowering them. Ladyfair’s makeup artist is skilled in both traditional and contemporary styles, ensuring every bride’s makeup aligns with her personal taste and the theme of her wedding. Why Choose Ladyfair for Your Bridal Makeup? Ladyfair’s at-home bridal makeup services offer numerous benefits that set us apart from the competition: Convenience: No need to travel to a salon on your wedding day. Our makeup artist comes to you, allowing you to relax and enjoy the experience in your own space. Personalization: Every bride is unique, and so is her makeup. We tailor our services to match your skin tone, facial features, and personal style. Quality Assurance: We use premium products and tools to ensure your makeup looks flawless and lasts all day. Customer Satisfaction: Our commitment to excellence has earned us a reputation for delivering beautiful results and exceptional customer service. Testimonials: What Brides Are Saying About Ladyfair Our brides love the convenience, professionalism, and stunning results they get from Ladyfair. Here’s what some of them have to say: "I was so nervous about my bridal makeup, but Ladyfair’s makeup artist made me feel so comfortable. The trial session was amazing, and on the day of my wedding, I looked exactly how I had always imagined." – Nisha "Ladyfair made my wedding day stress-free. The makeup artist was on time, professional, and incredibly skilled. My makeup lasted all day, and I received so many compliments." – Sheema Preparing for Your Bridal Makeup Session To ensure the best results on your wedding day, it’s important to prepare your skin in the weeks leading up to your bridal makeup session. Here are some tips: Hydrate: Drink plenty of water to keep your skin hydrated and glowing. Skincare Routine: Follow a consistent skincare routine that includes cleansing, toning, and moisturizing. Avoid New Products: Don’t try new skincare products close to your wedding day to avoid potential reactions. Communicate: Clearly communicate your desired look and any specific concerns to the makeup artist during your consultation. Beyond Bridal: Ladyfair’s Full Range of Beauty Services While bridal makeup is our specialty, Ladyfair also offers a variety of other beauty services that cater to different needs: Party Makeup: Perfect for guests attending weddings, parties, or special events. Everyday Makeup: Ideal for women who want to look their best for everyday activities. Special Occasion Services: Includes makeup for engagements, anniversaries, and other important events. The Future of Bridal Makeup Services in Sitamarhi As more brides in Sitamarhi and surrounding areas discover

Posted By: 26th July 2024
How to Maintain Healthy Hair in Different Seasons
Your outfit, Starbucks order, candle rotation, and more alter as we see a tiny chill in the air or the first traces of leaves turning. In the same way, cold weather causes your skin to become dry and damaged, the shift of seasons can also affect your hair. The most common symptoms include dryness, breakage, and brittle strands. Ladyfair chatted with three hairstylists and a trichologist about how to care for hair when temperatures rise. What transpires with your scalp and hair in these transitional months? According to certified trichologist Shayna Simone, seasonal hair loss usually occurs in the late summer to early fall, when the weather seems to shift dramatically and cools off for the first time following months of heat. "Seasonal hair loss occurs when the scalp and hair follicles are stressed by temperature changes, causing hair to come out more quickly than usual. Approximately 100 hairs each day are shed normally." Like our skin, as the temperature drops, our hair can get dry, which can have several negative effects, like making it seem brittle and drab. Among the several problems that might happen to dry hair, "ends will often split, giving the perimeter of the hair a “wispy” uneven appearance," explains Leslie Welton, a part-time hairstylist. Style is often a challenge. Breakage and a "fuzzy" texture could be present. Do some textures or varieties of hair get more damage from changing seasons than others? Each type of hair responds to the seasons differently, with humidity being identified as "the main contributing factor." "Heavy humidity causes frizz and expansion in thick, coarse, curly hair, making it more challenging to manage and style."This kind of hair is readily "undone" by the moisture in the air when it is straightened, so a sleek blowout won't remain as long as it would in colder, less humid conditions. "High humidity can have the opposite effect on fine or straight hair."Straight, fine hair can become limp and flat to the head due to the moisture in the air, making voluminous styles more difficult to achieve. Which hair care products are best for promoting healthy hair during times of transition? It should be noted that a combination of moisturizing shampoo and conditioner might help minimize dryness that certain people may experience in the winter. People who highlight their hair are more vulnerable to damage, so they must take extra precautions to guard against it. To attain healthy hair, moisturizing hair conditioning masks and heat protectants work wonders. Also Read : Essential skincare and hairstyling tips for men Wintertime Hair Health Advice Try these hair care suggestions for wintertime hair health: Consider using a chemical-free hydrating hair wash. To keep your hair hydrated, wash it less frequently. Refrain from styling your hair with the equipment. Shield your scalp and hair from pollution and the sun's damaging radiation. For greater results, try using natural home remedies on your hair. Springtime Hair Health Advice Try these hair care suggestions to improve the health and growth of your hair in the spring for healthy hair: See your stylist to have your split ends taken off in addition to receiving a lovely haircut. Try air-drying your hair instead of blow-drying it. For silky smooth hair, treat your hair strands with the greatest conditioner available. Include an anti-frizz serum in your hair care regimen if your hair is frizzy. Make an investment in organic products to achieve healthier hair. Tips for Summertime Hair Health To promote hair development, use the best hair care products. Put on items with UV protection. To shield your hair from dirt and the sun, wear a cap or scarf. Steer clear of excessive chlorine. Select hair accessories that fit your hair loosely and comfortably. Also Check : How to Choose the Right Haircut for Your Face Shape Autumnal Hair Health Advice It is rather common to experience some hair shedding in the fall, often called seasonal hair loss. You merely need to maintain your hair clean and moisturized as usual if you're having problems with hair loss during this season. You may have healthy hair in the fall by using the hair care advice listed below: To prevent split ends, have your hair trimmed frequently. Give your hair a hydrating treatment regularly. Make use of chemical-free hair care products that support healthy hair. In summary: With the advice above, you can maintain the health and beauty of your hair in every season. Thanks to chemical-free treatments, you can now be sure that your hair is healthy no matter the season. Additionally, remember that brushing your hair is essential to preventing hair loss. Try not to brush it too often or too firmly. Include no chemical products in your regular hair care regimen for greater self-assurance and a more appealing appearance.
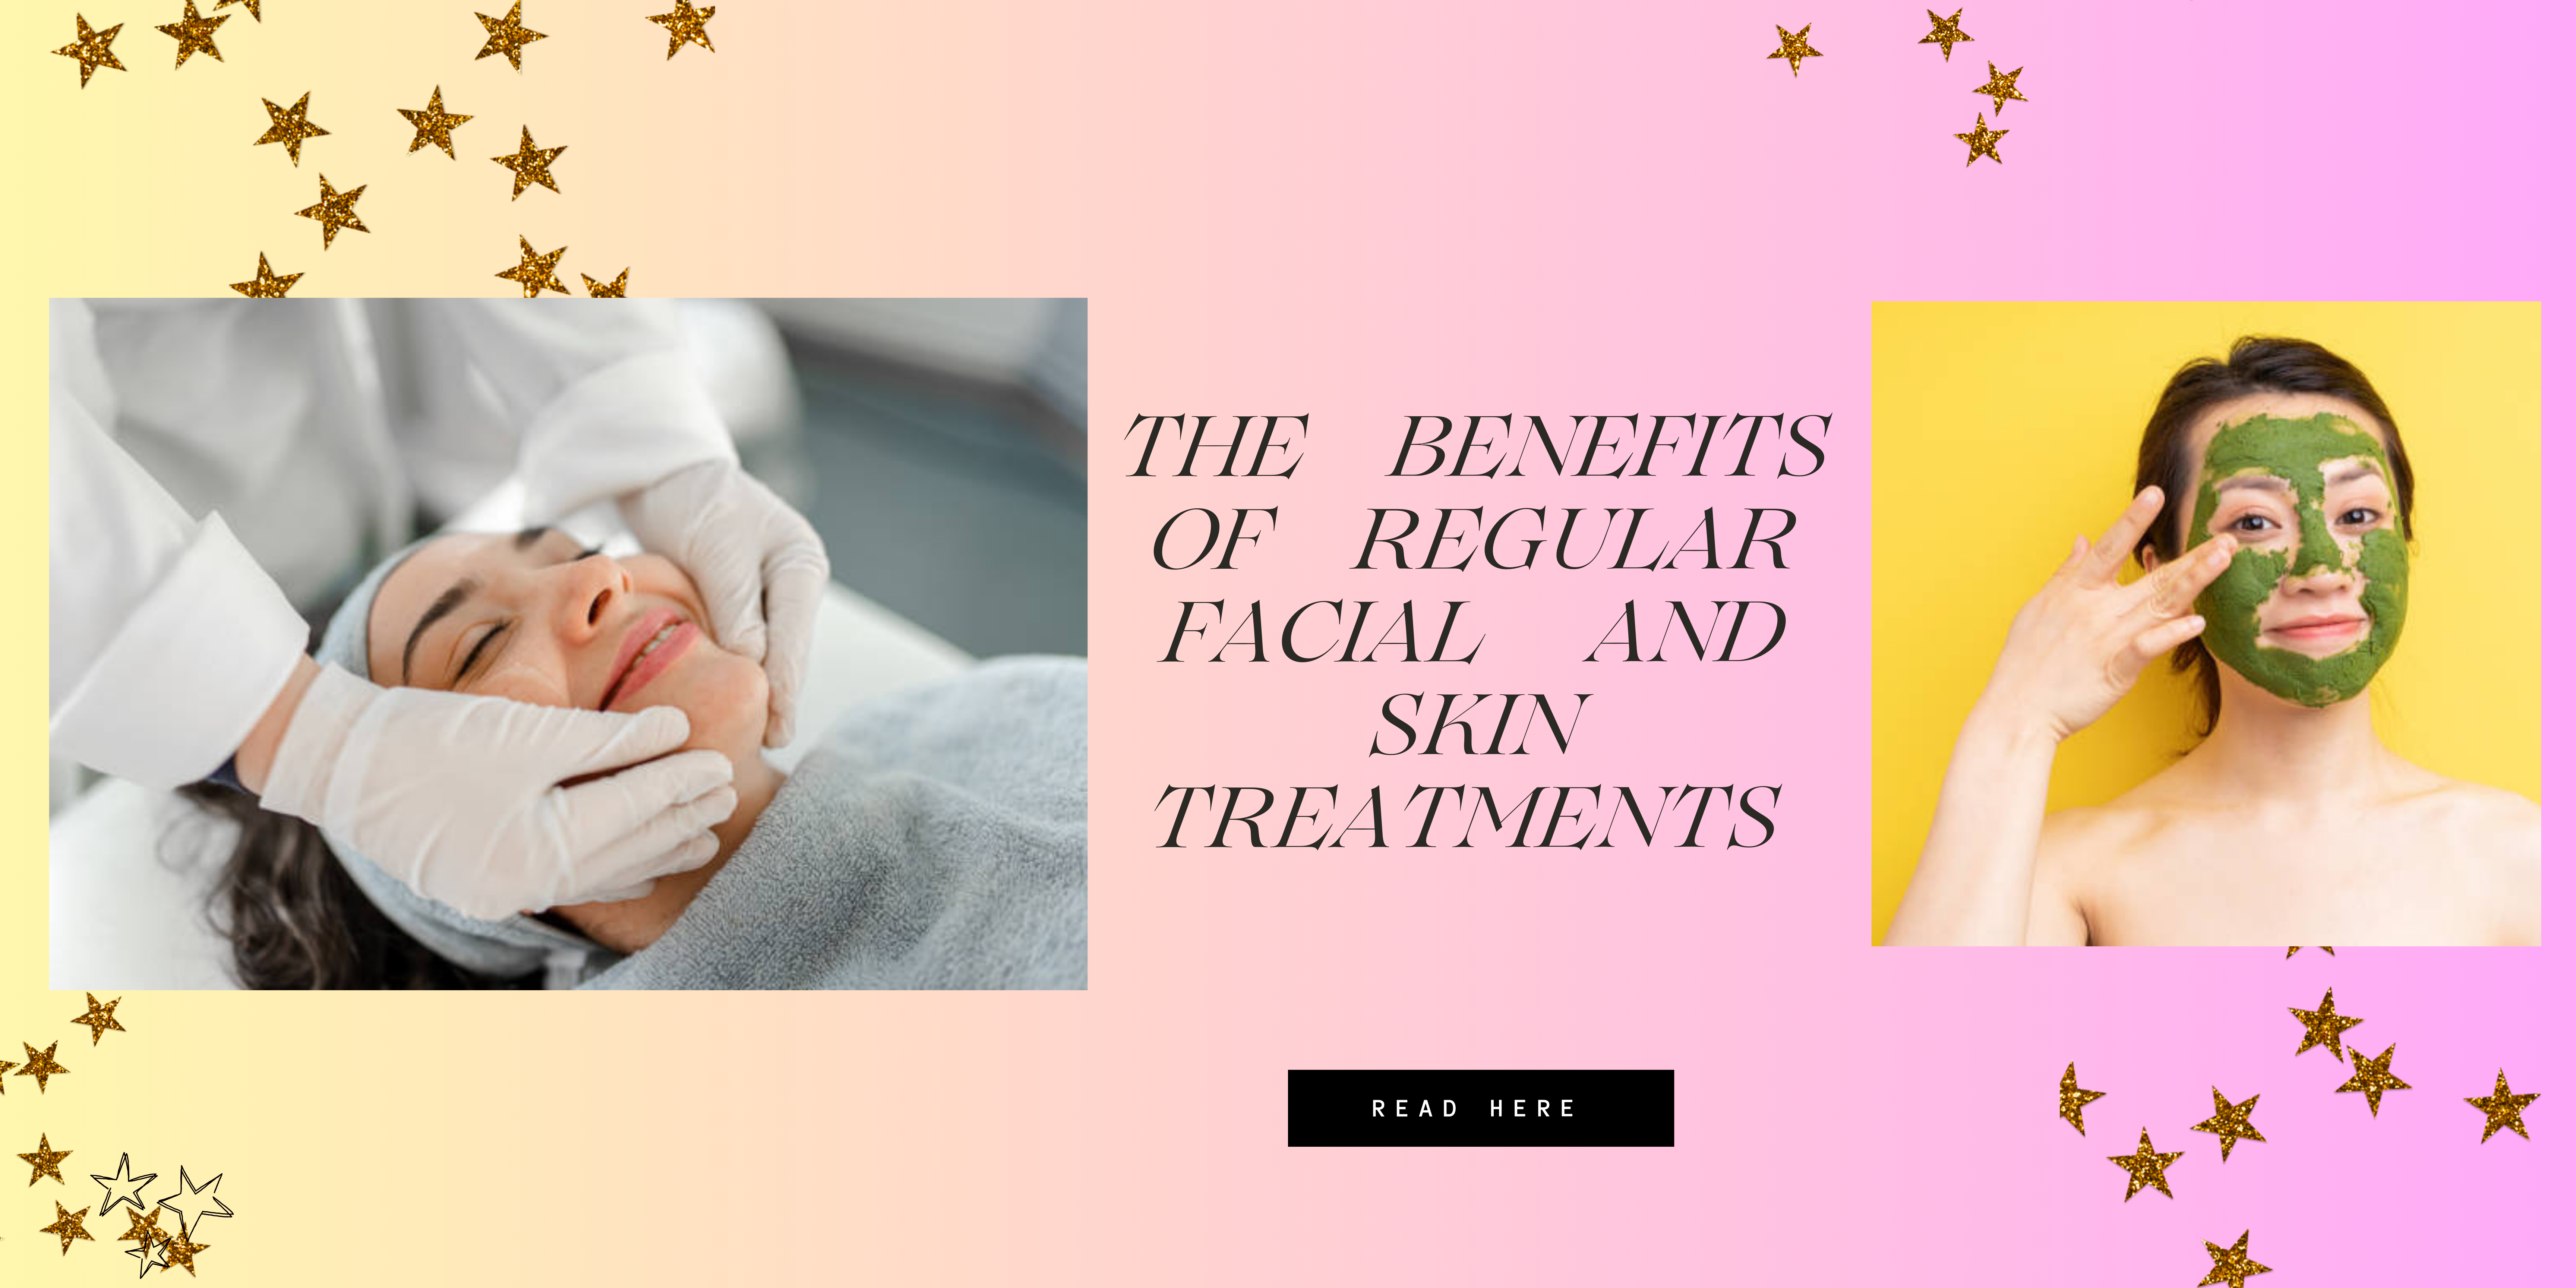
Posted By: 16th July 2024
The Benefits of Regular Facials and Skin Treatments
Benefits of Regular Facials and Skin Treatments Our favorites are everyday skincare routines. We believe consistent practice is the key to keeping your skin in good condition. (Plus, we never say no to a little daily indulgence!). However, there are situations when we encounter problems that we cannot resolve at home and must seek professional assistance from specialists. Facial procedures like chemical peels, microdermabrasion, or laser resurfacing can have dramatic effects, especially when combined with a consistent skincare regimen. Working with a medical aesthetician you trust who will take the time to understand your specific skincare challenges is crucial when creating your optimal skincare routine. If you're anything like us, you may struggle with various skin issues, including dryness, rosacea, hyperpigmentation, fine wrinkles, acne, and acne scars, keep reading at Ladyfair to know more about benefits of regular facials and skin treatments. Also check : How To Do Facial At-Home: Step-by-step Guide Here are some advantages of getting regular professional facial treatments in addition to your regular skin care regimen. 1. Gets rid of dead skin cells: Many people believe that our skin's outermost layer is living. However, the top layer is entirely composed of dead cells, ranging from 10 to 30. This results in dull skin. Thus, exfoliating the skin is crucial to showing the fresh skin underneath. We all want our skin to appear its best, no matter the time of year. Exfoliating your face is one approach to glowing skin. Exfoliating the skin involves eliminating dead skin cells from its surface. Several methods exist, such as utilizing an exfoliating facial treatment or a face scrub. Usually, the first step in facial treatments is exfoliation. It not only gently eliminates dead skin but also improves the skin's capacity to absorb all vitamin serums and creams more deeply, resulting in glowing skin. Exfoliation facilitates the removal of dead skin cells, clears clogged pores, and exposes fresh skin cells. As a consequence, skin feels softer and appears brighter. Furthermore, exfoliating might help lessen the visibility of wrinkles and fine lines. Get expert facials regularly and exfoliate your skin twice or thrice a week for optimal results. 2. Enhances blood flow: Moreover, it enhances blood circulation in the face. Frequent facial treatments promote blood circulation, which improves your skin by bringing oxygen and new blood to the surface of your facial skin. This allows your skin to breathe, and the improved blood flow provides vital nutrients and detoxifies your skin, leaving the surface of your skin looking radiant. Any skin type, including oily and sensitive skin, can benefit from face treatments. Topical serums assist in shrinking skin pores for an entirely natural facial. 3. Diminishes Wrinkles and Fine Lines: Reducing fine lines and wrinkles is one of the key advantages of getting frequent facials, and who wouldn't desire that? Facial washing, exfoliation, and hydration procedures can help smooth out wrinkles and fill up skin that has become dehydrated and aged. A facial massage stimulates your face's circulation and supports the skin's capacity to accelerate cell turnover, slowing the aging process. A monthly facial reduces fine lines and wrinkles tone of your skin by strengthening your facial muscles and stimulating the production of collagen and elastin. Skin begins to lose collagen at 25, so begin your face treatments now to maintain healthy skin. 4. Encourages Harmony in Tone: Regular facials can assist if you're worried about uneven skin tone or black spots on your skin from sun exposure. With skin exfoliation and antioxidant-rich creams and serums, facials will brighten dull skin, remove dead skin cells, and promote cell regeneration to rejuvenate your skin's cells and give you healthy skin. Sadly, most at-home exfoliators cause more harm to the skin's texture than good when it comes to removing dead skin cells. Maintaining a skin care regimen and getting facials regularly is crucial for maintaining healthy skin and promoting skin radiance. 5. Removes Clogged Skin: Regular facials are essential if you have oily or acne-prone skin! Deep cleaning benefits oily skin and all the pores by keeping them free of debris, oil, and other pollutants. It's like a skin detox for your skin's surface, addressing concerns with your skin. Whiteheads and blackheads block pores and dull the complexion. Therefore, it's time to get a facial and deeply clean your skin's pores if it looks bumpy. In addition to determining your skin type, your facialist could suggest chemical peels to treat acne and its aftereffects. 6. Presents antioxidants and nutrients: Your esthetician will probably use antioxidant-rich lotions and vitamin C during your facial massage. Antioxidants treat dull skin's surface, and the body responds by producing radiant, healthier skin. This process is known as cell regeneration, which is why skin facials are vital. In addition, these nutrients can help rejuvenate skin that seems tired by nourishing it and restoring its luster. Customized skin treatments are intended to address specific concerns with the skin, such as acne scars, dark spots, uneven skin tone, texture, or skin disorders. 7. Nourishes Parched Skin: Regular facials can help if you have dry skin. It can be really uncomfortable to have dry skin, especially in the winter. You might be asking what you can do to have healthy, hydrated skin if you have persistent dryness. Fortunately, frequent facials can have a significant impact. The products used during a facial can leave your skin feeling hydrated, plump, and radiant. Facials are a terrific way to give your skin more moisture. Also Read : The Benefits Of Face Masks Conclusion: Monthly Facelifts Involve More Than Just A Day Of Indulgence It's an investment in your skin's long-term health and beauty! Regular facials will not only keep your skin looking its best and feeling firm, but they will also increase circulation, lower stress levels, and lessen puffiness around the eyes, among other health advantages. Thus, why do you delay? Make an appointment for massage therapy now!

Posted By: 16th July 2024
How to Choose the Right Haircut for Your Face Shape
Your hair's texture and density will determine the most appealing haircut for you. It also depends on the form of your face. Guys are frequently let down when they bring a picture of their favorite celebrity to the barber since, more often than not, such celebrities have very different facial structures from their own. Keep reading to explore more about haircut for your shape only on Ladyfair. How can I Tell What Shape My Face Is? Conrad recommends taking a straight-on selfie with your phone and utilizing the mark-up function to outline your face to assess its shape. Examine the overall difference in breadth between the chin, jaw, cheeks, and forehead; note the position of the facial features about the forehead's height. Your weight, bone structure, and hairline all affect the form of your face. Which facial shape am I? After taking your picture and drawing the outline, it's time to determine precisely which category you fit into. Oval: Broadest at the brow, with gentle curves leading to the sharply defined jaw Rectangular: Identical to oval, but wider at the chin and higher on the forehead Round: Almost as tall as it is wide, with a gentle jawline, lower-set facial features, and wide cheekbones. Square: Has lower facial features and a strong forehead, with angles similar to a rectangle Triangle: Slightly narrower at the cheeks, quite narrow at the chin, and wider at the forehead and brow Diamond: Narrowest at the chin and forehead, widest at the cheekbones. Heart: Narrow chin but wider cheekbones and forehead Oblong: Consistently wider-set face, strong jawline Shaped like a pear: broad cheekbones, a wide jaw, and a slightly narrow forehead. Also Read : Must-Try Hairstyles for Busy Moms The Perfect Hairstyles For Various Face Shapes 1. Hairstyles For Round Faces: You've won the genetic lottery if you have an oval face, at least having the most possibilities for stylish haircuts. The ideal ratio of breadth to height is achieved by the oval face shape. You should consider yourself fortunate to have facial hair as a baseline already, as many other facial shapes attempt to exploit it to achieve an oval-shaped appearance. You will, however, look better in some styles than others. 2. Hairstyles For Square Face Shapes: Rectangular faces are one degree off from several other shapes. They have a broad brow and pronounced jaw, similar to oval shapes, so many things will look good on them. Rectangular guys need to draw attention away from anything that adds too much height and accentuates facial length since, like square faces, they have prominent foreheads and sharp angles. Softness and roundness up top are fantastic. 3. Hairstyles That Fit Round Faces: Guys with round faces must use their angles because of their softer structure and low-set facial features. Use styles that add length, sharpness, and textural movement to lessen the roundness. 4. Hairstyles For Square Faces: Although it may seem like a LEGO head, not everyone with a square face is a square. The goal is to hasten roundness by adding more length to the face, which means you don't want to add to the top or bottom alone. This is especially true for those with broad foreheads and wide faces. 5. Triangle Face Shape Haircuts: Triangular face forms are characterized by a chin that is cut out and gradually slopes upward and outward toward the brow. It's a striking face form that is also one of the more elusive ones. Tom Holland is one of the celebrities that fall under this category because of how well-defined and drawn forward their chin is from their jaw. 6. Hairstyles For Diamond-shaped Faces: Excessive elongation of the diamond shape is not desired. That volume goes pretty well with those crisp, clipped sides. Rounder shapes also perform well with a balance of scissor-cut sides and a texturized or swept top (with breadth on the top and corners). This will lessen the prominence of the forehead's narrowness. 7. Hairstyles For Heart-Shaped Faces: Is it a coincidence that the faces of so many pop music idols are shaped like hearts? Maybe. In addition, even though it wouldn't be your natural facial shape otherwise, you might be automatically heart-shaped if you have depressed temples or a widow's peak hairline. The components all function together. 8. Hairstyles For Long Faces: Aim for a buzzcut near the scalp, or perhaps go bald. A high fade haircut with soft sides to encourage roundness and detract from the length of the face also works well. The top should not be too high. Additionally, you can get away with medium-long haircuts with broad, flowing sides since they add width to balance the length; aim to match the height and side lengths. 9. Hairstyles For Pear-shaped Faces: Aim for softer, rounder, and (particularly) wider hairstyles that accentuate the roundness and width of the brow and top while de-emphasizing the width of the jaw. Second, any hairstyle with movement, texture, and flow will look great because it adds width at the top. Also Check : How Often Should You Get Salon Treatments for Healthy Hair Conclusion: It's important to pick the right haircut that suits the shape of your face so that it can bring out your best features and make you look balanced. By knowing the shape of your face - like if it's round, square, oval, or something else - you can choose a hairstyle that looks good with your face shape. Knowing the shape of your face helps you get a haircut that looks good on you.
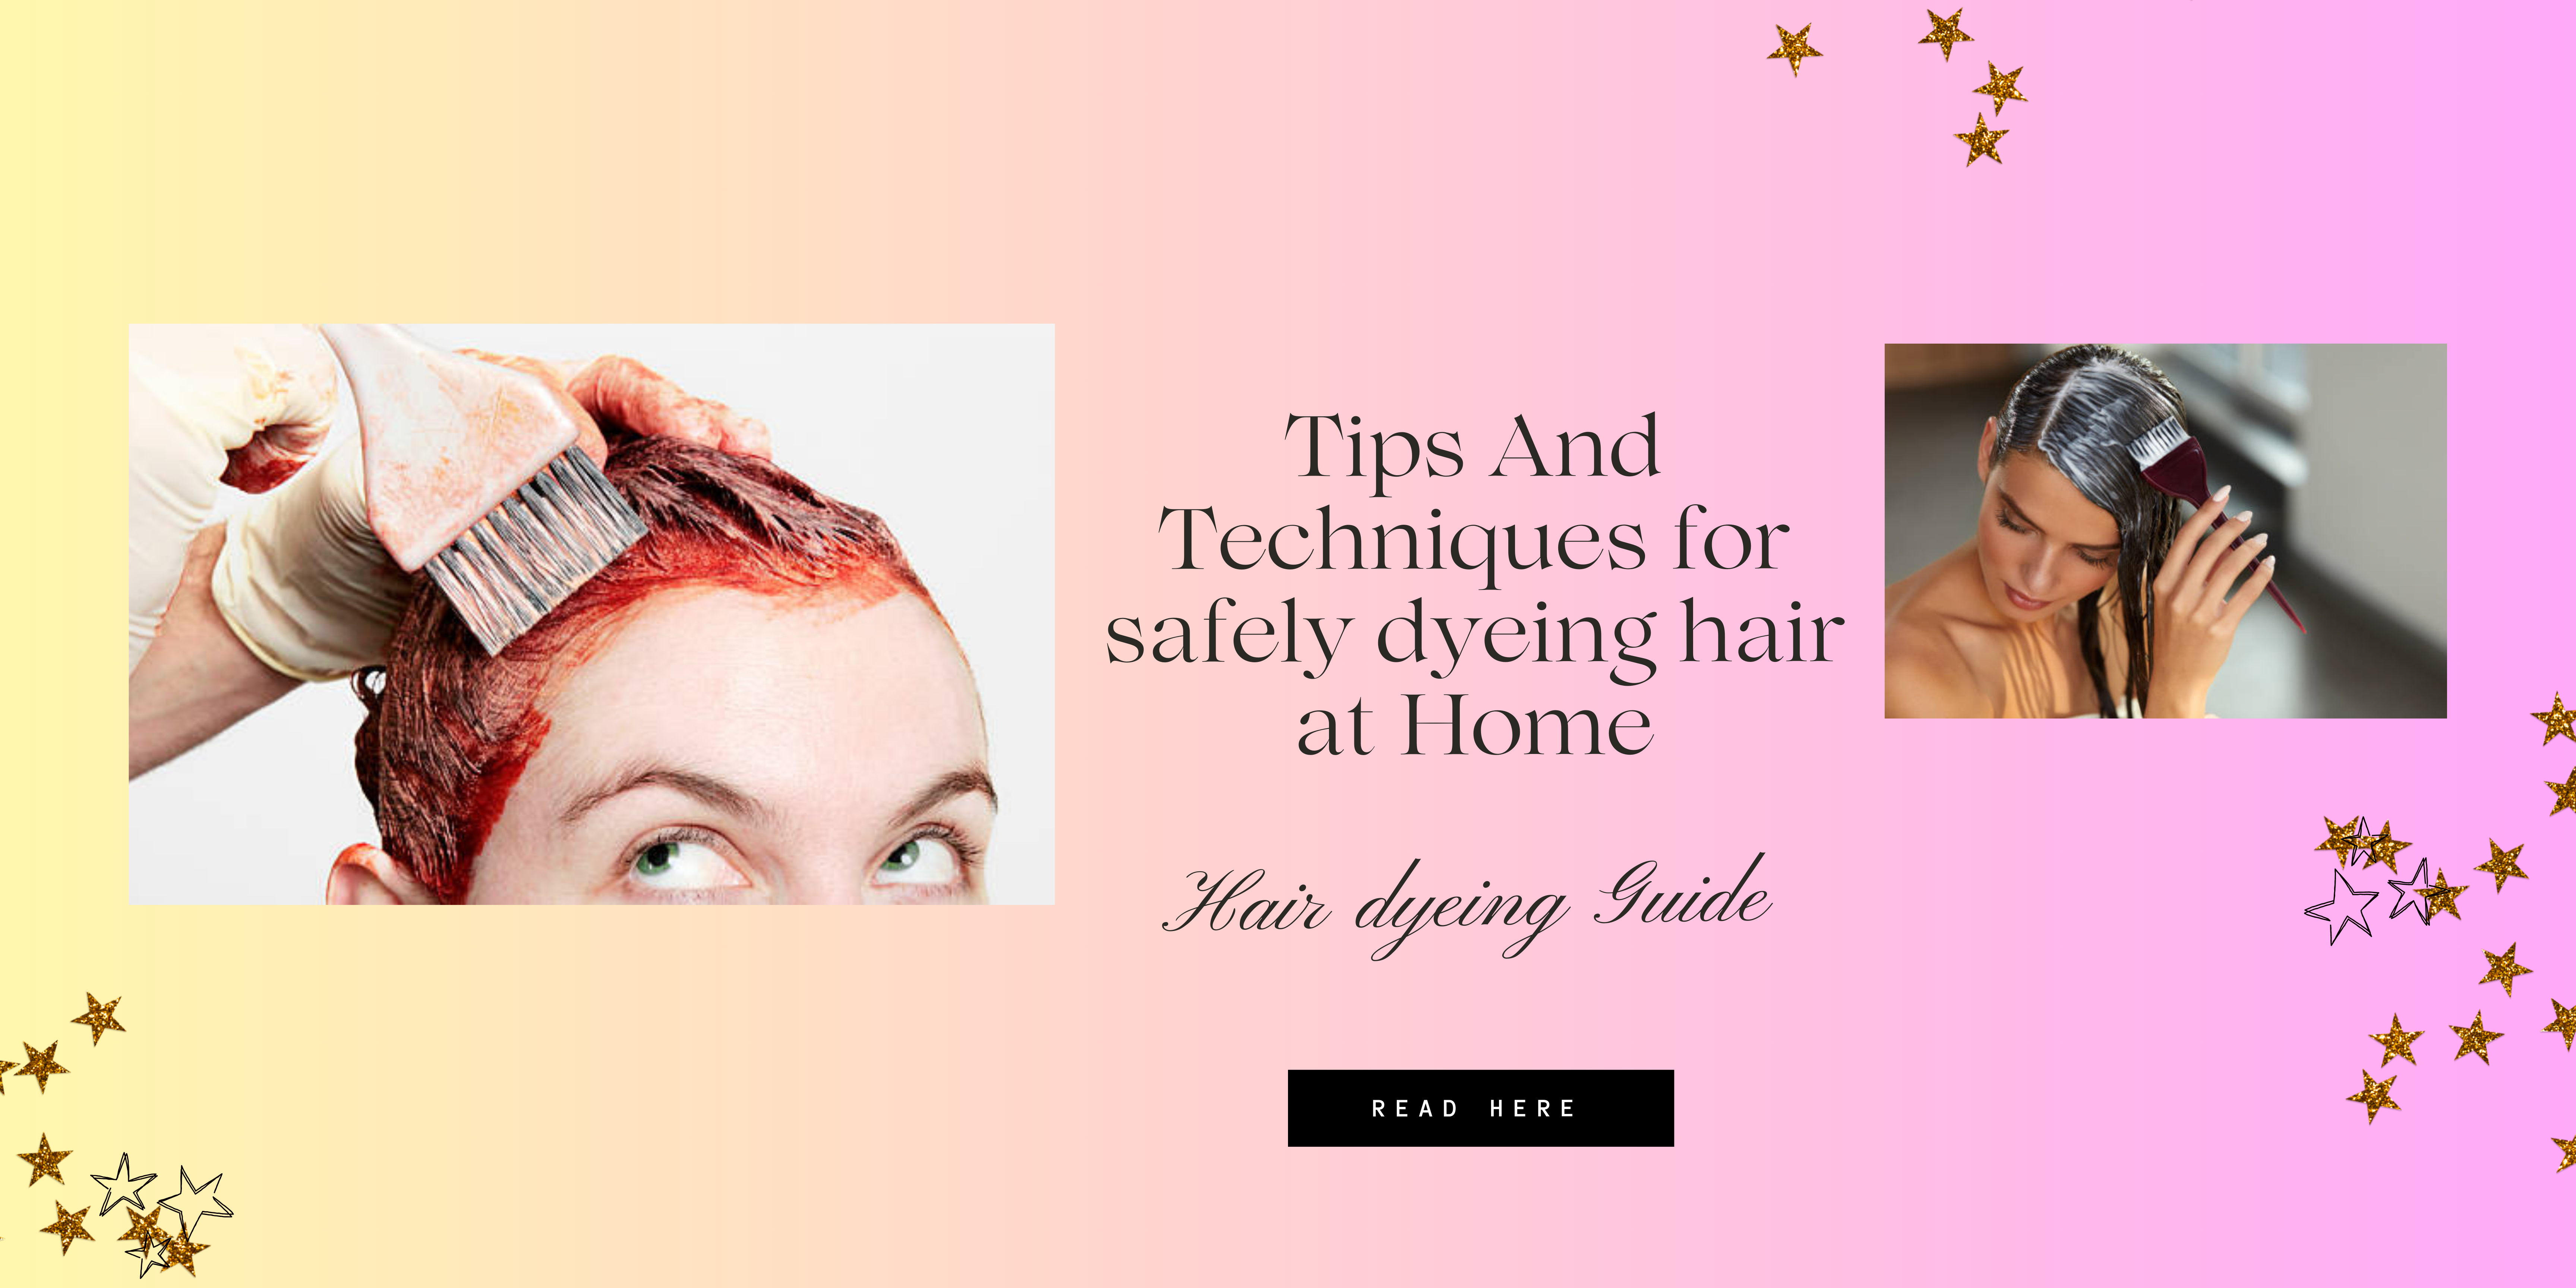
Posted By: 11th July 2024
Tips and techniques for safely dyeing hair at home | Hair dyeing Guide
safely dyeing hair at home Ladyfair understand if you'd rather shave your head than color your hair at home because hair coloring requires money and time. Furthermore, you could spend months attempting to correct a mistake because there is so much possibility for error, mainly if it's your first time. To put it mildly, it's scary. However, the cost of the salon can be high, so it's entirely reasonable to want to save your hard-earned money and buy a dye brush yourself. While dying your hair, several aspects must be considered: selecting the appropriate color (and making it appear correctly), applying the color where it belongs, and employing the proper equipment. And let's not even talk about the aftercare. But don't worry. All you need is a little perseverance (always proceed gently) and some advice from knowledgeable people to accomplish a flawless at-home color job. Now, let's see the top insider hair color tips and tricks you can use at home to get salon-quality results. Also Read : The Best Haircare Products For Every Hair Type 1. Think About The Texture Of Your Hair. Consider how your hair feels: When you dye your hair, the type of hair you have is just as important as your style of haircut. If you have fine to medium hair, it doesn't soak up color quickly and might look warmer with orange, red, or copper tones. If you have coarse, curly, or frizzy hair, it absorbs color speedily and will appear more relaxed with ashier or slightly bluish tones. 2. Always Purchase Two Boxes Of Hair Color. If your hair is long or medium length and very rough, use two boxes of the same color to ensure all your hair is covered. Mix the dyes in a glass or plastic bowl so they don't change color in a metal bowl. 3. Understand When To Make Things Brighter Or Darker. Here's the rule: Since the permanent dye is vital, Ionato recommends choosing a slightly darker shade than the one you want. Choose a lighter color when using semipermanent dye. Semi-permanent hair color doesn't need a developer, so it keeps getting darker the longer you leave it in your hair. "It's better to pick a lighter color from the start because it's safer. " 4. Don't Believe The Model On The Hair Color Box. Although the woman on the box's cover seems lovely, her hair color isn't authentic. The box color is paler every time than the model's hair color. The hair color you apply at home is more potent than what salons use. The color appears lighter than it does on the box. To see how the color will genuinely appear on your hair, glance at the tiny swatch at the top of the box. 5. One Way To Deal With Gray Hair Is To Treat Only Specific Areas. If you want a gray look, you don't need to dye all your hair. If you have gray hair, use semipermanent dye to color the area around your hairline. Robinson says you might have to work on your hair a little at a time. He suggests using an eyeshadow brush for better results. 6. Color Your Roots Without Getting Color On Your Scalp. To fix your hair's roots without making your scalp dirty, put coconut oil to keep it light and dimensional. When you rinse your roots, the water that runs down can make the rest of your hair messy. 7. Reevaluate The Tools You Use For Hair Coloring. Since box dyes are designed to lighten hair color by just one or two shades, they will not cover up the dark roots of your highlights if you're an unnatural blonde. Apply hair color to your roots and use a wide-tooth comb to feather the color slightly over the beginning of your highlights if you have grown-out highlights on top of the base color. 8. Do Section Vise. Separate the hair into four parts, two in the front by the ears and two in the back, to avoid uneven spots. Create a middle part in your hair that goes to the back of your head. "Make sure your application is neat. "Sometimes people can't reach certain spots or don't know how to get the back. Use clips to divide your work into four parts and review them individually to avoid missing any spots. " 9. Shampoo Should Be Added To Hair Dye. Don't apply color to your ends if you're dying hair with a complete head and your ends are dried. Instead, three minutes before rinsing, mix two spritzes of shampoo with the remaining dye in the bottle. Apply the mixture to your ends after shaking it up. It lessens the dye's intensity while maintaining some color and gloss. 10. Let Your Hair Fall Back. Do you recall how the models in the advertisement always had their beautifully styled, dyed hair tied up in a bun? Avoid doing that. When you rinse it out, the color won't be even." "Leave it down until the timer rings." Invest in a hair coloring robe so you have something to wear that you don't mind putting a little dye on; you don't want to ruin any things you genuinely care about when dyeing your hair. 11. You Need To Condition When You Have Finished. "If you don't use conditioner, the hair stays open and the color keeps working. " "Don't be shocked if your hair ends up darker than you planned. Keep the conditioner in the kit, or use a deep conditioner in the shower after washing the dye. " Also Read : Must-Try Hairstyles for Busy Moms Final Thoughts: If you do it right, coloring your hair at home can save you money and make you feel good. By looking at how your hair feels, picking the right color, and using the right tools and methods, you can make it look like it was done at a salon. Remember to do the important things, like using more than one box of dye for long hair, being careful not to get dye on your scalp, and using conditioner after dyeing to keep your hair healthy and the color looking good. With these secret tips and patience, you can dye your hair at home and get pretty and bright results.
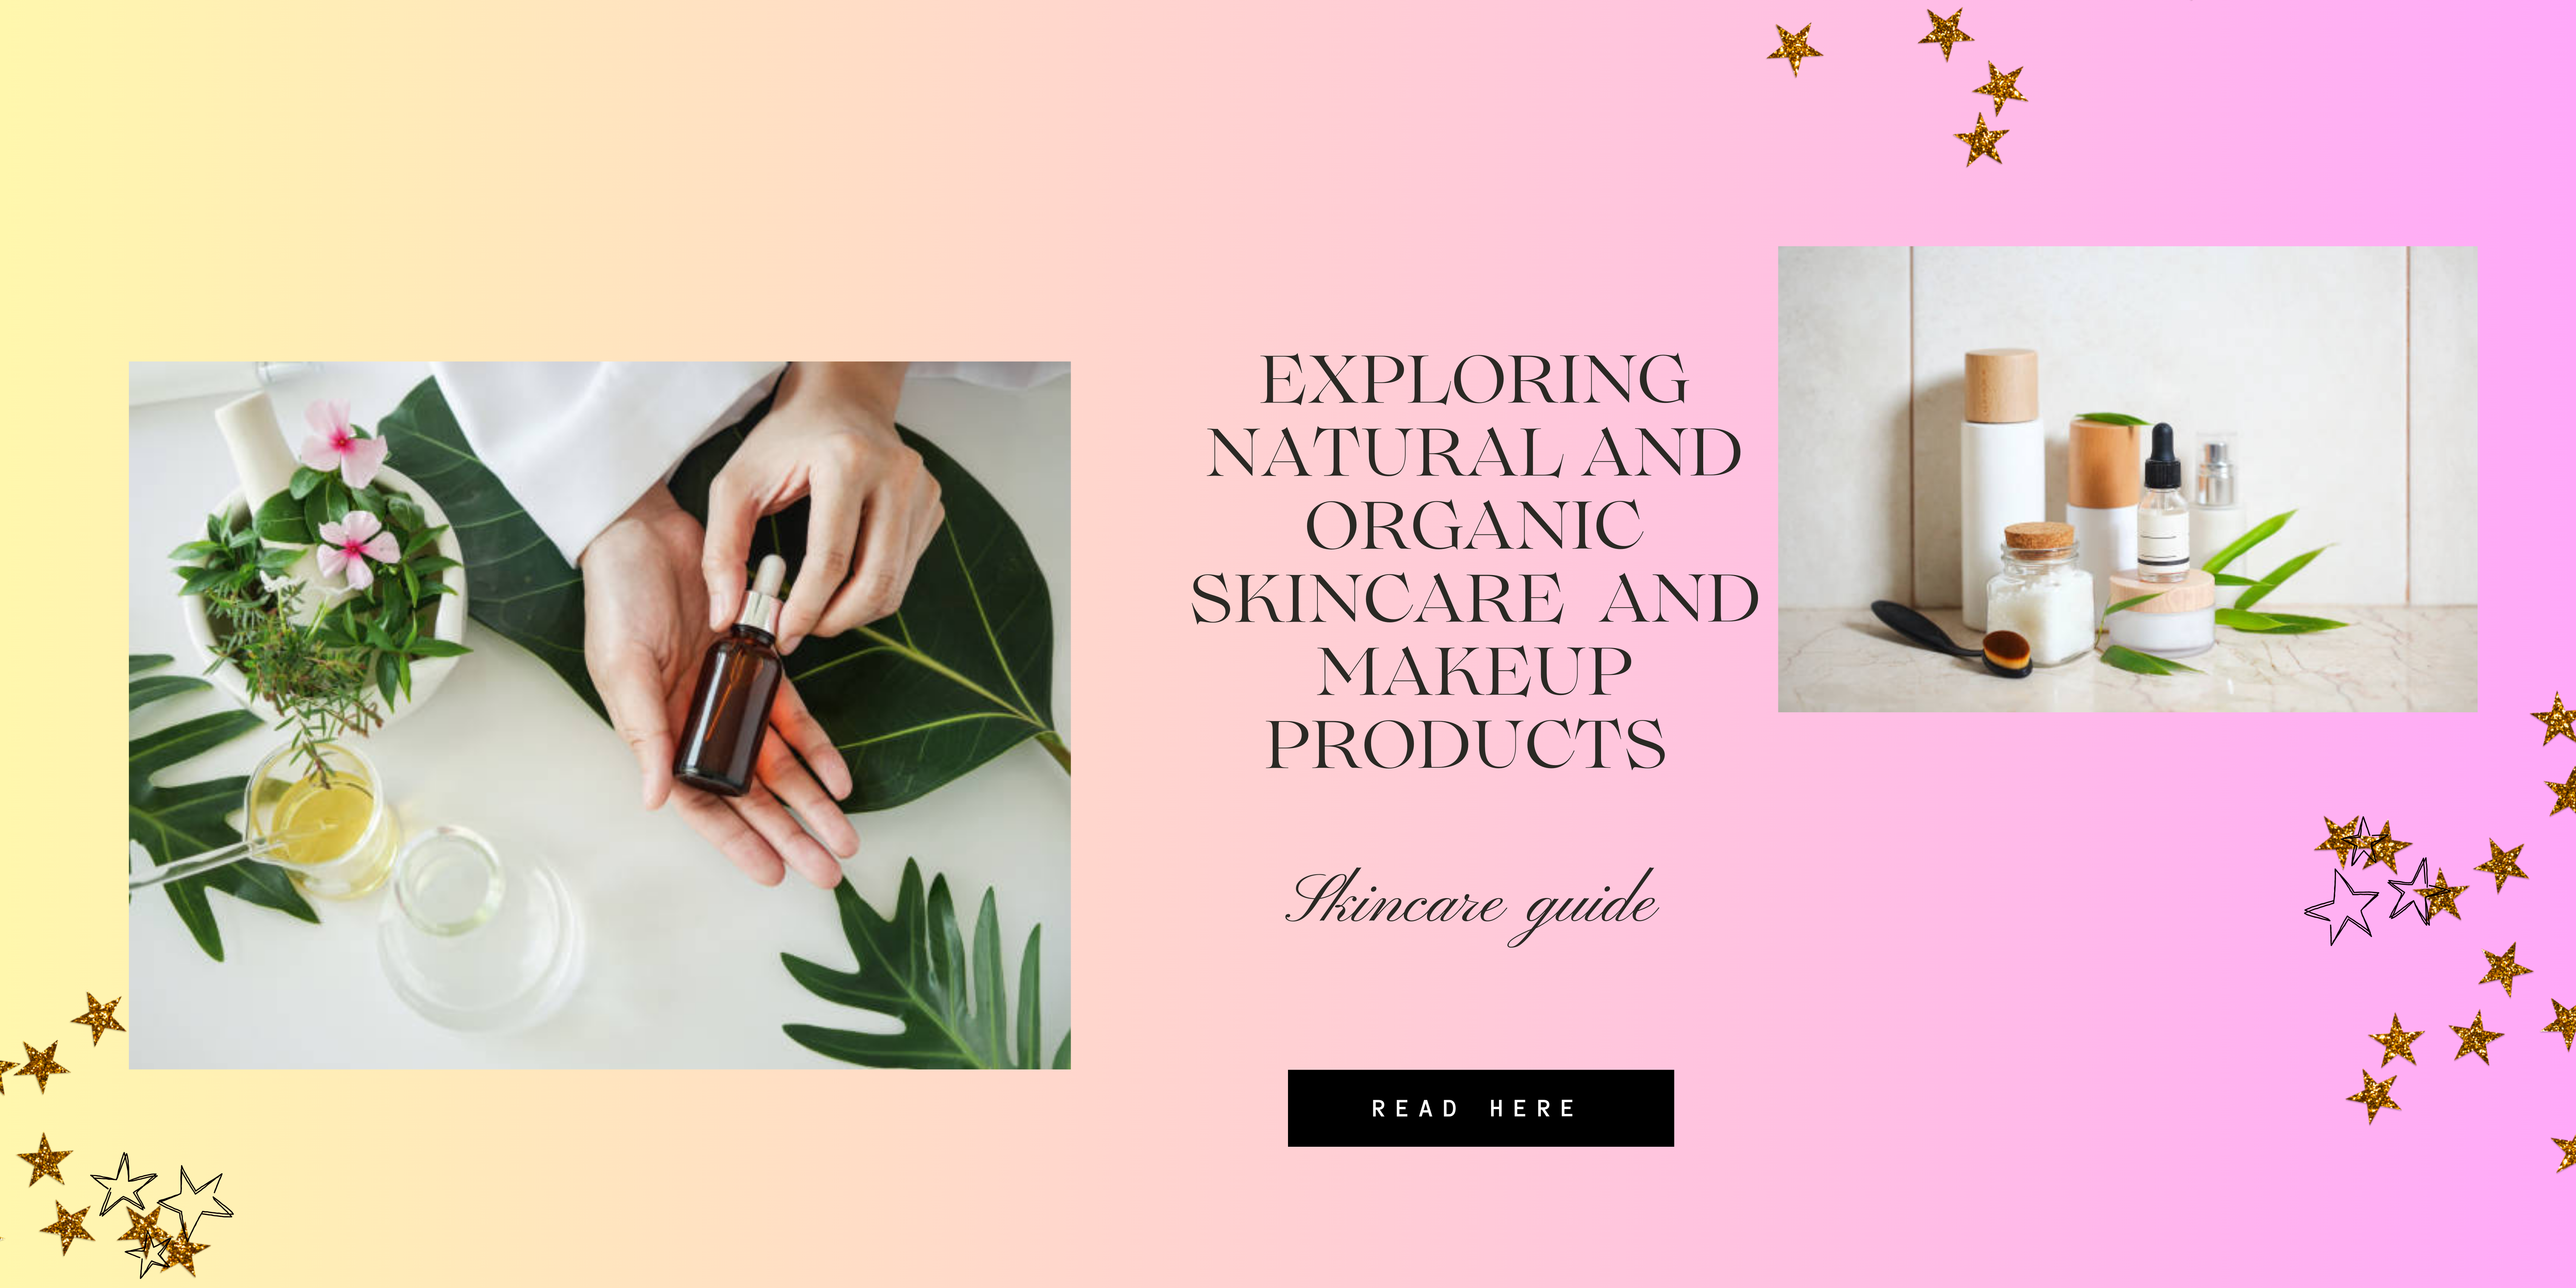
Posted By: 9th July 2024
Exploring natural and organic skincare and makeup products | Skincare Guide
Products made from plants, flowers, and minerals are natural and organic. Their lack of harmful chemicals that can destroy our flesh or nature makes them preferable to us. Natural and organic products can keep your skin healthy and protect the earth. Here, Ladyfair will look at why they are suitable for you, how to choose the right ones for your skin type, and some great options we recommend. If you have just started using natural skin care products or want to build up your collection, this guide will help you find the most suitable products for a healthy and beautiful skin. 8 Natural and Organic Skincare Products Delicate yet practical, these products have become quite popular due to their gentleness on the skin. In India, however, there are ten best organic and natural skincare products: 1. Forest Essentials Delicate Facial Cleanser: Forest Essentials Delicate Facial Cleanser is infused with pure rosewater and neem, which makes it ideal for mild everyday cleansing. By getting rid of impurities without depleting essential oils from one’s skin, its constituents moisturize it, keeping it hydrated. While suitable for all types of skin, compassionate ones because neem provides antibacterial effects towards blemishes on human skin, rose water also works as a toner, calming the skin. This cleanser leaves your face feeling soft, clean and rejuvenated with a subtle, natural fragrance that enhances the overall experience. 2. Kama Ayurveda Kumkumadi Miraculous Beauty Fluid: Kama Ayurveda Kumkumadi Miraculous Beauty Fluid is a night oil made of saffron and other Ayurvedic herbs. It lightens the skin and reduces spots, pigmentation, and wrinkles, which makes you look younger with radiant skin. 3. Juicy Chemistry Organic Blood Orange and Rosehip Lip Balm: The Juicy Chemistry Organic Blood Orange and Rosehip Lip Balm is made with certified organic raw materials that moisturize dry lips. A combination of blood orange and rosehip oil contains vitamin E, vitamin C, and antioxidants that nourish the delicate skin on your lips. 4. Mamaearth Ubtan Face Mask: Mamaearth Ubtan Face Mask uses traditional ingredients like turmeric, saffron, and apricot oil to achieve a brighter complexion. This mask effectively removes sunburns, scrubbing off dead cells resulting from aging, and enhances skin texture. Turmeric and saffron provide anti-inflammatory effects, while apricot oil hydrates the skin. 5. Biotique Bio Dandelion Ageless Lightening Serum: Biotique Bio Dandelion Ageless Lightening Serum is a blend of pure dandelion mixed with nutmeg oil for dark spot reduction and improvement in skin texture. The serum is lightweight; hence, it promotes cell regeneration, improving the face's appearance. 6. The Moms Co. Natural Vita Rich Face Cream: The Moms Co. Natural Vita-Rich Face Cream has hyaluronic acid, Vitamin C, and B3 for intense moisturization and enhanced skin texture. This lotion also works against wrinkles, lipofuscin, and lack of skin uniformity that usually appear on older women who take pride in a smooth look. It does not make the face oily as it gets absorbed quickly into the skin because it is light in weight. 7. Khadi Natural Ayurvedic Rose and Honey Moisturizer: Khadi Natural Ayurvedic Rose and Honey Moisturizer combine the hydrating properties of rose and honey to provide deep moisturization. Suitable for all skin types, it calms your skin, making it lively again, and leaves a tender touch on your face afterward. This will refresh your exhausted look because roses have toning effects on you, while honey locks moisture through its natural humectant features. Also Read : Step By Step Guide On Skin Care Best Natural and Organic Makeup Products in India When looking for makeup to put on our faces, we often consider whether it is chemical-free. In India, you can find many different kinds of quality makeup products made from organic materials. 1. Ruby's Organics Cream Blush: Ruby's Organics Cream Blush contains natural ingredients like jojoba oil and shea butter. This product provides a bright finish effect owing to several shades adapted for different tones of skin coloration; moreover, it can be easily blended, leaving the cheeks glowing healthily radiant. 2. SoulTree Ayurvedic BB Cream: Soul Tree Ayurvedic BB Cream incorporates the positive aspects of organic ingredients such as turmeric, licorice, and almond oil. SoulTree Ayurvedic BB Cream offers sheer coverage, skin tone uniformity, and a natural look. It also includes an SPF that shields your skin from harmful UV rays. 3. Disguise Cosmetics Ultra Comfortable Satin Matte Lipstick: Ultra Comfortable Satin Matte Lipstick has avocado oil, marula oil, and shea butter to enrich it. This lipstick gives an intense color payoff while keeping your lips moisturized and soft. Moreover, its formula is 100% vegan, cruelty-free, and free from harmful chemicals. 4. Kiro Clean Beauty Longwear Brightening Eyeshadow Stick: Kiro Clean Beauty Longwear Brightening Eyeshadow Stick has been formulated with natural ingredients like jojoba oil and mango seed oil. It is easy to apply and stays on for long periods, offering a smooth, vibrant finish. This one will be perfect for you if you want to create subtle or bold eye looks. 5. Lotus Herbals Ecostay Foundation: Lotus Herbals Ecostay Foundation is a lightweight foundation that lasts all day and is made from natural ingredients. Lotus Herbals Ecostay Foundation provides medium to full coverage while evening out the skin tone, naturally giving a matte finish. This foundation is suitable for all types of skin because it does not contain preservatives or parabens. 6. Ilana Organics Soft Blur Concealer: Packed with natural components such as Aloe Vera and jojoba oil, this Soft Blur Concealer of Ilana Organics is a blur. It may be used to cover blemishes, dark circles, and imperfections while efficiently moisturizing your skin. Allows for a soft, natural finish that suits all types of skin. 7. Just Herbs Herb Enriched Ayurvedic Kajal: Just Herbs Herb Enriched Ayurvedic Kajal contains almond oil, Triphala, and licorice, among its natural ingredients. This kajal is safe to use on sensitive eyes; it comes in black, which is very strong, making it a calming agent. It nourishes and strengthens eyelashes. Also Check : How to Choose Pure Vegan Makeup Kit Conclusion: Your skin will love you for using organic skincare products and environmentally friendly makeup. These involve using gentle ingredients like plants, flowers, and minerals rather than chemicals. You can have beautiful, healthy, eco-friendly skin by utilizing nature-based products alone. The best skincare products in India are detailed in this guide, aconsistingof cleansing products, moisturizers, and oils. If you’re just starting with natural skincare or looking to grow your collection, these items are suitable for both yourself and the environment, making them perfect additions to your beauty routine.
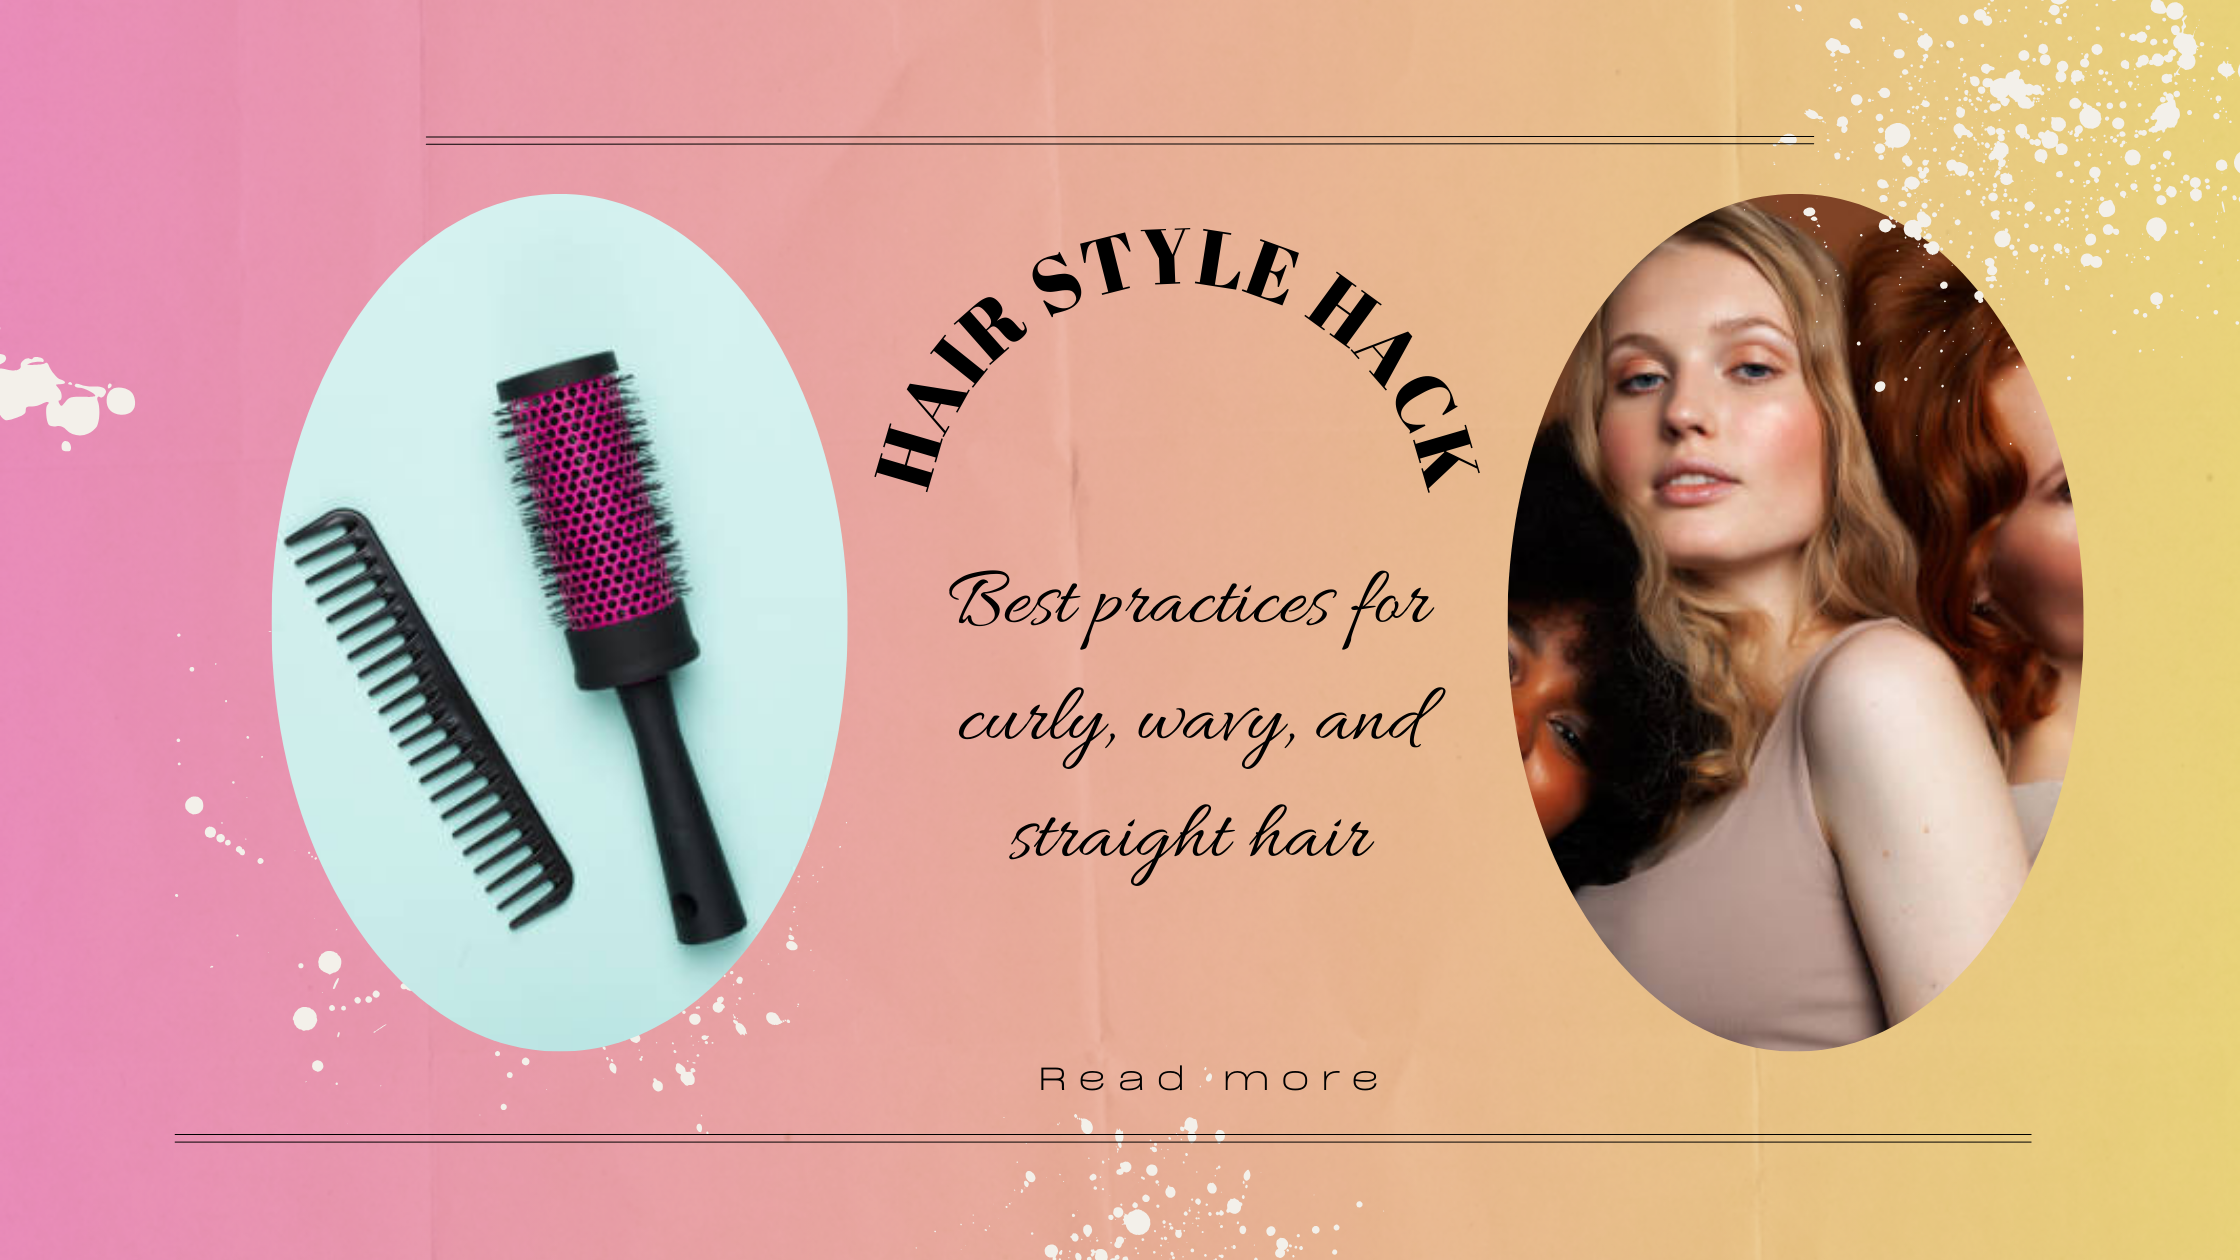
Posted By: 2nd July 2024
Hairstyle Hack | Best practices for curly, wavy, and straight hair
Ever wondered about your curly, wavy, or straight hair? Welcome to “Hairstyle Hack,” where we give you the best tips on achieving and maintaining any hairstyle. This could be due to frizziness, no volume, or just wanting to enhance your natural texture; you’re covered. Let Ladyfair simple and everyday advice guide you towards healthy and fashionable hair. So go ahead and dive in if you want it every day. Also Read : Anti-Aging Treatment Guide Best Practices for Curly Hair 1. Curly Hair Decoded: Curly hair is complex and requires unique maintenance to keep it healthy and beautiful. Because of its structure, curly hair tends to get dry easily and develop frizz; hence, one needs to understand how to look after their curls. Below are some ways that will help one’s curls always look great. 2. Moisturize: Curly hair generally tends to be drier because the natural oils from the scalp find it harder to travel down all the twists and turns of its strands. As such, use a hydrating shampoo and a conditioner to combat this issue. Look for sulfate-free products rich in moisture content, such as shea butter, coconut oil, and aloe vera. Deep conditioning is frequently used for softness and moisturized hair. 3. Try Not to Overdo Washing: Washing curly hair too much can remove its natural oils, leading to dryness and frizz. Try to wash your hair no more than two or three times a week. You can use a conditioner or co-wash (a cleansing conditioner) between washes that will keep your hair fresh without drying it. 4. Detangle with Caution: Curly hair is prone to tangling, necessitating gentle detangling. When your hair is wet and coated in conditioner, you should, therefore, use a wide-tooth comb or simply your fingers to detangle. Tugging from the ends upwards towards the roots ensures that breakage is minimized. 5. Working with the Appropriate Styling Products: Opt for styling products that accentuate and define curls but retain their lightness. Select curl creams, gels, and mousse specially developed for curly hair. Wet your hair before applying them; then scrunch them into place by hand. Drying alcohol should be avoided because it dehydrates. 6. Bedtime Hair Protection: To maintain your curls overnight, use silk or satin pillowcases. These materials create less friction compared to cotton, minimizing frizzing and breakage of curls. Best Practices for Wavy Hair 1. Moisturize with Prudence: Wavy hair requires conditioning to keep it moisturized. Use a light conditioner that feeds into your hair without adding any additional weight. Concentrate on the bottom and edges, where dryness mainly occurs. 2. Tips for a Tangled-Free Hair: Tangle prevention entails combing your hair when it is wet and conditioned. Starting from the roots, using thick combs or fingers prevents breakage as you go up. 3. Make Your Waves Distinctive: Applying styling products such as mousse, gel, or sea salt spray for lighter waves. Put on a damp mane and crush upwards, enhancing wave formation. Avoid heavy lotions or oils that can weigh down the strands. 4. Handle Drying Wisely: You can achieve well-defined waves by air drying your hair or using a low-heat diffuser. Do not brush dry tresses to avoid frizz so that the spiral pattern doesn't fade away in an instant. 5. Protect at Night: Preserve a wave by sleeping on silk or satin pillowcases, which reduce friction against curls and prevent them from becoming frizzy. Another option is loosely plaiting or pinning up the tresses, keeping waves in place. 6. Trimming Regularly: Trim your wavy hair every 8-12 weeks. Trimming frequently assists in maintaining fresh-looking, healthy waves throughout. Also Check : Must-Try Hairstyles for Busy Moms Best Practices for Straight Hair 1. Balanced Cleansing: Straight hair needs to be washed regularly as it is likely to get oily quickly. To cleanse your hair, use a gentle shampoo that does not contain sulfate every other day or when necessary. 2. Lightweight Conditioning: Conditioning is required to ensure the softness and manageability of your hair. Choose a light conditioner, which should be applied mainly on the ends of your hair to avoid weighing it down. Conditioner should be left off from the scalp to prevent oil buildup. 3. Volume-Enhancing Techniques: Incorporate volumizing products into your routine to keep straight hair from going flat. For example, before blow-drying, apply a root lifter mouse or spray. Moreover, you can blow-dry your hair upside down for more lift and body. 4. Protect Against Heat Damage: Heat styling damages straight strands, leaving them feeling dry and brittle. Always use heat protectant sprays before using blow dryers, flat irons, or curling tongs. This reduces exposure to heat styling tools, thus decreasing the chances of damage. 5. Guard Against Environmental Factors: Shield straightened strands from environmental aggressors like UV rays and pollution. Apply UV protection hair products during outdoor activities, and after swimming, use cold water only rinsing out chlorine or saltwater that could have gone through the wetting process since they are harmful to the straightening effect. Conclusion: Looking after your hair, whether curly, wavy, or straight, includes a few essential steps. If you do these easy things, your hair will stay healthy, be easy to style, and look really good. Love your hair's natural look and feel confident when you have a good hair day. Say no to messy hair days and say hello to beautiful, well-kept hair daily.
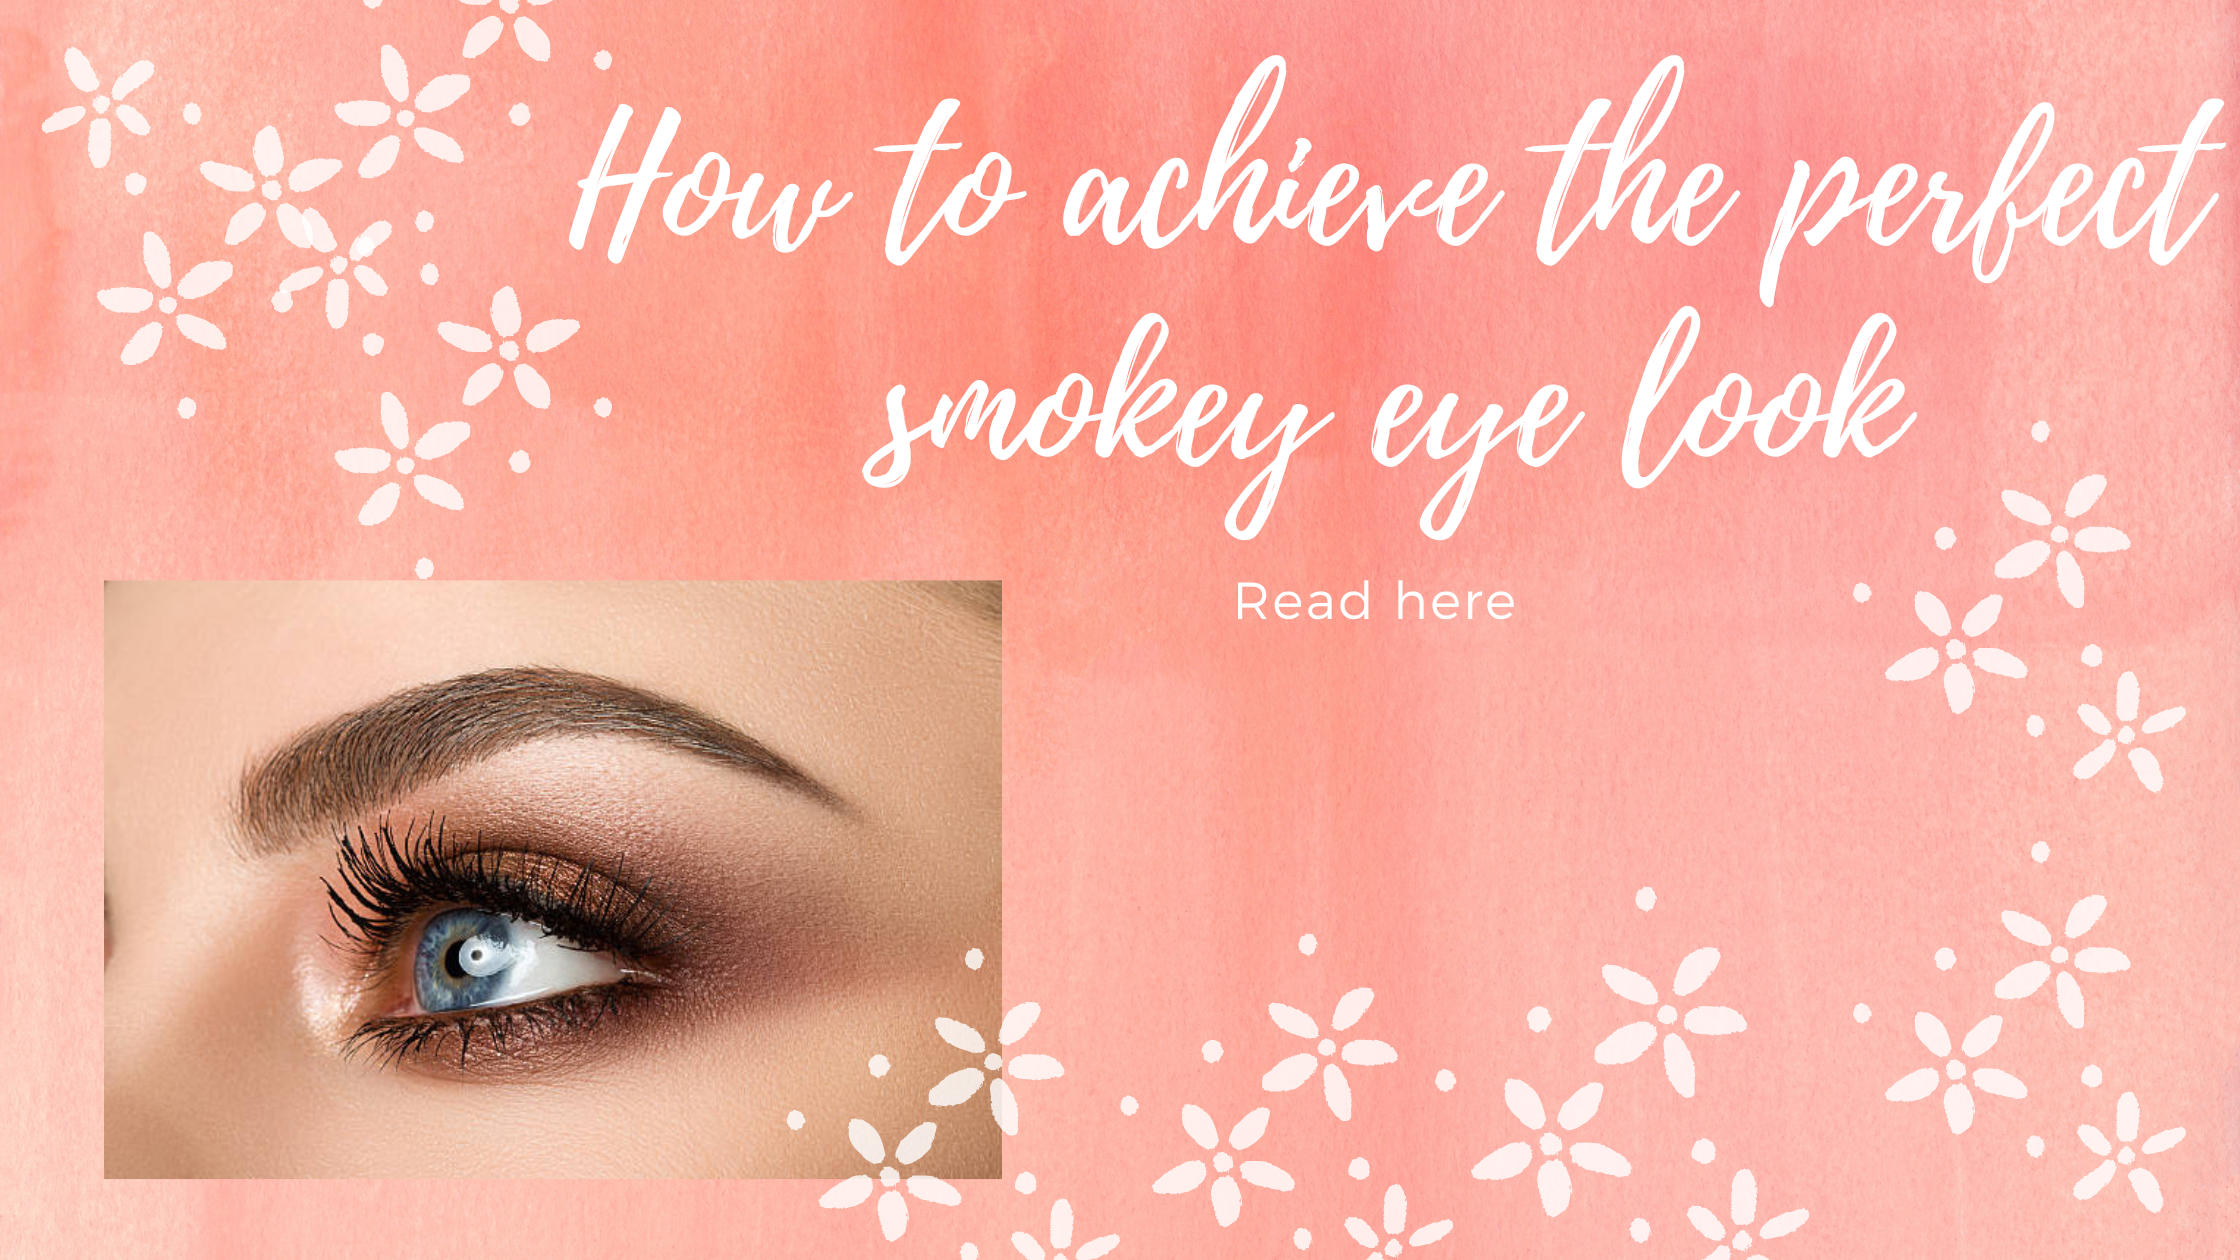
Posted By: 2nd July 2024
How to Achieve the Perfect Smokey Eye Look
and there can be too much smoke. In simple terms, there can be too much smoke. Smoky eye makeup is supposed to be bold and edgy compared to the carefully done makeup that girls usually wear. However, it's important to balance looking attractive and appearing too messy or strange. Therefore, it's understandable that over 21 million people have searched on Google for "how to do a smokey eye. " So stay here and keep readig because Ladyfair has best ideas for a smokey eye. A smokey eye: what is it? To begin with, what exactly is smoky eye makeup? In actuality, it's a diffused or blended eyeshadow as opposed to a single block color that: a) looks really good b) adds dimension Although you can use a single shade and blend it at the corners, you'll usually build layers with various textures and hues. Also Read : How To Do Facial At-Home 3 things to consider before applying smoky eye makeup Maintaining the darkest point at the lash line is crucial. It guarantees that you focus more attention on your eyes than your makeup and keeps it looking incredibly current and fresh. Make it easy. Use three shadows and a liner to make your eyes pop. Your friend is a blend. It takes brushes to get that mix. The secret to a smokey eye is how well you can blend the liner and shadow together, regardless of how dark you go or what colors you use. That's what makes it appear seductive. Directions Of Smokey Eye Makeup If you want to know how to do simple smoky eye makeup, you may smudge your eyeliner pencil to create soft, smokey eyes! However, we'll walk you through how to apply smokey eye makeup for beginners so you can achieve the timeless smokey eye look. Here's how to do it correctly! 1. Begin by washing your skin: The first step in this how-to video for basic smoky eye makeup is to clean your face well, paying particular attention to the region around your eyes. Use an oil-free cleaning solution to eliminate any traces of oil and debris in the creases. This will guarantee that the makeup pigments of the smokey eye look shine through in all of their glory. 2. Use primer for your eyes: Let’s start with eye primers as we proceed to the next level of our smokey eye makeup tutorial for beginners. Primers are makeup bases that help hide wrinkles and creases on the skin. Eye Primer smooths out the skin around the eyes. Ensure you do this if your skin is oily. Once you apply primer, wait a few minutes to allow it to dry completely. 3. For optimal effects, use concealer: You must follow this guide for beginners on how to apply smokey eye makeup. All eye makeup, including smokey eyes, will be hidden under dark circles or patches. Try using the correct color concealer for those dark circles under your eyes. Orange and peach are the most suitable colors for countering bluish rings around your eyes. The best way to apply this product is not by dragging it but by dabbing it around your eyes so it settles nicely. 4. At first, stick to primary hues: For beginners, use primary colors while applying smokey eye makeup. Once you’ve mastered that technique, start playing with colors and glitters for more dramatic looks! Mastering the classic smokey eye look can only be achieved by selecting a black and basic brown color scheme. Besides, some browns and blacks are different from that highlighter shade, which helps create the perfect play of light and shadow. 5. Select the appropriate tools: As you learn how to do smoky eye makeup for beginners, your beauty tools will become your best friends! Use brushes instead of using your fingers to apply paint to your eyelids. To apply the eyeshadow pigments evenly, you will need a set of brushes, including an eyeshadow brush, a blending brush, and a small-tipped brush. 6. Make use of the eyeshadow brush first: Now is the time to use the colors from the beginner's guide on smoky eye makeup! Apply the mid-toned nude shade over the eyelids to create a soft, smoky foundation. If you're a newbie and want a more subdued smokey eye appearance, staying with brown is okay. Take the pigment and use it on the upper lid's outside corner. Continue blending until you reach the crease line and the outer corner of the eye. Allow it to blend into the foundation eyeshadow color to create a smoother, deeper gradient. Recall to blend with a fluffy brush for details and to work with the corners of the eyes using a tapered brush. 7. Combine to sculpt the eyes: Now that we've covered how to apply smoky eye makeup for beginners let's add some highlighting effects to enhance the appearance. To achieve the ideal smokey look, highlight the area surrounding your eyes with more light. To lighten the appearance, tint the brow bones with the white. You can also lightly sweep this highlighter in the middle of the lid for a more radiant appearance. Ensure that every color has been blended into a smoothly flowing range of tones. Also Check : Hyperpigmentation Treatments 8. Make the best possible wings This is the last section of the beginner's guide to creating smokey eye makeup! For this phase, an eyeliner pen or brush can be used. Make a little wing that covers the smokey tip alone. Join the bottom lash line to the outer wing. It will highlight a smokey-eye appearance that is bright and well-framed. Remember to apply mascara to your lashes to give your eyes more depth. With these pointers, you should be an expert at applying black smoky eye makeup. Closing Up: In conclusion, in our beginner's guide to smokey eye makeup, we advise you to wear brown during the day. It will make you look glamorous and aristocratic wherever you go. Save the black and darker hues for the evenings and for times when you've mastered the art of creating the ideal smokey eye look. Use only top-notch eye makeup items for the most attractive face.
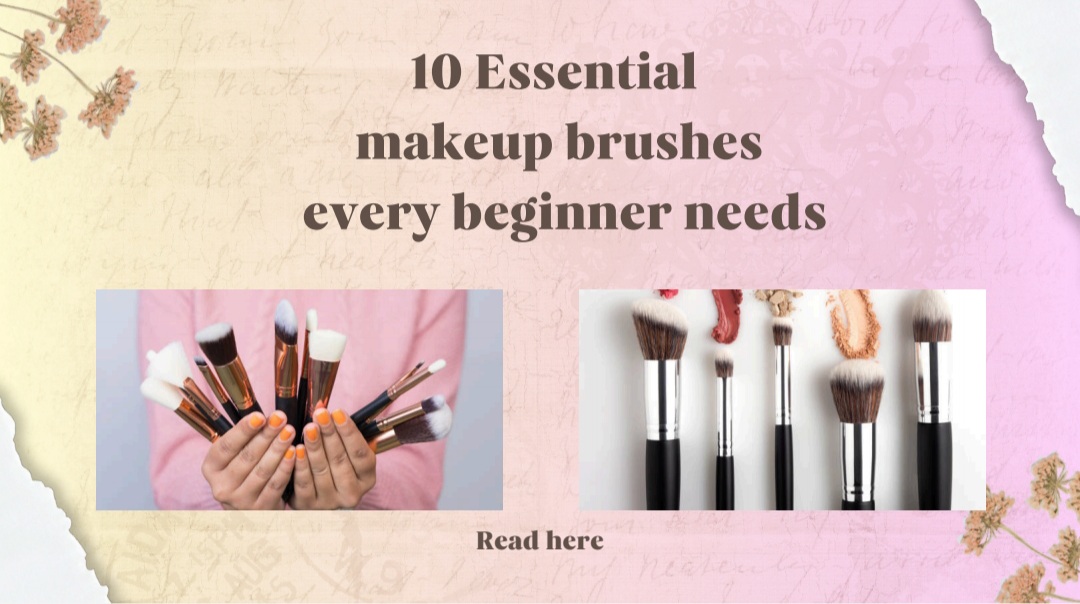
Posted By: 1st July 2024
10 Essential Makeup Brushes Every Beginner Needs
Makeup Brushes Every Beginner Needs Brushes help you apply makeup exactly where you want it, covering up minor imperfections and making it last longer. Do you really need all of them in your kit? We can help if you're having trouble choosing because there are too many options. Our Ladyfair guide lists the top ten cosmetic brushes you need. Take advantage of their size, shape, and bristle density. Also Read : The Best Haircare Products For Every Hair Type 1) A foundation brush: Although most of us have mastered applying makeup with our fingers, switching to a brush improves precise application. There are a ton of angled, fluffy, or dome-shaped contenders available, and you may veto those that don't match your go-to foundation formula. If you like cream, you'll want tapered bristles that effectively mix your skin's hues without leaving any noticeable streaks. Conversely, flat bristles work well with liquid foundations, providing more accuracy when creating a crease-free, smooth base. 2) The concealer brush: Concealer may hide many sins and cosmetic errors, but you could start over from scratch if you don't use the proper brush. If you are unsure of the appropriate sequence for applying concealer and foundation in your daily beauty routine, let your purpose guide you. To prevent wiping off your hard work with the fluffy underside of a foundation brush, spot-concealing zits, and premature pimples should be done after the base has been concealed with a creamy product and then fixed in place with the foundation. 3) A powder brush: Any makeup artist will give you a one-way ticket to their bad books if you don't set your face with loose powder, and for good reason. You may achieve an airbrushed look with your buildable makeup layers using a small amount of setting powder. A powder brush is handy for precise powder application, but it's primarily helpful to ensure you're not spilling too much product on your selected OOTD. The T-zone, temples, and chin are frequently the targets of mid-day shine. The fluffy bristles assist in evenly diffusing product over these areas and optically blur away any blemishes or unevenness. 4) A blushing brush: A blush brush, quickly the most recognizable item in the beauty kit, may be used for anything from a modest color flush to the ideal glow after a trip. The broad brush proportions provide a natural wash of color for daytime wear by evenly dispersing powder pigments over your BB cream or tinted moisturizer. Dip the brush into a bronzer and apply it over the cheek hollows, jawline contours, temples, and décolletage for extra sheen to enhance definition and depth. 5) The contour brush: Contouring aims to draw attention to the bone structure by varying the light and depth. An angle brush's bristles can apply a concentrated amount of product while minimizing fallout. Apply a light coat of highlighter to the corners of the eyes and the arch of Cupid's bow for a sculpted look using a tapered brush. 6) Brush for highlighter: Any OOTD looks excellent, with a radiant highlight as the ideal counterpoint, but applying the perfect quantity of shine-enhancing pigments to the appropriate spots only requires planning. To enhance your skin's natural brightness, the product selection is just as important as the application equipment. Use a fan-shaped brush to apply a concentrated dose of pigment to the parts of your face that catch the light. The bristles are splayed to help apply a precise stroke along the nose, forehead, and brow. Its linear density also aids in the flawless application of creamy sticks and powder illuminators. Moreover, this thin wand can spot-correct any makeup spills around your eyes. 7) Brush for eyeshadow: An eyeshadow brush is an essential tool for a cosmetic artist or novice. Packed with short, stubby bristles, it helps extract the most pigment from the palette to produce eye makeup looks that pop. Try dome-shaped brushes for more pigment payoff and precise control over where the color goes, especially in difficult-to-reach creases. 8) A blending brush: A blending brush may make all the difference in creating a smokey eye that will turn heads. Perfect for applying makeup, the little bristles offer enhanced control and accurate color dotting. After you've painted a thick enough base on your lids, use a blending brush to soften any harsh edges and define any creases. 9) The eyebrow brush: Strong eyebrows are essential to your overall beauty repertoire. An eyebrow brush is all you need to achieve dreamy, feathery arches, regardless of whether you favor pomade or powder. Usually, an eyebrow brush comprises a wand with two ends, one for an angular brush and the other for a spoolie. The former is used to fill in any spaces between hairs and shape the arches of the eyebrows. In the meantime, the spoolie helps plump up the current growth and control the direction of the brows. 10) A lip brush: Despite frequent neglect, lip brushes provide a budge-proof application and are a failsafe against feathery edges during the day. You'll be a believer if you use this pencil-like wand for touch-ups during the day rather than applying color straight from the bullet. This small brush is useful for everything, from creating buildable layers for more extended coverage to accurately lining the lips. Also Check : Tips To Avoid Makeup Mistakes Conclusion: The correct makeup brushes are essential for getting a perfect look, especially for people just starting to use makeup. Each brush has a different job, like making your face look smooth or blending eyeshadow well. Buying good brushes, like a brush for foundation, a brush for concealer, a brush for powder, and others, can improve your makeup. Learning how each brush works can improve the look and longevity of your makeup. With these ten essential brushes in your collection, you'll have everything you need to create many different makeup styles easily.
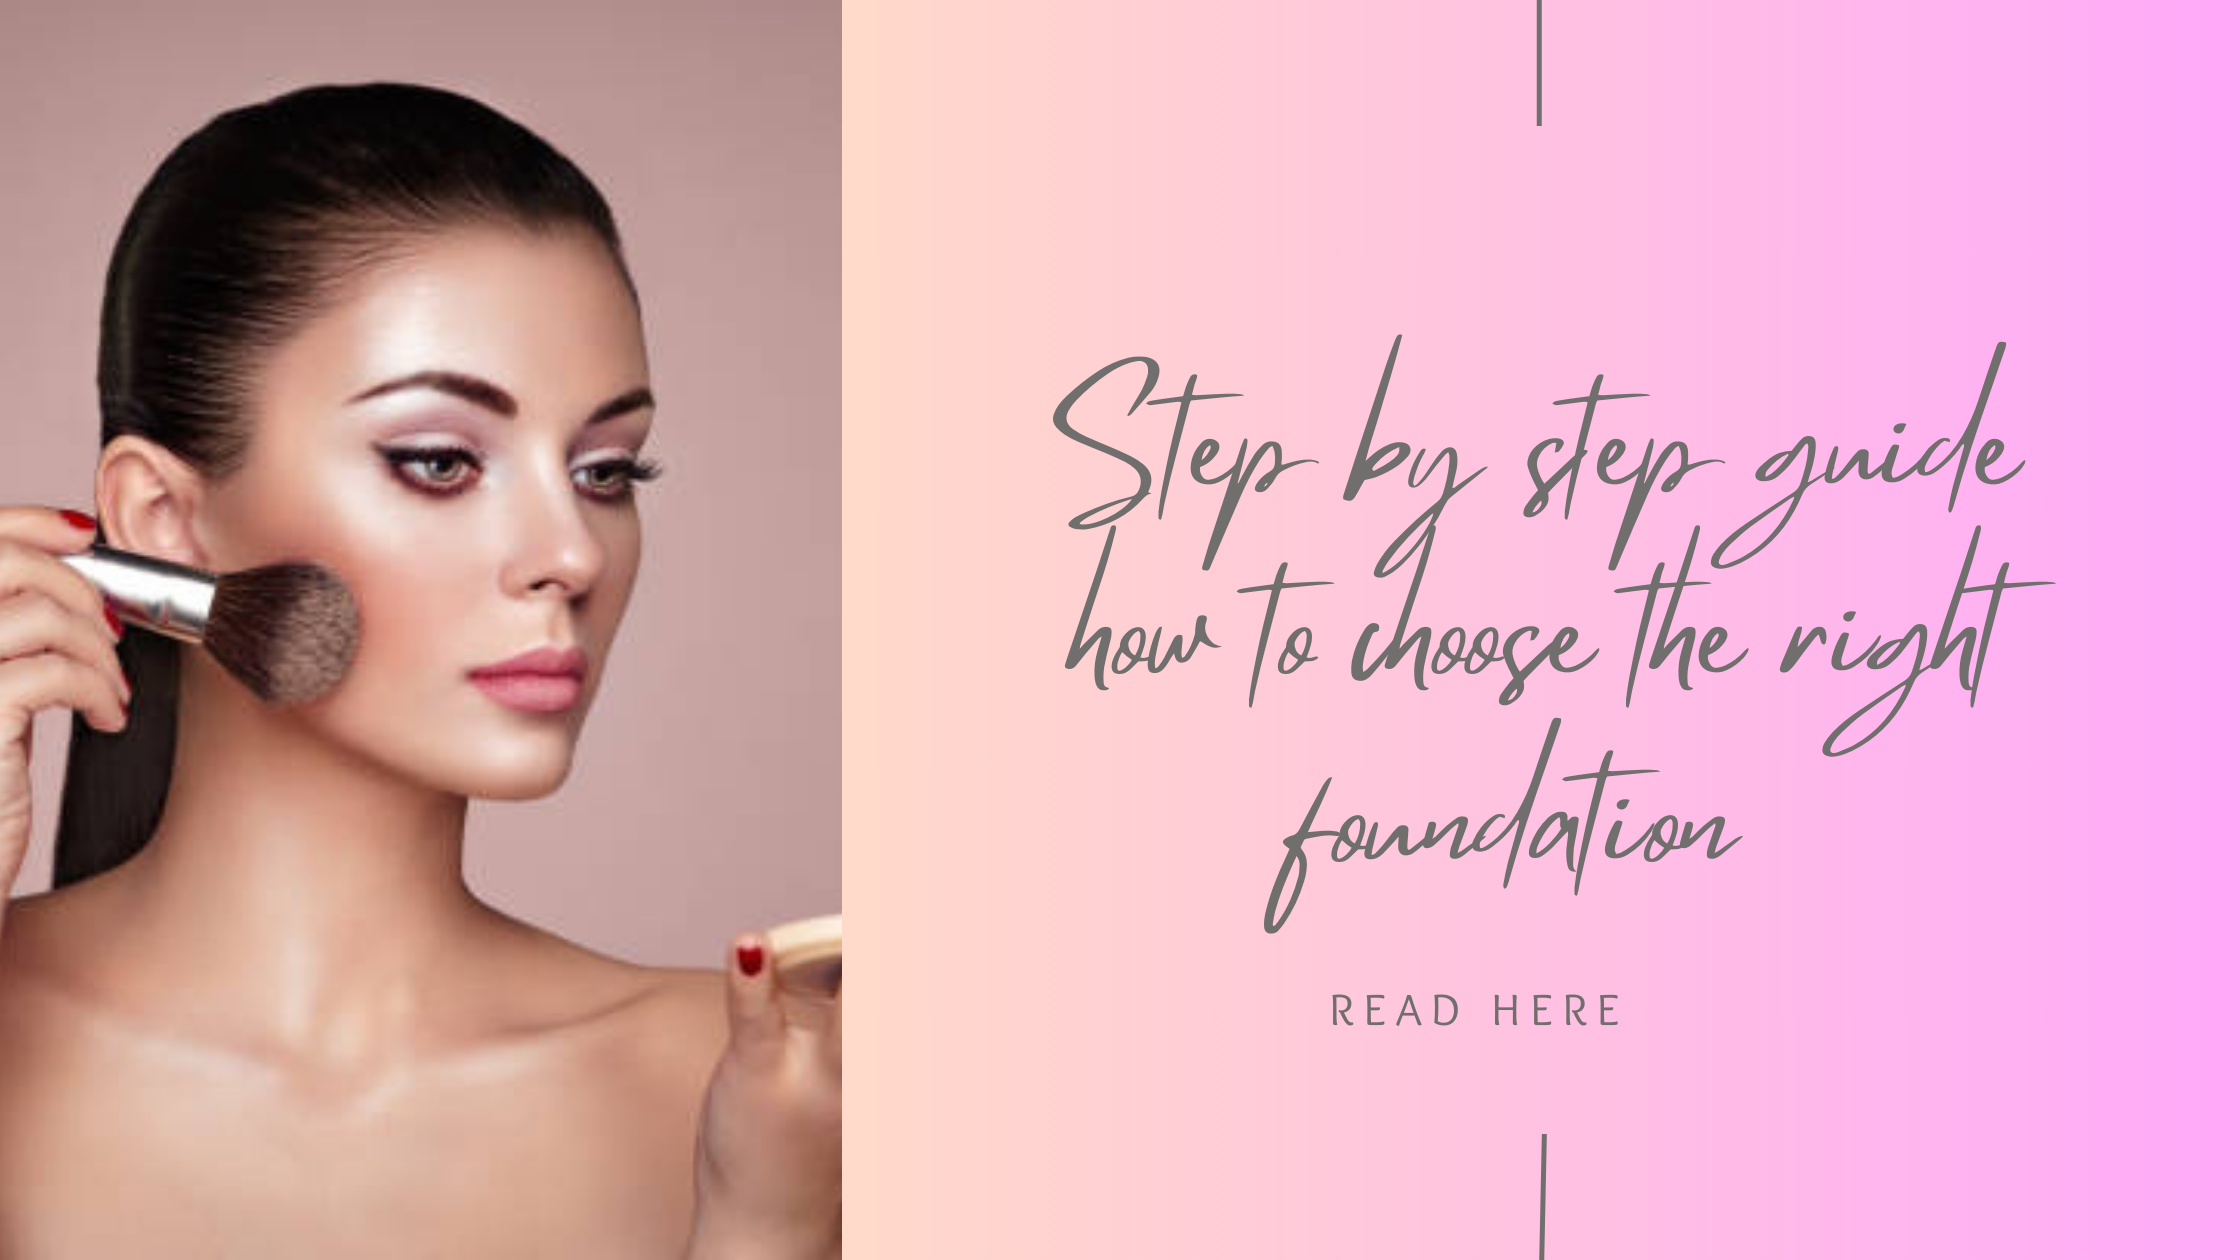
Posted By: 1st July 2024
Step By Step Guide How To Choose The Right Foundation
We've all made fun of someone for wearing the incorrect foundation at some point. However, even when it comes to our own faces, finding a foundation that isn't perfect requires a lot of time, many options, and irate sales associates. Furthermore, the wrong shade of makeup can indeed ruin your entire ensemble. All you need to look beautiful is a strong base, even if you are new to contouring or don't want to go overboard. However, how can one pick the ideal foundation hue? What about online foundation shade selection? Fortunately, Ladyfair have compiled all of the advice to assist you. What is Foundation, and Why is it Important? The main purposes of makeup foundation are to balance the skin tone and give other cosmetics a smooth surface. Among the different varieties, Matte Finish Foundation is notable for its capacity to manage shine and provide a stable, even complexion over time. Though improvements in formulae have made it suited for various skin types, people with oily skin will benefit most from it. The cornerstone of the beauty industry, foundation makeup, is necessary to enhance overall makeup application and provide a perfect base. Also Read : How to Choose Pure Vegan Makeup Kit Understanding Your Skin Type for the right foundation Normal, oily, dry, combination, and sensitive are the five primary types of skin. Usually, normal skin is well balanced in terms of neither too much oil nor over-dryness. The oily type of skin is characterized by more visible pores, and it looks shiny. Sometimes, dry skin feels tight and has flaky or rough patches on it. Combination skin is characterized by both qualities of oily and dry skin; often, there will be a drier cheek area with an oily T-zone. People with sensitive skin react easily to any irritant, and they can quickly become red. Begin by washing your face using a gentle cleanser to get familiar with what kind of skin you possess exactly. After completing your cleaning process, do not put on makeup for some time to enable you to evaluate the texture of your face without any distractions it. Are there marks like shiny (oily), dry (stretched), combo (shiny and tight areas), red (sensitive) or comfortable (normal) on your face? Selecting the Right Shade When purchasing foundation or concealer, a lot depends on what undertone means. This involves choosing the right shade for it. However, let us begin here: Undertones are the color under our skin, and complexions are what we see on the surface of our faces. Figuring out the undertone of our skin is harder than just knowing its color. Here's a quick way to find out the undertone of your skin: look at the veins on your neck, face, and other areas with veins. Cool: You have cool undertones if you notice blue veins. Warm: You have warm undertones if your skin appears green (olive) around your veins. Neutral: A neutral undertone is a blend of cold and warm undertones. Types of Foundation Coverage Foundation is available in a range of coverage choices to accommodate diverse skin types and preferences. For people with fewer imperfections, sheer or light coverage offers a natural look that discreetly evens out skin tone without disguising it. Medium coverage is better at hiding flaws and discolorations while preserving some of the skin's natural characteristics. Full coverage provides the highest level of pigmentation, providing a smooth, uniform appearance by masking the majority of blemishes, hyperpigmentation, and scars. Ultimately, the best option will rely on the skin correction or enhancement level you want and the finish you want. Also Check : How Herbal makeup will help you to Glow naturally Different Foundation Finishes Even though the foundation finish you select is primarily a matter of taste, different skin types react differently to different foundation finishes. As a result, it could be wise for you to decide based on both what best suits your skin type and what you prefer. 1. Complete Finish of Sheer Foundation: Though technically, sheer finishes function more like a tinted moisturizer than foundation, they are still considered foundations. The goal of sheer foundations is to somewhat neutralize your skin tone and conceal any pigmentation or discoloration as well as any skin imperfections. 2. Natural Foundation Finish: Natural finish foundations are made to be lightweight, breathable, and comfortable to wear. They conceal zits and acne scars just enough to avoid overdoing it and give you a completely glam appearance. 3. Dewy Foundation Finish: When you want that gorgeous lit-from-within look, dewy makeup foundations are a great addition to your arsenal. Whether it's summer or winter, they are comfortable and light to wear. Additionally, the majority of dewy foundation products contain a moisturizing ingredient that makes them excellent for skin, particularly for older or dry skin types. 4. Finish for Semi-Matte Foundation: Semi-matte foundation offers a semi-matte finish, as the name would imply. A semi-matte foundation has a finish that is in the middle of a dewy and full matte. Semi-matte foundation combines the delicate sheen of a dewy foundation with the long-lasting effect of matte foundation. 5. Matte Finish for Foundation: In the world of makeup, matte finish foundations are a classic. Even though the first matte finish foundations were made with a thick formula, makeup science has advanced to the point where lightweight matte foundations can now achieve the same look. Conclusion: To select the proper foundation, you should know your skin, realize your undertone, and consider the appropriate covering and finish. These activities determine a flawless base that seamlessly matches one’s natural shade and cares about the health of one’s cutis. Naturally, test any beauty products before finally committing to it as well as engage experts where necessary. With a good foundation, you can enhance your make up look as well as be more confident in yourself, knowing that your beauty routine is all about you. A foundation that is accurately matched, on the other hand, looks great and stays put throughout the day.
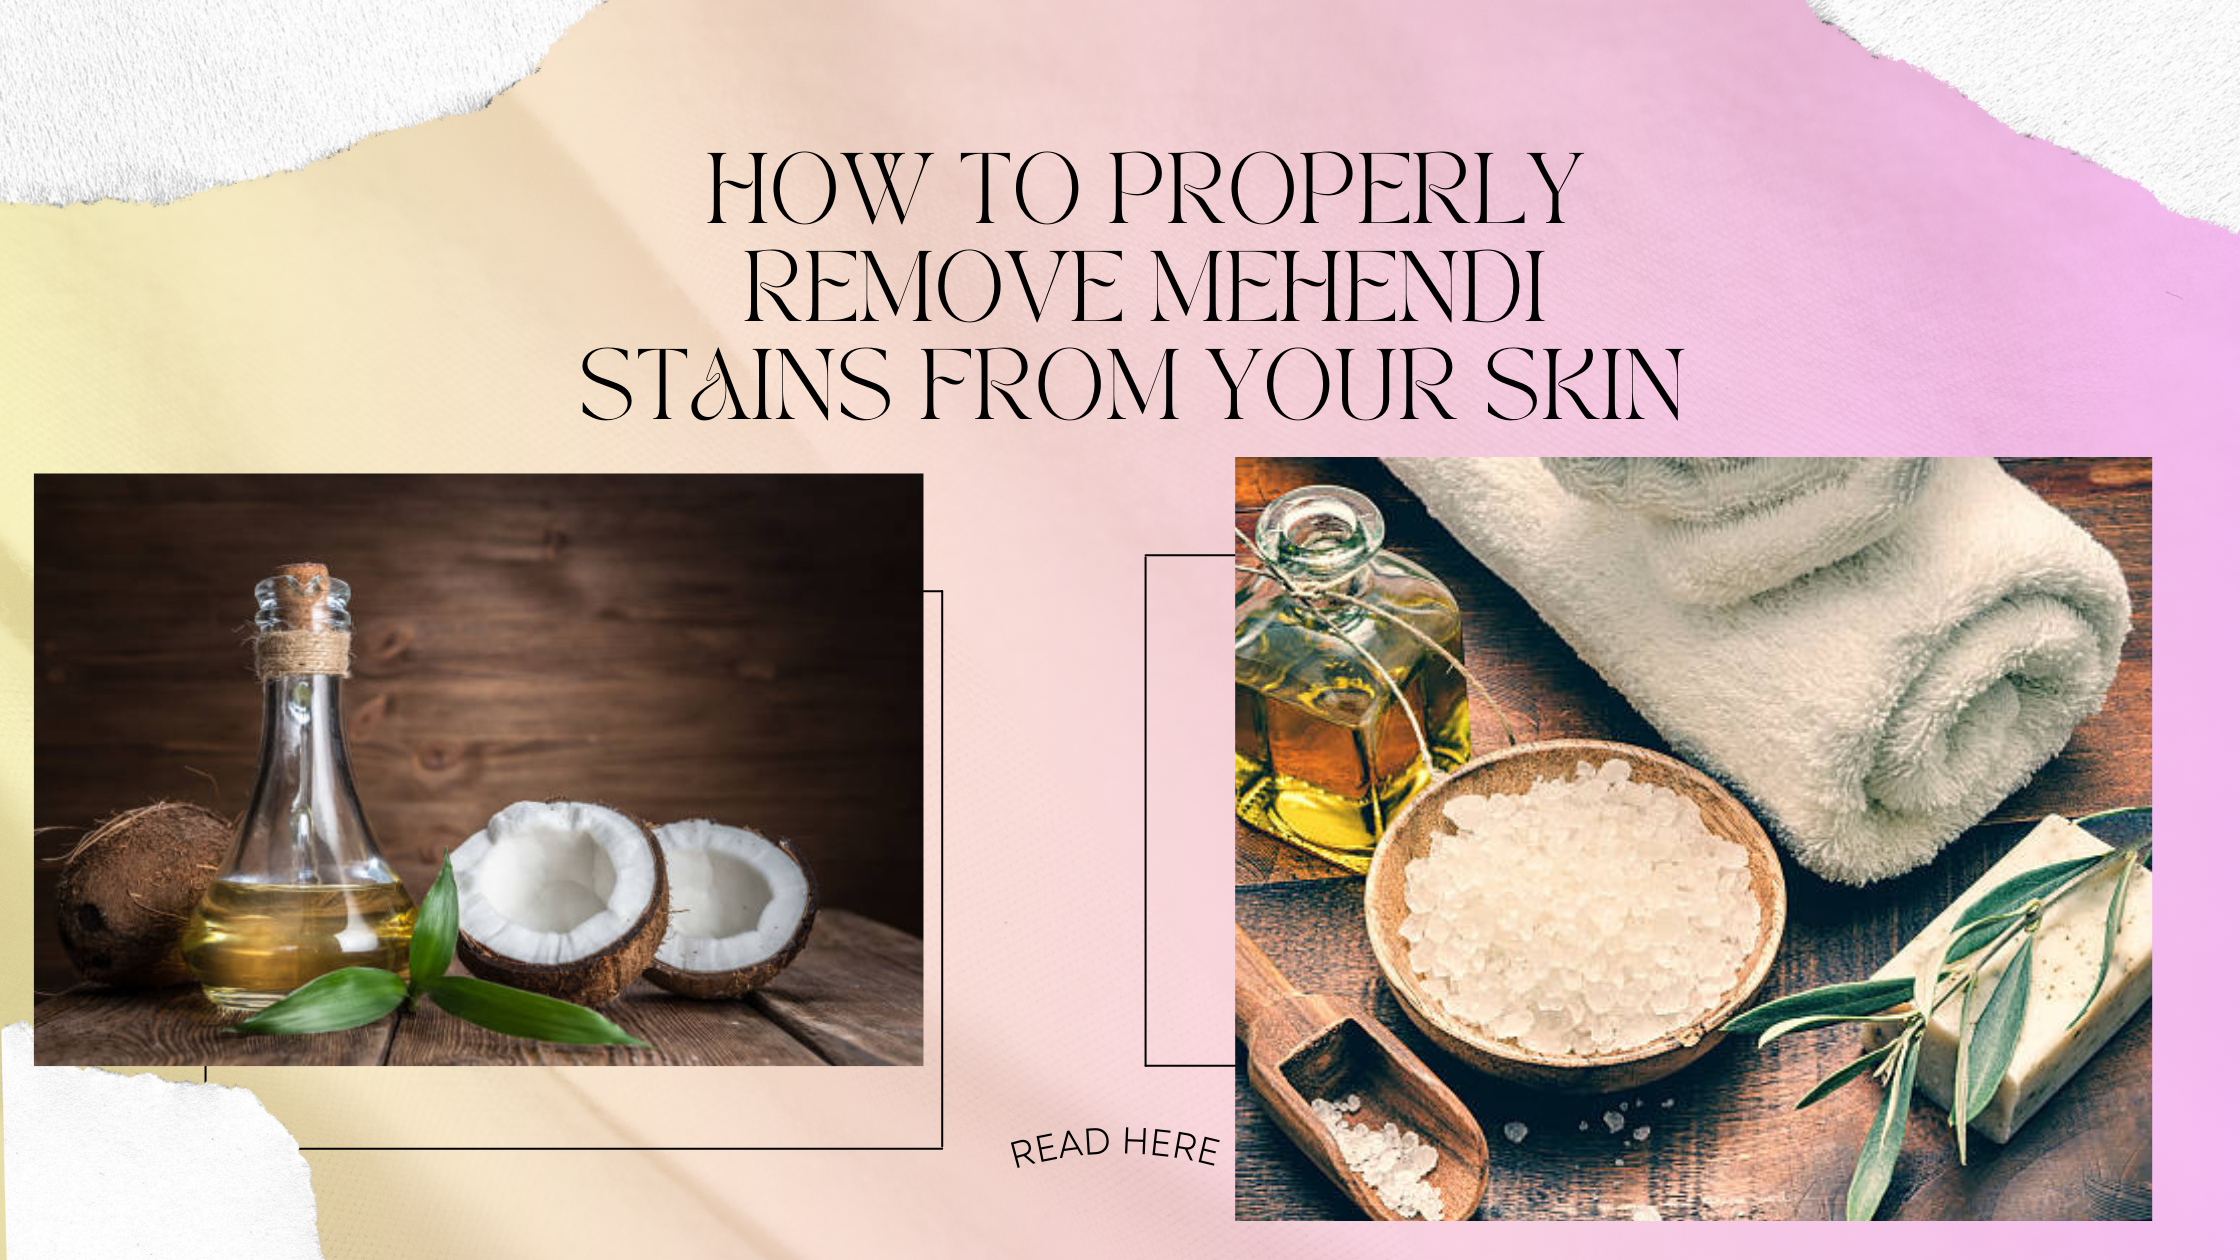
Posted By: 1st July 2024
How to Properly Remove Mehndi Stains from Your Skin
Getting mehndi applied on your hands is an excellent method to both commemorate and style oneself for any festival or wedding celebration. However, understanding how to remove mehndi from your hands is also crucial because, after the occasion, you'll want your hands to be free of mehndi. After all, it won't go with your regular clothes. Mehndi looks excellent with traditional attire, but you should be prepared with the appropriate advice to remove it as soon as the celebration is over. Mehndi is a semi-permanent skin tint. Thus, it differs significantly from cosmetics. To remove mehndi from your hands, follow the proper skincare procedures at Ladyfair. See these crucial pointers for quickly removing Mehndi from hands. Understanding Mehndi Stains The mehndi stains emerge when a paste from powdered henna leaves is applied to the skin. They are complex patterns that stain the skin with a reddish-brown color and are traditionally used on specific occasions in different communities, like marriages and festivals. The designs could be as simple as one or too complicated. After drying and flaking off, the stains can last for several days up to a few weeks before fading away gradually. Mehndi is not just a form of body art; it also has cultural and symbolic meanings. Also Check : Modern & Traditional Backhand mehendi Quick Tips for Removing Mehndi Stains Rub lemon juice over them to help lighten mehendi stains: Mix baking soda with water and scrub gently. Rub olive or coconut oil into the stained spot, then wipe it off. Put the stained area under warm, soapy water, soak it for some time, and gently rub it using a loofah. Apply toothpaste on the stain, let it dry, scrub it, and rinse it. You may use salt mixed with water to scrub your stained place. Sugar scrubs can exfoliate the skin, removing dark marks. 10-15 minutes should be enough before washing out whitening toothpaste applied on the stain. Remove this by applying a paste made from crushed aspirin tablets and rinsing it off with water. Soak hands in warm milk mixed with salt; this will help reduce the staining effect. Natural Methods to Remove Mehndi Stains Removing mehndi stains naturally requires gentle procedures and common household substances that aren’t harmful to your skin. Here are some natural ways that work: 1. Lemon Juice and Baking Soda: Lemon juice is a natural bleaching agent. It should be mixed with baking soda to form a paste. Leave the mixture on the stained part for a few minutes, and then gently rub it off. The stain is made lighter by an acidic lemon, and the abrasive nature of baking soda works in harmony. 2. Olive Oil and Salt: Olive oil is also known to be an effective moisturizer, and when mixed with salt, it can help exfoliate the skin. Mix olive oil with salt and apply it to this region. As you apply olive oil, sodium chloride will remove dead cells as well. 3. Sugar and Lemon Scrub: To make a scrub, mix sugar and lemon juice. Sugar naturally acts as an exfoliant, while the lemon lightens the stain. Gently massage your skin in circular motions using this mixture, then rinse off with warm water. 4. Vinegar and Warm Water: Soak a cotton ball in vinegar mixed with warm water. Apply it to this region and rub softly, trying to remove all the marks. Vinegar's acidity can assist in breaking down mehndi stains, making them disappear faster. 5. Aloe Vera Gel: Aloe vera has soothing and healing properties. Put fresh gel from an aloe vera plant on areas where color still appears and let it sit for 15-20 minutes. This helps lighten not only your staining but also moisten your dermis at once. Home Remedies to remove Mehndi stains for Sensitive Skin Here are several remedies that can help if you have sensitive skin: 1. Coconut Oil: Coconut oil moisturizes the skin and helps remove mehndi stains. For at least 30 minutes, generously put on the stained area. You could also leave it overnight as well. This oil helps weaken henna, thus making it easy to wash off. 2. Milk and Salt Soak: Soak the stained part in warm milk mixed with salt for approximately 15-20 minutes. Milk’s lactic acid eases out the stain, while salt acts as a mild scrub. This method is also gentle and perfect for those with sensitive skin. 3. Cucumber Juice: Cucumber juice cools and calms down irritated skin. Grate one cucumber, strain its juice, then apply to the affected area, gently rubbing in a circular motion until absorbed into your skin. Rinse after 20 minutes using lukewarm water. Cucumber juice is also good at reducing blemishes caused by staining without irritating. 4. Yogurt and Turmeric Paste: Create a paste by blending plain yogurt with a little turmeric powder (pinch). Apply this mixture onto the stained area and let it rest for fifteen minutes before washing it off again using clean water only without soap or any other cleansing agents since they may further aggravate your allergies while having anti-inflammatory elements. 5. Rose Water and Lemon Juice: Combine the same amount of rose water and lemon juice. Put the mixture on the stain with a cotton ball and wait for 10 minutes before washing it off. Rose water calms the skin, and lemon juice helps to make the stain lighter. Also Read : Best mehendi designs for bride Precautions to Take When Removing Mehndi Stains When trying to remove mehndi stains, it is important that one takes necessary precautions to ensure the safety and efficiency of the process especially if you have skin sensitivity or other skin issues. The following are some important precautions: 1. Conduct a little test: Before using any method or product for removing mehndi stain, patch test on a small less obvious part of your body so that you don’t react badly with the ingredients. 2. Avoid Strong Chemicals: Do not use strong chemicals or bleaches as these may irritate the skin and cause harm; you can opt for natural and mild methods which are less likely to cause irritation. 3. Be Gently: While scrubbing off or exfoliating to remove stain be gentle. Aggressively cleaning can break your skin leading to redness, irritation and even micro-tears. Avoid hurting yourself by rubbing gently in circular motion. 4. Moisturize After Treatment: It is essential to moisturize after an attempt has been made at removing mehendi stains completely. Since some means of removing mock tattoos dry up your body; apply a tender lotion which will keep your skin hydrated and fit. 5. Consultation with a Dermatologist: People with sensitive skins, allergic reactions or other skin conditions must consult dermatologists before attempting removal of their Mehendi designs. They will suggest methods that are safe and efficient regarding your type of skin. Bottom Line: In sum, getting rid of mehndi stains needs a gentle method to keep your skin healthy. By learning about how henna stains work and using natural ways and home remedies, you can make henna stains lighter and remove them. Follow these tips and be careful so you can enjoy mehndi during special occasions and easily get rid of the stains later.
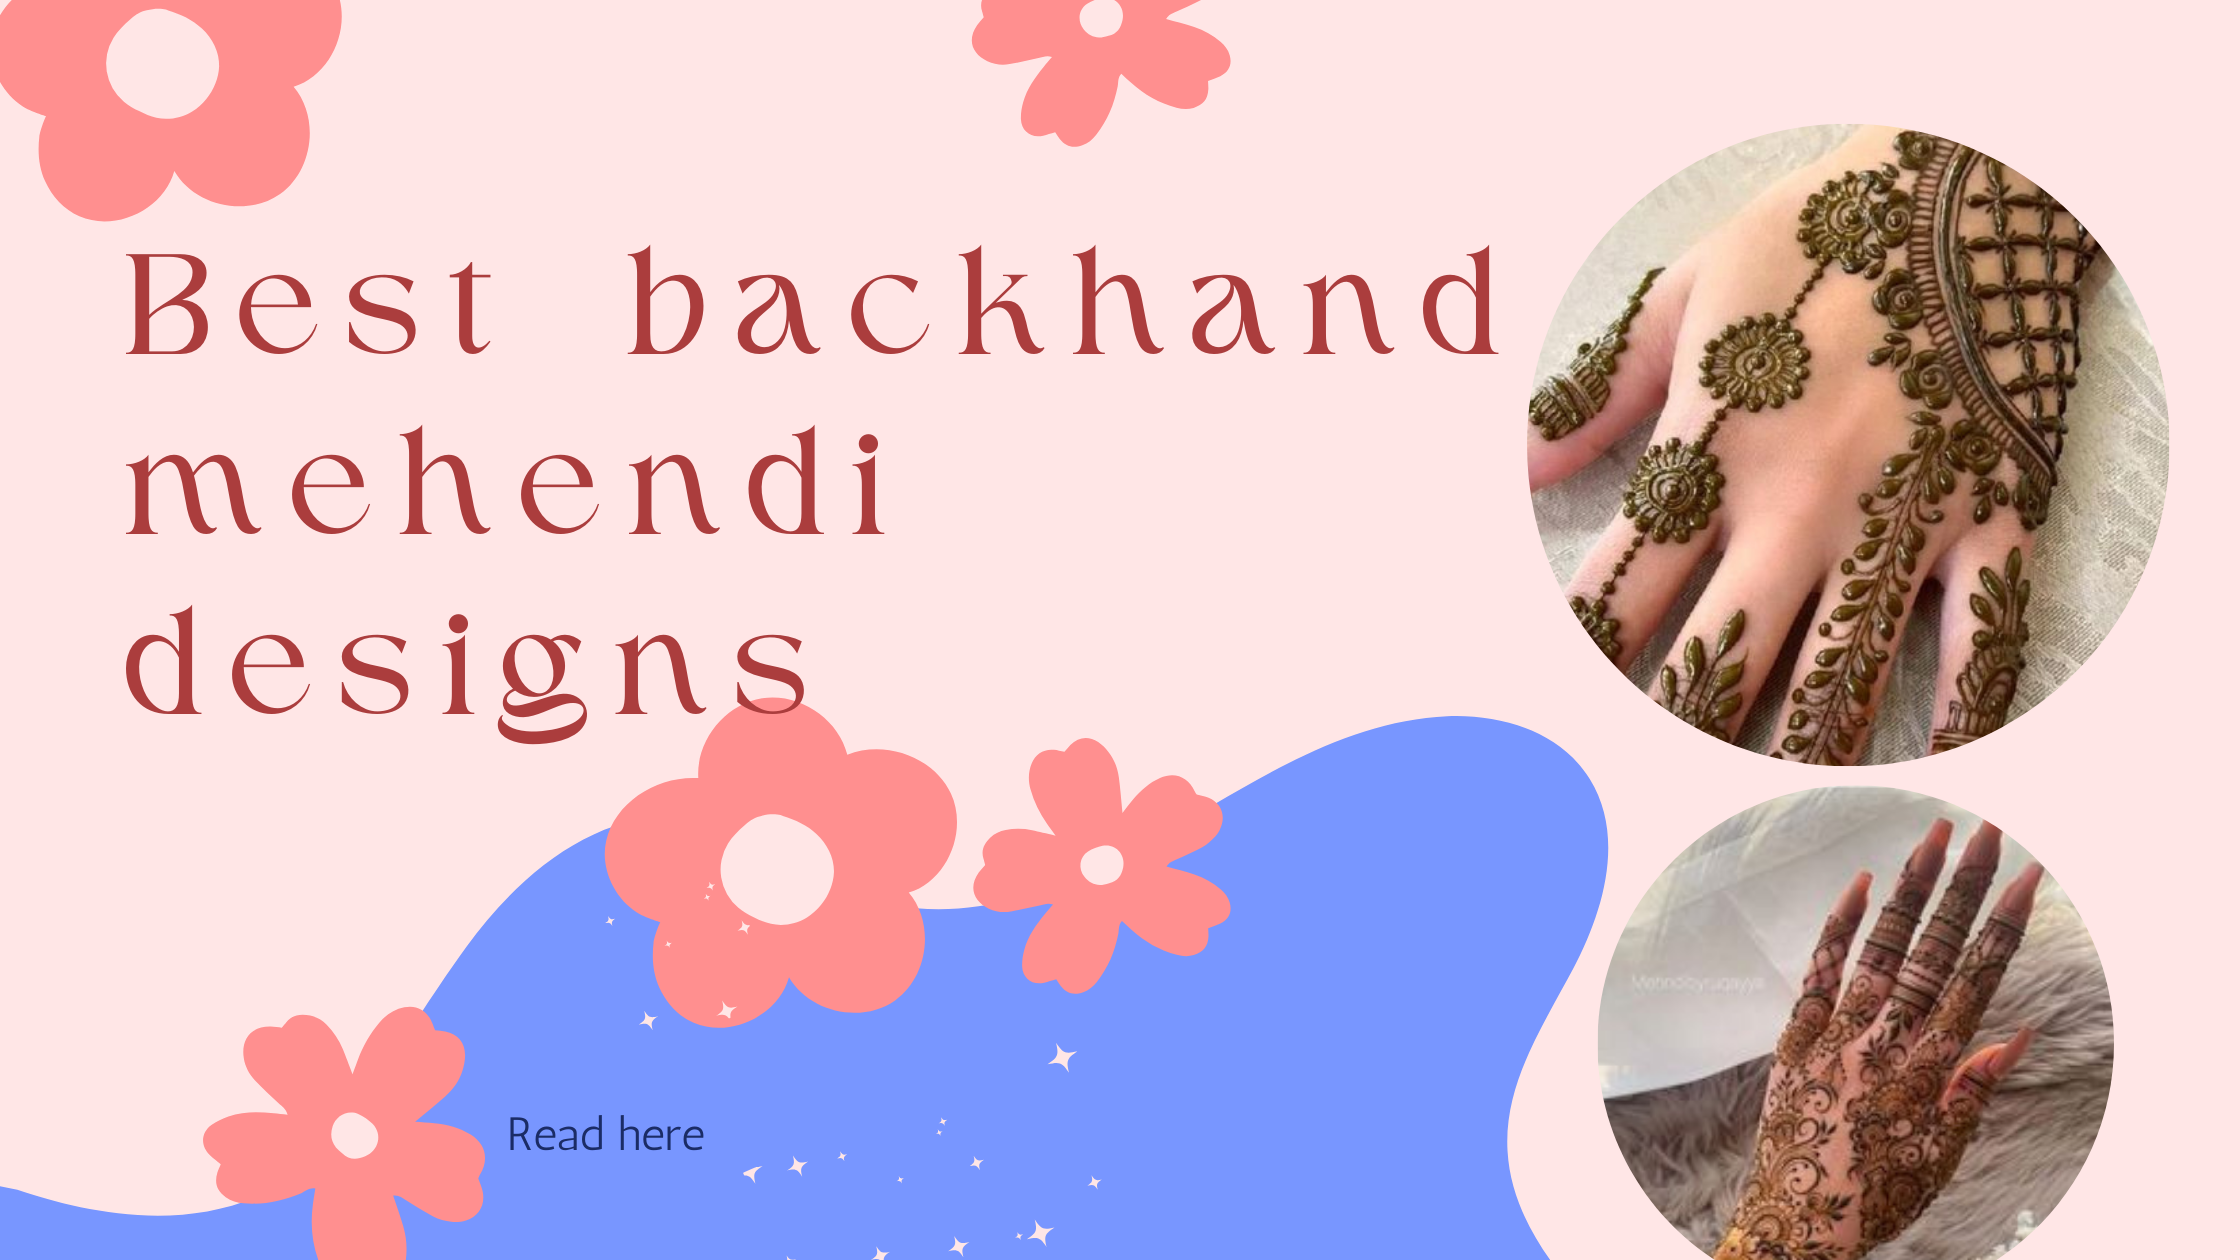
Posted By: 28th June 2024
Best backhand Mehendi Designs | Modern & Traditional Backhand mehendi
Backhand Mehendi Designs Your hands are a reflection of your individuality, and mehndi designs on your back are a wonderful opportunity to showcase your artistic side and accentuate your natural beauty. For millennia, mehndi, sometimes referred to as henna, has been an essential component of numerous cultures. In this post, we will learn about backhand mehndi designs, including their history, popular patterns, how to apply them, and more only on Ladyfair. Traditional Backhand Mehendi Designs 1. In parallel: It's only when one of your backhands has a gorgeous henna design that the other side appears attractive. The majority of royal brides choose sophisticated flower patterns on one side of the backhand for their wedding mehndi because they are so fashionable. Take a peek! 2. Arabic side-hand mehndi: Perhaps you would like more possibilities if you enjoy the concept of having mehndi designs on one side of your hand. For just one side of your hand, here is another backhand wedding mehndi design. It will add a sophisticated element to your Arabic bridal mehndi. 3. Easy and aesthetically pleasing: One of the most straightforward backhand wedding Mehndi designs is this one. You can choose this pattern with the least amount of work, and your Mehndi artist will enjoy it. You'll also adore the concept of wrapping the mehndi design more quickly and scheduling time for other enjoyable traditions. 4. Genuine Peacock Illustration: One of the most popular and preferred wedding designs among brides is the peacock motif. If you're not sure what will look well on your backhand, you can choose this design with complete confidence. It will give your backhand a refined and attractive appearance. 5. The longer, the better!: For women who are unwilling to settle for a simple or minimalist mehndi design for their marriage, this design is the greatest option. We advise you to choose this right away if you want your backhand to have both Arabic and elaborate Mehndi designs! Also check : Bridal Hand Mehendi Designs For 2024 Modern Backhand Mehendi Designs 1. Dense Henna: We promise that using this thick henna pattern for your backhand bridal mehndi will always be a success. When the mehndi turns red, a thick and generous application will ensure that it will bloom to its fullest splendor. 2. As Beautiful as You Are!: If you have an eye for beauty, there's no reason not to choose this Mehndi pattern for your backhand. You will feel amazing about yourself for taking the marriage vows, and we bet you can pull it off with the utmost ease. 3. Resting on the Thread: No, your ideas for your bridal mehndi will not be abandoned. Instead, we have this unique mehndi design for you to stand out from the competition and win over everyone. 4. Every Bride's Preferred: Yes, you did hear correctly! These days, most brides have come to love this backhand bridal mehndi style, which is in great demand. It goes without saying that it will draw the most attention and make your groom fall in love with you all over again. 5. An emblem of affection: With its unique pattern throughout, this henna design practically screams about love and its essence. But all it takes to make this mehndi design successful is hiring a skilled mehndi artist and having a lot of patience for a long! Seasonal and Festive Backhand Mehendi Designs 1. Top Flower Henna: This Mehndi design can be one of your top choices if you love flowery patterns and motifs in all of your clothes. It will do more than only enhance the beauty and vibrancy of your backhand to help you rock the mehndi function in your own unique way. 2. The Best of Everything!: Ladies, embrace your hearts! We think this design is one of the nicest that we have and one of our personal favorites. We are aware of no woman who has ever rejected this backhand bridal mehndi design! 3. Cute leaves: At weddings, leaves are an essential component of the bridal mehndi patterns. Whether it's an intricate leaf pattern or a more understated arrangement of leaves amidst designs, it will consistently meet your expectations. 4. Simple Mehndi Patterns: You must think about using simple backhand bridal Mehndi patterns for your wedding if you want to stay in line with the current trend. Whether traditional or modern, these henna designs work well together. Also Check : Best mehendi designs for bride Tips for Long-Lasting Mehendi on the Backhand Skin Preparation: Begin by washing your hands thoroughly. Gently exfoliate using a natural scrub. Use Fresh Paste and Apply Thinly: For the best results, use newly made mehendi paste. Old or premixed pastes may not give as dark a stain. Mehendi should be applied in thin, fine lines that dry faster and allow for deeper penetration. Natural Drying and Lemon-Sugar Application: Allow the mehendi to dry naturally, avoiding hairdryers or hand shaking, which can smear the design. When the paste has dried, apply sugar mixed with lemon juice using cotton wool. Heat & Clove Smoke: Put some cloves on an iron pan then pass the smoke over your mehendi. It is said to be an old method used to fix it and make it darker. After-application Care: Do not touch water after scraping off the mehendi paste for at least 24 hours since water lightens up the stain. Apply natural oils such as mustard oil or coconut oil. Regular application of these oils will help sustain henna’s vibrancy. Conclusion: Even if you may think this mehndi design is simpler. However, we're willing to wager that after applying it, your hands will resemble a dreamy work of art. For novice brides, our skilled painters give the best advice on this mehndi. These are some of the best bridal mehendi designs that have been added for your priceless hands. Our skilled mehndi artisans are utterly enamored.
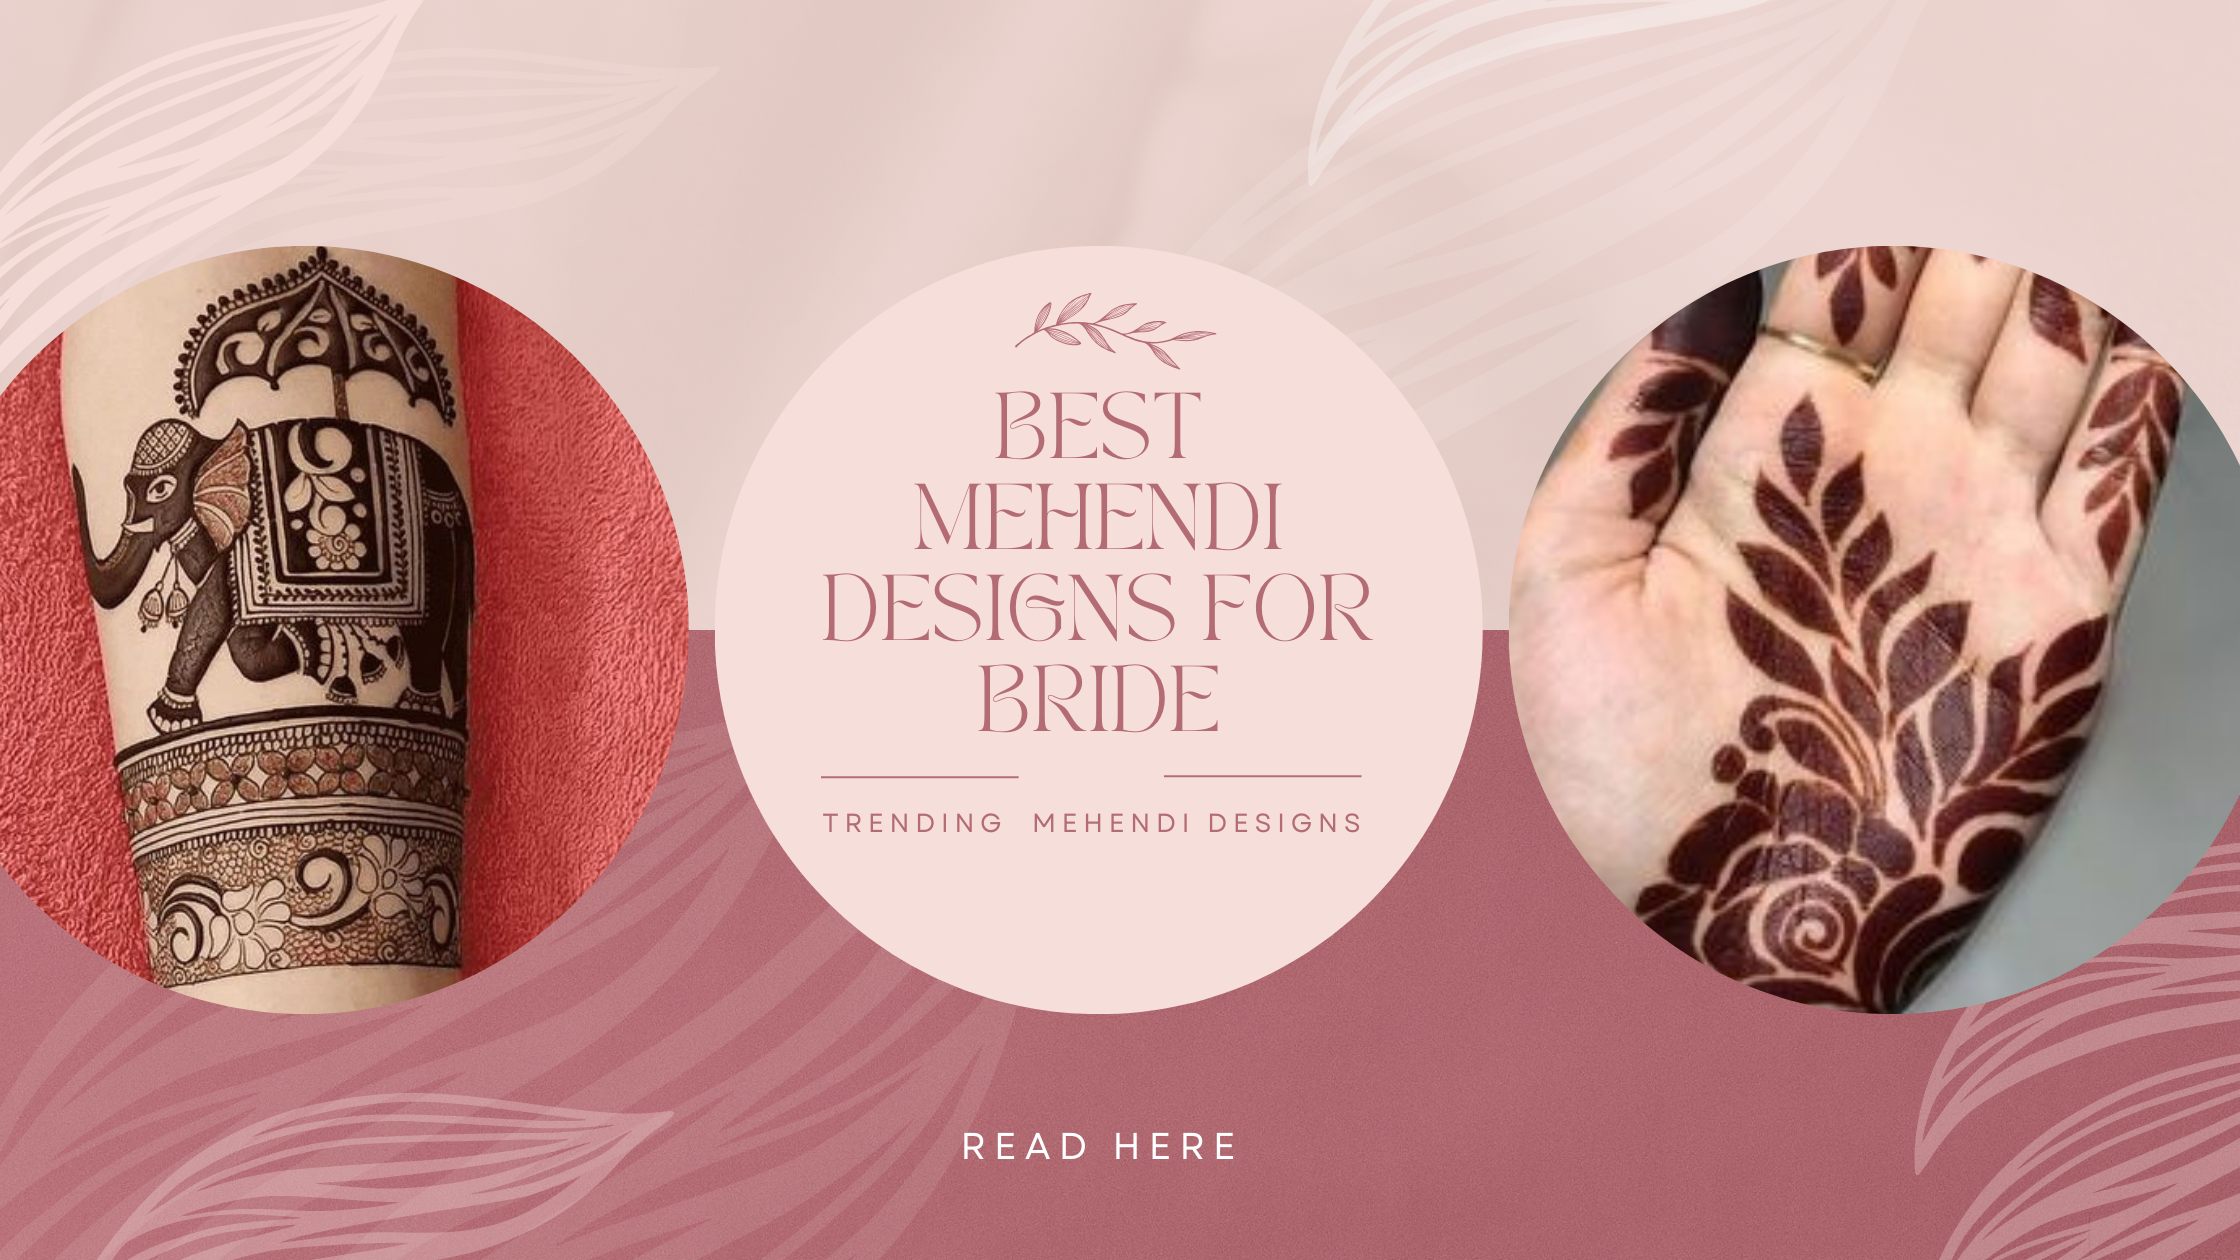
Posted By: 28th June 2024
Best mehendi designs for bride | Trending Mehendi Designs
Best mehendi designs for bride It's rare to come across a woman who doesn't adore mehendi. These illustrations on hands and feet have taken an artistic medium deeply ingrained in our customs and culture. The bridal ensemble is completed by the rich, dark brown, or crimson patterns on the hands and feet. The mehendi ritual, in which brides and other women adorned their hands to be ready for the impending wedding ceremony, evolved into a sophisticated custom. The bride can unwind and refresh at this enjoyable get-together of women, where they laugh and connect. There are countless options for marriage mehendi designs, but only a select few can win people over. Ladyfair has shared trending and best designs for brides, keep reading. Trending Mehendi Designs for Modern Brides 1. Floral Bliss: Featuring a combination of big and small flower motifs that convey a sense of elegance in the hands and wrists’ coverage. Each blossom is characterized by gentle petals and leaves, producing a rich garden-like appearance. This design is ideal for nature enthusiast brides who want to have a freshly blooming appearance on their wedding day. 2. Peacock Elegance: This design highlights the peacock, as it has fold-out detailed feathers. The peacock signifies beauty and gracefulness. Thus, it is usually preferred by many brides. Fine lines combined with curves create stunning and intricate patterns on the feathers, which spread across arms enticingly. 3. Mandala Magic: This pattern brings out some element of symmetry and magnificence by having mandala shapes in circular form. Each mandala is formed by dotted ones along with tiny straight lines; hence, its look becomes fantastic this way. This design would be appropriate for women who like traditional art and need their big day to be balanced, symmetrical, and harmonious. 4. Minimalist Charm: This mehendi design is uncluttered—simple lines all around and smaller designs, too. It’s perfect for brides who want something elegant but not overdone. A minimalistic approach leads to neatness and precision while creating simple patterns with tiny floral or geometric elements, thus making the bride appear smart-looking yet trendy. 5. Arabic Style: The Arabic mehendi design is renowned for its bold, flowing patterns and extensive shading. It has large floral and leafy motifs with bold outlines, creating a dramatic contrast. It’s ideal for brides who want to look distinctively attractive. 6. Royal Rajasthani: This design incorporates Rajasthan’s rich culture, including elephants, palaces, and royal figures. The intricate details and elaborate motifs create a majestic and regal feel, making it suitable for brides seeking a traditional touch of kingliness. 7. Modern Geometric: The contemporary design uses shapes like triangles, squares, and diamonds arranged in stylish patterns. Brides who love modern art will find this perfect, as it gives them an edge over others at their weddings. Geometric patterns are neat and structured, thus providing a sleek, fashionable look that matches well with modern bridal outfits. 8. Bride and Groom Portrait: A personalized design showing portraits of the bride and groom tells the couple's love story through this unique mehendi. The portraits are surrounded by complicated patterns and motifs, making it beautiful yet meaningful to use such a type of mehendi on the wedding day. 9. Glam Glitter: This design fuses classic henna with a dash of shimmer by using glitter particles. The glitter accentuates some parts of the design, giving it a luxurious and celebratory feel. This is perfect for brides who want to sparkle on their big day and add some glimmering effect to their classical mehendi. 10. Fusion Delight: This design combines traditional Indian patterns with a contemporary twist. It has traditional motifs like paisleys and flowers and modern features such as minimalist lines or geometric shapes. Brides can easily blend the tradition of their mehendi dresses with a touch of style that suits today’s ladies. Also Read : Bridal Hand Mehendi Designs For 2024 How to Choose the Perfect Mehendi Design for Your Wedding There are a few things to consider when selecting a bridal mehendi design. The following advice will assist you in choosing the ideal design for your big day: The mehndi design you choose should express your unique preferences and flair. Think about the themes, colors, and patterns you enjoy using, and then include them in your design. There are lots of print and web materials that feature a variety of mehndi designs. Go through these materials, noting any designs that grab your attention. You can also get inspiration and ideas from your mehndi artist. Determine the area of your body where you want mehndi applied. Some brides have more conventional designs on their hands and feet, while others can choose to have more unusual designs on their arms or back. Think about the money and the time: Remember that applying Mehndi designs might take a lot of time, particularly if you have a complex design. Be careful to account for the time required for the application process in your wedding planning, and remember that more complex designs could come with a higher price tag. Selecting a knowledgeable and talented mehndi artist for your wedding is critical. Seek out an artist with a sample of their work in a portfolio and get recommendations from previous customers. Tips for Long-lasting and Dark Mehendi Stains Give your hands a thorough wash with soap before sitting down to apply mehndi. Please refrain from using any lotions or creams. Your skin will be covered entirely in mehndi, and any possible layers will be removed, giving you a darker hue. Use eucalyptus oil on rare occasions. After cleaning your hands, apply this essential oil to your feet. The oil not only smells good, but it also helps darken the mehndi color. Let the mehndi on your hands dry naturally. Shake hands, don't blow dry your hair. Movement or breeze could smear the design, wiping out all the work you put into applying it. It's said that mehndi is made deeper by the smoke that cooked cloves emit. Preheat an iron skillet and put some cloves in it. Let the smoke from the cloves touch your mehndi. Keep your hands out as long as you can stand the heat; only take them in if they start to hurt. Rub the sugar and lemon juice together and apply to your hands once the mehndi has completely dried. Be careful when applying with a cotton ball. Do not go overboard, as the juice may lose its color. Also Read : How to Choose the Right Bridal Makeup Artist For a Wedding Conclusion: Mehendi is a cherished custom that beautifully complements a bride's attire and has unlimited options, from intricate floral designs to majestic portraits. Picking out the right designs should involve posing questions about one’s taste, referring to different sources, and hiring professional artists for advice.
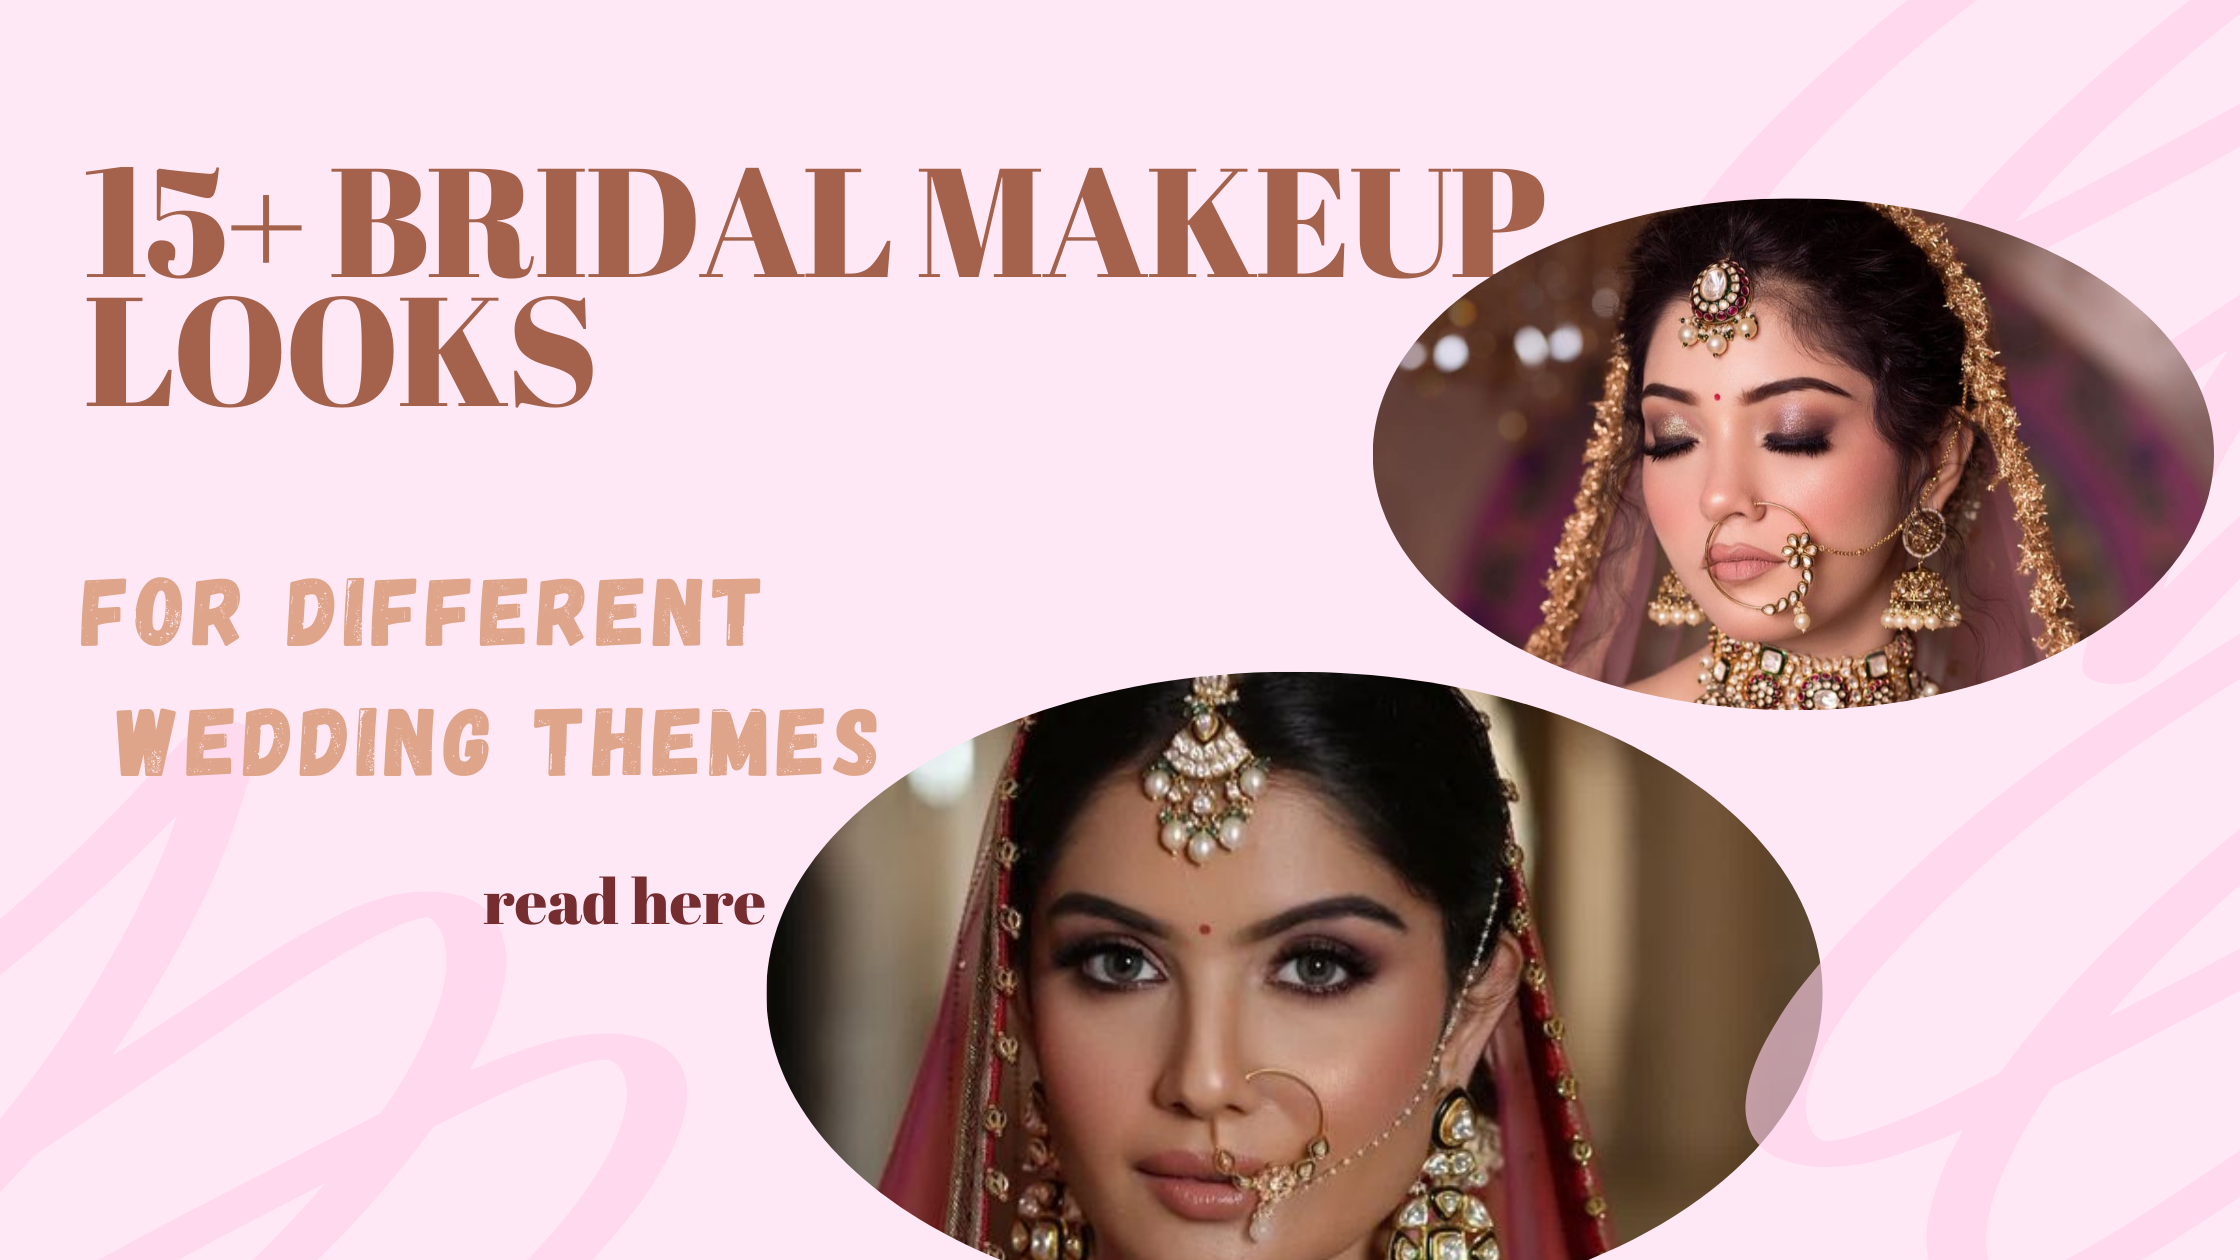
Posted By: 25th June 2024
15+ Best Bridal Makeup Looks for Different Wedding Themes!
Best Bridal Makeup Looks The Indian wedding festival is an enormous feast of food, beverages, and unrestricted champagne. The phrase "big, fat Indian wedding" was created in tandem with the wedding season, which has practically become a small-scale celebration. For many women, the pressure to achieve the perfect "bridal makeup looks" has often resulted in disastrous outcomes. Not to mention the exorbitant fees that numerous makeup artists demand based only on the number of followers they have on social media. Such a significant decision and investment require careful consideration and investigation. Nowadays, it might be difficult to distinguish between truth and fiction in the age of digital manipulation using filters, editing tools, software, and other resources. Ladyfair have carefully chosen and assembled a list of 15+ popular bridal styles to help the "bride-to-be" have an easier time with the procedure. Also Read : How to Choose the Right Bridal Makeup Artist For a Wedding 1. The Simple style: For many aspiring brides, minimalism is the new "clean makeup look." Its extreme simplicity adds even more specialness to the style. Nothing says "sheer elegance" like well-groomed cheekbones, arched eyebrows, a hint of highlighter, and a medium-cover base. If you have a naturally lovely complexion, minimalism is stunning. It reduces the number of items the makeup artist uses, lowering the possibility of cakey or creasing makeup. Take style cues from the gorgeous Alia Bhatt to finish the ensemble. 2. Bare and matte: One of the most well-liked and typical options for "bridal makeup looks" and "wedding makeup looks" is a matte, nude style. This look, inspired by superstars like Katrina Kaif, is a safe choice for someone lost and confused in the sea of "trending bridal makeup" looks. Your natural undertones will be accentuated, perfectly complemented by a clean base with muted eyes and a nude lip. 3. Brown Makeup's hues: It is subdued, uncomplicated, and tidy, yet it also has a hint of refinement and class. You can use this straightforward yet versatile hue to define and contour your eyes and shape your brows. This is the ideal choice if you're one of those brides who wants something stunning but not overtly "in your face." You don't need to explore much further if you are looking for terms like "Indian bride look" or "simple bridal makeup." Follow the lead of the stunning Bollywood actress Patralekha, who looked stunning during her wedding reception to Rajkummar Rao. 4. Bare and glossy: This style is really appealing because of the healthy, dewy skin that is accentuated with lots of highlighter glitter and a lovely glow. The ideal choice to complete this look is a light color on the lids, a little definition on the crease, and a tiny flash of loose pigment. For an added shine, ask your makeup artist to apply a shimmering setting spray to the entire look rather than a matte one. Look through the pages of your favorite artists when searching for keywords like "wedding Indian bridal makeup" to find the ideal inspirational photo and save it to your drafts immediately! 5. Shining and glossy: Our favorite Bollywood stars serve as the inspiration for a glitzy and glossy appearance. What distinguishes this look is the glossy lips paired with a blindingly bright highlighter. 6. No lashes or eyeliner look: Many brides have chosen to eschew the traditional wedding appearance despite the common assumption that the eyes should be the focal point of any look. The current fashion for brides who want to keep their look as light and uncomplicated as possible is to forgo eyeliner and use false eyelashes. This innovative approach to bridal makeup is undoubtedly here to stay. Nevertheless, use a brown eyeshadow and a delicate wing liner to avoid looking "washed out" and lifeless. Put on a contrasting lip color to complete the appearance. 7. Glistening Gold: Women frequently look for themes like "traditional bridal makeup" or "Indian bridal makeup," which conjures up images of shimmer, glitter, and gold. Gold is often used in makeup looks because it has long been connected to wealth, elegance, and glamour. It is frequently used with loose pigment or in conjunction with black smoky eyes. The color palette for this design has changed over time, going from bright yellow to softer, more subdued gold tones. It makes the eyes pop and immediately grabs attention. If you want to elevate your "bridal simple makeup," go for this look. 8. The bronzed appearance: You need not worry any longer if you enjoy feeling like Kim Kardashian. A super glam and bronzed look should be served. This will chisel your face and draw attention to your features instead of drawing attention to your bulky bridal jewelry or gown. 9. The Royal Red Theme: The exquisite royal red is a must-have for flawless bridal makeup. It shows a magnificent fusion of love in the sacred union of marriage, fertility, honor, trust, and togetherness. In addition to the customs of the past, ladies of all ages favor red since it brilliantly complements skin tones ranging from dark to fair. Add a stunning crimson to your lips, cheekbones, or eyelids for that dramatic impression. 10. Feathered Brow Style: The internet has gone crazy about feather brows. The brows are drawn with soft, feathery strokes rather than the conventional, strongly filled-in ones. This softens the face and gives it a more organic appearance. We adore this fresh interpretation of the bridal outfit. Clear eyebrow gels are a better option than soap bars since they are easier to apply and dry faster. 11. The enchantment of the smokey eyes: Since Bollywood films from the 2000s made songs like "Crazy Kiya re" and "Kajra re" popular, smokey eyes have been around. The epitome of a perfectly executed smoky eye is black eyeshadow combined with thick liner and eyeliner. Choose this option without hesitation if you are among the lucky brides with large, stunning eyes. In the same vein, avoid this look if your eyes are small, as it may make them appear smaller. To nail this style, take your cues from Deepika Padukone, the current queen of Bollywood. 12. Vibrant Colors: A vibrant combination of neon pink, green, blue, and yellow pigments is one of the most in-demand bridal styles. Most brides who wear this style are attending a Mehendi event. This look combines Brazilian makeup methods with an "angel eyeliner" style, is striking, dramatic, and guaranteed to leave your visitors raving. 13. The vibrant pink appearance: One of the newest trends in wedding makeup is "Hot Pink." The striking neon on the cheekbones, lips, eyelids, and even highlighter sets this look different from the others. This is the ideal alternative to try on your wedding day if you are one of those bold, unorthodox brides. 14. Finish with Airbrushing: To give a customer a "pore-less" bridal look, foundation, concealer, cream blush, and contour pigments are loaded into a specialized instrument called an airbrush finish. Many brides with texturized or acne-prone skin choose this choice. Using a tool, the makeup artist may ensure less skin contact with their hands, preventing further escalation of any existing facial or skincare concerns. To reserve your preferred makeup artist, look for terms like "bridal makeup Indian"; remember that this is a complex process to perfect, so pick a professional. 15. The wedding attire of millennials: Millennial brides are a unique blend of glamor, glamour, elegance, fun, and unconventionality. A millennial bride can add sparkle while keeping things simple, from delicate curls to sparkling eyes and graphic liner! Exploration to the utmost is the key. 16. High-definition makeup appearance: "High definition" makeup is the fundamental term for an HD makeup appearance. In essence, high-definition makeup is the ability to seem immaculate in real life, even without artificial filters, lights, or cameras. Long-lasting, high-quality ingredients are used to create an HD cosmetic effect. It fixes any mistakes and gives the skin a flawless appearance. Additionally, the makeup endures for around 18 to 20 hours, even when the bride cries or perspires. Also Check : Bridal Hand Mehendi Designs Conclusion: Bridal Makeup Looks encompasses many artistic fields that call for a great deal of inspiration, experience, and study. Due to skin type, tone, form, and texture variations, what suits one bride might not suit another. It's crucial to resist the urge to buy something just because it's popular or appealing on someone else's social media. To get the appearance of your dreams, develop your own unique style and talk about it with your makeup artist well in advance! We hope that this wedding season brings you all great joy.
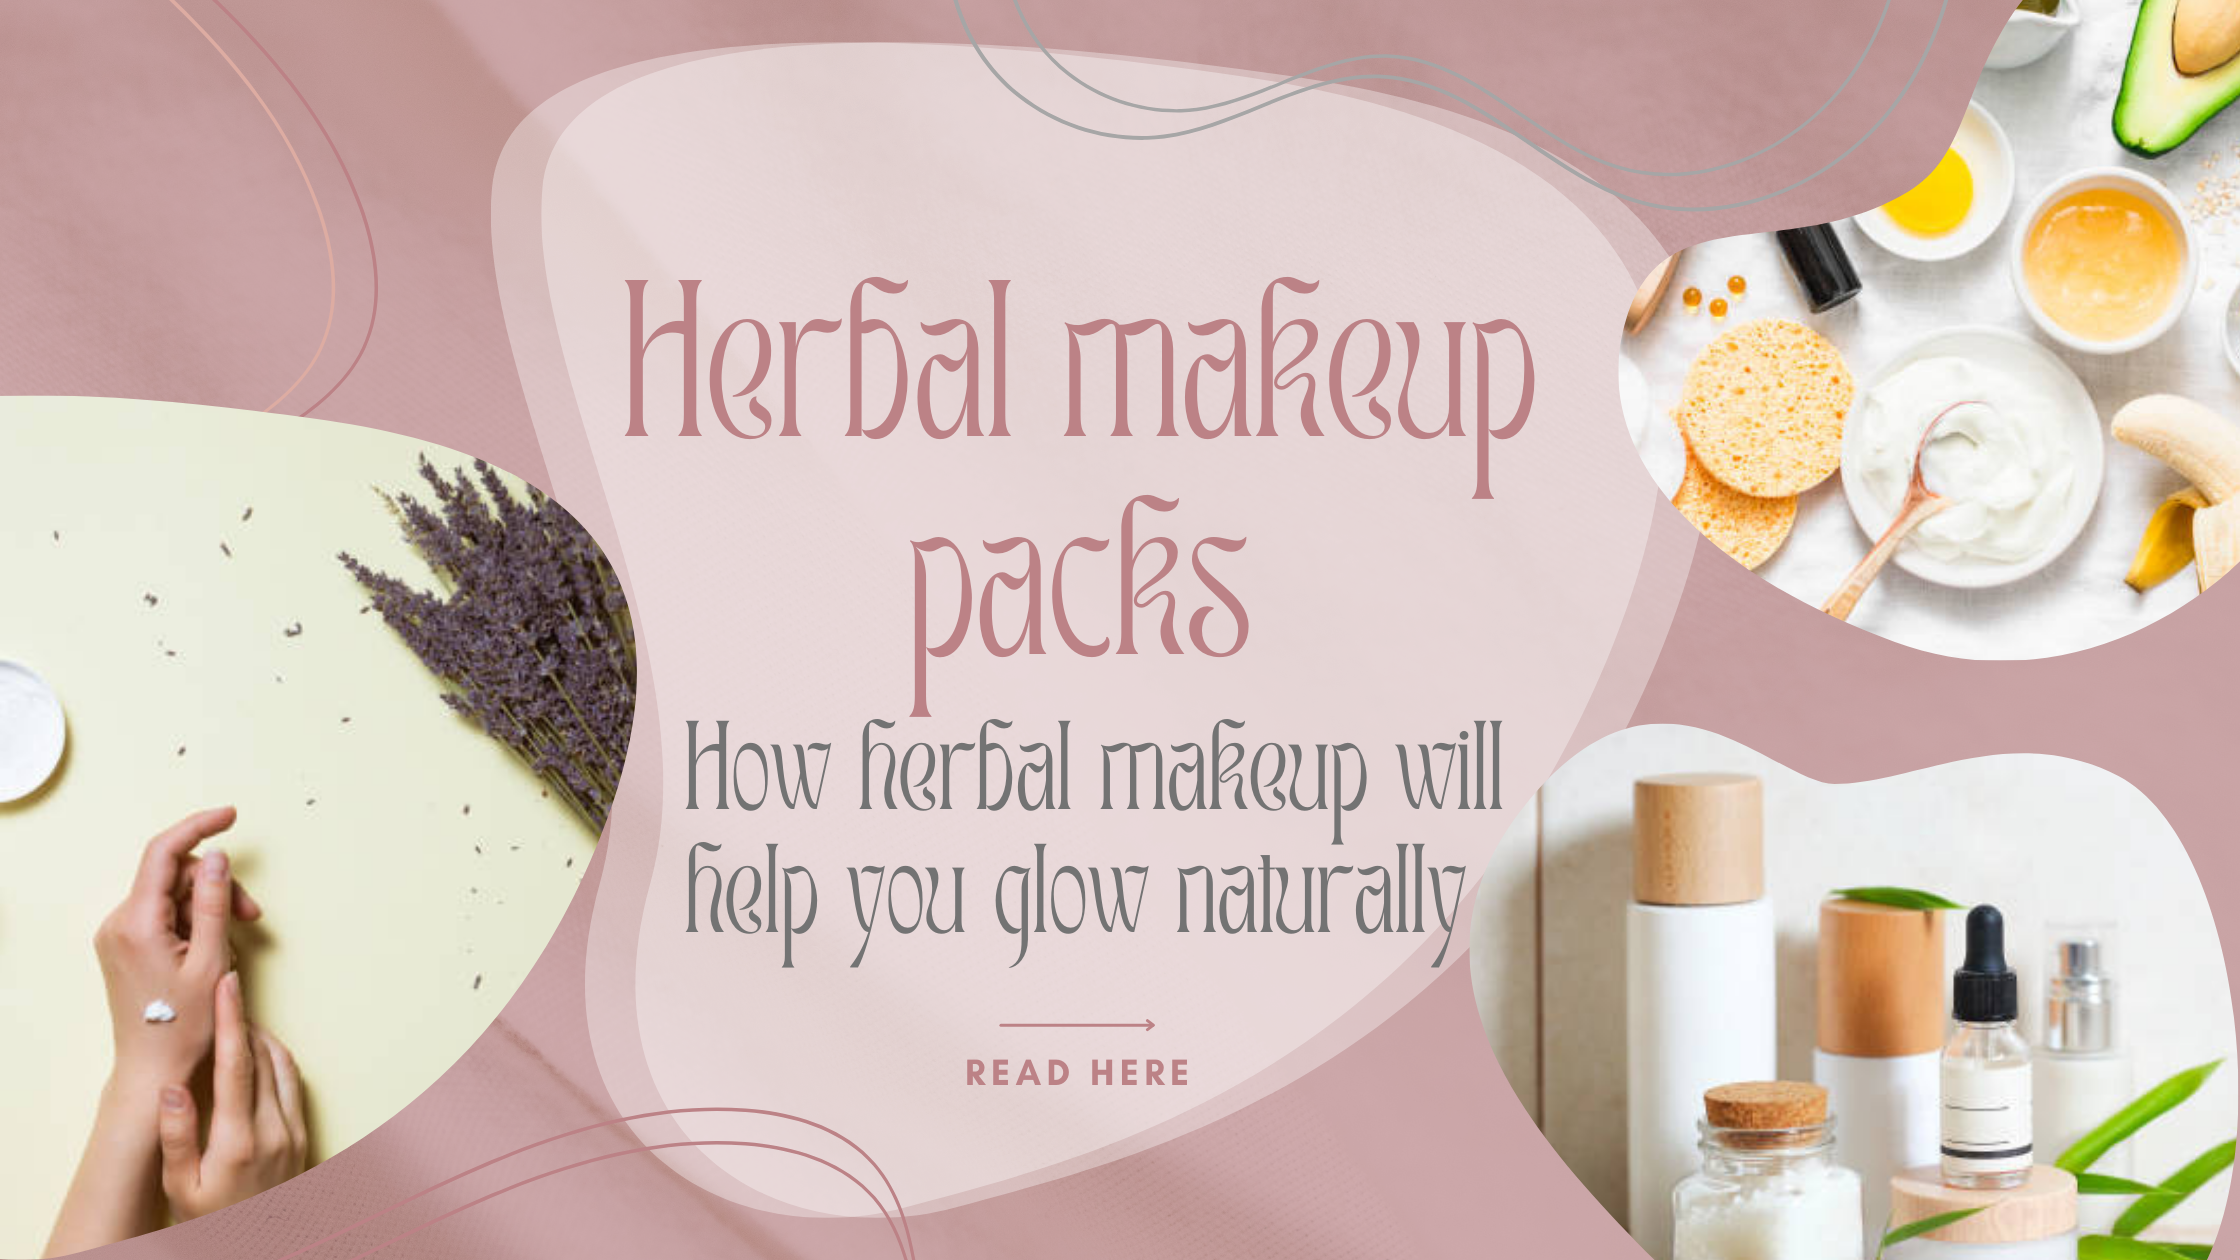
Posted By: 25th June 2024
Herbal makeup packs: How Herbal makeup will help you to Glow naturally
Herbal makeup packs are a great way to improve your natural looks through plants and herbs. Unlike traditional cosmetics, herbal makeup comprises natural ingredients that help feed and protect the skin. These products are gentle and, therefore, reduce the chances of suffering from irritations or allergies. Herbal makeup not only conceals blemishes and evens out skin tone but also improves skin health in the long term. Keep reading Ladyfair to know more about herbal makeup. Understanding Herbal Makeup: What Sets It Apart With ingredients like aloe vera, turmeric, and chamomile, you can enhance your face with a radiant glow without resorting to chemicals that may be harmful to your body when absorbed. For a more natural and healthy look, buy Herba makeup. Unlike conventional makeup, herbal cosmetic products contain plant-based components rather than synthetic ones. This one difference makes herbal makeup safer for human use and better for our surroundings. Many chemicals found in ordinary makeup brands can cause irritation to the skin, allergies, and even long-term health problems. Herbal makeup is gentler on the skin than anything else. It should not cause allergic reactions since it avoids using synthetic fragrances, parabens, and other artificial additives. This makes it an excellent choice for people with sensitive skin or those prone to acne and other skin issues. Moreover, the natural components in botanical cosmetics often have anti-inflammatory and antioxidant features that can soothe the skin and protect it from environmental destruction. The second significant element of herbal makeup is its food value. Many of these products’ herbs and plants contain a wide range of vitamins, minerals, etc., which can improve your skin’s health and appearance. For instance, aloe vera has moisturizing properties, while turmeric has anti-inflammatory and brightening effects. When you opt for herbal makeup, you are concealing your flaws and giving your skin the necessary care to remain healthy and lively. Additionally, herbal makeup promotes an eco-friendly form of beauty. These products are usually animal-friendly and made from renewable materials; hence, they are more suitable for those considering their ecological footprint. In sum, one may conclude that herbal make-up is excellent for people who want to highlight their natural beauty, care for their skin, and conserve nature. Also Read : How to Choose Pure Vegan Makeup Kit Natural Ingredients: The Power of Botanicals 1. Aloe Vera: Aloe vera is popular in herbal makeup because of its amazing ability to soothe and moisturize. It can help with hydration, reduce inflammation, and heal wounds. Aloe vera has the capacity to calm your complexion and nourish it. Your skin will feel smooth if you use it because its natural enzymes assist in mild exfoliation. 2. Turmeric: On the other hand, Turmeric is famous for its anti-inflammatory characteristics and brightening agent. It contains curcumin, which helps reduce redness and dark spots and even out the skin tone. Turmeric can give your skin a natural radiance, thus enhancing its general appearance. Turmeric especially benefits people who are dealing with hyperpigmentation or dull-looking skin. 3. Chamomile: Another miraculous botanical employed in herbal cosmetics is chamomile. Its sedative effect makes it perfect for sensitive and irritated skin. Chamomile possesses anti-inflammatory antioxidant properties; therefore, it relieves skin pain by lessening its redness. Additionally, chamomile acts as an environmental protector, ensuring no harm comes to our skin, hence keeping it healthy while we have radiant skin. 4. Green Tea: Green tea contains antioxidants that help fight free radicals and defend skin against damage. Its anti-aging properties reduce the visibility of wrinkles and fine lines. Green tea also has anti-inflammatory qualities that make it excellent for calming irritated skin or reducing acne breakouts. Wearing makeup products made from green tea is great for maintaining a youthful appearance. 5. Rose Water: Rose water is a must-have product in many herbal makeup lines because it is hydrating, refreshing, and soothing to the skin. It helps restore natural oils to the skin, keeping it moisturized in a non-greasy way. This kind of water also acts as an anti-inflammatory, thus good for calming redness and irritations. 6. Lavender: Lavender is famous not just because of its pleasant smell but also due to its soothing nature that balances the skin’s pH level. It helps lessen redness, calm irritated skin, and support a clear, even-toned complexion. At the same time, lavender has antibacterial properties that are helpful for acne-prone skin, too. Try using makeup with lavender in lavender to have calm, balanced, and blemish-free skin. Also Check : How Diet Affects Your Skin How Herbal Makeup Enhances Natural Glow? 1. Gentle on the Skin: Herbal makeup is created using natural ingredients that are delicate on the skin. Unlike conventional makeup, whose contents contain harsh chemicals, herbal makeup contains plant-based ingredients to soothe and nourish the skin. Because of this gentleness, irritation and inflammation are minimized, hence a healthy and glowing skin complexion. When your skin is calm and in balance, it naturally glows. 2. Nourishing Ingredients: Herbal makeup brings out your inner glow through its nourishing components. Botanicals such as aloe vera, chamomile, and green tea are rich in vitamins, minerals, and antioxidants. These nourish the skin internally to give it a healthy, vibrant look. Aloe vera acts as a moisturizer that hydrates and soothes the skin, while chamomile helps calm the redness down. Antioxidants contained in green tea help keep away environmental damage from your skin, therefore preserving a youthful appearance. 3. Hydration Boost: Many of these products also contain hydrating elements that retain moisture throughout the day to keep your skin soft, smooth, and plump-looking. Hydrated skin tends to look fresh, with no roughness or dry patches but rather appears shiny instead. For example, rose water can be used to balance natural oils found in our skins, hence preventing them from becoming too dry or oily. 4. Natural Brightening Agents: Commonly, herbal makeup is made up of natural lightening agents that can brighten the complexion. This includes turmeric, for instance, which is known to have a lightening effect on the skin and, therefore, make it brighter than ever before. It also reduces darkening caused by age and pigmented areas, henceforth bringing about a more radiating face. Other components, like glycyrrhiza glabra, are practical in having an even tone on the skin. 5. Anti-Aging Benefits: Numerous plants contain antioxidants that help combat free radicals and prevent early aging. Ingredients such as green tea or vitamin E applied to your face can lessen wrinkles around your eyes and mouth, thus leaving it smoother with fewer signs of maturity. When you have minimal signs of aging, your skin holds a refreshed, glowing appearance. Final Thoughts! Herbal makeup enhances your natural glow with its gentle, nourishing, and hydrating ingredients. Furthermore, it contributes to lasting skin health, has anti-aging properties, and uses natural brightening agents for an improved complexion. Therefore, you should prefer using this kind of makeup to have glowing, healthy skin. FAQs Q1. What makes herbal makeup different from conventional makeup? Ans. Herbal makeup uses plant-based ingredients rather than synthetic chemicals used in regular makeup. This implies that it is not harsh on the skin and reduces the chances of causing allergies or irritations. Q2. How does herbal makeup help achieve a natural glow? Ans. Gentleness offered by herbal makeup enhances our natural glow because of soothing, moisturizing, and nourishing ingredients. For example, Aloe vera, chamomile, and green tea contain hydration and antioxidants that improve the texture of the skin. Q3. Can herbal makeup be used on sensitive skin? Ans. Certainly yes! Herbal cosmetics are excellent for sensitive skin since they do not contain harsh chemicals or artificial fragrances that can cause pain or inflammation. The comforting qualities found in chamomile, calendula, and aloe vera are well-suited for people who need extra-sensitive skincare products, such as herbal makeup, which can be used safely on sensitive/ reactive skin.

Posted By: 24th June 2024
Vegan Makeup Kit Guide: How to Choose Pure Vegan Makeup Kit
Vegan Makeup Kit Guide It's simple to find vegan makeup nowadays. However, things weren't always this easy. Since then, a lot has changed. However, the majority of makeup products still use animal components today. Furthermore, a lot of businesses continue to use animal experimentation. Thankfully, things are rapidly improving. Around 2010, conventional cosmetics companies decided it was no longer possible to ignore the growing vegan market. Many businesses are still expanding their product lines with numerous vegan options. You already have amazing vegan beauty options, and thanks to the work of smaller, cruelty-free cosmetics companies, they only get better with each passing year. Keep reading Ladyfair has alot more Information about vegan makeup. Where to Get Cosmetics Free of Cruelty It makes sense to buy your makeup and beauty supplies online to save time and effort. This is because the great majority of brands found in pharmacies are still not vegan. Vegan options are often limited or nonexistent in many stores. You'll be forced to search through the back panels of numerous products in search of that elusive vegan seal. You will definitely leave the store without purchasing anything in a number of the beauty categories. Also Check : How Diet Affects Your Skin 5 Reasons To Buy Cruelty-Free Cosmetics Without Feeling Guilty Making the transition to cruelty-free makeup can improve the appearance and feel of your skin. The following are some ways that using cruelty-free products might help your skin: 1. Lowers the Chance of Allergies and Irritation: Products that are cruelty-free are typically made with mild ingredients, which makes them appropriate for skin types that are sensitive. You're less likely to have irritation or allergic responses when using these items because they don't include harsh chemicals or artificial additions. 2. Encourages Natural Brilliance: The use of organic and natural components in cruelty-free cosmetics can help preserve the natural beauty of your skin. These substances are abundant in vitamins, minerals, and antioxidants that are necessary for good skin. 3. Eco-friendly: Choosing cruelty-free makeup also entails supporting ecologically responsible goods. Eco-friendly production methods and sustainable packaging improve your skin while lowering waste and pollution. Natural materials, for example, typically break down faster, lowering the risk of harm to aquatic life. 4. Stresses the Value of Clean Beauty: The clean beauty movement, which advocates utilizing only safe, non-toxic components in cosmetics, is frequently in line with cruelty-free products. You are assisting businesses who put safety and transparency first in their formulations by selecting these items. 5. Higher Rates of Customer Satisfaction: Because of the advantages they provide for skincare as well as ethical and environmental concerns, cruelty-free products are in high demand. The cruelty-free industry is constantly evolving as a result of this increased demand, guaranteeing that you are getting the greatest goods for your skin. Important Considerations When Selecting A Contract Manufacturer For Vegan Cosmetic Products 1. Verify whether the manufacturer genuinely adheres to vegan standards: There are a few important things to take into account when choosing a vegan cosmetics brand to source from. Make sure the brand genuinely adheres to vegan values first and foremost. This implies that no product should contain any ingredients or by-products originating from animals. Confirming the brand's cruelty-free certification is also crucial. Companies who declare themselves to be vegan yet nevertheless test their components or products on animals go against the fundamental principles of veganism, particularly when sourcing from outside the EU. 2. Verify that the vegan beauty product producer possesses the required certifications: Second, look at credentials. Reputable organizations like The Vegan Society, Leaping Bunny, or PETA frequently certify vegan beauty products, so you may be sure that the products are produced without using any cruelty. 3. Don't forget to incorporate sustainability considerations into your product sourcing procedures: Thirdly, take into account the sustainability policies of the producer. Environmental responsibility is a factor that many vegan beauty product buyers consider important. This can involve things like production procedures, ingredient procurement, and packaging. 4. Examine ingredient labels: It's important to carefully study ingredient labels when looking for the best vegan beauty products available in India. This guarantees that the goods are devoid of components and byproducts produced from animals, including collagen, lanolin, beeswax, and carmine. Animal-based substances might easily be overlooked because many compounds have unusual or scientific names. Learn about common components originating from animals so that you can avoid them efficiently. 5. Examine the Ethics of Brands: To support businesses that share your beliefs, take the time to investigate brands' stances on sustainability and animal testing. A company's dedication to moral behavior frequently goes beyond the components of its products. Think about the company's entire business responsibility when purchasing the best vegan cosmetic products available in India. You can do this by looking into their labor policies, environmental effect policy, and material sourcing methods. 6. Think on Quality and Performance: When selecting vegan beauty products, don't sacrifice quality or performance in the sake of ethics. Seek for products whose formula, pigmentation, and longevity live up to your expectations and fulfill your promises. Vegan goods have advanced significantly, and many now match non-vegan products in terms of performance and quality. You can do this by reading reviews, asking for advice, and, if it's feasible, testing things to make sure they work properly. Smooth application, brilliant colors, and long-lasting wear are just a few of the desired effects that vegan makeup should deliver without compromising ethical standards. Also Check : Korean Makeup and Korean Skincare Routine Ingredients to Steer Clear Of: Carmine: A crimson pigment that is made from crushed insects and is frequently used in blushes, eyeshadows, and lipsticks. Lanolin: It is a fatty material that is typically found in lip balms and moisturizers. It is obtained from sheep's wool. Beeswax: A naturally occurring wax that bees make; frequently found in mascaras and lip balms. Collagen: A protein found in skincare products that is obtained from the connective tissues of animals. Keratin: A protein typically found in hair care products, originating from the fur, feathers, and hooves of animals. Squalene: A substance frequently found in skincare products, derived from shark liver oil. Guanine: It is a crystalline substance that is often used in shimmering nail polishes and eyeshadows. It is obtained from fish scales. Conclusion: Whether you're avoiding companies that test their components on animals or you're just vegan, there are many of options available to you when searching for cruelty-free beauty brands. There are a ton of essential vegan and environmentally friendly items available, ranging from highly pigmented eyeshadows to vegan eyeliner with great performance. Frequently Asked Questions Q1. Does Maybelline adhere to PETA's cruelty-free standards? Ans. No, PETA has not verified Maybelline as cruelty-free. Maybelline is also a retailer in China, where imports of cosmetics are legally obligated to undergo animal testing. Q2. How are goods tested by cruelty-free makeup companies? Ans. Companies that provide cruelty-free makeup don't test their goods on animals. To guarantee the security and effectiveness of their goods, they instead make use of alternative testing techniques such in vitro testing, computer modeling, and human volunteers. Q3. Are cruelty-free and vegan makeup brands interchangeable? Ans. Not always. While cruelty-free makeup brands do not test their products on animals, vegan makeup manufacturers do not use any substances obtained from animals in their products. While some brands may only follow one of these values, others may be cruelty-free and vegan.

Posted By: 24th June 2024
Step-by-Step Guide On Korean Makeup and Korean Skincare Routine
Korean Makeup and Korean Skincare Routine When we hear the term "K-beauty," we think of dewy skin, a complexion that glows from the inside, minimum makeup, and a young glow. Significant Korean skincare and makeup innovations have occurred in the last few years. Its practical items that yield quantifiable outcomes have contributed to its increasing popularity among reviewers and beauty fans alike. Furthermore, this piece is about Korean cosmetics, not K-beauty, with its maximalist 10-step routines and products, a topic Ladyfair would like to address individually. More specifically, it's about using skincare and makeup techniques from Korea to seem younger. Korean Skincare Routine in 10 Steps Buying the newest products and adhering to skincare trends is only one part of the 10-Step Korean Skincare Routine. Understanding your skin type can help you handle your skin troubles and will ultimately help you apply all of the products in the proper order, so you should learn the fundamentals of skin care. But above all, you must look forward to and establish a routine for caring for your skin! Thus, the following is our condensed version of the 8-Step Korean Skincare Routine: 1. Cleaners Based on Oil: You can easily clean makeup, sunscreen, and extra oil from your skin with an oil-based cleanser, either liquid or balm. The Double Cleanse starts like this. Koreans like using oil-based cleansers instead of makeup removers because they don't dry out the skin and help keep the skin's natural oils balanced and healthy. Put a little on your dry face, then wash it off with warm water. 2. Exfoliating agents: If you want your skin to look healthy and shiny, make sure to exfoliate regularly using either physical or chemical exfoliants in your skincare routine. Scrubbing your skin once or twice a week can help get rid of dead skin cells, make new cells grow, and improve sun-damaged, aging, or discolored skin. Always put on sunscreen right after scrubbing your skin. 3. Essentials: Essences are like the base of Korean skincare. They are really light liquids with great stuff in them that your skin soaks up right away. Choose a product that matches your skin type, and then gently put it on your face and neck by using your hands. 4. Treatments: A serum, ampoule, or booster has a special ingredient that can help improve your skin. These strong mixtures have lots of active ingredients to help with spots, lines, redness, pimples, and large pores. 5. Sheet Masks: Sheet masks are filled with good ingredients and wet with liquids or serum. They are also very calming, not too expensive, and easy to use. 6. Cream for the eyes: Eye cream is a crucial anti-aging medication that is made especially to moisturize the sensitive area around the eyes, which is prone to fine wrinkles. Use the ring finger to apply, being careful to do so softly. 7. Hydrating agents: Gently tap the product onto your face and neck to lock in all the good stuff. This layer, called the occlusive layer, keeps all the other skincare products in place. 8. Sunscreen: SPF sunscreen is important for protecting your skin from harmful UV rays and slowing down the aging of your skin. Remember to use SPF skin protection every day. Also Read : How to Treat Common Skin Issues at Home Tips for Korean Makeup After learning how to prepare your skin, try these makeup ideas and methods to accentuate the young features on your face. 1. Choose the gradient, stained lip: A common K-beauty method called "gradient lips" is painting the inner lips a darker color, which is then blended into a contrasting color or faded away at the margins. To blur the corners, all you need is a flat shader brush and matte liquid lipstick. To make it appear even more pouty, you can also use the tips of your fingers to smooth down the edges and apply gloss to the middle of your lips. Although they have a method to them, gradient lips are thought to be a low-maintenance appearance since they look lived-in. The perfectly put-together pout is the exact antithesis of the carefree, rubbed-off pout, which looks lovely. This little element gives your makeup look a charming, youthful quality. 2. Replace the puppy dog eyes with the cat eyes. Perfectly rendered cat eyes are indeed wild and amazing, but K-beauty prefers to soften the flick and go for puppy-dog eyes. The secret to pulling this off is easy: widen your eyes wide and slightly reduce the angle of the flick, stopping just below your upper lash line rather than extending it in an upward direction. Your eyes will appear longer and more young as a result of this. Avoid curving the flick too much since this could make your eye appear droopy. 3. Fake eye bags: Korean women are envious of the small protrusions under their eyes that appear when they laugh or grin. Unlike under-eye bags, which are puffy and dark, the bumps mimic a muscle that protrudes underneath, giving even cute anime characters an adorable appearance. Apply a highlighter just below your waterline to achieve this effect, and then add a bit deeper shadow immediately underneath to make it pop! 4. Straighten and fill up your eyebrows: Having brows done by a parlor stylist and getting an arch added makes me look many years older! It turns out that K-beauty's secret to looking younger is also having straighter brows. Korean celebrities are infamous for having this practice of drawing their eyebrows straight across, ending in a slight curve. Additionally, ensure that the brow hairs are filled in from the inner corner to the outside, tapering down to a single point. 5. For a natural flush, apply "fruity" pigments: Have you ever wondered why Korean women always seem to be blushing? Actually, the usage of fruity pigments in their makeup is to blame for this. Fruity shades like strawberry, watermelon, peaches, and cherries make up most of their beauty collection, including blushes, lip stains, and eyeshadows. They also don't restrict how these pigments can be used. For example, applying a fruity blush that reaches the temples and over the brow's edge is typical, starting from the apple of the cheeks. Because of this fascination with fruity colors, Korean lip tints are currently so popular in the beauty industry that everyone wants one! 6. Applicators with cushions for a perfect finish: Korean ladies typically use cushion compacts as their go-to applicator since they can handle liquid foundations, pressed powders, and even sparkly blushes. This is because makeup sponges are simpler to use, blend makeup more quickly, and leave your skin looking beautiful with no blemishes or wrinkles. Cushion applicators, which allow you to adjust the application by pushing your fingertips through them, are also excellent for evenly distributing goods. Oh, and some Korean makeup artists also use them for eyebrows! Also Check : How Diet Affects Your Skin Final Words! One of the reasons we fell in love with K-beauty is its holistic approach to skincare and makeup. It emphasizes healthy skin through a combination of meticulous layering and innovative products. This includes oil cleansers, exfoliators, essences, treatments, sheet masks, eye creams, moisturizers, and sunscreens, which form an 8-step Korean skincare routine that gives a foundation to radiant skin. Further enhancing this are Korean makeup tips such as gradient lips, puppy-dog eyes, and cushion applicators that are more youthful. K-beauty keeps on captivating beauty enthusiasts globally because of its complete perspective on skincare, along with subtle makeup strategies for practical tips on getting healthy, vibrant skin. Frequently Asked Questions Q1. What is the major aim of an 8-step Korean skincare process? Ans. The primary objective of the 8-step Korean skincare routine is to obtain a clear complexion through deep cleansing, moisturizing, and targeted solutions. This program ensures that product application is done sequentially so that maximum absorption and efficacy are guaranteed, encouraging the overall healthiness of your body’s biggest organ—skin. Q2. What makes oil-based cleansers the preference in Korean skincare? Ans. Oil-based cleansers are preferred since they effectively cleanse off makeup, sunscreens, and excessive sebum while also leaving your skin moisturized without drying it out. They do not overproduce oil and prepare the skin for other steps of care. Q3. Regarding exfoliation, how often should I use the Korean skincare method? Ans. Exfoliate at least twice a week as part of your Korean skincare routine. Regular exfoliation helps remove dead cells and promote cell turnover, addressing issues like photo damage, aging, and discolorations, among others. It leaves behind smooth, radiant skin. Q4. Why are essences important in Korean skincare? Ans. Essences are watery liquids containing active ingredients that can be easily absorbed by the skin. In Korea, these products are indispensable for hydrating the skin, enabling subsequent items to penetrate better into the dermis, and managing different conditions such as dryness or dullness.
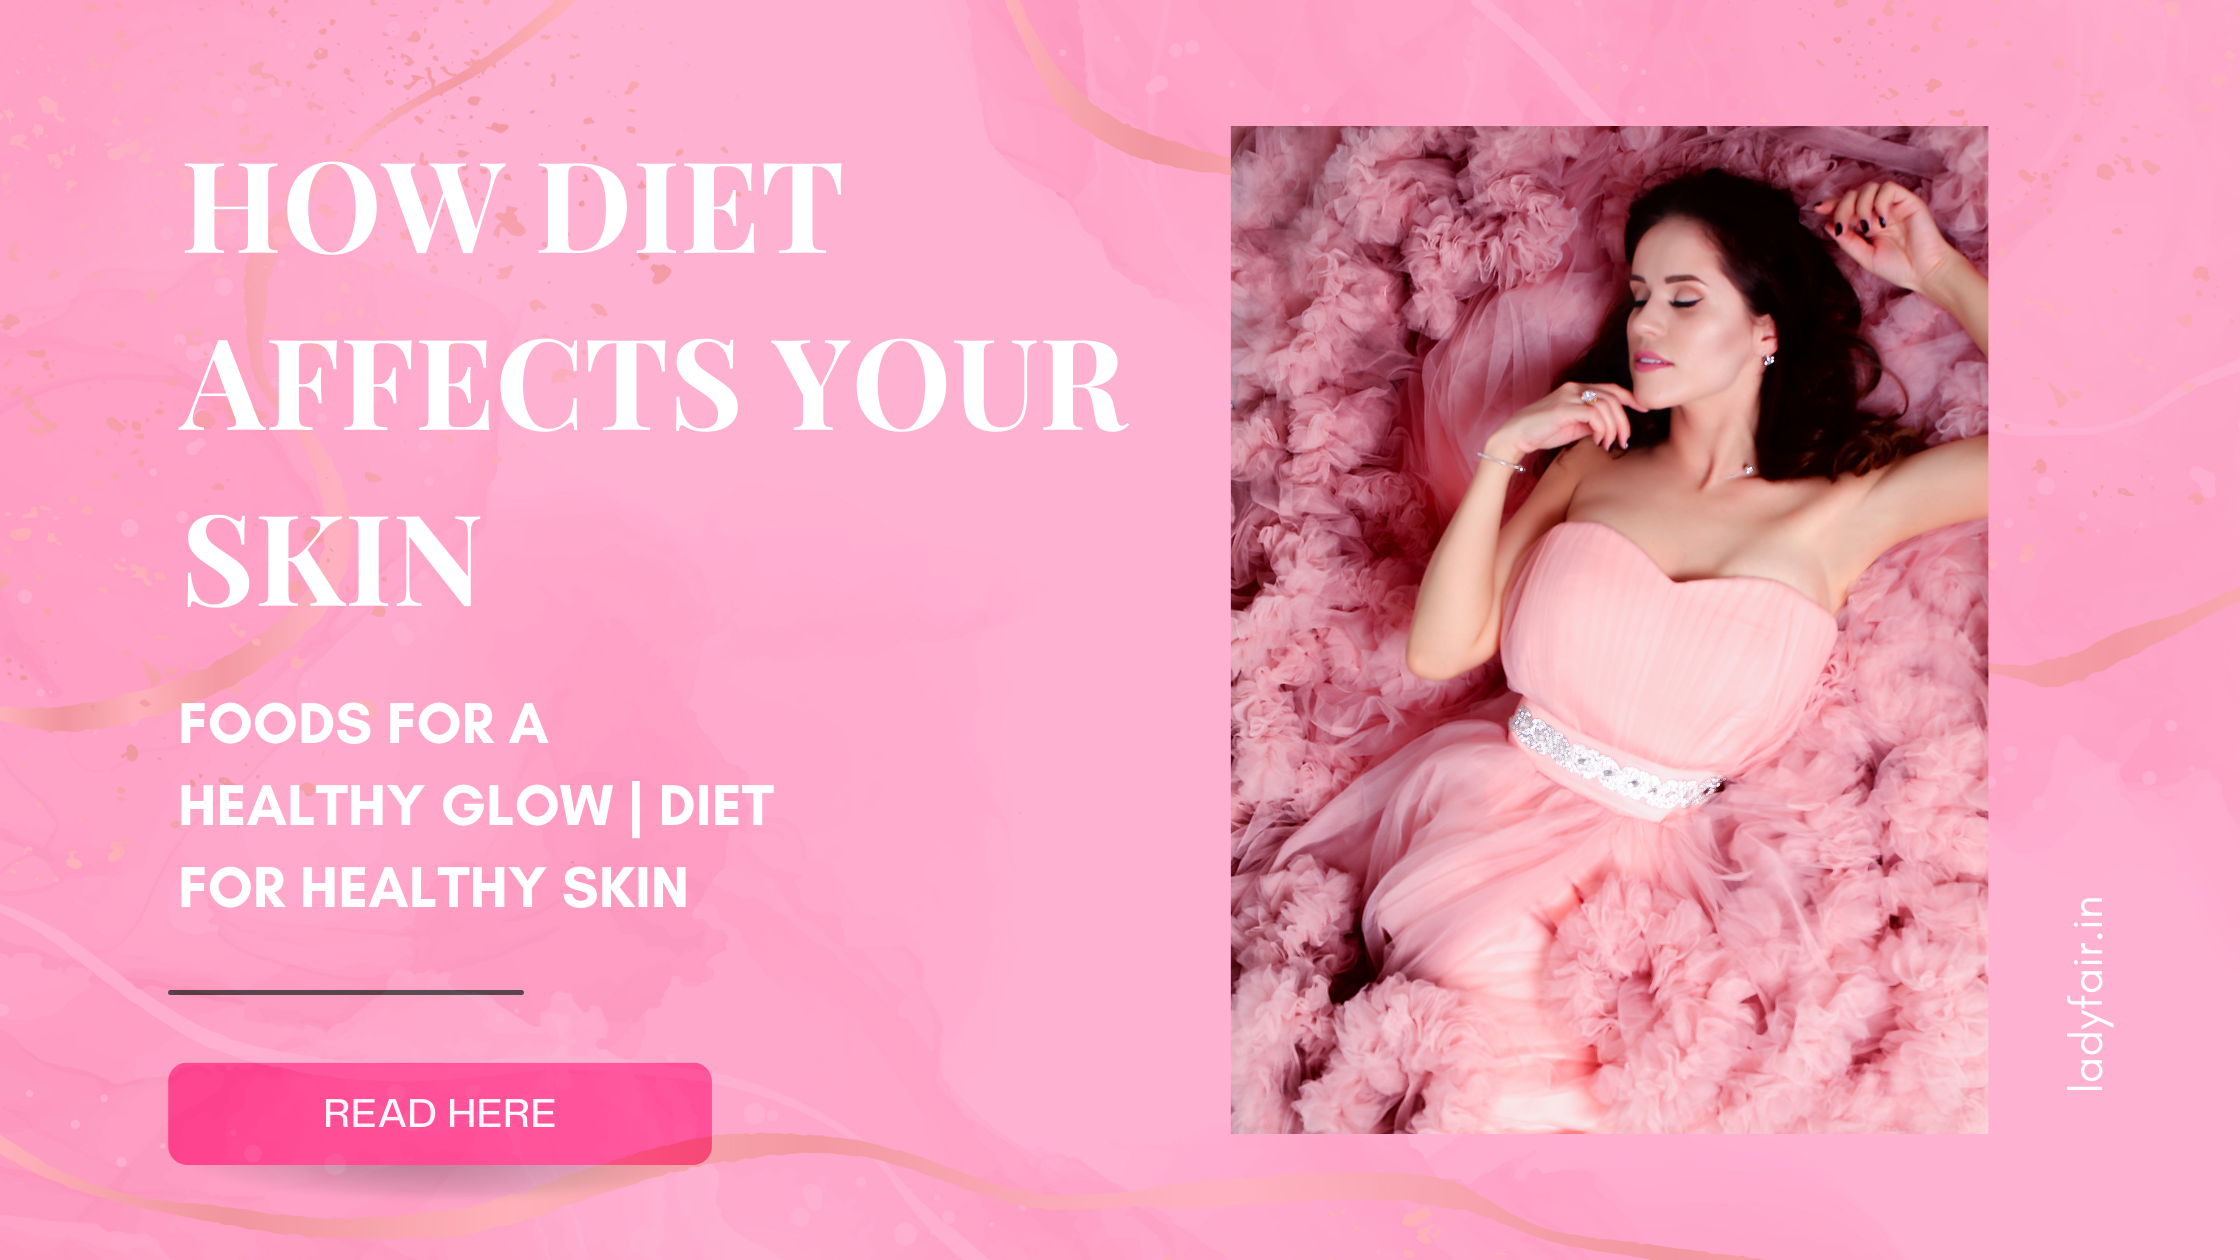
Posted By: 21st June 2024
How Diet Affects Your Skin: Foods for a Healthy Glow | Diet for Healthy Skin
If you're anything like most people, you undoubtedly worry a lot about maintaining your skin's health. While numerous approaches do this, the most effective is eating a diet rich in nutrients that support healthy skin. The diet is the key to having gorgeous skin! Your skin is the largest organ in your body. Shielding it from chemicals and outside toxins can be challenging, but daily nutrition has a more significant impact. So, how does your diet impact your skin type? keep reading to know more on Ladyfair. Ways Some Foods May Affect Skin Though most of us know the damaging consequences of a poor diet on our skin. Did you also know that a healthy diet can help prevent the effects of UV radiation from the sun? UV radiation exposure encourages the production of free radicals, which can harm the elastin and collagen that give our skin its structure and firmness. How does this relate to your diet, then? Consuming foods high in antioxidants, such as vibrant fruits and vegetables, can help enhance the skin's texture and prevent free radical damage. What Effects Does Diet Have on Skin Health? Eating a nutritious diet has several advantages, including preventing illness and supplying vital minerals and energy. Although the exact mechanisms by which a healthy diet promotes skin, hair, and nail health are still being studied. Skin and all, you will be healthy on the outer if you are healthy on the inside. We're here to discuss how what you eat can also maintain healthy skin since we think it's vital to understand how your diet impacts your skin! 1. Wrinkles: Although wrinkles are an inevitable aspect of aging. You can slow the aging process by applying sunscreen, quitting smoking, and eating a balanced diet. For example, fatty acids and protein peptides support the skin's antioxidant capacity and metabolism. The correct nutrition helps maintain skin strength and prevent its deterioration. Advanced glycation end products (AGEs) are oxidant stresses created when sugars interact with fat or protein. Overeating sugar also makes it easier for the body to produce these aging culprits. 2. Acne: Although the precise relationship between nutrition and acne is still being studied. Most physicians concur that diet can help prevent and manage the condition. When new skin cells proliferate improperly, they clog pores and retain natural oils beneath the skin's surface, leading to acne. These oils are a food source for bacteria, which causes acne scars. 3. Chronic Illnesses: Numerous other chronic skin disorders are influenced by nutrition. As an illustration: A diet heavy in fat and sugar, combined with alcohol and smoking, can exacerbate dry skin. Some people's eczema may be caused by allergies. Thus, consuming foods high in anti-inflammatory qualities can help lessen these skin problems. Hot beverages, spicy foods, and alcohol use can all cause rosacea. By avoiding these, flare-ups may occur less frequently and with less severity. Also Read : How Often Should You Get Salon Treatments for Healthy Hair and Skin Diet for Healthy Skin Your skin suffers from aging, pollution, and the sun. Stress and an unhealthy lifestyle follow suit; we cannot escape either. However, there is something you can do to repair the harm your skin has already sustained and restore its natural radiance. You don't have to endure pricey salon visits to accomplish it. All you need to do is alter your eating habits. 1. Avocados: Because it contains collagen and elastin, your skin is smooth and silky. They make your skin more elastic. However, as you get older, your body produces fewer of these. Your skin begins to lose its suppleness for this reason. However, the abundance of good fats in avocados can slow things down. Research indicates that a nutritious diet helps maintain taut, elastic skin. Avocados also protect skin from the sun's damaging UV radiation. 2. Fish that are Fat: Fatty fish is a great source of omega-3 fatty acids. Your heart health is improved by omega-3 fatty acids. This implies that your blood circulation improves, which is essential for healthy, glowing skin. Your skin could become dry and flaky if these fatty acids aren't present. 3. Seeds and Nuts: Nuts and seeds of all types are suitable for your skin. They contain lipids and vitamin E, which maintain their hydration and smoothness. They also encourage your body to create collagen, which retains its suppleness. 4. Carrots with Sweet Potatoes: These two veggies are rich in beta-carotene. Your body transforms this vital antioxidant into vitamin A. Beta-carotene and vitamin A function as natural sunscreens and maintain the smooth appearance of your skin. Apart from carrots and sweet potatoes, other fruits and vegetables like apricots, cantaloupe, mango, papaya, and pumpkin also contain beta-carotene, which gives them their orange color. Additionally rich in magnesium, which aids in muscle and nerve relaxation, are carrots. 5. Bell peppers: Yellow and red Bell peppers are also a great choice if you want to consume vitamins A and C. Combined, they strengthen collagen synthesis, encourage the formation of new cells, and heal the skin. 6. Tomatoes: Many different types of carotenoids, including lutein, beta-carotene, and lycopene, are found in tomatoes. Over time, they can prevent wrinkles from developing on your skin. They can also shield your skin from the sun's damaging rays and pollutants. 7. Broccoli: Broccoli is packed with nutrients, and broccoli is a superfood. Carotenoids, zinc, and vitamins A and C are all present and good for your skin. Most significant, though, is that it contains sulforaphane, a unique nutrient that can prevent cancer of many kinds, including skin cancer. 8. Green Tea: Green tea gives you glowing, bright skin by eliminating harmful substances from your body. It repairs the harm pollution and the sun have done to your skin. Additionally, it has a lot of polyphenols, which are anti-inflammatory compounds and antioxidants, both of which are good for the skin. 9. Cucumber: Cucumbers are a terrific way to add beauty. Their effects on the skin are astounding. Cucumber juice applied topically leaves skin smooth and radiant. Cucumber's anti-inflammatory properties naturally lighten skin and prevent tanning. Additionally, it lessens fine lines and wrinkles. 10. Aloe Vera: Applying aloe vera to the skin increases its elasticity, keeps wrinkles from forming, and nourishes the skin. Aloe vera maintains soft, radiant skin and avoids acne. Applying aloe vera to sunburns aids in their quicker recovery. 11. Coconuts Water: Coconut water benefits our skin greatly. It moisturizes, radiants, and is healthy when consumed, and it calms the skin. Coconut water's antifungal, antibacterial, and anti-inflammatory qualities shield it from illness. It postpones the signs of aging and successfully prevents acne. Also Read : How To Do Facial At-Home All-in-one Skin health benefits from a well-balanced diet rich in plant-based foods such as fruits, vegetables, legumes, nuts, and seeds. Fatty fish contain a higher concentration of skin-healthy nutrients. Additionally, consuming hydrated drinks like green tea and water is quite advantageous. By adhering to these dietary and drinking recommendations, increase its suppleness and moisture, and possibly even lessen the appearance of wrinkles. Furthermore, maintaining healthy skin benefits general health. Frequently Asked Questions! 1. What’s the best diet for maintaining healthy skin? Ans. Eating a diet filled with fruits, vegetables, lean proteins, and healthy fats is the best option for anyone whose goal is healthy skin. Nutrient-dense foods contain necessary vitamins, antioxidants, and hydration that promote skin repair and overall health. 2. Which food items help to have clear skin? Ans. Berries, cruciferous greens, omega-3 fatty fish like sardines, and walnuts are among the foods rich in antioxidants and anti-inflammatory agents. These foods assist in clearing the skin and reduce inflammation and oxidative stress, leading to clearer skin with reduced acne. 3. How does what we eat affect our skin? Ans. Dietary influences on the health of our skin occur when they supply essential nutrients for supporting its structure, hydration, and healing processes. An anti-inflammatory balanced diet reduces inflammation while preventing oxidative stress by facilitating collagen synthesis, which is crucial in sustaining our skin’s healthiness and vibrancy.
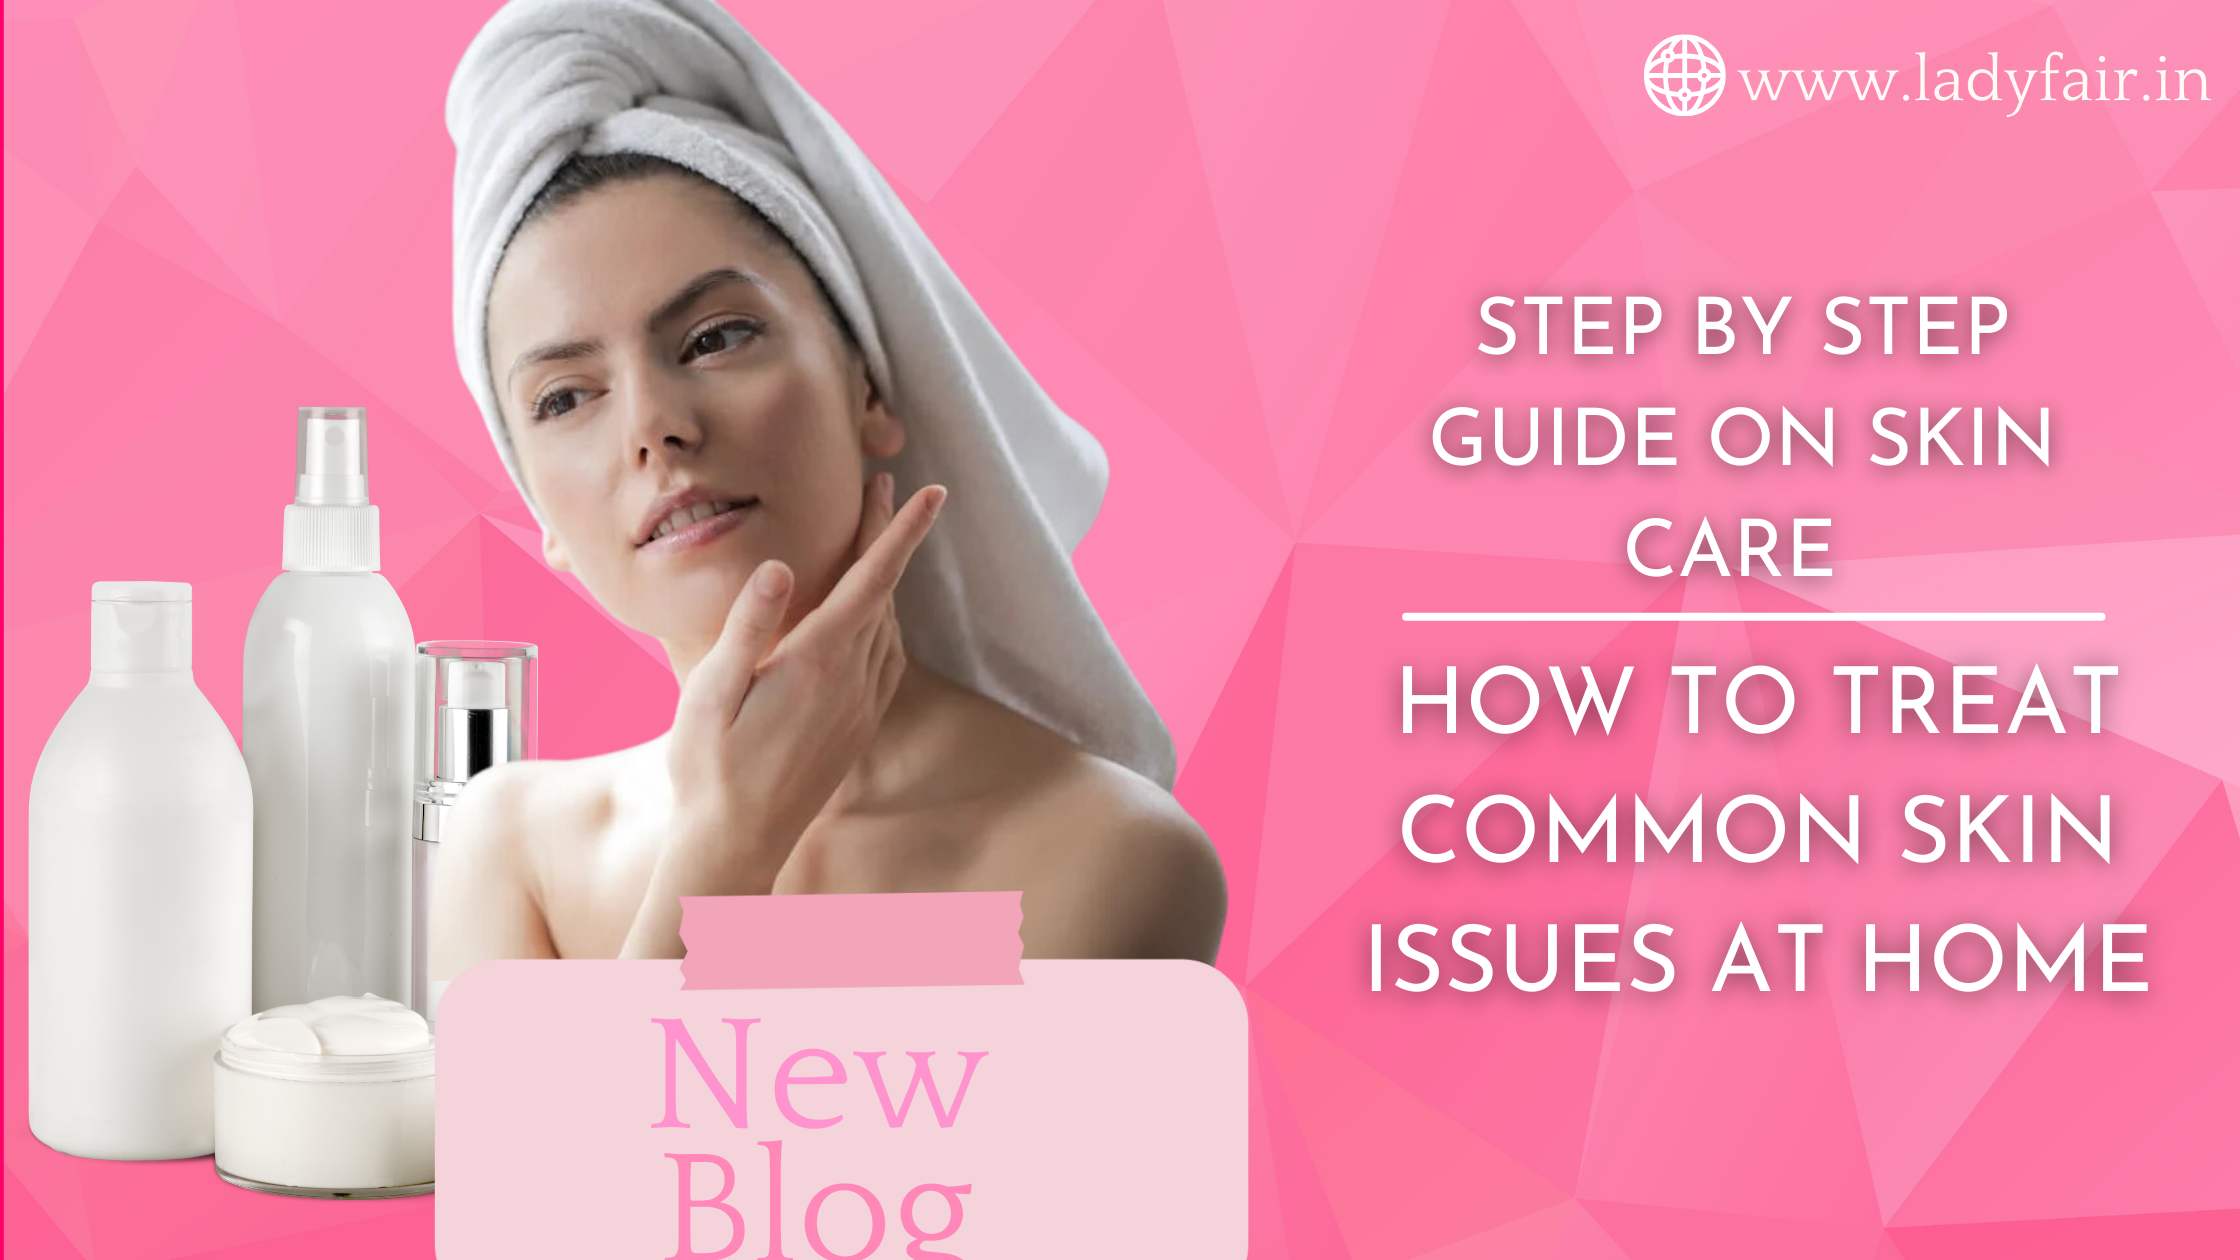
Posted By: 21st June 2024
Step By Step Guide On Skin Care | How to Treat Common Skin Issues at Home
Everybody has days when they feel like everything is against them, and you feel the same way about your appearance. During those moments, a slight push in the right direction might be pretty helpful! Your beauty regimen serves as your haven. Therefore, learning how to take better care of your skin is essential, whether you're a working mother who doesn't have as much time for herself as she'd like or a college student who is having trouble finding time in your schedule! Therefore, Ladyfair has created this helpful advice on using the finest skincare routine for both men and women to revitalize your beauty routine. Step 1: Cleansing It's easy to think that washing your face with your face cleansing product harder or for longer would result in a deeper clean. However, how long you spent lathering has little to do with how thoroughly you cleaned your face. Remain straightforward: Aim to wash your face for 20 to 30 seconds, or until the product lathers up, since longer than that may be too harsh on your skin. Red, irritated, and irate skin can soon result from excessive or prolonged washing, especially if your cleanser has any exfoliating components. Also Check : Anti-Aging Treatment Guide Step 2: Exfoliate Exfoliation eliminates dead skin cells from the skin's outer layers. It can help exfoliate dry or dull skin, improve blood circulation, and make your skin look radiant. Use light, circular strokes to apply the product if you're using a scrub or chemical exfoliant. After spending around 30 seconds doing this, rinse with lukewarm (not boiling) water. Use delicate, brief strokes when using a brush or sponge. Step 3: Apply mask A cheap, simple, and effective way to treat yourself and your skin is with a face mask. You can buy or make a variety of masks at home to achieve a wide range of skin advantages. You should prepare your skin before applying your mask properly if you want to apply it correctly. Additionally, you should obtain the necessary supplies. All it takes is a little time and work to have beautiful, healthy skin. Step 4: Tone After cleansing your face, dampen a cotton ball and gently wipe your entire face. Apply the toner using a spray bottle and let it air dry. Apply your moisturizer afterward for smoother and plumper skin. Step 5: Apply serum or concentrate Apply three to four pea-sized drops of a face serum onto your palms using a dropper. Gently distribute the product between your palms, taking care not to massage it. Apply the serum to your entire face and neck by tapping lightly and in little areas. Give it a few minutes before resuming your skincare routine. Step 6: Treat the eye area A pea-sized amount is sufficient for both eyes. Use your ring finger on that delicate place because it has the lightest touch in nature. You don't want to apply too much pressure to the skin. To apply, start at the inner corner of your eye. Gently tap in a semi-circle pattern to promote circulation until the product is completely absorbed. Remember not to get too close to your eyes to avoid irritation. Also, avoid applying to or near your eyelids unless expressly stated on the product label. Step 7: Moisturize Mist your skin with water before applying the moisturizer. Avoid pushing or rubbing. Use an upward motion to contribute to a little lifting effect. The ideal way to apply creams is to pat them on the skin gently. Gel or water-based moisturizers should be applied in circular motions until they are fully absorbed. Step 8: Apply sun protection Using your fingertip to apply the necessary amount of sunscreen to your neck area in upward strokes is the first stage in applying sunscreen to the face. Next, be sure to cover the back of your head, the sides of your neck, and the hairline with sunscreen. Next, if you're wearing a t-shirt that exposes a little more of your chest, dab on sunscreen there. Finally, apply a small amount of sunscreen on the sides of your nose, rubbing it toward your ears with your fingertips. Next, go to the region of the forehead, top lip, and chin. Also Check : Tips To Avoid Makeup Mistakes Conclusion: Naturally, not everyone follows their skincare regimen to the letter. Your regimen should be tailored to your schedule and needs. But remember that if you want healthy, protected skin, you should never neglect washing, moisturizing, and using sun protection. Frequently Asked Questions! 1. Why should someone have a skincare regimen that he/she follows with strict adherence? Ans. Following a skin regimen step-by-step is the way to go for each product to be adequately absorbed, maximizing its benefit. The correct order allows for effective cleaning, treatment, and shielding of the skin, strengthening its overall well-being and appearance. 2. Is it essential to follow a particular order when using skincare products? Ans. Yes, the order matters. Using the correct sequence to apply different products ensures maximal absorption and effectiveness. For instance, starting with water-based lotions and finishing up with oil-based ones helps prevent clogging pores and maximize each one’s usefulness. 3. What is the most important rule of skincare? Ans. The golden rule can be referred to as consistency in skincare. Following a regular program of targeted cleansing and sun protection is vital for maintaining healthy-looking skin. Consistency also improves long-term health and the appearance of our skin.
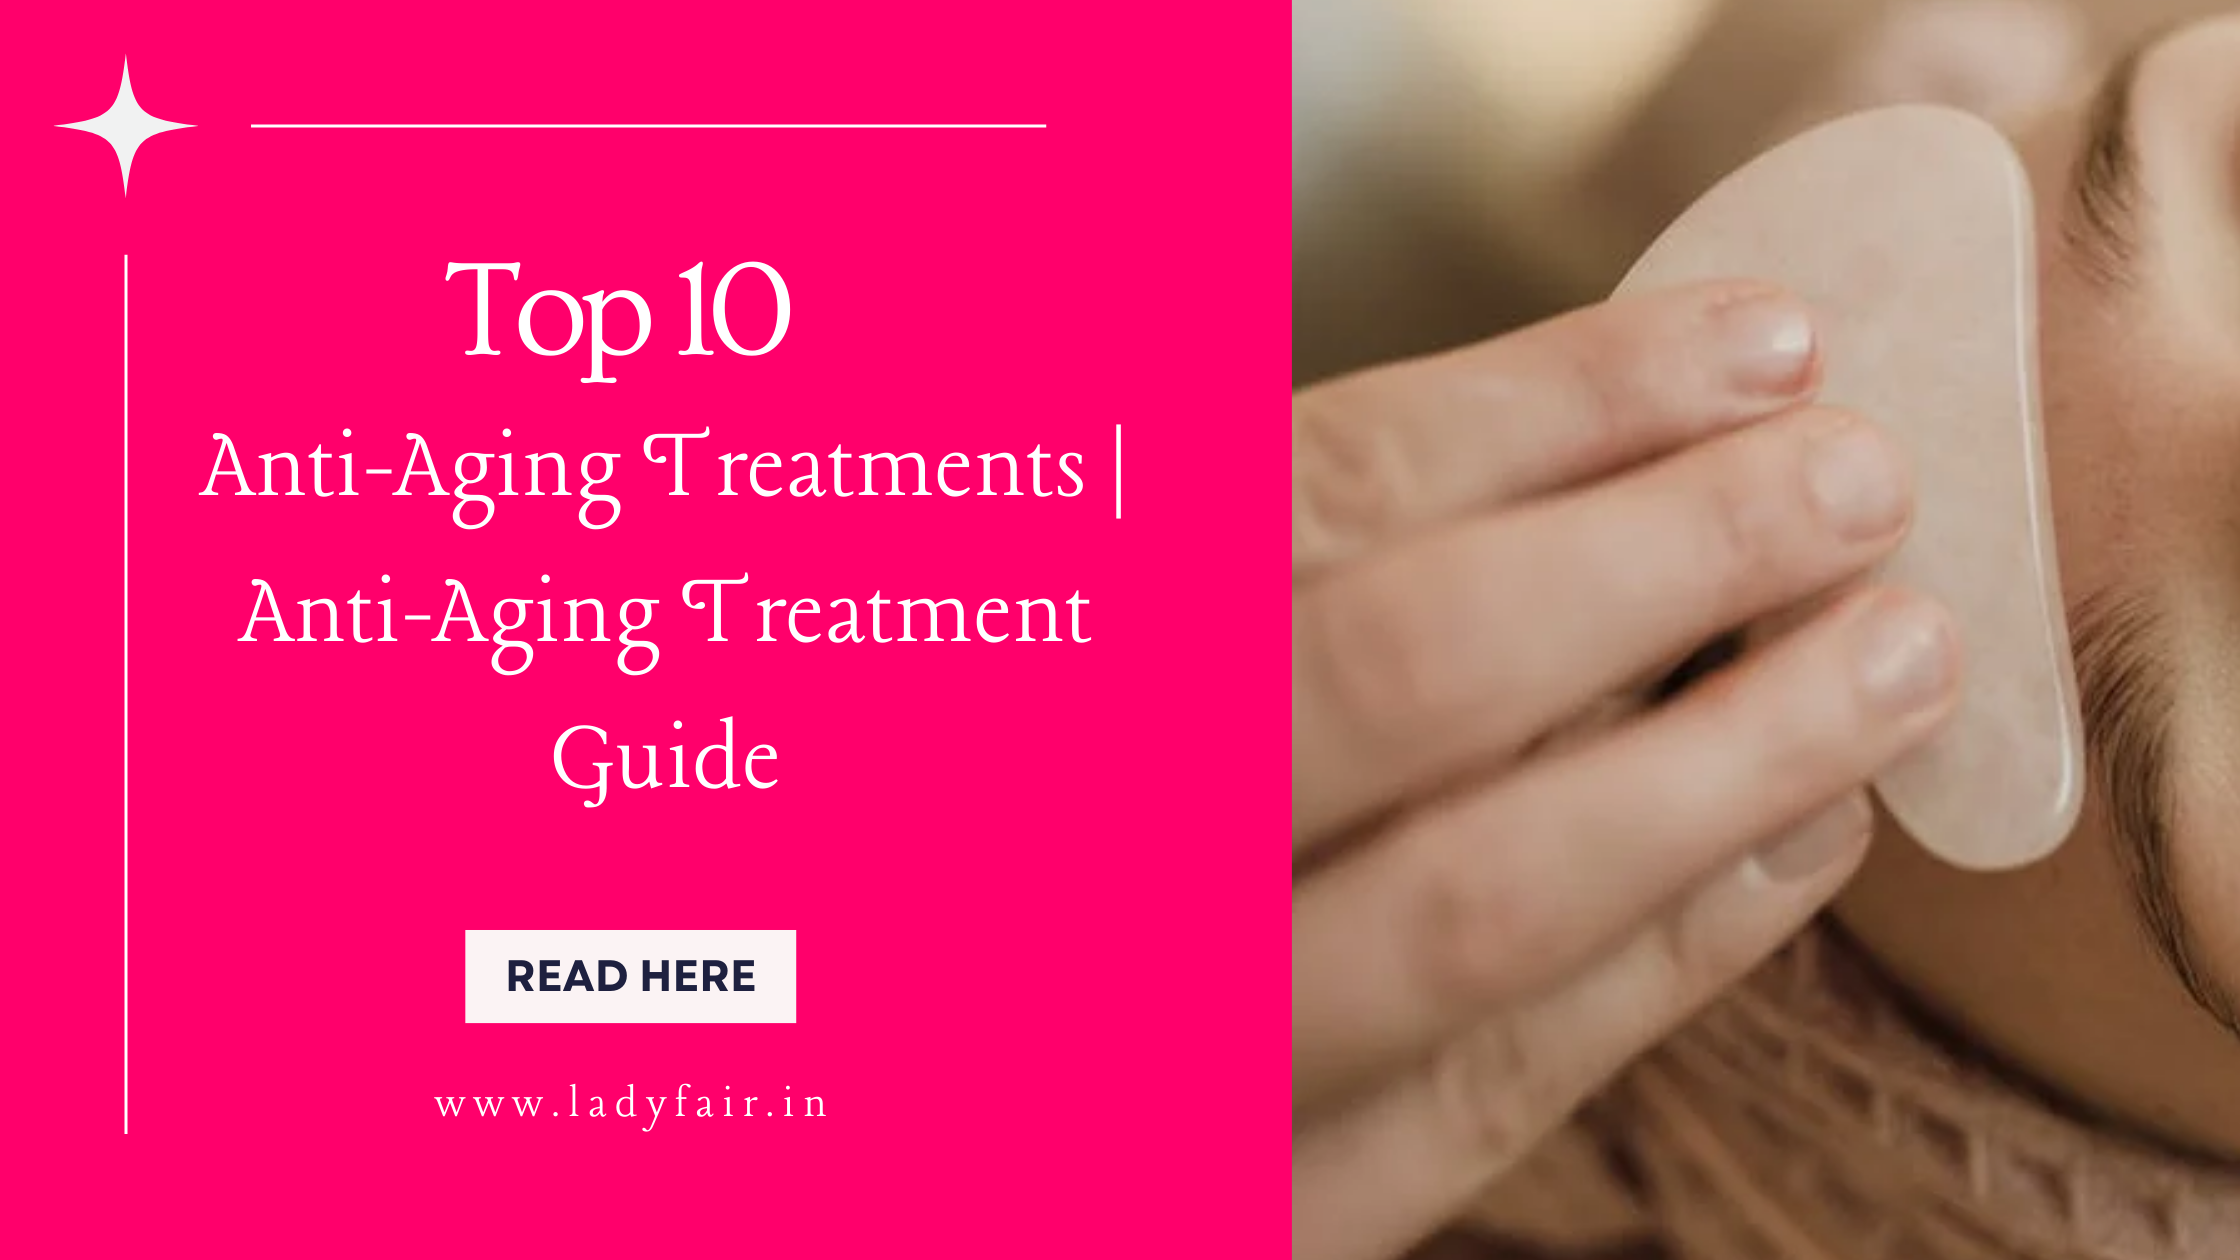
Posted By: 21st June 2024
Top 10 Anti-Aging Treatments | Anti-Aging Treatment Guide
One intelligent choice we have all made at some moment is to see if we can reset your skin. But that never materializes, does it? Your skin ages with you, bringing wrinkles, fine lines, sagging skin, dark patches, and other disorders associated with aging. The good news is that, even though we cannot restore the skin, your dermatologist can provide excellent therapies to stop the issue. Beyond anti-aging skin creams, anti-aging therapies address stretch marks, big pores, and many other issues. In addition to making the skin look younger and more radiant, anti-wrinkle treatments and anti-aging facials that you see so widely advertised also help to improve and speed up cell turnover, protect the skin from further damage, and increase collagen production. keep reading ladyfair brings the best solutions for anti-aging treatment. Why Do Anti-Aging Treatments? The following are some advantages of anti-aging therapies: 1. Hydration and Tightening of the Skin: Dryness, loss of skin suppleness, and firmness are indications of aging. Many techniques, including RF tightening, 4D, and thread lifts, can tighten the skin. 2. Boost Skin Brightness: Growing symptoms and a loss of luster are just two of the many factors that contribute to the appearance of aging skin. With the right anti-aging treatment, fine lines and wrinkles are easier to handle. 3. Enhances Your Self-Belief: Anti-aging routines have advantages for your inner self as well as the outside. You may decide to depend on anti-aging therapies since, among other things, you want to feel confident, and they assist you in achieving that goal. Something about it makes you feel more confident in your skin and increases your appreciation of your beauty. 4. Benefits For Your Health: Because it increases your confidence, the domino effect impacts your general health. You are more likely to interact with others when you change how you look, increasing your social interaction. Also Check : Hyperpigmentation Treatments: Effective ways to even out skin tone Top 7 Anti-Aging Treatments Let's examine the top 7 anti-aging remedies that specialists around the globe recommend to keep you looking young constantly. 1. Microdermabrasion: This is a well-liked method of exfoliating the skin that softly removes the outermost layer. A little mechanism inside the microdermabrasion tool sprinkles fine particles over the skin. The epidermis is peeled off, revealing a smoother, younger-looking layer of skin underneath. In addition to promoting collagen synthesis and improving collagen fiber density, this anti-aging treatment restores the distribution of skin elastin and speeds up the body's natural healing processes. 2. Chemical Peels: These work similarly to microdermabrasion, but they peel the skin's outermost layer using acid. You can choose the kind of acid administered to your skin according to the kind of skin condition you require. 3. Botox: In the cosmetic industry, Botox is the most often utilized medication globally. One kind of neurotoxin that is injected beneath the skin is called botulinum toxin. This functions by obstructing the tissues' nerve impulses. Skin tone is smoothed out as a result of decreased muscular activity. In the beginning, Botox was used to treat a variety of conditions, including overactive bladder, lazy eyes, excessive perspiration, and spasms. Injections of Botox are also effective in relieving migraines. Results with Botox treatments are immediate and last approximately half a year, or until the muscles begin to renew. 4. Skin Rejuvenation Without Ablation: The first indications of aging, such as wrinkles, age spots, and skin tone loss, can be treated with non-ablative lasers and other energy treatments. Non-ablative skin care procedures focus on the intermediate and deep layers of the skin rather than the epidermis. This stimulation reduces wrinkles and spots on the face while promoting the creation of collagen. The benefits of non-ablative skin rejuvenations are long-lasting and come with short recovery periods. These skin rejuvenation procedures tighten the skin and give it a youthful, firm, and healthy appearance, eliminating the apparent indications of aging. However, it may take several months and several sessions for the results to become apparent. 5. Treatments for Fractional Laser Skin Resurfacing: The most effective method for treating any kind of skin issue is to use a laser. They are utterly non-invasive and safe to use. Indian and Asian skin tones respond well to this kind of laser treatment. To distribute the laser beam's intensity uniformly over the treated area, fractional CO2 laser treatments operate on the skin's narrow columns. Consequently, there's a possibility of skin injury and increased efficacy. When the laser penetrates the skin's deep layers, it warms or destroys the cells. This triggers the body's natural healing process, increases the synthesis of collagen and elasticity, and causes the skin to transform into a smoother, younger-looking version of itself. 6. Ultherapy: Ultherapy, the newest anti-aging treatment, is a non-surgical skin rejuvenation process that uses ultrasound energy to target the skin's deep layers. Ultherapy is a very accurate treatment that uses heat to boost the skin's ability to produce new collagen and elasticity, which helps to gradually reverse the effects of aging. 7. Dermal fillers: Fillers precisely fill in the skin's voids, as their name implies. To smooth out fine lines and wrinkles, tiny needles inject these gel-like substances into the skin. Fillers plump up the lip line and improve lip definition; they are also a safe option for anti-aging lip treatments. Dermal fillers are appropriate for anti-aging treatments on the hands, cheeks, nose, eyes, jawline, and lips. The ease with which dermal fillers can be reverted by injecting a dissolving solution is a significant advantage of utilizing them. Also Read : Skincare And Makeup Advice For Teenagers Bottom Line! It's normal and natural to age. With skillfully performed anti-aging procedures, you can significantly lessen the appearance of aging and look more youthful and rejuvenated. Dermatologists can recommend a treatment or a combination of therapies based on their examination of your skin and discussion of any skin issues. Remember that anti-aging treatments are not permanent, and you will still need to take the best care of your skin to avoid seeing the aging indications again. Frequently Asked Questions! 1. Which is the best anti-aging medication? Ans. Metformin is the most popular anti-aging medication. It was originally meant for diabetes but shows promise in increasing life span and well-being by improving cellular functioning and lowering inflammation. 2. What is the most effective anti-aging substance? Ans. The strongest known anti-aging substance is nicotinamide mononucleotide (NMN). NMN heightens NAD+ levels, enhancing cellular repair and metabolism and ameliorating age-related decline. 3. What is the best facial treatment for a youthful appearance? Ans. The best facials to appear younger are retinoids mixed with hyaluronic acid. Retinoids increase collagen production, whereas hyaluronic acid moisturizes and plumps skin. Hence reducing fine lines and wrinkles.

Posted By: 13th June 2024
How Often Should You Get Salon Treatments for Healthy Hair and Skin?
Things like manicures and eyebrow shaping can easily be forgotten when life gets busy—sometimes we even forget where we placed our pen. However, it's more crucial to look after oneself the busier and more exhausted you are, girl. Salon services are a crucial component of self-care. Besides, when you're feeling well, handling stress is much simpler, right? "My eyebrows are perfect, but I'm going to go crazy from work and I'm dying." Thus, mark this salon treatment schedule in your Google calendar and handle it like you would any other crucial appointment. You're worthy of it! Self-care Is Not a Luxury; It Is a Priority Life can be hectic, demanding, and even overwhelming at times! So, how do you press the reset button and reboot? Take care of yourself! Self-care is frequently misconstrued! Some believe it to be an unnecessary indulgence or a selfish behavior. which is definitely not! Health care is self-care. It means looking after our physical, mental, and emotional well-being. It tends to our "future self," the person we are becoming as well as nourishing us in the here and now. Self-care includes exercises like yoga, walking, music listening, and getting expert beautification services. Engaging in these activities benefits your body as well as your mind! Beauty treatments are only a small part of what we refer to as self-care, yet they have a significant positive impact on self-esteem since it is incredibly powerful to feel and look beautiful. Also Read : Essential skincare and hairstyling tips for men So How Often do you go to a Salon? 1. Foot spas and pedicures: Each month, once: In reality, getting a pedicure along with a manicure is simpler. However, if you use a body scrub to exfoliate your feet routinely, you can wait a month. Get professional foot care at least once a month if you enjoy wearing sandals or have calluses from wearing boots or heels. The majority of salons in Singapore provide combos that include a pedicure and a scrub or soak for the feet. Certain people receive specialized care to cure fungal infections, damaged heels, and ingrown nails. 2. Manicures: Usually every two weeks: Avoid waiting until your nails are a messy, chipping disaster. Rough cuticles and hanging nails can be avoided with routine manicures. Additionally, using nail polish for an extended period of time will discolor your nails, especially dark colors. Make careful to rub cuticle cream or hand lotion onto your fingertips in between manicures. Adding another coat of clear top coat can help maintain the fresh appearance of nail polish. 3. Shaping of the eyebrows: Every four to six weeks: Of course, the mirror is your finest guide. Some people have more maintenance-intensive eyebrow shapes, or their eyebrow hair regrows more quickly. It's also important to think about the type of eyebrow treatments you receive. There are specific schedules for eyebrow threading, eyebrow waxing, and eyebrow embroidery. You might also need to get your eyebrows tinted if you colored your hair. (Although maintaining flawless eyebrows is a lot of work, this is one area where you can always have total control—unlike deadlines and life in general.) In between salon sessions, you can use a tweezer to remove a few stray hairs and clear eyebrow gel to sculpt unruly brows. 4. Facelifts: Once every eight to nine weeks: If you follow a good daily skincare routine that includes washing, masking, and exfoliating, you won't require as many salon facials. However, we still adore a good moisturizing facial or having our blackheads and whiteheads professionally removed. Furthermore, Singapore offers a plethora of excellent facials that address specific skin issues like pigmentation, aging, and acne and its marks. Why pass up the opportunity to experiment with novel materials or technology, or the justification to recline and enjoy a half-hour of pampering while you nap? It's a short life; go get a facial. 5. Haircuts and Haircare Procedures: Depending on how you style your hair: Find out from your hairdresser how frequently you should get a trim or touch-up when you receive a haircut or hair color. Naturally, shorter pixie cuts require a lot more upkeep than longer hairstyles that allow you to grow them out. However, in order to avoid split ends, you need still to get regular cuts even if your hairstyle is a very straightforward long and straight cut. Hair treatments (such as blowouts, hot oil treatments, keratin treatments, and straightening) are also handled on a case-by-case basis. Having a regular hairstylist at your preferred Singapore salon offers several advantages like the stylist getting to know your hair and advising you on what needs to be done and when to return. Also Check : Hyperpigmentation Treatments Conclusion: It's important to regularly go to the salon for self-care, which should be a priority, not just a luxury. Adding these services to your daily routine can help you deal with stress better and feel better about yourself, which makes it easier to handle all the things you have to do in life. Taking care of yourself, like going to the salon, is really important for your body and mind. It helps you feel good and ready to handle tough times. Frequently Asked Questions! 1. What is the appropriate number of times for me to get a facial to maintain healthy skin? Ans. The recommendation for facials is every eighth or ninth week. This will involve deep cleansing, exfoliation, and moisturizing that will improve your daily skincare regimen. Professional facials can also more effectively address specific skin issues like pigmentation, aging, and acne than at-home treatments. 2. How often should I consider getting my hair touched or treated? Ans. The frequency of haircuts and treatments depends on your hairstyle and hair type. Shorter styles may need trims every 4-6 weeks, while longer styles can go 8-12 weeks between cuts. For instance, keratin or hot oil treatments are best done within 6-8 weeks according to most stylists who want you to achieve good outcomes. 3. Why does self-care matter in relation to salon treatments? Ans. Self-care is important for physical well-being, mental wellness, and psychological fitness. A regular visit to a beauty parlor that includes manicures, facials, and haircuts goes a long way in enhancing self-esteem and reducing tension. Prioritizing such care regimens ensures steady personal care, enabling you to cope with each day’s challenges more efficiently and promoting the general health of your body.
Posted By: 13th June 2024
How At-Home Salon Services are Revolutionizing the Beauty Industry
Consider how luxurious it would be to receive a massage, haircut, or manicure in the convenience of your own home. No more fighting traffic to the salon or spa and lengthy waits. This fantasy is fast becoming a reality for many people because of the expanding popularity of mobile beauty treatments. With their convenience and individualized experiences catered to your needs, at-home beauty services are entirely changing the way you may take care of yourself. Technology has been a significant factor in making these services more accessible than ever in recent years. It only takes a few clicks on your computer or smartphone to schedule an appointment with a professional who will visit your home. This article will cover the advantages of mobile beauty treatments, well-liked at-home services, the ways technology is influencing the industry, strategies for developing a profitable mobile beauty business, and advice on selecting the best at-home service provider. Advantages Of Beauty Treatments Done At Home The advantage of mobile beauty treatments is that you can receive excellent care in the convenience of your own home. Imagine not having to stress about racing through a crowded salon appointment, finding parking, or dealing with traffic. Alternatively, you can unwind as a knowledgeable specialist treats you with their skills. Convenience and customization—tailoring cosmetic services to your preferences and schedule—are the focus of this trend. One of their main advantages is that mobile beauty treatments frequently accommodate customers with specific needs or preferences. For instance, a mobile therapist can tailor their services to your preferences for cruelty-free goods or if you have particular skin concerns. Furthermore, you can schedule sessions outside of standard office hours because these practitioners are typically more accommodating regarding appointment times. Even with extremely hectic schedules, people can find time for indulgence and self-care. Today's consumers find mobile beauty services appealing because of their convenience and accessibility. Facials, massages, hair styling, cosmetics application, nail care treatments, and anything else you'd typically want at a regular spa or salon are popular at-home services! Why not attempt it, then? Also Read : Best Haircare Products For Every Hair Type Common At-Home Services Provided Not surprisingly, at-home beauty services—like the well-known on-demand app Ladyfair—are becoming increasingly popular. These services, which are provided in your living room, include makeup application and hair styling. They are intended for people who have busy lives and might not have time to visit a spa or salon. Thanks to the ease of in-home salon services, you can now treat yourself to the opulent sensation of professional pampering without having to leave your home. These services include a wide range of at-home beauty treatments so that you may get manicures and pedicures in the comfort of your own house and convenient blowouts, styling, and cosmetics applications for special occasions or fun. Accepting the idea of in-home salon services allows you to improve your beauty regimen simply and pleasurable by bringing the advantages of specialized knowledge and customized treatments suitable to your door. These on-demand services offer comfort, adaptability, and individualized care from qualified experts. With simple-to-use applications or websites, you can schedule appointments and personalize each service to your tastes. This saves you time and work and lets you try new looks or stick to your favorite looks. One example of how technology is changing how we care for ourselves is the rise of at-home beauty services. This trend appears to be here to stay as more people adopt these easy-to-use solutions for their grooming needs. Also Check : Essential skincare and hairstyling tips for men! Technology's Impact On The Industry Technology is changing the beauty business tremendously as it develops, providing creative solutions and improving the experiences of both clients and service providers. 1. Book Appointments with ease: An excellent illustration of this is the ease with which manicure salon appointments can now be found and scheduled, thanks to digital networks. This improvement is beneficial for people who want to quickly manage their time by finding salons nearby and scheduling appointments online. The emergence of digital platforms has made it easy to schedule, book, and make payments—all of which can accommodate your hectic schedule. 2. Browse All-in-once: Additionally, you can quickly browse through different services and providers on these platforms, read customer reviews, compare rates, and decide which best suits your needs—all from the comfort of your home or place of business. 3. Keep up with Trends: Technology not only makes the booking process more accessible, but it also contributes significantly to the skill set expansion of beauty experts. They can keep up with the latest methods and trends by using the online tutorials and courses available online. Social media networks also enable them to correctly display their work. You may relax knowing you're getting excellent at-home beauty services from skilled professionals constantly honing their trade. 4. Virtual Consultations: Furthermore, because they save time and offer customized recommendations based on each person's tastes or concerns, virtual consultations have grown in popularity in recent years. Beauty experts can evaluate your demands more precisely than ever with video calls or chat tools found in mobile applications or websites. This guarantees that every appointment will be a remarkable, personalized experience. At-home beauty treatments are tempting for various reasons, one of which is convenience, given how technological advancements have shaped the industry today. Suggestions For Selecting The Appropriate Home Service Provider You'll discover that there are more factors to consider than talent and knowledge when choosing the ideal at-home service provider, which can significantly impact your pampering experience. As this expanding trend gains momentum, it's critical to be sure the experts you let inside your house are qualified in their field and dependable and trustworthy. We've compiled a list of considerations for at-home beauty services to aid your selection process. Start by conducting research. Look through past customers' reviews, ratings, and testimonies on various websites and social media channels, including Yelp. This will help you understand how other clients have interacted with the service provider. Never be afraid to inquire about their credentials, degree of experience, and personal cleanliness standards. They must be current with pertinent industry developments and possess the appropriate qualifications. Finally, it's essential to communicate when expressing your preferences and expectations for the service or treatment. To ensure no surprises during the consultation, ensure you feel comfortable sharing any worries or unique requests in advance. An excellent at-home beauty service provider should always be flexible and able to listen to your demands while offering professional advice on what would look best on you. Recall that selecting the correct professional is essential to getting high-quality services and guaranteeing a tailored, comfortable, and pleasant experience in your own home! Bottom Line So, you're unsure which to choose—at-home beauty services or the salon? It's time to embrace the convenience and individualized care of mobile treatments. You'll be left wondering why you missed out on this trend earlier! The industry is changing due to technology and many options, making it easier than ever to choose the correct service. Frequently Asked Questions 1. What are the main advantages of having beauty treatment at home? Ans. You can have professional treatments without leaving your house, saving time and effort. Furthermore, it enables personalised treatments that can be tailored according to one’s needs or schedule, which makes for a more comfortable experience and hence a lot more fun than in the case of regular salons. 2. How do you maintain safety and hygiene in a home-based beauty service? Ans. It is important to ensure safety and health by conducting extensive research on qualified persons who can perform the service using available reviews and testimonials. Ask about their certificate or ask them how they handle cleanliness issues. Good providers should have high standards of cleanliness, use clean tools, and adhere to safe practices while carrying out treatment procedures. 3. Do I have to pay more for at-home beauty services than a salon? Ans. Indicatively, prices for at-home beauty services may differ, but they generally mark around the same level as what you would expect from a salon. Though some services may have higher costs for convenience, most customers value personalized attention and time saved, justifying their costs. Lastly, through various platforms or offers, competitive pricing is always available for these types of services.
Posted By: 12th June 2024
How to Get Salon-Quality Manicures & Pedicures At Home
Don't we all like having our nails and manicures done? This leisurely session lets you take it easy and pamper yourself. However, there are a few issues with this. Mani-pedis are getting so expensive that you can't afford to keep visiting the salon regularly. However, you can definitely start a DIY (Do-It-Yourself) mani-pedi routine during your week off! Allow Ladyfair to guide you through the eight steps of doing salon-quality nails at home. Keep checking back! Pedicure And Manicure Types To enhance the appearance and condition of their nails, people get mani/pedis done. When you go to a mani-pedi spa, you have many options, colors, and styles to select from. Let's discuss the different types of manicures and pedicures that are available! 1. French Pedicure And Manicure: The typical manicure and pedicure procedure is applied here. After filing and shaping the nails, a base coat is applied. The base is polished with a light pink or clear polish. It will only have naturally occurring white tips, giving it a healthy appearance. A black French manicure uses black color instead of white tips. However, a gel manicure would appear more glossy because it is exposed to UV light. 2. Normal/Regular Pedicure And Manicure: Soaking the skin and nails in warm, soapy water can help to smooth and soften them. To remove any dead skin, wash the feet after cutting, filing, and shaping the nails. Then, to make the nails look better, paint them and use a moisturizer! 3. Paraffin Pedicure And Manicure: It is well known that paraffin wax, an alkaline-based substance, over-hydrates and nourishes the nails. Among the ingredients are chamomile and tea tree oil. After the nails have been dipped in paraffin wax for a significant period of time, the salon staff member will perform a conventional manicure and pedicure. 4. Spa Pedicure And Manicure: There is a more involved version of the manicure and pedicure for people who want to care for their nails! More focus is placed on each nail to present a flawless appearance. Furthermore, using premium paint and nail polish truly aids in creating a faultless design. Certain locations also provide hot stone massages and salt treatments. Also Check : How To Do Facial At-Home Crucial Equipment/Supplies Required Old nail polish can be removed using acetone or nail paint remover. You need a filer and nail cutter to shape and trim your nails. Your nails are polished and smoothed using a nail buffer. To hydrate and push back cuticles, apply a cuticle oil stick. Dead skin is exfoliated by hand and foot scrub. During foot baths, Epsom salt relaxes and softens the feet. Soak and unwind your feet in a foot bath. A pumice stone or foot scrubber can remove rough skin and calluses. Your skin is nourished and hydrated by body butter or moisturizer. Base coat nail paint shields nails from stains and prepares them for polish. Your nails gain color from nail paint. Nail polish is preserved and sealed with a high-shine topcoat. When painting nails, toe finger separators keep toes apart. Achieve The Perfect Manicure And Pedicure At Home By Following These Steps. 1. Brush your nails: To remove old nail lacquer, use acetone, a cotton pad, and nail wipes. Apply this to both your hand and footnails. Choose an alcohol-free remover; these are supposed to be beneficial for nails. 2. Cutting, filing, and shaping the nails is step two: You should get your nails trimmed to a length that suits you. If you want them almond or square, make them in the appropriate shape. After polishing your nails, wash your hands and feet with water. Since you will be applying moisturizer to your hands, you will skip this step with a dry manicure. 3. Rub Cuticle oil: It's common knowledge that cuticle oil promotes and fortifies nail development. Applying cuticle oil and rubbing for three to five minutes is one way to care for your nails. Your nails can have a good form if you use a cuticle stick to push backward in an inclined motion. 4. Dabbing the nails: After cutting your nails neatly, bathe them in a bath containing one teaspoon of Epsom salt for five to ten minutes. This will clean your nails and get rid of any dead skin. It will also aid with muscle relaxation! A lotion or heat treatment replaces This phase in a dry manicure to leave your skin feeling silky and smooth. 5. Removing The Death Skin: After bathing your hands and feet, polish your heels and knuckles, remove any tanning, and remove all dead skin with a pumice stone or good foot scrub. As a result, the skin surrounding your nails will become smoother and cleaner. 6. Massaging and moisturizing the nails: Put a lot of moisturizer on your nails. You can apply hand and foot cream or body butter to your nails. Massage the area for around ten minutes to encourage good blood flow, even the skin's texture, and help the skin recover from the recent harsh exfoliation. 7. Accurately Designing Nails: Finally, the exciting moment is here after all of these phases! Use a base coat protectant to keep your nails' natural luster. Let this coat dry for three to five minutes. This will help to avoid discoloration of the nails in any way. 8. Reclineing And Getting Restricted: Your nails are prepared to look fantastic and gorgeous once you have completed the previously described steps! Just relax and let the nail paint and top coat dry. Don't try to hasten the process; that will not help things go well. These simple directions let you make gorgeous DIY nails at home without breaking the bank. Also Check : Best Ways To Make Your Makeup Last All Day Long A Few Nail Hacks To keep your nails nourished and healthy, periodically apply cuticle oil. Your nails will grow faster, and your gel manicure will last longer. We advise you to have a traditional pedicure once every one to two months. Select a service that offers a long-lasting hybrid varnish. Traditional pedicures can nourish the skin and nails of the foot. When receiving a hot stone pedicure, use stones no hotter than 4 degrees Fahrenheit. Massage the marma points on your foot with these stones to promote greater health and relaxation. Conclusion: And now look at it! You've invested a lot of money in getting the kind of nails done by patrons of mani/pedi spas. Don't you like having beautiful nails that you can receive in the convenience of your own home? Tell us what you think! Frequently Asked Questions 1. How often should I perform a Do It Yourself (DIY) manicure and pedicure? Ans. A DIY manicure and pedicure should be done at least every two to four weeks for overall nail health, preventing hangnails and keeping cuticles beautiful. 2. What are the benefits of using cuticle oil regularly? Ans. Cuticle oil can be used daily on the cuticles so that they not only look better but also grow healthier nails. This avoids hangnails and dryness, which makes your nails appear neat and glossy. 3. Can I use regular household items for my DIY manicure and pedicure? Ans. Yes, you can use many common things at home to do a DIY manicure and pedicure. For example, olive oil serves as a cuticle oil, sugar mixed with olive oil can function as a scrub, and Epsom salt in warm water acts as a soak. 4. How can I make my nail polish last longer? Ans. To ensure that your nail polish stays on longer, start by ensuring that your nails are clean and dry. Prior to polishing, apply a base coat followed by a high-shine top coat. To protect your hands when doing chores, avoid hot water and instead wear gloves.

Posted By: 12th June 2024
Hyperpigmentation Treatments: Effective ways to even out skin tone
In medicine, darker skin patches caused by an overabundance of melanin production are referred to as hyperpigmentation. Hormone changes, UV damage, and acne scars are just a few possible causes of this. You are not alone if you are struggling with hyperpigmentation. Various treatment methods are available for hyperpigmentation, a common skin problem. Continue reading at Ladyfair to learn more about your options, what to anticipate from treatments like microdermabrasion, and other topics. Four Potential Causes of Hyperpigmentation These are the most typical causes of hyperpigmentation, and they might vary in severity in individuals with different skin tones. 1. Sun Damage: The UV rays from the sun cause your skin to produce more melanin. You get tanned because of the excess melanin. However, excessive or regular sun exposure might result in the appearance of black sunspots. The American Society for Dermatologic Surgery states that sun-exposed skin may acquire precancerous lesions that resemble sunspots, even if they are not cancerous. This is why it's crucial to have a dermatologist examine your skin once a year. 2. Inflammatory response: Inflammation can be triggered by skin trauma, including acne, eczema, insect bites, cuts, scrapes, and even scratching or friction from, for instance, vigorous rubbing. After the damage has healed, inflammation can cause pigment-producing cells to activate, forming a dark area. 3. Melancholy: Brown patches, often known as the "mask of pregnancy," are the hallmark of melasma, a condition frequently developing in women whose hormone levels fluctuate, such as during pregnancy. Although it can happen to men as well, women are more likely to have this kind of hyperpigmentation. Given that using oral contraceptives has also been connected to it, a combination of genetics, sun exposure, and hormonal changes are thought to be the cause. Melasma can also be brought on by other hormone medicines, which are covered in the next section and are used for birth control and menopause symptoms. 4. Health Issues or Prescription Drugs: Addison's disease is a dysfunction of the adrenal glands that can lead to an increase in melanin production and hyperpigmentation. Antibiotics, nonsteroidal anti-inflammatory medications (NSAIDs), and antimalarial medications are among the medications that may raise the risk of hyperpigmentation. Some chemotherapy medications may also result in transient hyperpigmentation. When using chemotherapy medications, the corresponding black spots normally go away 10 to 12 weeks after the treatment is over because new ones replace the dead skin cells. Also Read : Skincare And Makeup Advice For Teenagers Effective ways to even out skin tone 1. Use Face Acids: Skin acids, often known as face acids, remove the outermost layer of skin cells. Whenever you exfoliate, new skin cells grow from the skin to replace the old ones. As a result, your skin tone becomes more balanced and smoother overall. Many facial acids can be purchased over the counter at drug and beauty stores. Popular choices include: Alpha hydroxy acids, including vitamin C (ascorbic acid) and glycolic Lactic Citric, malic, or tartaric acid Azelaic Kojic Salicylic acids 2. Maintain Hydration to Increase Cell Turnover: While lightening the dark spots is the main objective when treating hyperpigmentation, an efficient over-the-counter (OTC) moisturizer should also include substances that have additional skin-beneficial properties. A good product will address pigment problems and hydrating ingredients like hyaluronic acid or glycerin; it may even contain retinol to increase cell turnover. According to the University of Tennessee Medical Center, an effective moisturizer can also restore the skin's lipid, or fat, barrier. This will support the health of new skin cells as they emerge to replace old ones. 3. Refrain from touching bug bites, blackheads, and other wounds: While squeezing a stubborn blackhead or itching a mosquito bite could be tempting, heed your mother's advice and don't pick. Picking and scratching at a location will only exacerbate the inflammation, causing the skin to discolour. 4. Examine OTC Solutions for Whitening: The earlier you address hyperpigmentation, the easier it will be to remove it. Over time, the pigment of brown patches may penetrate the skin more deeply. The American Academy of Dermatology (AAD) advises searching for spot-eradicating components in over-the-counter medications, including retinoids, vitamin C, and glycolic and azelaic acids. Vitamin C, licorice root, and kojic acid are among the components used in treatments that help lessen hyperpigmentation by suppressing tyrosinase. This enzyme forms melanin, which darkens the skin. The study notes that the surge in over-the-counter medications containing the chemicals mentioned above can be attributed to the discovery of the connection between tyrosinase and excess melanin production. 5. Shield Your Skin from the Sun: The best defense against discoloration caused by the sun is to consistently wear broad-spectrum sunscreen with an SPF of 30 or more every day, even on gloomy or chilly days. Dark patches get darker due to the pigment's hyperdrive caused by UV radiation. SPF solely describes protection against UVB short-wave radiation. Select a product containing Mexoryl, Parsol 1789, titanium dioxide, zinc oxide, or avobenzone to further protect against UVA long-wave radiation. The AAD also advises against going outside between 10 a.m. and 2 p.m., when the sun is at its brightest. You can also wear a hat with a wide brim to protect your head, face, ears, and neck. 6. Expert skin care procedures: You may benefit from some in-clinic treatments if, after a few months, prescription skincare isn't improving your hyperpigmentation or if your specific case calls for more intensive solutions. Peels are the most accessible treatment for all skin types. AHA peels with stronger concentrations are more frequently used than those done at home. "Repeated application of AHAs, such as mandelic, lactic, and glycolic acid, at intermediate strengths is often very beneficial for pigmentation of most types. For optimal results, AHA peels are typically performed once per month for four to six months. They can be used in conjunction with skincare and other therapies. Also Check : How To Do Facial At-Home Overall! Dealing with dark spots on your skin can be annoying, but you can try many good treatments. There are many ways to make your skin tone even better. You can use face acids, moisturize skin, avoid picking at your skin, and use over-the-counter whitening products. Using sunscreen that protects against different types of sun rays and getting professional treatments like peels can greatly help your skin. By learning what causes your skin problems and trying different treatments, you can have healthier and more glowing skin. Get advice from a skin doctor to figure out what kind of skin you have and what it needs. Frequently Asked Questions 1. What are the methods of treating hyperpigmentation and uneven skin tone? Ans. Start by exfoliating using face acids such as glycolic or salicylic acid. Use moisturizers containing Hyaluronic Acid to hydrate the skin, and wear broad-spectrum sunscreen every day. For dark spots, you can also try over-the-counter retinoids, vitamin C, or kojic acid products, which can help lighten these areas. In the case of severe conditions, you can opt for chemical peels or laser therapy. 2. How do I even make my skin tone? Ans. Begin with a mild cleanser and a toner. Exfoliate consistently and apply brightening serums like Vitamin C or Niacinamide. Sun protection should always be used to prevent further damage. Retinol moisturizer will affect texture and tone favorably over time. 3. What is the most effective way to even out hyperpigmentation? Ans. Exfoliate your skin using Lactic Acid or Glycolic Acid face acids. Use serums that brighten your complexion, such as those containing Vitamin C, Kojic Acid, or Licorice Root Extract in their formulas. Don't forget to apply SPF 30+ sunscreens daily on your face and your body if there is any exposed area of it, though it’s not recommended for everyone since they have different types of skin; thus, a dermatologist consultation is needed before receiving this treatment.
Posted By: 10th June 2024
Essential skincare and hairstyling tips for men!
Grooming and skincare are frequently associated with women. Thankfully, as more and more guys realize how important skincare is, this view is beginning to shift. In reality, the selection of men's grooming products has taken a completely new turn in recent years, with several products catering to particular skin and hair issues progressively finding their way into the vanity of most guys. If you're trying to up your grooming game or are still unfamiliar with the skincare concept, Ladyfair has this list is for you. The products listed below are necessities for every man's skincare and hair care collection. Also Check : The Best Haircare Products For Every Hair Type Men need skincare, but why? Men's skincare goes beyond "looking good." Here's why men need to take good care of their skin: Skin health: Proper skincare can avoid dryness, wrinkles, and acne. With the proper care, your skin will look great and stay healthy. Environmental protection: UV radiation, pollution, and severe weather are just a few elements your face is exposed to. You can shield your skin from these dangerous environmental factors with the proper maintenance. Confidence-boosting: Following a successful skincare routine will help you feel more confident. You'll always be pleased with how attractive you look. Preventing skin cancer: Proper skin care shields it from damaging environmental factors that can lead to cancer. Therefore, you can help avoid this dangerous illness by adhering to these useful skin care guidelines for men. 5 Basic skincare tips for men Men's facial care is essential to preserving their general health and well-being. However, men should create a skincare regimen that suits their demands and works for them. Adhere to these crucial men's skincare guidelines to maintain radiant skin. 1. Do Cleaning Properly- One of the best skin care practices to keep your skin looking its best for longer is cleansing. Cleaning your face twice daily helps eliminate dead cells, pollutants, and dust, keeping your skin smooth and healthy. Cleaning is essential because it releases bacteria from the pores by clearing them of blockages. 2. Do not skip Toning- Proper toning is one of the top ten men's skincare suggestions. It's one of the most incredible natural beauty suggestions for men. Toning balances the skin's pH because it is naturally acidic. It also cleans the pores of contaminants. Men should use non-irritating ones to get the most out of their skin type-appropriate toners. 3. Drink water- Drink a lot of water every day. Hydrating your skin is essential because it helps remove toxins. Consequently, drink eight glasses of water daily or more if you're active. Maintaining the proper skin hydration level with appropriate water consumption keeps skin appearing plump and healthy. 4. Gentle Shaving & Beard Maintenance- Another great men's facial glow tip is to shave your beard. Maintaining and shaving your beard makes you appear more put together and shields your skin from discomfort and ingrown hairs. Use good shaving cream or gel, warm water, and a sharp razor. 5. Spot Treatment- If you know anything about skincare for boys, you have to see this tip. For young males who get breakouts now and then, it works. Also Read : Skincare And Makeup Advice For Teenagers Know Some Hairstyling Tips Too But now that you're alone, you need help maintaining your hair's greatest possible appearance. Fortunately, we have you covered. These are our top five suggestions for men's hairstyles. 1. Use a Mild Shampoo: The mixture of shower gel and shampoo in your shower? You should stop using that to wash your hair now. If you give up on chemical-laden formulas, you'll notice a significant change in the feel and appearance of your hair. For instance, if your shampoo contains a sulfate-based detergent, it may be harsh on your hair's cuticles and cause frizzy hair. Thus, review the list of ingredients in your shampoo. If the mixture contains ingredients like wheat protein, vitamin E, or amino acids, your hair will be in a much better, more manageable style. 2. Don't Wash Your Hair Daily: You might assume that washing your hair every day is the first piece of advice on keeping it looking nice. However, frequent shampooing can quickly dry out your hair, leaving it frizzy and brittle. To bring back your hair's natural strength and shine, try washing it every other day. Curly hair typically requires fewer weekly washes than straight hair. 3. Use Conditioner As Well: As previously stated, the all-in-one soap bottle in your shower won't help you control your coif.Purchase an independent conditioner bottle and use it each time you wash. Conditioner is essential for your hair to look and feel its best. After shampooing and oil-freeing your scalp, conditioner is applied to strengthen and nourish your hair. Once more, you should modify your wash-and-condition routine to fit the kind and texture of your hair. During lockdown, you have little choice but to experiment a little. Spread out your hair washes to watch how your mane responds. 4. Select the Proper Styling Supplies: If you start with healthy, clean, and nourished hair, styling it how you like it will be much more straightforward. Nevertheless, you won't be able to finish the task without the appropriate style products. Specialty hair products are also available. For instance, treatments containing clay are intended for thinning hair. Then there are gels, which offer visual hold; put another way, after applying the gel, your hair will appear glossy and sleek. You'll also need to experiment with this stage. Take a fresh pomade or gel and examine its appearance and texture. Try different approaches until you discover the most effective at-home hairstyle. 5. Use the Correct Hairbrush: Use a well-made, naturally bristled hairbrush. Brushing or combing your hair with the correct brush can help distribute natural oils evenly throughout the hair shafts, conserving moisture and preventing hair loss. This will give your hair a healthy and shining appearance. Also, you ought to get proficient in using a comb. A comb with finer teeth is ideal for those who like a smoother appearance or a little more structure. If you want a tousled look, you can finger-comb your hair. Try combing your hair in several directions to see which style suits you the best. Final thoughts Men also have to pay attention to their hair and skin like women. Having an uncomplicated skincare routine and using the right products will help men maintain their skin's healthiness and keep these organs radiant. Similarly, taking care of your hair using proper tools can make you look nice and neat. From washing and hydrating routines to choosing the best shampoo/conditioner, tips like these are essential in looking/feeling your best possible otherwise felt before now. Follow these habits for self-assurance while upholding your skin or hair hygiene. You should bear in mind that looking good does not only mean dressing well but also feeling great about yourself Frequently Asked Questions 1. What should a hair care routine include for a Man? Ans. A good men’s hair care routine involves using a mild shampoo and conditioner that suits your hair type. Refrain from washing it daily to avoid drying out. Trim it frequently to maintain the shape and do away with split ends. Such as gels or pomades that meet the needs of your hair and the style you desire. Finally, buy a high-quality brush or comb for equal distribution of natural oils in your hair, ensuring it is healthy and manageable. 2. What should men do for their skincare? Ans. Men should have a consistent skincare regimen based on their skin types. Cleanse your face twice. Remove dirt and excessive oil every day. Also, ensure your skin is moisturized at all times to prevent dryness. Use sunscreen every day to safeguard your skin against ultraviolet ray’ damage. For pimples, you can use spot treatments with benzoyl peroxide or salicylic acid. 3. Do Men need Skincare? Ans. Yes, men need skincare, too. Good skincare helps prevent common problems like dryness, acne, and premature aging. Additionally, it shields the skin from environmental damage caused by factors such as UV rays or pollution. It builds confidence by keeping the complexion looking healthy and glowing through an efficient daily routine. 4. What are some natural ways men can naturally get their skin to glow? Ans. Men should follow healthy living and good skin care for healthy and glowing skin. Drinking a lot of water maintains your body's hydration. They need a balanced diet with fruits, vegetables, and healthy fats to provide essential nutrients. Ensure you get enough sleep each day. Regular exercise enhances blood circulation, resulting in radiant skin. Furthermore, clean your face every day, wash it every week to remove dead cells from the surface, and moisturize it frequently to sustain its normal beauty.
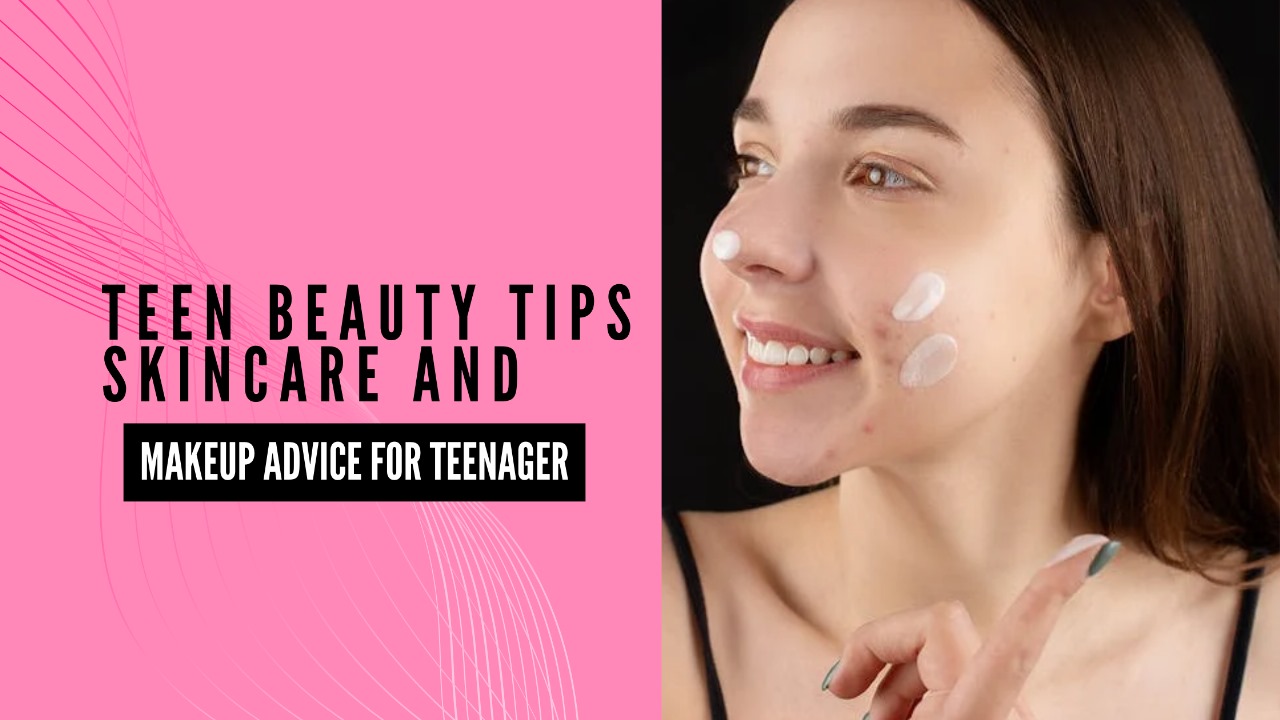
Posted By: 10th June 2024
Teen Beauty Tips: Skincare And Makeup Advice For Teenagers
While everyone wants to present their best self, some may wish to retreat from the outside world during their youth or teenage years. Though they might not deal with wrinkles, your adolescent can deal with blackheads, pimples, or sensitive skin. It might be uncomfortable and even depressing to stand out from the crowd during these formative years with a giant zit or red, inflamed skin. Issues like acne can be complicated if your adolescent is being taunted or bullied because of them. Here are some simple and effective beauty tips just for you from Ladyfair ! Why Skincare and Makeup Advice for Teenagers? Teenagers’ skin needs care and makeup knowledge for various reasons. One, during your teenage years, your skin undergoes many changes. Hormonal imbalance can cause pimples and oily skin that may be avoided by adhering to a good skincare routine. Two, understanding makeup could greatly contribute to boosting your self-esteem. Makeup is one of the enjoyable ways you can express yourself while still enhancing what nature gave you. Correct application can make you feel at ease and confident. Third, establishing good routines will lay the groundwork for healthy skin later in life. Routine cleaning, moisturizing, and sun protection are vital since they prevent the later appearance of skin problems. Knowing what kind of skin you possess and choosing appropriate products will save you from suffering from irritation or breakouts. To finish with, maintaining great skincare and using makeup sometimes is an excellent way of practicing self-care. Paying attention to oneself daily, even just a few minutes, can be satisfyingly relaxing. It’s a chance to treat your body right and feel good about yourself. Also Check : The Benefits Of Face Masks Skincare Advice for Teenagers The good news is that clear, healthy skin is achievable even though battling hormones and peer pressure is not always easy at this stage of life. Dermatologists recommend these skincare suggestions to keep your teen's skin radiant. 1. Don't complicate your skincare regimen: Keep your skincare regimen straightforward and regular. When a routine has too many steps, it might become counterproductive. Wash your face first thing in the morning and last thing at night. You should also wash your face after perspiring. Place your items next to your toothbrush and wash your face while brushing your teeth to maintain consistency. Keep face cleaning at the top of your mind. Additionally, avoid using anything that can irritate the skin, such as washcloths and mesh sponges. Instead, cleanse your face and apply makeup with your fingertips. 2. Make use of non-comedogenic and oil-free products: Seek out items that won't clog your pores. These products will be marked as "noncomedogenic" or "oil-free," meaning they won't clog pores by causing comedones, blackheads, or whiteheads. This holds true for sunscreen, cosmetics, and moisturizers. 3. Treat acne from the start, head-on: During adolescence, when hormones are released into overdrive, acne is frequent. One acne product at a time is an excellent place to start if you start experiencing mild breakouts. Add another acne product if you still don't observe any difference after four to six weeks. This method can assist in combating the various factors that contribute to acne, including bacteria, plugged pores, oil, and irritation. 4. Apply sunscreen all year round: Sunscreening one's skin from the sun's damaging UV rays is a good life habit. Wearing sunscreen is essential, come rain or shine. Utilize a broad-spectrum sunscreen with an SPF of 30 or higher, even if you wear cosmetics. Dry, sun-damaged skin is chafed, and skin breakout can cause a bothered complexion. 5. Steer clear of touching, plucking, scouring, and using too many products: Excessive exfoliation, popping zits, washing your face too often, and attempting new acne treatments every week may all seem extraordinary at the time. "Avoid doing too much too quickly as this can exacerbate acne, irritate the skin, and trigger allergic reactions."Moreover, popping or picking zits is strongly discouraged. This may cause scarring and prolong the time it takes for the zit to go away. Also Read : Tips To Avoid Makeup Mistakes Makeup Advice for Teenagers These teenagers are on a journey of discovery and are often inspired by makeup. Who can’t be mesmerized by the range of eye palettes and blushes? 1. Things to Consider Before Purchasing Teenage Makeup: However, when purchasing makeup for teens, it is important to consider that they have reached a specific age stage, skin type, and preferences during this period. Here are the things to keep in mind: Go for teen makeup. Lighter natural versions over heavy mature ones would work best. Sheer lip glosses and tinted moisturizers will achieve the right youthful look. Emphasize skincare rather than thick makeup application; buy products that multitask as skincare, such as those with SPF sunscreen protection. Pick easy-to-blend and apply cosmetics that can be enjoyed well by teenagers. 2. Essentials of Teen-Approved Makeup for Your Vanity: Stocking your cosmetic bag with the right supplies is important before attempting various makeup styles. Our choice of makeup is safe on all skin types, wearable, and youthful every day. Boost your makeup: Use a primer that blurs lines, which helps your foundation last when applied to oily skin. Use only over the parts of your face that tend to be shiny right after sunscreen and moisturizer. Moisturizing and hydrating primers will help those with dry skin avoid making their base look dry and flaky. CC and BB Cream: Keep your teenager’s makeup looking natural by applying light to medium coverage foundation. Apply in areas of concern, then blend using fingers. If necessary, layer more where you need extra coverage. Finish with a CC, BB cream, or tinted moisturizer with SPF lightly applied. Remember: generally, there is less. Concealer: Concealers blend well with skin, so they can replace a foundation or cover dark circles and pimples. After hydrating or prepping the skin, apply dots of concealer to the face or areas. Blend by using circular movements to apply the concealer to your fingers or a medium blending brush. Cream cosmetics: Cream blushes, eye shadows, and highlighters are great because you can easily apply them with your fingertips and retouch during the day. That will give a complete, glowing, young, beautiful look perfectly blended into their skin. Stain Lip Tints & Gloss: Lip stains come in various shades, providing users with natural colors to suit their complexion. Besides, they last throughout the day without any fuss. Alternatively lip-gloss makes one’s lips look damp and trendy. It is portable so reapply as needed; hence it keeps luscious shine on the go. Conclusion: Taking care of your skin and considering cosmetics will make your adolescent's life pleasurable and guarantee a person scores high in self-esteem. Straightforward skincare and fundamental cosmetics tips will also give you certainty and keep your skin solid. Skin shifts from individual to individual, so be understanding in finding what works best for you. Grasp your normal excellence and let cosmetics be a shape of communicating yourself. Remain positive, keep your skin brilliant, and appreciate the gleam of this energizing time. Frequently Asked Questions! 1. Can a teenager use a face serum? Ans. A teenager can indeed use face serum, particularly if he or she suffers from skin problems like acne, dryness, or dullness. You must go for a serum that suits the tender skin of a young person, as sugary and irritating ingredients are in it. It is better made to moisturize your skin, such as hyaluronic acid, or it’s better suited for acne and oil control, either via niacinamide. When you want to discover how new products work on your skin, always patch-test them first and start with a little bit. 2. What should a teenager's skincare look like? Ans. However, teenagers' skin care routines must be accessible and practical. This usually involves washing the face twice daily with a mild cleanser to remove dirt and excess oils. Applying light, noncomedogenic moisturizers keeps skin hydrated without blocking pores after washing. A broad-spectrum sunscreen of at least 30 SPF is indispensable because sun protection is essential daily. Spot treatments, including salicylic acid or benzoyl peroxide, can help deal with breakouts for people with acne-prone skin. Gentle serums or toners might be added to fit an individual’s skin type. 3. Is it reasonable to do makeup in my early 14s? Ans. At fourteen years old, there is nothing wrong with starting to try out makeup. Do not hide your looks under layers of makeup; keep them simple and natural. In this case, you should concentrate on basic things like tinted moisturizers, lip glosses, mascaras, and a hint of blush. Makeup is supposed to be an enjoyable tool that helps improve self-esteem, so do not feel obliged to wear it each day. 4. What makeup should a 16-year-old have? Ans. A 16-year-old should have essential makeup items that are age-appropriate and assist in enhancing their natural beauty. These may entail BB creams/ tinted moisturizers meant for light coverage which evens out tone while not feeling too heavy on one’s skin A cover stick helps hide pimples and dark rings under eyes. The lips will feel great with lip glosses or colored balms.
Posted By: 8th June 2024
Pre-wedding skincare and makeup planning!
It's no secret that your wedding day could be the most essential and memorable day of your life. There will be multiple events, spamming days, and, of course, an army to make everything great. You will have focused solely on the important details of your wedding and paid little attention to your skin. But, hey, you are the star of the day, from your hair and makeup to your ethereal gown to the paparazzi, a.k.a. wedding photographers, who capture every glimpse of you all day. However, no matter how talented your bridal makeup artist is, they can only demonstrate their abilities on your canvas. Yes, we are discussing bride-to-be skin care recommendations to help you achieve beautiful skin and be prepared for your big day. A thorough skincare routine that moisturizes, brightens, and balances your skin creates a canvas for seamless and smooth makeup application. In addition to your wedding checklist, you have a list of things to do to keep your skin in good form for your wedding and throughout your honeymoon. From redesigning your everyday skincare routine to following these pre-bridal skincare suggestions, every step will help you achieve the perfect wedding-day look. To plan your pre-wedding skincare program, Ladyfair says to first identify your skin issues. Also Check : How to Choose the Right Bridal Makeup Artist Why Is a Skincare Routine Important Before the Wedding? It pays paid in the long run to have nice skin, weddings excepted. A good routine not only leaves your skin immaculate but also helps you appear your best by treating wrinkles and preventing acne. For brides, flawless makeup can definitely be an instant fix, but a natural bridal glow is truly priceless. Your wedding day provides you with a deadline, so if you want to start dazzling skin tips before the wedding, you need to start early. Brides, time is of the essence—the skin requires time to cure! Upgrade your skincare routine with our pre-bridal skincare advice to get that lit-from-within complexion in addition to your diet of love and fresh air. 1. Never Skip CTM: After all of the endless trips to your wedding planner and dress fittings, your skin probably turned dull instead of radiant. The three most important phases of any skincare regimen are cleansing, toning, and moisturizing. The CTM routine relieves tension from the skin and prevents the dreadful likelihood of breakouts while also keeping your skin clear, clog-free, and hydrated. Use a mild cleanser every day to keep your skin problems at bay. It contains natural components. After that, use a moisturizing toner to remove all of the toxins and debris that have become lodged in your pores and leave your skin feeling clean and smooth. Hydrating is the last step. Your skin will be nourished and kept supple with a moisturizer, which also helps seal in moisture. 2. Bet on Do-It-Yourself Home Treatments: Your pre-bridal skincare regimen aims to treat yourself to self-indulgence and care before your wedding. You want your skin to be healthy, shining, and looking its best to feel secure and beautiful when you walk down the aisle. You may create many do-it-yourself home cures with natural ingredients. Take a look at them below. 3. Adopt A Healthier Diet: The fact that your skin reflects what you consume is well known. In addition to using natural skincare products before the wedding, a balanced diet is advised. Six months before your wedding, you might meet with your dietitian to create a customized food plan. The last thing you want on your most wonderful day is to be starving while you stand there, so steer clear of the fad diet. Incorporate superfoods high in antioxidants, vitamins, zinc, and healthy fats to give you that inner glow instead of starving yourself. Instead, eat more leafy greens to reduce stress. 4. Prepare Your Skin Three Months Earlier: If you haven't already, start the process. Three months before the wedding, begin nurturing and preparing your skin because it takes time to heal. Find a reliable aesthetician and take care of any serious skin issues, such as acne and uneven pigmentation, beforehand. They will advise you on the suitability of laser therapy or mild resurfacing procedures. A skin facial may need to be done in several sessions. Thus, wait a few months to observe the effects add up. Make sure the treatments are scheduled so they don't conflict with one another. To achieve the best effects, schedule your final pre-wedding facial one week before your wedding day. 5. Reduce Stress: One of the main things that damage our skin is stress. Our bodies create the hormone cortisol in response to stress, which can cause breakouts and increase oil production. Make time for yourself and engage in relaxing and stress-relieving activities to maintain clear, healthy skin. This can be doing yoga, practicing meditation, having a warm bath, or simply going outside. 6. Control Your Sleep Pattern: Getting enough sleep is one skincare tip every bride-to-be wears before her wedding. On your big day, the last thing you want is to have those black eye bags appear. Sleep is the closest thing to a fountain of youth regarding beauty regimens. Your appearance is enhanced by the self-repairing skin cells that occur as you sleep. It prevents the first indications of aging and brightens and revitalizes your skin. Also Read : Bridal Hand Mehendi Designs 7. Make a plan beforehand: Not sure when to begin skin preparation for your wedding? The response will come as soon as feasible. While it doesn't necessarily mean you have to visit your dermatologist immediately after receiving the proposal, try to keep it in mind when planning your outfit for the big day. A year to six months is ideal for noticeable transformation. A smart place to start is by taking the time to examine your skin and consider any potential gaps in your regimen. A virtual consultation with a skincare specialist to review your regimen might be in order.
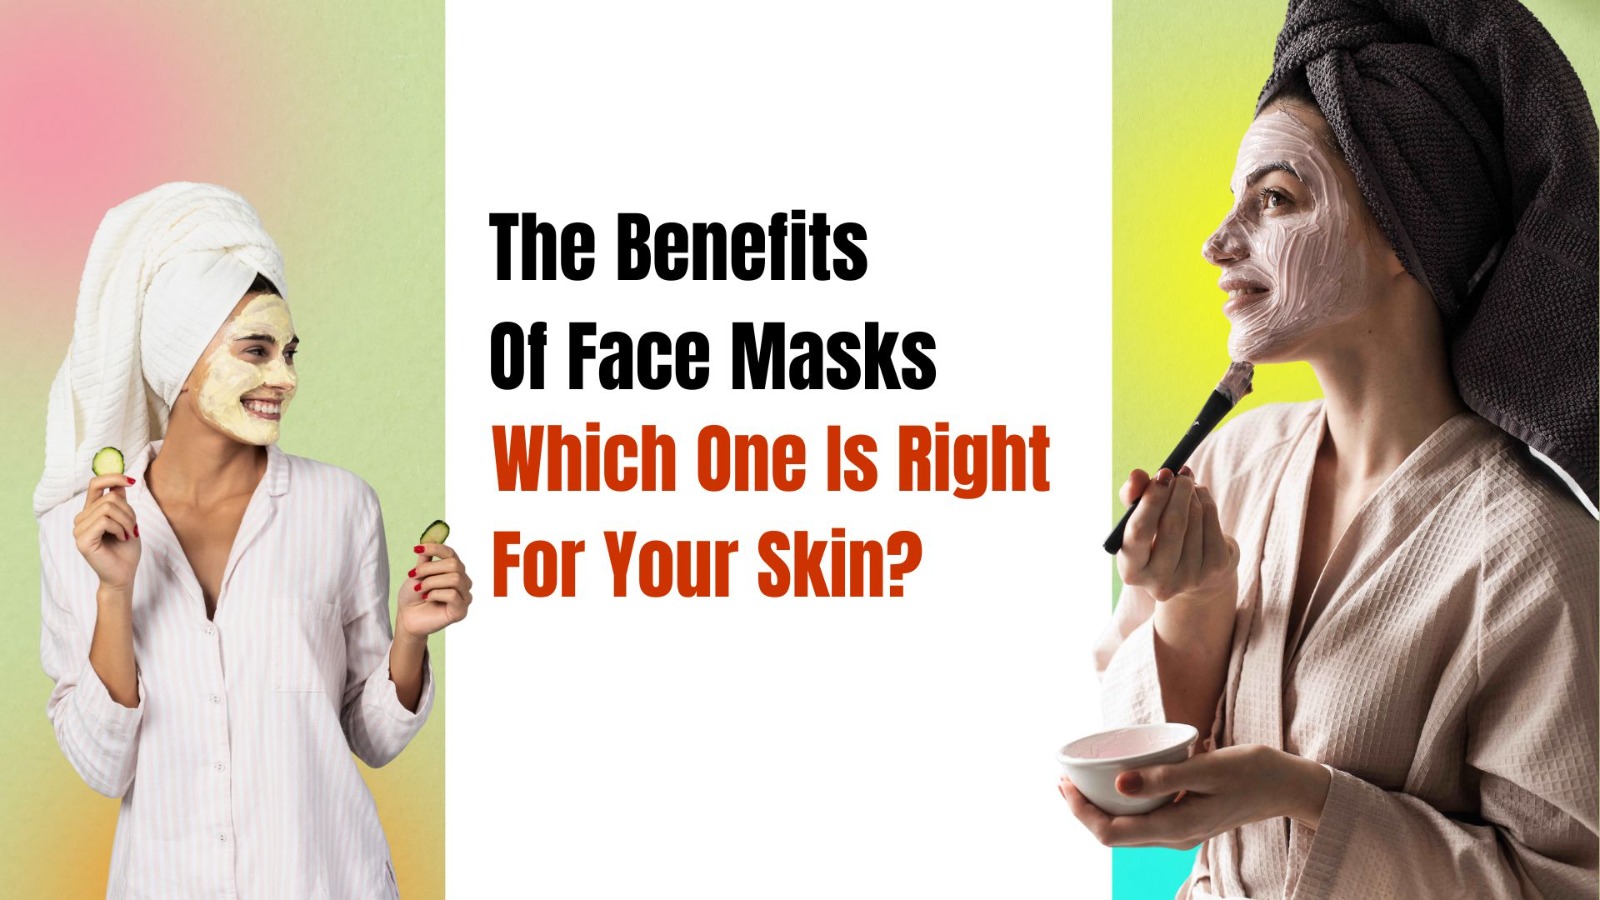
Posted By: 8th June 2024
The Benefits Of Face Masks | Which One Is Right For Your Skin?
Nothing improves your skin care regimen more than a face mask. The correct mask can address essential skin issues and conditions and be a decadent pleasure. There is a mask that will work for you whether you have dryness, fine wrinkles, big pores, acne, or a combination of these issues. Continue reading to learn about the various kinds of face masks, how to use them, and which ones are best for your complexion type and age range on Ladyfair. Benefits Of Face Masks A face mask is an instrument for skin care, much like a serum or moisturizer. It provides the skin with vitamins, nutrients, and highly concentrated active ingredients to enhance general health. Face masks are special because of their occlusive properties, which form a physical barrier to keep the healthy components within and improve skin absorption. Face masks are intended to be applied sometimes to instantly improve your skin. A mask can do any of the following tasks, alone or in combination, based on the demands of your skin: 1. Cleanse the pores on the skin: Facial masks can achieve cleaner skin and refined pores. Certain masks can thoroughly clean pores and remove fatty materials, metabolic waste, and dead cells that might clog them. While masks designed specifically for the cleansing step yield a more effective outcome at this stage, all properly applied masks aid in cleansing because they must be applied to a clean face and removed with water. 2. Hydrate: Masks give dry, parched skin moisture and hydration. The water in the mask softens and increases the skin's flexibility by penetrating deeply into the epidermis. The appropriate makeup is easier to put on hydrated, well-moisturized skin. The skin also appears younger, smoother, and healthier. Therefore, it is ideal to use it as a step or product before an event that calls for glowing skin. 3. They offer a uniform skin tone: Facial masks can reduce hyperpigmentation and make skin tone and texture more uniform. They also encourage sweat gland output to raise the skin's oxygen content. 4. Reduce the thickness of fine lines: Frequent usage of face masks can minimize wrinkles, dark spots, fine lines, and other indications of aging. Additionally, they can accomplish softer and smoother skin. 5. Control greasy skin: Sebum is the natural oil that lubricates and protects the skin, and it is frequently produced in excess, which leads to oily skin. Since hormones frequently cause this overproduction, no product can "fix" the issue. But by absorbing oil and enhancing natural hydration and moisture, a good face mask can help minimize oily skin by making the skin less likely to overproduce oil. 6. Firmer skin: Skin sagging can give the appearance of aging. Certain face masks can battle free radical damage and boost collagen formation, progressively leaving skin feeling tighter, firmer, and more youthful. Also Check : How To Do Facial At-Home Face Mask Types With so many variations available, how can you select the best face mask for your specific needs? Let's explore the topic further to determine which mask texture is best for you. 1. Gel Consistency: Gel masks are similar in consistency to jam or jelly. With their lightweight texture, they are ideal for oily to normal skin. Many gel masks contain astringent substances such as raspberries and blackberries, which help to reduce oil and constrict pores. Others are made with moisturizing components such as stone fruit and honey to restore the appearance of parched skin. 2. Cream: A cream-based mask feels similar to the texture of a heavy moisturizer. These face masks work wonders to replenish moisture and nutrients in the skin, keeping it plump and youthful-looking. Cream masks can treat various problems, including obvious symptoms of aging and problematic skin. The Bamboo Age Corrective Masque improves the appearance of dry, parched, or aging skin overnight, while our Clear Skin Probiotic Masque is ideal for acne-prone and oily skin types. 3. Clay: Clay's absorbing, exfoliating, and astringent characteristics help to cure acne-related skin issues such as excess oil and irritation. A clay mask can also be applied to specific problem areas, making it effective as a spot therapy. If you have congested pores, the Charcoal & Black Seed Clay Masque absorbs excess oil and minimizes the appearance of huge pores and dark stains. Illite clay, activated charcoal, and black seed oil combine to create a product that visibly improves the appearance of congested pores, leaving the skin even and rejuvenated without drying out. 4. Exfoliating masks: Exfoliating masks boost your skin's natural turnover process and eliminate dead skin cells. This kind of mask can be similar to a chemical peel, which uses beta or alpha hydroxy acids to breakdown and remove dead skin cells from the skin's surface. After using the hypoallergenic Radish Seed Refining Peel, fine lines and wrinkles appear less prominent. 5. Warming: Active spices like cinnamon and paprika give the skin a warming sensation and tingle when applied. This is the outcome of enhanced blood flow to the region, explaining why some people may feel like they glow. The results show a clean, healthy complexion after 20 to 60 minutes. Nevertheless, not everyone should wear these masks: It is preferable to use a cream or gel-based mask that won't aggravate your symptoms if you have sensitive skin. Which Face Mask Is Best For Your Skin Type? Selecting the ideal face mask for your skin type and problems is crucial if you like to apply one mask at a time. Here are some ideas to get you thinking about every kind of skin: 1. Face mask for Oil skin: Excess sebum production on the skin is a sign of oily skin. Breakouts are frequently the result of germs and dead skin cells interacting with this much oil. 2. Face mask for Dry Skin: Flaky areas, scaly skin, or cracked, itchy skin are common symptoms of dry skin. Choose a face mask that contains shea butter and grape seed oil. It provides essential fatty acids that can help with dryness and suppleness. 3. Mixed Skin Type: It can be annoying when you have dry cheeks but oily spots on your chin and forehead. By firming the skin's appearance and bringing out its smooth brightness, it will help to balance the appearance of the skin. Also Check : Best Ways To Make Your Makeup Last All Day Long Conclusion: If you're unsure about applying a face mask all over, try it on a tiny section first. Remember that your healthcare practitioner is your most valuable asset when it comes to your skin's health. Face masks don't work like magic. "Daily skin care, such as adhering to a good cleansing regimen and drinking plenty of water, is much more important for maintaining healthy skin." Face masks can boost your skincare routine, but they won't completely eliminate all of your bad habits. When used correctly, they can be a quick, affordable, and efficient method of giving your skin a little more care. Digi-follower.com Digi-follower.com Digi-follower.com Digi-follower.com Digi-follower.com Digi-follower.com Digi-follower.com Digi-follower.com Digi-follower.com Digi-follower.com Digi-follower.com Digi-follower.com dg-ads.com dg-ads.com dg-ads.com dg-ads.com dg-ads.com dg-ads.com dg-ads.com dg-ads.com dg-ads.com dg-ads.com dg-ads.com digi-members.com digi-members.com digi-members.com digi-members.com digi-members.com digi-members.com digi-members.com digi-members.com digi-members.com digi-members.com digi-members.com digi-members.com buy-follower.co buy-follower.co buy-follower.co buy-follower.co buy-follower.co buy-follower.co buy-follower.co buy-follower.co buy-follower.co buy-follower.co buy-follower.co buy-follower.co nabfollower.com nabfollower.com nabfollower.com nabfollower.com nabfollower.com nabfollower.com nabfollower.com nabfollower.com nabfollower.com nabfollower.com nabfollower.com nabfollower.com خريدهاست.com خريدهاست.com خريدهاست.com خريدهاست.com خريدهاست.com خريدهاست.com خريدهاست.com خريدهاست.com خريدهاست.com خريدهاست.com خريدهاست.com خریدفالوورایرانی.com قیمت-لیر-ترکیه.com هاب فالوور smmpro.vip digi-follower.com/en/
Posted By: 8th June 2024
10-Minute Makeup Routine For Busy Morning | Makeup Routines For Busy Schedule!
Are you busy and finding it difficult to maintain your beauty because of a demanding schedule? Don't worry, though! Your problem is not unique; many others have similar issues. But having a hectic lifestyle doesn't mean you have to sacrifice having a beautiful face. Fortunately, a quick and simple 10-minute morning beauty routine can help you achieve the look you want. Let's Ladyfair first address all of your questions. You may be wondering if this short routine is really that effective. Is it merely a dumb notion, or does it even function? Yes, it does. This is because it incorporates every necessary beauty technique needed for gorgeous skin. Also Check : Tips To Avoid Makeup Mistakes Begin with a Gentle Cleanser: Begin your morning routine by cleaning your face using a gentle cleanser that is friendly to the skin. It helps you eliminate stress, night sweats, and dirt, thus leaving your skin refreshed and clean. Apply the cleanser gently onto your face in circular motions before using lukewarm water. This stage prepares and smooths your skin, providing an ideal background for other skincare products. In addition, having clean skin allows lotions and serums to be absorbed into the body more easily, helping you achieve a healthy, bright complexion. Keep Your Skin Hydrated with Moisturizer: For healthy-looking skin, hydration is vital. Use a moisturizer that suits your skin type to keep it hydrated at all times. This step is important since proper hydration ensures a soft, supple, and healthy complexion. Be careful not to use too much; just apply very little on the surface to avoid making you feel oily on the surface of your skin. A good moisturizer will help maintain the moisture on your face while protecting its protective mechanism and giving it a smooth foundation for makeup application. This is why the step is necessary during the morning process, as hydrated flesh looks puffy, juicy, and attractive. Boost Your Glow with a Serum: Include a serum in your morning routine to add some glow. Serums are full of active ingredients that deal with particular skin issues like dullness, wrinkles, or unevenness. Use a small portion of serum on your face and gently massage it into the skin using your fingertips. Let it sink in completely before proceeding to the next procedure. This will make your complexion look naturally radiant and ensure you have a smooth, glowing finish that lasts for the whole day. Never Skip Sunscreen There is no morning skincare regimen without sunscreen. It prevents sunburn and other skin problems resulting from harmful UV rays. Cover your face, neck, and any exposed areas generously with it every two hours when out under the sun). Keep sunscreen in your bag so you can reapply rain or shine. By performing this necessary action, you will be able to maintain its health and youthfulness, thus making it an indispensable part of everyday life. Keep Lips Soft with Lip Balm: Your lips deserve just as much attention as the rest of your face does. Moisturize them by applying a nourishing lip balm. At this stage, one should not allow their lips to get dry or cracked, especially in harsh weather conditions. For effective results, go for a lip balm containing moisturizing agents such as shea butter or coconut oil where needed most. Perfect Your Skin with Foundation: If you want perfect skin throughout the day, use a foundation of the correct color that matches your skin tone. You may apply it lightly for an everyday natural look or heavily for night outs. Get a foundation brush or sponge to evenly apply it to your face with a smooth texture. The purpose of wearing a foundation is to even out your complexion, hide flaws, and make you look put together. Without this step, achieving a flawless, long-lasting appearance will be impossible. Conceal Imperfections with Concealer: Then, use concealer to cover any remaining spots or blemishes. Apply it over your T-zone, under your eyes, and anywhere your face has redness or dark marks. Remember to blend it in well so that you cannot tell where the foundation ends and the concealer begins. This stage makes your complexion brighter and erases flaws, thereby giving you a faultless finish on your skin. A properly applied concealer can transform how you appear, ensuring you are completely confident and well-groomed. Add a Pop of Color with Blush: Highlight your natural glow with some blush. Have creamy blushes if you prefer dewy looks, whereas for a more precise definition, opt for powder ones like these. Apply them from the apple of the cheeks up towards the temple area. Doing this gives your cheeks an impression of good health, making them seem lively and full of life. Blush is one quick way to add contouring effect and warmth in seconds, without much ado about anything but normal daily routine stuff like that, for instance, when putting on makeup each morning before going out.” Enhance Your Eyes: Do not forget to apply eye shadow and eyeliner to enhance your eyes. If you want people not to notice that you have makeup at all, apply natural colors and use brown pencil eyeliner. For a more dramatic effect, opt for a darker shade of eyeshadow, black liner, and mascara to make your lashes appear thicker. Apply the eye shadow on your lids, blending it nicely so that there are no harsh lines. Lastly, add some layers of mascara onto the lashes. Also Read : Must-Try Hairstyles for Busy Moms Finish with Lip Color: Another way to finish off your look is by bringing out your lip color. To get rid of dry patches on lips, consider margarine before applying a lipstick that matches the whole face. Whether you prefer bold or subtle hues, ensure they blend in with what you have done on the rest of your face and the clothes you wear. Moisturizing lipsticks offer hydration and a silky touch. This makes you appear fresher and completes your overall appearance. A wisely selected lip stain can work miracles; just one application will give you enough confidence to face any ordeal during the day!
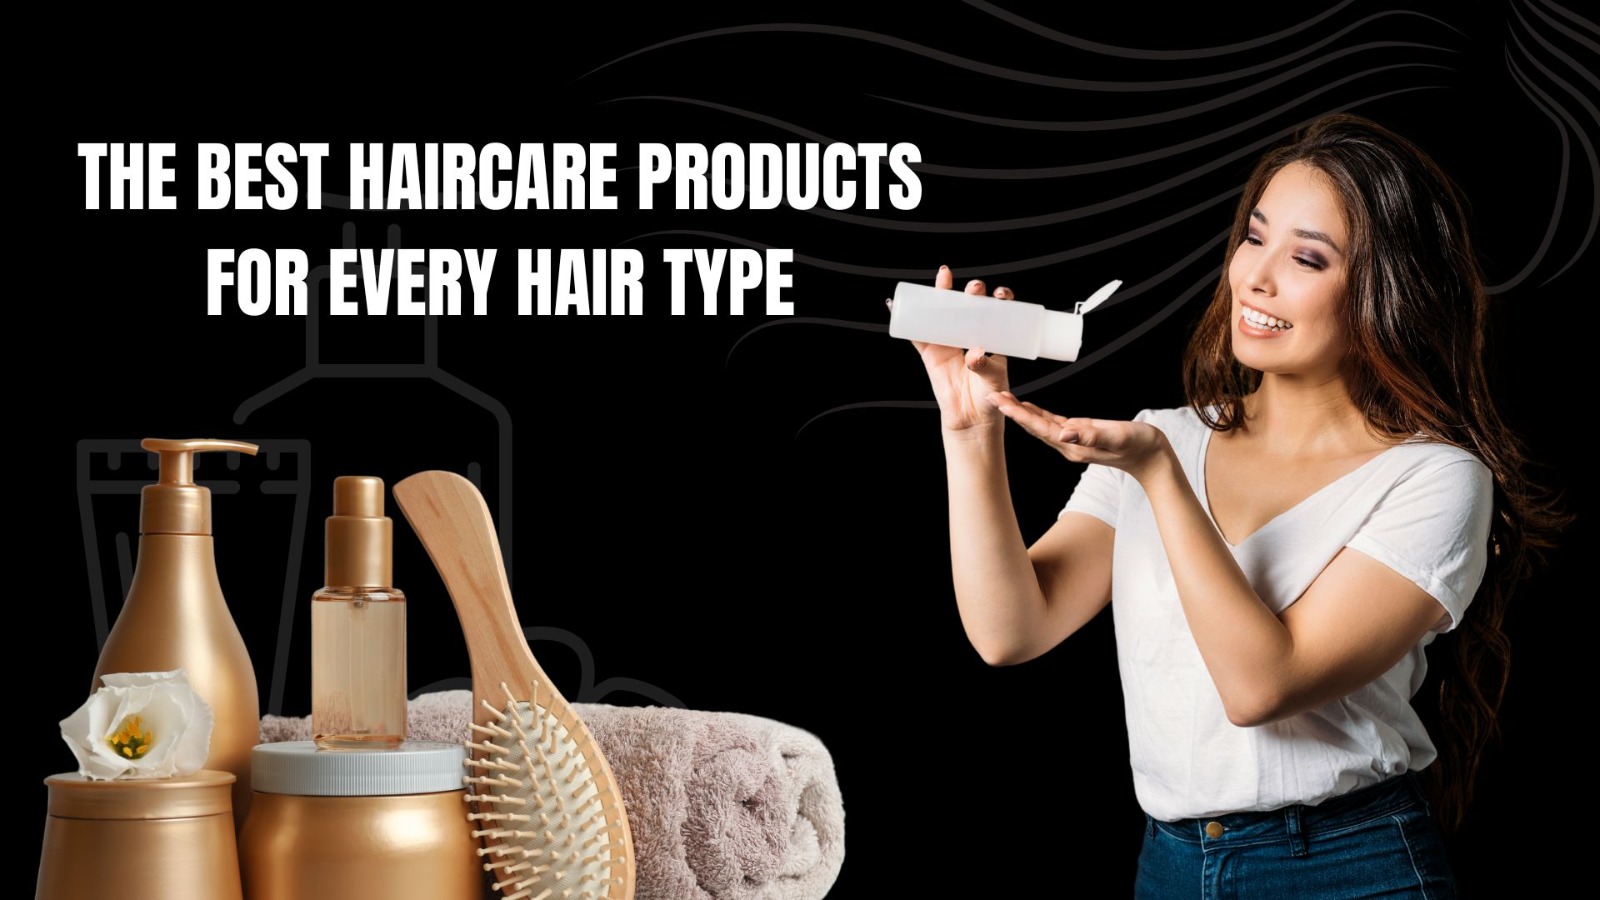
Posted By: 8th June 2024
The Best Haircare Products For Every Hair Type!
Everyone wants healthy, lustrous hair, and choosing the correct shampoo is the first step in any successful hair care routine. Anti-hair fall treatments fortify hair strands, minimizing breakage and encouraging fuller, stronger hair. Shampoos for anti-dandruff soothe the scalp and provide relief from bothersome flakes. Specially designed shampoos improve manageability and sleekness for people with straight hair, guaranteeing a perfect finish. Comprehending the significance of customized hair care is imperative for attaining targeted outcomes, be it addressing hair loss, eliminating dandruff, or refining straight hairstyles. With so many alternatives, selecting the ideal shampoo for your needs is critical if you want healthy, glowing hair. Review our current assortment and complement your hair care routine with the best shampoos at Ladyfair. 1. Biotique Ocean Kelp Anti Hairfall Shampoo: Biotique Ocean Kelp Anti Hairfall Shampoo is a nutritious blend of genuine kelp, natural proteins, neem bark, and bhringraj plant extract that provides intensive hair development therapy. This herbal mix invigorates the scalp with a gentle cleansing action to promote healthy shine and new growth. Rich in vitamins and minerals, it fights hair loss, delays the onset of grey hair, and manages dandruff, leaving hair significantly brighter and stronger. 2. Dabur Vatika Health Shampoo: Discover the revitalizing properties of Dabur Vatika Health Shampoo, which is enriched with seven organic components, including shikakai, amla, and henna. It is ideal for daily usage because it cleanses gently yet effectively without removing moisture. This shampoo nourishes hair from root to tip and smoothes frizz and rough patches, strengthening hair and leaving it manageable, silky, and soft. With each wash, bring out the natural shine of your hair for a bright, lively appearance. 3. Indulekha Bringha Shampoo: Enriched with powerful Bringharaj ingredients, Indulekha Bringha Shampoo provides a complete solution for enhancing hair development and reducing hair fall. It works with all hair types, giving moisture, energy, and scalp health. It is infused with six herbs and nine complete Bringharaj plants. Shine and scalp purity is preserved by its antifungal Shikakai qualities. This natural, fragrance-free, and synthetic-free Ayurvedic shampoo moisturizes and soothes hair while Rosemary adds just the right amount of soothiness. 4. Khadi Natural Amla & Bhringraj Shampoo: The tried-and-true Khadi Natural Amla & Bhringraj shampoo promotes healthy scalp function and hair growth. Its age-old formula deeply penetrates roots, promoting follicles for greater growth. Its Ayurvedic components ensure complete cleansing while fighting dandruff and scalp irritation. This shampoo, which is free of harsh chemicals and nurtures hair with natural sweetness, can benefit all hair types. 5. Kesh King Ayurvedic Anti Hairfall Shampoo: Discover the rejuvenating potential of Kesh King Ayurvedic Anti-Hairfall shampoo, enhanced with 21 organic components such as Amla, Bhringraja, and Aloe Vera. Have smooth, glossy, and silky hair with up to 80% less hair fall. For the best possible health and energy, nourish your scalp. All hair types can use this paraben-free, cruelty-free, and FDA-approved product, which guarantees a secure and efficient hair care solution for the whole family. 6. L'Oréal Professionnel Xtenso Care Shampoo: Pro-Keratin & Incell Technology-enhanced L'Oréal Professionnel Xtenso Care Shampoo provides specialized care for straightened hair. This nourishing solution provides intense treatment, rebuilding hair fibers for strength against outside aggressors while also boosting shine and adding volume. Experience hair that is more resilient, manageable, vibrant, and protected. 7. L'OREAL PROFESSIONNEL PARIS Absolut Repair Shampoo: Discover the rejuvenating effects of L'Oréal Professionnel Paris Absolut Repair Shampoo, explicitly designed for weak and damaged hair. This salon-quality product protects your hair from outside damage while revitalizing each strand and rebuilding the core of your hair. Rich in wheat protein and gold quinoa, it provides intense nourishment, making your hair feel incredibly moisturized and silky. Combine it with the Absolut Repair hair mask for the best effects. 8. Mamaearth Onion Hair Fall Shampoo: Discover the hair-rejuvenating powers of Mamaearth Onion Hair Fall Shampoo, enhanced with plant-based Keratin and onion oil. Reduce hair loss as plant-based keratin strengthens and smoothes the scalp, and onion oil increases circulation. Soft surfactants clean without stripping, retaining the suppleness of hair. This toxin-free product guarantees a healthy and safe hair care routine for all hair types, including chemically treated hair. 9. Matrix Opti. Care Professional Shampoo: The goal of Matrix Opti. Care Professional Shampoo is to achieve straight, salon-smooth hair. Shea butter adds a nourishing layer that efficiently controls frizz and unmanageable hair. It's ideal for maintaining straight hair because it soothes the scalp, hydrates hair, and reduces frizz without parabens. This unisex solution, suitable for all hair types, even chemically treated hair, is trusted by hair professionals. 10. Tresemme Keratin Smooth Shampoo: TRESemmé Keratin Smooth shampoo is designed to convert frizzy, dry hair into sleek perfection. Experience the transformation. For up to three days, hair remains frizz-free and silky because of the deep hydration provided by the nourishing keratin and argan oil infusion. Savor the advantages of two actions at once—frizz control and 100% smoother, shinier hair. All hair types can use it; it's the best option for manageable, styleable hair. Also check : How To Do Facial At-Home How To Select The Appropriate Hair Products Based On Your Hair Type Utilizing the proper hair care products, which are as individual as you are, can greatly improve the health and beauty of your hair. A beautiful mane requires the right products adapted to your hair type, from sulfate-free shampoos to conditioners and treatments. In this guide, we'll discuss the finest options for different hair types and provide answers to frequently asked hair care questions. Know your hair type before taking any action. Depending on your hair type—oily, dry, curly, thin, thick, or combination—particular solutions are made to meet your exact requirements. 1. Products for Oily Hair Types in Hair Care: If your hair gets oily easily, choose light, volumizing conditioners and sulfate-free shampoos. Look for components such as tea tree oil or rosemary that balance oil production without overly drying out your scalp. 2. Products for Dry Hair Type Hair Care: On thirsty, dry hair, use a thick, hydrating conditioner and a sulfate-free shampoo. To add extra nutrition and moisture restoration to your routine, consider using a moisturizing hair mask. 3. Products for Thin Hair Types in Hair Care: Wishing for long, lush hair won't cut it! Lightweight conditioners and volumizing shampoos are best for people with thin hair. Seek products that will strengthen and add body to your hair by adding components like curry leaves and biotin. 4. Products for Thick Hair Types in Hair Care For thick hair, shampoos and conditioners with more moisture are beneficial. Consider applying a deep-conditioning hair mask regularly to keep your hair manageable and hydrated. Try Argan conditioner and show off the hair you've always wanted. Also Read : Must-Try Hairstyles for Busy Moms Bottom Line! Choosing hair care products suitable for your specific hair type is essential for maintaining healthy hair. Knowing your hair's unique demands, whether oily, dry, curly, thin, thick, or a combination of these, is the first step towards having luscious locks. By determining your particular hair type, you give yourself the freedom to select shampoos, conditioners, and treatments designed to meet those exact needs. Try out different brands and formulas until you find the one that works best for your hair type, then observe as your hair becomes the vivid, thick hair you've always wanted. Digi-follower.com Digi-follower.com Digi-follower.com Digi-follower.com Digi-follower.com Digi-follower.com Digi-follower.com Digi-follower.com Digi-follower.com Digi-follower.com Digi-follower.com Digi-follower.com dg-ads.com dg-ads.com dg-ads.com dg-ads.com dg-ads.com dg-ads.com dg-ads.com dg-ads.com dg-ads.com dg-ads.com dg-ads.com digi-members.com digi-members.com digi-members.com digi-members.com digi-members.com digi-members.com digi-members.com digi-members.com digi-members.com digi-members.com digi-members.com digi-members.com buy-follower.co buy-follower.co buy-follower.co buy-follower.co buy-follower.co buy-follower.co buy-follower.co buy-follower.co buy-follower.co buy-follower.co buy-follower.co buy-follower.co nabfollower.com nabfollower.com nabfollower.com nabfollower.com nabfollower.com nabfollower.com nabfollower.com nabfollower.com nabfollower.com nabfollower.com nabfollower.com nabfollower.com خريدهاست.com خريدهاست.com خريدهاست.com خريدهاست.com خريدهاست.com خريدهاست.com خريدهاست.com خريدهاست.com خريدهاست.com خريدهاست.com خريدهاست.com خریدفالوورایرانی.com قیمت-لیر-ترکیه.com هاب فالوور smmpro.vip digi-follower.com/en/

Posted By: 27th May 2024
10 Must-Try Hairstyles for Busy Moms: Quick and Easy Looks
Well, to all the courageous, amazingly talented, and gorgeous mums, this article is here for you! Your cluttered schedules, extremely timed calendars, and the way you manage it all without a frown is deeply appreciated! We feel for you when you take a deep sigh and say, "It is a task to maintain a good hairstyle while doing all the work, either at a professional level or at a personal level! Rather than discussing the issue at length, let us go right into the solution We are here with 10 must try hairstyles for busy moms! Read it till the end! We applaud your effort to the core! 1. The Easiest Hair Bun Recipe: Tying your hair in an updo, is everybody's go-to style for every other occupied female, engrossed in work! We are quite skilled in making a bun out of hair! So, we do not think we need to talk more about this recipe! 2. High Pony-Tail: To all the ladies working 8 hours a day in a house set up or working a 9-5 job in your office space, ponytail can be a friend to your hair on a humid day! Just take all your hair together and tie a band across your hair! It will keep your hair in check as it is tied at a higher angle! 3. Keep It Simple: Well, this hairstyle is as simple as the name sounds! Ladies who work day and night either to make ends meet or in pursuit of a better, grander lifestyle should not be troubled with trivialities of the hair! Ladies, just keep your hair open!! It's that simple! 4. Decorate: This hairstyle makes use of decorations! Stay rest assured we are not asking you to decorate yourself with heavy jewelry! Not at all! In fact, we are simply asking you to include add-ons to your hair, like, hairpins, headbands, and scrunchies possibly might be a good alternative! 5. Curls Save The Day: If any of you ladies, have a few extra minutes to style your hair, you can definitely try out the curling option! This hairstyle does not only make you look cute and sweet but also, the self-love that you have for yourself amplifies and comes through! Curls suit any hair length; it is a sure shot when we say cuteness at maximum! 6. Braid - Your Everlasting Hair Companion: Braiding your hair is the best option to avoid hair tangles and unnecessary hassles of maintaining! It is simple to just braid the hair and leave it as it is! 7. Lowly Ponytail: Well, high ponytails’ opposite is a lowly ponytail implying that loosely tying your hair with a rubber-band, makes an easy-to-follow hairstyle in no time! 8. Straighten It Up: When we say using curls as a hairstyle makes you look cute, straightening them makes you look sleek and gorgeous! Try it out and listen to your spectators as to what they have to say about your hairstyle! You are welcome! 9. Short-Hair Rescues: Any ladies with shoulder-length hair will relate to this hairstyle! It is damn simple! You have to keep it open and have all your hairstyling done and dusted! Just a simple piece of advice: scrunch your short hair to make it look better than it is! 10. Be Comfortable: We believe that being comfortable with your hair is more important than styling it! If you are comfortable with how your hair is, and you love your hair, you will choose the best style that aptly brings the "YOU" out! So Here is the End! We would just like to end by reminding you all ladies out there you are a work of art, a diva, in your own self! Hairstyling just amplifies your character and makes you more appealing! That is all! As we already covered 10 hairstyles for busy moms so do try out these simple hairstyling hacks. We would love to hear your comments down in the section below! Until then, bye-bye!
Posted By: 27th May 2024
How To Do Facial At-Home: Step-by-step Guide
Who would not want a facial that makes them glitter like a health spa? Luckily, there is still glowing skin without spending much for a spa. In this step-by-step tutorial, we will guide you through how to do a facial at home. Prepare for self-indulgence and reveal the natural beauty hidden beneath everyday drudgery. Benefits of At-Home Facial There are many advantages to having an opulent facial from the comfort of your own home, and apparent cost savings are one such reason. Well, then, let’s explore some unique benefits that come with joining the revolution of the do-it-yourself face. 1. Specifically for Every Skin Type: Most commercial spas provide generic service, but you and your skin are two different people. With DIY facials, you can adjust every step according to your skin's needs. Whether you want to address dryness, acne, or aging signs, you can tailor your facial routine to target your issues. 2. Affordable Beauty: One of the most significant benefits of do-it-yourself facials is that they are cost-effective. Spa services charge a lot, but you invest in having your house feel like a spa without inducing a big hole in your pocket just to enjoy skincare indulgences. A one-time investment in high-quality skin care tools and products can make a huge difference. 3. Comfort of Known Environments: There's just something about being in the confines of your own home that is so genuinely soothing. DIY facials do this up a notch with added spa comfort and satisfaction since doing the most relaxing beauty routine in the coziest place is part of feeling the most comforting. 4. Flexible Scheduling: Life gets crazy, and a spa appointment is not always on the cards. DIY facials will allow you to take care of the skin whenever it fancies you, be it in the dim hours of the night for a glow or at dawn for renewal. 5. Educational Skincare Journey: Start your DIY facial adventure by familiarizing yourself with all the substances and procedures involved in skincare. Go through the different substances and modalities used quickly to get a general idea of what might be involved and, hence, a better appreciation of what your skin would do. Very soon, your skincare regime will become extremely enlightening and empowering as you learn what your skin needs. 6. Testing Natural Substances: Commercial skin care products often include a long list of ingredients, some of which are less than ideal for your skin type. Do-it-yourself facials encourage experimentation with ingredients duplicated from nature, such as avocado, yogurt, and honey. This can bring astounding advantages and make your routine a little fun. How To Identify Your Skin Type And Needs For Facial Understanding your skin type is important in creating a skincare routine that works well for you. Here is a guide to help you determine your skin type and learn how to care for it with the right facial products. 1. Cleansing and Seeing: Start by washing your face using a mild cleanser. This will remove all makeup, grime, and oil that may interfere with the evaluation process. After cleansing, do not use anything on your skin for one hour. 2. Examining Your Skin: After 60 minutes, check your skin in daylight and note the following characteristics. Normal skin is appropriately balanced, meaning it is neither oily nor dry. It has an even texture, tiny pores, and few blemishes. Oily skin looks shiny, especially in the T-zone areas (forehead, nose, and chin). It often has larger pores than normal skin and is prone to acne or blackheads. Dry skin may feel tight and have rough or patchy areas. Usually looking lackluster, this type of epidermis can become easily irritated, leading to fine lines appearing on it. The combination kind has different skin types in various parts of the body. Typically, the forehead is oily, while the cheeks are normal or dry. Sensitive skin quickly gets red from any environmental factor or product. 3. The Blotting Sheet Method: This technique will help validate your findings. Pull out a clean blotting sheet and press down on several areas of your face: forehead, nose, chin, and cheeks. Investigate the quantity of oil that you have accumulated. Normal skin will show little oil residue on the blotting sheet. Oily skin will produce immense evidence of oil in the sheet, mainly around the T-zone. Dry skin will give little or no evidence of oil from the blotting paper. Combination skin would make the T-Zone look much oilier compared to the cheeks. Skin sensitivity can show areas of blotchiness or redness when blotted or irritated. 4. Understanding the Skin Needs: After you have established your skin type, it is crucial to select the correct products that would serve your individual needs. If you have normal skin, choose a hydrating cleanser with light formulations. Get a lightweight moisturizer that is not greasy. Gently exfoliate weekly to keep the texture smooth. And don't forget to put on broad-spectrum sunscreen daily. Choose a foaming or gel wash designed for oily skin. Use a light moisturizer or a gel-type moisturizer that is grease-free. Use products that can be applied at night and include salicylic acid, as this can prevent pores from becoming blocked. One can also use a clay mask once a week to absorb the surplus oils. Wash dry skin with a hydrating cleanser. Creams or emollient ointments can be applied to provide rich moisture. Exfoliation is gentle to slough off dead skin cells. Moisturizing serums with hydration enhancements. A proper cleanser should be chosen that balances out the combination skin and does not dehydrate it. This can be followed up with a lighter moisturizer for the T-zone and a richer one for the drier areas. The oilier parts need more exfoliation, so it's particularly important to exfoliate these parts; a balancing toner is to be used afterward to normalize skin texture. If you have sensitive skin, you may use a mild, fragrance-free cleanser. Apply a hypoallergenic, soothing moisturizer. Avoid harsh scrubs; if needed, use a chemical exfoliant. Aloe, chamomile, and other such ingredients calm the skin. 5. Tailoring Your Facial Routine: Add some steps suitable for your skin type to make a successful facial, either by yourself or with a specialist. Always commence with an appropriate cleanser to remove all dirt. To scrub off dead cells, select a mild exfoliant that suits your skin type. A mask meant for your needs, be it moisturizing, clay-based, or calming, should be applied. Toning is vital to balance the pH and prime the skin for moisture absorption. Using specialized serums such as vitamin C for brightening or hyaluronic acid for hydrating purposes may also be appropriate. It is essential to use an acceptable moisturizer to keep moisture on the skin's surface. You should always wind up with day time sunscreen so as to safeguard you from UV rays. By rightly recognizing what your skin is and understanding its requirements, you can have a custom-made skincare plan that leads to healthy, radiant skin. Top Facial Products To Use For All Skin Types The choice of the right facial products is crucial for a glowing and healthy-looking complexion. Some products can be utilized across different skin classes, even though there are different requirements for each. The best-rated facial products also cater to all kinds of skin, maintaining it hydrated, protected, and fully nourished at all times. 1. Gentle Cleanser: CeraVe Hydrating Facial Cleans:- That said, the first step in every skincare procedure is cleansing, and the best product for all skin types is the CeraVe Facial Cleanser. The product is rich in ceramides and hyaluronic acid, which allows it to be moisturized while restoring the skin barrier. It gently cleanses the makeup without disrupting the skin's natural protective barrier. This hydrating facial cleanser is non-comedogenic and free from fragrance, making it gentle even for sensitive skin. 2. Hydrating Serum: The Ordinary Hyaluronic Acid 2% + B5:- Hyaluronic acid is a powerhouse in moisturizing and works for all skin types. The Ordinary Hyaluronic Acid 2% + B5 is a lightweight serum that gets into the skin to add moisture and bounce. Further enhancing surface hydration is the presence of Vitamin B5 in this serum. This formula makes your skin supple and soft and helps restore texture and elasticity. 3. Hydrator: Neutrogena Hydro Boost Water Gel:- One good moisturizer is among the pivotal products required for maintaining skin hydration. Notably, Neutrogena Hydro Boost Water Gel is noteworthy, as it is unparalleled in its class of water gels. It immediately surges skin with moisture upon application but does not leave a greasy feeling. It locks in hydration and keeps releasing it during the day with the help of hyaluronic acid. Oil-free non-comedogenic, it is suitable for sensitive and acne-prone skin. 4. Sunscreen: La Roche-Posay Anthelios Melt-in Milk Sunscreen SPF 100:- Sunscreen is necessary for all skin types, and La Roche-Posay Anthelios Melt-in Milk Sunscreen SPF 100 provides broad-spectrum protection. It uses Cell-Ox Shield technology, which merges UVA/UVB filters with antioxidants. Non-greasy and lightweight, the sunscreen blends easily into the skin, making it ideal for everyday use. At the same time, it does not have fragrance and can be used by people with sensitive skin, thus providing wide-ranging sun protection that can irritate. 5. Exfoliant: Paula's Choice Skin Perfecting 2% BHA Liquid Exfoliant:- Paula’s Choice Skin Perfecting 2% BHA Liquid Exfoliant has salicylic acid, which mildly peels off layers of dead cells on top to reach deep within dermal pores, allowing for the natural extraction of oil while helping blackheads, pimples, and fine lines disappear without aggravating your skin. 6. Face Mask: Origins Clear Improvement Active Charcoal Mask:- The Origins Clear Improvement Active Charcoal Mask is a versatile choice. It uses activated charcoal to remove impurities and toxins, leaving your skin refreshed and clean. Additionally, it contains white China clay and lecithin to absorb excess oil and improve skin clarity. How Often Should You Do At-Home Facial? The key lies in understanding the frequency of an at-home facial: not too much, as it can be irritating, and not too little, which may not give you the benefits you seek. 1. Skin Type Considerations: Normal Skin: With a normal skin type, one can undergo a facial at home once every week. It will leave your skin in a balanced, clean, and moisturizing state quite often without causing irritation. Oily skin: For this skin type, at least twice a week, the individual should do an at-home facial to help control sebum production and clear the pores. Clay masks and exfoliants are good products for controlling this excess oil; hence, breaking out would be minimized. Dry Skin: Facials for dry skin levels can be done once every two weeks. This will strip the epidermis of essential oils and dry out the skin even further. For dry skin, Masks focus on rehydration and gentle exfoliation to maintain a smooth skin surface. Combination Skin: This skin type should receive a facial once weekly. Pay special attention to the specific needs of your T-zone and dry regions, and use products that balance oils and dry patches. Sensitive skin: This should easily handle an at-home facial every two weeks, or sometimes even less, depending on reactivity to products. Look for soothing, hypoallergenic ingredients and avoid anything with harsh exfoliants, which can be a skin irritant. 2. Key Steps and Their Frequency: Cleaning: Cleansing should be done every day, but a more serious washing can be performed once a week as part of your facial care. Use a mild cleanser that suits your skin type—it will help you get rid of impurities. Exfoliation: Exfoliation should be done once or twice weekly, depending on skin type. Overdoing it can be harmful. Thus, striking a balance is vital. For delicate skins, exfoliate at most once in seven days or even less. Steaming: Steaming will open the pores and result in deeper cleansing. Afterward, steaming once per week will do for most skin types. Persons with sensitive skin may need less frequent steams, such as every two weeks. Masks: The frequency at which you apply face masks depends on their type. Hydrating masks can often be used many times, even several times per week, while clay masks and those meant to cleanse deeply are best applied no more than once a week, especially if the skin is dry or sensitive. Toning: Toning must follow cleansing each day as part of your daily routine. Use an appropriate toner during at-home facials that complement other treatments to pH-balance the skin. Moisturizing: To keep moisture in and improve your complexion, use a richer moisturizer or hydrating serum when giving yourself a facial every day. 3. Special Considerations: Age: Skin typically becomes drier and more fragile with age. Mature skin may need less aggressive treatments; hydration and gentleness of care might be more critical. Anti-aging masks and serums should appeal to concrete concerns. Skin Conditions: If you have specific skin conditions such as acne, hyperpigmentation, or rosacea, then tweak the frequency of the facial according to your treatment guidelines. Consult with your dermatologist about advice on how often you should get one. Tips On How To Do At-Home Facials Professionally Pampering your skin with an at-home facial is a luxurious and effective way of taking care of it, maintaining its health, and addressing any specific concerns you might have. By adopting the right approach and techniques, you can achieve results similar to those in a professional spa. Here are some handy tips to guide you in performing at-home facials like professionals. 1. Create a Soothing Environment: Build up to create a calming environment. Pick out a quiet place where you will not be distracted. Lower the lights, light candles, and play soft music that soothes. This ambient atmosphere will help you relax, which is good for your skin and overall well-being. 2. Gather All Necessary Supplies: Having all your supplies ready before you begin is crucial. This includes: A gentle cleanser Exfoliator Steamer or a hot water bowl Face mask (clay, hydrating, or sheet mask, depending on your skin type) Toner Serum Moisturizer Soft towels Facial sponges or cotton pads 3. Start with a Thorough Cleanse: Start by washing your hands thoroughly so that they get clean. After that, clean away makeup, dirt, or impurities in a mild cleanser according to your skin type. Perform gentle circular motions for one minute. After that, rinse off thoroughly using warm water and pat dry with a clean towel. 4. Exfoliate Your Face: For a glowing complexion, exfoliation is imperative- take care of this by using a gentle exfoliator to remove dead cells on the surface layer of your skin. If you have sensitive skin, choose chemical exfoliators containing alpha-hydroxy acids (AHAs) or beta-hydroxy acids (BHAs), more delicate than physical scrubs. Remember to use tender circular movements when exfoliating without much pressure on your face's surface. 5. Steam that opens your pores: Steaming opens the pores for the next treatments to penetrate the skin. You can steam your face over a bowl of hot water or use a facial steamer, drape a towel over your head, and put your face in to catch the steam. Steam your face for about 5-10 minutes or until it is no longer too hot to be tolerable. 6. Put on a face mask: Choose the mask appropriate to your skin needs. Using a clay mask will draw out excess oil and other impurities in case of oiliness or pimples. If you have dry or sensitive skin, a mask should help bring back the moisture. Apply your mask in an even layer onto your face, avoiding your eye area, and leave it on for several minutes. Rinse off with lukewarm water. 7. Tone to Balance: When you have finished, cleanse your face of the mask and apply a toner to your skin. It will help to rebalance your skin and remove any leftover impurities from your pores. Using a piece of cotton, gently swipe across your face with the toner, or if you like to be a little more direct, pat it on with your hands. 8. Serum Treatment: However, serums are usually super concentrated for the single purpose of addressing skin issues like dehydration or brightening. Just put some drops of the serum on your palm and dab them gently on your face. Apply the serum only after it has been entirely absorbed within your skin. 9. Hydration Locking through Moisturizing: Always end with a moisturizer that suits your complexion type so that you can seal in benefits from prior steps and keep the skin hydrated. Start applying it from below in upward movements, stroking gently as well, then remember to apply up to the neck area, including the décolletage. 10. A rub Down for Better Circulation: Take a facial massage into account to increase blood flow and aid lymphatic drainage. With your fingers or face roller, you should undoubtedly put gentle pressure on your face upwards and outside. At this stage, you will unveil facial muscle relaxation, leading to improved absorption of dermal products. Conclusion: Doing a professional at-home facial requires proper planning, appropriate products, and knowledge of techniques. Adhering to these procedures will make one’s own bathroom appear like a spa experience that not only indulges but also supports one's specific needs. Regular facials done at home help maintain a healthy, glowing skin complexion and offer relaxing moments away from our daily lives.
Posted By: 27th May 2024
10 Common Makeup Mistakes: Tips To Avoid Makeup Mistakes!
Some of us are unaware of daily makeup mistakes. It is a fierce task to find cosmetics shades and brands that go with your face. A few people struggle for years to get it right in terms of their makeup. After you have seen the right items, still you might not manage to look at what you want. Your favorite beauty blogger might make it sound easy, but perfecting the art of blending makeup is a hard thing to do. However, this doesn’t mean that you can’t try out new things; there’s always a chance for improvement. We’ve outlined typical cosmetic mistakes we should avoid at all costs. So as to enable you to understand the principles behind them and thus enhance your current style of putting on makeup. How To Choose the Right Makeup Products For Your Skin It may be difficult selecting make-up for one’s skin type. Here is an easy guide on how to apply makeup products for beautiful, healthy skin. 1. Oily Skin- For oily skin, lightweight, oil-free, non-comedogenic products that do not clog pores are the most appropriate solutions for this condition. Always double-cleanse before using any product on your face. Pore-(minimizing) blurring primer best suits such kind of skin because it usually has open pores which release more oils than dry skin type does. Consider choosing a matte foundation or tinted moisturizer instead of dewy ones for oily skin types. To keep your makeup flawless just use loose powder or a compact powder designed specifically for setting foundation so as to maintain its soft finish throughout the day while wearing it. Blotting papers are useful when managing oil production during daytime hours till evening time. 2. Dry Skin- A dewy or silky foundation or hydrating tinted moisturizer will nourish dry skin. Matte or powder foundations and powder-based products can exacerbate dryness, so use them sparingly. Use a hydrating fixing spray to end your makeup dewy. 3. Combination Skin- Combination skin with oily T-zone and dry cheeks requires oil-free, lightweight T-zone products and moisturizing cheek creams. Choose a matte T-zone foundation and a moisturizing cheek foundation. To be safe, apply a water-based moisturizer and mattifying primer before makeup. A translucent powder sets makeup without cakeiness and is lighter. Reduce highlighter if your skin is greasy and glossy at night. If you have dry cheeks, use a liquid highlighter. Finish makeup with a matte setting spray. 4. Sensitive Skin- If you have sensitive skin, look for fragrance-free, hypoallergenic, non-irritating, and anti-inflammatory products. Choose mineral makeup that doesn't contain dyes or additives. Remove makeup with natural cleansing balms instead of wipes to avoid skin irritation. Too many skincare activities are harmful. Tools And Techniques For Better Makeup Results Skill, materials, and procedures are needed for faultless makeup. Understanding and using the right equipment and methods can improve your makeup application, regardless of your experience. These critical equipment and practices will enhance your makeup results. Essential Tools for Better Makeup Results Brushes and Sponges: A good foundation brush is essential for an even, smooth application. Kabuki brushes with densely packed bristles are suitable for liquid or cream foundations. The sponge helps the foundation blend smoothly into your skin, leaving a natural airbrushed finish. It may be used moist or dry to offer more coverage for a dewy look. Eyebrow Tools: Precise applications require eyeshadow brushes of different shapes and sizes. Flat brushes are good at applying color to the lid area, while fluffy blending brushes help soften edges to create a gradient. The angled brush is the best tool for a blush that provides precise placement and blending in contouring. They outline brows, giving them a polished appearance. To obtain the desired results, opt for shades that complement your natural brow color. Brows need spoolie brush accessories to blend products into them and create a natural finish. Eyelash Tools: Eyelash Curler: Open your eyes by curling your lashes before you put on mascara. It also makes your lashes appear longer. Mascara: A lovely mascara will add volume and length to your eyelashes. Get a non-clumpy one that lasts long. Setting Tools: Setting Powder: Translucent powder is used to set foundation and concealer, removing the shiny look and making them last longer. Setting Spray: A setting spray helps keep your makeup fresh for the whole day. Techniques for Better Makeup Application 1. Skin Preparation: Start with a clean, moisturized face. This will ensure the smooth application of makeup. The smoother the foundation application, the better it clings to the skin; hence, it will last longer. A primer will make the face smooth, diminish large pores, and keep the makeup intact. 2. Foundation Application: Find a foundation that matches both the undertone and skin tone. Verify this through tests on the jawline. Apply coats of thin layers of the foundation one right after another, allowing drying in between, until the coverage is right to the point of acceptable. That way, there is no cake effect and the finish has got to be natural too. 3. It's all about highlighting: Put a lighter shade around the areas of your forehead, cheekbones, and brow bones to bring them forward. Don't forget to put a darker shade under your cheek hollows, at the sides of your nose, or along the jaw line—anywhere you want to look more receding. 4. Blending: Blending should be done to create a seamless fusion of color into the skin, using brushes, sponges, or even fingers. Proper blending will lead to no harsh lines—just a gentle union of colors to give. 5. Eye Makeup: Apply a transition shade in the crease for blending between colors. Work from lighter shades and slowly build up with darker ones to create depth. 6. Pucker up: Line your lips using a lip liner to prevent feathering and perfect the shape of lipstick. Use a lip brush for perfect application, especially if you're doing a statement color. 7. Human element: Finish with a setting powder and spray to secure the look for the rest of the evening. Professional makeup techniques and equipment can achieve professional outcomes. Practice and experiments will help you find what fits your features and preferences. 10 Common Makeup Mistakes To Avoid 1. Doing Makeup on Dry Skin: One of the worst beauty blunders is applying makeup on dry skin, which may make the face look lifeless, cracked, aged, and exhausted. A moisturized face is the foundation of everything excellent. Hydrate your face before applying makeup. 2. Bad lighting for makeup: You should test cosmetics on your skin in natural light to see what works for you. Try-on makeup in artificial lighting won't seem as flattering. Choose what suits you best in optimal lighting. 3. Misblending Techniques: Poor mixing techniques can cause makeup disasters. Makeup is more than applying blush or eyeshadow. A neutral tone will look unnatural and out of place without adequate blending. Blending is the secret to natural makeup. Poorly mixed makeup can be funny. Start by watching beauty lessons online and buying nice brushes. 4. Using Too Much Foundation: Your makeup will look cakey if you overapply foundation. Or worse, you look like a costumed clown. A full face of foundation is unnecessary unless you're wearing light makeup. Just apply it to your cheekbones, nose, and under-eyes. Some ladies use it to disguise blemishes and unevenness, but concealers do that. Choose a foundation shade that matches your skin tone. Avoid foundations lighter than your skin tone. An improper shade will highlight blemishes, fine wrinkles, and other skin flaws. Only a skin-matching shade will give you a perfect face. Always blend appropriately. Apply it to your neck and ears. Everyone can tell you're using makeup if your face and neck are different colors. 5. Misapplying Concealer: Whether to apply foundation or concealer first always causes strife. Covering imperfections once the foundation sets makes sense, so use it before the concealer. You must remember these two points when doing so. Avoid applying too much product to the desired region. Too much concealer on dark circles ages you. Dab a few drops of color-corrector concealer on the bone underneath your eyes to mask dark circles and mix. Avoid applying it to dark circles. Layering is another option. Apply a little to a blemish, let dry, then apply more. Use setting powder between layers. You can't use one concealer everywhere. Different shades of concealers have various functions. A peach-toned corrector concealer erases blue and fights dark circles. Green cancels red, so use a green concealer to disguise zits. Use yellow concealers to smooth out vast patches of skin. After applying tinted concealers, use a concealer that matches your skin tone. 5. Heavy Blush: Without correct application, blush can make you clownish. When blushing, use foundation. Otherwise, the color becomes too harsh on the cheeks. Use a brush to swirl the product, tap off excess, and apply it to your face. Using too much product will make you look overdone. 6. Highlighting in the Wrong Place: One makeup hue can give you raccoon eyes, so avoid it. Use a highlighter to accentuate your brows. Gold or silver highlighters complement all skin tones. 7. Avoiding Primer: Primers have been around for a while, but women are just starting to utilize them. You can spend all day perfecting your makeup, but without a primer, the party turmoil will either bleed or fade or make you appear as you posed in oil. Before applying makeup, use a primer to keep it in place and make it look flash-ready. 8. Ignoring Eyelash Curler: Without an eyelash curler, your lashes won't seem lifted and curled. Open eyes and consistent lash form are achieved with an eyelash curler. Skip curling, as they may look straighter and less defined. An eyelash curler before mascara can also give you gorgeous, voluminous lashes. 9. Makeup Matchup with your outfit: Matching is outdated. Bright clothes and makeup equal tacky. Makeup experts recommend a neutral palette for vivid outfits. Avoid glossy cosmetics and opt for the classic smokey eye if you choose metallic holiday clothing. 10. Lipliner Mistake: Getting harsh lip lines when applying makeup is the worst. Do not define your lips with a tiny sharp line. One of the major annoyances. If you use a black liner with a light lipstick, your lips may look odd. They define your lips, not draw borders. Lip liner prevents lipstick bleeding. Harsh outlines fade, making lips seem bad. The goal is to blend. Draw a smeared outline like you're shading your lips with the pencil for optimum results. Another suitable method is to create the outline, fill your lips with a lipstick-matched lip pencil, and then apply lipstick. Avoid lipstick on your teeth with this. Why Avoiding Makeup Mistakes Matters Avoid makeup blunders for skin health and a polished, professional look. Understand why it matters to make better cosmetic choices and improve your appearance. Skin Health- Mistakes like not removing makeup before sleeping, using expired products, or using filthy utensils can cause skin problems. Sleeping with makeup on can clog pores and cause acne and discomfort. Expiring items may hold microorganisms and cause illnesses and allergic responses. Applying makeup with dirty brushes or sponges can also cause outbreaks and infections. Maintaining a clean makeup routine keeps skin bright and healthy. Enhancing Natural Beauty- The improper foundation hue might give you a cakey, unnatural appearance, reducing your looks. Overusing blush or bronzer can also look harsh. By choosing the perfect tones and applying them correctly, you can highlight your greatest features and look more natural and radiant. Blending eyeshadows with contour products creates a seamless, elegant appearance that flatters your features. Professional Appearance- Well-applied cosmetics can boost confidence in professional settings. Mismatched foundation, uneven eyeliner, and smudged lipstick detract from your skilled picture. Applying makeup effectively and keeping it on can increase your confidence and amaze others. In business, beauty, and media, appearance is crucial to your professional image. Saving Time and Money- Avoiding makeup blunders saves time and money. Starting anew to fix smudges or uneven application wastes product and time. Learn proper techniques and choose products for your skin type and tone to streamline your makeup routine and reduce touch-ups. Buying high-quality, suitable materials and tools improves outcomes and longevity, giving you better value. Boosting Confidence- Finally, not making makeup blunders boosts confidence. You'll feel more confident and ready for the day when your makeup is perfect. Confidence can improve personal and professional relationships. Learning and practicing makeup skills can make you look better and feel more confident. Final Touch-Up! Beginners may make these makeup mistakes. You can avoid these mistakes now that you know them. Getting a flawless makeup look takes skill. Do not worry! Following our step-by-step guide, you'll be skilled after a few practices. So don't panic if you don't reach your goals straight away. This article should be followed religiously. As noted, avoid overwashing your face. Moisten your face before applying makeup to avoid cakey, spotty results.

Posted By: 27th May 2024
How to Choose the Right Bridal Makeup Artist For a Wedding
Choose the Right Bridal Makeup Artist For a Wedding It’s great that you are in search of an excellent wedding day beauty artist! One who can help you appear and feel your most beautiful on your wedding day. These things will allow you to be sure of yourself when marrying the person of your dreams. It is just a matter of finding a makeup artist free on your date and booking an appointment with them, isn’t it? There are many things to consider when selecting a makeup artist. The Importance of Choosing the Right Makeup Artist Your wedding day is one filled with love and commitment. We plan everything to make your trip outstanding. Above all else, how you look as a bride matters even more than any other preparation done so far. Bridal makeup artists are skilled magicians enhancing natural beauty that lasts indefinitely. 1. Detail Oriented: A gifted bridal makeup artist brings creativity and experience into their special day. Their combination of attention to detail, knowledge about skin tones, and expertise in applying make-up makes you look stunning . In the most graceful and subtle way possible, their proficient hands add on to your attractiveness from your radiant blush through to those dainty structures of yours. 2. They will know your preference: You need a good make-up artist, not just in terms of the skill set possessed but in many other aspects as well. They become your confidante, understating your tastes and creating a look that ultimately matches your goal. They personalize your bridal appearance to match your dress, theme, and style. The ability to calm pre-wedding nerves is crucial on a day when it can be so hectic. 3. Ensures Timely Process: A good makeup artist will have you looking impeccable from the 'I dos' all the way to the very last dance. With quality products and proper techniques, you get guaranteed makeup that will be both durable and comfortable. You can then savor every moment without the hassle of touch-ups. How To Find Makeup Artists Ask friends and family for referrals to makeup artists. Research local artists on Instagram, Yelp, or wedding websites through their portfolios and ratings. Find top makeup artists by visiting beauty salons and spas. Attending bridal or beauty expos to meet artists. Follow local makeup artistry hashtags on social media. Call a few artists to introduce yourself and talk about your needs, availability, and pricing. Give them a try and see if their style jives with yours. Tips on how to choose a wedding makeup artist for your wedding. The most serious job for the Bride on this very important day is to book the right artist who is going to bring every dream of hers to life with every brush stroke. These tips will help you find a beauty artist that is right for you:. 1. Do Some Tiny Research: Research and recommend the top salon near me. Begin with the local listings, reviews, and recommendations from friends and family. Prepare the list of all make-up artists and see their styles. 2. Experience and knowledge: This is important for a makeup artist with multi-year experience in bridal makeup. Check out their past experience working with different types of skins and tones to get a better result on your day. Professional makeup artists will make you feel comfortable on your wedding day with their professional attitude and assurance. Trust in their knowledge and be at ease, knowing that you are under-skilled hands from go to whoa. 3. Search Right Away: Start your search for a makeup artist early so that it can be a stress-free and constructive experience. A search in advance will give you grand opportunities to research, receive recommendations, and set up appointments with those artists who fit your preferences. This means being able to look at more options and compare styles and prices. It allows you to make an informed decision about the availability of an artist and reduces the last-minute stress—one more assurance that on a special day, you will look and feel your best. 4. Make a trial: It's best to try out the makeup artist or nail extension specialist in East Delhi with a trial run so that you are sure that what is in your mind about your bridal look should be executed on your wedding day. You could also work with your makeup artist to try many looks to get all the details perfect until you really have the look that you want for yourself. On the rehearsal day, speak your mind: say your likes and dislikes and give the artist feedback so he totally gets the concept. This is also a day to assess the endurance of makeup throughout the day. All the time and effort invested in this rehearsal will definitely leave you at ease, knowing you are about to look good and feel beautiful on that aisle. High-definition makeup has a lightweight feel and looks natural in spite of having superb coverage. HD formulations expose the eyes to the natural beauty of skin rather than mask-like foundations that suffocate it. The HD formulations are light and sheer; they are made with light pigments for enough coverage to define your features without hiding them. 5 Proper hygiene and product quality: Sanitary products highly appreciate makeup artists. Confirming that makeup artists use high-quality items and practice cleanliness to avoid skin sensitivities. Always make sure palettes and brushes are clean. Every individual should take care of their skin and look great every day. 6. Check Portfolio: Evaluate a makeup artist’s portfolio to establish their ability to enhance natural beauty, originality as well as creativity. Considering the fact that there is an artist in this portfolio who can adapt themselves to various styles of customers, whether it be Halloween make-up or wedding make-up. A good portfolio should include classical romantic looks, as well as bold fashion-forward trends for demonstrating flexibility and adaptability. 7. Spending Plan: To start with, just like anything else, budgeting for makeup and hair styling services is important. Tell the artist how much you want to spend and talk about package choices within your budget. If you request it, the artist can adjust the package accordingly. With regard to that, go through their bargains and pick one that suits your pockets. 8. Attainability: When picking a beauty artist for your wedding day, ensure availability first. Ensure that the chosen makeup artist will definitely be available on the date of your wedding day and cooperate with your timetable. You must book them many months in advance if you want their service especially when it comes to busy times of weddings when people need those special facial touches otherwise known as wedding make-up artists. 9. Communication: The best way to ensure you and your makeup artist understand is to talk to each other. Talk freely and honestly about what you like and don't like and any specific worries you may have. Don't be afraid to say something that doesn't feel right during the trial. Your makeup artist will listen and make changes as needed until you're happy. A makeup artist should be able to communicate clearly, listen to what you have to say, meet your needs, and be sensitive to your comfort. Questions to Ask Before Hiring a Bridal Makeup Artist Choosing a bridal makeup artist can dramatically affect your wedding day. Before selecting a makeup artist, ask these ten questions to ensure you get the proper one: 1. Can you do makeup for weddings? Makeup artists with bridal experience are essential. This will ensure they understand bridal makeup's unique needs, including long-lasting and photogenic looks. 2. What goods do you use? Find out what brands and products the makeup artist uses. Make sure your makeup artist utilizes professional-grade materials that last all day. 3. Can you provide client references? Ask for references or examine client evaluations to be sure the makeup artist has satisfied consumers. 4. Can you accommodate my wedding date/location? Make sure the makeup artist can travel to your wedding and is available on your wedding day. 5. Can you provide a portfolio? A makeup artist's portfolio will show you if their style suits you.
Posted By: 27th May 2024
9+ Best Ways To Make Your Makeup Last All Day Long
Weddings and TV sets use it to get a cosmetics look that lasts all day under bright lights and long work hours. It's doable even if it appears impossible to most. Professional makeup artists employ particular techniques and layering processes, but you can use their beauty items. Get excited—you can nail dawn-to-dusk makeup regardless of your budget, expertise, or skin type (oily, dry, or combination). For light or all-day smokey eyes, we have you covered. To maintain your look all day, let's discuss cosmetics and beauty routine. Acne-prone skin is considered in these suggestions. Why Does Your Makeup Come Off And Smudges Smudging is more likely with cheap or oily makeup because of its components. Unless you already do, avoid cosmetics with heavy oils. The nice stuff is made to stick to your skin. Consider this if you have oily skin. Choose skin-friendly cosmetics to keep it in place. You should also use makeup as intended. Not using a primer or laying too thick could cause a product to rub off prematurely. Consider what and how you use each product to avoid smearing and keep it on your face longer. Wearing makeup that matches your skin might improve your daily look. You can help your makeup last without a setting spray. Consider this when buying makeup or refilling your stash. How To Select The Right Long-Wear Makeup Formulas For Makeup For special occasions or lengthy days, choosing the correct long-wear makeup formulas can alter everything. Here are some recommendations for choosing durable products: 1. Understanding Your Skin Type: Understanding your skin type helps you choose long-wear makeup. Choose mattifying, oil-free formulations for oily skin to decrease shine and oil. Hydrating and moisturizing products shouldn't settle into dry spots on dry skin. Look for items that balance oily and dry skin for a mixture skin. 2. Choosing Foundation and Base Products: Full-coverage, oil-free liquid foundations last the longest. Matte powder foundations are ideal for oily skin. Set your makeup with a setting spray to reduce touch-ups throughout the day. 3. The Importance of Primer: Primers are vital for long-wear makeup. A smooth base from an excellent face primer helps the foundation cling and last longer. Eye primer keeps eyeshadow bright all day and prevents creasing. 4. Opting for Waterproof and Smudge-Proof Products: Use waterproof mascaras and eyeliners to avoid smudging and running. Lip stains and liquid lipsticks last longer. 5. Testing Before the Big Day: Check your makeup's durability on a long day before an important event. If needed, you can change your routine. 6. Keeping a Touch-Up Kit: Bring a tiny touch-up kit with blotting sheets, powder, and lipstick. You can immediately fix any issues with this. Common Makeup Longevity Issues 1. Color clash: Makeup experiments are welcomed, but you must be careful when mixing colors and textures. Avoid clashing colors and overdoing it with prominent components to avoid a sloppy effect. For a sophisticated look, choose a consistent color palette and balance vivid colors with neutrals. 2. Not caring for skin: Skipping skin care is a cosmetic sin, so use bridal makeup in Bhubaneswar to your advantage. Neglecting to cleanse, tone, and moisturize your skin can cause dullness, dryness, and premature aging, reducing makeup effectiveness. Skincare is essential for a clear, bright face that complements party makeup. 3. Avoiding makeup removal: After a night of partying, it's tempting to fall asleep, but you should always remove your makeup first. Leaving makeup on overnight can clog pores, cause breakouts, and hasten aging. You must regularly cleanse and moisturize your face to keep it healthy and beautiful. 4. Heavy-handed use: When applying makeup for special events, less is more. A cakey mask looks strange if you apply too much makeup. Instead, construct a product slowly and lightly. Blend well to create a smooth finish that enhances your features without overpowering them. Tips To Make Your Makeup Last Longer 1. Choosing Foundation and Concealer: Luckily, long wear makeup doesn't have to be thick or cakey nowadays. There are various possibilities, but “finding a long-wearing foundation and concealer in your desired coverage” will keep your makeup all day. 2. Skin Prep is a must-must: Skin prep and a good skincare routine create the perfect canvas for long-lasting makeup. Hydrate and exfoliate. Hydrating your skin makes makeup stick and prevents fine wrinkles from forming. Keep excess oil at bay with the correct cleanser and skincare products to prolong your makeup look. Natural skin oils produce wrinkles. A gentle twice-weekly exfoliant removes dead skin cells and keeps skin smooth, fresh, and clean. This improves makeup adhesion and evenness. Apply an oil-free moisturizer and SPF30 sunscreen after cleansing and exfoliating for protection. Put on a primer to seal in the moisturizer, smooth your skin, blur flaws, and give your foundation a place to stick. Choose primers for your skin. Smoothing primers are best for big pores and fine wrinkles. Use a mattifying primer for oily skin or a moisturizing primer for dry. 3. Do Not Skip Translucent Setting Powder: Applying loose powder to face makeup may seem obvious, but do it right. Grab loose powder and a puff. Sprinkle powder on puff, fold, and rub. Press and roll the skin gently to set it, then dust off excess with a broad fluffy brush. This keeps your makeup in place. 4. Add one more layer of concealer: Some people might think the foundation is too heavy, but it's an important part of making sure your makeup stays on all day. Before putting on the foundation, Gomila puts on concealer, and then she puts on more concealer to make sure there is a good covering. 5. You must use eye primer: Porter says you don't have to use face primer, but you do have to use eye primer for eye makeup. In the end, folding isn't a style. "When you put on eyeshadow, make sure you use an eye primer first." "Make sure that all of your eyeshadows have a lot of color." This is important for making colors stand out. 6. Take your lips to the next level: Long-lasting lip colors are very important. They come in many styles and textures, but you should always wear lip liner with them to keep them from bleeding.Put on one layer of regular makeup, blot it off, and then put on another layer. 7. The key is to blot: Powder makeup shouldn't be reapplied too often during the day. Putting on foundation again can ruin the first coat you made and remove any makeup that is already on your face. Also, too much foundation can make your makeup look cakey. Wet paper can be used to fix small mistakes. 8. Don't stack things too high: You won't believe this, but less is more when it comes to makeup that lasts. Put on your makeup in thin layers. Powder blushes and bronzers should be lightly swept on and built up, and they should be blended in well. Apply light coats of makeup with a beauty sponge to get a smooth, even skin tone. As you wait, let your face breathe. The finish will look more natural without being heavy or cakey. 9. Finish with makeup setting spray: Makeup setting sprays have several uses. They usually boost radiance and include nutrients, but most importantly, a spritz or two seals in all your facial work. “Choosing one with a tiny mist helps with even application. “Let it dry before touching your face.” 10. Don't touch your face: Remember not to touch your face while you wait for items to dry. Better yet, don't touch your face at all during the day! If you touch your face, all of your hard work will be gone. To avoid getting smudges, don't rest your hands on your phone, rub your eyes, or hold your phone against your cheek. Take on the Day with Long-Lasting Makeup Keep makeup out of your regular stress. Instead, apply cosmetics as a soothing routine to prepare for the day. If you love cosmetics, you should enjoy your time in front of the mirror putting it on and wearing it. Continue using the makeup tips you learned today to enjoy your stunning looks and be ready for the day. Bookmark and share this page with beauty-loving friends and family to get others interested in makeup!
Posted By: 24th May 2024
50+ Bridal Hand Mehendi Designs For 2024: Simple And Latest
Designs in general for Henna or Mehendi, an Indian tradition not only appealing to the eye but also a highlight of a celebratory occasion, are simple and extravagant too sometimes, no matter whichever design one chooses, the color at the end is just a delicacy to watch for the eyes. Moreover, bridal Mehendi designs are mainly in demand! Mehendi designers during the Wedding season are akin to celebrities whose autographs are wanted by every household where a daughter is getting married! Now that we have discussed how unique and important Mehendi is to the brides let us focus on the types of Mehendi designs found in India. Types of Mehendi designs in India can only be limited by an artist's imagination and creativity. How many types of mehndi designs are there in India? To give a brief idea, Mehendi designs are broadly classified into Arabic and Indian designs! Allow us to explain! Well, as mentioned above, the designs are limited to the imagination and creativity of the Mehendi artist; however, classifying Mehendi designs into Arabic and Indian designs is just a way to provide the Mehendi artists a framework. The bride is the only one who decides the design she wants to see in her hand. Generally, in India, it is an unsaid tradition that brides ask the artists to apply an Indian Mehendi Design, which covers the bride's hands, making it look awesomely beautiful and festive! However, nowadays, with the concept of less is more, Arabic-style designs in Mehendi are gaining more traction! Arabic-style designs of Mehendi are applied in a diagonal direction to the hand. This means that, as contrasting as the Indian style of design, the Arabic style of design is considered more elegant and classy, to an extent! Best mehendi-design type for Bride? The designs in both these frameworks, Indian and Arabic, cannot be given a specific number as it depends on the imagination and creativity of the one making it! However, to give a set of ideas to all the readers, we will list down the easiest and most commonly used Mehendi Designs for brides! If you are going to get married in the upcoming months, make sure to stick with us till the end! You are welcome! Are you excited? Without any further ado, let us explore! 50 Mehendi Designs for Bride 1. Arabic henna: Arabic henna designs are trendy and beautiful for brides. This is the easiest hand mehendi pattern to apply in minutes. Thus, your mehendi ceremony does not require hours of waiting. 2. Bridal Jaali Mehendi Designs: Bridal jaali mehendi designs are elegant and chic. Your bridal look will be more beautiful. 3. Bridal Mehendi Designs Back Hand: Back mehendi lasts longer than the palm mehendi, so embellish both hands with stunning royal mehendi designs that match the bride's kundan haathphools. 4. Bridal Mehendi Designs Hand-harness: The traditional hand harness of bridal jewelry inspired this mehendi back hand design. This design is ideal for individuals who want to beautify both hands without wearing heavy jewelry. 5. Bride and Groom Name Mehendi Designs: Modern brides love this bridal mehendi design front hand, which hides or reveals the bride and groom's names with beautiful motifs. 6. Bride and Groom with Dholkis Design : This stunning wedding mehendi design features a marriage scene, dholkis, and a bride and groom. 7. Chain Pattern Mehendi: This fashionable full-hand bridal mehendi design will make Your hands look more beautiful and modern. 8. Floral Jali Mehendi: Want intricate wedding mehendi designs? Then, floral jali mehendi is excellent for your hands. The exquisite floral jali pattern will enhance your hands. 9. Flower design: Flower bridal mehendi designs are the oldest but always popular wedding designs. Exquisite flower patterns make your hands look beautiful. 10. Flowers and leaves inspired Mehendi : Bring elegance to your gentle hands on your wedding day with flowers and leaves mehendi. Try this gorgeous wedding henna design to show off your hands on your big day. 11. Geometric design: Another viral bridal mehendi design. Moroccan henna designs incorporate triangles, squares, diamonds, and other geometric shapes. Hand mehendi patterns using these shapes often look great. 12. Gujarati Dulhan Mehendi Designs: A true Gujju must attempt this on their wedding day. This pattern suits brides who prefer grand front and backhand designs. 13. Hand accessories or jewelry-inspired henna: Jewelry-inspired mehendi looks like haathphools and beautiful jewelry. This hand jewelry option is great. 14. Jharokha Style Modern Bridal Mehendi Designs: Jharokha mehndi designs add elegance and grandeur to hands. Brides will love this bridal mehendi design front hand with delicate patterns, exquisite embellishments, and elegant lacework. 15. King and Queen Mughal Mehendi: Many Hindu and Muslim brides still like kind and royal Mughal patterns after centuries. 16. Leafy Mehendi Patterns: Leafy mehendi is for nature lovers. Leafy mehendi will make your hands look graceful and attractive. 17. Lotus henna design: Many brides prefer this lotus-inspired design. An elegant lotus blossom pattern gives this mehendi a feminine appeal. 18. Mehendi on fingers: Not everyone likes full-hand bridal mehendi today. They can only use their fingers for mehendi. This Mehndi design is new. 19. Minimal henna: This pattern suits girls who appreciate basic mehndi designs and don't want to overdo their bridal look. 20. Moon Design Mehendi for Weddings: Most Muslim brides choose this modest front-hand mehendi pattern. Hindu brides can still try it. 21. Moroccan geometric design: Another viral bridal mehendi design. Moroccan henna designs incorporate triangles, squares, diamonds, and other geometric shapes. Hand mehendi patterns using these shapes often look great. 22. Palki Bridal Mehendi: These traditional bridal mehendi designs feature a palki or dola with lovely marriage-themed themes. 23. Peacock Bridal Mehendi Designs: The beautiful peacock inspires exquisite bridal mehendi designs. These designs symbolize grace and beauty with exquisite feathers, flowing swirls, and elegant curves. Rich henna colors depict the peacock's brilliant colors, giving bridal hands a royal touch. It's lovely for traditional wedding jewelry. 24. Portrait mehendi pattern: Portrait mehendi is unique and requires artistic drawing. This design centers on palm faces. Get a portrait mehendi design of your sweetheart to beautifully express your affection. 25. Sophisticated and modern Bridal Mehendi designs: Modern but sophisticated mehendi patterns are clean, minimalistic, and appealing for weddings. These patterns match modern bridal outfits with clean lines, geometric shapes, and intricate decorations. They add style to basic henna art for modern brides with floral patterns, minimalistic features, and creative placements. 26. Stunning Royal mehendi: These patterns match modern bridal outfits with clean lines, geometric shapes, and intricate decorations. They add style to basic henna art for modern brides with floral patterns, minimalistic features, and creative placements. 27. Symmetrical henna design: Symmetrical henna designs are great for weddings that want something distinctive, appealing, and modern. When you combine your hands after applying this sophisticated bridal mehendi pattern on both, it will seem balanced. This is an uncomplicated bride mehndi design that looks chic and professional. 28. Traditional mehendi: Want the vintage, rich Indian bridal look? Try a traditional mehendi design instead of something trendy. Grand extravagant bridal mehendi designs for weddings enhance both hands. 29. Tribal mehendi: These appealing tribal mehndi patterns are sweeping the beauty and fashion industries. They produce a visual illusion on your hands, like Moroccan geometric designs. Try this stunning, full-hand mehendi design on your wedding day to stand out. 30. Traditional Mehndi: Want the vintage, rich Indian bridal look? Try a traditional mehendi design instead of something trendy. Grand extravagant bridal mehendi designs for weddings enhance both hands. 31. A Lace inspired Mehendi Design: Lace-inspired Mehendi motifs are delicate. These patterns are ideal for brides who want feminine, elegant hands. Fine embellishments and delicate textures give the patterns a classy appeal that suits bridal wear. Lace-inspired Mehendi patterns are popular for weddings and other occasions when the bride wants a timeless and elegant look due to their softness and complexity. 32. Bird Motif Full Hands henna design: Bird motif Mehendi designs span both hands in intricate bird motifs, symbolizing freedom, elegance, and beauty. Brides seeking exquisite henna designs love these designs. Birds like peacocks, swans, and songbirds are painstakingly sketched to display their feathers and grace. Brides who like nature-inspired themes and want their Mehendi to portray a story of flight and beauty will love bird motif designs. 33. Bridal Vine Mehendi Designs: Elegant bridal vine Mehendi motifs imitate winding vines and floral tendrils. These designs represent growth, prosperity, and nature's beauty. The bride's Mehendi has botanical beauty as vine designs gracefully wrap over her hands and arms. Bridal vine motifs are classic and versatile, matching many bridal styles and outfits. They represent nature and growth, making them a meaningful option for brides who value organic beauty and want their Mehendi to reflect this on their wedding day. 34. Coloured Mehendi: Colored Mehendi uses bright colors and pigments to update traditional henna painting. These bright, festive motifs bring a whimsical touch to bridal ornamentation. Red, blue, green, and gold are used in colored mehendi to highlight the designs and contrast with the skin. Brides can customize their Mehendi with unique color combinations to match their style and personality. Colored Mehendi is popular among brides who want to make a statement and bring joy to their weddings. 35. Elephant Mehendi Designs: Elephant themes in Indian mehendi symbolize power, wisdom, and luck. Traditional bridal Mehendi features these motifs to wish the newlyweds luck. Mehendi elephant designs are painstakingly created to represent the animal's regal height and embellished with saddles and flowers. Elephant Mehendi patterns are symbolic and culturally significant, making them a popular choice for brides seeking blessings and positivity on their wedding day. 36. Floral Cascade Mehendi Designs: Floral cascade Brides look beautiful and charming in mehendi designs with flowing flowers and botanical motifs. These designs feature gracefully flowing arrangements that cascade down the hands and arms like blossoms. Floral cascade Mehendi patterns are popular with brides who love flowers because they represent beauty, grace, and nature. These patterns' elaborate craftsmanship and organic flow give bridal Mehendi a whimsical and ethereal appeal that enhances the bride's timeless grace. 37. Ganesh Ji with Om Pattern Mehendi: Om-patterned Ganesh Ji, The bride, receives blessings, prosperity, and auspiciousness from mehendi designs, including Lord Ganesh (the remover of barriers) and Om (the voice of the universe). These profound designs are typically used in bridal Mehendi to ask for divine blessings for the couple's new journey. Ganesh Ji with Om pattern Mehendi is meticulously created, demonstrating Indian spirituality. Brides chose these designs for blessings and a happy, blessed marriage. 38. Heart Motif Mehendi Patterns: Beautiful heart-shaped motifs in Mehendi designs symbolize love, affection, and romance. Wedding Mehendi with these designs is lovely and heartfelt, capturing love and camaraderie. Heart theme Mehendi patterns range from little hearts dispersed throughout to massive, elaborate heart motifs. Heart motif Mehendi symbolizes love and the emotional significance of the wedding day, giving brides a meaningful hand and arm ornamentation. 39. Mandala Design: The exquisite circular patterns of Mehendi mandalas represent harmony, balance, and oneness. Geometric forms, floral themes, and concentric circle motifs make up these intricate compositions. Mandala Mehendi designs cover large parts of the hands or arms, hypnotizing. Mandalas are peaceful and symbolic. Therefore, brides pick them for their spirituality and beauty. Mandala Mehendi symbolizes cosmic balance and timeless beauty, making it a tempting choice for women wanting meaningful and beautiful bridal ornamentation. 40. Nature-inspired Bridal Mehendi Designs: Nature-inspired bridal Mehendi designs use elaborate floral, leaf, vine, and other botanical patterns to commemorate nature's beauty and richness. These patterns represent nature's grace, development, and rebirth. Nature-inspired Mehendi motifs are typically artfully combined to mimic natural settings, giving brides a whimsical and appealing look. Nature-inspired bridal Mehendi designs enhance the bride's radiance with timeless floral elegance, whether with blossoming roses, lush foliage, or delicate tendrils. 41. Paisley Mehendi Design: Paisley Mehendi designs symbolize fertility, prosperity, and abundance with teardrop-shaped paisleys. These ageless designs are employed in traditional bridal Mehendi for their cultural importance. On the bride's hands and arms, beautiful paisley motifs add beauty and ornateness. Paisley Mehendi is popular with brides because of its symbolism and beauty. Paisley mehendi adds beauty and tradition to bridal ornamentation, symbolizing prosperity and fertility for the newlyweds. 42. Radha Krishna Mehendi Patterns: Radha Krishna Mehendi patterns represent Radha and Krishna's divine love via elaborate motifs and artistic compositions. These Hindu mythology-inspired artworks honor the holy couple's undying love and devotion. Radha and Krishna Mehendi depict divine love and fellowship via beautiful scenes, amusing positions, and symbolic themes. Radha Krishna Mehendi's spiritual importance and captivating beauty inspire brides to imbue their wedding with divine devotion and eternal love. 43. Romantic Rose Pattern Mehendi: Rose themes symbolize love, passion, and beauty in mehendi patterns. Roses add passion and elegance to the bride's hands in these designs. Mehendi rose patterns can be single blossoms or large cascading rose arrangements, each painstakingly drawn to depict their delicate petals and beautiful curves. Romantic rose pattern Mehendi is a captivating and appealing hand and arm ornament for brides to show their love and celebrate their wedding day. 44. Sindoor Dan Bridal Mehendi Designs for Weddings: Sindoor Dan's bridal Mehendi designs are inspired by the traditions of placing sindoor (vermilion) on the bride's hair parting to symbolize marriage and commitment. Sindoor-inspired motifs and patterns give bridal Mehendi a sacred and auspicious look. Sindoor Dan Mehendi patterns symbolize marriage and the sacred link between husband and wife, making them a meaningful choice for brides seeking blessings and wealth. Brides pick Sindoor Dan Mehendi to honor tradition and add cultural and spiritual meaning to their wedding. 45. South Indian Bridal Mehendi Designs: Traditional South Indian bridal Mehendi designs feature regional elements and artistic influences. These designs showcase South India's rich culture with bold and elaborate patterns. The intricate craftsmanship of South Indian bridal mehendi includes mango designs, peacocks, temple architecture, and culturally significant symbols. South Indian Mehendi designs honor brides' ancestry and display South Indian artistry, producing a magnificent and culturally authentic bridal decoration. 46. Sun-inspired design with finger detailing: Sun-inspired Mehendi designs symbolize vitality, energy, and cosmic force with bright sun motifs and exquisite finger designs. Sun symbolism is captured in these designs, symbolizing life-giving energy. Mehendi sun designs are elaborately painted with swirling rays and artistic flourishes, typically using finger details to accentuate the composition. Wedding brides pick sun-inspired Mehendi for its colorful symbolism and dynamic appearance to spread joy and enthusiasm. Sun-inspired bridal jewelry embodies the sun's eternal brilliance and cosmic harmony. 47. Swirl and Dots Designs: Dots and swirl Intricate mehendi patterns include whirling motifs and delicate dotwork. The mesmerizing and dynamic arrangements display creative flexibility and rhythmic movement. Dots and swirl Mehendi patterns on hands and arms are detailed and captivating. Swirl and dots Mehendi patterns are hypnotic and beautiful, and brides love their rhythmic flow and harmonious balance. Intricate swirl and dot patterns bring creative refinement and whimsical beauty to bridal jewelry, boosting the bride's style. 48. Temple Design bridal Mehendi: Indian temple architecture inspires the temple design of bridal Mehendi with divine motifs and elaborate decorations that show spiritual veneration. Temple facades, deity statues, religious symbols, and floral embellishments influenced by temple art are common in these designs. Temple design Mehendi symbolizes Indian temples' spirituality and culture, blessing the bride. Temple design Mehendi honors tradition and adds sanctity and grace to weddings, producing a sacred and appealing hand and arm ornament. 49. Traditional Punjabi Bridal Mehendi Designs: Bold patterns and themes showcase Punjab's colorful culture and traditions in traditional bridal Mehendi creations. Intricate geometric shapes, floral motifs, and ancient symbols like kale are common in these designs. Punjabi bridal Mehendi is recognized for its intricate craftsmanship and joyful mood, capturing the excitement of Punjabi weddings. Traditional Punjabi Mehendi designs allow brides to display their cultural identity and passion for wedding festivities with a vibrant and colorful hand and arm ornament. 50. Varmala Mehendi Designs for Wedding: Mehendi patterns inspired by the varmala (garland exchange) ceremony symbolize love and connection between bride and husband. These designs generally feature floral garlands, interwoven rings, or marriage and togetherness symbols. Varmala Mehendi symbolizes the couple's sacred relationship and wedding romance. Brides pick var mala Mehendi to celebrate their union and express their love and commitment. Infused with romantic symbolism and matrimonial joy, Varmala Mehendi patterns enhance the bride's ensemble with timeless romance. Conclusion: These top 50 Indian bridal mehendi designs for hands cover all current patterns and motifs. In Indian culture, mehendi represents fertility and profound love between newlyweds. Choose the finest design and showcase your images. Also, show your mehendi artist these designs, and you'll be the talk of the party!